demag
Part of things
 
Posts: 30
|
|
|
|
I'll get some pics of the part numbers Monday for you, I've got a customers 190 in at the moment which we put a m111 in a few years ago. Couldn't get the phone in there to take pics but the numbers are 601223004 for the right side, and 1112230704 for the left side. The right side mount is common across many engines, the left side is harder to find. Thanks for that Carat, searching for them I see that 1112230704 is off a m111 engined w124 but nothing for the other one, luckily I know where there is a w124 with that engine lying in a scrap yard that I rescued my C180 from. I'll get the mounts off that and see how I get on. Do you have a build thread anywhere for that conversion? |
| |
Last Edit: Jun 28, 2022 0:05:35 GMT by demag
|
|
|
|
|
|
|
Jun 29, 2022 17:34:27 GMT
|
Couldn't get the phone in there to take pics but the numbers are 601223004 for the right side, and 1112230704 for the left side. The right side mount is common across many engines, the left side is harder to find. Thanks for that Carat, searching for them I see that 1112230704 is off a m111 engined w124 but nothing for the other one, luckily I know where there is a w124 with that engine lying in a scrap yard that I rescued my C180 from. I'll get the mounts off that and see how I get on. Do you have a build thread anywhere for that conversion? I The w124 mounts will do the job fine, I lost interest in doing build threads a few years ago but I'll be happy to help if you need advice. |
| |
1988 Mercedes w124 superturbo diesel 508hp
1996 Mercedes s124 e300 diesel wagon
1990 BMW E30 V8 M60 powered!
1999 BMW E46 323ci project car
|
|
dikkehemaworst
Club Retro Rides Member
Posts: 1,636
Club RR Member Number: 16
|
|
|
|
|
|
| |
|
|
|
|
|
Mar 19, 2023 23:45:17 GMT
|
|
Hi,
The Mercedes W124 200E engine mounts are perfect for this swap. I have used them in my car and countless other people have done the same. No need to fabricate new mounts
|
| |
|
|
demag
Part of things
 
Posts: 30
|
|
|
|
|
No updates yet, I have the mounts for it. I've had to take it out of the workshop so I can get other stuff in and out but should have space for it again soon. I took the engine out before I moved the car out and have done some work on that.
|
| |
|
|
demag
Part of things
 
Posts: 30
|
|
Jun 27, 2023 22:52:43 GMT
|
I haven't an update on the 190 yet, I had to move it out of the workshop to do some other jobs and haven't had a chance to do any more on it yet. My C180 daily has been getting a little bit rusty so it's time to get that sorted. 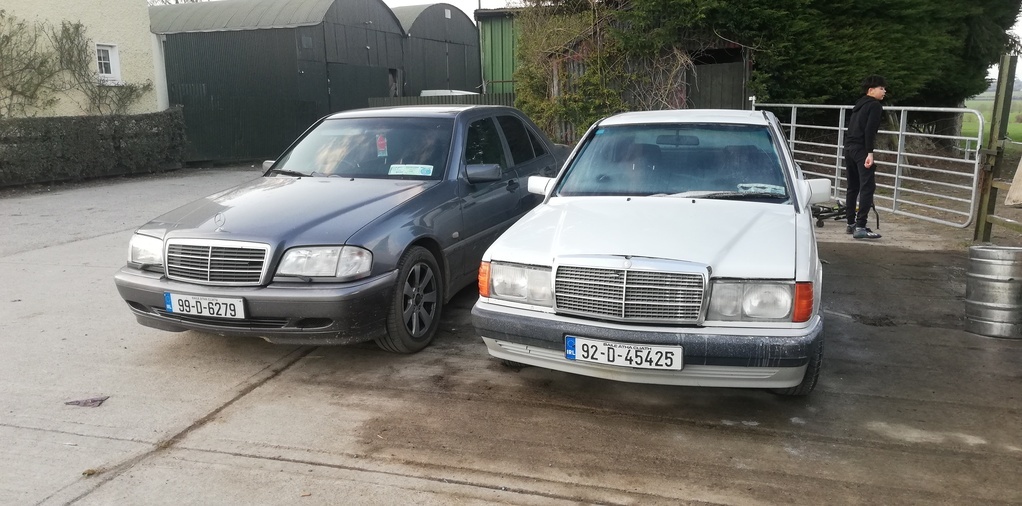 I bought it in August 2020 from a scrapyard for €150 where it had sat for 2 years. It had a blown headgasket so I fixed that, put new tyres and dampers on it, 2 suspension arms and apart from servicing nothing else since. I love it, comfy, decent drive and good enough poke for a 1.8. |
| |
Last Edit: Jun 27, 2023 22:53:29 GMT by demag
|
|
demag
Part of things
 
Posts: 30
|
|
Jun 27, 2023 22:59:42 GMT
|
I forgot to take any before pics, this is what both front wings looked like. 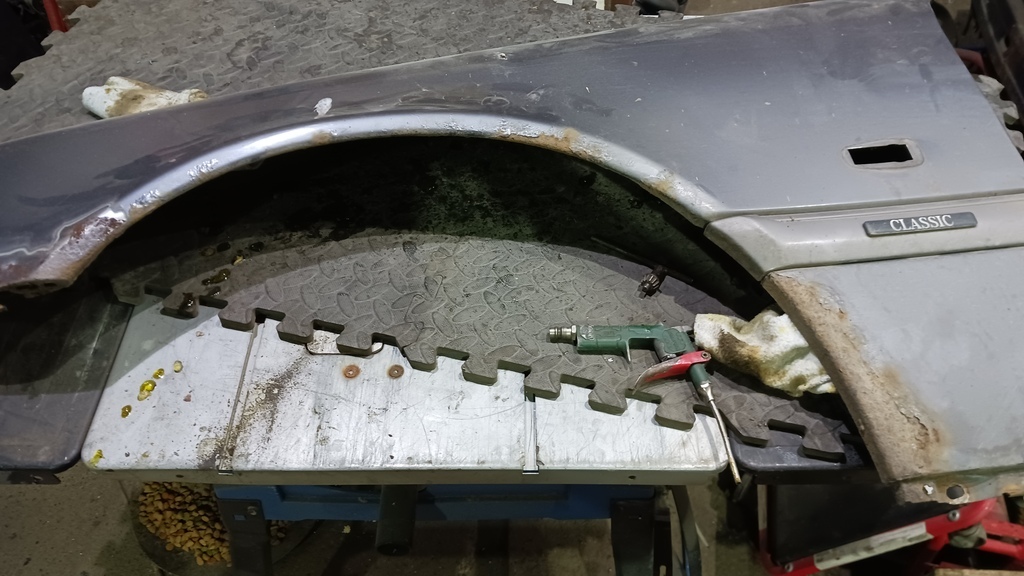 Front passenger door had the bottom corner replaced. 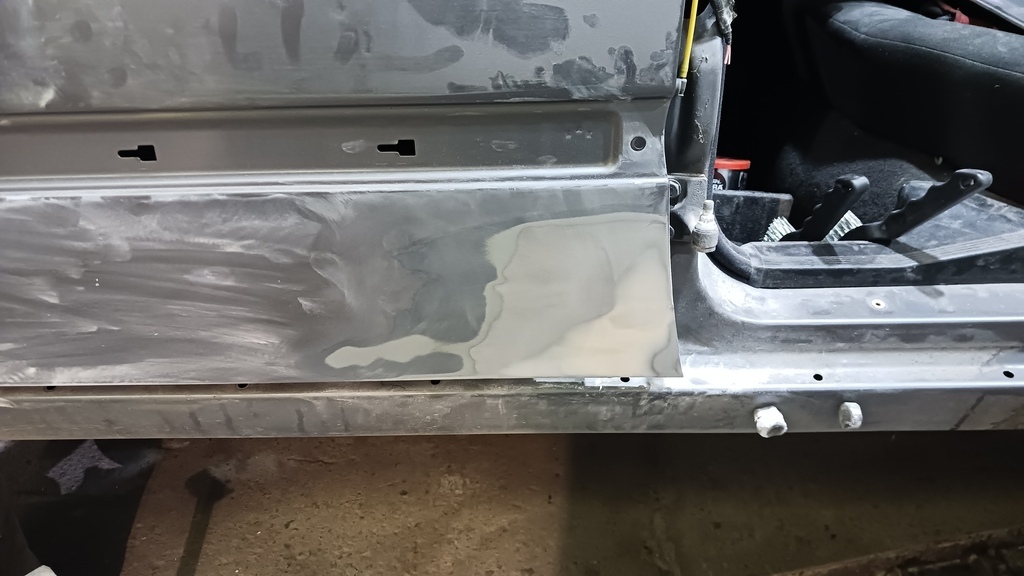 Rear passenger door had a hole right in the middle of it, welded a patch in. 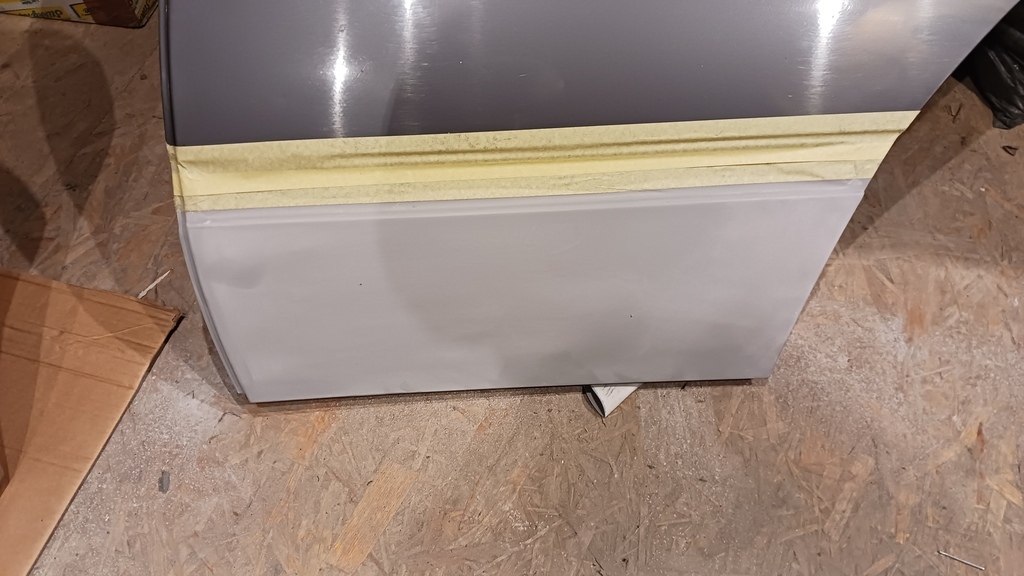 |
| |
|
|
demag
Part of things
 
Posts: 30
|
|
Jun 28, 2023 20:32:08 GMT
|
There was a lot of surface rust but it was very deep. Wire brushing basically had no effect, I'd seen this stuff recommended in a few places so gave it a try. 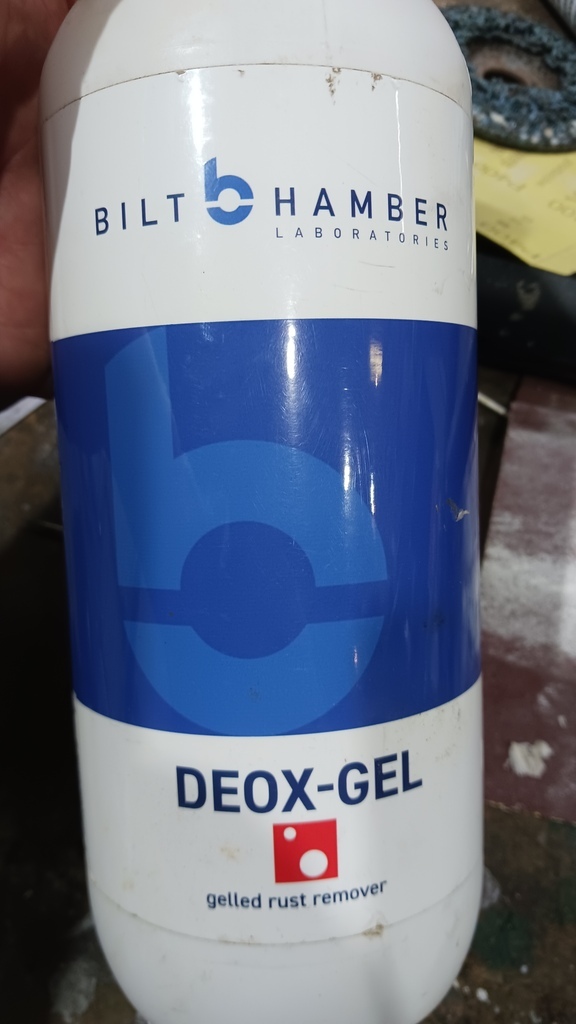 It's curse word, don't bother with it if you have anything other than very very light surface rust. I followed the instructions to the letter, even trying it on for more hours or overnight so what I did instead was I got some wallpaper paste, citric acid and water. Cup 3/4 full of hot water, add in as much citric acid as will dissolve in it and stir in the wallpaper paste. Get it to the kind of consistency as jam and you're good to go. Cover the rust and leave it overnight, do that twice and rust was gone. Clean it off with water with some baking soda mixed in or it'll flash rust in a few minutes, actually the deox gel is useful for cleaning the flash rust. You can see just how bad the pitting was here 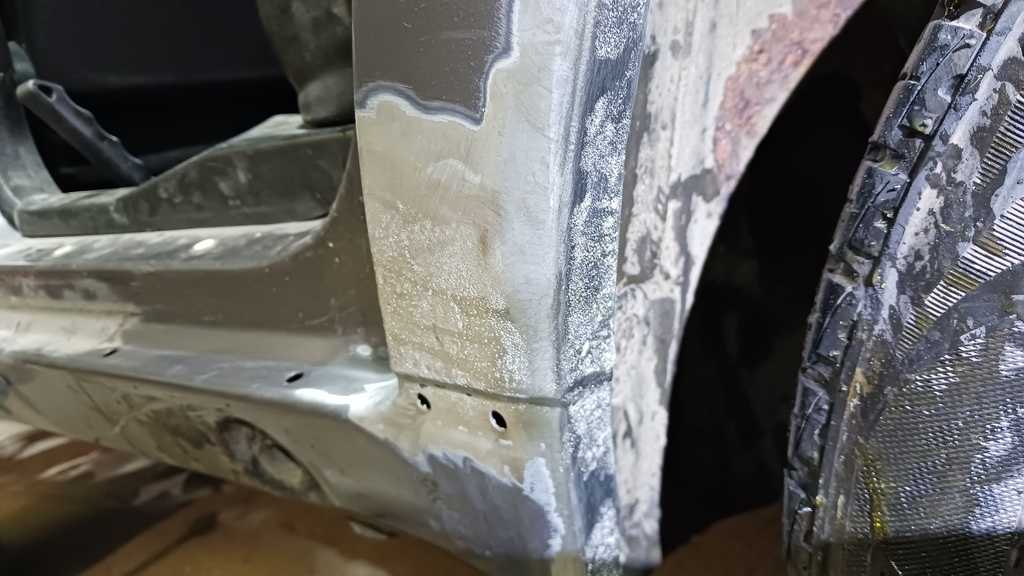 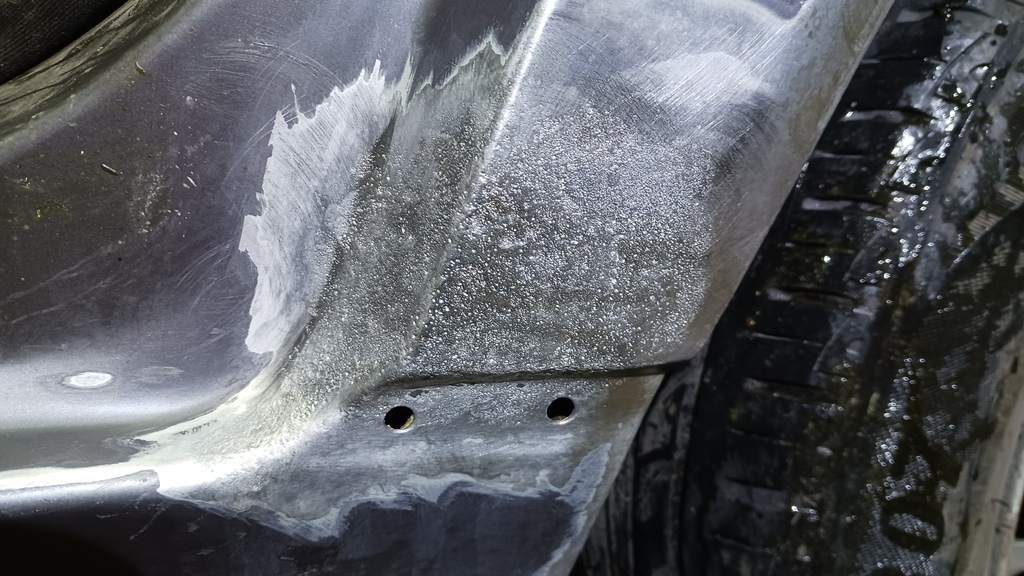 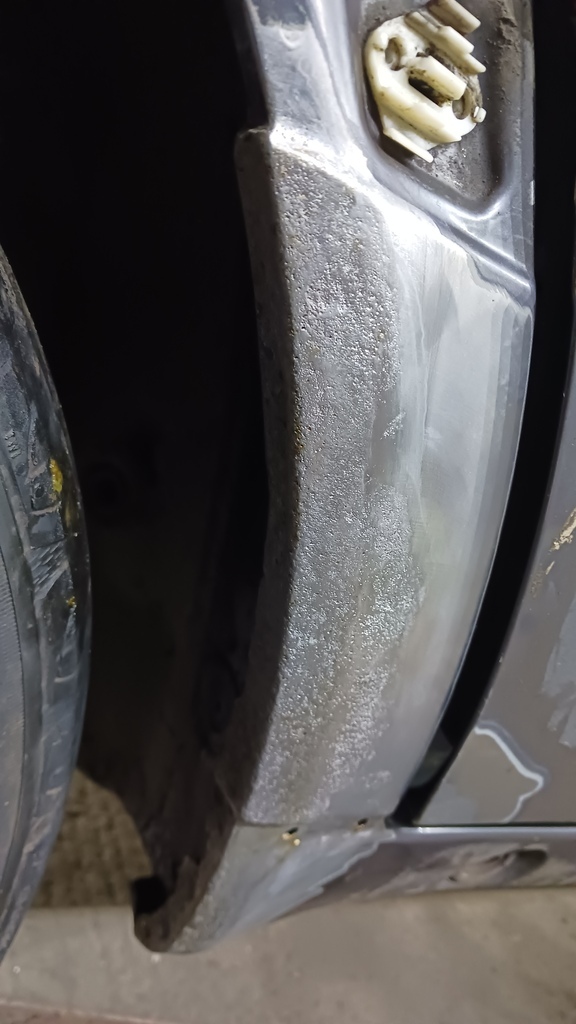 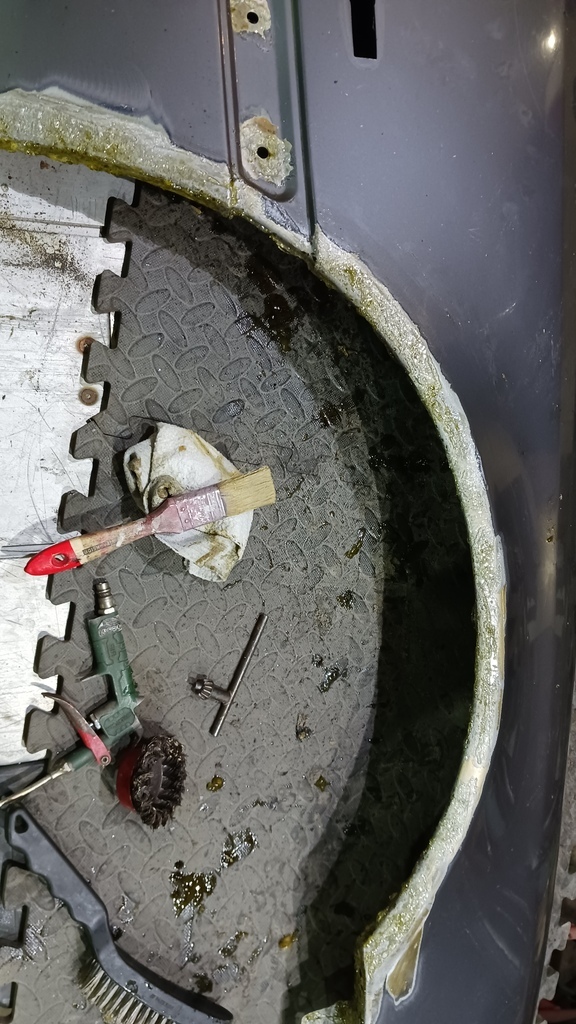 |
| |
Last Edit: Jun 28, 2023 20:33:41 GMT by demag
|
|
demag
Part of things
 
Posts: 30
|
|
Jun 28, 2023 22:05:26 GMT
|
Looking rough. 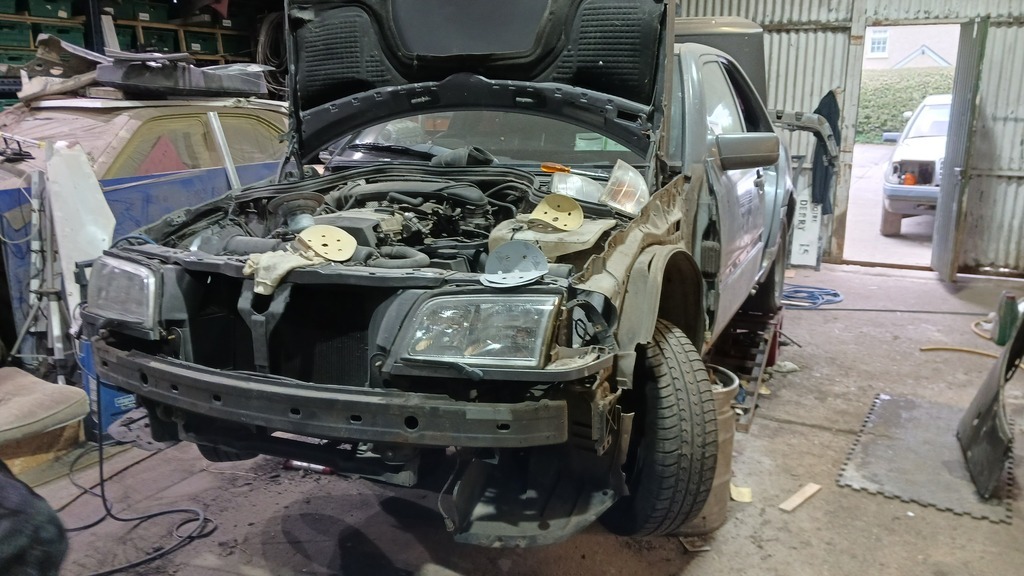 |
| |
|
|
75swb
Beta Tester
Posts: 1,052
Club RR Member Number: 181
|
|
Jun 29, 2023 10:21:09 GMT
|
Cup 3/4 full of hot water, add in as much citric acid as will dissolve in it and stir in the wallpaper paste. Get it to the kind of consistency as jam and you're good to go. I'd heard good things about bilt hamber previously so disappointing you had poor results. I can't get their stuff over here in NZ anyway so it's a moot point for me, but I'm going to give your recipe a go instead. The locally available rust converter is dire |
| |
|
|
|
|
demag
Part of things
 
Posts: 30
|
|
Jun 29, 2023 14:20:10 GMT
|
I'd heard good things about bilt hamber previously so disappointing you had poor results. I can't get their stuff over here in NZ anyway so it's a moot point for me, but I'm going to give your recipe a go instead. The locally available rust converter is dire It really works well, doesn't just convert the rust, completely dissolves it and it's gone. The wing needed 3 applications but it's back to shiny metal now. It costs a fraction of the deox gel too. |
| |
Last Edit: Jun 29, 2023 14:21:17 GMT by demag
|
|
demag
Part of things
 
Posts: 30
|
|
Jul 31, 2023 22:02:24 GMT
|
The plan is to paint everything below the trim line and both front wings as that's where all the rust is. It's the primer line in the pic. That's all I'm painting, no mission creep, no " I'll just do that bit while I'm at it" definitely not painting more than I have to. 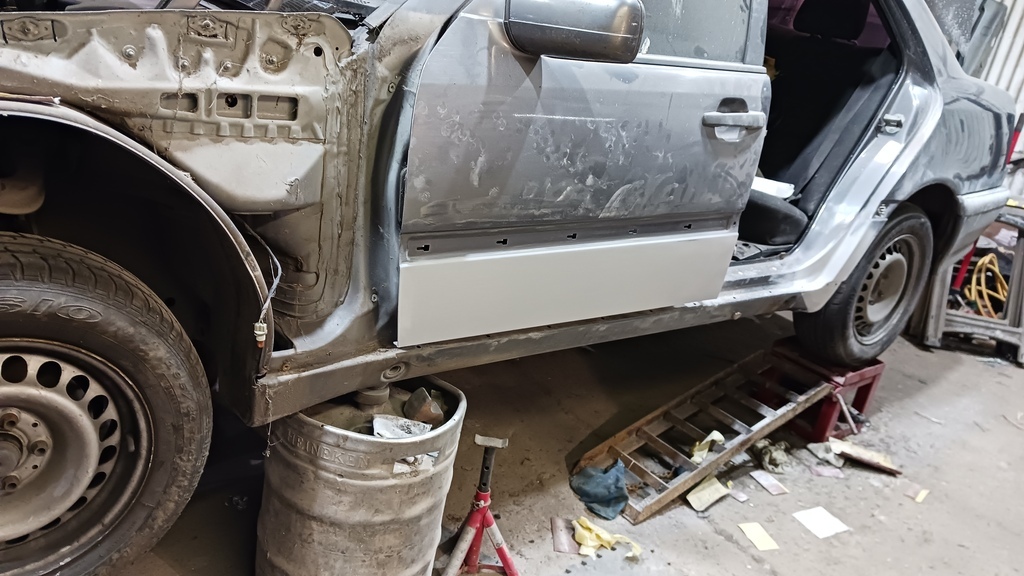 |
| |
Last Edit: Jul 31, 2023 22:06:46 GMT by demag
|
|
demag
Part of things
 
Posts: 30
|
|
Jul 31, 2023 22:13:57 GMT
|
Paint arrived and painted the wings first to see how it goes. Paint looked a bit different but should be OK. 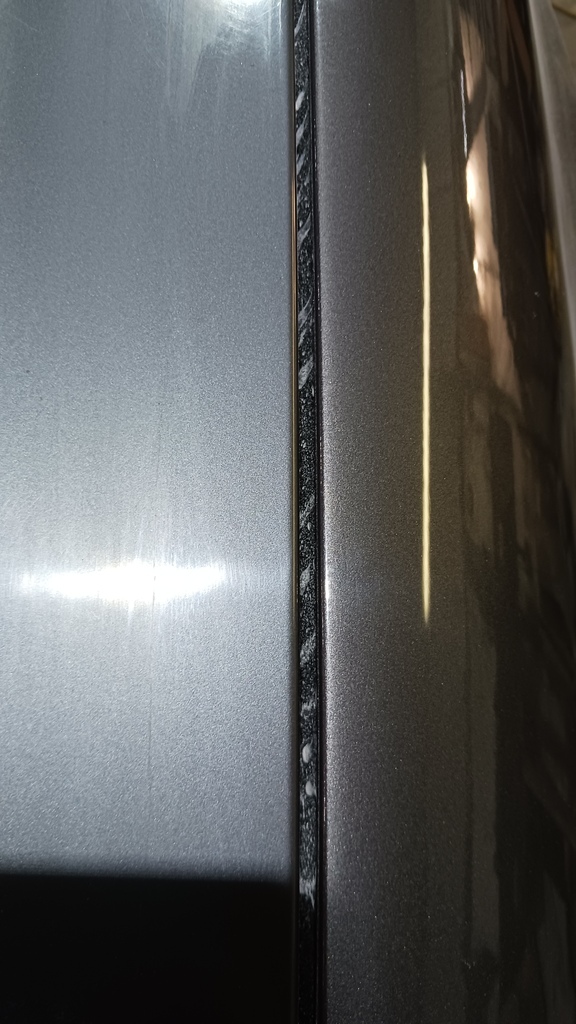 Wing on the right, bonnet on the left, completely different colours. I used the paint code from the car and found no evidence of previous respraying when I was prepping it so the paint must have faded a lot. What else can I do but paint the whole car. 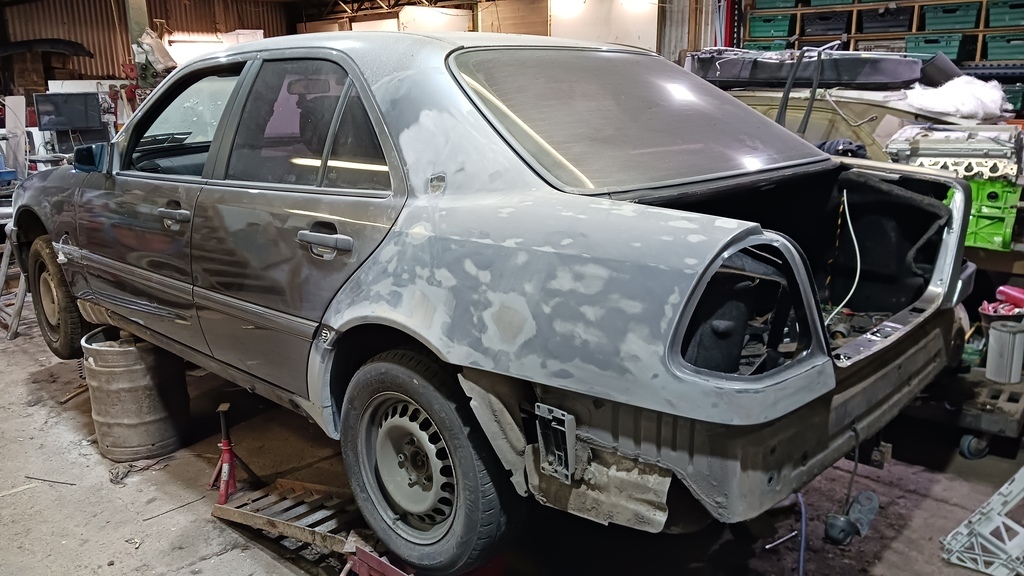 So far all 4 doors have been done, both wings, front bumper and the bootlid. |
| |
Last Edit: Jul 31, 2023 22:17:54 GMT by demag
|
|
demag
Part of things
 
Posts: 30
|
|
Jul 31, 2023 22:25:48 GMT
|
Not a great pic but that's the rear bumper in pieces. 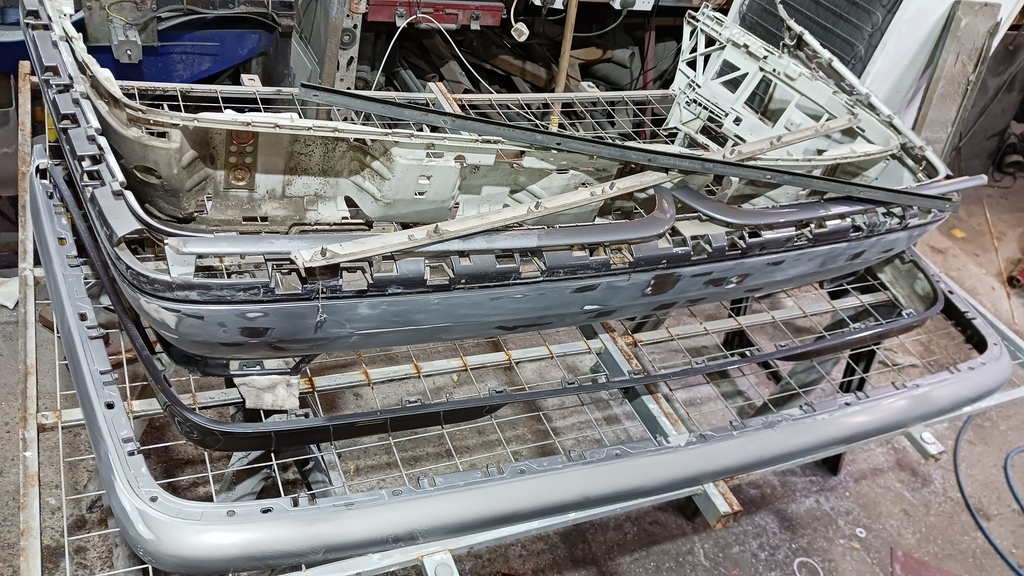 8 separate pieces, sorry, no it's 10 including the 2 foam blocks inside it. I can see places where the pieces were clamped with something to hold them for paint. 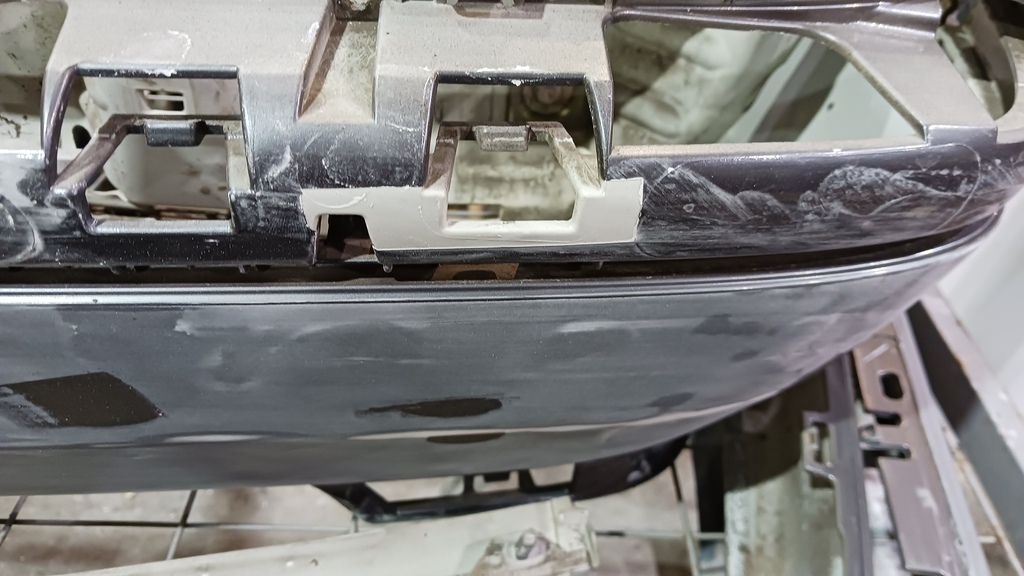 After splitting it up there's no way it could have been put together by machine so they must have painted each bit separately then put it together by hand, think this was Mercedes in their over engineering phase. |
| |
|
|
biturbo228
Posted a lot
  
Posts: 1,868
Member is Online
|
|
|
|
|
Love the citric acid wallpaper paste idea. I've recently discovered the wonders of having a tub of acid to pickle rusty parts in and was wondering if there was a way to do the same for rusty panels. Will be trying that shortly!
|
| |
|
|
|
|
|
|
|
|
Excellent thread,
Brilliant work so far
Bookmarked,
Nigel
|
| |
BMW E39 525i Sport
BMW E46 320d Sport Touring (now sold on.)
BMW E30 325 Touring (now sold on.)
BMW E30 320 Cabriolet (Project car - currently for sale.)
|
|
demag
Part of things
 
Posts: 30
|
|
|
|
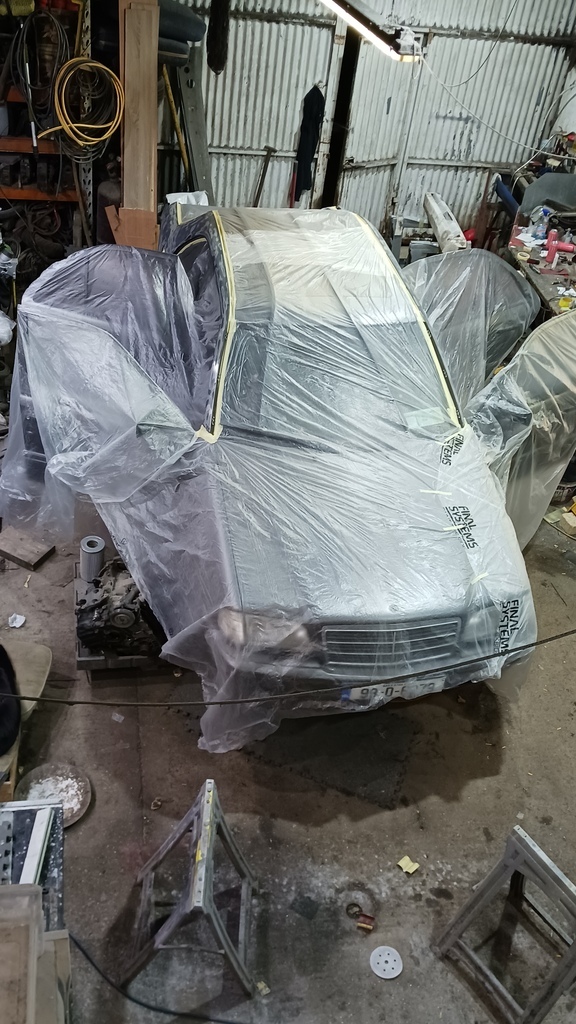 Oh I love masking up, would have been so much easier without the doors but I put them back on after painting them and I was just going to live with the difference in colour. I also had to do the NCT/MOT which it failed as I'd missed a rusty brake pipe so it came back in and I decided to finish painting properly. The doors are a pain to take off again as there's no connectors at the hinge points, all the wiring has to come out of the door to take them off. 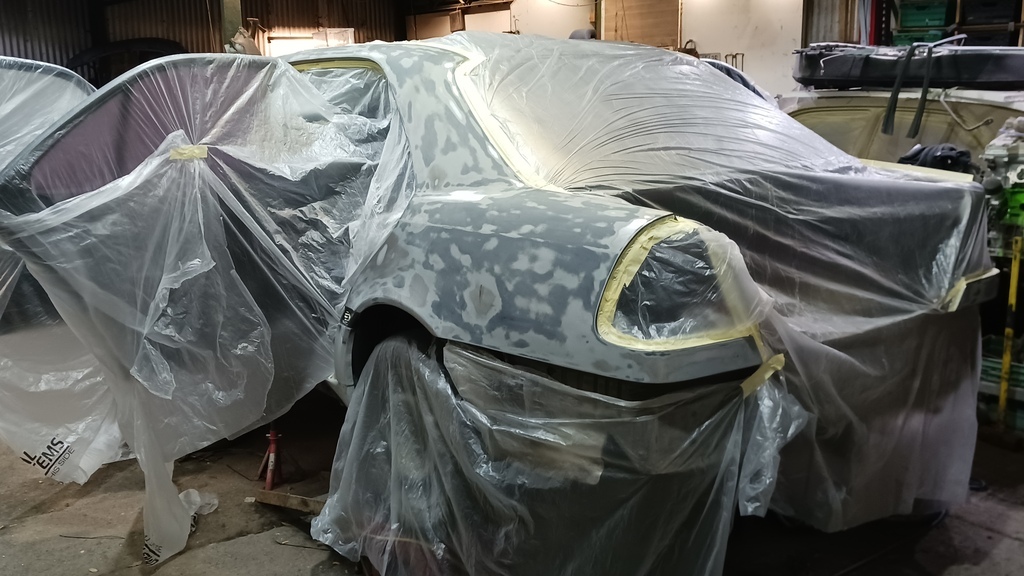 |
| |
Last Edit: Aug 2, 2023 23:49:07 GMT by demag
|
|
demag
Part of things
 
Posts: 30
|
|
|
|
Yay, masking again, this time I took the back doors off as there's only the vacuum pipe for the central locking. 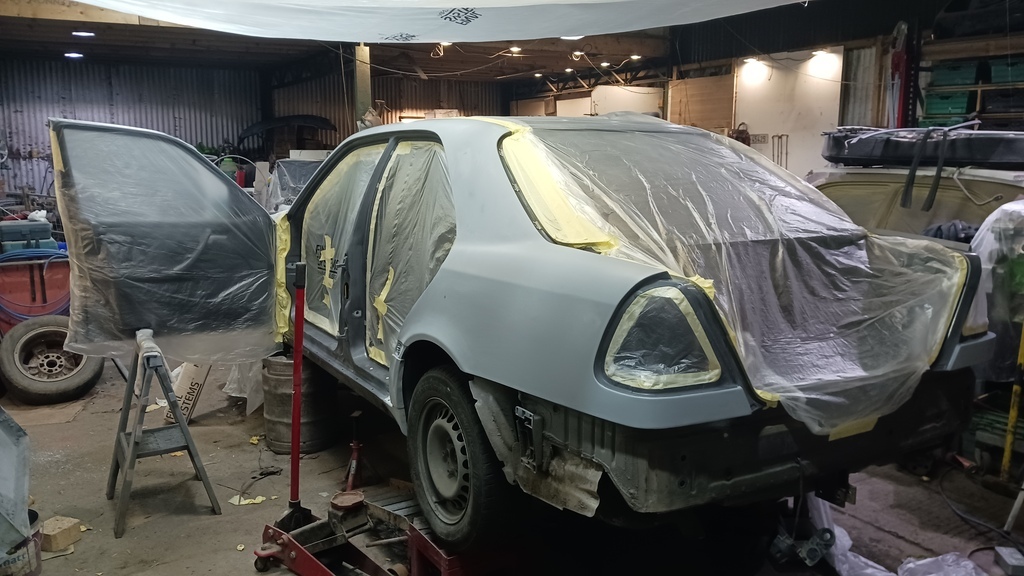 Had to put some sort of canopy above it to stop dust falling off the rafters on to the paint. 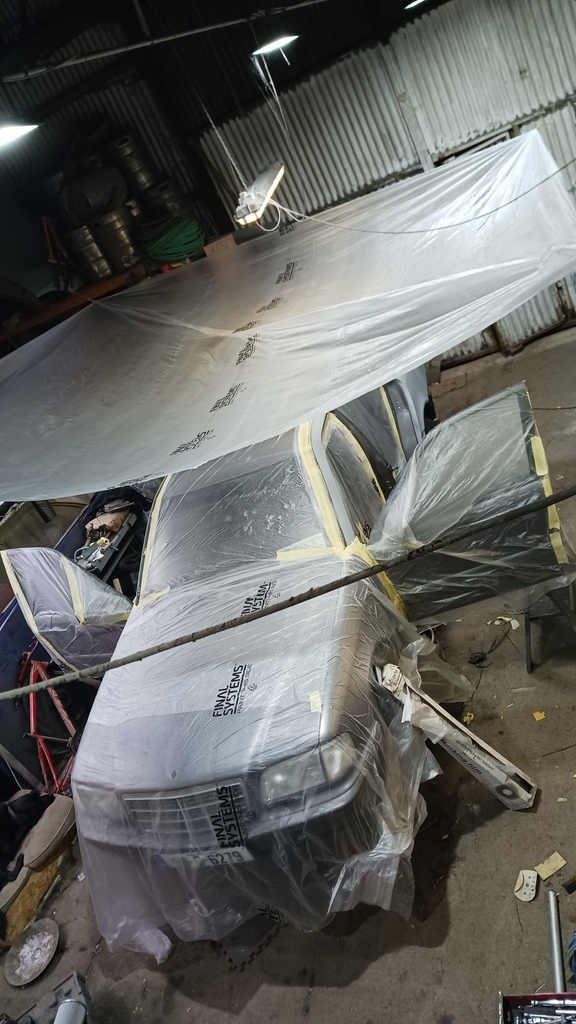 Hopefully it'll work. |
| |
|
|
demag
Part of things
 
Posts: 30
|
|
|
|
Didn't go well, it came out blotchy and I was trying to cover up where it was a lot darker than the rest and got some massive runs. There was a lot of bits in the paint too, funny that, painting in a dusty shed, who'd have thought. 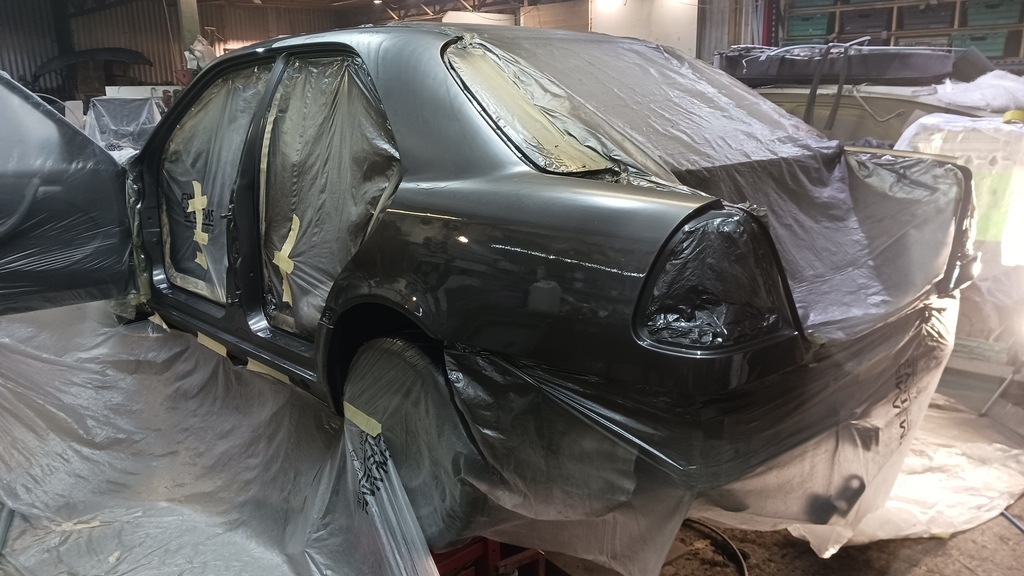 Flatted down and go again. 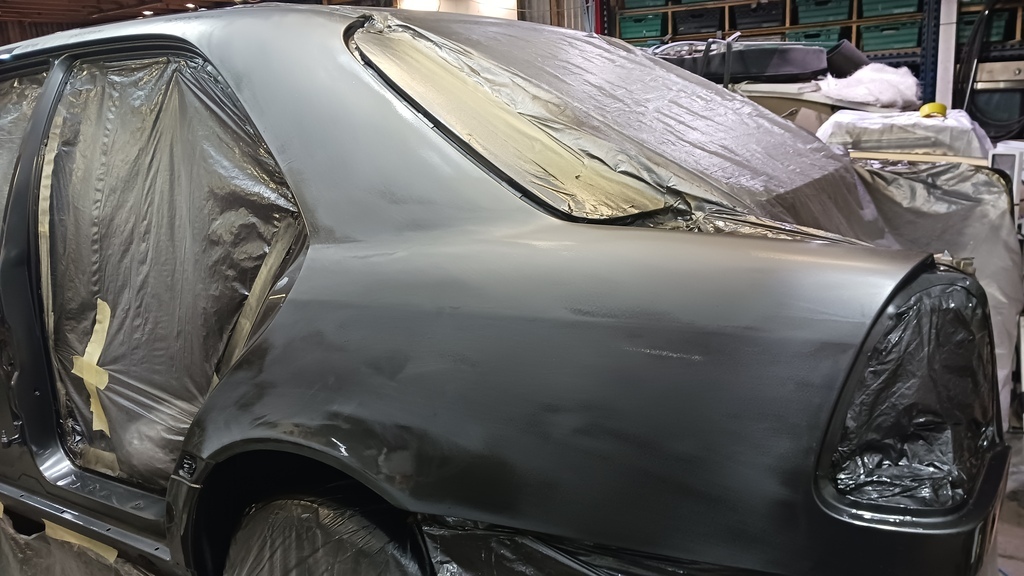 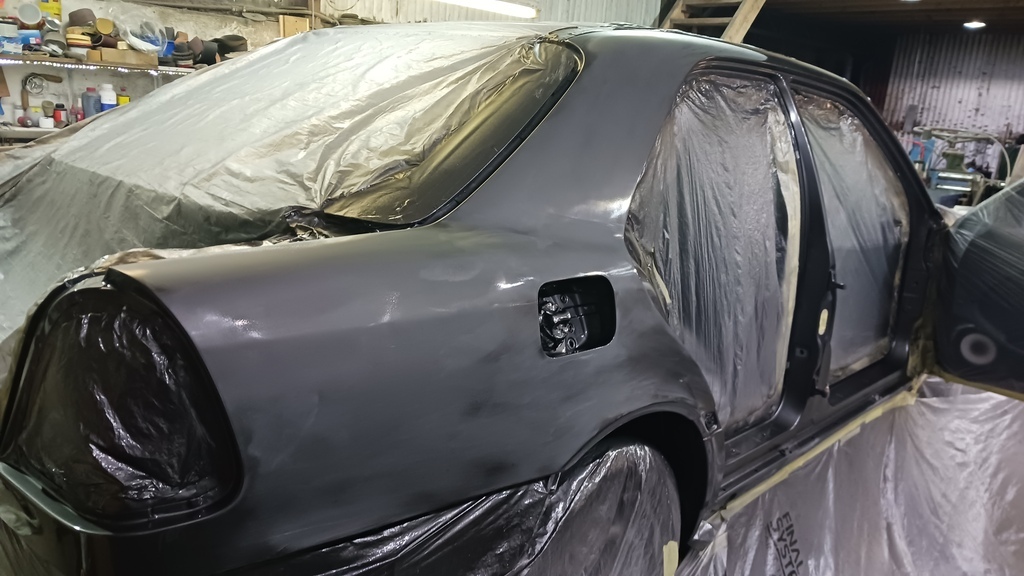 I figured out that the blotchiness ( I think that's a real word ) was from holding the gun too close so it came out better the second time. 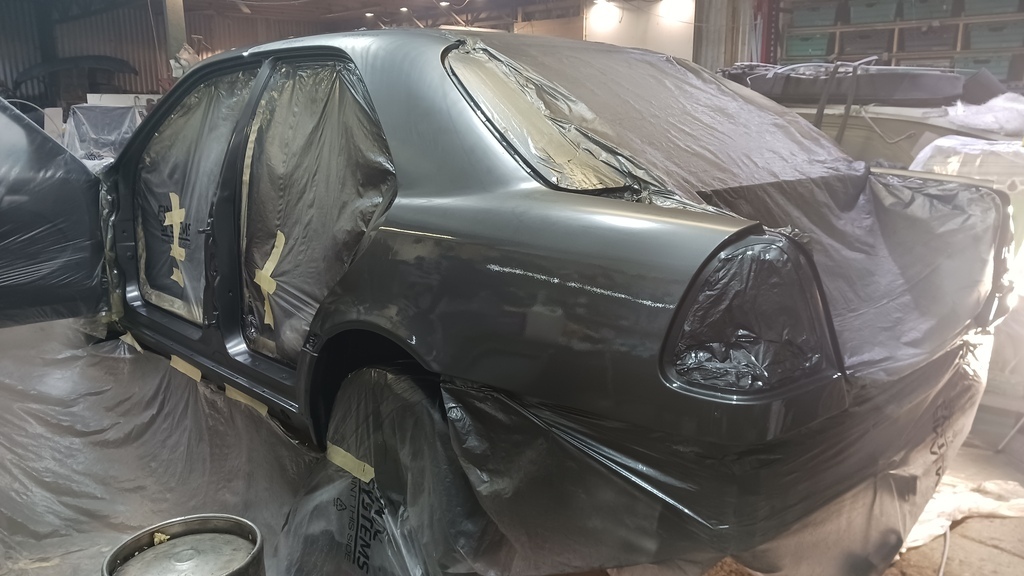 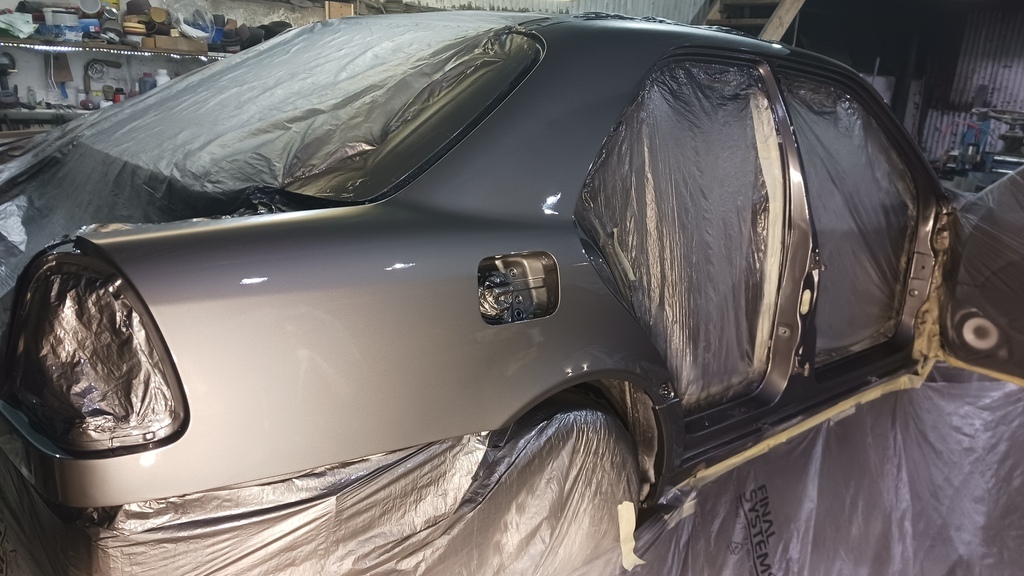 Not too bad for a first attempt (only ever painted a mini with spray cans before) dirty shed and the cheapest spray gun I had bought years ago to spray a trailer. There's still some bits of dust in it but I put on lots of clearcoat so I can flat and polish it later, cos that's what the professionals do, innit  |
| |
Last Edit: Aug 6, 2023 22:47:15 GMT by demag
|
|
demag
Part of things
 
Posts: 30
|
|
|
|
|
NCT/MOT Tuesday, hope the paint is dry enough to start putting it back together tomorrow.
|
| |
|
|
|
|


