|
|
|
Nov 30, 2022 14:31:47 GMT
|
|
Well the gauge repair place got back to me and the news is about as bad as it could be, in that they're all three goosed.
200 euros per gauge to fix them. Which is about what i was expecting tbh.
What to do? the availability of 6v gauges is somewhat limited. There's a repro Motormeter type one I could get for oil pressure, which is the one that really matters, but it's 110 euros and I also found a cheapy Jeep gauge that works with 6 or 12v, but it's sort of a waste of money if I buy either, then there's never going to be any incentive to repair the other two gauges.
And they do make a nice set.
I might get the oil pressure gauge fixed, since it's the one I really need and then get the other two repaired later on, to take the sting out of it.
|
| |
|
|
|
|
glenanderson
Club Retro Rides Member
Posts: 4,091
Club RR Member Number: 64
|
'58 Karmann Käfer Kabriolettglenanderson
@glenanderson
Club Retro Rides Member 64
|
Nov 30, 2022 21:51:13 GMT
|
|
I don’t know much about VDO gauges, but if they’re anything like Smiths ones their insides are normally fairly interchangeable. I’ve had successes in the past by swapping faces, needles and bezels between working ones of a different style to that I want with those of the ones that I do. They’re fiddly, but not impossible to fix yourself.
|
| |
My worst worry about dying is my wife selling my stuff for what I told her it cost...
|
|
|
|
|
|
|
I don’t know much about VDO gauges, but if they’re anything like Smiths ones their insides are normally fairly interchangeable. I’ve had successes in the past by swapping faces, needles and bezels between working ones of a different style to that I want with those of the ones that I do. They’re fiddly, but not impossible to fix yourself. Ok, that's interesting to know Glen. I suppose, since they're already broken, I've less to lose. The trouble might actually be finding new guts for them, as new 6v stuff is very thin on the ground. |
| |
|
|
|
|
|
|
|
Been a while and the following all happened before Christmas. Starting a new job next week, so I suppose the pace of progress will slow (I mean, if it could possibly get any slower...) I managed to make up a fairly tidy little patch for the big hole, after some fussing. Always make the patch AFTER you really investigate how big that rust hole is. The finger sander arrived and I have to say it is an excellent tool, aside from a bit of an appetite for belts. I really wouldn't have been able to do anywhere near so tidy a job without it. Impossible to get the angle grinder in there. It let me grind old welds right off the surface of the metal, so cutting away old repairs didn't leave me with a bigger hole. 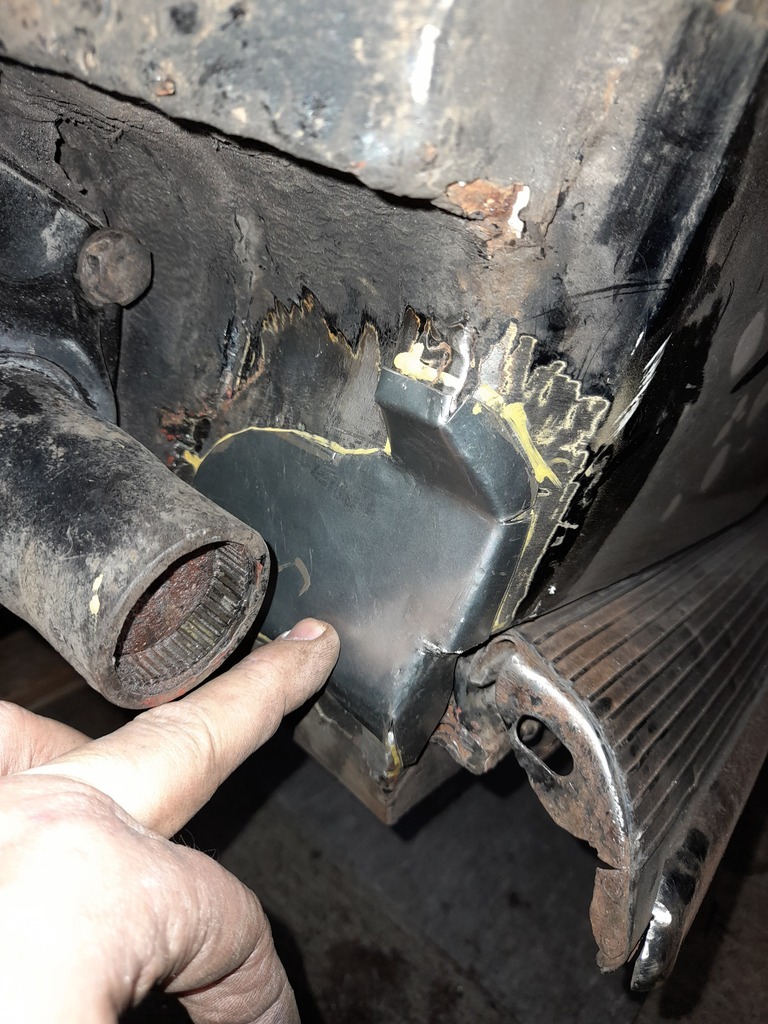 I had to do some finessing of my welder to get it going properly. I had a feeling that it wasn't working very well, as it never made the 'frying bacon' sizzle that I've seen on 1001 youtube videos. I think the gas hose was much too long and also mayhave been leaking a bit, due to mismatched connections on the welder and the gas bottle valve. In any case, it was much happier after some fiddling. 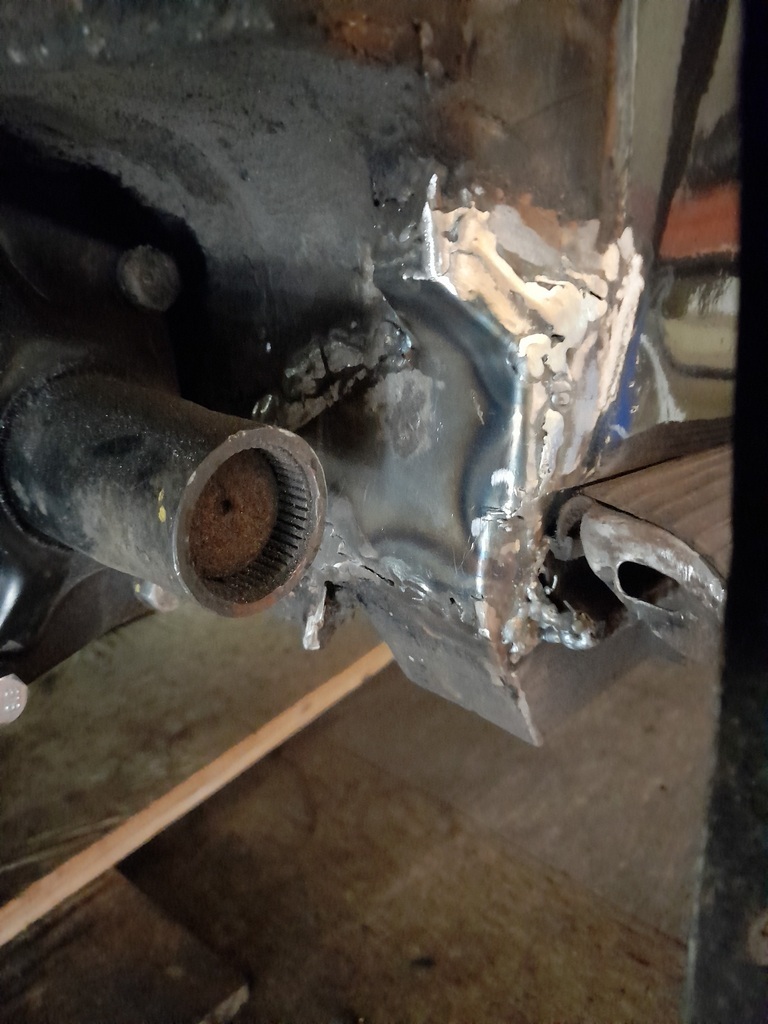 So yes, it is a bit crude, but it's a patch on an already plated up corner and it is only meant to be on there so I can register the car. That rear wing never fitted properly and I did at least discover why. It was because the last guy had welded the repair panel on in the wrong place and then had to bend the wing about to fit afterwards. It's a good bit better now, after some hammering. I'm thinking I may actually pay someone to do the heater channels and floor pan edges properly, fairly soon. I'm sure I could get new sills in there, but getting the doors to fit nicely and shut properly on one of these floppy old cars is a bit of a dark art. And it needs to be right and structurally sound, before I can even think about getting a new soft top put on it. I put a small plate on the other side of the car too, sprayed some smoothrite on there and decided it was good enough. 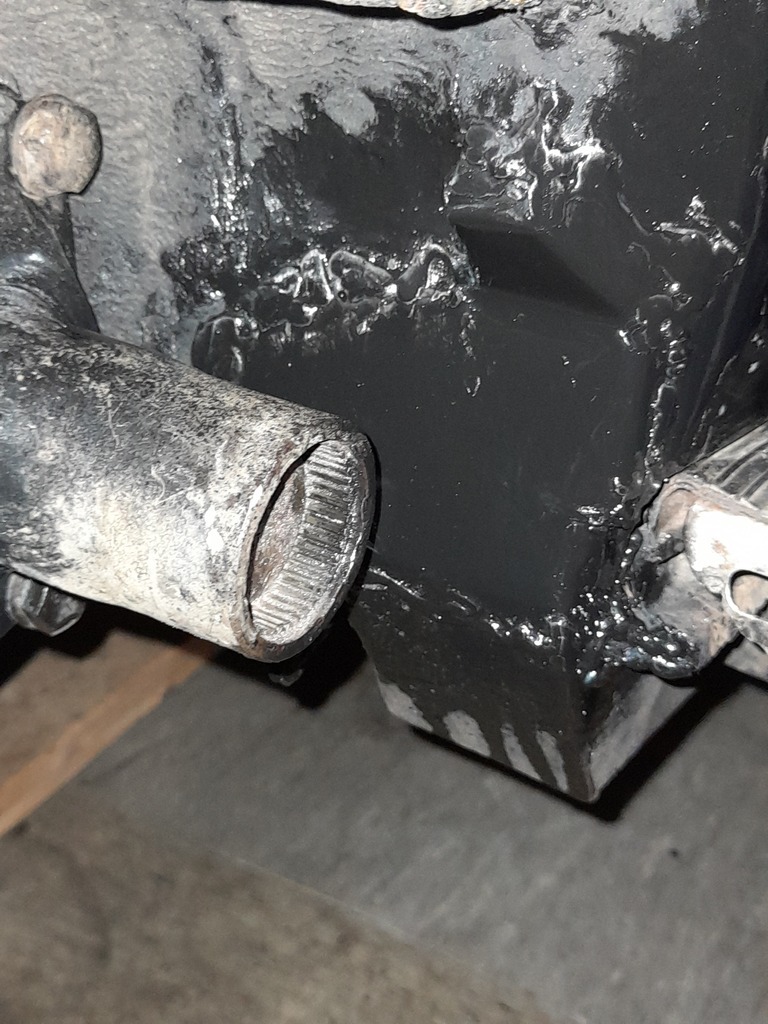 While that was drying, I thought I ought to take a look at the 356 brakes for the front. If you ever wondered what the difference is between these and VW drums, then this pic tells you.  They're massive alloy drums, with a pressed in iron braking surface. You have to watch out buying used ones, that the liners are still plenty thick and that there's no corrosion between the ally and the iron as it pushes them out of shape. These only just fit inside a 15" wheel. I wouldn't have thought about buying them, but I was told that it might make life much easier with the TüV to have an upgrade. Since these were half the price of a disc brake kit, I thought it was worth a shot. I did find I was missing a couple of small parts - a banjo fitting and the screw to fit it. I suspect these are (or once were) fairly standard parts, but I couldn't seem to find the banjo as an individual part, so I ended up buying a wheel cylinder that had them fitted. I can keep the cylinder as a spare. 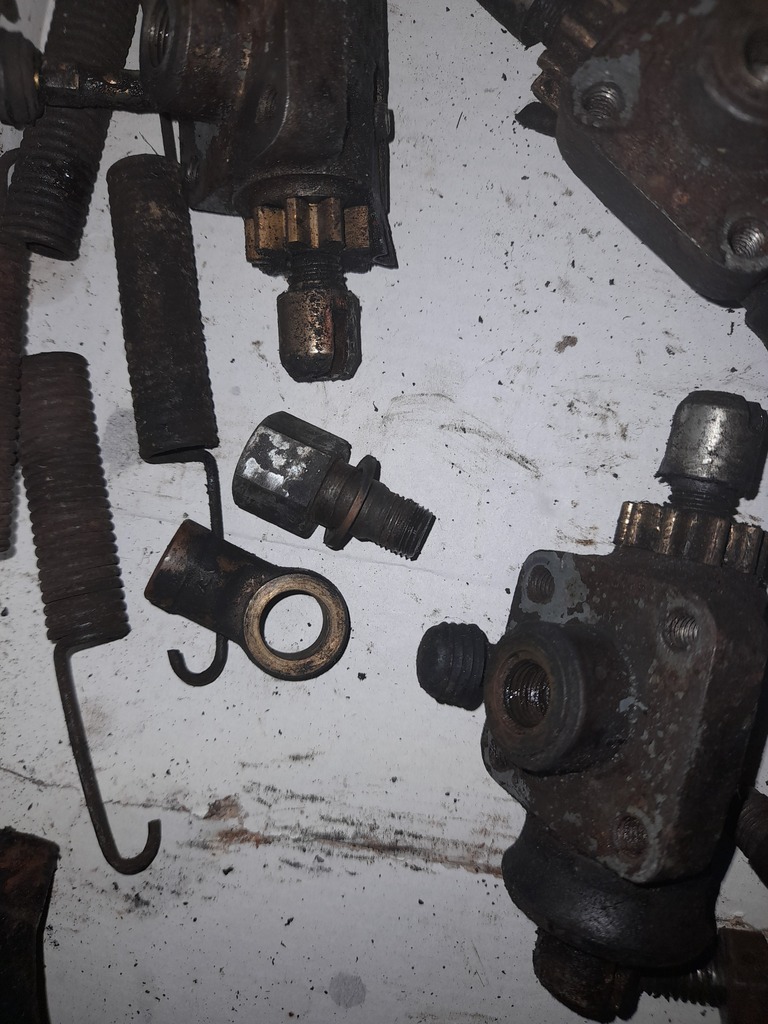 Hope I don't need to be buying too many more erly Porsche spares. There are four wheel cylinders in the front and the fancy OEM ones are 150 euros each. Still waiting on the oil pressure gauge to show up before I start the motor. Also I'd better get myself a brake bleeder and some wheel nuts for the front and Porsches have nuts and VWs bolts. |
| |
|
|
misteralz
Posted a lot
 I may drive a Volkswagen, but I'm scene tax exempt!
Posts: 2,326
|
|
|
|
|
Excellent stuff. Looking forward to seeing it at Ninove.
|
| |
|
|
|
|
|
|
|
Excellent stuff. Looking forward to seeing it at Ninove. Oh heck, I will need to get my finger out for that! |
| |
|
|
|
|
|
Mar 12, 2023 21:08:20 GMT
|
|
Well...so much for Ninove.
Bit of a non-update-but-I'm-still-working-on-it report. Sorry...not even any photos...boring!
I've been spending most of my time away from home with a new job, which has really impacted on car time. Hopefully it'll improve when I can work from home a couple of days a week.
But today I was all jazzed up to go and work on the car, utterly convinced that I had all the bits i needed to crack on with fitting the 356 drums to the front. Yeah...right....I pretty much immediately realised that although I had all the special bits (fancy hydraulic fittings, copper washers), I needed 4x M6x12mm bolts and spring washers to hold each wheel cylinder in place. And had I gone down there on Saturday, like I was going to, before getting involved digging the moped out of hibernation, I could have simply gone to the shop and got some. So as every time I go there, it devolved into yet another session of meticulously cleaning crappy old oil and rust off things.
In this case wheel cylinders. Cleaned rust off around where the seals sit and degreased everything.
Followed by another session of trying to work out how it all goes together. Have to say, the pistons in the wheel cylinders are a little rattly. I was kind of wondering if the guy just sold me the "set" of all his old knackered ones, but
the new one I bought to get a fitting and a seal from isn't much different (aside from being longer and having a spring and an extra seal inside it). I'm just going to fit them and see how it goes. I know normally you'd just replace, but that's 500 quid, so let's just see if this works first.
I still haven't started the motor, as I was thinking it would be a far better plan to get the front wheel back on it, so I can turn it round and run it up with the motor pointing out the doorway. Rather than gassing myself.
|
| |
|
|
glenanderson
Club Retro Rides Member
Posts: 4,091
Club RR Member Number: 64
|
'58 Karmann Käfer Kabriolettglenanderson
@glenanderson
Club Retro Rides Member 64
|
|
|
|
Not gassing yourself is always a sound idea. 👍
|
| |
My worst worry about dying is my wife selling my stuff for what I told her it cost...
|
|
|
|
|
Mar 19, 2023 10:00:43 GMT
|
|
Another weekend of frustration.
Despite my saying that OEM wheel cylinders for 356 drums are hideously expensive (144 euros each x4 thangyouverymuch), I discovered some copies for a far more affordable 38 euros a pop. At that price, I felt like it wasn't really worth messing with the ones i have, so i ordered new ones and the 16 bolts I needed to fit them.
I would like to be able to skip ahead to the part where I say "off I went to fit them", but as I was planning to take the moped down there, things got tricky. I had started it up last weekend with no issues and it started up again after some kicking, but waited until I had pushed it outside onto the road to completely quit. More kick start action with only the occasional burst of life. Then the kick start itself decided to pack up. Grrr....
I took the car, to give me time to think about what sort of relaible, electric start Honda moped I was going to buy. Or more likely a lawnmower style pull start for the one I have, as it's defintiely cheaper and probably more reliable that that garbage kick start. Can't even bump start it thanks to the drive system.
Went and picked up the brake cylinders from the post box and went to the workshop, all full of enthusiasm. Opened a box. Looked at the instructions. "Please be certain to thoroughly lube your new wheel cylinders with ATE wheel cylinder grease"....wait...what? I don't have any of that stuff (since I'd no idea it was a thing until that very moment) and any local motor supply places are closed by now, so home I go again to search ebay for ATE greas, a brake bleeder and a pull starter for a Motobecane.
Jumping back a few weeks; since I forgot to mention it at the time, I did get my oil pressure gauge back, wired that up and did some cranking, just to see what would happen. It worked too. The gauge went pretty much all the way up. Left me wondering how much oil pressure is too much of a good thing? I guess stone cold oil is going to be super thick, which will give a dramatically different reading to when it's hot.
|
| |
|
|
|
|
|
|
|
Actual slight progress. Bit of a guessing game assembling these from internet photos, making sure all the bleed nipples are facing up and the cylinders push in the right direction, but it all fits. 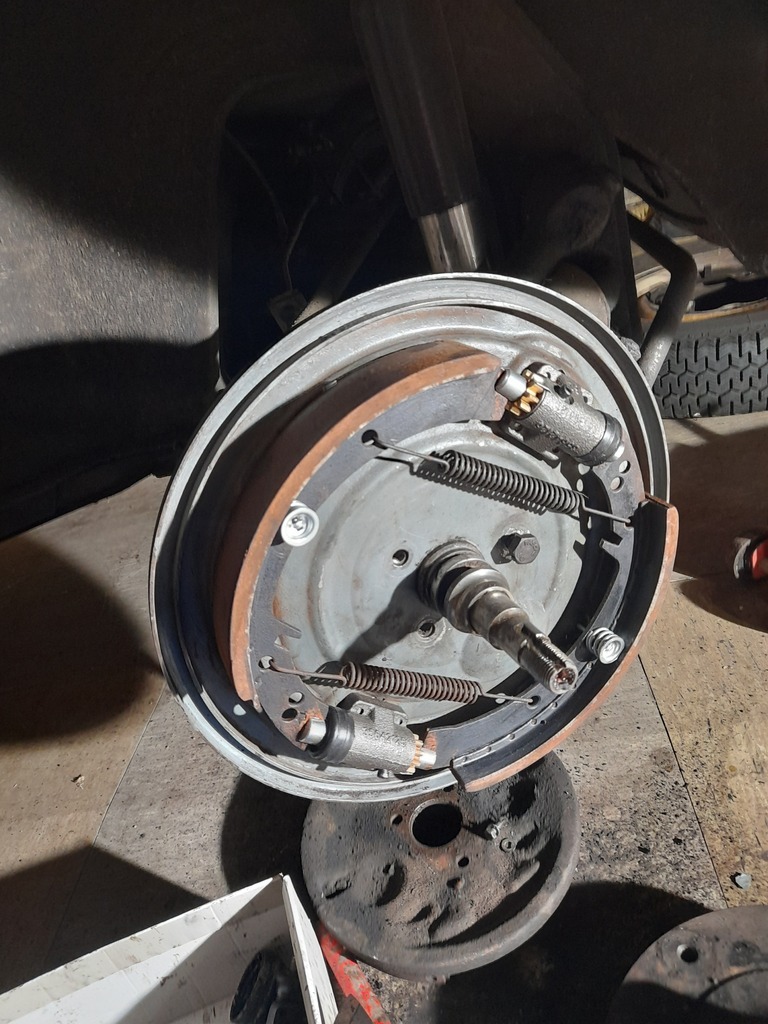 |
| |
Last Edit: Mar 27, 2023 6:40:15 GMT by horrido
|
|
|
|
|
|
|
Apr 23, 2023 18:08:54 GMT
|
|
The epic and seemingly endless saga of never ever having the right bits to get on continues...
I got the 356 backing plates fitted up and even used some wire to wire lock the three bolts in there, as per the factory.
What's next then? Pop the brake drums on and we're golden. Oh...wait...there aren't any outer wheel bearings in these drums. Gah! I never noticed. So that was that. Went home and ordered up some new outer bearings. I could have taken the bearings from the Beetle drums I suppose, but they were the old style ball bearings, whereas the better replacements are rollers. Also I didn't know what sort of condition they were in and I couldn't be bothered tapping the races out of the drums. I return home and order some outer bearings.
Two weekends later I get a chance to carry on, safe in the knowledge that this time it would all work out.
Of course....
I fitted the drums on the spindles and pushed the outer bearings in. All seemed ok, until I pulled on one of them to adjust the brakes up and noticed a curious movement. When i backed off the spindle nut, the rattle got a lot worse. Did some quick measuring and a brief internet search and what do you know? 356 spindles are thicker at one end, so you have to use Beetle inner bearings too. And I don't have any.
I should be happy in a way. I could have done a lot of damage if I'd driven it like that and it was really lucky that I spotted it at all, since the seals in the back of the drums held them fairly well in place with the nuts done up.
So I guess I dodged a bullet.
|
| |
|
|
|
|
|
Apr 25, 2023 14:28:35 GMT
|
|
With regards to the gauges, for about €30 you can buy a 10 Amp, 6-to-12 Volt DC-DC converter.
That then opens up your availability massively for gauges and has the added benefit of keeping the voltage feeding the gauges stable no matter the engine speed.
Phil
|
| |
|
|
|
|
|
Apr 25, 2023 14:44:35 GMT
|
|
Thanks Phil. Filed for future reference.
|
| |
|
|
munky
Part of things
Posts: 462 
|
|
Apr 25, 2023 22:52:38 GMT
|
|
It’s going to be a real shame, when the brakes are all back together. The wonderful finned hubs are going to be hidden by the smoothies and hubcaps… unless you have a cunning plan!
And if there is anything gauge wise, that we might have state side, let me know. I’ve already been to one swap meet already this year, and planning on another in June.
|
| |
Last Edit: Apr 25, 2023 22:53:42 GMT by munky
|
|
|
|
|
Apr 26, 2023 16:04:10 GMT
|
It’s going to be a real shame, when the brakes are all back together. The wonderful finned hubs are going to be hidden by the smoothies and hubcaps… unless you have a cunning plan! And if there is anything gauge wise, that we might have state side, let me know. I’ve already been to one swap meet already this year, and planning on another in June. No cunning plan. They'll be getting covered up. I have them on there because I have a bigger motor and because I need to keep the TüV happy and they were cheaper than a disc kit. Though I half expect they'll tell me I need rear ones too (and wouldn't that just be the most fun ever - rear ones are rather harder $$$ to find and fit). Oh blimey, I hope my gauge buying days are behind me! Though if you do see a matching one to mine, then I'd be into it, thanks! Nobody seems to know what car mine are from or if they're just accessories from the time. |
| |
|
|
|
|
|
|
|
This feels like it's been dragging on like the 100 years war at this point, but what can I do but carry on? I was looking for inner wheel bearings and of course, the cheapest way was to buy sets, which not only got me some seals, but also another superfluous pair of outer bearings too. Oh well...spares are good. Again, i was careful and dodged a bullet. I thought that I might be able to drop the beetle bearings into the Porsche races in the drums, but nope...they didn't feel quite right. Strangely, the rollers are set at a noticeably different angle and so there was nothing for it but to knock the races out, which wasn't such a chore. Getting the hub seals in was proving tricky though. You know how it goes. Tap one side in and the other pops out. Not know ing anyone with a press, I put a bit of wood across the back and stood on it. Went striaght in. 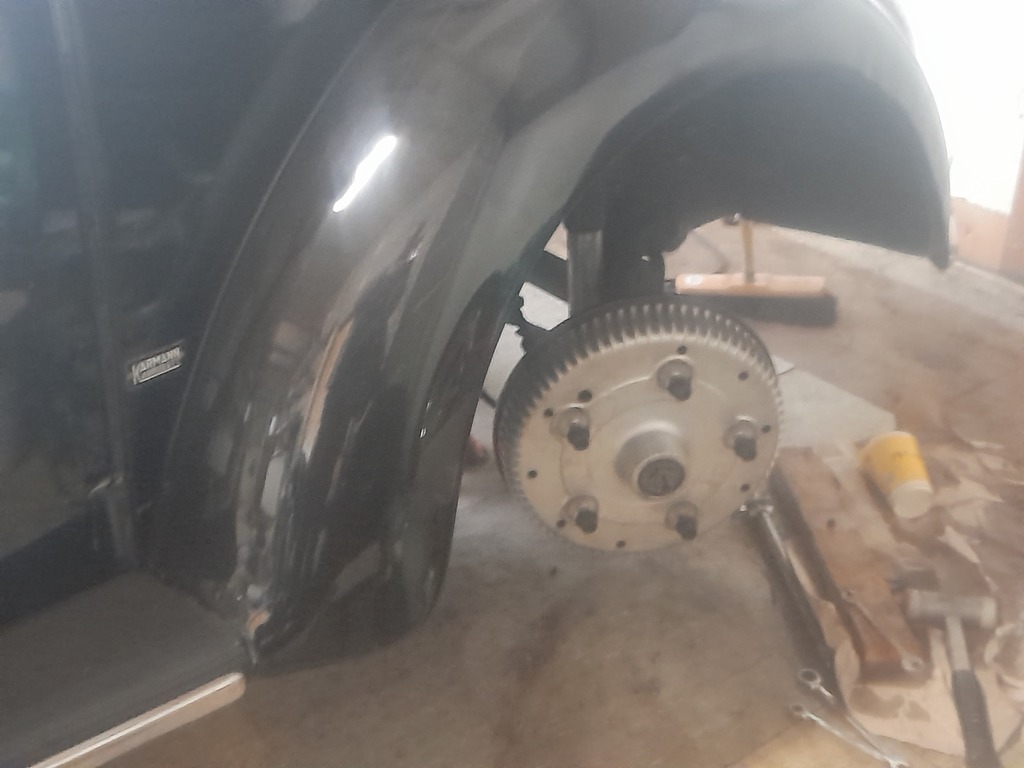 Spent some time adjusting the shoes up and then trying to bleed the brakes with one of these El Cheapo ebay hand vacuum pump things. These were made by optimists, that much is certain. Didn't seem to do much though. Not to say it didn't suck, just not in the way intended is all. Oh well. Some troubling news about my workshop. It seems the landlady is selling up, so i hope to hell i don't get booted out by the next owner. I said I'd buy the place if she was willing, but I get the impression it's too much hassle for her and she just wants out, as she's a pensioner. |
| |
|
|
|
|
|
|
|
This feels like it's been dragging on like the 100 years war at this point, but what can I do but carry on? The epic and seemingly endless saga of never ever having the right bits to get on continues... Story of most of our lives... Keep at it, not far to go! |
| |
|
|
|
|
|
|
|
Where were we? Bleeding brakes? Despite the abject failure of the brake bleeder, it was actually a super easy job with a little help from GF, pushing the pedal. So with that done, I fitted the wheels back on (haven't locked the front spindle bolts yet....don't forget that!) and got it off the axle stands and pushed it outside for the first time in forever and turned it round, to get the engine end next to the doors. GF wasn't shy about pointing out the appalling mess that the workshop was in so I took some time to have a semi decent tidy up and pushed the broom round. This was over the last couple of weeks. I was back there today and really was hoping that finally I could get it started. I cranked away and got some oil pressure up. Pulled a spark plug to see if it was sparking and then connected the coil and let rip (or as much rip as it could muster with 6 volt electrics). Nothing. I tried a few things with checking the timing, but it seemed about right. Very petrol smelly though, which makes me wonder if I'm flooding it. It's probably got plenty of scope to dump far too much fuel into the motor. Anyway, it's looking more up together than it has in a long while and I should be close to getting it going, if I can just figure out why it won't fire. It didn't even cough.  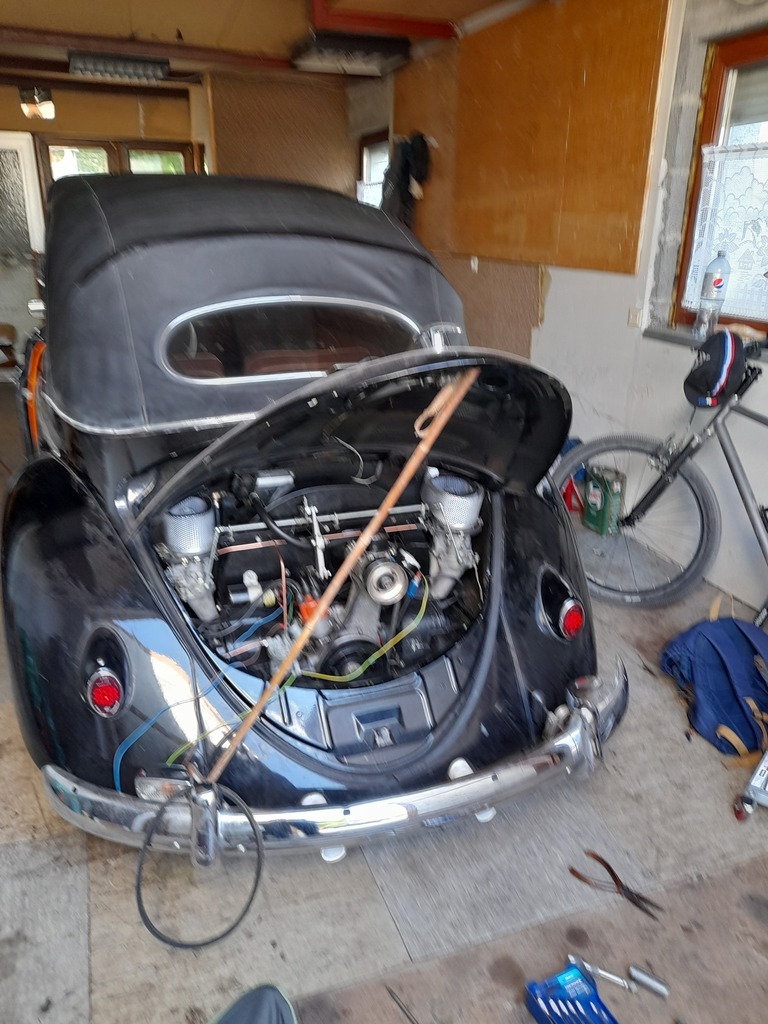 |
| |
|
|
|
|
|
Jun 10, 2023 20:24:28 GMT
|
|
So, still no joy starting it, but I've isolated a possible problem. The standard test, with the voltmeter on the coil, showed zero volts, when turning the motor over. Like it's meant to flash on and off as the points open. But then the voltmeter also showed zero volts directly across the battery...so...yeah, i guess that's not so trustworthy.
I lashed up a bulb and a wire and repeated the test and it appears that it's just at six volts (six volt car, don't forget) all the time. The points opening and closing don't make a difference. The light just stays on. Anyone know what might be causing this? It has to be a crossed wire or something silly. Strange because I definitely saw a spark at the plug I removed last week. Pulled another one out today and I got nothing.
Also snapped the front spring on the moped on the way down there. It went all lowrider on me. Managed to tie the two broken ends together with a couple of jubilee clips. Somewhere, an ancient French farm machinery mechanic is smiling down on me.
|
| |
Last Edit: Jun 10, 2023 20:26:49 GMT by horrido
|
|
|
|
|
|
|
|
Sorry, no pics or video, but blinking flip, I only managed to get it running.
I swapped the coil and then was thinking about swapping the dizzy for another one, just to see. Started doing some "back to first principles" type checks and realised it was 180 degrees out.
Swapped it round, hit the key and off it went. Lots of popping and banging and some black exhaust as if it was very rich, so I didn't leave it running too long and in any case it really didn't want to idle.
I went past my pals workshop on the way home and he said he would come and try and get it running better. At least well enough that it could be driven the few miles to his place, for proper tuning and hopefully a TüV test, registration and a historic status. I may yet be driving this thing again this year.
|
| |
|
|
|
|