Paul
Posted a lot

Posts: 1,903
|
|
|
|
New parts day! Combined with Covid isolation this seemed like the perfect time to get to work. 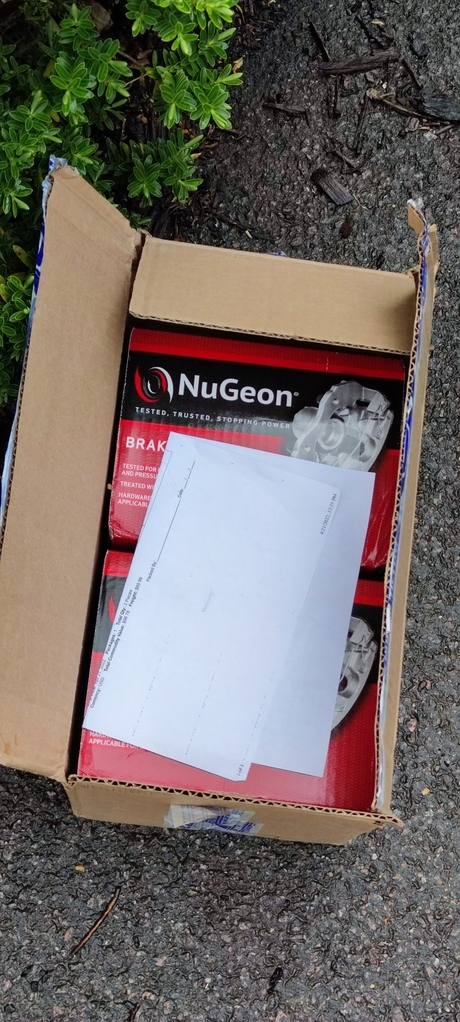 Time to have a go at changing these dodgy brakes that stick when warm 😬 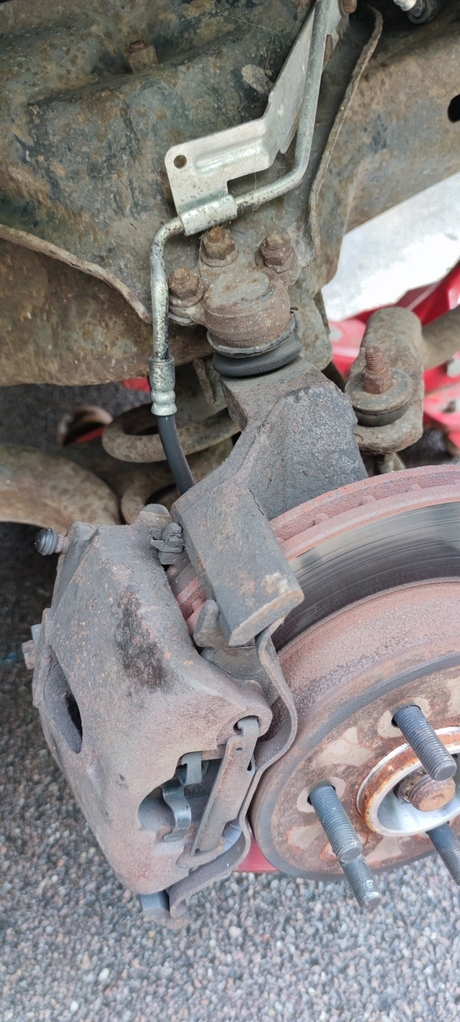 Lines look good, but those do look like original calipers. 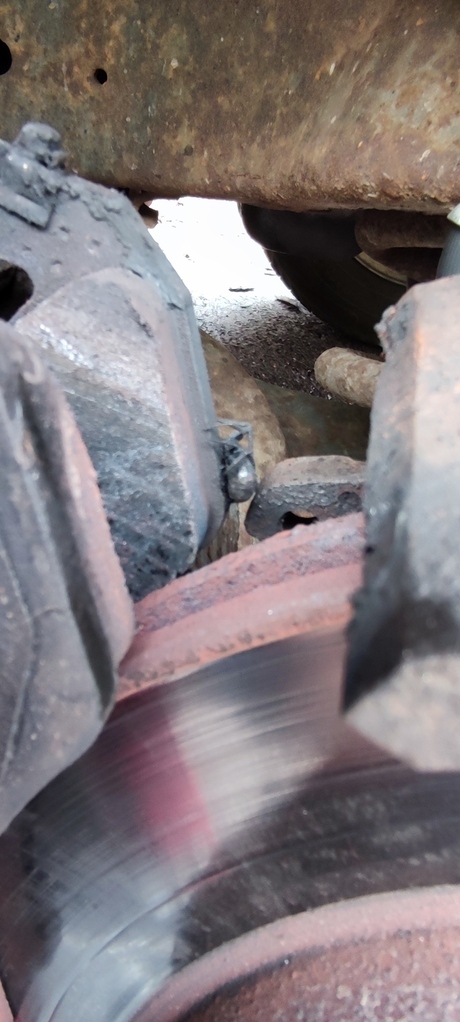 No idea how long that stowaway had been there, sabotaging my brakes. It's a remarkably simple setup. One bis spring clip, 2 7mm caliper slider pins, one 15mm sandwiched between 2 crush washers holding the line on. 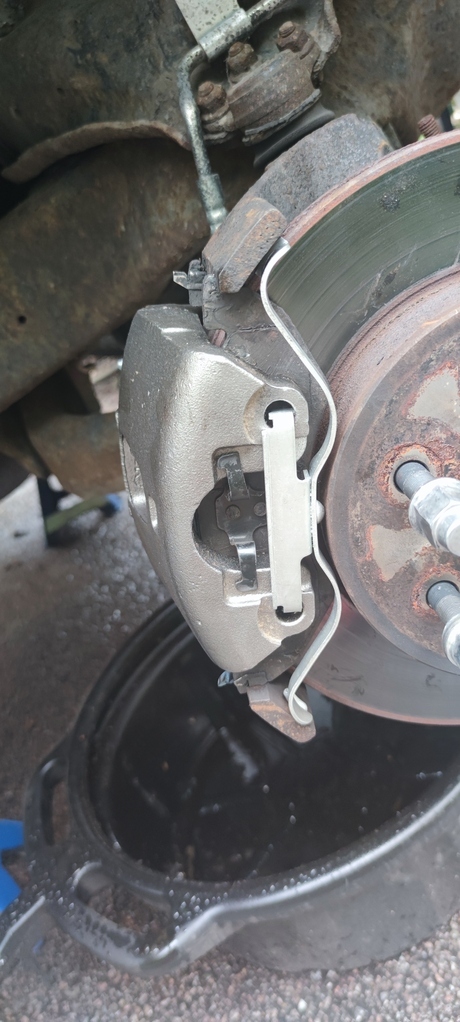 Offside...simples Nearside looks a bit grotty - sway bar links and upper ballpoints required I think 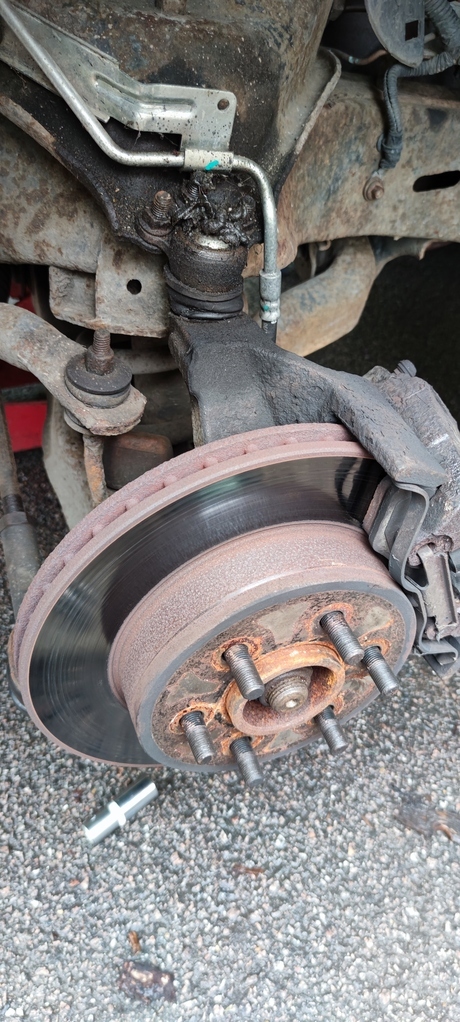 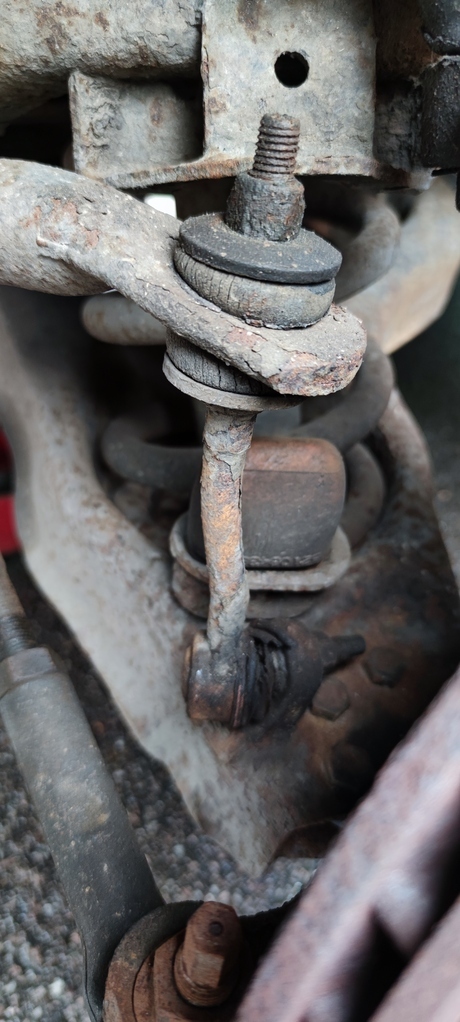 Unfortunately this is where the fun stopped 😡 Slider pin bolts came out a little TOO easy...on refitting I found that there was practically no thread left in the carrier to screw into. Common fault, apparently. Sigh. M9 X 1.25 helicoil set ordered, should be here by tomorrow. We go again... |
| |
|
|
|
|
|
|
|
|
|
|
All this comes together in the end.
It will come together
|
| |
|
|
Paul
Posted a lot
Posts: 1,903
|
|
|
|
So let's do this...  The offending holes: 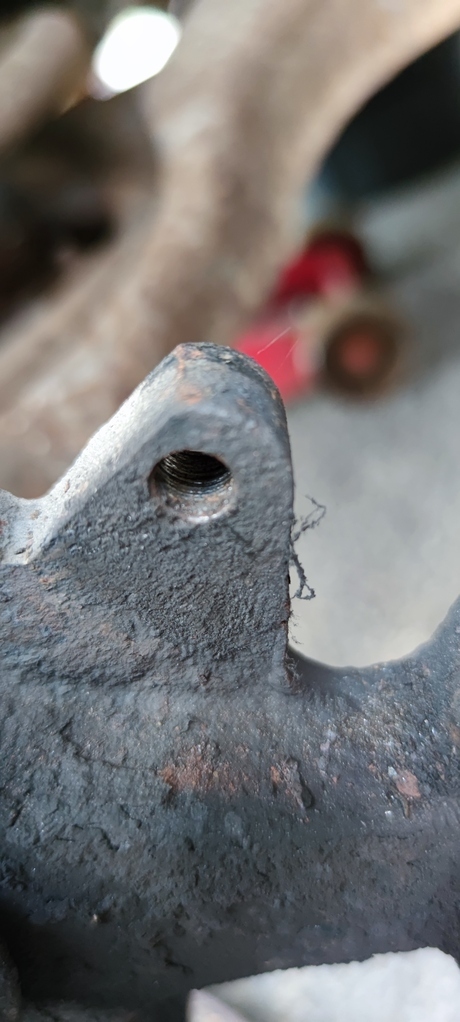 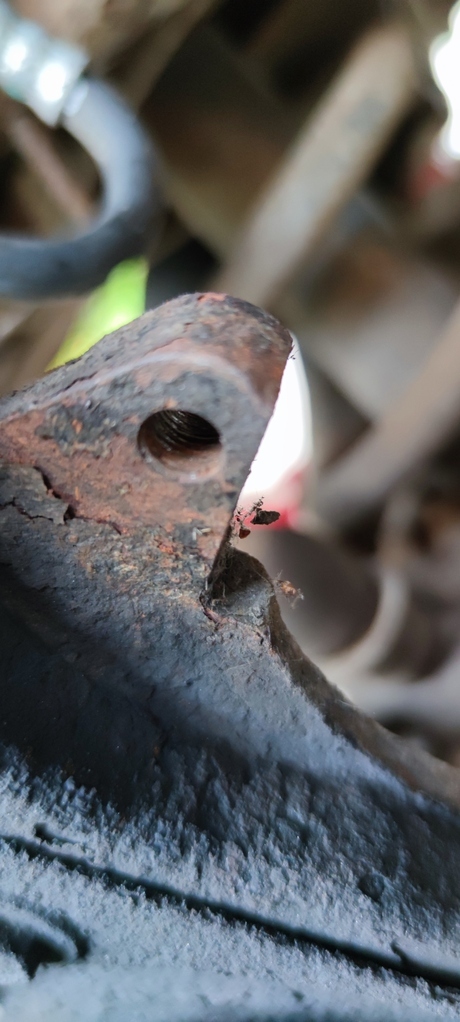 Threads are just about visible but not holding a bolt. Really common apparently. Having never installed a helicoil there were a couple of deep breath moments...there's not a lot of room for error here. Drilled out with a nice round 9.3mm bit, tapped out with an M9 tap. Fresh looking 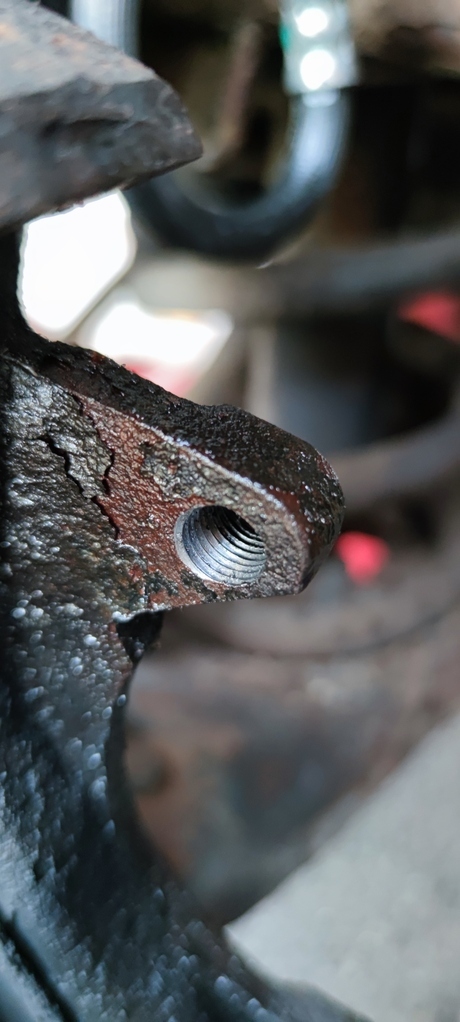 Here's the coil ready for installation - annoyingly I bought the red bottle of thread lock because I presumed it was, y'know, the red stuff. Apparently not. 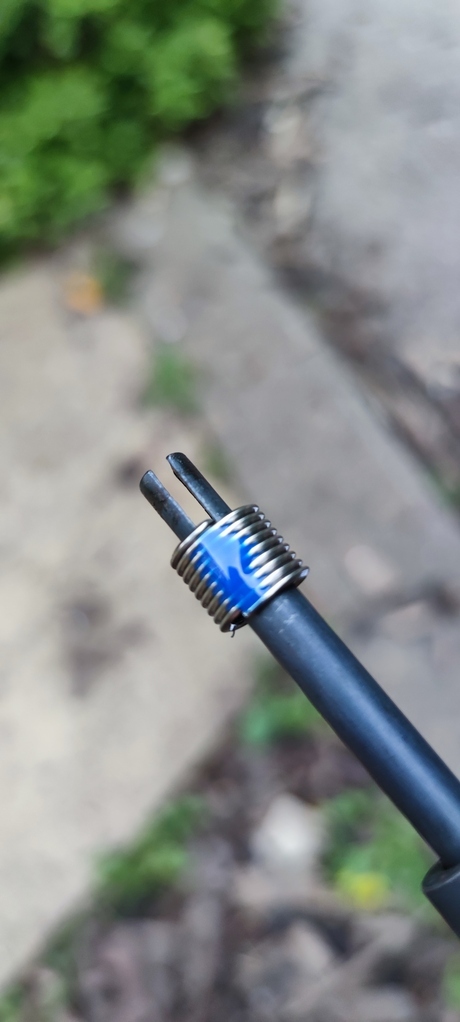 Beautiful. Imagine 2 of them obviously. 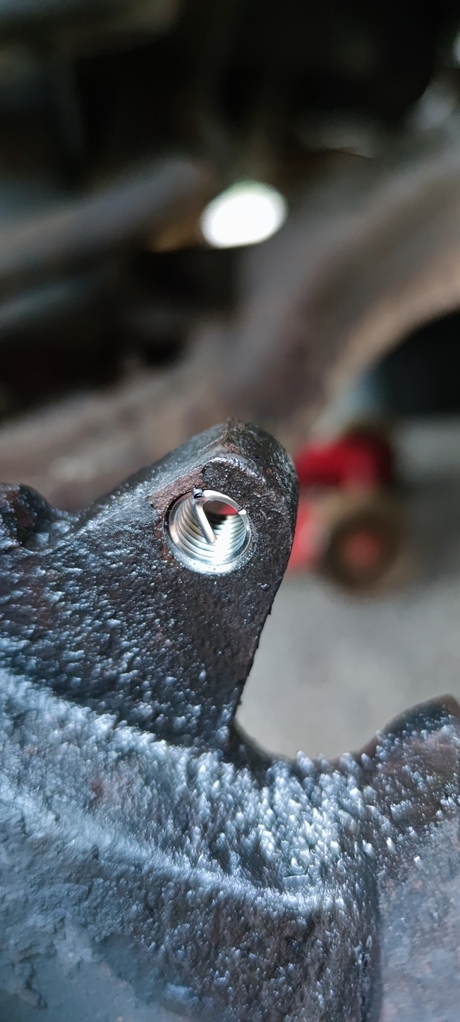 Knocked out the tang with a punch, ready to reinstall parts in 20 minutes. 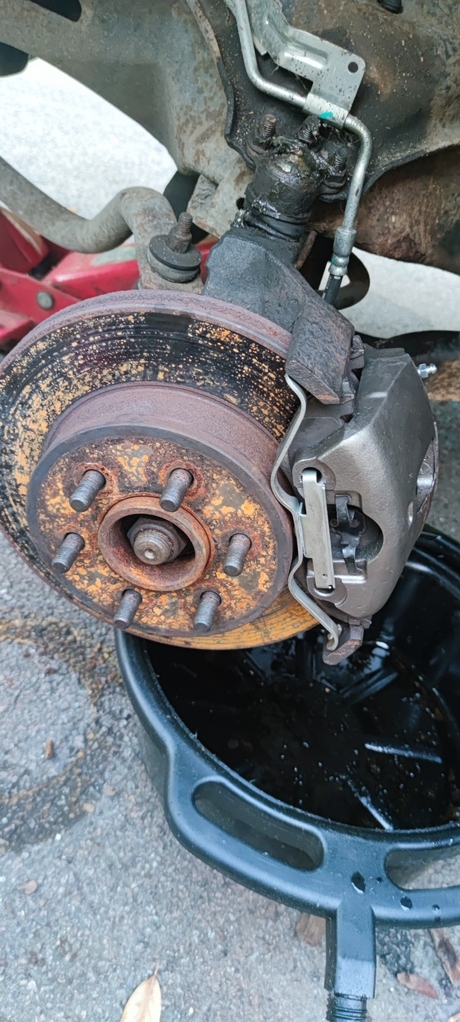 Golden. With the help of my glamorous SMWBO assistant the brakes bled through quite easily and seem to be behaving as expected. I'm going to leave the helicoils overnight to set before giving the slider pins another tighten, but first thing tomorrow the wheels will be on and out for a test run she will go 🙂 |
| |
|
|
jamesd1972
Club Retro Rides Member
Posts: 2,834  Club RR Member Number: 40
|
|
|
|
|
Love it when a plan comes together !
Win.
James
|
| |
|
|
Paul
Posted a lot
Posts: 1,903
|
|
|
|
Took her for a 40 mile test run as the brakes only seized on when hot. Did a mix of town and A roads...no issues. Also didn't burn through 1/4 of a tank in 30 miles at 4,000 rpm  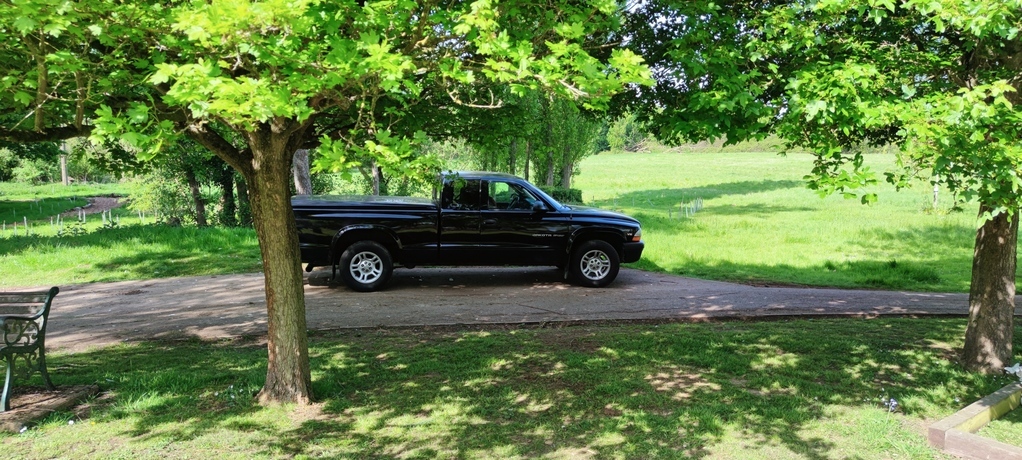 I'd say that's one less thing to worry about. So I treated her to a couple of other minor things: You may note that 3 of these are different from the other 3. 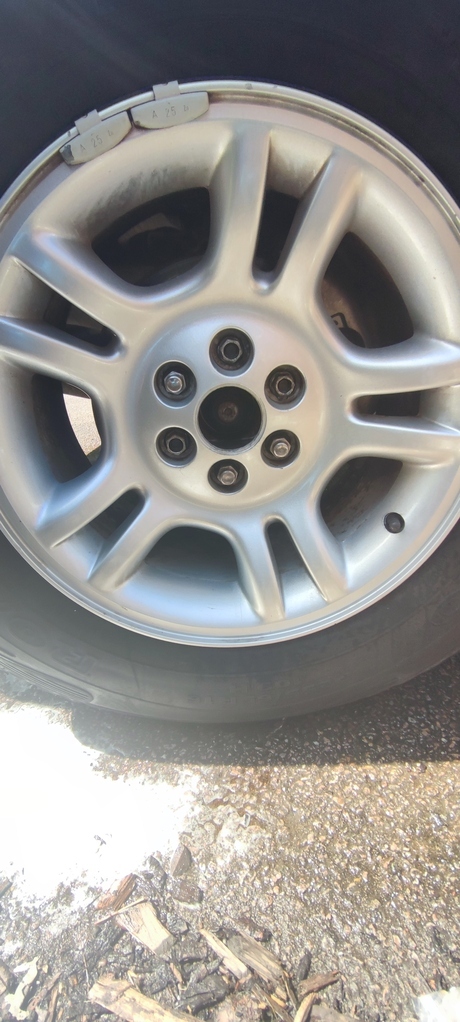 No idea why, but 3 of the wheel nuts are totally different - not a major issue in itself, but they're 18mm when the rest are 19mm and I nearly rounded one off with my rattle gun finding this out. It bothered me. £5 on eBay later... 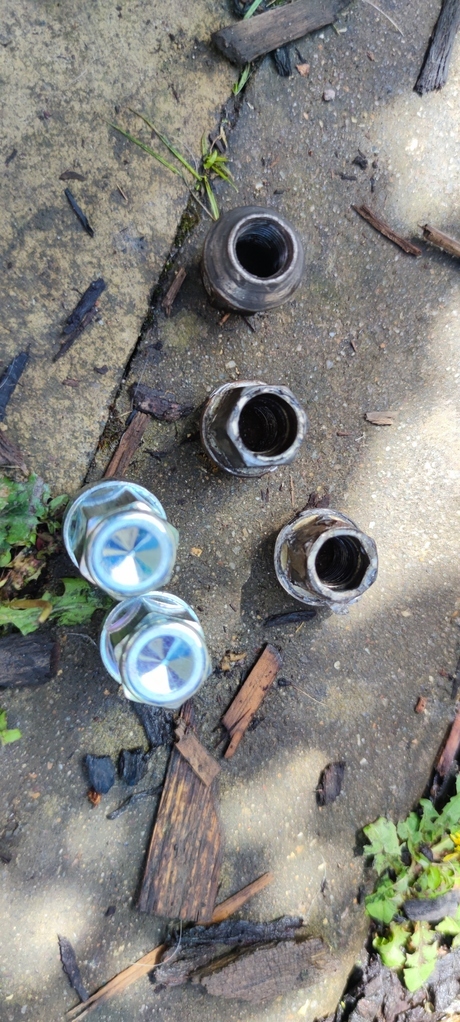 Okay, still not totally matching in appearance but at least they are all the same size 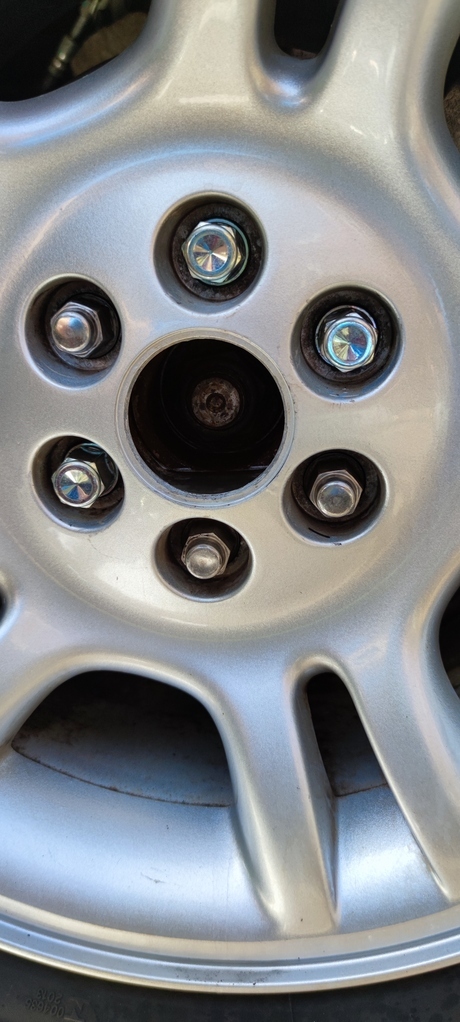 Also set about installing that new visor clip that I'd forgotten about. Old v new 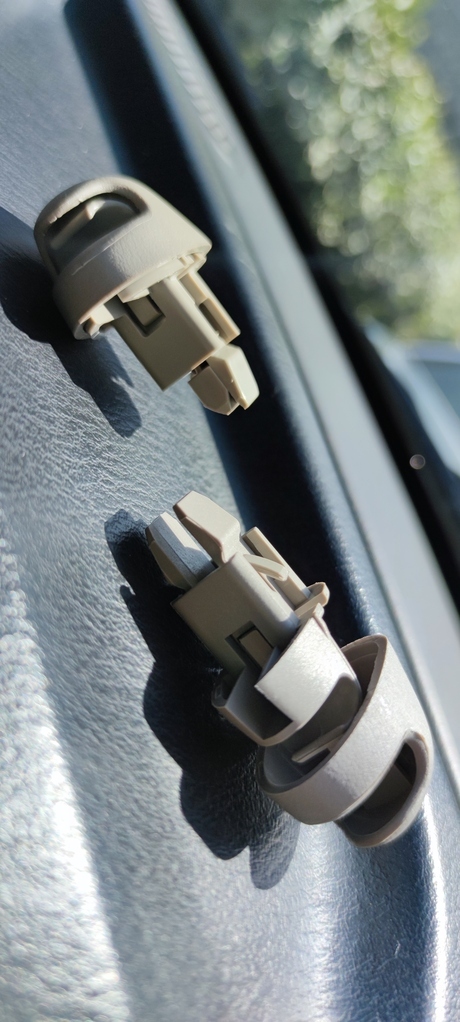 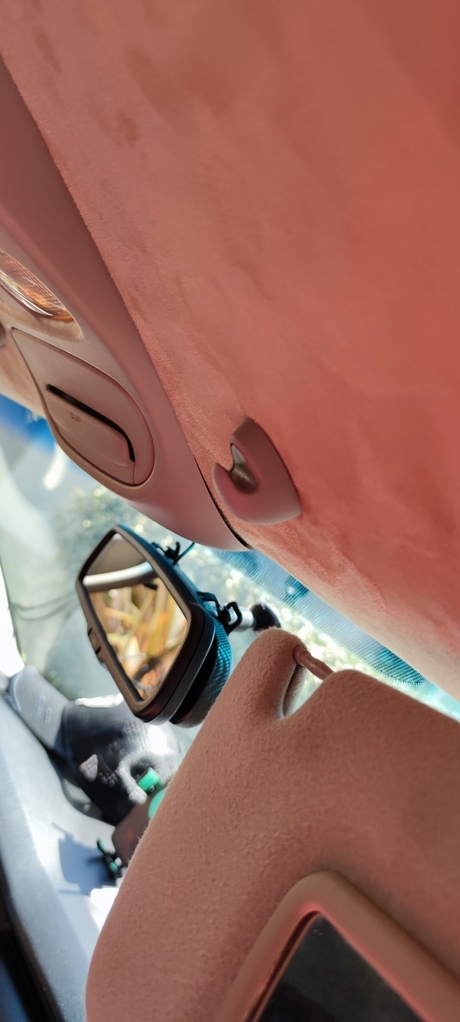 Much better. And she deserved a wash too, whilst I treated myself to a midday cerveza for my efforts. 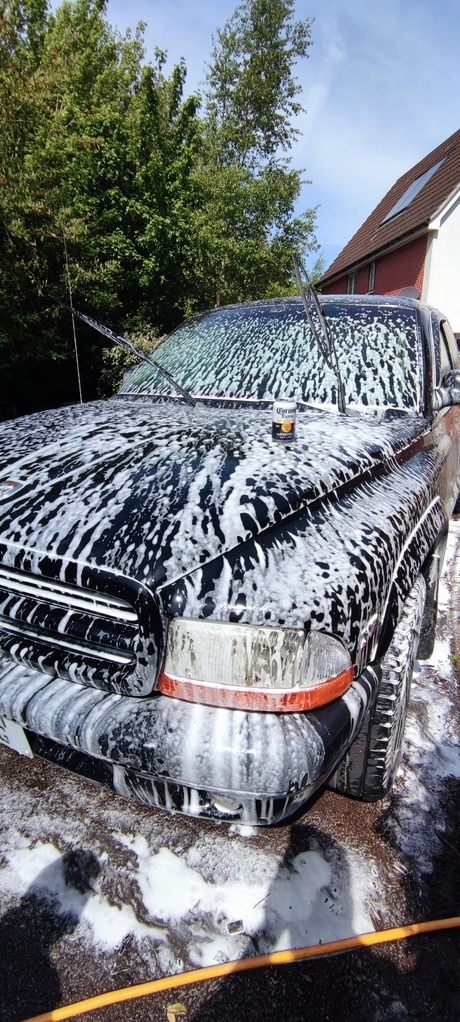 Lovely. 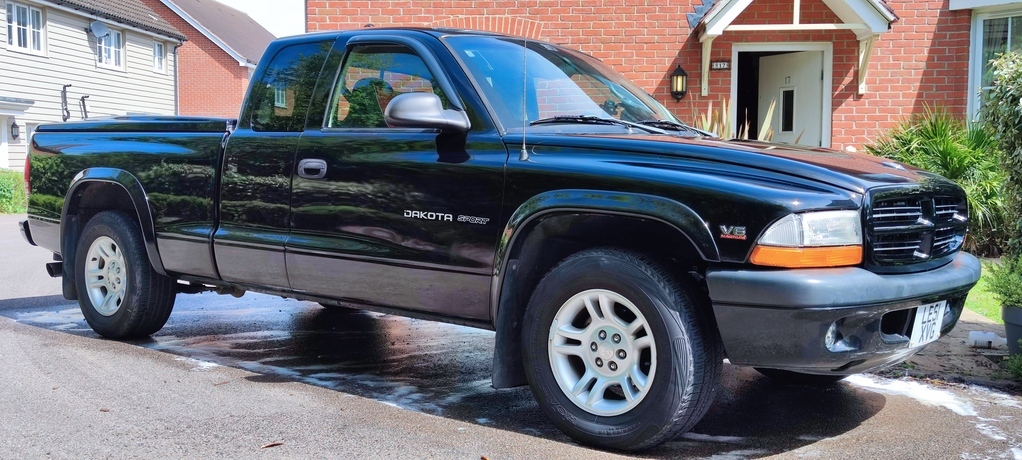 I really need to give her some time with my machine polisher and some Autoglym SRP, but a quick detailer product will do for now 🙂 |
| |
|
|
thebaron
Europe
Over the river, heading out of town
Posts: 1,643
|
|
|
|
|
Nice progress.
|
| |
|
|
|
|
|
|
|
|
You really are enjoying your truck ehhh.
Very well done on the repairs.
Looks lovely cleaned up.
|
| |
|
|
Paul
Posted a lot
Posts: 1,903
|
|
May 30, 2022 13:50:28 GMT
|
I reported before how the front suspension was due a little refresh - here are the offending ball joint and sway bar link (as the yanks call them) 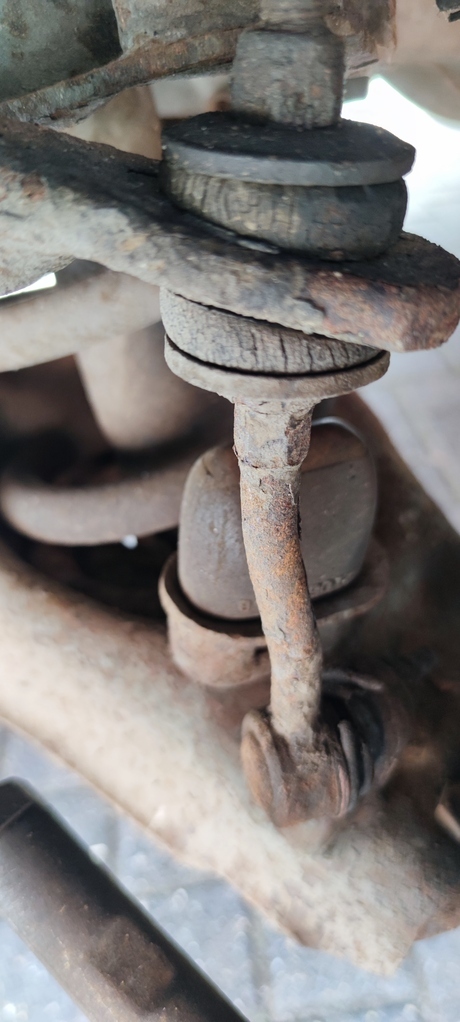 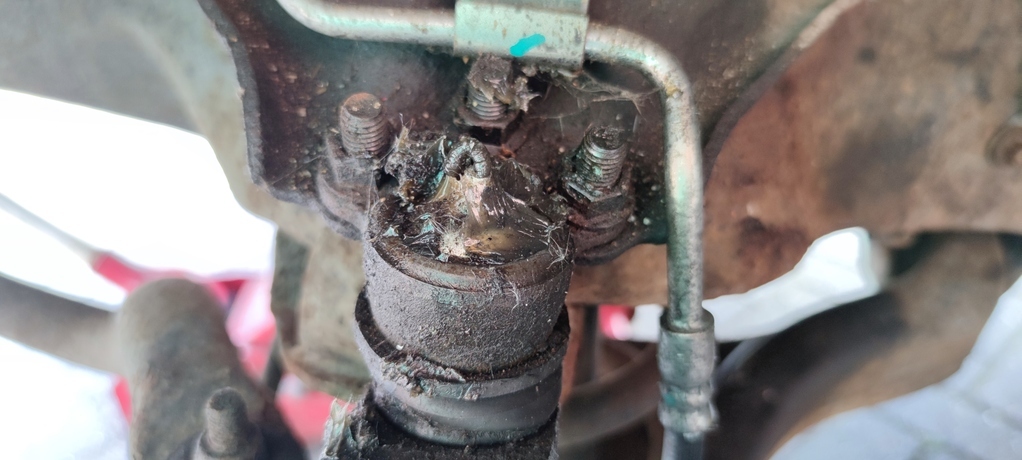 The ball joint wasn't particularly problematic...3 15mm nuts (having been previously replaced it seems as they came on bolts...the originals were riveted on) and the 22mm castle nut. Out, in, greased: 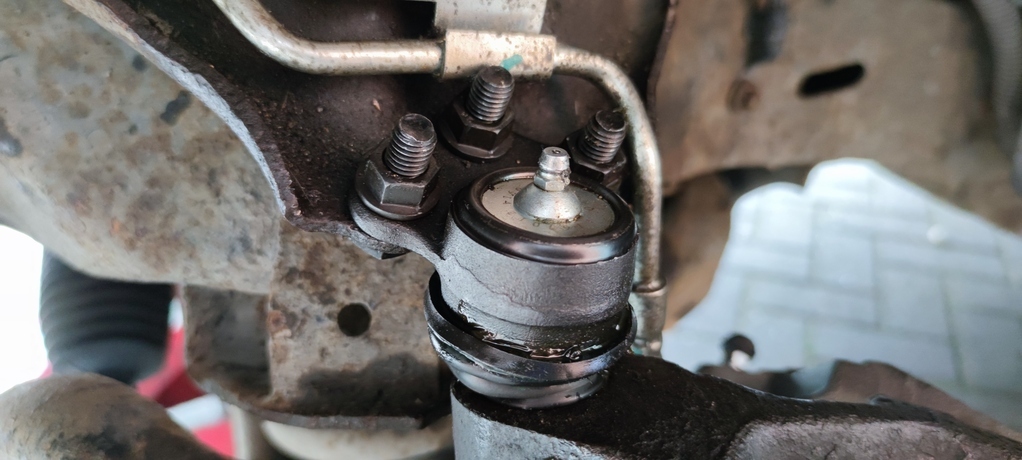 However the sway bar link put up a fight like none I've ever encountered before. It was totally, totally seized into the hub. Angle grinder, Dremel, pry bars, big hammers, bigger hammers, and a whole series of different drill bits were employed to get it removed. Carnage. 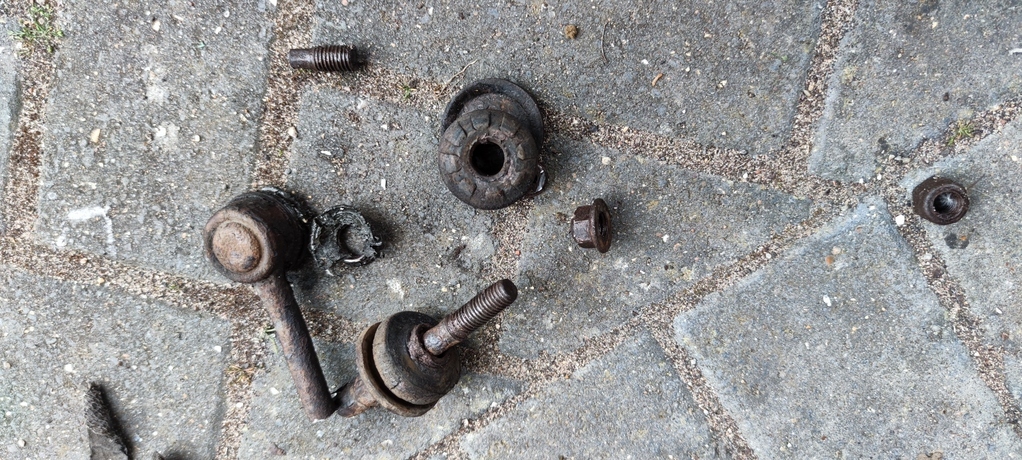 Success! 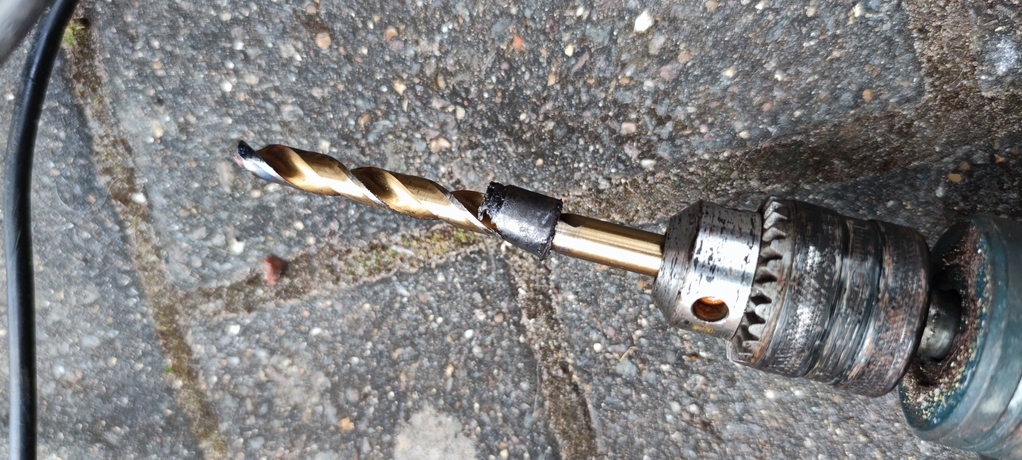 All buttoned up with new blue bushings, good for +5hp a corner I'm led to believe: 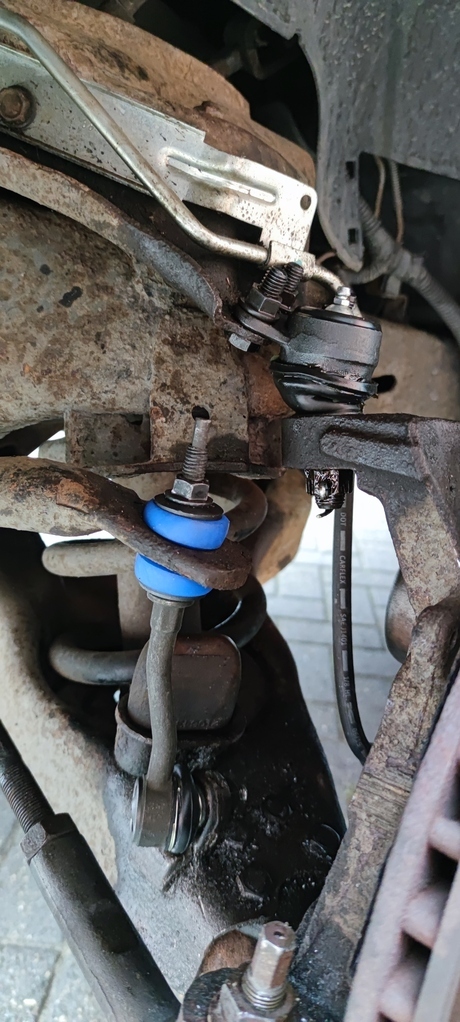 I had planned to do both sides today. I am not doing both sides today. In other news the indicators (of which there are 3 bulbs in EACH headlight) were playing up. Now this was a doddle of a job. A solitary t10 torx bit holds them in... 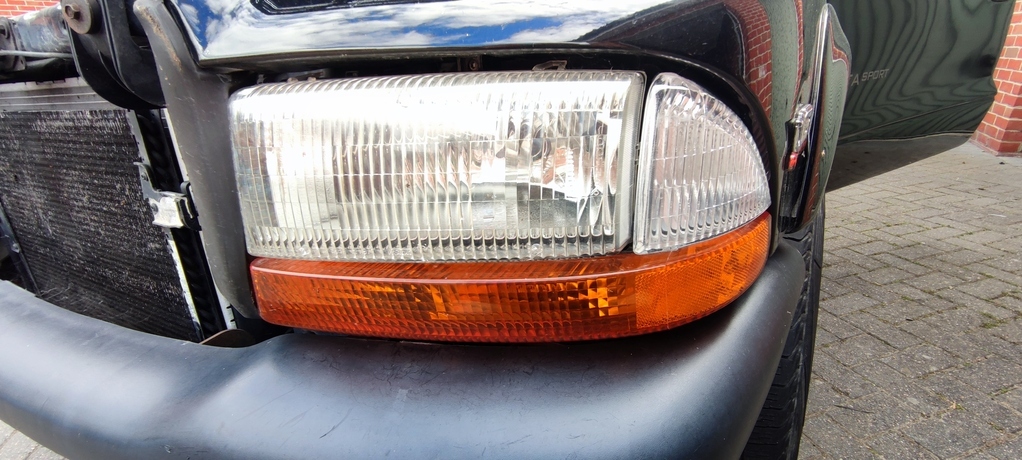 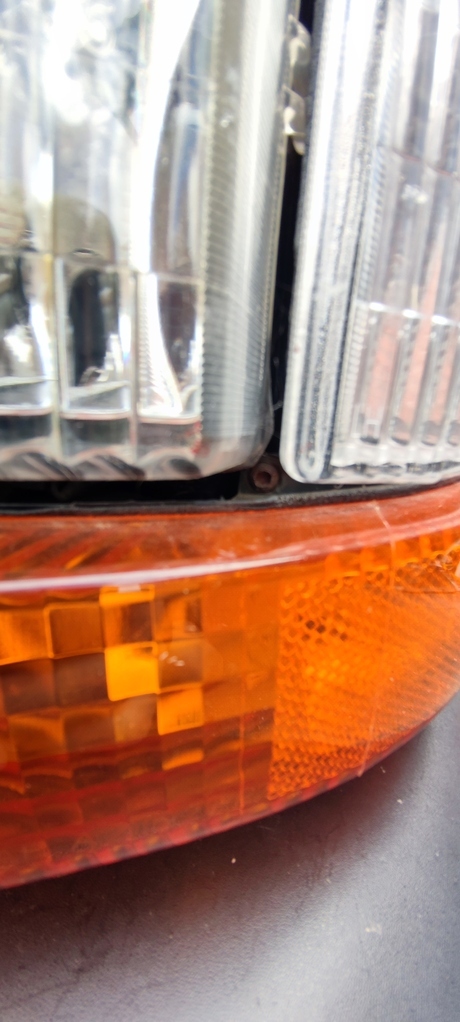 I'm not even sure the bulbs were dead, but the connection was intermittent on 2 of them. Old (left) v. New 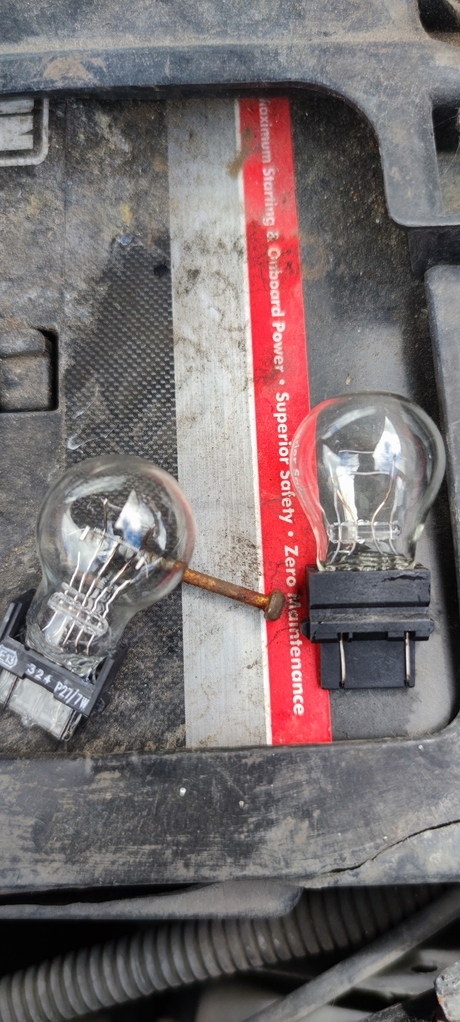 Flushed with this success I whipped out the machine polisher and gave the front end a good going over with Autoglym SRP, followed by Meguiars Gold Class wax. Shines up well. 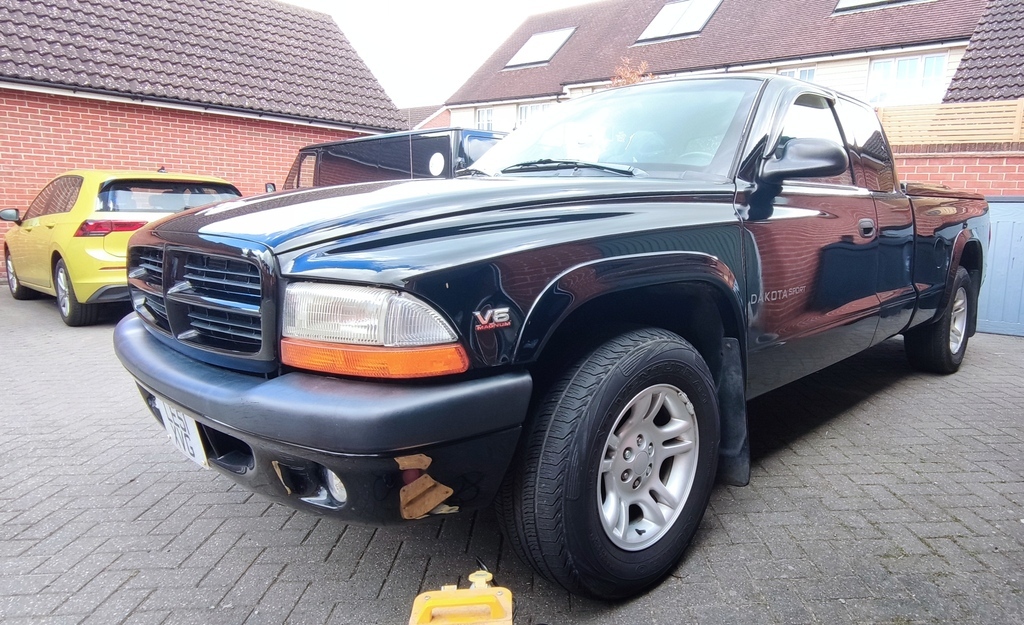 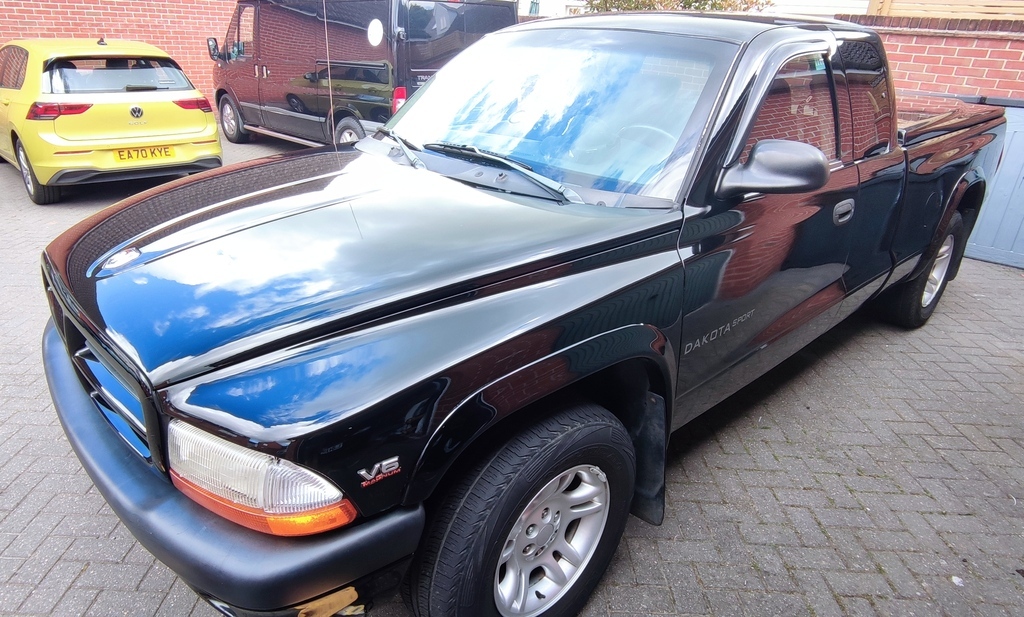 So of course it started raining. Oh well, a lovely bead on the paint though... 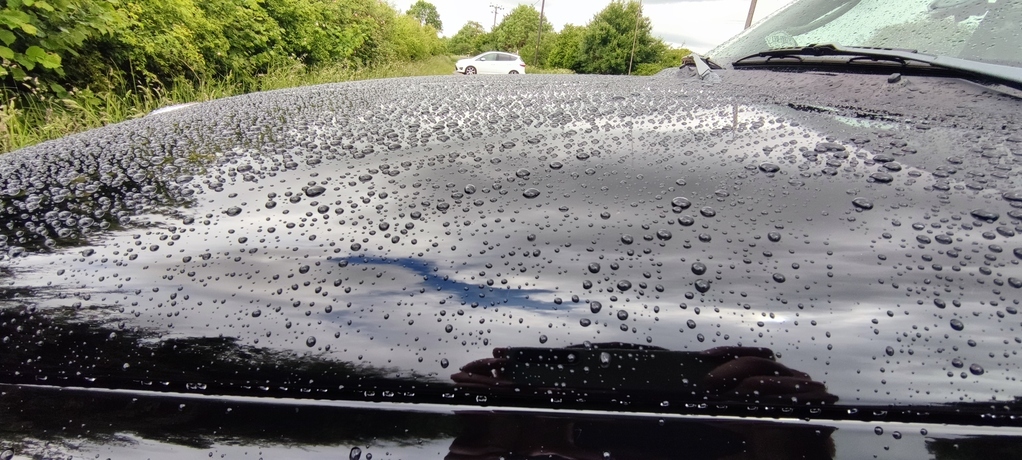 If I find suitable time or motivation I'll tackle the ball joint and ARB link on the other side, although right now I think I've earned a cold one |
| |
|
|
mrbig
Part of things
Semi-professional Procrastinator
Posts: 461
|
|
May 30, 2022 14:00:01 GMT
|
Pity they didn't sort the caster out, that also is a cause for pulling/drifting to the side with the lower reading. It will also naturally drift left slightly because of road camber. To be fair its a only fraction out. Is castor even adjustable on something like this? |
| |
Last Edit: May 30, 2022 14:04:27 GMT by mrbig
1969 German Look Beetle - in progress
|
|
Paul
Posted a lot
Posts: 1,903
|
|
May 30, 2022 14:41:38 GMT
|
Pity they didn't sort the caster out, that also is a cause for pulling/drifting to the side with the lower reading. It will also naturally drift left slightly because of road camber. To be fair its a only fraction out. Is castor even adjustable on something like this? If it is adjustable they didn't mention it...and if they thought it was an issue they would definitely have told me. Drives so much better after their efforts. |
| |
|
|
|
|
milk
Part of things
Posts: 102
|
|
|
|
|
For some reason ever since the jag, you only seem to buy cars that I want haha.
|
| |
|
|
|
|
|
|
|
Pity they didn't sort the caster out, that also is a cause for pulling/drifting to the side with the lower reading. It will also naturally drift left slightly because of road camber. To be fair its a only fraction out. Is castor even adjustable on something like this? Yes, on the top arm, where the pivot pin bolts to the chassis, slotted holes. Mine were full of crud so no too obvious. The Hunter alignment machine will also show diagrams of how to. |
| |
|
|
Rich
Club Retro Rides Member
Posts: 6,234
Club RR Member Number: 160
|
|
Apr 14, 2024 20:21:53 GMT
|
This popped up on Facebook, it’s 1998 but the MSRP was interesting if nothing else  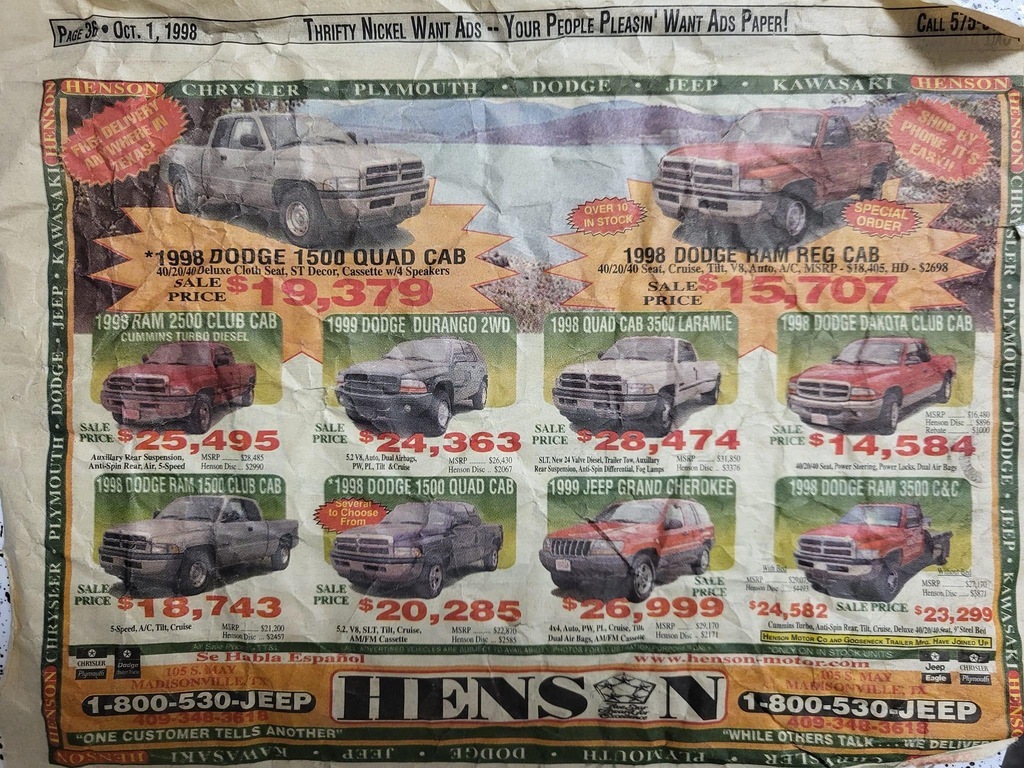 |
| |
Last Edit: Apr 14, 2024 20:22:10 GMT by Rich
|
|


