The clutch was still playing up, so it was time to find out why.
The work I did on the clutch hydraulics, and adding the missing bolt to the clutch pedal bracket, helped the clutch issues a bit, but it was far from perfect. It was drivable now, but the clutch still bit right off on the floor, had a really long engagement, almost no feel in the pedal and would drag if you didn't keep your foot planted on the pedal as hard as you could. Not to mention the engagement was a bit on the soft side.
I ordered an OEM replacement Exedy clutch kit, a new clutch fork (pre-empting a potential failure point), new fork bushes, and bolts for the flywheel and clutch cover (you can probably reuse the cover bolts safely, but the flywheel bolts must be replaced each time).
Last weekend I got stuck into removing the gearbox. The first job is to remove all the gubbins around the gearbox in the engine bay, so first the intake ducting comes out, then the coolant overflow bottle, followed by the battery and its hold down.

Next, the battery support needs to come out. There are three 10mm bolts on the base, and then the ECU can be disconnected, The ECU can remain attached to the support. The ECU plugs have a latching lever to lock them into place.

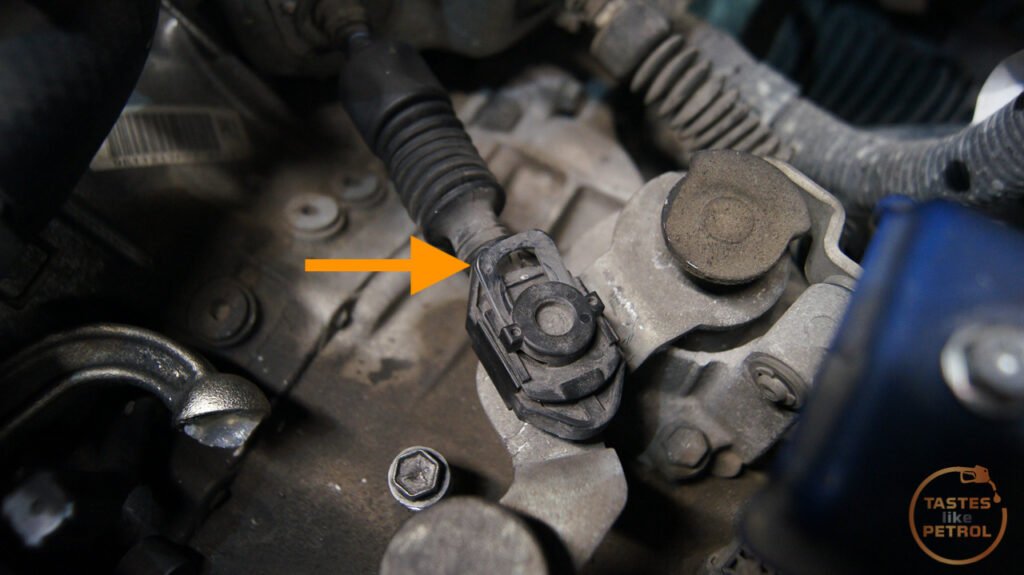
The shifter cables were next to go. These were a bit of a pain, and different to the videos I had seen of the UK cars. First, this clip needs to be removed (partly removed in photo). You need to lift the end the arrow is point to upwards to clear the locking piece, and then the clip can slide out, allowing you to lift the cap and cable off the shifter mechanism.
The other cable just levered out. It has a soft plastic bushing inside it, which remained on the mechanism for me, so I levered that off and inserted it back into the cable.
With the cables disconnected from the shifter mechanism, I needed to remove the cables from the gearbox. They are retained in this bracket.

This seems to be where the JDM cars differ from the UKDM ones. The cables on the JDM cars are retained to the bracket via a pair of metal clips with tangs that stop the cable from coming out.

I used a tiny flatblade screwdriver to press these tangs in so they were flush with the clip, and the cable could then be removed. I later bent the tangs back out before refitting.
With everything up top sorted, the engine was supported by my engine support brace (which was a pain on the Swift, as the engine bay is very short, so it had to almost go on the slam panel and gave very little space to work up top). The axles were then removed, which was also a pain as the outer CVs were seized in the hubs and needed to be smashed out with a sledgehammer. Before the axles were removed I was sure to drain the old gearbox oil, which was very dark, stank and was about as viscous as water; far too thin.

Finally, all the various (excessively tight) nuts and bolts around the gearbox, including the rear and LH mounts, were removed and the gearbox gently manhandled down to the ground, using my belly as support.
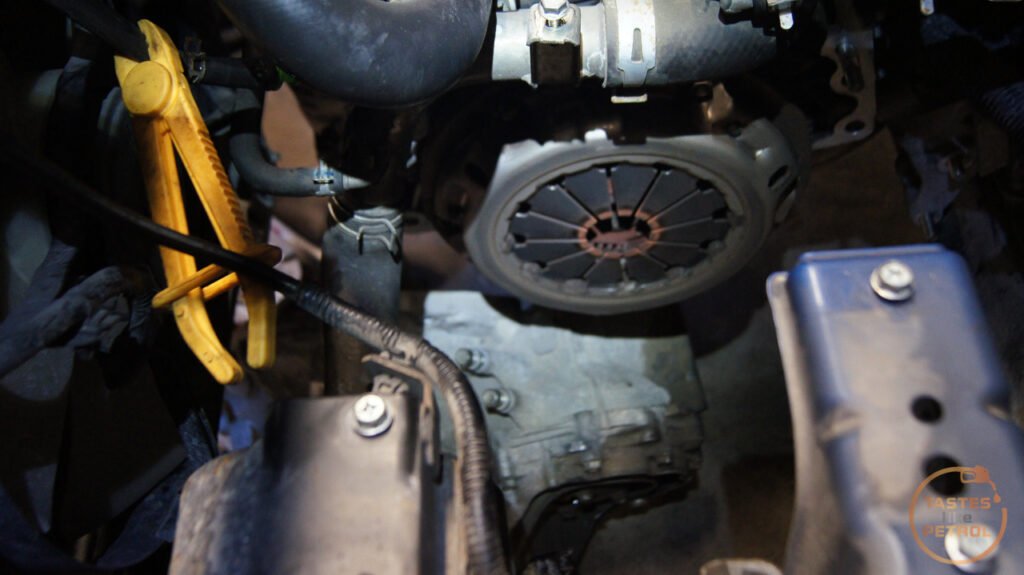
With the gearbox out it was immediately obvious what the issue was

The bellhousing was packed with old clutch dust, and the release fork and bearing barely moved by hand. It was all binding badly. The bearing was also really rumbly; no Bueno.


I removed the clutch and flywheel next.
Interestingly the clutch was already an Exedy, so either they are an OEM supplier, or the clutch has already been changed (from my research it appears it could have been the original OEM clutch plate; its slightly different to the aftermarket kit I got and the pressure plate has no markings)


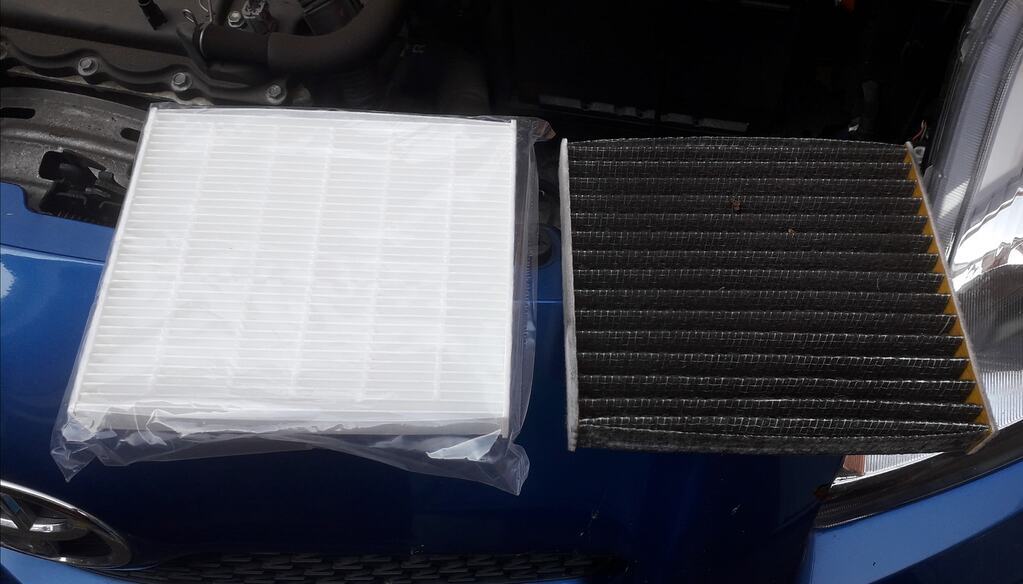
You can see in the photo above that the plate is heavily worn, and almost down to the rivets. There are no signs of the diagonal recesses in the friction material that they have when new.
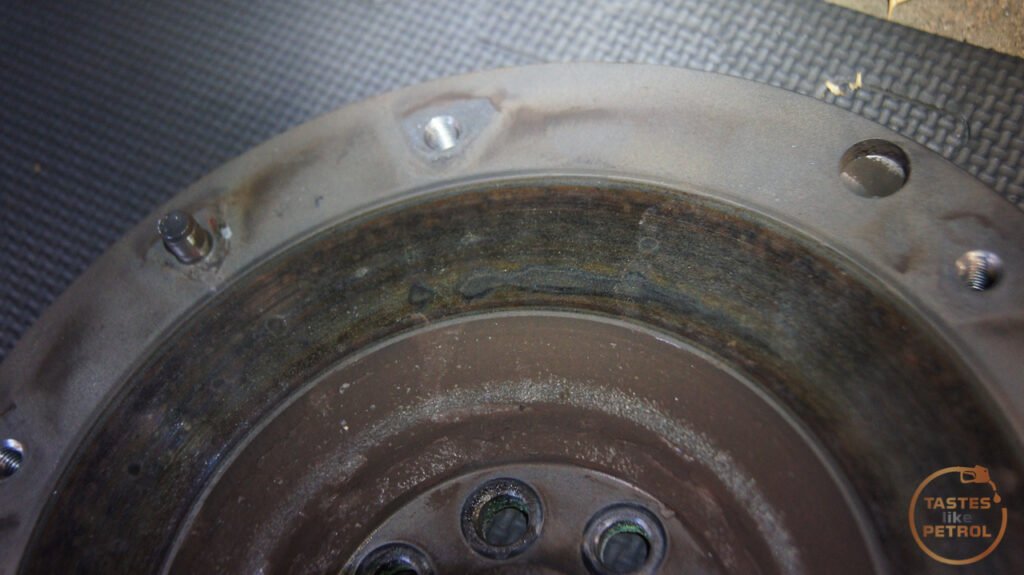
The flywheel had clumps of fibrous clutch material on it


Whilst the surface the clutch plate runs on had some bad heat spotting
During the week I sent the flywheel off to be machined, and it came back looking really nice

I also took the time to knock out the old top bush and remove the clutch fork. There is a special tool to remove this bushing, but I don't have one.


So I made do with what I had. The same job can be done with an old 5/8" spark plug socket, cut in half and the end with the square in it cut off. A section of pipe of the same OD would work too.


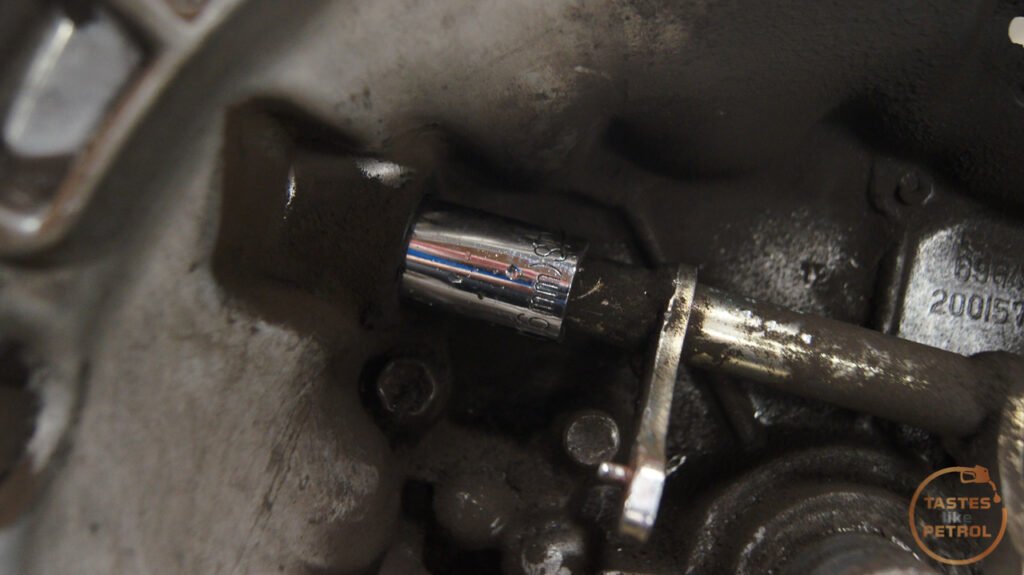
Combine this with a hammer and punch

And you can drive the seal and bush out


This high-tech tool may scratch up the surface of the clutch fork, which I'm replacing anyway, but do this at your own risk.
With the bushing removed, the clutch fork can then also be removed and after a clean, thoroughly inspected.

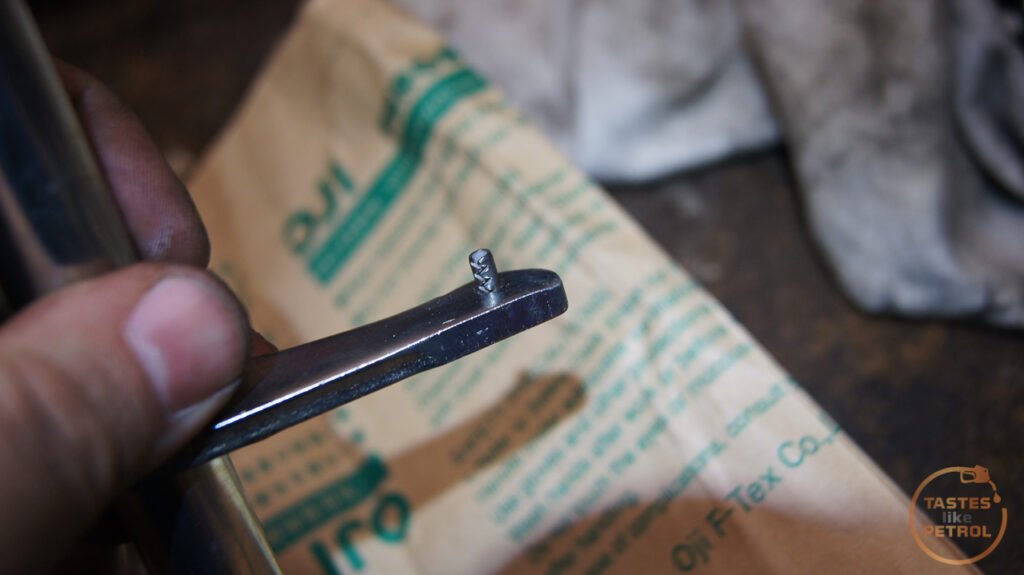
Due to a bad design where the welding is only halfway around the rod, they are prone to cracking at the ends of the weld, causing many issues, since this is what translates the movement in the hydraulic system from your foot, to actually moving the release bearing and pressing on the clutch pressure plate (which takes a lot of force).


Mine wasn't cracked and would probably be fine to reuse, but I wasn't taking the risk since I was already here. I had a replacement genuine part on hand, and it's good to see that Suzuki realised it was a flawed design and superseded it with a newer design that is fully welded.


I can only really come up with a couple of conclusions as to how this issue happened. The obvious one is that over time the factory fitted grease that should be on all the pivot points, but is now completely missing, wore away and was replaced with high friction clutch dust. This issue was compounded by the leaking slave cylinder, and the flexing pedal bracket which failed to allow the clutch to fully disengage, which caused even more clutch dust, and just bound up the fork and bearing. The alternate theory is the same, except when the clutch was replaced, the mechanic failed to grease the pivot points and it's been operating dry this whole time.
I don't know if the clutch was replaced, the car has no service history, so we can only speculate.
I cleaned out the bellhousing, and cleaned the lower bush. It appeared ok and cleaned up well, so I chose to reuse it rather than try and work out how to remove it.
The replacement fork had a new roll pin fitted
both bushes were lubed up, and the new fork fitted

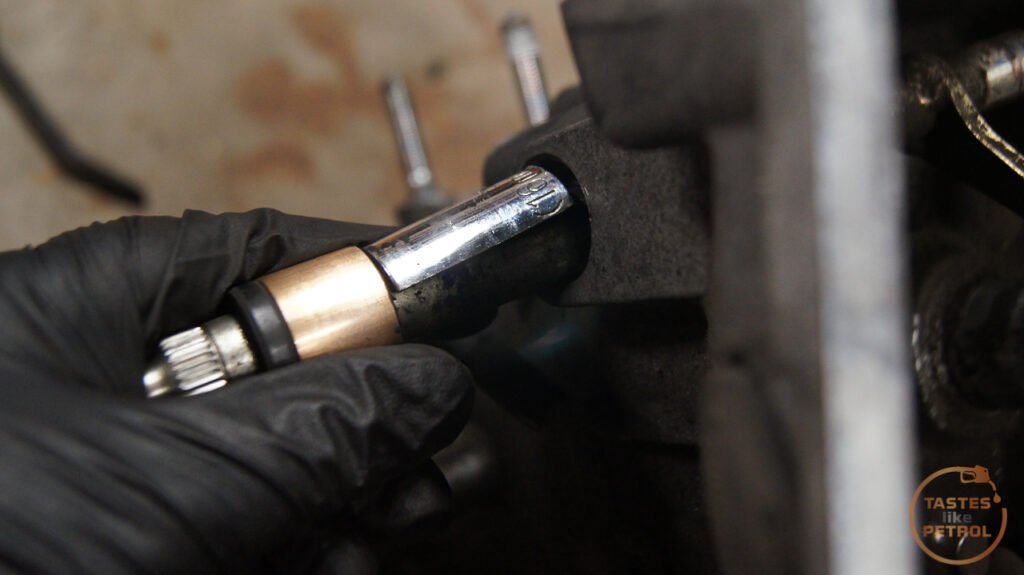
I used the old bushing and another 5/8" spark plugs socket (complete this time) to drive the new bush in

Followed by the new seal

Lots of the fancy purple Exedy grease was used on the snout, input shaft and contact patches of the fork, and the new release bearing was fitted
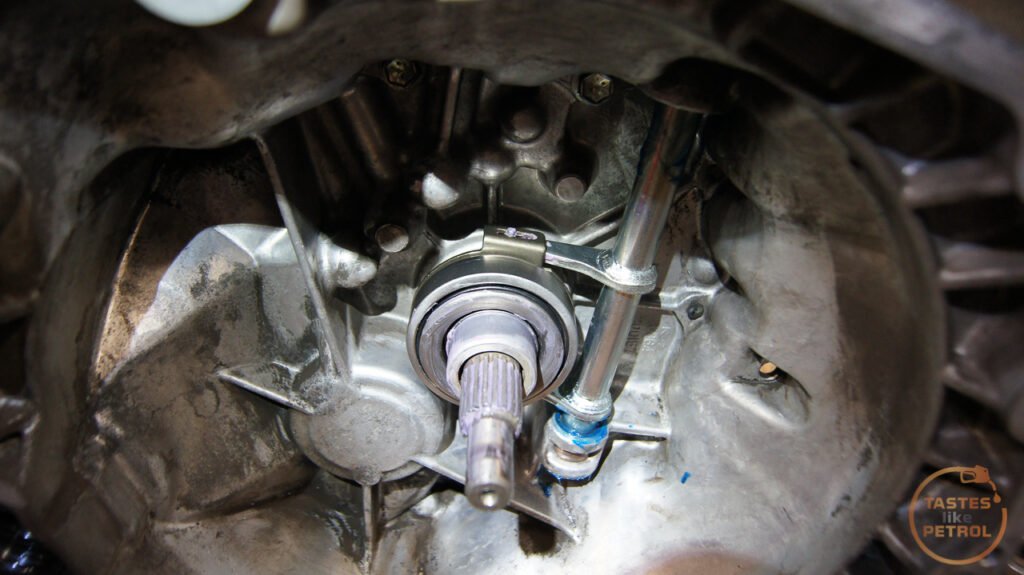
The clutch fork more or less flops about and takes no force to move, which is a huge difference from how it was before.
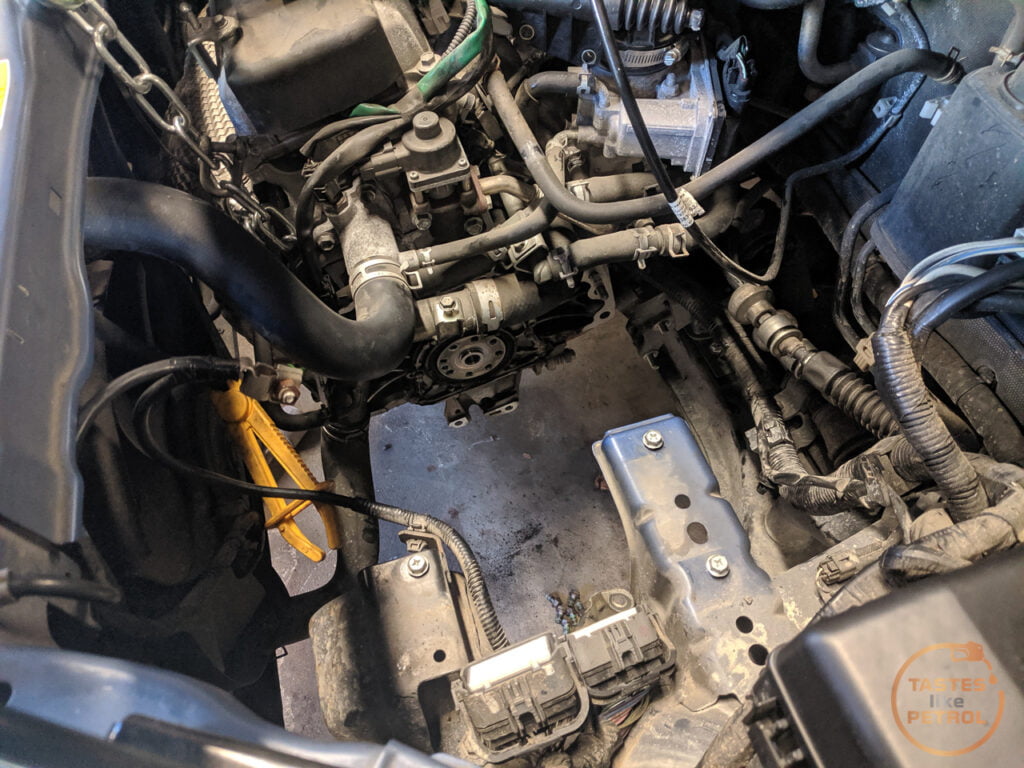
While the gearbox was out, I took the opportunity to also replace the rear engine mount. There was some movement in the engine when coming on and off the throttle, and there would never be an easier time to get at the mount than now. The old one wasn't cracking or torn, but had slumped slightly due to the weight of the engine.


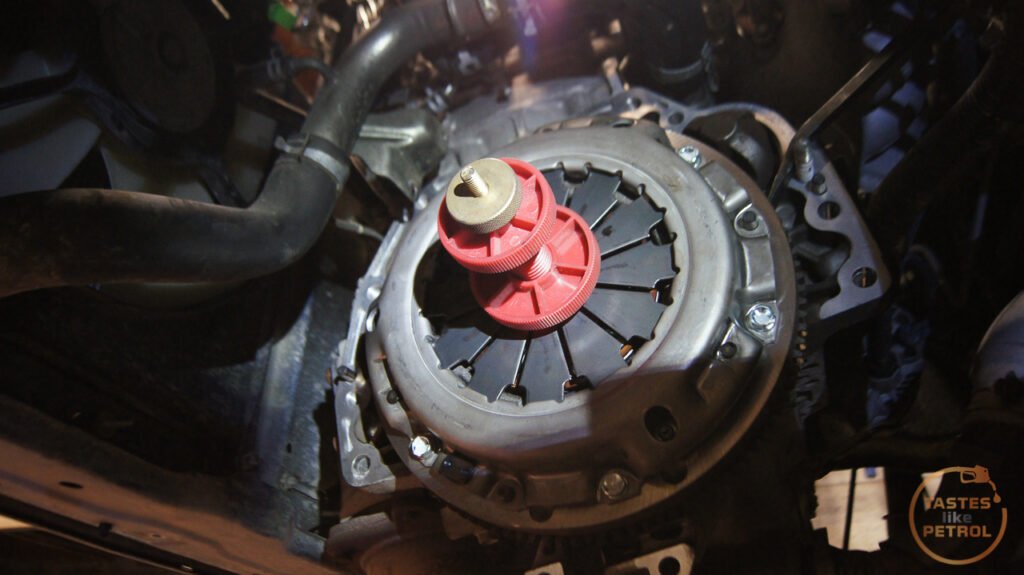
Once that was loosely in place (it cant be fully installed until all the other bolts around it are tight, as it and the bracket that attaches to it are in the way) the freshly machined flywheel (with new bearing) was fitted. My paint pen is rubbish, but the marks on the new bolts indicate I have torqued them to spec.

The new clutch getting ready to fit

And here you can see the recesses that had been worn down on the old clutch. That's quite a lot of material to be missing from the plate

The kit came with a spline type alignment tool but I prefer my old style universal one. It seems to be quite accurate. I tested the spline type one once the clutch was fitted and there was enough play in it that I could see it being annoying to use.
Now the gearbox could finally go back on. I tried the reverse of removal and lifted the gearbox up onto my torso and tried to bench press it into place, but it was getting hung up somewhere and my lack of upper body strength was starting to show, so I moved on from that technique. The tried and true jack it up and slip it on technique was the winner here, after a few tries. I found that it was easiest if I used the support bar to lower that end of the engine down about as far as it would go, as this put it on a steep angle and gave me more room to fit the gearbox in. Eventually, after some wiggling, the input shaft found its way through the clutch and it all slid together nicely.

All that was left was to do the reverse of disassembly. Install lots of annoying to get to bolts, line everything up, and refit all the gubbins. I made sure to clean and grease the splines on the outer CV joints when I refitted them so they come out easier next time.
Don't forget to fill the gearbox with your favourite flavour of GL4 oil in about 75W90 weight. Mine is Penrite, it just tastes better (and is a lot thicker than what came out).
Before I wrap up the clutch job, there are a few other things I was doing at the same time. One of them was to pull the front off the car and make it look far worse than before.
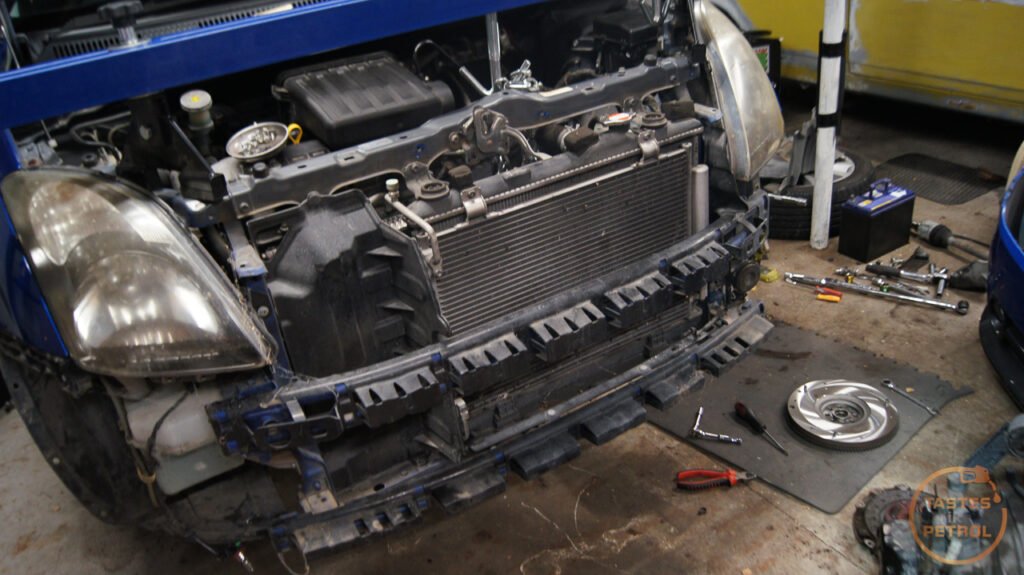
The bumper comes off really easily. Four bolts and two clips up top above the grille, three bolts on the underside, a few clips for the front guard liners, and then a screw on each side in the wheel arch going into the bumper retainer. It then unclips from the retainers and basically falls off.
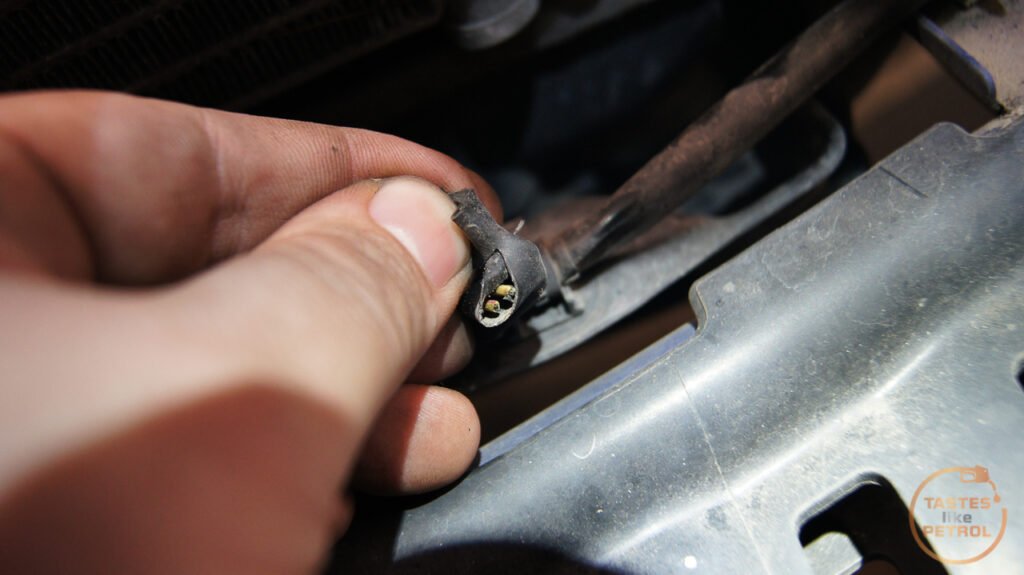
There were two reasons for this work. One, was to replace (or in this case, fit) the ambient temp sensor as mine wasn't working, showing as a series of dashes on the temp display, and a lack of average fuel consumption display (it's a weird thing to be joined). I can't stand things that don't work.
It should be here, attached to wires that should be coming out of this sleeve. The sensor clips into that oval hole.

The wires are still there, thankfully, but either torn or cut off
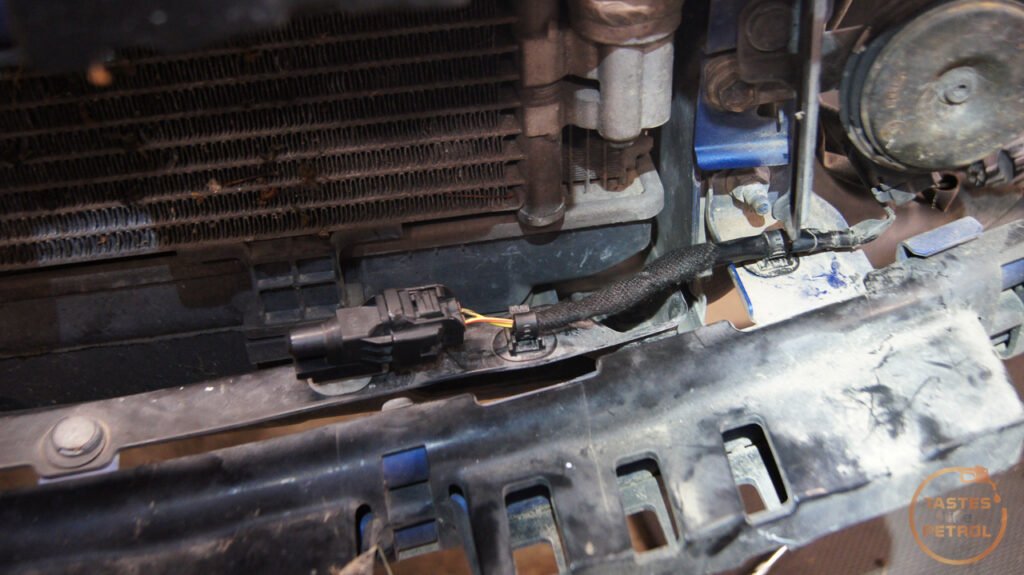
I grabbed a sensor and a section of the loom a while ago from Pick A Part, so set about joining a new plug onto the remains of the loom. I cut the sleeve back, and stripped back the wires

The sensor just clips in

And because I'm lazy, I used these solder joiner sleeve things. The wiring here isn't critical, and will be wrapped in tape, so should be ok.
Kelvinator
A final wrap in some loom tape, and zipped into the little zip tie fasteners, and it all plugged in nicely.
A quick test with a jump pack balanced precariously in the engine bay, and we finally had an ambient temp display (and on the test drive the average consumption came to life too)

The second task was to replace the headlights. Mine were very cloudy and very yellow. Didn't look too bad in photos but was horrible in person. They were also a bit dubious for the warrant check in a few months. I came across a pair of black housing halogen lights like mine on a local Facebook group, being sold due to upgrade, and they looked spotlessly clear, so I snapped them up.
These were the old ones. They are worse in person.


They are only three bolts each to remove

And the replacements.


It's not hard to see the difference. The only little quirk is that these are from an NZDM Swift Sport, which obviously didn't have electronic height control (via a dial, not automatic) as these didn't have the height control motors, and it looks like they couldn't be retrofitted. Not an issue though as they work fine as manual lights, and I hate the height control thing anyway as I never use it (designed for if you have a heavy load in the rear of the car, so you can dip the lights down further and not blind traffic). I'll get a blanking panel and pull the dial out of the dash at some point.
The bumper was refitted (as were the wheels, and being lowered to the ground), and it looked like a car again.

So, back to the clutch. With the car still up on the Quickjacks I checked that the clutch worked, and all the gears could be found, which they could, so on went the wheels and down onto the ground the car went. It was test drive time.
The first drive was just a short one around the block to make sure everything worked and nothing fell off. It was a good start, as the clutch felt good right off the bat. The pedal had a nice spring to it, and a bite point was dead center in the travel. Full disengagement was obtained way before the pedal was fully pressed, so no chance of the clutch dragging anymore. The new rubber pedal stop cushion makes for a nice gentle stop, as opposed to the old one which was completely mashed by having to press the pedal right to the floor and then some.
A quick spanner and leak check at home, and then another drive to get dinner. This time I covered a few more KM, and it's all working very well, as it should. It's taking a bit of getting used to as the clutch bites a lot firmer now, I didn't realise just how soft the old clutch engagement was; you could basically dump the clutch as quick as you wanted between gears. I still have 500km or so to bed the clutch in, so oh noooo, I will have to drive the car as much as possible and try and get the miles on it; what a shame.
Even with the new clutch, mount, hydraulics etc, it still cost me less than it would for the next cheapest Swift Sport in this condition, mileage and year.
I have a couple of modifications to fit soon, including a new rear muffler and some wider wheels. That'll come in the next instalment of Swifty fun times.