pptom
Part of things
 
Posts: 475 
|
|
|
|
Finally after lots of cleaning, scraping, blasting, degreasing etc I've got all of the hub bits painted. All of the bolts have been plated too, so we're close to reassembly 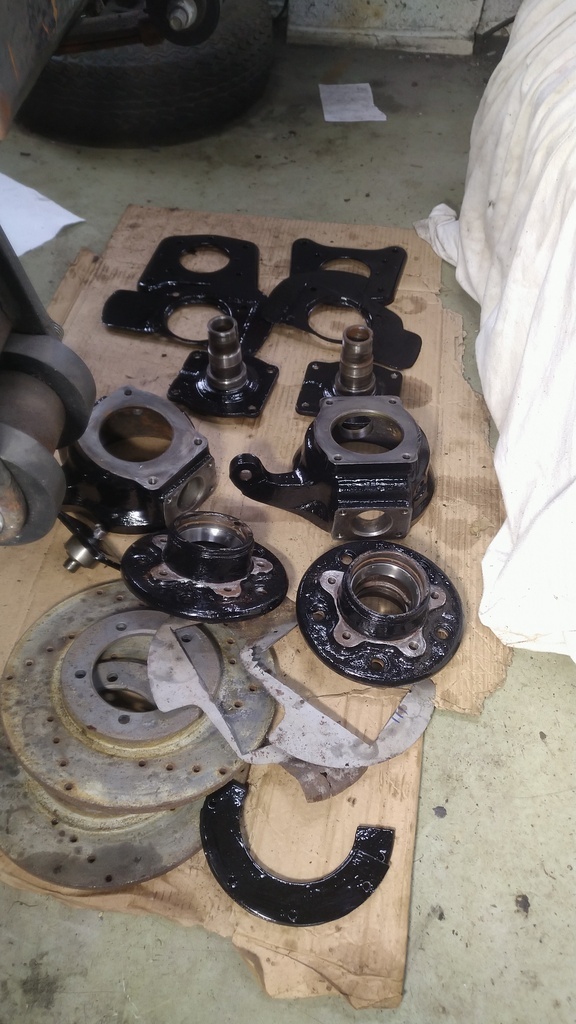 I'll be glad of it too. I've had bits spread around the garage in various states of cleanliness and I hate it being unorganised and dirty. Brake discs cleaned up and derusted with phosphoric acid. The calipers have been be blasted and plated and rebuilt with new seals. The pistons luckily came up as good as new with 5 mins on the buffer. Swivel hub kit turned up from Australia with minimal fuss too, which leads me onto the Swivels / knuckles themselves. After a proper clean of them, it was clear they should be alot smoother than they were, there was also a badly pitted band around them where I would guess it was sat up for many years and some moisture had got under the seals and ate away at the metal. 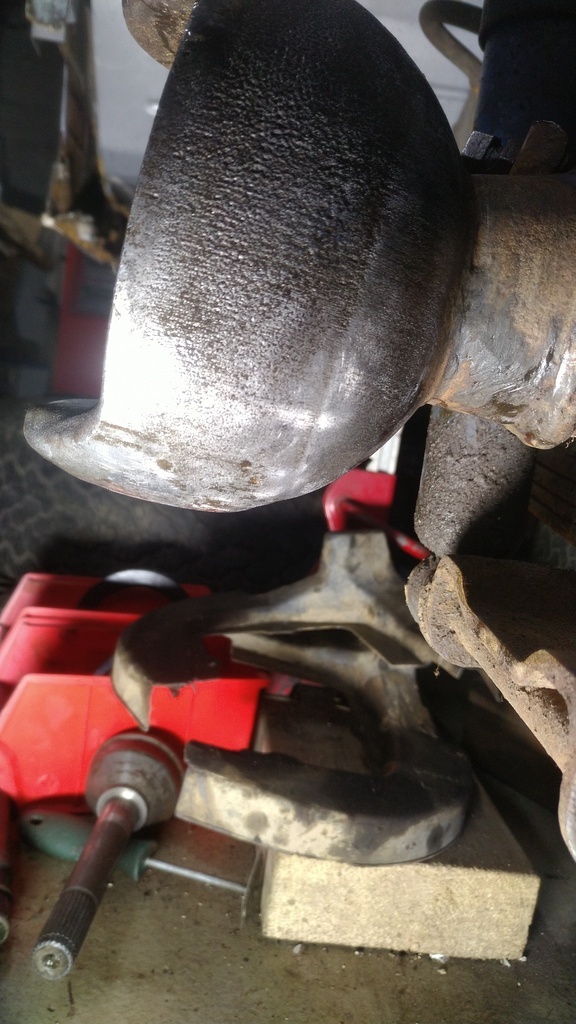 In the end I decided to give them a couple of coats of epoxy mastic, which I sanded down smooth. 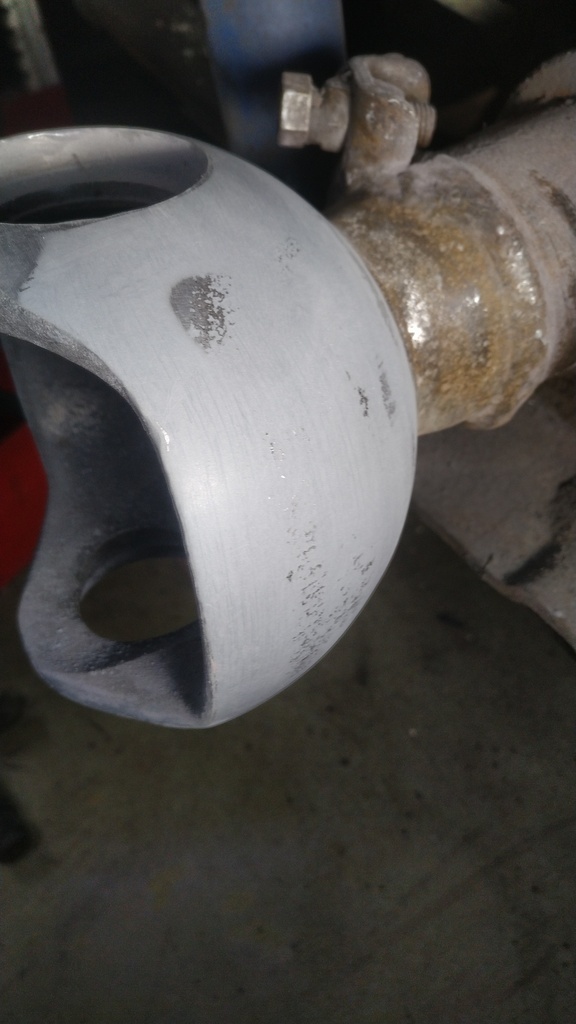 I've just finished topcoating them with Jotun Hardtop AX which is basically a marine grade 2k topcoat. I'm hoping this should provide a durable finish and something nice and smooth for the seal to glide over 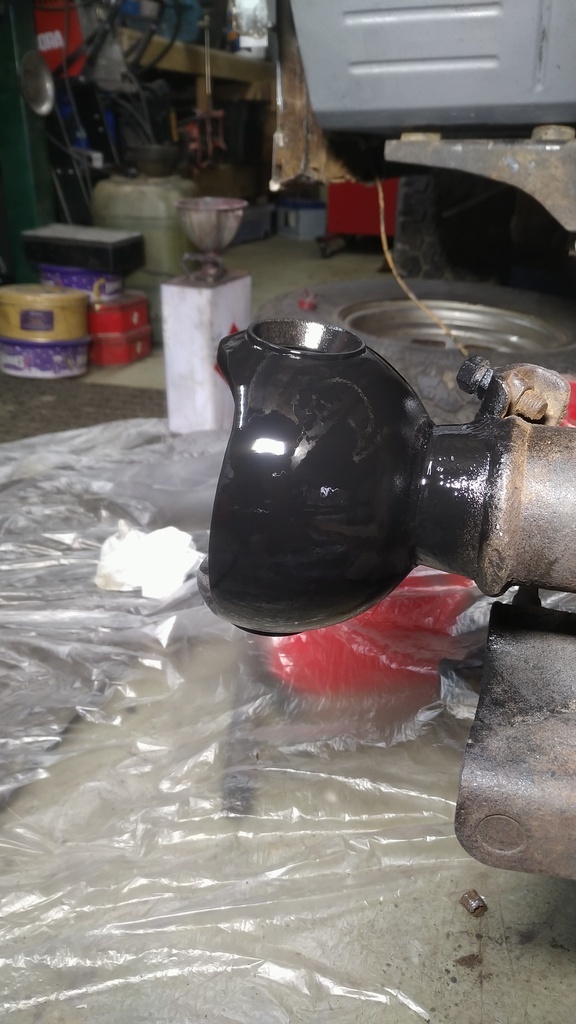 |
| |
|
|
|
|
pptom
Part of things
 
Posts: 475 
|
|
Apr 15, 2022 14:51:31 GMT
|
Chipping away... Got the driver's sill chopped out, pretty Rancid in there, made a new inner and some other bits and pieces. I decided to ship out the folding of the sill as I don't have the capacity for a metre plus fold, nor the talent to do a tidy job. Made a template and gave it to someone I'd not used before, but a recommendation, anyway, that was a month ago and I've not heard anything. 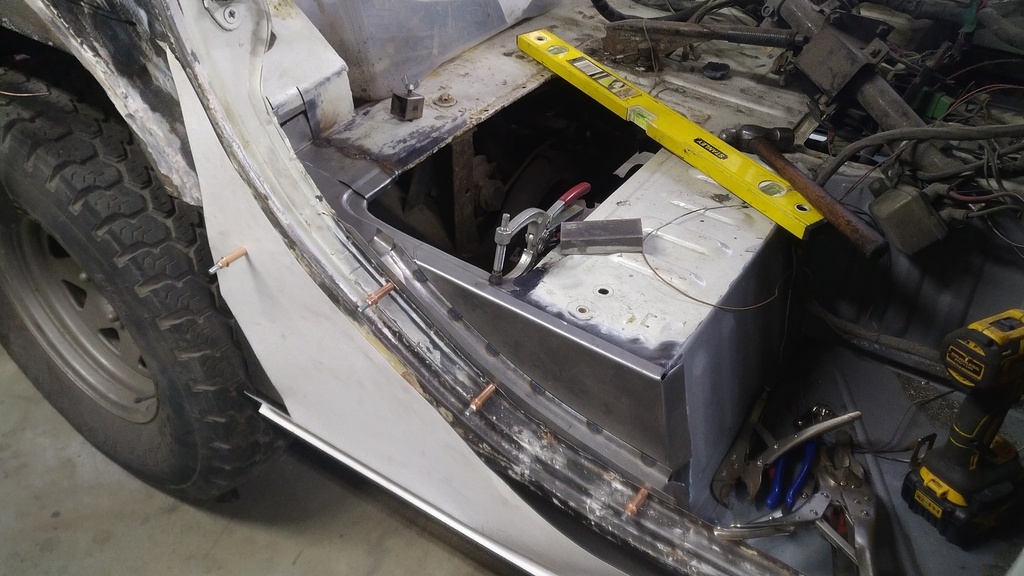 Whilst waiting, I didn't want to start any other bodywork as I like to concentrate on one bit at a time, so I refurbished the props with new UJ's and a lick of paint and painted the servo, cleaned the master cylinder ready for some new seals 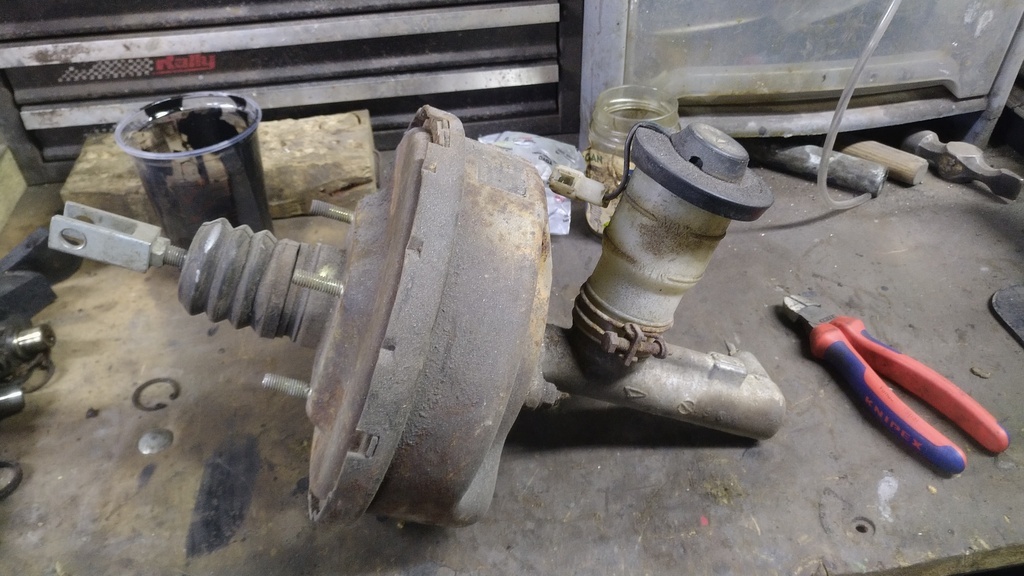 Can't find an after picture, but the servo was masked up, blasted and painted while the m/c spent a while in the ultrasonic cleaner. |
| |
Last Edit: Apr 15, 2022 15:29:59 GMT by pptom
|
|
pptom
Part of things
 
Posts: 475 
|
|
Apr 15, 2022 14:59:54 GMT
|
Then I broke the golden rule of only doing one bit of bodywork at a time. It started off as just reprofiling the convex window frames, I was fretting about this for quite a while, but it actually turned out ok. I cut some slits in the edge every 4" or so and just flattened the curve with a hammer and dolly. Before and after on different sides of the car, but hopefully it shows the difference 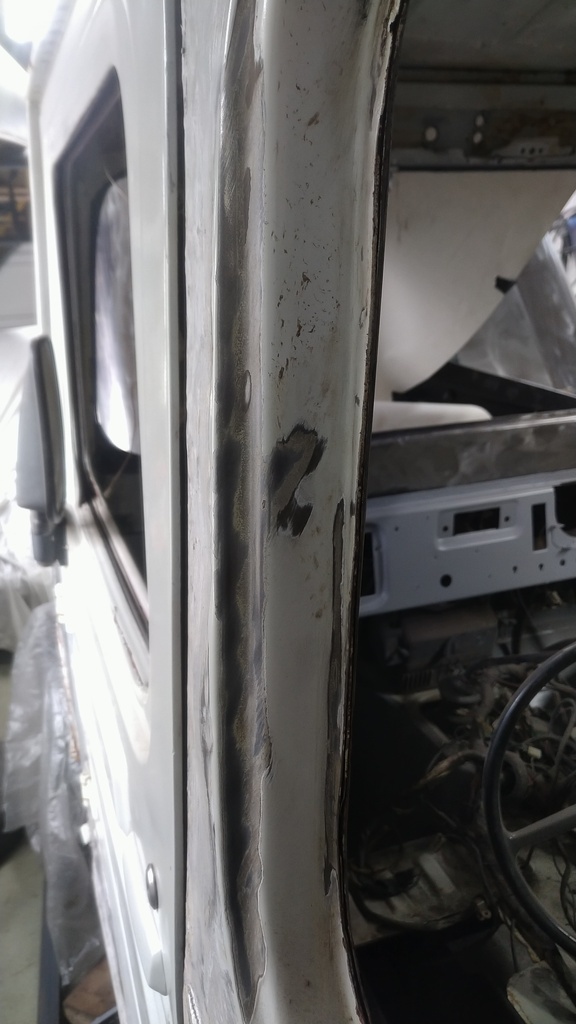 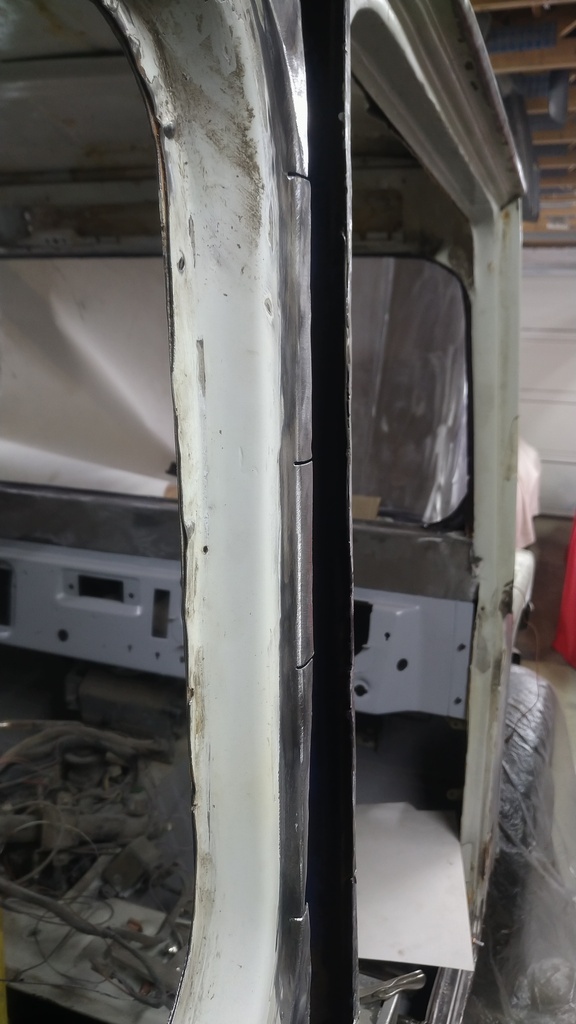 Then all I had to do was stick some flat panels in the holes 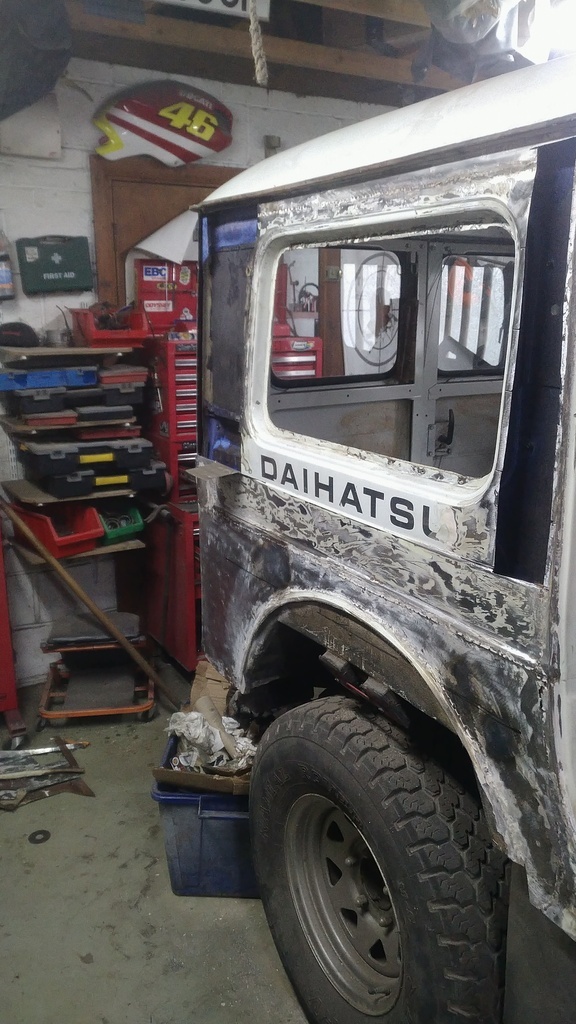 Dress and roller on some epoxy mastic. |
| |
|
|
pptom
Part of things
 
Posts: 475 
|
|
Apr 15, 2022 15:13:37 GMT
|
By this point I'd got the bit between my teeth, so carried on working down. 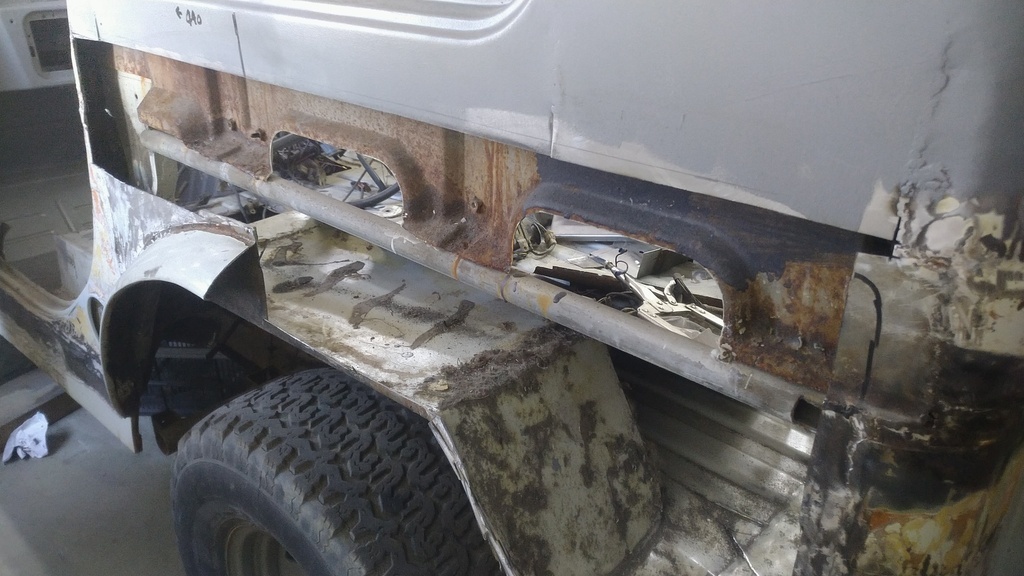 The rusty interior metalwork is original Taft, the round bar is an addition, stinks like it's galvanised too. Obviously all of this will need to be dressed up. Made panels for both sides. I'm leaving the front of the arch until I've sorted the sills. I'll also need to make new wheel wells, but they are doing a decent job of holding the body in some sort of shape at the moment, so can wait. 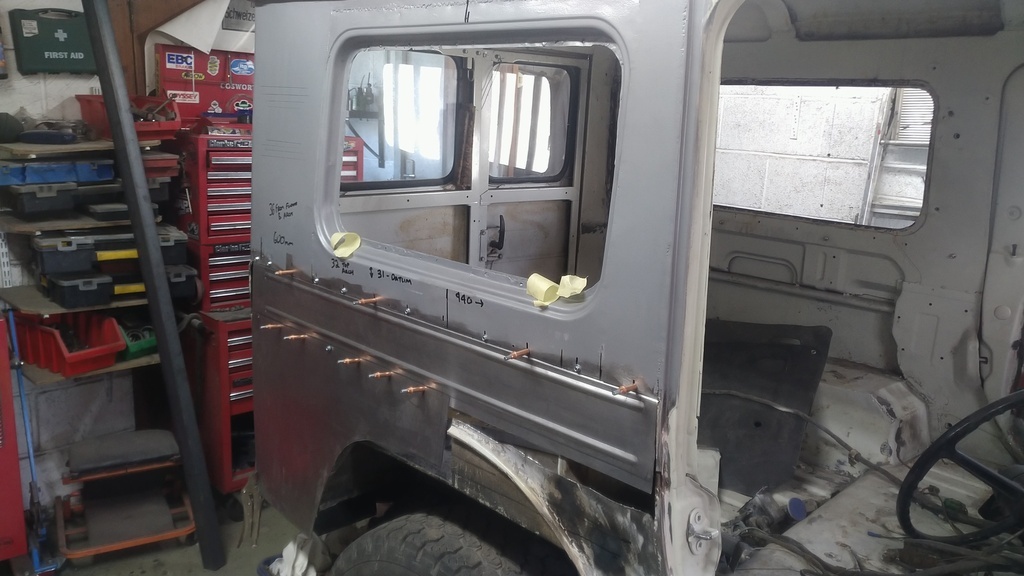 I tried to replicate the original Taft body moulding, but found it impossible without putting a massive distortion in the metal so have opted for 2 stripes instead which sit on the same level as the original pressing, so hopefully won't look out of place. Obviously the Cleco's are on lap joints. I don't want to seam weld these as it's a hell of alot of welding and don't want to distort anything. I can't get to the rear of the seam to seal / paint it, so I suppose that rules out spot / plug welding. I was thinking of panel bond, it's expensive and it would leave me with loads of holes to fill (from the Cleco's / screws) Anyone have any other ideas? |
| |
|
|
pptom
Part of things
 
Posts: 475 
|
|
Apr 15, 2022 19:13:31 GMT
|
Clocks were a bit tired looking. Not sure if I had got grinding sparks on the glass faces or someone else had, anyway, bit by bit I've been refurbing them. 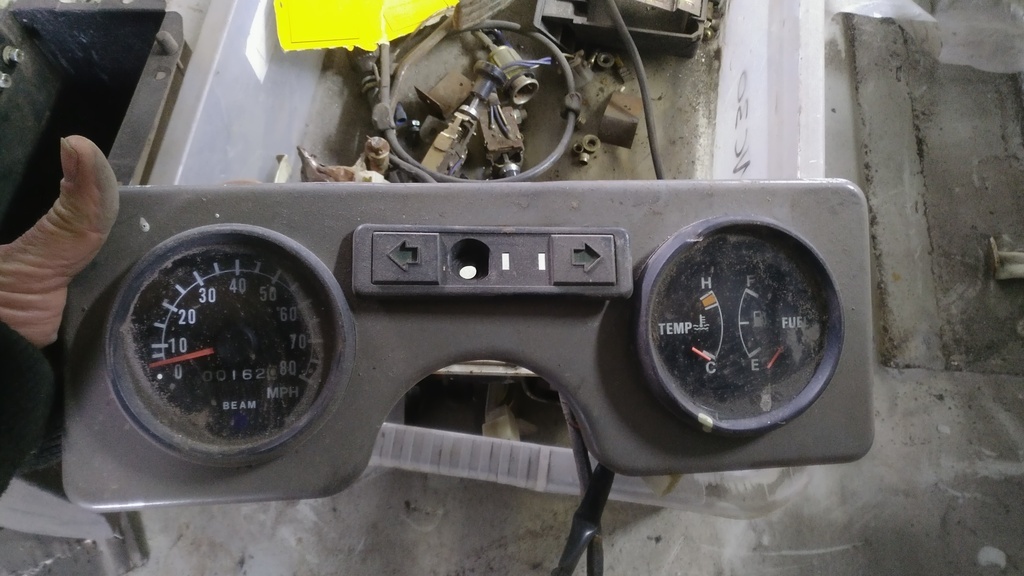 A splash of wrinkle paint (think I have a fetish for it) some new glass faces and I've just finished putting them together. 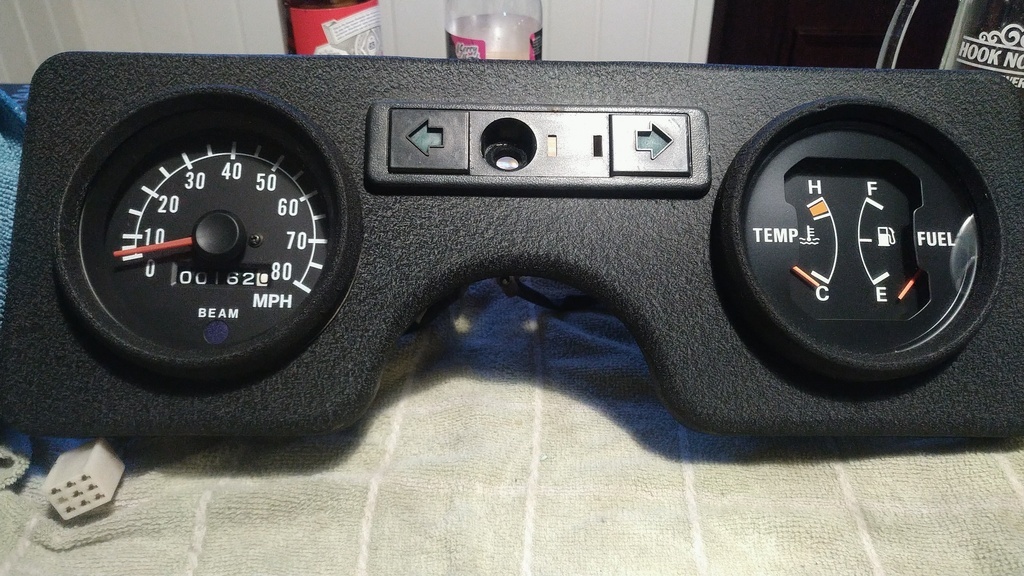 |
| |
|
|
|
|
|
Apr 15, 2022 19:35:29 GMT
|
|
No idea how and why I missed the last few updates.
This continues to be a great build.
Brave to say the least.
|
| |
|
|
|
|
|
Apr 15, 2022 20:02:17 GMT
|
|
Great fabrication going on and the refurbished clocks look the business 👍
|
| |
|
|
teaboy
Posted a lot
   Make tea, not war.
Posts: 2,125
|
|
Apr 15, 2022 23:55:55 GMT
|
|
Clocks look ace!
|
| |
|
|
|
|
|
|
|
|
My favorite thread on here! All the work is great. As a old school 4x4 guy and 84 Patrol owner I really like the Taft.
|
| |
|
|
|
|
|
Apr 18, 2022 17:09:24 GMT
|
|
|
| |
|
|
|
|
spacekadett
Part of things
  F*cking take that Hans Brrix!!
Posts: 838
|
|
Apr 18, 2022 21:36:10 GMT
|
By this point I'd got the bit between my teeth, so carried on working down.  The rusty interior metalwork is original Taft, the round bar is an addition, stinks like it's galvanised too. Obviously all of this will need to be dressed up. Made panels for both sides. I'm leaving the front of the arch until I've sorted the sills. I'll also need to make new wheel wells, but they are doing a decent job of holding the body in some sort of shape at the moment, so can wait.  I tried to replicate the original Taft body moulding, but found it impossible without putting a massive distortion in the metal so have opted for 2 stripes instead which sit on the same level as the original pressing, so hopefully won't look out of place. Obviously the Cleco's are on lap joints. I don't want to seam weld these as it's a hell of alot of welding and don't want to distort anything. I can't get to the rear of the seam to seal / paint it, so I suppose that rules out spot / plug welding. I was thinking of panel bond, it's expensive and it would leave me with loads of holes to fill (from the Cleco's / screws) Anyone have any other ideas? A friend used panel glue to bond in a a section of roof when he got rid of a horrible aftermarket sunroof and replaced it with a factory steel one from a mk2 Golf. If you catch it in the right light you can just make out the outline of the roof section, which appeared a while after it was painted but hasn’t got any worse, and it’s been done for several years now. My brother, who used to run a body shop swears by it, and the stuff he used was ok with heat, and you could spot weld etc through it |
| |
Mechanic's rule #1... If the car works, anything left on the floor after you finished wasn't needed in the first place  |
|
pptom
Part of things
 
Posts: 475 
|
|
Apr 19, 2022 13:43:41 GMT
|
Thanks for those last few replies. Sent the guy who is meant to be folding my sill up a text this morning as it's now been a month. No reply so far .. Thought I'd clean up the roof gutter with a view to treating and painting it, but inevitably crept to removing loads of filler. 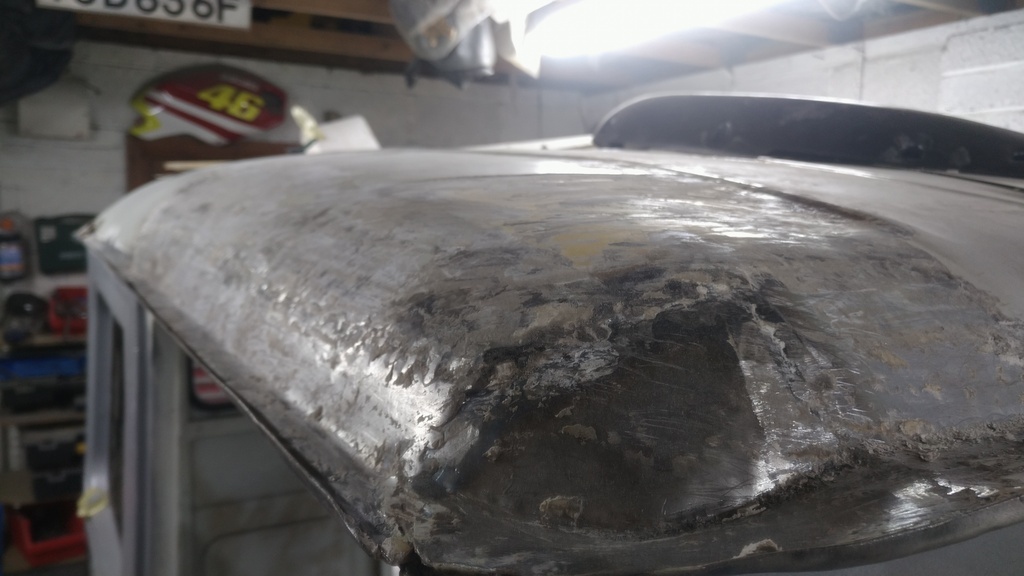 You can see that the original roof skin was chopped out and a replacement laid over the top and stitch welded on. Just a straight overlap with no joggle or anything. Of course there is shed loads of filler over the seam and in fact from inside the gutter to about 8" over the roof. The 4 corners are particularly rough as I assume they couldn't be stretched over the existing, so have been 'fabricated' 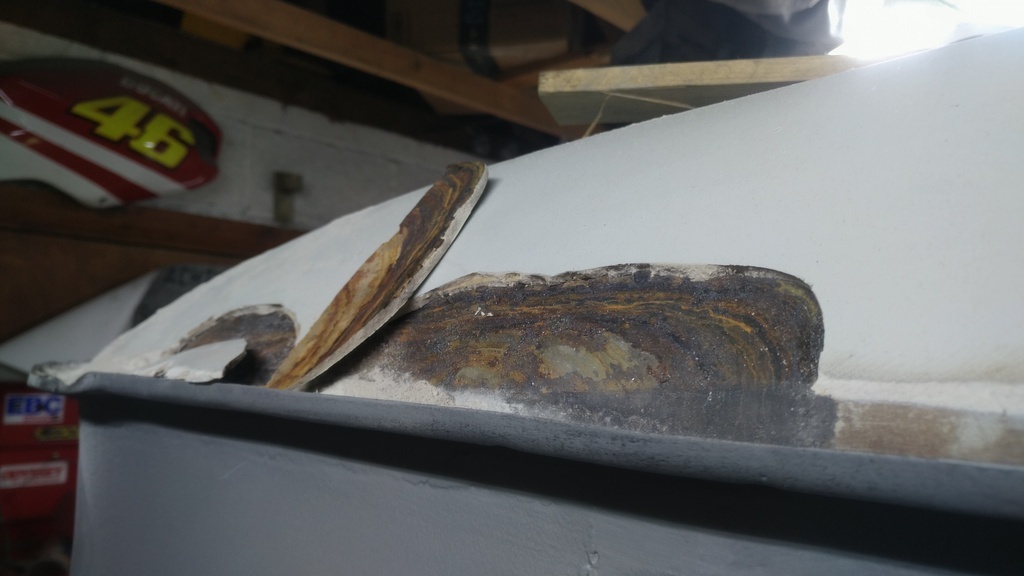 Overlap from the inside 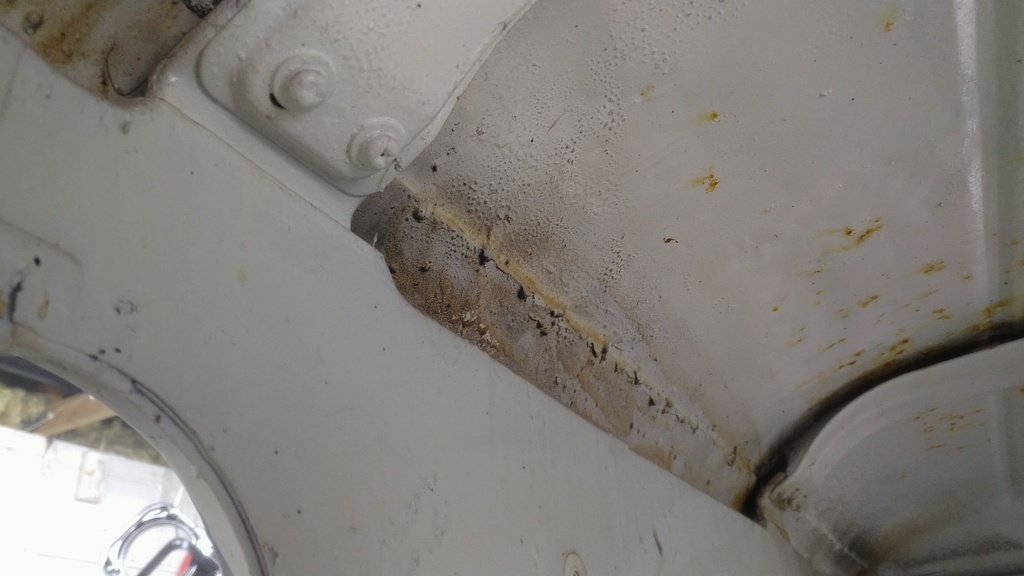 I've removed a 2ft long strip, but I'm not really feeling the filler love today so have given up. Last contact I had with the chap I know with the skills and talent to make a new roof skin I got the impression he'd cooled off on the idea. He's pretty booked up and a VW man, so I expect if it was an old bus he'd be all over it |
| |
|
|
pptom
Part of things
 
Posts: 475 
|
|
Apr 21, 2022 14:56:45 GMT
|
A 10" strip all around the roof from gutter upwards now cleaned of filler 5mm thick in most places. What a joyful job. 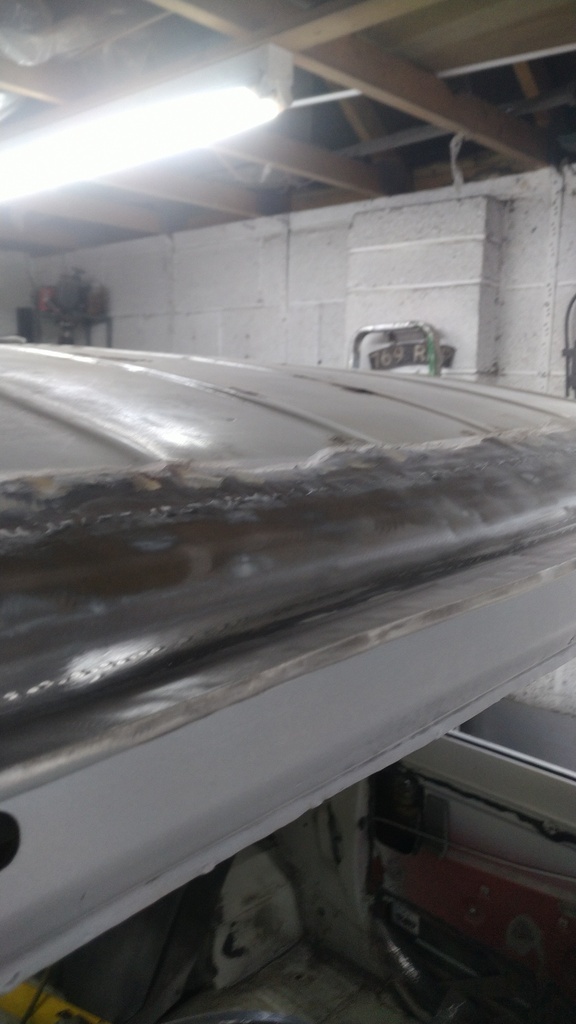 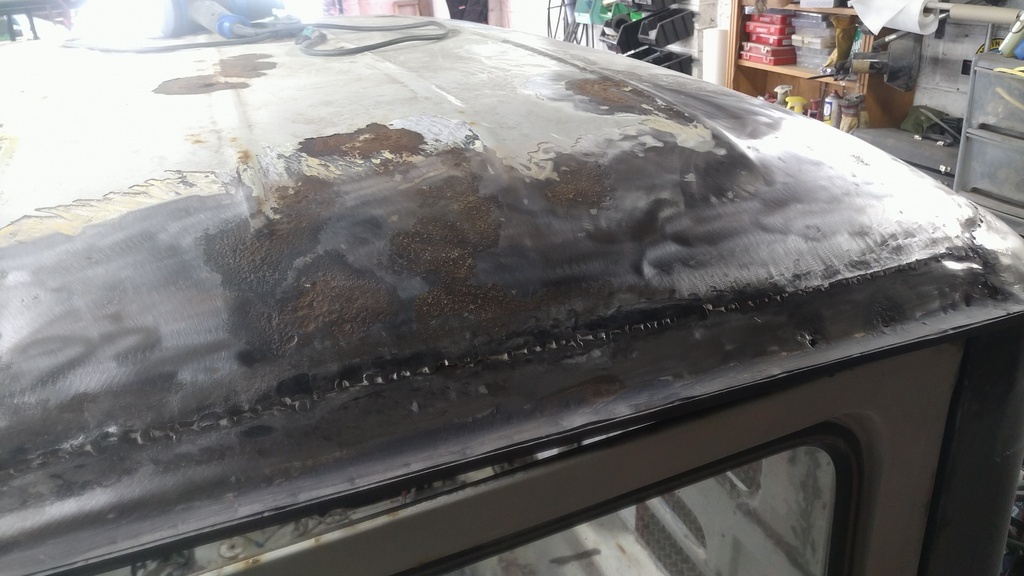 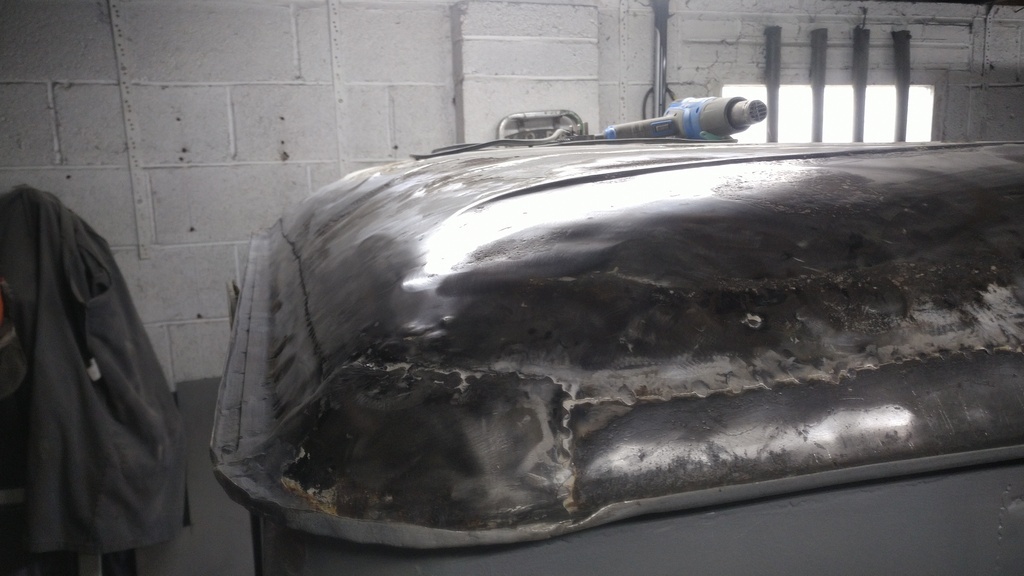 Centre section is beyond saving
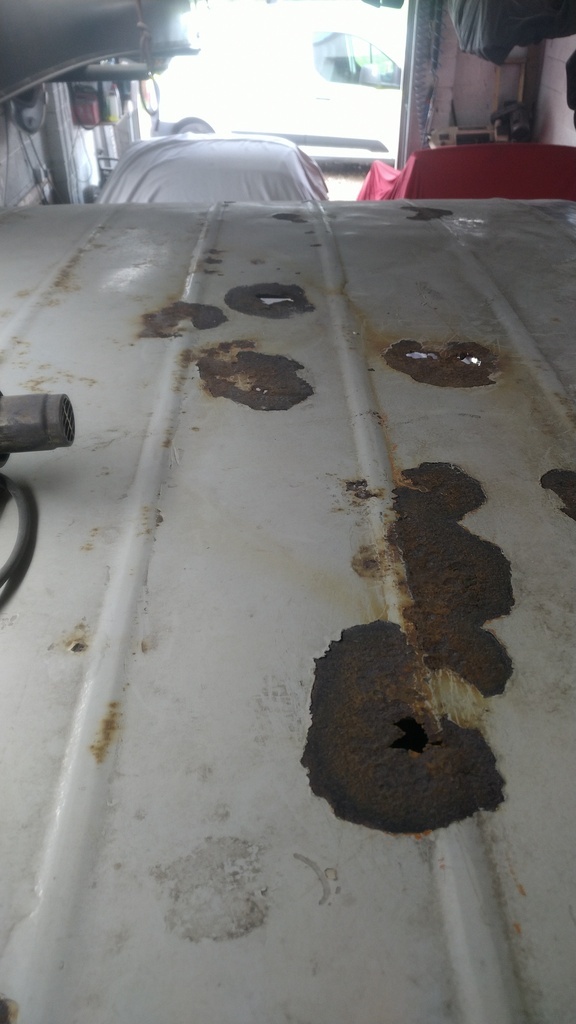 |
| |
Last Edit: Apr 21, 2022 14:57:54 GMT by pptom
|
|
pptom
Part of things
 
Posts: 475 
|
|
Apr 21, 2022 15:02:26 GMT
|
I've got a tentative plan, but it's not ideal. There is about a 1m wide strip along the centre of the roof which only seems to curve front to back, so I think I could make this, with the swage lines and joggle it in. That would have to leave the bodged section around the outside. Fortunately as it's pretty tall, the roof is above eyeline, so as long as it's leak free i should be able to live with it. Looking at the roof line from the front, it seems like the profile doesn't match left to right. 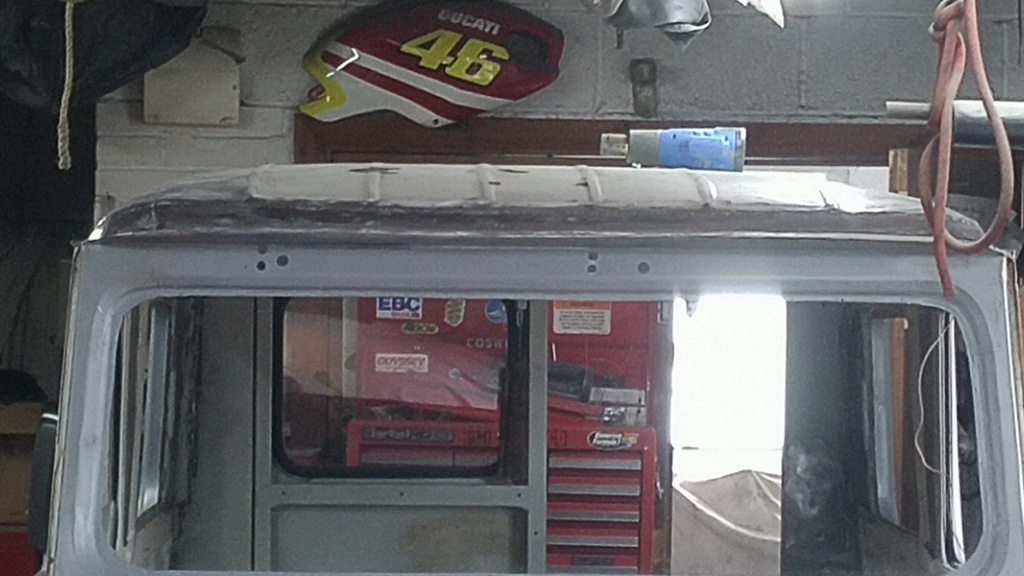 |
| |
|
|
pptom
Part of things
 
Posts: 475 
|
|
Apr 21, 2022 15:05:22 GMT
|
|
Oh, and liberated the sill template from the chap who was supposed to be folding it up for me who is clearly too busy to send a text.
Given it to someone I know where it should have gone in the first place.
Live and learn
|
| |
|
|
glenanderson
Club Retro Rides Member
Posts: 4,353
Club RR Member Number: 64
|
Daihatsu Taft F50 glenanderson
@glenanderson
Club Retro Rides Member 64
|
Apr 21, 2022 15:15:52 GMT
|
|
Could you maybe take a roof cut from something else?
|
| |
My worst worry about dying is my wife selling my stuff for what I told her it cost...
|
|
|
|
|
Apr 22, 2022 18:43:26 GMT
|
|
the body work is really escalating, not so much the amount work required, but if you don't have the original shape to replicate you are banging your head against a wall.
donor cab time ?
|
| |
Last Edit: Apr 22, 2022 18:44:44 GMT by darrenh
|
|
pptom
Part of things
 
Posts: 475 
|
|
Apr 22, 2022 21:05:37 GMT
|
|
Happy I've broken the back of it now, I'm actually feeling pretty positive about it having done most of the bits I was scratching my head over. It's only really the passenger sill and forward part of the rear arches, oh and the roof left.
I think it would be fair to say that rust is the No1 killer of these, mechanically they seem pretty good. I bet there is only a handful of decent condition bodies in the UK, including those on the road, so finding one better than this currently sits would be an impossibility.
Plus I'm enjoying bringing this back from the brink. The fun is in the process for me, not buying something perfect.
Been thinking about and looking at various vehicles for a donor roof, but not sure what, if anything will fit not much that have used gutters in the last 20 years. Zero chance of finding a good Taft one. Roof rot seems commonplace.
If I can make and let in a decent centre section, that will take care of the rust. Then it's just the ugly cut and shut line, which I think I can improve upon.
|
| |
|
|
pptom
Part of things
 
Posts: 475 
|
|
|
|
The plan for the roof is now set. The middle strip with all of the beads on is about 1m wide, this is going to be removed altogether and replaced with some sheet which I will roll some beads into. That leaves the curved outside section to the gutter and corners which have their own problems. For the last few days I have been patching 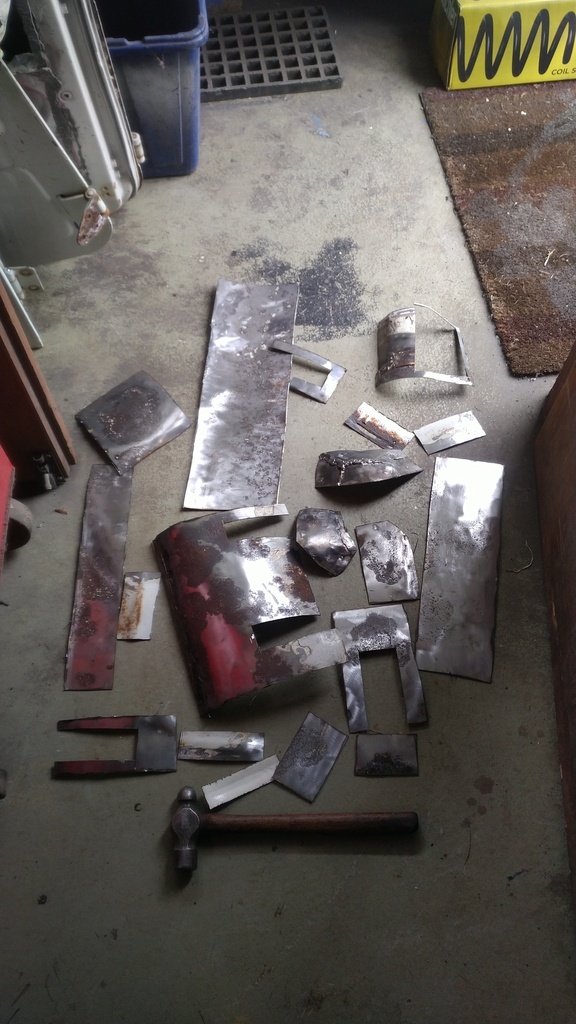 13 altogether, most of it was well developed surface rust which had pitting and I didn't want it to come back. I also made new corners of a fashion. Gone from this sort of thing 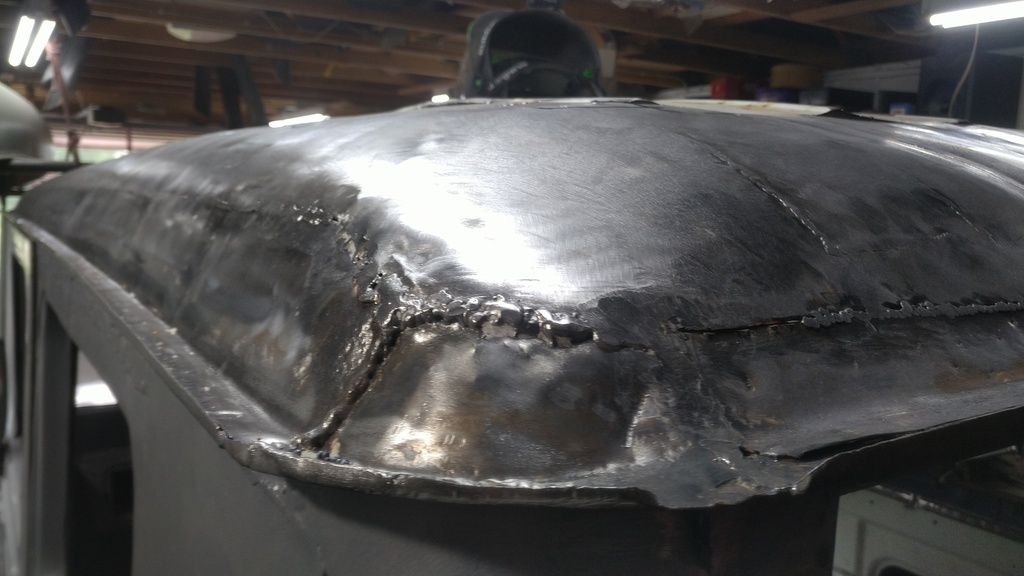 To this, still filler required in the weld area, but not a great gob of it 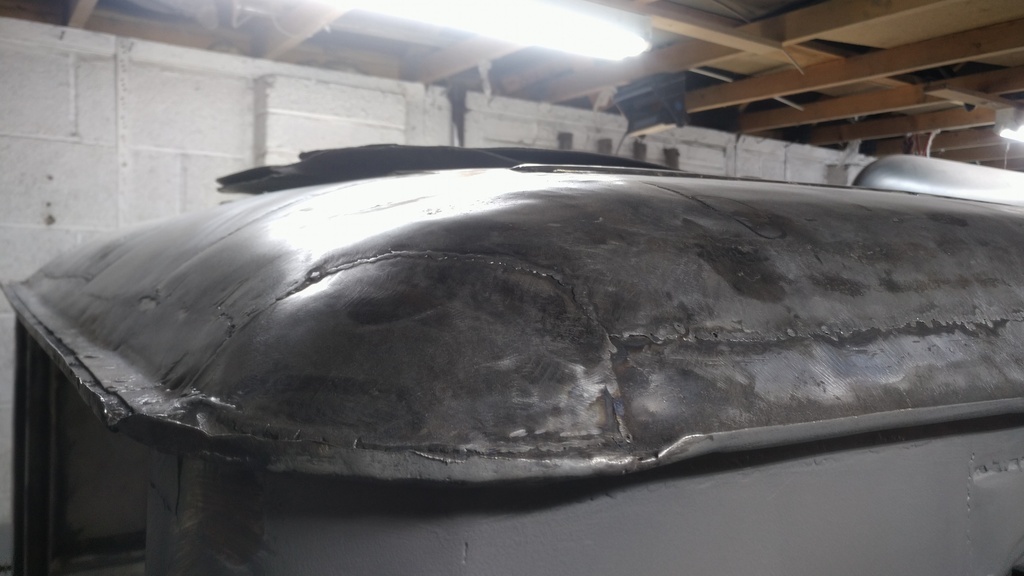 I've also cut into the lap weld all around the replacement roof skin and butt welded it around the entire roof. It's never going to be perfect as it had some hefty grinder modification by the person who did the re-skin. But it sits better, without an obvious step and will be better for moisture as the lap joint only had a tack about every 10mm. The relied on filler to keep moisture out! |
| |
|
|
pptom
Part of things
 
Posts: 475 
|
|
|
|
As it now sits 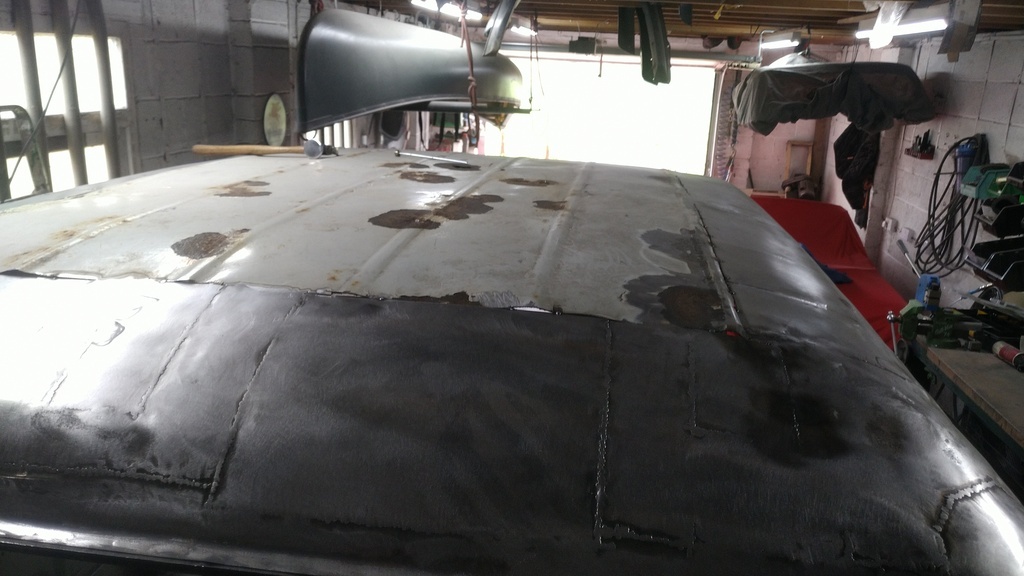 I'm going to paint the roof off white with Raptor. Hopefully it will just need a bit of filler on the welds and the Raptor will help with all of the imperfections. Just finishing up one of the last patches when I ran out of welding wire, went to swap it and the wire feeder crumbled a bit. The welder is an old Cebora 130 which performs perfectly, but the whole wire feed mechanism has gone brittle, and spares aren't available. I've repaired it before, so glued it up again last night and went to reassemble it today and the part I glued broke again 3mm away from the glue, so got a generic replacement coming which will need mods to fit. While waiting, I decided to have a go at the door apertures, obviously found more filler and more repairs required. If you like welding, get a Daihatsu Taft. The gift that keeps on giving. 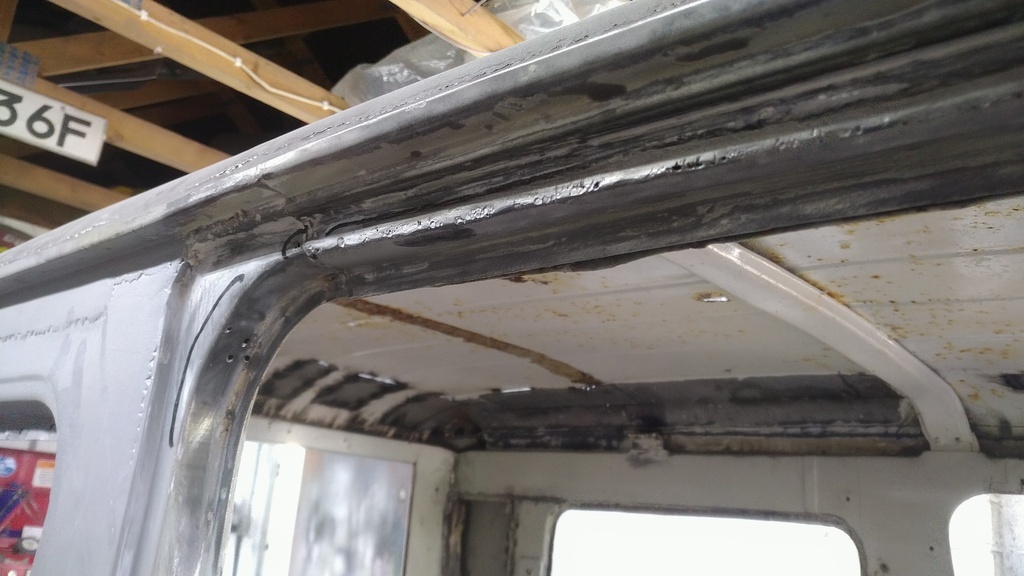 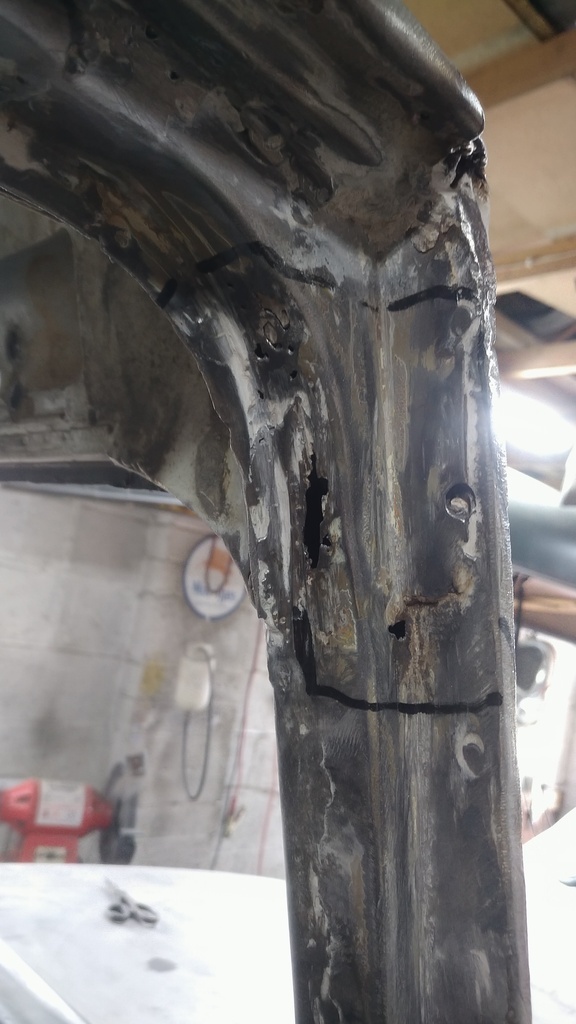 |
| |
Last Edit: May 4, 2022 15:03:40 GMT by pptom
|
|
|
|


