skinnylew
Club Retro Rides Member
Posts: 5,717
Club RR Member Number: 11
|
|
|
|
|
Wow what a collection! Love to see such heavy old trucks on the road.
There is a big old army truck near me under an oil canvas, not sure what but it's big whatever it is.
Never really seen anything like this up close but I can only imagine how big the Kraz is. I thought a Unimog was big but these are next level big!
|
| |
|
|
|
|
raumer
Part of things
 
Posts: 138 
|
|
Oct 24, 2021 22:00:25 GMT
|
It has been a while since I last updated this thread. Lots has been going on with a lot of work done on the gun tractor. At some point I'll try and do all the updates for it but it's going to take a while! So in the meantime a bit more on the Unipower. The barn it normally lives in is used for grain during the summer so she has to live outside for a couple of months. She is now back in the barn although the engine was running a little bit odd. The diesel pump needs to be filled up with oil every now and then to make sure the rack that controls the amount of fuel stays lubricated. As we haven't been out to rallies for a while it's a job that hasn't been done. So once back in the barn it was a nice simple job to undo the tiny screw and fill the rack up with oil. We have not started her up since but did move the rack back and forth a few times and it's feeling a lot better. Time for some body work. A few years ago I had the Unipower sat on the drive at our home in Gloucester. The only problem was that the drive was only wide enough to have her parked hard against the fence then with space to walk down the passenger side. One of the jobs I did was to take off the passenger wing and get it repaired. It had rotted at the lower rear edge. When the wing comes off we also took off the side panel and the inner panel that attaches to that. Whilst it was off we painted the chassis and also had the panels we took off dipped and then primed. This is why most of the photos of her have one wing being grey. The only problem was that I couldn't get to the drivers side to do that one. So now that she is in the barn time to attack it. 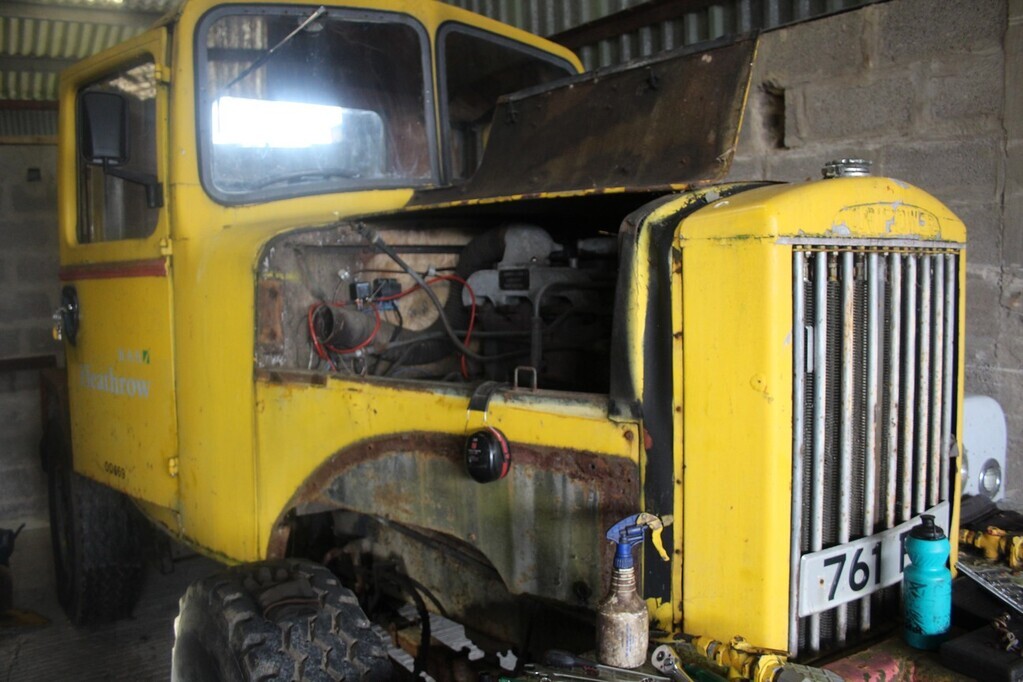 I didn't get a before photo so this is with the main wing removed. You can see the bolt holes in the rusty strip that is where it was held on. The reason for the rust is that there is a rubber trim that sits between the two panels and traps the moisture there. There are also three bolts that go in to the bumper and then there should be two at the back of the wing - one has completely rotted out. The bolts all came undone which was a nice surprise. This also completely misses the fun and games of getting the air filter and it's mounting bracket off. The actual air filter was easy as we only refitted it last year and it's not that heavy. But the bolts holding the bracket on were a struggle. 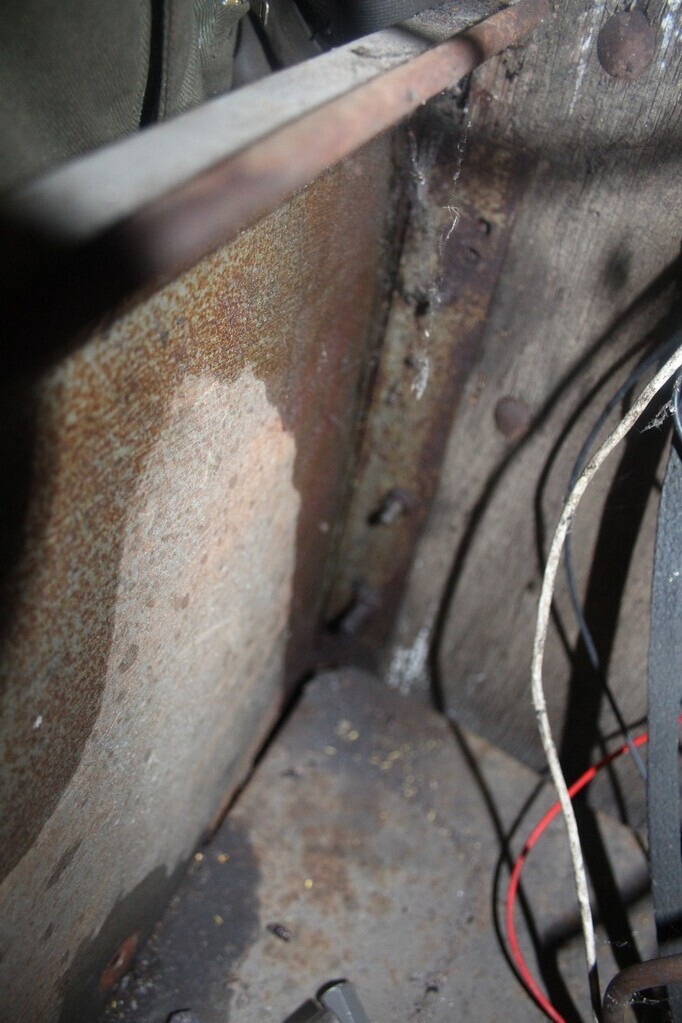 The strip of metal on the left with three bolts sticking out is where the side panel is held on to the bulkhead on the inside of the panel. Annoying bit is they are coach bolts. The wood on the other side is not in great condition so they were spinning. Two were easily cut with the angle grinder. But the third was very difficult to get to, the disc wanted to go through the side panel. But eventually got them off after cutting the nut almost in half then plenty of application of hammer and chisel. 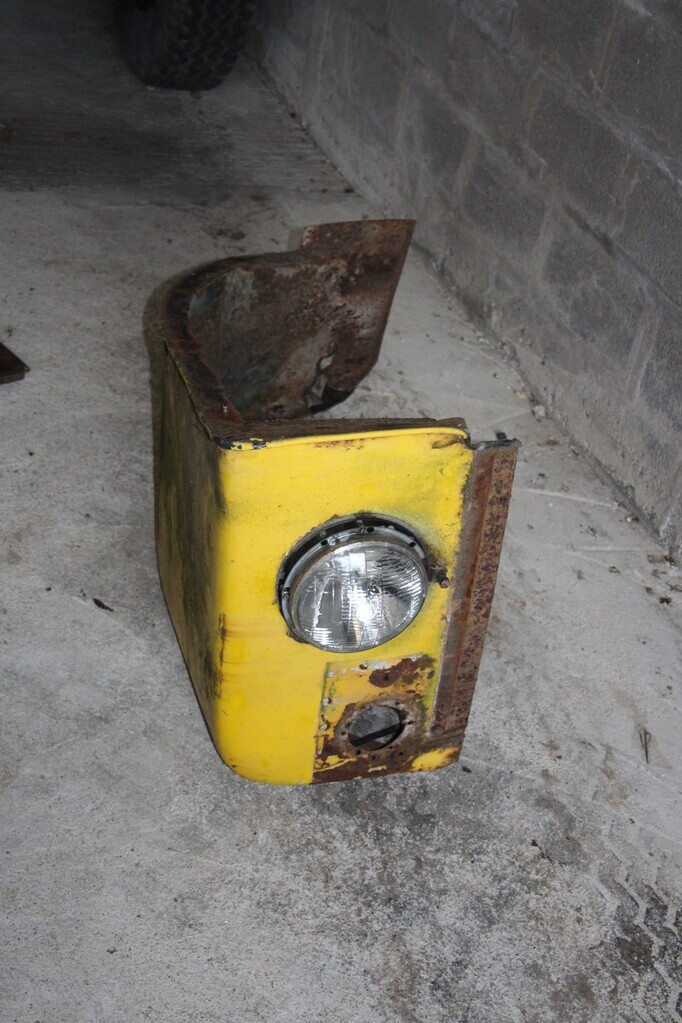 This is the wing now removed. We took the sidelight off but I'd forgotten to take allen keys with me so couldn't take the headlight out. 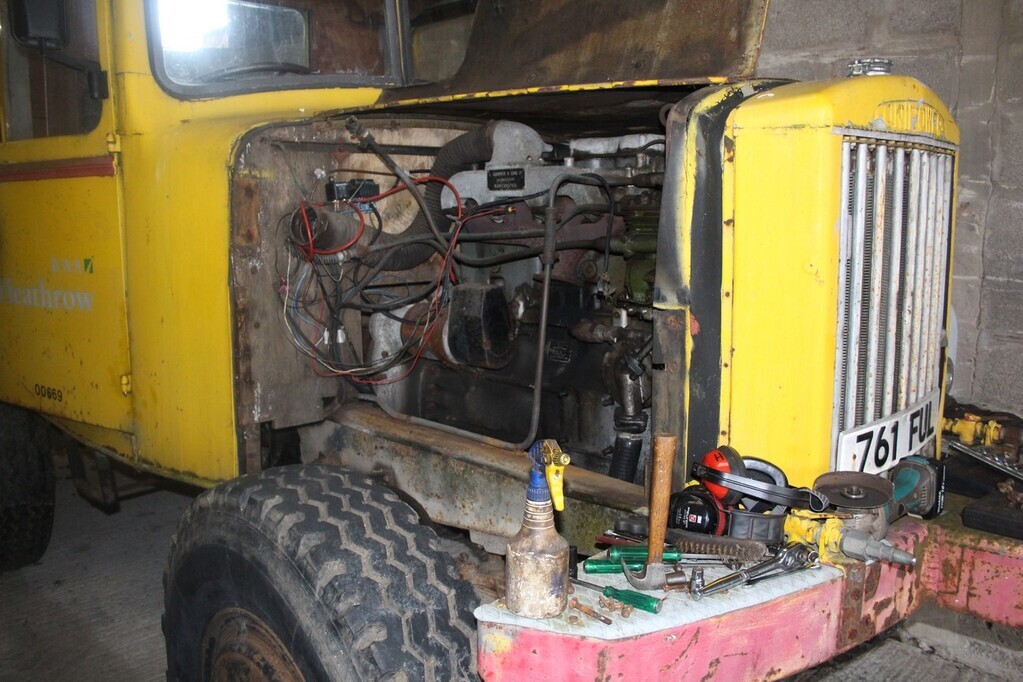 Unipower with wing, side panel and inner panel all removed. The inner panel was difficult as it has two screws going through the chassis to hold it in place. The two screws go through brackets that hold the air pipe - the pipe in the photo that comes down vertically and then heads along the chassis. Very little space to get at the tops of the screws and they didn't want to undo. Managed to angle grind a bit of the head of one but not really working. Ended up digging out one of my favourite tools - carbide burr on the end of the drill. Neatly ate away the head of the screw without doing too much damage to the surroundings. Then the fun and games of taking the panels off. The inner panel slots in to a bent U at the bottom of the side panel and at the other side goes under the air pipe and over the edge of the chassis. With a bit of levering and force it all came off. The chassis is going to need a good clean with the wire wheel and then painting. We will replace all of the iffy bolts with new ones. 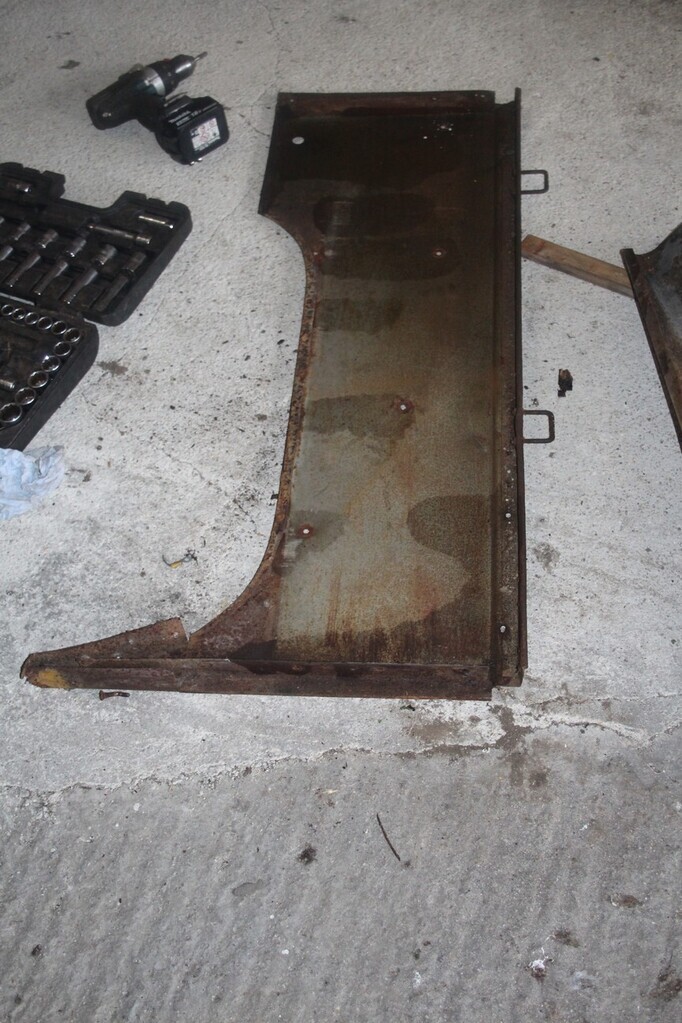 This is the side panel, in good condition except for the extended leg at the bottom of the picture. This should go a bit further and then the back of the wing bolts to it. 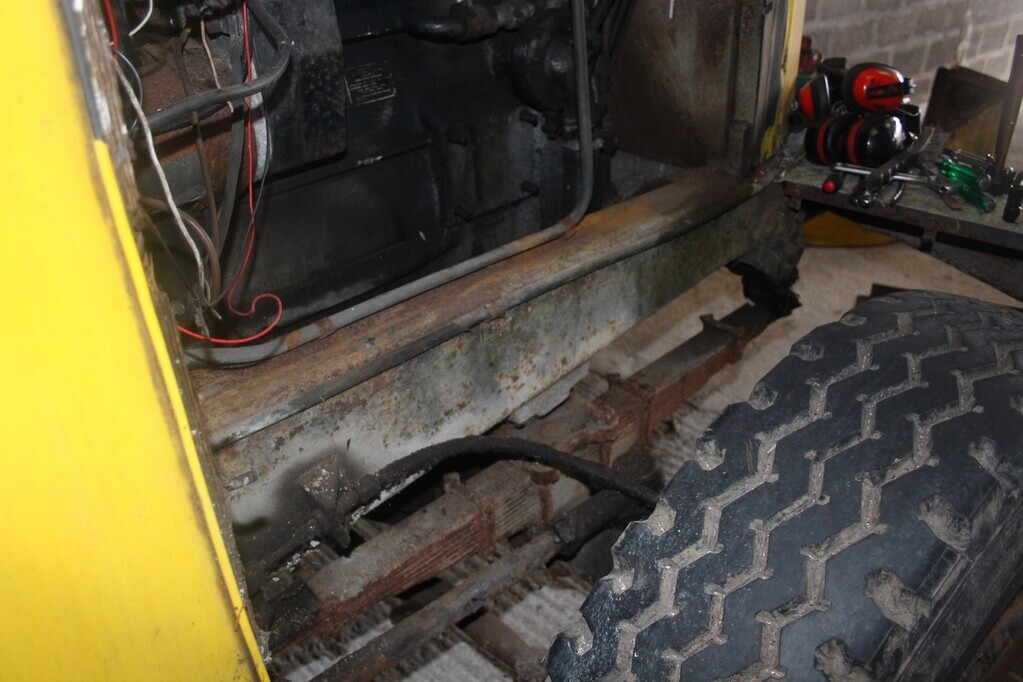 Unipower without the panels on showing the chassis and the other bits. 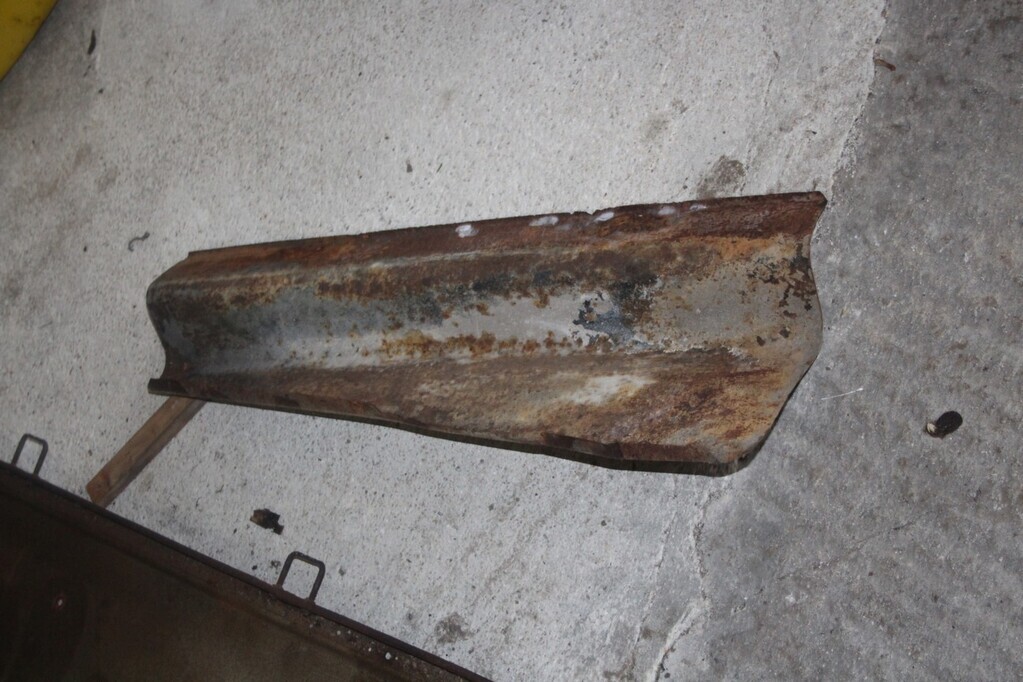 The inner panel, the lip at the bottom is the bit that slots in to the side panel. Next job is to have a chat with a friend of ours who repaired the passenger side wing. He's a very good fabricator and welder so hopefully he can do the repair work, along with a couple of bits for the gun tractor. In the meantime I need to clean up the chassis and get it painted. Will also tidy up some of the wiring and we might remove the passenger side wing so we can give it a fresh coat of primer and then finally give it the correct top coat. |
| |
Mine: 1938 Scammell Pioneer R100, 1944 Scammell Pioneer SV2/S, 1959 Kraz 255b tractor unit, 1960 Unipower Industrial ballast tractor, 1960 88 Landrover Series 2 SWB, 1983 110 Landrover CSW
Look after:
1935 Scammell Rigid 6, 1951 Scammell Scarab, 1961 Landrover Prototype, 1985 Landrover 110
|
|
|
|
|
Nov 21, 2021 21:59:16 GMT
|
Love this thread. Something a bit different and involving big heavy vehicles. Last week against my better half’s judgement I picked up something similar. Well it’s bigger than a car but probably not on your scale either but I may be tempted to do a thread after having a good read of yours. 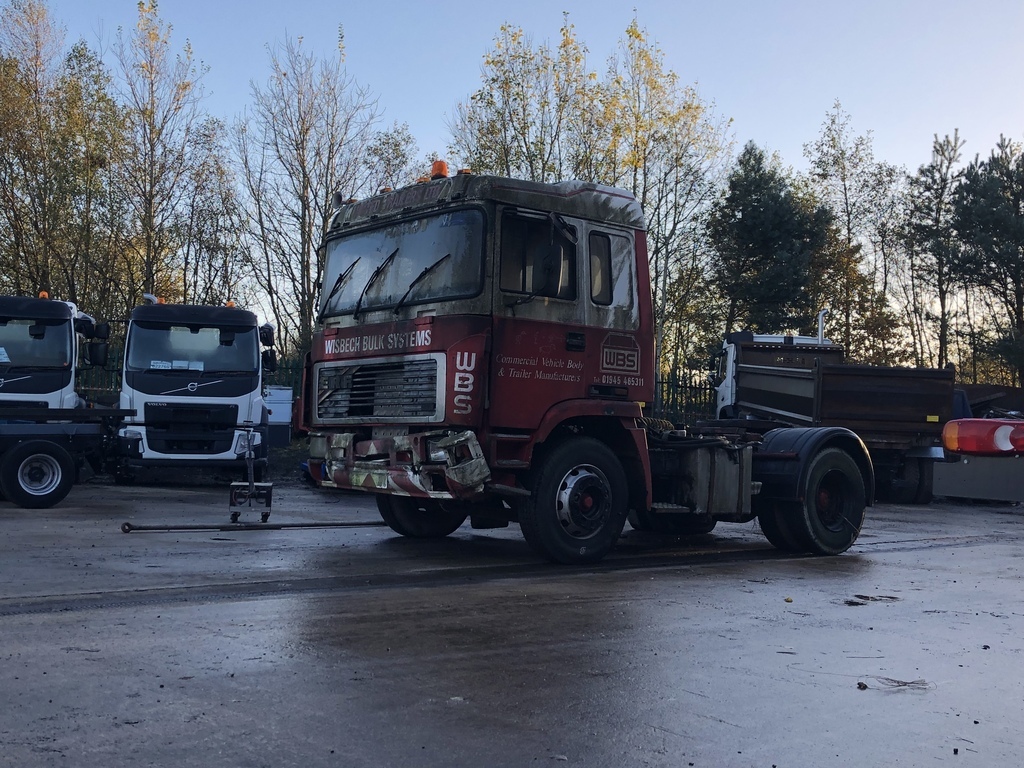 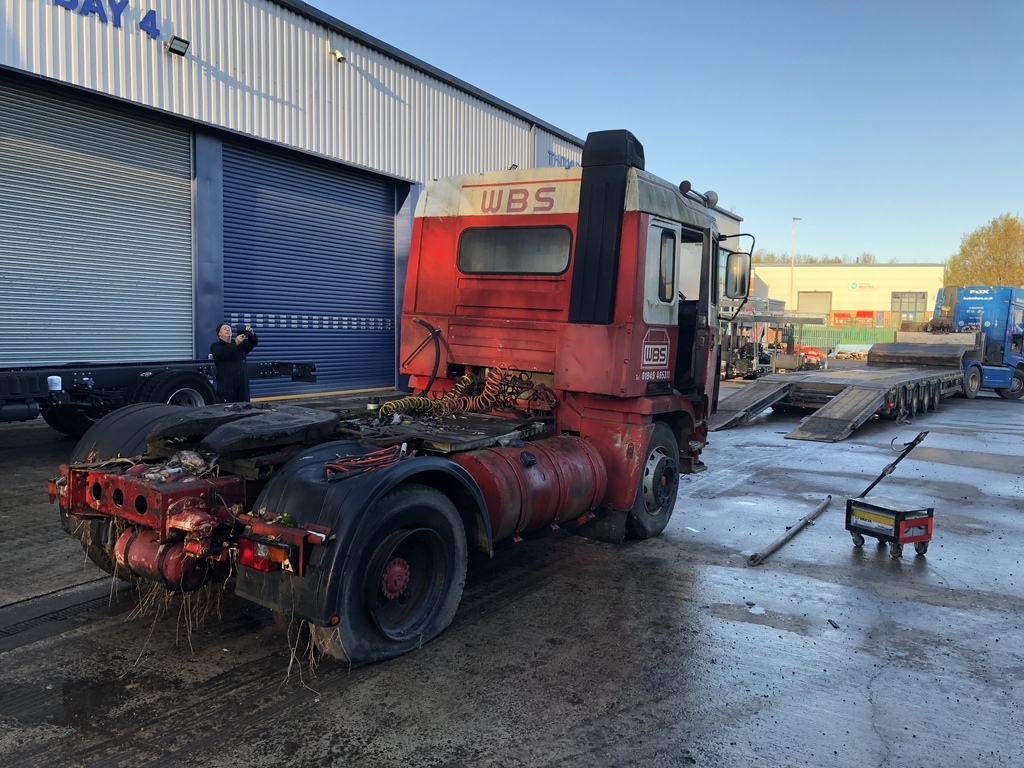 As we dragged her out the undergrowth. Fresh battery’s and she fired straight up. Seized clutch slave cylinder and a stuck rear shoe on the drum. Other than that she’s not to bad. Even gave her a good scrub and a wash off. 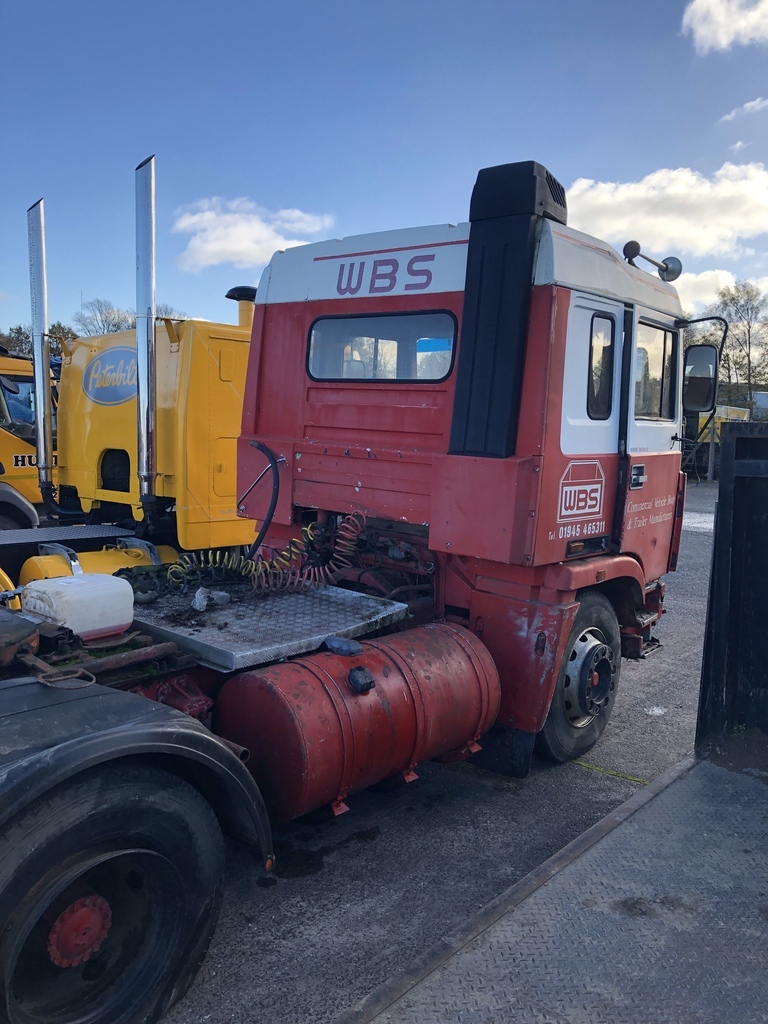 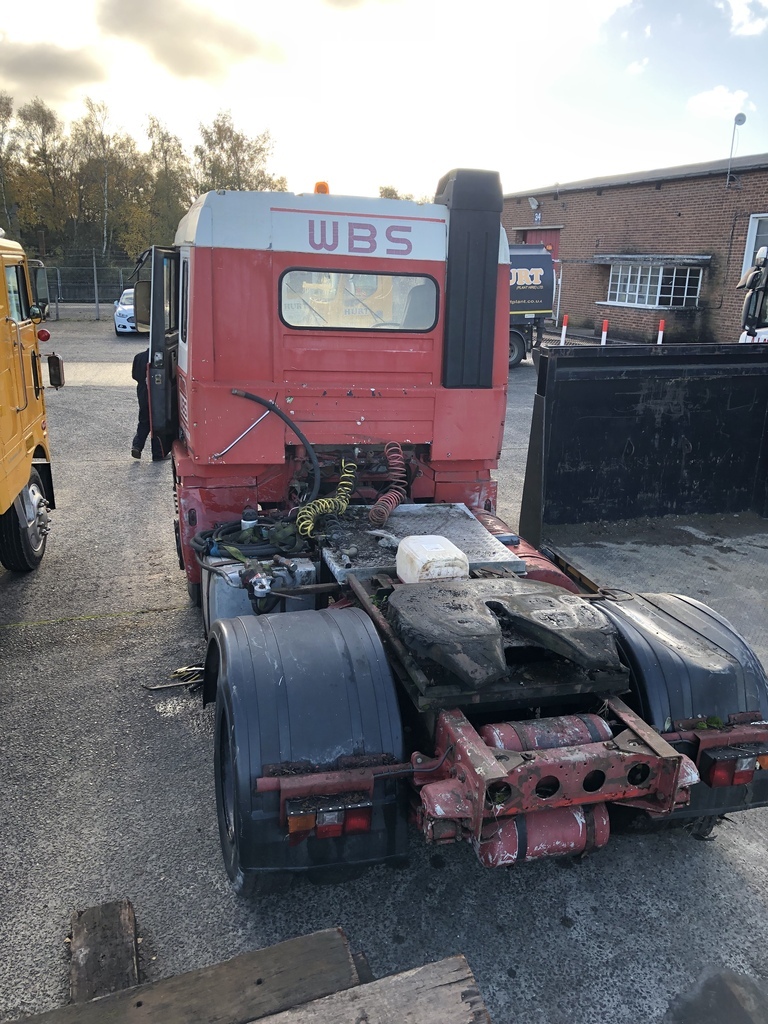 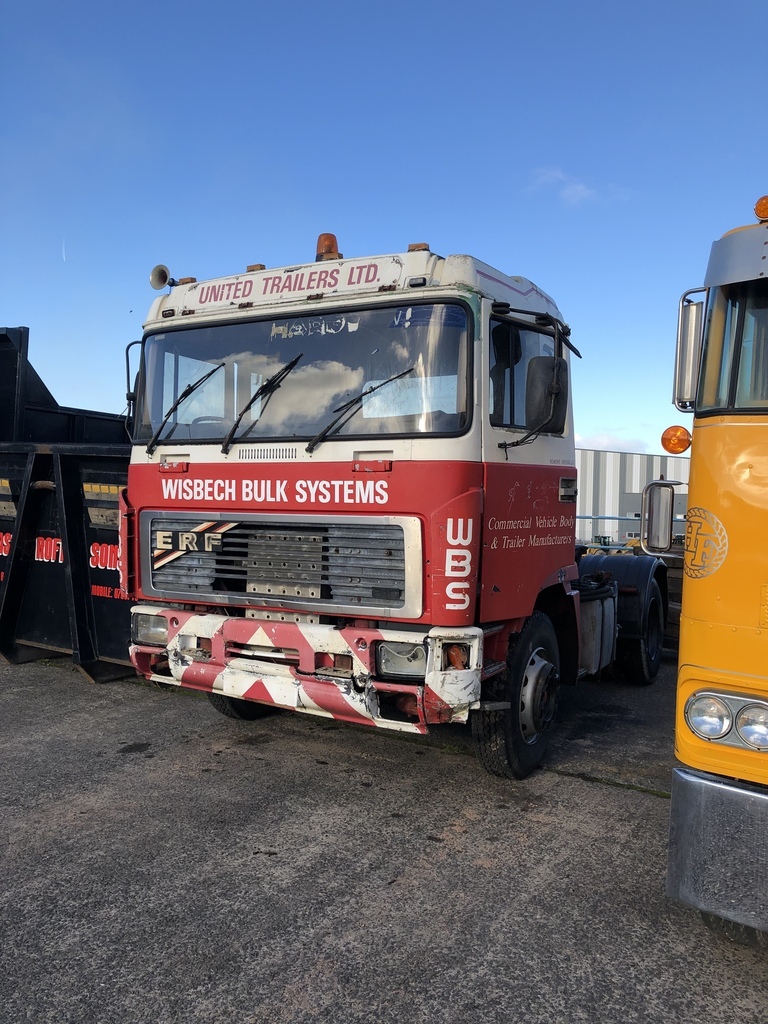 Keep up the good work 👍🏻 |
| |
|
|
|
|
|
Nov 21, 2021 22:39:12 GMT
|
|
Nice E-Series. L10 in that?
|
| |
|
|
Rich
Club Retro Rides Member
Posts: 6,338  Club RR Member Number: 160
Member is Online
|
|
Nov 21, 2021 22:48:09 GMT
|
I may be tempted to do a thread after having a good read of yours.  Please do. I would happily bookmark that..  |
| |
|
|
glenanderson
Club Retro Rides Member
Posts: 4,354
Club RR Member Number: 64
|
|
|
|
I may be tempted to do a thread after having a good read of yours.  Please do. I would happily bookmark that..  Me too. I did many miles in an E14 ERF with an Eaton twin-split gearbox. Cracking wagon. Not a lot of room in the cab to live out of, but capable of working hard. 👍👍 |
| |
My worst worry about dying is my wife selling my stuff for what I told her it cost...
|
|
|
|
|
|
|
Nice E-Series. L10 in that? Yes L10 and a Eaton gearbox. Should make a nice rallie and show truck. |
| |
|
|
raumer
Part of things
 
Posts: 138 
|
|
Dec 28, 2022 10:40:27 GMT
|
Over a year since my last update! Far too long but it has been a busy year. Two shows with the Unipower, a few other show visits, a house move, new technical centre for work and a very hectic work year. Work has now built a technical centre in Leicestershire and so we needed to move from Gloucestershire up to the midlands. Now based in rented accommodation in Nottingham. Annoying to be so far away from the vehicles but has given a definite search area for a permanent home. But also means that most stuff is staying boxed up and not making any progress on vehicles stuff. Anyway back to the vehicle updates. After taking off the drivers side wing and side panel they went off to be dipped and then repaired. At the same time decided it was best to strip down the passenger side as well. Then it was the usual fun and games of working out what order everything needed to be done in so that it could all go back together in order. I do seem to have forgotten to take photos at some points so not great illustrations at points. With the wings & inner panels off I cleaned and painted the chassis rails that were now exposed. Then we scraped and sanded the paint off of the radiator. Ideally we would strip the radiator down and do all the bits individually but they are a lot more awkward than normal radiators. Lots of individual tubes that each seal in to the top and bottom tanks. If it's not leaking then leave well alone! One good thing is that there is good access and also not looking to get everything back to a smooth finish. Just want everything protected and looking tidy. So first photo with me spraying the primer on, all of the painting done was using rattle cans. When she is all finished will give her a proper spray job but that is a good few years away. 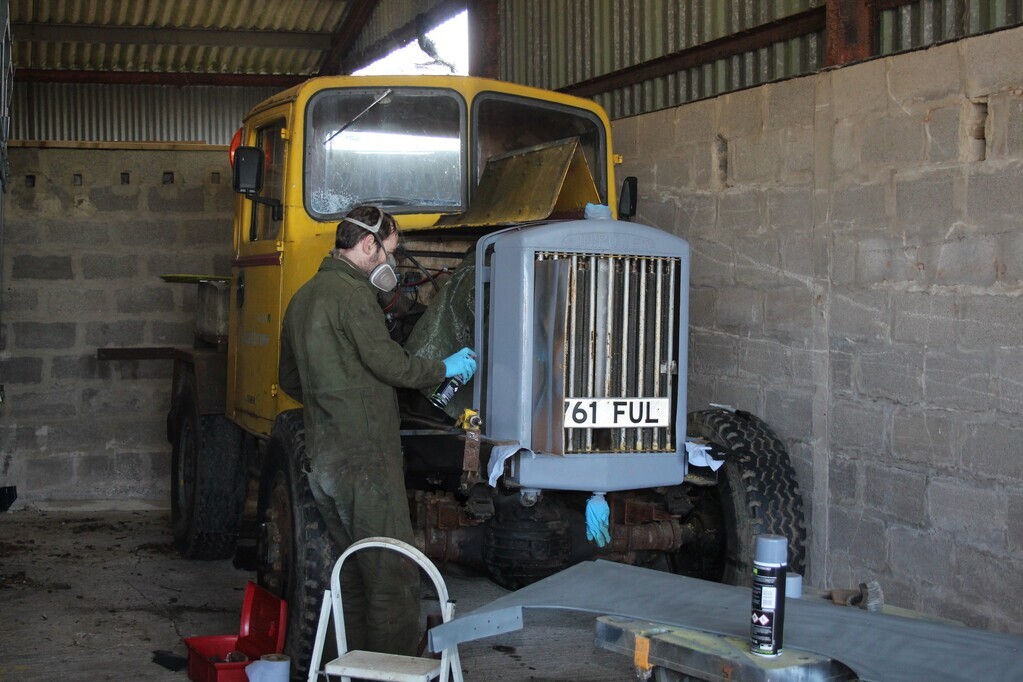 Then after I'd done the top coat: 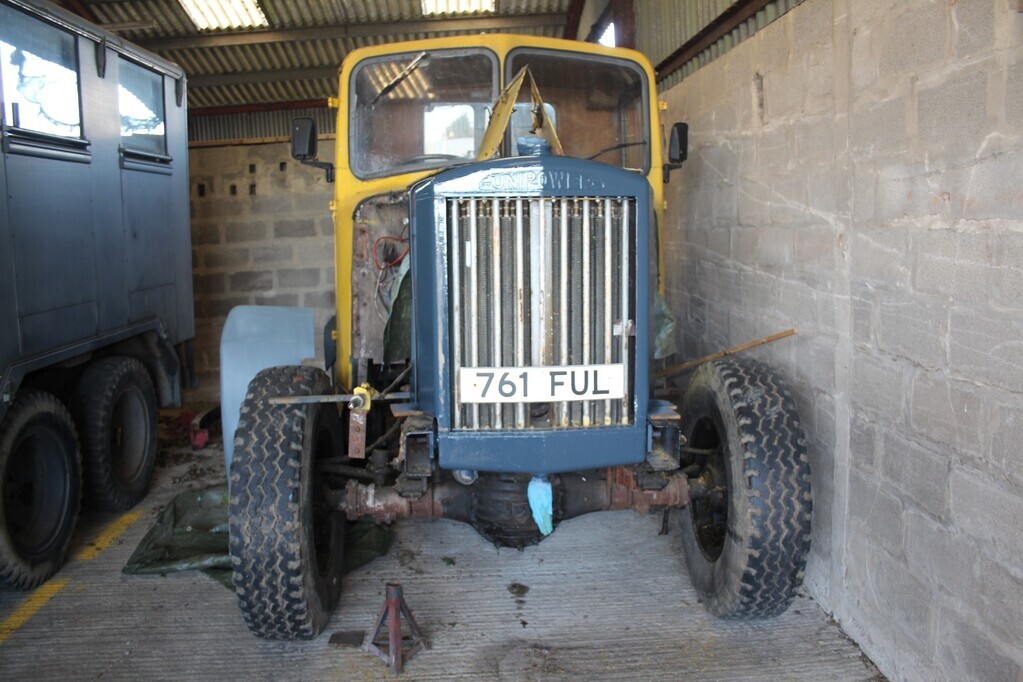 I do quite like the hot rod look without the body panels but she does look a bit ungainly! |
| |
Mine: 1938 Scammell Pioneer R100, 1944 Scammell Pioneer SV2/S, 1959 Kraz 255b tractor unit, 1960 Unipower Industrial ballast tractor, 1960 88 Landrover Series 2 SWB, 1983 110 Landrover CSW
Look after:
1935 Scammell Rigid 6, 1951 Scammell Scarab, 1961 Landrover Prototype, 1985 Landrover 110
|
|
raumer
Part of things
 
Posts: 138 
|
|
Dec 28, 2022 12:14:14 GMT
|
There was a lot of swapping between which parts I was working on depending on the weather and what was available. Ran in to all of the usual issues along the way - running out of paint, not having the right bolts, realising that parts won't go together in that order etc.... To make it a bit easier to follow I'll try to stick to going through the jobs on each batch of parts. One of the bits that is always fun to remove is the bumper. The bumper itself is a heavy chunk of steel but has an even heavier cast sprung coupling in the middle. First bit is to remove the coupling which is only four decent sized bolts. After that the bumper itself is fairly easily removed although there are lots of bolts. Eight or so holding on the treadplates, four holding the air fittings on, then eight hold the bumper to the chassis. Access is pretty good and I have had it all off before so no seized bolts. With the shape it was easy to use a wire wheel and sanding disc on the angle grinder to clean it all up. Bit of a boring bit to look at so just a couple of photos of it all painted up. All of the parts got rust treatment, then layers of primer and finally layers of top coat. 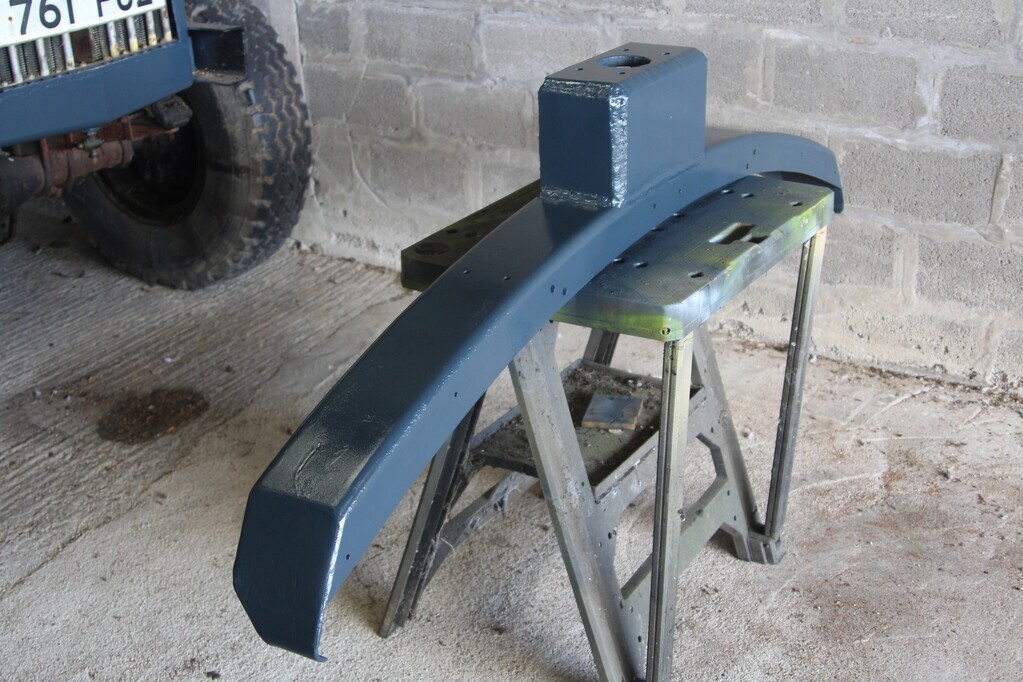 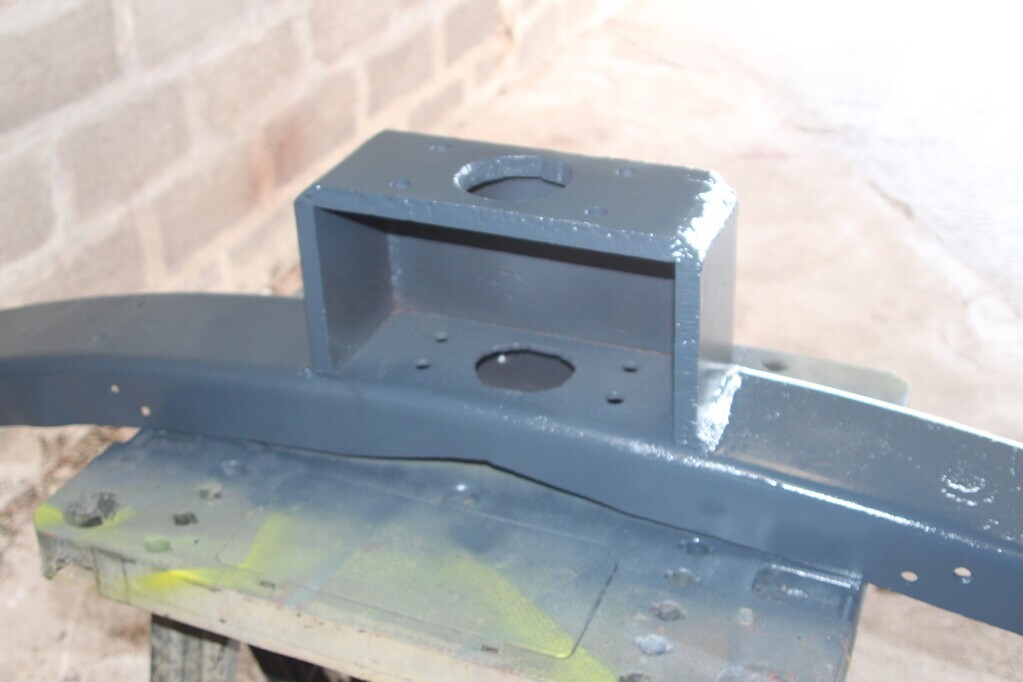 The second photo shows the underside of the bumper. Here you can see the original mounting holes for the original small front pin hitch. At some point they wanted to fit the sprung loaded type hitches. To do this they welded on a simple extension. It is functional rather than pretty. The extension is only welded on the outside and not the inside. After the bumper the next logical bits are the tread plates. These had been blasted and primed a few years ago. So a simple case of clean up then prime and top coat. This time in to lovely bright yellow. Trying to use black and white photos to work out what colour different bits should be is not the easiest! Aided by some trace bits of paint being left and knowing that originally she was RAF grey and yellow only. 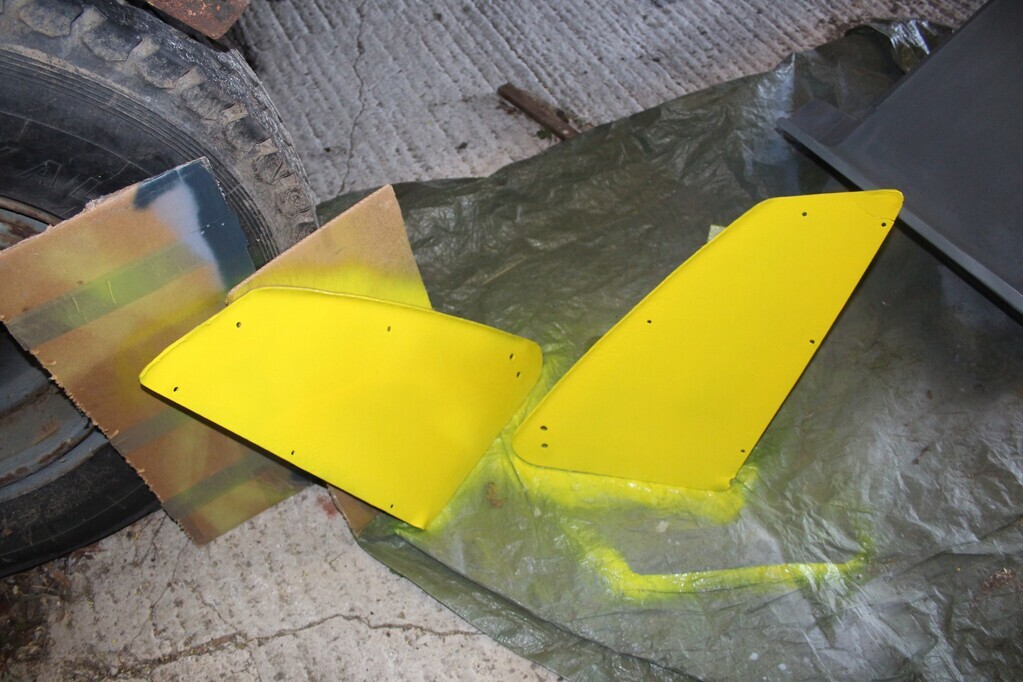 It did take a few coats but eventually they did start to look yellow. 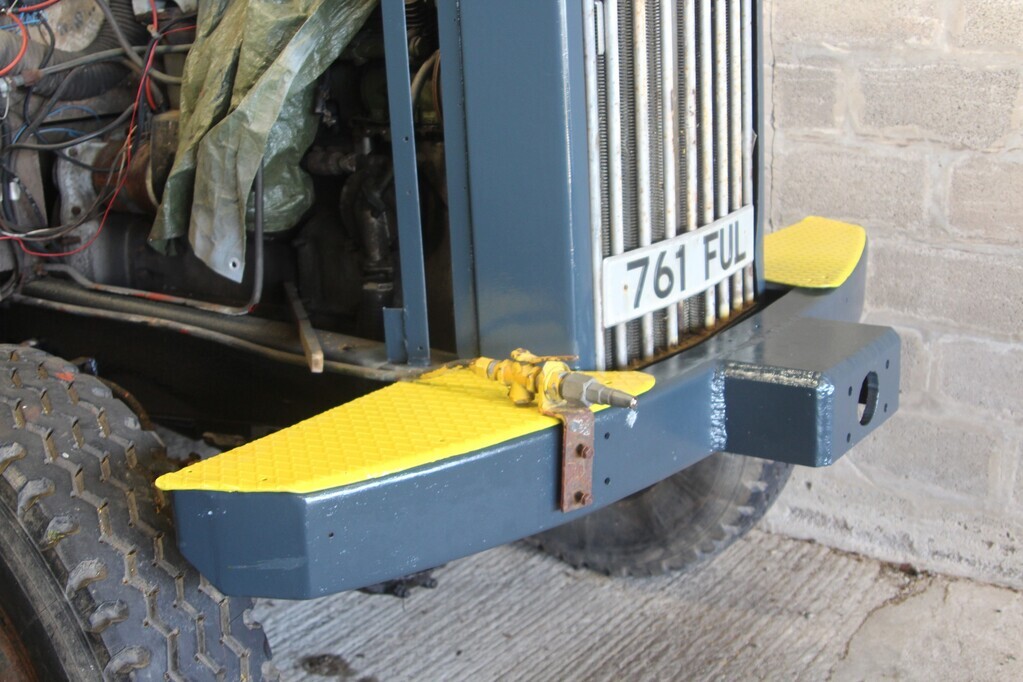 Treads loosely fitted in place. 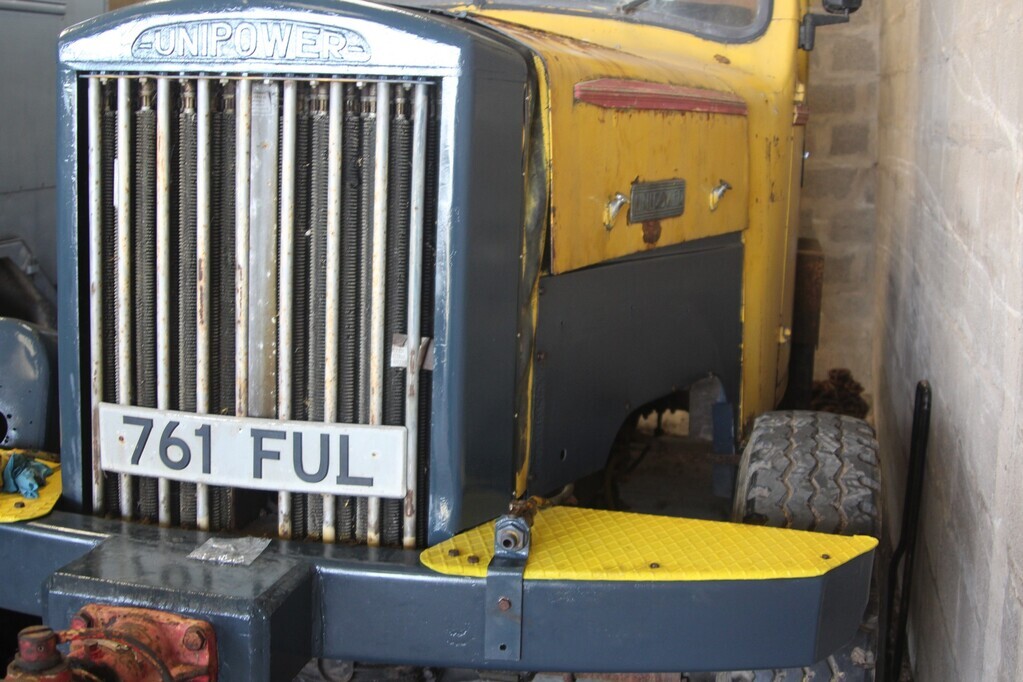 Bolts added but nothing done up tight yet. Always best to leave doing anything up tight until it is all in place. You can also see in the last photo that the airline bracket was taken off and painted. The inner wing panel is also in place but will come back to that in another post. |
| |
Last Edit: Dec 28, 2022 12:14:57 GMT by raumer
Mine: 1938 Scammell Pioneer R100, 1944 Scammell Pioneer SV2/S, 1959 Kraz 255b tractor unit, 1960 Unipower Industrial ballast tractor, 1960 88 Landrover Series 2 SWB, 1983 110 Landrover CSW
Look after:
1935 Scammell Rigid 6, 1951 Scammell Scarab, 1961 Landrover Prototype, 1985 Landrover 110
|
|
|
|
|
Dec 28, 2022 15:14:02 GMT
|
|
I always find your posts interesting, down to earth and about vehicles which appeal. This latest post really struck a chord, that is the registration number on the vehicle. I used to have a Series 1 Land Rover (86") fitted with a factory hard-top and station wagon back door. Reg.No. 590 FUL. This Land Rover was ex-RAF; lo and behold later on in the article, your vehicle was also ex-RAF. Obviously both vehicles were sold off at the same time, having FUL registrations.
My Land Rover has disappeared off the face of the earth. Often wish that I had never sold it; that's life I'm afraid.
Keep up the good work.
|
| |
|
|
|
|
raumer
Part of things
 
Posts: 138 
|
|
Dec 28, 2022 15:53:27 GMT
|
|
Thank you, always nice to know that posts are appreciated and of interest.
The Unipower gained it's civvy registration in 1962 when it went from RAF to Board of Trade, whilst staying at Heathrow. I have come across some other ex-RAF vehicles with FUL registrations so as you say must have been a batch of RAF vehicles all registered at the same time. The UL part of the registration is for Greater London which doesn't help much!
Sadly we can't keep all of the vehicles and I'm sure I'll regret selling some of my previous ones at some point. Although I tend to regret the ones I didn't buy more!
|
| |
Mine: 1938 Scammell Pioneer R100, 1944 Scammell Pioneer SV2/S, 1959 Kraz 255b tractor unit, 1960 Unipower Industrial ballast tractor, 1960 88 Landrover Series 2 SWB, 1983 110 Landrover CSW
Look after:
1935 Scammell Rigid 6, 1951 Scammell Scarab, 1961 Landrover Prototype, 1985 Landrover 110
|
|
Frankenhealey
Club Retro Rides Member
And I looked, and behold, a pale horse! And its rider's name was Death
Posts: 3,885
Club RR Member Number: 15
|
|
Dec 28, 2022 15:54:00 GMT
|
I used to have a Series 1 Land Rover (86") fitted with a factory hard-top and station wagon back door. Reg.No. 590 FUL. This Land Rover was ex-RAF; Something like this but shorter? 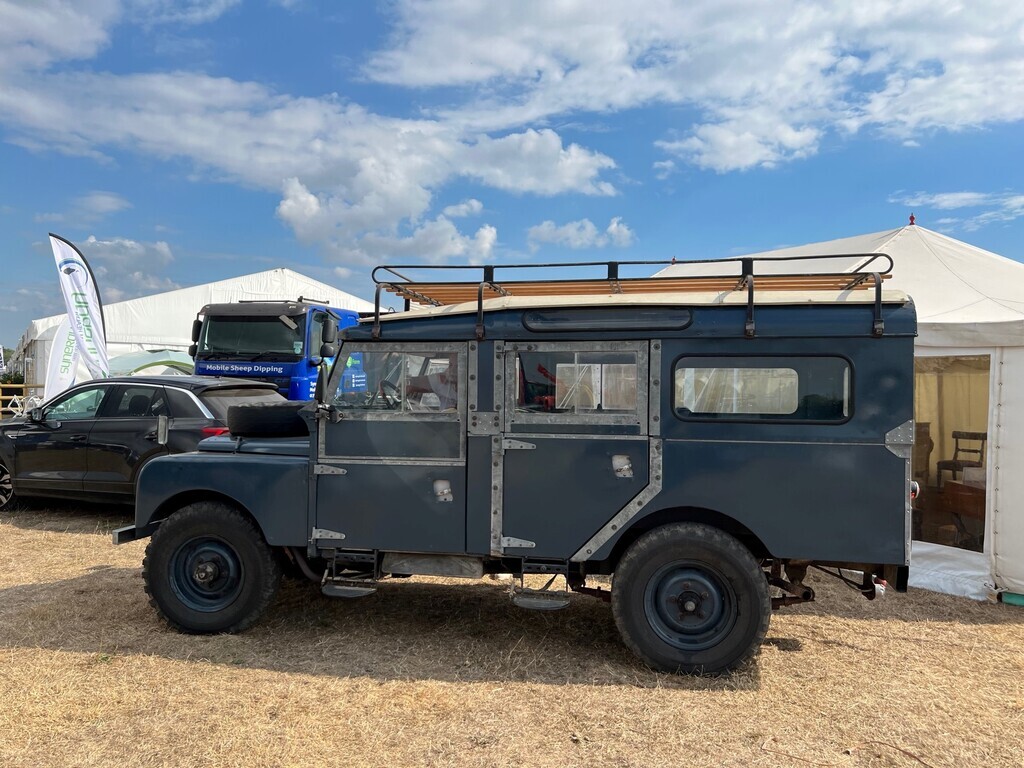 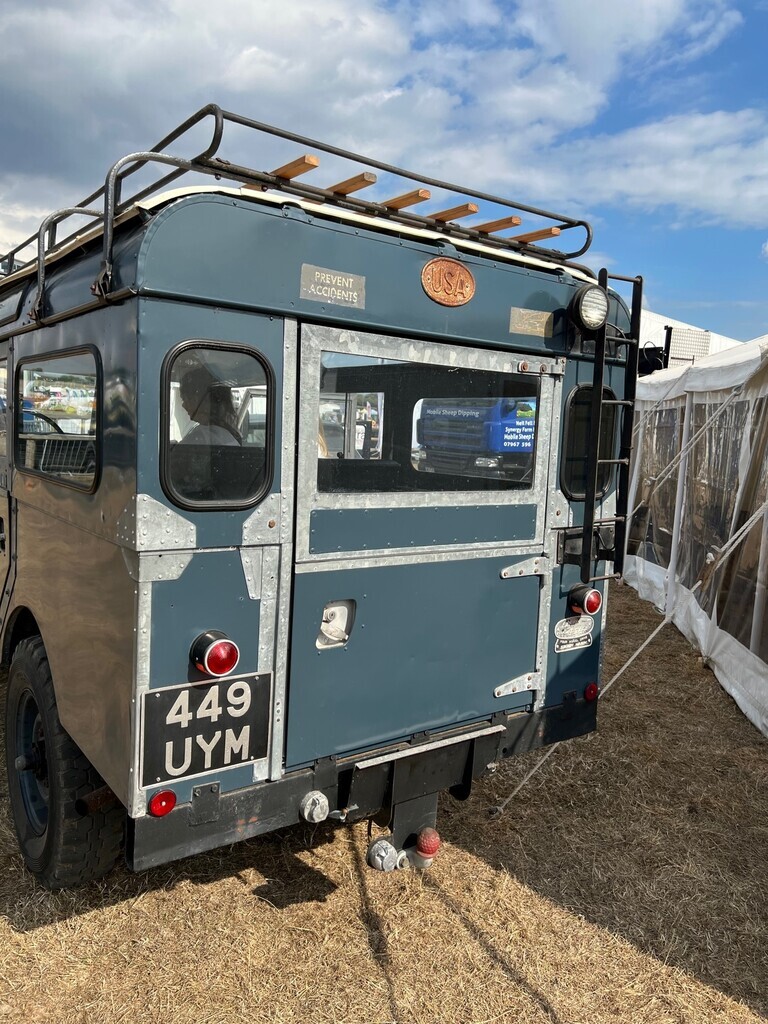 |
| |
Tales of the Volcano Lair hereFrankenBug - Vulcan Power hereThe Frankenhealey here |
|
raumer
Part of things
 
Posts: 138 
|
|
Dec 29, 2022 17:33:36 GMT
|
On to the next bit. Ages ago the engine note had changed, took a while to track down the cause. It turned out to be the flexible exhaust pipe had split in multiple places. An exhaust bandage did enough for the last couple of outings but now time to repair it properly. After a bit of searching found some exhaust pipe the right size and our friendly local welder cut off the old and welded the new one in place. And made up a new exhaust gasket to go on to the manifold. No good photos before I refitted it but at least a before and after photo. Before: 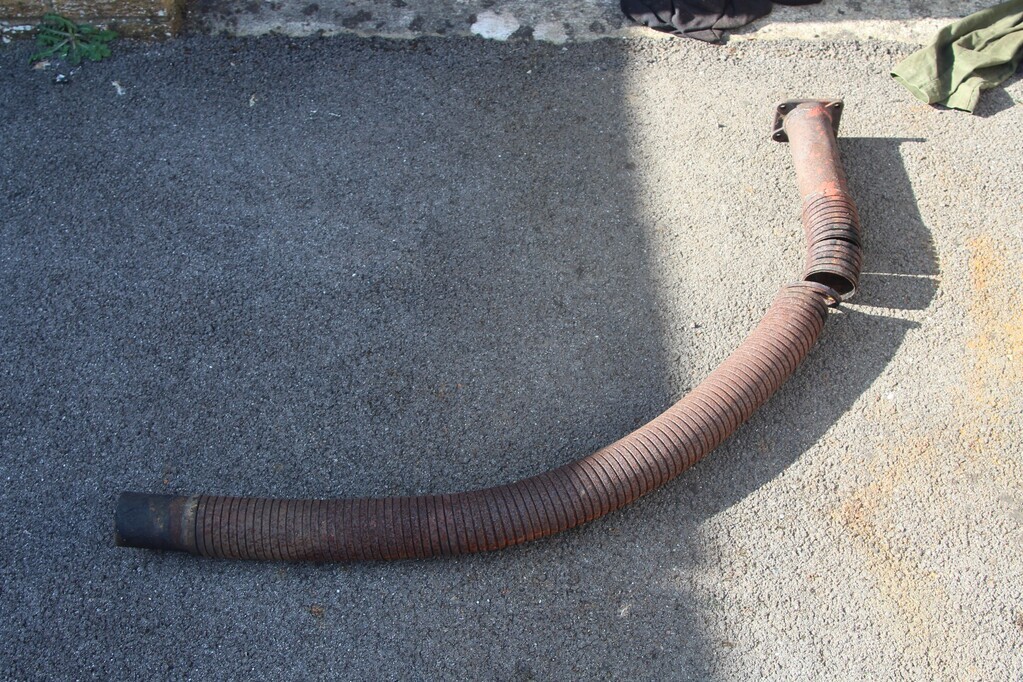 After: 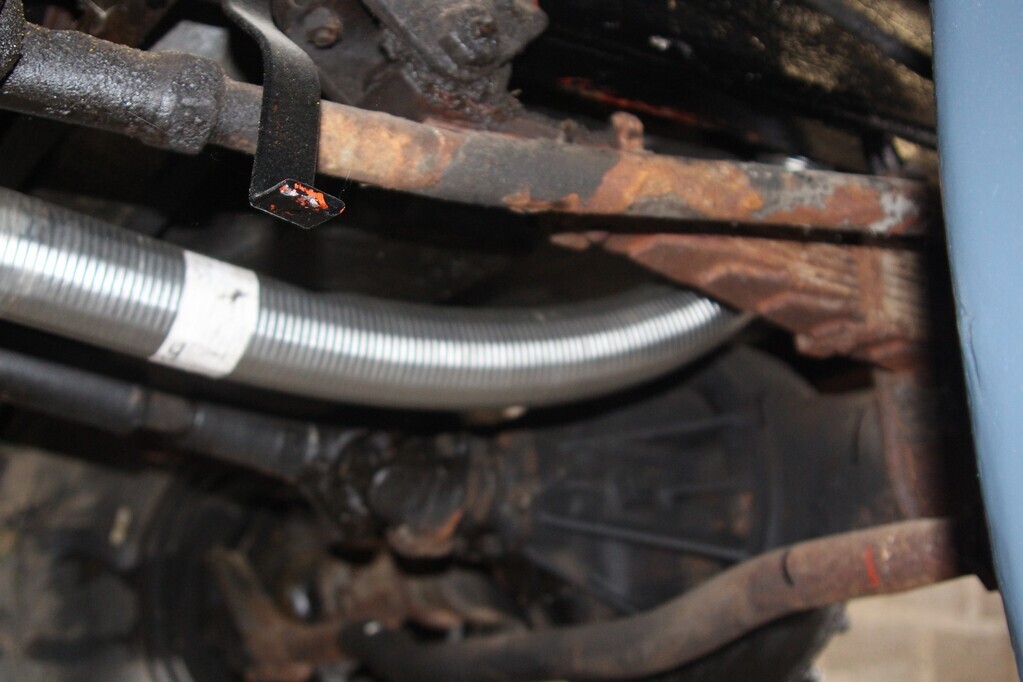 Now back to the bodywork. The side panels have folded over edges, some held together with rivets. These all had to be opened up as the dip gets in to the gaps and rusts them. Usual plan of clean it all up, rust treat, prime and then top coat. You can see in some of the photos the surface pitting that we have left in place. It's not a shiny show vehicle and they were never finished to that high a standard originally. 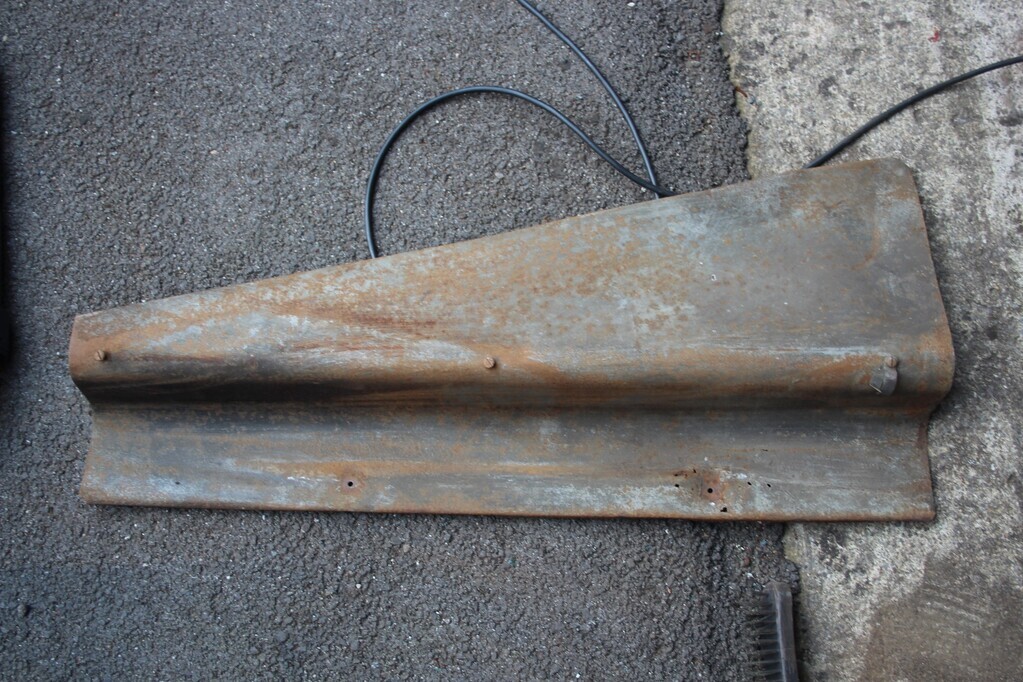 This is a filler panel that goes between the side panel and the chassis rail. 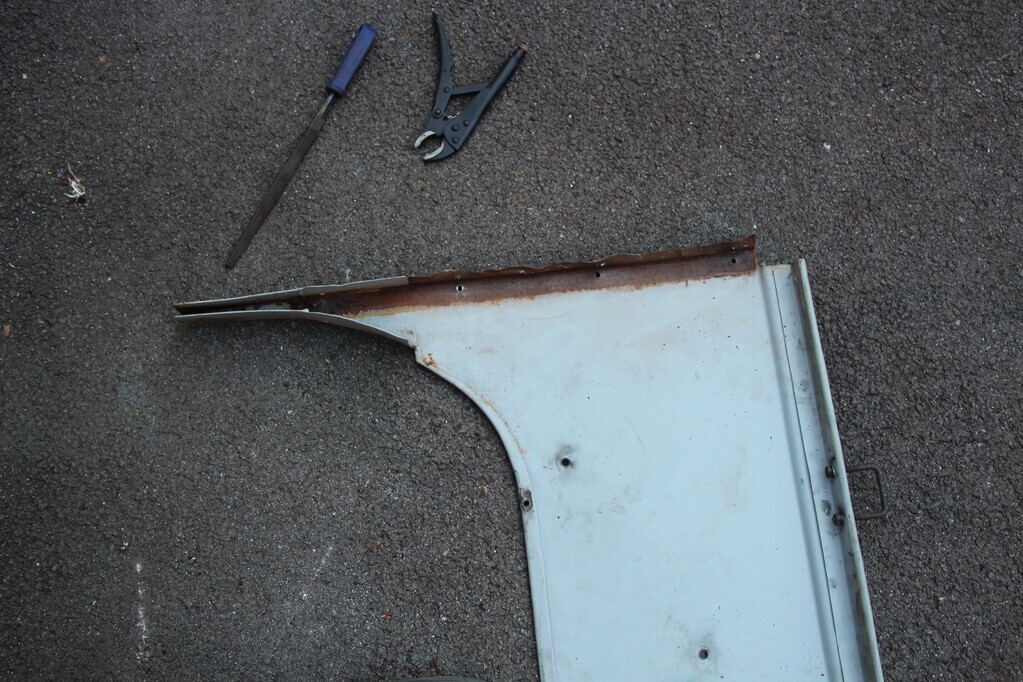 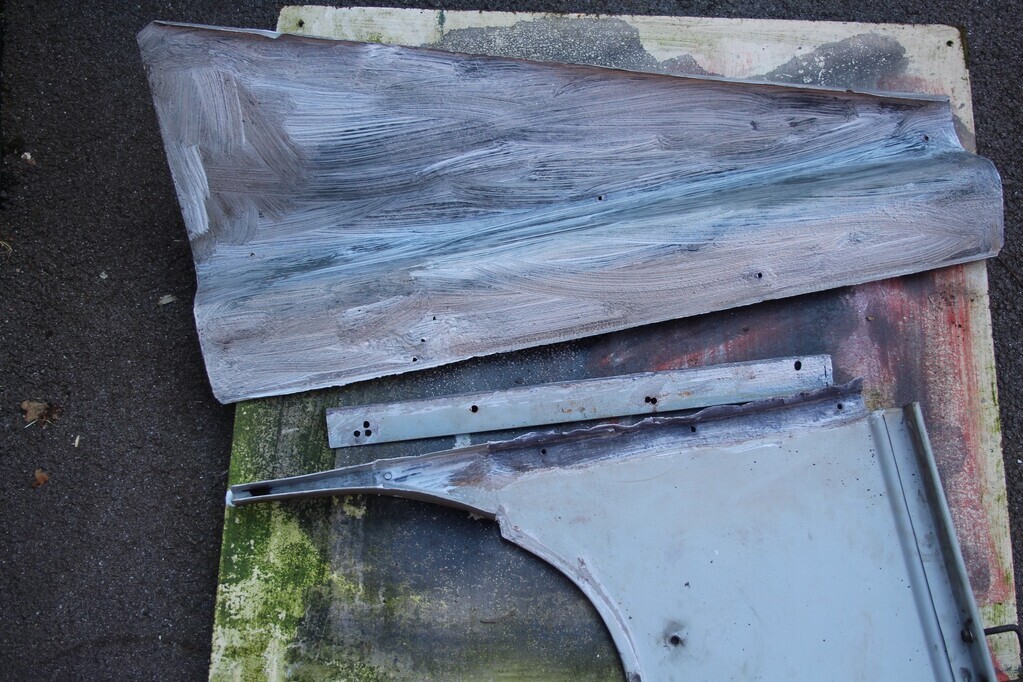 The odd piece of angle sits between the front edge of the wing and the tread plate, connecting the two together. These are replacements that I made up a couple of years after I go her as the olds ones were rotted out. 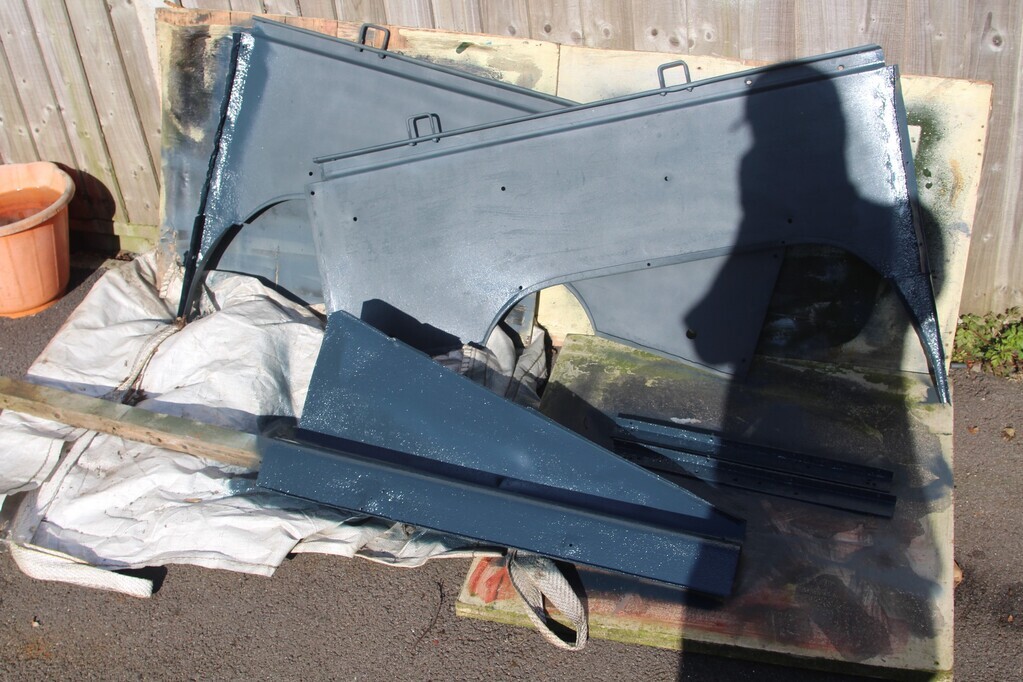 Topcoated in the areas that needed to be folded back over to maximise the protection. 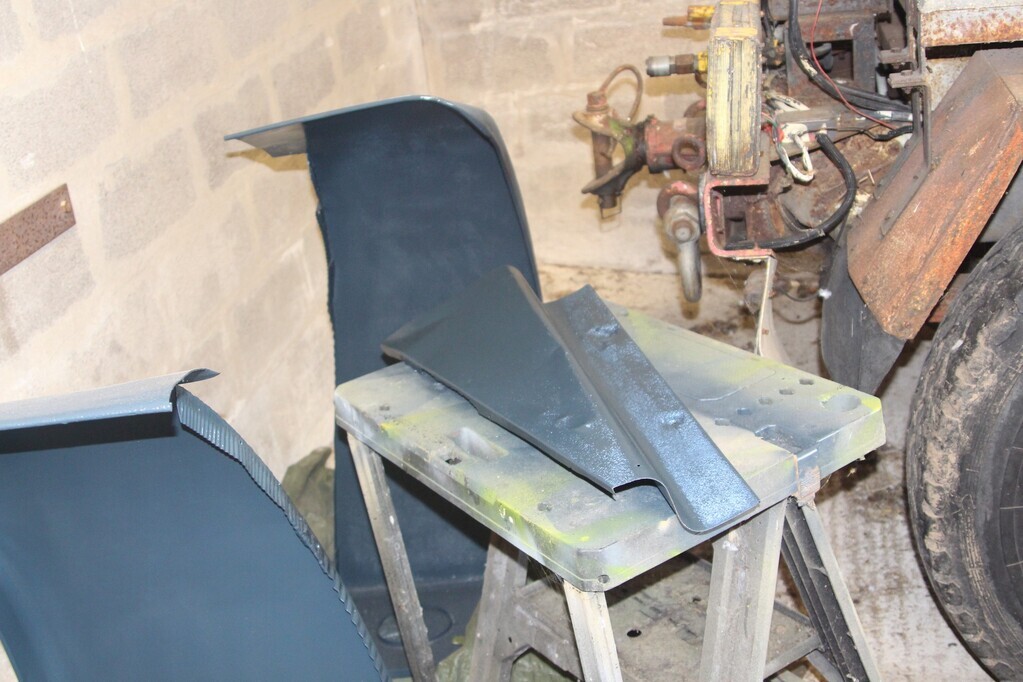 You can see here the inner edge of the wings. Relatively rough and ready finish with all of the folds. This is probably the main reason it then has a rubber trim to go between the wing and the side panel. 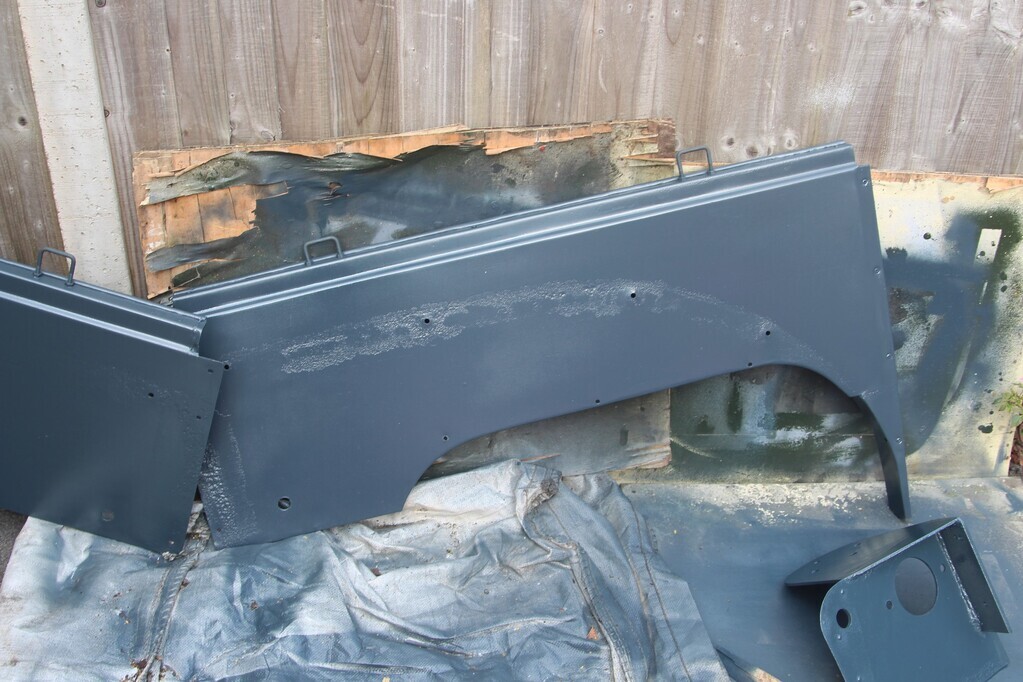 Inner panels and also the mounting bracket for the air filter housing. 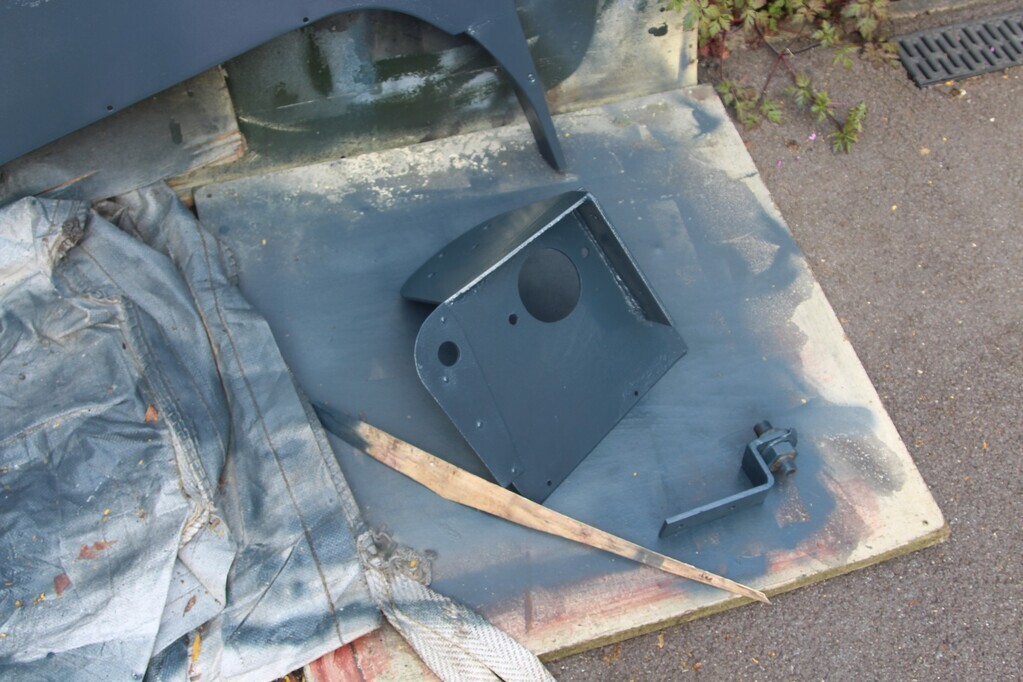 Mounting bracket for the air filter housing and the passenger side bracket for the front air take off. |
| |
Mine: 1938 Scammell Pioneer R100, 1944 Scammell Pioneer SV2/S, 1959 Kraz 255b tractor unit, 1960 Unipower Industrial ballast tractor, 1960 88 Landrover Series 2 SWB, 1983 110 Landrover CSW
Look after:
1935 Scammell Rigid 6, 1951 Scammell Scarab, 1961 Landrover Prototype, 1985 Landrover 110
|
|
raumer
Part of things
 
Posts: 138 
|
|
Dec 30, 2022 15:40:29 GMT
|
Next job on the list were the wings. Big and awkward things but at least there was plenty of space in the barn to leave them out and being able to get the whole way round them. Again it was the usual pattern of primer then top coat. Trying to be patient and doing multiple light passes. 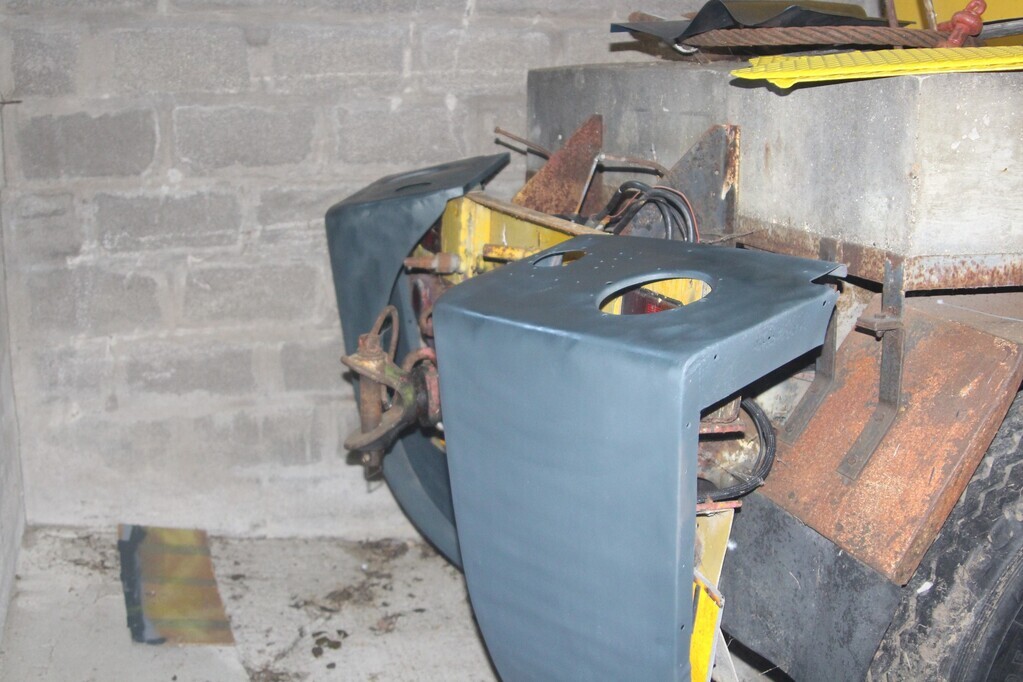 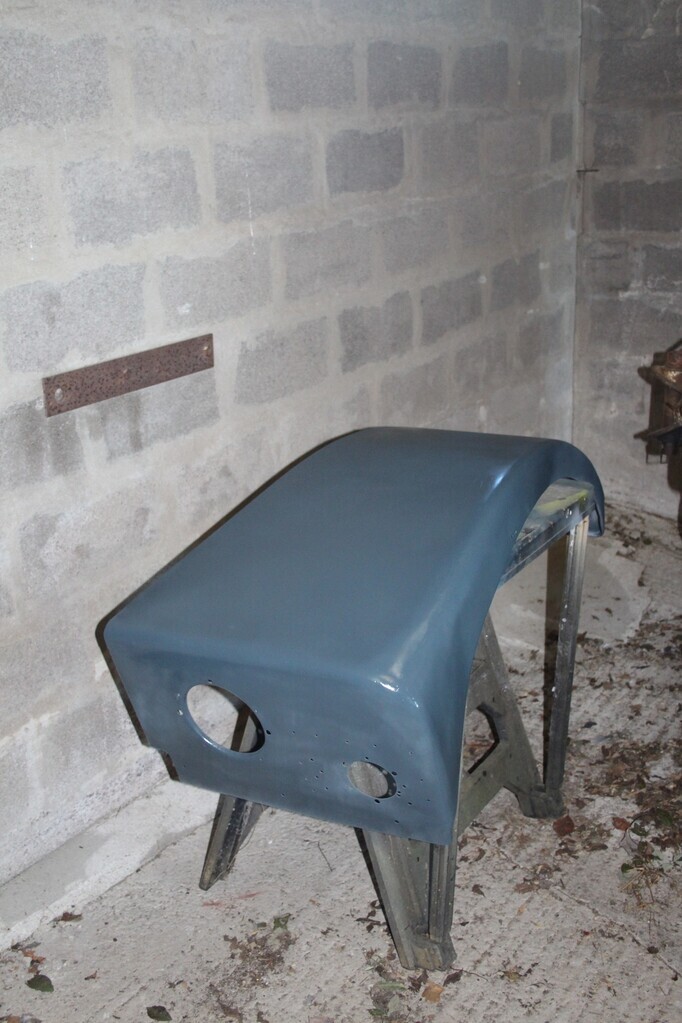 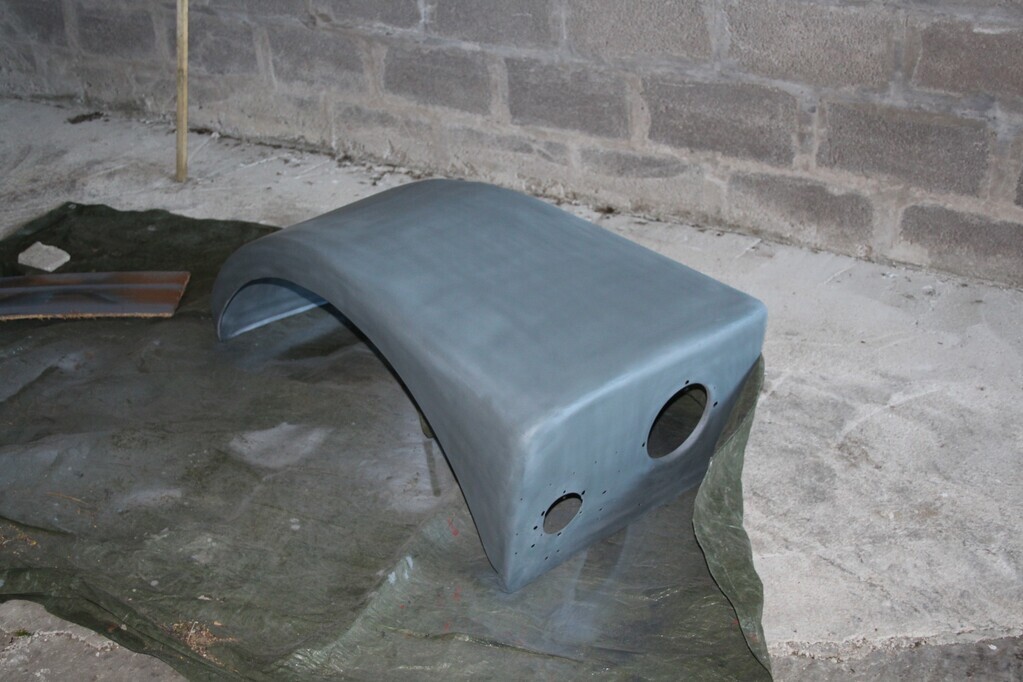 Added advantage of being able to use the vehicle itself to hang the wings off of. The fun bit that I don't have any photos of is sorting out the trim for the wings. Did this in the comfort of the living room. Using some red paint to mark the holes and then a hole punch tool normally used for leather work for the small holes. And we have a set of punches that you hammer through for the holes the tool couldn't do. Can thoroughly recommend getting a set of the punches, very useful for this type of thing as well as making your own gaskets. At this point we were a few weeks away from the first show of the year. Only about 3 miles away but would still help to have the Unipower in one piece. So time to start fitting the wings. 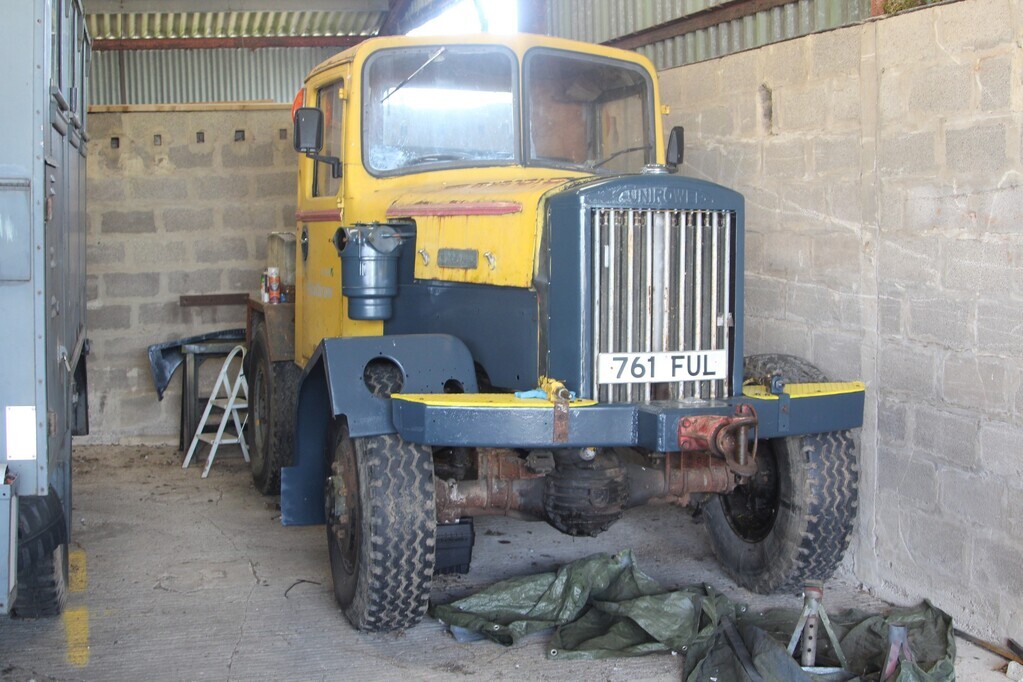 At which point everything came to a grind halt. I had put a tarp over the engine to give it a bit of protection whilst we got on with the bodywork. This turned out to be a mistake. I was lining up the wing when I heard some movement. A glance under the tarp showed bit of a problem. 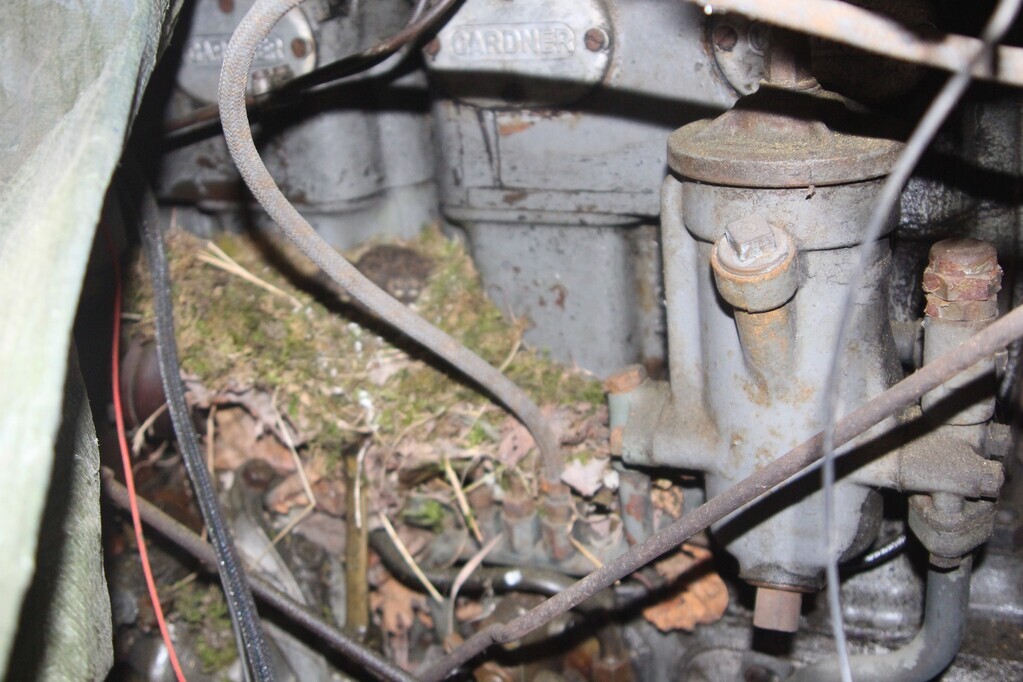 One birds nest with three or four baby birds. Looking around I could spy mum or dad up in the rafters keeping an eye on me. With hindsight the nest must have been there whilst I was fitting the inner wing and parts. I'd just never needed to move the tarp so had missed it. Time to put it all on hold and head home. Only job we could do was to order in the remaining bolts we needed. And hope the birds had fledged before the show! |
| |
Mine: 1938 Scammell Pioneer R100, 1944 Scammell Pioneer SV2/S, 1959 Kraz 255b tractor unit, 1960 Unipower Industrial ballast tractor, 1960 88 Landrover Series 2 SWB, 1983 110 Landrover CSW
Look after:
1935 Scammell Rigid 6, 1951 Scammell Scarab, 1961 Landrover Prototype, 1985 Landrover 110
|
|
|
|
|
Dec 30, 2022 16:58:22 GMT
|
Sorry to barge in on Kraz But here is my old 255b former pontoon bridge layer. I imported from Finland Unfortunately sold to someone in Devon area no idea where it is now Only 1400 Km’s on from new back when I sold it 2008  |
| |
|
|
raumer
Part of things
 
Posts: 138 
|
|
Dec 30, 2022 17:49:12 GMT
|
|
Nice, did you road register it? And where abouts in the country did you have it? I remember seeing a couple at shows so may well have seen it.
Will check with my brother if he has come across your one. I'm sure I've seen one like this with a flat bed fitted to it.
My brother tries to keep track of all of the ones in the UK.
|
| |
Mine: 1938 Scammell Pioneer R100, 1944 Scammell Pioneer SV2/S, 1959 Kraz 255b tractor unit, 1960 Unipower Industrial ballast tractor, 1960 88 Landrover Series 2 SWB, 1983 110 Landrover CSW
Look after:
1935 Scammell Rigid 6, 1951 Scammell Scarab, 1961 Landrover Prototype, 1985 Landrover 110
|
|
|
|
|
|
|
|
UK Registered, was in north Dorset
|
| |
|
|
raumer
Part of things
 
Posts: 138 
|
|
|
|
|
Can you remember what the reg no. was?
|
| |
Mine: 1938 Scammell Pioneer R100, 1944 Scammell Pioneer SV2/S, 1959 Kraz 255b tractor unit, 1960 Unipower Industrial ballast tractor, 1960 88 Landrover Series 2 SWB, 1983 110 Landrover CSW
Look after:
1935 Scammell Rigid 6, 1951 Scammell Scarab, 1961 Landrover Prototype, 1985 Landrover 110
|
|
|
|
|
Dec 31, 2022 11:10:20 GMT
|
|
No idea I no it was pre letter reg as I got it reg as 1958
|
| |
|
|
Rich
Club Retro Rides Member
Posts: 6,338  Club RR Member Number: 160
Member is Online
|
|
Dec 31, 2022 14:08:54 GMT
|
No idea I no it was pre letter reg as I got it reg as 1958 Naughty  |
| |
|
|
|
|


 Ax GTi Turbo


