|
|
|
|
|
Are you talking about rolling and tipping or something else? Won't be rolling, it's a motorcycle so no areas flat enough to consider rolling. I'll either brush or spray depending in what works best and what items I'm painting. Bigger ones brushed, smaller ones sprayed. Depressingly, as nice as that is, the finish isn't quite as nice as I'd want to achieve. Reaffirms how hard this will probably be  |
| |
Last Edit: Nov 5, 2020 21:58:54 GMT by VW
|
|
|
|
|
|
|
|
|
This is a pretty decent example 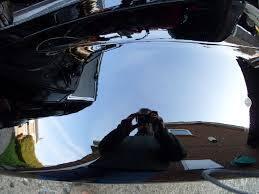 |
| |
|
|
|
|
|
|
|
|
You should be able to get a superb finish on a motorcycle using pro aerosols the finish is much better than the run of the mill ones.
|
| |
|
|
vitessetony
Club Retro Rides Member
Posts: 1,055
Club RR Member Number: 114
|
Coach enamelvitessetony
@vitessetony
Club Retro Rides Member 114
|
|
|
This is a pretty decent example That looks amazing, to get a finish like that with a brush probably takes lots of practice at a guess, sending lots of luck your way  |
| |
|
|
|
|
|
|
|
You should be able to get a superb finish on a motorcycle using pro aerosols the finish is much better than the run of the mill ones. I have a compressor and spray gun. I could do it in celly, I'm confident with celly, but alot of parts will be awkward to polish. I could spray non iso 2k, but hear alot of bad reviews. I could use normal 2k but I don't want to die (close neighbours won't like it either, they had the hump when I painted my kitchen in celly!) I could spray the enamel, my main concern with enamel is trying time, Both with dust and how long I can keep the workshop warm. I don't mind the paint taking months to set properly hard, I'm in no rush to reassemble. I've found a supplier of non iso 2k aerosols that seem good, might try that as the cost is no more than buying the paint, hardener and thinners really and at least I know it's mixed right. Heard so many stories of it not setting though. No paint system seems like a clear winner. Coach enamel has the advantage that I've always been curious about it and hopefully will give the look a 1950s motorcycle should have rather than a glass like lacquered 2k finish. It's basically down to coach enamel or non iso 2k at the moment. |
| |
|
|
Dez
Club Retro Rides Member
And I won't sit down. And I won't shut up. And most of all I will not grow up.
Posts: 11,712
Club RR Member Number: 34
|
Coach enamelDez
@dez
Club Retro Rides Member 34
|
|
|
|
I have zero pictures because it was 20 years ago, but me and my grandad did my first bsa bantam in gloss black coach enamel.
Did it by brush in a 16’x8’ breeze block workshop with a curse word roof, no flooring and a massive window. Just shoved a calor gas fire in there in the middle and hung everything around it. Cranked it up beforehand to get things warm, including stick the tin of paint on top of it 😂
The finish was amazing, a light polish by hand and it was super shiny, got loads of comments about how expensive the paintjob must have been!
The only post application work we needed to do was to get rid of dust nibs due to the amazing conditions we applied it in. If you keep it warm it self levels really well and hides blemishes well.
It take a little more patience than other paints and spraying as application, but we don’t have any of the gear at the time so we made it work.
|
| |
|
|
|
|
|
|
|
I have zero pictures because it was 20 years ago, but me and my grandad did my first bsa bantam in gloss black coach enamel. Did it by brush in a 16’x8’ breeze block workshop with a curse word roof, no flooring and a massive window. Just shoved a calor gas fire in there in the middle and hung everything around it. Cranked it up beforehand to get things warm, including stick the tin of paint on top of it 😂 The finish was amazing, a light polish by hand and it was super shiny, got loads of comments about how expensive the paintjob must have been! The only post application work we needed to do was to get rid of dust nibs due to the amazing conditions we applied it in. If you keep it warm it self levels really well and hides blemishes well. It take a little more patience than other paints and spraying as application, but we don’t have any of the gear at the time so we made it work. Great story  I've read in a few places warming the paint helps it flow. |
| |
|
|
|
|
|
|
|
|
There is no need to be afraid of coach painting , I am 75 and done it fit years , I am talking the best coach enamel was Polygloose ,I have literally done hundreds of buses for loads of companies , obviously the prep is very essential, the dust aftertaken out of every nook and cranny, masking up is essential to give you a clear run on the panels , primer undercoats have got better over the years , when applying at this stage thin the paint get the paint into a foam roller , brush the panel in as quickly as you can , then use the roller to liighly apply a stipple to the panel, leave it dry for 24 hours , flat off with wet and dry next day wash all the panels and dry all areas, use a. Tack rag to make sure there are no bits left on the panels , spray some water around the vehicle on the floor , make sure you have paper overalls on and if you have long hair cover it. Split the paint up into two pots ,thin the paint a little and try it on a small area to see if it suite you , with the one pot of paint go around all your shuts making sure to wipe excess pant off the panels it is. Better to leave the shuts dry over night ,next. Day start with the other pot of paint doing the roof first then the bonett and the boot lid follow through with the rest of the panels leave to dry and flat off and apply a second coat a day later , now as a coach painter whe I started there was no such thing as foam rollers and it was frowned upon to use them bat as time went on new comers to the trade quickly found it gave a better finish quicker than jusy using a mop, the true is paint your vehicle on a day we’re you need not heat you garage anything blowing heat around also blows dust , take it. From me you will be pleased with the finish ,do not hurry the job , I now paint rally cars for people who are crashing them all the time , Hollyboy sixty years in the trade
|
| |
|
|
|
|
|
|
|
There is no need to be afraid of coach painting , I am 75 and done it fit years , I am talking the best coach enamel was Polygloose ,I have literally done hundreds of buses for loads of companies , obviously the prep is very essential, the dust aftertaken out of every nook and cranny, masking up is essential to give you a clear run on the panels , primer undercoats have got better over the years , when applying at this stage thin the paint get the paint into a foam roller , brush the panel in as quickly as you can , then use the roller to liighly apply a stipple to the panel, leave it dry for 24 hours , flat off with wet and dry next day wash all the panels and dry all areas, use a. Tack rag to make sure there are no bits left on the panels , spray some water around the vehicle on the floor , make sure you have paper overalls on and if you have long hair cover it. Split the paint up into two pots ,thin the paint a little and try it on a small area to see if it suite you , with the one pot of paint go around all your shuts making sure to wipe excess pant off the panels it is. Better to leave the shuts dry over night ,next. Day start with the other pot of paint doing the roof first then the bonett and the boot lid follow through with the rest of the panels leave to dry and flat off and apply a second coat a day later , now as a coach painter whe I started there was no such thing as foam rollers and it was frowned upon to use them bat as time went on new comers to the trade quickly found it gave a better finish quicker than jusy using a mop, the true is paint your vehicle on a day we’re you need not heat you garage anything blowing heat around also blows dust , take it. From me you will be pleased with the finish ,do not hurry the job , I now paint rally cars for people who are crashing them all the time , Hollyboy sixty years in the trade It took some learning, but I brushed it, and it came out well. Thinning didn't work at all. Adding oil based brushing additive helped alot though. Temperatures are important! Main issue, as you say, is dust. Mainly as it stays tacky for so long. It doesn't polish up as well as the initial shine is either so best to avoid the need for a final flat and polish. The result 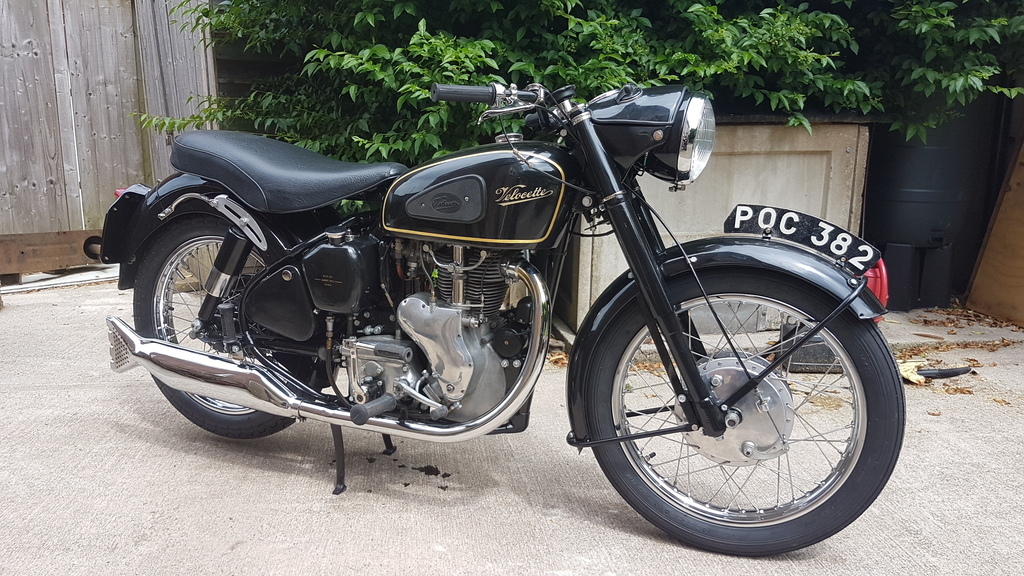 |
| |
|
|


