Paul
Posted a lot
  
Posts: 1,994
Member is Online
|
|
Feb 28, 2021 16:56:56 GMT
|
10 mile test drive to and from the shops completed and the sump plug (which had a leak) and the oil cooler (which had a bigger leak) look to be bone dry - result! There's a weep from the gearbox and further forward at the power steering, but I choose to focus on the positives  Next up, back to wrapping the outside. Started bright (well, grey) and early pulling off the old wrap. Persisted for all of about 17 seconds before getting the heat gun out - which made pulling the old wrap a cinch. Even left some paint on the cab.  Just a little bit of rust...hardly notice it. Even evidence of a partial respray in mismatched hammerite thrown on with a brush. The bits that fall off all help with weight saving 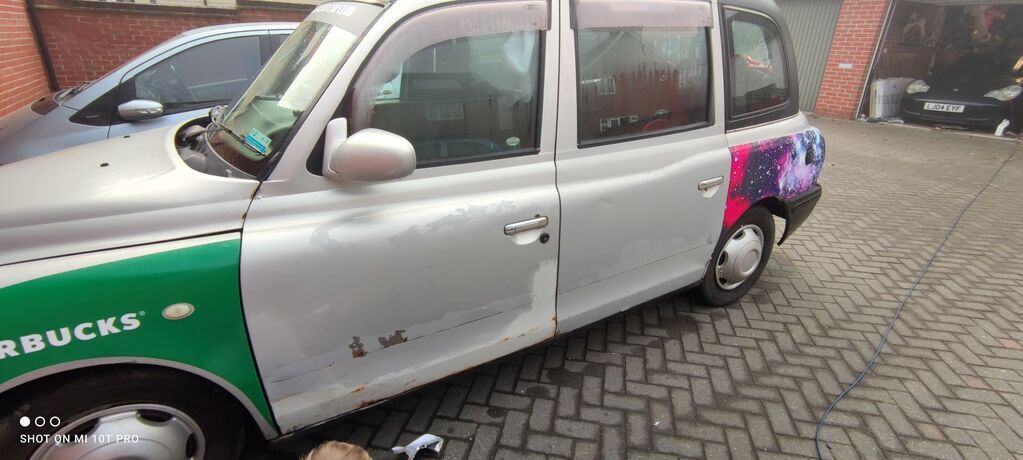 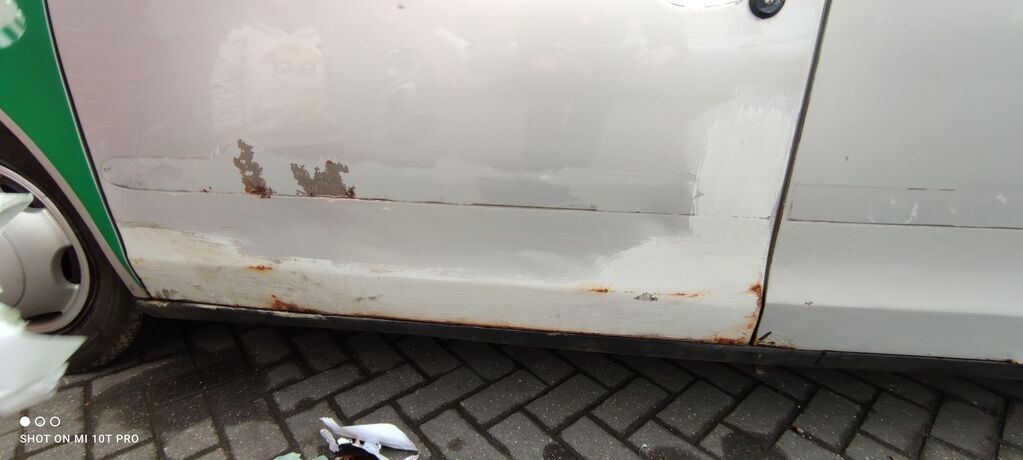 They're in a pretty sorry state - good new is that donors are cheap. Bad news is that most of them are black. So took a break, had a cup of tea, swapped the summer wheels onto the BMW daily and the 911, and when the sun came out and the surface had dried off we were ready to roll 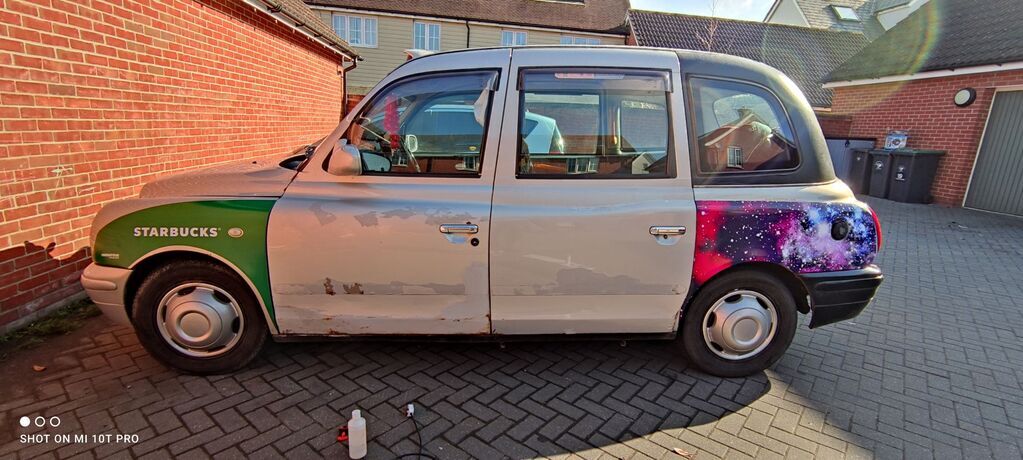 My initial plan was to tackled both doors in one go to keep the pattern matched, but this quickly proved impractical with the size of the vinyl - so it was sliced into two very quickly.  Thus the painstaking process of sticking, squeegeeing, removing, realigning, heating, more squeegee action etc. etc. commenced. My observations were There's clearly a sweet spot for the right amount of heat and stretching on the vinyl. It's quite malleable but easily damaged with too much of either. Vinyl won't hide any blemishes or dents - they'll all show up. The paint on this is atrocious and on inspection you can still see (and feel) the blemishes. Vinyl is great on flat, straight surfaces but as soon as we hit a curve it began to crease...so back to point 1 and finding the balance of heat & stretch. Sometimes it worked, sometimes it didn't. I promised to keep to the lines of the old wrap to keep things simple - no way I could do the whole thing. Removing fitting like lights and locks is infinitely preferable to cutting around them. I will never do this professionally. More than once I was ready to tear the whole thing off and start over, but the good Mrs. Paul stopped me and helped repair the damage I had caused. So about 3 hours later the result looked like this...  What's not immediately obvious in the picture is that this does (just about) follow the lines of the old vinyl and the doors which have some odd curves in them. For an amateur playing with dirt cheap vinyl I'm pretty happy with that. Don't ask about the other side yet... |
| |
Last Edit: Feb 28, 2021 16:59:04 GMT by Paul
|
|
|
|
Paul
Posted a lot
  
Posts: 1,994
Member is Online
|
|
|
|
Today's mini update - I had a spare hour after work and before collecting lil' Paul. Now usually when people tell me "oh it's been well looked after, regularly serviced, just don't have the paperwork" I take it with a block of salt. Pulled the air filter because I had one as part of a service kit (and I forgot to do it when doing the oil filter) Well I'll. Be. Dipped 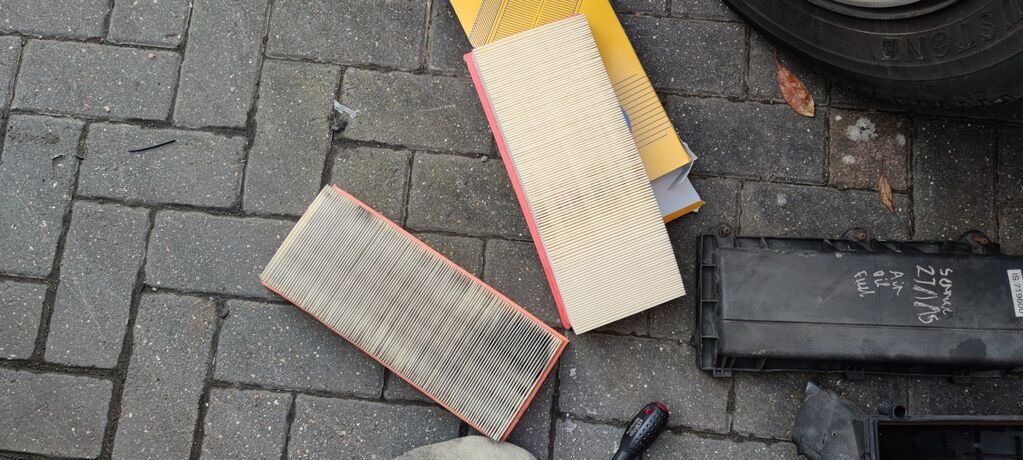 Remarkably clean for a new purchase in my experience. Perhaps it has been well looked after? This may need some attention though - I'm getting a little drip of PAS fluid under the car...tried to identify from where. This pipe is damp and I think it's dropping onto the steering column and down onto the ground. Pretty sure that's a high pressure pipe from the PAS pump - although the PAS fluid level is slightly above max and not moving. Sorely tempted to just leave it for the minute. Besides I've got much more ridiculous jobs to do... Christ. 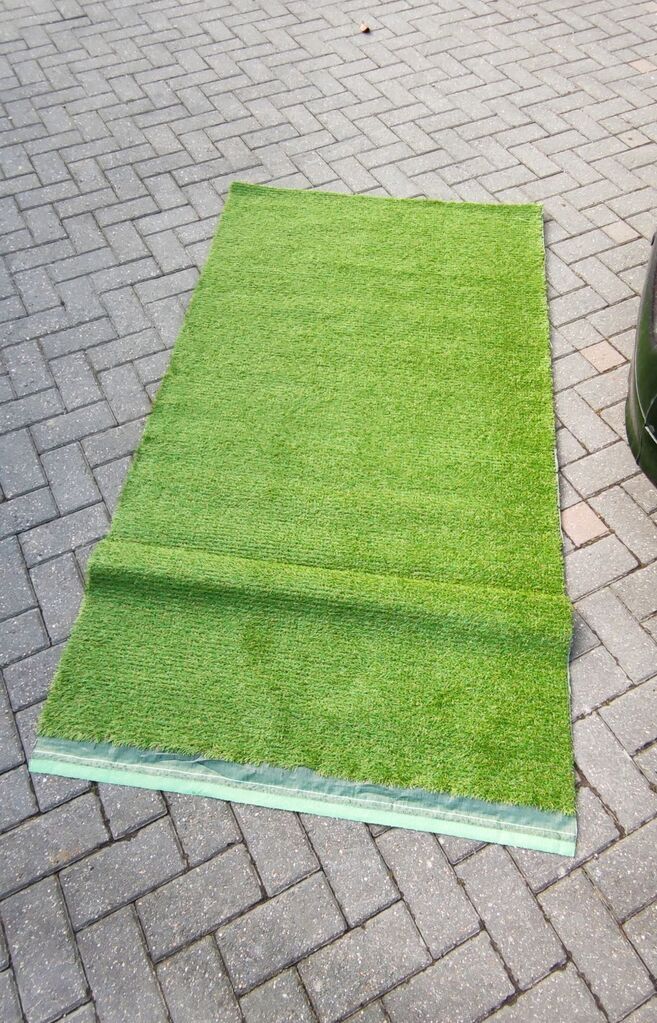 So out with the old 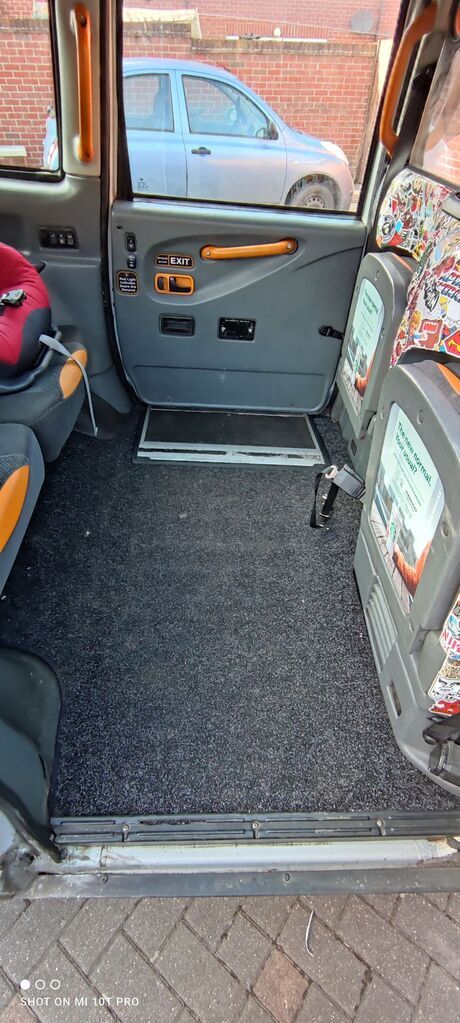 More bluergh 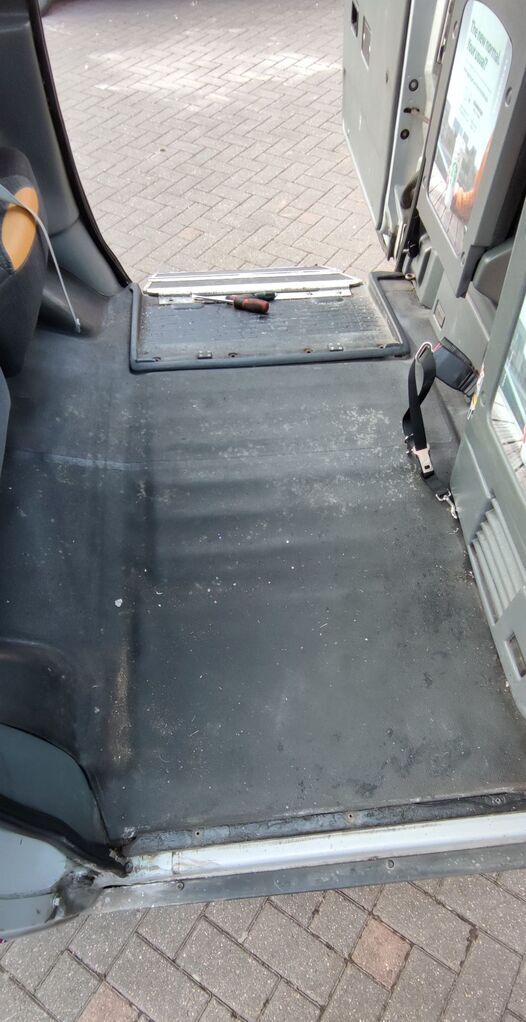 Now I know that nobody will see this when it's covered but I just couldn't bring myself to leave it that grubby. So out with the Dyson, Autobrite Fab and Autoglym Vinyl and Rubber care. 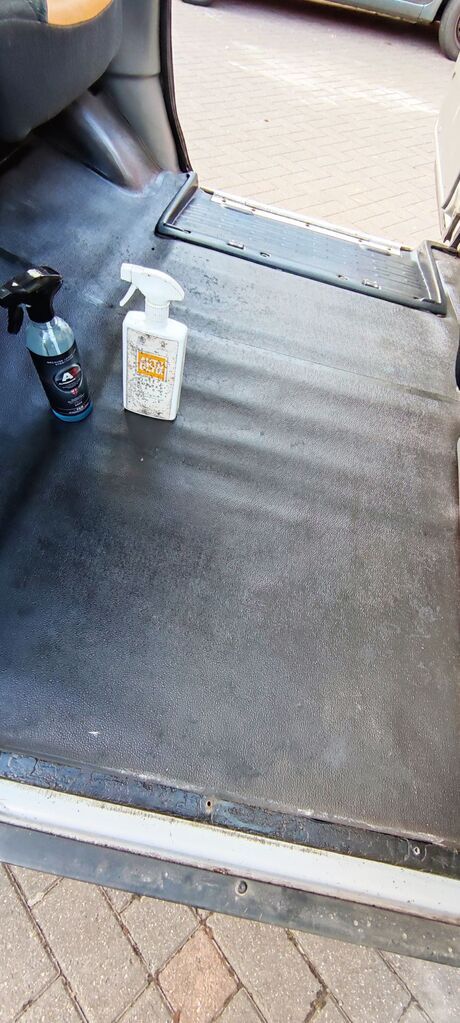 Cut to fit 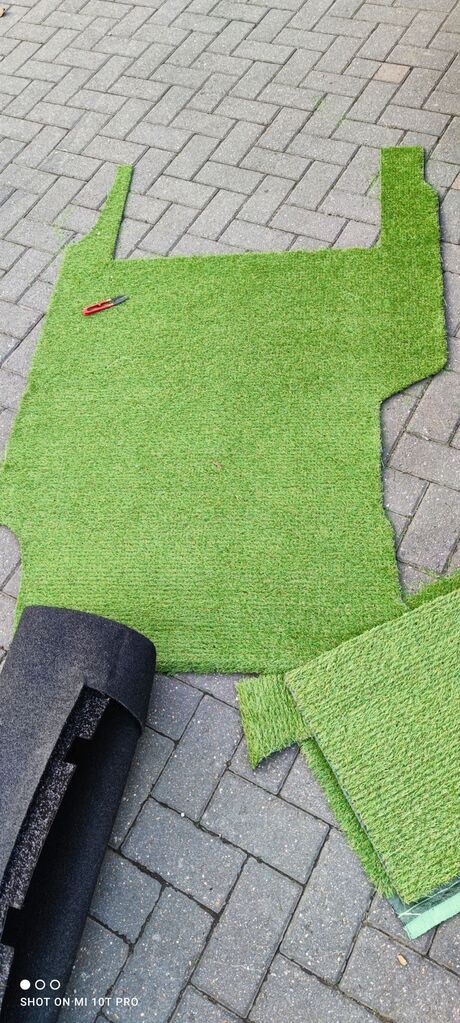 Ridiculous 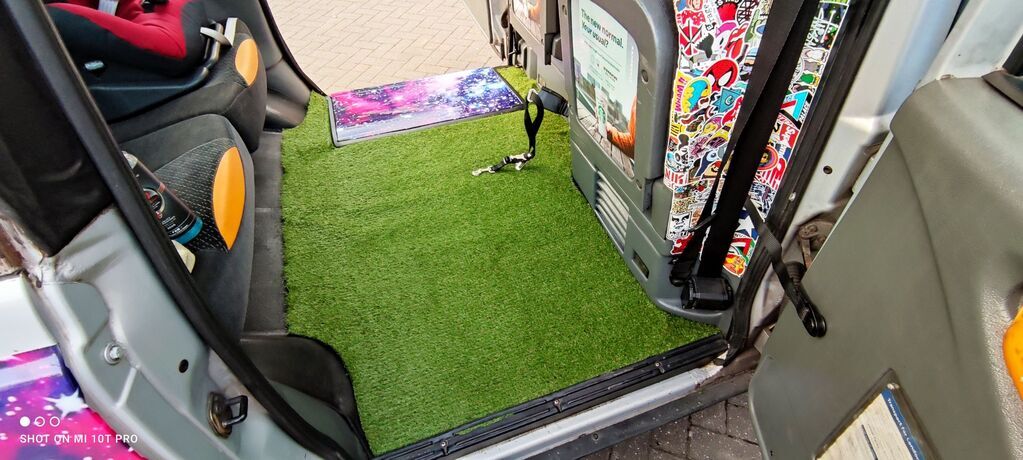 Left over vinyl offcut from yesterday put to good use. I pondered covering the ramp altogether but it's part of what makes this taxi a taxi, so I've tarted it up instead. Unlikely to get much use but it's still perfectly workable and ready if ever needed.  Yup, that's today's time waste done. I'm back to commuting next week so I've been trying to use that 90 minutes or so to do jobs I wouldn't otherwise get done. For the sake of a £15 cut of fake grass (I had an Amazon voucher) I feel like this adds to the silliness. Might get a beach mat or something as well... |
| |
|
|
Paul
Posted a lot
  
Posts: 1,994
Member is Online
|
|
|
|
It's ridiculous that I spend so much time on the cheap, clunky, leaky and generally unpleasant retro chode in my life and so little time on what's by far the best driver's car I own...so today it was time to put that right and give the 911 a little loving. I've been endeavouring to drive her at least once a week as I've never known a car that didn't like driving as much as this 996. I left her trickle charging but she's barely seen daylight in the last few months and she came out of the garage groaning, complaining, smoking, chugging and misfiring a few weeks ago. A gentle-ish essential trip to Tescos to get her properly warmed up and all her ills went away, leaving her purring like the German kitten I know she is. When I first bought her I was worried I'd bought a nail but a bit of reading would suggest that these 'foibles' are to be expected. Like it or not the engine design is nearly 25 years old, and it just hates not being used - oil leaks through the flat cylinders to create an impressive smoke bomb on startup if left too long, leaving them idling to warm up only makes things worse (and is a HUGE no-no), and they eat coil packs like smarties. I've decided to call it 'character'. For the last few months something has felt a bit off-ish in the suspension...she was a bit floaty and twitchy at speed, and every cat's eye or puddle jerked the steering wheel. I changed from the more worn out OEM winter wheels to my shiny black semi-forged super lightweight race numbers (with new tyres) and it didn't make much difference. Of course the missus thought it was all in my head. Like all good paranoid car owners with too much time and access to Google I was warming up the parts cannon to fire a grand's worth of drop links, coffin arms, tie rods etc. etc. at the car - but then I thought I'd let a specialist have a look first. Cue a trip to TyreSmart in Witham (I've been going there for years) and my suspicions were proven correct. With apologies for the filth on the car. 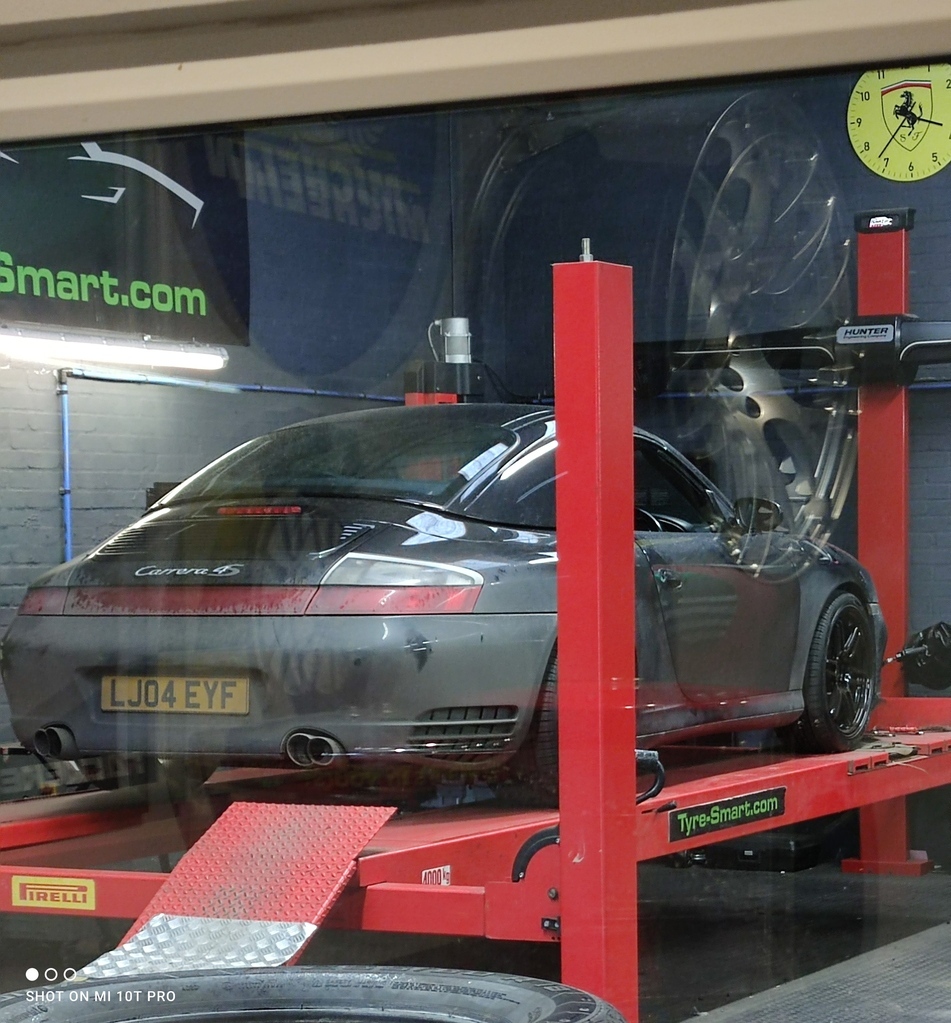 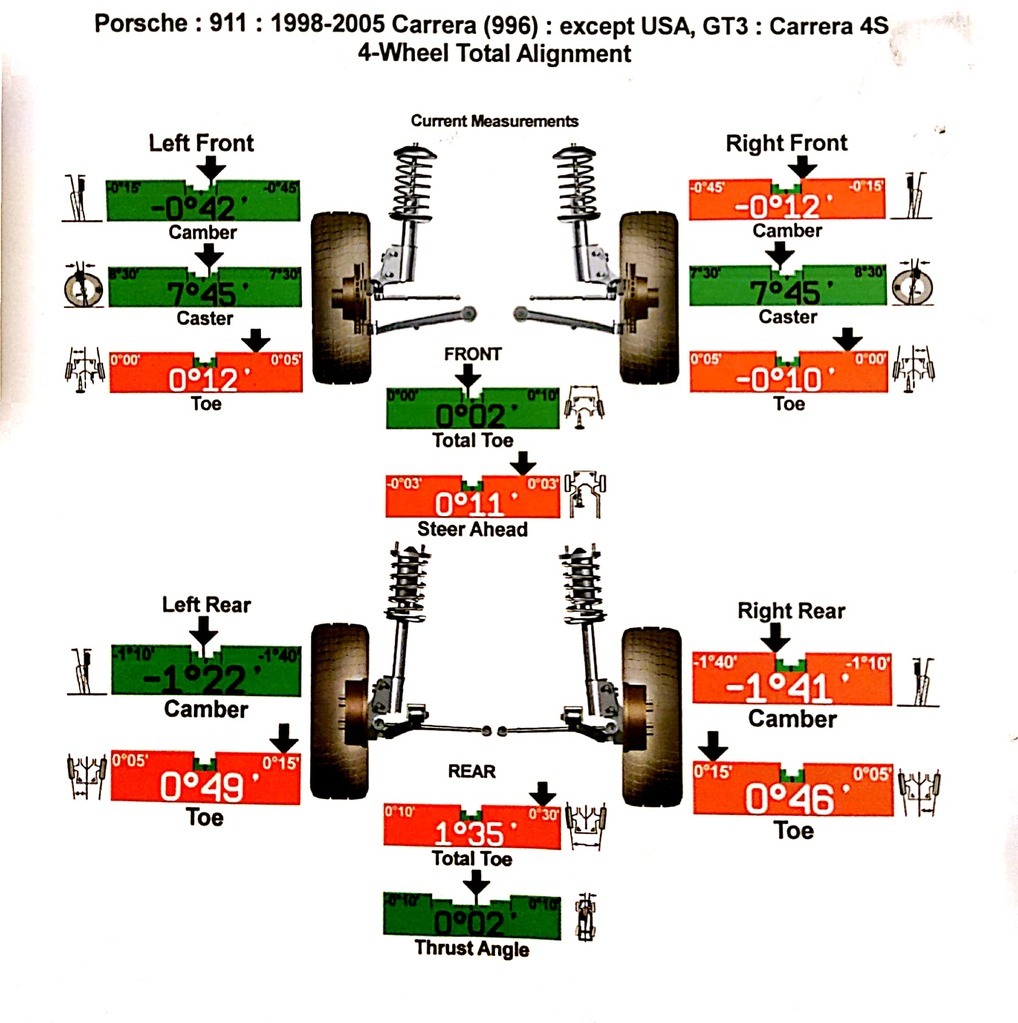 This stuff goes way beyond me, but they correctly identified that the steering wheel was a little off to the left...however his main concern was the toe in on the rear wheels. This perfectly explained the symptoms I was feeling about being skittish in puddles and on uneven surfaces. Then for the fun part - the aluminium frame combined with steel bolts made for some 'interesting' hammering noises, and by his own admission the old girl put up a fight. I'd watched enough YouTube videos of working on Porsche suspension to know I'd rather leave this one to the pros, but after an hour of clunking and banging we had this 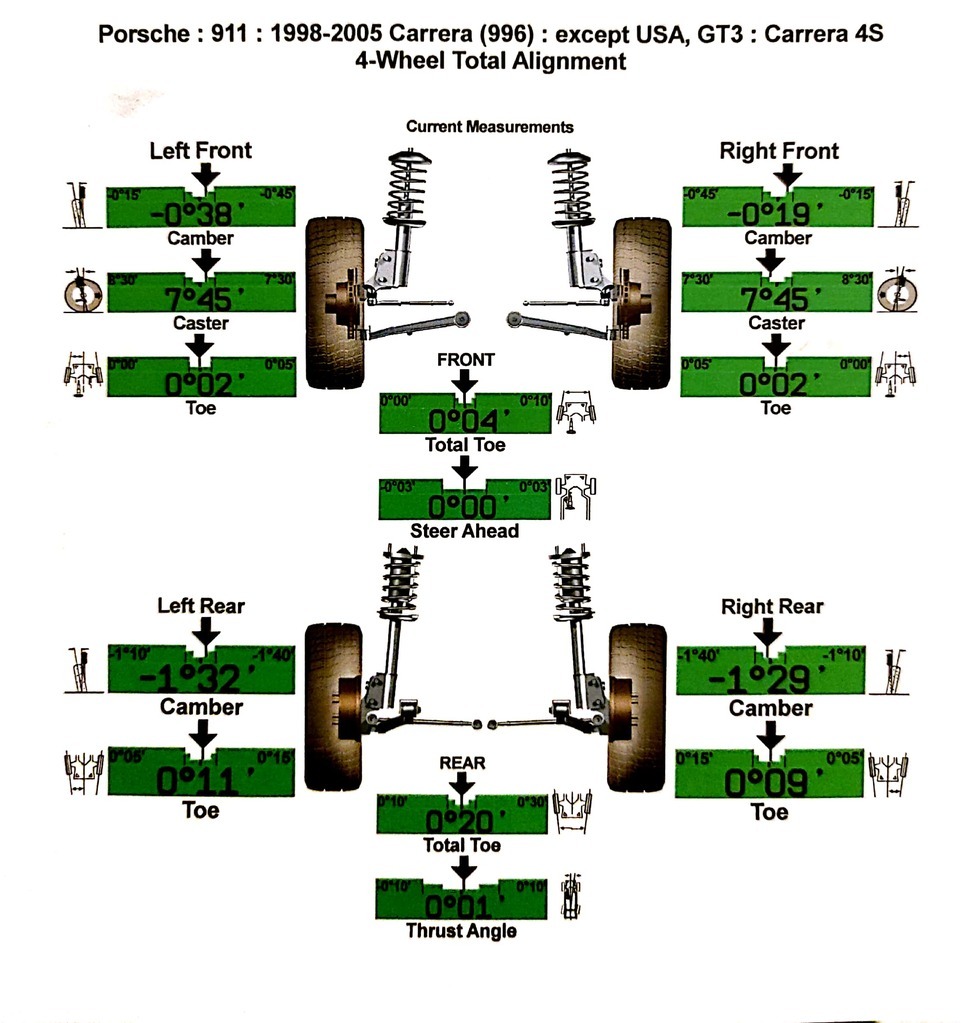 I know enough to know that red is bad, green is good! Now, every time I go here they always tell me 'it'll drive like a new car' afterwards - and frankly every time they are right. He reported a clean bill of health on the suspension parts themselves, and assured me they do hundreds of these as they're very sensitive to alignment issues. The rain was hurtling down on the way home - conditions that would have made me nervous previously - but this felt planted, compliant, well balanced and reassuring. I didn't push it - I'm not an idiot - but for less than £100 my confidence in the old girl is totally restored! |
| |
|
|
Paul
Posted a lot
  
Posts: 1,994
Member is Online
|
|
|
|
Working from home stops tomorrow so it's back to commuting - trying to get every last little job I can done between meetings etc. etc. Really quick fix today on the taxi bonnet hinge which gave up the ghost recently, making opening and closing the bonnet a bit like stirring porridge except with real chunky bits of metal. This arm is supposed to be connected here... 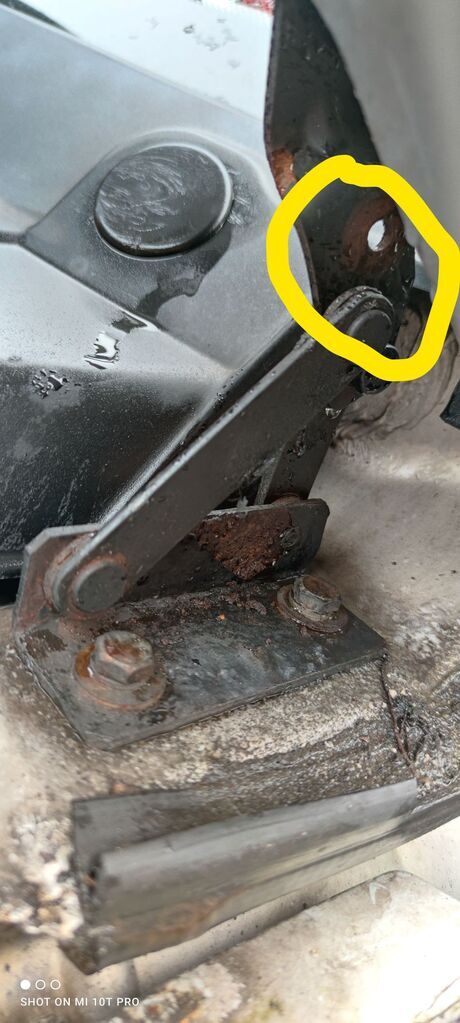 Now, there's probably a way of fixing this and making good on it but, for about £8 a side on the bay, I sourced a replacement 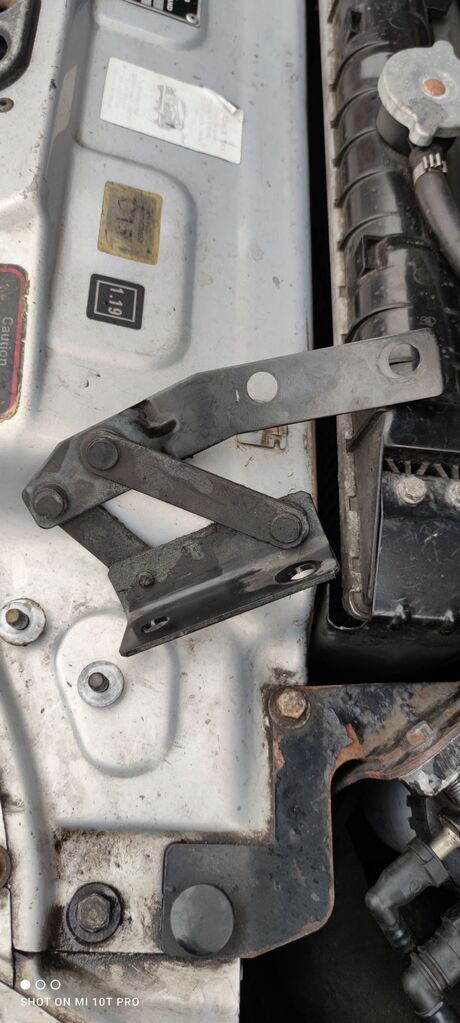 Ah, more speed & less haste Paul. Best make sure you've got the right one in your hand when the bonnet is resting on your head. Idiot (I did buy a pair...I'll keep the other one in the toolbox and will probably change it over on a warmer, drier day. The other side is rusting but nowhere near as badly as this one). 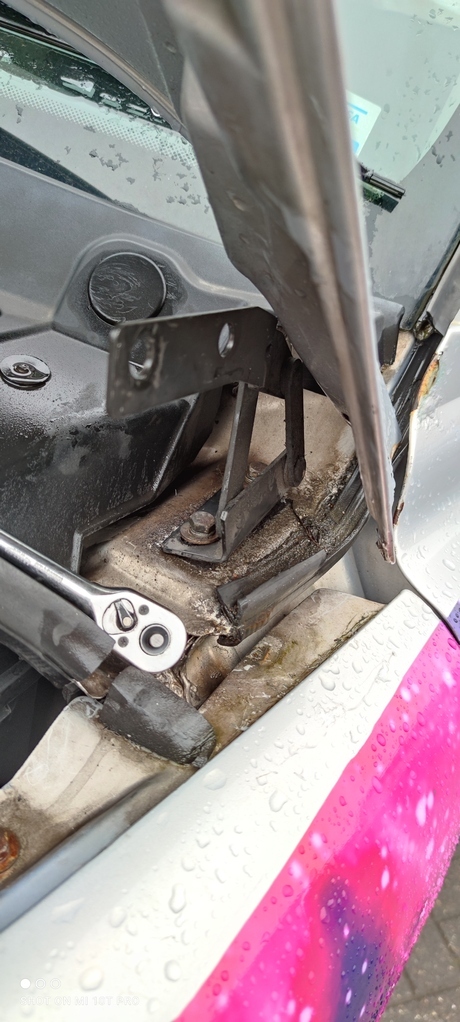 That's better... 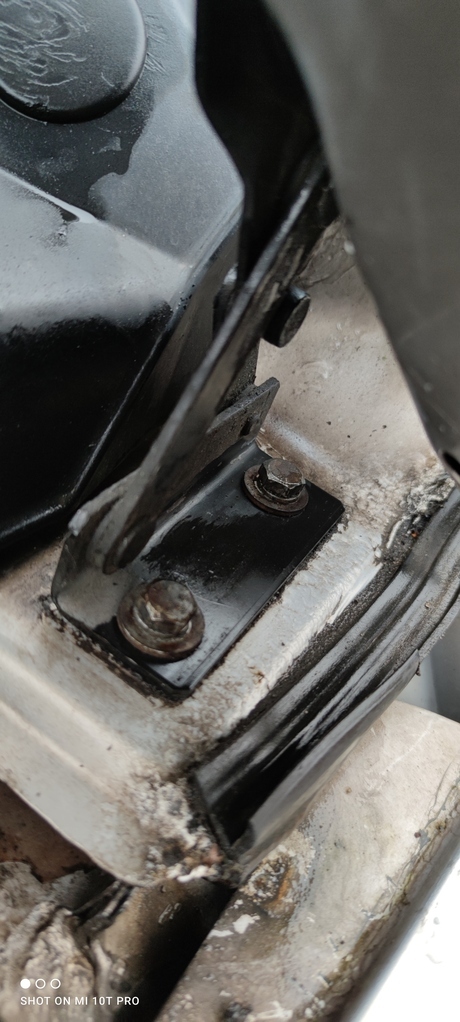 Progress will likely slow now that I'm back to the grindstone - although I'm hoping to finish off the vinyl wrap this weekend and maybe identify exactly the source of the PAS leak and order up some replacement power steering hoses. |
| |
Last Edit: Mar 4, 2021 10:18:07 GMT by Paul
|
|
jamesd1972
Club Retro Rides Member
Posts: 2,920  Club RR Member Number: 40
|
|
|
|
|
Sounds like a right bargain for the suspension geometry, get that money back on proper tyre wear.
Taxi still fun to see, can see that working as a local family / tip run hack.
James
|
| |
|
|
Paul
Posted a lot
  
Posts: 1,994
Member is Online
|
|
|
|
Taxi still fun to see, can see that working as a local family / tip run hack. James Exactly that...she's done a couple of tip runs already clearing up junk from being locked down. When the weather improves and we move out of lockdown she'll be heading out on a few day trips for sure. Got the other side finished up today...vinyl doesn't stick well to rust.  |
| |
|
|
Paul
Posted a lot
  
Posts: 1,994
Member is Online
|
|
Mar 14, 2021 16:17:13 GMT
|
So despite having no time, money or storage I seem to have added to the fleet 😬 I've always lusted after an 850 Volvo. Spacious, boxy, ultra safe...I feel like their curve of uncoolness has bottomed out and now their kudos is rising... Yes it's not a T5R...it's equipped with the 20v 2.0 engine in automatic flavour, cloth interior (one fag burn only), steelies, tow bar and wheel trims for extra giffer points. , tow More importantly it's got a full year's ticket, new cam belt and 107k on the clock, which we all know is nothing on these engines. 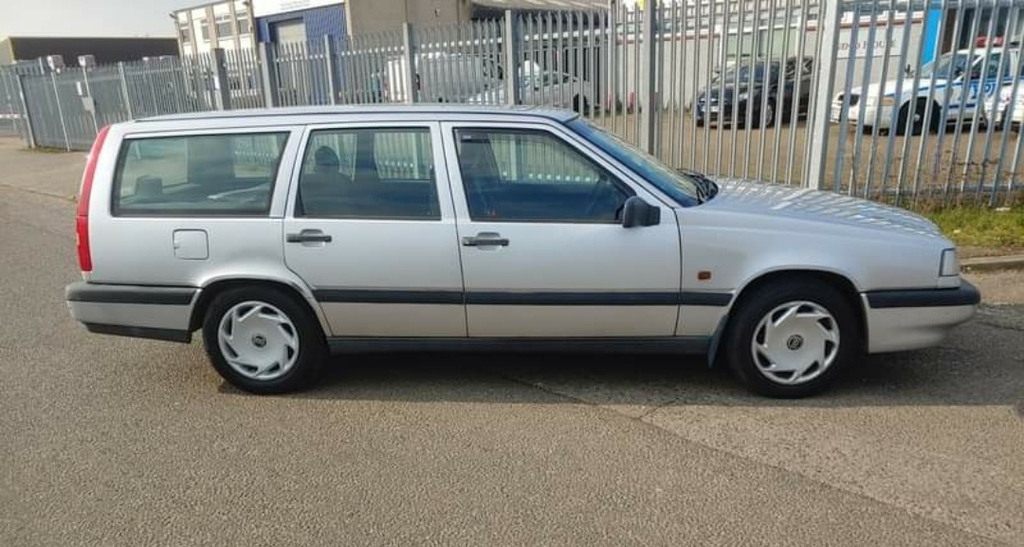 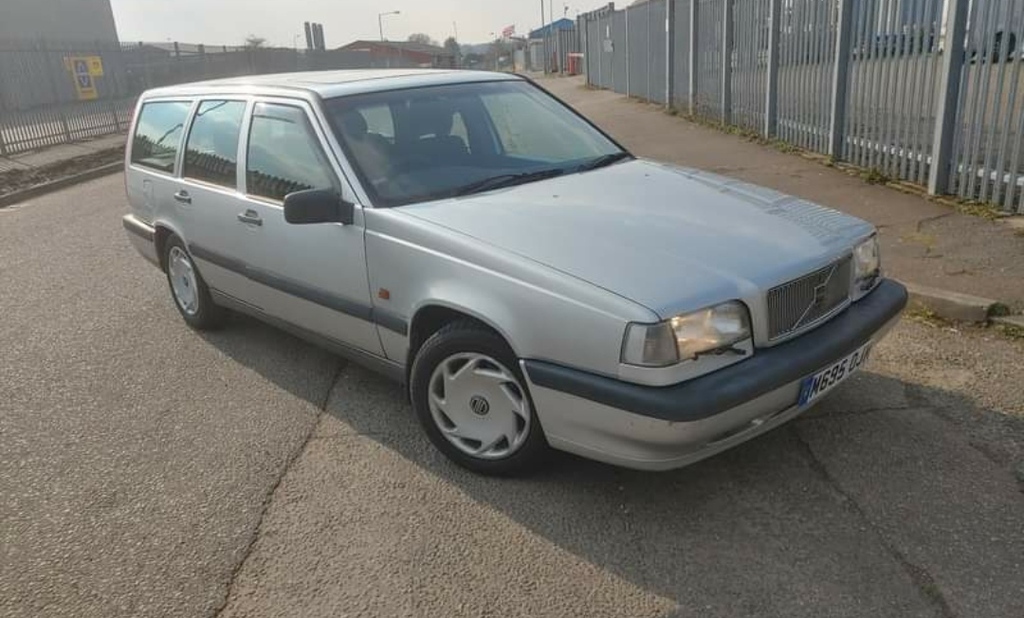 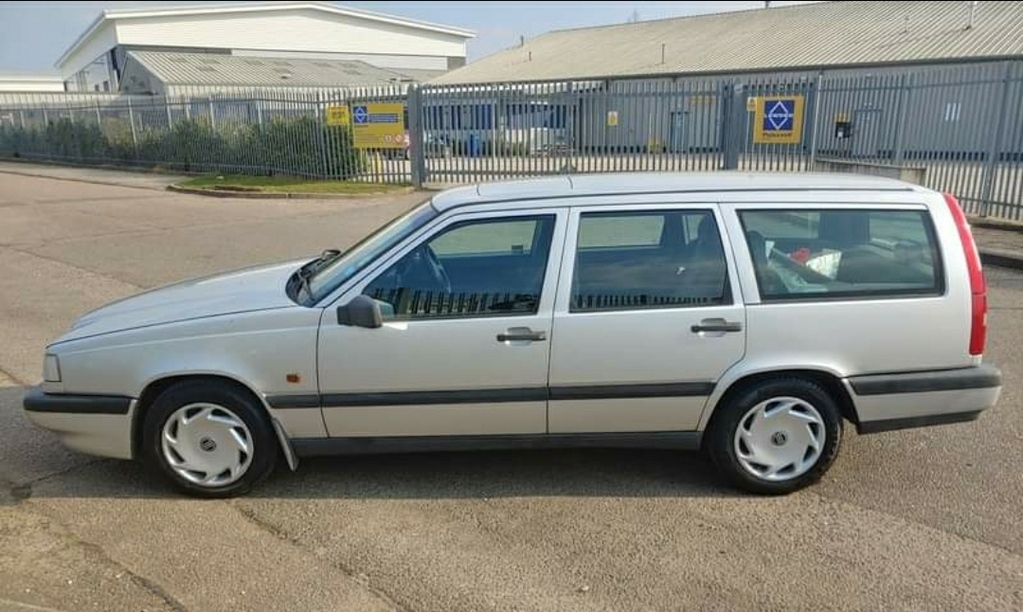 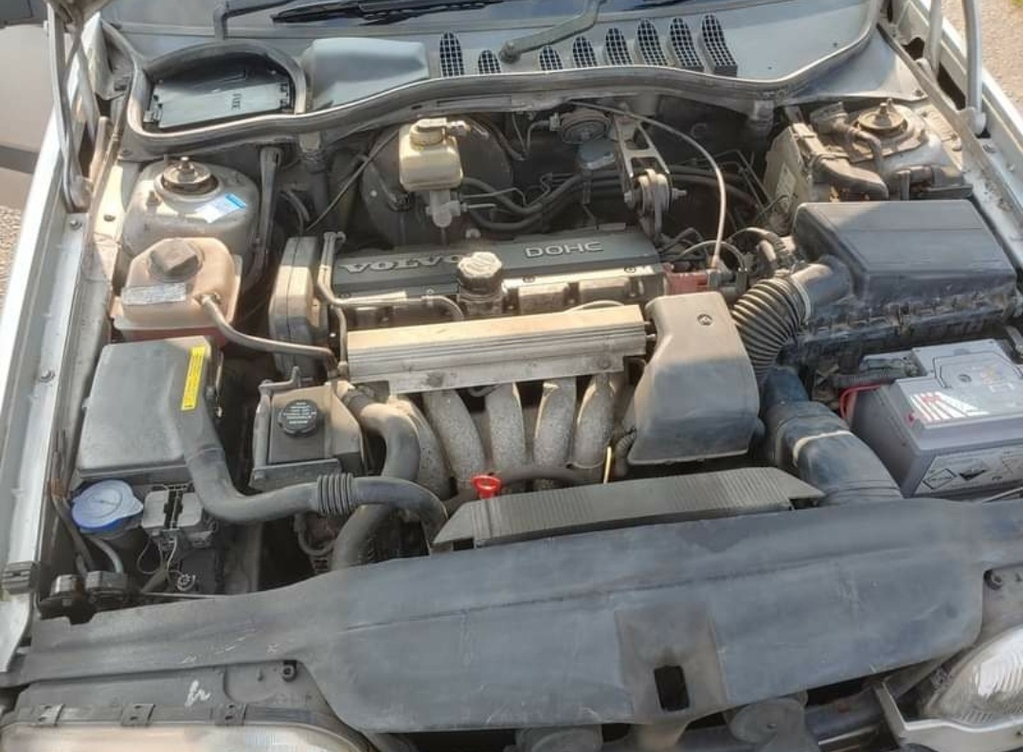 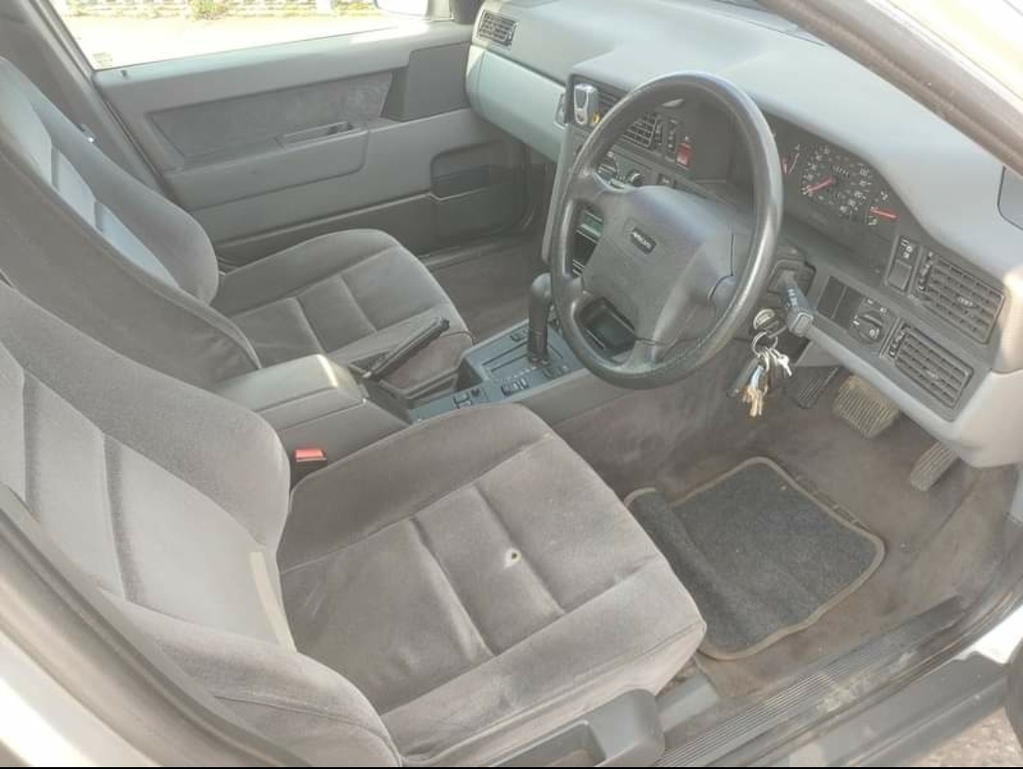 No aircon, no electric sunroof, so less to go wrong in my eyes. All other electrics seem to be working, heated seats are extra toasty, even the original stereo is fine. Plans? Not a lot. Unlike some of my cars I intend to keep this standard. It needs 2 front tyres and the paintwork is nothing to shout about, so I'll be doing with that what I can. More importantly, it looks like this will be the chosen chariot for the Weekender! |
| |
Last Edit: Mar 17, 2021 13:40:34 GMT by Paul
|
|
|
|
|
|
|
|
Will it at least get the stick??
I was offered a V70 2.0 estate last week. I was tempted.....
|
| |
|
|
|
|
|
Mar 16, 2021 15:53:38 GMT
|
|
I love these, I was lucky enough to have had an 850r estate.
One of the best all-rounders and such a capable car, would love another.
As you say 100000 miles is nothing, I've never bought a Volvo with less than a hundred thousand miles.
Good luck with it, it looks pretty tidy, does it have the seven seat option ?
|
| |
|
|
Paul
Posted a lot
  
Posts: 1,994
Member is Online
|
|
Mar 21, 2021 14:13:12 GMT
|
Will it at least get the stick?? 1) I love being part of a community where we know exactly what 'giving it the stick' means  and 2) Never say never, as these things do look amazing with a subtle drop - but it's not on my to do list right now. |
| |
|
|
|
|
Paul
Posted a lot
  
Posts: 1,994
Member is Online
|
|
Mar 21, 2021 14:14:15 GMT
|
I love these, I was lucky enough to have had an 850r estate. One of the best all-rounders and such a capable car, would love another. As you say 100000 miles is nothing, I've never bought a Volvo with less than a hundred thousand miles. Good luck with it, it looks pretty tidy, does it have the seven seat option ? Would have loved an 850r but values of those are only going one way - and they're too rich for my blood. Just 5 seats, which is preferable as I've got the dog to get in the back  |
| |
|
|
Paul
Posted a lot
  
Posts: 1,994
Member is Online
|
|
Mar 21, 2021 14:38:48 GMT
|
Gave the brick (as it shall now be known) a bit of attention today. Here's the before: 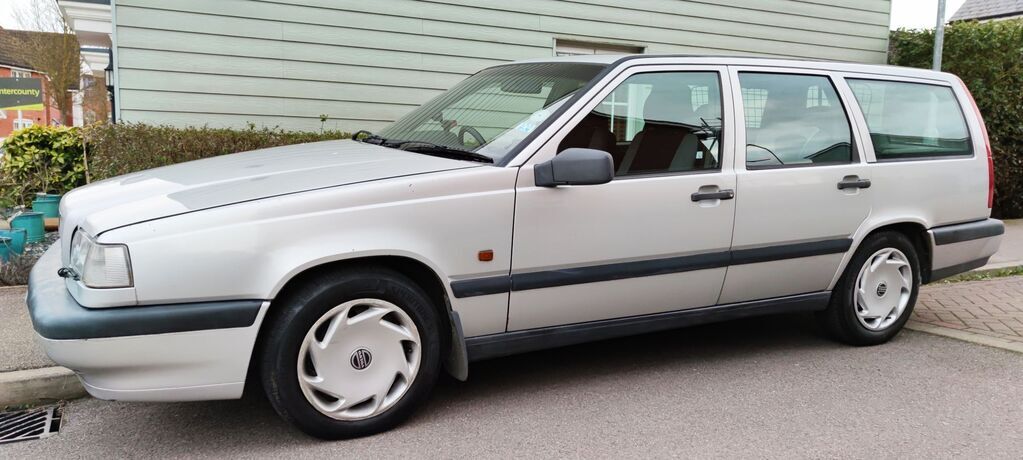 Back looks practically unsat in - also note the new car mats, courtesy of eBay 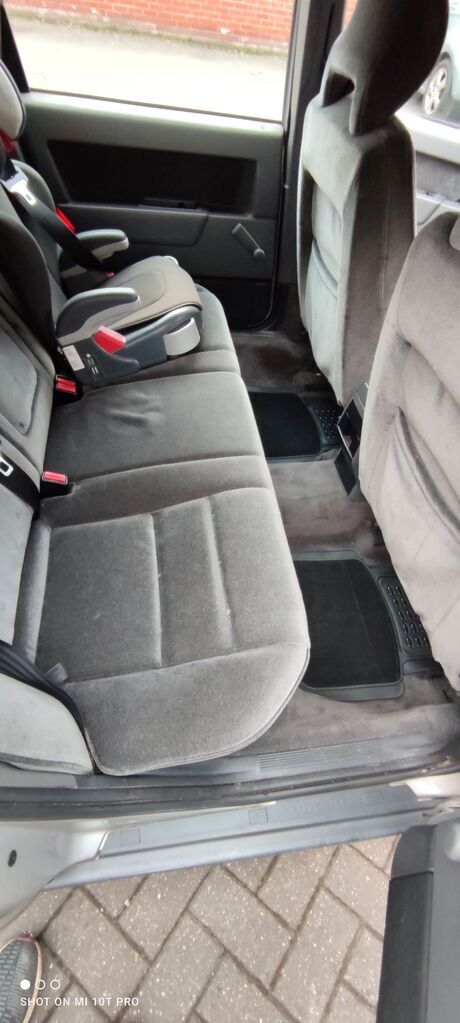 Front has that annoying cigarette burn right through to the springs 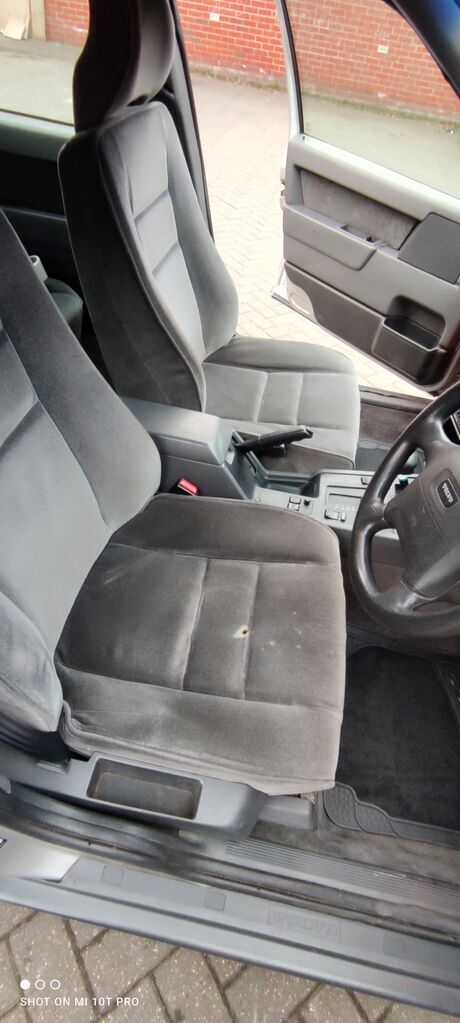 Giffer sticker burned right into the paint 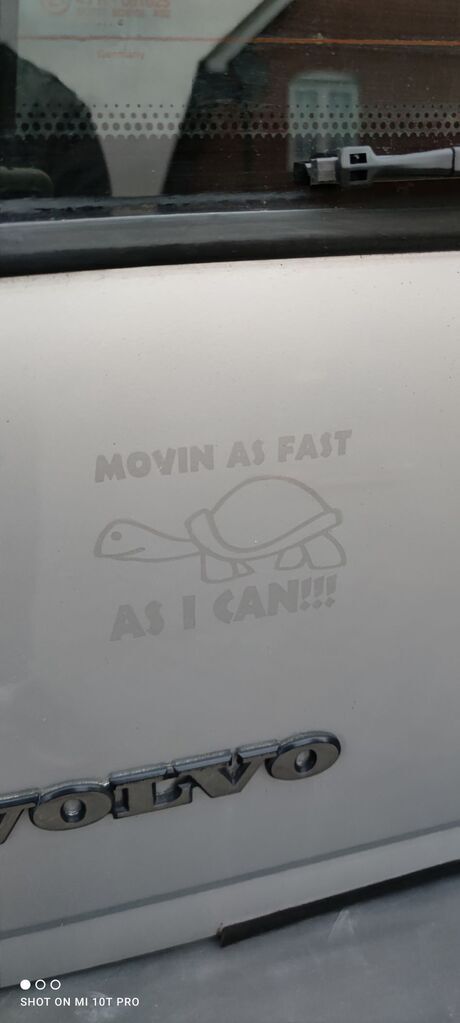 So dragged her round to the back of the house and broke out the snow foam 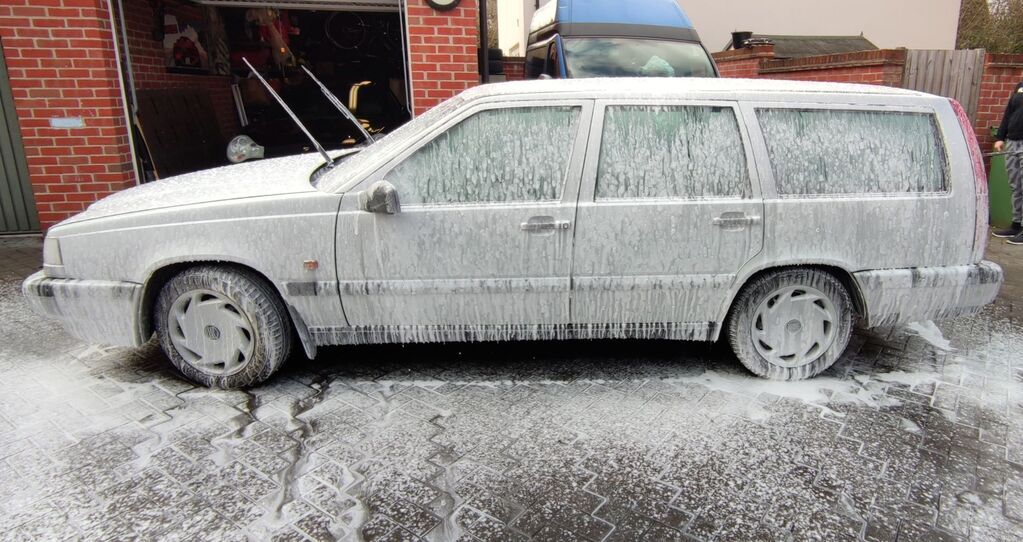 ...and some slave labour... 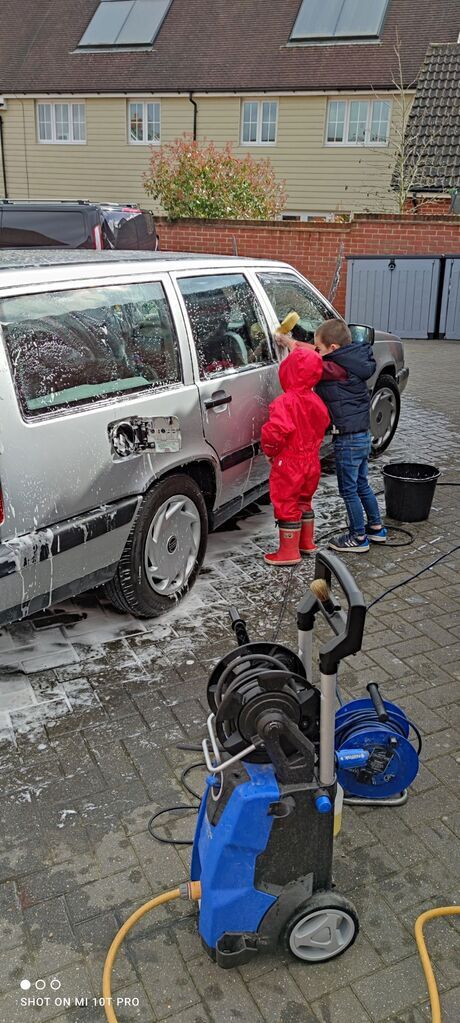 So much ROOM FOR ACTIVITIES! 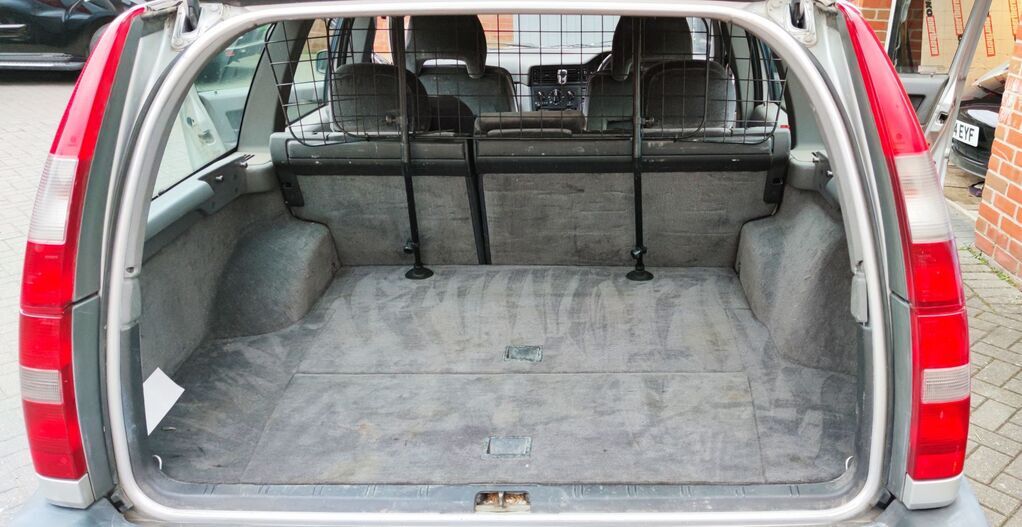 #prancingmoose 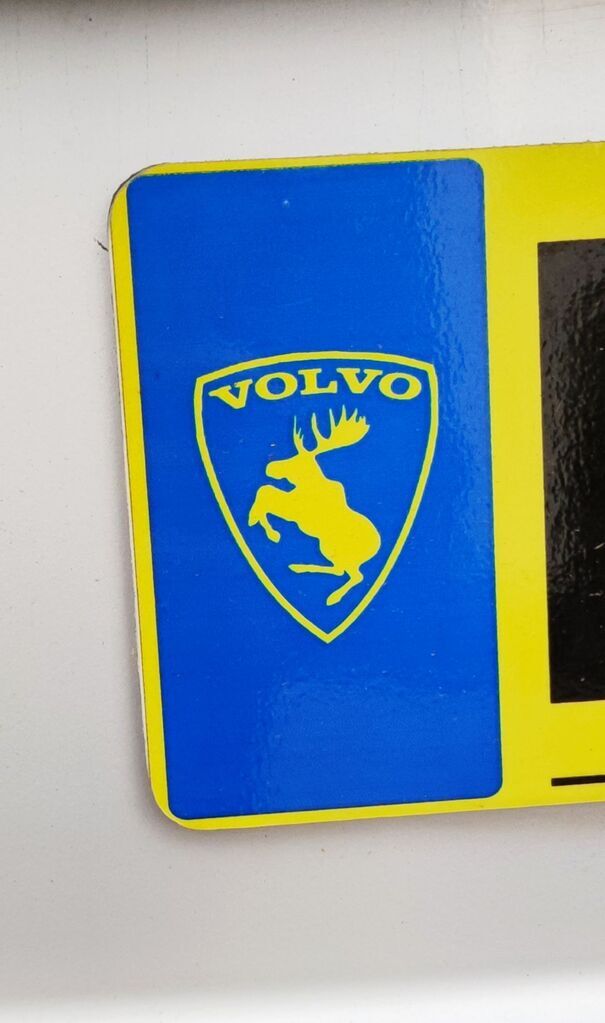 Cleaned the interior with a combination of Autobrite Fab and Autogylm Vinyl and Rubber care. It's a sea of 90s blandness (to which I added a rather incongruous Pioneer HU). Blaupunkt make a very retro-looking double DIN unit which I may well invest in, but this one does have oodles of functionality even if it does look out of place. 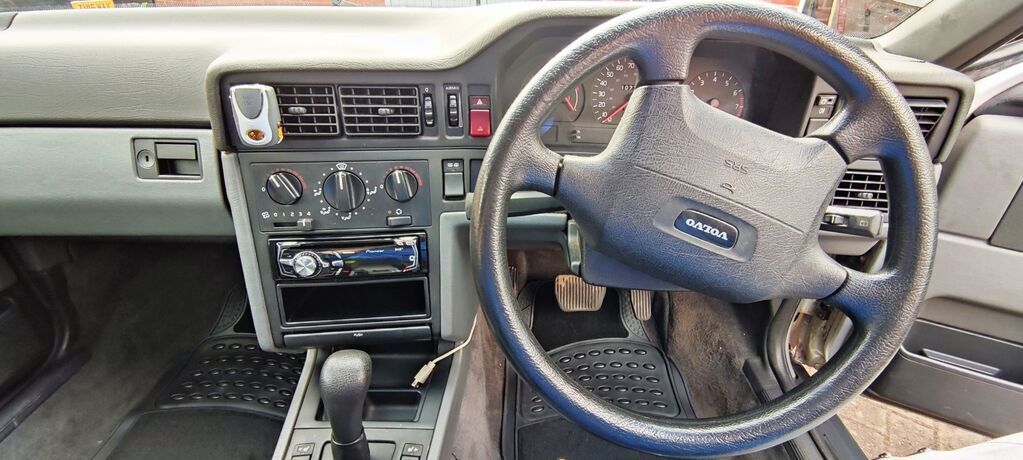 Just an armrest? Not in Sweden... 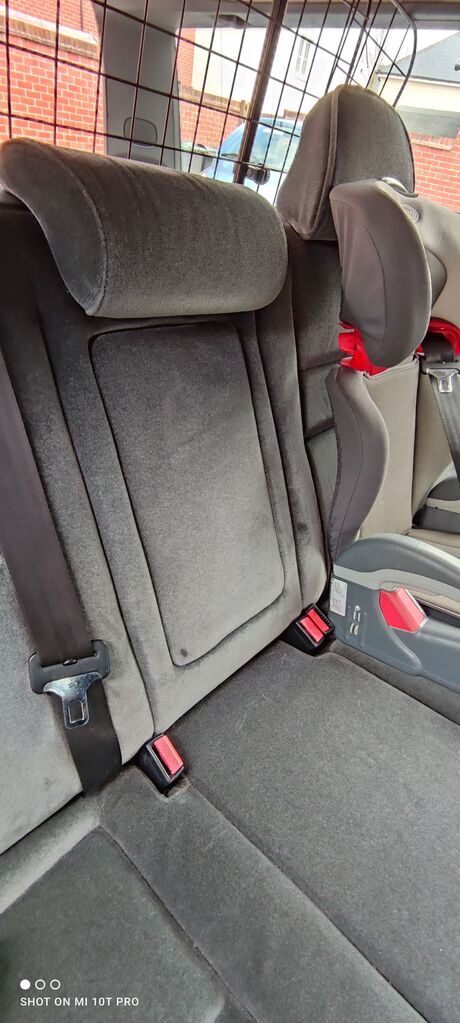 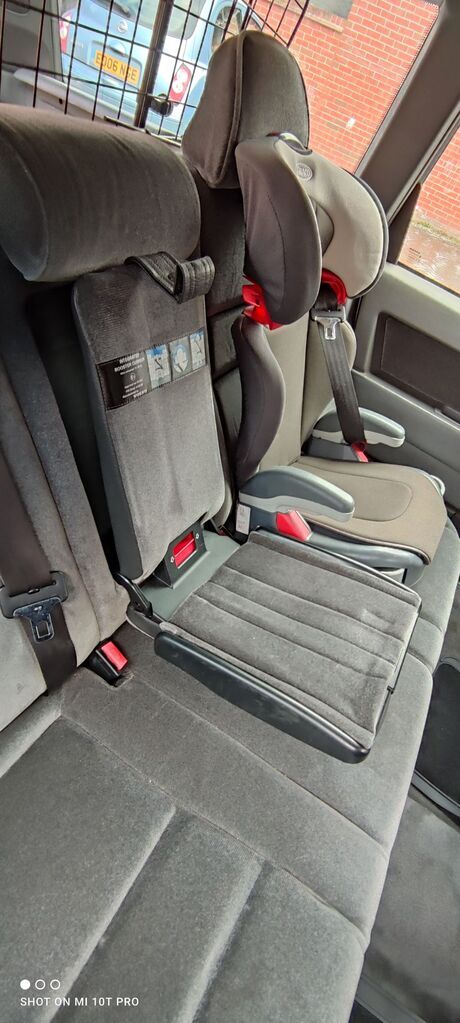 As mentioned elsewhere in this thread, you can keep your Meguiars and your Back to Blacks...nothing beats boiled linseed oil for bringing back faded plastic trim (of which this Ovlov has in spades). Had the same bottle 20-odd years. 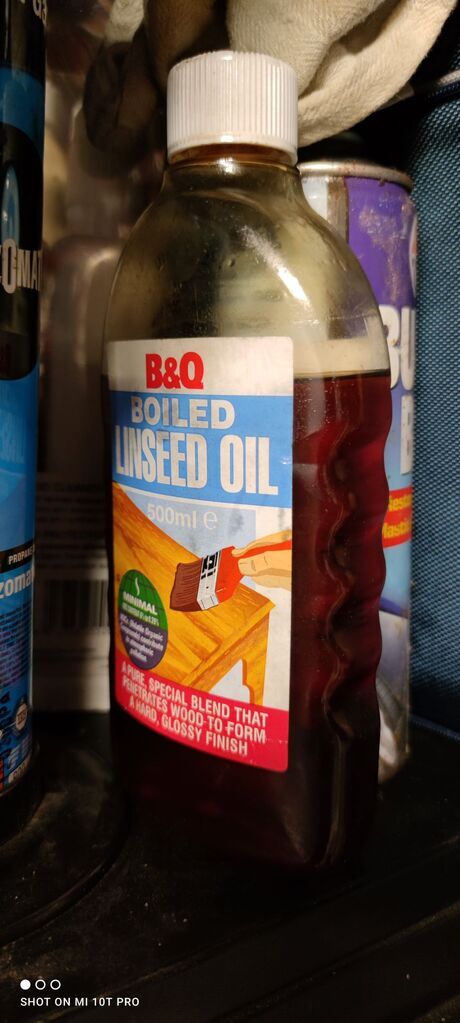 Here it is in action - and unlike most of those sprays it's pretty permanent (a heat gun will do the same, but there's a fine line between restoring the plastics and melting them. 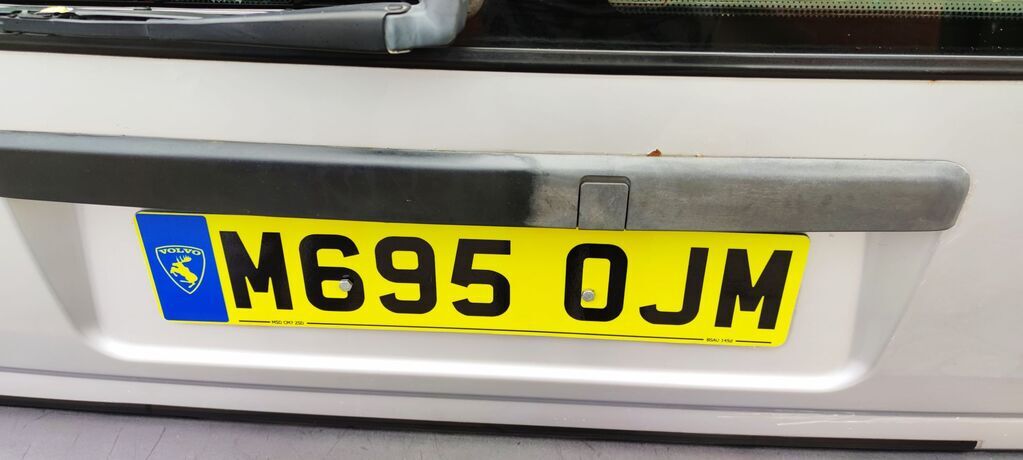 Amazon seat covers for a below-average fit. They're comfy enough though. 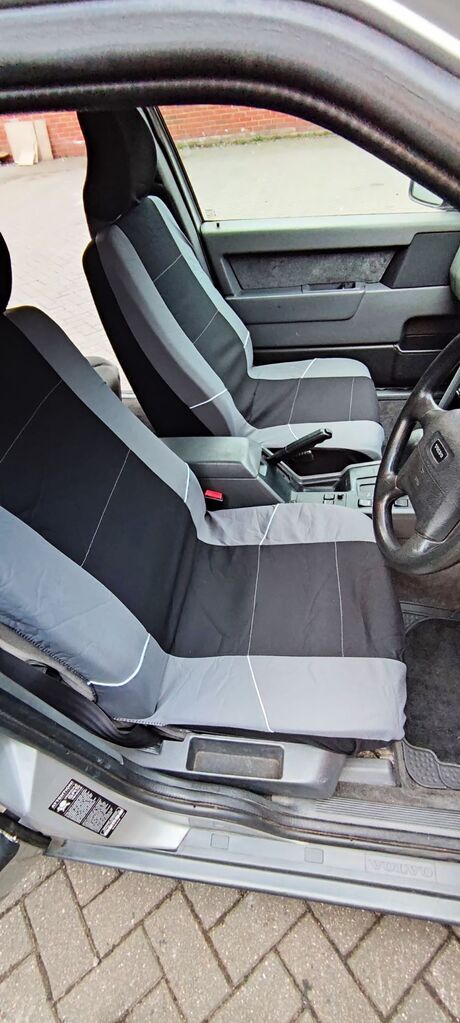 And here's the after. 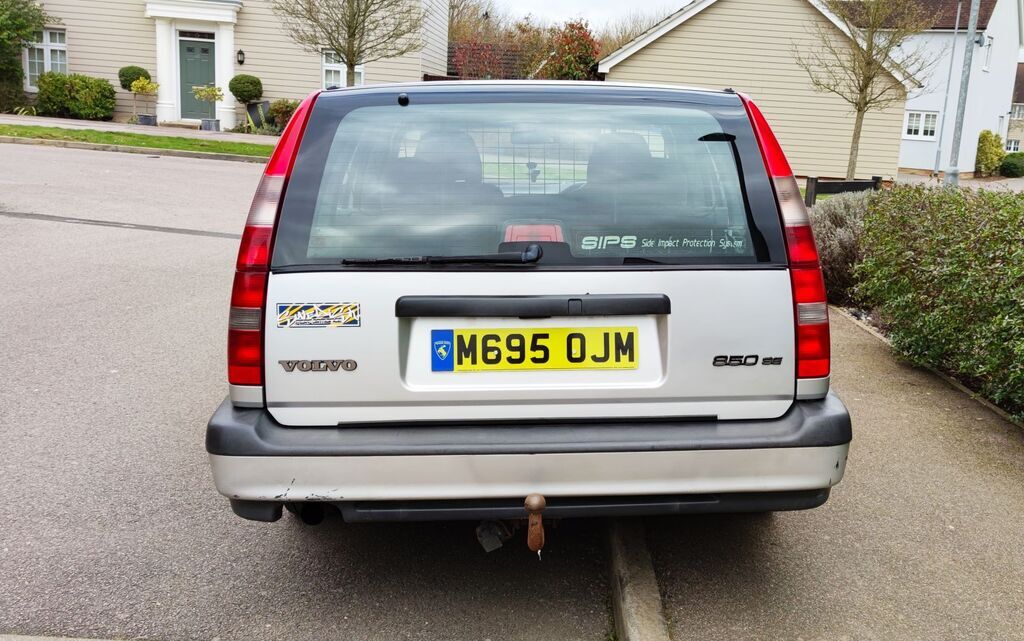 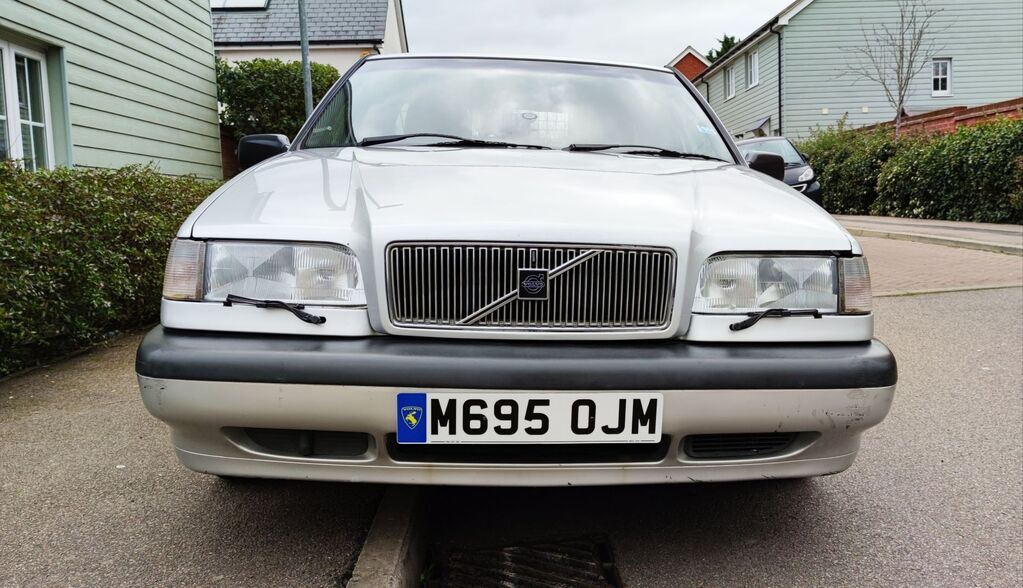 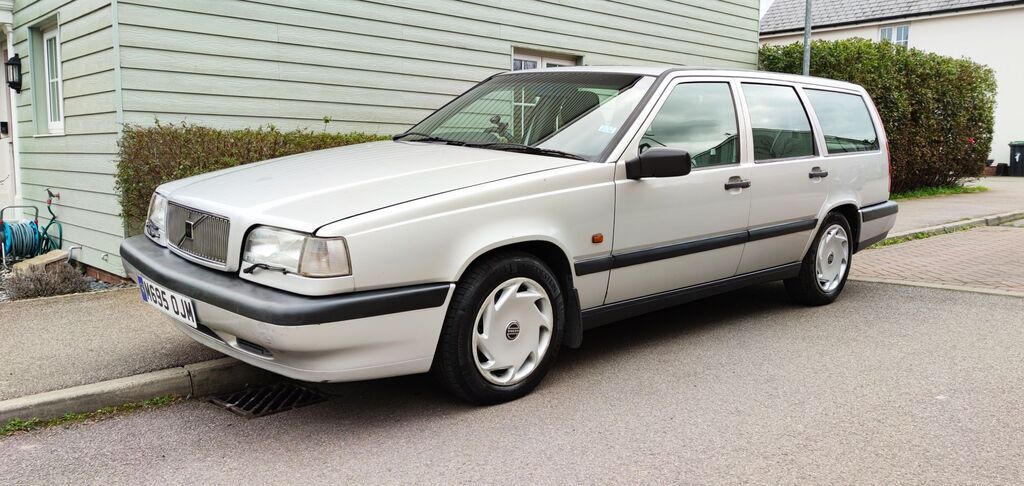 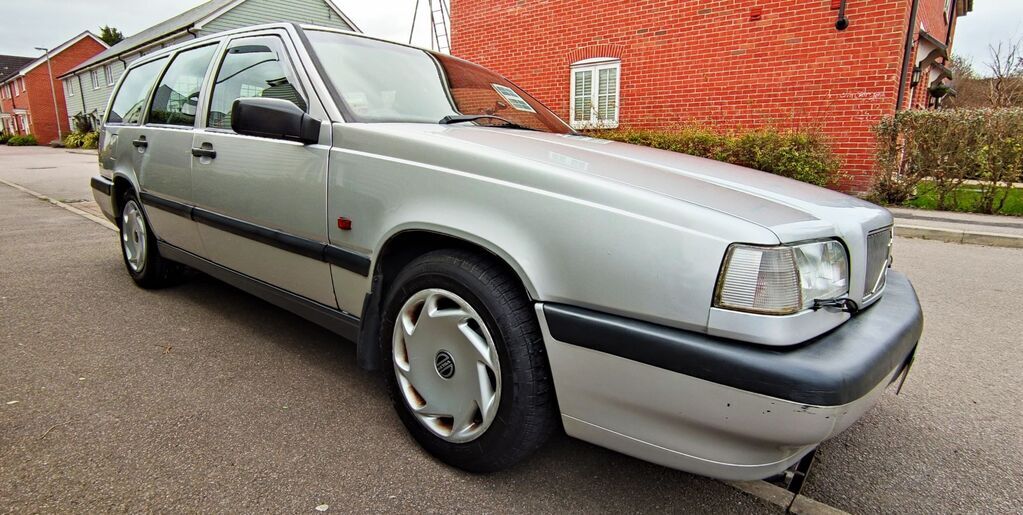 Found some overspray that indicates relatively recent paint to the O/S/F wing and (I think) the roof. She could certainly use more paint - there are oodles of giffer scrapes on all 4 corners, and the back bumper is a bit wobbly from all the thwacking it's taken. I'll see what I can do. Driving impressions have been entirely positive - she doesn't drive like an old, wafty, floaty barge at all. Steering is sharp and responsive, body roll is minimal, and cornering feels positive and assured. I'd read they were better to drive than they looked but I was unconvinced until today. Very happy. I do want to get the 2 front tyres changed as they're cracked, and I'll definitely want to touch up some paint. I'll also give the engine bay a bit of a detailing at some point...there's a big lump of pig iron under there make no mistake. |
| |
|
|
Paul
Posted a lot
  
Posts: 1,994
Member is Online
|
|
Mar 28, 2021 13:38:47 GMT
|
Short update - bit more time spent on the brick. After a recent jaunt I was alarmed to find that the O/S/F indicator lens had just upped and left. Poof. Vanished. This was all that remained. 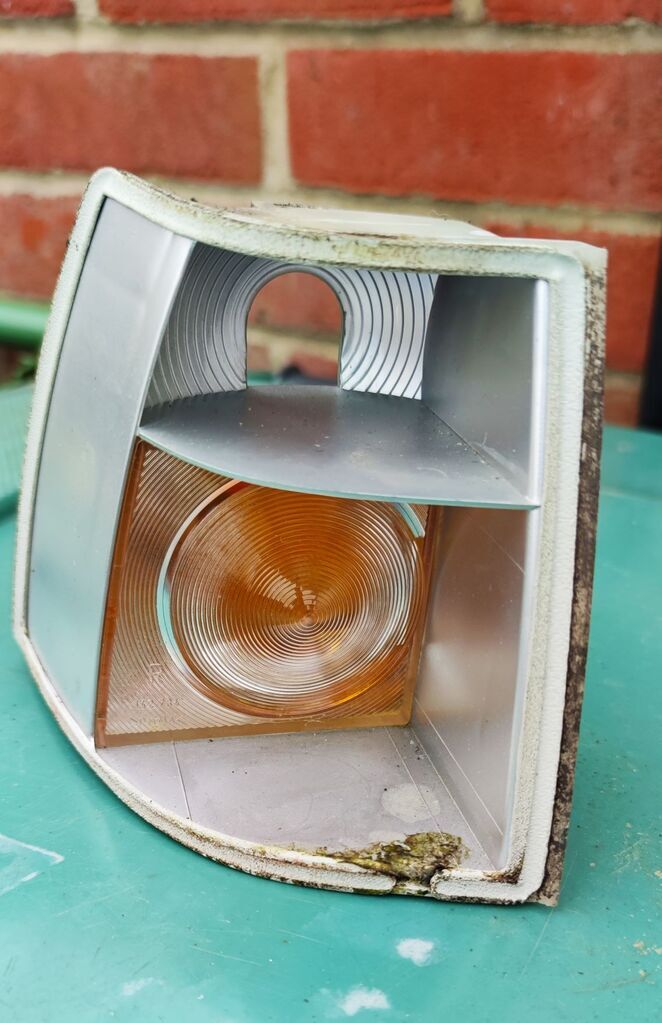 Weird. It survived a good blasting with the pressure washer, and must have fallen off...somewhere. Never mind, £20 on eBay later and 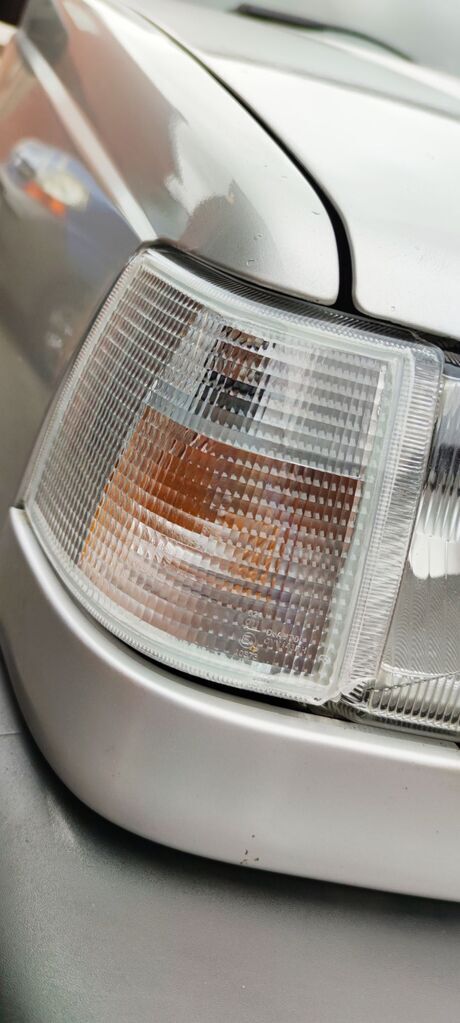 Yes, it's chipped. No it didn't come like that. Ol' brainiac here decided to leave it on the roof on a really windy day. A gust of wind and...crack. At least the damage is relatively minimal...it'll do for now. Glad I checked because I hadn't noticed the blown bulb. Thankfully I had a spare kicking around in the toolbox. 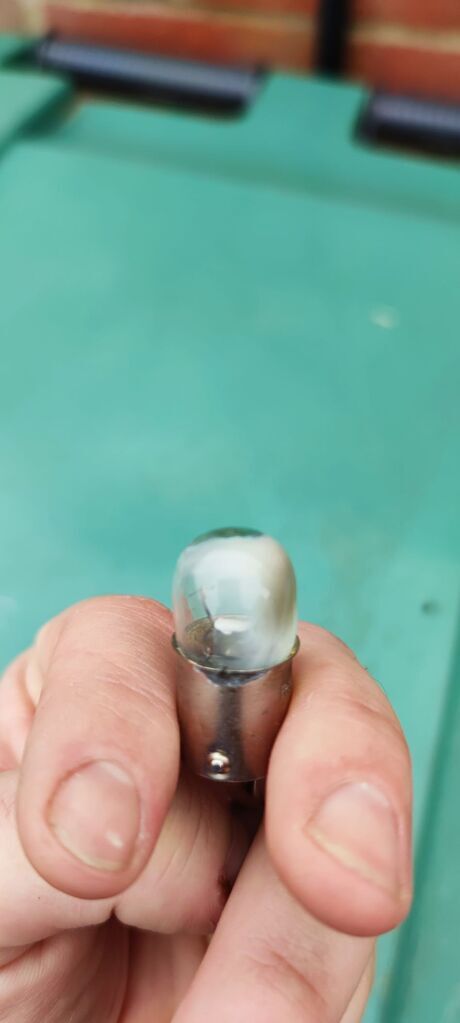 Front tyres were quite badly perished on collection, purely through age. 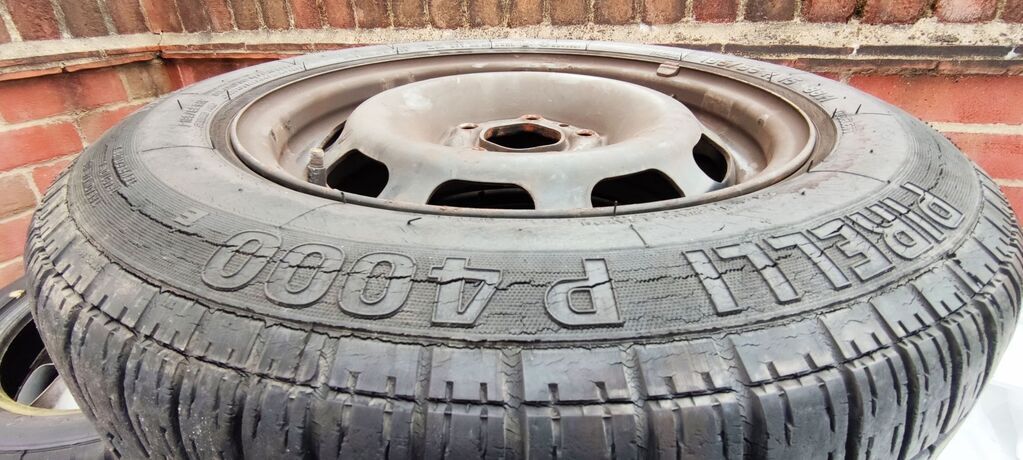 Pirelli p4000? I'd heard of the p6000...  Ah, that'll be why. So, the choice was either to replace the tyres, or try and source some wheels. My luck has been in recently and these period-correct 16" OEM alloys turned up only 40 minutes away. Deal done. 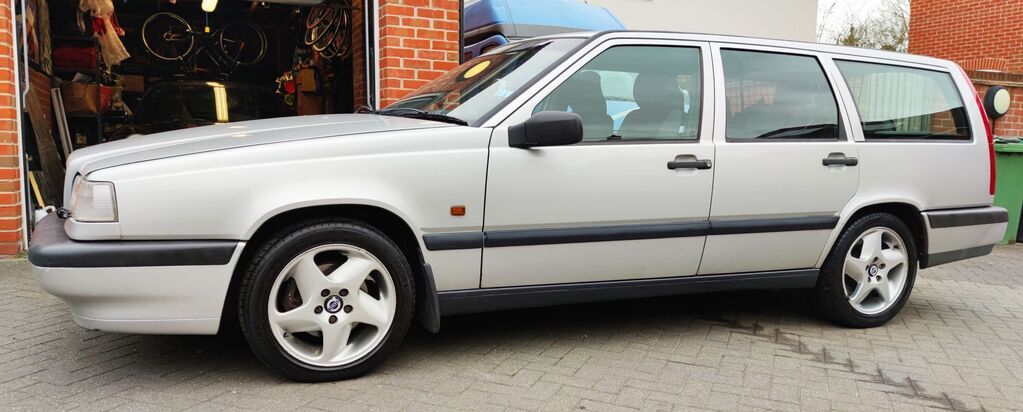 Now here's the mystery...my car/garage app lists the car as being simultaneously a 2.0l and a 2.4l depending on which page you look at. V5 lists it as a 2.0. Cambelt cover disagrees... 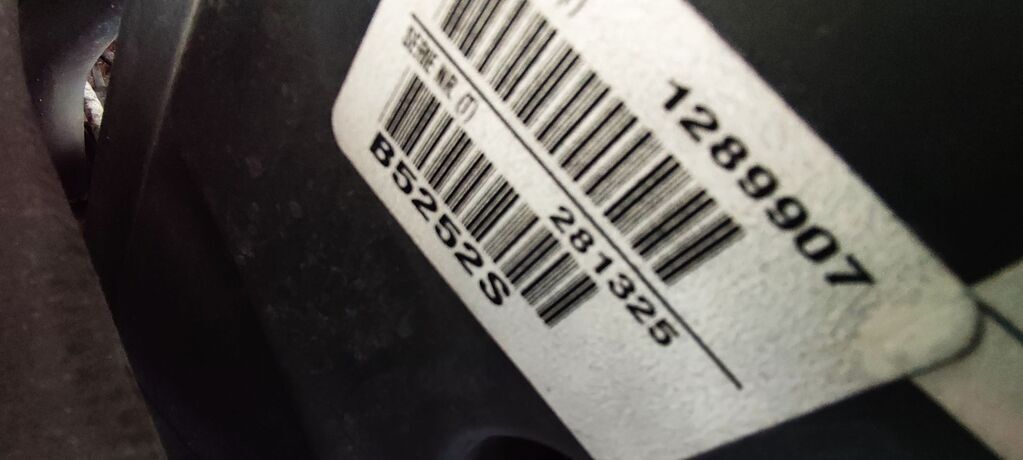 B5252S is definitely the 2.5l 10v engine, assuming of course that the sticker is correct. I need to get in there and have a good look at the block. Well, there it is. 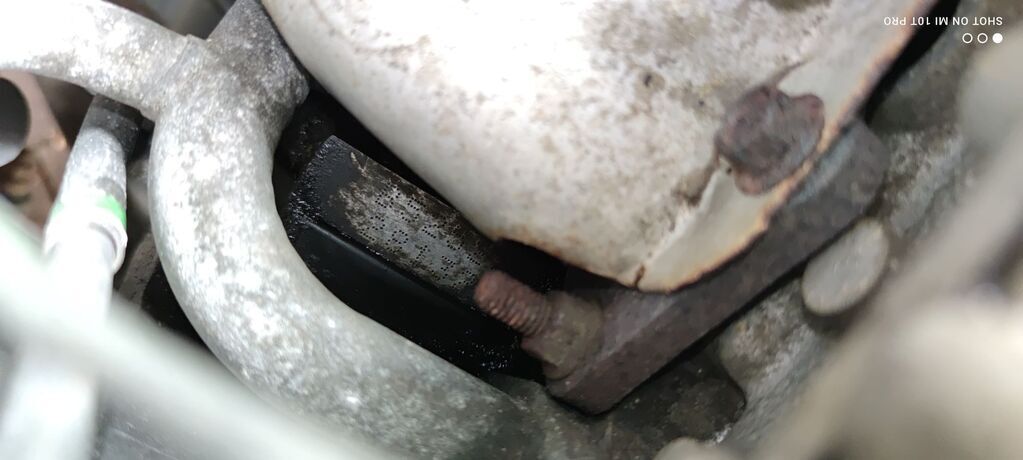 I just gained (according to Wikipedia) 18bhp and 27lb ft of torque. Free remap! It's looking increasingly likely that the campervan still won't be ready for the Weekender, so this will most probably be the chariot of choice. Delightful! |
| |
|
|
Paul
Posted a lot
  
Posts: 1,994
Member is Online
|
|
|
|
Real quick update - if this chariot is going to escort us to the Weekender a guy's gonna need to keep his cold snacks cold (with apologies to Derek), so I set about putting a 12V plug for the cool box in the boot. Nowadays every car has at least 3, but this was something largely overlooked 27 years ago. I was impressed to find that the boot liners are all made of wood - not in the world of all that is VAG have I ever seen anything other than compressed card or flimsy plastic. 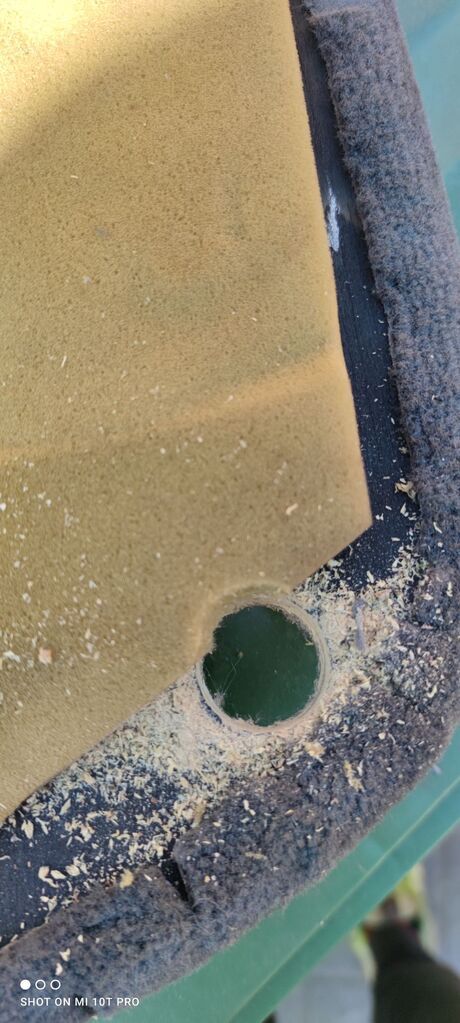 Decided to put it in the floor as there was a load of space under there, not so much behind the side panels. Since the Volvo comes with DRLs there was no shortage of +12v on ignition wires to splice into. 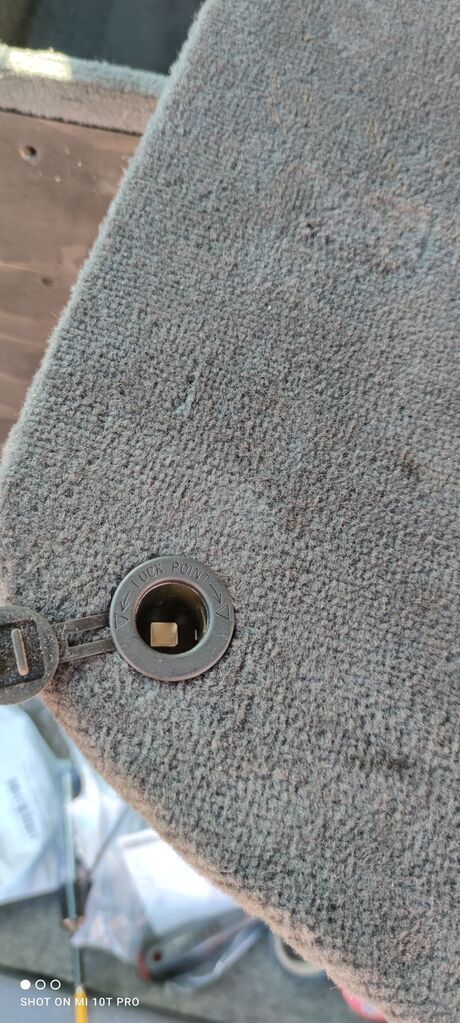 Seamless 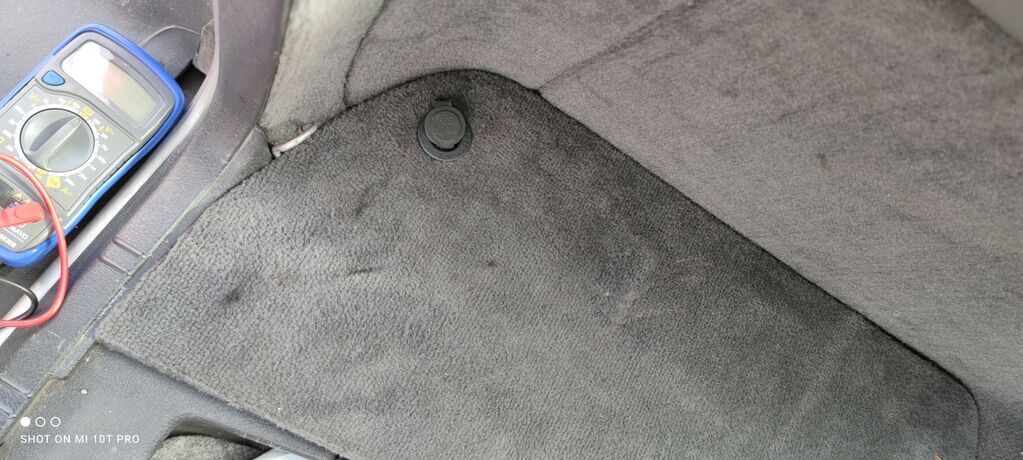 Factree. Now I hadn't actually intended to do this, I got distracted by the 'ooh, shiny!' in my toolbox and fitted the above. I'd actually come out to fit reversing sensors. Flush with success from fitting them to the taxi, and knowing a) She's the best part of 16 feet long b) The wife would be sharing driving duties c) The kit isn't even £17 on Amazon I thought I'd set about getting them installed. 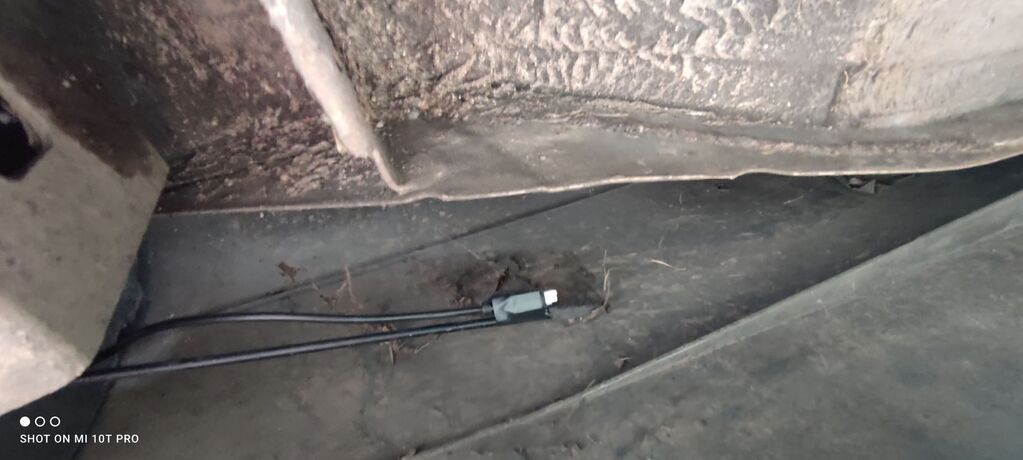 My weapon of pokey-holey-chasey-wirey through the bumper sound deadening is this broken aerial from a Ford Puma. Magic. 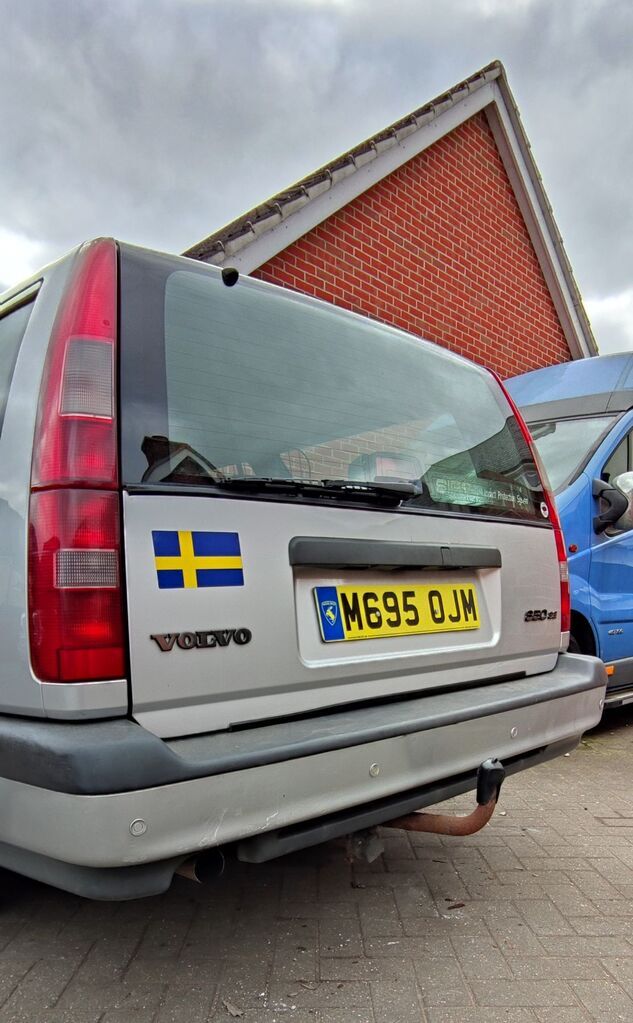 Factree #2  She's certainly growing on me, that's for certain. 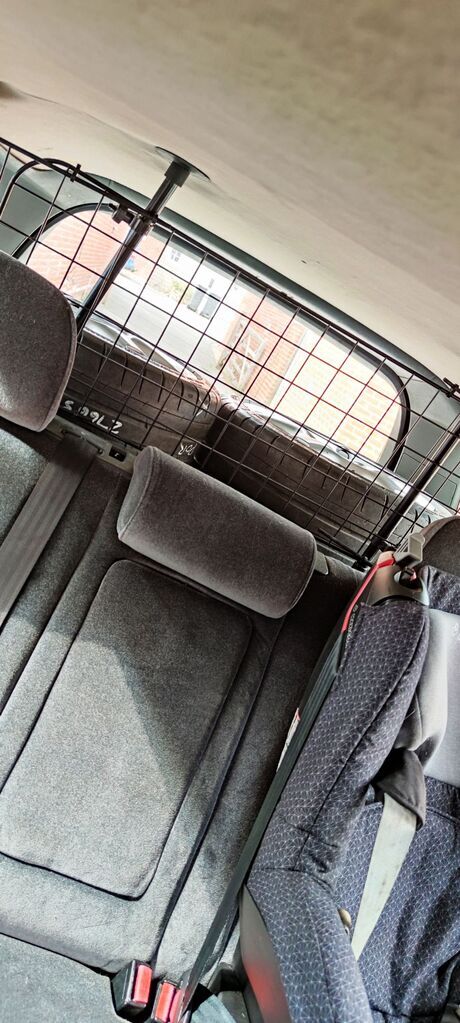 What's she hauling? You'll find out...tomorrow hopefully :-) |
| |
Last Edit: Apr 7, 2021 16:25:47 GMT by Paul
|
|
Paul
Posted a lot
  
Posts: 1,994
Member is Online
|
|
|
|
Well, if you guessed that yesterday's load being lugged in the Ovlov was new shoes for the 911 - then you're correct! 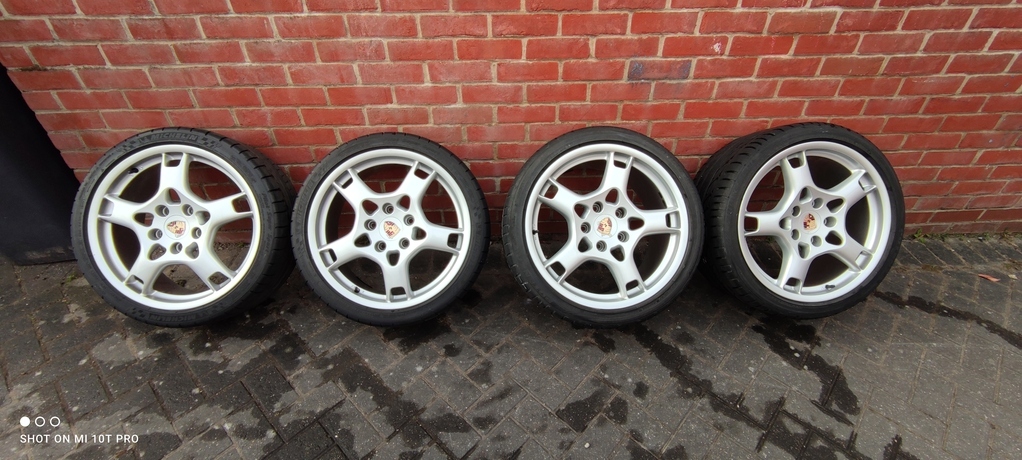 19" 997 911 wheels, affectionately known as 'lobster claws' - although mention it in the wrong circles and you'll be flamed as some insist they are lobster forks. I don't care, I've just always liked them - I think they're a thoroughly modern-looking OEM wheel and I've been trying to source a set at a reasonable price for ages. These came up reasonably locally, a bit of toing-and-froing ensued, and eventually a deal was done with the previous owner who took them off his 997 because he'd upgraded to some very shiny BBS multi-spoke numbers. 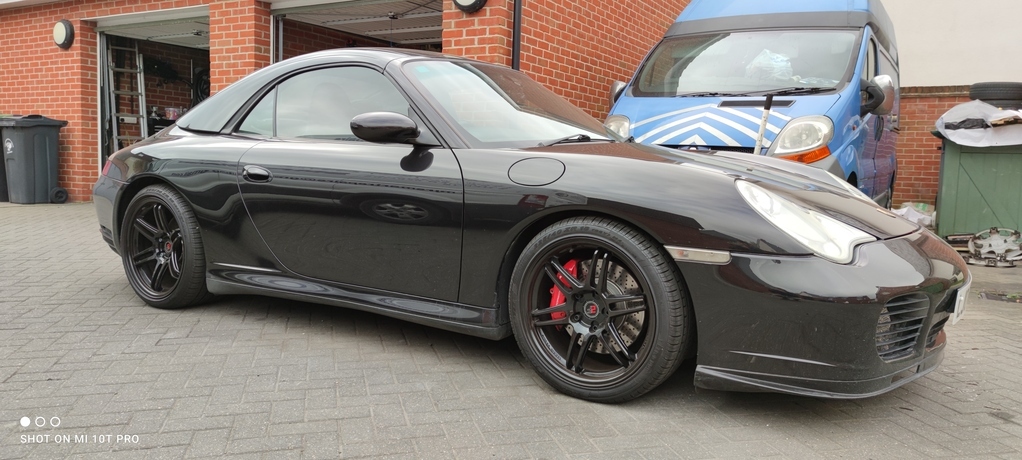 Just for reference here's how she looked this morning with the ultra lightweight and very racey numbers attached - it's all just a bit too much black for me though. 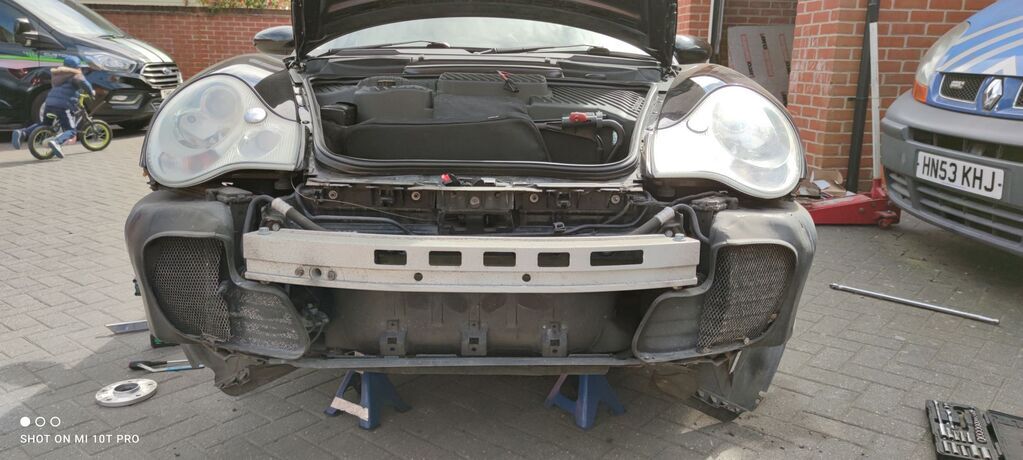 Ah, so what's going on here, I hear you ask...that's now how you change wheels. Well, the aircon in her has never worked. "Just needs a regas" says the dealer when purchased. So I took her for a regas and she wasn't holding pressure...of course. Most likely the condensers or the compressor - thankfully neither are too expensive (if it's the compressor it's - off the top of my head - a Lucas part available for a huge number of different cars), but I knew I'd never cleared out the condensers at the front so I ordered a pair. This was last...July? They've sat gathering dust ever since. What can I say? She kinda has built in aircon anyway. Taking the front bumper off was entertaining at best - clearly someone's been here before. Some screws are missing, some are the wrong size, and there's a big variety of T25, 27 and a rogue 30 Torx holding it all on. And a random screw or two. Not encouraging. But she came apart pretty much as expected to reveal this. 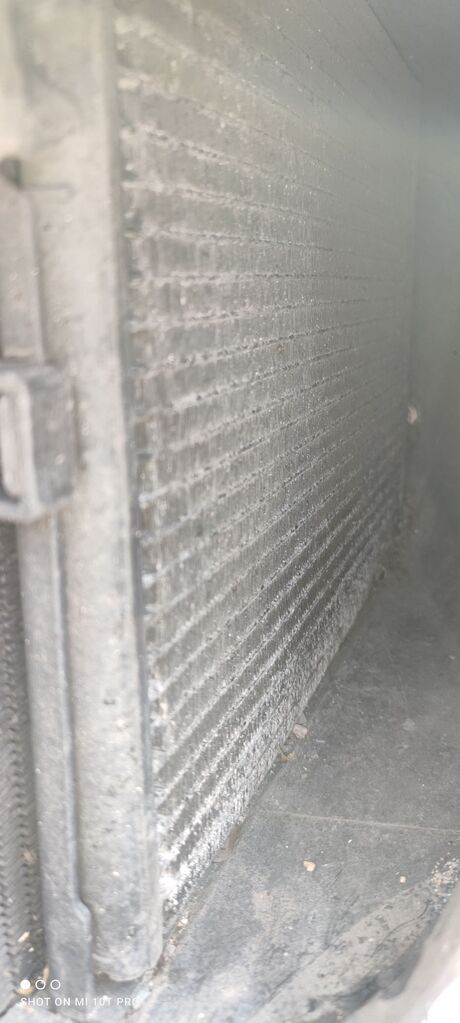 Ah, but do not be fooled young adventurer - they always look like that from this side. Take off the plastic shrouds and 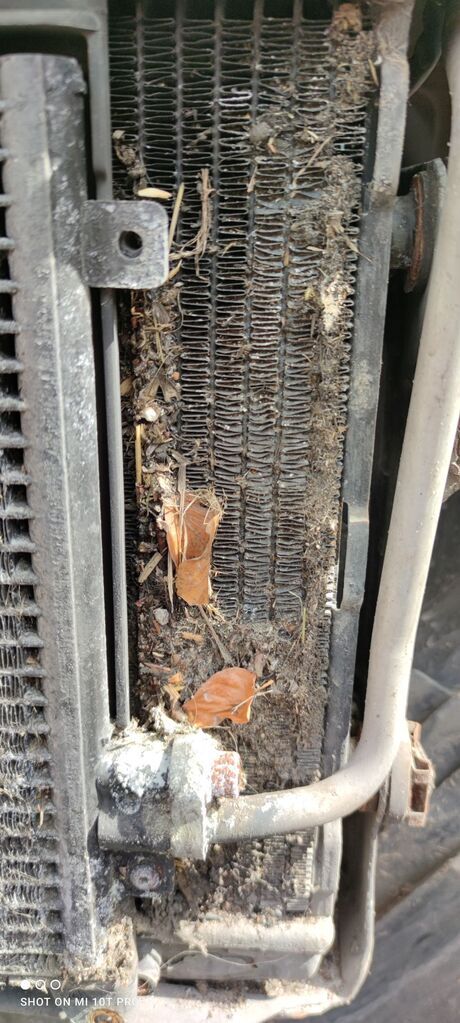 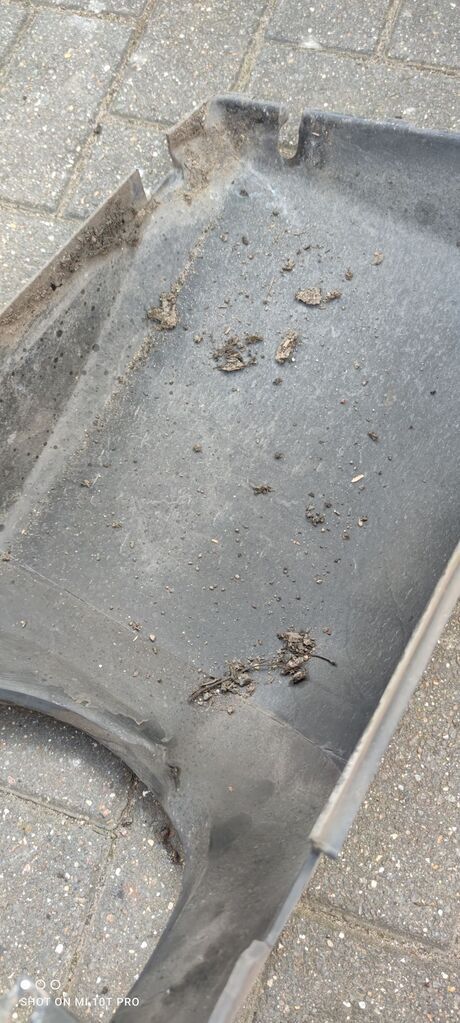 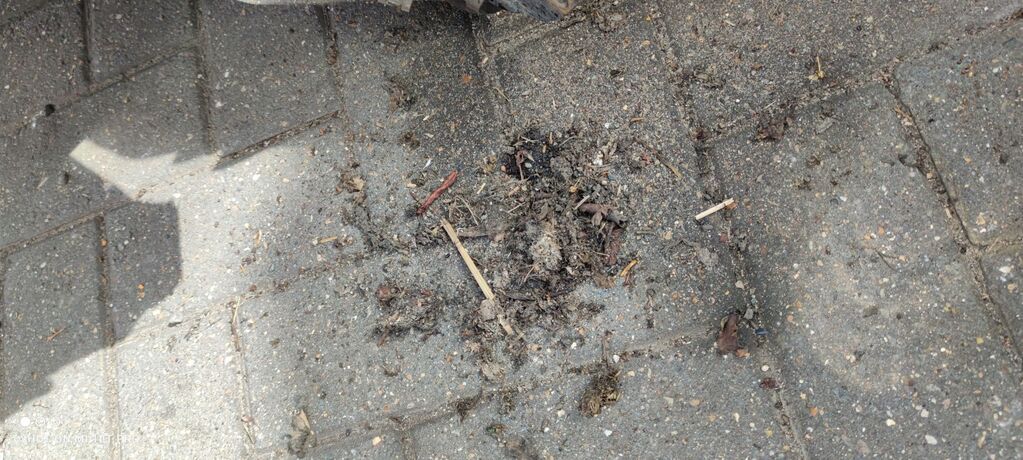 Yes, that all fell out of the near side in one go. 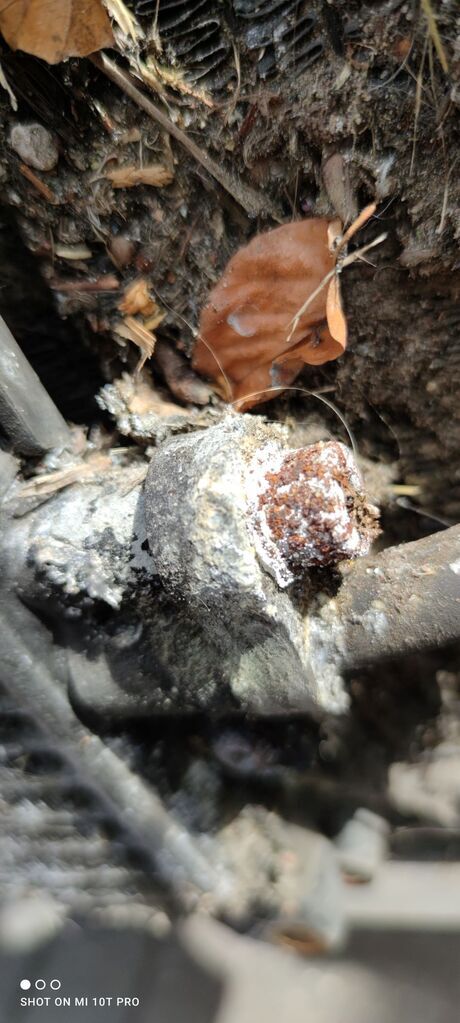 I think I found the problem. To guard against this a previous owner had fashioned their own very ill-fitting grilles from, as far as I can make out, chicken wire and black mastic. 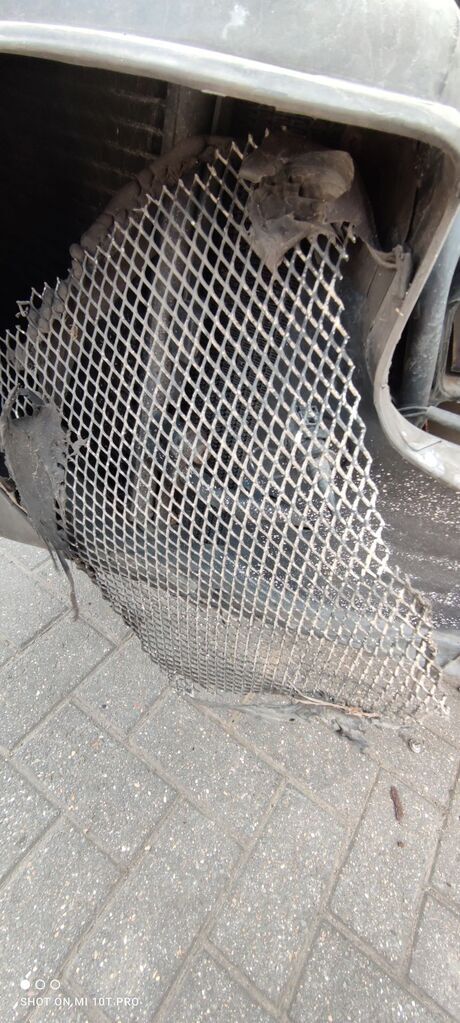  Come on now - this is a Porsche 911, it deserves better. 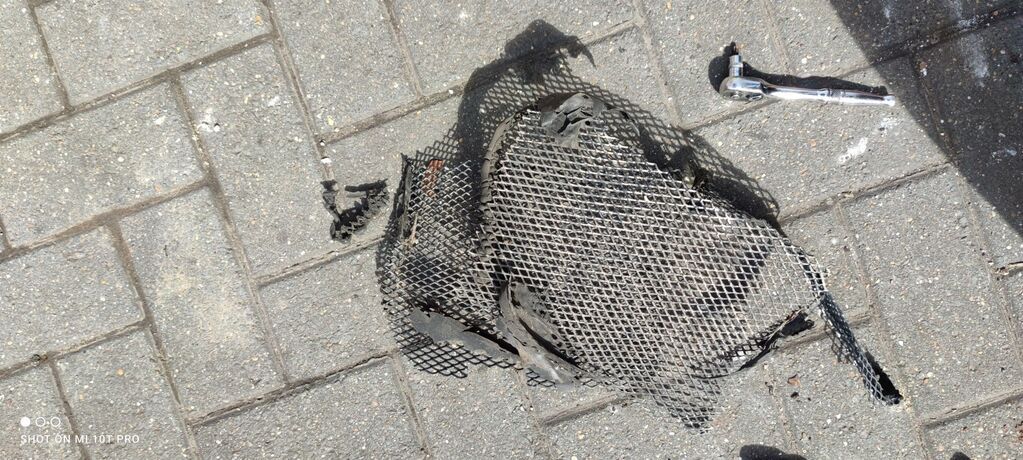  Now aftermarket grilles carry a ridiculous scene tax - I get it - but this is ridiculous. And clearly these made no difference to junk getting in there. Thankfully the O/S wasn't quite so bad... 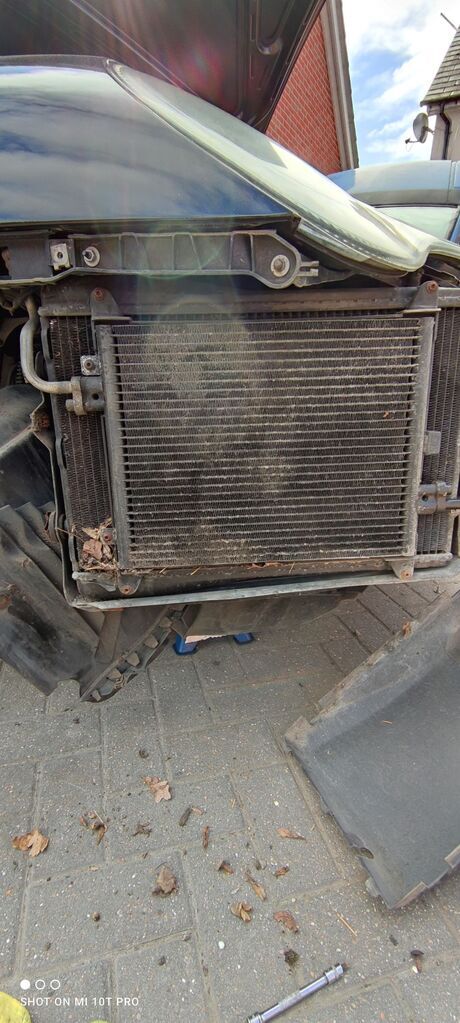 Shiny bits ready for fitting 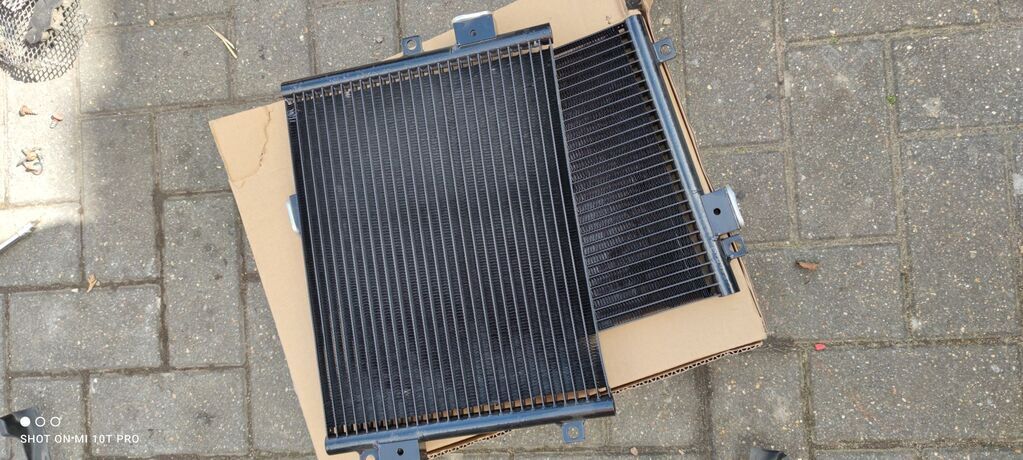 So thus began the very satisfying process of removing the old units (they're only held in two 7mm hex head fittings - even the crusty one came apart with a bit of Plusgas and some persuasion) and cleaning out with an old toothbrush and compressed air... 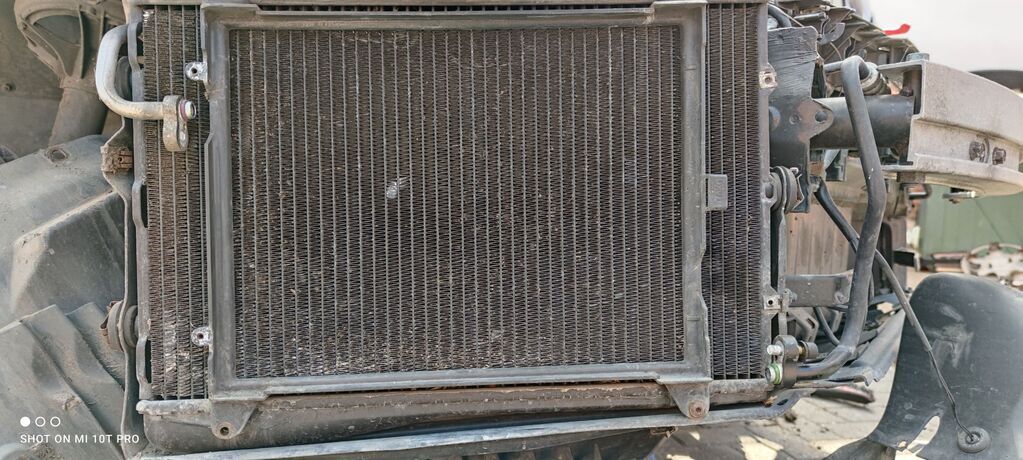 I was surprised to find the new units already had a short 14mm bolt in each plug, and the ends capped off with rubber. 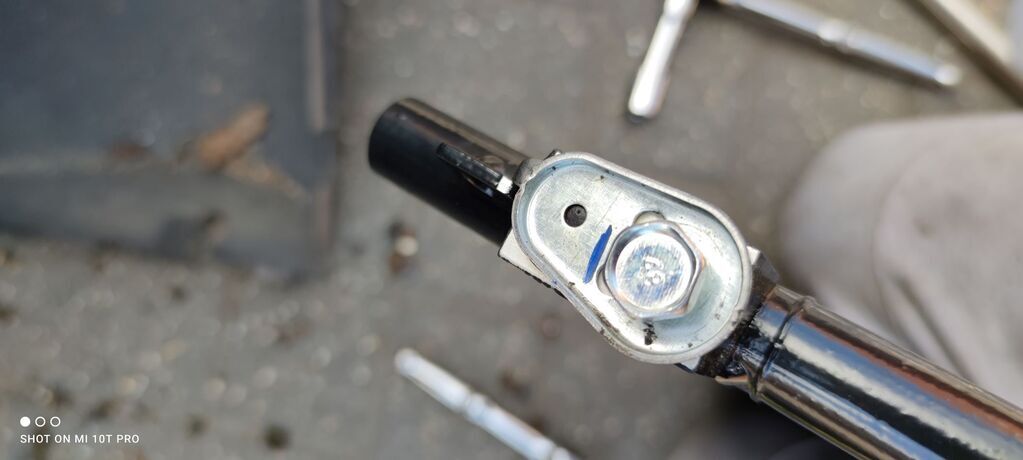 Why, you ask? Well, removing the bolts (which took some persuading tbh) revealed a very pleasing WHOOSH-hisssss noise. I presume they're plugged up and pressure tested in the factory before testing, and it saves time and energy to just leave the plugs in. Gave me the fright of my life on the first one I can tell you. 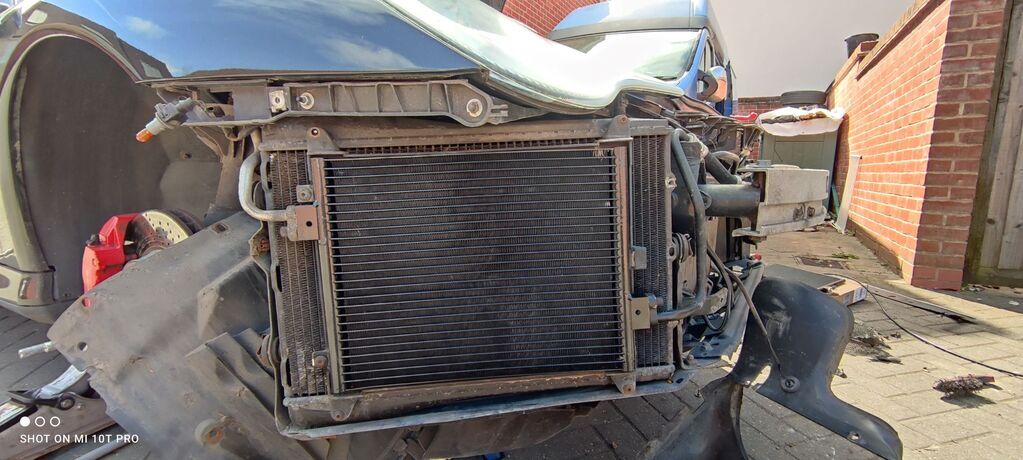 Refitting is the reversal of removal Were a couple of the Torx bolts rounded? Naturally. Did I have any spare? Of course not. Did I replace them with some very creative and artistic use of cable ties? Not in any of the pictures I'm going to show you I can assure you. From starting on the bumper to dropping the wheels took 2 1/2 hours-ish, with a stop for a sandwich and several cups of tea. Getting the splash guards wrestled in place under the bumpers was the tricky but as usual...I never can get the hang of manipulating them back into place easily. 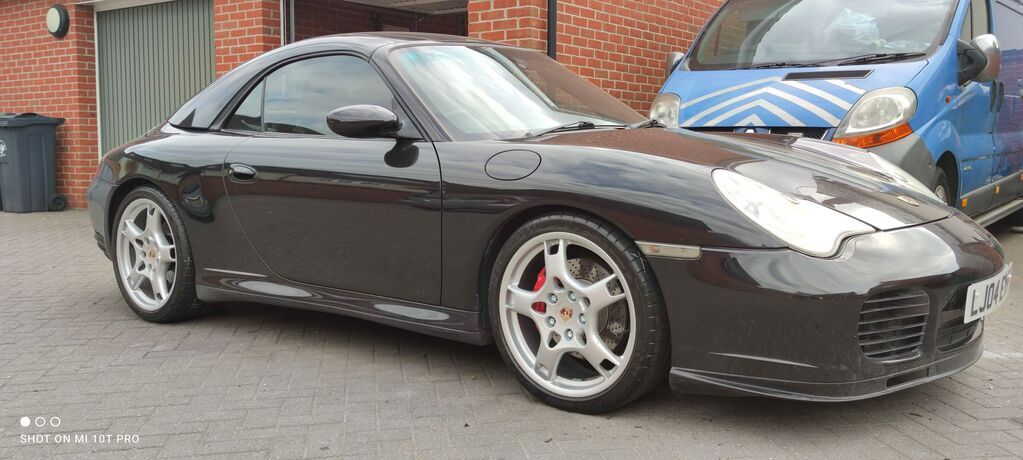 Reassembled and new shoes on - 25mm spacer at the rear, 15mm spacer at the front and she's sitting purty. A good day's work :-) Now to book in for a regas and see if I was right after all - there's no doubt that at least one - if not both - of the condensers were shot, but we'll wait and see whether it was just that... |
| |
Last Edit: Apr 8, 2021 15:15:15 GMT by Paul
|
|
Paul
Posted a lot
  
Posts: 1,994
Member is Online
|
|
|
|
Not a lot to report today - the 911 definitely rides more firmly on 19s than 18s, but it's bearable to look that good. Determined to take advantage of the good weather I gave the load lugger a bucket and sponge, starting with the engine bay. Before 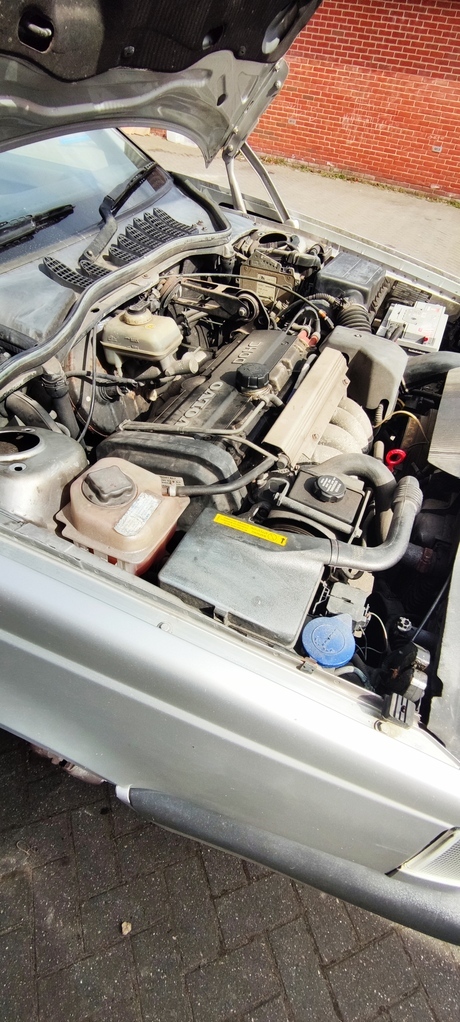 After a bucket and sponge, some degreaser and Autoglym trim and bumper spray. 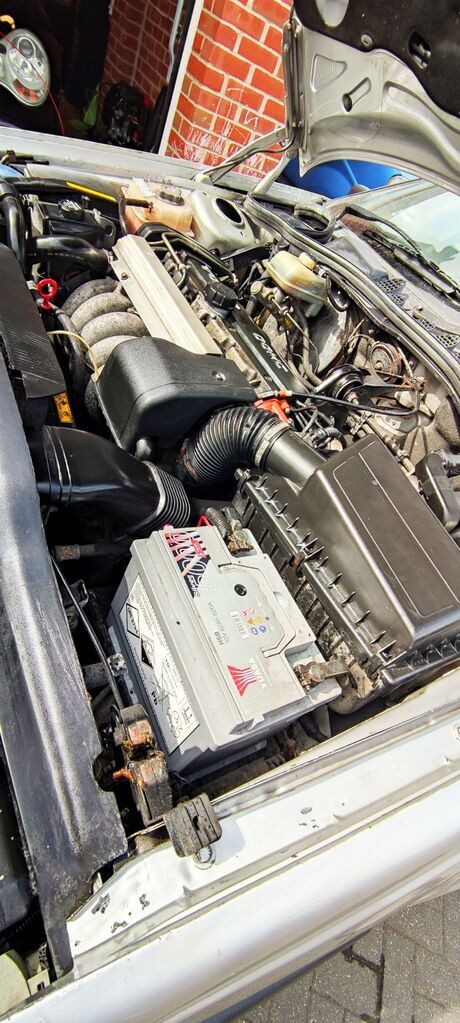 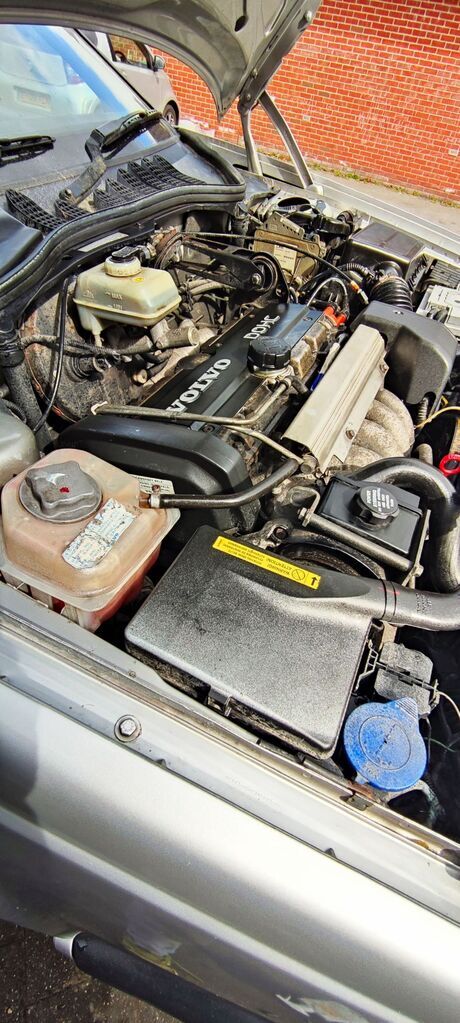 So as of today here's how she's looking - in all her OEM PuRiTy 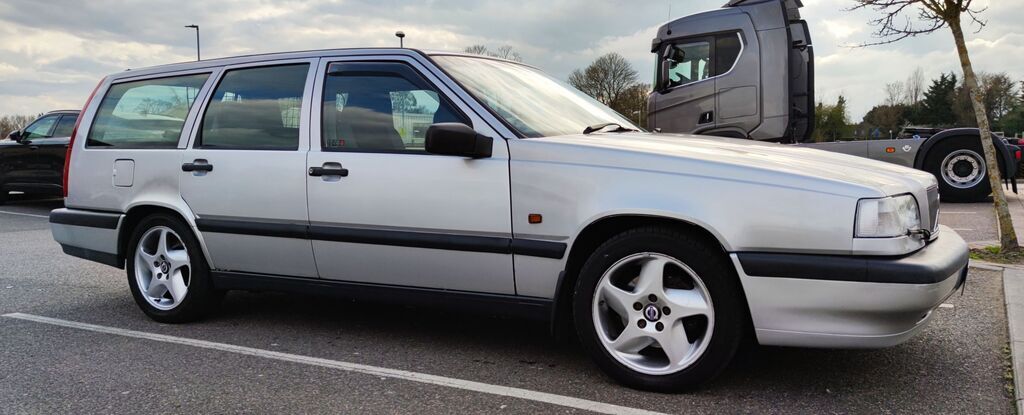 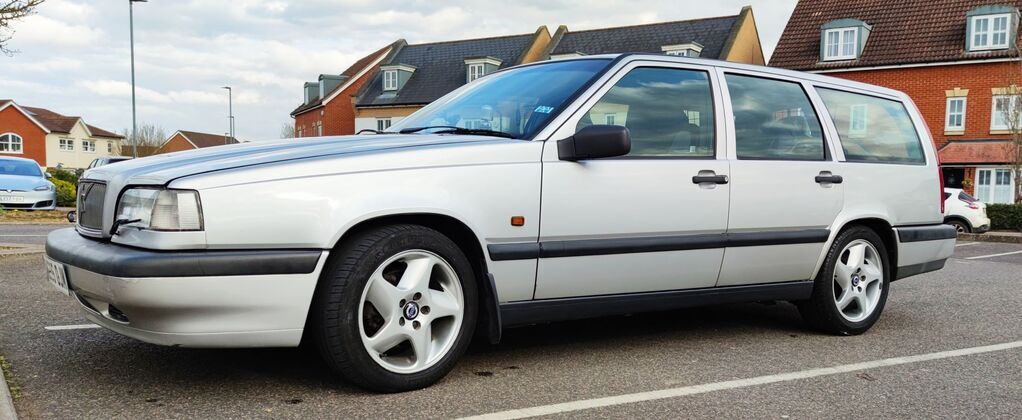 |
| |
|
|
Paul
Posted a lot
  
Posts: 1,994
Member is Online
|
|
Apr 17, 2021 10:52:41 GMT
|
Been trying to give the Ovlov some love, but man she's been fighting me of late. When inspecting and cleaning the engine bay I found this upper engine mount was FUBAR. 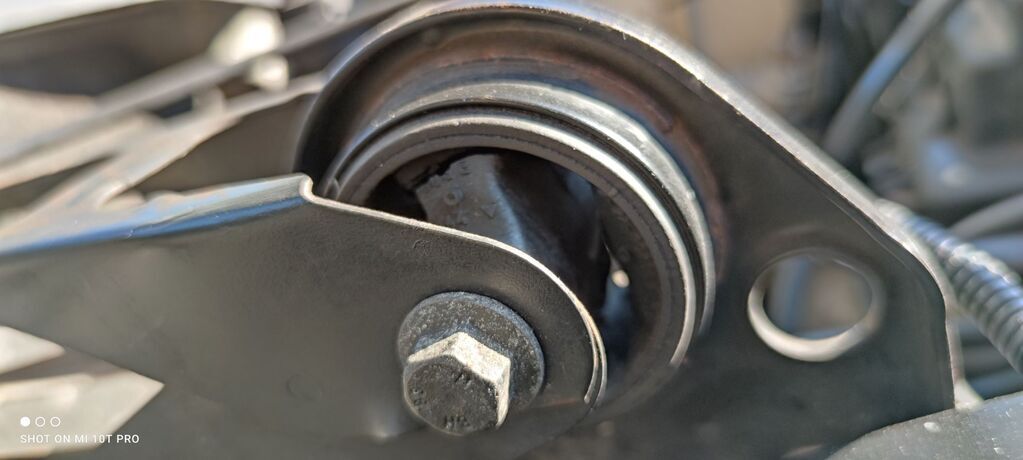 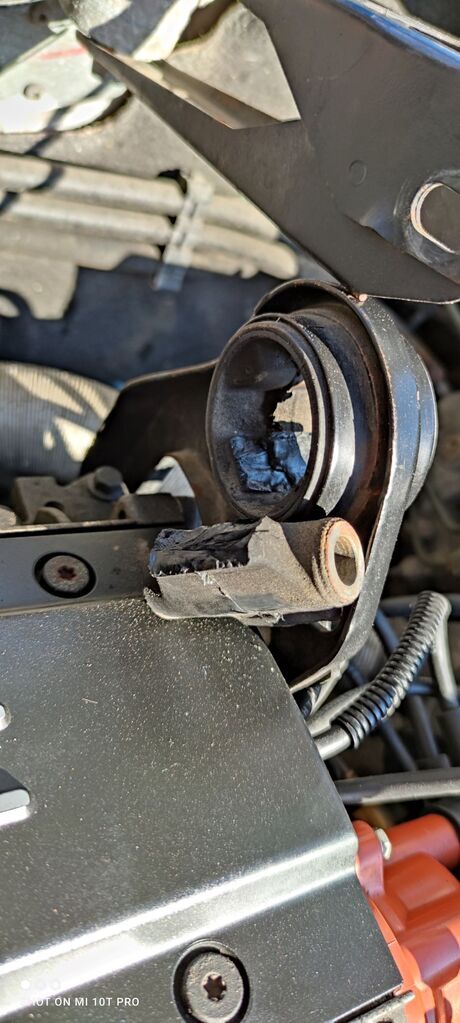 Getting it out was the easy bit - it had practically self-ejected itself already.  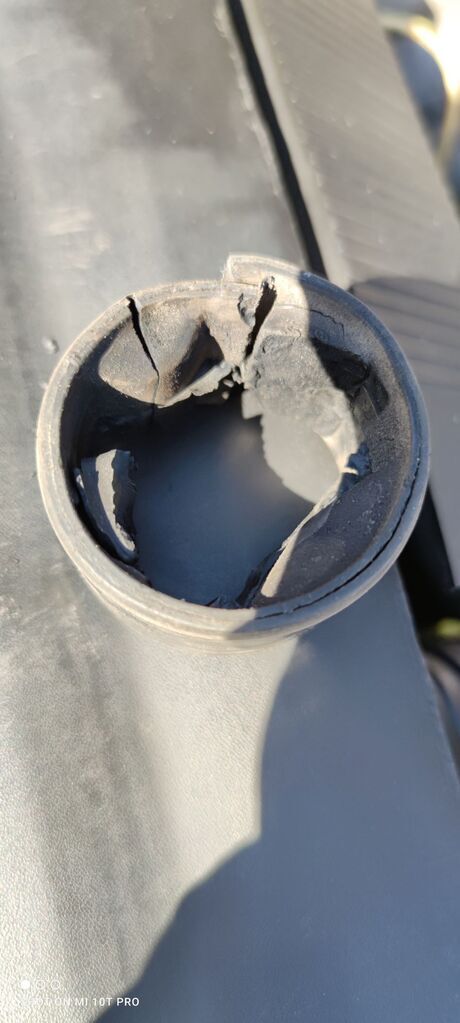 That's where the fun stopped. The new pattern part was just a smidge too wide, despite my homebrew bearing press made of threaded rod, square washers and some pre-drilled chunks of wood. I had to break out the Dremel and taper an edge down on one side, along with half a gallon of WD40, to eeeeeeeaaaaassssseeeeeeee her on in there. Man that's ugly. 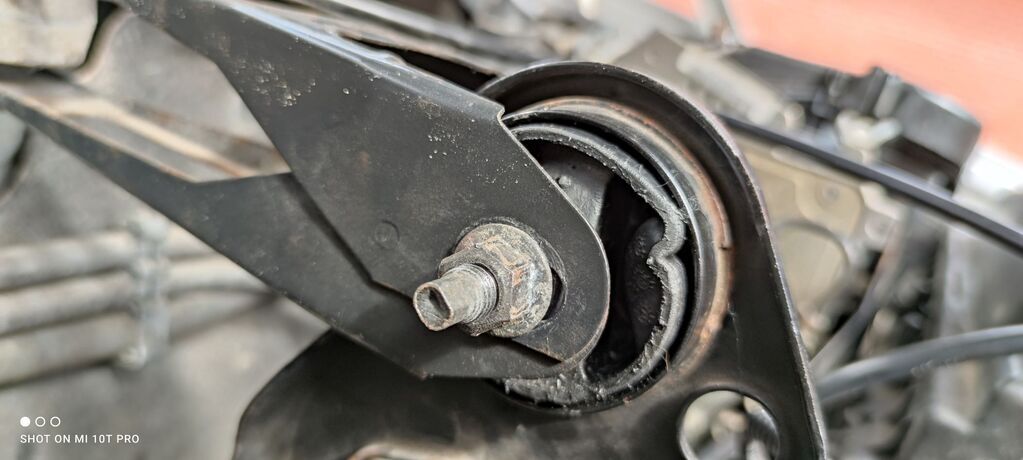 Next time (and there most probably will be a next time) I'll do what the internet said and get one of those split polybush kits instead. Yesterday my sister was moving house, so of course the Ovlov was called into service. Got down there, loaded up, only to find a large puddle of coolant forming under the OSF of the car, directly under the lower rad hose. Balls. Topped up the coolant reservoir and made a dash to unload (thankfully only a few miles up the road, and in the direction of home), and get the car back to base before ending up stranded. Of course, to add insult to injury this light came on 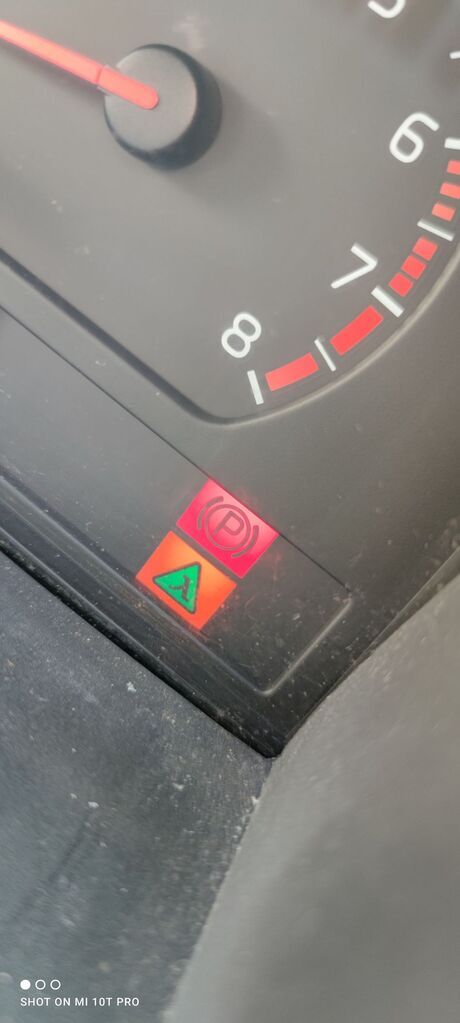  No idea. The manual tells me this is an emissions fault, so I go to plug in the code reader. Ah, no code reader. 1994 is pre-OBD2. So, what to do? Well, this is where things get really cool (in my eyes) because Volvo were way ahead of me here. This is the onboard diagnostic port located in the engine bay. Catchily entitled 'Fenix 5.2', you take the supplied pin, plug it into Port no.2, and press the 'A' button...then count the LED flashes 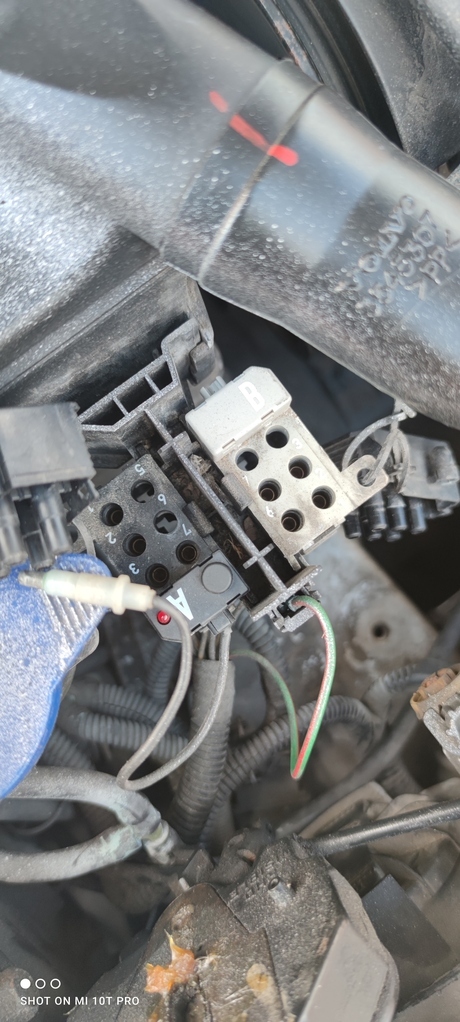 I had something similar in my old KA9 Honda Legend, but you had to Find the diagnostic plug under the passenger side dash bridge it with a paperclip run around to the dashboard count the different light flashes on the dash. This...well this was child's play by comparison. 'Scanned' it twice, threw up one code: 3-1-4. Quick cross reference to Google indicates Camshaft Position Sensor fault. This makes sense actually, as she's been slightly rough starting, running quite rich and definitely giving even worse MPG than I'd anticipated - at a rough calculation less than 20mpg. New part ordered! Also managed to find this plug dangling loose under the battery - any and all suggestions welcome! 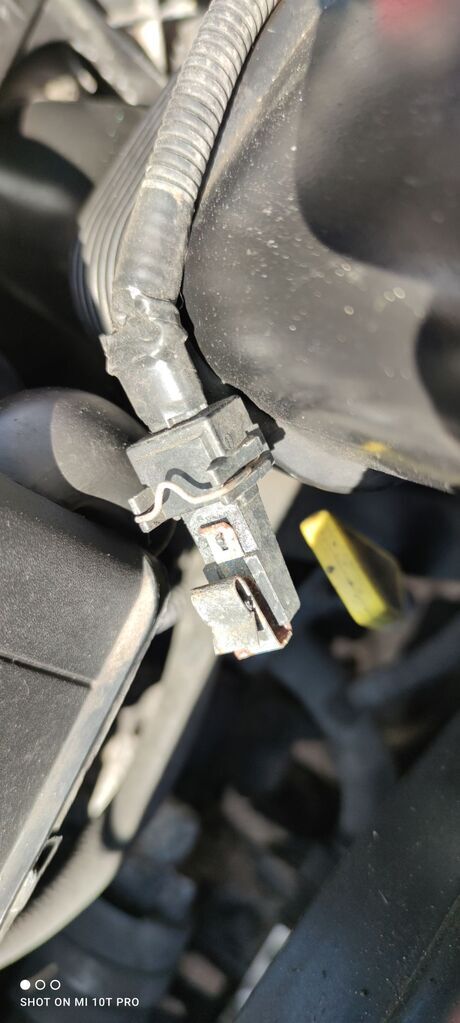 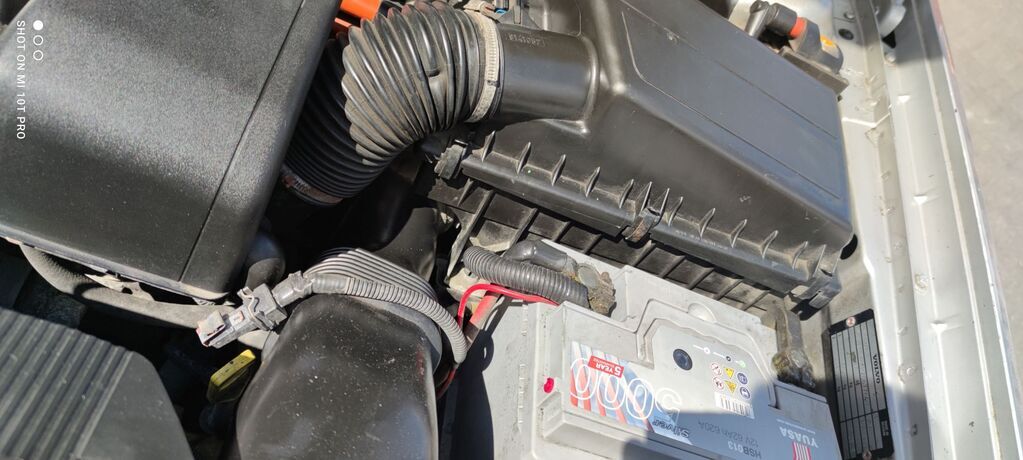 So, back to the coolant leak. Parked up, ran her for 20 minutes - idle, under load, fan on - the works. No leak. Bone dry. Drier than a peppermint fart. Rad has seen better days though. I'd rather not change it if I can avoid it - not because of the cost, but because most of the hoses and hose clamps look thoroughly rusted and I fear I'd be entering a whole world of pain getting them off. Looks to me like it'll drop straight out the bottom if needs be though. 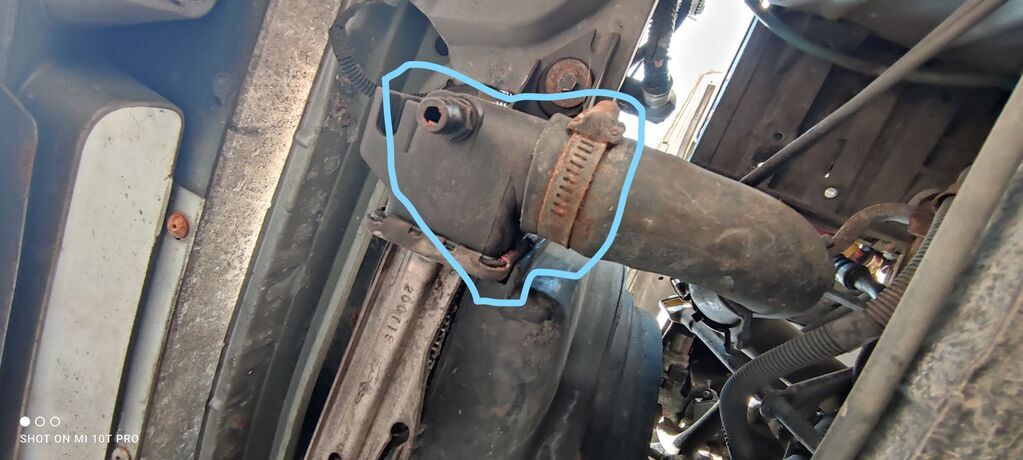 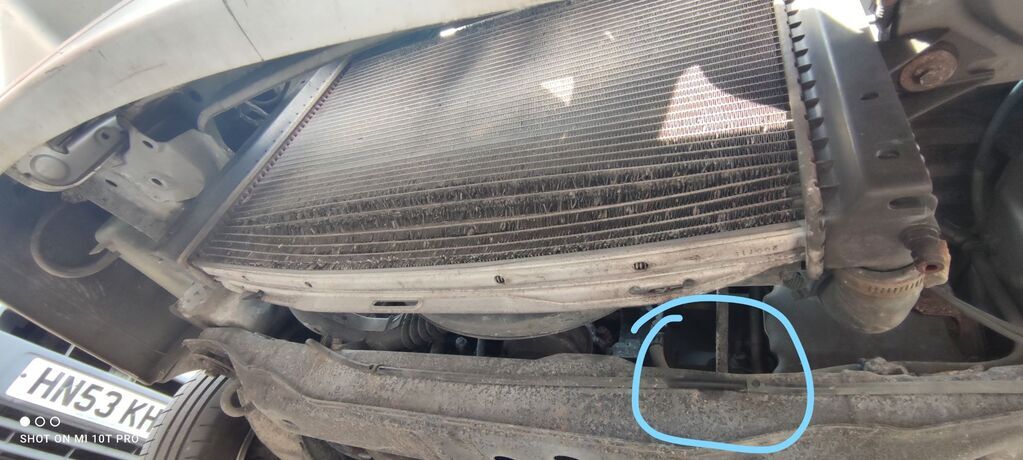 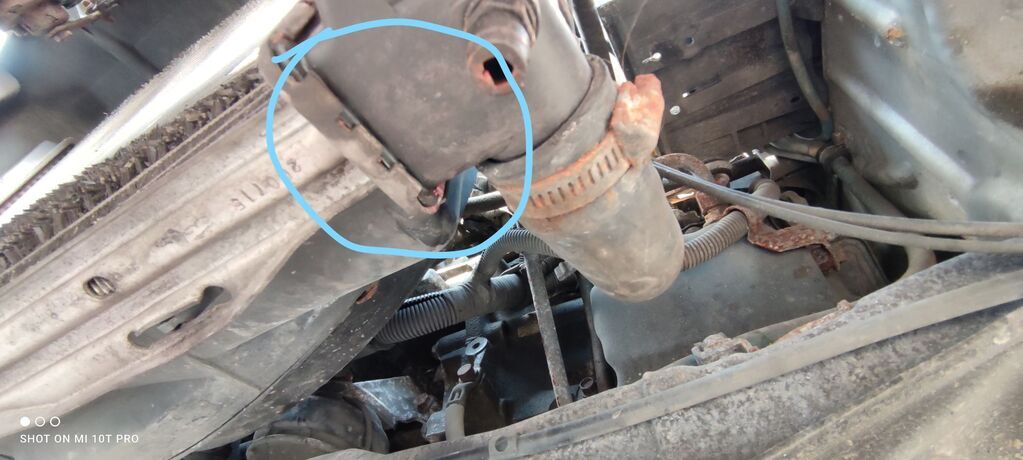 There's some telltale red crustiness under there, and I managed to get fully 3 turns on the radiator drain plug as it wasn't particularly snug...guess I'll just monitor it? |
| |
Last Edit: Apr 17, 2021 10:54:56 GMT by Paul
|
|
Paul
Posted a lot
  
Posts: 1,994
Member is Online
|
|
|
|
This week's update is a decidedly mixed bag. Starting with the crankshaft sensor... Old one held in place with 2 T40 torx bolts and one plug 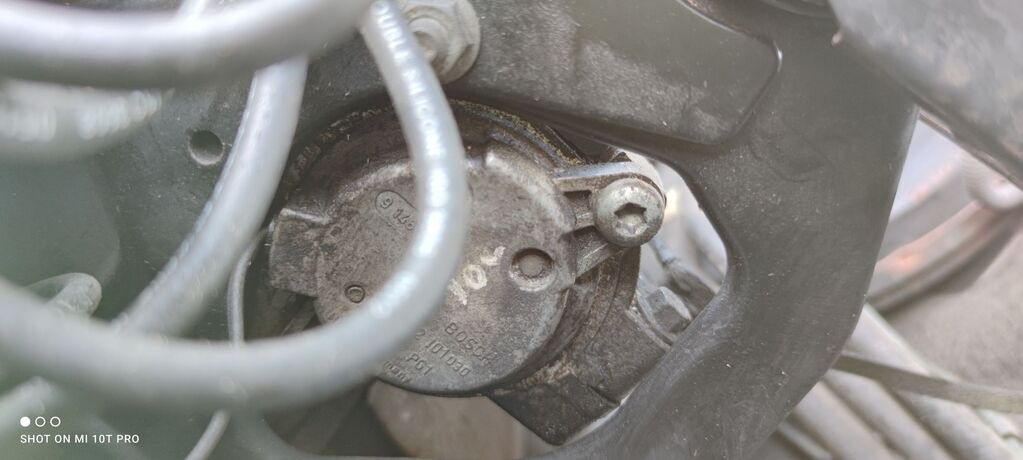 Inside definitely looked a bit furry and the tracks well worn... 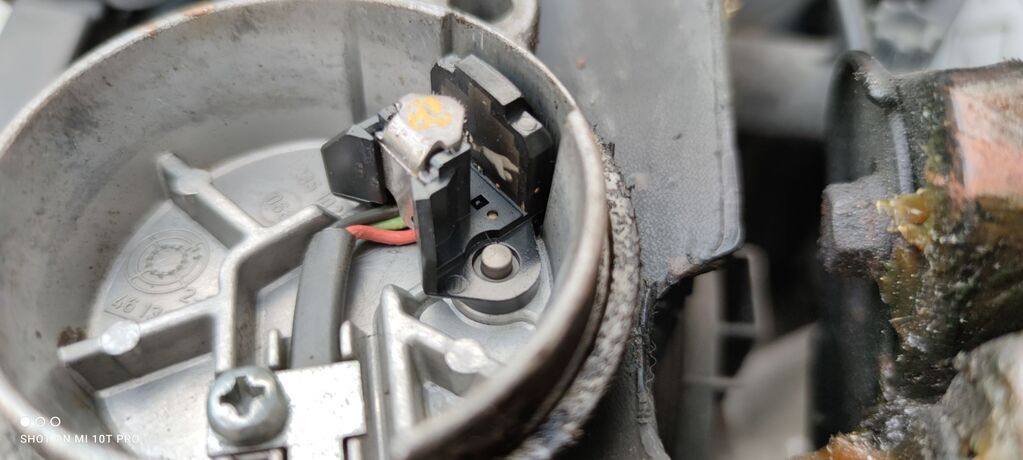 Compared to the new one 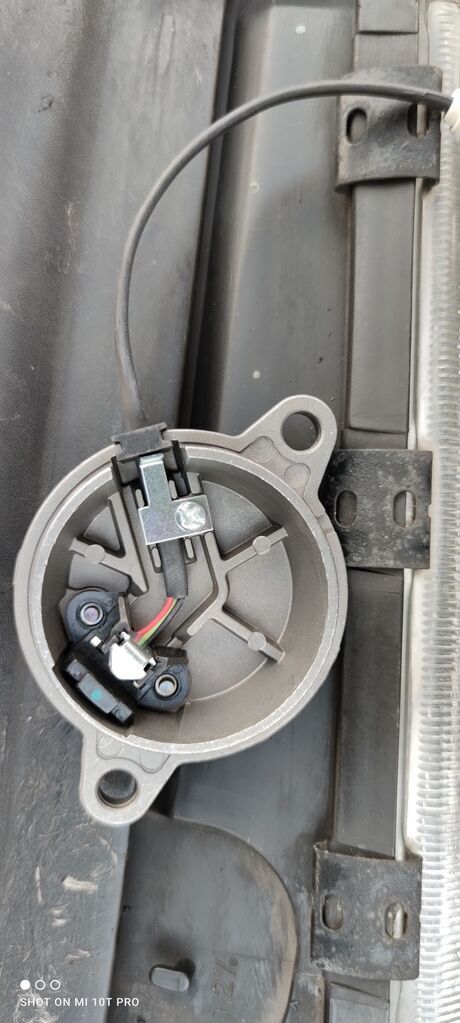 Fitting time about 3 minutes. Time wasted trying to identify why she still ran like a bag of spanners and why I couldn't clear the error code - 15 minutes. As it happens, these parts work better when they are plugged in. Once plugged in she instantly ran smoother and not reeking of petrol. Problem #1 solved. 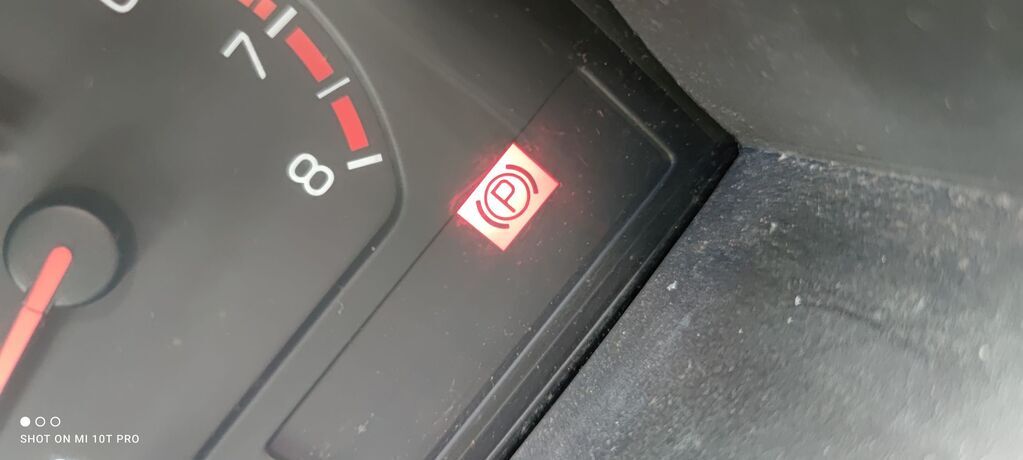 Sadly chucking a bottle of Radweld down the expansion tank did nothing to seal up the leaky rad 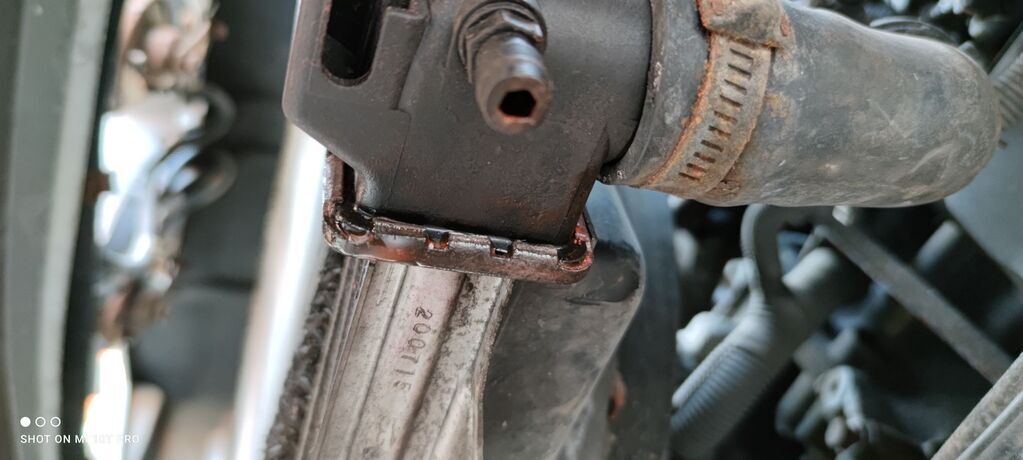 It's hard not to see why really, this one has seen better days 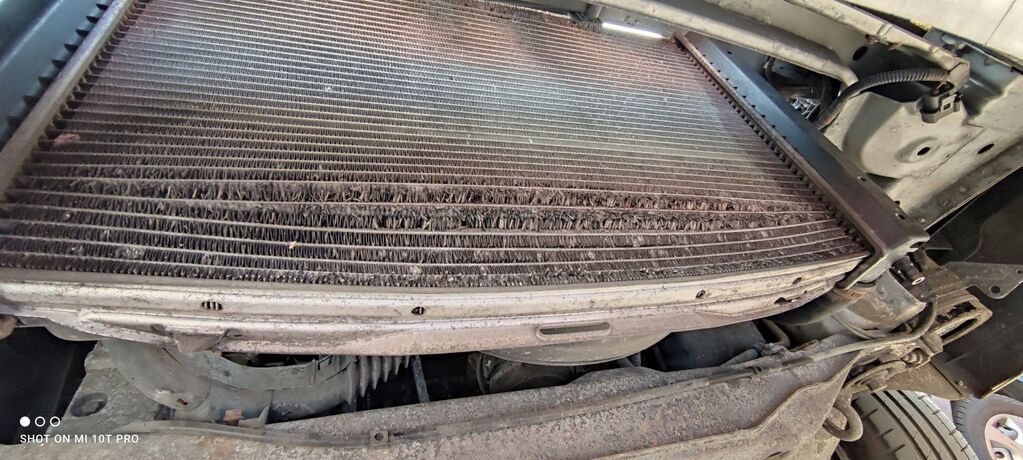 So, start with drainage...mmm, cherry red (I think it's actually supposed to be green, but since this is what's in there I'll stick with fresh red after) 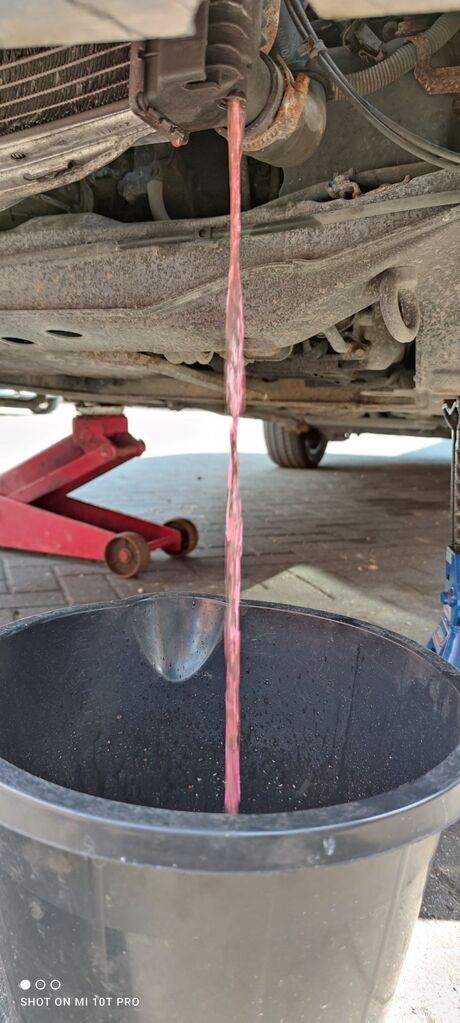 The first in what was to be a recurring theme of corroded and snapped bolts...this is one of the 8mms holding the fan to the back of the rad. Both snapped of course. 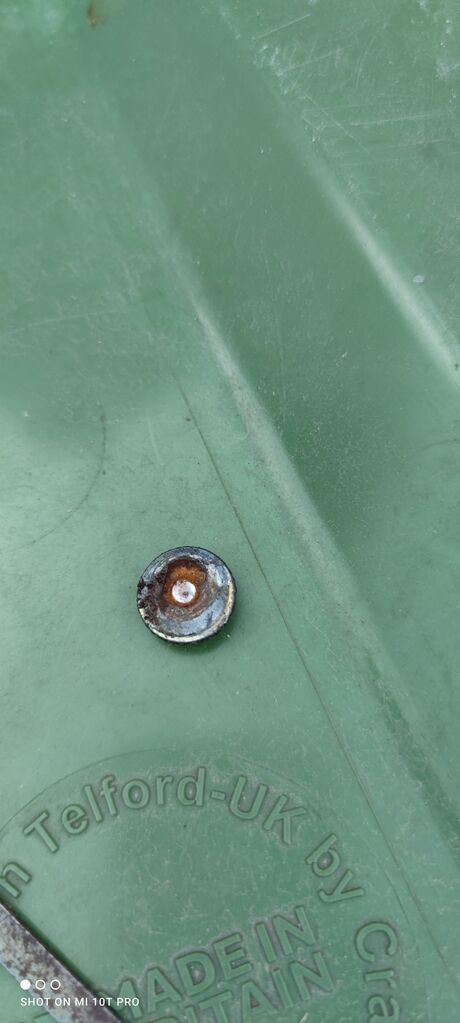 Jubilee clip on the lower rad hose didn't fancy it either. Required some rather subtle and deft work with an angle grinder to snap the tension 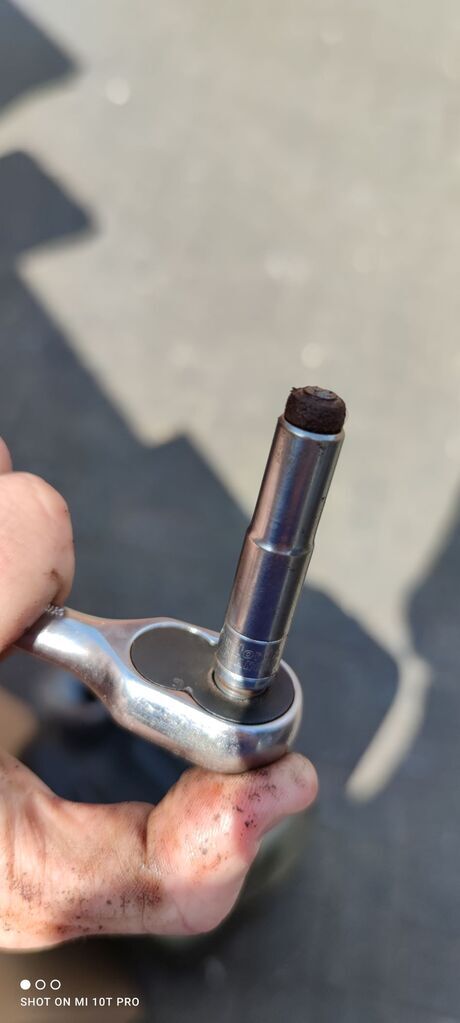 The top of the radiator fan shroud is home to a wide range of plugs and connectors. I was initially worried about getting them all back in the right place - hence the picture - but not only is every plug markedly different, but those smart Swedes even supplied a diagram. Plugs were unplugged, fan shroud removed. 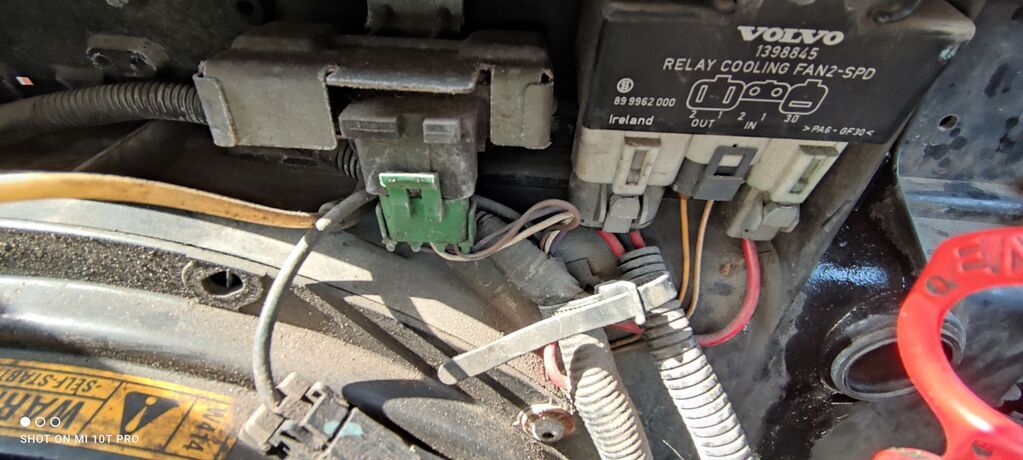 Hoses removed, oil cooler lines removed, slave labour employed to flush the system. He already has the unimpressed look of his dad down to a tee 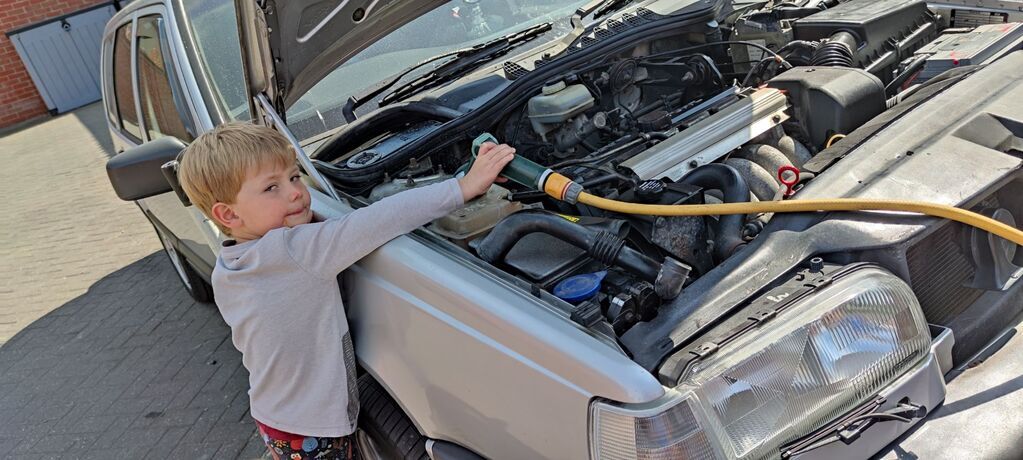 Left with the last two bolts mounting bolts to remove...of course one captive nut was no longer captive. I'd had just about enough by this time, so the angle grinder made light work of the last plastic bracket and the remains of the bolt 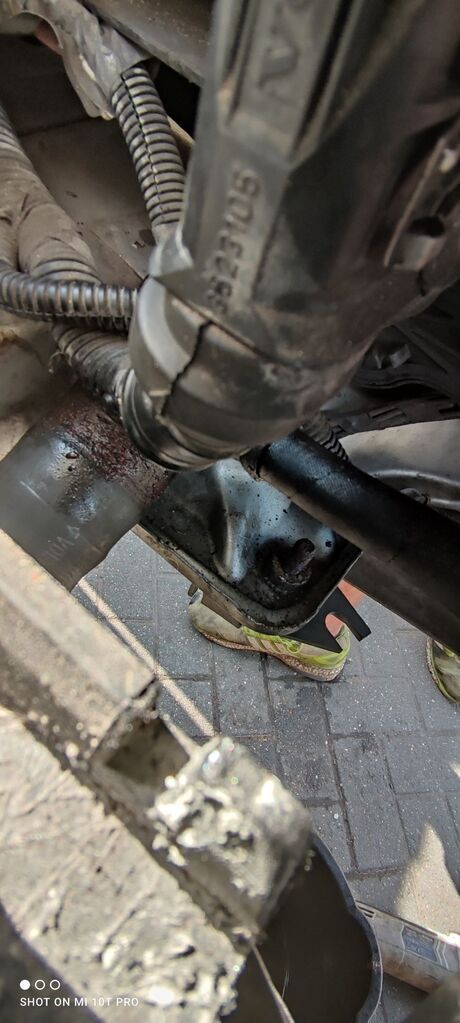 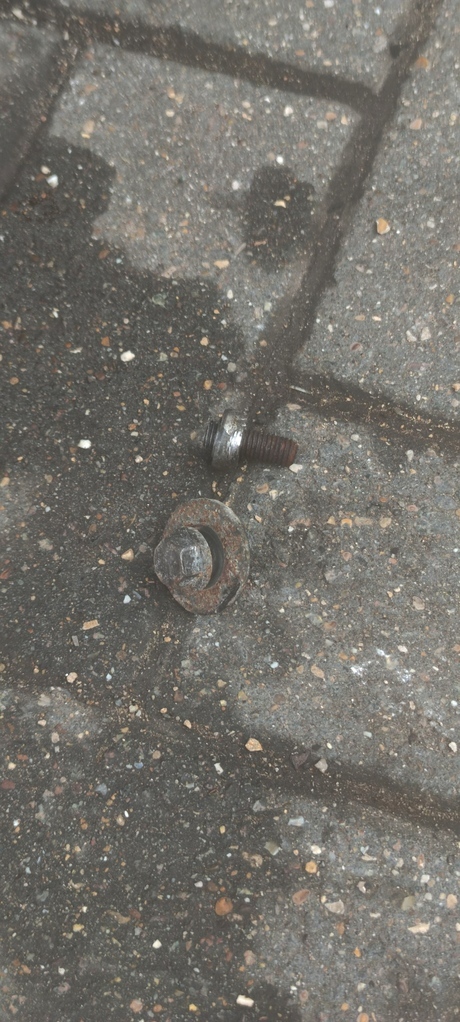 Yeah, that looks shot. 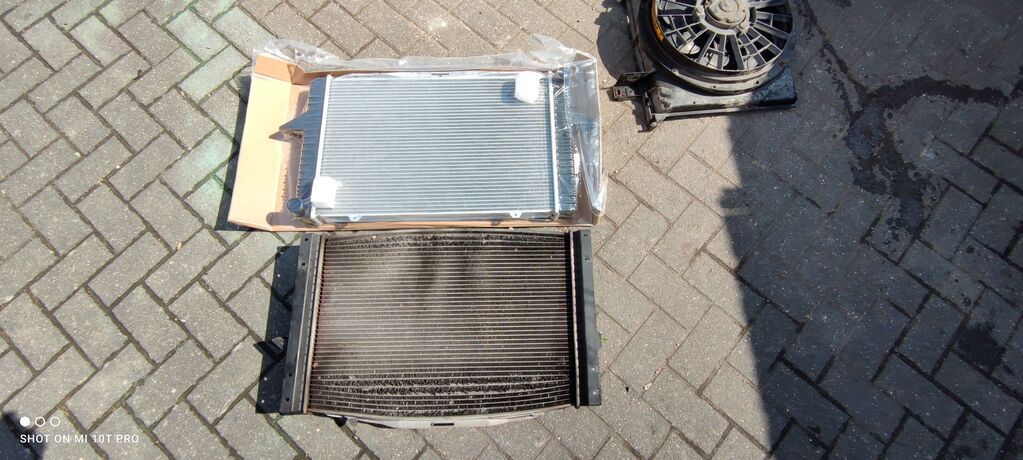 Sadly it was here that play had to stop. Or rather, I got the new rad fitted and went to refit the cooler and oil lines only to find that the radiator I had purchased didn't have the inlet/outlet for the oil cooler. Turns out I'd bought a manual rad instead of an automatic one. Not only did I fail to read the description, I had already taken it upon myself to 'modify' (read mangle) one of the brackets to accommodate the fact that I'd lost the captive nut. Sigh. So, ANOTHER replacement rad has been ordered. Refitting is simply the reversal of removal, right? |
| |
|
|
hairymel
Club Retro Rides Member
avatar by volksangyl
Posts: 1,081
Club RR Member Number: 207
|
|
|
|
...and some slave labour...  I have trouble keeping fully up to date with the constant fleet changes, and don't remember that pressure washer before , but i deffo only recall you having one child? |
| |
whats that burning smell?
oh curse word :-(
|
|
glenanderson
Club Retro Rides Member
Posts: 4,341
Club RR Member Number: 64
|
|
|
|
|
I have often been reminded that things work better when plugged in... 🤣🤣
|
| |
My worst worry about dying is my wife selling my stuff for what I told her it cost...
|
|
|
|


