jmsheahan
Club Retro Rides Member
Posts: 689
Club RR Member Number: 121
|
|
Dec 13, 2021 11:15:52 GMT
|
A rapid fire update! Realised the other day this has been 'away' for over a year with various friends asking if it still exists. Progress is well underway at the bodyshop. Not too many photos at the moment, just the one when I went to check on progress the other week but it's all been documented and I'll update in due course. 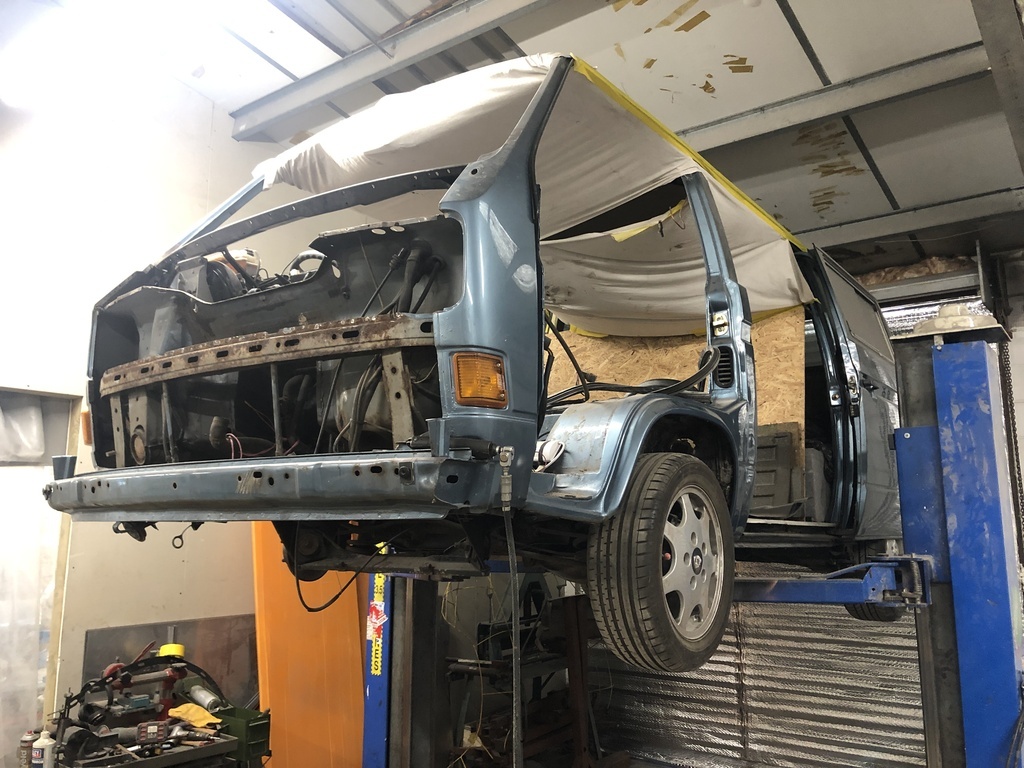 So far one side is complete, new arch, new B Pillar (I'll let the photos below show the state of that), new drivers floor (old one was plated over and held in with filler), new front support and at this time of writing the other side is well underway too. It's looking really good. I'd like to think I'm relatively clued up when it comes to retro's but damn this van was hiding some horrors under it's underseal! State of that: 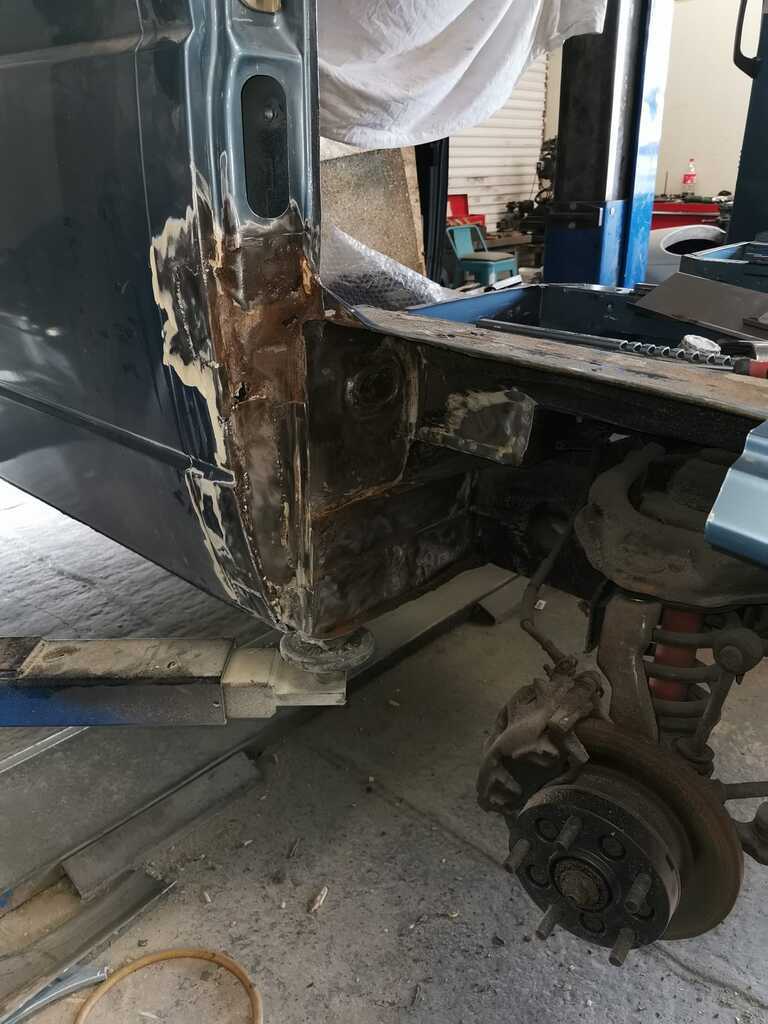 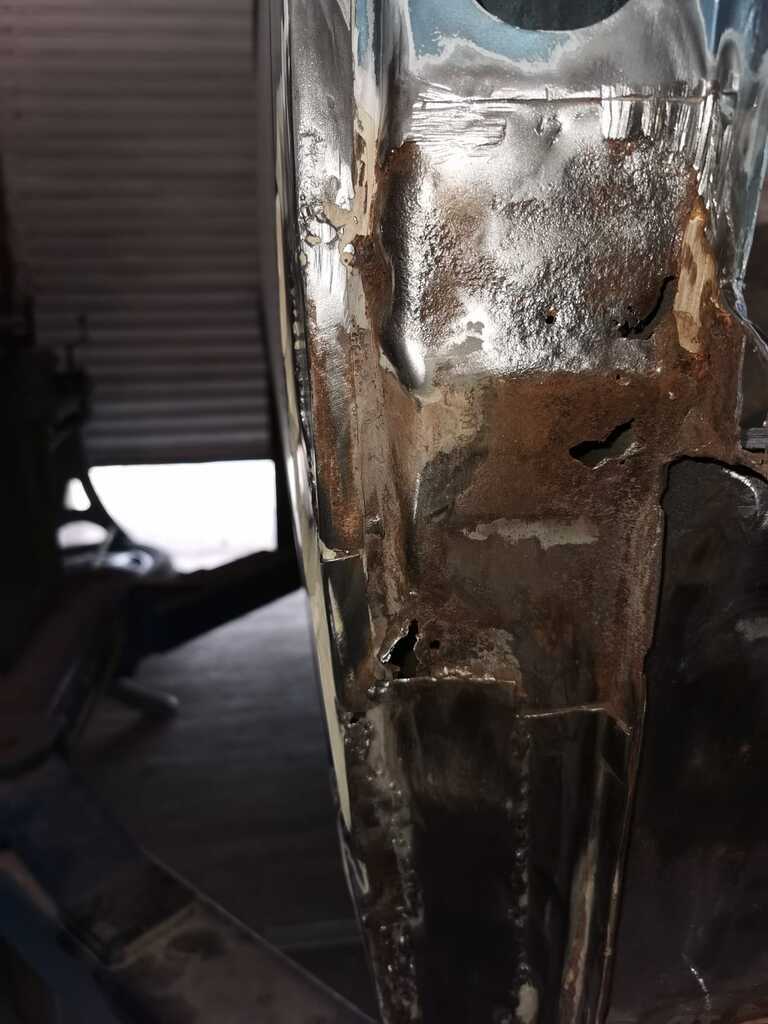 Box of 'remains' 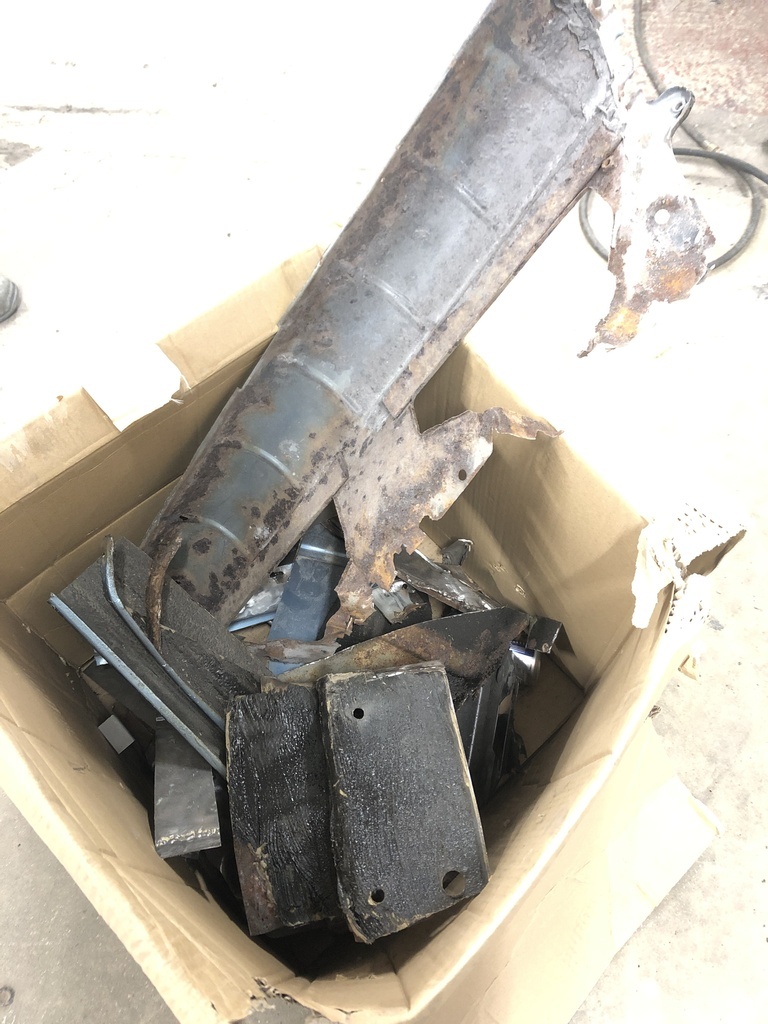 In other news I've been slowly gathering parts. 996 calipers for the front ('safety' item you know  ) 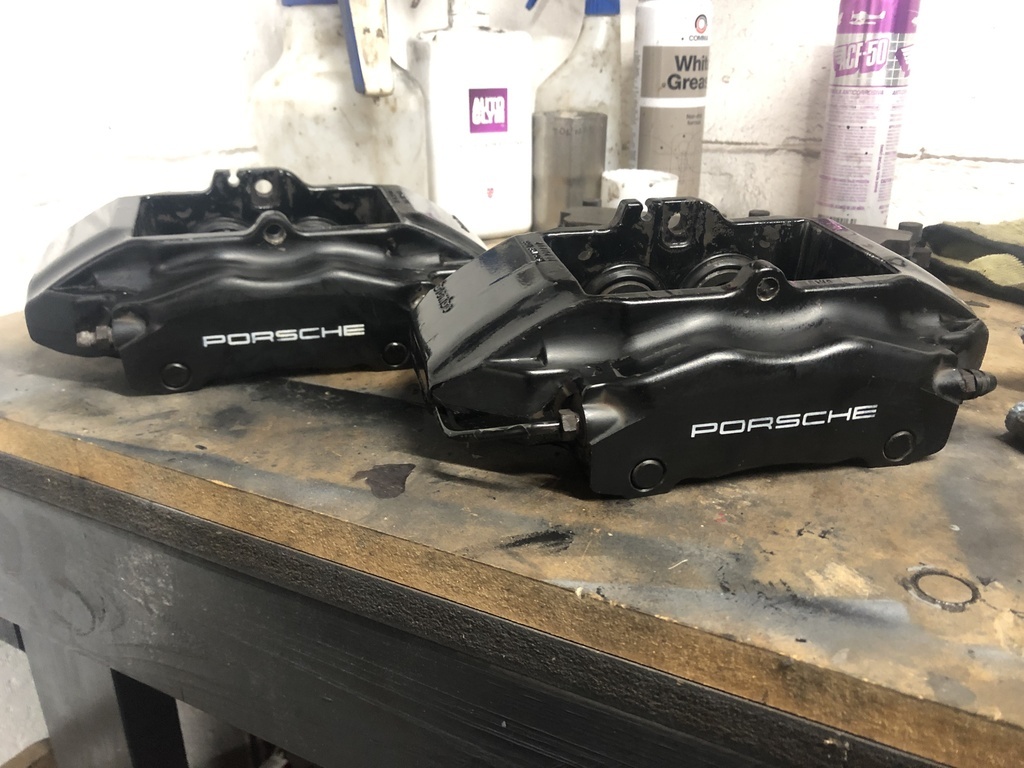 Picked up this beautifully engineered shifter mechanism from 025 Motorsport. This should help reduce the 3 miles of throw travel between each shift and it's centre-biased. Most importantly it's not bent like the current stock one. 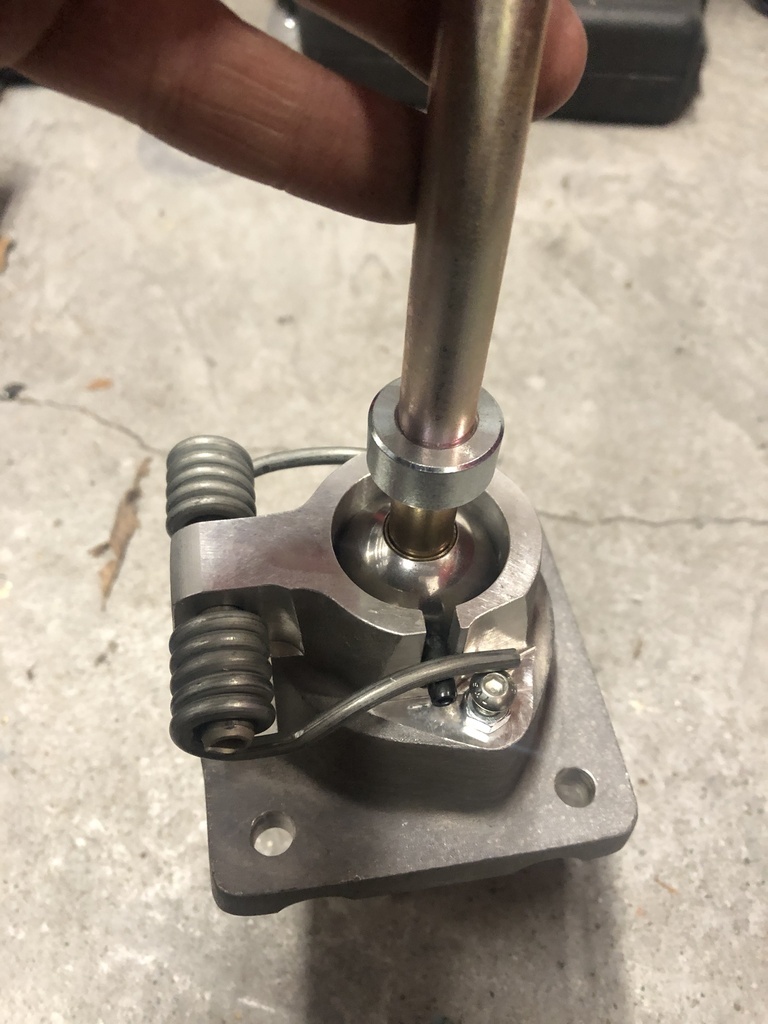 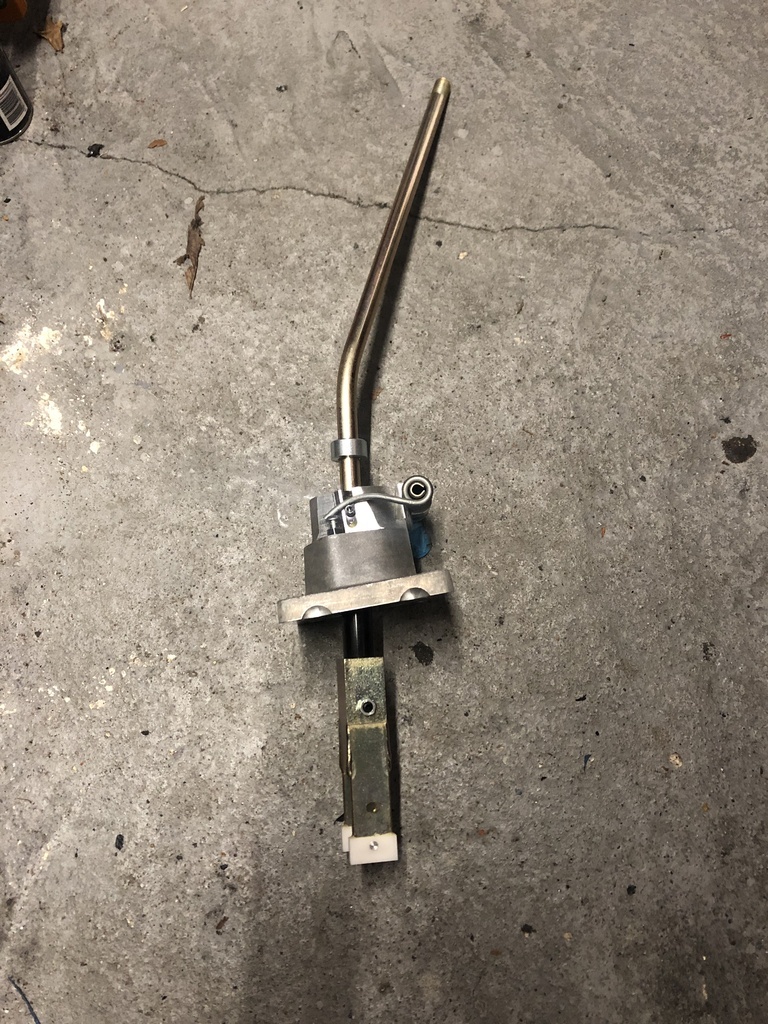 Lastly, I've finally taken the plunge and bought myself a Mig welder. I have a long learning curve ahead of me but it's a skill I've always wanted to learn so here goes. It's been incredibly frustrating lacking the skill set to be able to tackle some of the van's bodywork myself so fingers crossed this is a good step towards having those for future work. 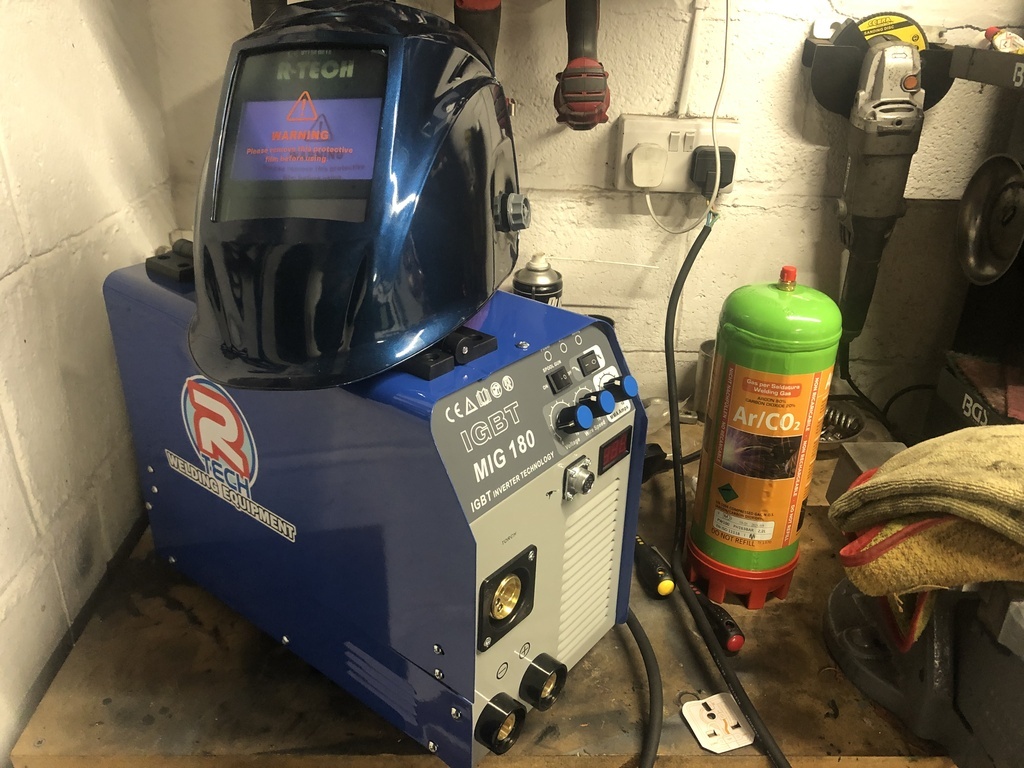 Best stock up on these 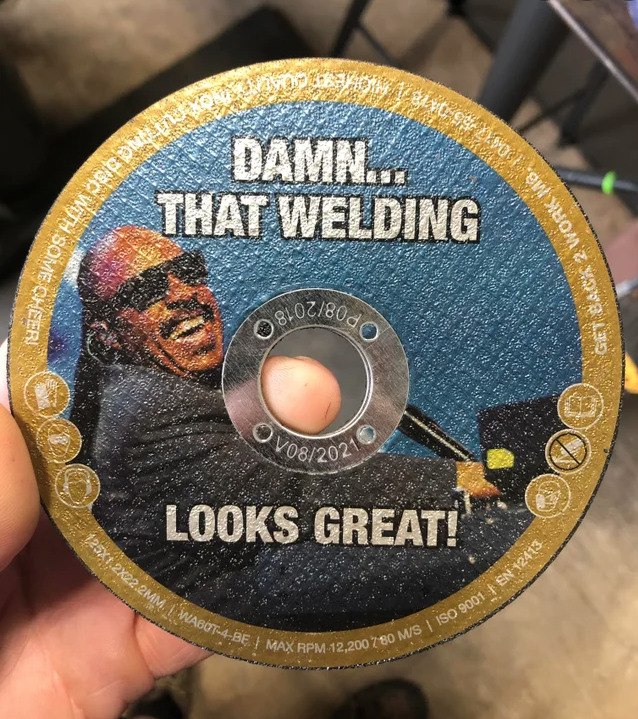 Hopefully more soon, literally can't wait to get stuck back in to this! |
| |
Last Edit: Dec 13, 2021 11:18:32 GMT by jmsheahan
|
|
|
|
|
|
|
Dec 13, 2021 17:31:35 GMT
|
Lastly, I've finally taken the plunge and bought myself a Mig welder. I have a long learning curve ahead of me but it's a skill I've always wanted to learn so here goes. It's been incredibly frustrating lacking the skill set to be able to tackle some of the van's bodywork myself so fingers crossed this is a good step towards having those for future work.  Best stock up on these  Hopefully more soon, literally can't wait to get stuck back in to this! Good choice of MIG welder, I have one of these myself. Makes my welds look half decent. As for the grinding disk; Brilliant, where did you get these? |
| |
|
|
jmsheahan
Club Retro Rides Member
Posts: 689
Club RR Member Number: 121
|
|
|
|
Good choice of MIG welder, I have one of these myself. Makes my welds look half decent. As for the grinding disk; Brilliant, where did you get these? Ah thats good to hear. Welding wise for me, it's definitely a case of 'all the gear no idea' at the moment but after a lot of research I thought it best to spend a tad more and get something semi decent. Just need to get a new regulator as the one supplied is for the massive gas bottles and I only have that small hobbyweld disposable. Then I'm ready to start blowing holes in sh*t and making 'garden art' whilst I practice. No idea on the discs I'm afraid, just saw it and found it funny  |
| |
Last Edit: Dec 14, 2021 9:47:45 GMT by jmsheahan
|
|
|
|
|
|
|
|
Advice: invest now in the big bottle of gas … it’s the only way to go. Way cheaper in the long run, and so much more convenient.
Looking at that bog and previous welding …. this was meant to be a “nice van purchased from two nice people”, right? I wonder if they knew the full story? Good job hanging in there with it.
I like the 996 stoppers.
John
|
| |
|
|
|
|
|
|
|
|
Just fully caught up on this thread,
Excellent work and perseverance, it's going to be a cracking motor when it's finally, (are they ever,😁😁) finished,
It's always great to see the "do it properly, do it once" attitude,
Looking forward to seeing future updates on this thread,
Nigel
|
| |
BMW E39 525i Sport
BMW E46 320d Sport Touring (now sold on.)
BMW E30 325 Touring (now sold on.)
BMW E30 320 Cabriolet (Project car - currently for sale.)
|
|
jmsheahan
Club Retro Rides Member
Posts: 689
Club RR Member Number: 121
|
|
Dec 15, 2021 10:27:05 GMT
|
Cheers guys, appreciate the comments  Indeed I should have rented a big bottle. I bought a hobbyweld one so I could have a practice without a huge canister taking up space in the garage, and for less outlay. Probably a bit shortsighted in hindsight, especially needing a different regulator. Anyone have any recommendations for suppliers? Yes that's a question that I mulled over in my head many times! In fairness to the previous owners, I really don't think they knew and didn't seem hugely mechanically minded. More concerning was the fact it passed MOT's and they were driving about in the state it was seemingly unaware. There's ZERO paperwork with the van, and all I can tell from MOT history is there was a period of a few years where it was off of the road before being sold to the previous owners. I think that may have been where most of the bodges happened and it was blown over with a fresh lick of colour. The paint is actually very good, it's just a shame corners were cut - windows not removed, filler repairs etc. A few months ago I was beating myself up a bit thinking HOW could I not have seen this? I've been around enough ropey retros to know what I'm looking at but the reality is when you can only visually inspect the surface, things get missed. Perhaps I should have been a bit more gun-ho but it's tricky when it's not your own vehicle. The black underseal really has hidden a multitude of sins! It's only once the wheel of death comes out all is truly revealed! I did go in to this eyes wide open so I'm pretty chilled about it all, it's nothing that isn't standard for a T25  I don't plan on selling this anytime soon so it's worth the time/money investment. Just got to bite the bullet and keep trucking through! Can't wait for it to be back so I can get stuck in and pick up the pace for more regular updates. |
| |
Last Edit: Dec 15, 2021 10:28:21 GMT by jmsheahan
|
|
|
|
|
Dec 15, 2021 23:39:27 GMT
|
|
|
| |
Sometimes, others may not understand why you like a car so much. Sometimes, you may not even understand why you like a car so much. But none of that matters; all that matters is that you like the car, and having it makes you happy.
|
|
oldisbetter
Part of things
  If it has a ECU it's complicated :)
Posts: 478 
|
|
|
|
|
I still have the BOC volkszone deal for argoshield which is a 50% discount
|
| |
|
|
jmsheahan
Club Retro Rides Member
Posts: 689
Club RR Member Number: 121
|
|
|
|
|
Been a minute since I've frequented Volkszone. Nice one, will check that out, thanks!
|
| |
Last Edit: Dec 16, 2021 9:27:35 GMT by jmsheahan
|
|
jmsheahan
Club Retro Rides Member
Posts: 689
Club RR Member Number: 121
|
|
Dec 28, 2021 17:15:30 GMT
|
Hope everyone had a great xmas and best wishes to you all! Popped up the workshop in the festive downtime to have a look at progress. Things are shaping up nicely. Most of the drivers arch is now complete: 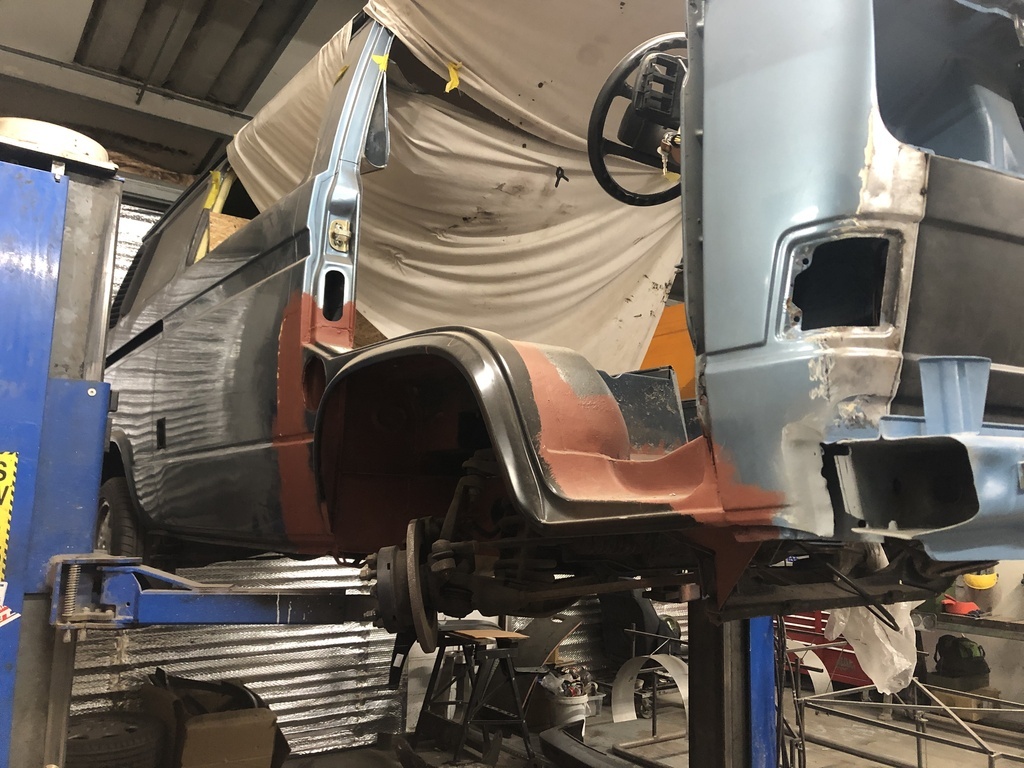 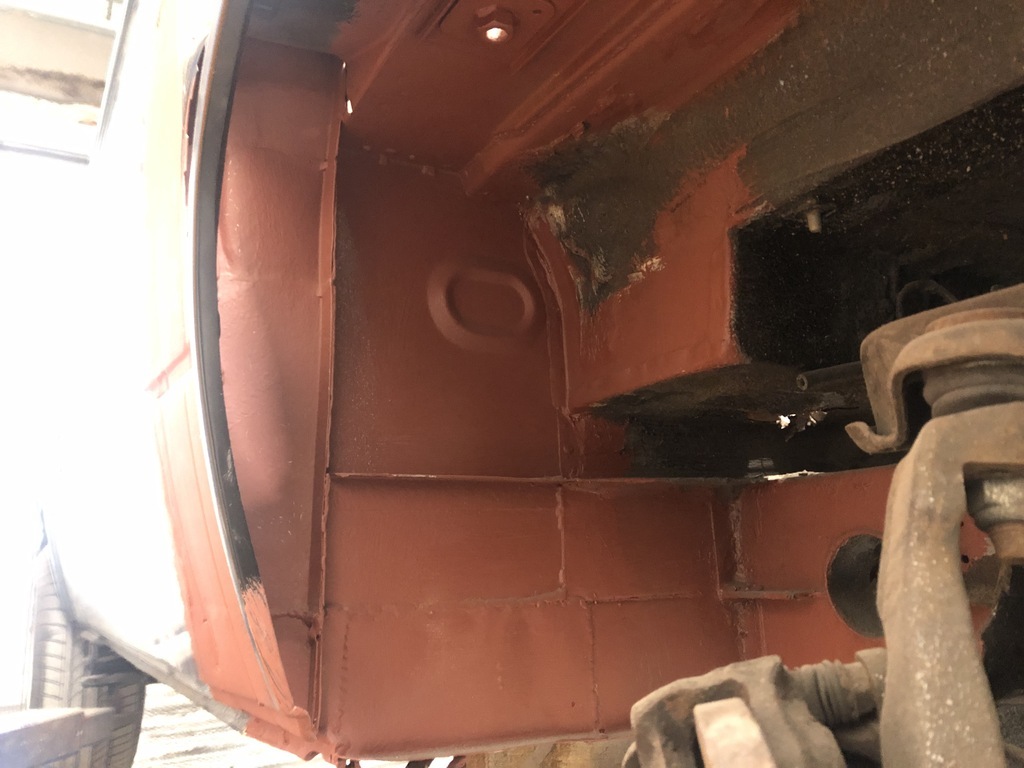 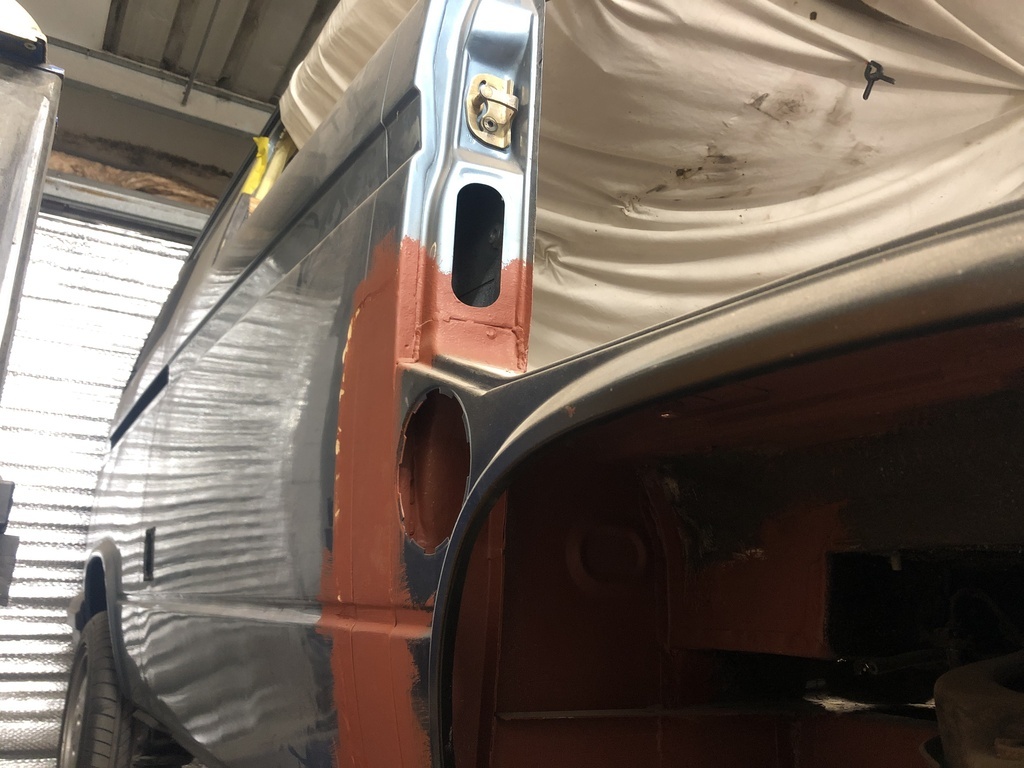 We also now have a front and windscreen lip again! 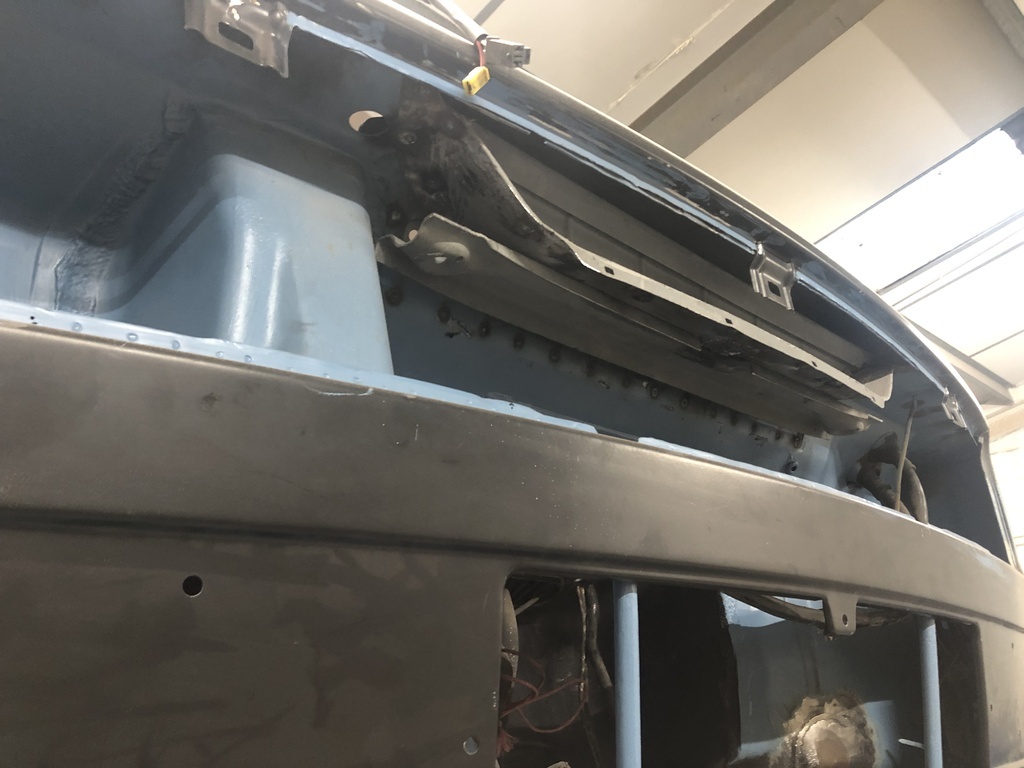 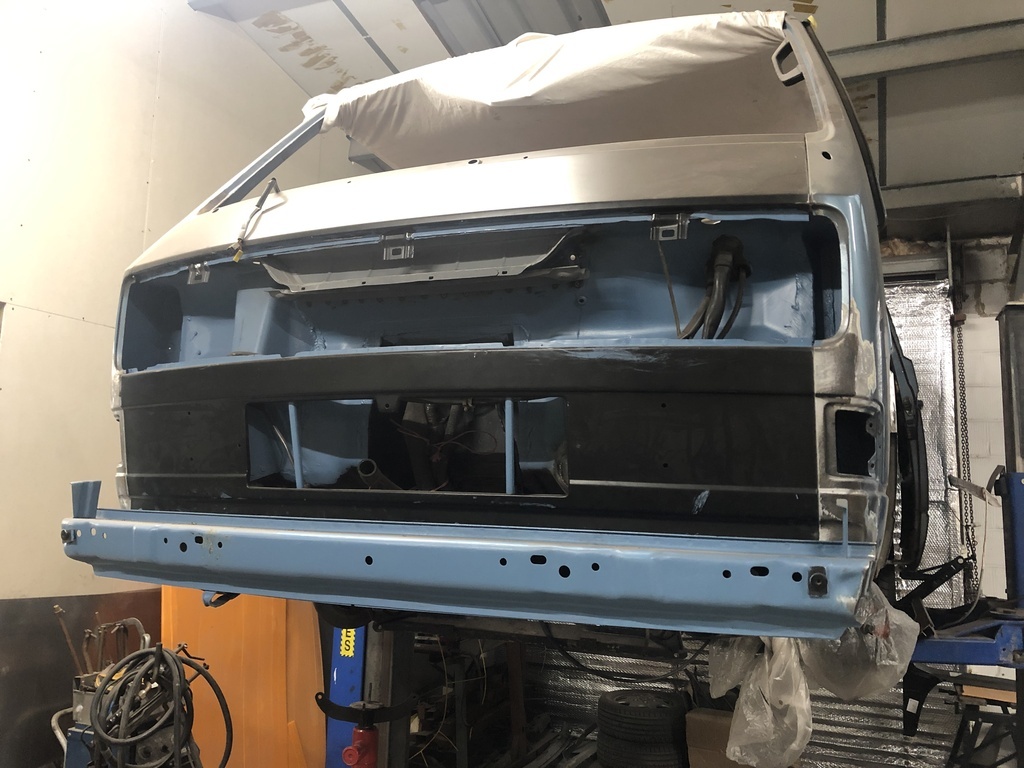 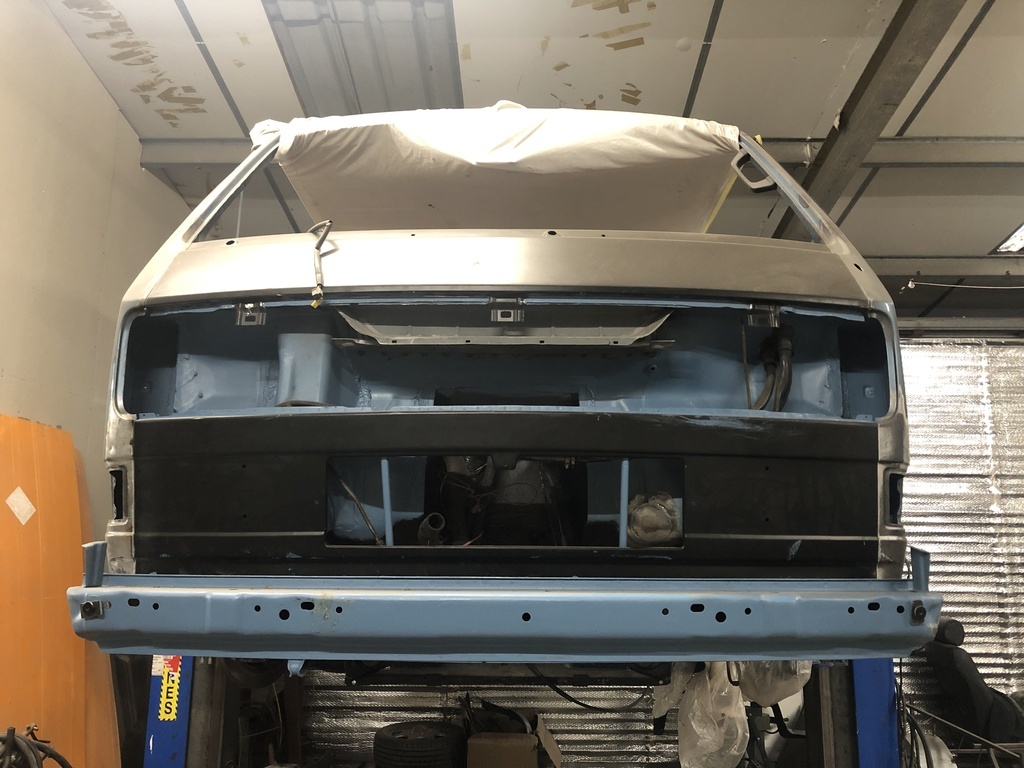 Passengers side sill jacking has largely been replaced along with remedial work on the b-pillar: 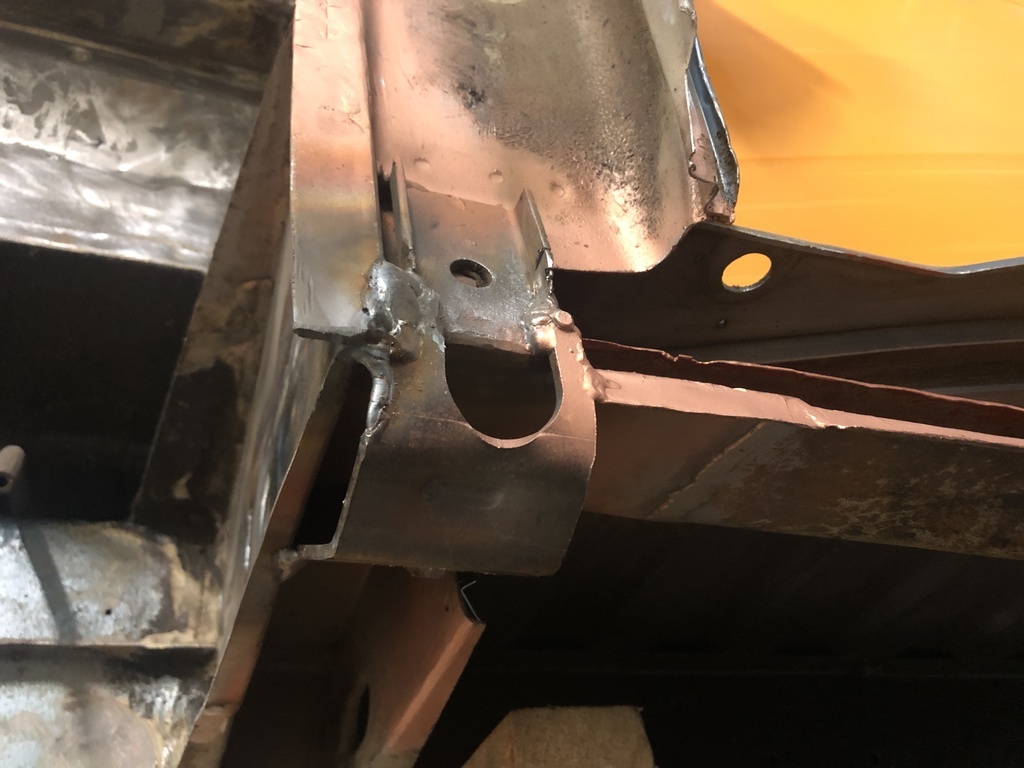 Progress underway for a repeat on the passenger side: 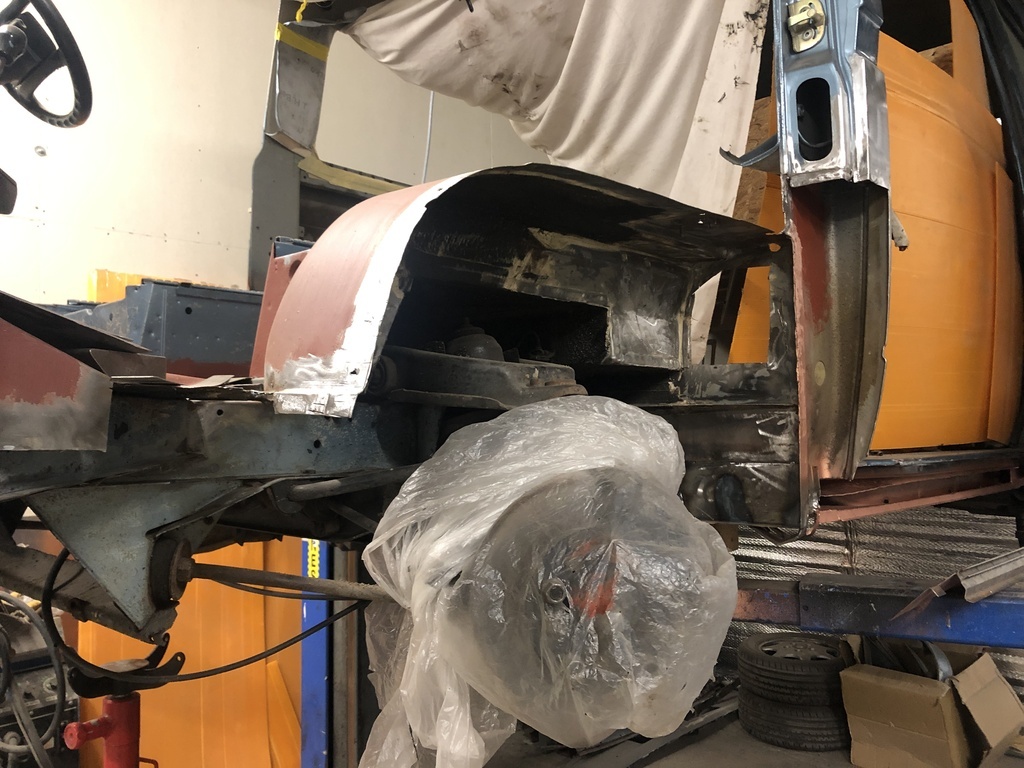 Couple more weeks and the front fabrication work should be finished. Then I need to decide how to dig into the rear arches... GULP |
| |
Last Edit: Dec 28, 2021 17:17:21 GMT by jmsheahan
|
|
|
|
LAndy
Posted a lot
  
Posts: 1,061
|
|
Dec 28, 2021 17:19:09 GMT
|
|
You're making great progress on this! Can't wait to see the front end all finished.
|
| |
Previous retros: 92 AX GTi 92 Scirocco Scala 94 80 sport 87 Golf Cab GTi Current retro: 1965 Clark Cortez YouTube Website Instagram |
|
jamesd1972
Club Retro Rides Member
Posts: 2,921  Club RR Member Number: 40
|
|
Dec 28, 2021 19:32:23 GMT
|
|
Progress is progress, nice choice on welder, my boy is taking the lead on using mine (or ‘ours’ as he sees it..). haven’t been brave enough to do more than patch the visible hole in the rear crossmember on cars get yet as that is just holding back the 1/4 chassis it really needs. We need something cheap to mess with soon.
Think we all catch a cold once in a while on cars but the skill you are learning are worth so much as well as a saving on paying somebody else to do it.
What you doing with the rear brakes ? If it’s anything like my old Skoda I always felt it would take nearly as much on the back wheels as the front.
Keep the updates coming.
James
|
| |
|
|
jmsheahan
Club Retro Rides Member
Posts: 689
Club RR Member Number: 121
|
|
Jan 16, 2022 19:36:17 GMT
|
You're making great progress on this! Can't wait to see the front end all finished. Thanks mate! Progress is progress, nice choice on welder, my boy is taking the lead on using mine (or ‘ours’ as he sees it..). haven’t been brave enough to do more than patch the visible hole in the rear crossmember on cars get yet as that is just holding back the 1/4 chassis it really needs. We need something cheap to mess with soon. Think we all catch a cold once in a while on cars but the skill you are learning are worth so much as well as a saving on paying somebody else to do it. What you doing with the rear brakes ? If it’s anything like my old Skoda I always felt it would take nearly as much on the back wheels as the front. Keep the updates coming. James Thanks James! Indeed, it really has escalated wildly but fortunately, I have an understanding OH and I've just got to suck it up and press on forwards. Nice to hear another R-Tech being put to use, it does seem a really well-made bit of kit. Whilst I am very much in that boat of paying someone else at the moment for fabrication, I hope in the future I'll have the necessary skills to rectify at least some of the horrors myself. Let's face it, this won't be my last 'project' car and there's already a couple of bits on my Mk2 that could do with a tickle from the weldy stick  The rear brakes will be converted to discs using Golf hardware - Mk4 rear calipers for a decent handbrake, and an array of Mk2 bits luckily already in my spares. Disc size I'm unsure of just yet. -------------------------------------------------------------------- Checked in at the bodyshop over the weekend and wow they've really picked up the pace! NSF is now finished, doors are back on and the front from a fabrication point of view is finished. Please excuse the terrible pic, a bit of a rapid-fire shot as the van was in an awkward spot! So thats: - New NSF arch (genuine)
- New OSF arch (genuine)
- New front crossmember (genuine)
- New front valance
- New front rad slam panel
- New heater box and rad support panels
- Repairs to floor panel
- New bumper crumple end panels
- New windscreen lip
- New sliding door sill runner
- New front jacking points
- OSF repairs to inner arch and B pillar
- NSF repairs to inner arch and B pillar both sides
- New seatbelt mounts both sides
- New battery tray
- Plus probably more I've forgotten about!...
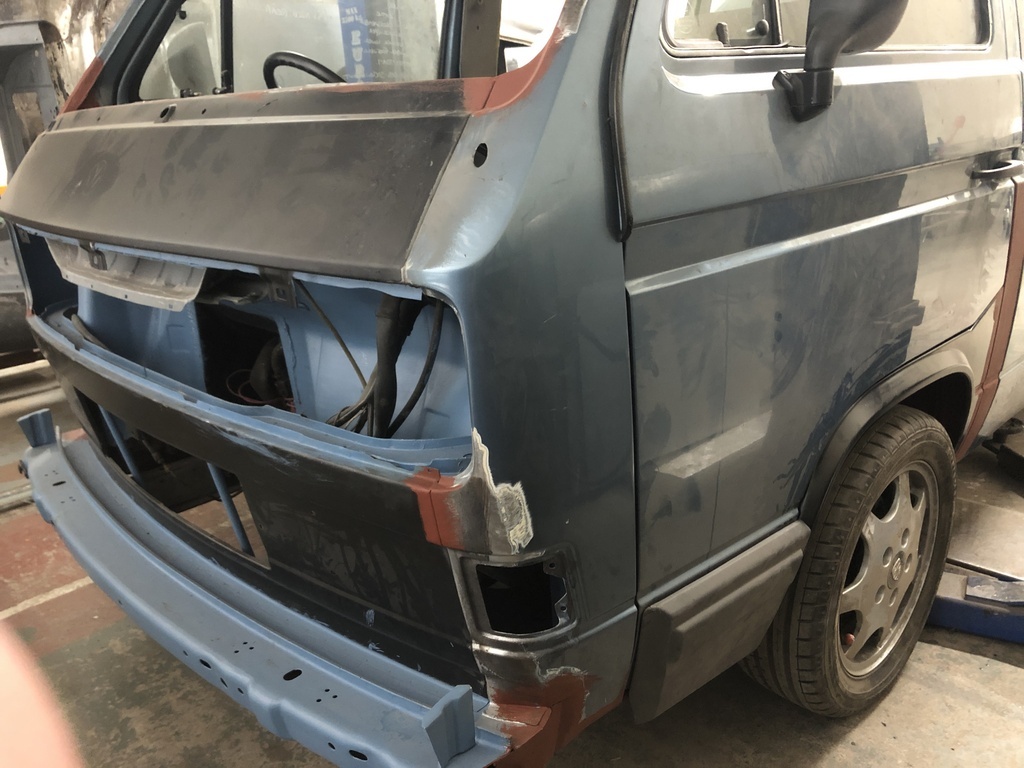  So what's next? Well, having seen the state of the front, I've made the decision to go full steam ahead and cut ALL of the rot out. This is now a full restoration...SHOCK HORROR, I hear you all cry! Who knew...PROJECT CREEP! There's rust creeping in the seams on the rear arches, probably horrors behind the trailing mount arms, and considering the scooby lump going in, I want to make sure these are completely solid. And once that's all be completed...well we're in full respray territory... Baked beans on toast for the next year for me then...watch this space, really going to be chucking everything I have at this! |
| |
Last Edit: Jan 17, 2022 9:09:25 GMT by jmsheahan
|
|
|
|
|
Jan 16, 2022 23:58:28 GMT
|
|
Fantastic work as ever, this remains one of my favorite projects. Glad you’re doing it right. Please keep surgical images coming.
Best, John
|
| |
|
|
jmsheahan
Club Retro Rides Member
Posts: 689
Club RR Member Number: 121
|
|
|
|
Fantastic work as ever, this remains one of my favorite projects. Glad you’re doing it right. Please keep surgical images coming. Best, John Thanks John, really appreciate that! Glad you're along for the ride! |
| |
|
|
jmsheahan
Club Retro Rides Member
Posts: 689
Club RR Member Number: 121
|
|
|
|
Feeling extremely grateful this morn, there really are some awesome people in the world. After a long chat with the bodyshop and making the decision to go full resto, it’s been agreed that I’m going up weekends to remove the engine, gearbox, rear suspension, all windows, trim etc. It’ll save me some precious funds, save a heap of work for the bodyshop, I know how it all came apart, and means I can begin restoring bits away from the van ready for reassembly. We’re all working a bit backwards because of the project creep, but this way we can all get back on track! My mate who was helping me before is being an absolute diamond offering help wherever he can, and is really excited he gets to now paint the entire thing. I’m really humbled and I can’t thank them enough! Speaking of parts away from the van, I began restoring the heater box recently. This looks like it’s been taken from the Titanic due to being in the firing line of the leaky windscreen for so long. It's a real pain to access this when the vans are complete, so I'm replacing anything inside I possibly can. State of that: 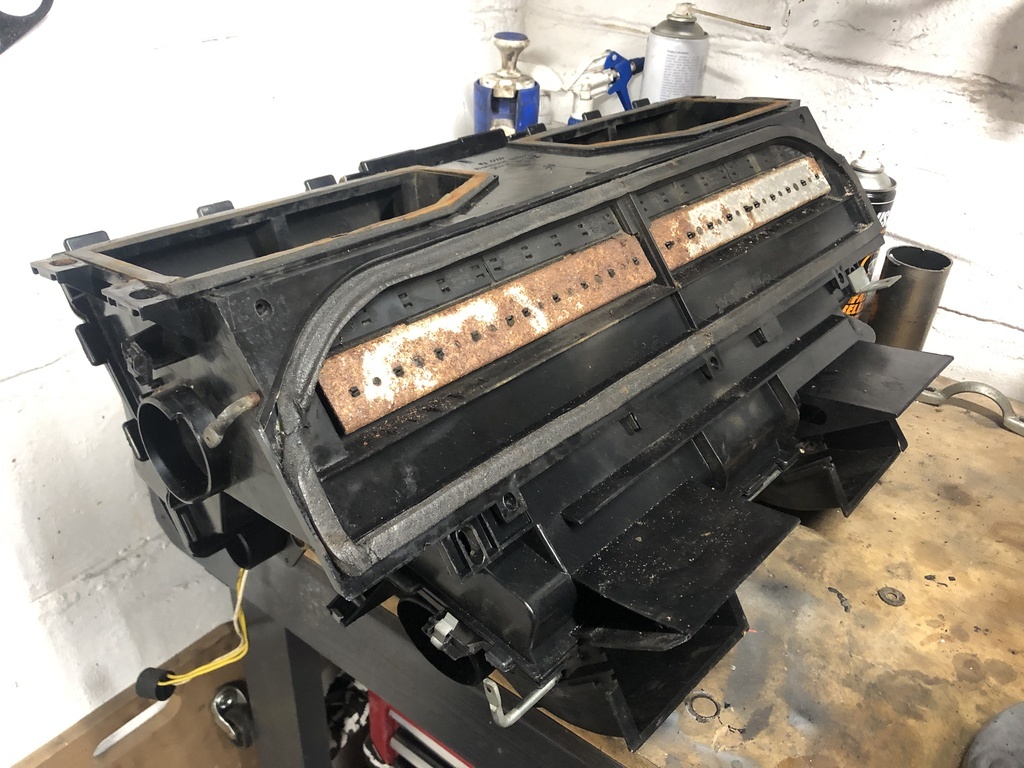 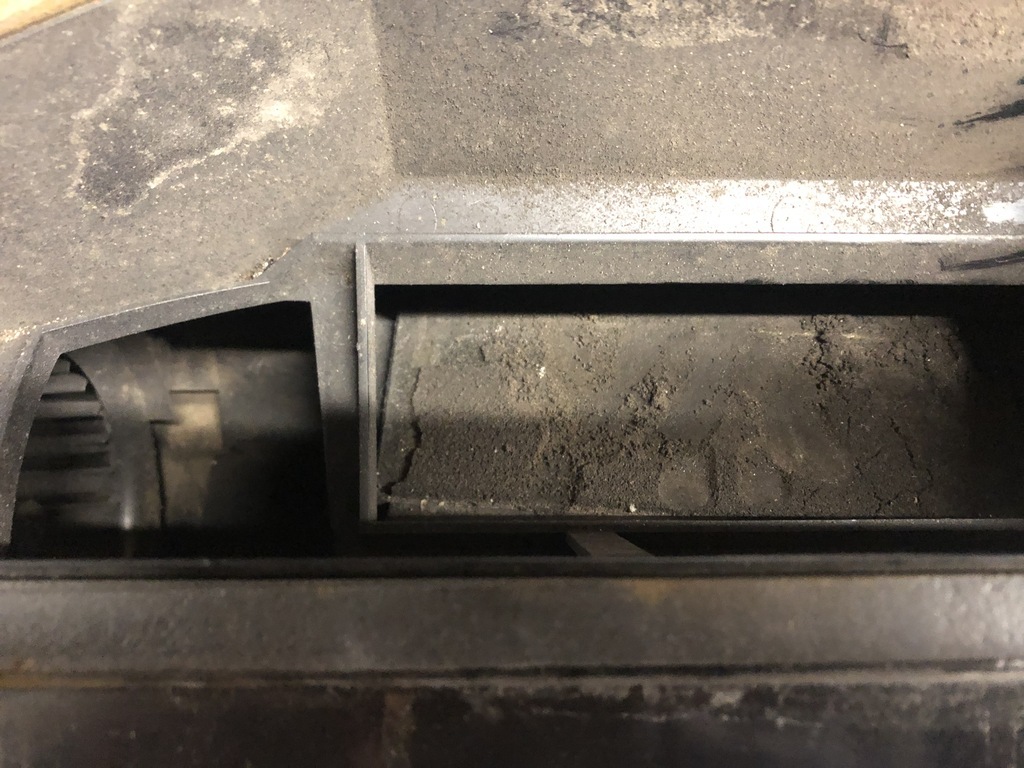 Having had the heater box in my Golf apart, I knew what to expect inside but man, this one was bad! Volkswagen glue these together for some reason, so the first job is taking a dremel/cold chisel and cutting the tabs open to get in. The first time it's been apart and therefore still on its original fan motor and wiring. Seized solid! That would explain why it pops fuses! 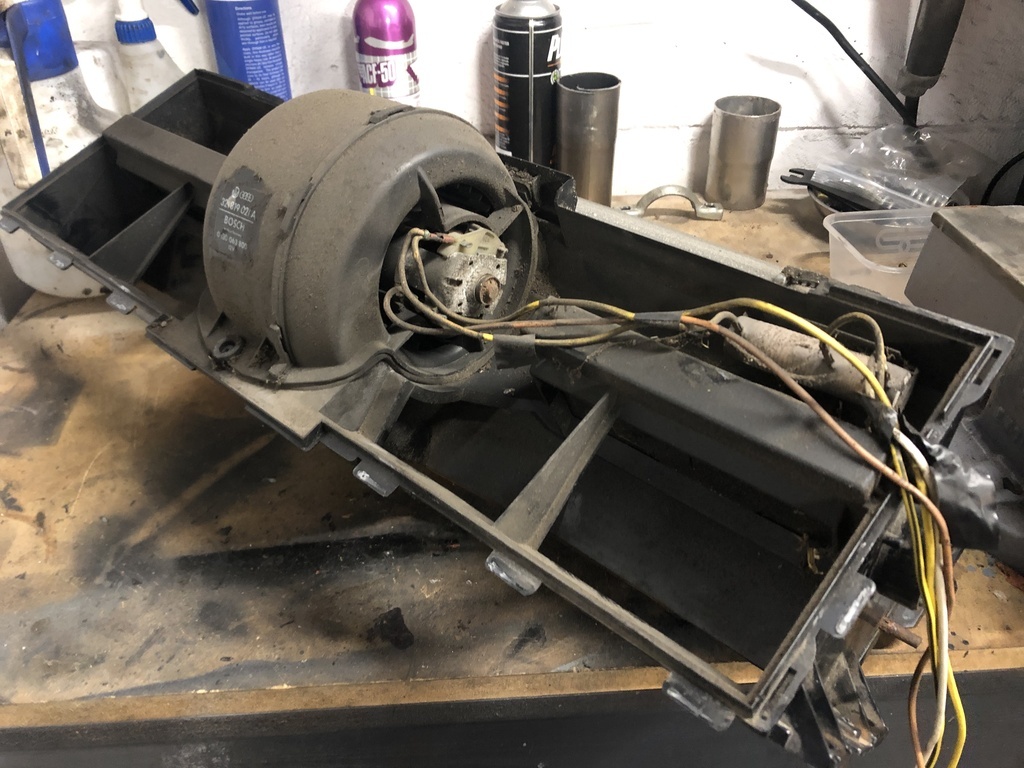 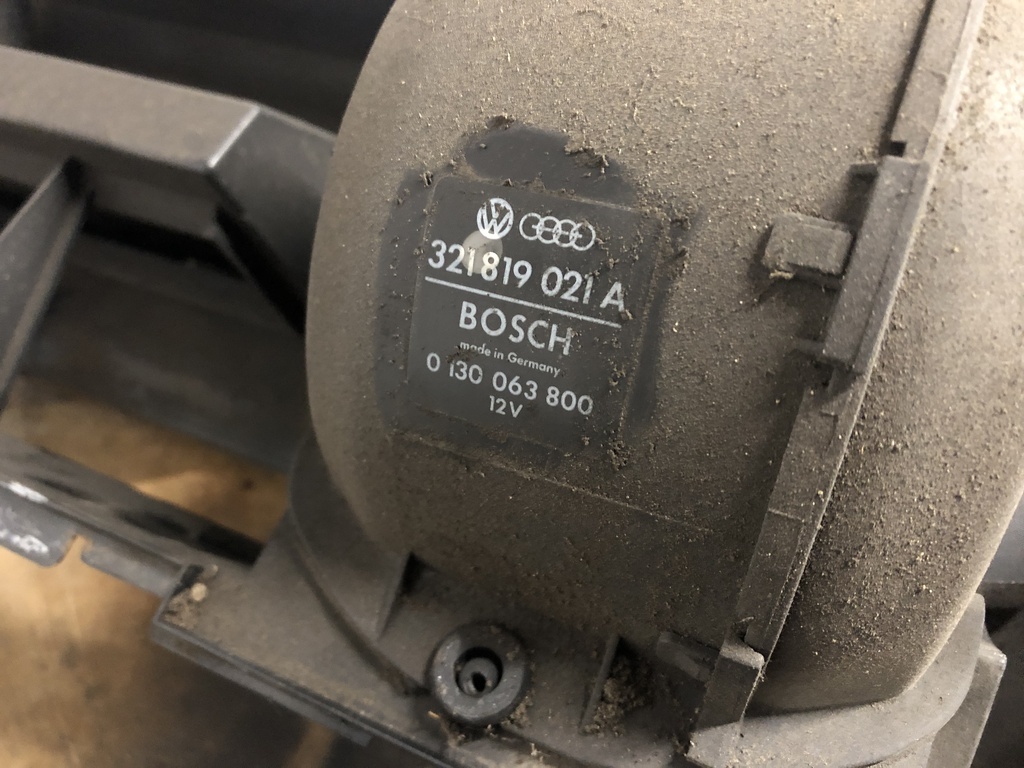 Original matrix and 30 years of roadtrippin'. Bleugh. 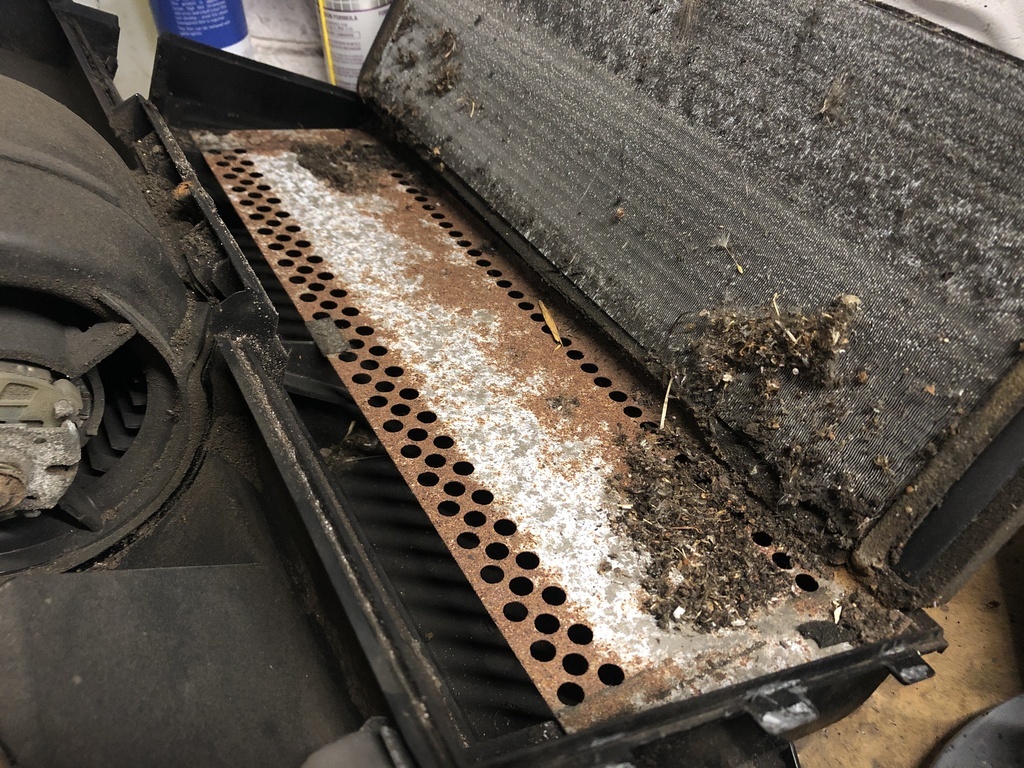 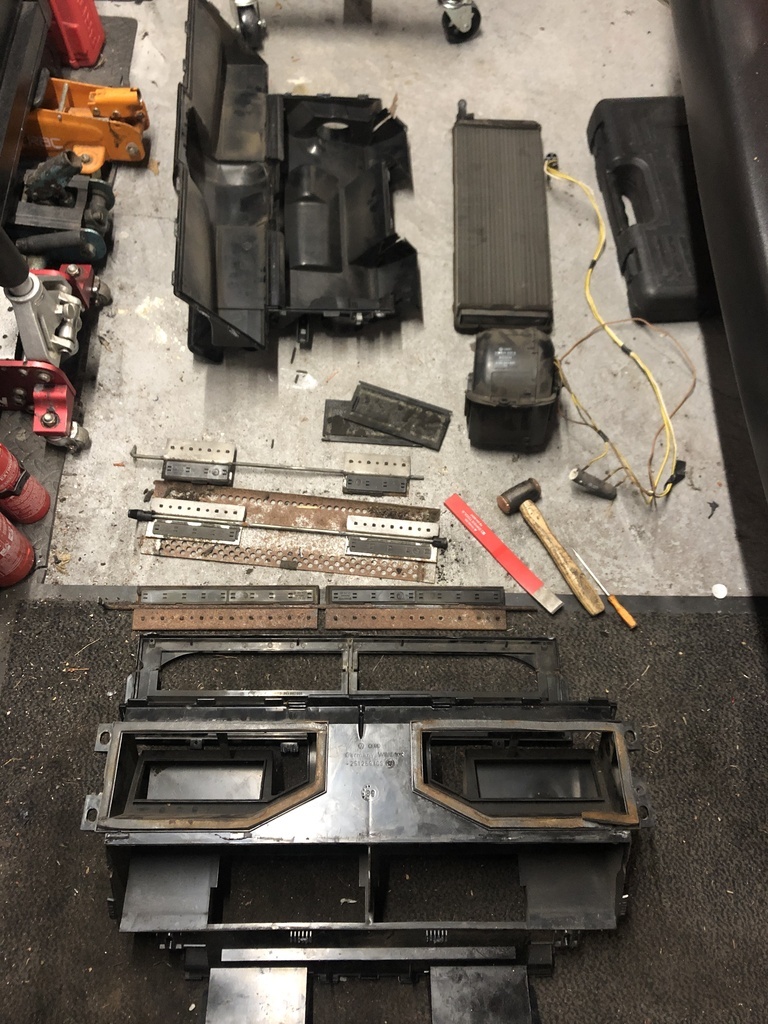 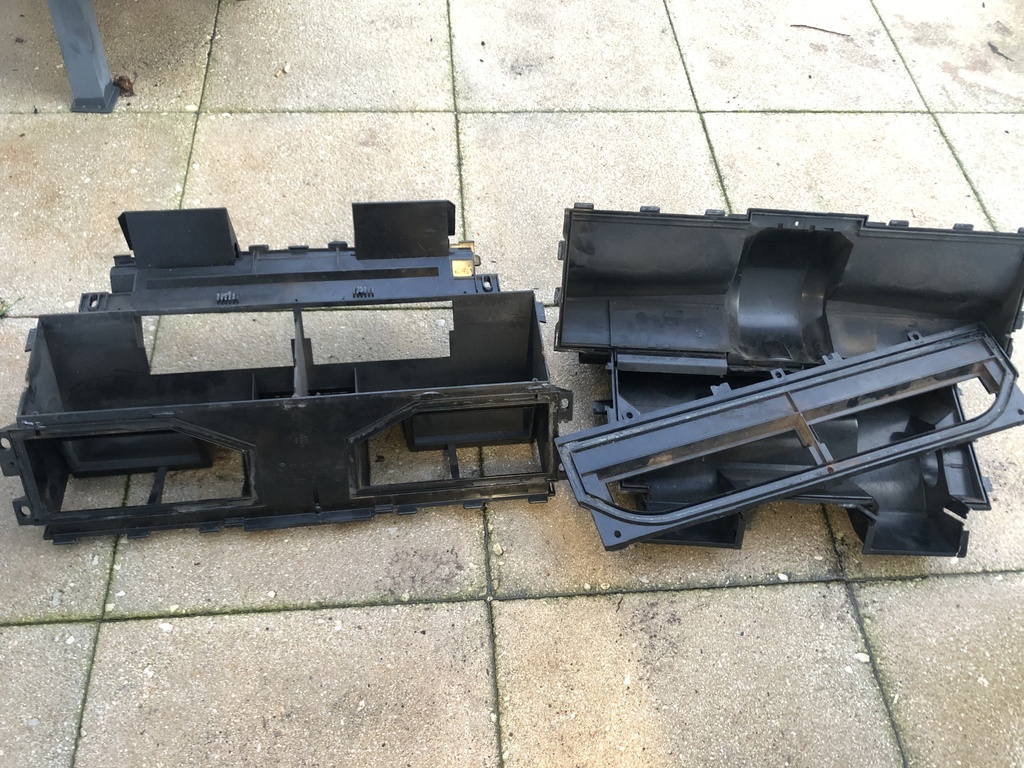 Crusty! 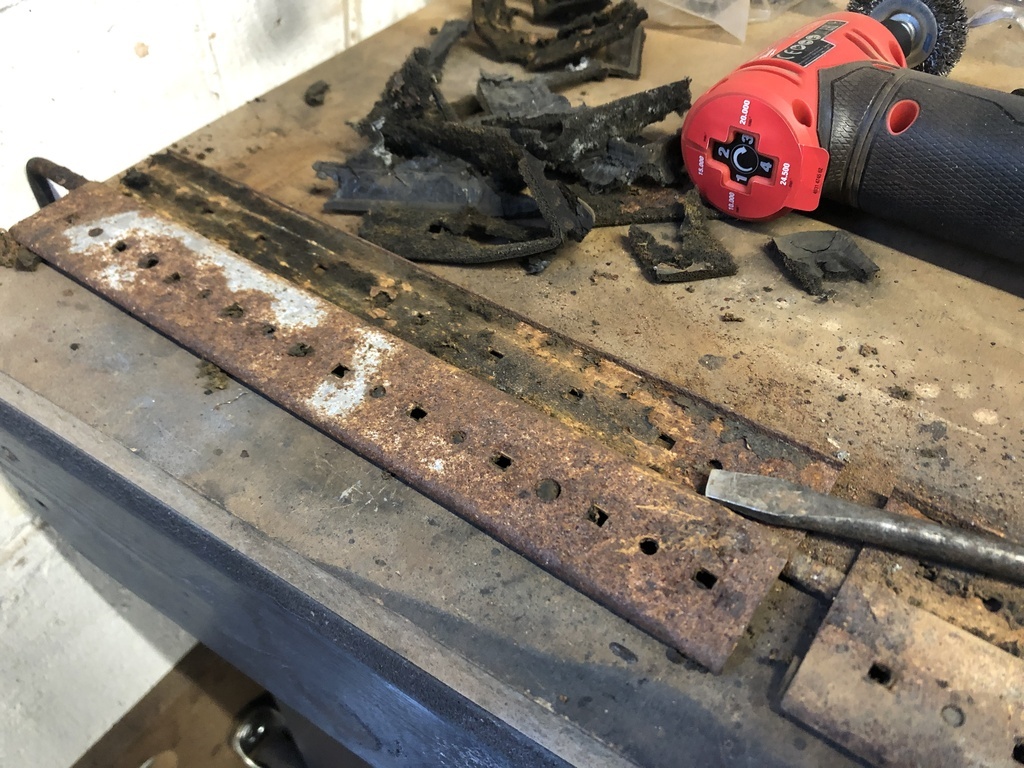 Into a Deox bath they go: 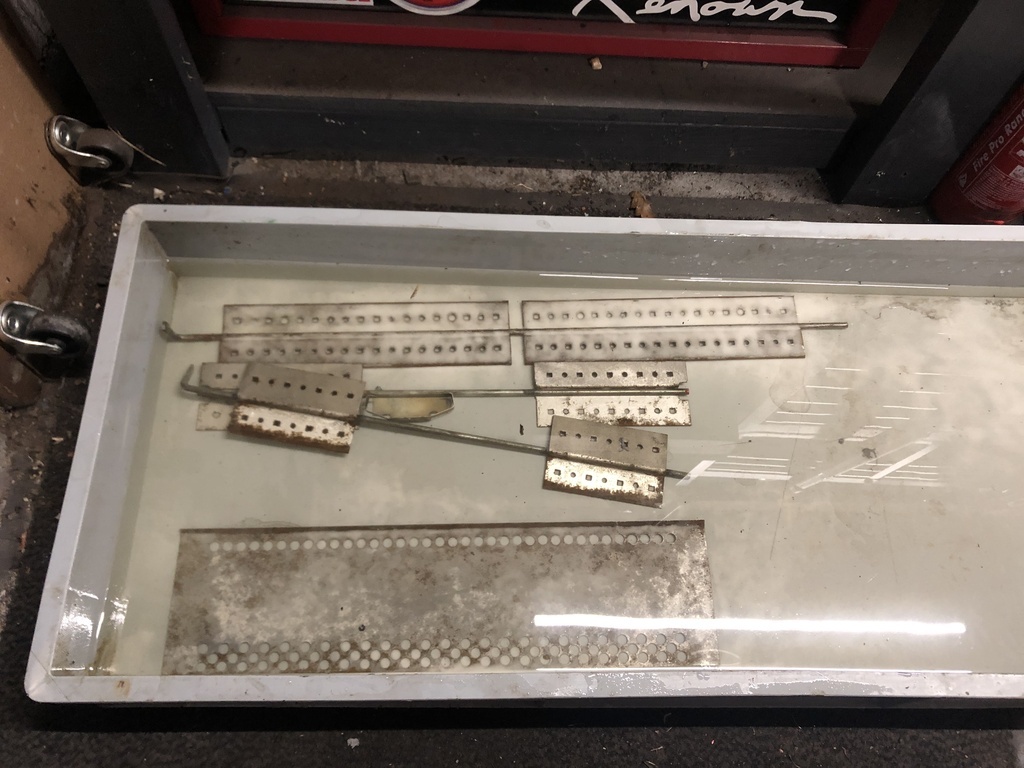 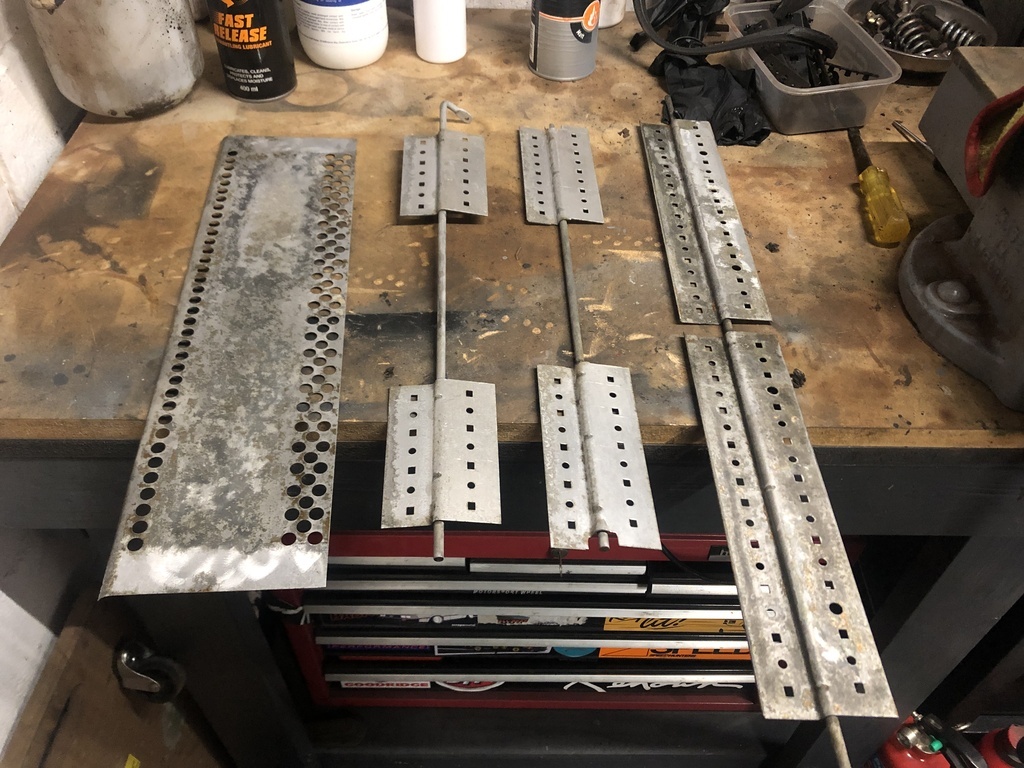 Primed: 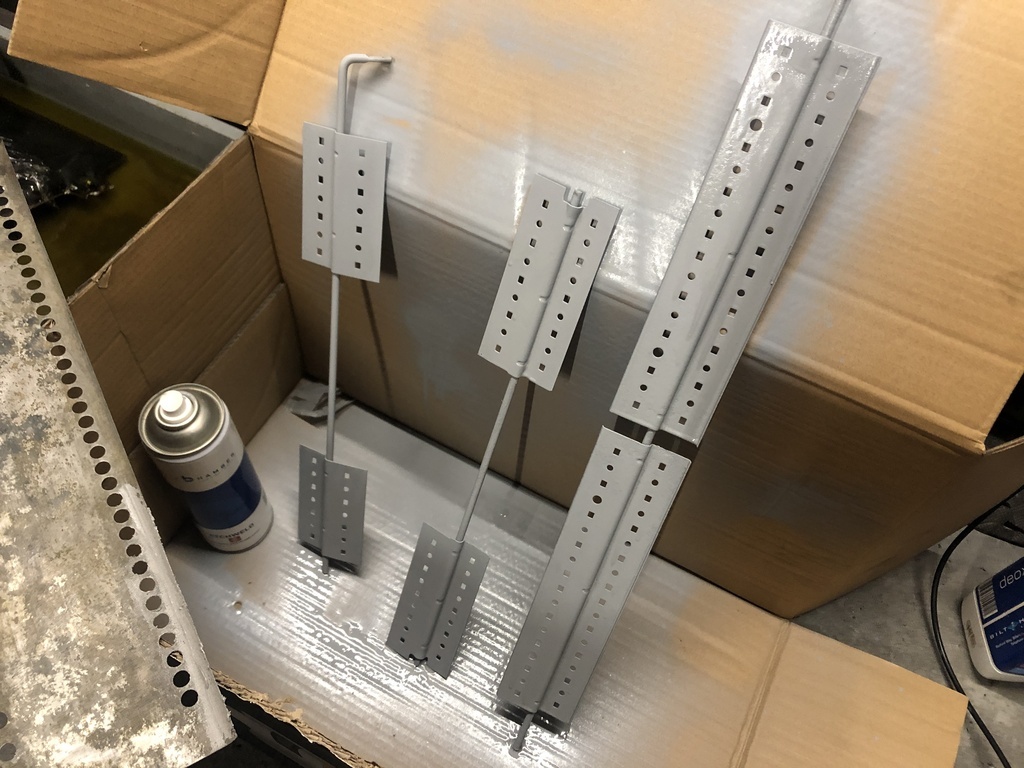 Haul of new parts - Blower motor, flap sealing kit, heater resistor and wiring, and a new upgraded heater matrix. Unfortunately, this was damaged so awaiting a replacement. Ignore the suspension mounts, for another time! 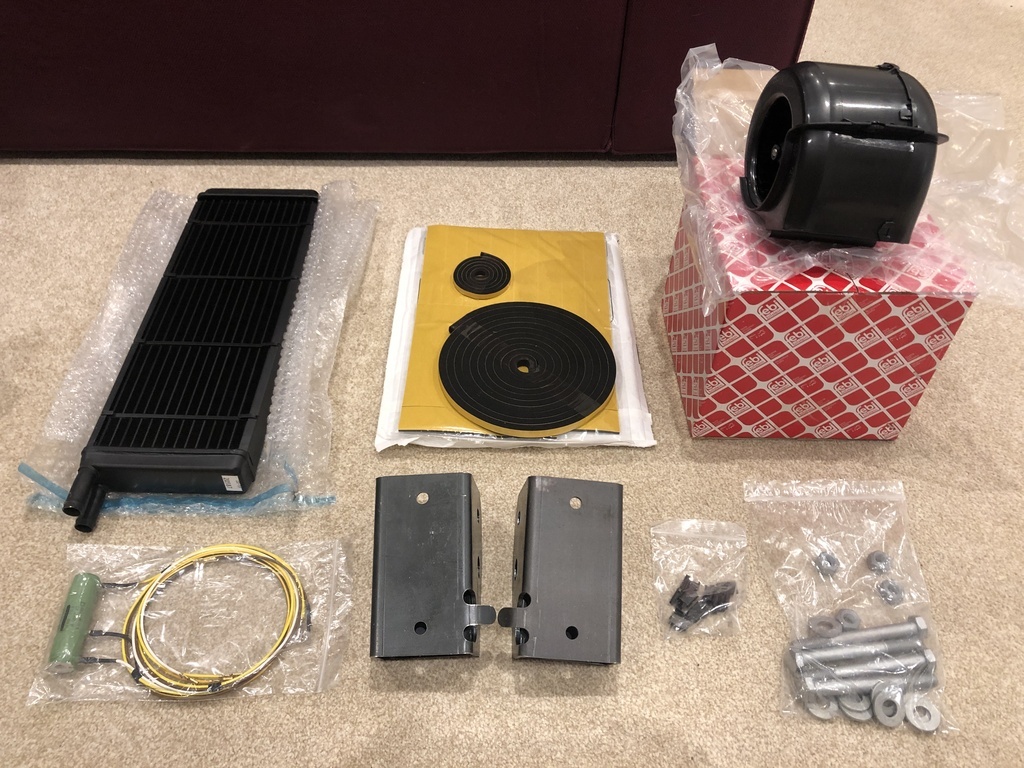 Brickwerks flap sealing kit was very comprehensive: 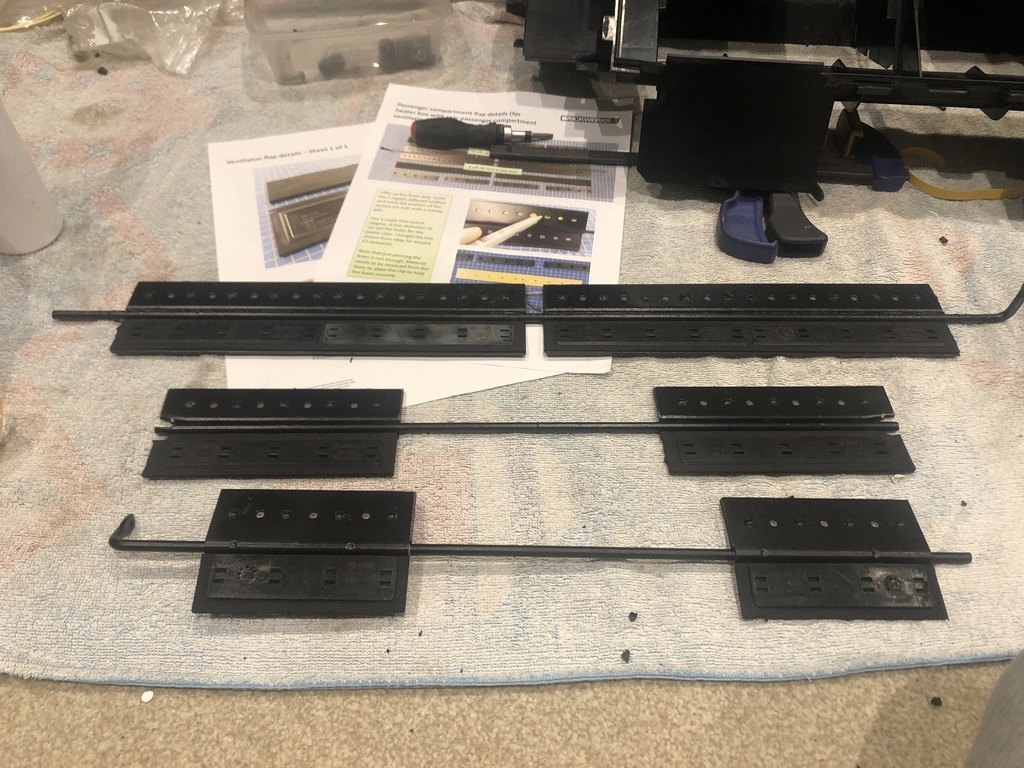 Dog is being helpful as ever:  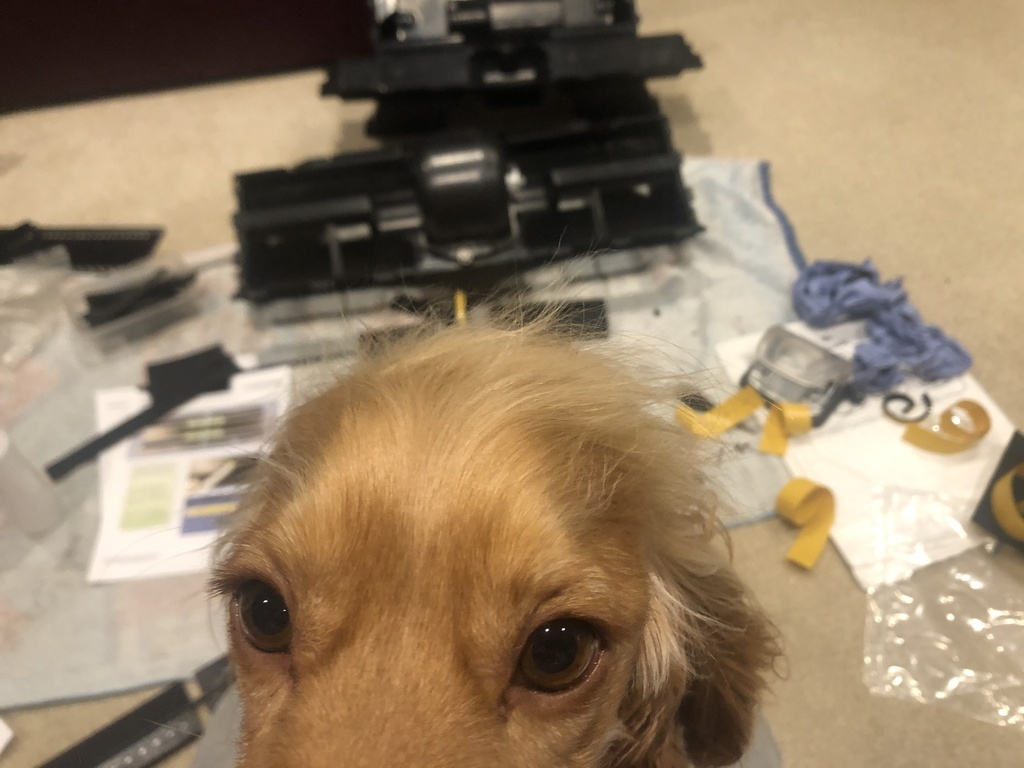 Much better: 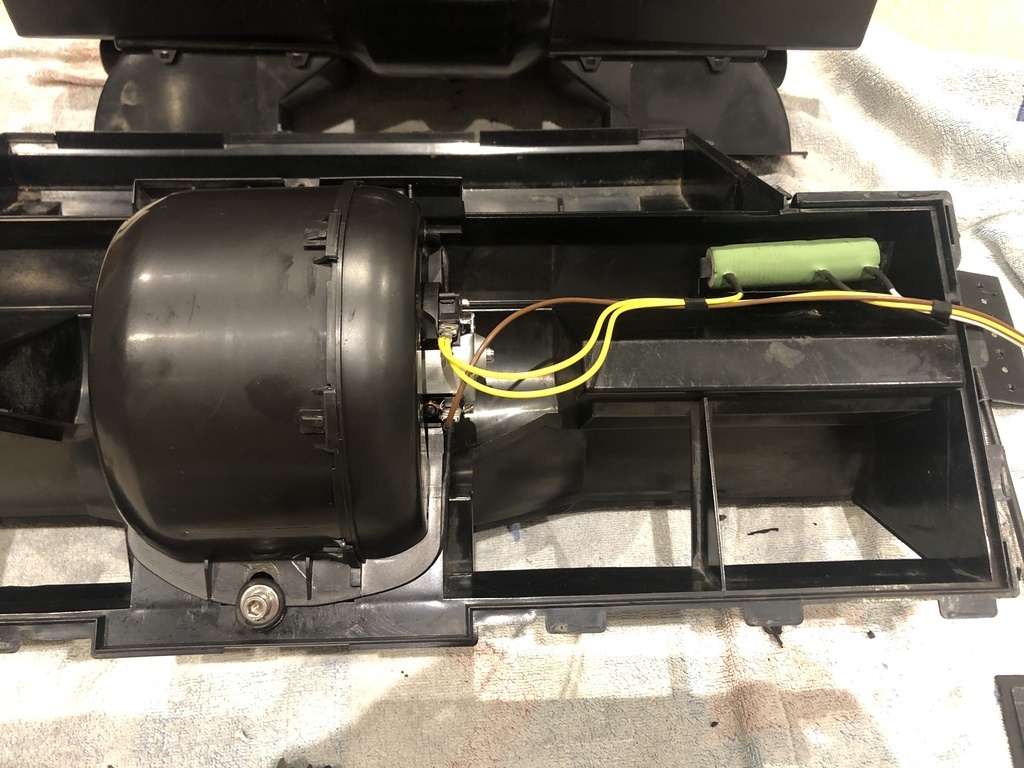 More soon once the replacement matrix arrives. |
| |
|
|
jmsheahan
Club Retro Rides Member
Posts: 689
Club RR Member Number: 121
|
|
Jan 21, 2022 10:51:34 GMT
|
Finished up the heater box yesterday. Complete ballache with parts supply but got there in the end. One company sent a faulty matrix, then another billed me for a premium version but sent a Cheap special cheeky bastards. Anyway, all back together. Should probably bench test it before it goes back in the van but a little way off of that yet. 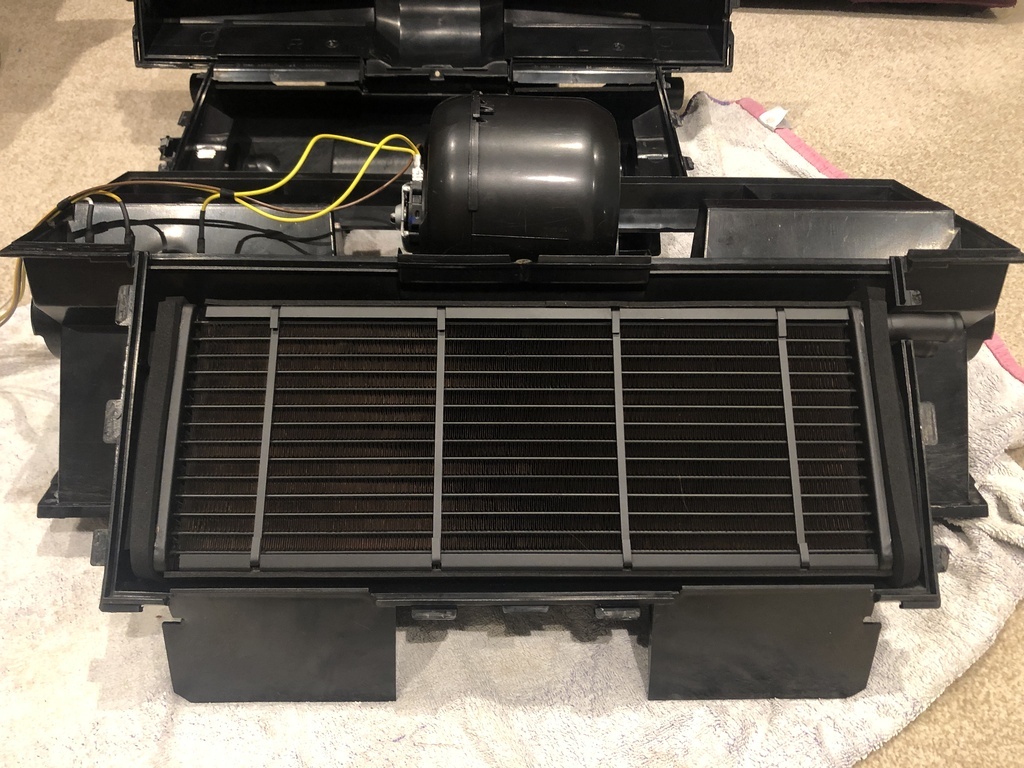 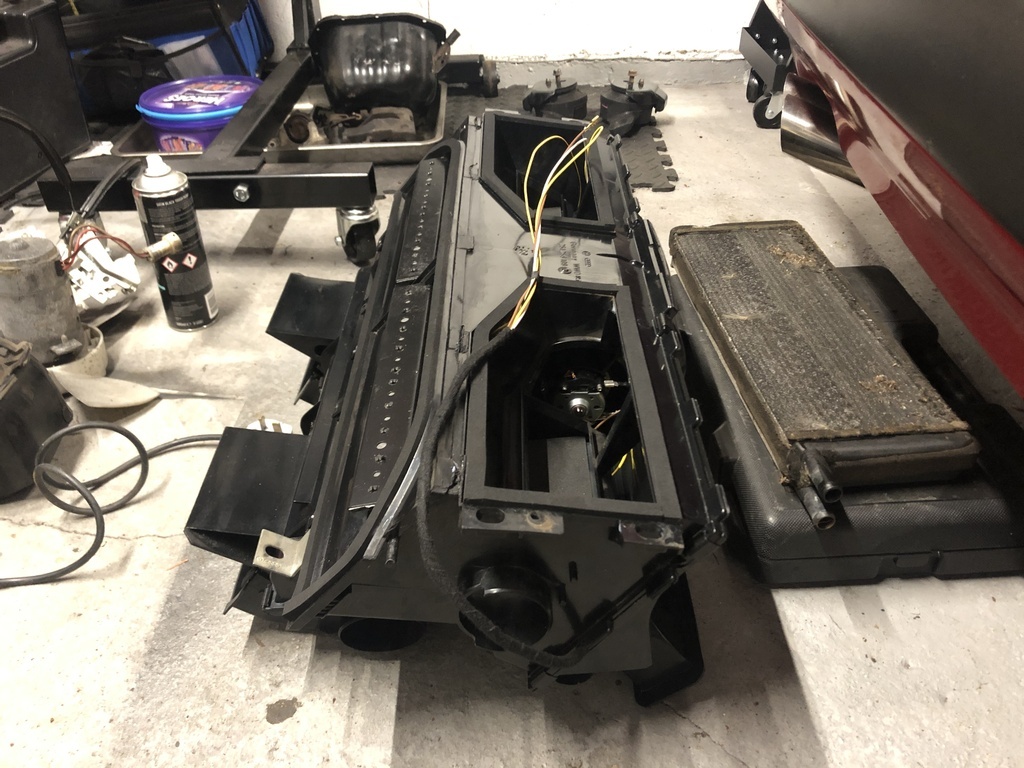 After seeing the cost of a new rad fan shroud (£150!!), I tracked down a second-hand, non-scene taxed replacement. It is a little grotty but cleaned up fine and bonus of a spare fan motor. Usual Bilt Hamber bath followed by a lick of primer. Ready for the topcoat. 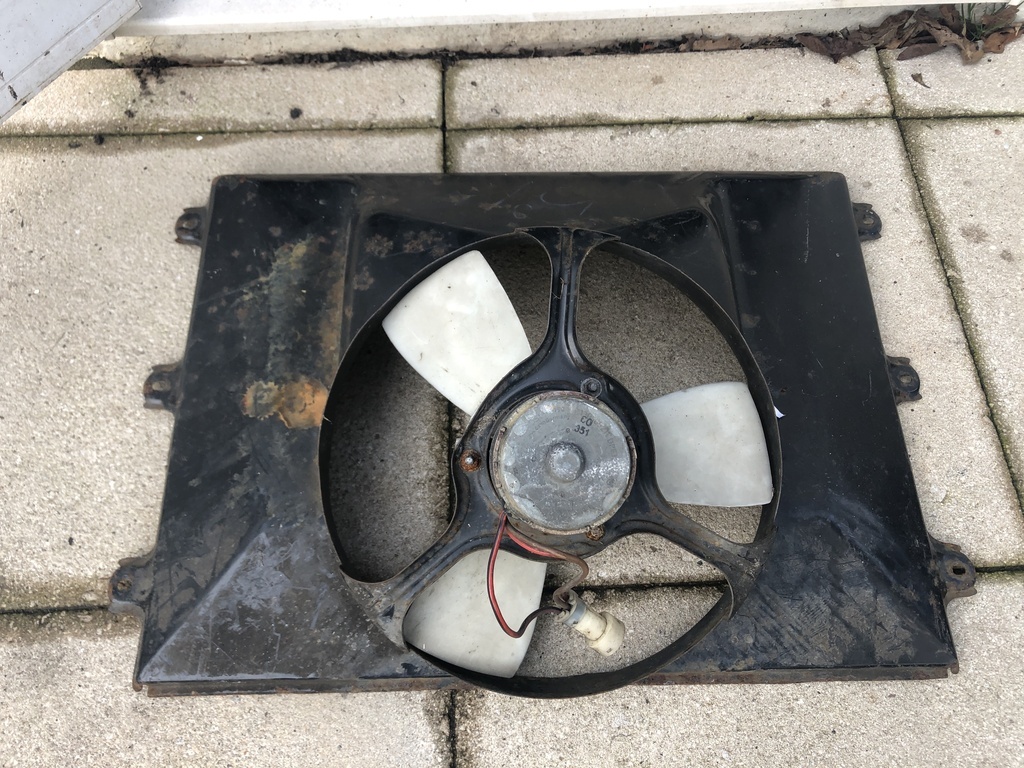 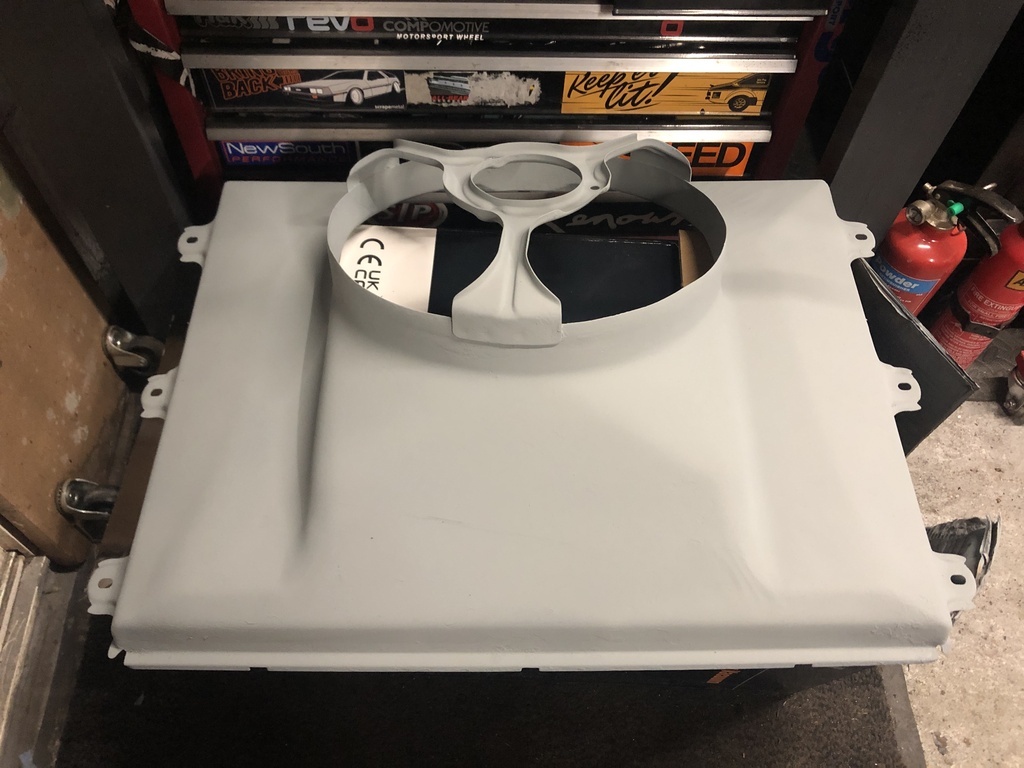 Anyone have any recommendations for a decent hardwearing satin black topcoat? I will be needing a lot of it for suspension components. POR15 is the obvious choice but I've never had much luck with the stuff. |
| |
Last Edit: Jan 21, 2022 10:53:06 GMT by jmsheahan
|
|
|
|
|
Jan 21, 2022 10:56:52 GMT
|
There's something so satisfying about a fresh primer coat! Looking forward to seeing more  |
| |
|
|
jmsheahan
Club Retro Rides Member
Posts: 689
Club RR Member Number: 121
|
|
Jan 29, 2022 18:06:08 GMT
|
Got a few hours in on the bus today. Please excuse the terrible photos (on the fly) but the engine and box are now out. Childs play taking anything VW air-cooled derived out - the ramp was a damn nice luxury compared to the skateboard I used to use for engine removal on my old beetle  . My cheapo ATV lift did a sterling job of supporting the engine and box too. Couple of mount bolts I had to get a little medieval on but all in all was out in an hour. 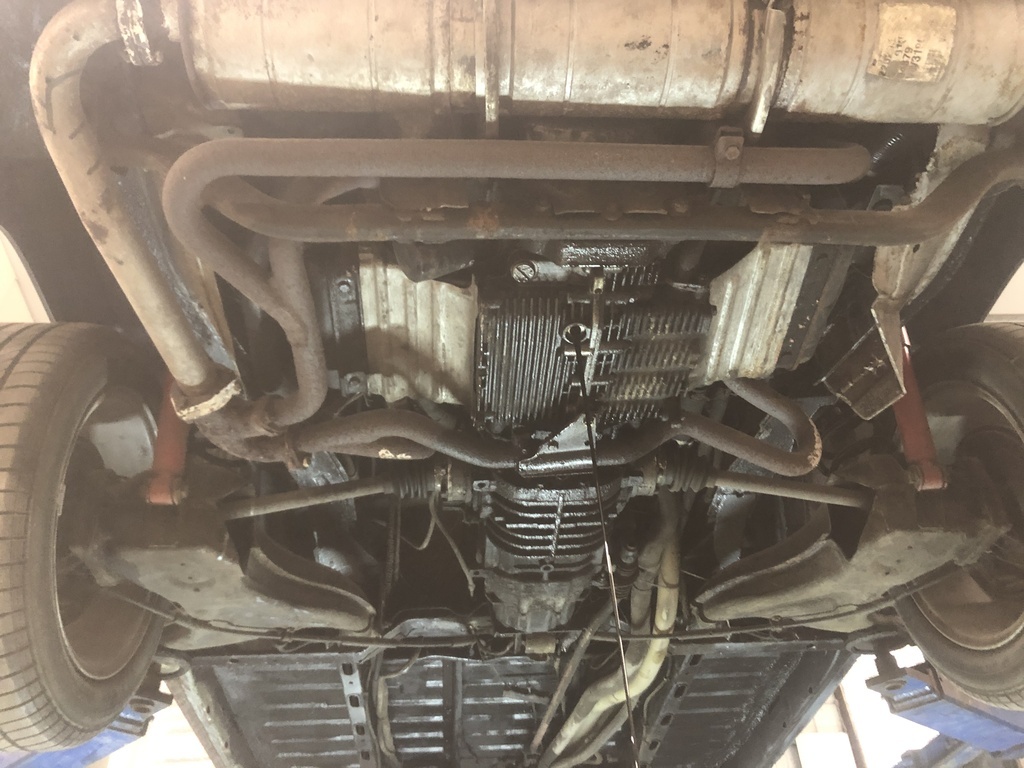 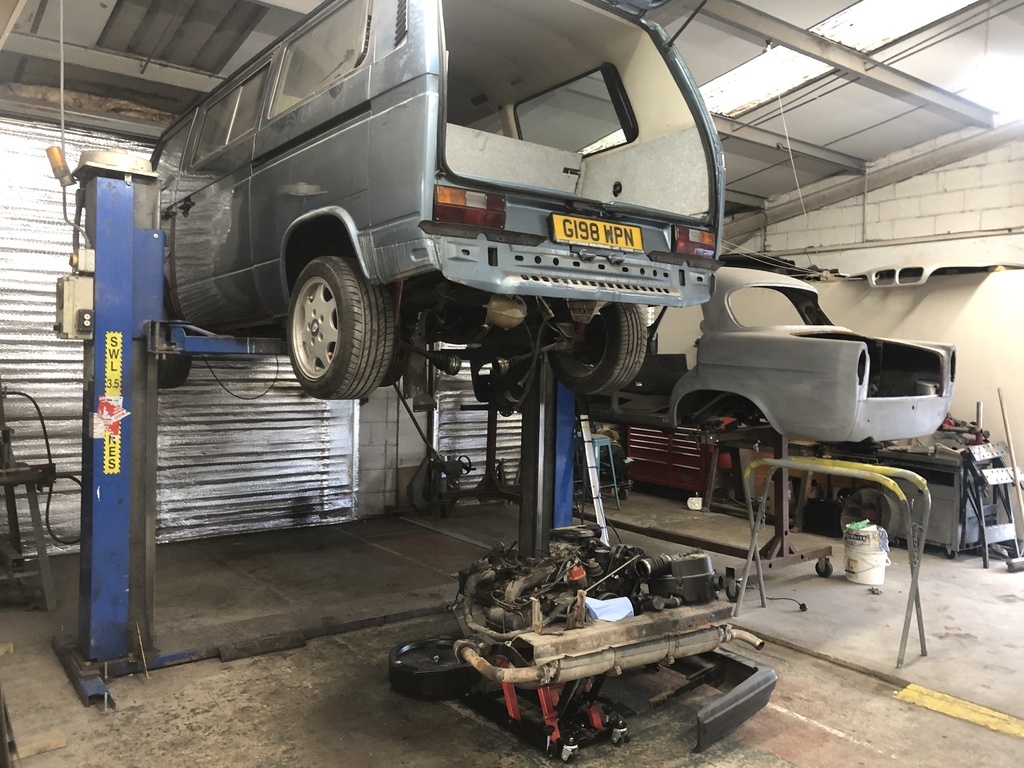 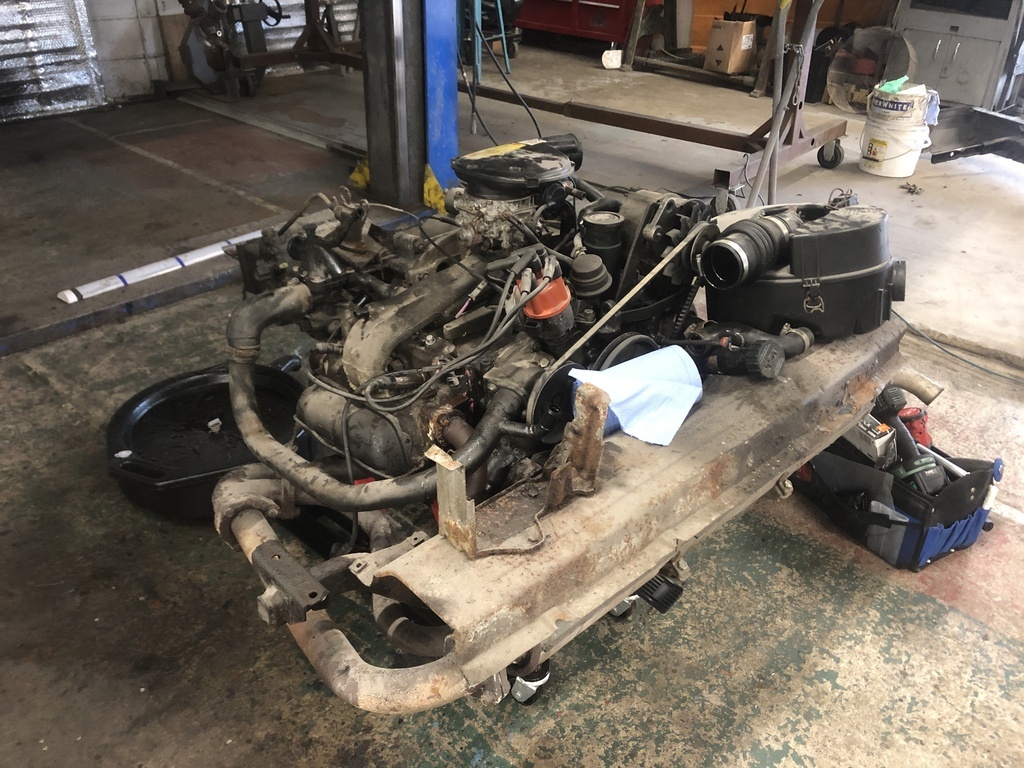 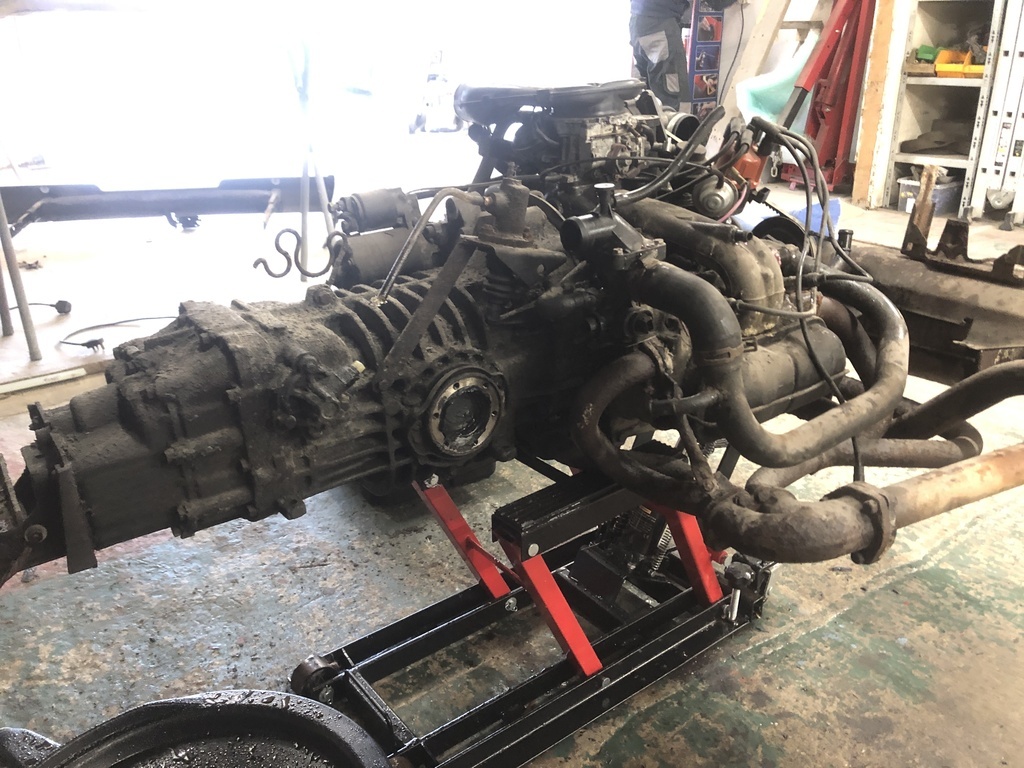 The engine bay is looking decidedly crusty (the main reason this is all coming out right now), as are the rear quarters behind the bumper. That's for another session! Really complicated cooling system on these, pipes and connectors all over the place. Guess that's due to it being originally aircooled and the Veedub designers working with what they had. Hoping to simplify this significantly when the Subaru lump goes in. 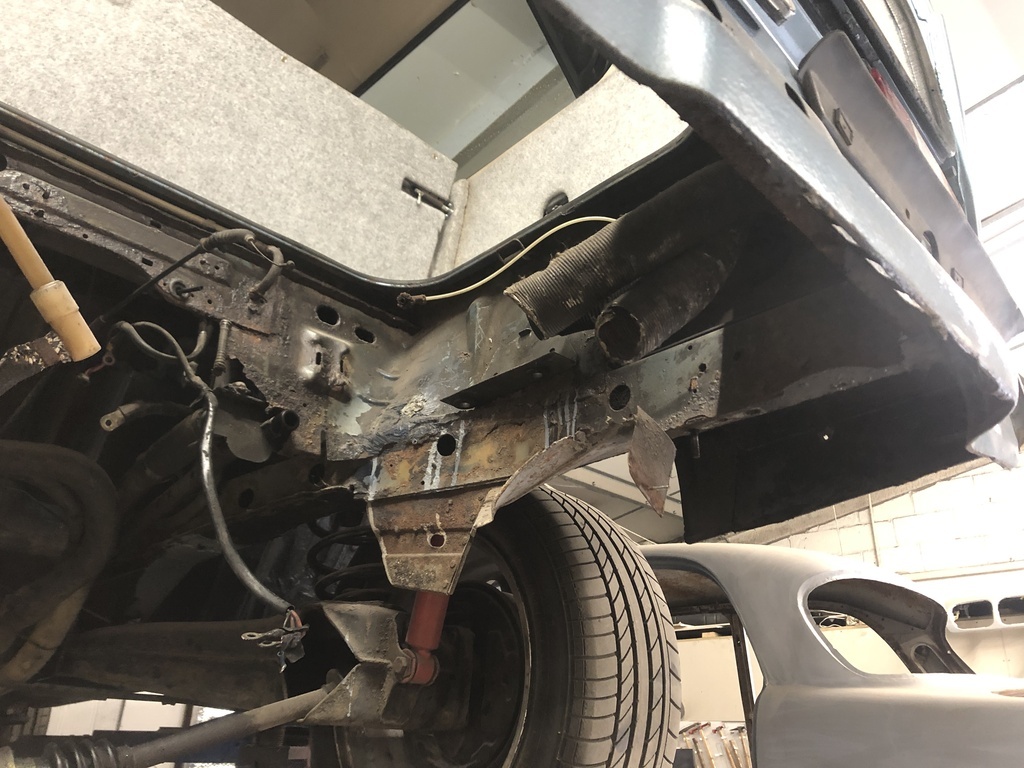 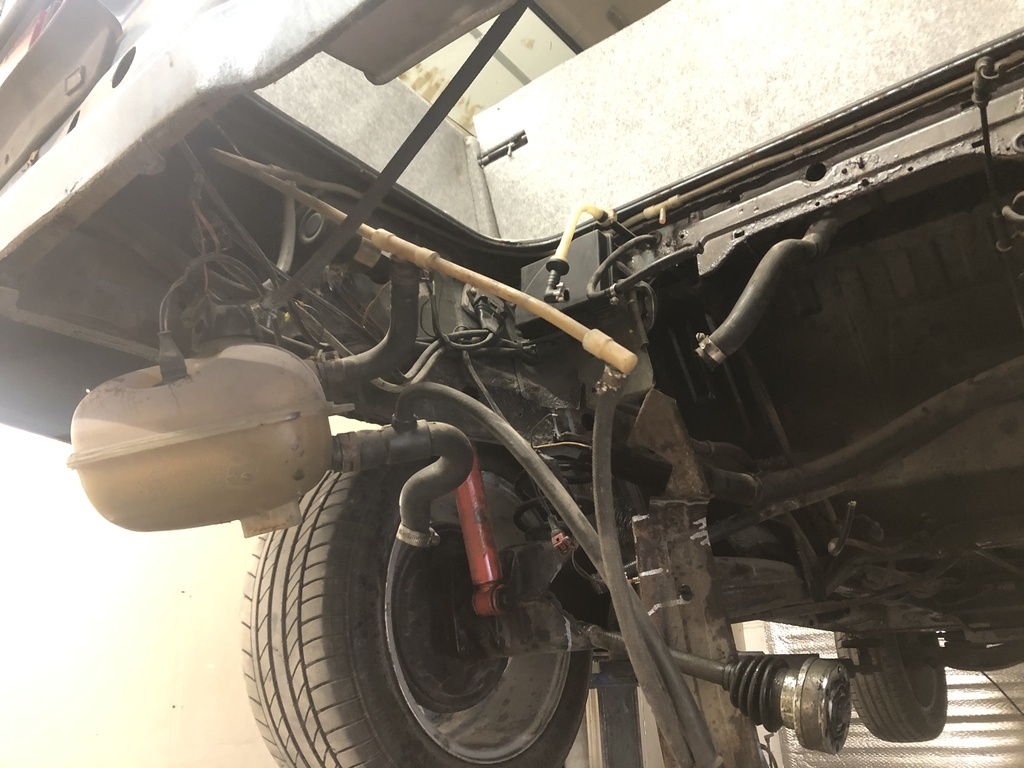 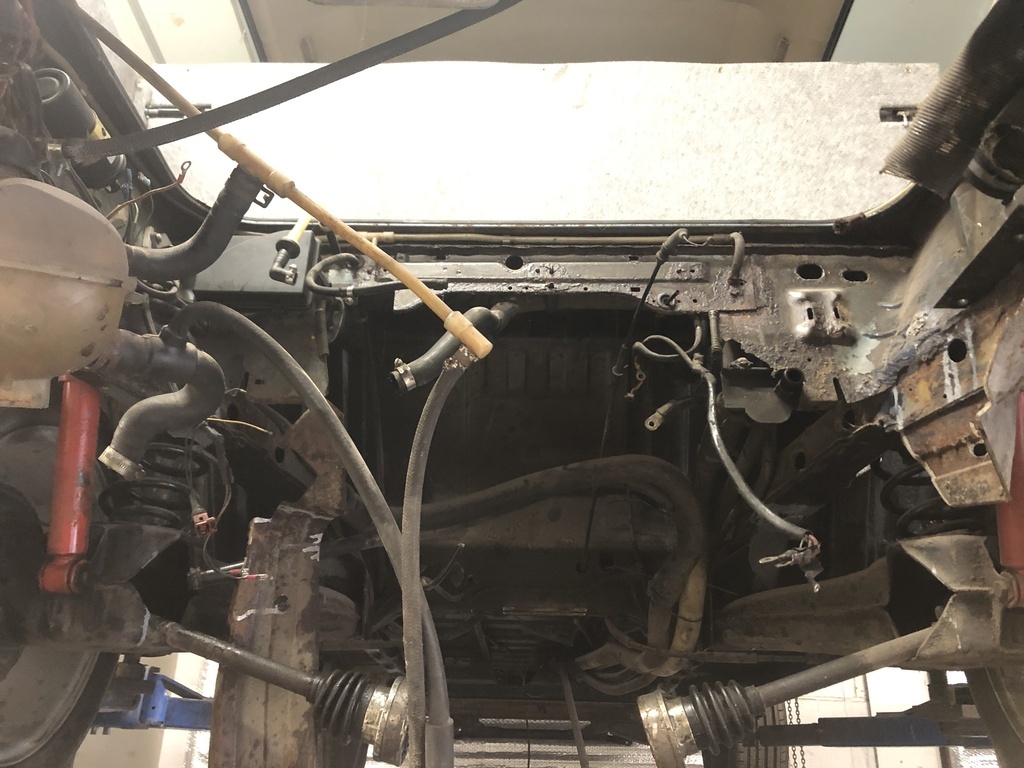 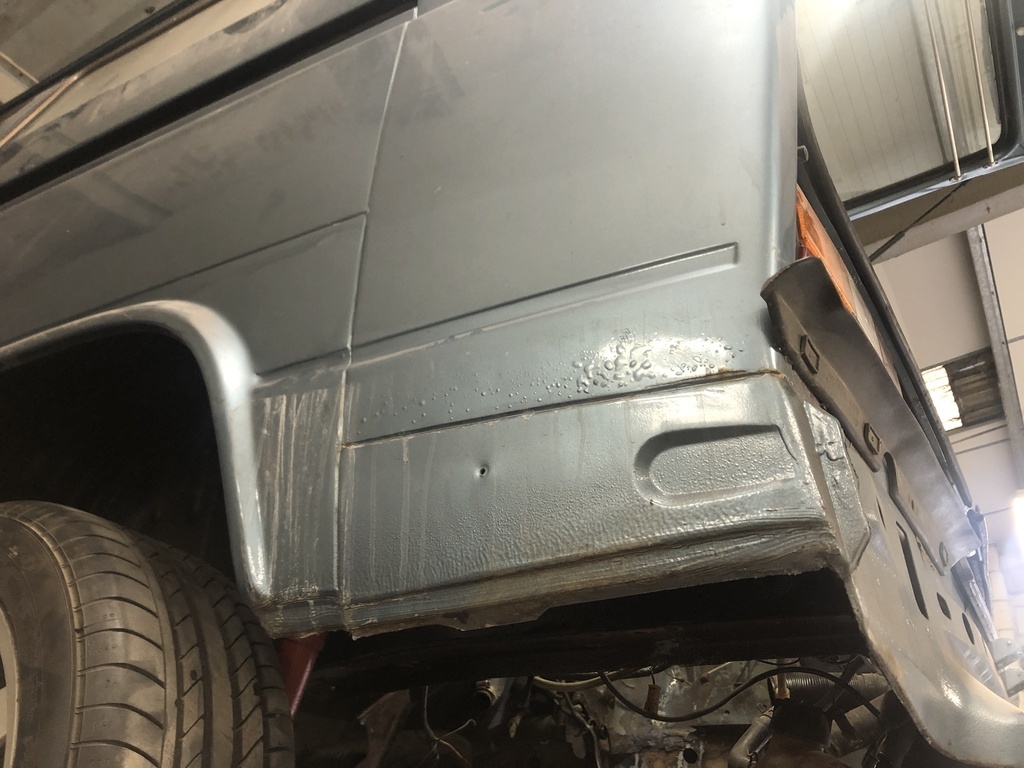 Suspension out next weekend and then probably time to order yet more panels once I've totted it all up. 'Hello is that Brickwerks? Yeah can you just send me one of everything. cheers'  If anyone is looking for a watercooled 1.9 DG lump hit me up. I should have it back at mine next weekend so will be going up for sale. Until next time! |
| |
Last Edit: Jan 29, 2022 18:14:17 GMT by jmsheahan
|
|
jmsheahan
Club Retro Rides Member
Posts: 689
Club RR Member Number: 121
|
|
|
|
Productive weekend on the van as the strip down continues. Rear-end is now completely stripped so engine, box, springs, trailing arms, hubs, coolant lines, gear linkages are all gone. 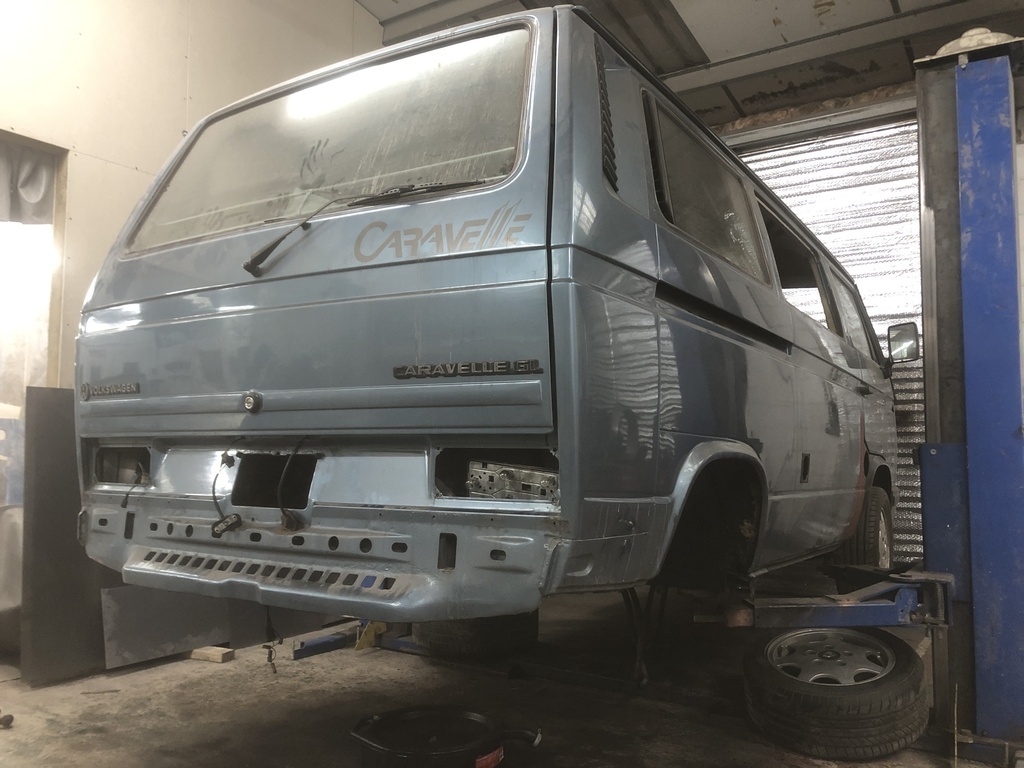 Trailing arm bolts are a notoriously rubbish job on these but they weren't too bad. Both inner bush bolts came out without too much of a fight. The two outer ones were toast though and required cutting off. 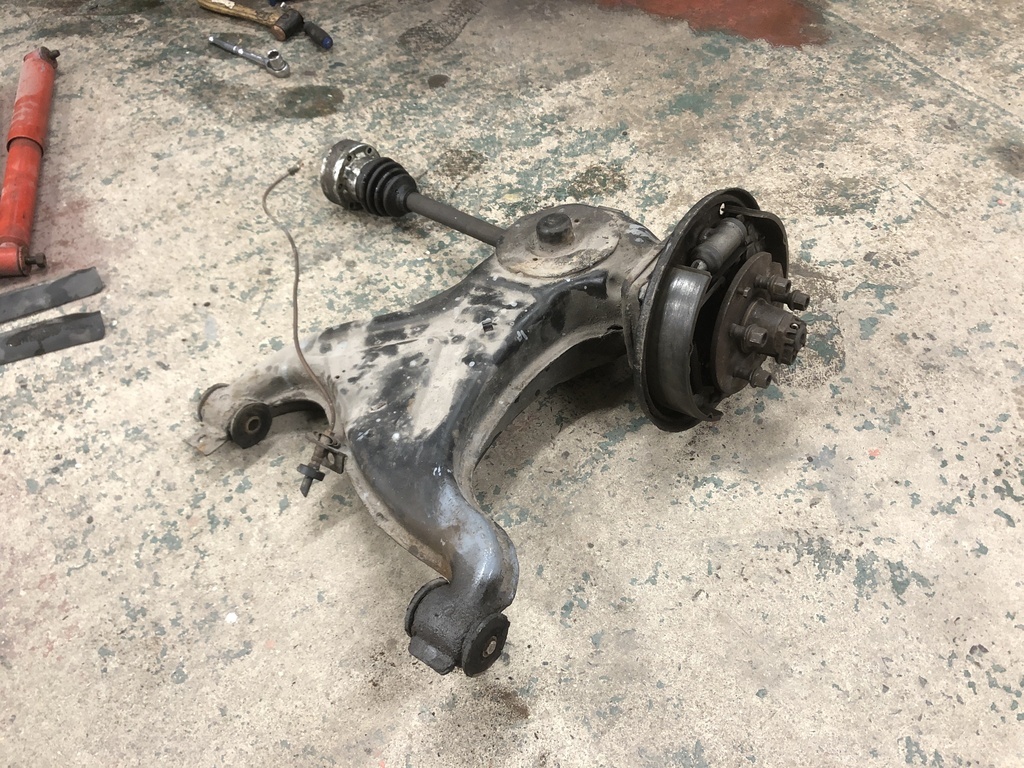 Considering the rot elsewhere on the van I'm pleasantly surprised with the condition of the lower inner arches and sill ends. Possibly been worked on before. The mounts were in reasonable condition but thining a little so those will be being replaced along with the arches. 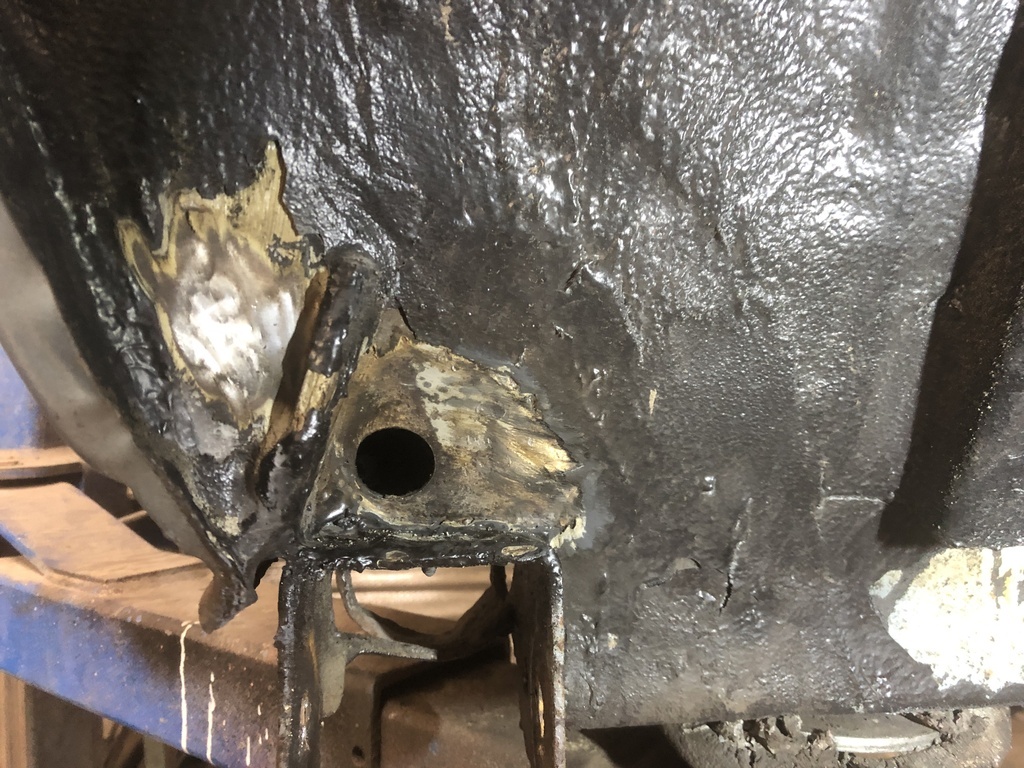 Hover van! 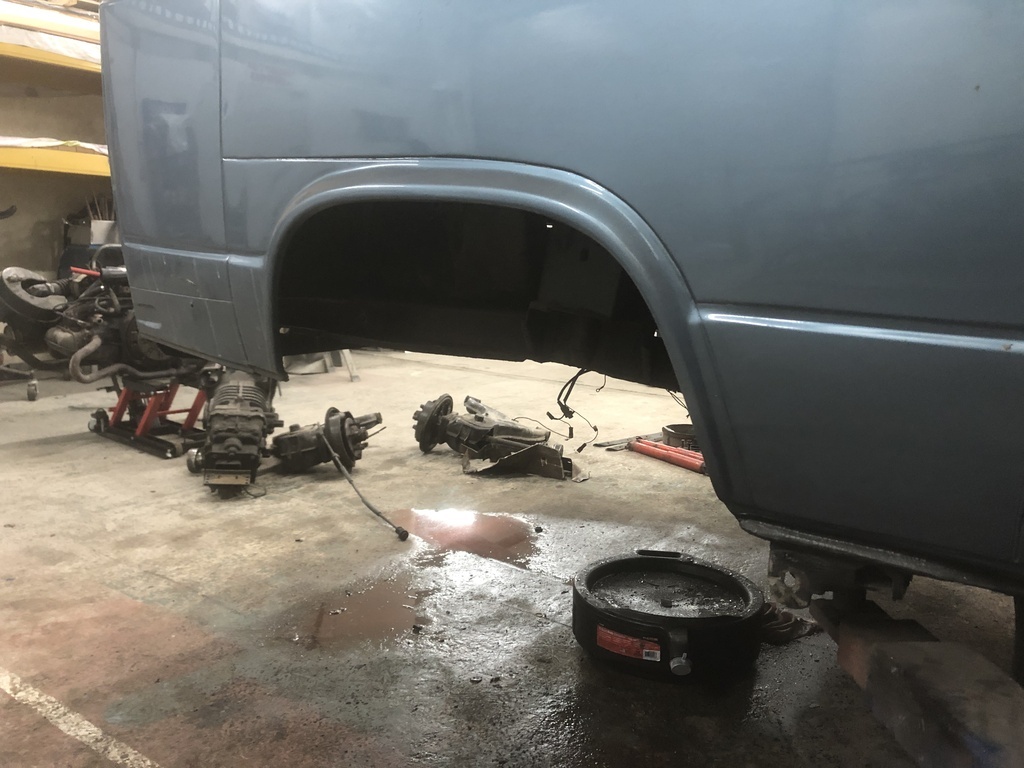 Managed to take a few pictures of the front-end insides. Nice heater box not full of holes: 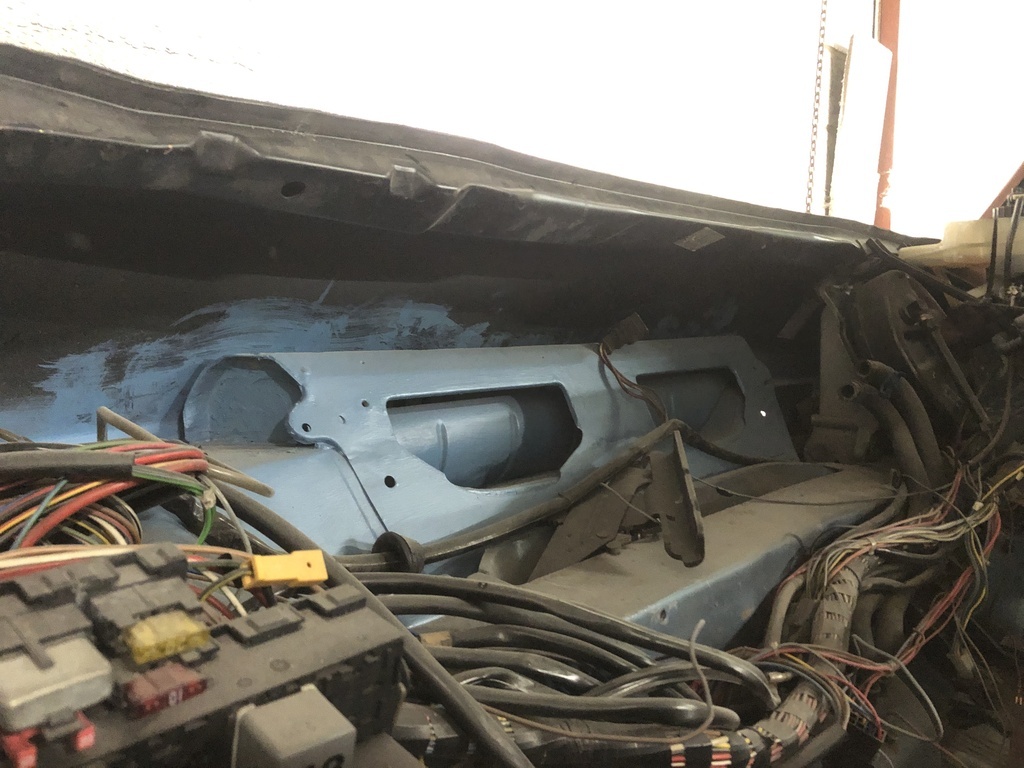 A speed hole free floor: 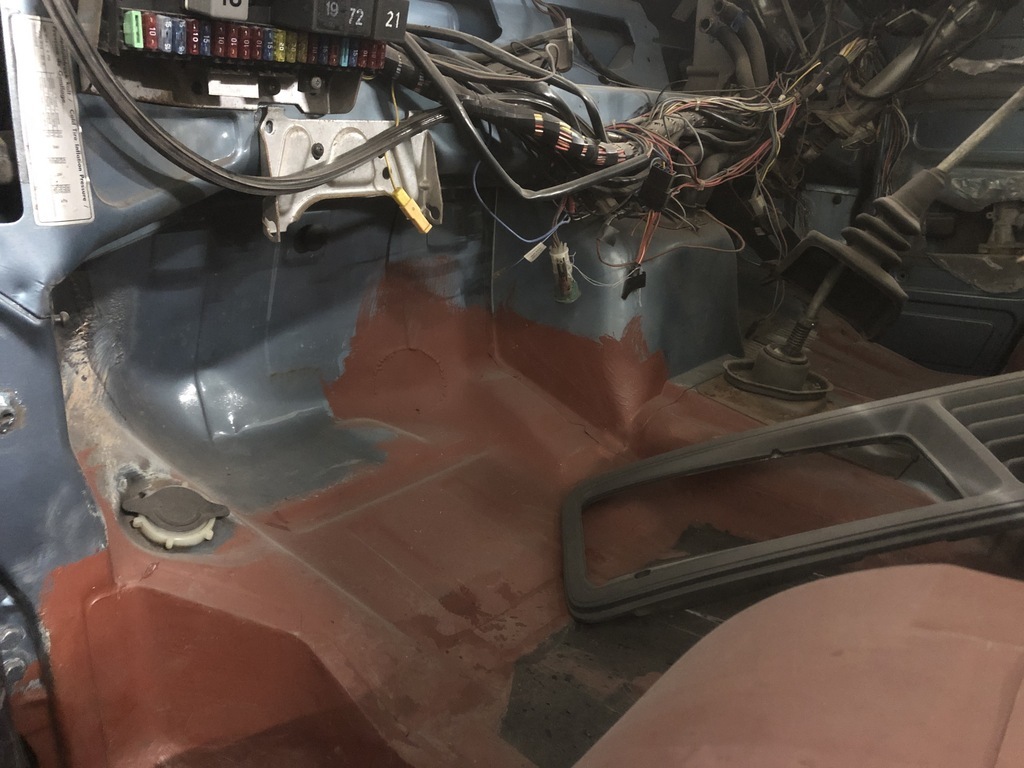 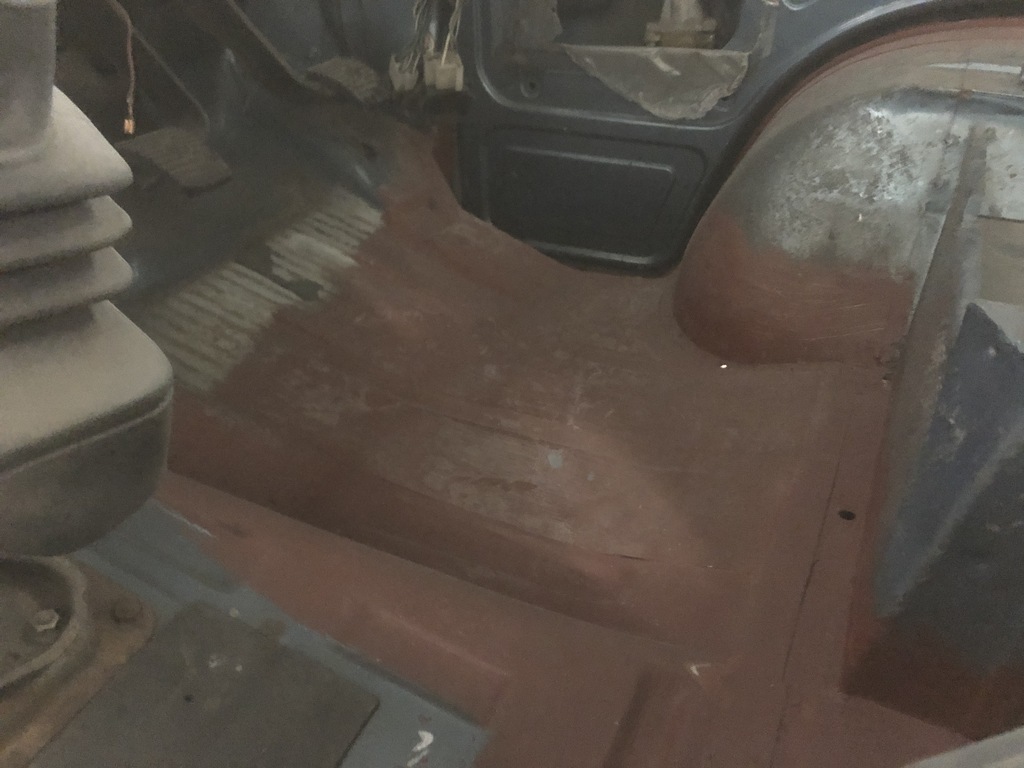 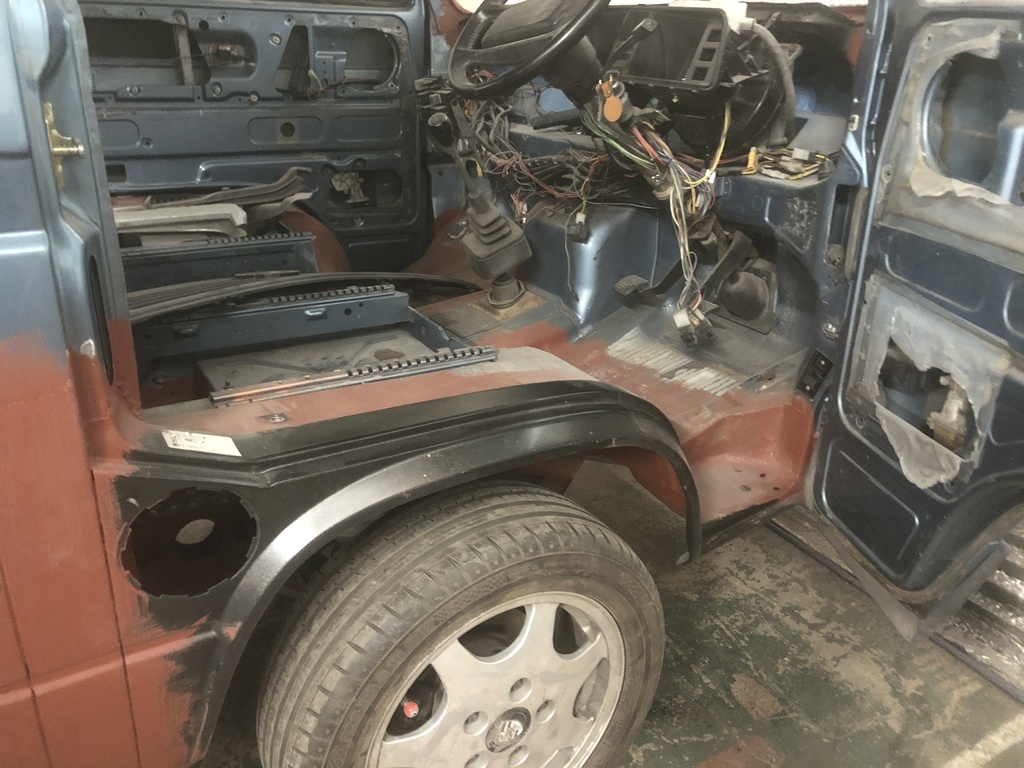 Battery tray: 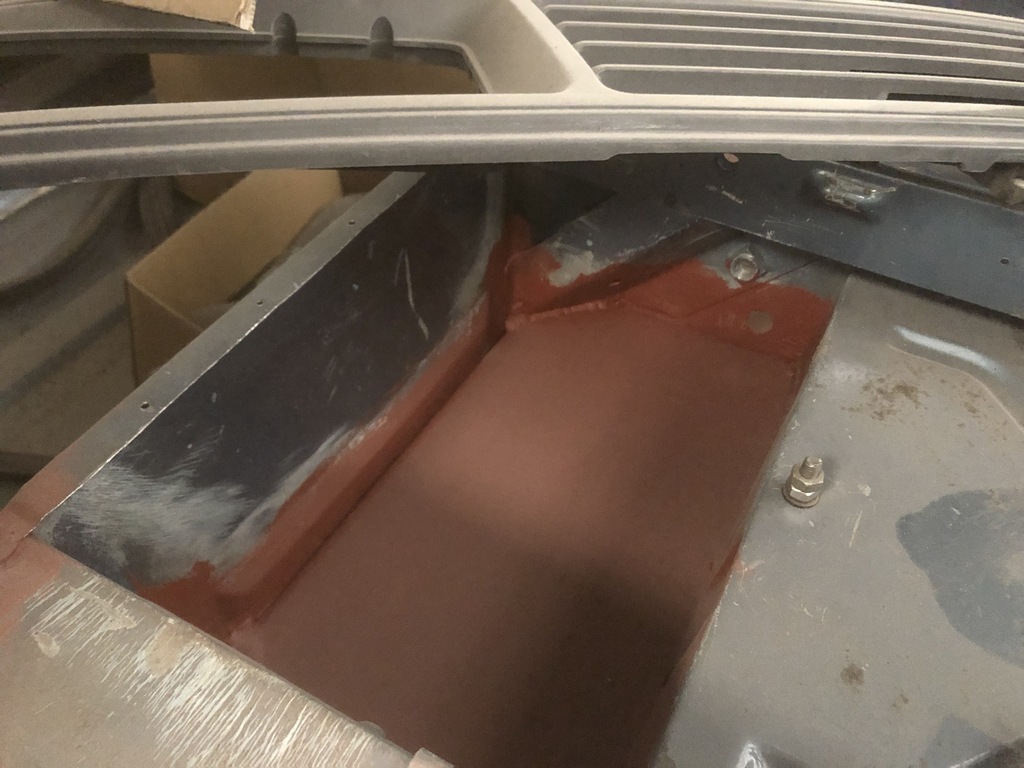 Bumper bar repair: 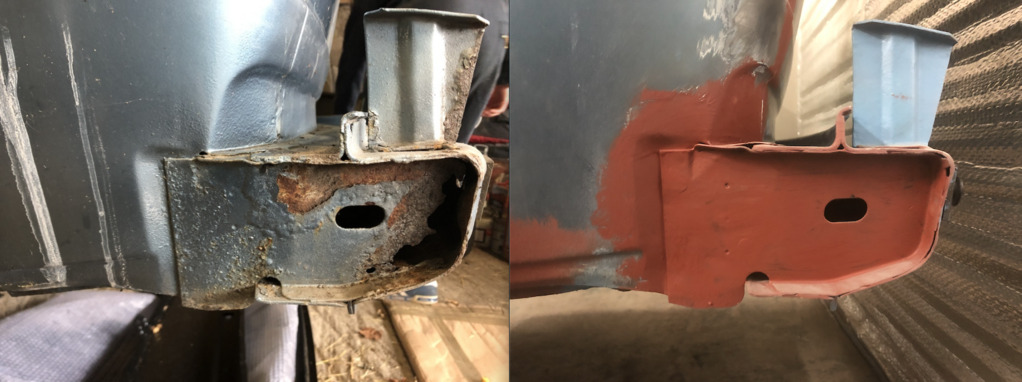 Longest coolant hoses in existence. Must have had a shower from these at least 6-7 times  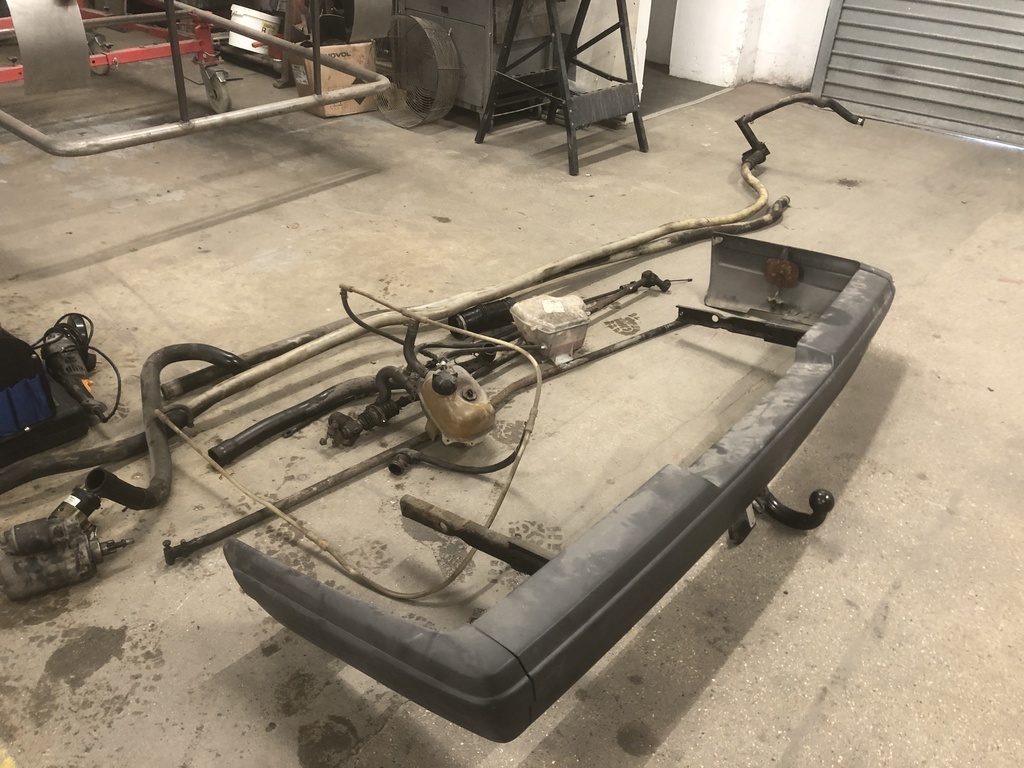 Split the box from the engine: 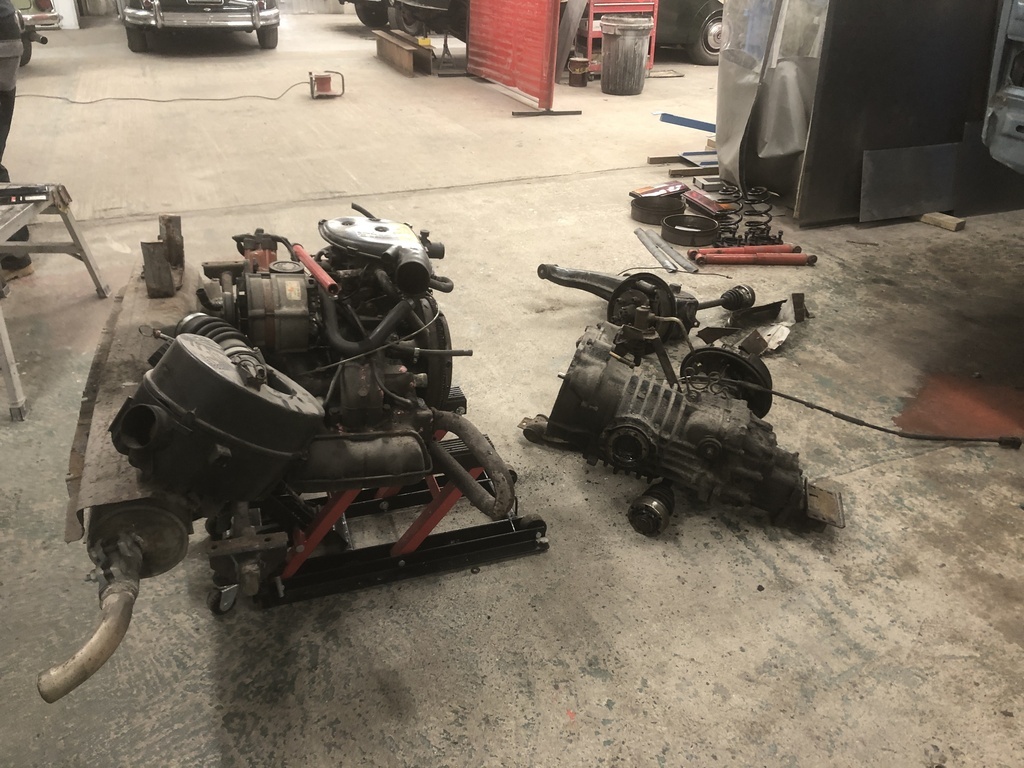 Sling it all in a hire van: 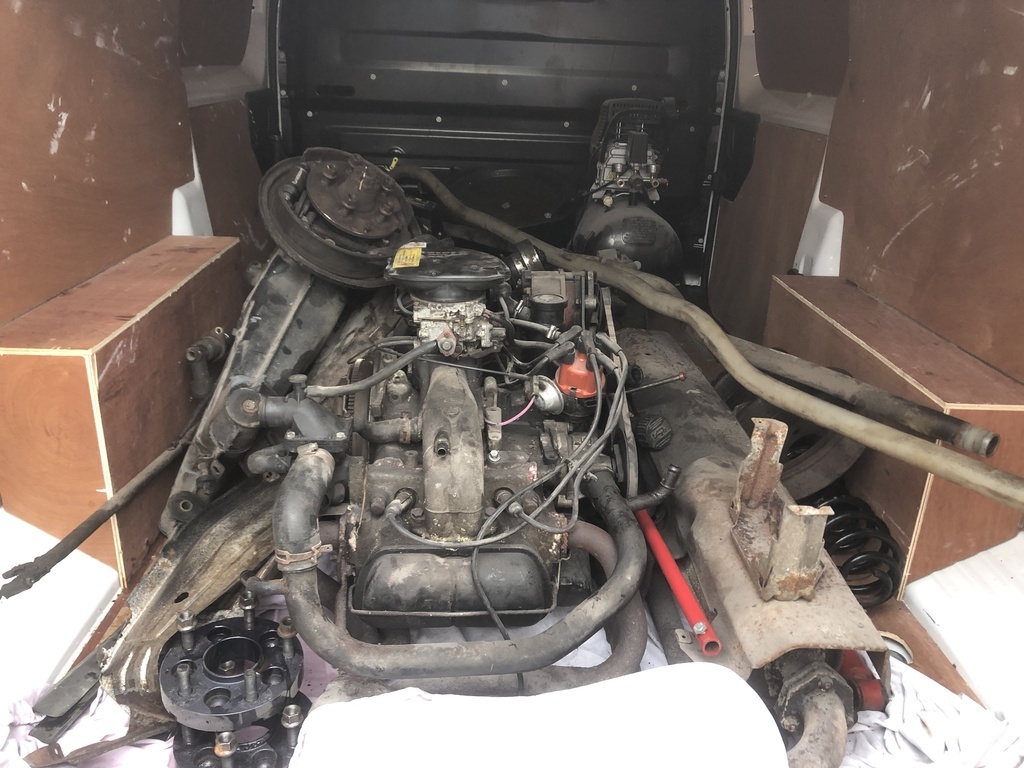 Make a mess with it unloading: 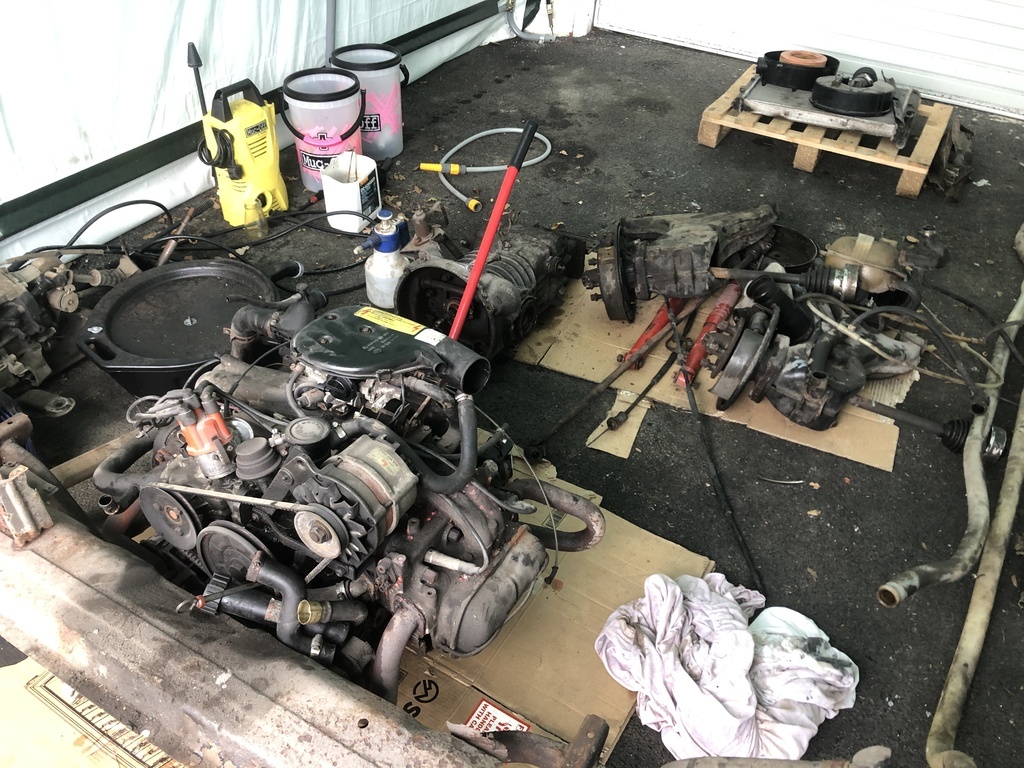 Engine now up for grabs if anyone is after one: 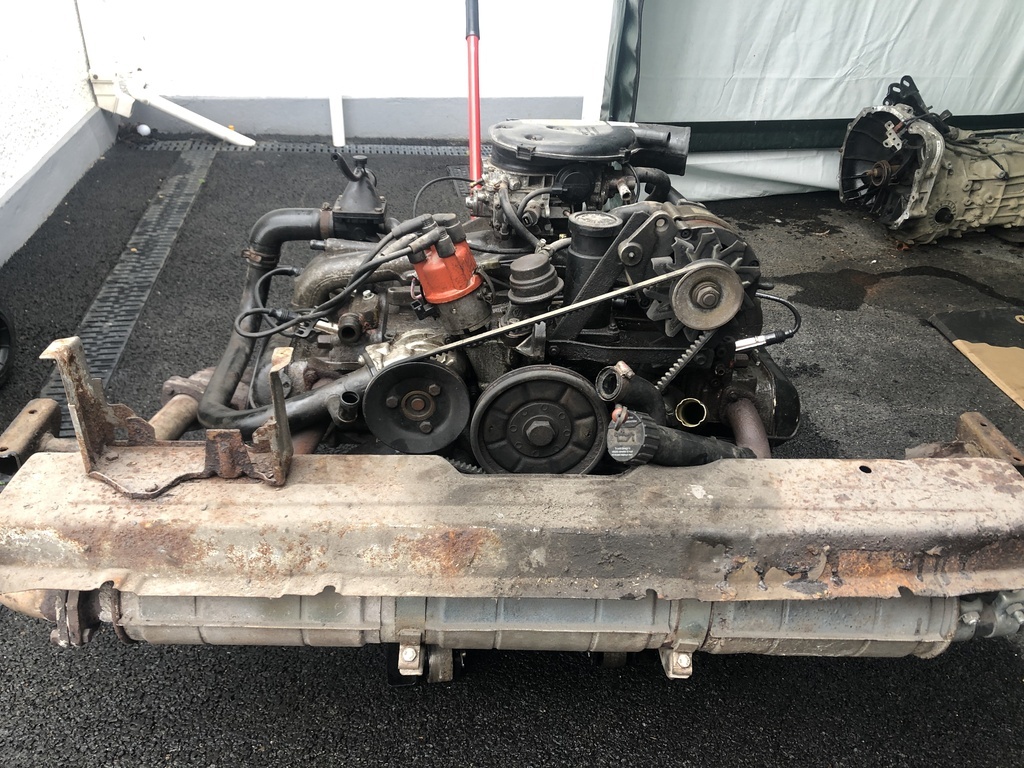 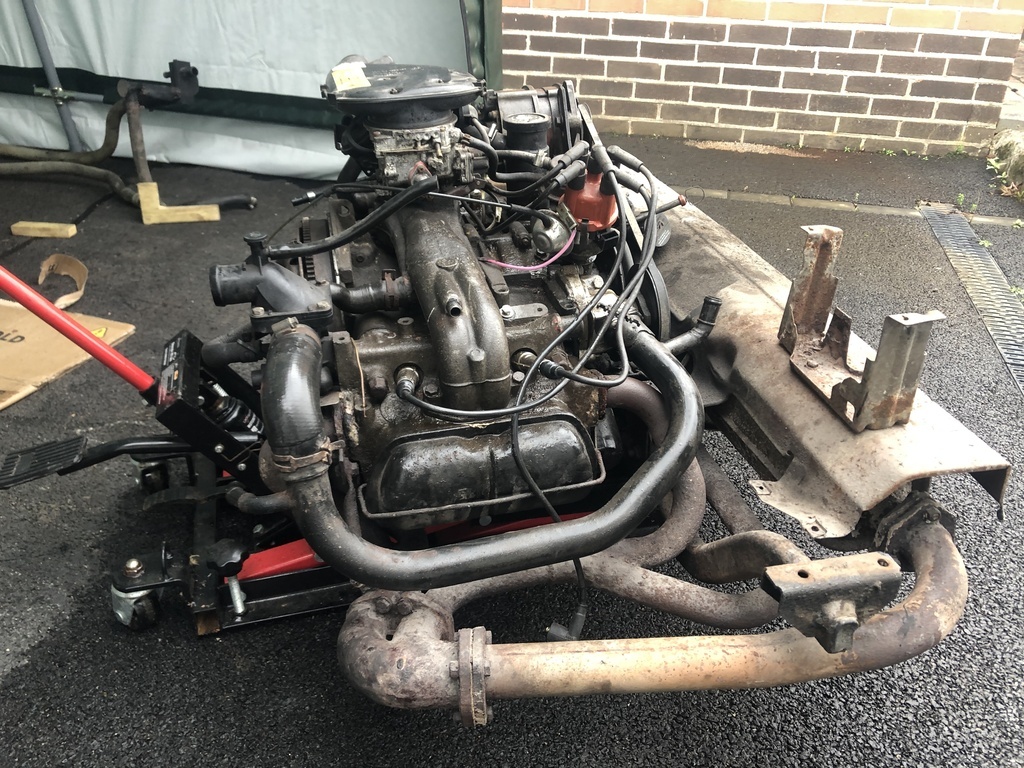 Managed to find the code on the gearbox. It's an 'ASM' so I think this should have suitable ratios for the Subaru conversion. RJES has a great ratio table but for this code, it's missing some info. Need to have a think about what direction to go with for that. 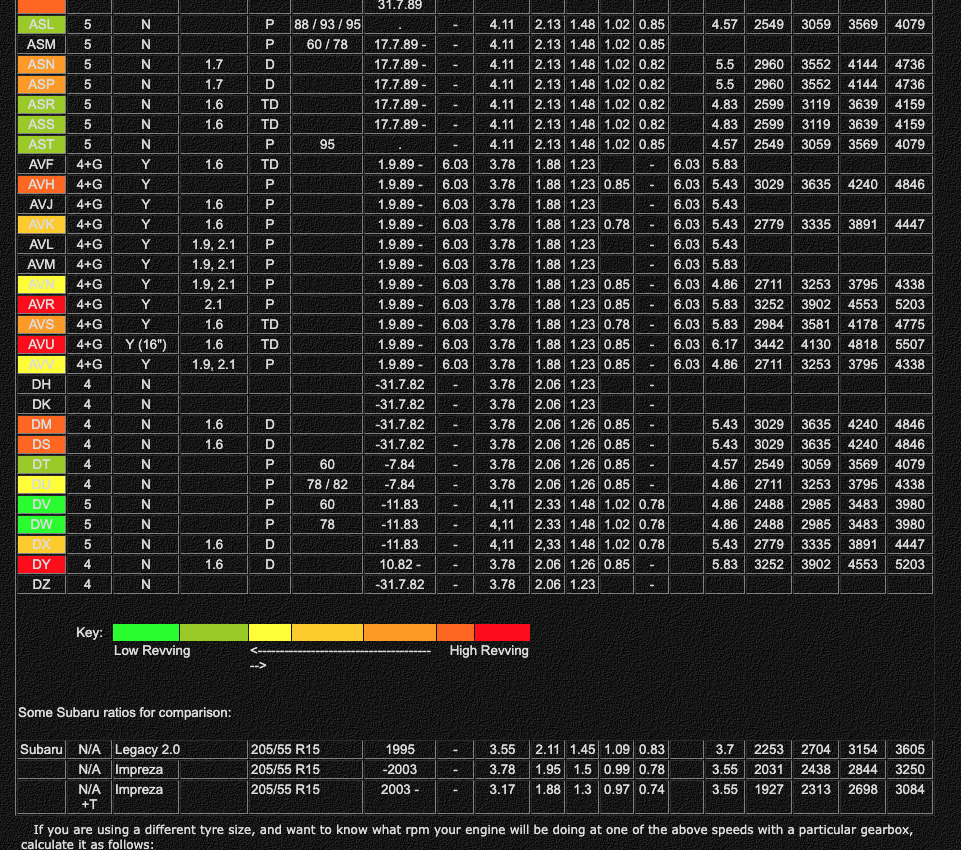 Drained the oil. Drain plugs all came free no dramas. The magnetic sump plug revealed a few 'extras'. Not uncommon for a box this age but I think a rebuild may need to be on the cards if I choose to use the VW box. 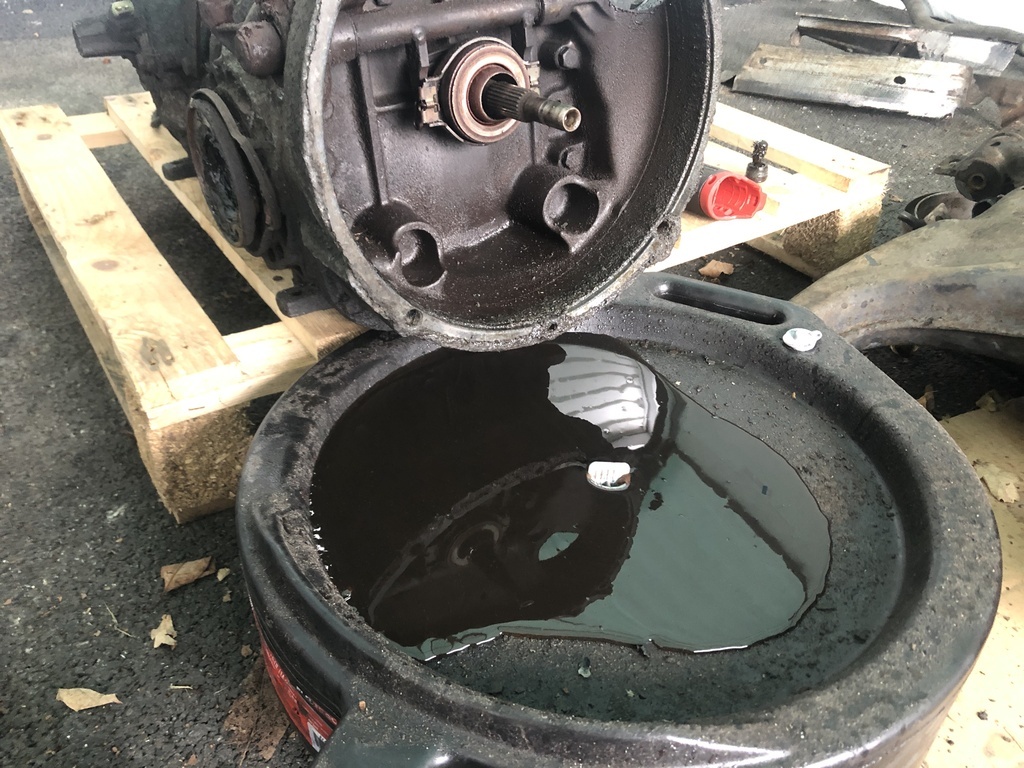 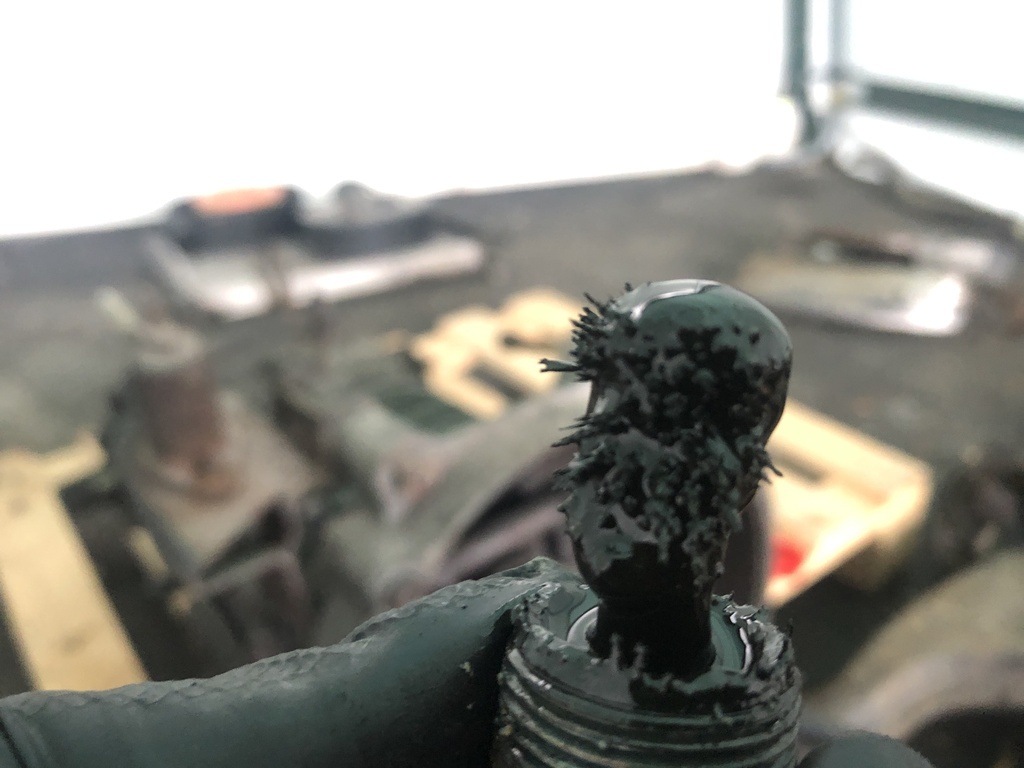 Big order went in with Schofields for panels so hopefully by next week the bodyshop will be back on the metal fab whilst I refurb the trailing arms ready to put it back on its wheels. I'm knackered. Time for a beer! Cheers for reading. |
| |
Last Edit: Feb 6, 2022 19:12:23 GMT by jmsheahan
|
|
|
|


 )
)


 )
)


 . My cheapo ATV lift did a sterling job of supporting the engine and box too.


