|
|
|
|
|
Hi all, I was put onto this time black hole by a mate (hi logicaluk , thanks!) and thought it time I contribute to the general distraction.  I should first say that Rosie the Herald belongs to Mrs Badger and I'm just the amateur grease monkey and very amateur part time navigator. Mrs Badger always wanted a Herald, but after a painful episode with a commercial 'restorer' in Bridlington she played with a Midget 1500 and a BMW Z3 for a while, before she could stand to go looking for a Herald again. Personally I'm glad she did because being tall, even a minor accident in the Midget would have cost me both kneecaps and the top of my head.  I've seen people have issues with adding photos so lets see how well this works:  Mrs Badger at EYTCC Humber Bridge Mrs Badger at EYTCC Humber Bridge by Mr Badger, on Flickr Rosie came to us already converted to Spitfire 1500 engine and overdrive gearbox (love that overdrive!). We don't know when the conversion was done but from the MOT and history file: - 2006 she was in Maidstone
- 2008 she had a fairly big restoration and was in Gillingham
- 2009 in Diss Norfolk
- 2017 Harleston Norfolk where we bought her in 2019
She only did 3,300 miles between 2006 and 2018 (less than 300 miles a year on average) which should have got me thinking; a lot of the work I've been doing is due to lack of use and regular maintenance. If anyone has any history on Rosie it would be most welcome. If the photo works I'll post some more of what we've been up to. Finally a big shout out to the Club Triumph Hull & East Riding group, they're a fabulous bunch and we're really missing all the events this year. |
| |
Last Edit: Jun 7, 2020 22:32:53 GMT by mrbadger
|
|
|
|
drseg
Part of things
 
Posts: 142
|
|
|
|
|
lovely, miss my 13/60 for some reason fitted with an 1147 Datsun seats, got given it with busted dif and gearbox £25 for both twaS A while back took off roof if it rained I got wet then made a Perspex fold up roof and just drove it sadly died in an arson attack on my garage along with an 1100 special mini.
|
| |
|
|
|
|
|
|
|
Great first post mrbadger - more pics please + interior + bonnet up. |
| |
|
|
|
|
|
|
|
|
Lovely car - I'm trying to talk Mrs Jim into a Herald
|
| |
1966 Ford Cortina GT
2018 Ford Fiesta ST
Full time engineer, part time waffler on Youtube - see Jim_Builds
|
|
|
|
|
|
|
Thanks for the comments, its really nice to know I'm not just talking to myself. Here's some more photos now that I know it works. Mrs Badger driving it back from Norfolk:  IMG_0916 IMG_0916 by Mr Badger, on Flickr and then introducing to Riley who seemed to approve:  IMG_0919 IMG_0919 by Mr Badger, on Flickr The interior which after a damn good clean is in reasonably good nick:  IMG_1447 IMG_1447 by Mr Badger, on Flickr  IMG_1448 IMG_1448 by Mr Badger, on Flickr The first problem we hit was the clutch. We knew the brake master cylinder exploded not long before we bought it, I say exploded correctly because the paint was damaged in places by flying brake fluid. Well the clutch master cylinder quickly followed:  IMG_1007 IMG_1007 by Mr Badger, on Flickr  IMG_1449 IMG_1449 by Mr Badger, on Flickr It was in a shocking state, the circlip had corroded away, the cylinder wouldn't come out and the rubber boot had been replaced with one hand moulded out of black silicone sealant (!)  IMG_1003 IMG_1003 by Mr Badger, on Flickr  IMG_1002 IMG_1002 by Mr Badger, on Flickr The previous owner had paid £860 in 2017 to have the gearbox rebuilt and clutch replaced, and I'm sure it was the shonky master cylinder all along. So that was all fixed and then on to the next thing...... Engine shots to follow.  |
| |
Last Edit: Jun 8, 2020 18:34:59 GMT by mrbadger
|
|
|
|
|
|
|
|
Always fancied a Herald / Vitesse for top down motoring!
|
| |
|
|
drseg
Part of things
 
Posts: 142
|
|
|
|
|
they are so great to work on sitting on the tyre, gear box out jobs usually get some stinky gearbox oil on the interior but would still love another!
|
| |
|
|
|
|
|
|
|
Yup, lovely to drive now, keeps up with modern traffic easily and 50 MPH feels like warp factor 10. But I'm getting ahead of myself. I know she can be MOT free but we will always have it done for peace of mind, and we get this: 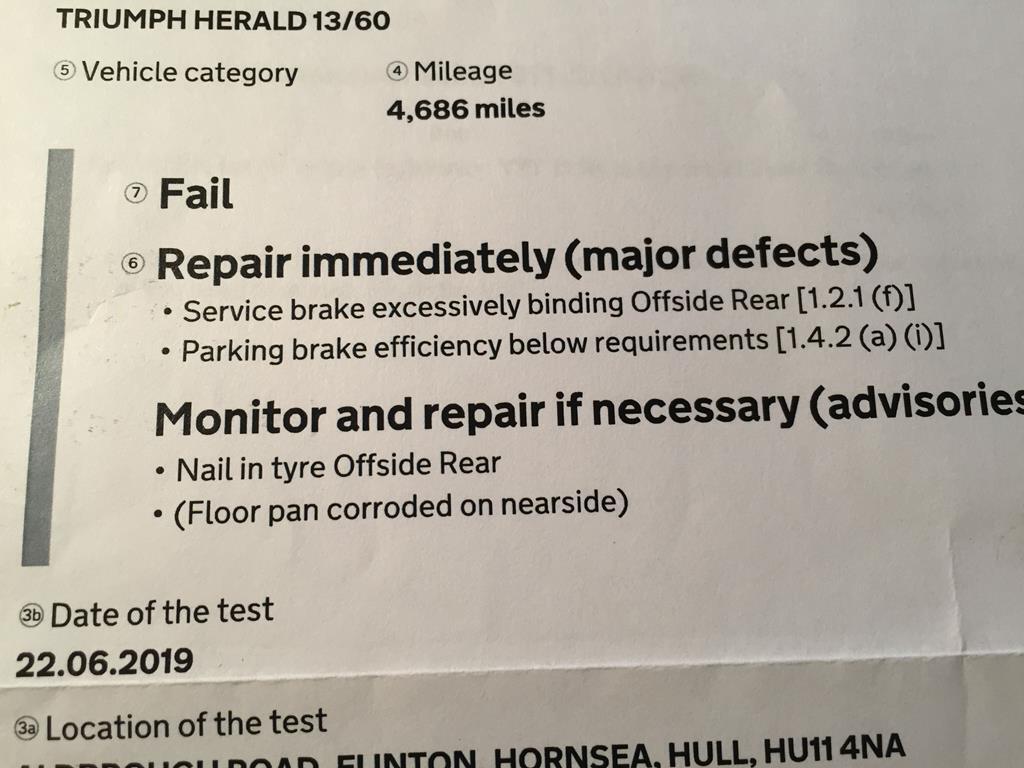 I thinks "not so bad" and because I'm busy (and Mrs Badger wants to play with Rosie while the weather is good) she agrees to get it fixed at the local MG garage, they do still exist. Next thing is £800 later both rear brake cylinders and both front calipers have been replaced along with a cross threaded flexi-hose. That doesn't even include fixing the tyre. I wouldn't mind but I had to fix the partially seized handbrake quadrant myself later on. I did promise an engine shot but I don't have any from when we bought her. I think I was a bit ashamed because the under-seal fairy had gone bonkers, painting the engine shrouds, the steering rack, even the rubber track rod bellows. Mrs Badger spent ages this year scraping all that off and then painting the engine shrouds.  IMG_1362 IMG_1362 by Mr Badger, on Flickr Good lock-down therapy, as long as I'm not doing it. Back to 2019, we next did Border Raiders with Club Triumph and had a ball. For those not familiar it's a non-competitive route book based jaunt, skipping from England to Scotland and back a few times.  IMG_1025 IMG_1025 by Mr Badger, on Flickr  IMG_1055 IMG_1055 by Mr Badger, on Flickr 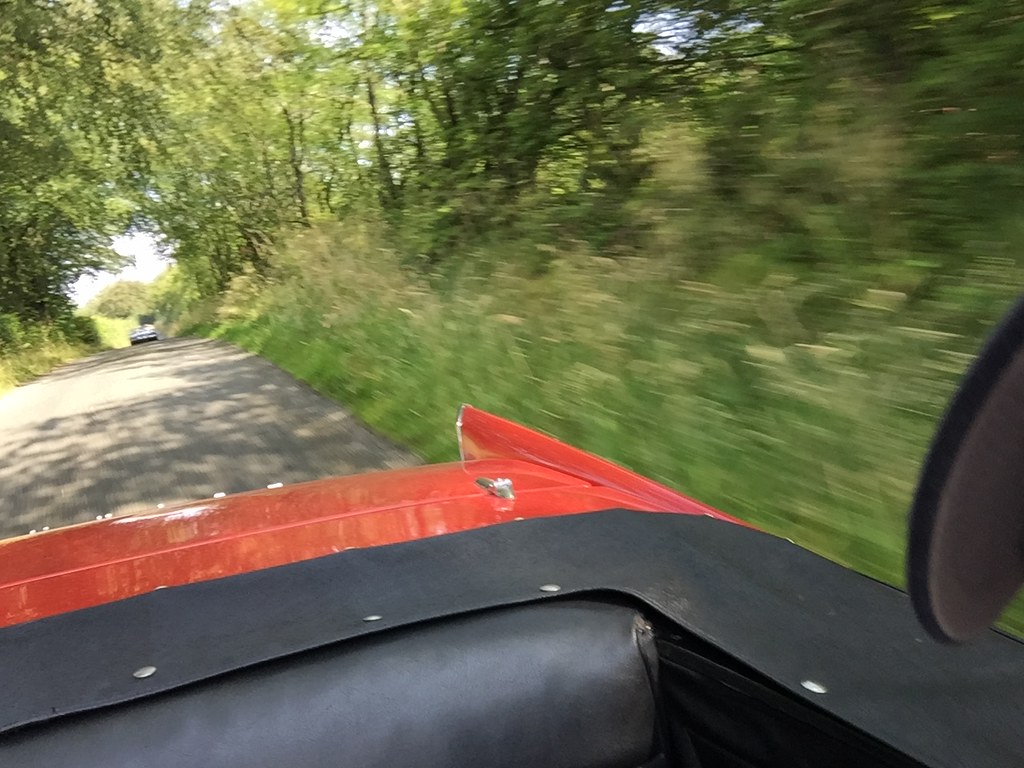 IMG_1070 IMG_1070 by Mr Badger, on Flickr  IMG_1082 IMG_1082 by Mr Badger, on Flickr Complete with spectators on the very special stages:  IMG_1073 IMG_1073 by Mr Badger, on Flickr Rosie went OK, with only the odd bit of judder when pulling away on steep sections noted. When the weather went grotty I started looking her over (Rosie, not Mrs Badger) and found massive play in the drivers side rear trunnion, god knows how it wasn't spotted on the MOT! What turned out to be a full strip down of the rear suspension began. |
| |
|
|
|
|
|
Jun 15, 2020 21:06:06 GMT
|
I've been looking for a short video of the play in the drivers side rear trunnion, it was a bit sobering when the thing flopped front to back by about 15 degrees.  That will be the explanation for the clutch judder on hills then. First step was to access the rear spring fixings behind this panel:  IMG_1211 IMG_1211 by Mr Badger, on Flickr You cant really tell from the photo but the boot is trimmed in blue domestic carpet spray painted black; over the years the combination has turned into a rigid fibrous board. Mrs Badger informs me that it's 'historic' or 'patina' and has to stay. I don't have a picture but behind that innocent looking carpet was what looked to be a piece of old kitchen cupboard carcass or worktop, held in with 6 (!) coach bolts, metal plate with screws and the most vicious little tacks you've ever met holding the carpet on. It must have weighed 30 kg ish all by itself. I removed the cover and find this, looks nothing like the pictures in the two workshop manuals I have (?).  IMG_1217 IMG_1217 by Mr Badger, on Flickr Next remove the driveshaft bolts and unbolt the trunnion/hub assembly. Very little is left of the drivers side trunnion bushing explaining the sloppiness.  IMG_1214 IMG_1214 by Mr Badger, on Flickr  IMG_1213 IMG_1213 by Mr Badger, on Flickr The upright turns out to be scrap due to corrosion, but makes a nice ornament after it was cleaned up, the underseal and a fine wire brush in a drill give almost a polished effect. The passenger side did not play nicely, the bolt had corroded within the sleeve.  IMG_1231 IMG_1231 by Mr Badger, on Flickr I threatened it with the angry grinder and it didn't listen  IMG_1241 IMG_1241 by Mr Badger, on Flickr  IMG-1200 IMG-1200 by Mr Badger, on Flickr A failure in negotiation skills on my part obviously. Next the spring came out and wow, it turns out to be the fabled swing spring type from a late spitfire.   IMG_1218 IMG_1218 by Mr Badger, on Flickr Next follows lots of very boring scraping, wire wheel action, degreasing and painting. I come to re-assembling the spring and no I did not mark the components orientation on removal, so sod it lets see what happens in use. Trying to assemble the spring pack in the swing carrier turns out to cause further casualties.  IMG_1271 IMG_1271 by Mr Badger, on Flickr Luckily its only and old spare and not my favourite one! Many thanks to Barry who had the ultimate solution in the form of a hydraulic press, it took 16 tons pressure to get the damn bolt in! In the picture the little black things on the bench are the rubber buttons, which we inserted with a pry bar after assembly of the spring.  IMG_1275 IMG_1275 by Mr Badger, on Flickr Finally all back in place, the bolts to be tightened after the cars weight was on the suspension:  JRNF7954 JRNF7954 by Mr Badger, on Flickr I then made a light weight version of the kitchen cupboard to trim the boot, re-using the original spray painted carpet. Long staples and PVA glue worked well in the construction.  IMG_1432 IMG_1432 by Mr Badger, on Flickr I have no pictures of the final drama. Refitting the trim panel I needed access to the hood well, lifting the hood there is the most horrendous clunk and scraping noise. Turns out bolt number 41 had unscrewed itself over the years and chose that moment to fall out. 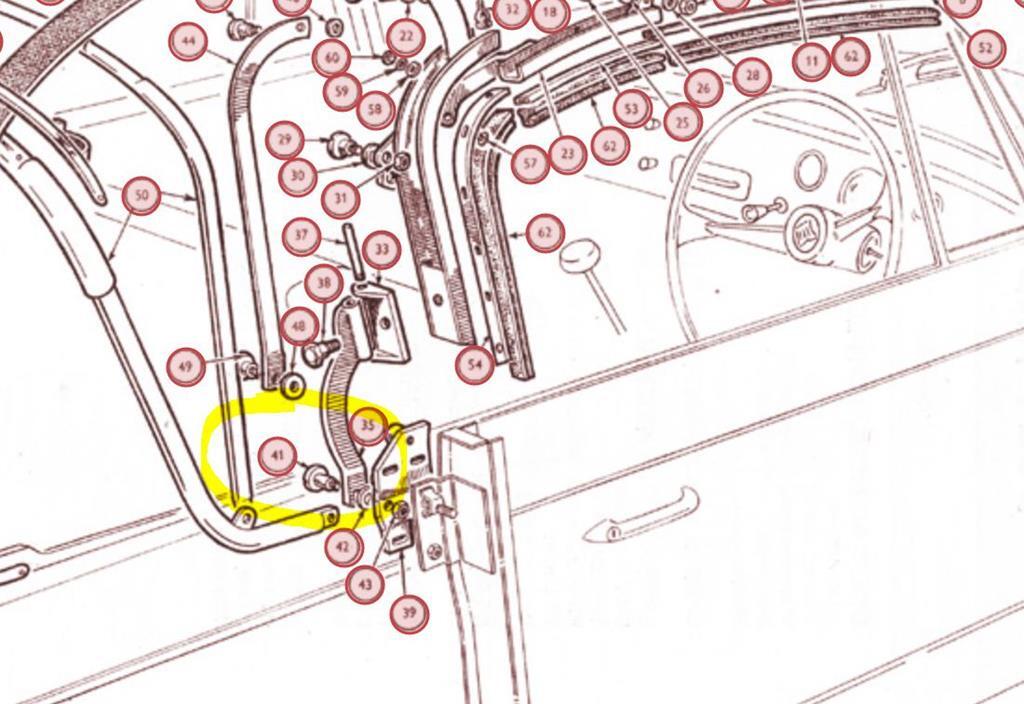 The toys were not only out of the pram, but were also stabbed and set on fire. No pictures of the hours spent trying to remove plate number 39 to put the bolt (and non-captive nut!!!) back and then reassemble, it would have been easier to pick my nose with a shovel. Mrs Badger decided rightly that I wasn't in a fit state for company, least said soonest mended. Apologies for all the exclamation marks but they artistically reflect the emotions released. Next instalment, the leaky engine. |
| |
Last Edit: Jun 15, 2020 21:19:13 GMT by mrbadger
|
|
logicaluk
Posted a lot
   Every days a school day round here
Posts: 1,373
|
|
Jun 21, 2020 20:15:02 GMT
|
|
Having reflected on telling you about retro rides I feel I can honestly say how NOT sorry I am.
Bookmarked
Carry on.
Dan
|
| |
Last Edit: Jun 21, 2020 20:17:18 GMT by logicaluk
|
|
|
|
|
|
|
Jun 22, 2020 16:59:15 GMT
|
Having reflected on telling you about retro rides I feel I can honestly say how NOT sorry I am. Bookmarked Carry on. Dan Cheers Dan. More nonsense to follow. |
| |
|
|
|
|
|
Jun 22, 2020 20:51:59 GMT
|
So this wasn't the post I was expecting to make next. Mrs Badger was looking through some old photos and came across these photos of our first triumph.  img015 img015 by Mr Badger, on Flickr  img014 img014 by Mr Badger, on Flickr It would have been 1991 and 'Jellybean' the Dolomite was made 13th June 1979, so it was in that terrible pre-classic phase. We bought it from Southampton car auctions, the old style with an auctioneer on a lectern you couldn't understand and cars driving (or being pushed!) by in a pit below. It was late in the running order, everyone else wanted a Sierra or a Cavalier so from what I remember it was a bargain. It came with bags of history and the previous owner had looked after it very carefully. It was rear wheel drive 1300cc engine, beige cloth interior, wood dashboard, rear seat belts and a massive boot. I think we ran it for a couple of years and apart from a temperamental fuel pump it ran perfectly. Hugely comfortable, great engine, no 5th gear but it was fine on the motorway. When we sold it, the body had the first slightest hints of a couple of rust spots, so it must have been waxed from new. We loved that car and I've no idea why we sold it for a Scimitar SS1 with hidden chassis rot - doh! The older gent we sold it to was a proto-classic car nut so we had high hopes it was going to a good home. Sadly the MOT history shows no record at all, I'll prefer to think it got exported to a warmer climate with no road salt and lives on.  |
| |
Last Edit: Jun 22, 2020 22:19:42 GMT by mrbadger
|
|
|
|
|
|
|
Right so where was I. The rear end had done a few miles now and we're really happy with it, no more clonks good ride height and a lot more visually appealing. My main goal over last winter to fix the horrendous oil leaks from the engine, one for sure being the timing cover seal. I don't have a great deal of pictures because I I'd never heard of retro rides at this point.  I took a brave pill and then took the tinware and radiator off. Yet again the under-seal fairy had gone crackers so they all needed scraping, degreasing and painting by Mrs Badger. There was at least some coolant in the engine but closer inspection revealed some of the hoses at the back of the engine by the heater box were very dodgy. As this car is a dastarb child of a Herald and a Spitfire, parts ordering is a pain in the ass, but I got most of what I needed by ordering a Herald hose kit.  IMG_1298 IMG_1298 by Mr Badger, on Flickr  IMG_1302 IMG_1302 by Mr Badger, on Flickr I tend to use James Paddock for the parts, reasonable prices, good availability and reasonable quality so far. The crank nut came off easy with a very old compressed air Chicago Pneumatic impact gun. The timing chain was checked for wear and found to be well within tolerances, thank crunchy! An evil pixie had whispered in my ear that it could be leaking from the rear main seal as well. I took the starter motor out (also to get a clean and paint) and this proved not to be the case.  IMG_1317 IMG_1317 by Mr Badger, on Flickr The sharp eyed will note however that it was peeing out of the bottom of the fuel pump, removal revealed half a gasket and some silicone sealant - bodgetastic! Thankfully there were no cracks in the filter housing and I replaced a gasket cut from a sheet of gasket paper - fantastic stuff and everyone should have at least two thicknesses in stock. I checked the fuel filter and found this:  IMG_1318 IMG_1318 by Mr Badger, on Flickr  I painted up the timing cover, being sure to take a photo of the marks before painting over and then highlighting the zero and 10 degrees marks to make life easy.  IMG_1307 IMG_1307 by Mr Badger, on Flickr I knocked in the new oil seal and then used a bit of bent wire to keep the chain tensioner in the right place during fitting. Torqued it up feeling dead chuffed and then noticed the oil thrower sat on the bench.  After calming down I took it all off again, installed the cursed oil thrower then put it all back together again. Tightening it back up again with my brand new swanky Teng 3/8" torque wrench and suddenly one of the bottom bolts just keeps spinning.  Off it all comes again and yes a 5/16" UNF thread has pulled. A quick google search enlightens me that Triumph in their wisdom used alloy 'bridges' to fill the gap below the crank! The savages even used bits of wood to hammer either side, it just aint right! Dan the man ( logicaluk ) comes to the rescue with a HeliCoil kit, left socially distanced on his front wall - thanks Dan! Now I've never used a HeliCoil before, all goes well until I come to break off the tang, it takes no end of knocking and waggling to break it off. Something was obviously not right because screwing in the bolt damages the end of the thread so I convert it to a stud. I know this aint quite right but it works fine and when the engine comes out (it's definitely a when and not an if because its a Triumph 1500 after all) a steel bridge will be fitted. No pictures of all this because toys have been thrown out of the pram, stabbed and set fire to again. The other leak is from the rocker cover so I invest in a Rimmer Bros silicone seal attached to the cover with RTV before putting in place. I bash the top of the rocker cover back into roughly the right shape, to repair the PO's idea that just tightening it down more will work. Of course the cover gets painted racing red while its off, and for once the under-seal fairy had not been there first.  Preparing for reassembly I take the dodgy hoses off and find this in the end of the heater valve:  IMG_1346 IMG_1346 by Mr Badger, on Flickr Disassembly shows that originally a lump of silcone sealant had partially blocked it first and silt had done the rest, new valve please.  IMG_1347 IMG_1347 by Mr Badger, on Flickr Just to rub salt into the wound a thread in the themostat housing was lunched due to corrosion on the threads, I'd checked it and it held just enough to give a false sense of security, until you try to torque it down. It's 5/16" UNF again but by this point I've given the Helicoil kit back to Dan. Stuff it, it gets tapped out to M8 thread and a std bolt just fits. Flushing the heater matrix yields biblical amounts of brown silt. This convinces me to run some of this through the engine before filling with coolant: 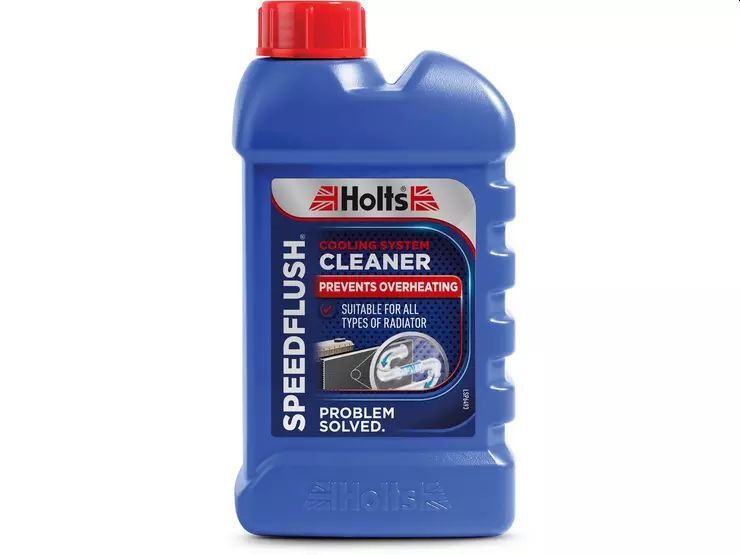 and absolutely nothing comes out. Conclusion is that some previous owner had problems with the temperature and had got there first, but neglecting the heater. While we've had Rosie the temperature gauge has always been rock steady, even with some long hard drives in hot weather. Cassie the hound made a brief visit, she doesn't come in the garage much because there's no food, so whats the point?  IMG_1366 IMG_1366 by Mr Badger, on Flickr We're getting there now but first I want to change the oil on the gearbox, mainly because the drain plug is leaking. This comes out:  IMG_1395 IMG_1395 by Mr Badger, on Flickr No lumps, very smooth when rubbed between finger and thumb. The gear change was good before but with fresh oil now fantastic. The PO had the box rebuilt, so I suspect it's just from bedding in of the new components. The drain plug still leaks even with PTFE on the thread, hhmmm. I adjust the valve clearances (only two needed any adjustment) and check the points gap, all good. Starts up fine (phew) and next step is to change the oil and filter, the PO provided a K&N filter with the car. Hot oil drained, filter off and then the new filter turns out to be the wrong size - thank you again to the PO. Dan the man again steps in to get me out of a hole - thanks! The car was running increasingly smoky and it was no surprise to find the plugs were very sooty. The plug gaps were enormous and the plugs the wrong type as well, thank you again to the PO, there seems to be a trend emerging here. Before messing with the carbs I checked the ignition timing with a strobe light. It was set at zero degrees BTDC, a quick adjustment to 10 degrees BTDC and the idle revs rise by over 500 rpm, the sooty smoke disappears and the engine sounds so much happier. Now kicking myself for not checking this earlier.  The final step was tuning the carbs, I personally had more luck with the Gunson Colourtune than the lift the piston approach. A synchrometer was a good investment, but I made up a right angled adapter from PVC pipe and a random rubber piston seal to get round the tinware for the front carb. 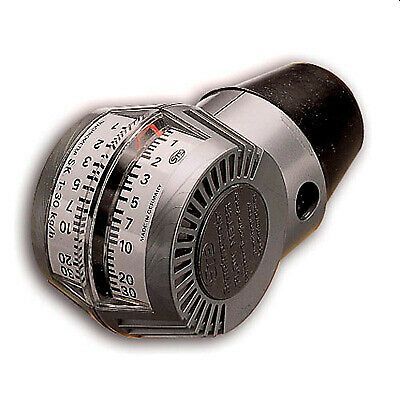 Rosie now flies and the engine is utterly transformed; Mrs Badger is the owner/driver (I've got my bikes) and I'll be honest I didn't enjoy driving her (Rosie that is). Now I get it and enjoy driving her occasionally, I should have had more faith in my limited abilities early on. That gets us pretty much up to date so I thought no more posts for a while. Then Mrs Badger brings Rosie back today with toasted rear brakes, despite me taking the handbrake quadrant out and greasing it up a while back. Ah well, it keeps me busy. |
| |
Last Edit: Jul 5, 2020 23:14:51 GMT by mrbadger
|
|
logicaluk
Posted a lot
   Every days a school day round here
Posts: 1,373
|
|
Jul 11, 2020 18:58:47 GMT
|
|
Mr Badger, you are most welcome. I'm looking forward to a ride in Rosie, after the brake conundrum is sorted. (see what I did there!!)
I'll get me coat.
Dan
|
| |
|
|
|
|
|
|
|
Wow, long time no post. The sticking handbrake in the last post managed to toast the drivers side rear wheel bearing. Due to the design it's a hell of a job so I entrusted to Barry, the man who can ably assisted by Mrs Badger. No pictures I'm afraid because I was busy working at the time but the hub was toast as well. Got it back on the road but with COVID, lockdown and all the events cancelled Rosie got very little use during 2020. Rolling swiftly on to 2021 as soon as the garage got warm enough it was time to tackle some more issues. The front trunnions had always worried me because they'd been greased so the winter project was to dismantle the suspension and replace all the bushes. 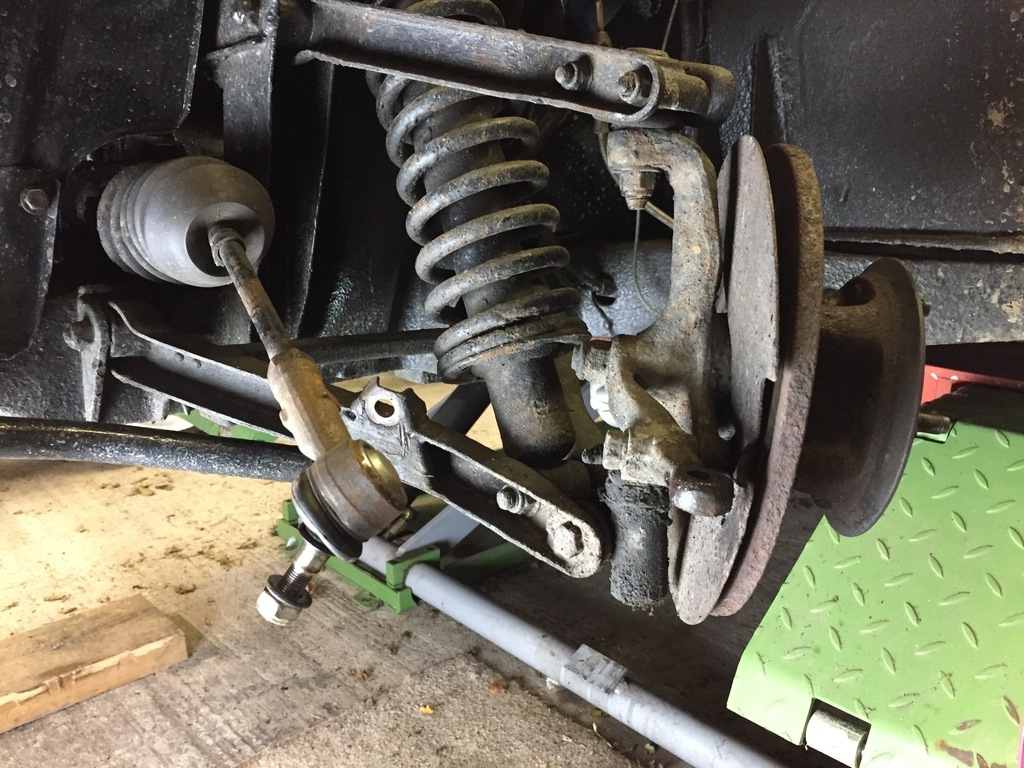 The front shocks were looking ropy so I planned to buy some standard shocks at £18 each. Mr Dan ( logicaluk ) advised these we "wibblepooh" which ended up with me buying shiny yellow adjustable ones .  I started on the passenger side and everything came apart very easy, wow! The trunnion was mucky but after cleaning it was inspected and approved for re-use: 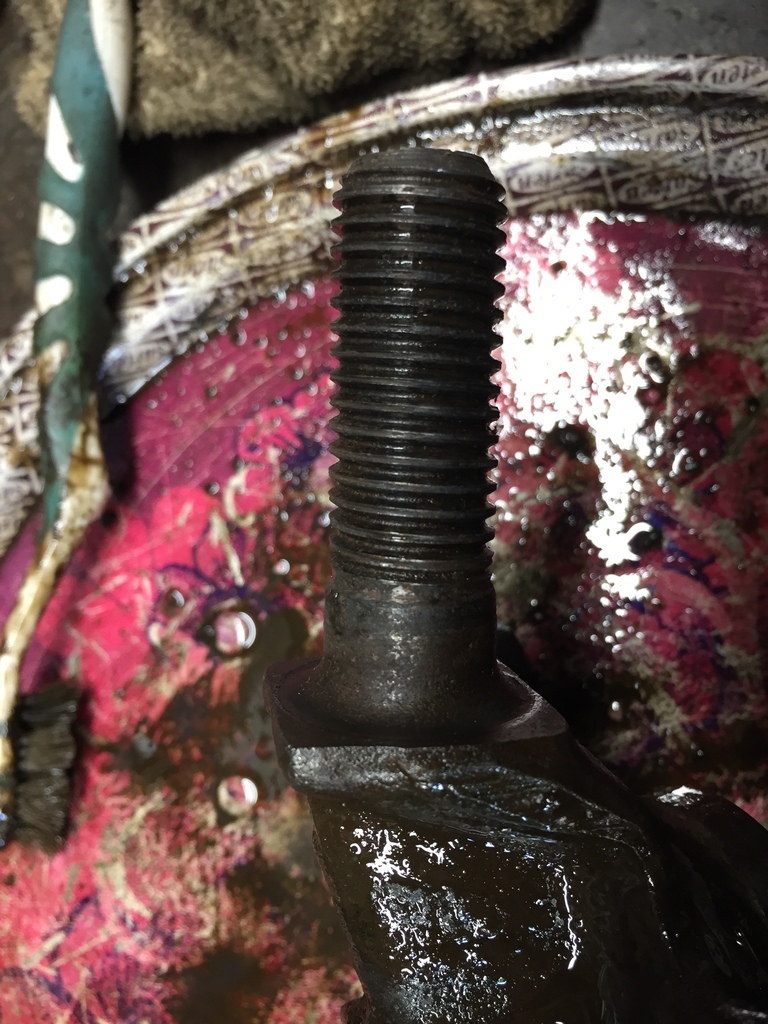 Spring and shock that came out: 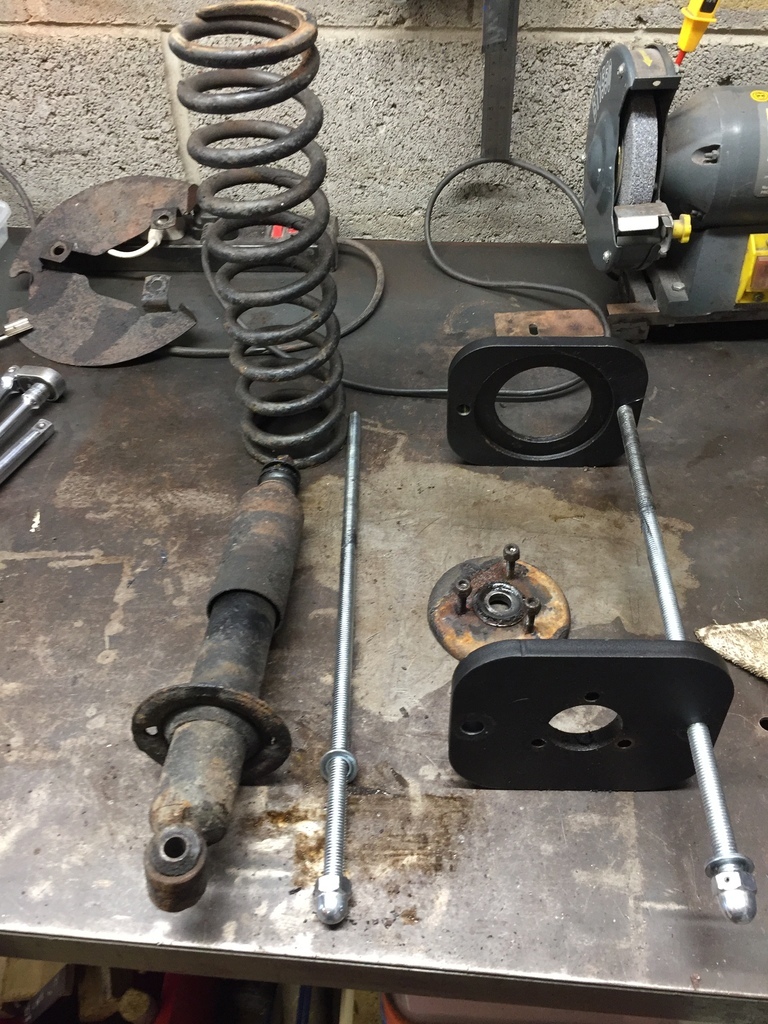 New shock and (stock) spring being assembled. I bought the correct spring compressor because I can vividly imagine what happens if it goes wrong. 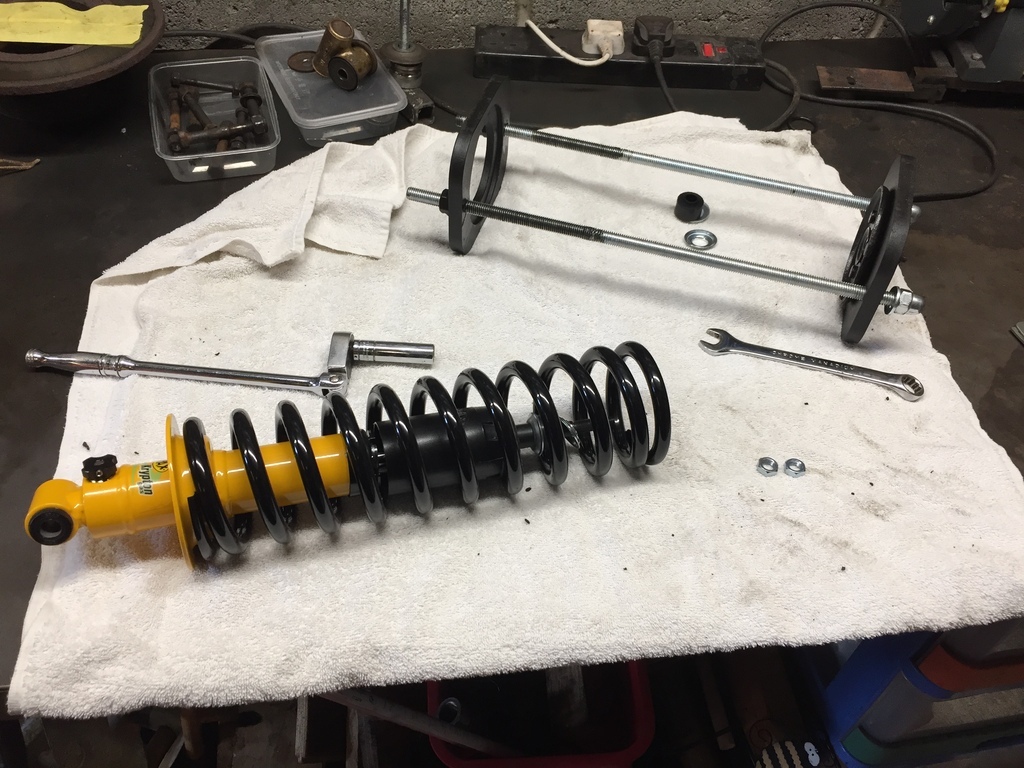 To remove the old bushes running a 10mm drill down the steel centre worked wonderfully, the combination of relieving the tension, heat and torque often meant the bush simply popped out on the end of the drill bit. 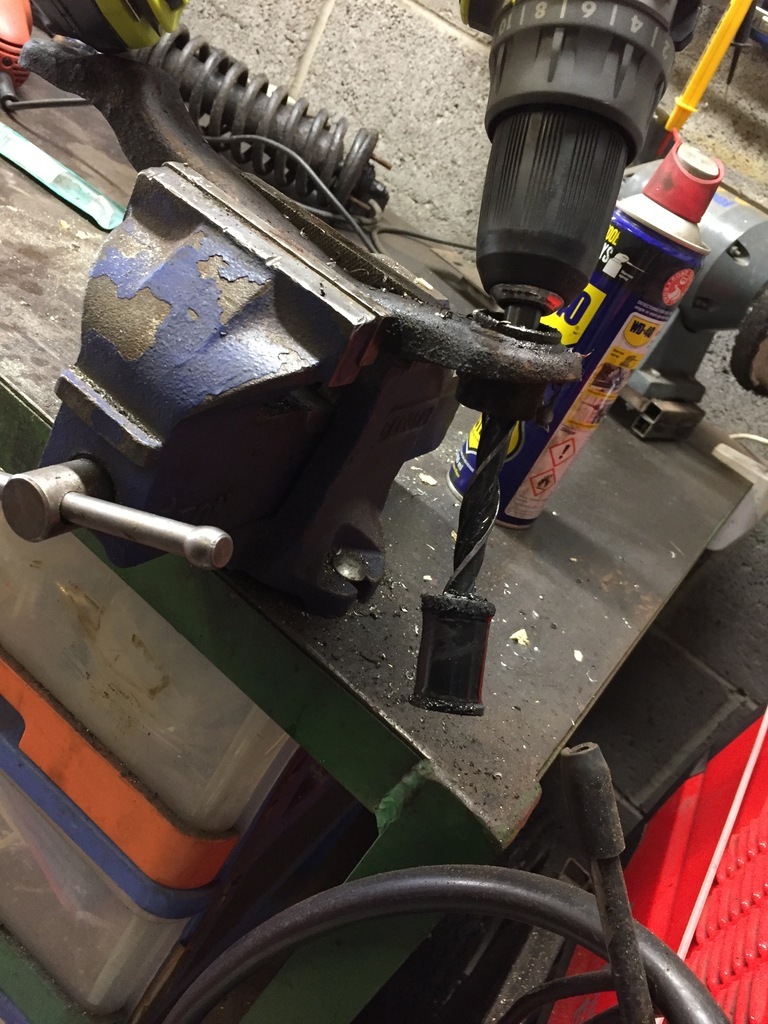 The suspension arms and upright were cleaned up with a wire wheel and then painted. I made up a little contraption to put in the vice and draw the new bushes in lubricated by tyre soap. 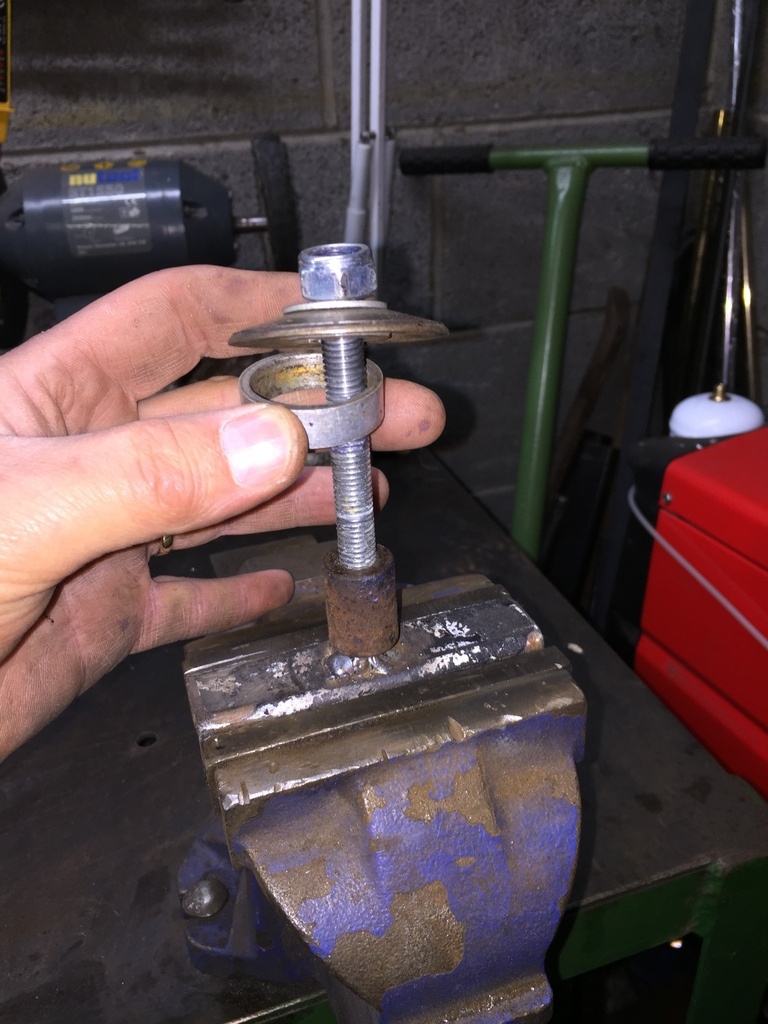 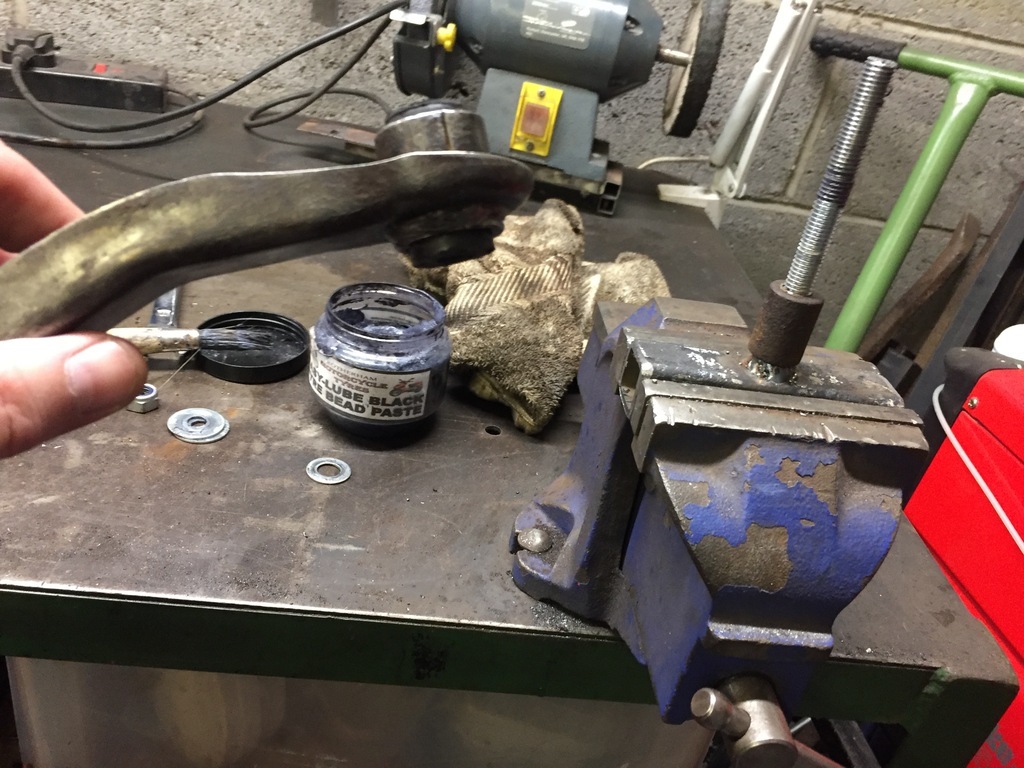 During assembly with a full set of shiny new bolts: 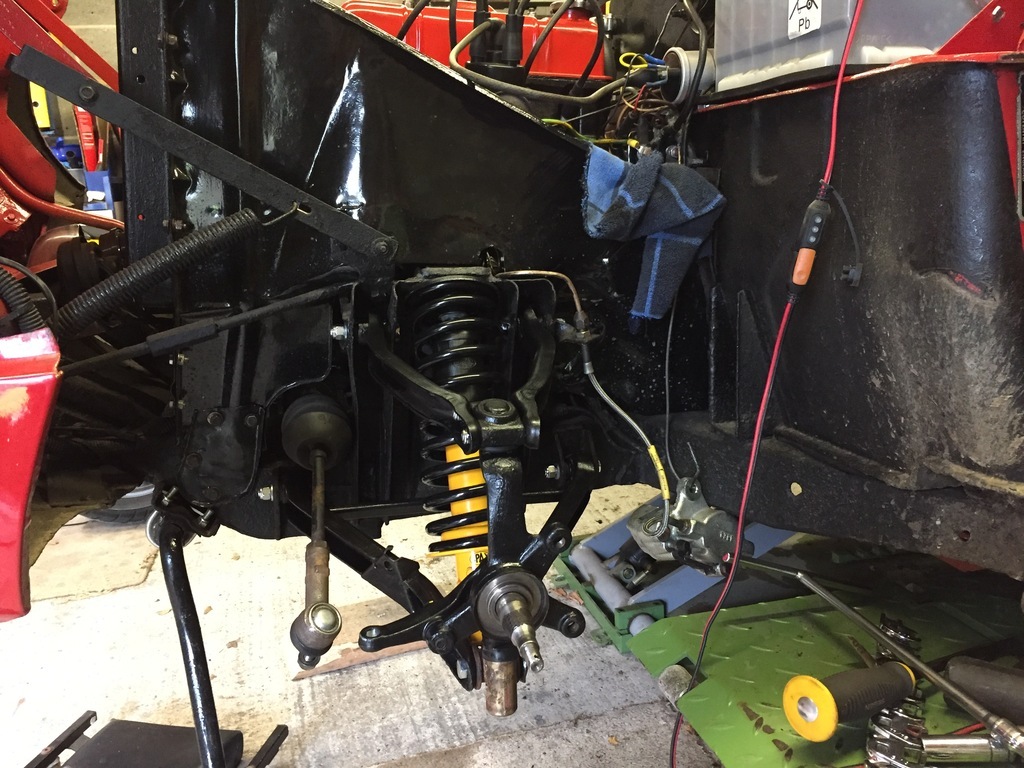 So I got everything back together on the passenger side and I was feeling so chuffed with myself I forgot to take a picture. Don't worry, it won't last...... |
| |
Last Edit: May 8, 2021 21:28:59 GMT by mrbadger
|
|
logicaluk
Posted a lot
   Every days a school day round here
Posts: 1,373
|
|
|
|
|
Great to see you posting again, looking forward to the next exciting installment of, Mr Badger inside rosie.
|
| |
|
|
|
|
|
|
|
Last instalment the passenger side front suspension was done apart from full tightening of the bushes, here's the lost, now found, picture to prove it. 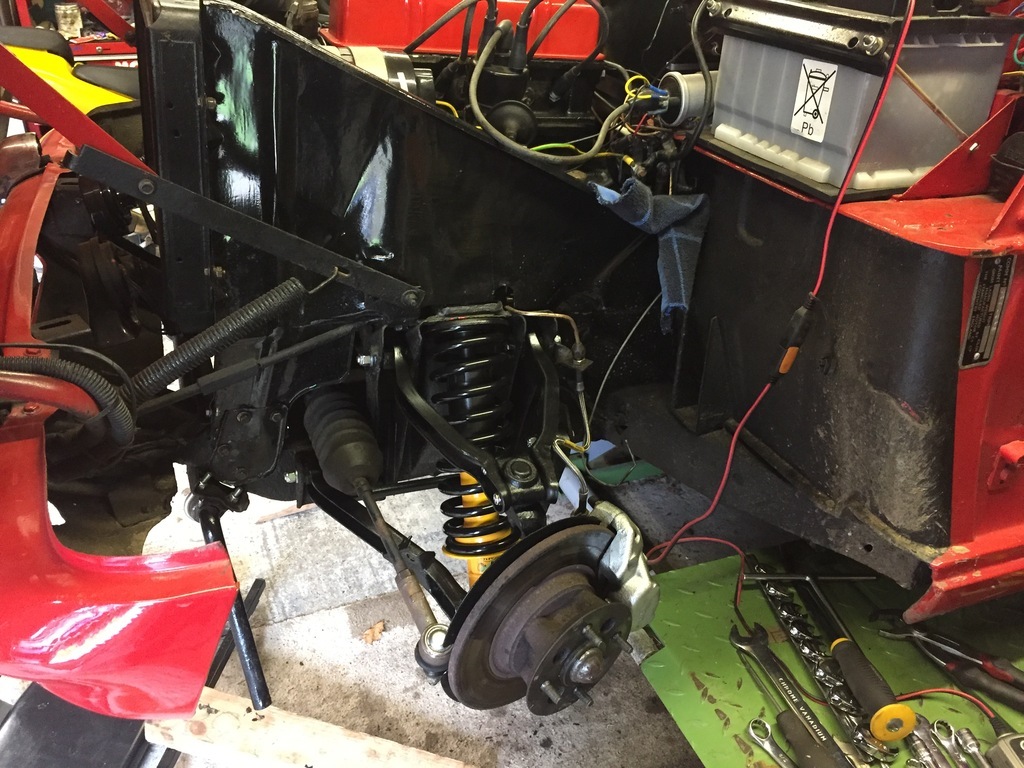 Feeling chuffed I thought simply rinse and repeat for the drivers side, hhhm. The lower fulcrum bolts and the trunnion bolts undid but would not leave their comfy hidey holes even with the big hammer. So stepping up to Defcon 4 the angry end came out. 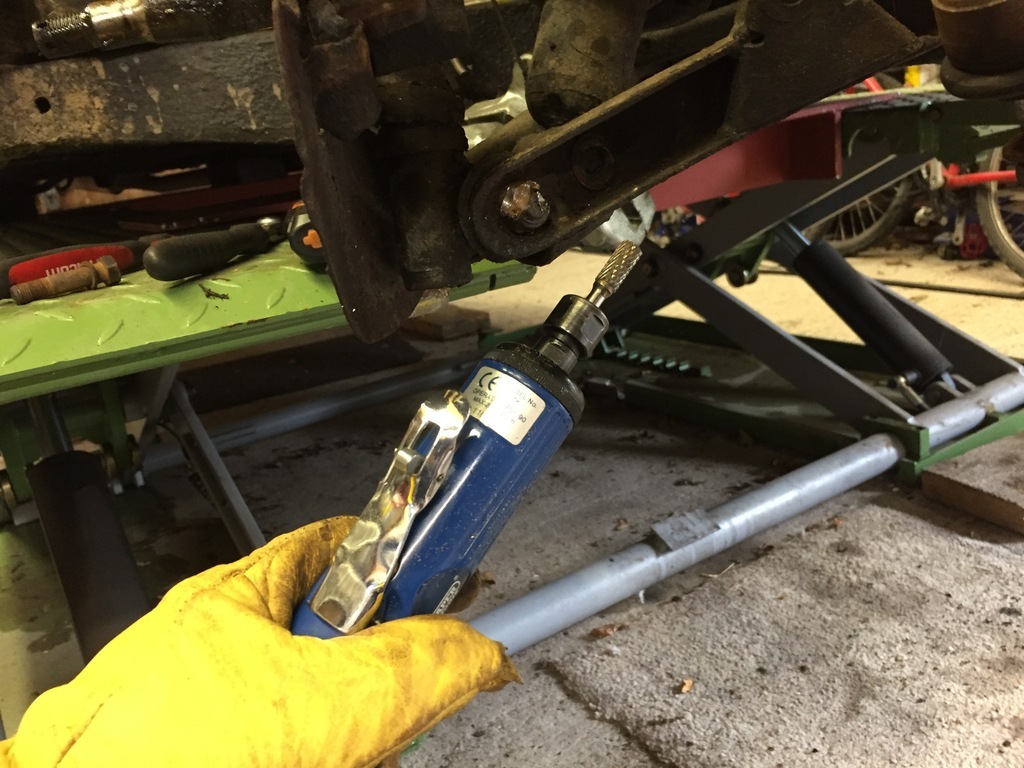 Taking the head off the bolt helped not at all, so then it escalated to removing the trunnion the hard way. 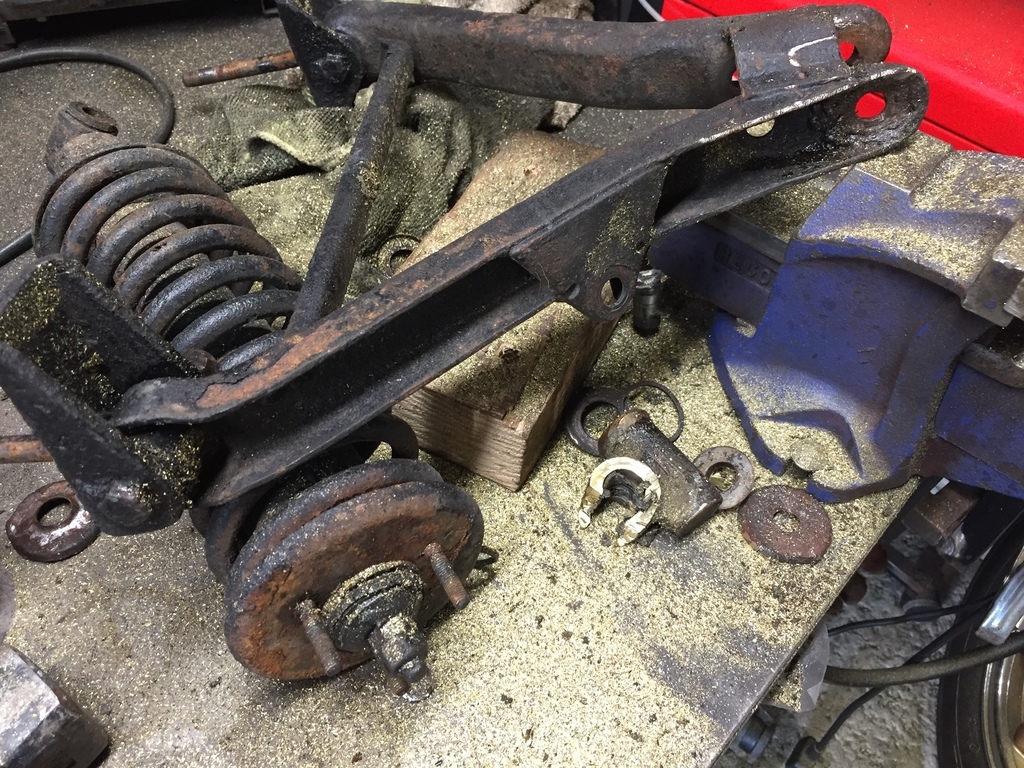 The remnants of the bolt still wouldn't let go so I had to turn all of the bolt into metal shavings. The compressor got upset at all this hard work and decided to burst it's cap.  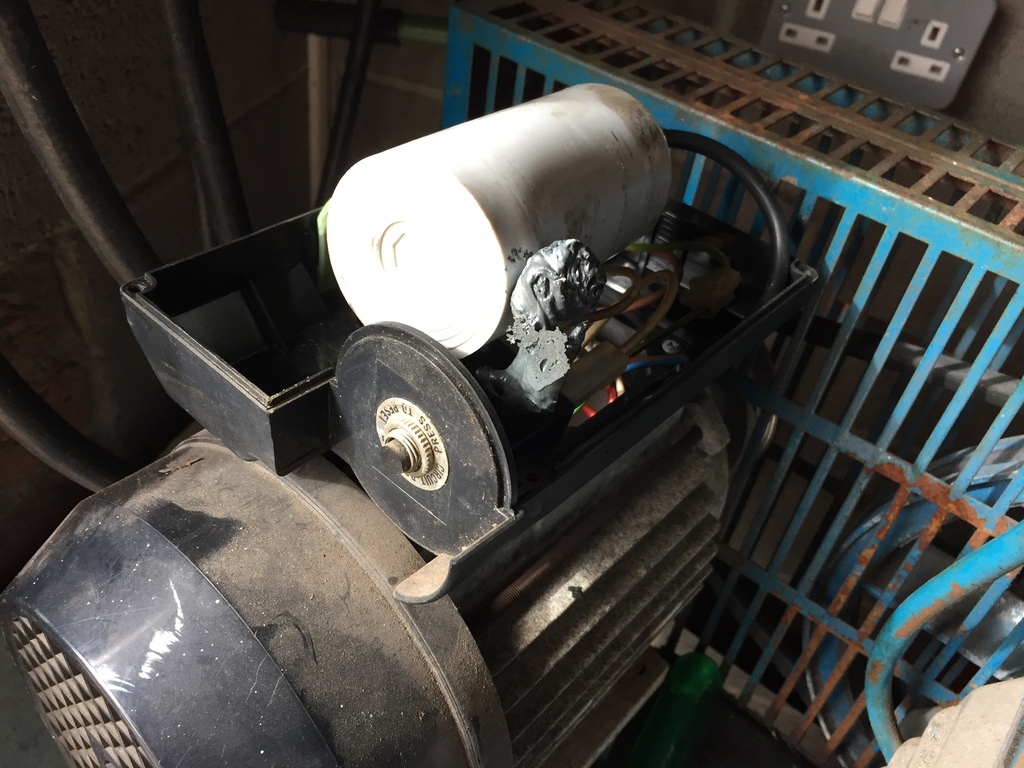 The fulcrum bolts I took out with the hacksaw because I was concerned with damaging the brackets if I used an angle grinder. 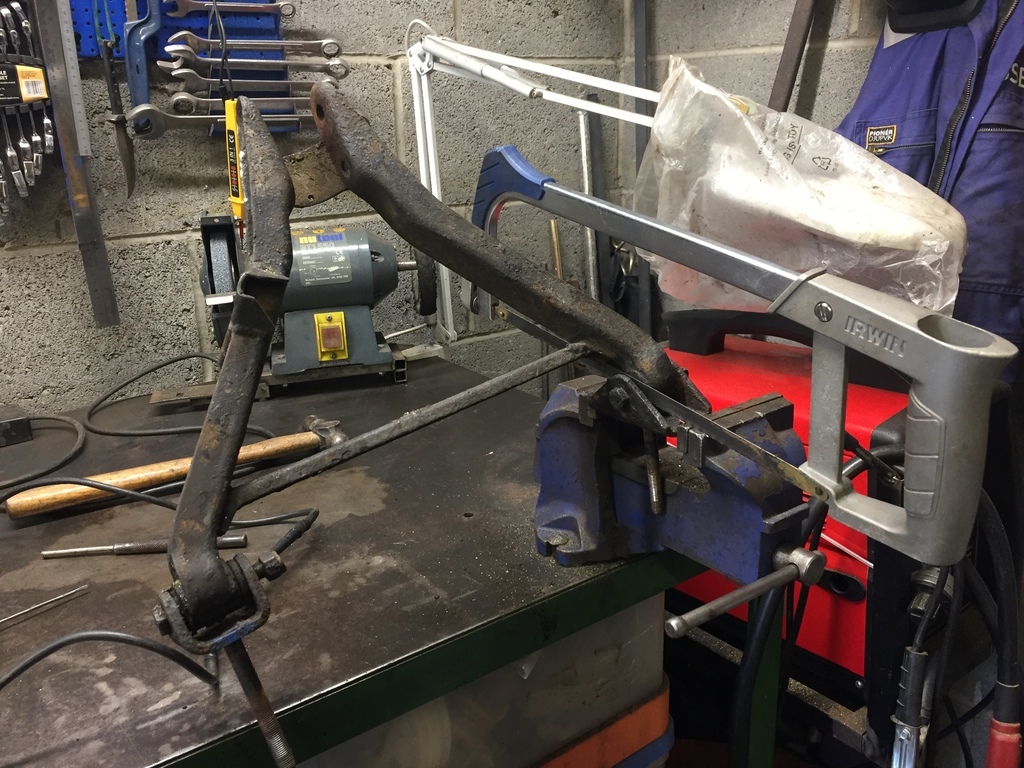 After all that the upright was condemned due to lots of rust pitting and replaced, complete with a new trunnion. 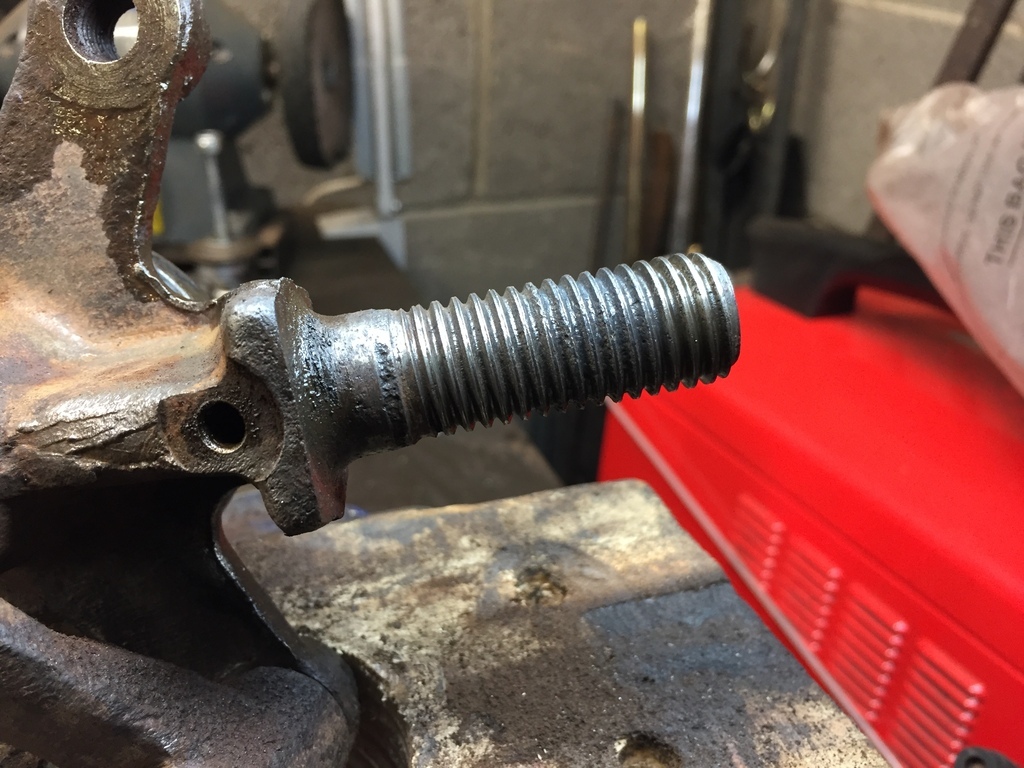 Clearly the drivers side front suspension hadn't received much love this century. Lots of scraping off of underseal, wire brush in a drill action, bush insertion (sounds so wrong) and assembly with shiny bolts followed. 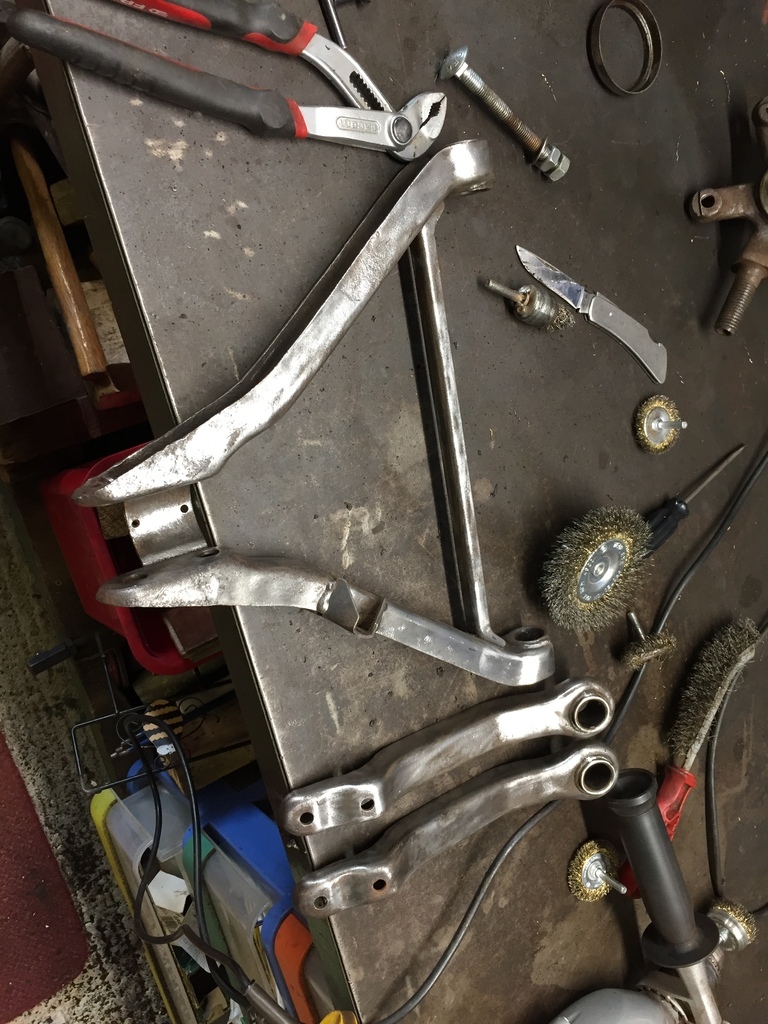 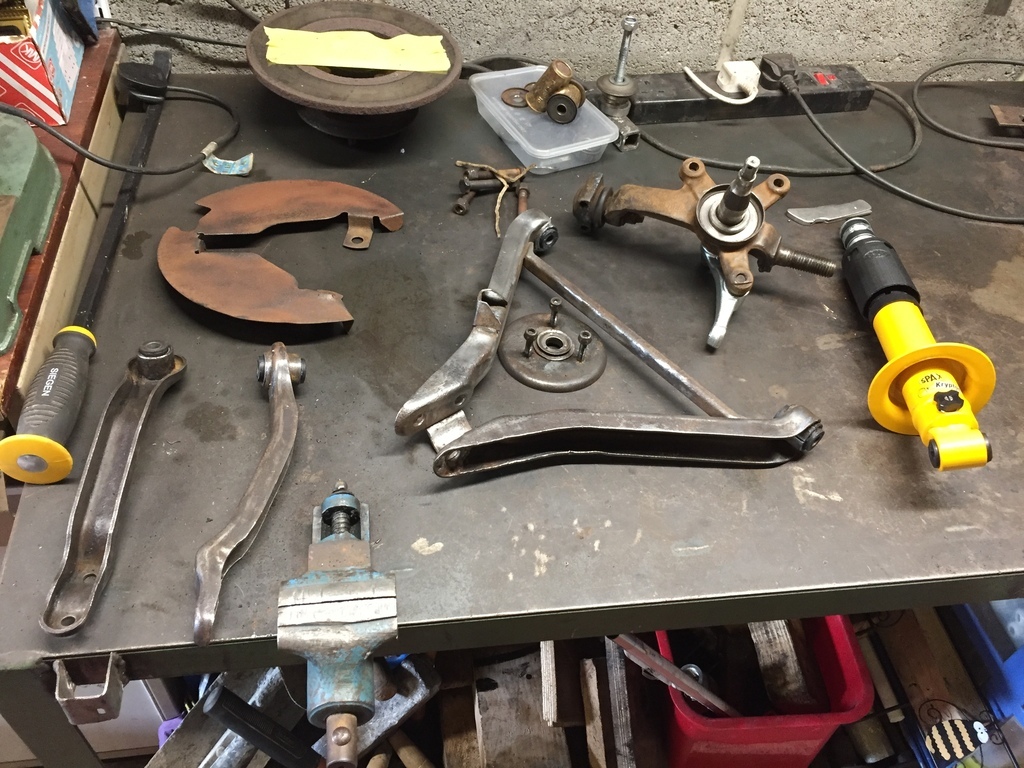 If anyone has a blast cabinet going spare let me know! To cheer myself up I did an easy job and fitted the back shocks. 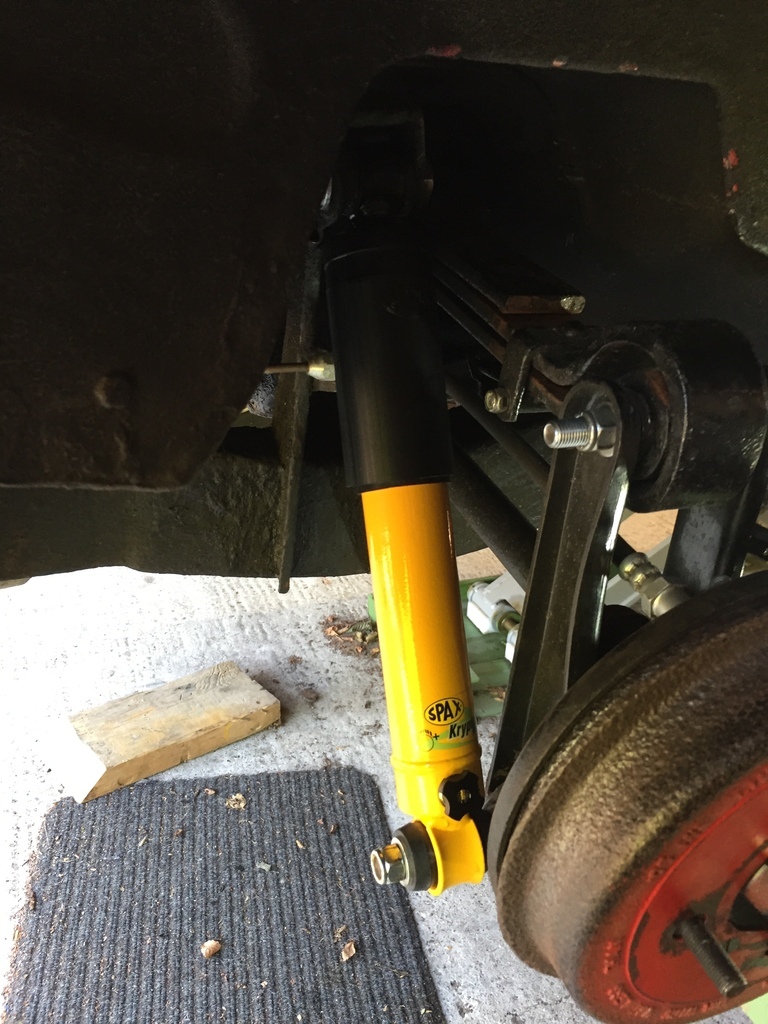 The drivers side was now fully back together again but I got distracted and didn't take a picture . What distracted me was loss of fresh coolant I'd only recent just put in after fixing a slight weep from the thermostat housing. I checked the hoses - nope, checked the radiator - nope, checked the thermostat housing again - nope, checked the water pump - nope, checked the heater - nope. Then I checked what I should have checked already and found this, forgive the picture but it's well hidden under the inlet and exhaust manifolds. 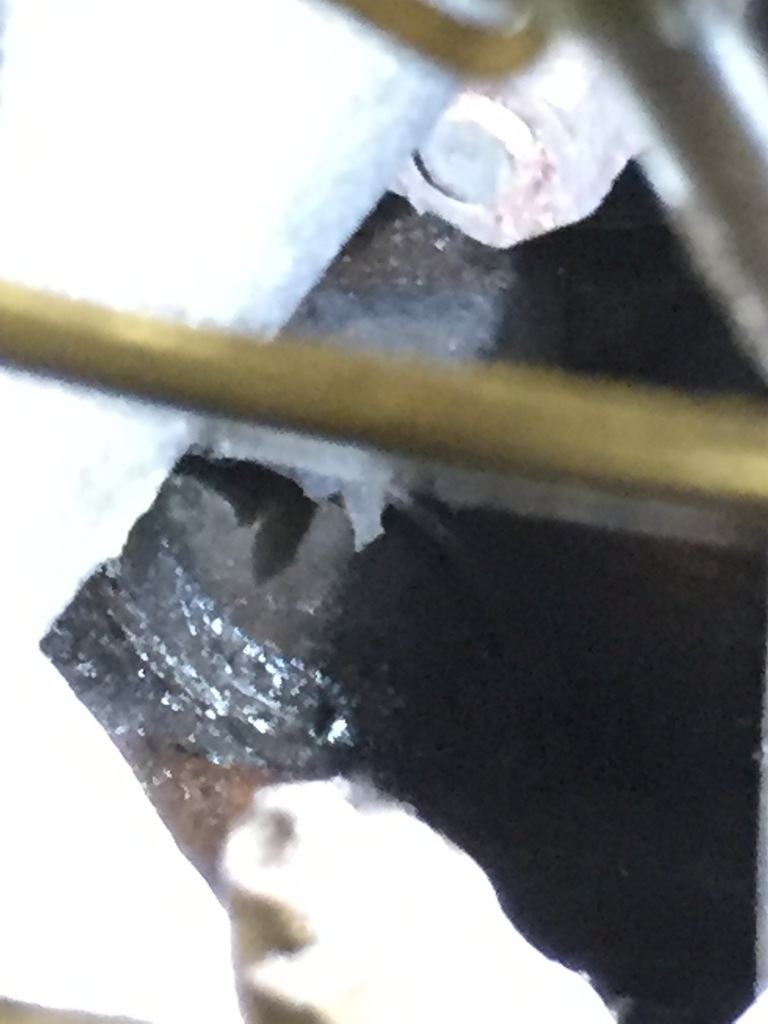 A nasty, spiteful, good for nothing core plug that had been leaking for a long time but the acid flush of the cooling system I did last year must have finished off. Cue expletives and the throwing of random non expensive things until I felt better. The local Club Triumph brain trust tell me that if one core plug has gone, the rest are well on the way, so as you read this drastic action has already happened. The only question is if I have the ability to to turn a pile of components back into a functioning car. At least the weather has been curse word and events not yet allowed, so Mrs Badger hasn't missed much. Until next time.  |
| |
|
|
|
|
|
|
|
Great to see you posting again, looking forward to the next exciting installment of, Mr Badger inside rosie. Cheers Dan, somehow you make it all sound so smutty when actually it's a very platonic relationship.  |
| |
|
|
logicaluk
Posted a lot
   Every days a school day round here
Posts: 1,373
|
|
|
|
Great to see you posting again, looking forward to the next exciting installment of, Mr Badger inside rosie. Cheers Dan, somehow you make it all sound so smutty when actually it's a very platonic relationship.  It's a gift. Dan |
| |
|
|
|
|
|
|
|
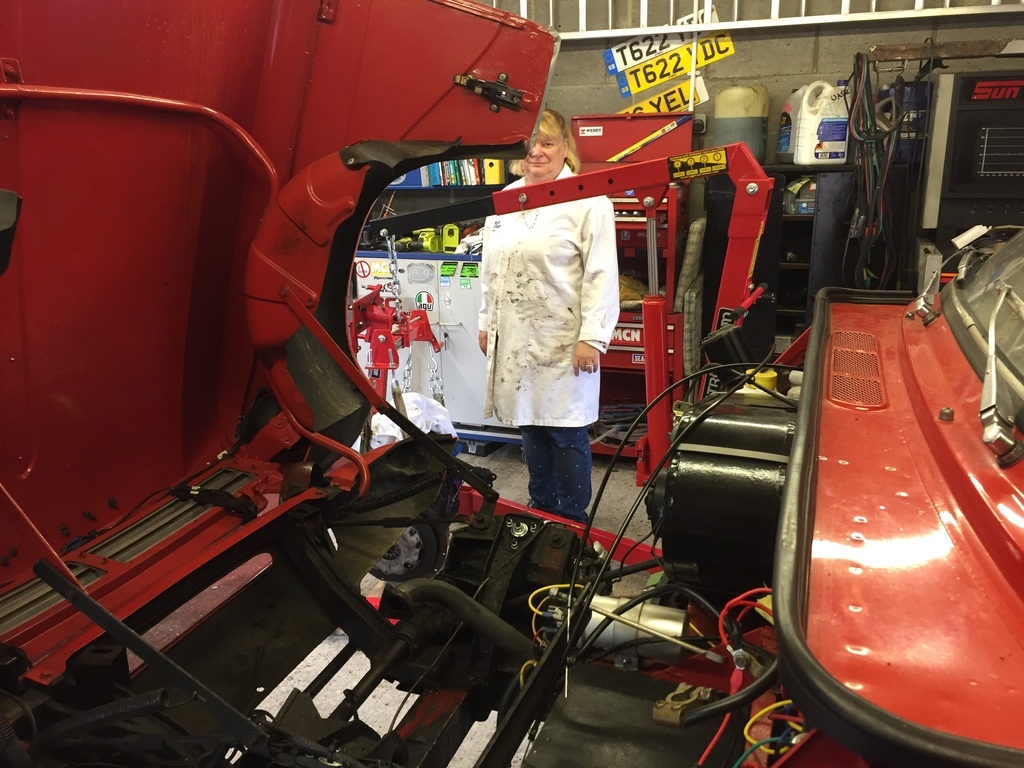
Episode 9 - Broken hearted In the last exciting episode I dropped the bomb shell that one of the core plugs had rusted out, explaining the nagging coolant loss we'd been experiencing. So the only option was to remove the engine, luckily I'd gone halves with Badger Junior on an engine crane and had picked up a second hand engine stand years ago as part of a bundle with other tools I wanted at the time.
At least access in the Herald is better than any other car I've worked on. The process is fairly simple:
- Drain coolant and remove the radiator.
- Remove the tinware either side of the engine along with the horn support bar.
- Remove carbs and exhaust manifold.
- Disconnect everything, then check again that you've disconnected EVERYTHING!
- Take out the fibre board gearbox cover inside the car.
- Support the gearbox, in my case a lump of wood between the two sides of the ramp was easy.
- Attach crane and take the weight before unbolting the engine mounts
- Unbolt the engine from the gearbox
The worst bit was trying to separate the non standard performance manifold from the exhaust.
You can apparently take the box and engine out together but for my first engine removal in over 30 years I wanted to make life easy for myself. There's not many photos because Mrs Badger and I were so wrapped up in not damaging the car, or ourselves.
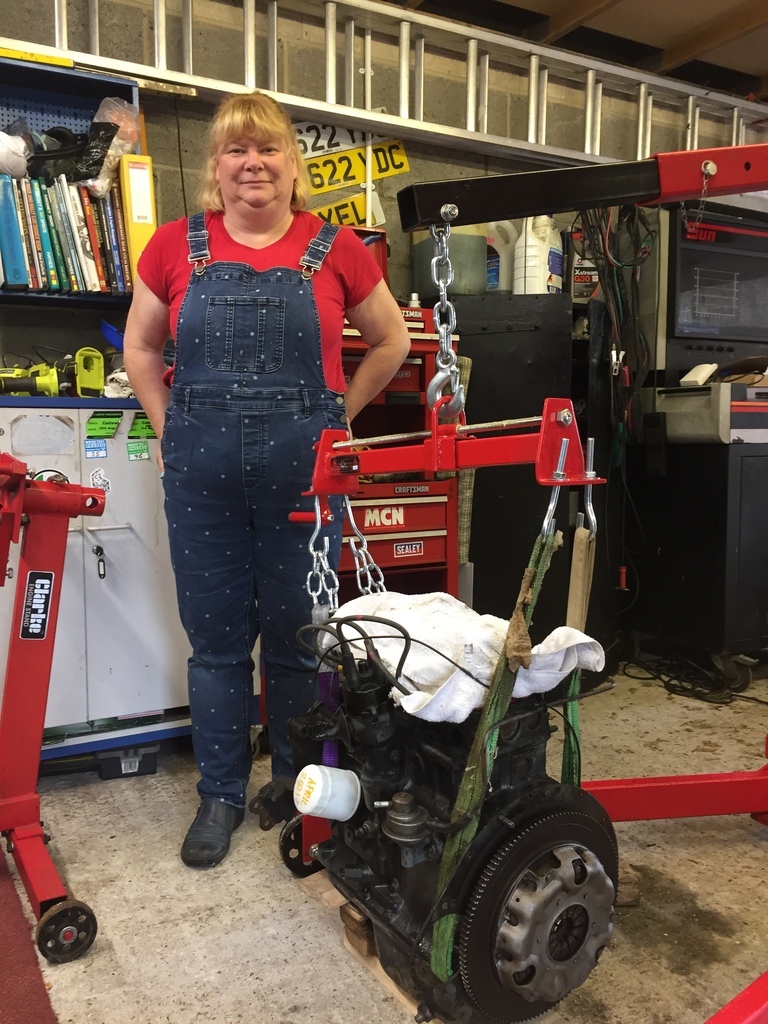  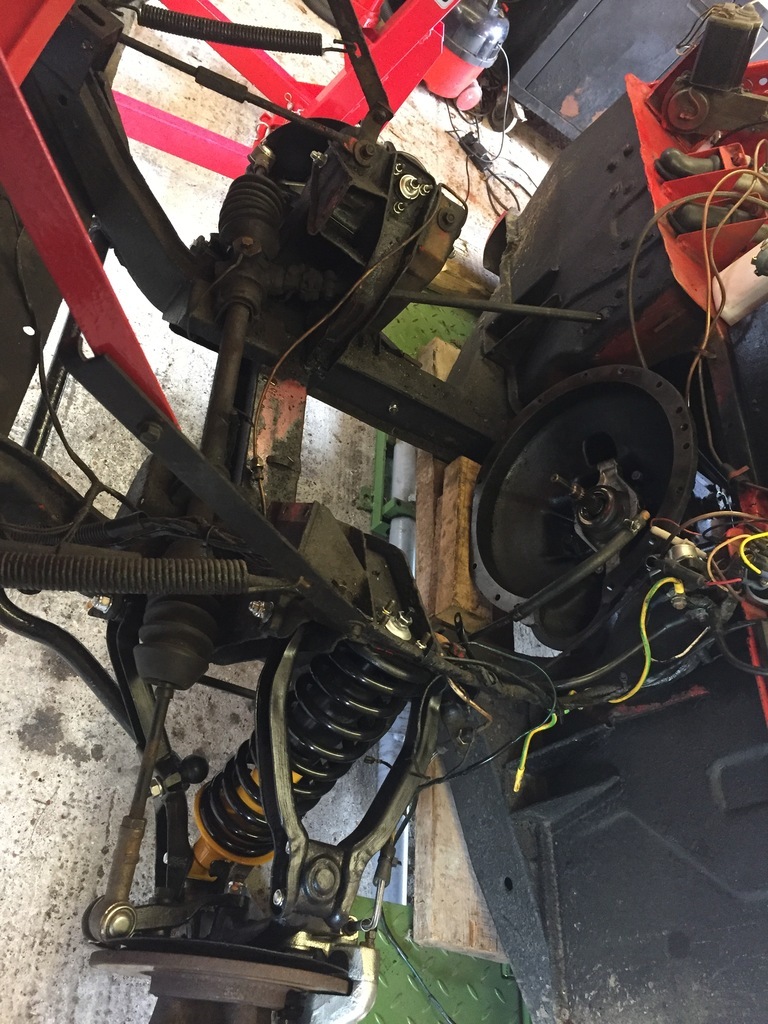 I'd bought a load leveller from Machine Mart and frankly it's brilliant, it would be such a faff trying to balance the engine by adjusting the straps. The clutch had been replaced and gearbox recon'd by the previous owner not long before we bought it, the emphasis was on the con. The gearbox leaks like a sieve, helped by every bolt being loose and the pressure plate they put back in was completely knackered: 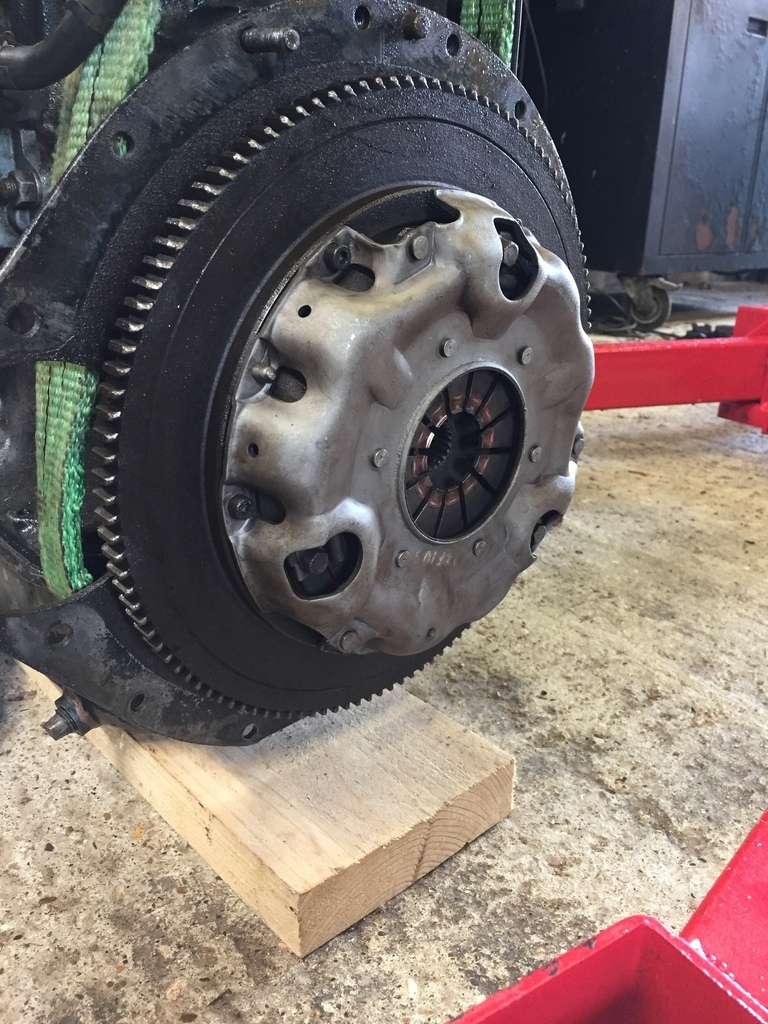 The next job was to fit the engine to the stand, loads of googling revealing its a pain with a the Triumph series of engines. The last engine on the stand had been Badger Juniors 2 litre Golf engine, those butch metric bolts were not going to be any good for the Triumph engine! 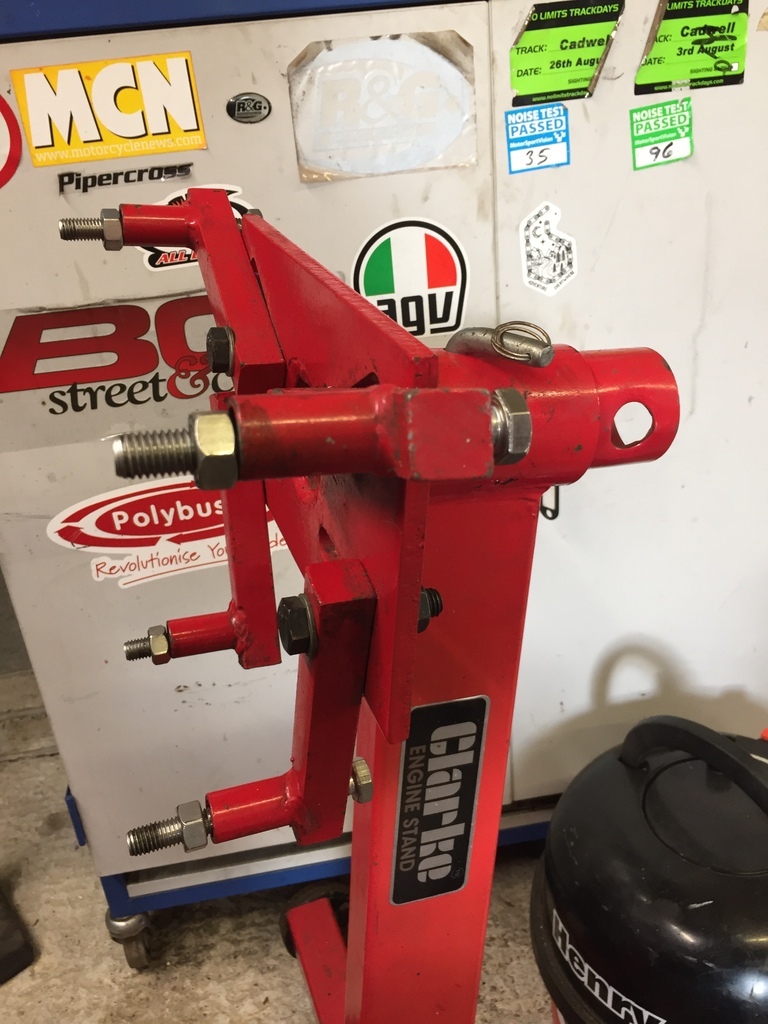 In the end I took off the back plate along with the studs and dowl pin at the top block and bolted the plate directly to the back of the block without the arms. On the advice of the Club Triumph brain trust I invested in some brand new 5/16 UNF high tensile grade 8 bolts for the job. 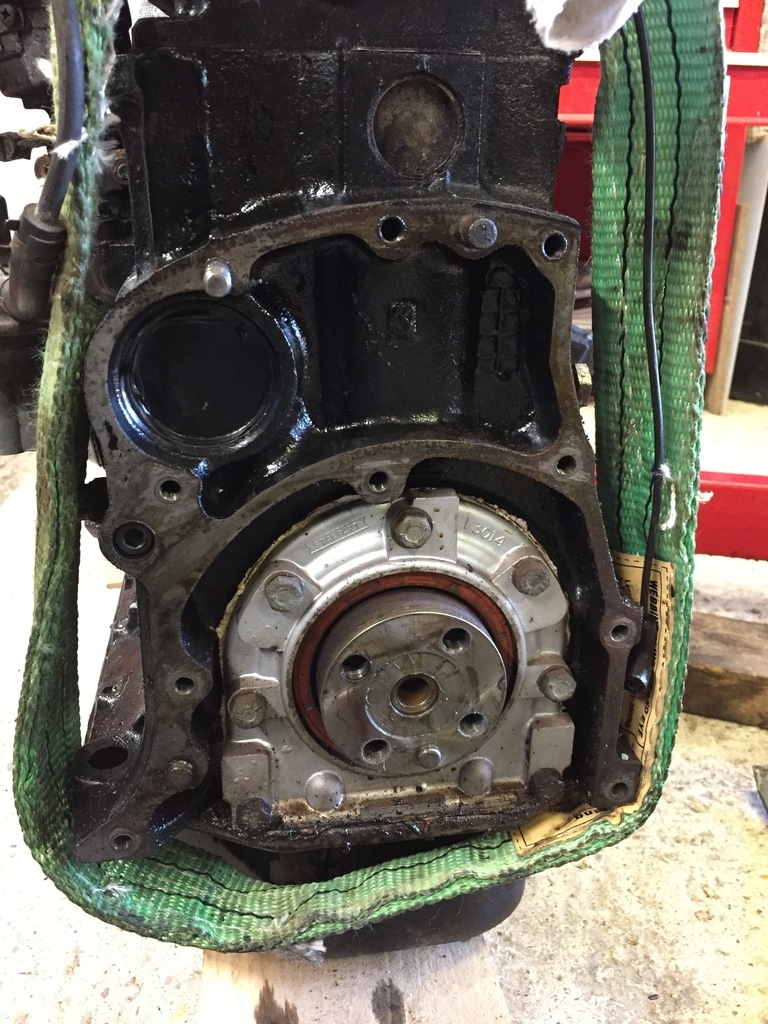 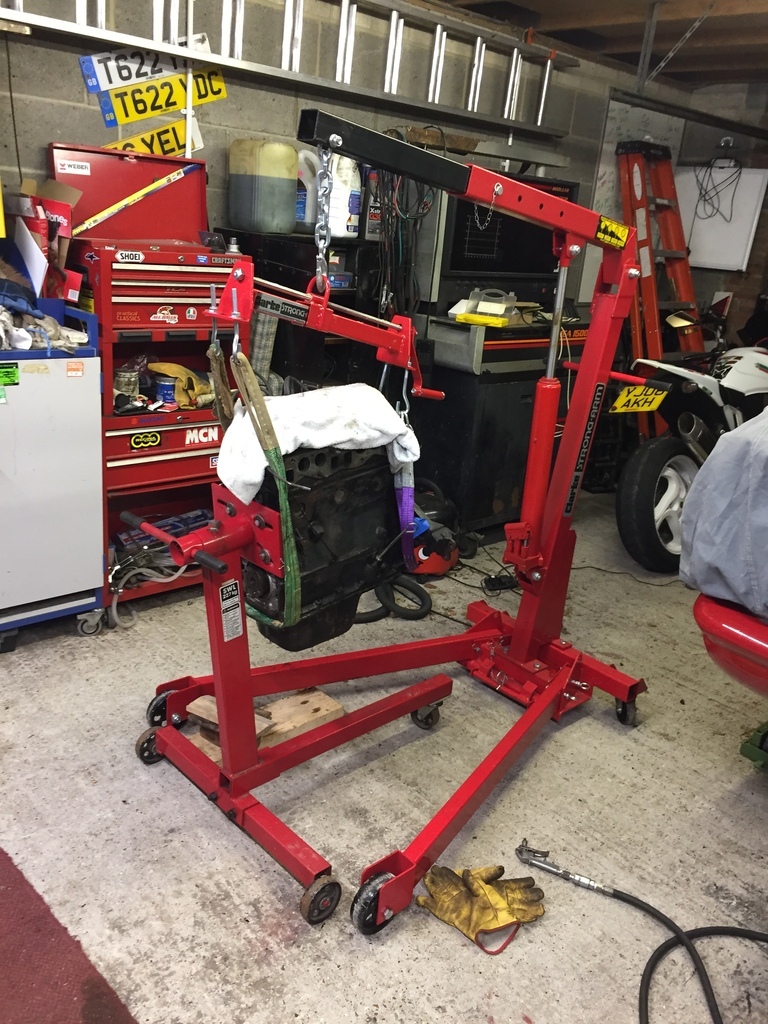 It's not shown in the last picture but I'd bolted a thick section piece of square tube to the bottom of the block to stop the lifting strap sliding out from under the bottom of the block in the absence of the back plate. Once on the stand the balance for rotating the engine was spot on, no fighting with it. It was nerve wracking hanging 100kg of engine from those four weedy looking bolts but no one died and no fingers or toes were lost - result!! So at this point I was feeling dead chuffed, you'd think I would have learned by now! That good feeling all evaporated when I saw this: 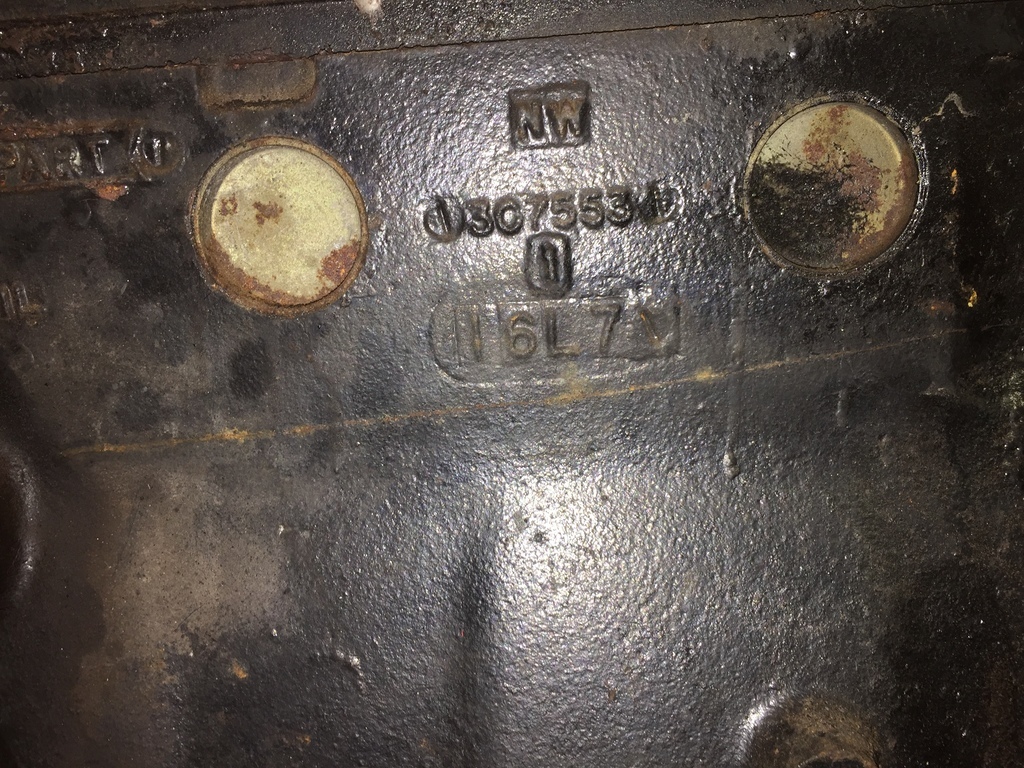 I knew some numpty previous owner had not used coolant from the state of the heater matrix and engine coolant passages. It was now clear that it had also frozen at some point and cracked the block from front to back. Rosie's block was scrap. After calming down and talking to the CT brain trust again a plan was hatched (those chaps have the patience of saints and are worth their weight in gold!). The plan would involve travel to foreign parts (Sheffield), risk, adventure and the help of Dan ( logicaluk ). Tune in the for the next exciting episode. |
| |
Last Edit: May 22, 2021 3:30:06 GMT by mrbadger
|
|
|
|


 Mrs Badger at EYTCC Humber Bridge by Mr Badger, on Flickr

 Mrs Badger at EYTCC Humber Bridge by Mr Badger, on Flickr


 That will be the explanation for the clutch judder on hills then.


