|
|
|
Jun 29, 2022 22:41:45 GMT
|
Thanks for your kind words 👍....I appreciate you taking the time to comment. Right at the very beginning...it was only meant to be a quick tidy up. But, I always have the problem of not being able to do that.....whether it's something silly like house work, or as in this case...the truck. I've inherited this trait from my late father. He was such a 'perfectionist' as it were....( I don't really like using the word perfectionist/perfection as many peoples idea of perfection are at many different levels....so in my head...it can't be achieved ). He was a builder/carpenter and would put the same amount of time and effort into everything....whether it was a million pound house in Sandbanks or one of the local council houses. He would constantly say " Don't bother doing anything unless you're going to do it right." I get a lot of people asking why am I bothering with an old undesirable builders truck that should of been scrapped years ago.....they just can't get their heads round it. To be honest...I can't really give them a straight answer.....but it's like an OCD thing that I just can't help 😁😁 i have the the same ethos, some of the skill, but not the patience. so often choose "don't bother doing it"  |
| |
|
|
|
|
|
|
|
Jul 23, 2022 18:33:39 GMT
|
Right.....I have been soooo busty lately that all of my plans to update regularly went straight out of the window! But....I've found a small window of opportunity today......so time for another update I'd say. With the front right chassis removed, and a few local repairs done, it was on to the task of removing what was left of the right rear chassis. Once again, I shall mostly let the pictures do the talking.....it's easier that way. Here's what was about to be removed...... 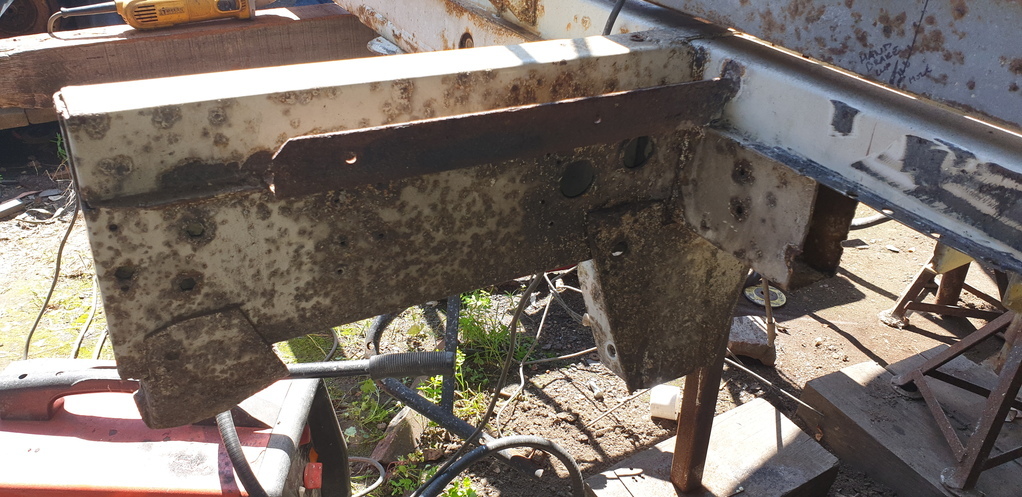 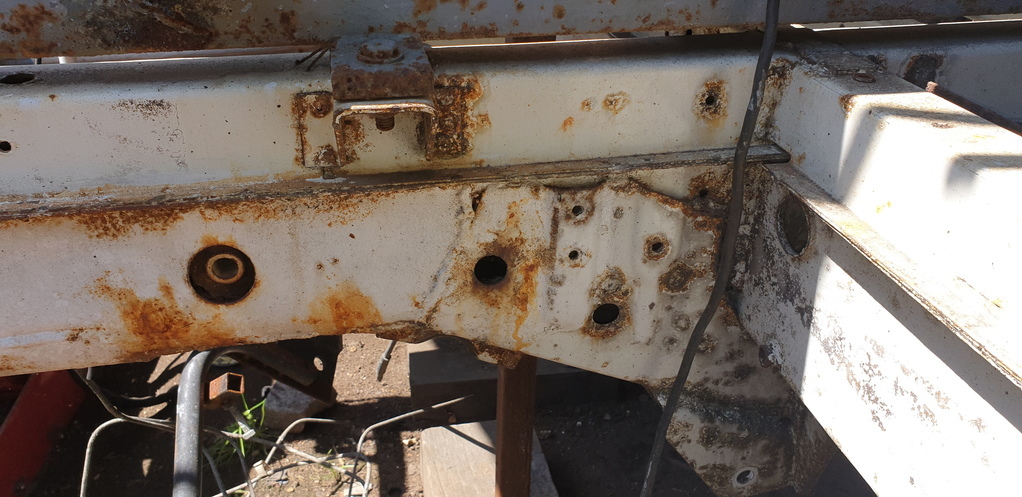 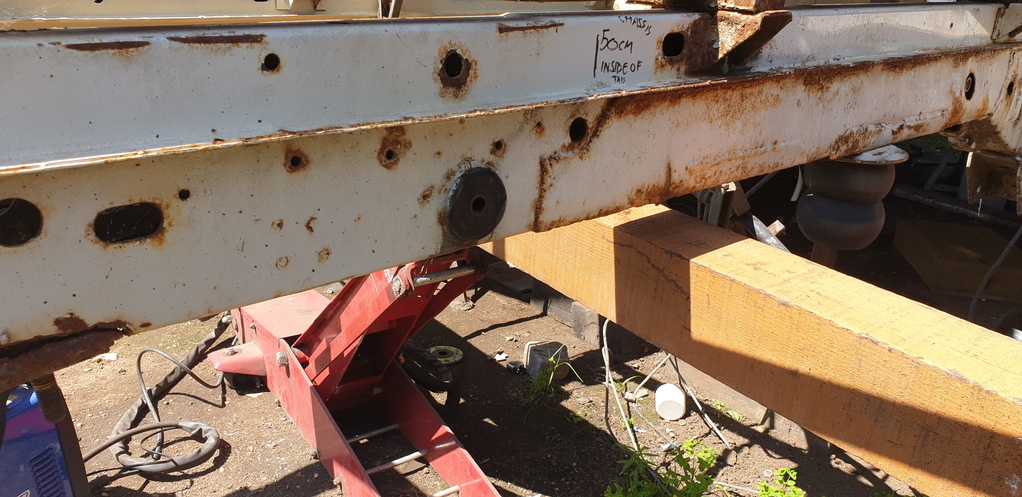 Then it was on to re-jigging the jig as it were. Obviously, it was set up for the left hand side.....as that's when it was last in use. It was originally mounted on the outside when jigging the left, but for the right hand side....to save time messing around and cutting the jig up and rebuilding it, I decided to mount it on the inside. This meant that there was very little that needed to be adjusted to the jig. So....this would be a bit of a mind settler as well....will the jig, in its current position, line up perfectly with the untouched factory original mounting points on the right ......and the answer was YES.....it did!.....thank God! If it hadn't, then serious questions would of been raised over whether the left was in its original position....but all was good. 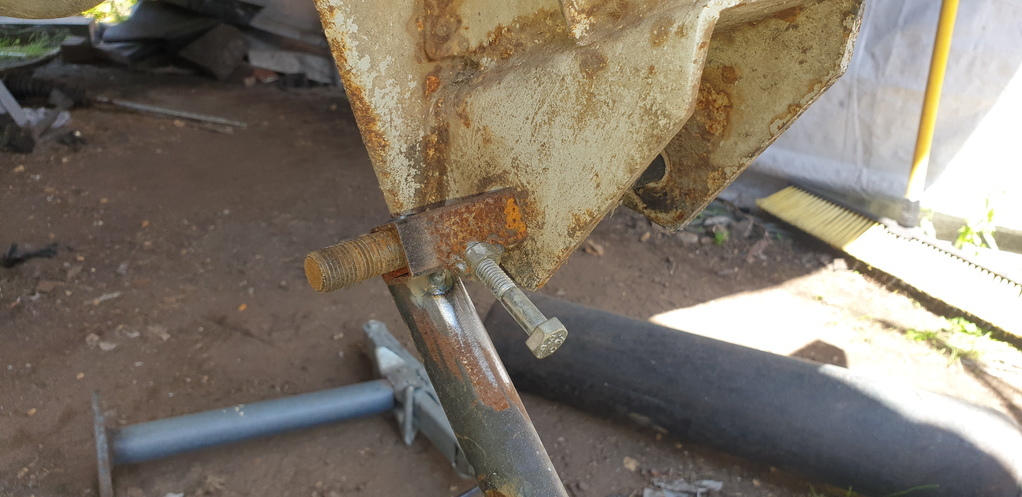 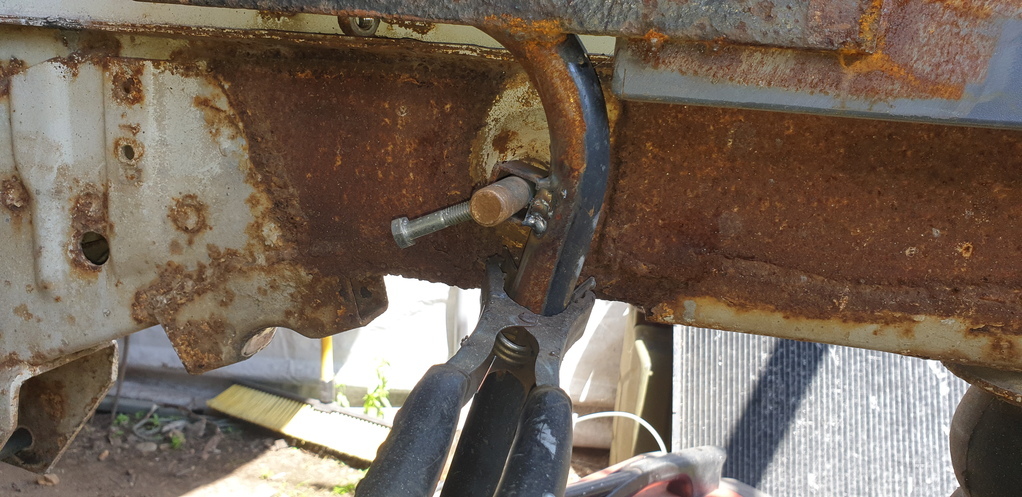 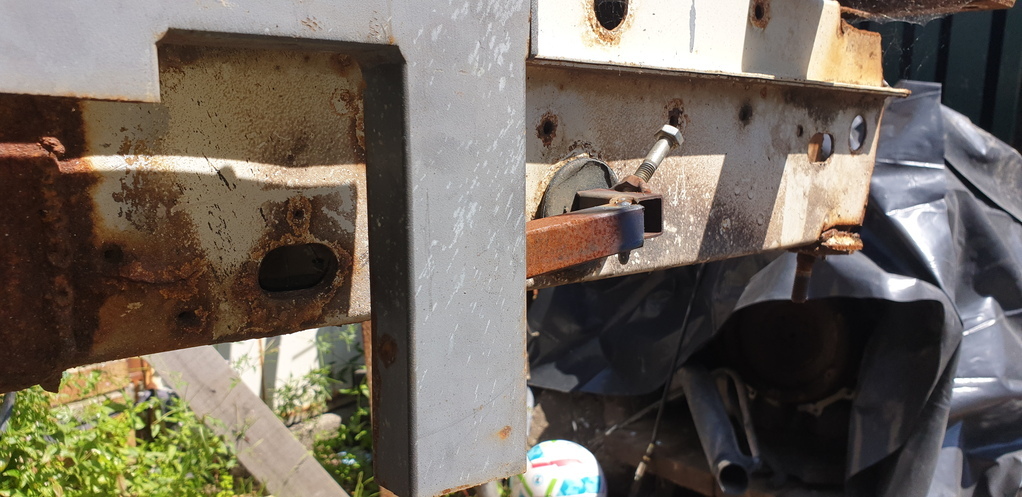 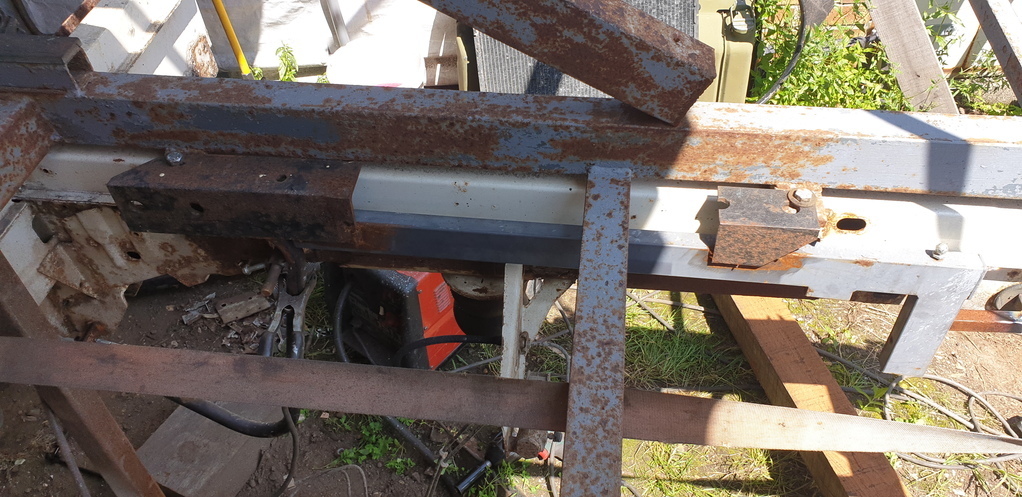 " Let battle commence!!!! " 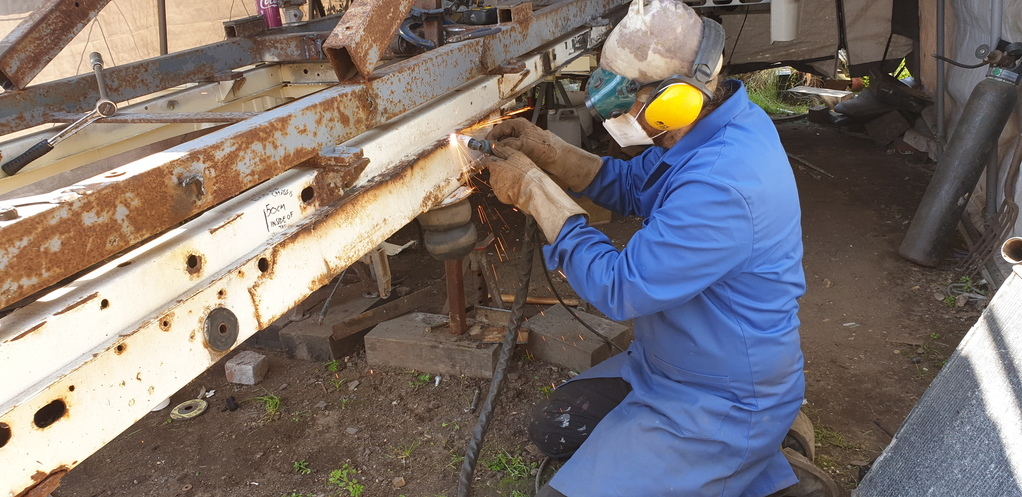 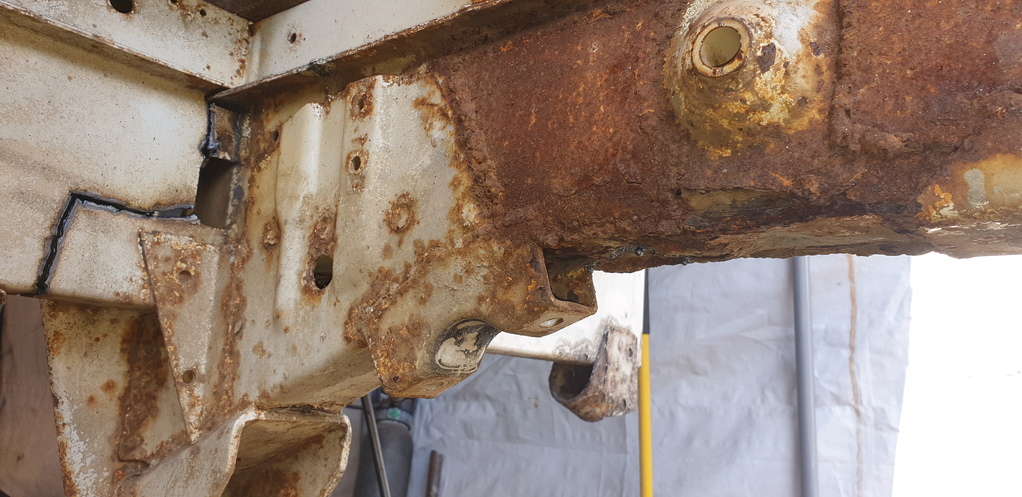 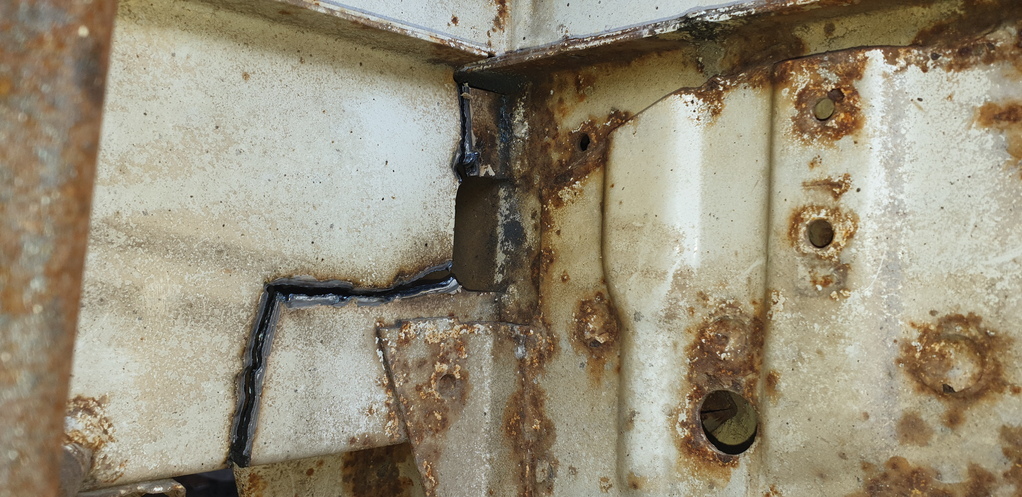 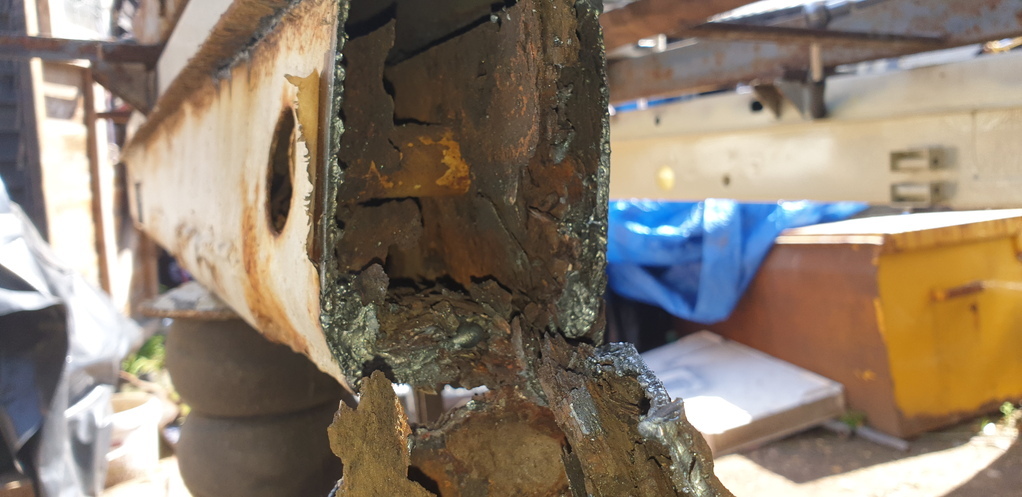 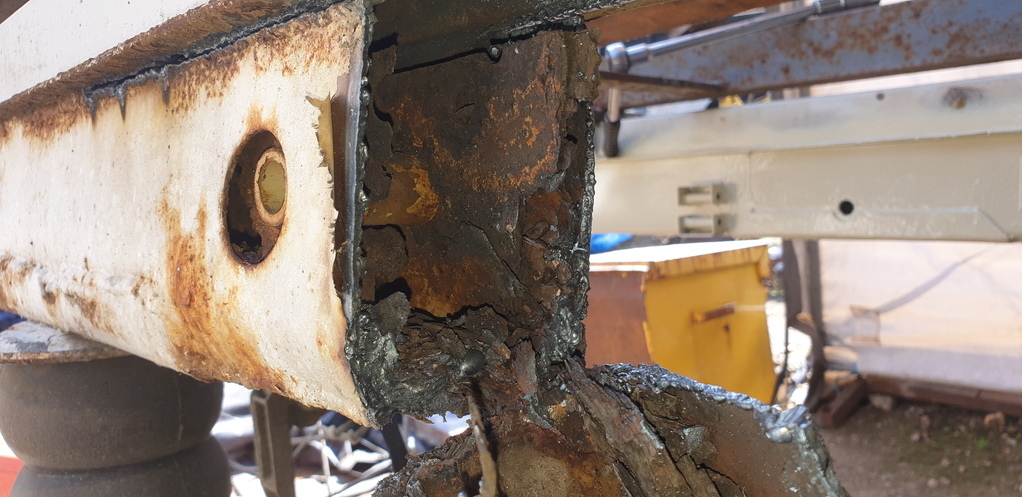 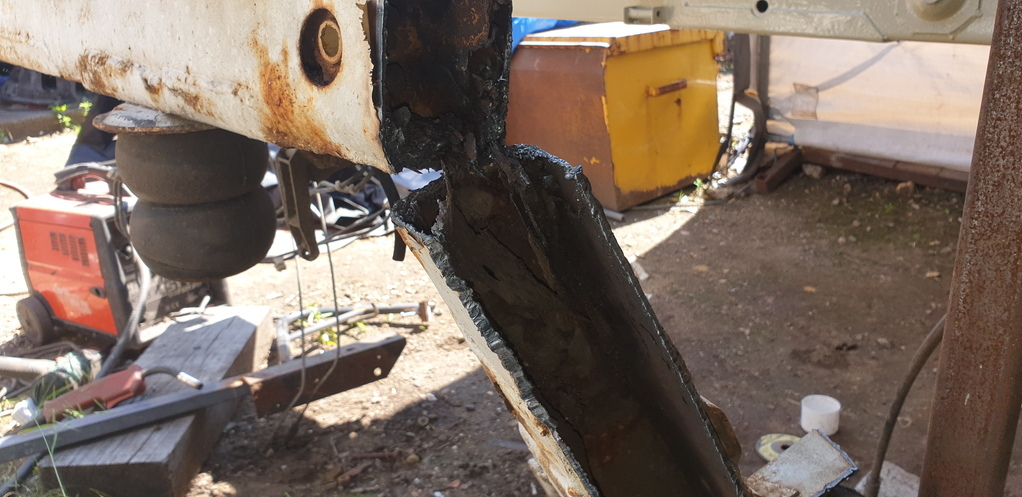 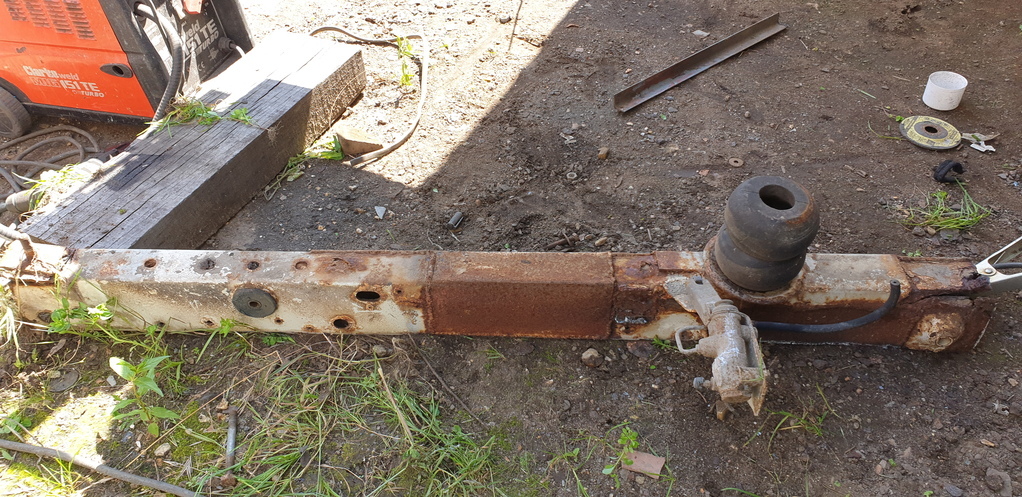 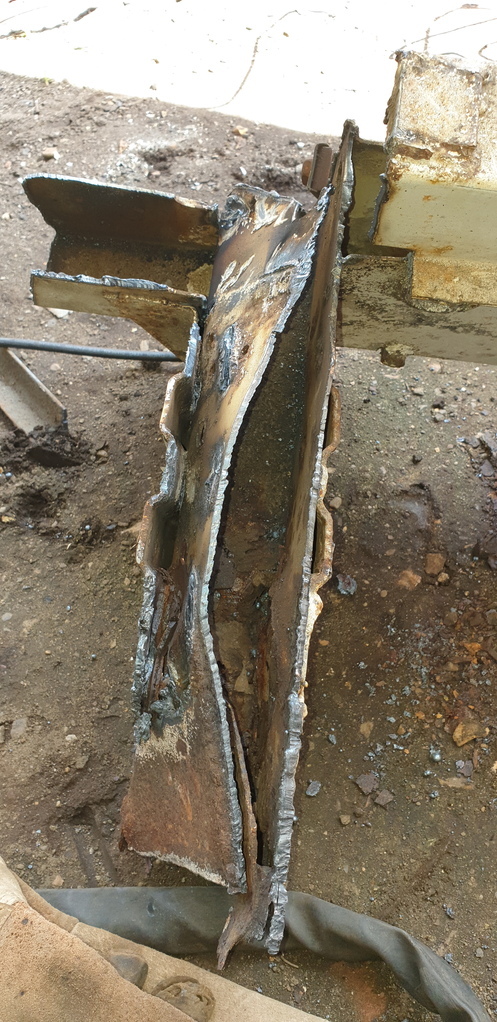 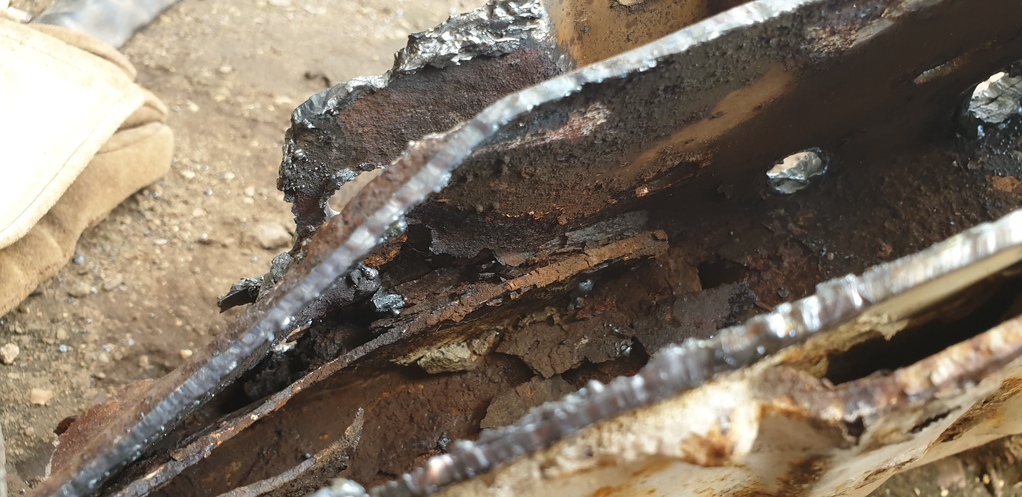 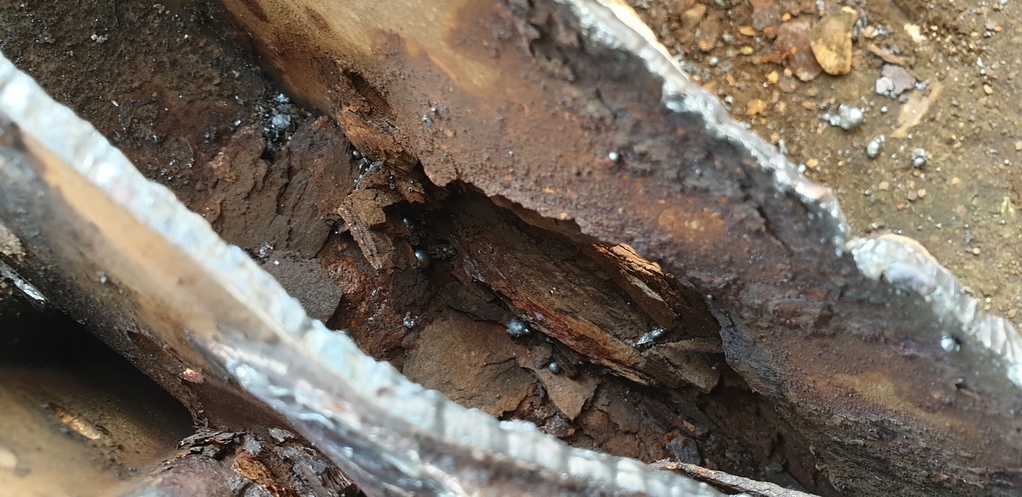 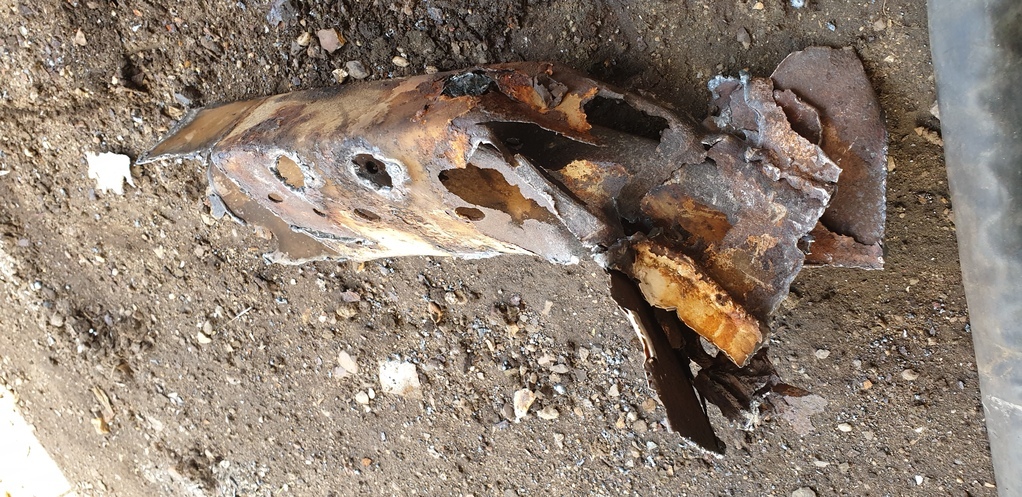 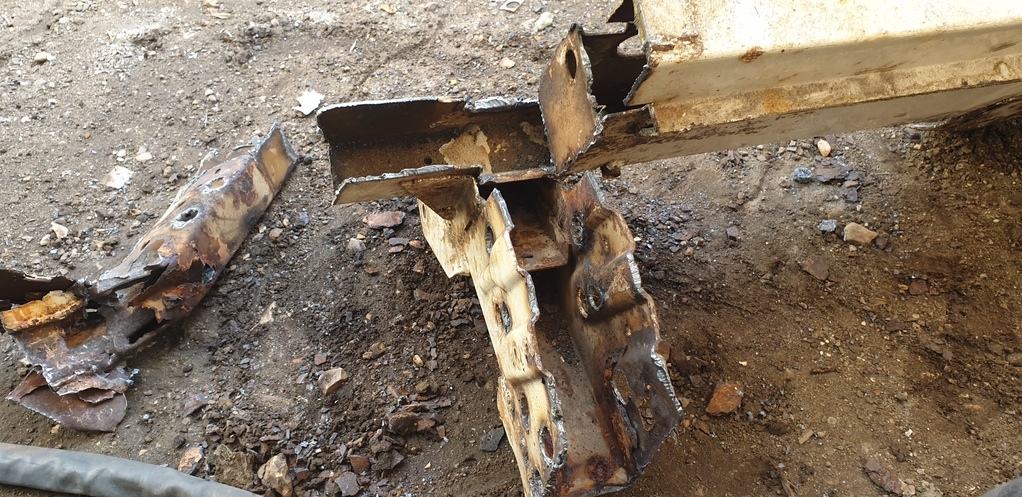 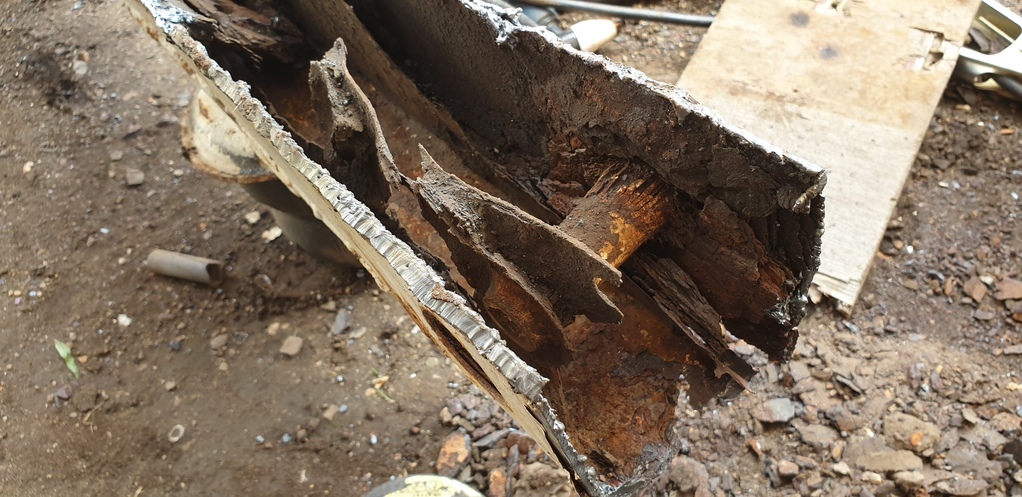 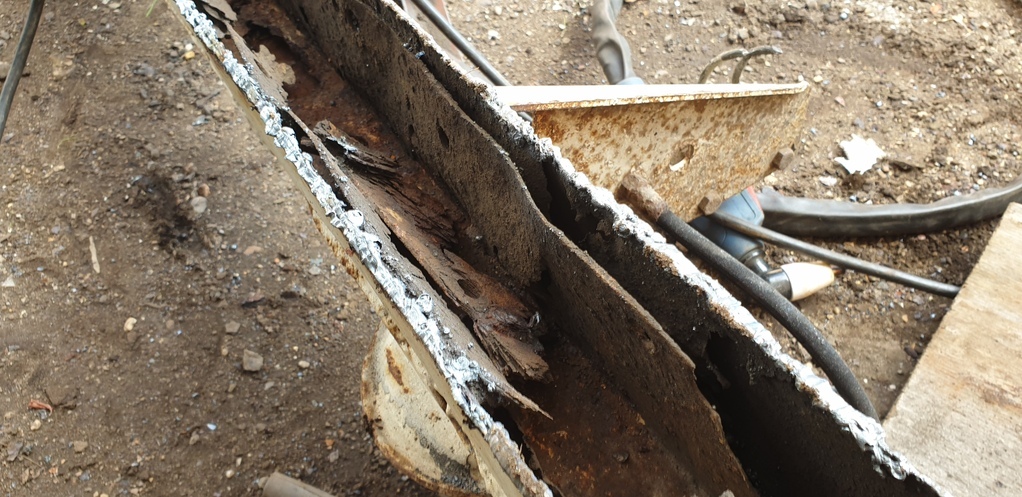 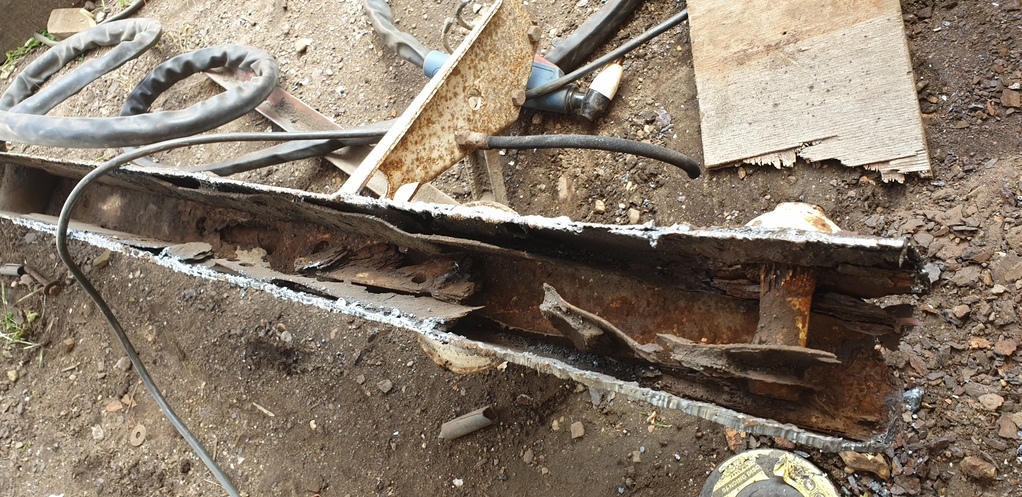 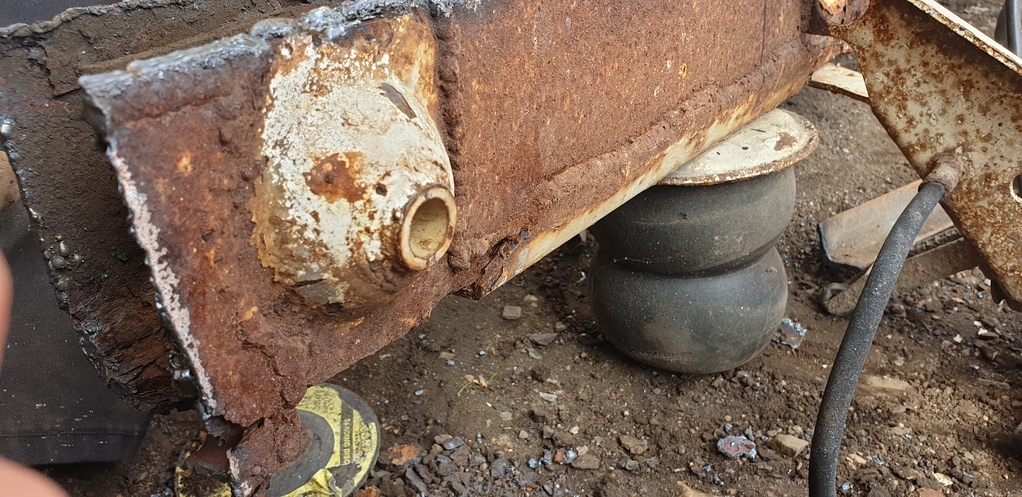 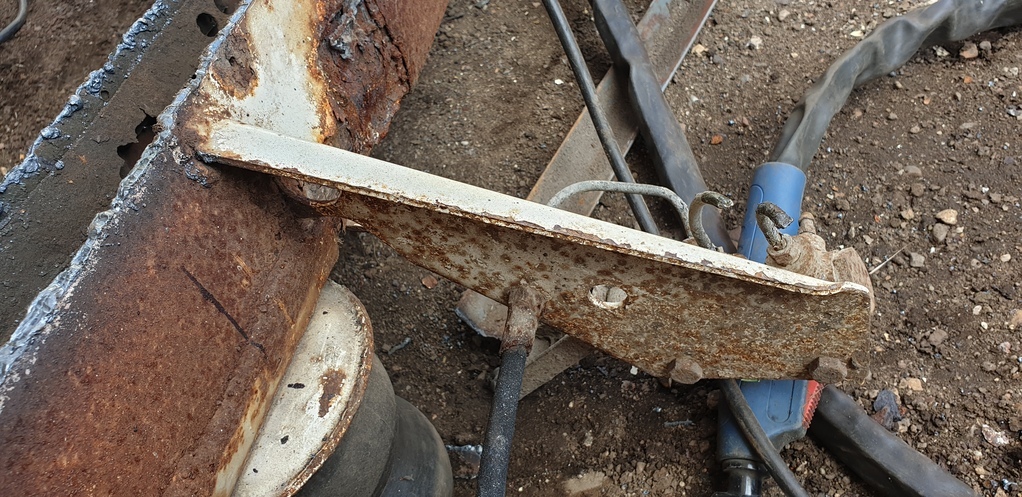 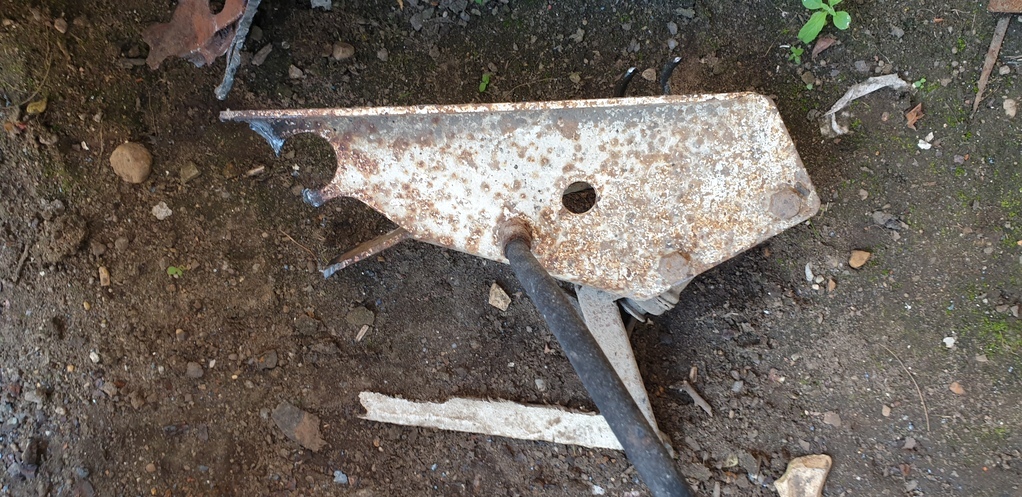 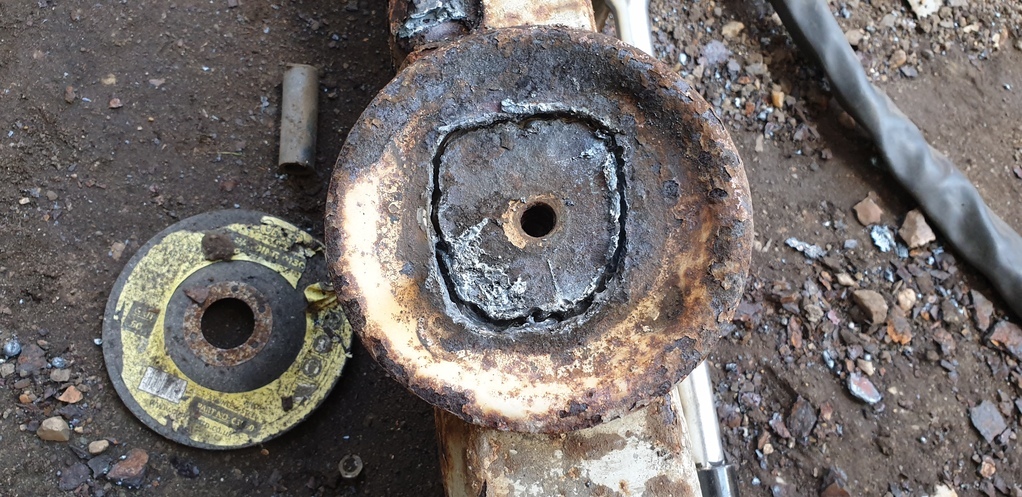 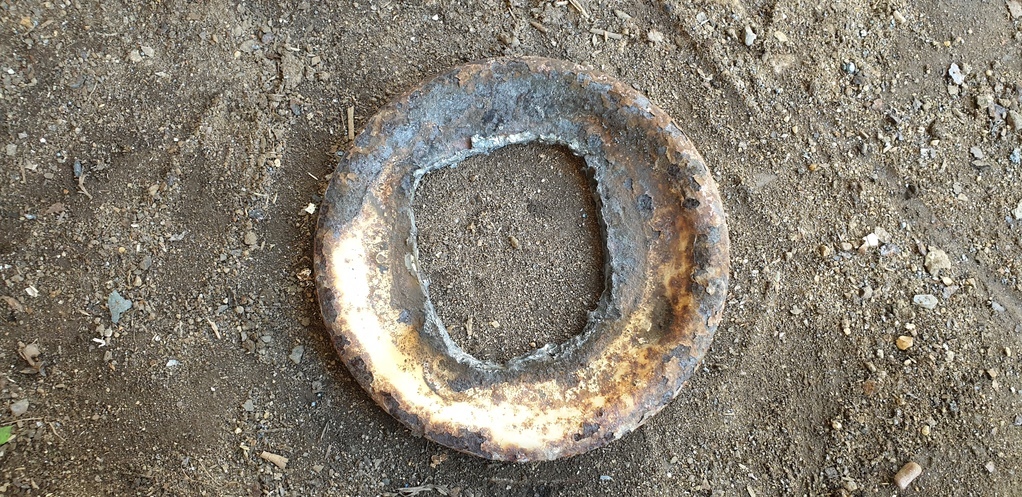 It was at this point that I noticed that the top half of the right rear chassis was considerably more corroded than the left was. To mechanically remove the rust, or use the countless rust treatments I have just wasn't going to cut the mustard on this one. So......I cut it off! 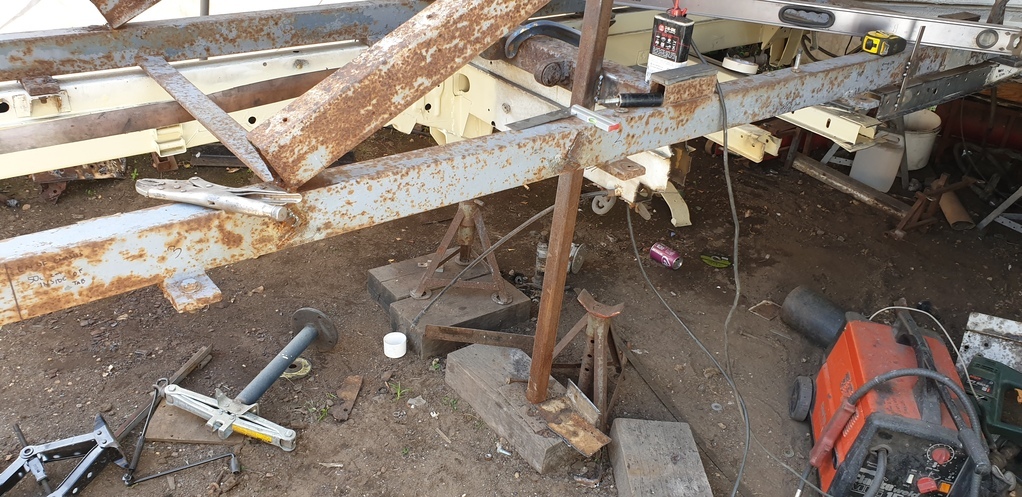 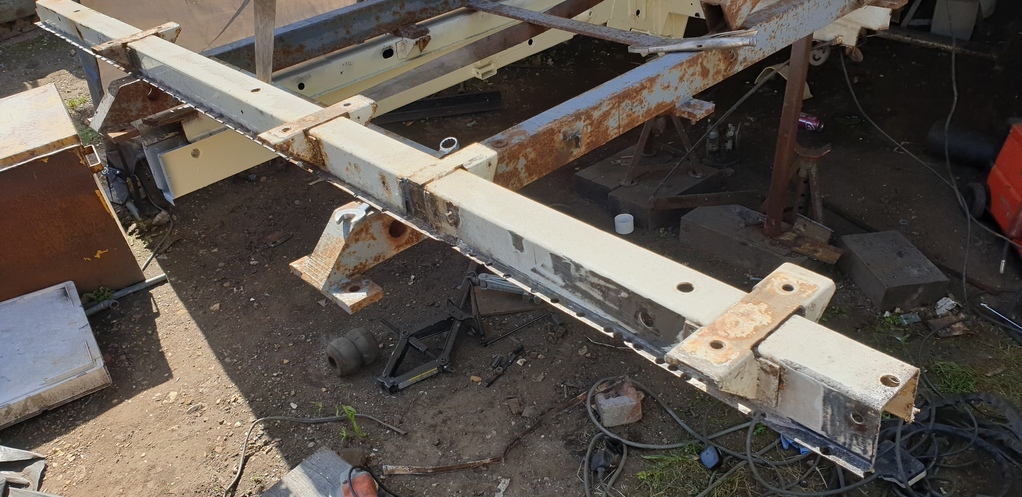 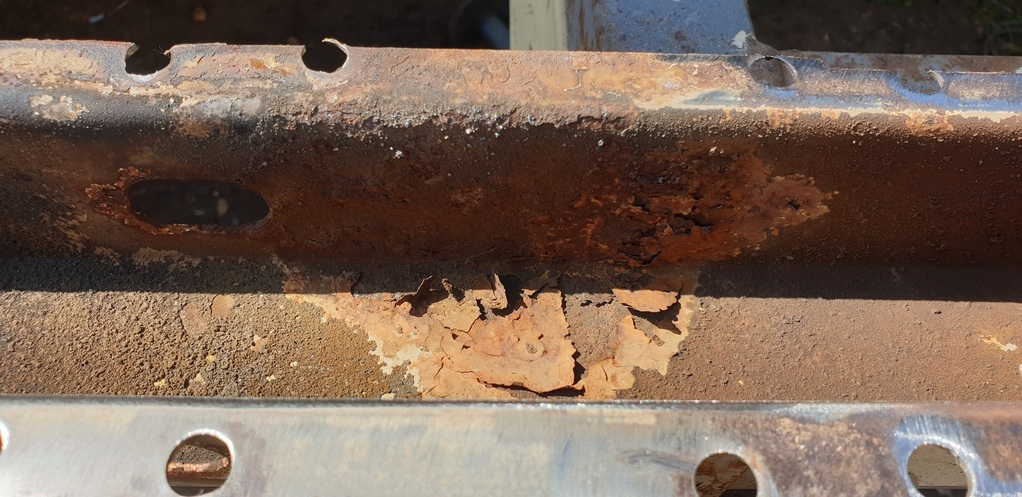 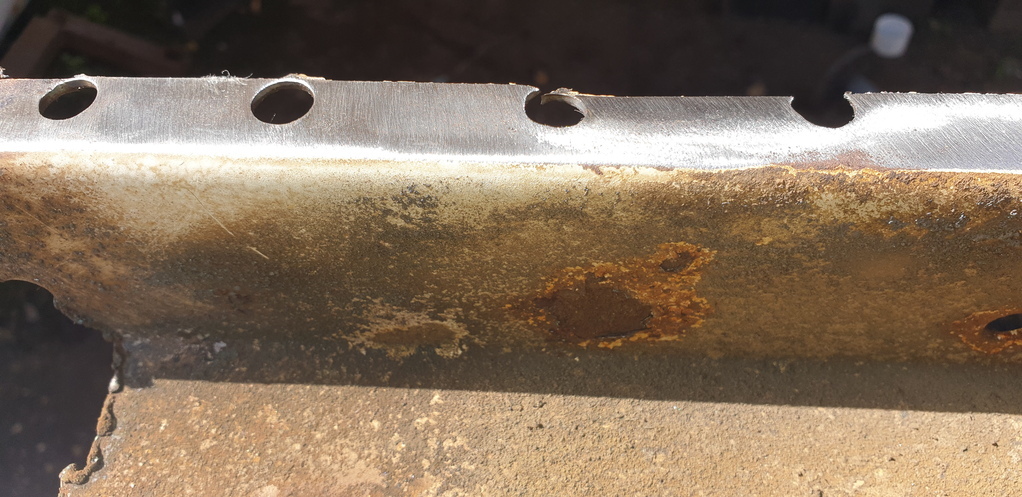 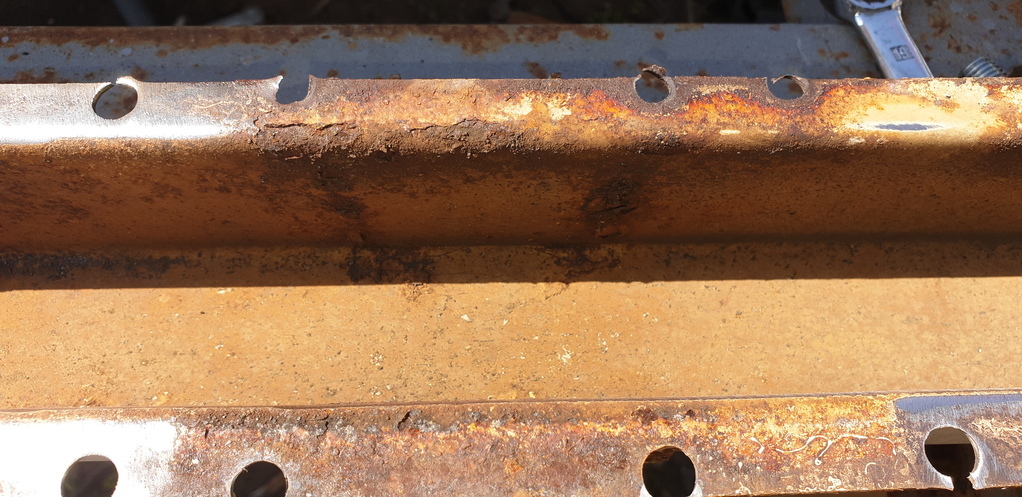 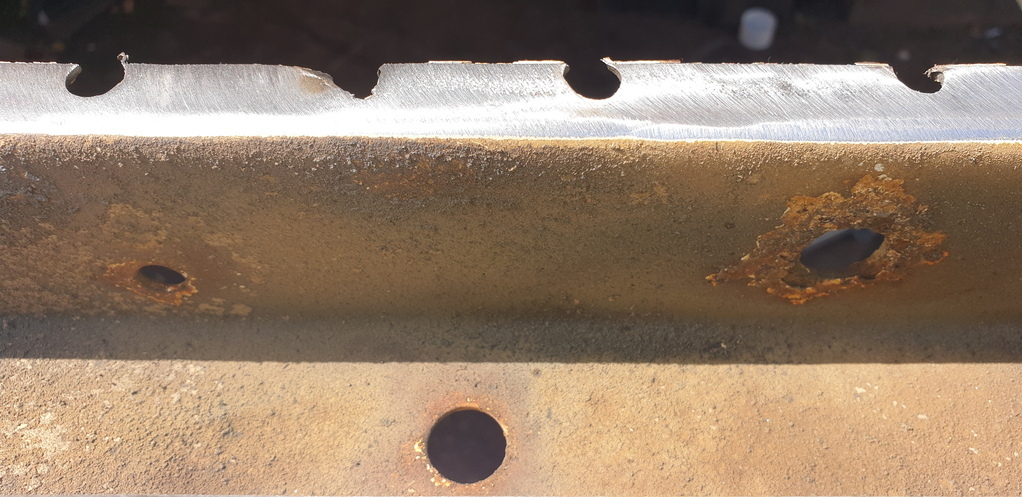 Once it was off, I could then pop it into the trough of de-rusting solution and let it sit there for a few days. 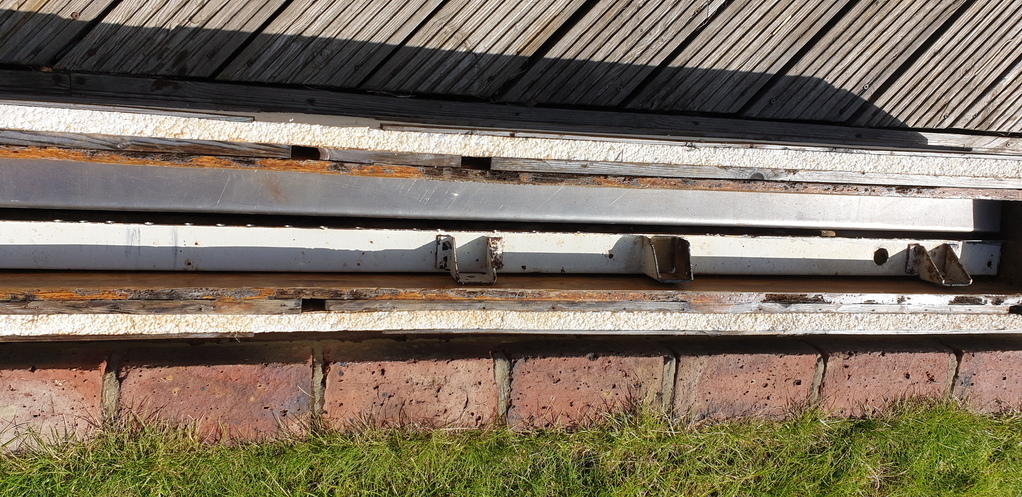 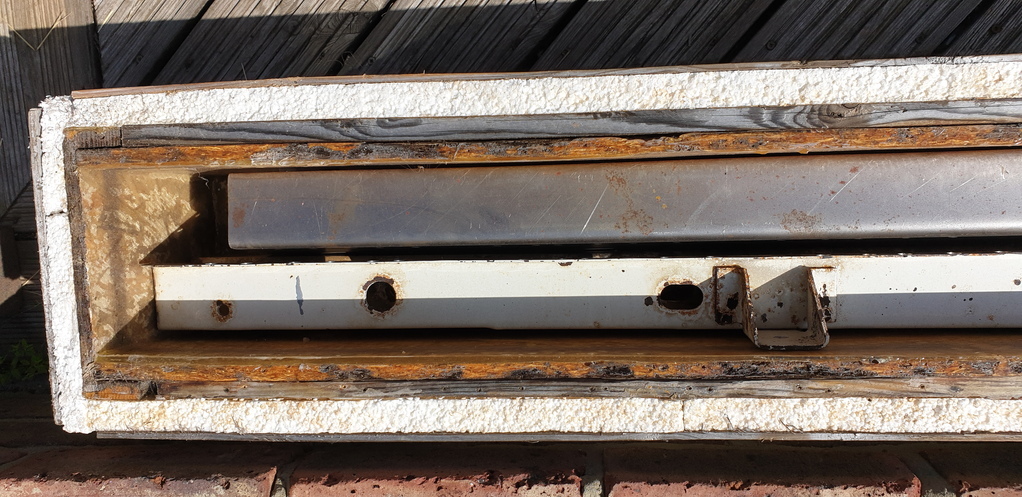 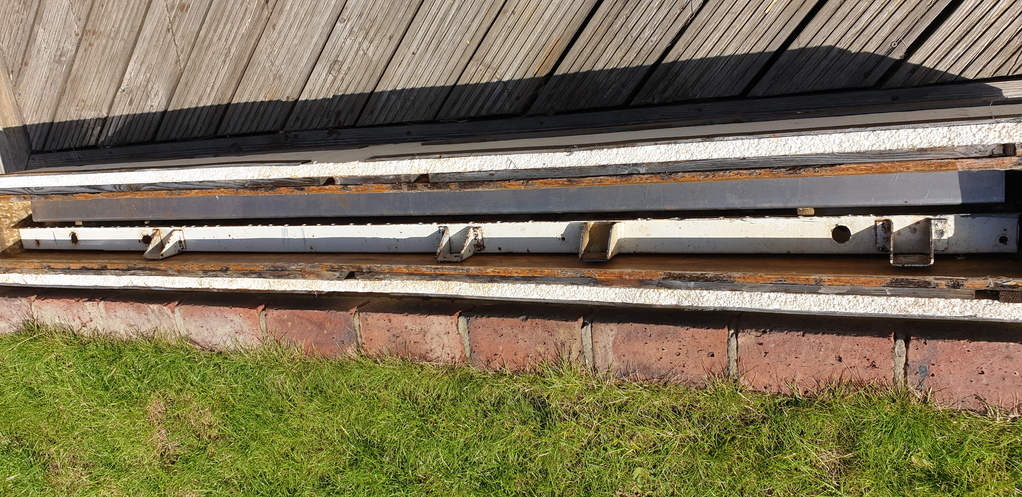 After a bit of cleaning up, I was pleased the results...... 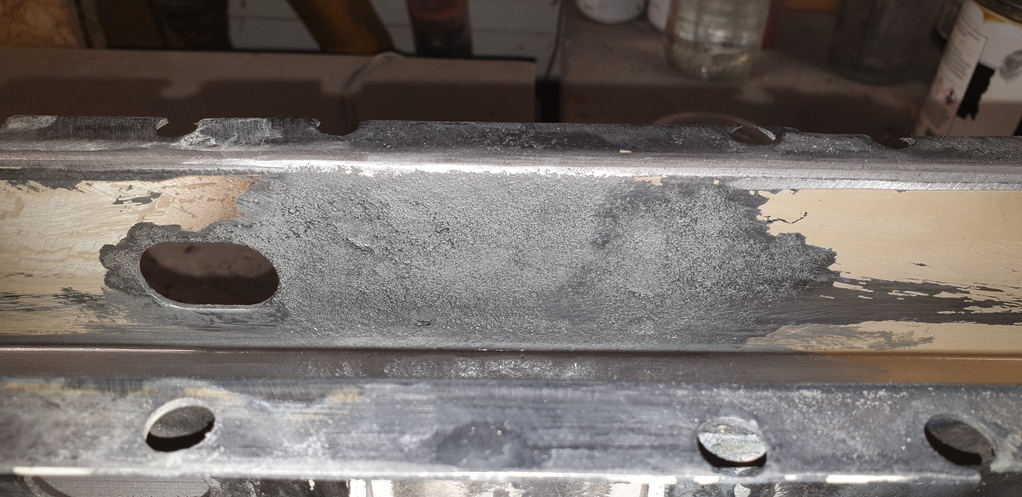 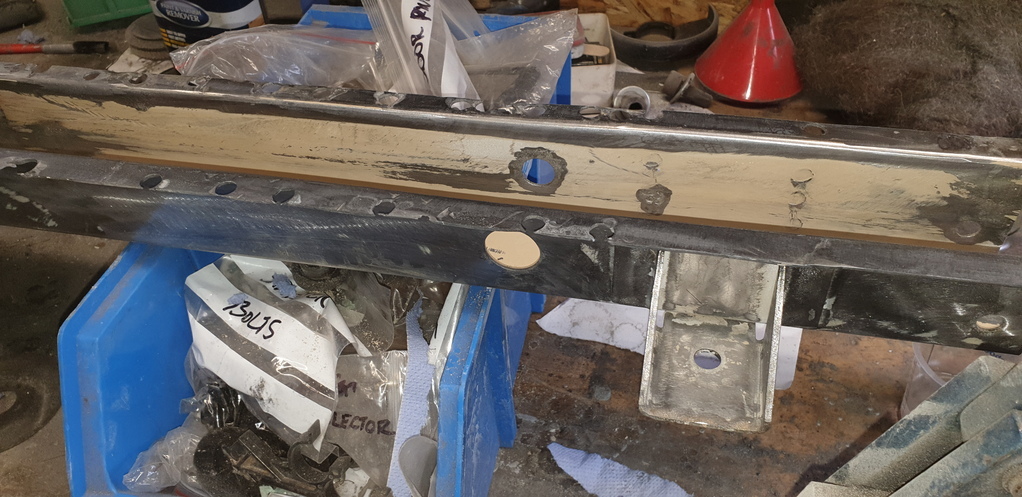 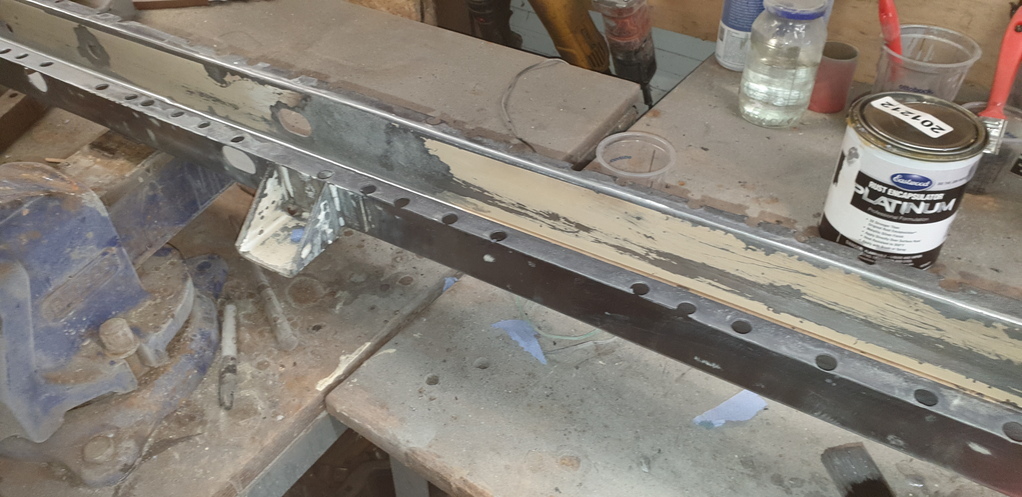 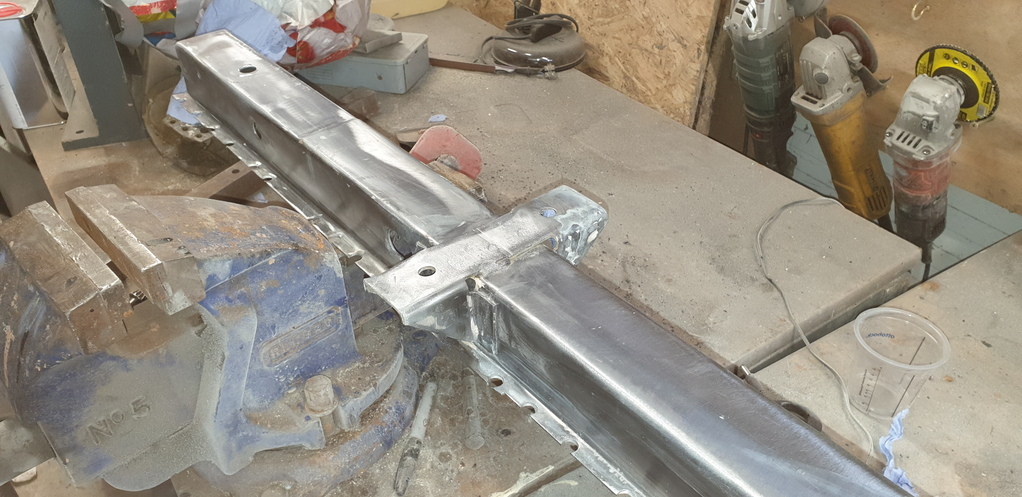 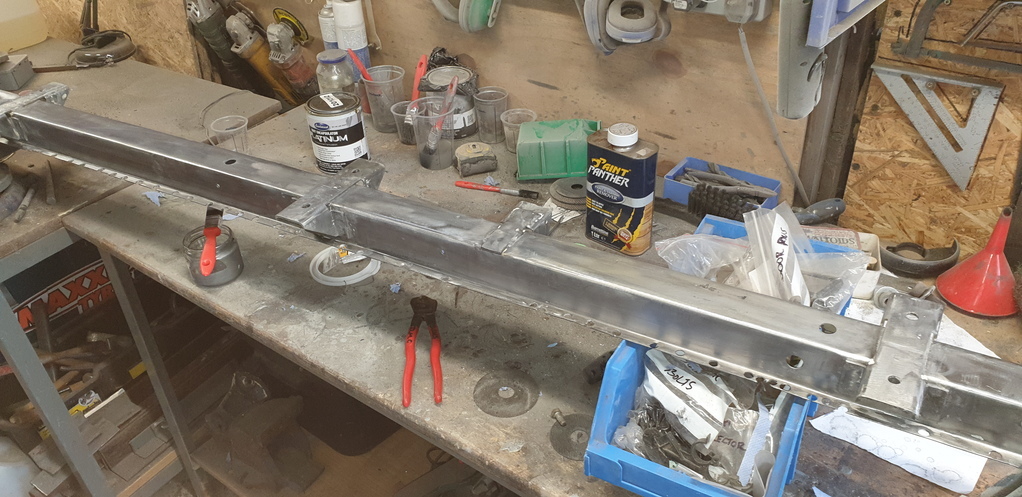 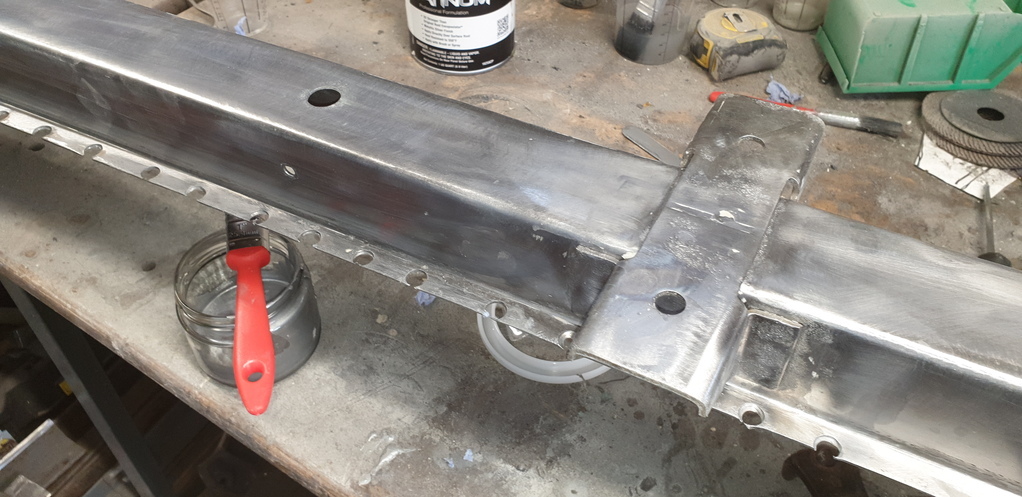 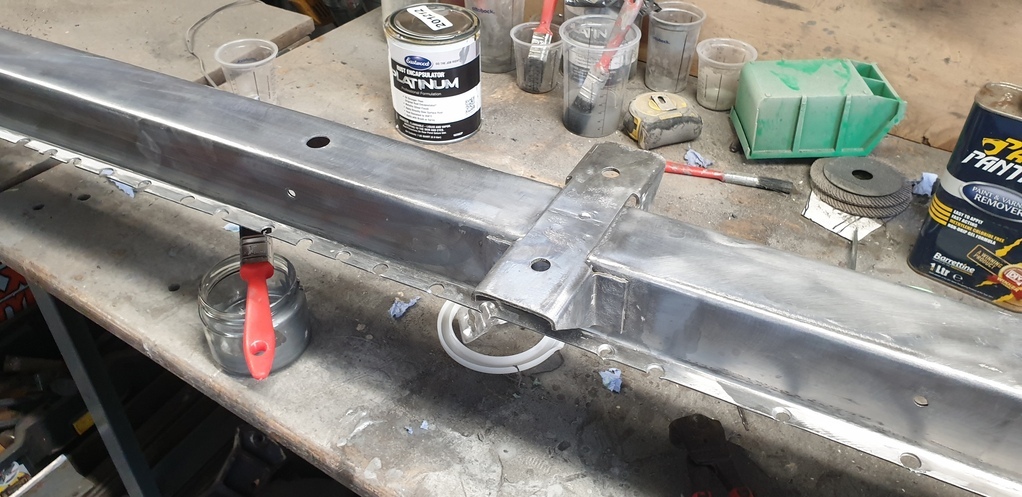 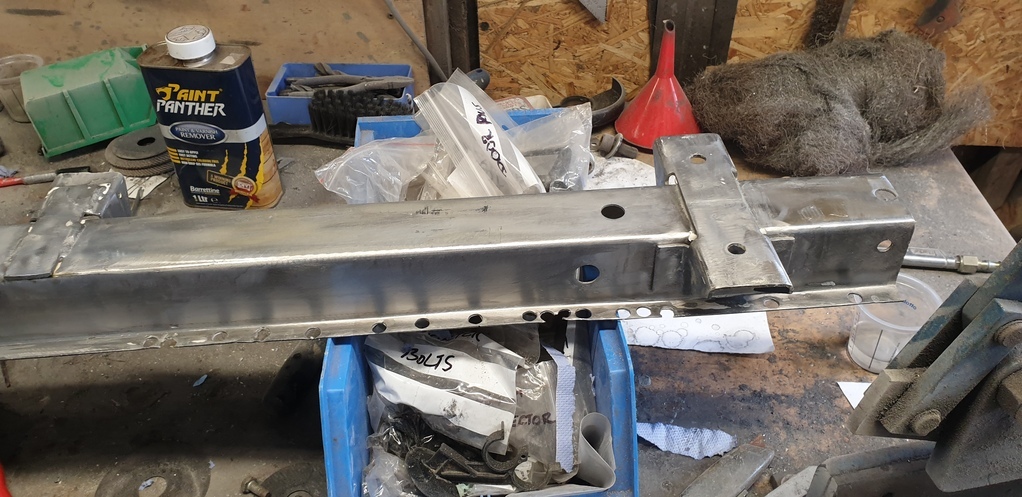 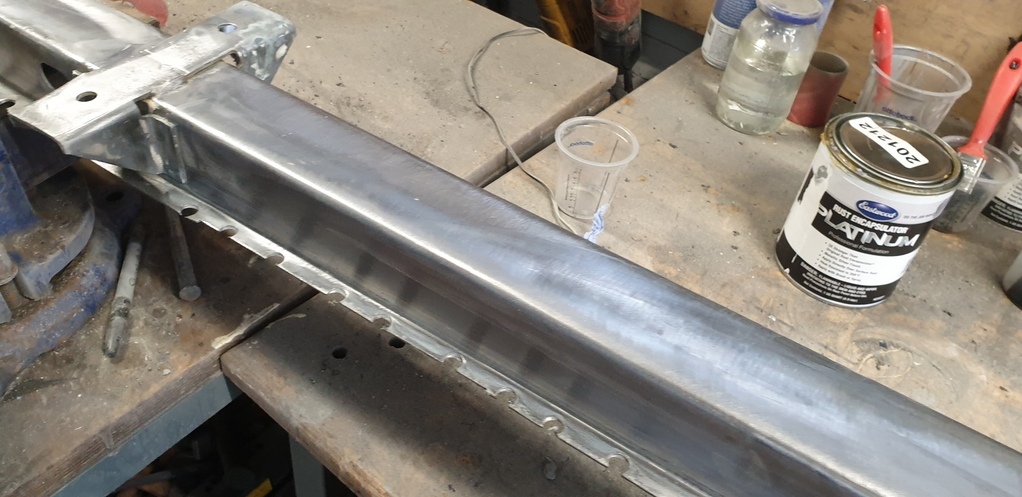 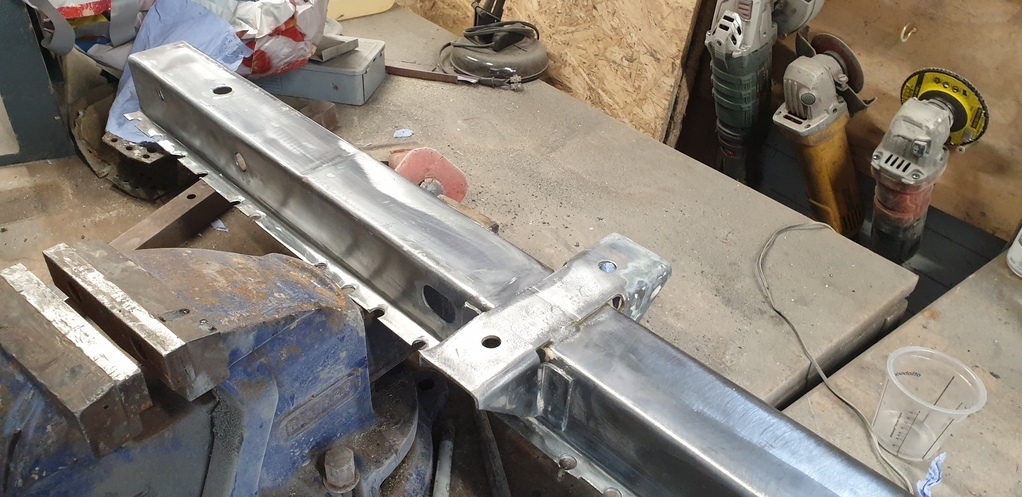 Now.....to get it into the de-rusting solution, I had to cut a few inches off the end......which as it happened, needed repairing. so that's what I did...... 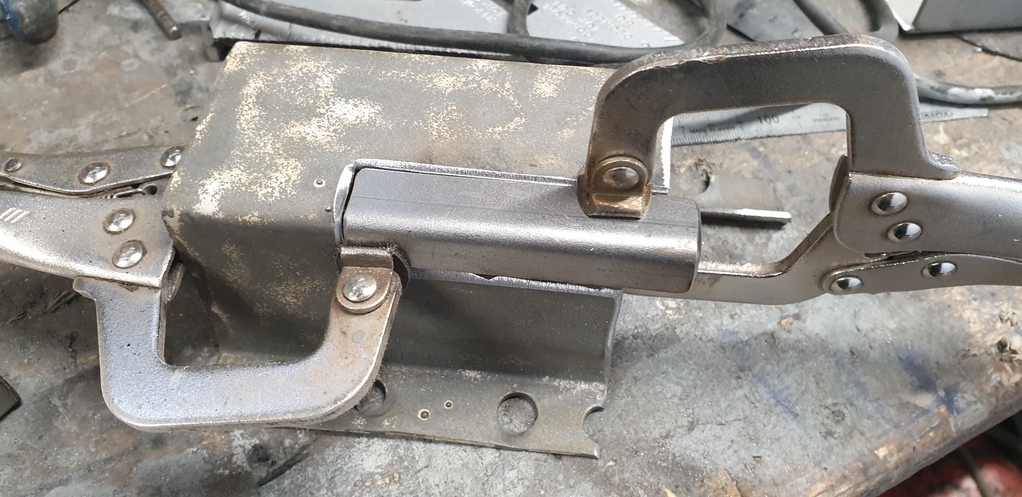 Then just a simple case of welding it back on...... 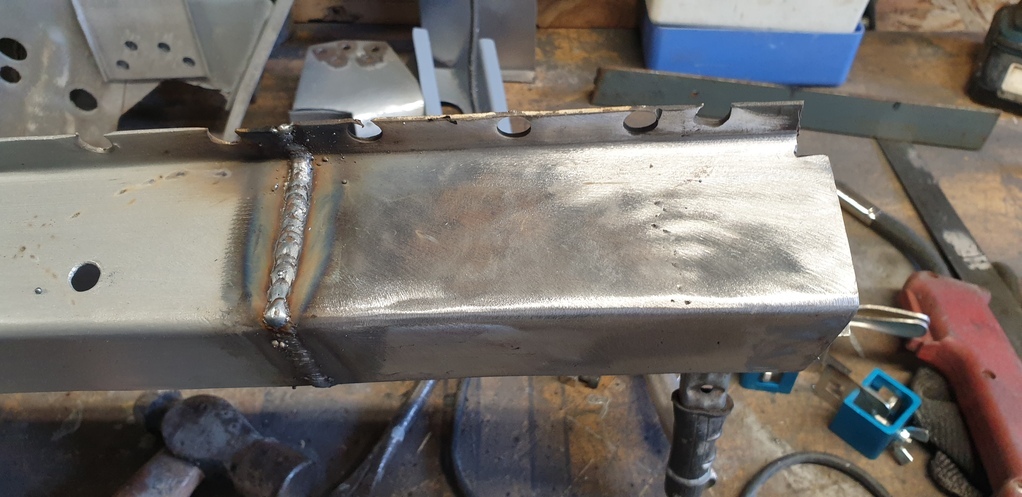 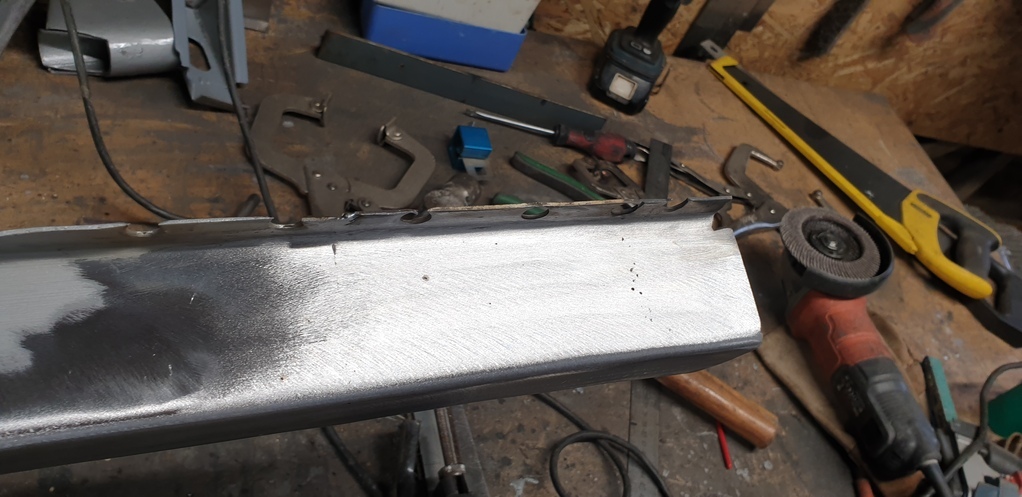 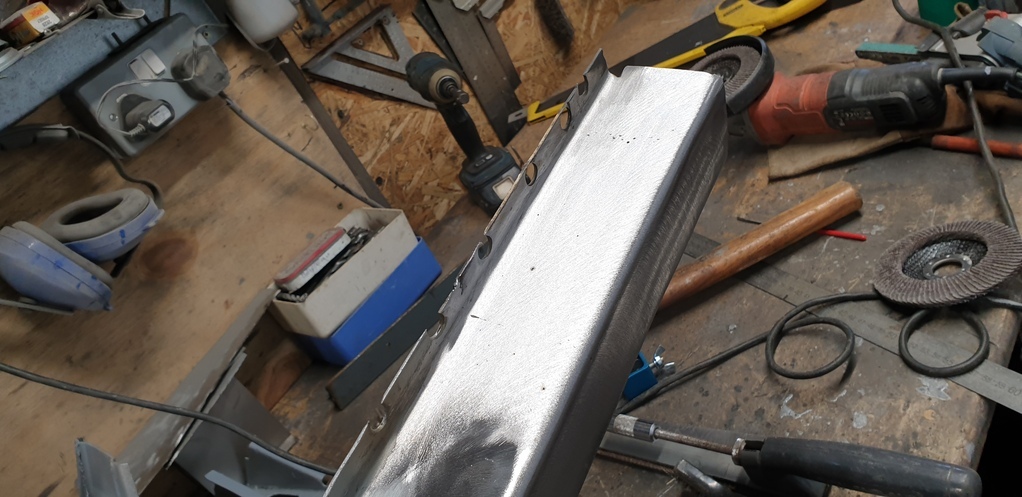 That's all for now folks......more soon Dan |
| |
Opel Commodore A Coupe
Opel Rekord C Coupe
Opel Rekord C Saloon
Vauxhall Magnum Coupe V8 (Magnumania)
Mk1 Scirocco GLS
Mk1 Scirocco GLS (early chrome bumper)
Corrado G60
Mk1 Cortina 2 door Pre Airflow
Mk2 Escort 1300 2 Door
VW LT35 Tipper Truck
BMW 320D E91 Tourer
|
|
|
|
|
Jul 23, 2022 18:47:55 GMT
|
|
Absolutely beautiful work as usual Dan,
The exceptional levels of both your fabrication and welding are first class,
Nigel
|
| |
BMW E39 525i Sport
BMW E46 320d Sport Touring (now sold on.)
BMW E30 325 Touring (now sold on.)
BMW E30 320 Cabriolet (Project car - currently for sale.)
|
|
|
|
|
Jul 23, 2022 21:11:53 GMT
|
It's the exceptional levels of bravery that make me gasp. James |
| |
|
|
|
|
|
Jul 23, 2022 22:05:00 GMT
|
|
Top work as usual, I should of asked last time I was there, what is the recipe for your de-rusting solution.
|
| |
1955 Austin A30
1981 Jawa Mustang
1990 Trabant 601 (Tommy)
1989 Trabant 601
2009 Jaguar XF
2012 Toyota AYGO
2018 Scomadi TL
|
|
|
|
|
|
|
|
As usual.
Beautiful work there
I am not doing anything on the Rezin Rockit this weekend.
|
| |
|
|
Norman
Part of things
 
Posts: 449 
|
|
|
|
|
Well Dan, What can I say that hasn’t been said already, wow wow and wow. I think I would have ran for the hills, you certainly have the skills and dedication to see it through. I’m already looking forward to the next update. All the best, Norman
|
| |
|
|
|
|
|
|
|
|
|
Continued awesomeness of the first order!  |
| |
1968 Mini MkII, 1968 VW T1, 1967 VW T1, 1974 VW T1, 1974 VW T1 1303, 1975 Mini 1000 auto, 1979 Chevette, 1981 Cortina, 1978 Mini 1000 1981 Mini City, 1981 Mini van, 1974 Mini Clubman, 1982 Metro City, 1987 Escort, 1989 Lancia Y10, 1989 Cavalier, 1990 Sierra, 1990 Renault 19, 1993 Nova, 1990 Citroen BX, 1994 Ford Scorpio, 1990 Renault Clio, 2004 Citroen C3, 2006 Citroen C2, 2004 Citroen C4, 2013 Citroen DS5. 2017 DS3 130 Plenty of other scrappers!
|
|
|
|
|
|
|
Back with an update by popular demand!!!.....( grizz ) 😅😅 First things first.....thanks to everyone for your kind words and comments on the last update. ( Alpina99 sweetpea austinpowers grizz norman and OAY842F ) as always....really appreciated. austinpowers ........ the recipe for the de-rusting solution is eye of toad, hair of newt, two legs from a snake....front or rear...the choice is yours, a used cow bell and exhaust soot from a Hymac 580c excavator. All mixed together in highland pond water. But....if you find that tricky to get hold of, one mug of citric acid to 5ltrs of hot water should do it. It works really quickly when hot....but still does a good job when cold if left long enough. So....on with the show..... With the right hand rear chassis now removed and the spring hanger dissected form the rusty bits, it was time to repair said spring hanger. Again, I shall let the pictures do the talking most of the time. Drill out the factory spot welds.... 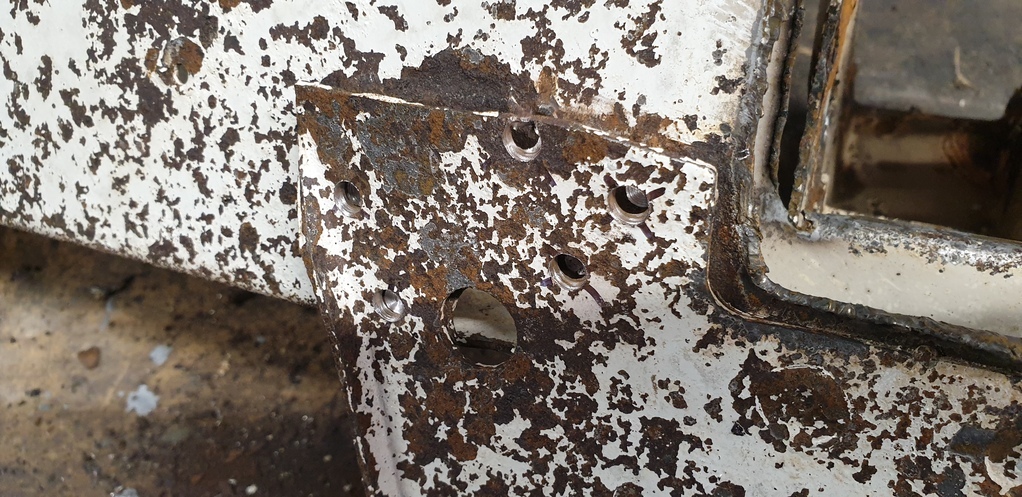 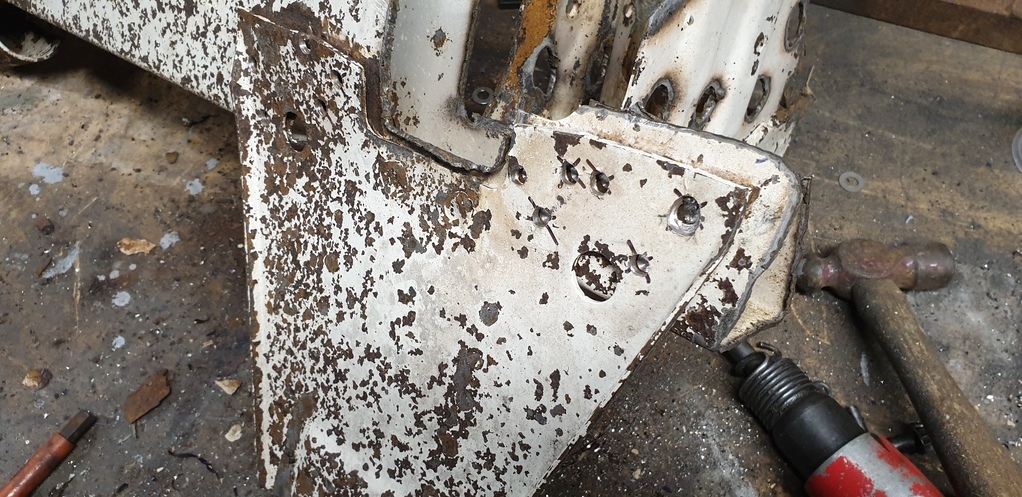 Take some measurements..... 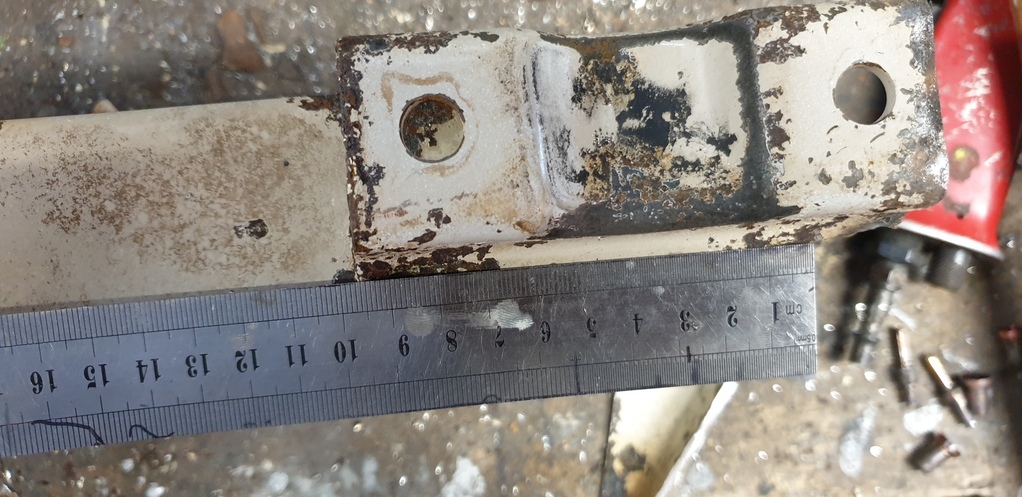 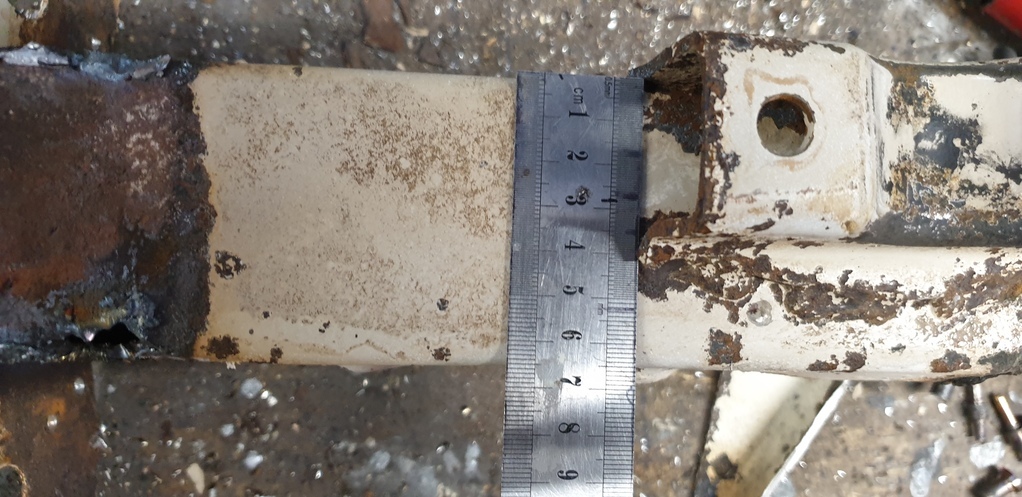 Assess the task ahead...... 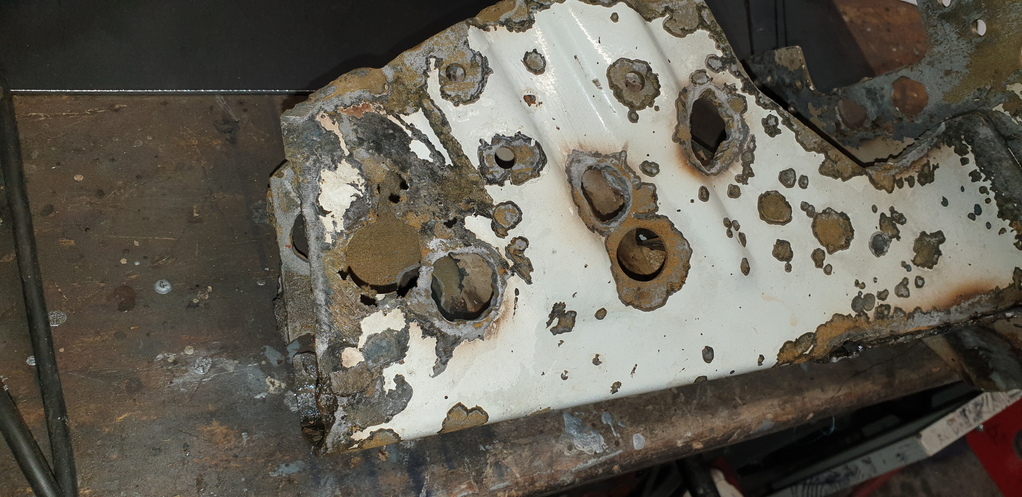 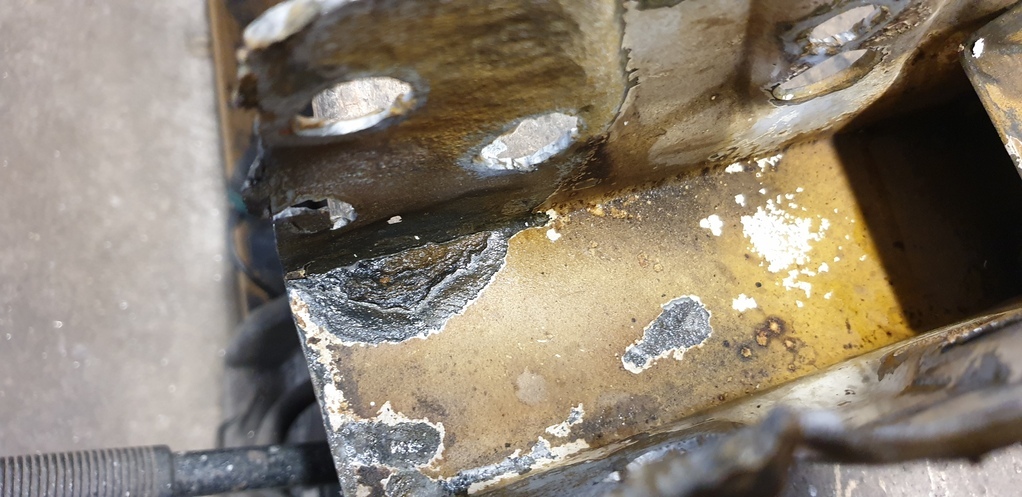 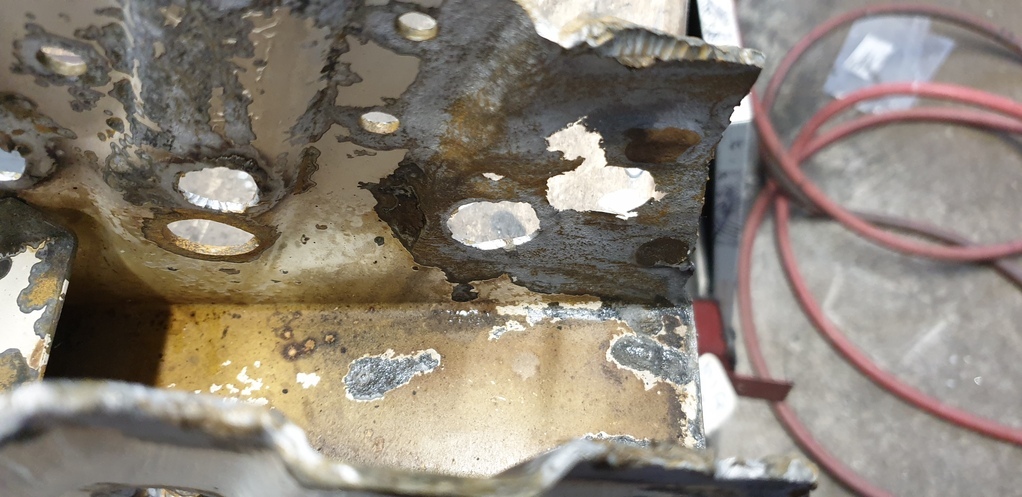 Make a paper template..... 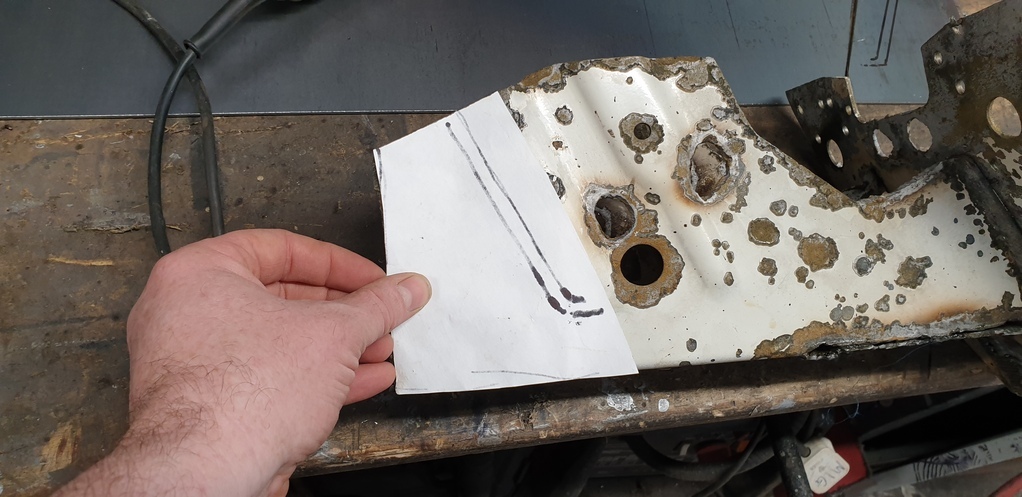 Transfer onto 3mm steel and cut it out 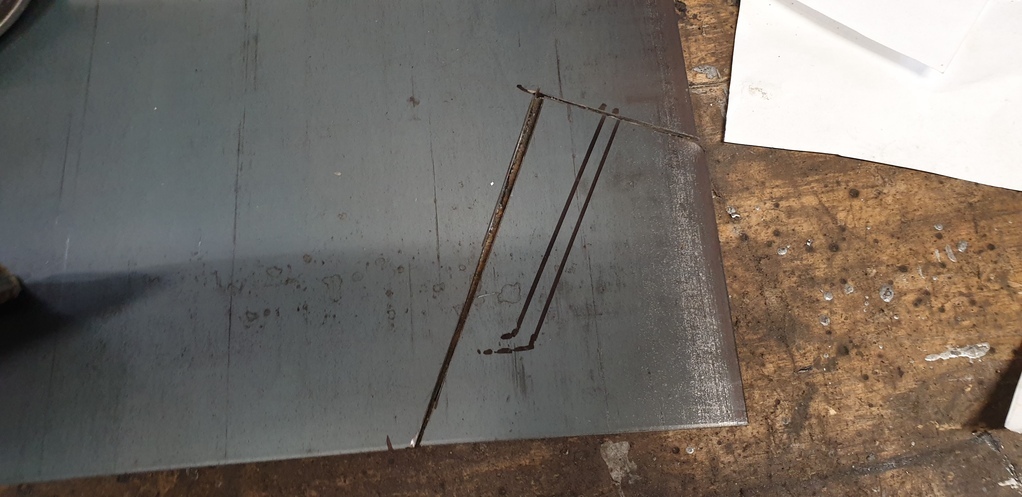 Clamp it in the vice and beat it into submission with a bolster and hammer..... 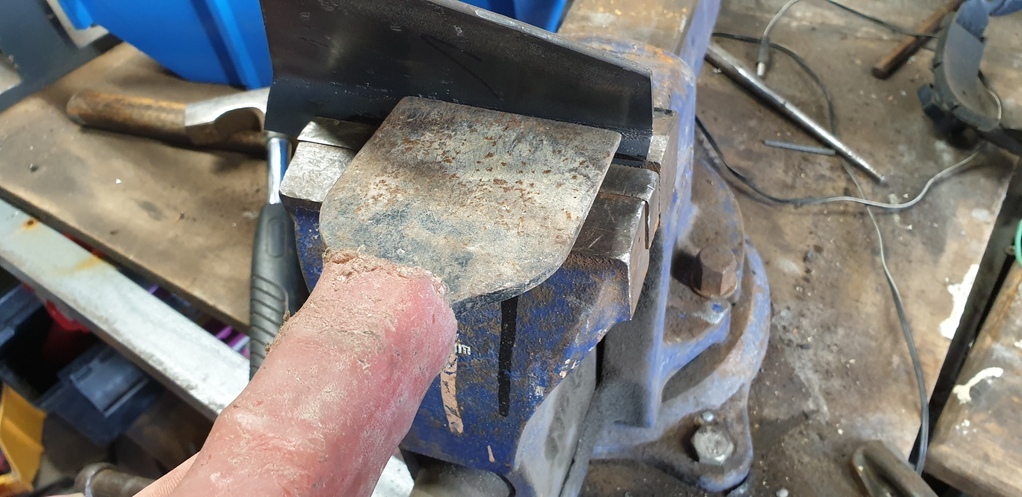 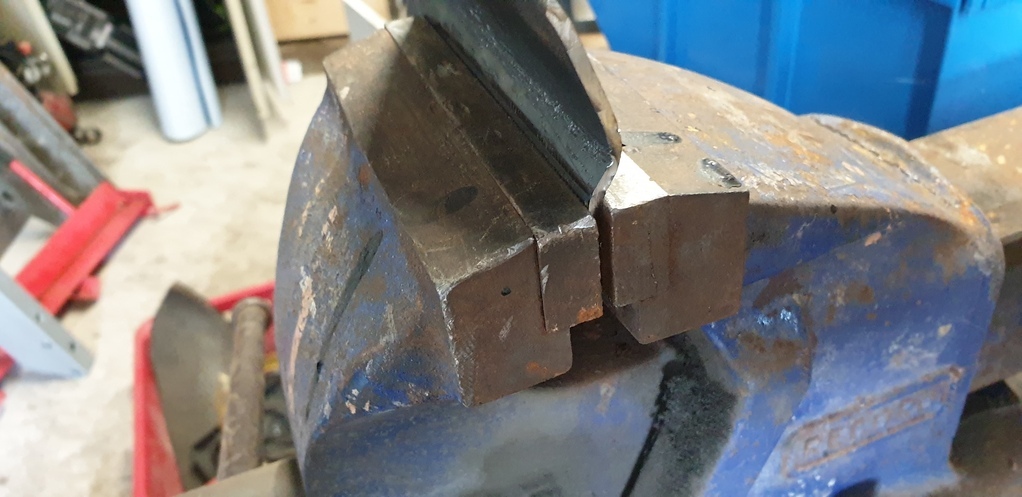 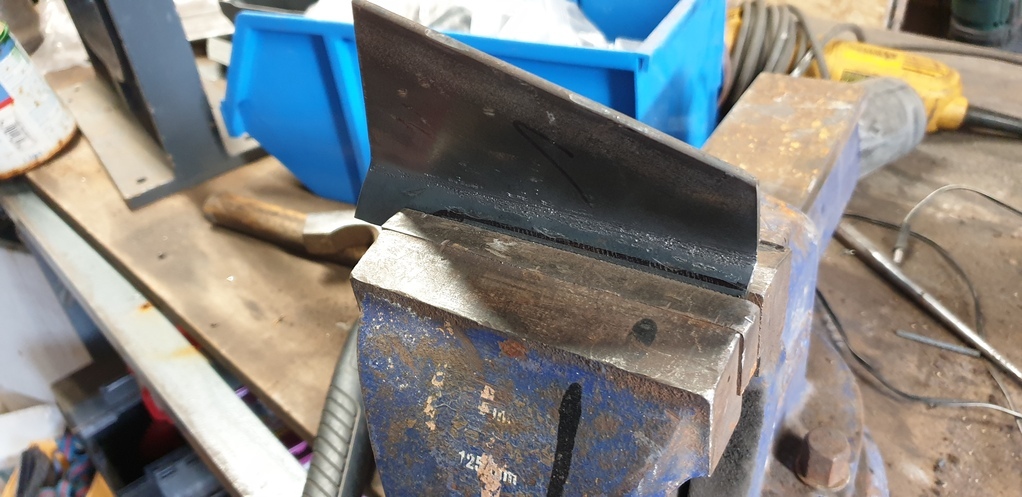 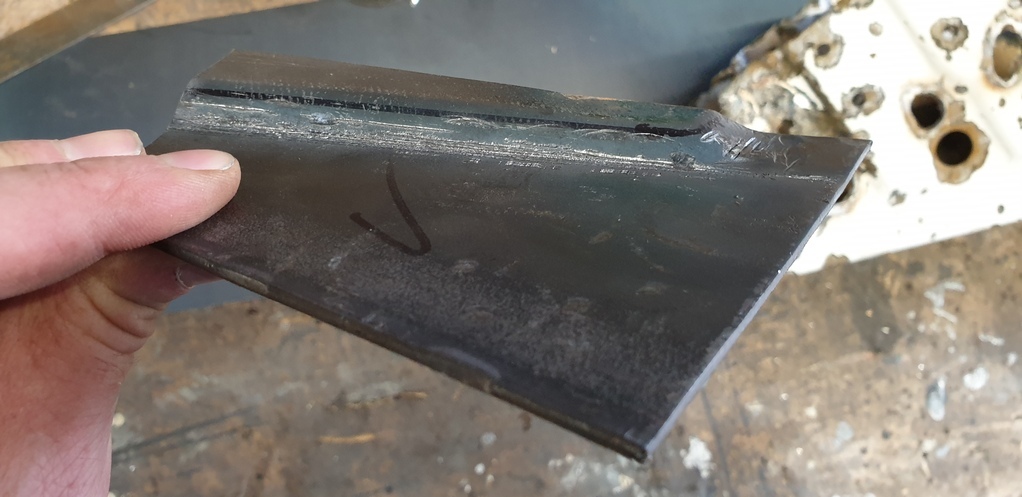 Check the fit...... 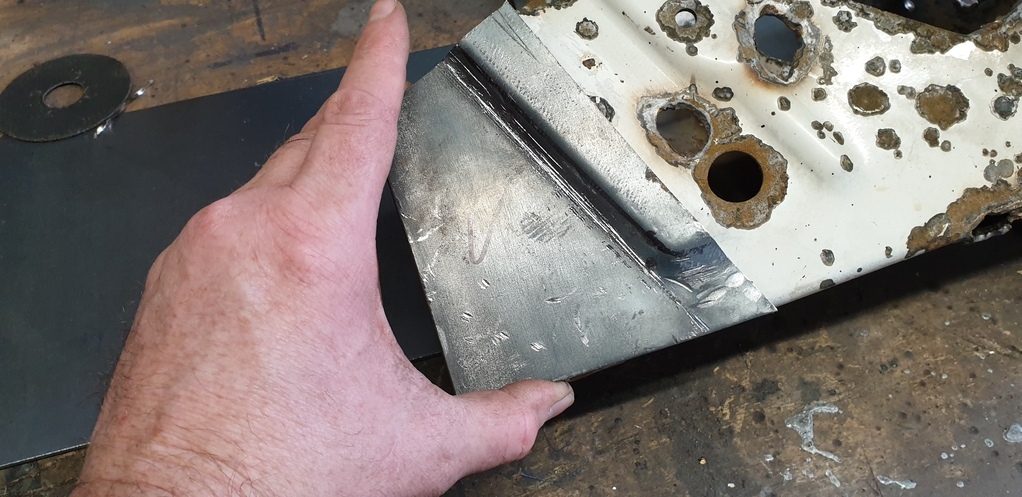 Cut the old out and weld the new in..... 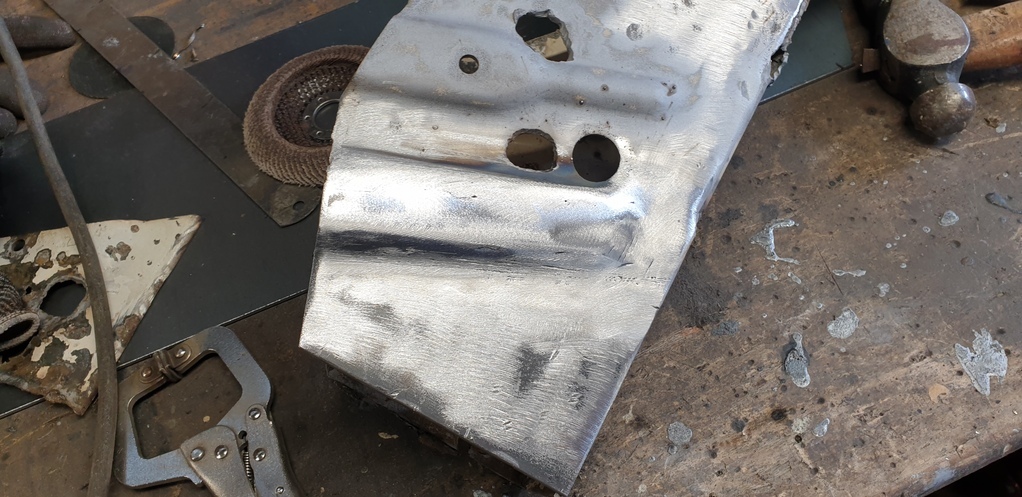 Repeat the process for the rest of the necessary repairs...... 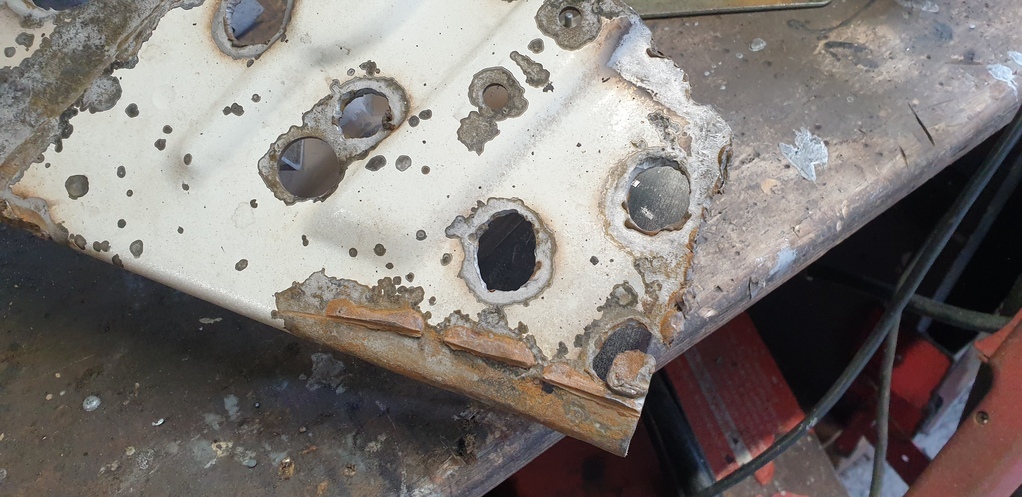 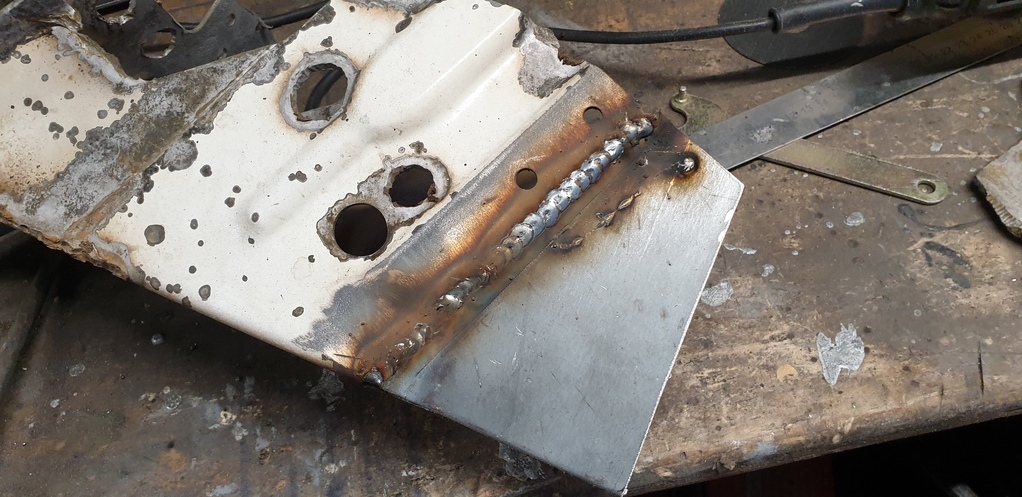 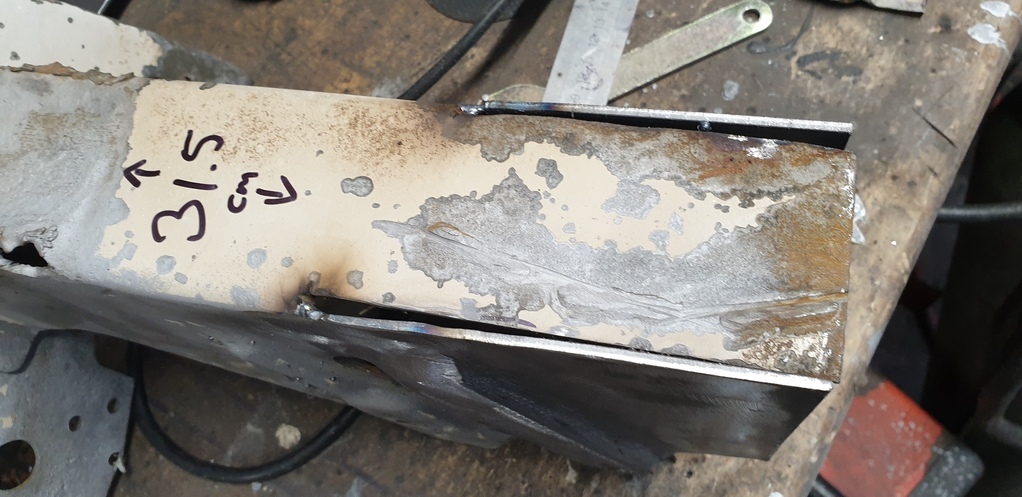 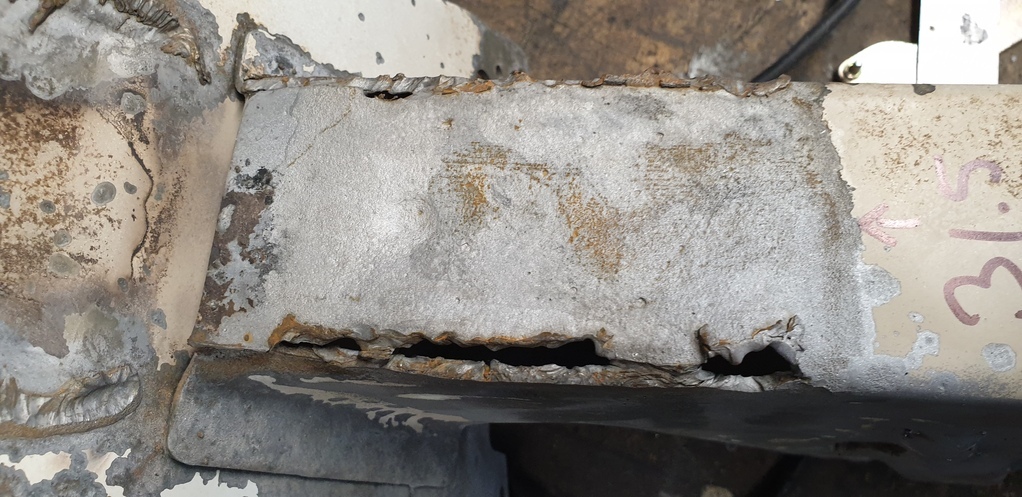 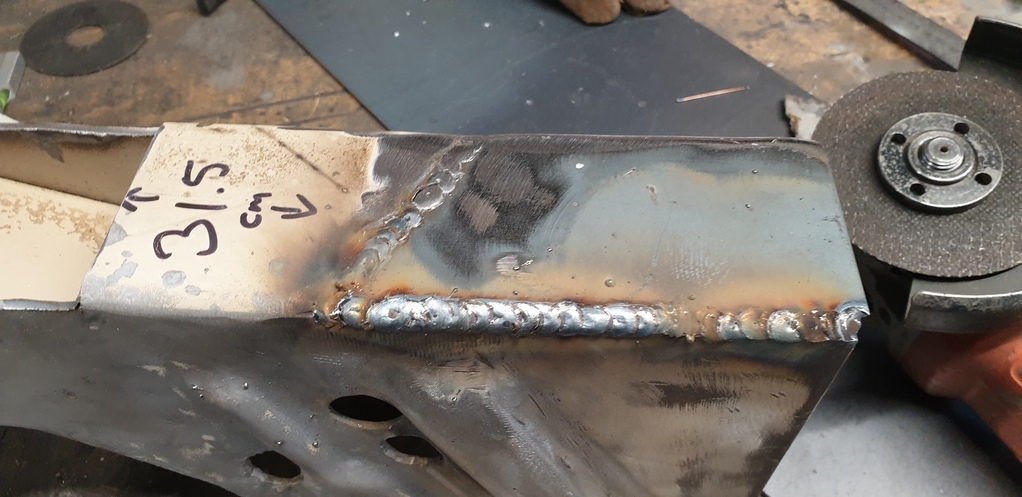 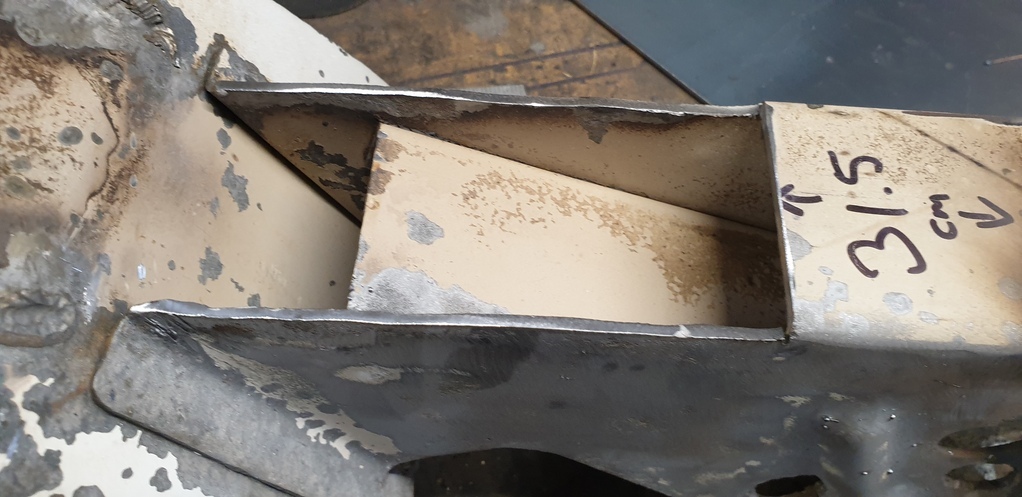 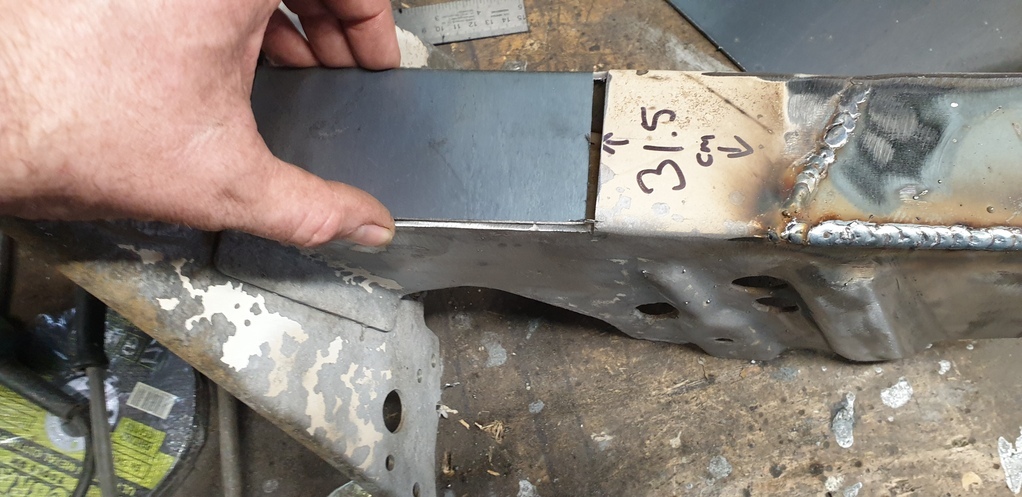 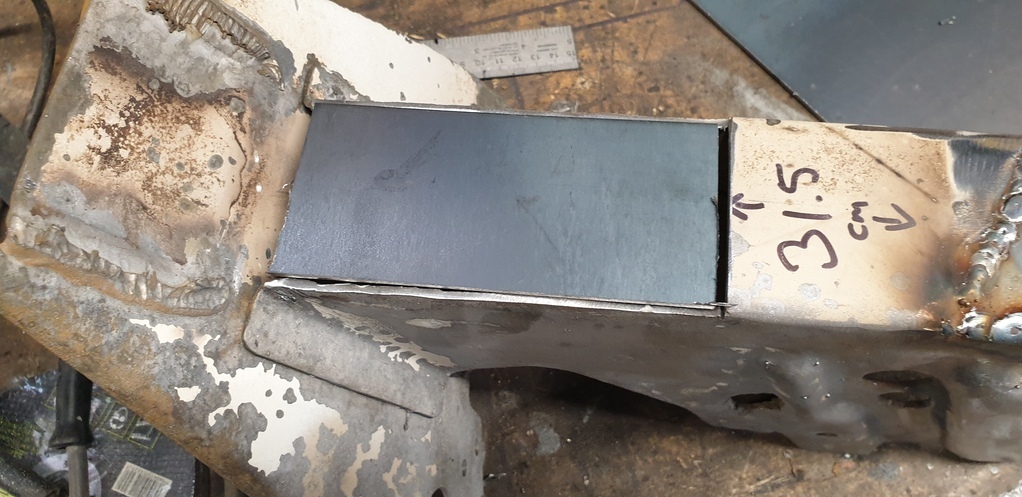 All done...... 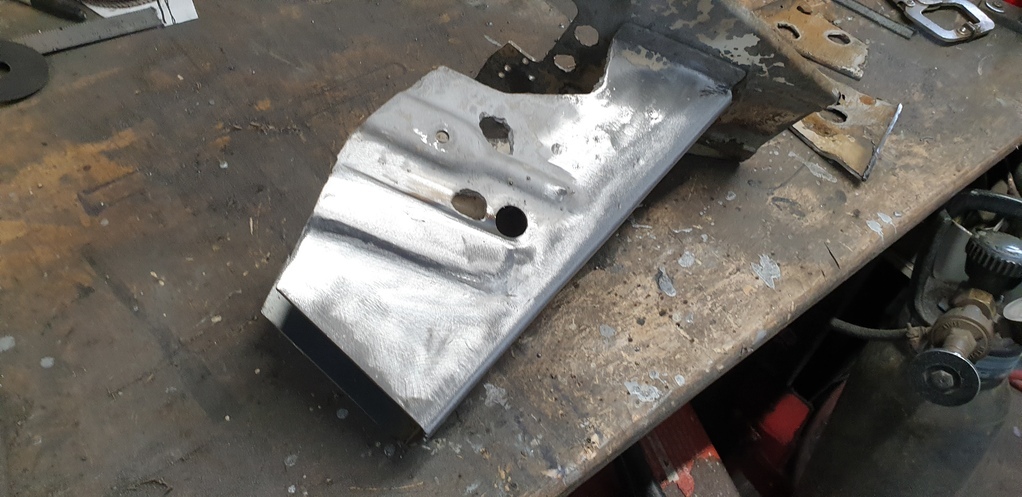 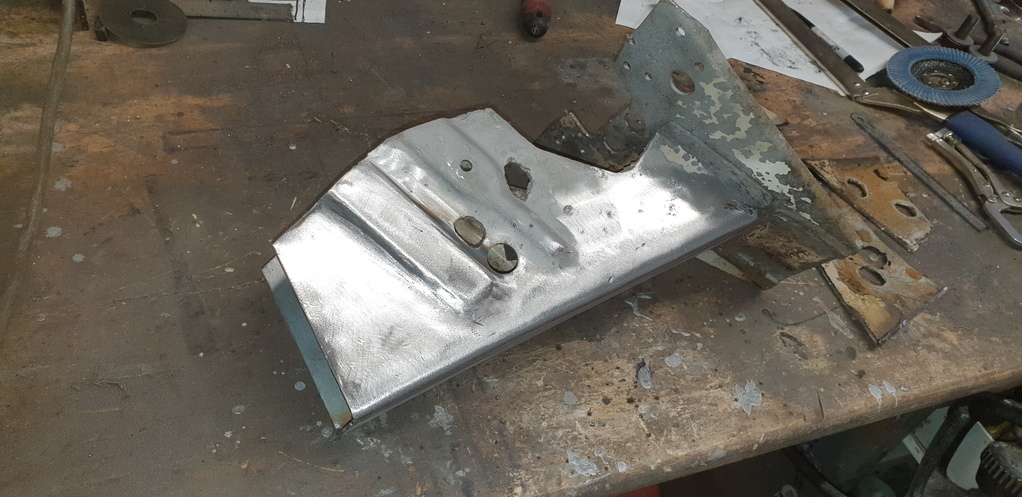 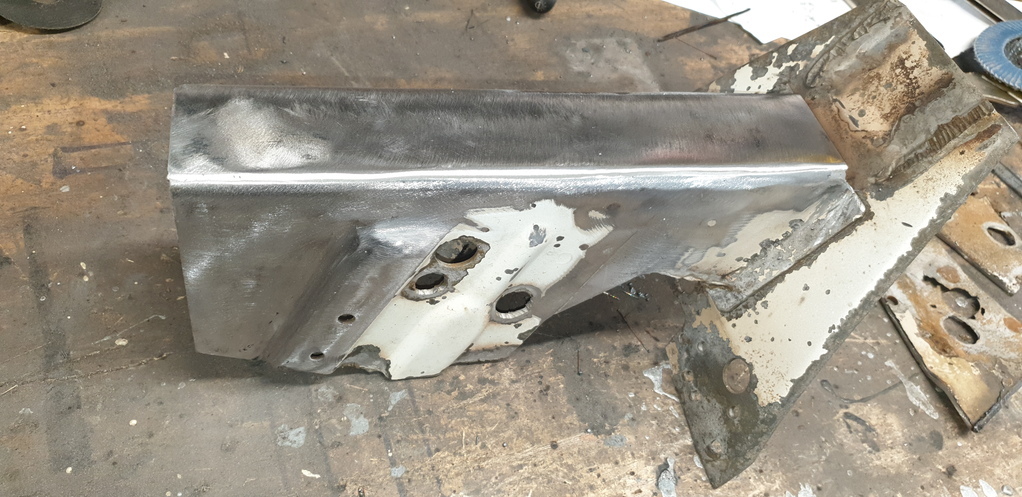 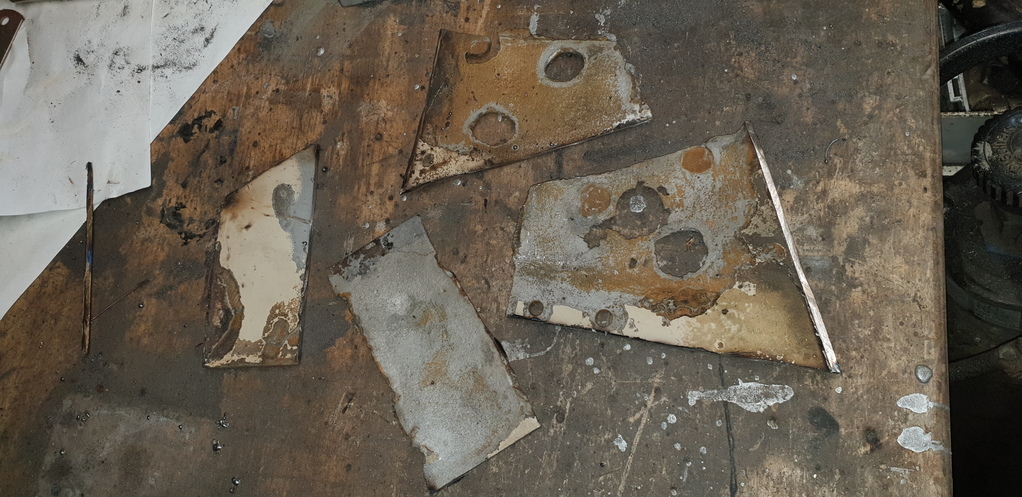 Now......you may remember that when I was dissecting the left hand rear chassis, I was able to save the domed piece of 3mm steel that made up part of the rear shock mount. Just as a reminder as to what it should look like.....here it is once I'd welded it back on..... 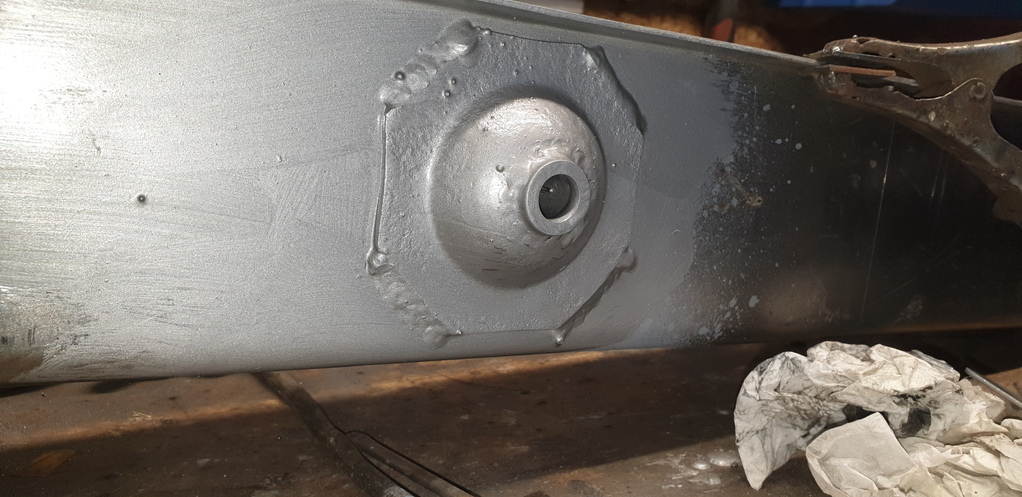 Unfortunately.....the same couldn't be said for the right hand side. It was beyond saving.... 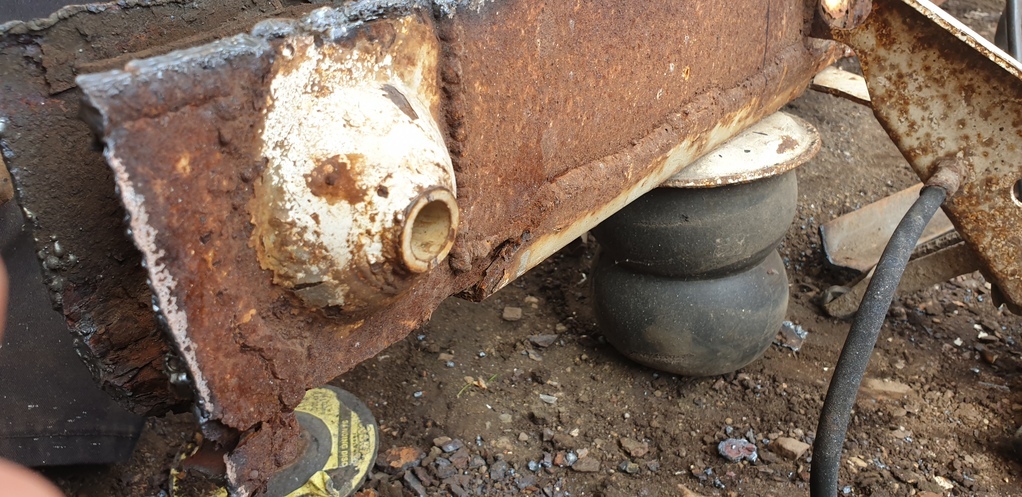 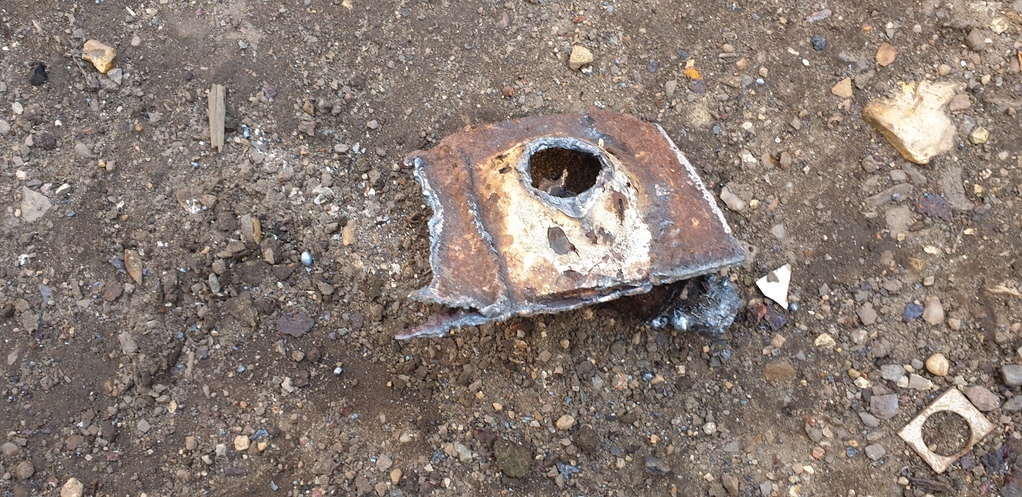 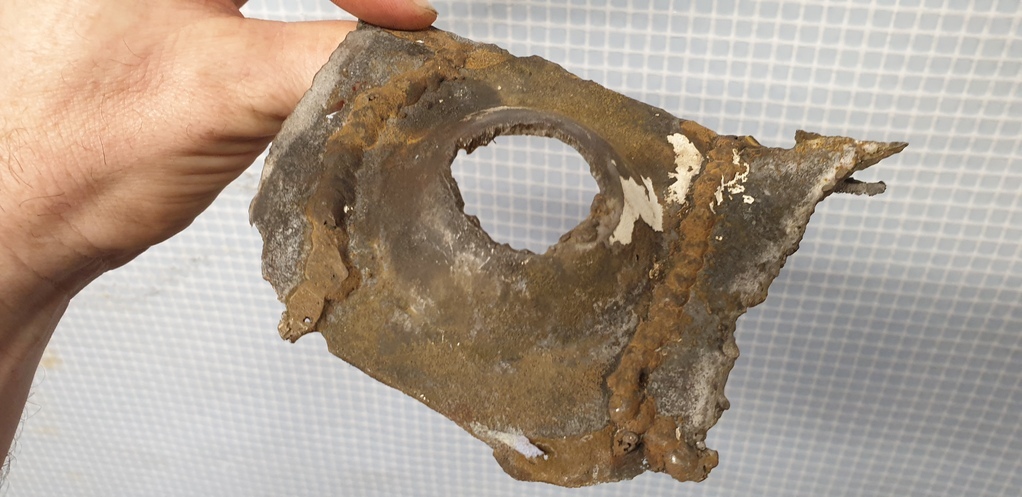 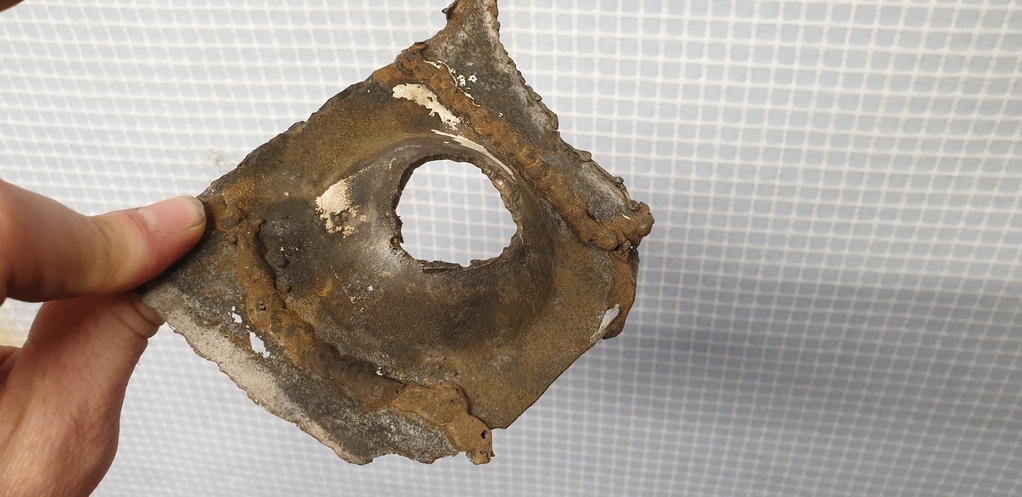 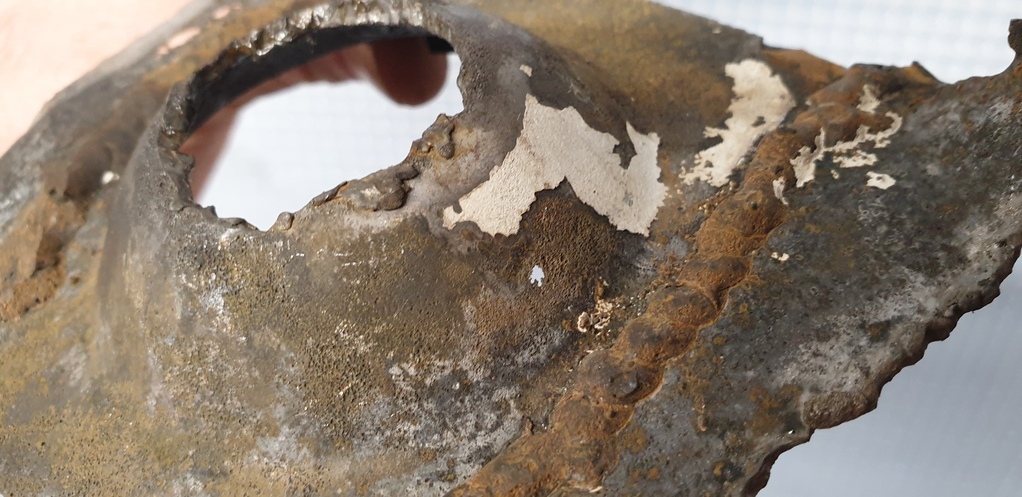 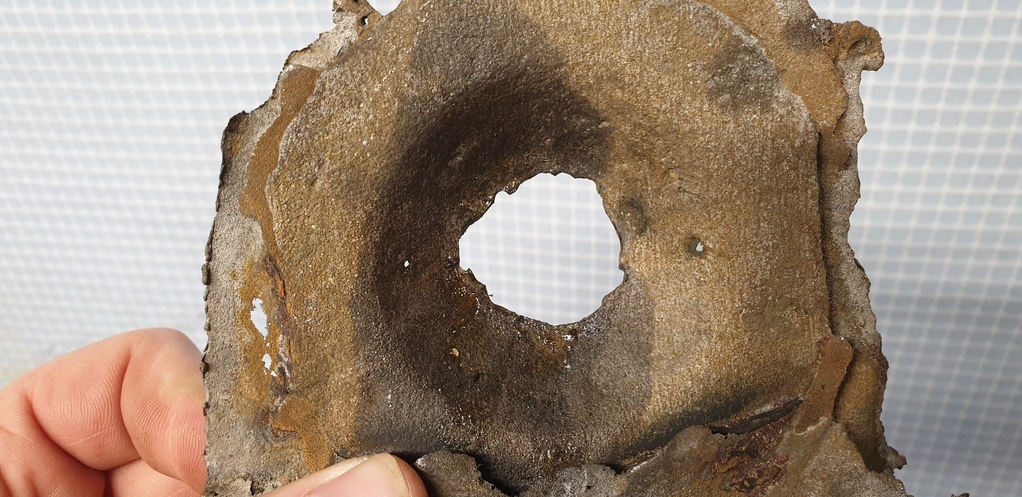 So.....I had to fabricate a new one. One thing is for sure....3mm steel doesn't like to move as easy as the thin stuff! Using an old bearing case off my old Lexus LS400.... 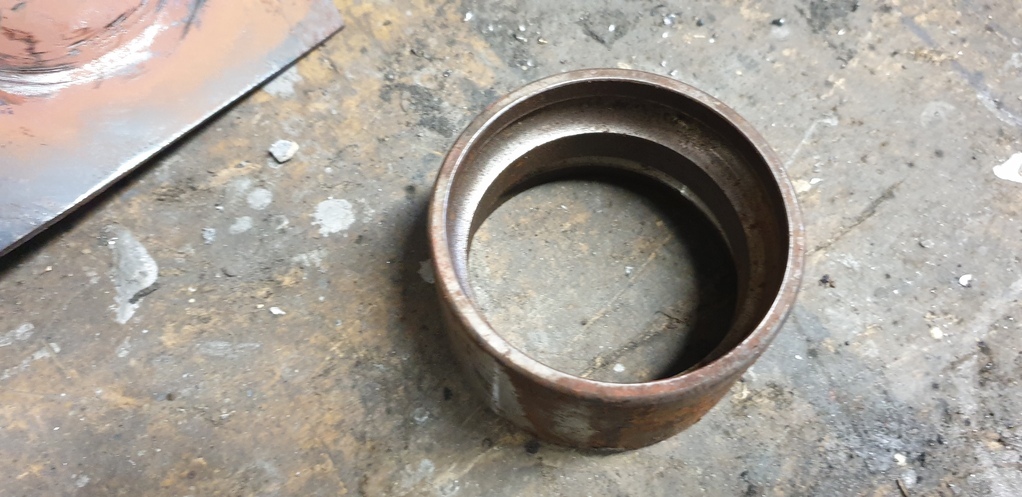 I started by heating it up and hitting it with a ball peen hammer into the bearing case..... 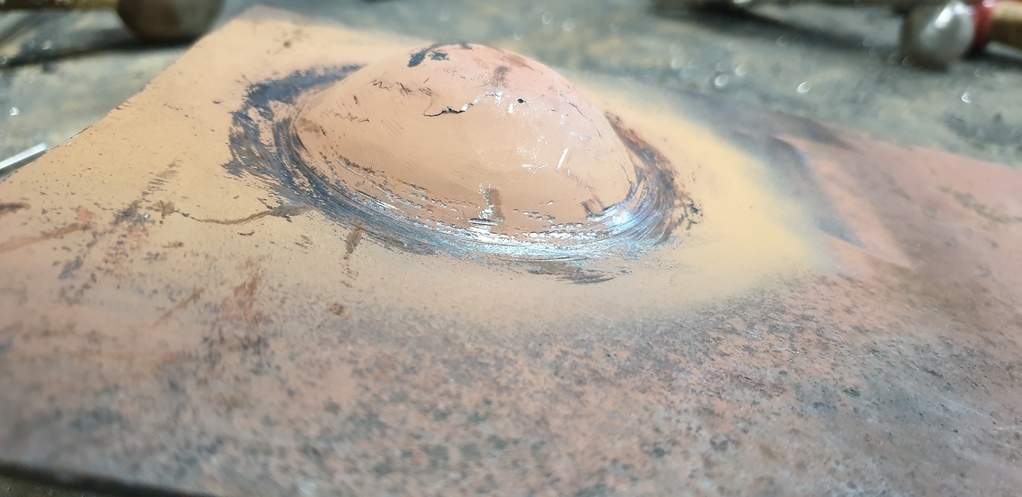 That didn't really achieve the desired result.....so, I borrowed this rather handy mandrill from work.....which turned out to be the perfect size... 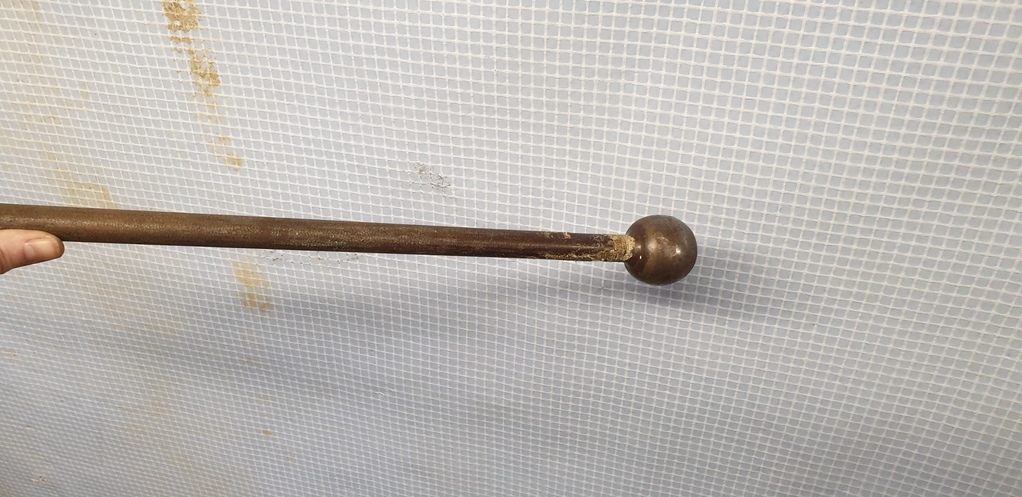 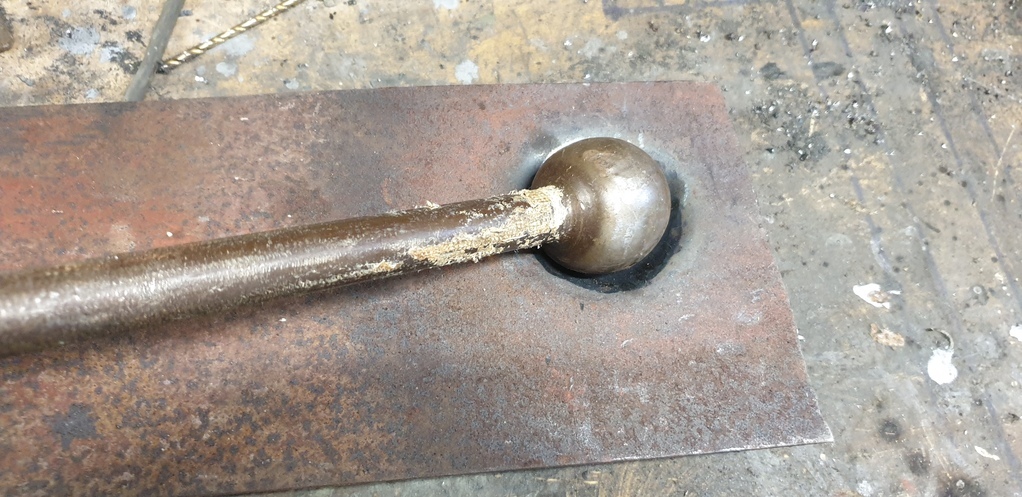 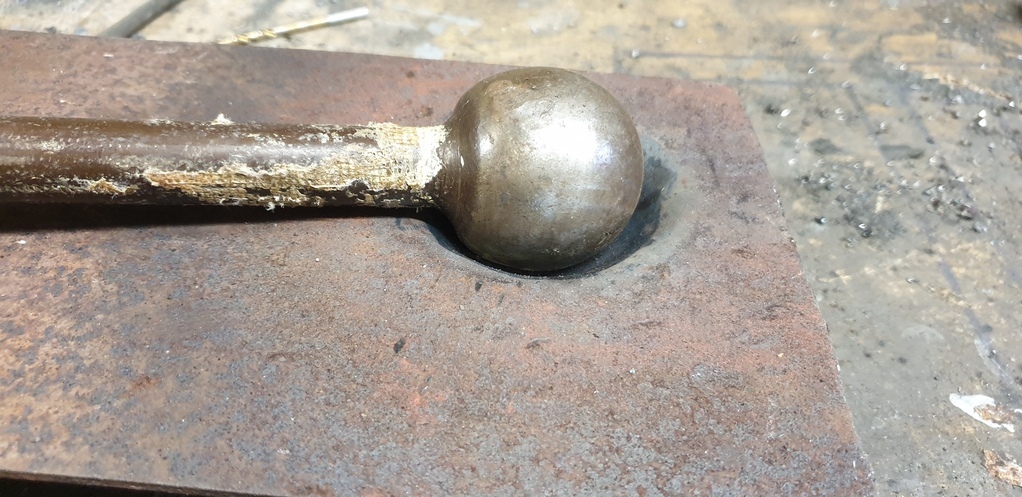 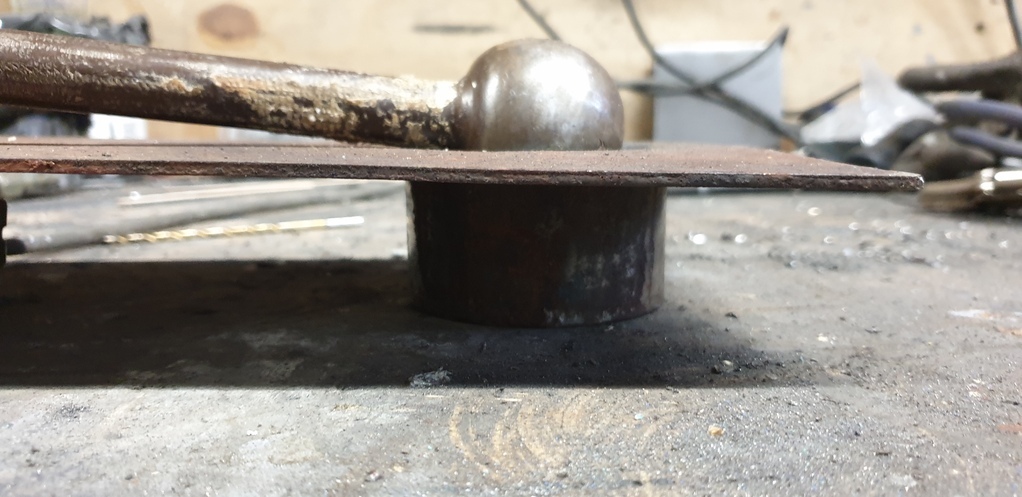 After a lot of heating, beating and tidying up.....this was the result..... 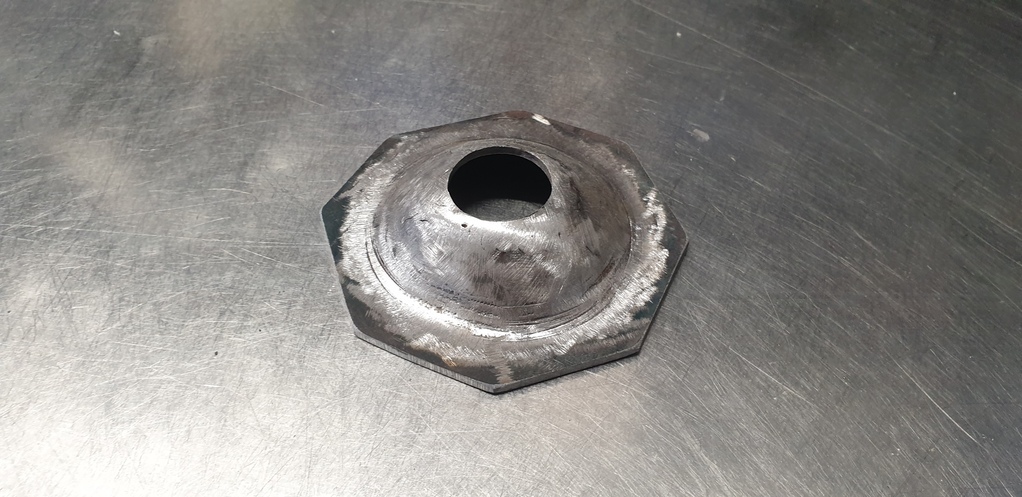 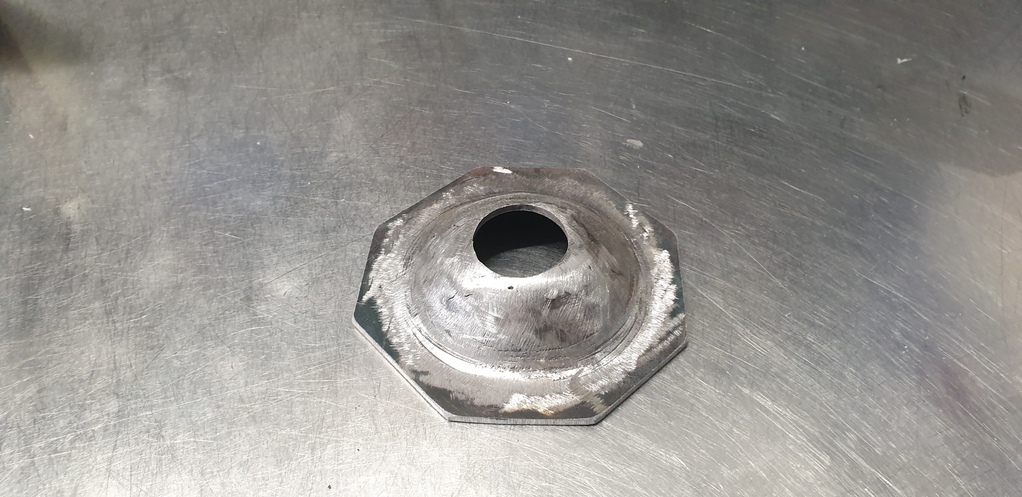 That's all for now, more soon. Dan. |
| |
Opel Commodore A Coupe
Opel Rekord C Coupe
Opel Rekord C Saloon
Vauxhall Magnum Coupe V8 (Magnumania)
Mk1 Scirocco GLS
Mk1 Scirocco GLS (early chrome bumper)
Corrado G60
Mk1 Cortina 2 door Pre Airflow
Mk2 Escort 1300 2 Door
VW LT35 Tipper Truck
BMW 320D E91 Tourer
|
|
|
|
|
|
|
|
|
|
Borrowed Mandrill.
Easy peasy.
Result !!
|
| |
|
|
|
|
|
|
|
Stunning work as always!  |
| |
|
|
|
|
|
|
|
|
Good work and thanks for the recipe. Just clarify, do I need to put the special hat on and sacrificed A series motor.
|
| |
1955 Austin A30
1981 Jawa Mustang
1990 Trabant 601 (Tommy)
1989 Trabant 601
2009 Jaguar XF
2012 Toyota AYGO
2018 Scomadi TL
|
|
|
|
|
|
|
Good work and thanks for the recipe. Just clarify, do I need to put the special hat on and sacrificed A series motor. Only when it's a full moon 😅😅 |
| |
Opel Commodore A Coupe
Opel Rekord C Coupe
Opel Rekord C Saloon
Vauxhall Magnum Coupe V8 (Magnumania)
Mk1 Scirocco GLS
Mk1 Scirocco GLS (early chrome bumper)
Corrado G60
Mk1 Cortina 2 door Pre Airflow
Mk2 Escort 1300 2 Door
VW LT35 Tipper Truck
BMW 320D E91 Tourer
|
|
|
|
|
|
|
|
You make it look so easy !!
Fantastic work as usual,
Nigel
|
| |
BMW E39 525i Sport
BMW E46 320d Sport Touring (now sold on.)
BMW E30 325 Touring (now sold on.)
BMW E30 320 Cabriolet (Project car - currently for sale.)
|
|
mrbig
West Midlands
Semi-professional Procrastinator
Posts: 508
|
|
|
|
|
Amazing stuff. My skills are a million miles from yours, but I would have looked at that section of chassis and decided it was scrap! The way you are bringing this back from the dead is fantastic. Can't wait to see the finished result!
|
| |
1969 German Look Beetle - in progress
|
|
Norman
Part of things
 
Posts: 449 
|
|
|
|
|
As always great work Dan, your arms and wrists will be sore working with 3mm steel. It not very malleable even with some heat. Keep up the good work, we are all awaiting the next exciting instalment. All the best, Norman
|
| |
|
|
tofufi
South West
Posts: 1,463
|
|
|
|
Incredible work and attention to detail  Keep up the cracking work! |
| |
|
|
|
|
|
|
|
Did you have to get the sheet cherry red and then use a press on the mandrel? Result looks really good, but am intrigued how you got there Anyway, looks good  |
| |
|
|
|
|
|
|
|
Did you have to get the sheet cherry red and then use a press on the mandrel? Result looks really good, but am intrigued how you got there Anyway, looks good  Thanks 👍....yes that's almost exactly how I did it. I think it took three attempts if I remember rightly. My heat source is just a Calor gas blow torch, the same as roofers use. So getting proper heat into the 3mm steel takes ages and it doesn't really go cherry red. First attempt was just using the hammer and heat. But I just couldn't get it deep enough while maintaining an even shaped dome. I then borrowed the mandrill from work, heated up the steel and pressed the mandrill with my bearing press into the bearing case.....but it split the steel almost straight way and the sides started to curl up. So, I went back to the first attempt which had at least started to resemble a dome. I heated it as hot as I could get it and pressed it between the mandrill and bearing case. It worked!!.....sort of? It took on the dome shape nicely, but it did split it slightly. Plus, while it was in the press, I heated it back up and hammered down the flat tabs that had started to curl up again. It was good enough for me....so I just set the welder to high and welded up the split..... 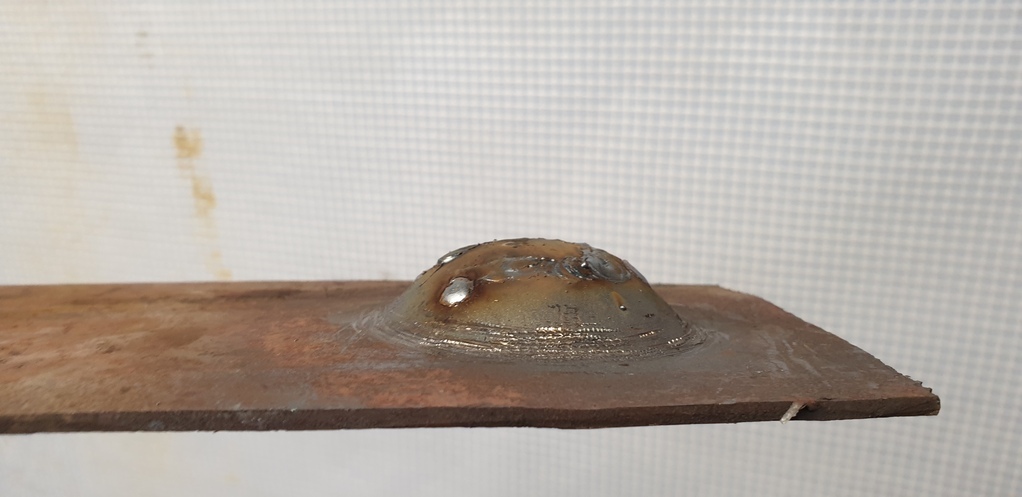 The whole time I was doing this, I was fully aware of the fact that despite being incredibly hard, bearing case's are very brittle and shatter easily, especially when relying on its strength in the wrong direction.....like I was doing. So I wore full face mask and gloves etc.....luckily I got away with it. Dan |
| |
Opel Commodore A Coupe
Opel Rekord C Coupe
Opel Rekord C Saloon
Vauxhall Magnum Coupe V8 (Magnumania)
Mk1 Scirocco GLS
Mk1 Scirocco GLS (early chrome bumper)
Corrado G60
Mk1 Cortina 2 door Pre Airflow
Mk2 Escort 1300 2 Door
VW LT35 Tipper Truck
BMW 320D E91 Tourer
|
|
|
|


