|
|
|
May 16, 2020 21:46:36 GMT
|
I bought some fire proof overalls after nearly setting my clothes on fire, they trap sparks and lumps of molten splatter inside though, so can’t win  Good progress, fingers crossed for some more steel |
| |
|
|
|
|
Norman
Part of things
 
Posts: 449 
|
|
May 18, 2020 18:08:32 GMT
|
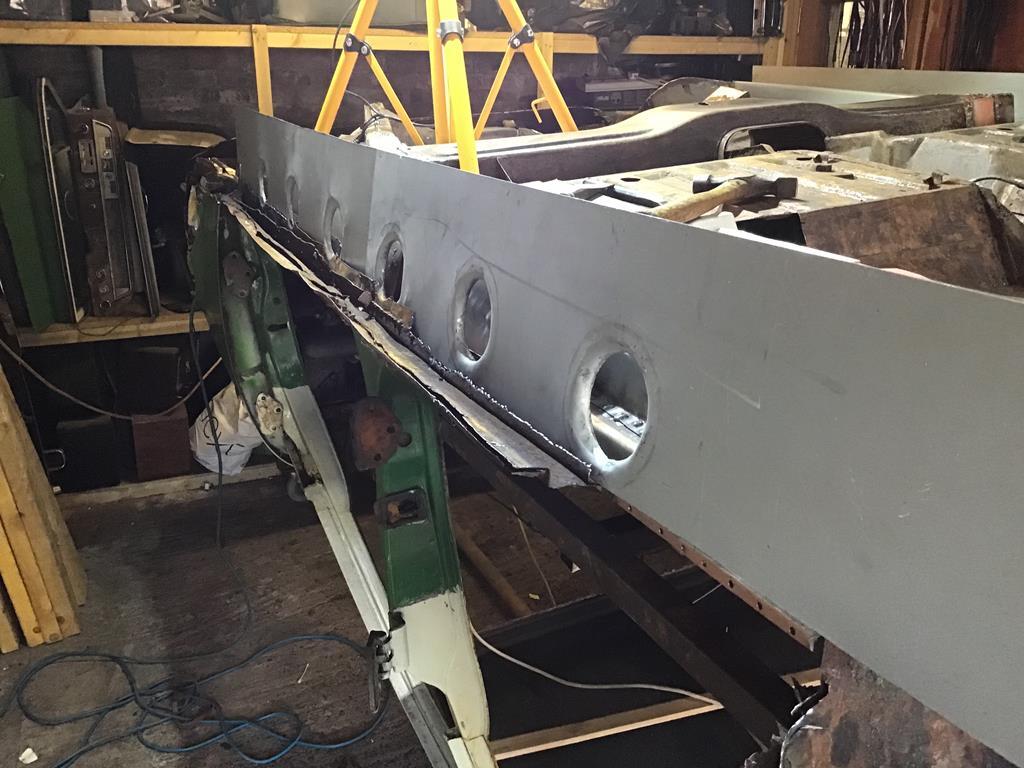
Here is today’s progress, there’s not much to show but I was happy how it went. I am making the sill strengthener which is just a straight piece with some holes pressed in for strength. I didn’t have a piece of metal large enough to do it in one piece so had to join it. I marked up where the depressions went and drilled a hole big enough to let me get a jigsaw in. I cut out the holes although they weren’t very round, a file sorted that out. I couldn’t find a large enough piece of tube to use as a former for the holes so had to go with a bit of box section. Talk about round peg and square hole! So by using the corner of the box section I hammered the metal down into the box and kept turning it. Then using a hammer and dolly I picked up the edges and managed a reasonably round hole. I trial fitted it in the car and was surprised it lined up with the remains of the old strengthener. It still needs trimmed for length and height. I need to make the same for the other side, this took me the hole afternoon and the arm muscles are tired now. Here are some pictures to explain the procedure. 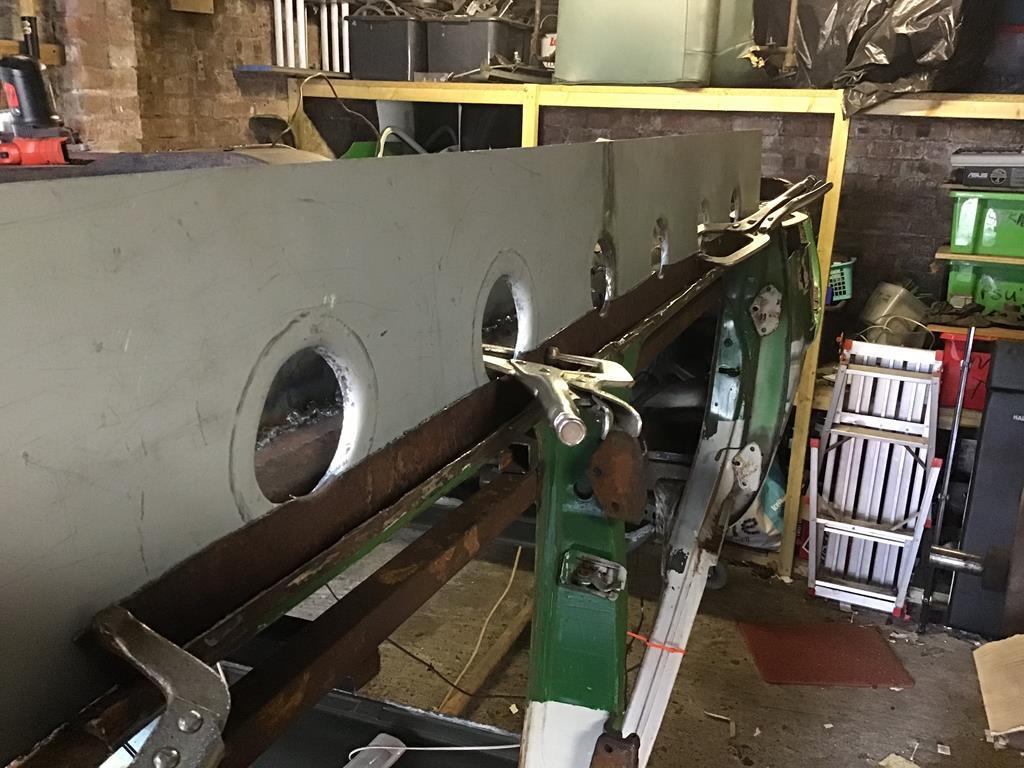 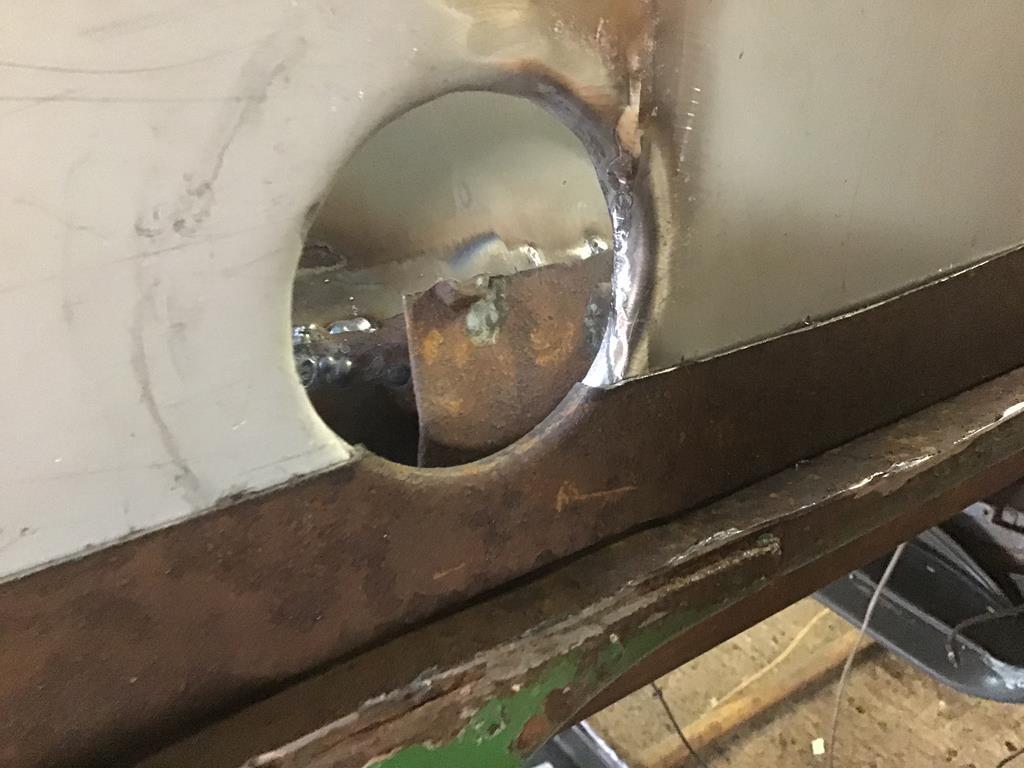 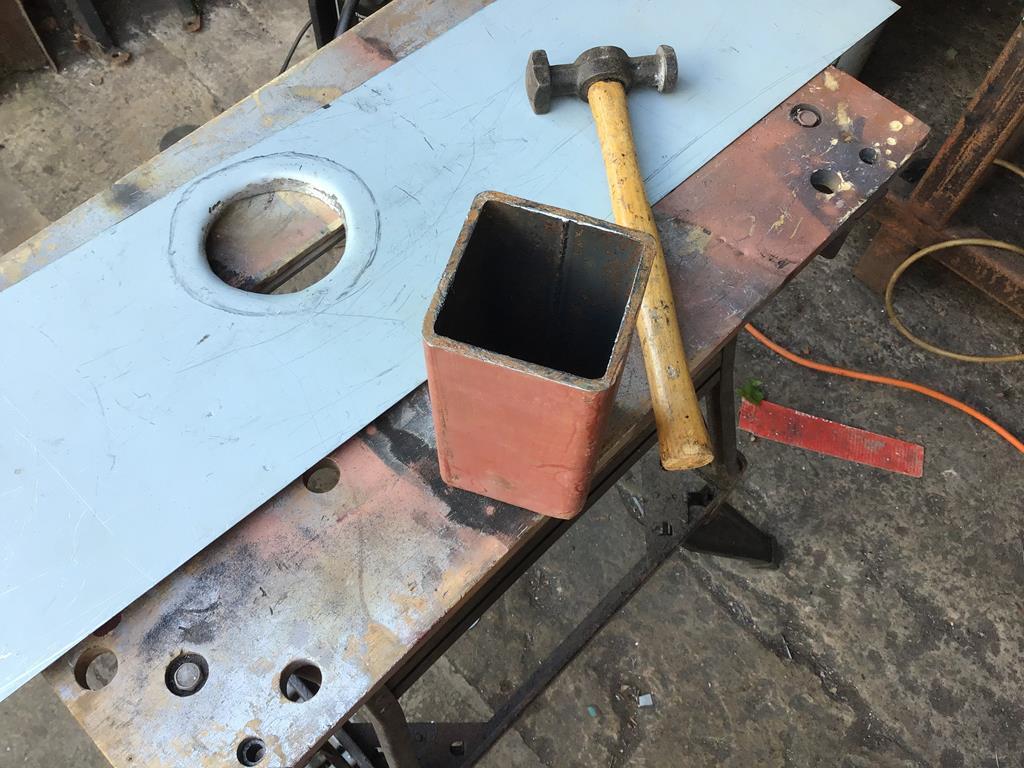 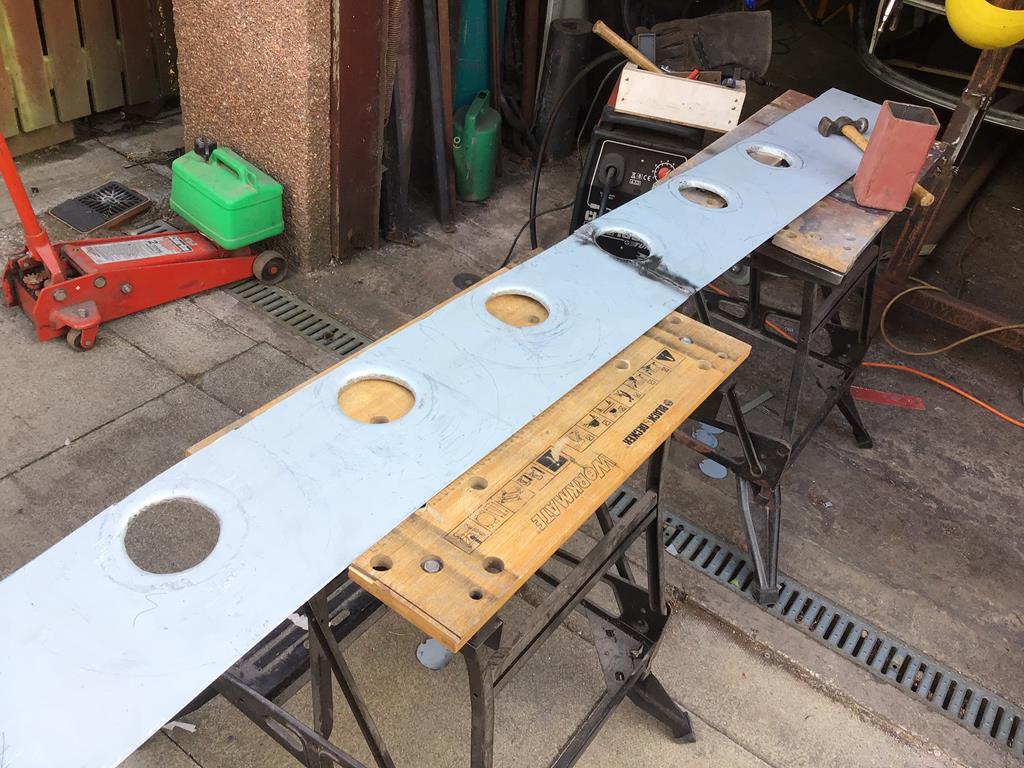 I will get back to some tin bashing tomorrow and make the other side and hope it doesn’t drive the neighbours nuts. I am trying to tackle the sills now before I go to the rear chassis legs which are pretty crusty. As per usual the pics are in the wrong order! As per usual please feel free to comment etc. All the best, Norman |
| |
Last Edit: May 18, 2020 18:11:41 GMT by Norman
|
|
|
|
|
May 18, 2020 18:14:52 GMT
|
|
That is looking good and you do not see it. I sometimes use a piece of 20mm plywood and make a hole in it and then hammer the metal to a swag hole- Important is that you have a heavy bench to do or do it on a thick concrete floor.
Amazing amount of work on that car! Keep up the good work!
Peter
|
| |
|
|
Norman
Part of things
 
Posts: 449 
|
|
May 18, 2020 18:40:33 GMT
|
|
Hi Peter, I never thought about using a piece of plywood, that might have made life easier. I did this today on the ground, sore knees and muscles! My brain sometimes goes blank and I can’t see a solution to the problem. Might try plywood tomorrow if I can find a piece or phone my joiner son! All the best, Norman
|
| |
|
|
|
|
Norman
Part of things
 
Posts: 449 
|
|
May 24, 2020 19:30:01 GMT
|
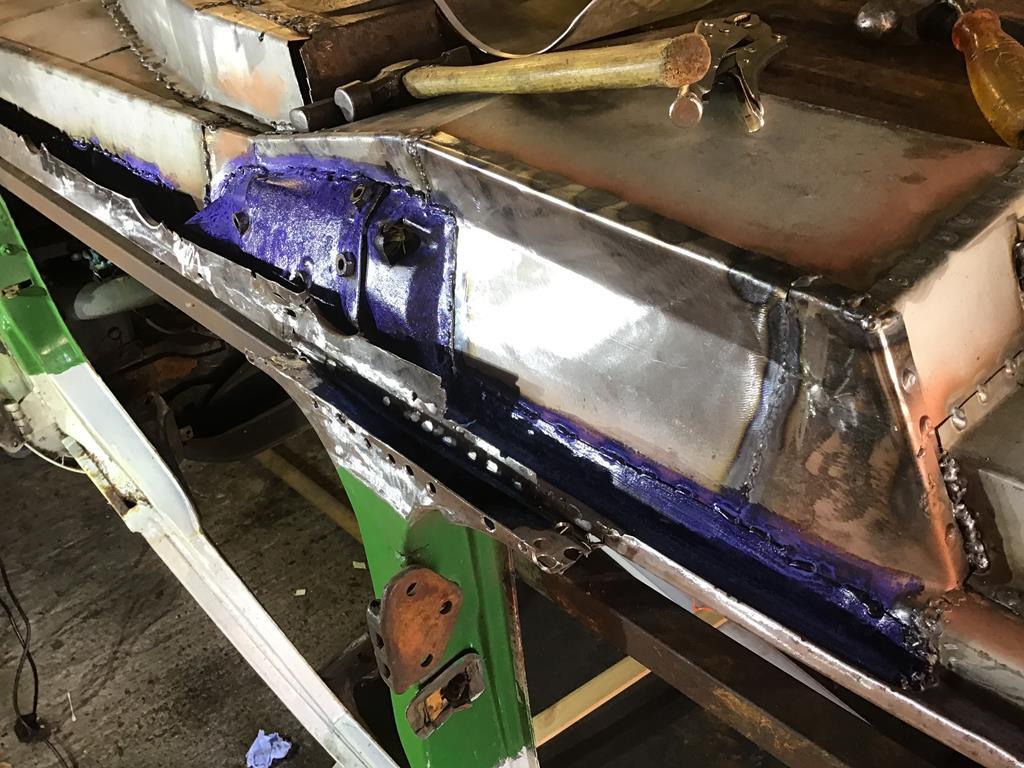
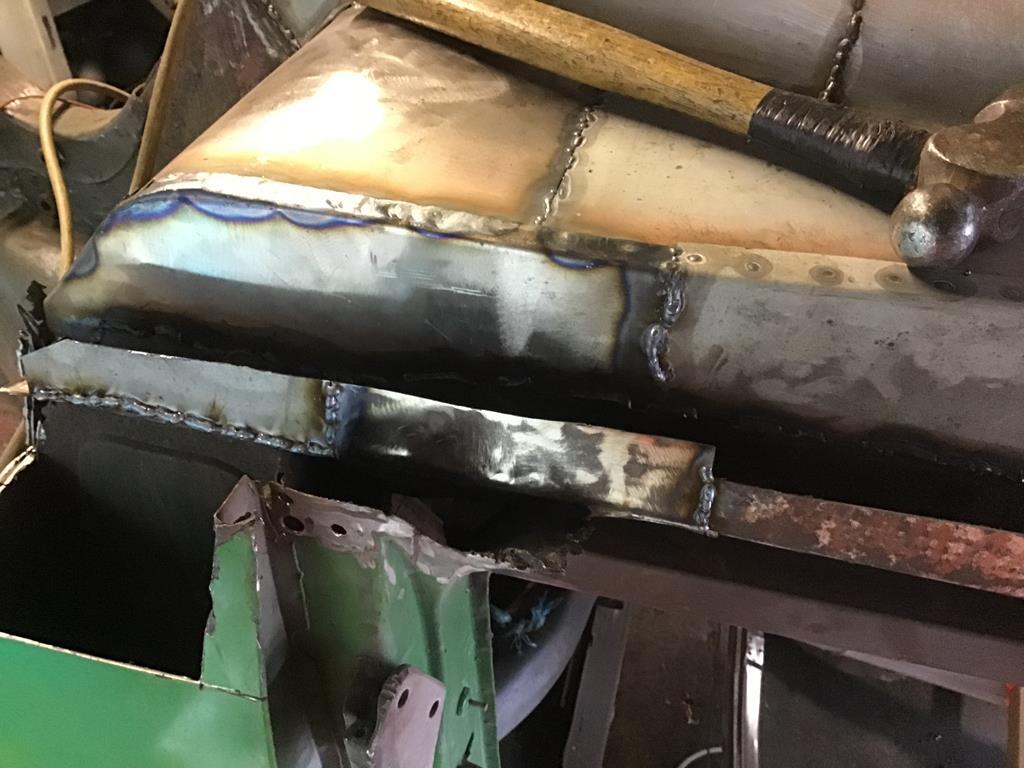
OK, here is the latest instalment, progress has been slow. I have prepared the area for the inner sill and also the sill strengthener. I also fitted the doors on the offside so i could align the outer sill. Fitting the doors was difficult as i has to balance them on the jack whilst trying to fit the hinge bolts, the doors are heavy. The inner sill is now fitted by a series of spot and stitch welds. I didn’t clean the welds back as they wont be seen, it may have looked better if i had dressed them back. I brushed on some seam sealer and it’s not pretty but again won’t be seen. Here are some pics of the work. 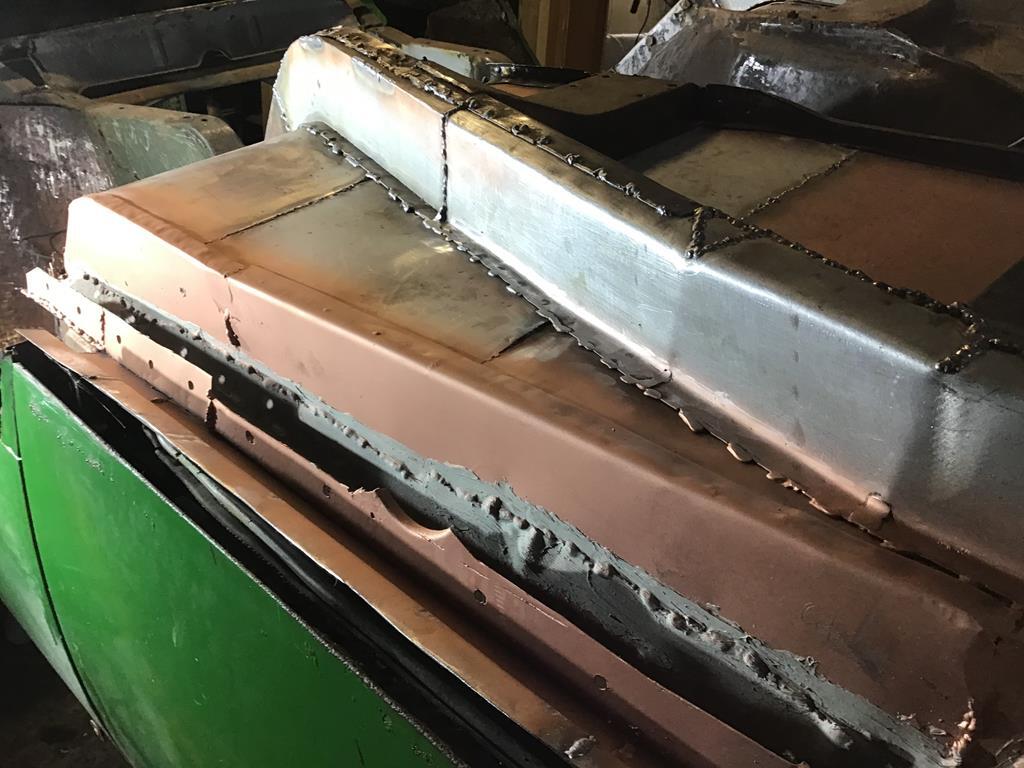 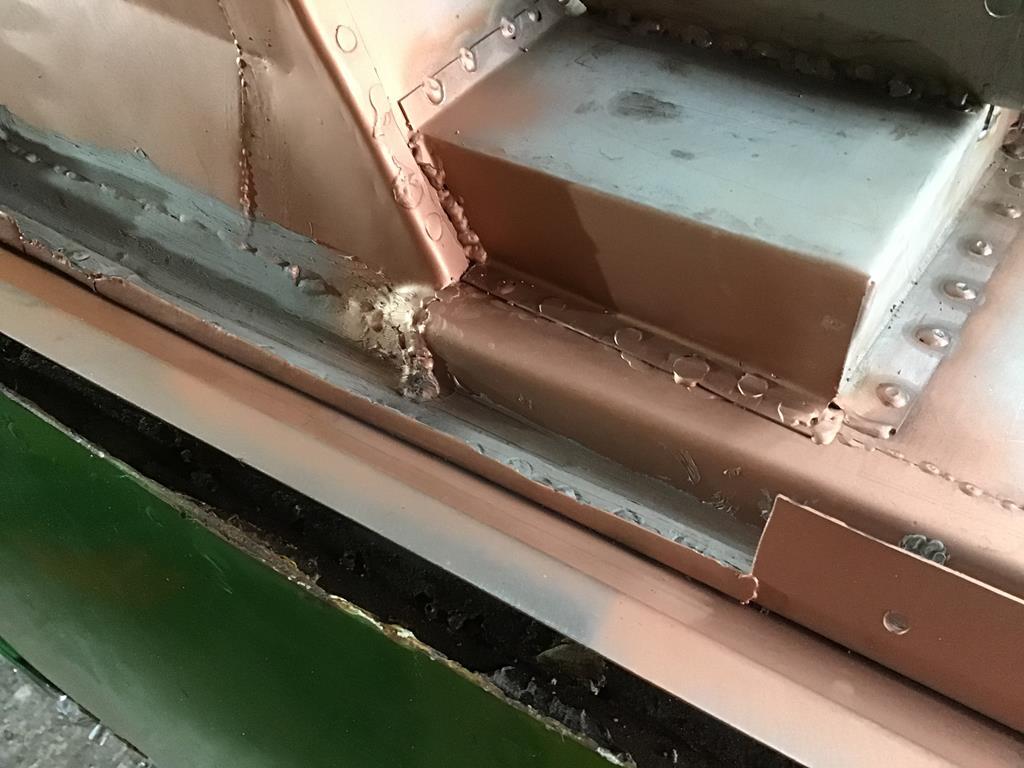 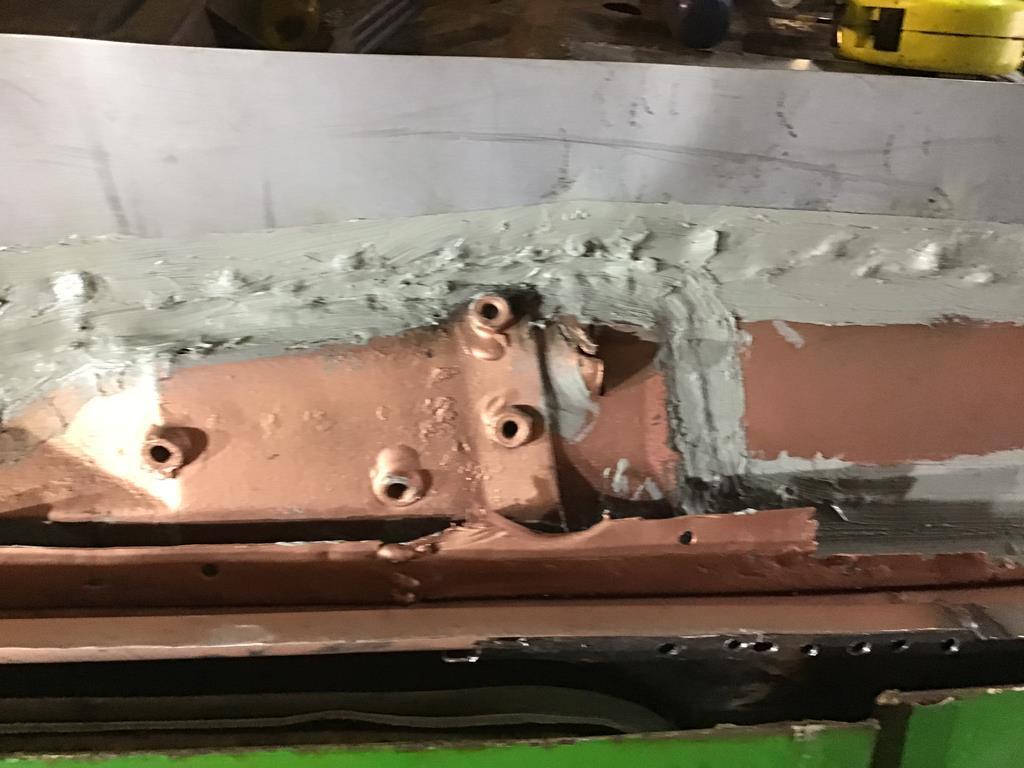 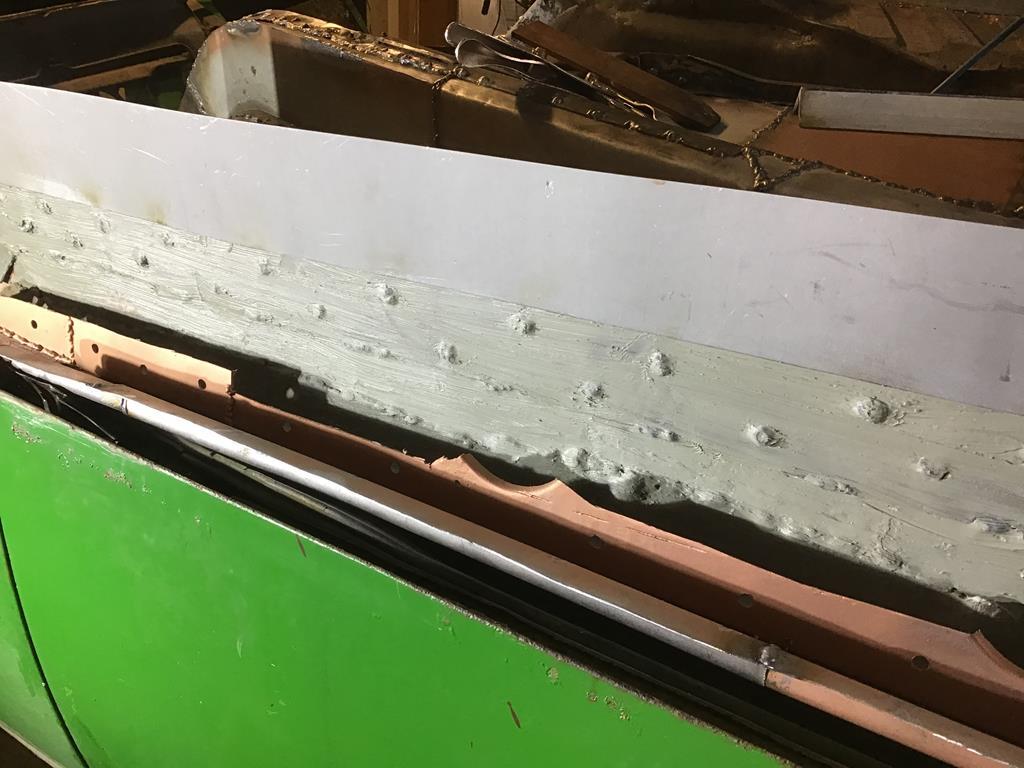 Tomorrow I will fire some etch primer into the area then fit the sill strengthener. The inner sill and strengthener will need trimmed to fit the outer sill, this will be done when i bring them together. Hopefully I will make better progress tomorrow and have an update. Please feel free to comment, all the best, Norman |
| |
|
|
Norman
Part of things
 
Posts: 449 
|
|
May 26, 2020 18:11:06 GMT
|
Here is the latest instalment, forgot to take pics but anyway i finally managed to get one of the sills on. I pulled, pushed, hammered, swore, stared at It trying to work out how i could achieve a reasonable fit. I finally managed a reasonable fit that i was happy with. The bottoms of the door are bulged with rust and filler which i will take care of later. 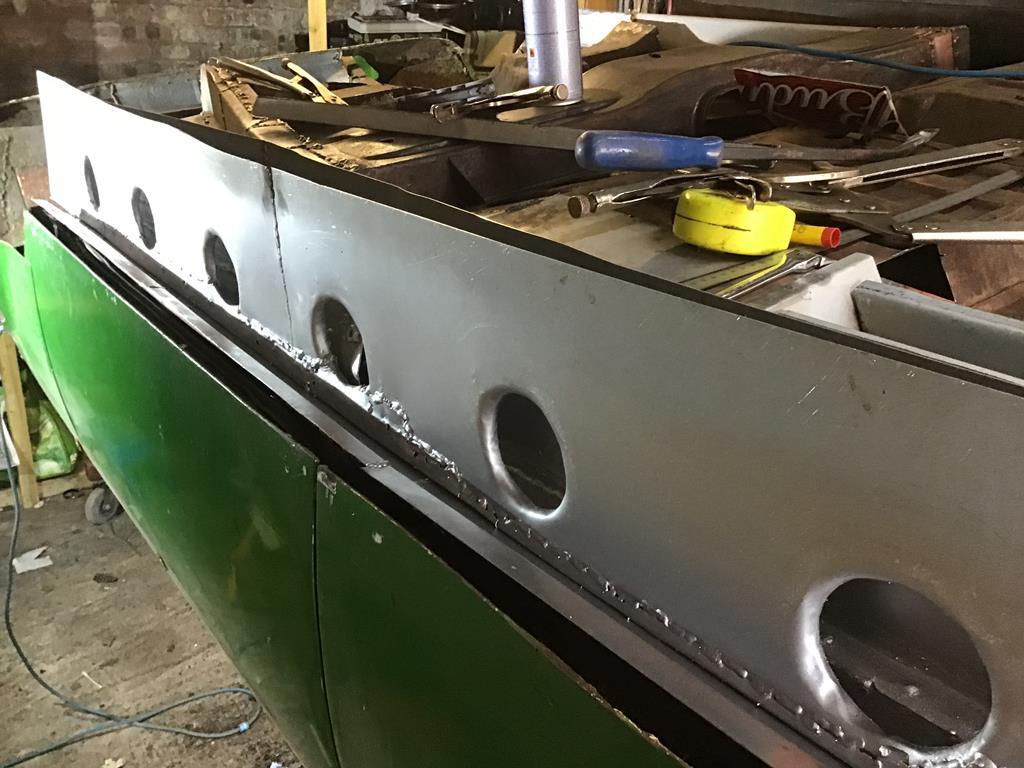 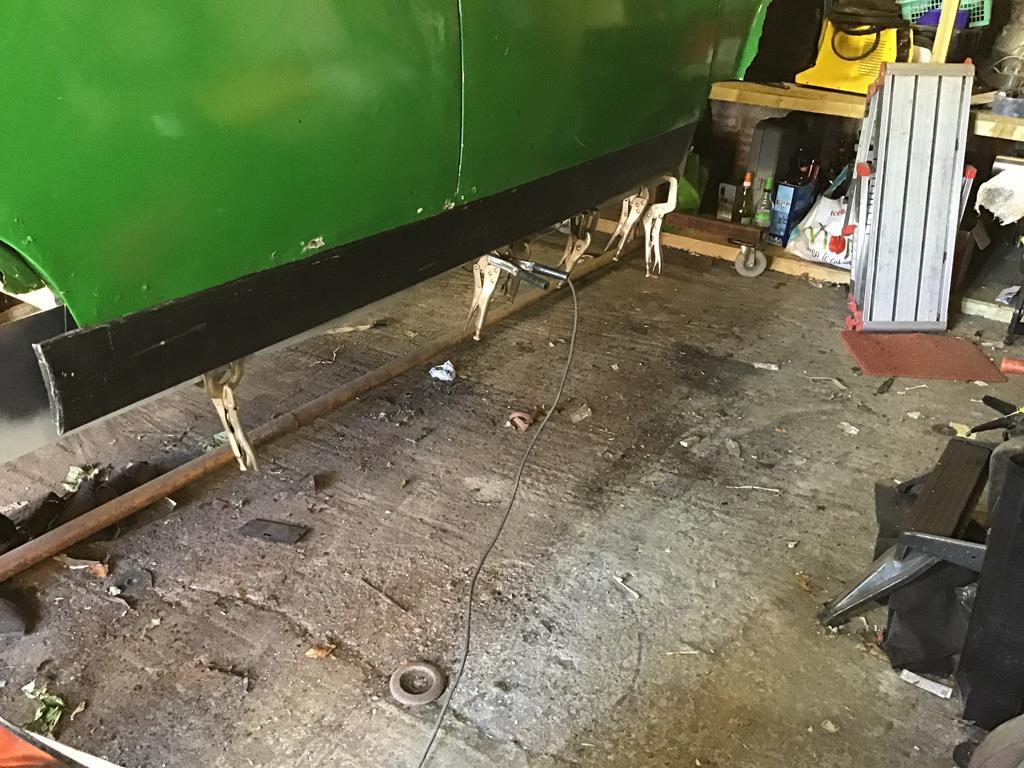 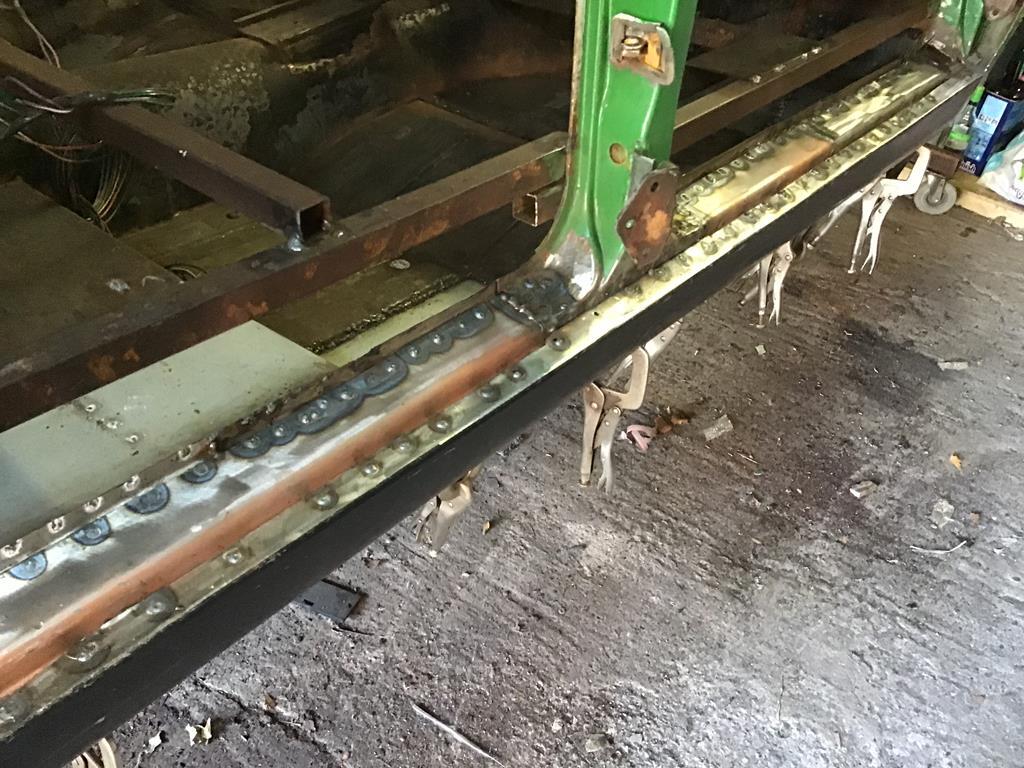 That’s all the pics i took today, i had a few problems along the way. I was spraying what i thought was etch primer but it looked a bit silvery. I had lifted the wrong can, it was wheel silver and not etch primer. One other problem i had was when i had fitted two doors to one side of the car, it shifted the balance of the shell and I couldn’t turn it over. I called on my long suffering wife to help me. We managed between us although I wasn’t happy how it was sitting. I jammed a workmate under one side to help support the shell. When i had the sill fitted i removed the doors which gave me better mobility. There is an even gap between the bottoms of the doors and the sill although it doesn’t look like it. I still need to work out how the ends of the sill go. Unfortunately when i got the car the inner sill, strengthener and most of the outer sill was missing. There is a million spot welds as you can see keeping it all together. That’s it for today, please feel free to comment good or bad. Thanks for looking and for the encouragement. All the best, Norman. |
| |
Last Edit: May 26, 2020 18:15:41 GMT by Norman
|
|
Norman
Part of things
 
Posts: 449 
|
|
May 26, 2020 18:22:48 GMT
|
|
I forgot to say my compressor has been playing up for ages with a major air leak. I looked on YouTube as you do and found the problem. The “check valve” had a very small piece of debris in it and was stopping it from sealing. Where would we be without YouTube? Norman
|
| |
|
|
Norman
Part of things
 
Posts: 449 
|
|
May 27, 2020 17:52:06 GMT
|
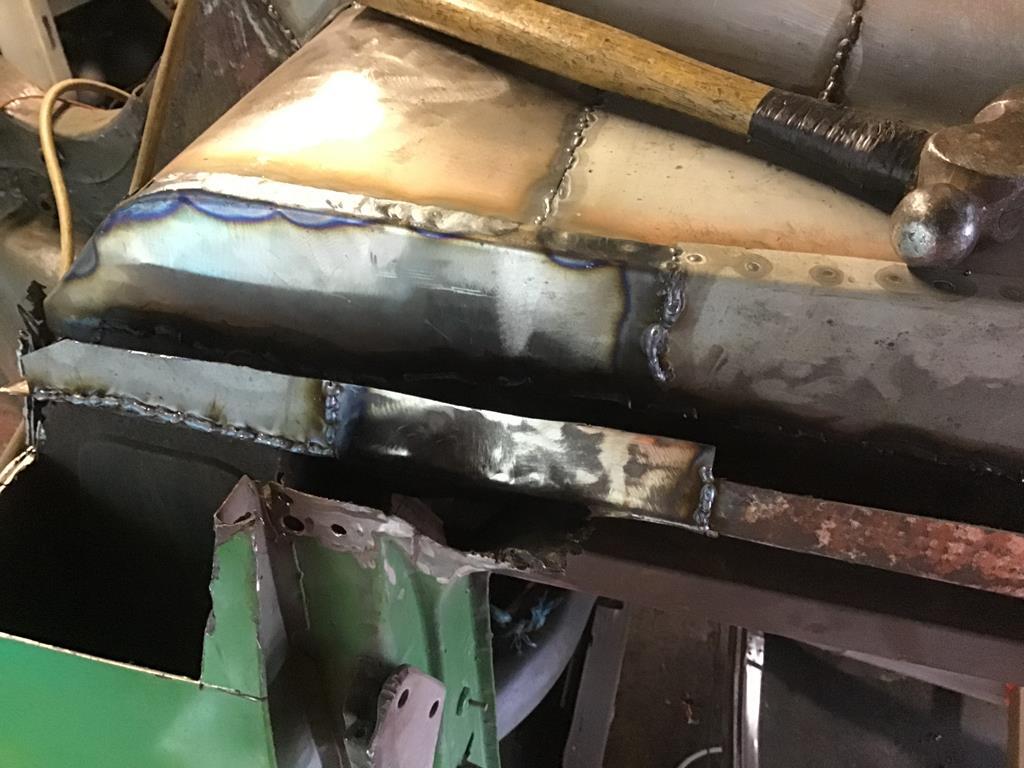
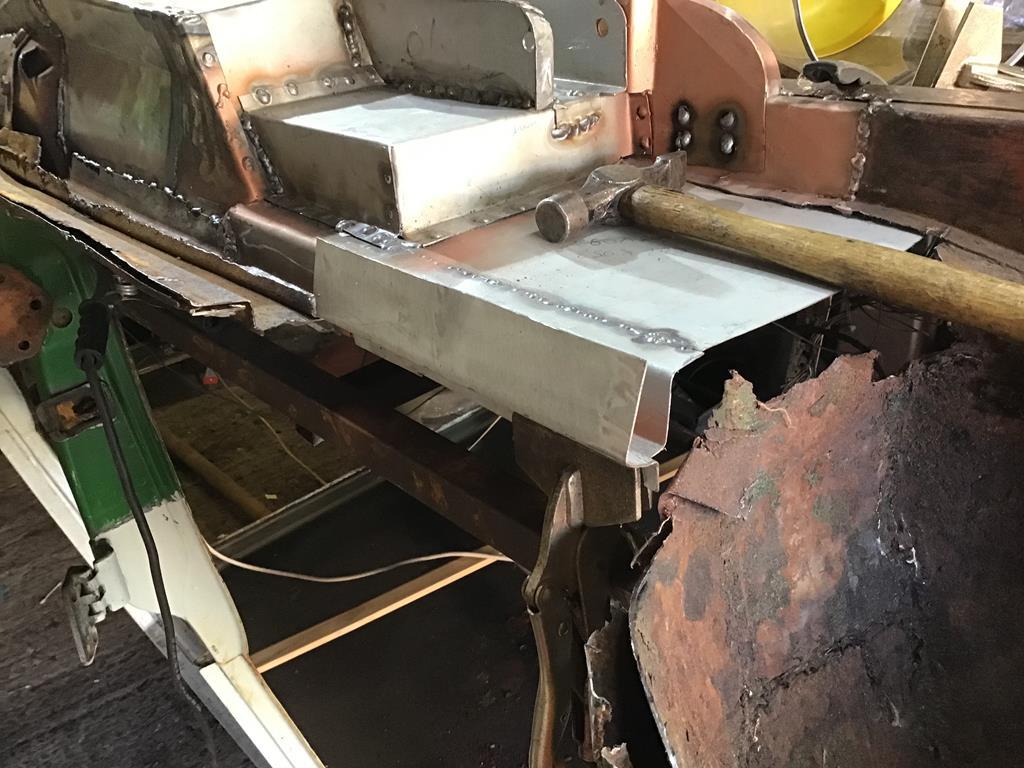
OK here’s what has gone on today, I finished the off side sill by bringing the outer, strengthener and inner sill together. I spot welded the outer to the strengthener and the inner to the strengthener. It looks ok and is strong. I may weld the three flanges together as a belt and braces job. I have started the near side sill now and have treated the inside with hydrate 80. I have trimmed the inner sill to fit better, spot and stitch welded it into place. I have applied seam sealer to the welds and edges. Tomorrow i hope to fit the doors on the near side and fit the strengthener and outer sill and try for a decent fit. We will see how that goes! Here are the pics from today, please feel free to comment/criticise, i can take it. To change the subject we have been self isolating for 8 weeks now and haven’t left the house as i am in the at risk group. I am self employed and haven’t been working during this period. I took the decision the other day to retire which will give me more time to play in the garage. I reallyhope to have ALL the structural welding done soon 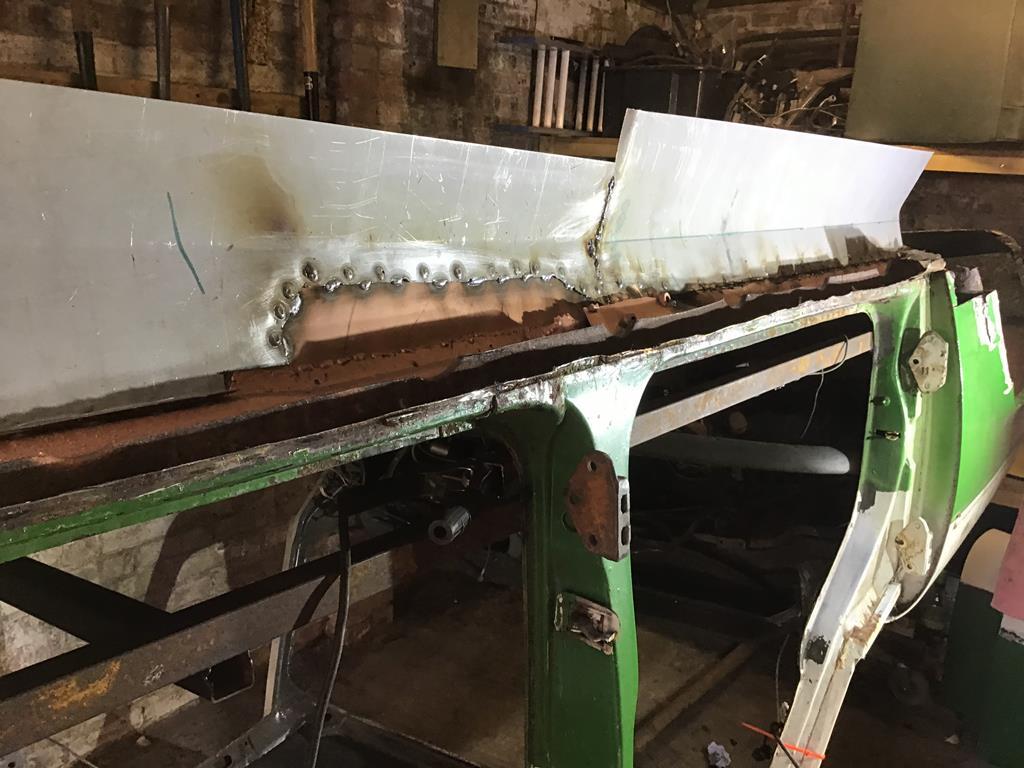 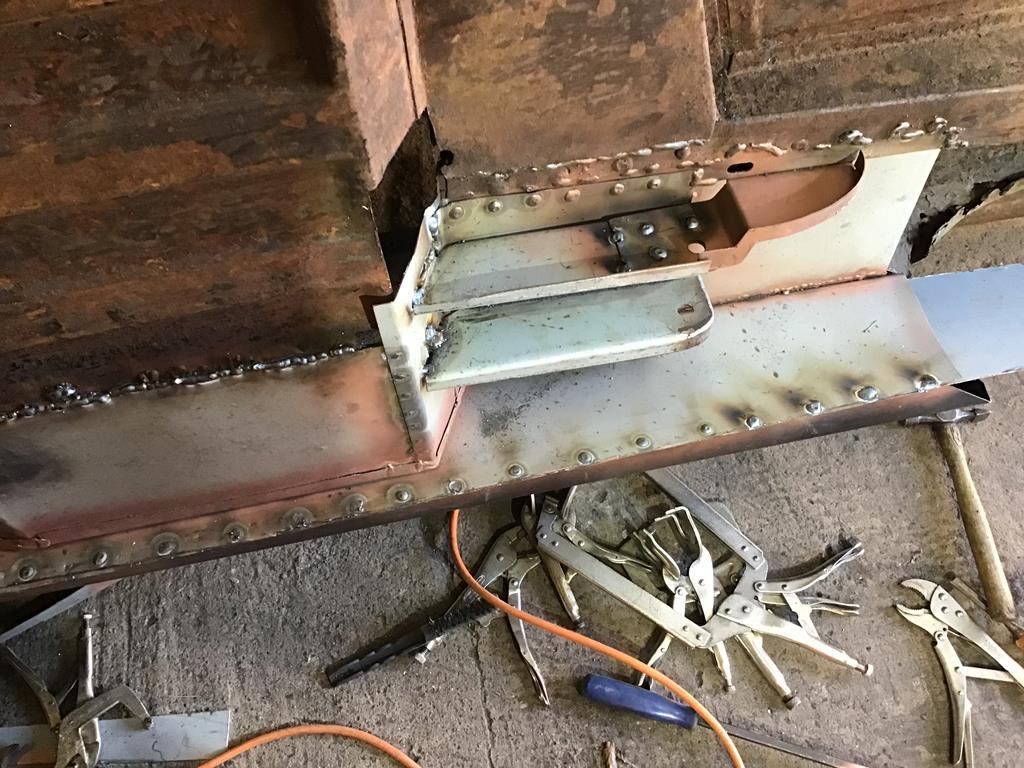 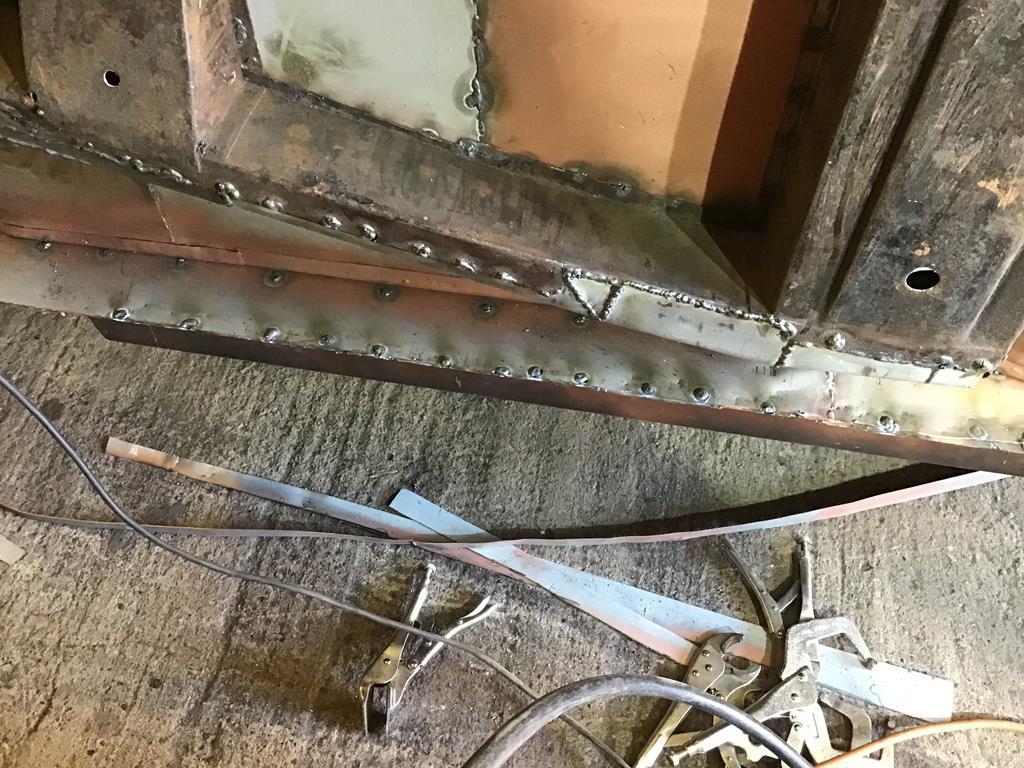 |
| |
|
|
|
|
|
May 27, 2020 17:57:34 GMT
|
|
Happy retirement
Looks like you won’t be getting bored for a while.
|
| |
1955 Austin A30
1981 Jawa Mustang
1990 Trabant 601 (Tommy)
1989 Trabant 601
2009 Jaguar XF
2012 Toyota AYGO
2018 Scomadi TL
|
|
|
|
glenanderson
Club Retro Rides Member
Posts: 4,353
Club RR Member Number: 64
Member is Online
|
|
May 27, 2020 19:51:59 GMT
|
|
Yes, congratulations on your retirement. 👍
|
| |
My worst worry about dying is my wife selling my stuff for what I told her it cost...
|
|
Norman
Part of things
 
Posts: 449 
|
|
May 28, 2020 18:15:09 GMT
|
Not a lot to report today, i fitted the Near side sill strengthener using my usual technique of spot and stitch welds. I then treated the area with hydrate 80, after that was dry i sprayed etch primer then seam sealer and more etch primer. I also repaired some small areas that needed attention. I gave up at that as the temperature in the workshop was horrendous, the sweat was dripping off me. Here are the pics although as i said not much. 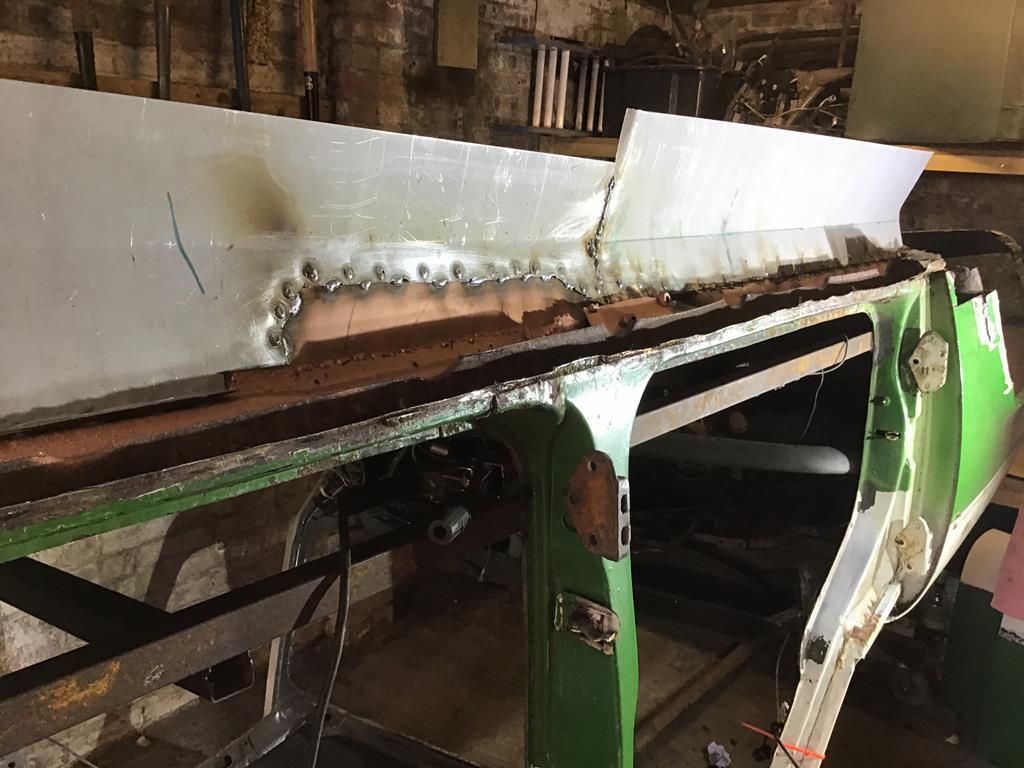 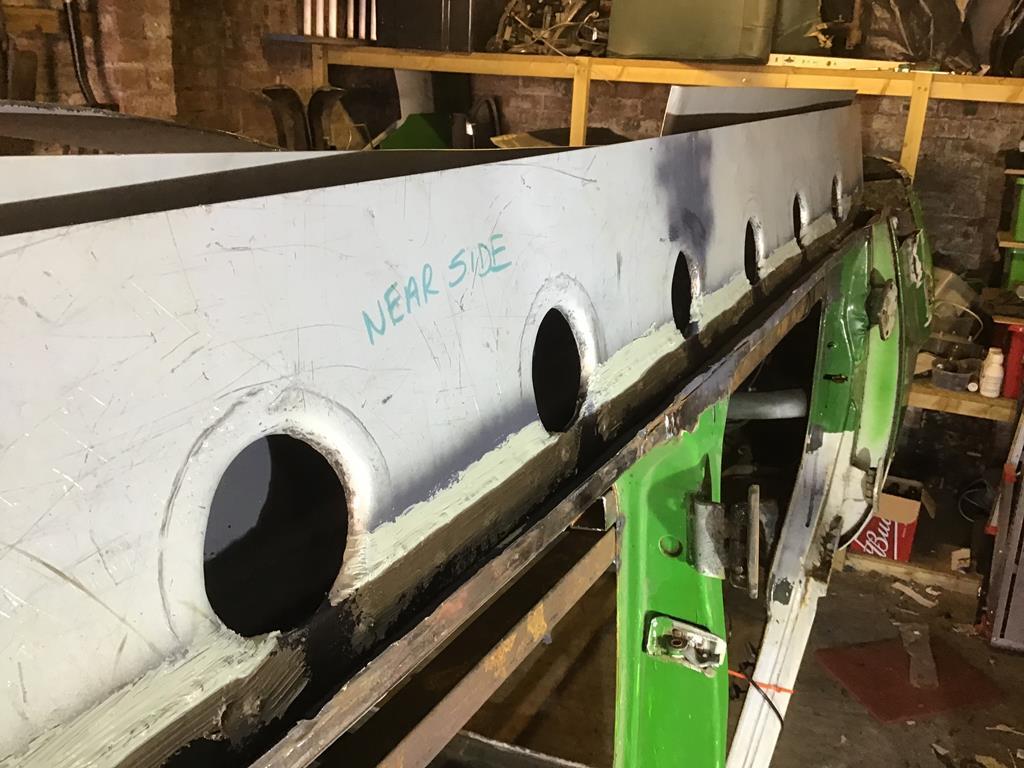 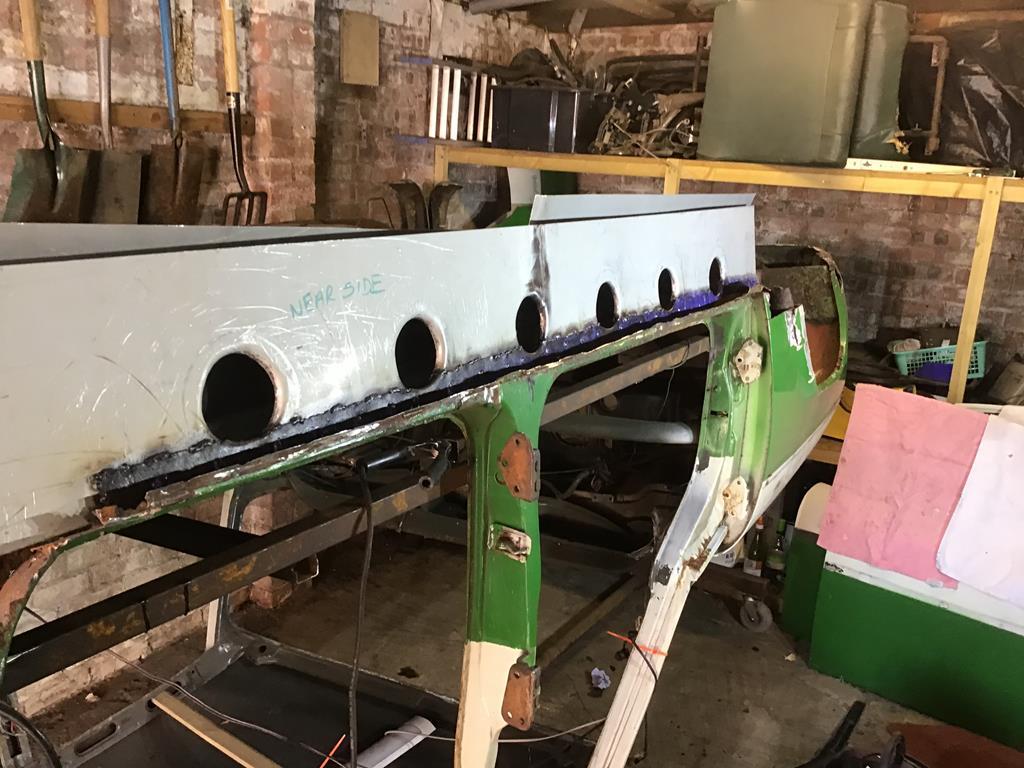 Please feel free to comment as usual, all the best, Norman |
| |
Last Edit: May 28, 2020 18:17:09 GMT by Norman
|
|
|
|
|
May 28, 2020 20:32:38 GMT
|
|
some bit of reconstructing like it
|
| |
|
|
Norman
Part of things
 
Posts: 449 
|
|
May 28, 2020 22:02:42 GMT
|
|
The problem I have is i have no idea what it’s supposed to be like. I am making it up as i go along. A mechanic and mot tester friend of mine said to me “just make it fit”. That’s what I am trying to do. Norman
|
| |
|
|
Norman
Part of things
 
Posts: 449 
|
|
|
|
Well at last i have both sills on, inner, outer and strengthener. I still have a few odds and ends to weld on the floor and sill ends. 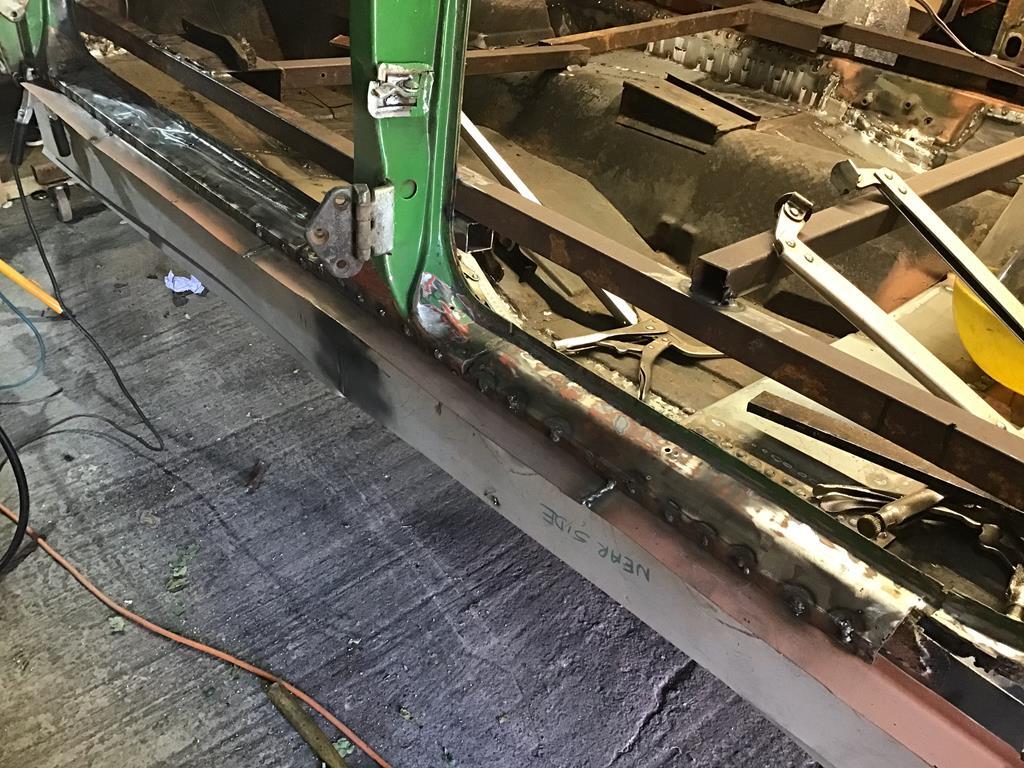 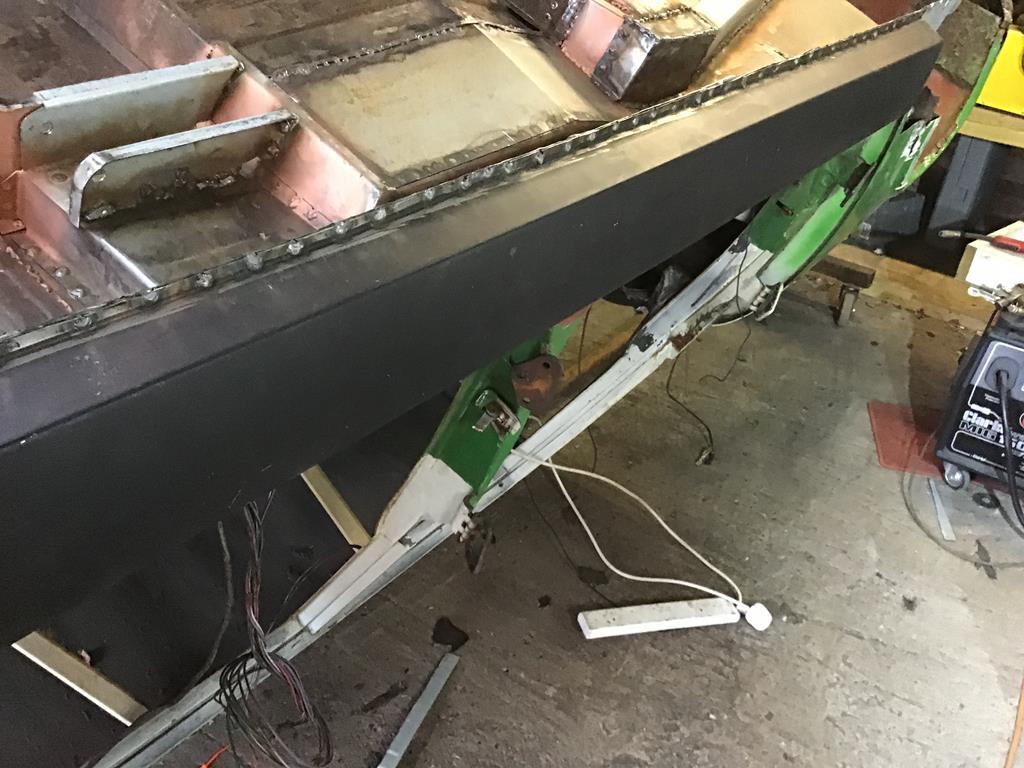 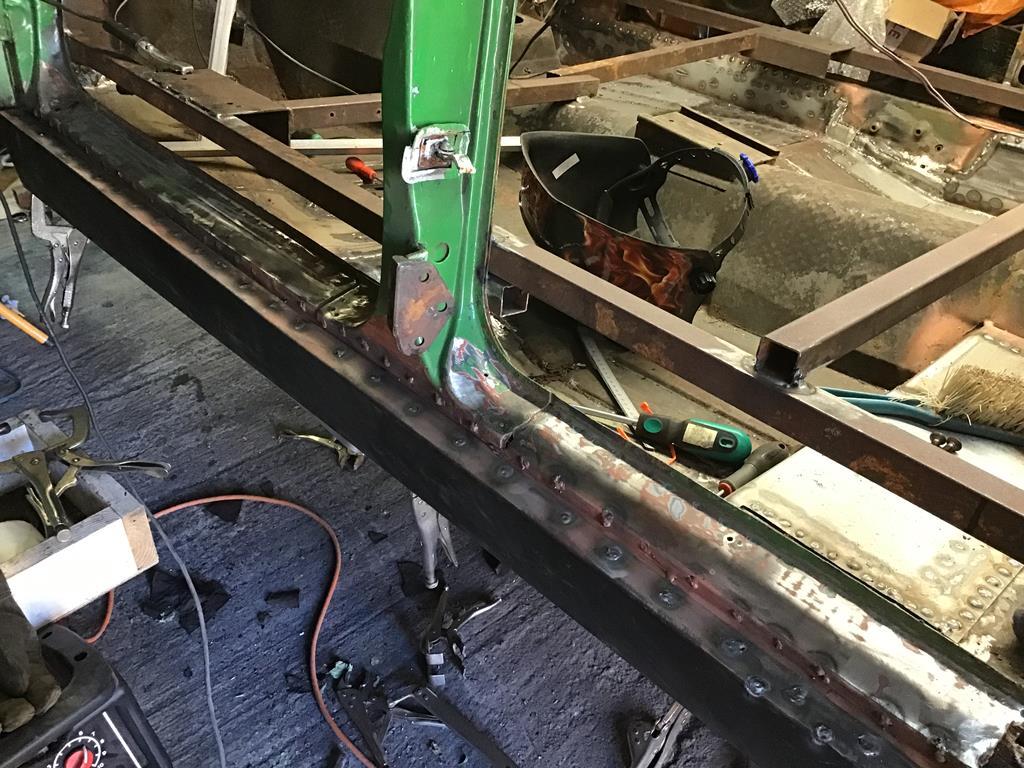 My youngest son paid a visit with my youngest grandson at the weekend. Social distancing was maintained as much as possible. My grandson saw the garage open when he arrived and he was straight in there playing with tools. He asked why i had colouring pens and i said it was to mark metal. He spotted a scratch on the paint and set about with a pen to fill it in. He said i should paint the green bits blue and paint the white bits white again!! I said we could pretend it’s a rally car and you can write your name on the side. He wrote his name on it and then drew a man with a helmet and put him in a car. He is only 51/2 so if you can’t read his name it’s Murray. Now the trick is not to let him draw on it when it’s done. 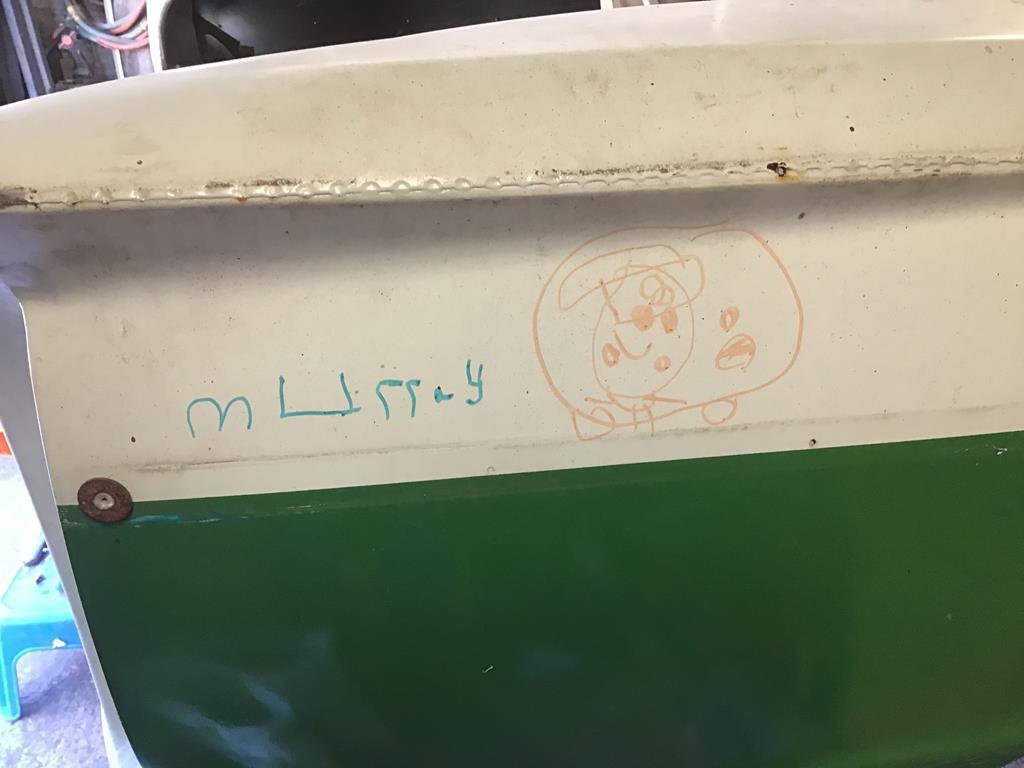 The next task is to tackle the rear chassis legs which are covered in body filler and underseal. Oh the joys of diy repairs. I fear i will need to chop a lot out before i can see what’s going on. Please feel free to comment. All the best, Norman |
| |
|
|
|
|
|
|
|
Cracking work as usual Norman. And congrats on your retirement  |
| |
|
|
|
|
|
|
|
So... When's the roll cage going in, then?  |
| |
|
|
Norman
Part of things
 
Posts: 449 
|
|
|
|
Today i made a start to the rear chassis legs, as usual full of rust and body filler. I thought i was going to just do some localised patching but they are rotten. I tried to find the spot welds to drill out but wasn’t having much luck. I found one then measured where i thought the next was but no, so try again. The spot weld spacing seems to vary between 20mm, 25mm and 30mm. Some are in the middle of the flanges others at the edge or right at the back of the flange. No robots here just put them anywhere you like. When i finally got them out it didn’t want to let go, some hammer and chisel work saw it off. I decided to make the legs from 1.5mm zintec but don’t have enough. The reason i wanted 1.5mm is that at the rear of the chassis leg is the jacking point which is a piece of box section welded in. I have ordered more metal today so i will move onto tidying all the little bits i have left along the way. Here are the pics from today. 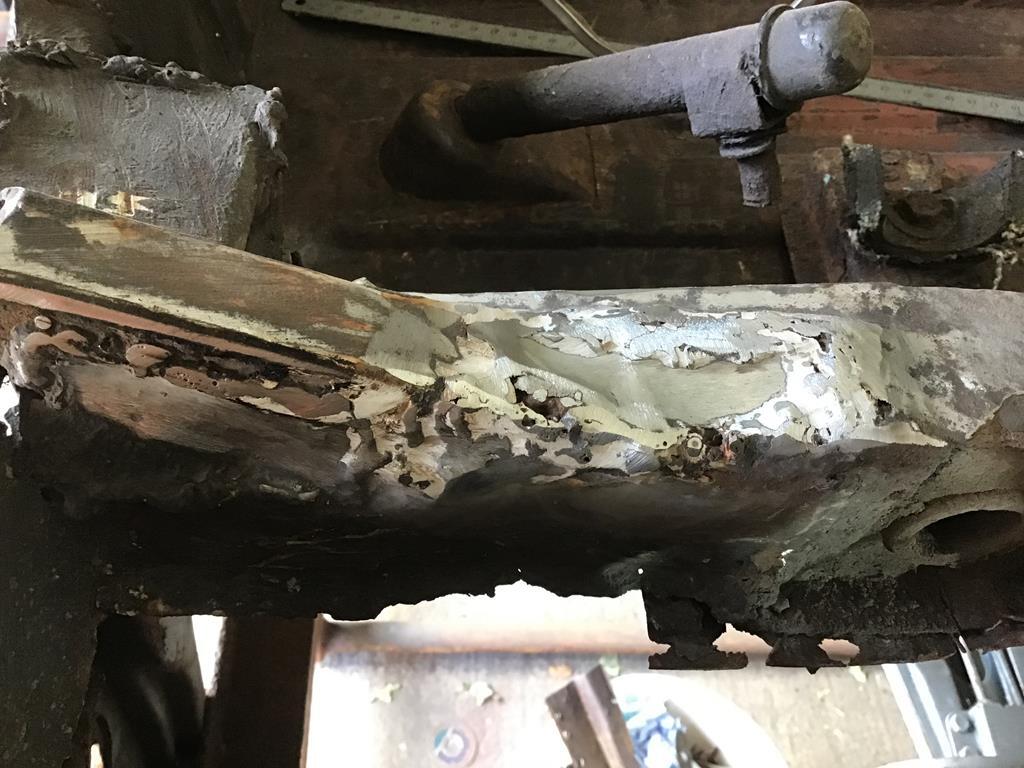 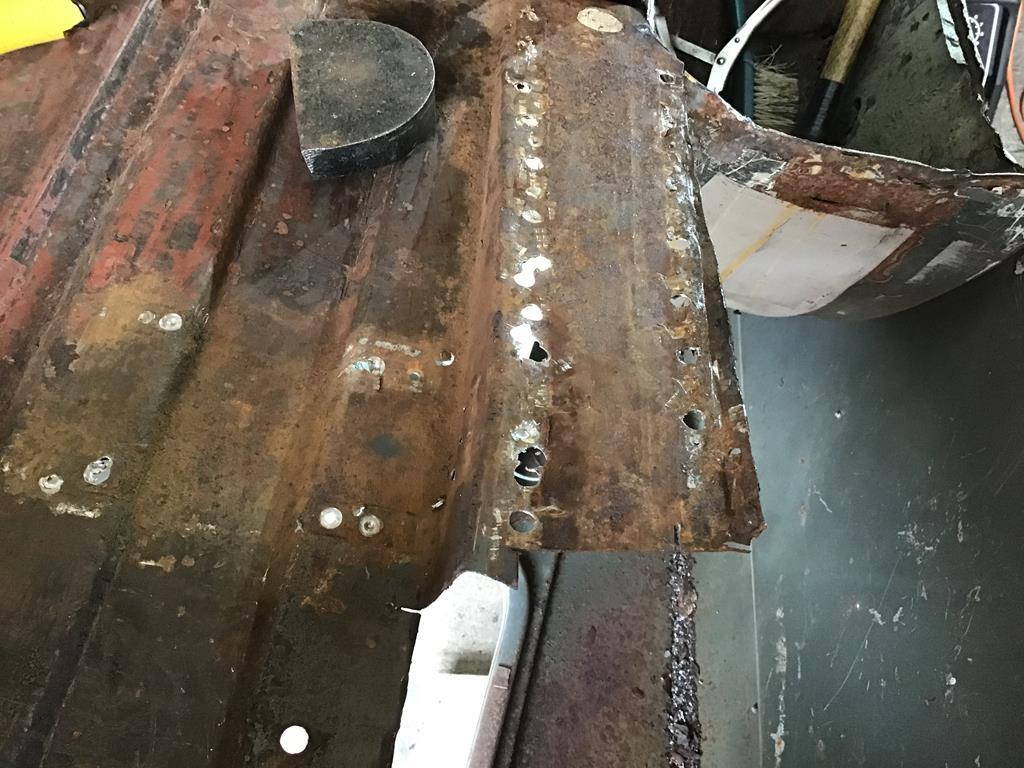 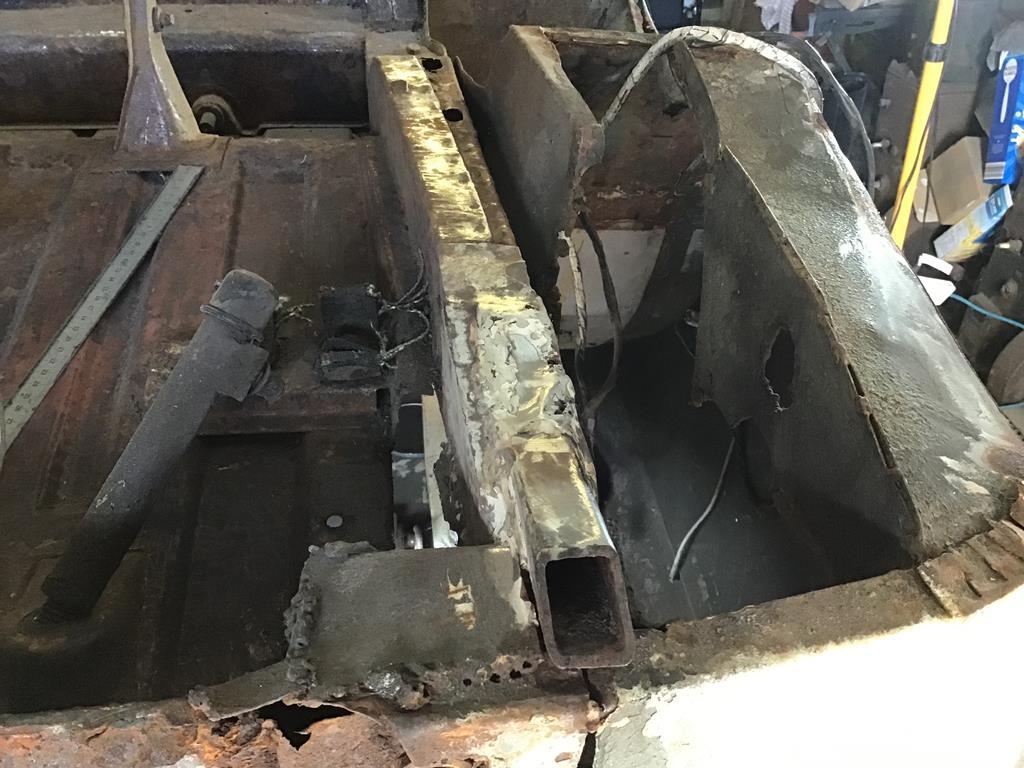 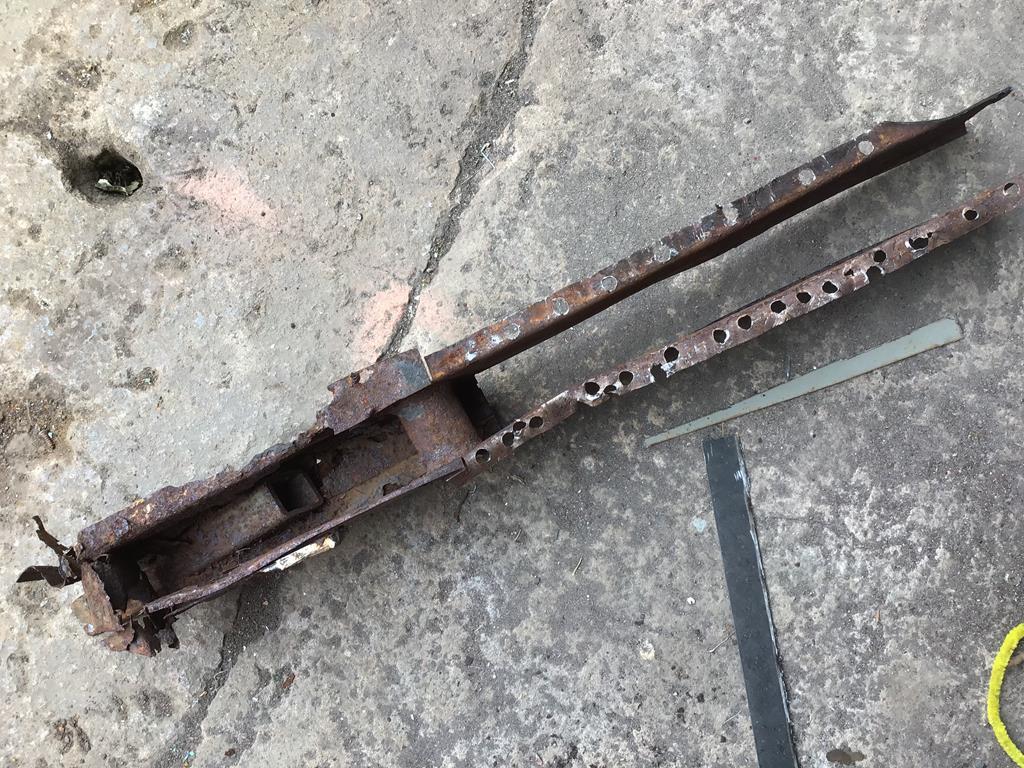 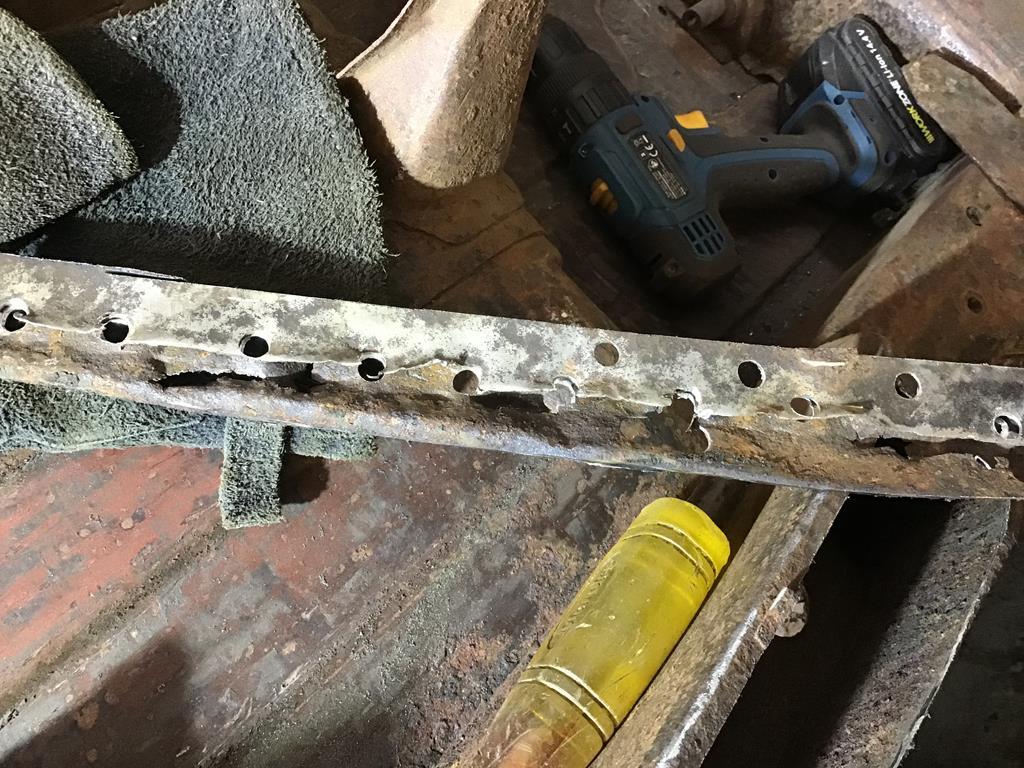 As you can see the chassis legs are totally rotten and need replaced. I have plenty of other bits to attend to that will keep me amused. As usual feel free to comment, advise etc. All the best for now, Norman |
| |
Last Edit: Jun 3, 2020 18:50:11 GMT by Norman
|
|
|
|
|
|
|
|
I can relate to trying to find the spot welds. It’s almost impossible on my Austin. And completely randomly placed. I just end up using a old chisel and a hammer. And carefully go along the seems finding them, and then try and drill them out.
|
| |
1955 Austin A30
1981 Jawa Mustang
1990 Trabant 601 (Tommy)
1989 Trabant 601
2009 Jaguar XF
2012 Toyota AYGO
2018 Scomadi TL
|
|
Norman
Part of things
 
Posts: 449 
|
|
|
|
Today i tidied some of the welds on the floors etc. I have both ends of two cross members to tie in, i managed to get one side done today. Here are the pics of today’s progress. 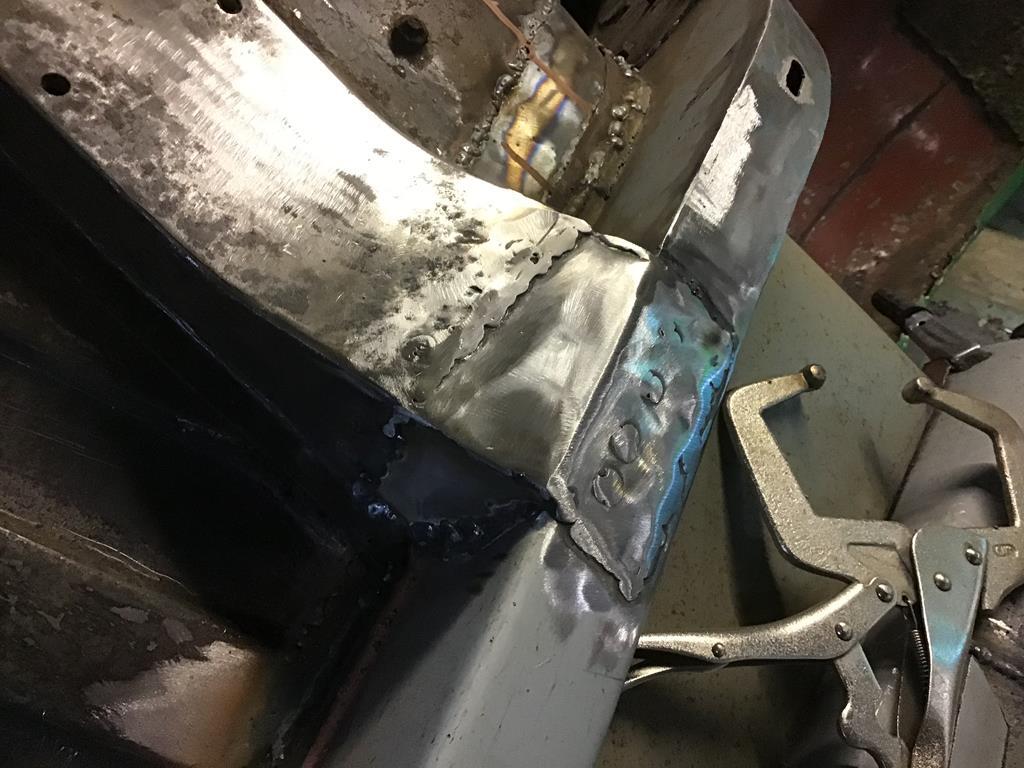 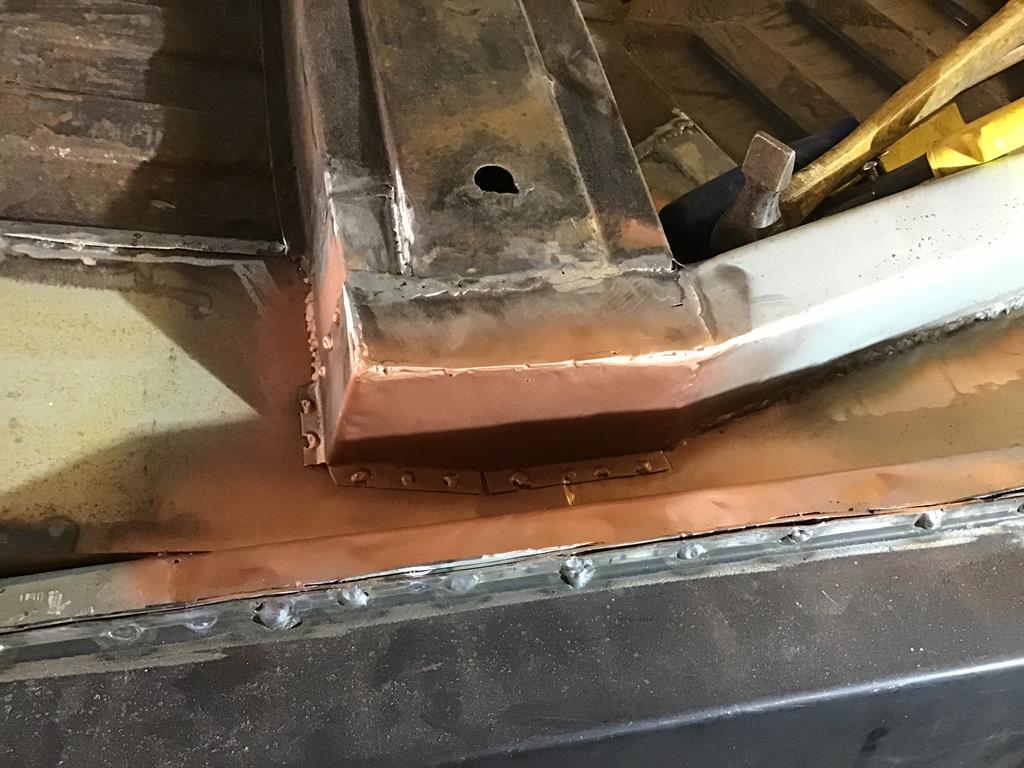 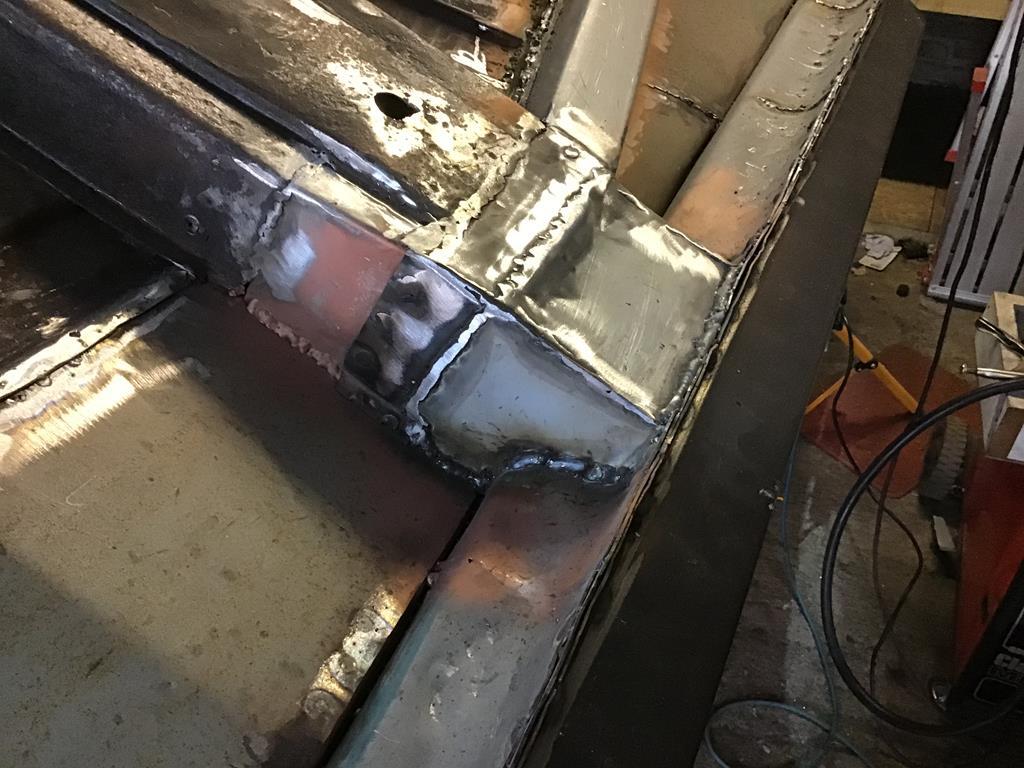 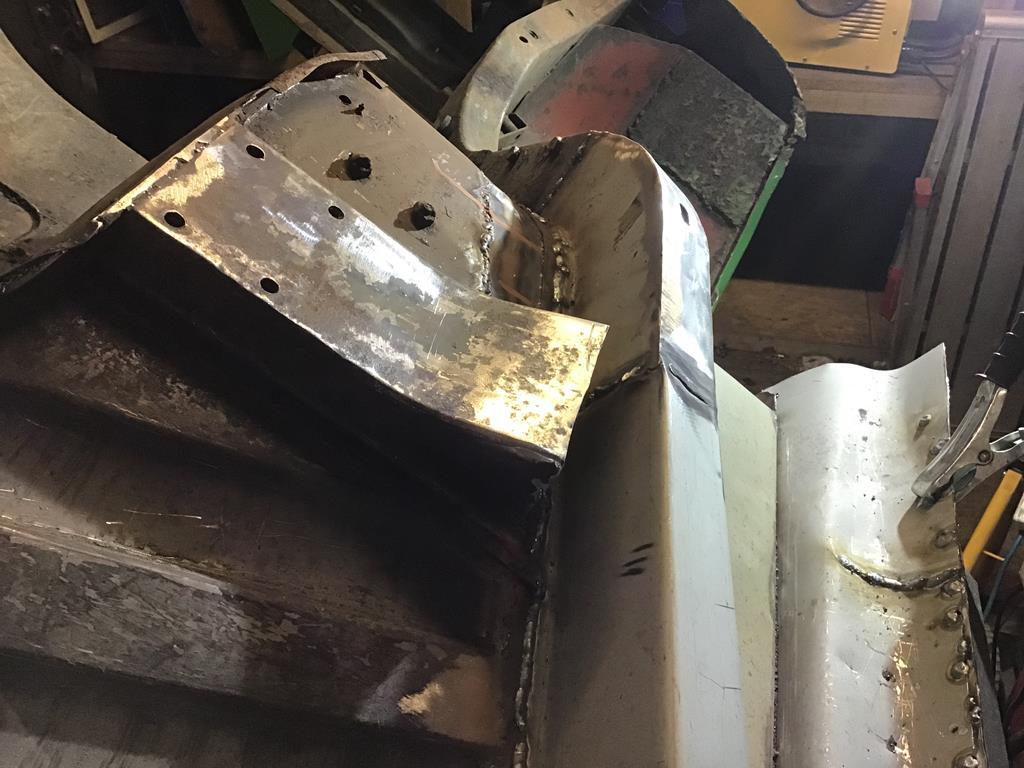 I think i need to work on my grinding technique as i keep taking too much surrounding metal away. I was going to try some of those strip discs today only to find the ones i bought have too small a hole in them to fit my grinder. My grinder is 125 mm and the discs i bought i think are 115mm. Hey ho another costly mistake. I can either buy a smaller grinder or sell these and get the correct ones this time. Tomorrow i will do the other side and hopefully some other little bits while await delivery os some more metal. Please feel free to comment or advise on grinding techniques etc. All the best, Norman |
| |
Last Edit: Jun 4, 2020 18:08:20 GMT by Norman
|
|
|
|


