|
|
|
Jun 14, 2023 18:09:47 GMT
|
|
Stop sanding, and start painting!
A couple of coats of 2k hi-build primer applied with a roller - Lechler Green TI is what I use. Block it with 240grit, and reassess the finish.
|
| |
|
|
|
|
pptom
Part of things
 
Posts: 475 
|
|
Jun 14, 2023 19:07:00 GMT
|
|
Agree with nick wheeler on paint and method
Guidecoat after the high build.
I've used 3M guidecoat Norman. It's a powder which you apply with a sponge, bit like powder puff makeup apparently 🙄, not the cheapest, but I like it, doesn't clog sandpaper and is very inert.
Actually, just checked the price and it seems to have gone up even more, pretty sure other manufacturers do their versions of it.
'dry guidecoat'
|
| |
Last Edit: Jun 14, 2023 19:09:15 GMT by pptom
|
|
pptom
Part of things
 
Posts: 475 
|
|
Jun 14, 2023 19:20:02 GMT
|
|
Norman, I've just remembered, last year I got sent 2 lots of Green Ti instead of 1 by mistake. I contacted the seller and they weren't interested in me sending the extra one back, so it's still in my shed unopened.
I'm not going to paint any more cars and I can think of no better place for it to go than on your Singer.
If you want it, send me a message with your address and I'll get it couriered.
|
| |
|
|
Norman
Part of things
 
Posts: 449 
|
|
Jun 14, 2023 20:01:23 GMT
|
|
Hi Guys, Thanks for the advice, pptom that’s a very generous offer and I have messaged you. I love this forum, so many giving up their time, experience and knowledge to help others. I am truly humbled, thanks again, Norman
|
| |
|
|
|
|
|
Jun 14, 2023 20:18:26 GMT
|
|
I would seal it with a coat of epoxy primer before moving to high build, when you flat the high build back stop when the epoxy starts to show.
|
| |
|
|
|
|
|
Jun 14, 2023 22:08:18 GMT
|
|
I would seal the car with epoxy before any filler personally.
Then fill, and then epoxy on top of the filler.
High build after that if you are happy with the shape/finish. Flat the high build and then colour.
I would not put any high build on until you are happy with the shape/finish as it will absorb moisture (epoxy won't).
I usually flat the epoxy with 240/320 grit dry paper. I might use a bit of 400 to finish prior to topcoat/high build.
|
| |
|
|
Norman
Part of things
 
Posts: 449 
|
|
|
|
|
Hi Mark, I did seal the car with epoxy before filler as you had previously suggested, I have rubbed it through in a few areas. I will stick another coat of epoxy on it and see where I go from there. Thanks to everyone for the advice, Norman
|
| |
|
|
jmotor
Part of things
 
Posts: 54
|
|
|
|
|
Happy to see you've made it this far with the car.
Impressed with how it's coming along.
BTW, wanted to thank you for the link you posted about those 1mm cutting discs a while back. It's the only ones I use now and waaaay cheaper than last lot I had.
|
| |
|
|
Norman
Part of things
 
Posts: 449 
|
|
Jun 29, 2023 17:37:31 GMT
|
Hi guys, Just incase you think I have run off, here is a small update. My sons came to give me a lift with the doors to fix them to the shell, they are very heavy. This is where everything started to go wrong, the doors don’t fit in the holes anymore. Not just one but all of them. We had a think about what could have moved during welding but couldn’t decide on anything. The shell was braced across the door openings and between the two sides. The front doors foul the front wings and the back edge of the doors foul the B posts. The rear doors foul the front doors and the rear edge of the rear doors foul the C posts. We did get it better by heating the front door hinges and knocking ten bells out of them to shift them forward slightly. I had to trim a bit of the rear edge of the front wing to stop the fouling. The rear hinges I couldn’t get to bend so they were cut and repositioned. I them had to trim a bit of the body at the C post. I have to say I was for giving up and scrapping the car I was so sick off it. My sons said to give up for the night and have some beer which was a good idea. The next day I started to tidy up some of the work we had done so have some progress again. I don’t have pictures of this but will take some tomorrow. The next thing I have to look at are the doors themselves. I knew they were needing repaired, some bits were worse than I thought others were better. Here are a few pictures of the doors. 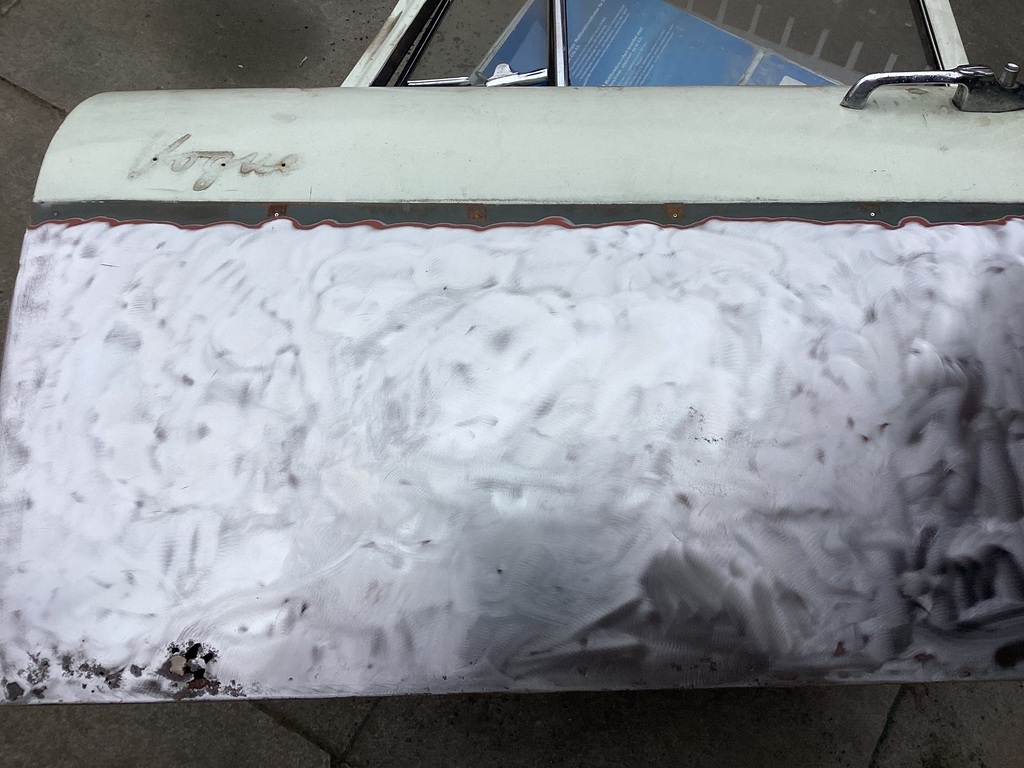 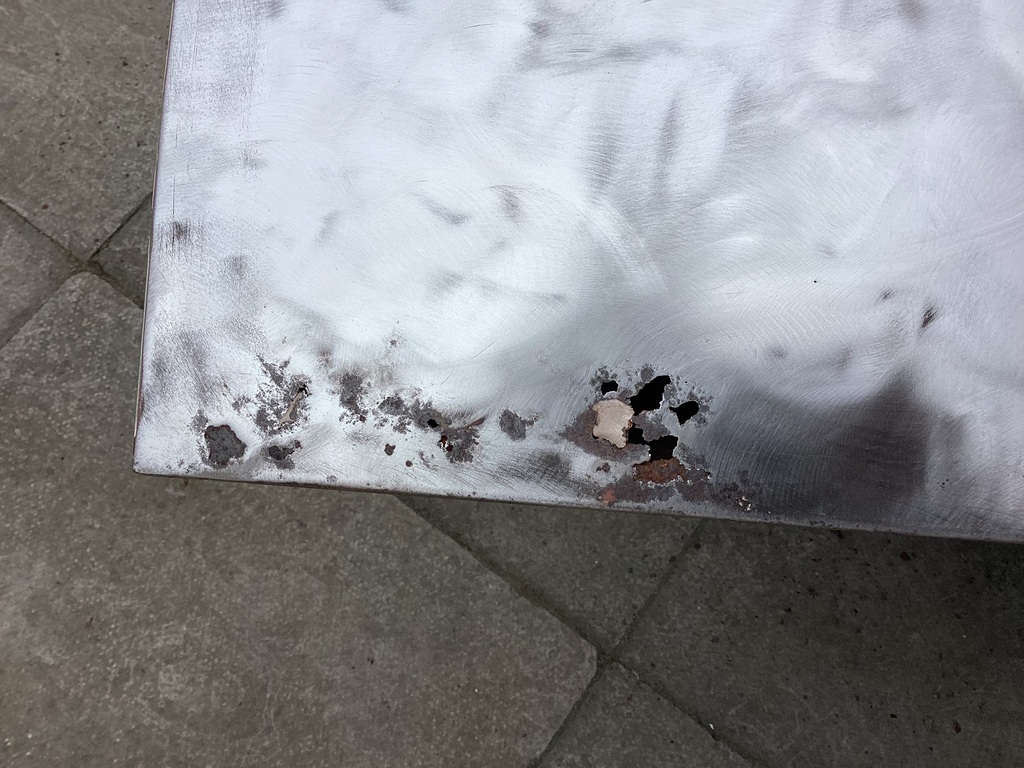 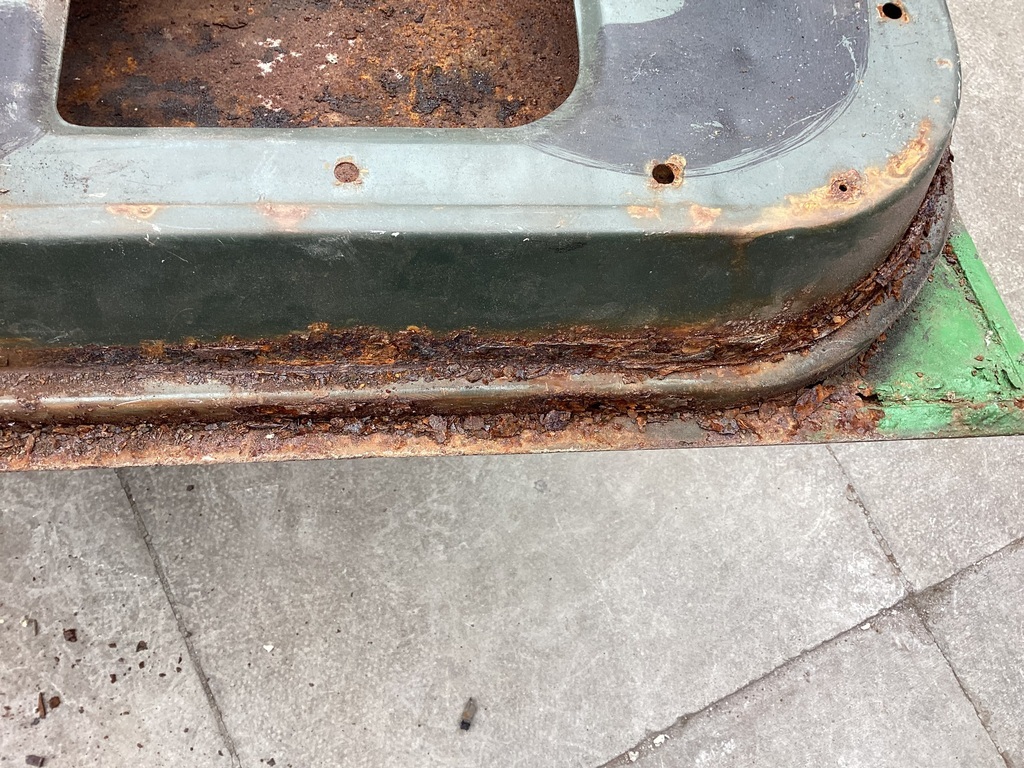 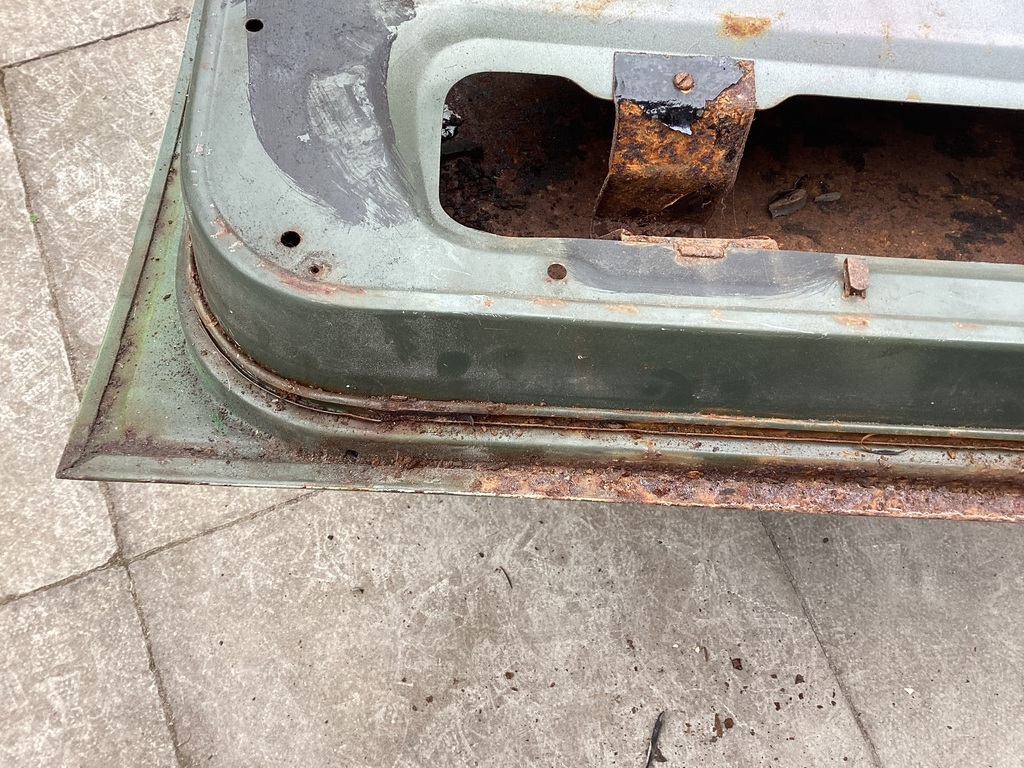 These pictures are the inside of the door, jeeeezus. 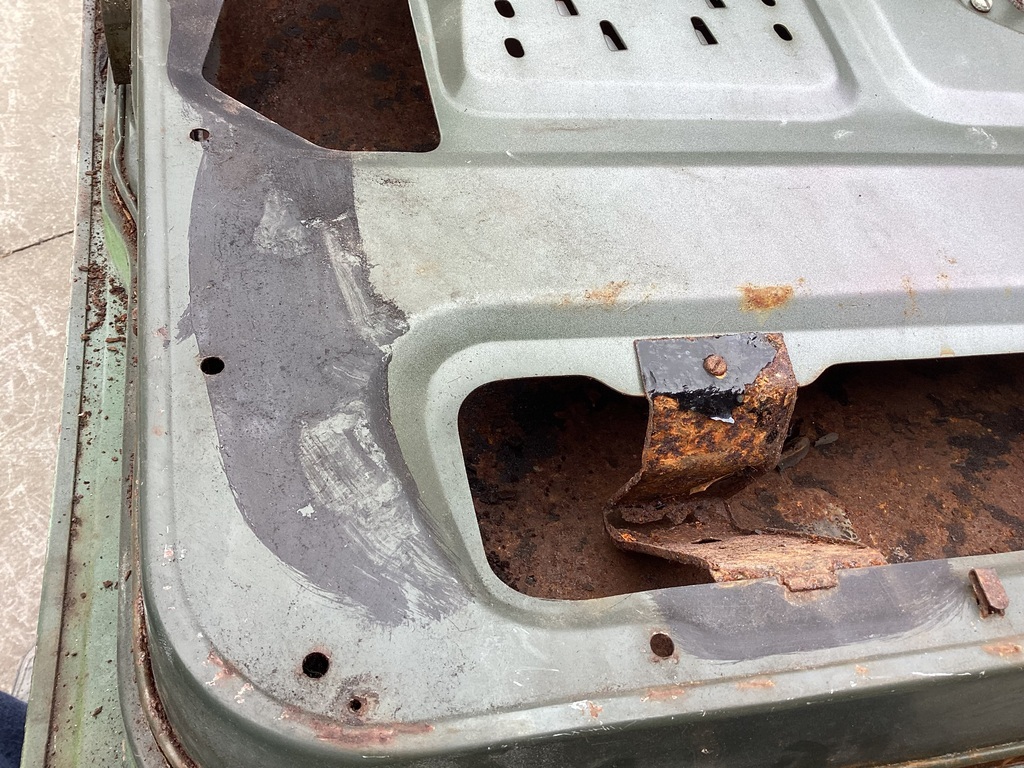 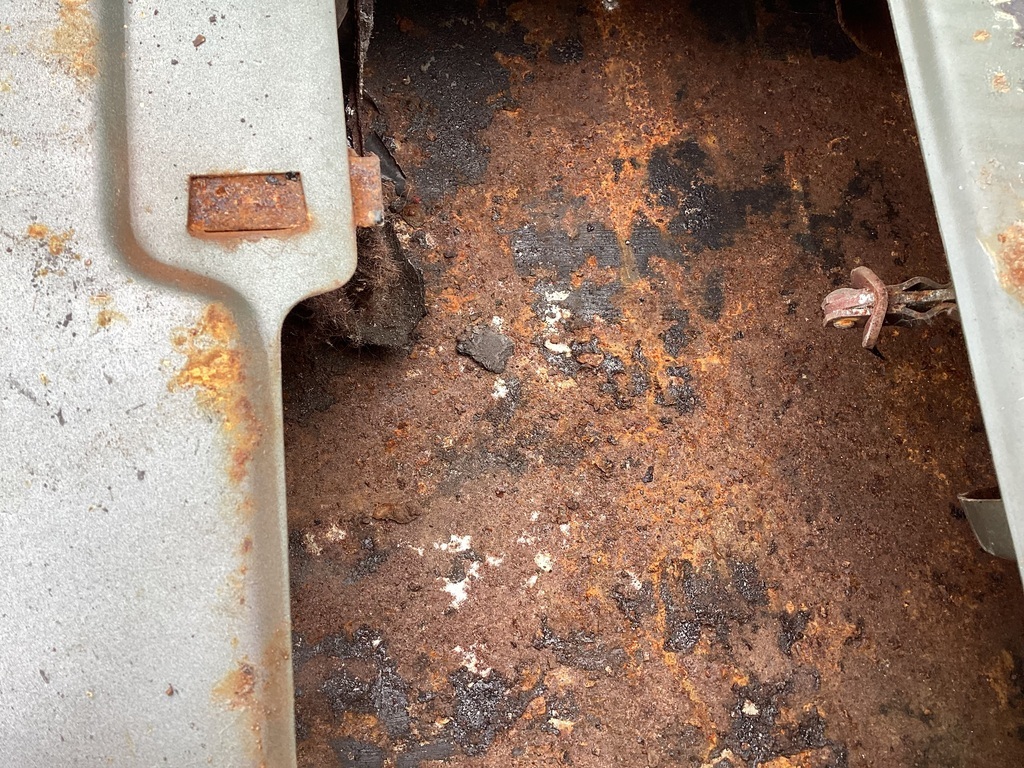 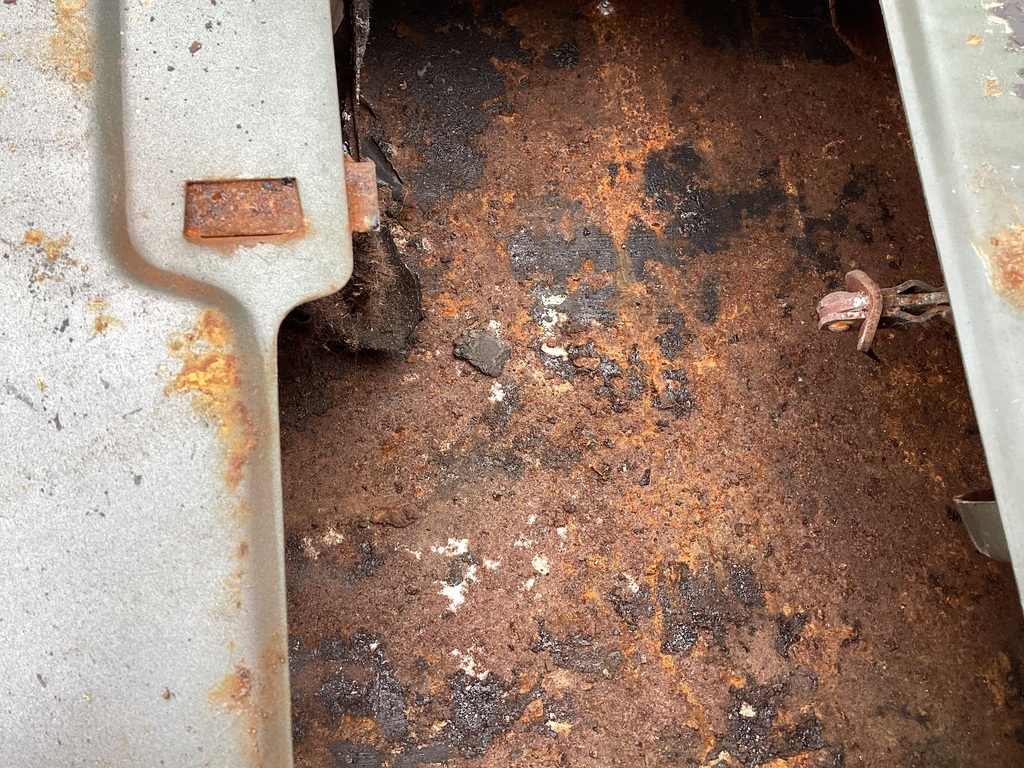 I must admit I have been jumping around the car refurbishing other parts in preparation for going back on the door. It all has to get done. We have been stripping the front crossmember removing the hubs and springs etc. I think a teabag has less holes in it than this crossmember. I am trying to clean off the rust to establish what needs plating. I have also been sorting through the various boxes of parts trying to establish what I need. I came to the conclusion that there must be lots of death trap classic cars on the road, now MOT exempt, what a mistake that is. Well that’s it for now, thanks for reading if you have made it this far. All the best, Norman |
| |
Last Edit: Jun 29, 2023 17:43:39 GMT by Norman
|
|
|
|
|
Jun 29, 2023 18:07:27 GMT
|
Those door pictures take me back to my Superminx, and not in a good way. The doors are straightforward to repair, but the tricky bit of the job is the channel that holds the door seal. Have a pic: 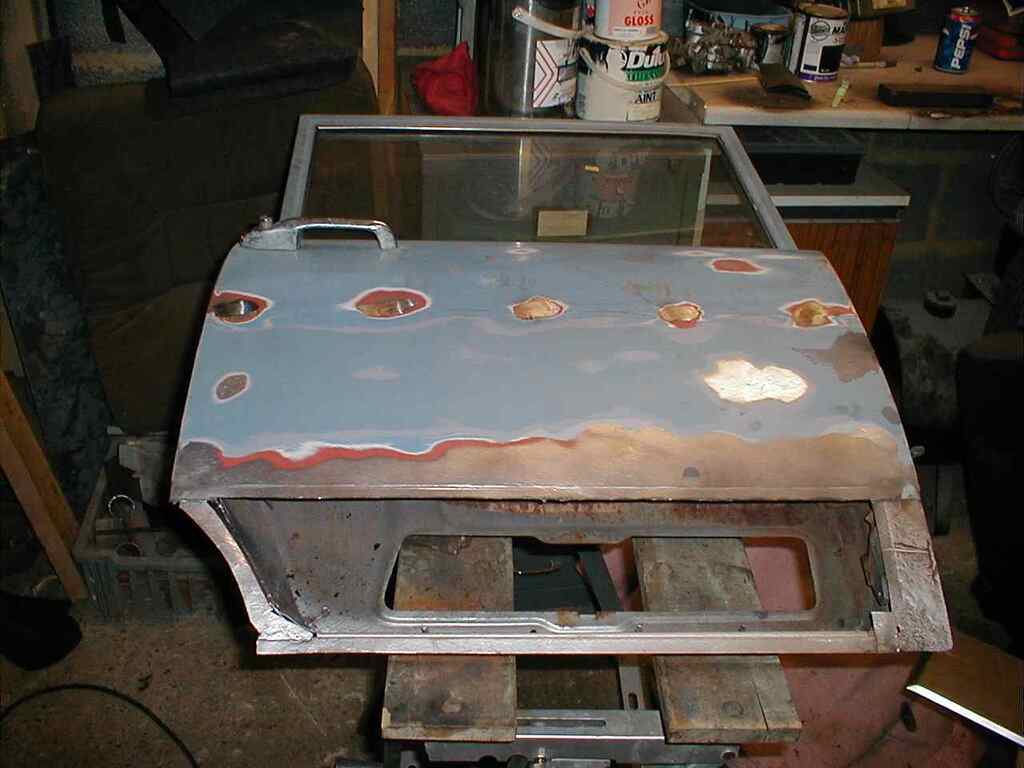 MOT exemption was always a terrible idea. |
| |
|
|
|
|
|
|
|
Jun 29, 2023 18:28:39 GMT
|
|
I think it’s inevitable when you do this amount of work to a car, that it’s going to move. If you watch programs on YouTube they usually have the car on a jig so it stays in shape. Far beyond what us mere mortals can afford.
If you have the car on a rotisserie I would put it back on its wheels - or axle stands under the suspension pick up points, before you finalise any panel gaps. You’d be surprised how much cars bend on the rotisserie.
Regardless, if the gaps have closed, your more than capable of sorting them.
|
| |
|
|
Darkspeed
Club Retro Rides Member
Posts: 4,879
Club RR Member Number: 39
|
|
Jun 29, 2023 19:16:55 GMT
|
|
It would be near impossible to brace a car that was so structurally unsound to start with, without extensive and well triangulated reinforcement - Almost building a spaceframe within the shell (or a pro chassis alignment jig)- and that is assuming that the door gaps were good to start with and not being held by the locks and hinges as they are with most cars with extensive corrosion to the sills - Your bracing was always going to be up against it.
I hope that does not sound disparaging as it is not meant to be - I have seen a professional in the past do just the same and then blame all in sundry as to why things are out of alignment and no longer fit resulting to using porta power to try and push and pull the shell back into shape. Trouble is that once welded in its not really going to move again.
Let us do some maths.
The two doors are probably 1800mm long combined and the gaps say 3mm and you have 3 of them - some gaps are a mere 1mm and others can be 6mm so the combined average is say 10-12mm for reasonably large gaps.
12mm / 1800mm = 0.006 so a tolerance of 0.7% ! - So you were trying to stop a structural change of a little more than half of 1% longitudinally ! Do not beat yourself up. A tolerance of +- 2mm over 1800 is 0.11%
When 75% up the mountain turning back because a section of the final 25 just got a little steeper just needs another bought of digging deep before for the summit - I am sure its in you. - Yep easy for me to say.
Failing to maintain a 0.4-0.6% tolerance is absolutely no failure. Keep the faith.
|
| |
|
|
Norman
Part of things
 
Posts: 449 
|
|
Jun 29, 2023 19:48:42 GMT
|
|
Thanks for the encouragement and explanations. The front doors had to be moved forward by about 6mm and the rears by about the same. I am working toward rebuilding/repairing the front crossmember and the rear springs and axle to put it back on its feet before finalising the gaps. I must admit I was so disheartened when the doors wouldn’t go back on. Onwards and upwards every little bit done is a step closer to the end.
|
| |
|
|
|
|
|
Jun 29, 2023 20:16:19 GMT
|
|
|
| |
|
|
Norman
Part of things
 
Posts: 449 
|
|
Jun 29, 2023 21:12:53 GMT
|
|
That’s worth a look, I was going to remove it all and fit some kind of sealer strip, my son (the joiner) says you get some self stick window stuff that would work.
|
| |
|
|
|
|
|
Jun 29, 2023 21:31:37 GMT
|
|
A pain but far from insurmountable, I was watching the Retropower escort build the other week and they were having to cut and weld hinges to get a good fit. The usual way is to start with the back door, then the front, then the wings.
On our minor I had to take a slit out of the rear Quarter to get half decent door gaps.(if I lined the door up with the quarter the front hit the A pillar).
You son is right when it gets frustrating take a break, you will get there in the end.
|
| |
|
|
|
|
|
|
|
|
Don't give up Norman, I found my doors did not fit after finishing painting the car. Drivers one fitted with a bit of hinge heating and bending and a bit of the front corner trimming off.
Passenger door needed 3mm taking off the whole front edge, it took me two months to pluck up the motivation to slice it off and weld it all back up again. Then of course I had to sand the door back and paint the door all over again.
Very disheartening! As others have said, get it stood on stands on the suspension points before doing final fitting.
|
| |
|
|
|
|
|
|
|
Hi Norman, For some reason, once again, I've missed at least the last three updates you've posted?? My bookmarked threads alert doesn't seem to be very reliable lately, as it's been happening with other threads. Anyway, wow....progress was going well until the kick in the nuts! But Norman......I can only repeat what blackpopracing and others have said. Honestly, I'd say that every project has this kind of 'major' set back at some point. I had a few issues with the passenger side door shut ( amongst other things ) on the truck. It took a lot of time and patience to sort it.....but I got there in the end. It really only takes something to be a few millimetres out, to then throw, lets say the door, off by what seems a long way. Please don't let this situation make you decide to give up. Try not to see it as a set back, but see it as just 'par of the course'. It probably won't be easy, but you'll get there in the end. Dan |
| |
Opel Commodore A Coupe
Opel Rekord C Coupe
Opel Rekord C Saloon
Vauxhall Magnum Coupe V8 (Magnumania)
Mk1 Scirocco GLS
Mk1 Scirocco GLS (early chrome bumper)
Corrado G60
Mk1 Cortina 2 door Pre Airflow
Mk2 Escort 1300 2 Door
VW LT35 Tipper Truck
BMW 320D E91 Tourer
|
|
|
|
|
|
|
|
The panel tolerances on my car from the factory are about a quarter inch.
That's them putting it together on a jig.
Tweak the gaps, that's well within what they managed to achieve when they spot welded it together.
There was plenty of post production adjustment before the shells went to paint. Fret not, you've made it strong.
Phil
|
| |
|
|
|
|
|
|
|
|
As others have said, don't give up. Projects do tend to turn round and bite you at some point.
I've just had to pull the engine back out of wifeys Pop project due to an oil leak from the rear crank end area. That was just turning it over! Total pain and I still don't know if it's sorted.
|
| |
Proton Jumbuck-deceased :-(
2005 Kia Sorento the parts hauling heap
V8 Humber Hawk
1948 Standard12 pickup SOLD
1953 Pop build (wifey's BIVA build).
|
|
|
|


