glenanderson
Club Retro Rides Member
Posts: 4,353
Club RR Member Number: 64
|
|
Apr 21, 2020 10:00:09 GMT
|
Is this a standard Land Rover part? I've looked everywhere for a 3-way fitting with a 4th brake light switch port. Is the switch port 1/8 npt or Unf like the brake fittings? Enbloc Threads are the same on all ports. I have a spare 5 way you can have if its any good. Just put a blank or a bleed nipple in the 5th port. Yes, it’s a standard fitting. They’re getting a bit hard to find, but I have several here if you want one, including that one I’ve just taken off. On the Land-Rover, the brake switch port is definitely a different thread form. Still 3/8” (ish), but flat bottomed as opposed to the other ports having raised conical seats to seal the brake pipes. There’s a 4-way version that I have one of, but I’m pretty sure it’s got 3/8” UNF brake fitting ports all around. Give me a bit and I’ll dig them out and post you some pictures. |
| |
My worst worry about dying is my wife selling my stuff for what I told her it cost...
|
|
|
|
jamesd1972
Club Retro Rides Member
Posts: 2,921  Club RR Member Number: 40
|
|
Apr 21, 2020 10:10:09 GMT
|
|
|
| |
|
|
glenanderson
Club Retro Rides Member
Posts: 4,353
Club RR Member Number: 64
|
|
Apr 21, 2020 10:22:37 GMT
|
The five port one appears to be 4 x 3/8” UNF and 1 x 1/8” NPT. The four port one is al 3/8” UNF.    |
| |
My worst worry about dying is my wife selling my stuff for what I told her it cost...
|
|
jamesd1972
Club Retro Rides Member
Posts: 2,921  Club RR Member Number: 40
|
|
Apr 21, 2020 10:28:10 GMT
|
Glen, I'm blaming you for how this escalated ! So I'll share here if thats OK ? So a defender tdi donated its throttle pedal but the bulkhead has different angles... 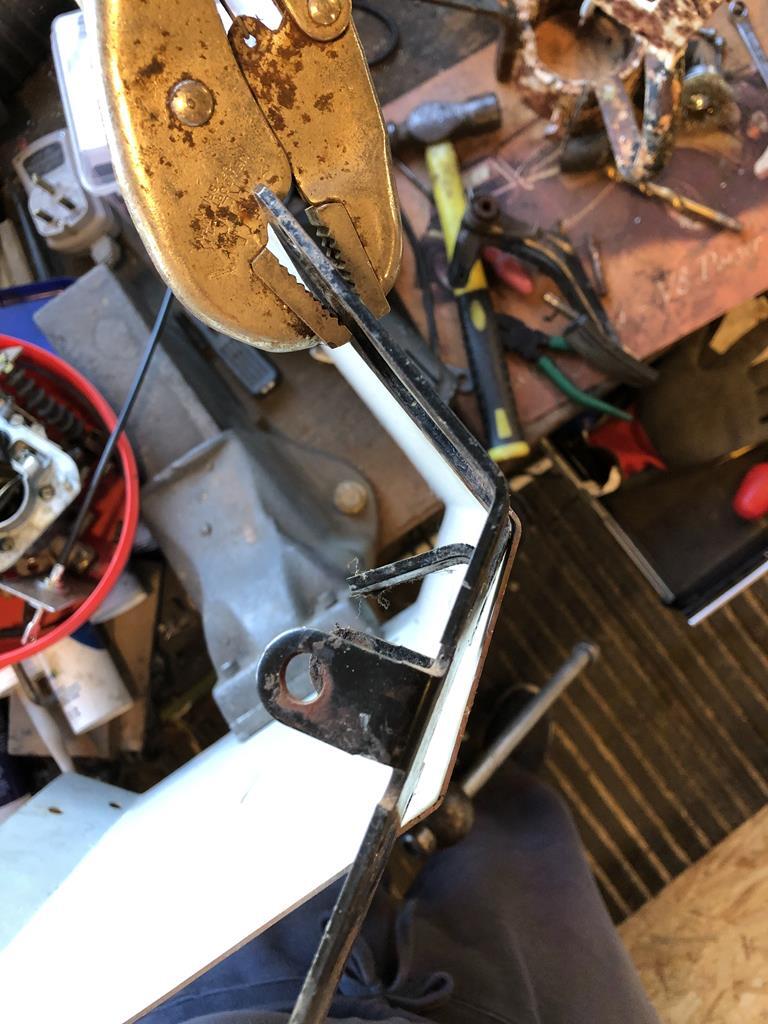 Bumhats. This also meant that the defender pedal lost too much travel and because Glen had planted an evil seed it looked out of place anyway. 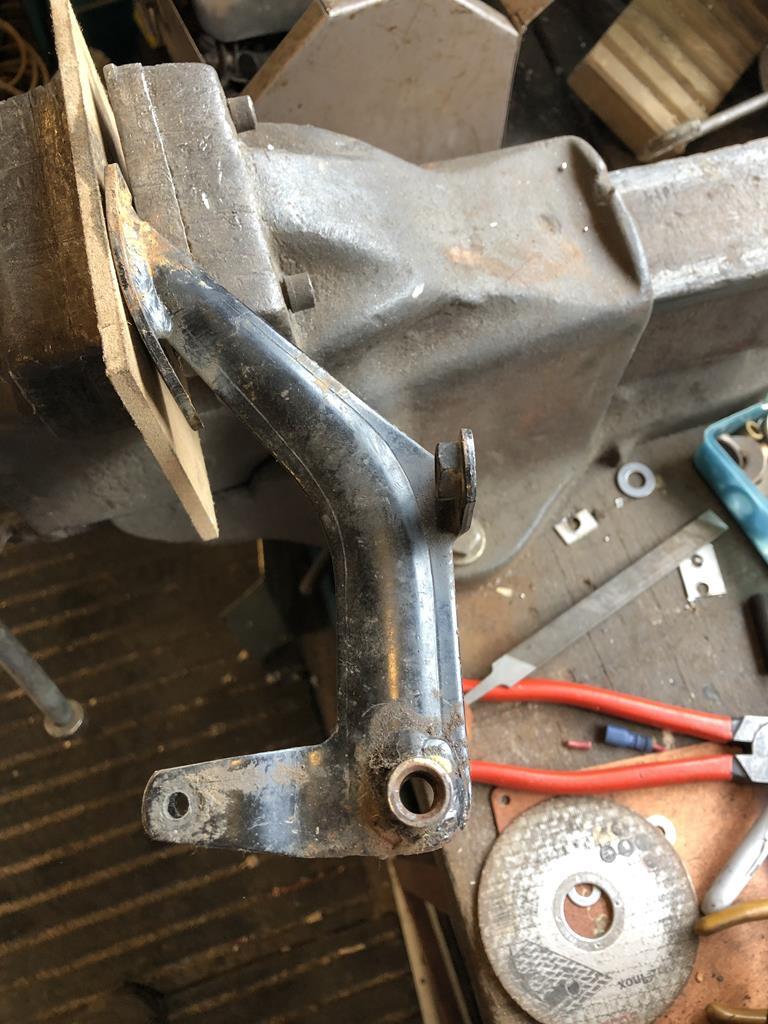 So the angry grinder came out and attacked things, leaving a stump of original pedal and a 44 year old original with a slot 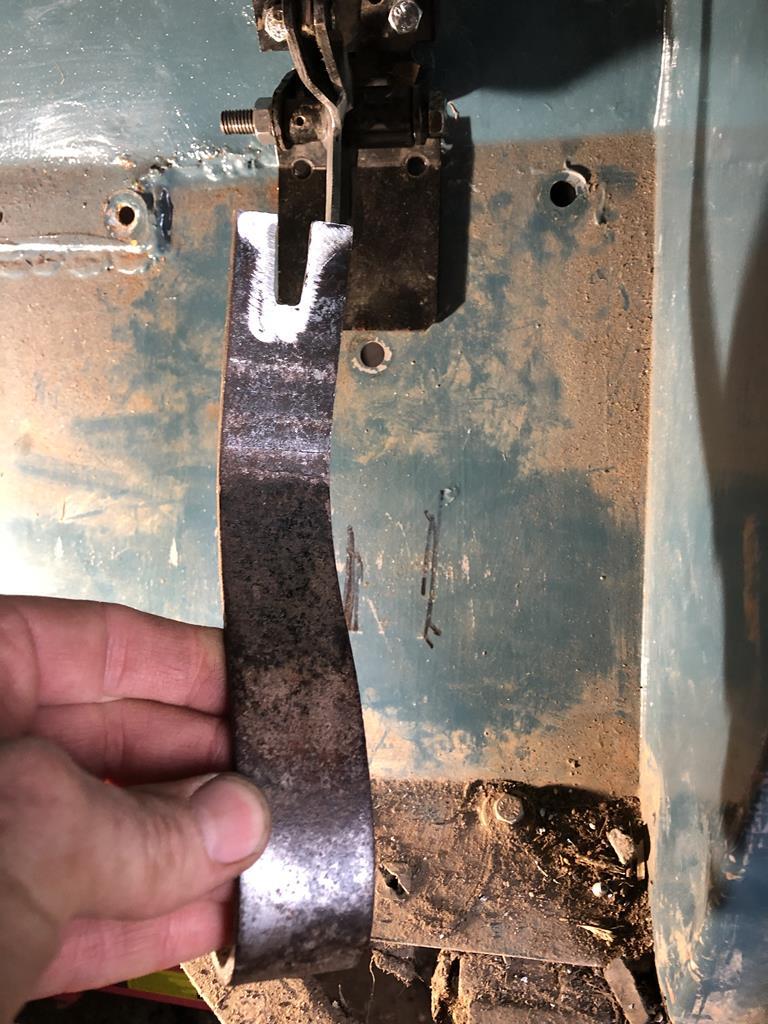 Local garage visited (keeping distance) for essential welding 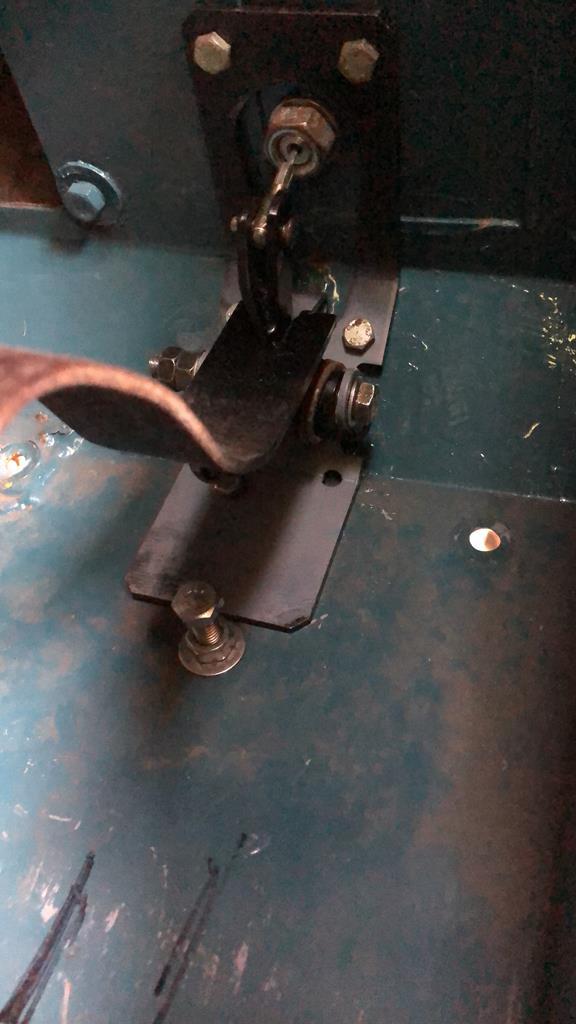 And we have an original pedal in more or less the same position (Land Rover Tolerances applied) giving full movement to a std defender cable to work the new carb. James |
| |
Last Edit: Apr 21, 2020 10:34:42 GMT by jamesd1972: Video
|
|
glenanderson
Club Retro Rides Member
Posts: 4,353
Club RR Member Number: 64
|
|
Apr 21, 2020 12:00:52 GMT
|
|
I take no responsibility for my writings effects on people’s standards rising to meet my levels of insanity/obsessiveness. 🤣🤣🤣
|
| |
My worst worry about dying is my wife selling my stuff for what I told her it cost...
|
|
|
|
|
Apr 21, 2020 12:28:43 GMT
|
I take no responsibility for my writings effects on people’s standards rising to meet my levels of insanity/obsessiveness. 🤣🤣🤣 Or for 3 new tools ordered this week...? |
| |
1987 Supercharged BMW R1150 Citroen 2cv Hillclimb Monster
1995 Renault Master Mk1 Race Transporter
1994 Mazda MX5 Mk1 / NA Road Going Class Hillclimber
1991 UMM Alter II Crew Cab OM606 SuperTurbo Diesel MegaUMM Overlander
1992 UMM Alter II Station Wagon
1980 UMM Cournil - survivor - resto project
1979 Lomax 224
2014 VW T5.1 Transporter Kombi Highline
|
|
glenanderson
Club Retro Rides Member
Posts: 4,353
Club RR Member Number: 64
|
|
Apr 21, 2020 13:18:02 GMT
|
I take no responsibility for my writings effects on people’s standards rising to meet my levels of insanity/obsessiveness. 🤣🤣🤣 Or for 3 new tools ordered this week...? Nope, that’s nothing to do with me either. 🤣🤣 |
| |
My worst worry about dying is my wife selling my stuff for what I told her it cost...
|
|
Phil H
Posted a lot
  
Posts: 1,448
Club RR Member Number: 133
|
|
Apr 21, 2020 13:37:23 GMT
|
|
Back to the 4 way splitter - Minis (MK2) used them too IIRC?
|
| |
Last Edit: Apr 21, 2020 13:38:49 GMT by Phil H
|
|
|
|
|
Apr 21, 2020 14:19:13 GMT
|
|
and morris minors ( it think the were 4 way NPT) certainly not unf.
|
| |
|
|
jamesd1972
Club Retro Rides Member
Posts: 2,921  Club RR Member Number: 40
|
|
Apr 21, 2020 16:21:58 GMT
|
|
|
| |
|
|
|
|
glenanderson
Club Retro Rides Member
Posts: 4,353
Club RR Member Number: 64
|
|
Apr 21, 2020 16:50:31 GMT
|
|
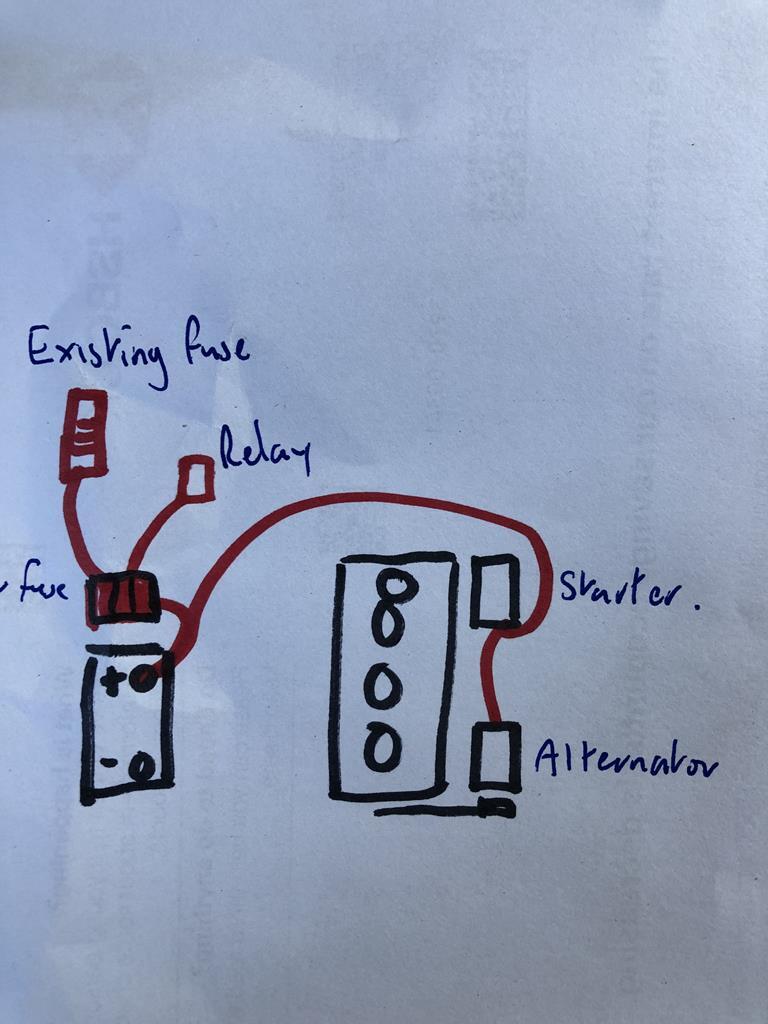
Yes, from what I can see that looks right.
Double up the heavy wire from the alternator to the solenoid, using both large flag terminals, as that cable is good for just under 40 amps solo. That way, if you fit a higher output alternator at a later date you don’t have to worry about the wiring.
|
| |
My worst worry about dying is my wife selling my stuff for what I told her it cost...
|
|
glenanderson
Club Retro Rides Member
Posts: 4,353
Club RR Member Number: 64
|
|
Apr 21, 2020 16:52:39 GMT
|
|
Can you connect your existing loom to the new solenoid? Or won’t it reach?
|
| |
My worst worry about dying is my wife selling my stuff for what I told her it cost...
|
|
jamesd1972
Club Retro Rides Member
Posts: 2,921  Club RR Member Number: 40
|
|
Apr 21, 2020 17:48:39 GMT
|
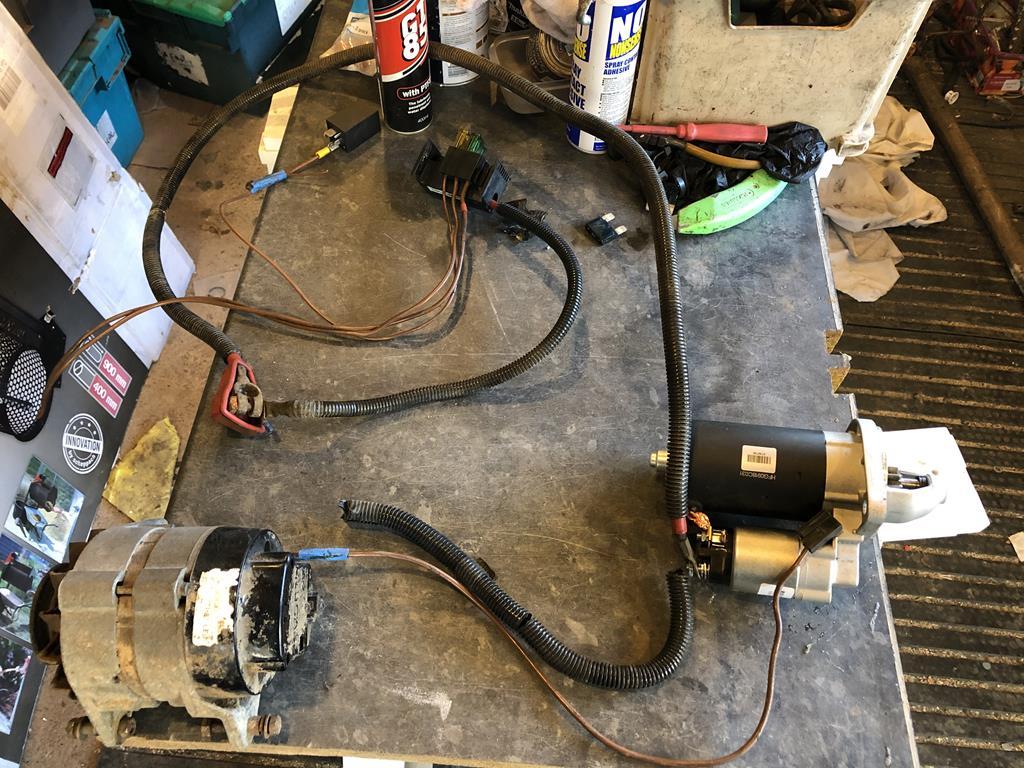
Can you connect your existing loom to the new solenoid? Or won’t it reach? Existing loom was nowhere near and in poor condition, just have to make sure I tie things out of the way of the exhaust... Thinking I'll drop down to the sump to a 'P' clip just to keep things out of the way. looking at it I might be able to replace one of the sump bolts with a longer on and put a nut on the top to hold the 'P' clip on Current loom picks up fuse board supply from the solenoid but won't reach battery once removed. No chance of a high output alternator - no excess needs on this it doesn't even have an interior light ! Current solenoid an oily mess as lives under old oil bath air filter, one ring connection needs to connect to new fuse and one spade connection to extend to new starter. Another issue is how to join this existing fuse box supply to new fuse box, might go for solder and shrink as a low vibration area. Will post photo's when the up-loader decides to work again... Thanks James |
| |
|
|
jamesd1972
Club Retro Rides Member
Posts: 2,921  Club RR Member Number: 40
|
|
Apr 21, 2020 18:15:18 GMT
|
Ha working now ! Like this 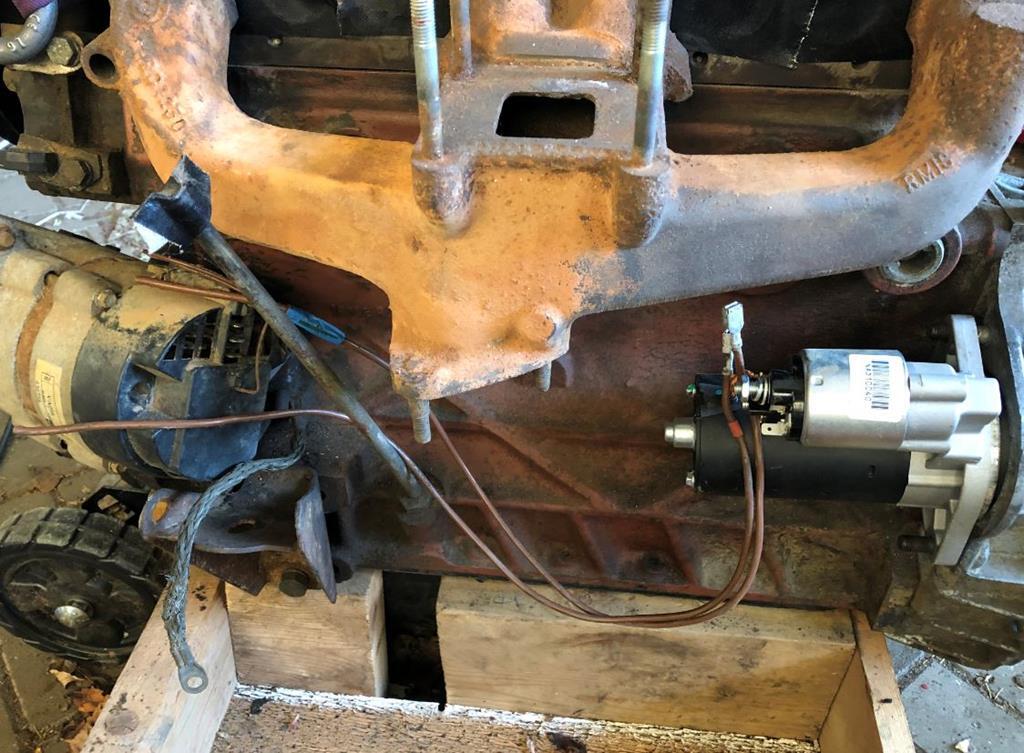 Existing grotty solenoid 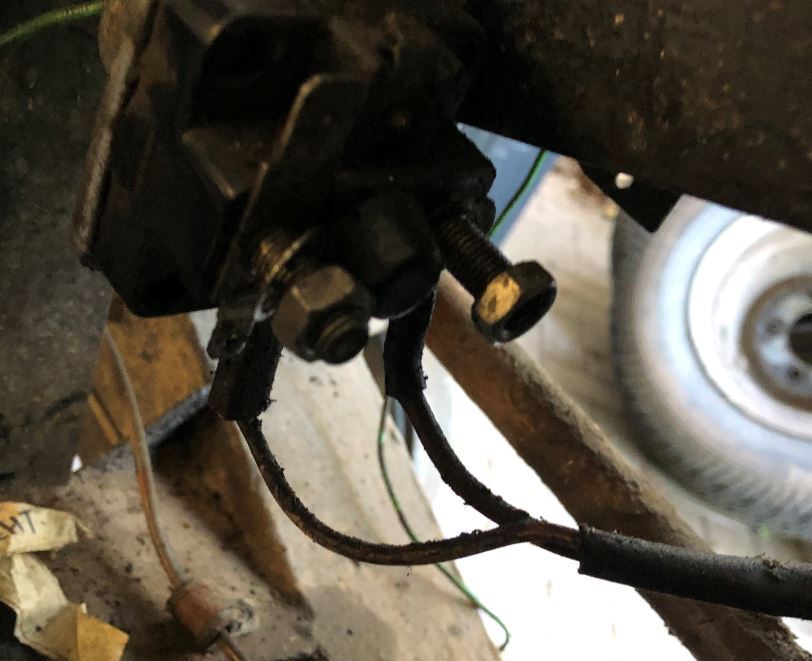 |
| |
|
|
glenanderson
Club Retro Rides Member
Posts: 4,353
Club RR Member Number: 64
|
|
Apr 21, 2020 23:58:20 GMT
|
Evening good people of Retro Rides.  I got a bit side tracked today. Had a panicky phone call from a mate, stuck mid way through a job and had run out of materials. Did I have any timber batten? No, but I have an old fence post and a circular saw. Text me the measurements and I’ll run you some up. So, by the time I’d extricated the saw from its slumbers, run the post through it, cleaned it, changed the blade, repaired the adjuster mechanism, and put it all away again that was most of the morning gone. Still, these things have a way of coming around again, and this was the bloke who gave me the shed that sparked the lean-to storage build the other year. So, after lunch I set to a bit. Then promptly got distracted again. As has been already mentioned, I tend to work in an almighty mess; spanners and stuff everywhere. So I thought I’d have a bit of a tidy. My lathe was still covered in swarf from making the spigot rings for my trailer the other week, so I thought I’d clean that up. Then I remembered that I had another turning job to do that would make an almighty mess again. So I thought it’d be a good idea to “just” get it out of the way. So, I took a spare one of these drive flanges (the round bit with the six bolts and little tin cap in the centre of the wheel).  Stick it in the lathe and reduce 80% of it to swarf.  Then take an old socket that is big enough for the necessary internal clearances, that you have a duplicate of.  And set it to one side for welding together the next time the welder is out. This will be a tool to hold/lock the input or output shafts of a Series Land-Rover gearbox when stripping or rebuilding it. Then I cleaned the lathe and it’s surroundings. I really like turning stuff. You’ve got to concentrate. It’s easy to make an expensive mistake if you let your attention drift. It’s a real time eater though. :eek: Yesterday I’d convinced myself that I needed to make a pair of captive bolt plates. Today I decided that I didn’t. So I bolted in the seat box using the same contortions (and swear words) as I’ve used each time I’ve done the job. Next time I’ll probably make some captive bolt plates... Then I had a bit of a clean up inside the cab, particularly the area behind the seats, because that was really grubby. I went to fit the cab floor and was reminded that my gearbox tunnel/cover looked like this.  A particularly “workmanlike” repair, carried out about eighteen years ago to cover this butchery underneath.  Which I decided, at this late stage, that I couldn’t live with. So I found a replacement on eBay and bought it. Thus will delay procedures a little, but one of the reasons I’ve lived with the current one so long is that they’re a hideous job to change in isolation, because you have to strip the whole floor out to remove them. So if I don’t do it now, then it’s going to be years (hopefully) before I get the chance to do it again. So, instead of refitting the floors, I cut a bit of rubber mat for the bottom of the battery box, and dropped the two batteries in. I need to fashion a new clamp, and will rustle up something temporary while I’m saving up for a pair of optima batteries, at which point I’ll make a proper effort at something that fits them exactly. Then I spent a bit more time plotting my next challenge, which involves revision of the column switch and auxiliary instruments. Bought an MGB column cowl on a hunch the other week, and it turned up today. Looks like it’s the perfect size to be working around.   Anyway. That’s your lot for today. More tomorrow if you behave.  |
| |
My worst worry about dying is my wife selling my stuff for what I told her it cost...
|
|
|
|
|
|
|
Wonderful stuff, as ever. Don't you just love those "little" jobs!  |
| |
Last Edit: Apr 22, 2020 0:15:23 GMT by georgeb
|
|
Enbloc
Part of things
 
Posts: 399
|
|
Apr 22, 2020 19:25:11 GMT
|
The five port one appears to be 4 x 3/8” UNF and 1 x 1/8” NPT. The four port one is al 3/8”  Thanks for the info and pics. Didn't realise the original picture showed a 5-port, thought it was only 4! The 4-ports only seem to come in inverted flare, didn't realise you could get a 5-port union. Your old is 5-port is perfect, 3/8 UNF inverted flare with the single 1/8 NPT port. I'd be interested if you don't want it anymore? Let me know. |
| |
|
|
glenanderson
Club Retro Rides Member
Posts: 4,353
Club RR Member Number: 64
|
|
Apr 22, 2020 20:43:57 GMT
|
Your old is 5-port is perfect, 3/8 UNF inverted flare with the single 1/8 NPT port. I'd be interested if you don't want it anymore? Let me know. You have a message. 😃👍 |
| |
My worst worry about dying is my wife selling my stuff for what I told her it cost...
|
|
glenanderson
Club Retro Rides Member
Posts: 4,353
Club RR Member Number: 64
|
|
Apr 22, 2020 22:44:27 GMT
|
So. Today I was supposed to be at work, but the reduced service means that we’re not all needed, and those of us that are surplus to requirements for the day are, because of social distancing, now “on call” at home for the duration of the shift, rather than all sat in the mess room together. I had to do the dreaded shopping first thing (before duty), but this afternoon I could potter on the Land-Rover provided I didn’t embark on anything I couldn’t kick the door shut on and walk away from inside ten minutes and get to work. First thing I did was refit the grille. It makes it look more like it’s finished. I even treated it to a replacement poppy as the old one had faded really badly.  You will remember the new toolboxes? And mention of a diesel powered night heater? Well, it’s this little beauty.  When you could only buy this kind of thing form Eberspacher or Webasto, you’d have been looking at £600+ for one of these, which was daylight robbery really. Yes, they were good bits of kit, but just because they were expensive, didn’t mean they weren’t temperamental. However, this one cost me £120, including shipping, and in contrast I simply can’t understand how they can be made so cheaply. Yes, some of the ancillary parts are a little dubious, and I think that the fuel filter in particular is a waste of time, but overall it’s astonishing value. I have a proper fuel filter on order, which will sit on the chassis up under the rear body and connect to the fuel line I t’d off the other day. While the seats are still out, the aperture into the toolboxes is bigger by a couple of inches along the side nearest the door, because there’s a loose filler strip that you can move out of the way. So now is a good time to be fitting stuff in there as there’s more room to see and work. Here’s where it’s going to sit.  And here’s an idea of how much less room you have with the loose panel laid in place.  Because these things are often fitted into boats, caravans and suchlike, with wooden floors, there’s a metal plate provided that although I don’t need it, acts as a good template to mark out the panel for drilling the mounting and inlet/exhaust holes. So after a quick offer up and mark, it was an easy job to sort out drilling those. I’d already worked out the route the ducting was going to take, so broke out the holesaw and chewed a massive hole on the side of my lovely new box.  Unsurprisingly, I don’t have any grommets on the shelf to suit a 70 mm diameter hole. So I took an old bit of fuel pipe and cut a slot along one side. Then used that to line the hole. This first prototype effort is a little short, but I need to take it apart and apply a little paint around the bare steel anyway, so I’ll cut another a few mm longer and have another go.  The duct pipe is a really nice snug fit.  It’s going to go to a central outlet between the seats, that can be rotated to point towards the driver, passenger or forward towards the windscreen. I did try and find a dual outlet, but other than doubling up what I already had with a Y pipe, there didn’t seem to be anything out there. I don’t have a great deal of room between the seats anyway, and the cabin area isn’t massive, so the simplicity of one pipe, one outlet won out in the end. The next part of the job is to look at the wiring for it, and at this point I have to confess to having dropped the ball a little in my preparations. I’ve had the heater a little over a year, and other than a cursory glance inside the box when it arrived to make sure it was complete and undamaged, I’ve not really looked at it at all. If I had, I would have laid in the bits to revise the wiring loom already. There’s nothing actually wrong with it per se, and it would certainly work without issues as-is, but it’s a typical “universal fitment” kind of setup, with the cable miles longer than it needs to be and all the plugs ready fitted. Now I understand why they do that, because they want it to be as simple as possible for the kind of people that struggle with wiring, and this is effectively plug-and-play, but I wish they’d left the plugs loose so the wiring could be tailored to suit the install. Also, the entire loom is wrapped, poorly, in some kind of hideous cloth tape. It looks shocking and has no place on any vehicle of mine. So I’ve had to order some new plugs to allow me to shorten the loom, and I’m kicking myself a bit.  Anyway, it’s not the end of the world, just a bit frustrating. I’ve got to wait for some other wiring stuff for the split charge system as well, so it’s not like I could have done it all today anyway. The main thing is the unit is in and the holes are all done whilst access is good. I made a start on two additional feeds into the same area that I will splice in to the heater loom in due course. One is for a planned stereo amplifier, the other a redundant “spare” against needing something else powered up in there at a later date.  Tomorrow I shall refit the seats, make up some kind of temporary battery securing device, and see about going for a test drive. |
| |
My worst worry about dying is my wife selling my stuff for what I told her it cost...
|
|
|
|
|
|
|
|
A thoroughly satisfying story. John
|
| |
|
|
|
|


 is to be replaced by