mylittletony
Posted a lot
  
Posts: 2,420
Club RR Member Number: 84
|
1957 Ford Fairlane mylittletony
@mylittletony
Club Retro Rides Member 84
|
|
|
Looking good....So are the doors done? Sadly not, the rear lights are back in, with new gaskets and the number plate/fuel hatch re-attached. Bumper still occupying patio space...  I'm actually getting it out of the garage today to make a quick hit list for an appointment with HARDCORE on Sunday, things like "bolt front seat down", "put instrument cluster back in", "take all the boxes of parts out", "stop horn continuously sounding" etc. So more progress should be occurring, with more updates too. I should also start a thread on the distraction  |
| |
|
|
|
|
|
|
|
|
|
I should also start a thread on the distraction  Oh go on then. Can be as much fun as the motor bits!  |
| |
|
|
|
|
1957 Ford Fairlane HARDCORE
@hardcore
Club Retro Rides Member 190
|
Apr 21, 2021 10:10:27 GMT
|
"stop horn continuously sounding" We'll hear you coming then   |
| |
|
|
mylittletony
Posted a lot
  
Posts: 2,420
Club RR Member Number: 84
|
1957 Ford Fairlane mylittletony
@mylittletony
Club Retro Rides Member 84
|
|
|
|
Well, I made it!! 30 odd mile round trip successfully completed!
I was super nervous before setting off, but she actually ran great and it was a lot of fun getting out and about.
Feeling motivated to crack on with the sprucing - just need the distraction done!
|
| |
|
|
|
|
mylittletony
Posted a lot
  
Posts: 2,420
Club RR Member Number: 84
|
1957 Ford Fairlane mylittletony
@mylittletony
Club Retro Rides Member 84
|
Jul 20, 2021 15:03:34 GMT
|
Wowzers, April since the last update! The "distraction" - a Chevy Astro camper conversion, was mostly finished in time for our weekend away over the second May bank holiday so I was able to spend a bit more time on this. First thing I did was buy some wheels 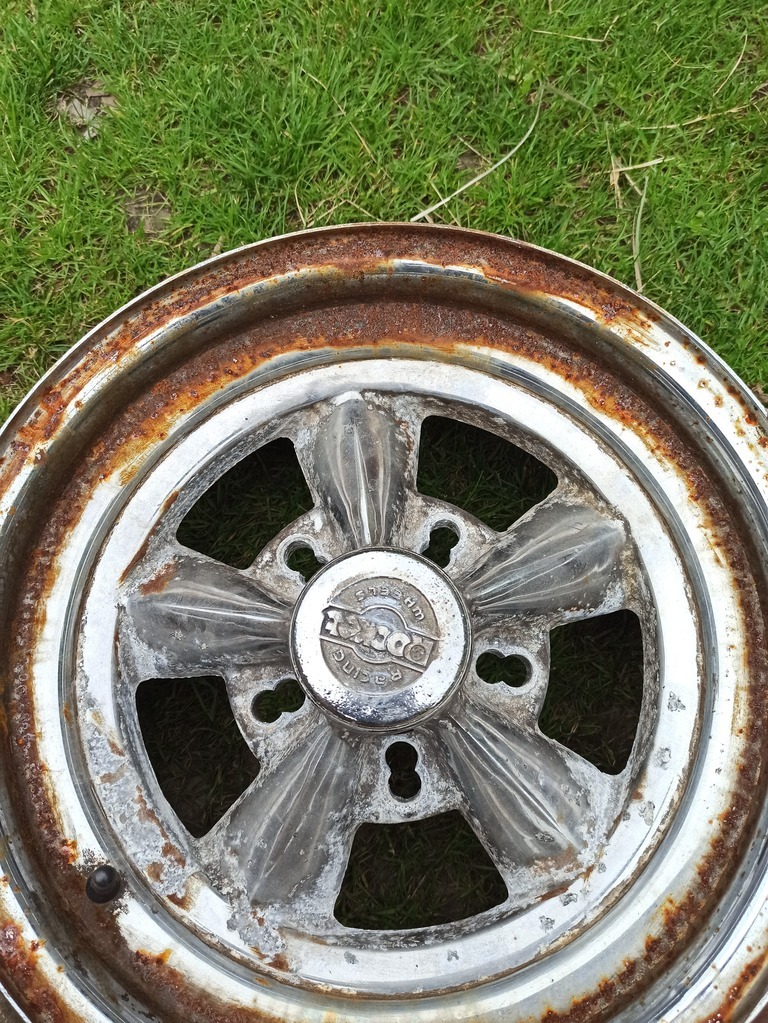 Then I decided they needed too much work, so I bought some others. I sold the steels and swapped the tyres over - much ferrying, unpacking and repacking of wheels and tyres... 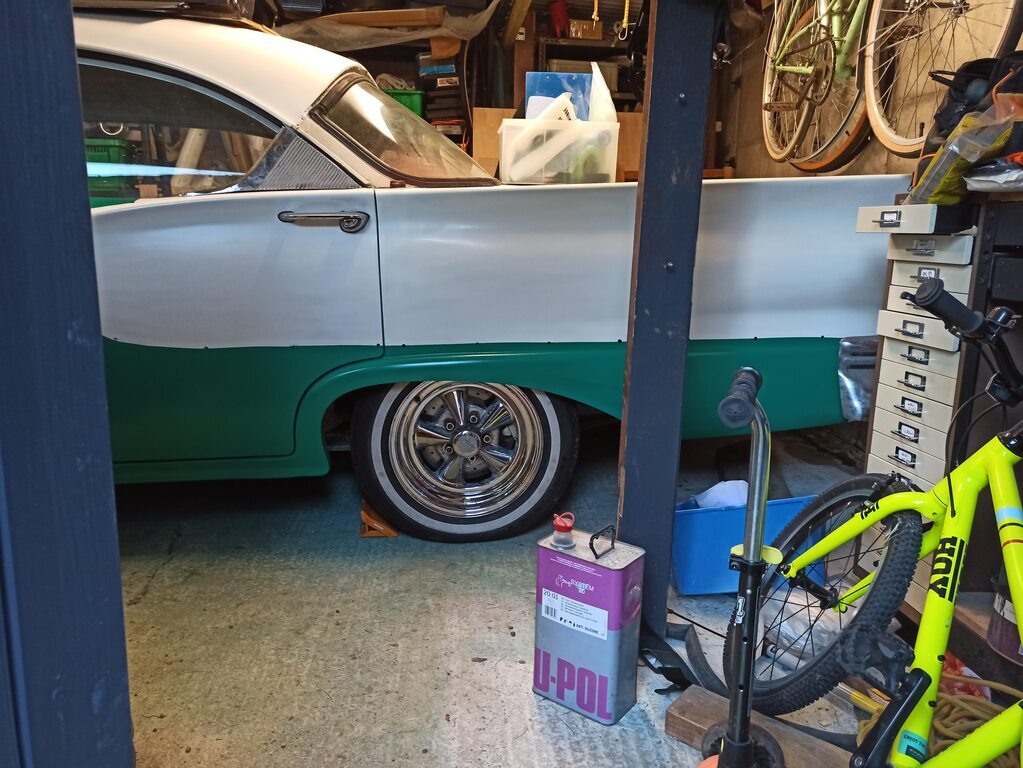 I also painted the roof, which was a major hurdle in sorting out the cosmetics, purely because of the logistics of painting a large horizontal surface in a low height garage, where I have to open the large door to swap sides of the car. It's come out ok, needs a good flat back though. I had planned to turn it round in the garage, but the battery was completely flat. Naturally I discovered this after removing all the stuff from inside, around and on top the car, shuffling cars on the drive and loading up the boys for a little fun... Battery removed and kickstarted with an old school charger, then connected to my conditioner for a couple of days 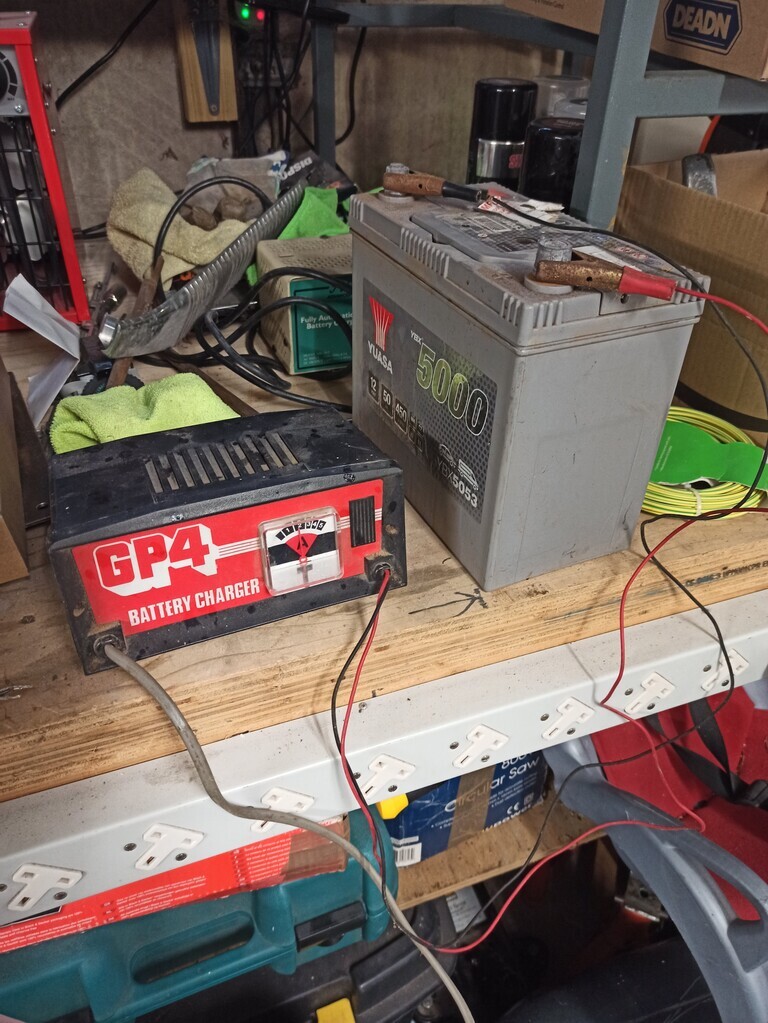 I believe it to be the old school ticking clock, something is drawing about 40mA and I'd not used it for about 8 weeks... Turning it round allowed me to paint the front of the car. Missed a few pics as I was charging ahead 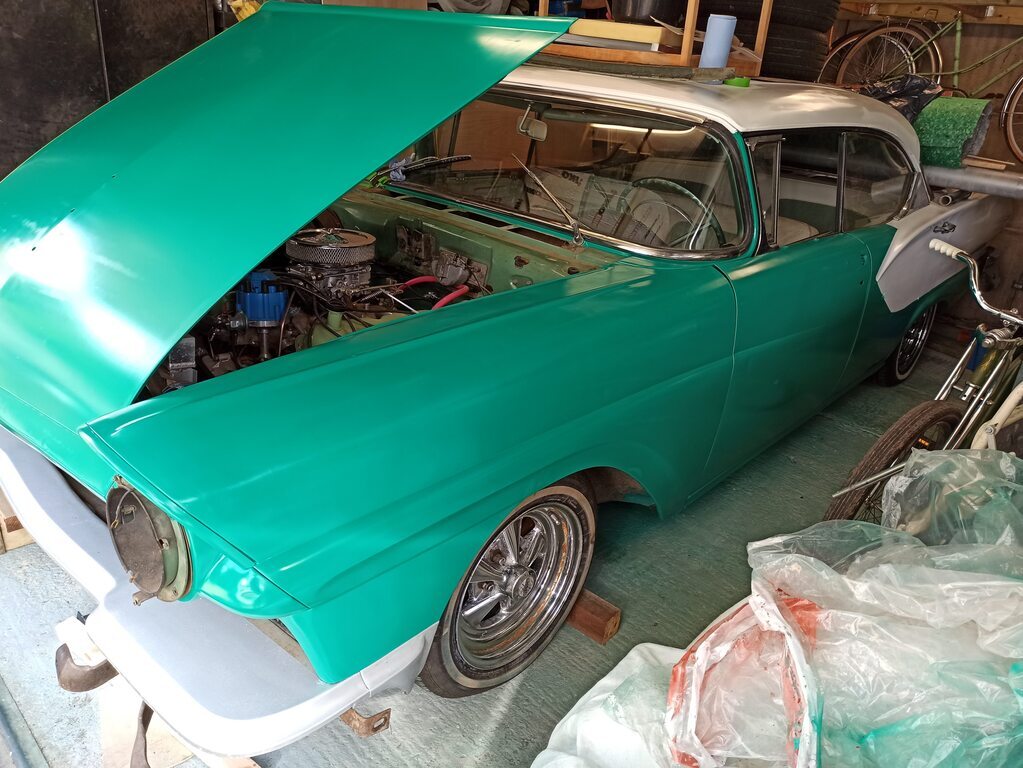 Masked up below, before sheeting to paint the final wing. The front pan on these was a silver colour as it mainly lines up with the front bumper, so I decided to replicate that rather than experiment with body colour. 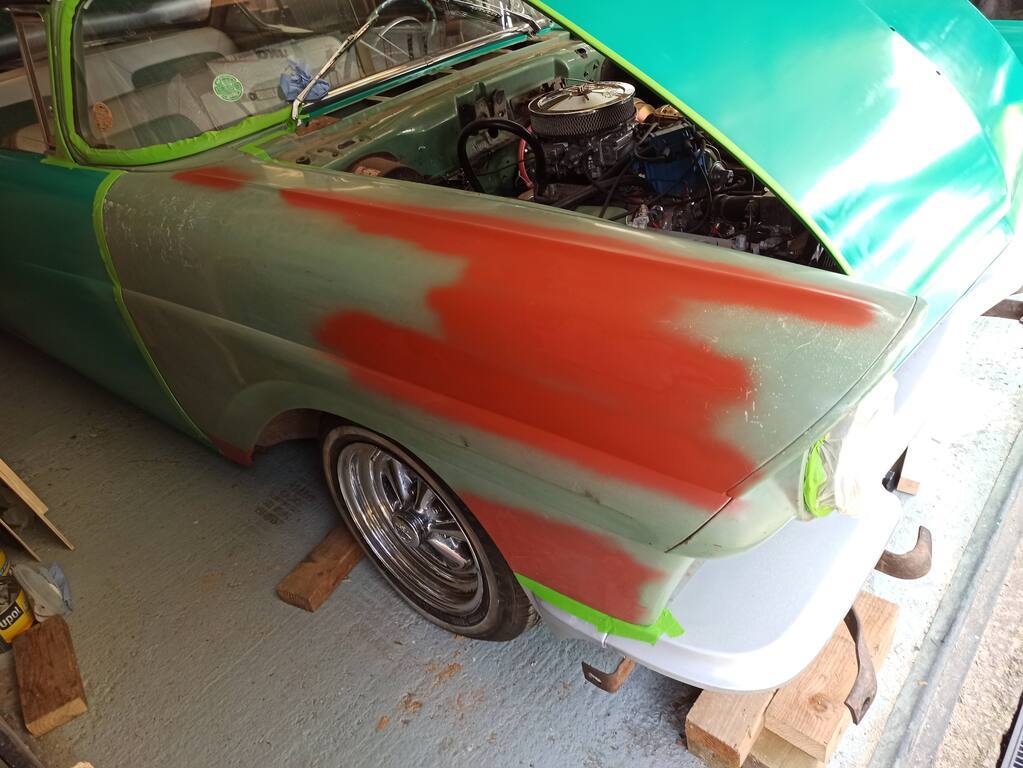 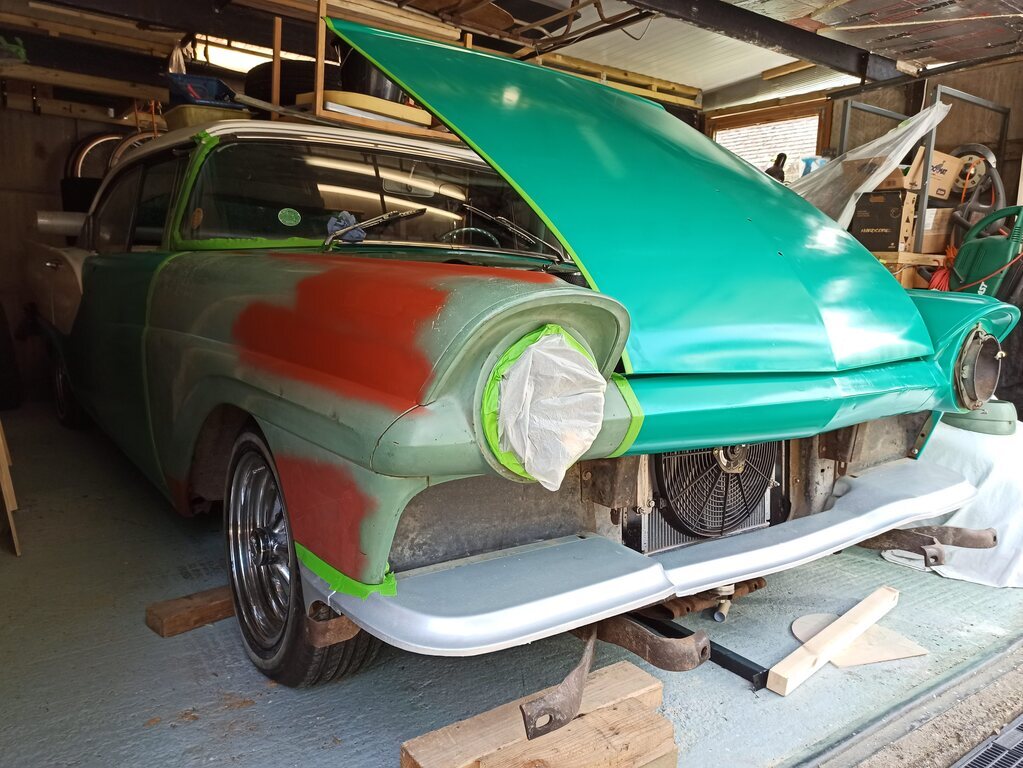 Lots of faffing around reassembling in the wrong order, but it's back in one piece and painted (for now - lots of remedial work required, but at least SWMBO is happy) I also had the chance to look into the poor running. It drives off idle fine, but as soon as you apply any real load it pinks (sounds like) like mad and is flat. If you back off, it cleans up and pulls better. I noticed a vacuum port on the carb base was open, so that got plugged and it was time for a test drive! 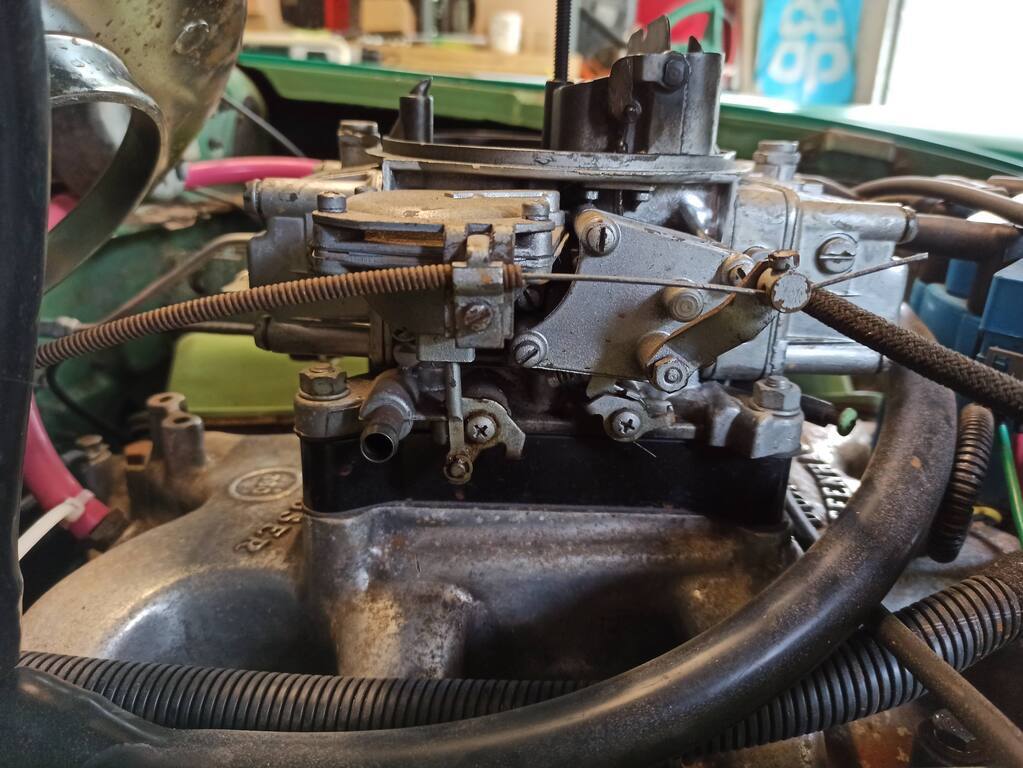 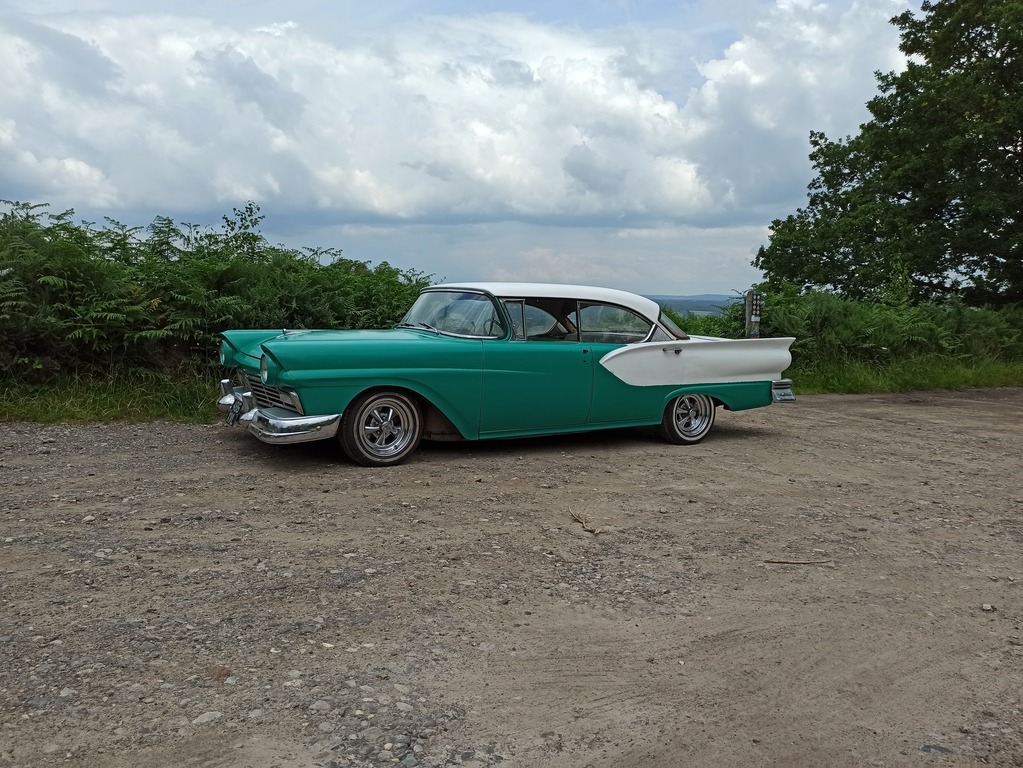  Conclusions: Really happy with how it looks!! Drives better, but still not right... hmmm  I checked out the timing and it was WAY off, like 30 o retarded!! First port of call was to verify cyl #1 TDC to pointer/timing marks and they line up, so I've re-timed it to 10 o BTDC and it starts up well. I've also checked the mechanical advance in the dizzy without the vac advance connected, and is around 30 o (by eye) which, according to the internet, is close enough to rule out any misbehaviour, but I've not yet had the chance to go for a drive. You might notice a lack of trim, door handles etc. I was waiting until it was painted for the handles etc and I needed to fix a few cracks/chasms in the screen seals. 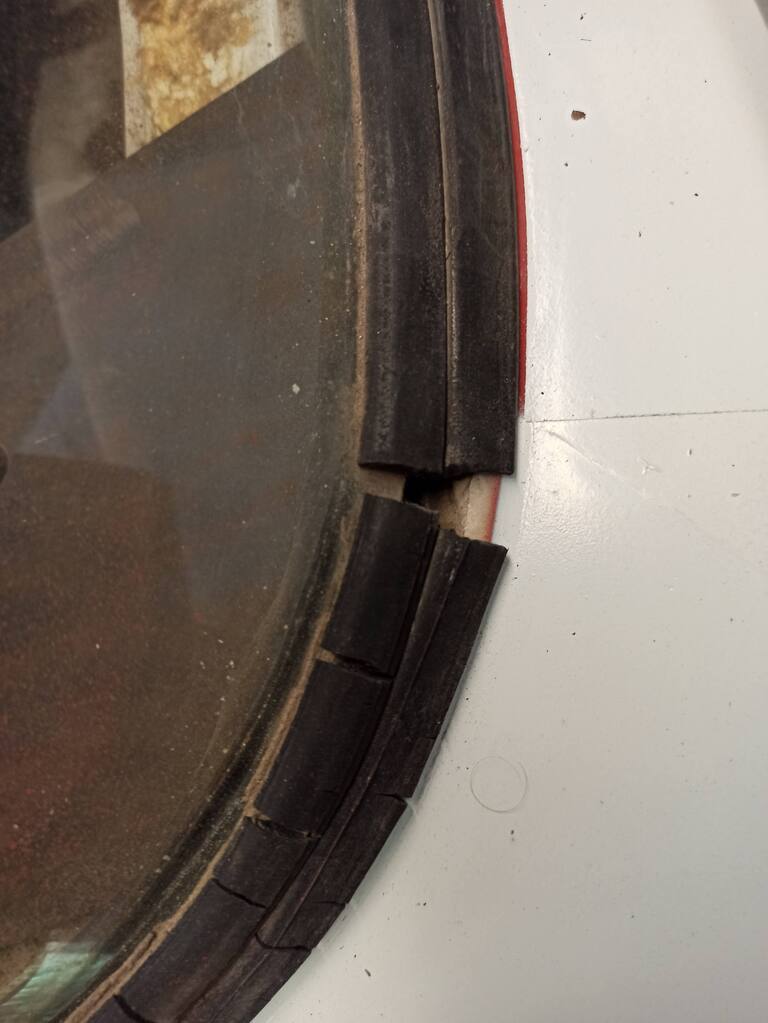 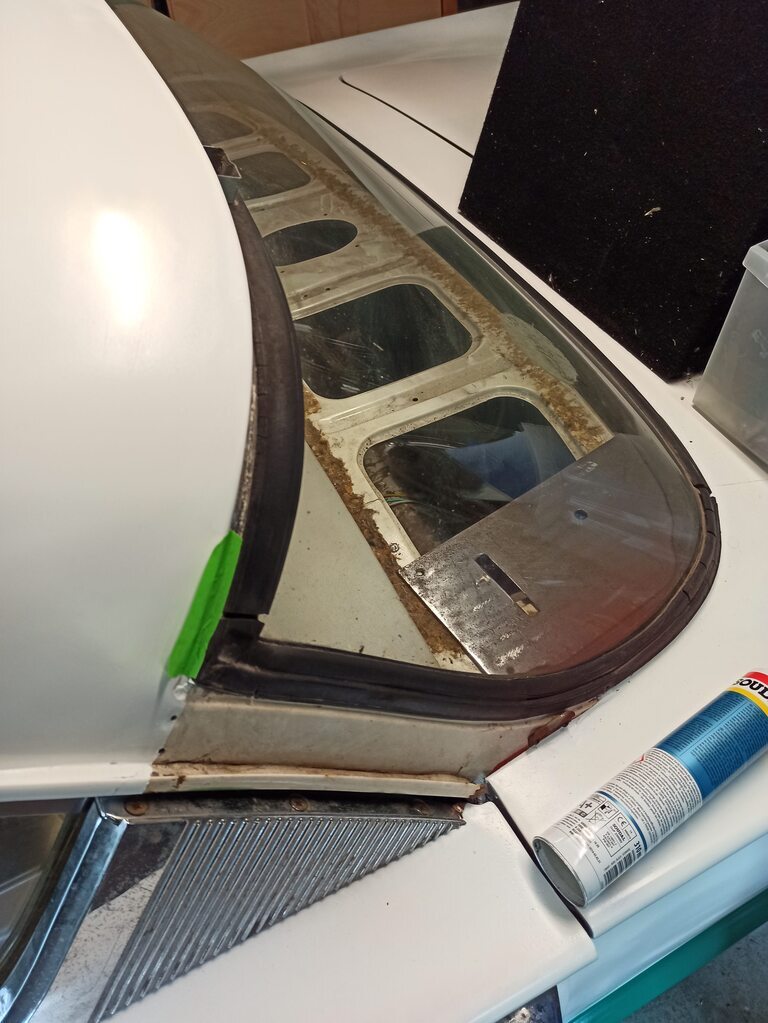 Following some suggestions from here I used a polyurethane rubber that sets all the way through but still remains soft-ish, applied little by little and the surrounding areas well masked. It's worked pretty well in terms of filling the gaps - I'm not gonna leave it out in the rain to find out though! Another win is working out why the headlights weren't working on dipped beam. I could hear the relay click when they were turned on and they worked on full beam, so I unplugged the relays and the reason was pretty apparent 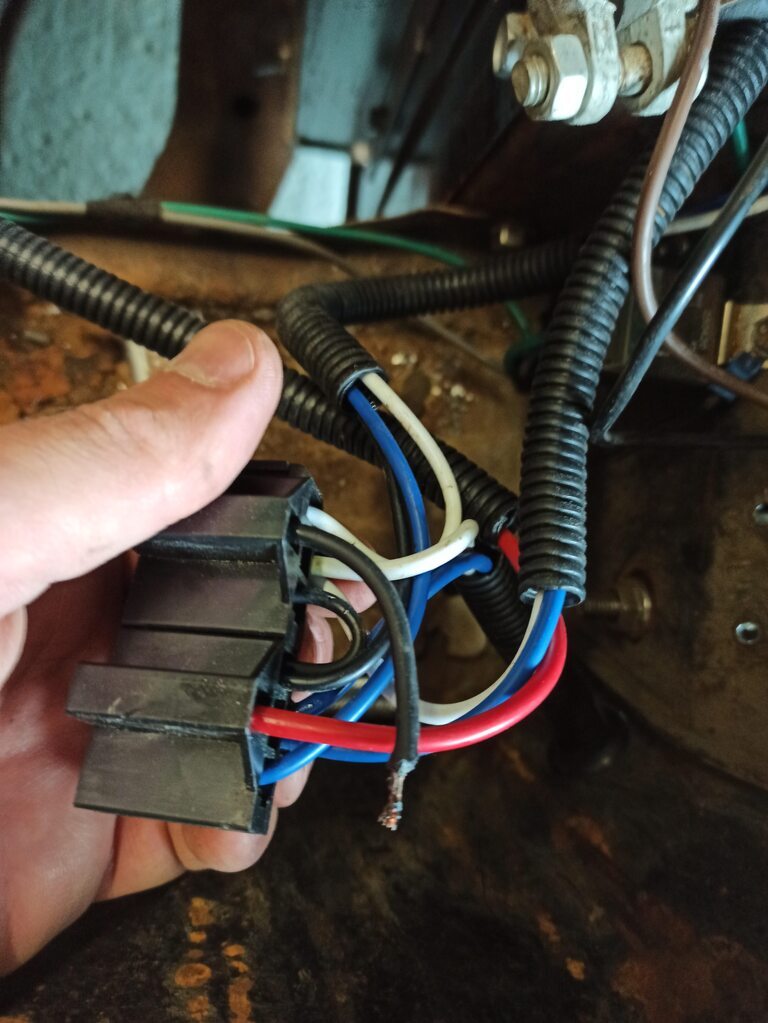 Cheapy ebay relay kit! Crimp removed from plug, recrimped (better) and reinserted. Full complement of lights returned!! Only other real update is that the ride height is about spot-on for my driveway - luckily! 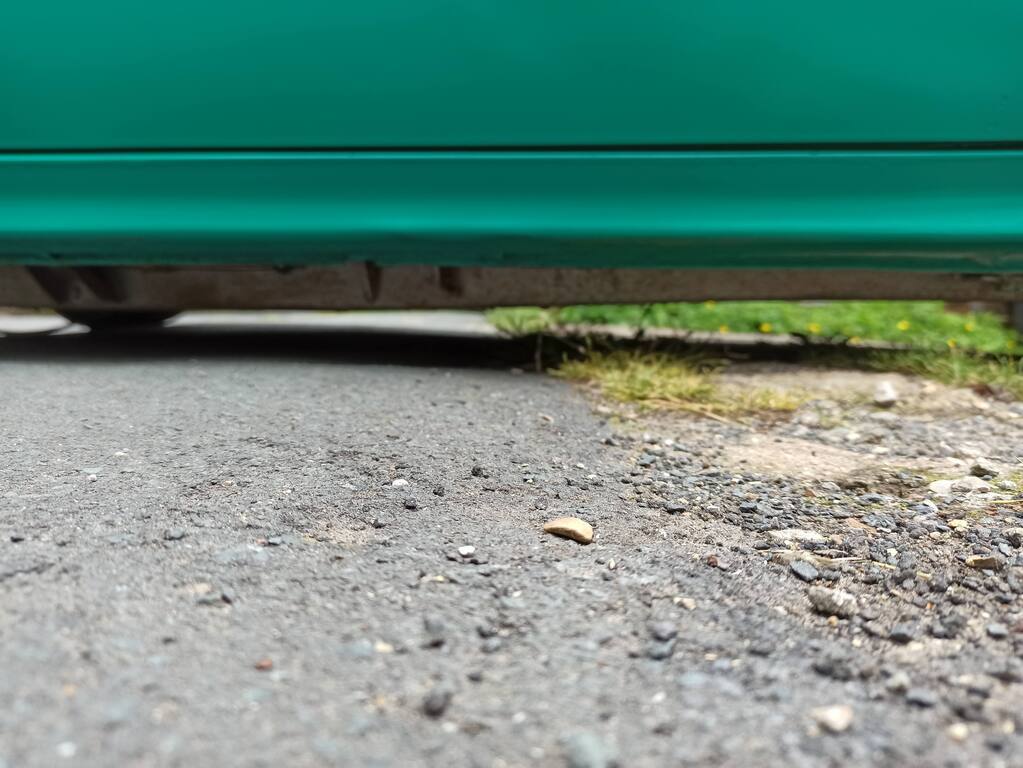 I'm trying to crack on, but have been yet again distracted by round 2 of improvements to the Astro before another trip. Seat belts and dash trim/stereo install are next on the list, as well as reinstating the trim and seeing if my ignition timing stuff has made any difference. Plenty to be getting on with! |
| |
|
|
|
|
|
Jul 20, 2021 16:06:19 GMT
|
|
Excellent. Looking good.
|
| |
|
|
|
|
|
Jul 20, 2021 17:17:59 GMT
|
|
Just compared the before and after pics of the car with the old and new wheels and it transforms the car.
I've been beavering away (well sort of, the more I beaver the more I find I need to do and more parts needed) on mine so I hope we can have a drive out and meet up soon.
|
| |
Last Edit: Jul 20, 2021 17:20:27 GMT by Deleted
|
|
mylittletony
Posted a lot
  
Posts: 2,420
Club RR Member Number: 84
|
1957 Ford Fairlane mylittletony
@mylittletony
Club Retro Rides Member 84
|
Jul 20, 2021 19:48:35 GMT
|
Just compared the before and after pics of the car with the old and new wheels and it transforms the car. I've been beavering away (well sort of, the more I beaver the more I find I need to do and more parts needed) on mine so I hope we can have a drive out and meet up soon. Cheers man, I always knew some chrome 5 spokes were in my future and the steelies were bought as a temporary fix really, but with lack of funds they became longer term. I managed to cover the cost of the cragars by selling tyres and steels, so they ended up cost neutral (or near enough anyway) I've got another set of wheels with Dez for pcd alteration which should work very nicely, but they've not broken cover yet. And yes, let's try and take a drive soon, I know HARDCORE is keen too |
| |
|
|
|
|
|
|
mylittletony
Posted a lot
  
Posts: 2,420
Club RR Member Number: 84
|
1957 Ford Fairlane mylittletony
@mylittletony
Club Retro Rides Member 84
|
|
|
I decided to pop out round the block just now to see if my timing changes had made a difference. I wanted to go before the heat of the day really struck and I won't have another chance until Sunday, which may be raining. I also checked the static timing with the vacuum advance connected and disconnected - about a 10deg difference, again, roughly what it should be. Good news! It pulls much better!! I can actually floor it, which is pretty good fun. Didn't have time to do more than a lap, especially since we're under siege of roadworks - 3 sets of temporary lights to go 7 miles. I need to adjust the idle down a touch, find out where the heater matrix is dripping from and try and locate various rattles and other assorted noises. In the meantime, here's a quick clip of it idling since someone asked for one I've also grabbed a couple of pics of the filled rear screen seal: 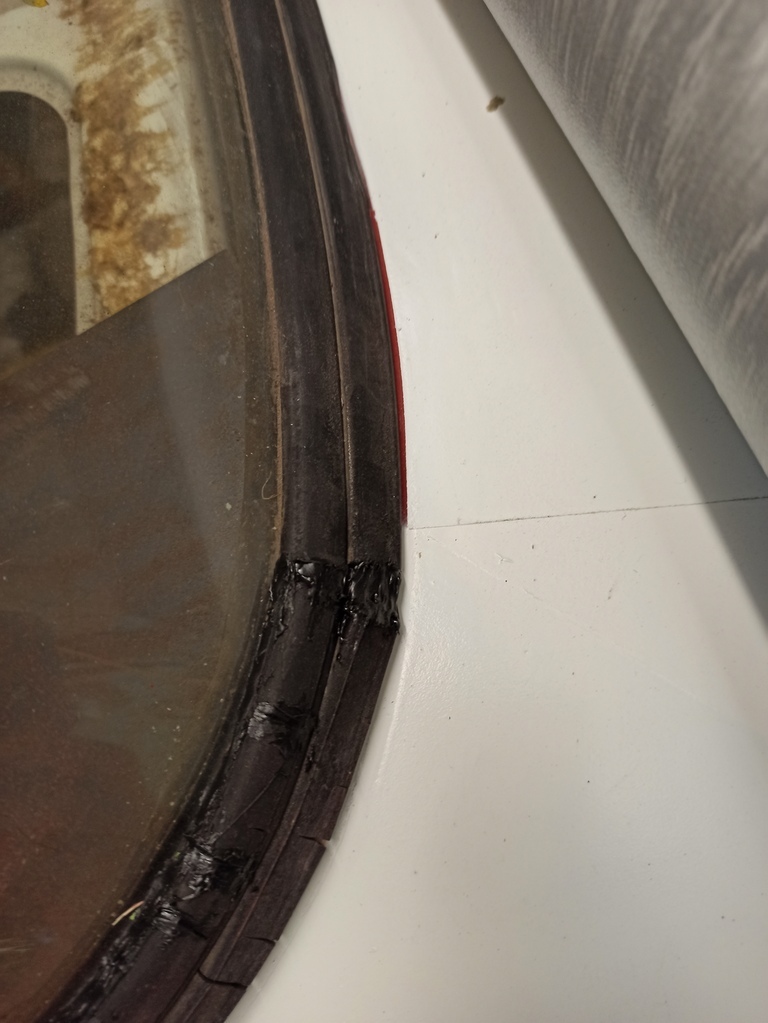 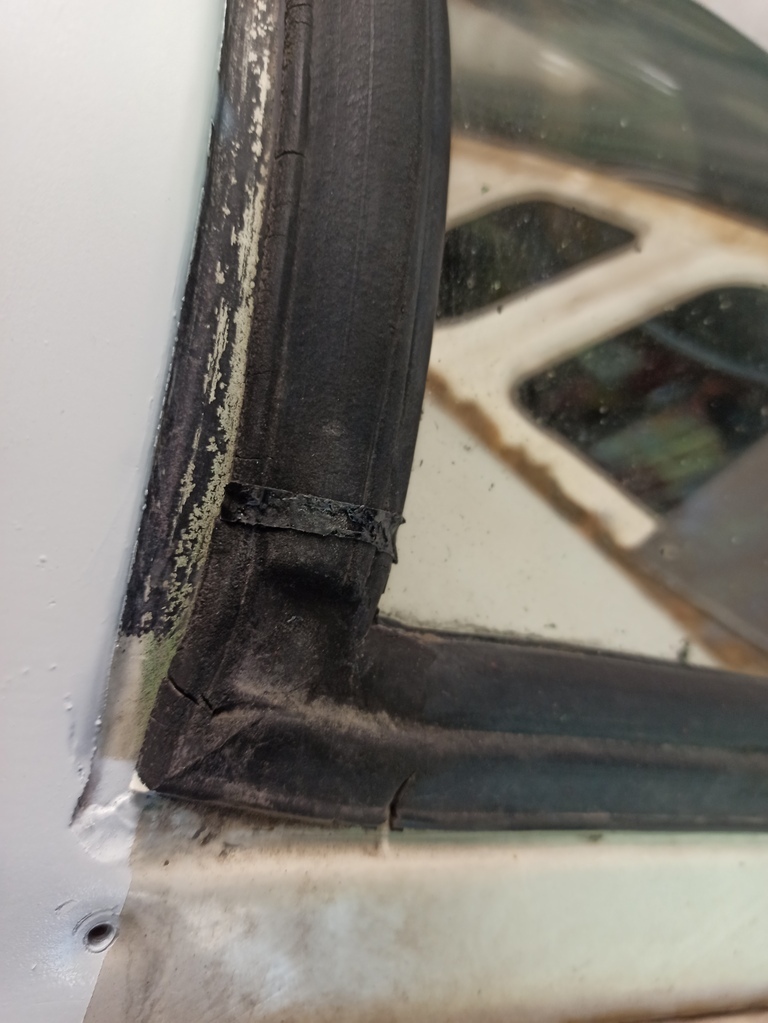 They'll largely be covered by the trims, but I'll have a crack at dressing them back a little too. |
| |
|
|
|
|
|
Jul 22, 2021 15:44:14 GMT
|
|
Absolutely awesome stuff!
That is a great looking yacht! Awesome work that has gone in to that from both you and Dez.
The paint is coming out really nicely.
|
| |
|
|
mylittletony
Posted a lot
  
Posts: 2,420
Club RR Member Number: 84
|
1957 Ford Fairlane mylittletony
@mylittletony
Club Retro Rides Member 84
|
Jul 22, 2021 16:01:24 GMT
|
Absolutely awesome stuff! That is a great looking yacht! Awesome work that has gone in to that from both you and Dez. The paint is coming out really nicely. Thank you, although it's definitely a ten footer paint job. I'm cool with that though, certainly at this stage |
| |
|
|
EmDee
Club Retro Rides Member
Committer of Autrocities.
Posts: 5,934
Club RR Member Number: 108
|
1957 Ford Fairlane EmDee
@emdee
Club Retro Rides Member 108
|
|
|
|
How did I not have this bookmarked?!
You know how I feel about this Mate, looks great, and glad to see the timing has made the difference.
As someone who has had a passenger ride in this I can confirm that it is as good as it looks in the pics. Although I've not yet seen the "ten footer" paint job 😆 I'm sure knowing you that it'll be 9 or less, but then I do own a 75 footer.
Must catch up again soon man 👍
|
| |
|
|
|
|
|
|
|
|
Well done.
I love that Soudal product range.
Only recently discovered it.
Doubt I would use anything else now.
Glad your missis is happy too, always nice to share
|
| |
|
|
mylittletony
Posted a lot
  
Posts: 2,420
Club RR Member Number: 84
|
1957 Ford Fairlane mylittletony
@mylittletony
Club Retro Rides Member 84
|
|
|
Making progress with the stereo installation; I've decided where it's going, where the speakers are going and how to mount them, just have to do it now. Blanks for a basic under dash console have been cut. Also got the last couple of bits needed for the rear seat belts, so the reels have been mounted. They're going here, hidden underneath the parcel shelf. 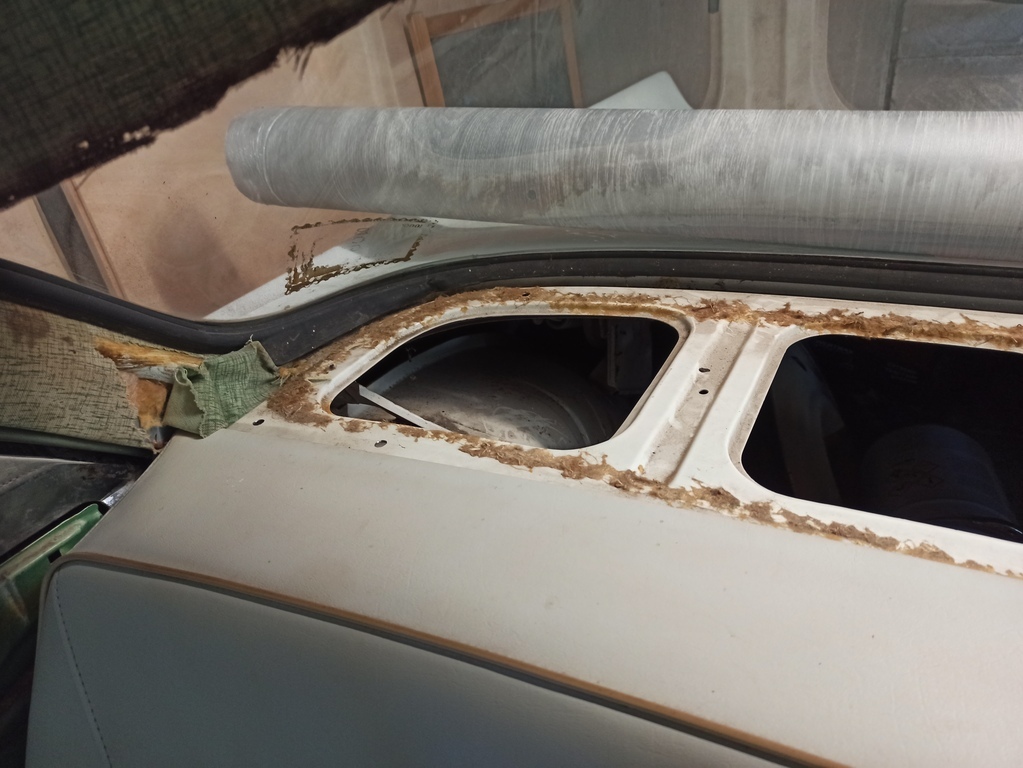 Drill a few holes 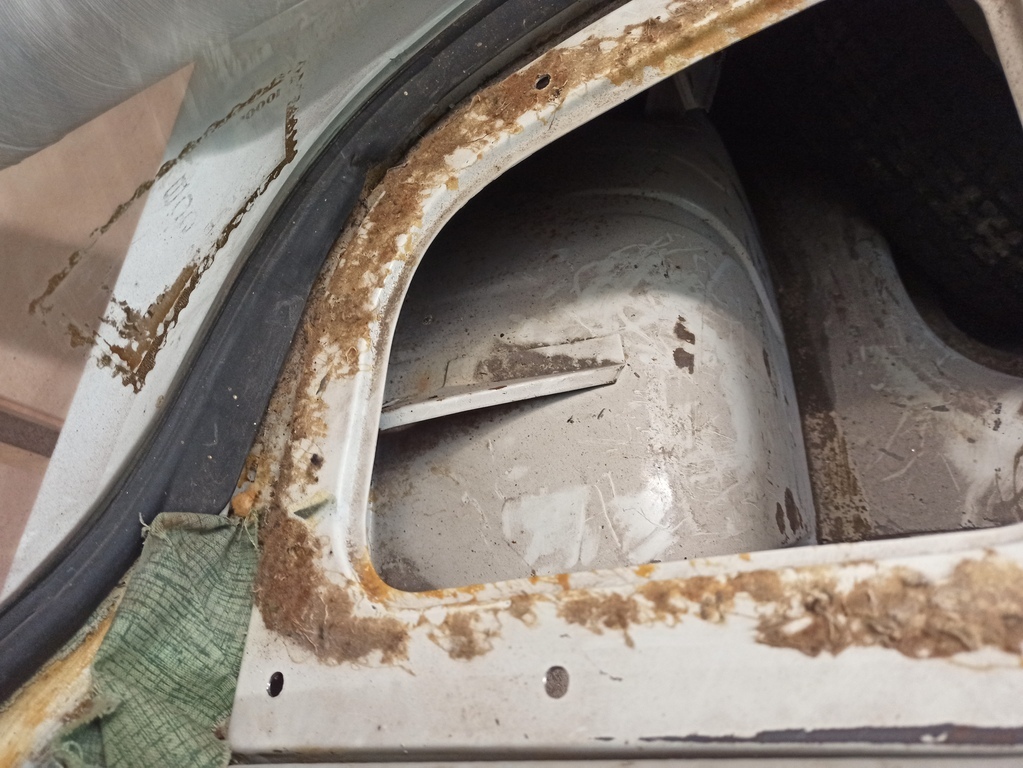 Take one universal mount seat belt and a nice thick bit of steel plate, trimmed to shape and painted black 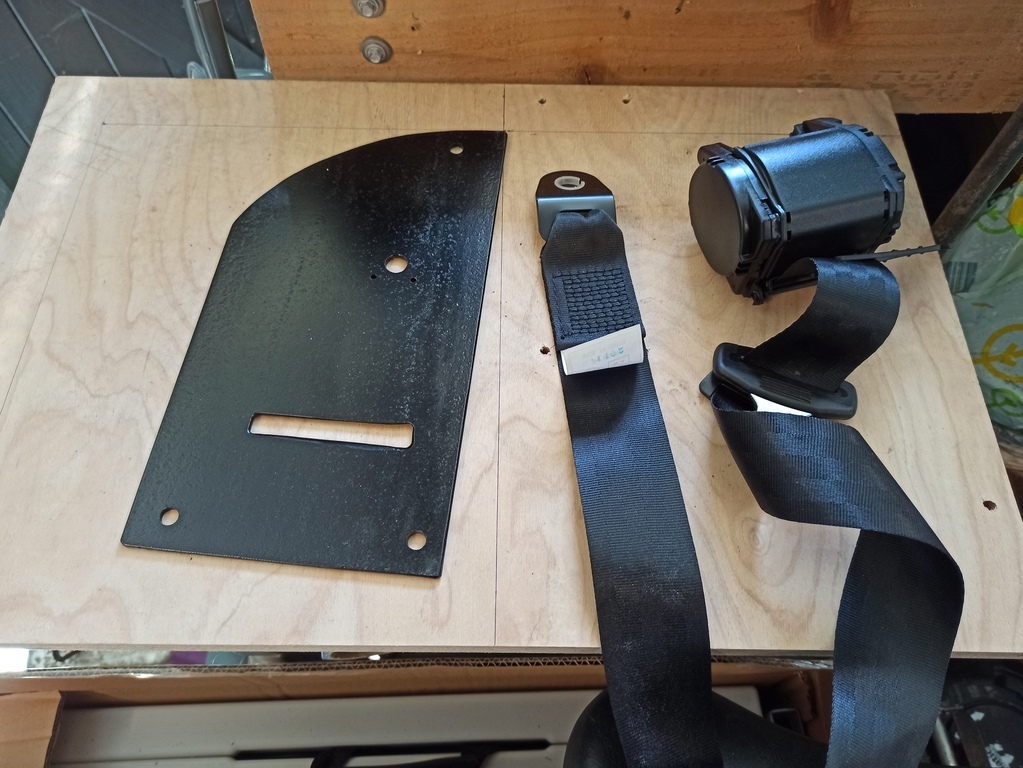 Add a few doubler plates cut from some very thick wall box section 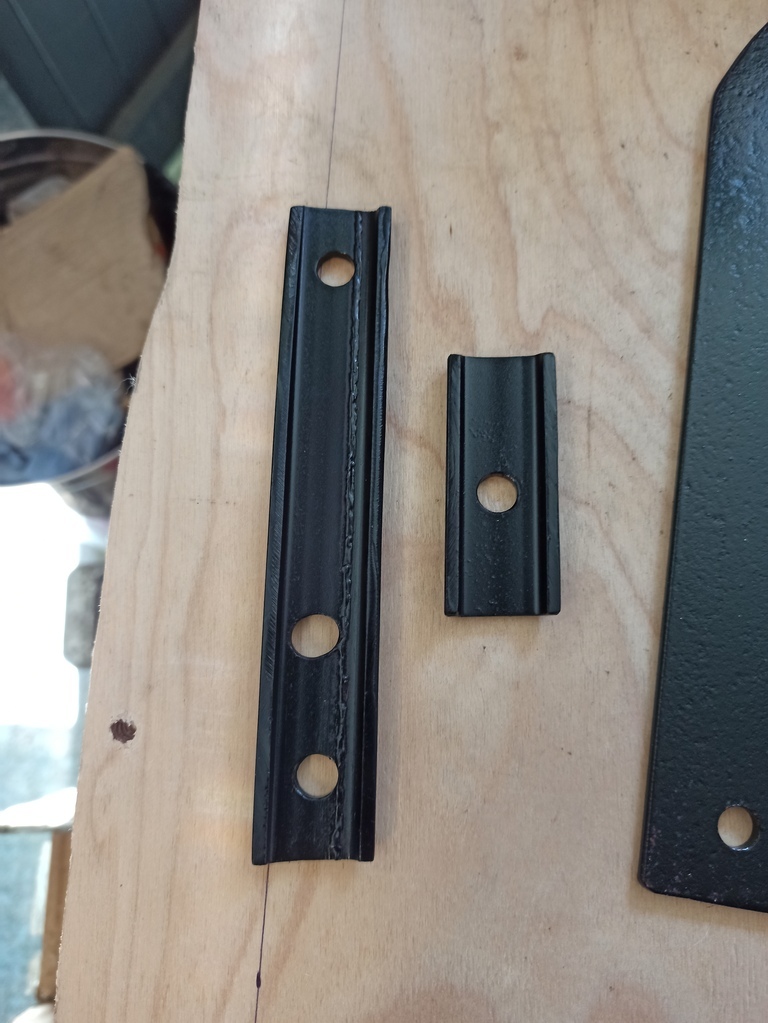 And bolt it all together with some new 10.9 bolts, button head to help hide away. 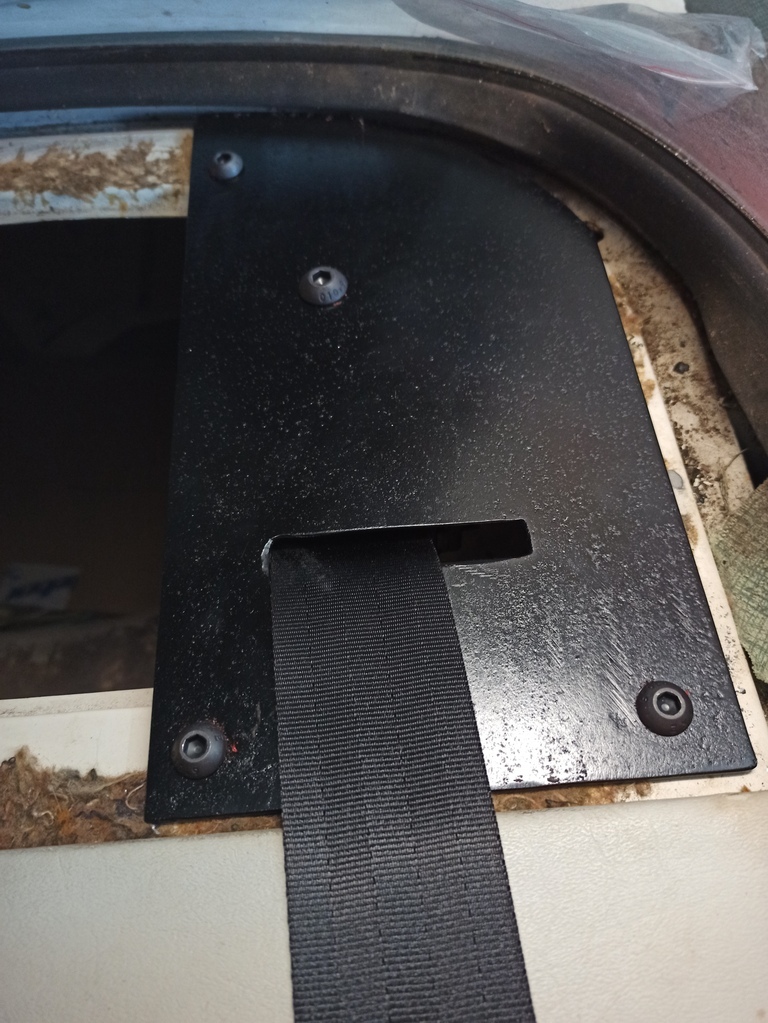 I need to take the rear seat out to fit the lower point and the buckle, I've got some generic belt mounting plates for those. The rear speakers are going inboard of the belts, I've just cut a board to mount them, then another thinner board will go over the speakers and belt plates which will be covered in material. In other, less photo worthy, news I've disconnected the heater matrix to prevent leaking into the cabin. I still need to remove it, but that's lower priority. I also took delivery of a pukka screw kit for the interior and exterior trim which, while it was expensive, is worth it for time saving. Each screw type and location is individually bagged and marked. I'm off on hols for a week, so must keep up momentum when I'm back... |
| |
|
|
mylittletony
Posted a lot
  
Posts: 2,420
Club RR Member Number: 84
|
1957 Ford Fairlane mylittletony
@mylittletony
Club Retro Rides Member 84
|
Sept 15, 2021 8:41:38 GMT
|
I've been gradually ticking off a few jobs: I've started covering the dash and refitting the original trim. It needs sticking down along the front edge still, but I'm pretty happy with how it's looking. 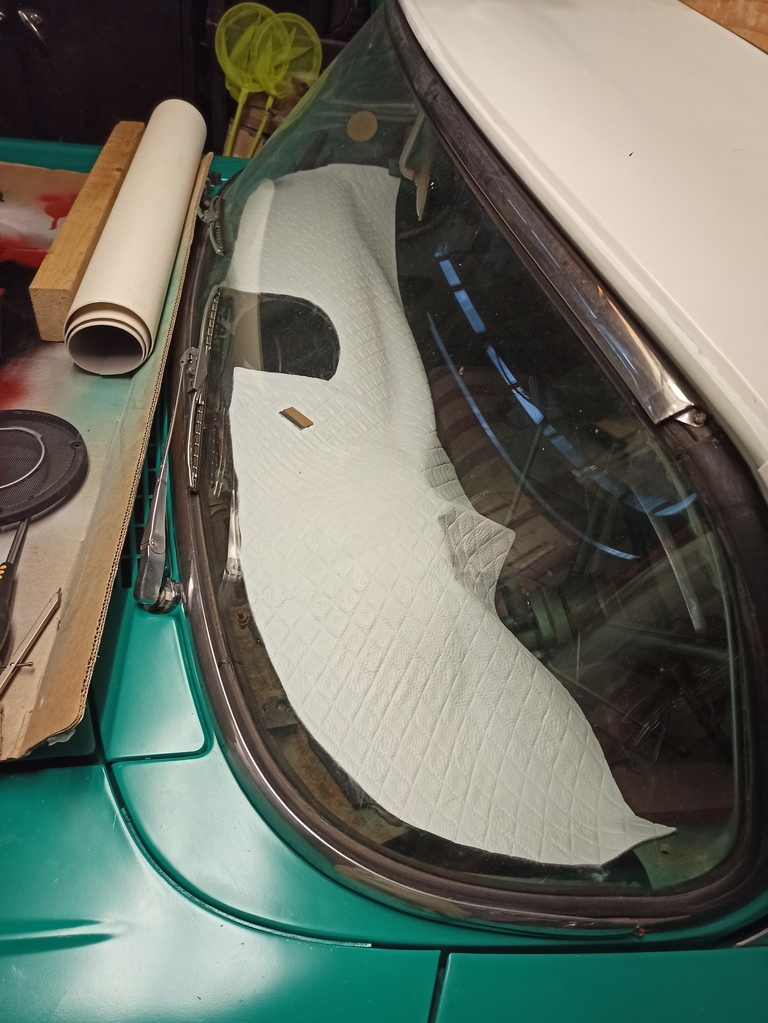 The front console is together and I've got a plan for where the speakers and crossovers are going. Need to run the wires for the stereo next. I've dug out all the exterior trim and started fitting it back up - the only piece I'm worried about is the rear screen lower trim as it is supposed to tuck in the seal which as per previous posts is rock hard, so I think that may get left off until I can justify a new seal. Once again it's mainly been used a glorified shelf... 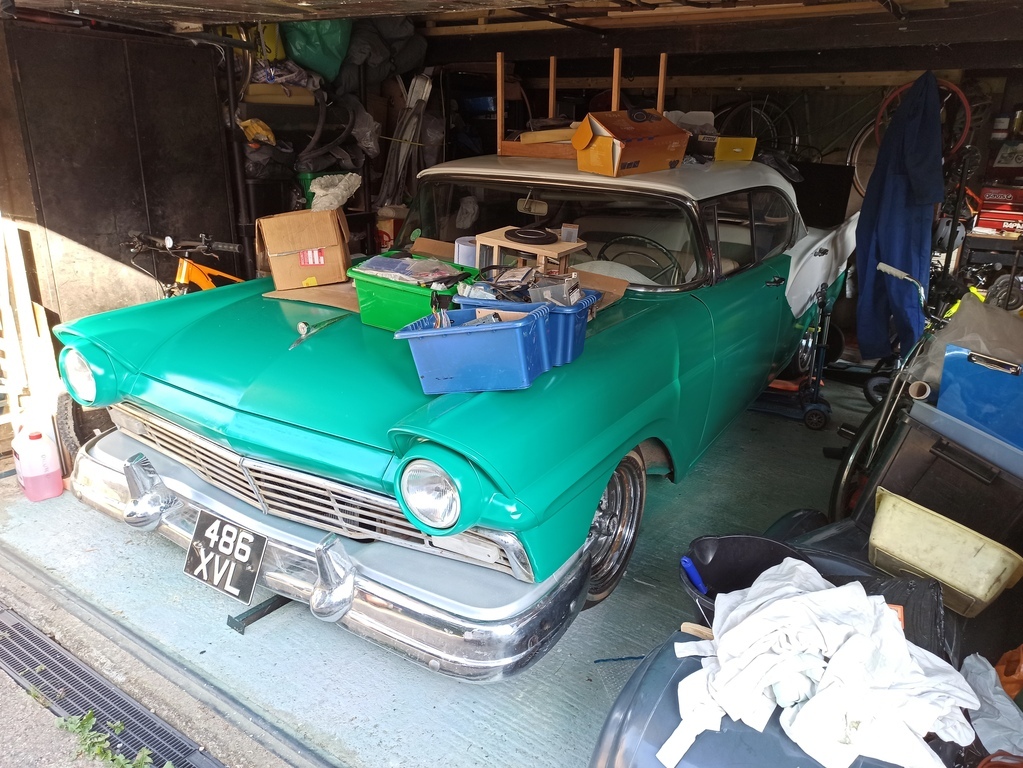 so I made the decision to clear it off and take it down to our local village meet last Sunday, both boys in tow. They really enjoyed it, I did too, even though it's only 1/2 mile from our house!! Here's some pics and a screen grab from a video, none of them mine: 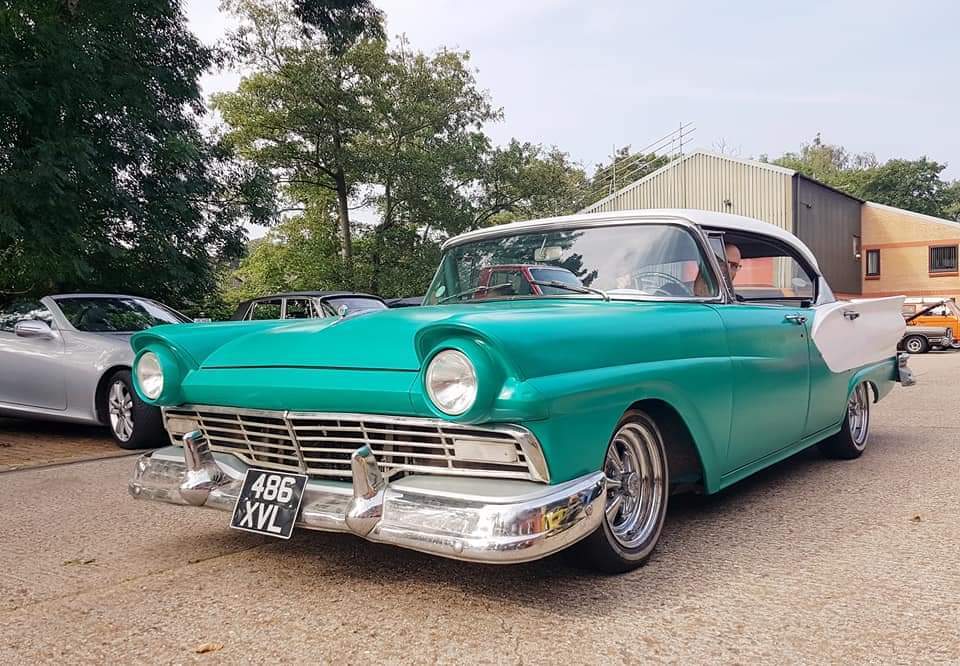 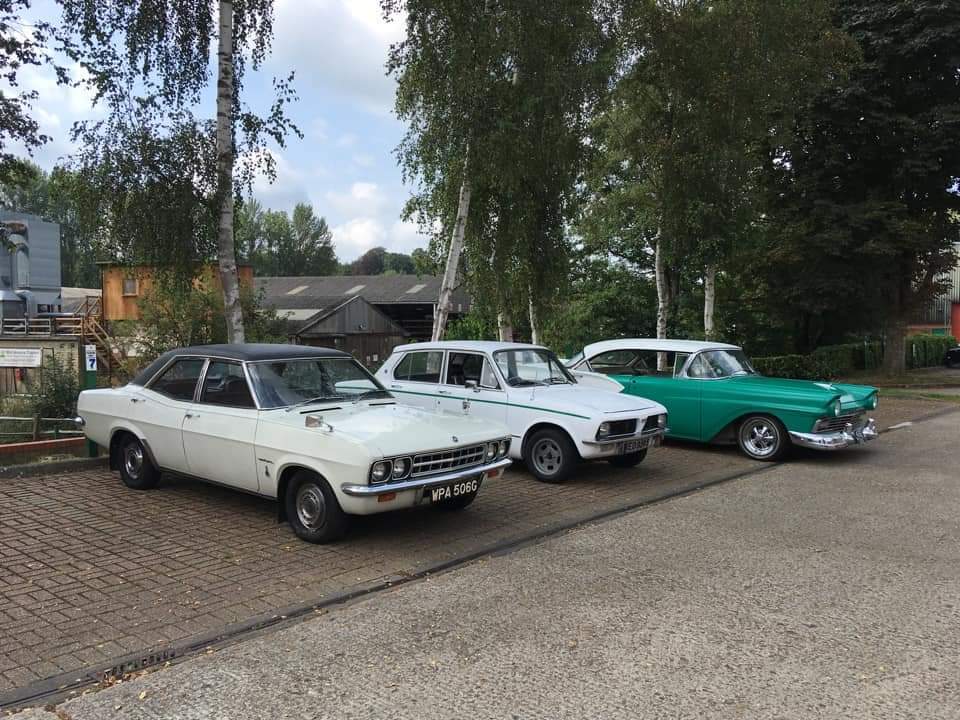 garycox garycox Ventora & Josh's Triumph looking splendid 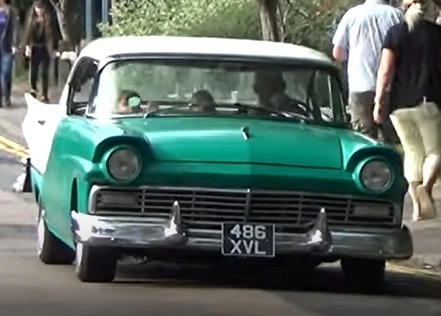 |
| |
|
|
mylittletony
Posted a lot
  
Posts: 2,420
Club RR Member Number: 84
|
1957 Ford Fairlane mylittletony
@mylittletony
Club Retro Rides Member 84
|
|
|
Winter/life has really impacted me on this one... I re-floored the camper project and any time I do any work on that, I need to empty the contents into the garage, usually on top of the Fairlane. This obviously makes working on the Fairlane immensely harder. However, where I can I've been running stereo wires & making connections to the car, carrying on with the speaker mounting, dash trimming and other generally non-photo worthy things. I removed the heater ducting from under the dash a while back so I could get the leaky matrix out, which I finally got round to last night! There's no obvious signs of where it's leaking, but plenty of evidence that it has been. 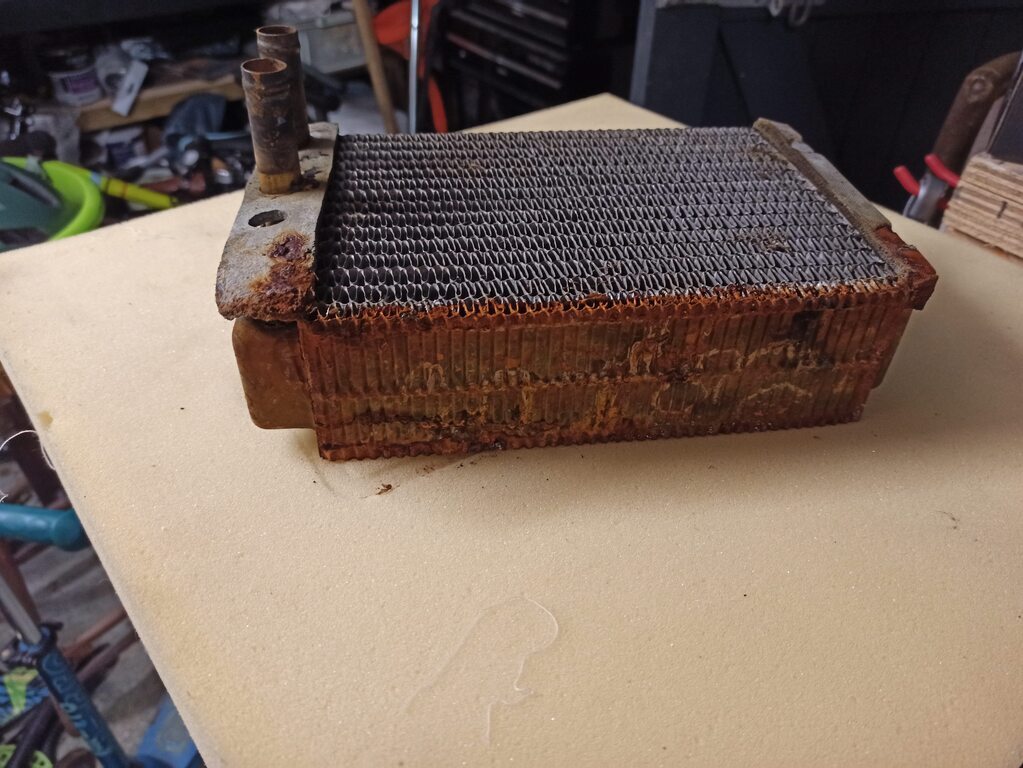 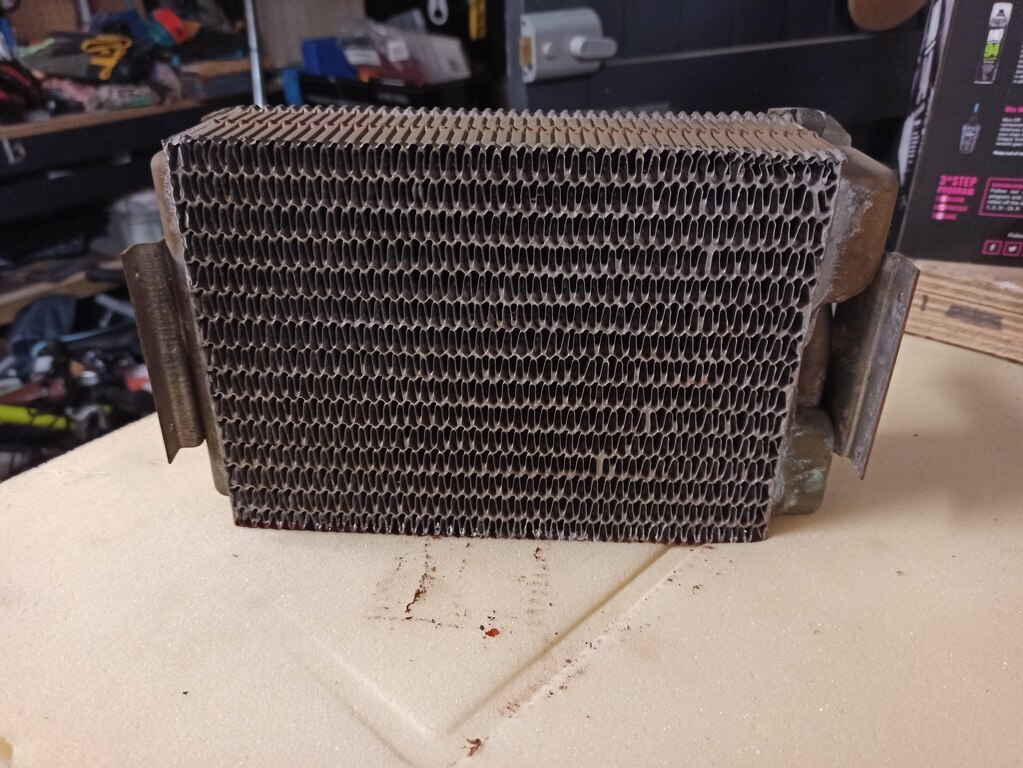 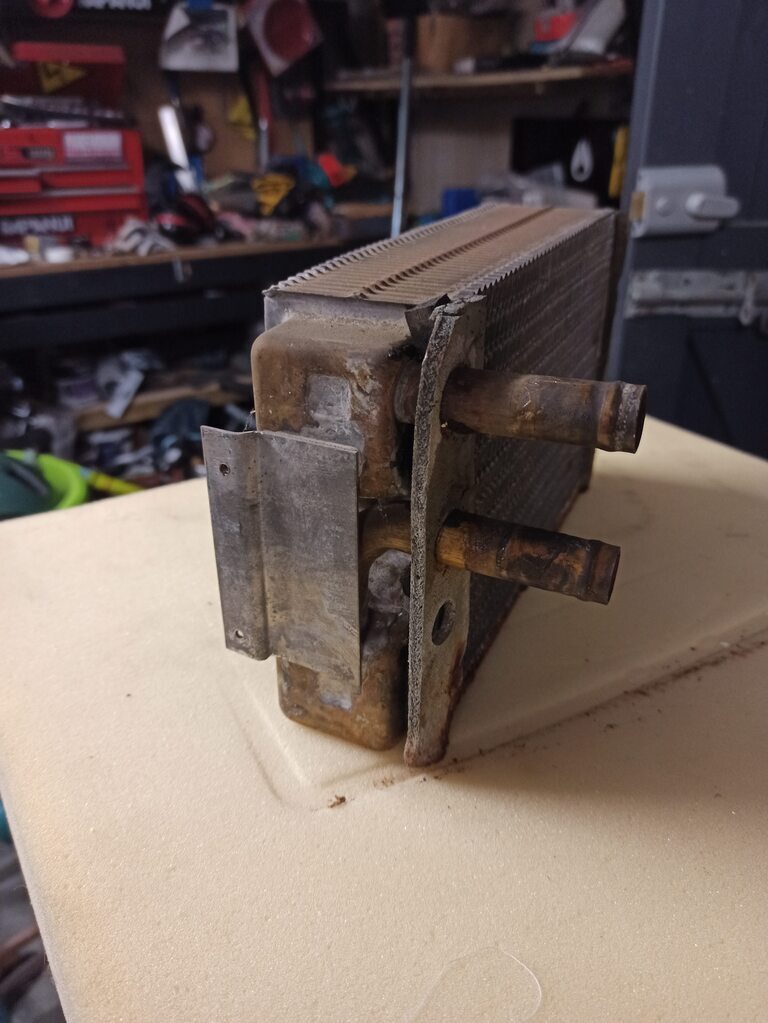 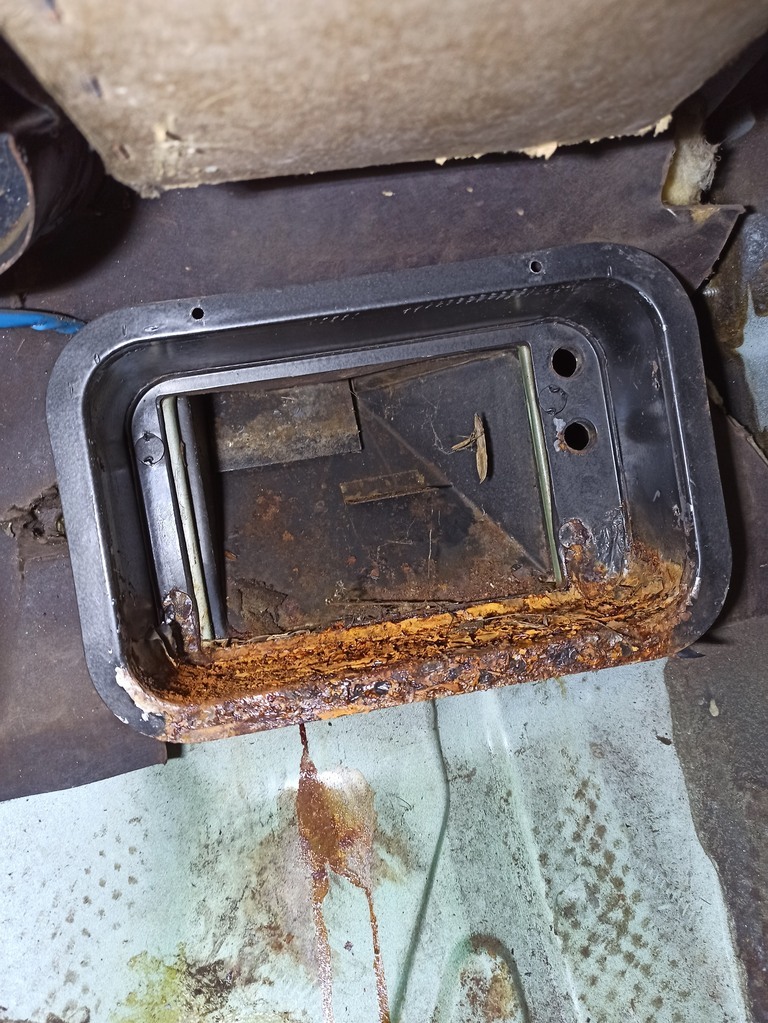 I'm taking it to a place in Tunbridge Wells to see about repairing it. I've also got tomorrow off to progress some further camper jobs, which will allow me to clear out the garage and thus do more on the Fairlane. Plenty of things to do, and I've finally got some motivation back after a long stretch of felling overwhelmed, so hopefully more progress to follow |
| |
|
|
|
|
|
|
|
I've decided to stick with the green and white mainly because of the interior, but it also opens up other options for material selection. e.g. I need to cover the dash and parcel shelf Black gorilla fur or white angel hair |
| |
|
|
|
|
|
|


