mylittletony
Posted a lot
  
Posts: 2,420
Club RR Member Number: 84
|
1957 Ford Fairlane mylittletony
@mylittletony
Club Retro Rides Member 84
|
Apr 28, 2023 15:58:15 GMT
|
First a covering of nice squishy foam 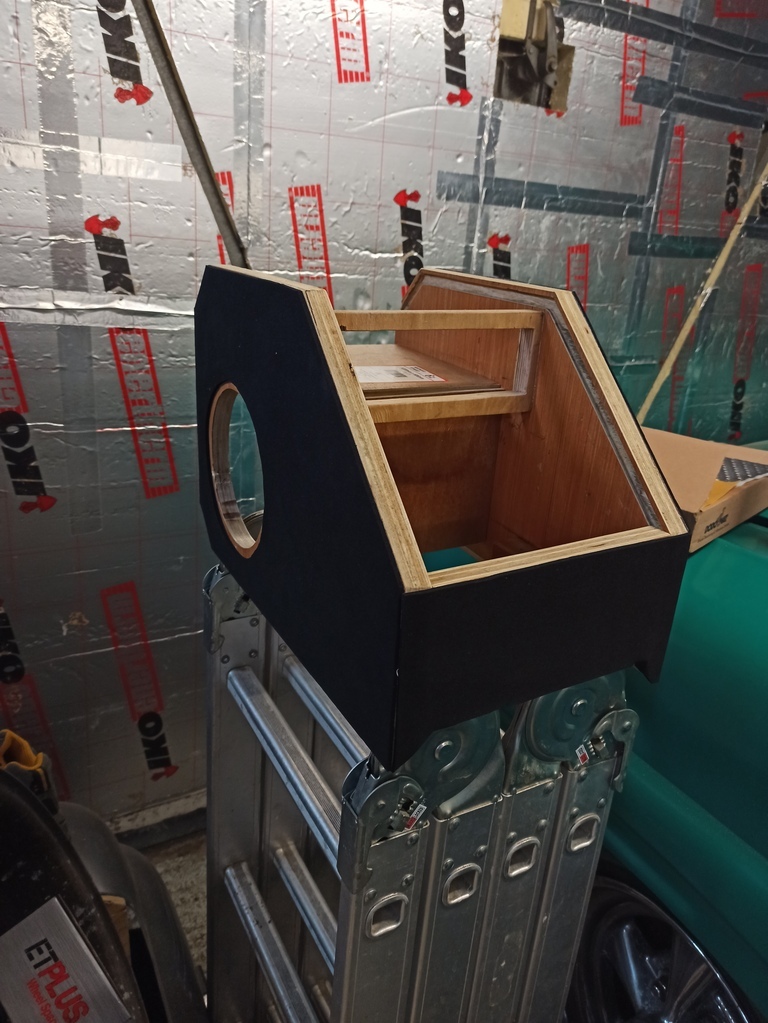 Then yes, the white quilted vinyl. I might spray the shutter green in an attempt to make it not all white, and the inside might get a lick of paint too. I would make you one, but this one has taken me *some* time, with the car to hand |
| |
|
|
|
|
|
|
mylittletony
Posted a lot
  
Posts: 2,420
Club RR Member Number: 84
|
1957 Ford Fairlane mylittletony
@mylittletony
Club Retro Rides Member 84
|
|
|
I recently realised how close we are to the Weekender, how I went last time with it a bit scruffy and how close I am to it being more presentable, so I went out and cracked on with the console. Stick on some vinyl 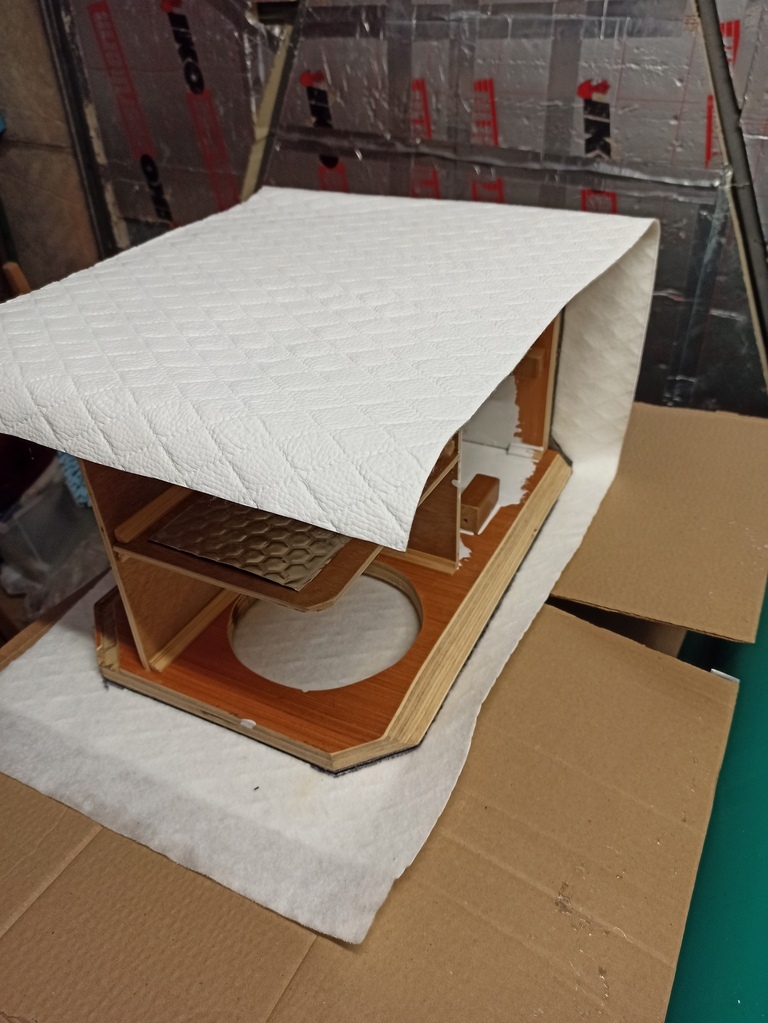 Staples in non visible areas and start trimming 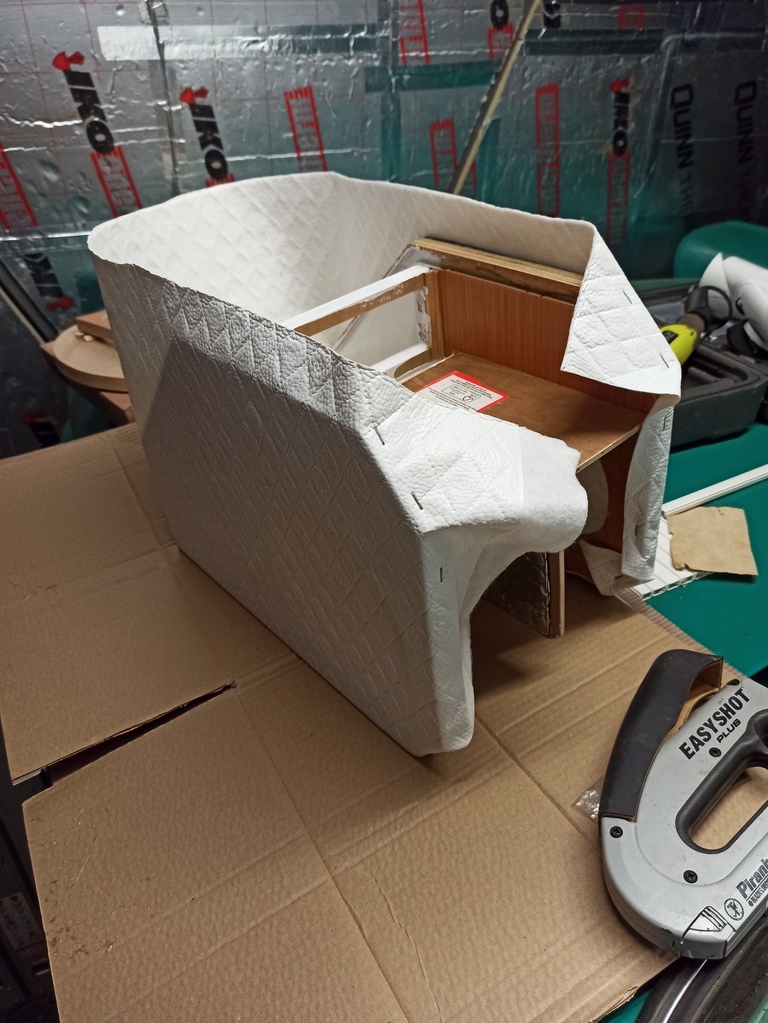 Continue, including cutting out speaker 'oles, until we get to this point 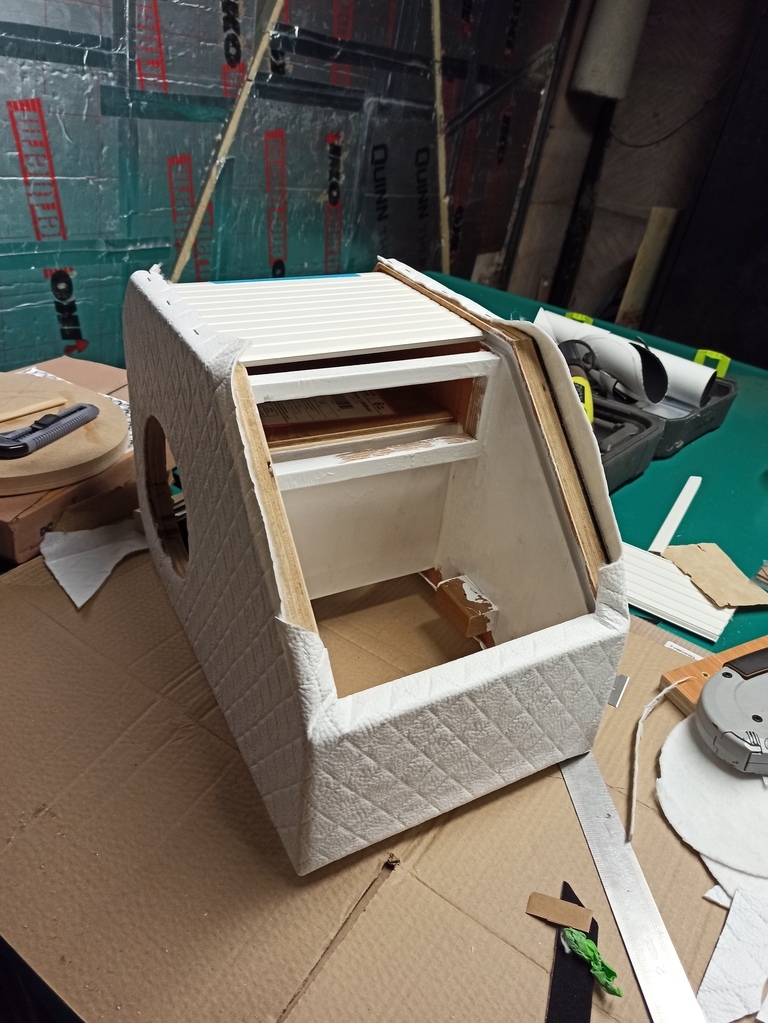 Time for a test fit: 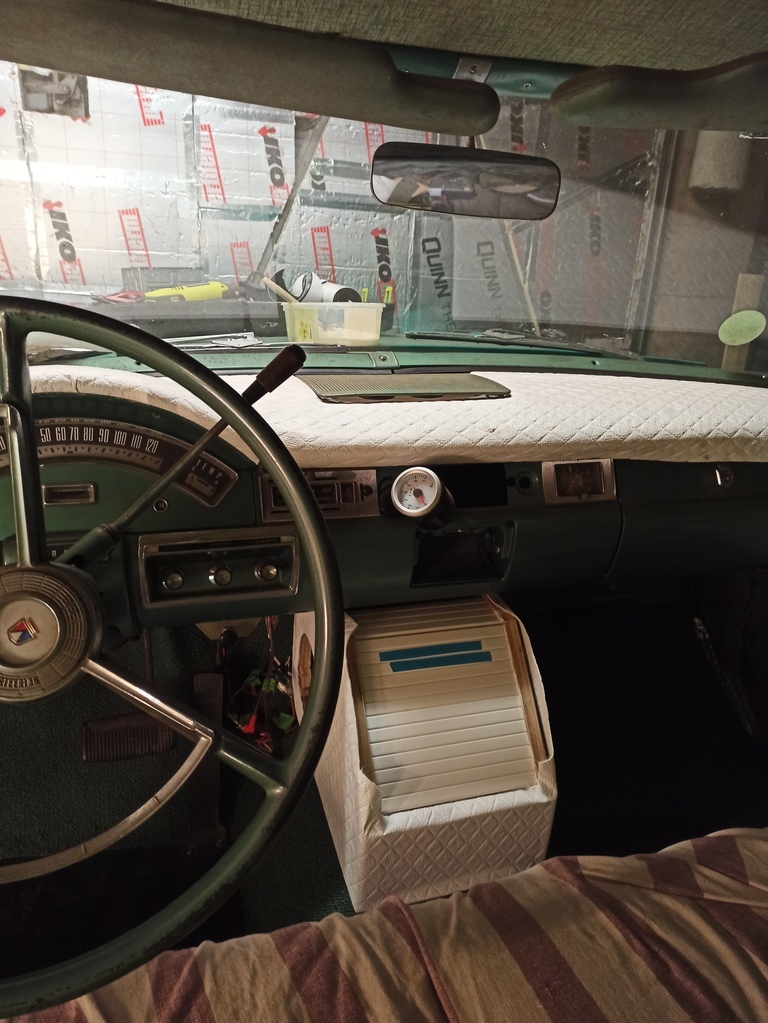 Yes, that's taking shape. Next up is filling it with stuff 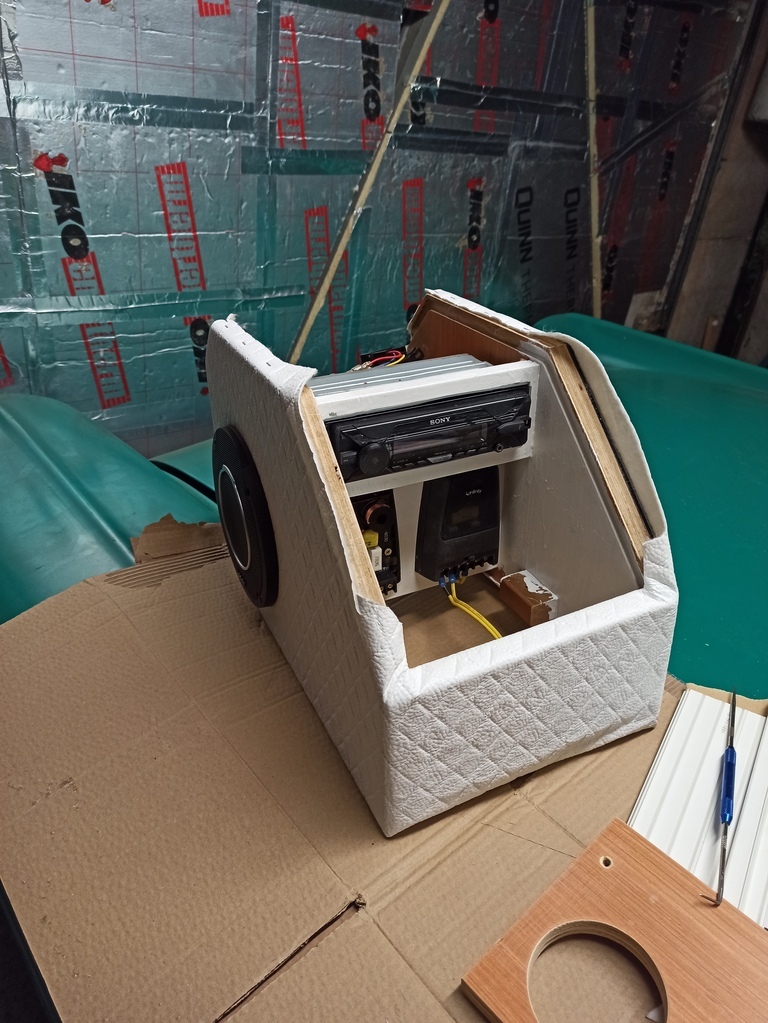 I had been struggling with how to attach the vinyl along the front edges, without visible staples. I've not yet found a glue that will hold on a thin edge like that... So I'm waiting for some small unequal aluminium L section to arrive and some capped screws which should finish it off and give a little bling to it as well. I want to check the speakers before I fit it to the car for good, and have some upper dash tidying before that too. |
| |
|
|
mylittletony
Posted a lot
  
Posts: 2,420
Club RR Member Number: 84
|
1957 Ford Fairlane mylittletony
@mylittletony
Club Retro Rides Member 84
|
|
|
|
It's also worth mentioning that the boxing in of the speakers looks very promising from a sound point of view.
I glued in a separating baffle, and the PVA sealing seems to have taken a fair bit of the hollowness out. The main help though was two pieces of the sound deadening material stuck to each side!
|
| |
|
|
mylittletony
Posted a lot
  
Posts: 2,420
Club RR Member Number: 84
|
1957 Ford Fairlane mylittletony
@mylittletony
Club Retro Rides Member 84
|
|
|
|
I grabbed a quick 5 mins to test the speakers, they're better but still nowhere near the punch from the rears...
Luckily, since I fixed the rears, this is less of a problem!!
I cleared some of the stuff off the car, found the other crossover grill and wrapped the spare screen to go in the loft
I still need to reattach the original dash speaker grill and then refit the OG radio to fill the hole, then once the console is done I can slot it in more permanently.
|
| |
|
|
mylittletony
Posted a lot
  
Posts: 2,420
Club RR Member Number: 84
|
1957 Ford Fairlane mylittletony
@mylittletony
Club Retro Rides Member 84
|
|
|
Here endeth my productive streak. Back to regular f***ing things up. I was doing so well! I decided that seeing as tomorrow is going to be a beautiful day I would take it to work, first outing of the year. I got everything off the car, sorted out the inside a bit, fired it up and got out to the driveway. Pumped up the tyres and blew off some of the dust even! I have had a slow but persistent water leak, the level kept dropping and it took me a while to find it was coming from here, under the thermostat housing. 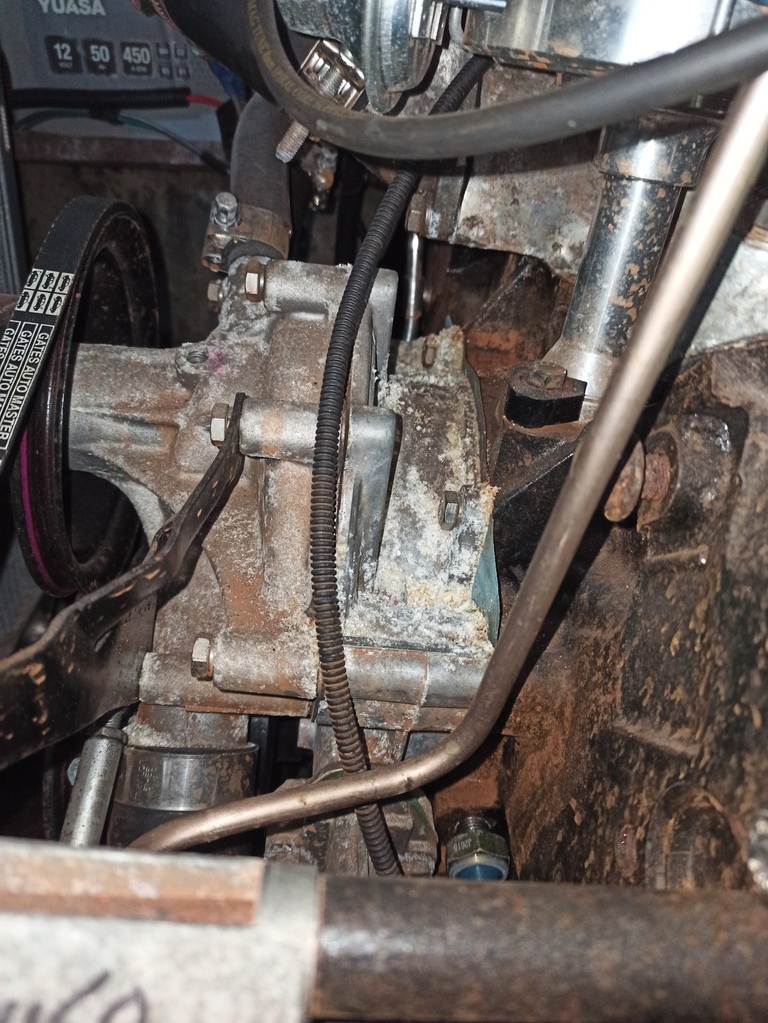 Dez Dez had mentioned it was a pig to seal, so I had bought a really fancy (expensive, really expensive) gasket, touted to solve miracles 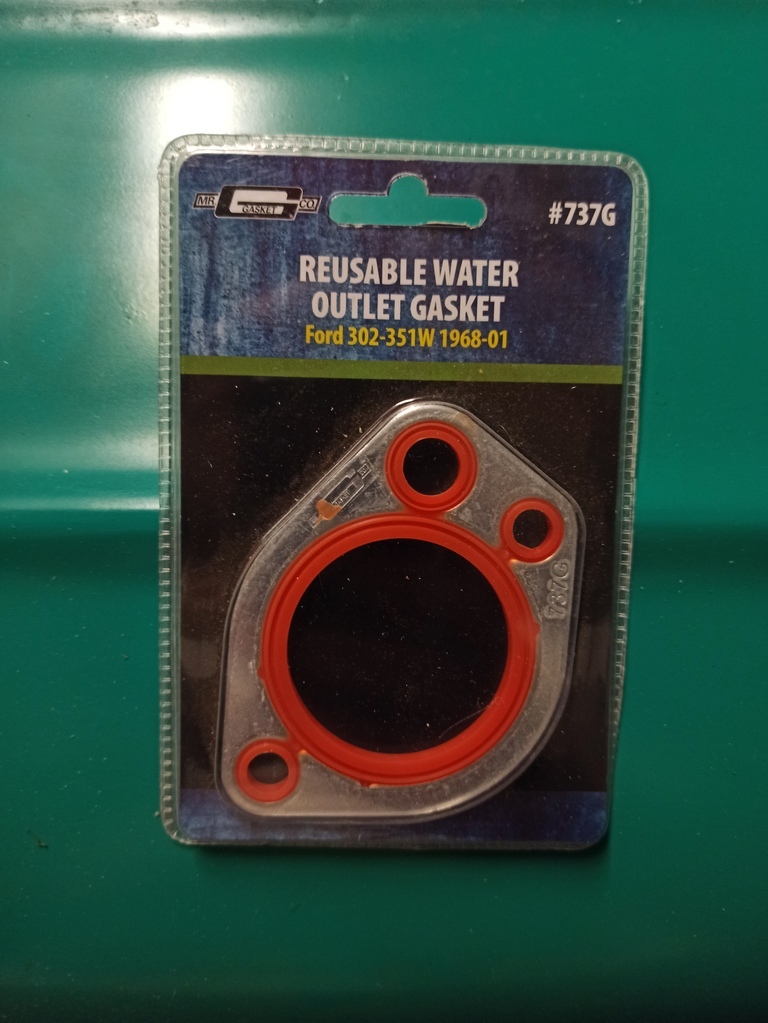 So I thought to myself; this would be a great time to fit the gasket, whip off the thermostat housing, swap gaskets, problem solved. Road test tomorrow! 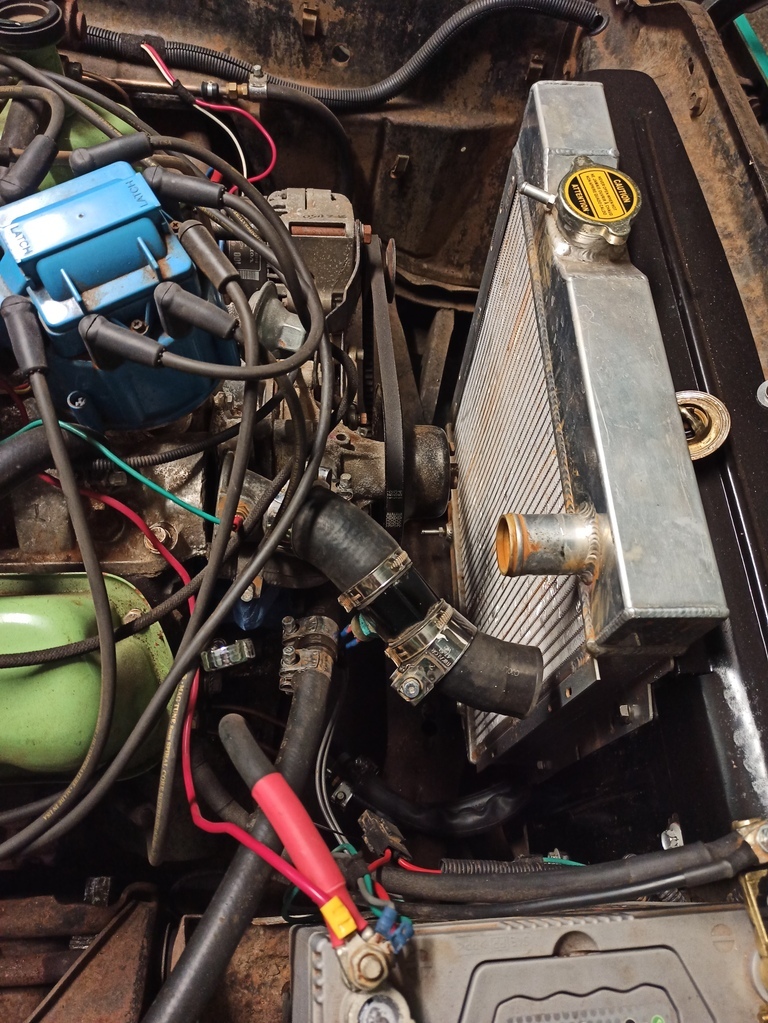 The hose routing and inline radiator switch mean this is a total **** Grubby parts and goop to seal 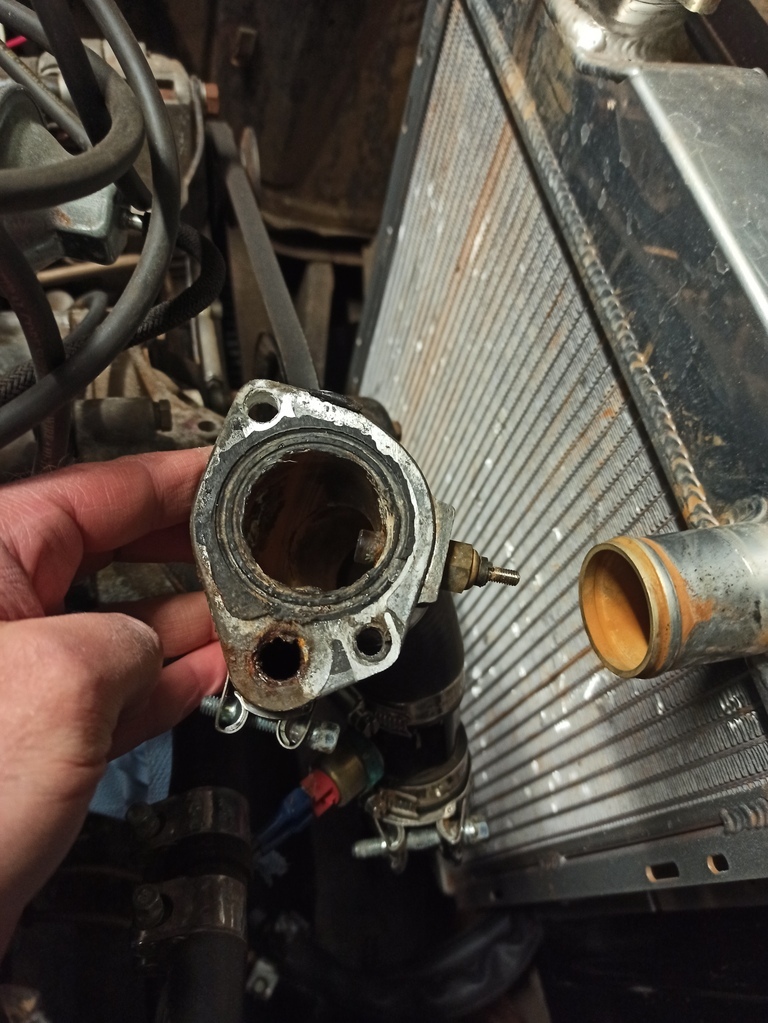 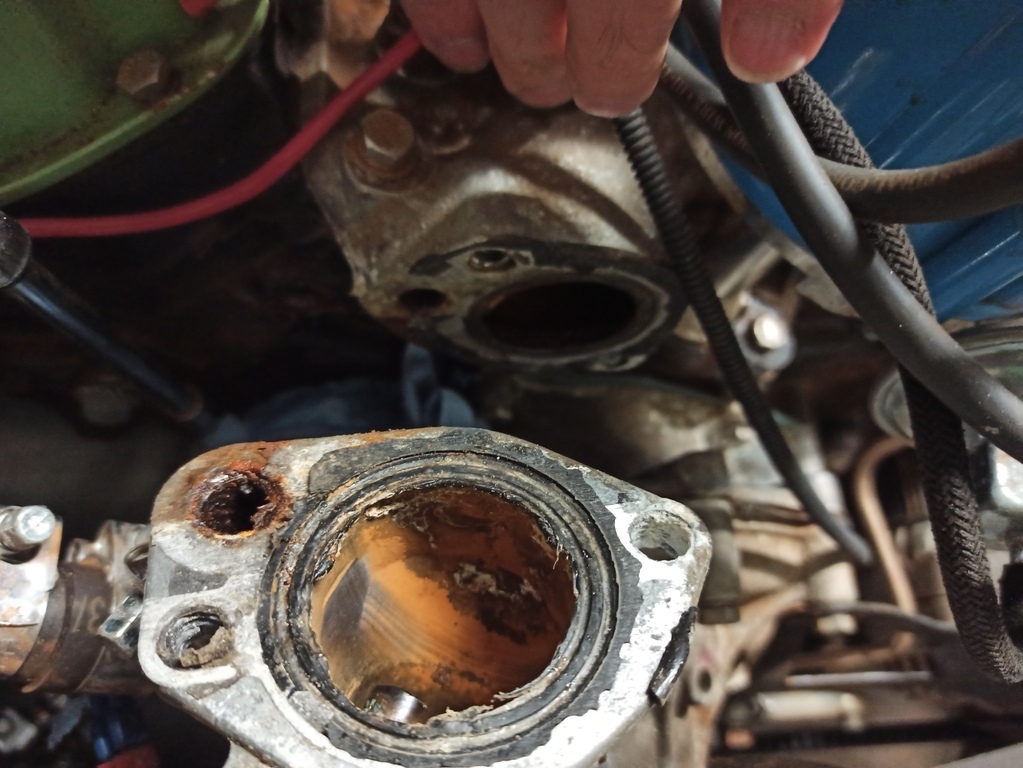 I cleaned up the surfaces slipped in the new gasket, remembered to fit the thermostat, bolted it up (also a massive **** due to zero spanner room) and filled it up. The water fell out Naturally I had decided to do coolant system work IN the garage, AGAIN. So I had to deal with two litres of water on the floor. Luckily we pet-sat some hamsters not long ago and had some bedding left over... Anyway, I can't see why it's falling out, unless I'm missing something? Thermostat goes into the housing like so? 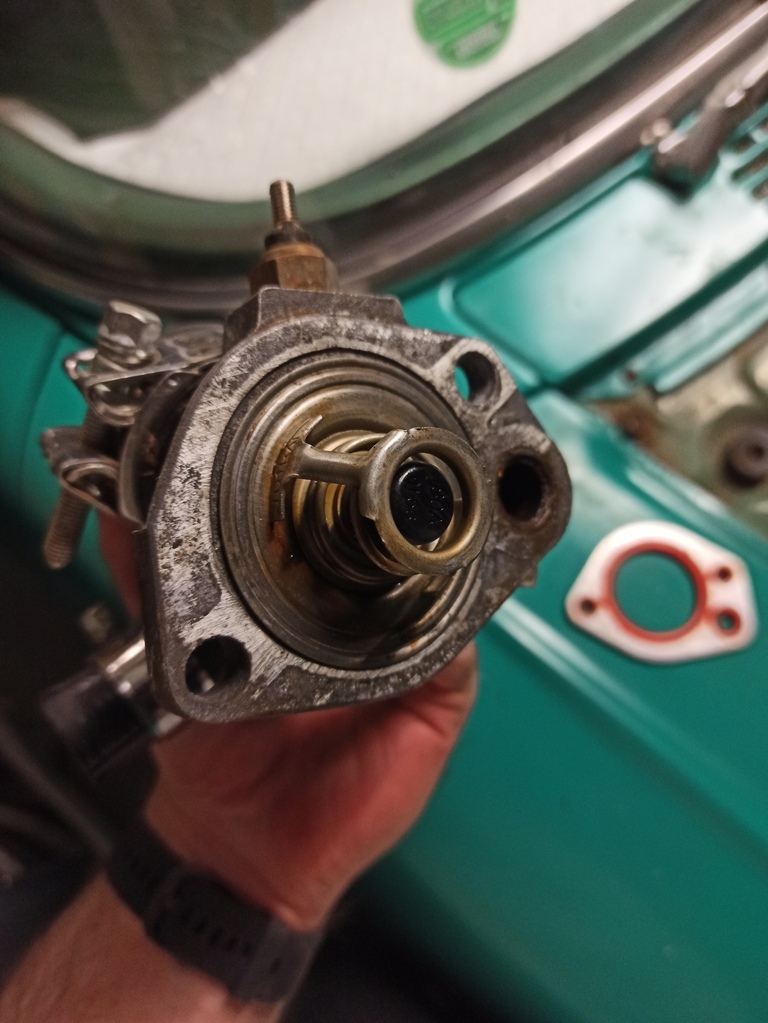 Then gasket like so, then bolt to inlet manifold? 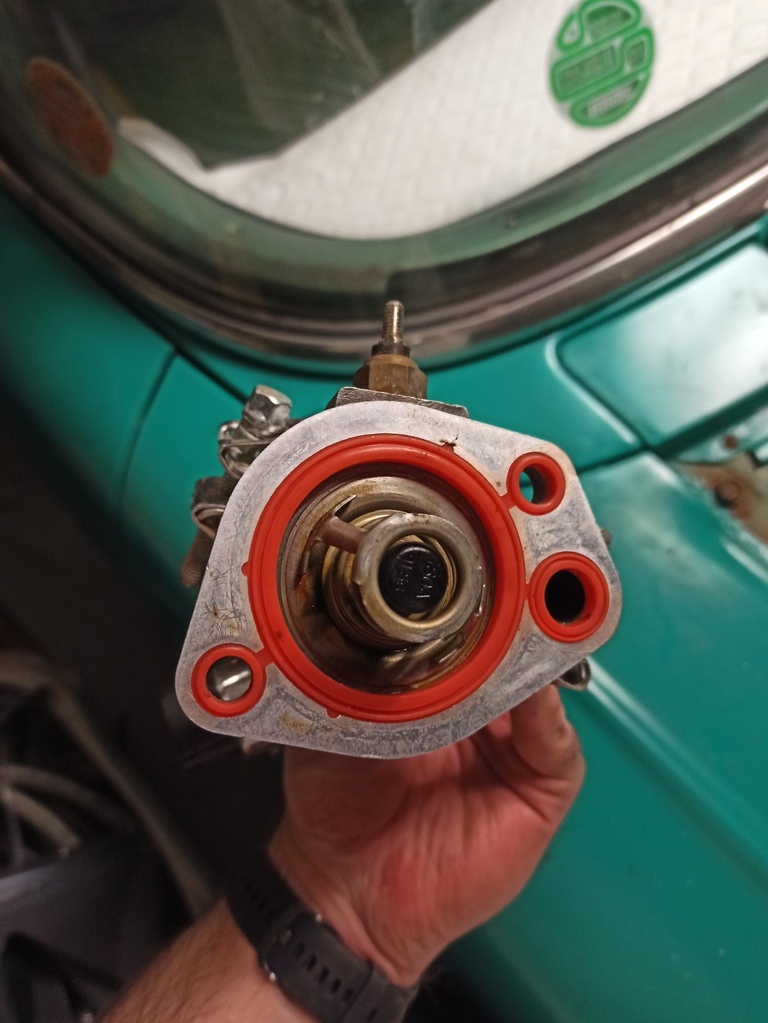 So basically I rendered my working car completely unusable the night before it's first trip of the year, yay me. Any ford v8 gurus ( metalshapes blackpopracing and anyone else I've missed) please feel free to weigh in! |
| |
|
|
Dez
Club Retro Rides Member
And I won't sit down. And I won't shut up. And most of all I will not grow up.
Posts: 11,790
Club RR Member Number: 34
|
1957 Ford Fairlane Dez
@dez
Club Retro Rides Member 34
|
|
|
Looking at that, it seems to be leaking from the bypass and not around the thermostat.  And yeah that thing was an utter sh1t. I don’t like using gasket goop if it shouldn’t be there, so I filed both surfaces flat before fitting. The inlet was quite corroded and took a bit to level out, it’s a fairly poor quality casting even before the corrosion and there was no hope of it ever sealing before despite the 3 gaskets on it. The thermo housing was better quality casting was wasn’t too bad. I think I had to helicoil both those holes as well due to previous overtightening, presumably in an attempt to get a seal. It still leaked so I had to goop it. Tbh it only having two bolt holes is a poor design given where the bypass is. The fact that gasket exists suggest that. All you can really do is take it all apart and sand/file things smooth and flat again and hope the better gasket will sort it. *EDIT* looking at in again I think the thermostat housing is warped. Get it on a flat surface on a sheet of medium grit paper and rub it back and forth ‘til all the mating surface is shiny, then refit. |
| |
|
|
mylittletony
Posted a lot
  
Posts: 2,420
Club RR Member Number: 84
|
1957 Ford Fairlane mylittletony
@mylittletony
Club Retro Rides Member 84
|
|
|
Looking at that, it seems to be leaking from the bypass and not around the thermostat. *EDIT* looking at in again I think the thermostat housing is warped. Get it on a flat surface on a sheet of medium grit paper and rub it back and forth ‘til all the mating surface is shiny, then refit. Yeah that was definitely where it was originally dripping from. I cleaned up both surfaces when it was apart and the gasket is supposed to tolerate "surface imperfections" but the new leak was a proper stream... I wondered if I had the thermostat seated badly, i.e. not in the recess, but it was so hard to assemble I couldn't really check. I've got it apart again, so will check the housing for flatness and try to remove and refit the hoses last |
| |
|
|
|
|
1957 Ford Fairlane HARDCORE
@hardcore
Club Retro Rides Member 190
|
|
|
Here endeth my productive streak. Back to regular f***ing things up. I was doing so well! You've not curse word that up man. Annoying timing, but it's better to have it geyser there than on the motorway. |
| |
|
|
|
|
|
|
|
|
I agree with Dez. get a sheet of sandpaper on a really flat surface and keep rubbing it till its shiny all over.
If you are able to get a very flat sanding block (peice of planed wood) on the engine surface then do that as well.
A thin smear of Hylomar on each surface - let dry before assembly - as well as the gasket 'should' render it leak free.
|
| |
|
|
|
|
mylittletony
Posted a lot
  
Posts: 2,420
Club RR Member Number: 84
|
1957 Ford Fairlane mylittletony
@mylittletony
Club Retro Rides Member 84
|
|
|
A little update: The way I assembled everything was having the hose attached to the rad and housing, then manipulating to get the thermostat and gasket in. I've got a feeling the thermostat lip may have been trapped given the rate the water came out. I brought it all into work to have a fiddle and had a little brainstorm with dez. I measured the relative diameters 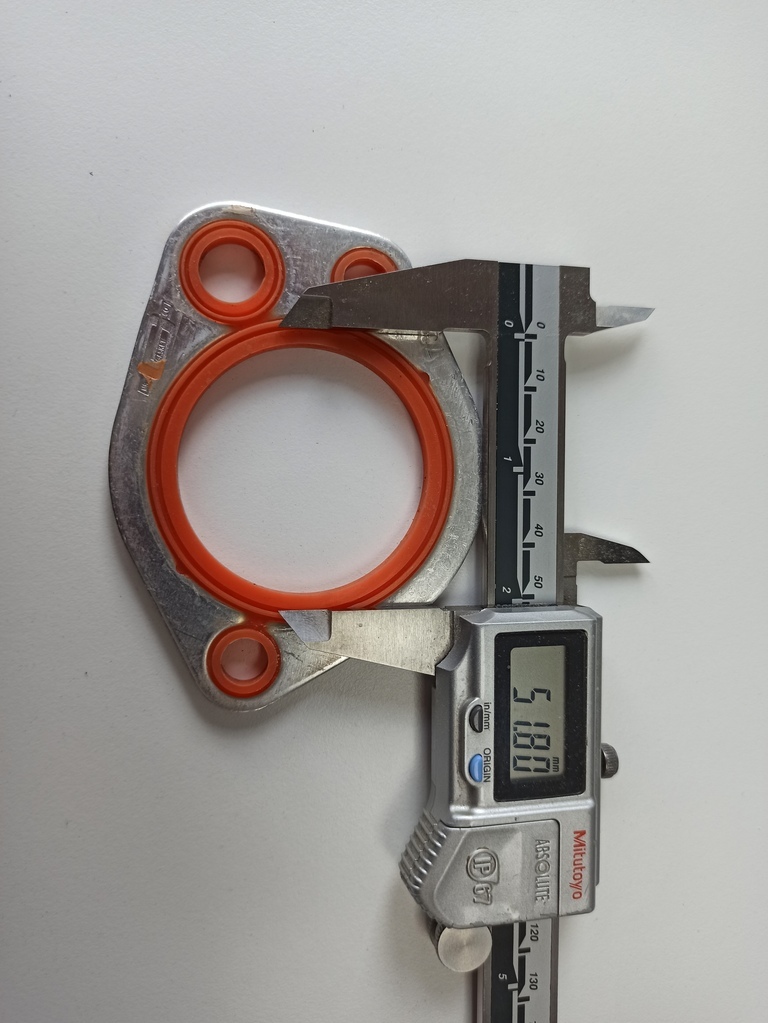 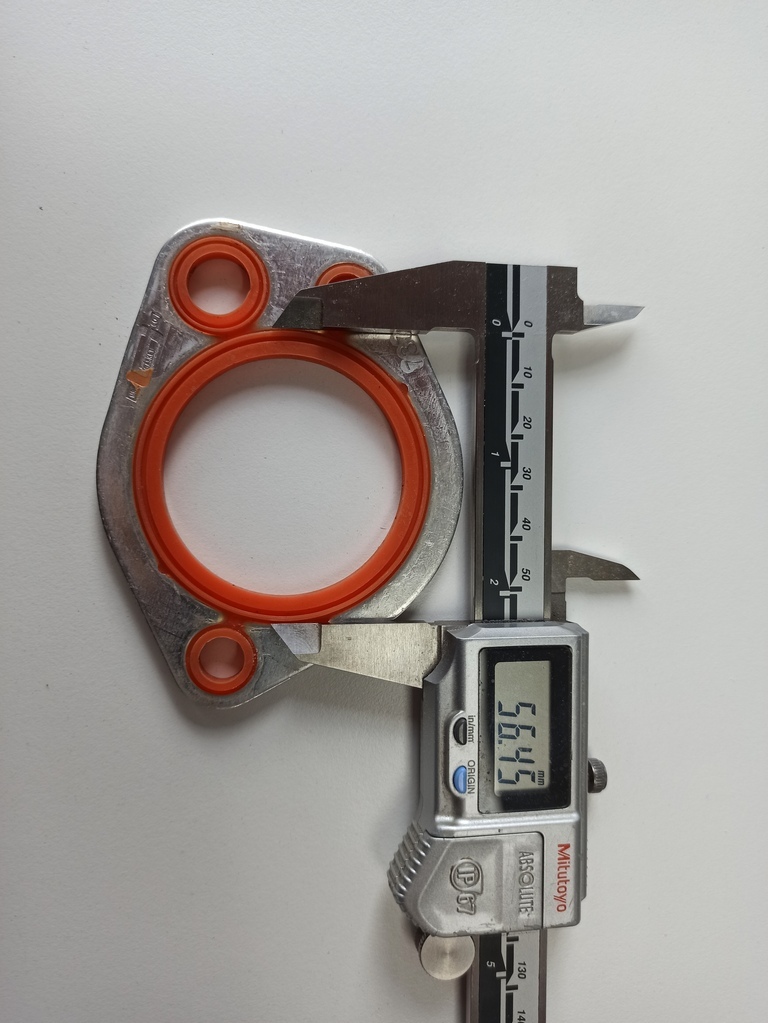 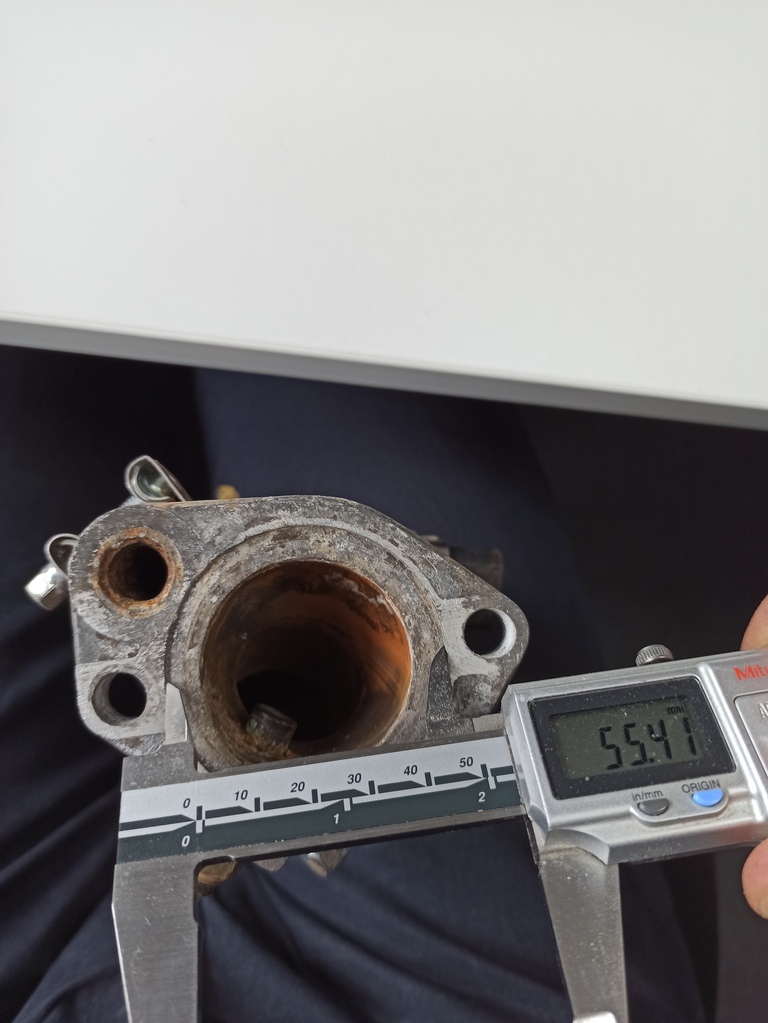 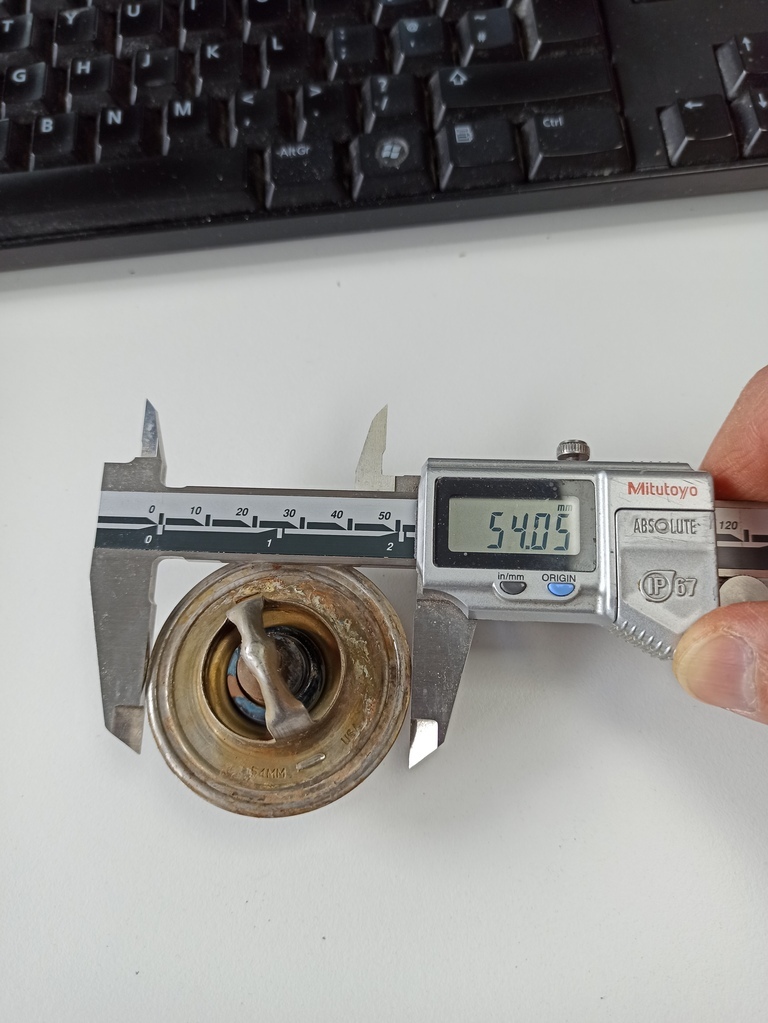 It looks like the thermostat sits slightly proud of the housing 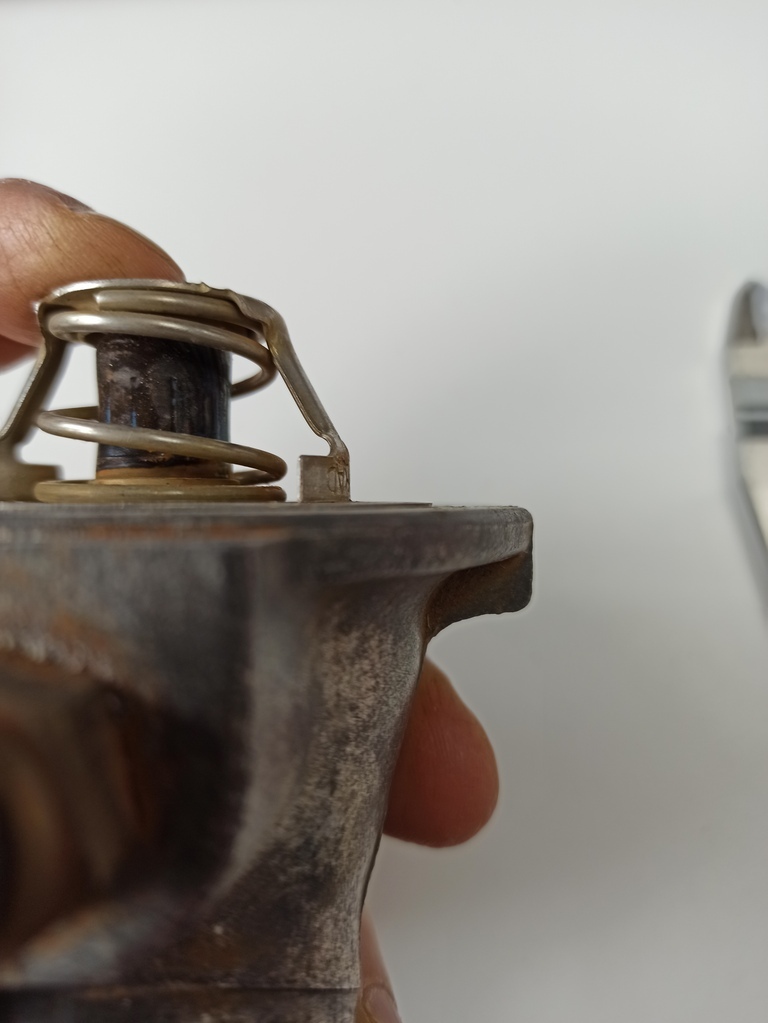 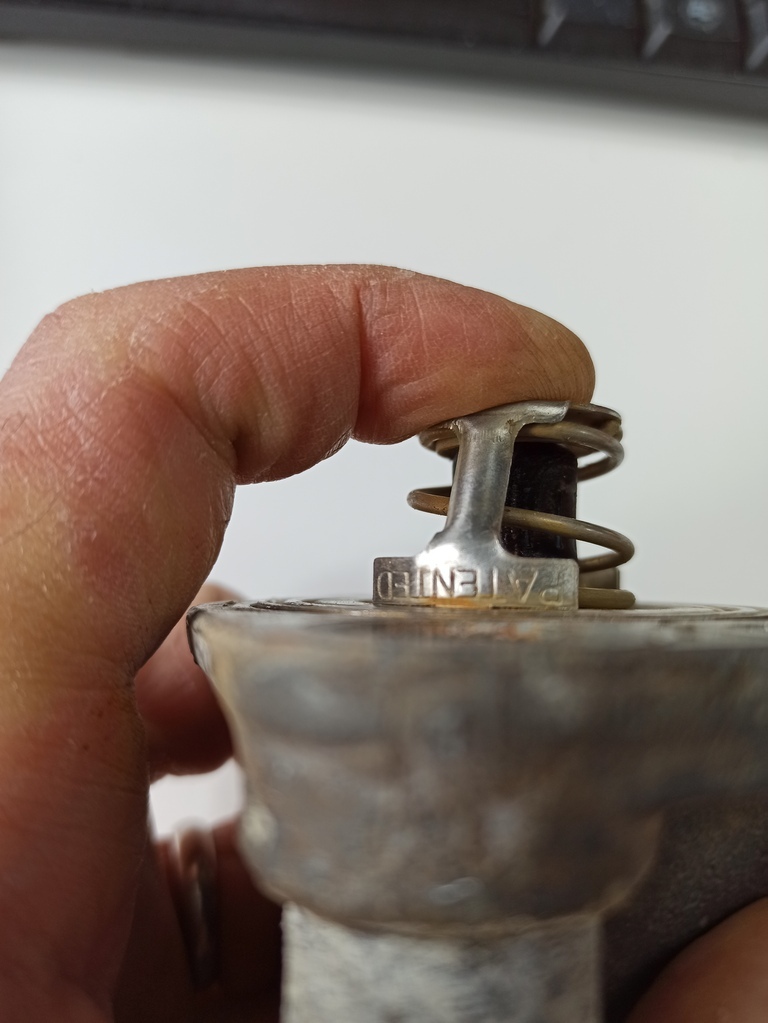 I have sanded the surface of the housing and got this: 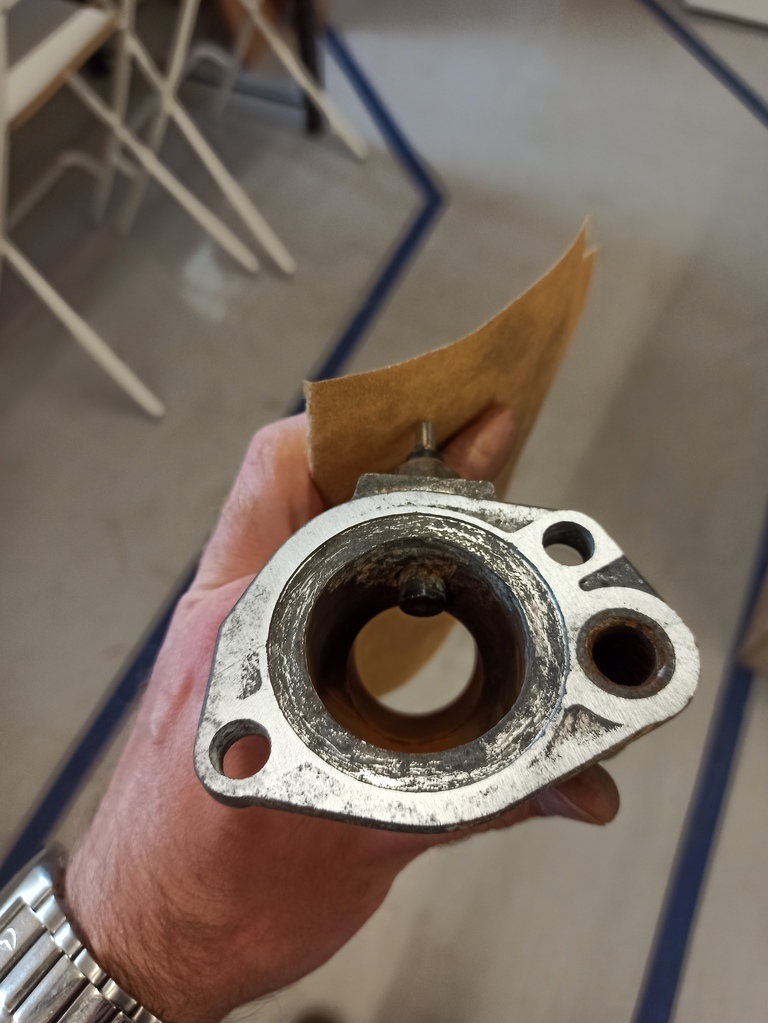 Part of the problem is the inline rad fan switch making fitting the upper hose virtually impossible, so I'm going to look into relocating this. I'm also going to refit the housing without the thermostat to see if I can get the seal to seal. |
| |
|
|
|
|
|
|
|
|
Bit more, at the 4 o'clock position into the triangle needs to be more flat to not leak.
Over time the pits will gather water and corrode, pushing the seal out.
Would also move to 800 grit from there.
Yes the stat should be slightly proud, the bulge pressed into the metal of the stat frame is springy and designed to make a seal against the block.
|
| |
Last Edit: May 4, 2023 13:49:34 GMT by PhilA
|
|
|
|
|
|
|
|
Does the bypass part of the gasket seat on the nice clean surface, looks to me like it might be on the horrible corroded bit.
|
| |
|
|
mylittletony
Posted a lot
  
Posts: 2,420
Club RR Member Number: 84
|
1957 Ford Fairlane mylittletony
@mylittletony
Club Retro Rides Member 84
|
|
|
I really appreciate everyone's help on this, exactly what a good forum is all about. I had another sand of the housing, then when I got home this afternoon a lick with some 600 wet and dry. I also gave the inlet manifold the same, using a block of planed wood as suggested. See the results below, note the inlet pic is blurry which makes it looked really warped. 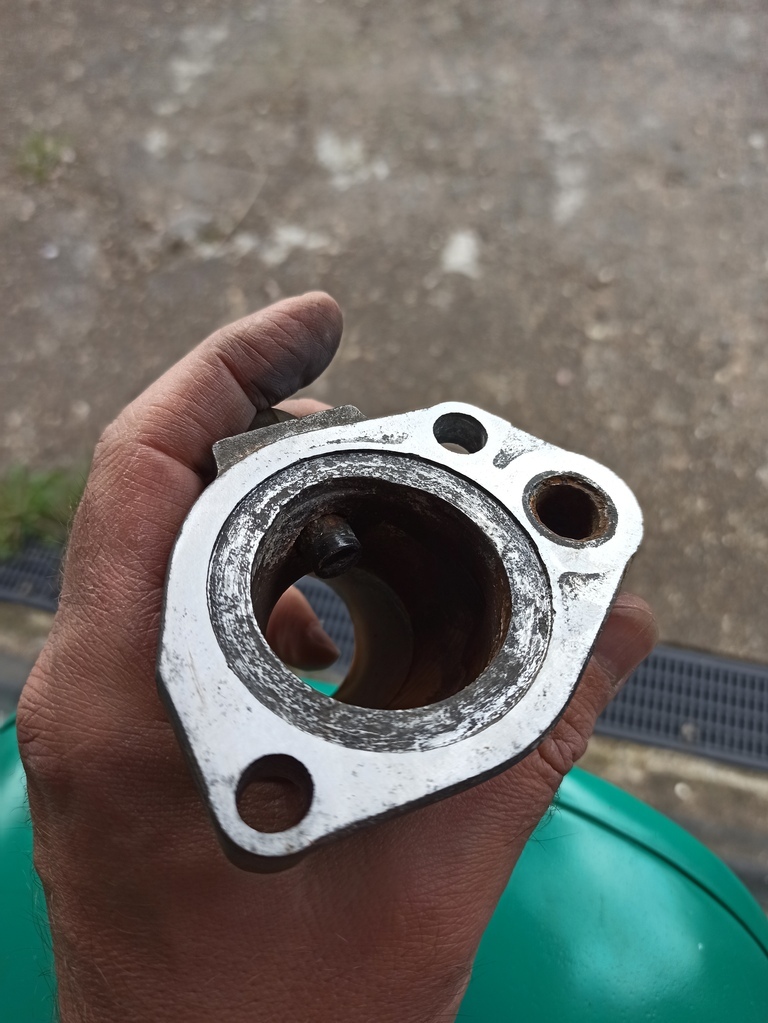 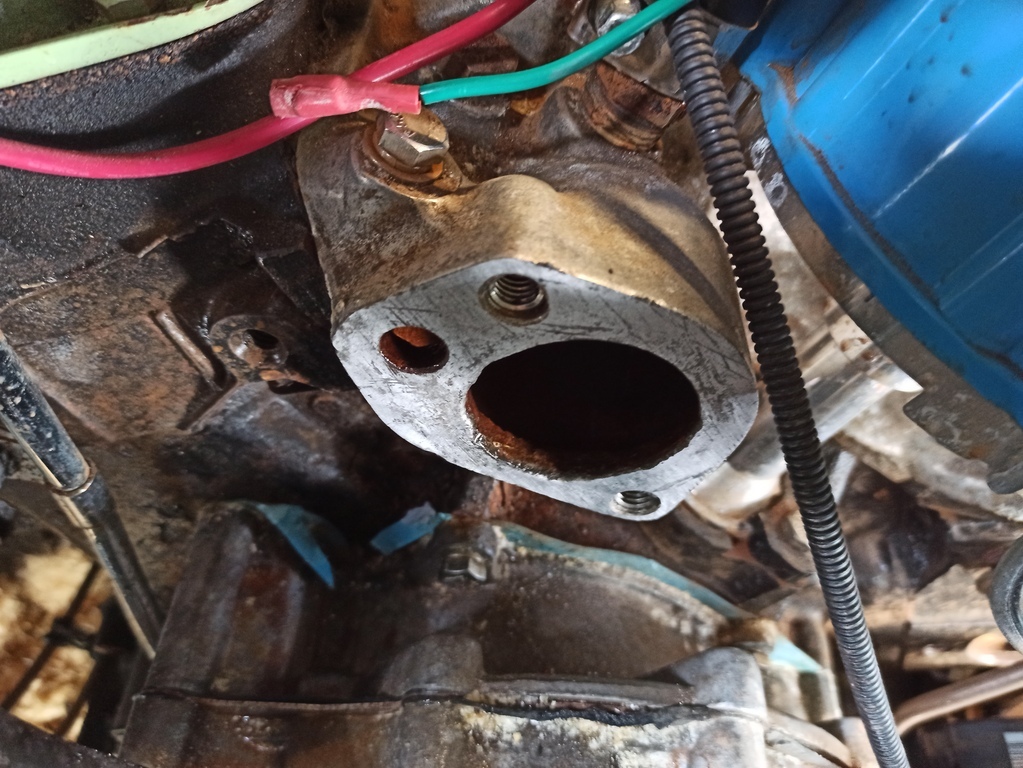 I reassembled the housing, thermostat and gasket before attaching the hoses and everything felt tight, I couldn't get a finger nail between anything underneath. I made sure I got the car outside this time! You can see the aftermath of last time here 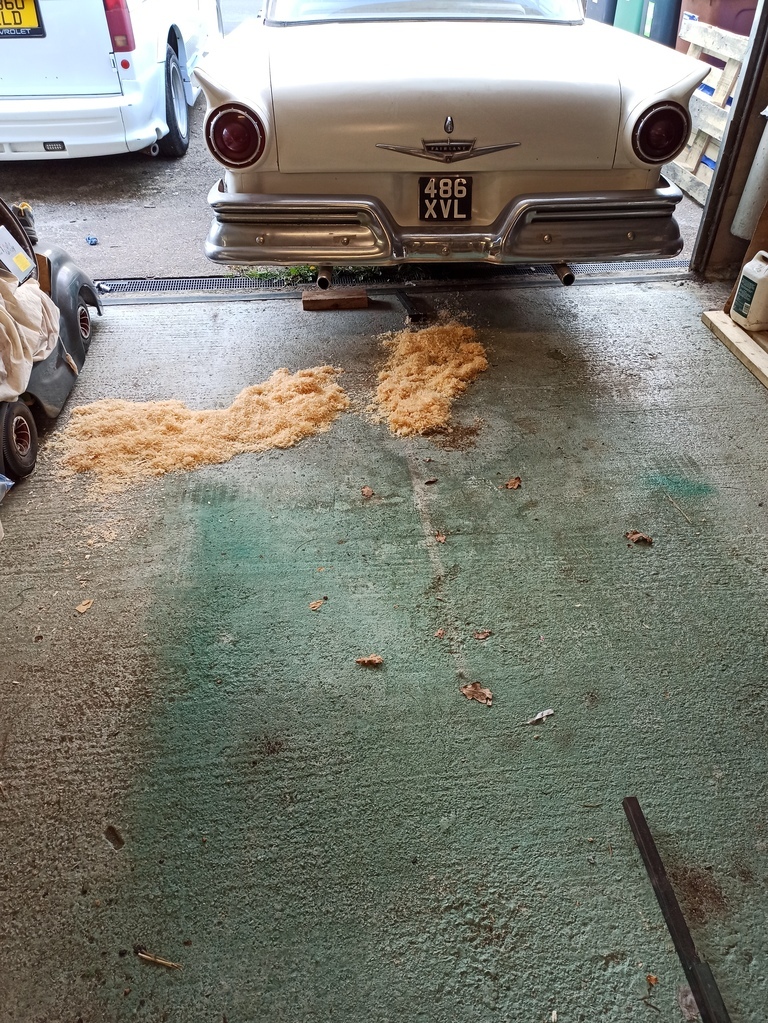 So the moment of truth! Well, I'm back to a drip which I suppose is some level of success... Here's a video, apologies for going upside down, only way I could get the camera in close enough. From that it looks like it's coming from the housing side of the gasket... Now I can get it all apart quicker, the plan is to take it apart, try without the thermostat and give the manifold a bit more attention while it's in pieces. I've ordered a new housing from rockauto and some hylomar yesterday, so I can try all of that if the first attempt doesn't work. I'm happy to drive it as is and top up every journey, so that's a small victory I'm happy to take |
| |
|
|
|
|
|
|
|
|
Well it's not a loss, even if it isn't quite a win yet either.
|
| |
|
|
Enbloc
Part of things
 
Posts: 399
|
|
|
|
|
Some thoughts to add.
When I did a thermostat change on my mine I ended up with a big leak. The reason was the thermostat dropped out of its groove when I bolted it back. I was more cautious the second time and it sealed fine. I think its easy for this to happen because the mount is vertical and you can't support the thermostat in its groove as the housing goes on.
As mentioned previous the thermostat sits slightly proud of the mating surface but as everyone and their aunt seems to have sanded and filed yours flat maybe you've lost that tolerence?
How tight are you doing the thermostat housing bolts?
In these situations we tend to wrench on the fixing bolts more and more chasing a seal. This can be counter productive and can make the situation worse as it starts to over compress gaskets and warp components making the leak worse.
The factory torque rating on the two housing bolts is only 12-15 ft/lbs.
|
| |
Last Edit: May 6, 2023 22:31:14 GMT by Enbloc
|
|
mylittletony
Posted a lot
  
Posts: 2,420
Club RR Member Number: 84
|
1957 Ford Fairlane mylittletony
@mylittletony
Club Retro Rides Member 84
|
|
|
Some thoughts to add. When I did a thermostat change on my mine I ended up with a big leak. The reason was the thermostat dropped out of its groove when I bolted it back. I was more cautious the second time and it sealed fine. I think its easy for this to happen because the mount is vertical and you can't support the thermostat in its groove as the housing goes on. As mentioned previous the thermostat sits slightly proud of the mating surface but as everyone and their aunt seems to have sanded and filed yours flat maybe you've lost that tolerence? How tight are you doing the thermostat housing bolts? In these situations we tend to wrench on the fixing bolts more and more chasing a seal. This can be counter productive and can make the situation worse as it starts to over compress gaskets and warp components making the leak worse. The factory torque rating on the two housing bolts is only 12-15 ft/lbs. Yeah I definitely think the thermostat was pinched in the joint when I first put it together, the water all fell out in quite a stream. The latest time may well be down to a past-its-best housing, but I have a new one on order so hopefully that will make a difference. I've not done the bolts up that tight, I was concerned about stripping the threads out. I'll have another go with the bits I've got over the weekend, then hold out for the new housing if I have no joy |
| |
|
|
|
|
|
|
|
Hi, mylittletony , sorry for the slow response. As a test I'd put the neck on the intake without the thermostat. Not to run it that way, but to check that the surfaces that are supposed to seal do seal ( it looks like your super gasket is reusable). If there are no leaks, then there is a clearance issue with the thermostat. |
| |
|
|
mylittletony
Posted a lot
  
Posts: 2,420
Club RR Member Number: 84
|
1957 Ford Fairlane mylittletony
@mylittletony
Club Retro Rides Member 84
|
May 10, 2023 18:41:10 GMT
|
This arrived in the post today, I'm very pleasantly surprised at the quality, given it was $9 (plus shipping and import to get to £27, but still cheaper than any available here) 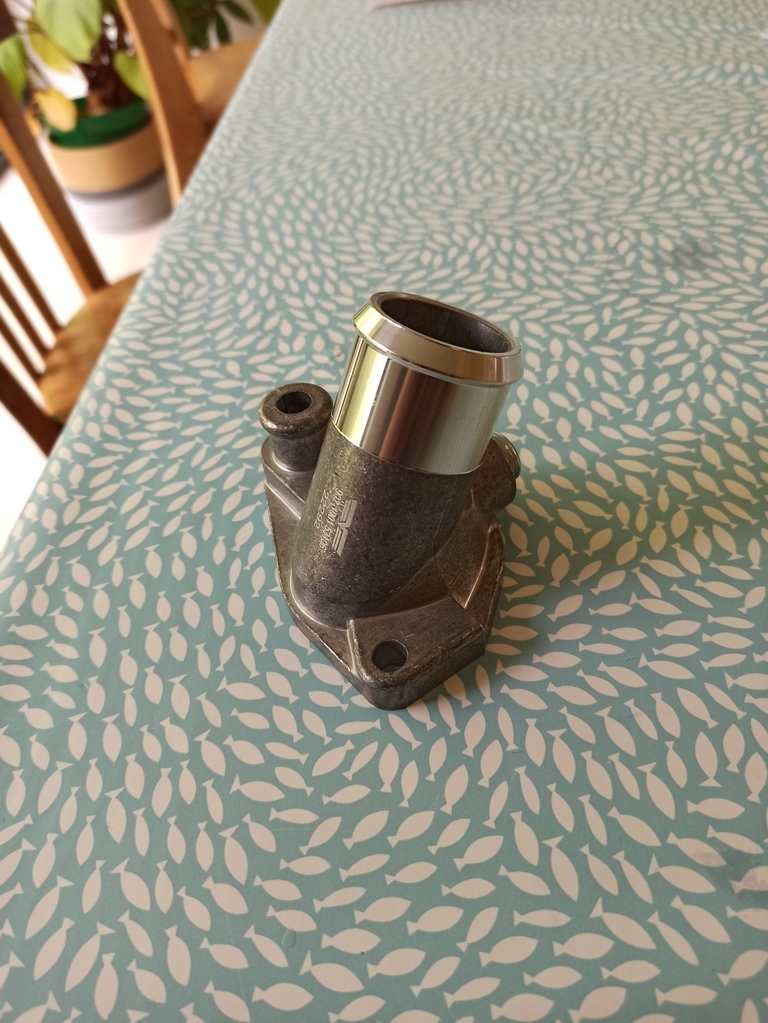 The recess does look deeper than the one fitted, so I'm hopeful 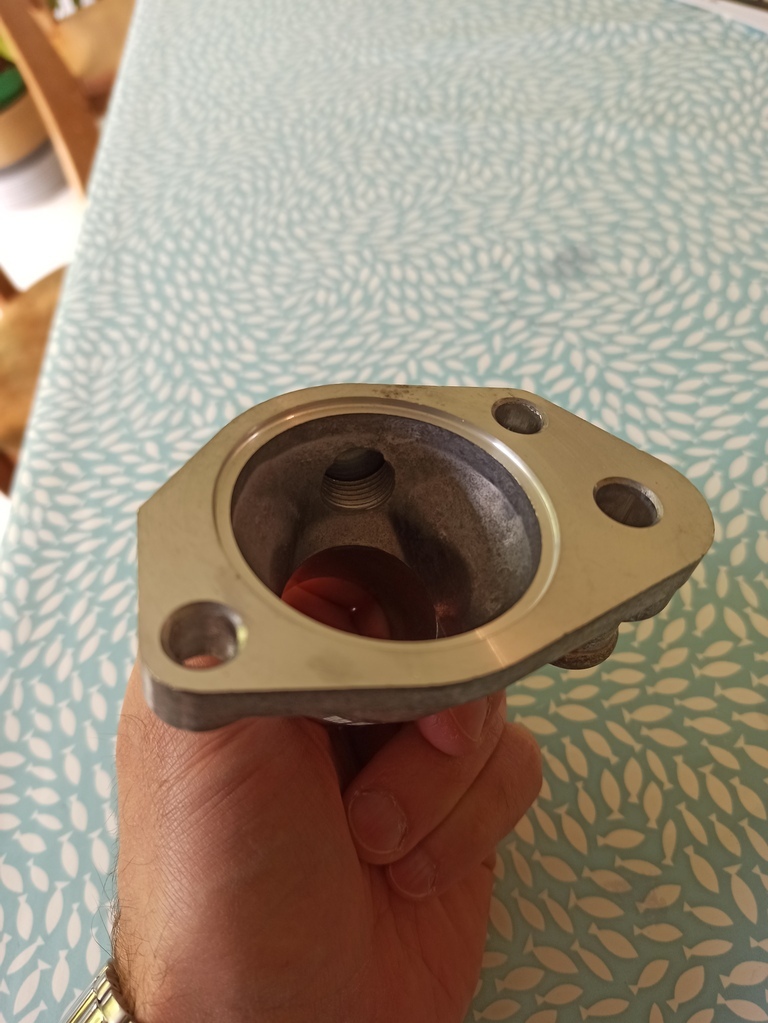 I've not had a chance to fit, but hoping to do so tomorrow. Got some family admin to see to this eve. I took the console to work so I could trim the trims. I bought a length of this off eBay 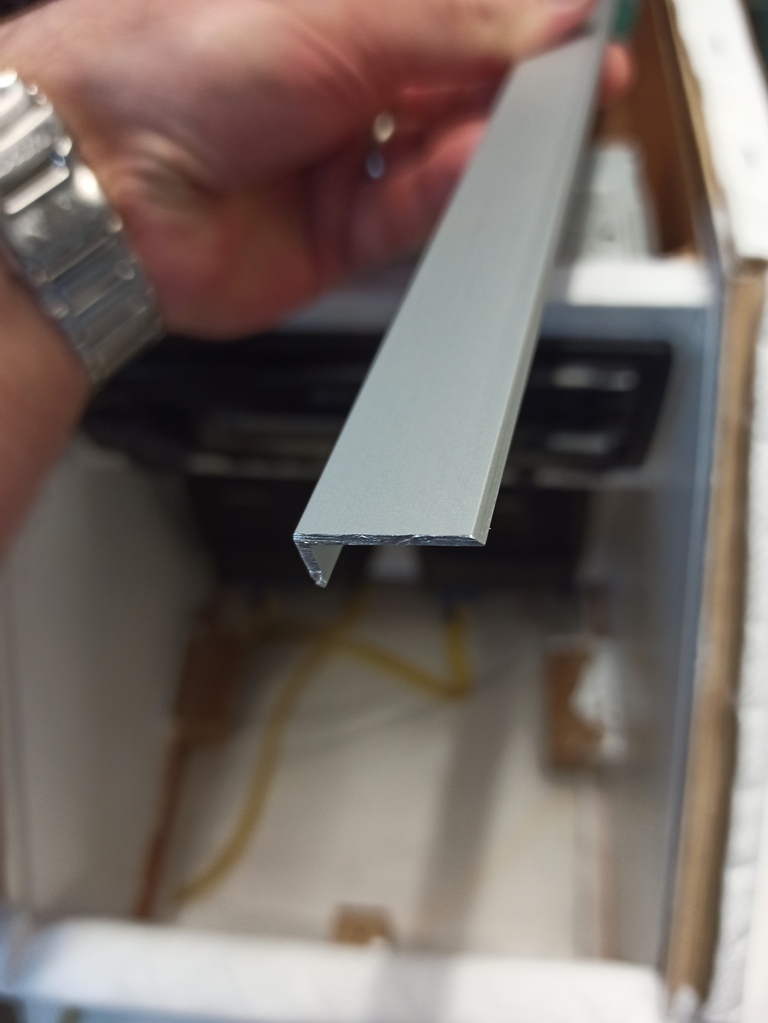 The idea being I needed something to tidy how the vinyl wraps over these edges 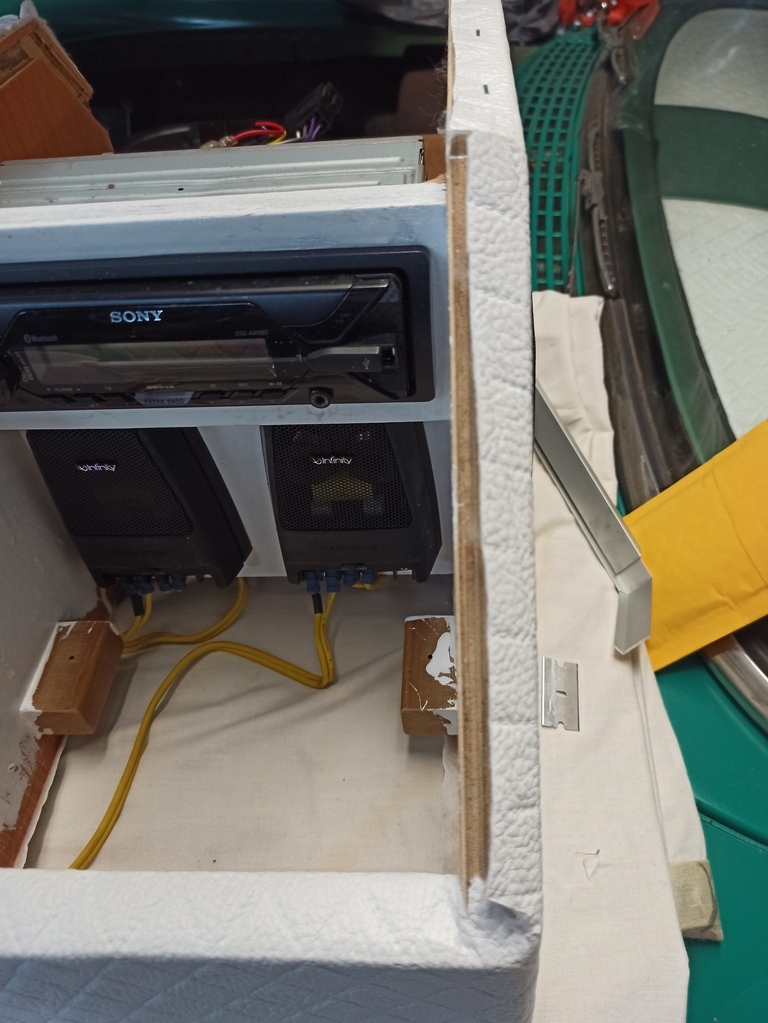 Cut to length, and angle the end. Then I cut a v notch and bent it to wrap over to the top edge. Fits like so 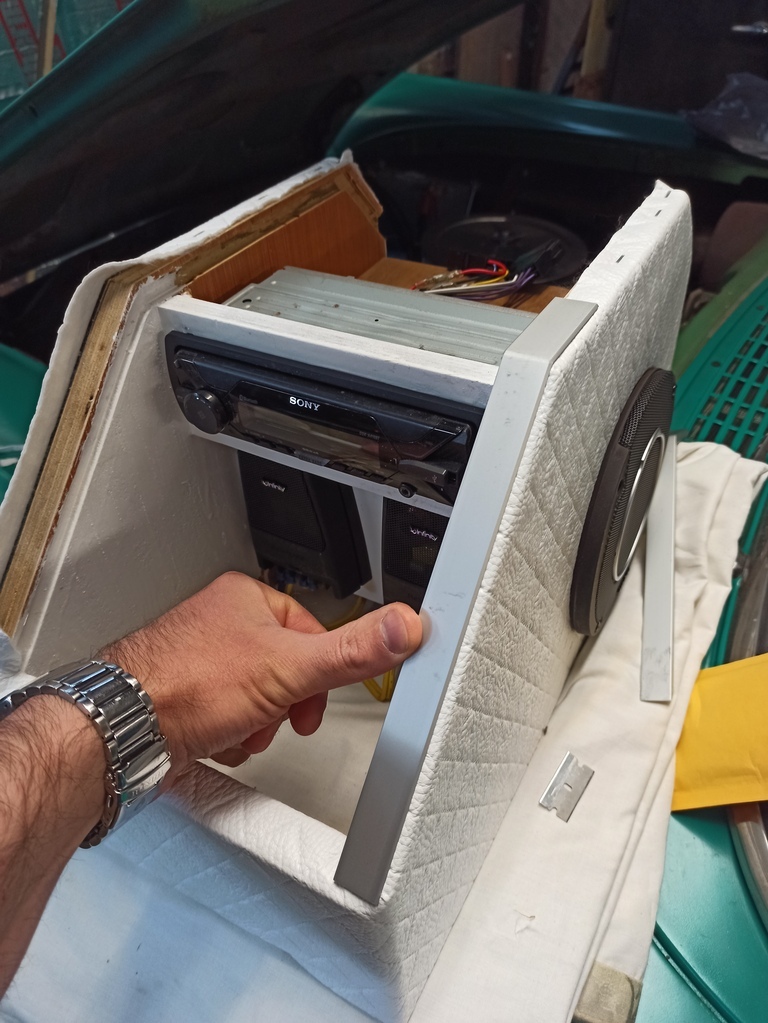 Next was to drill holes and try some of the hidden head screws 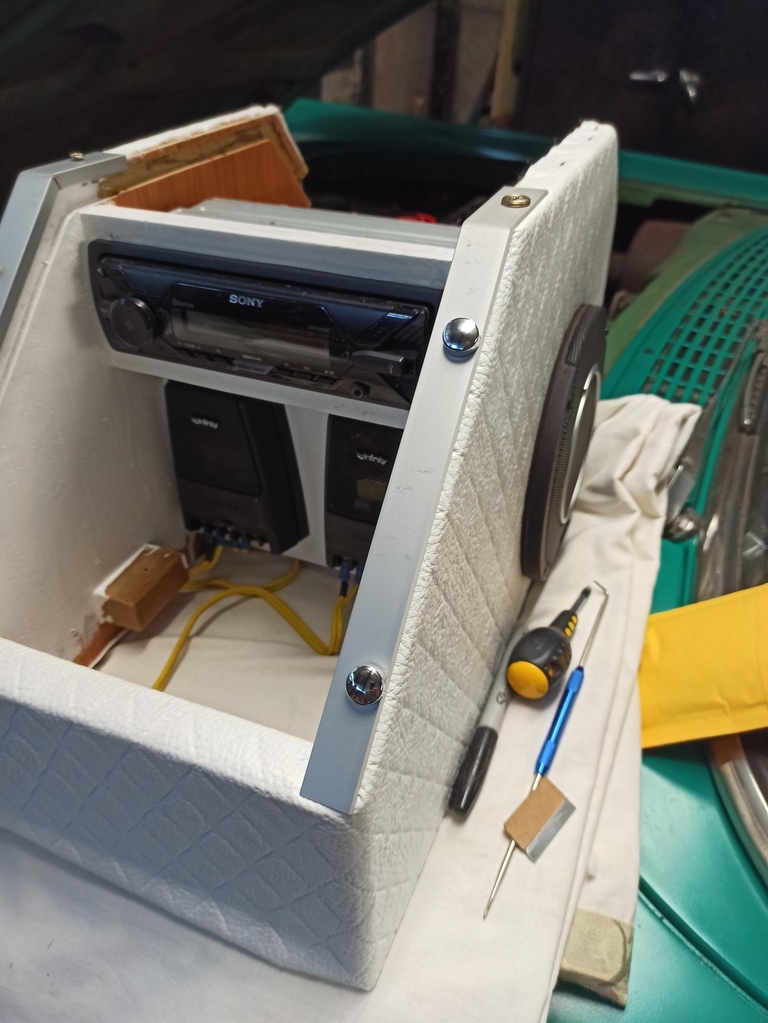 But they're a bit chonky and don't actually go together very well, so I've ordered some dome head screws to use instead. Both trims fitted, nice 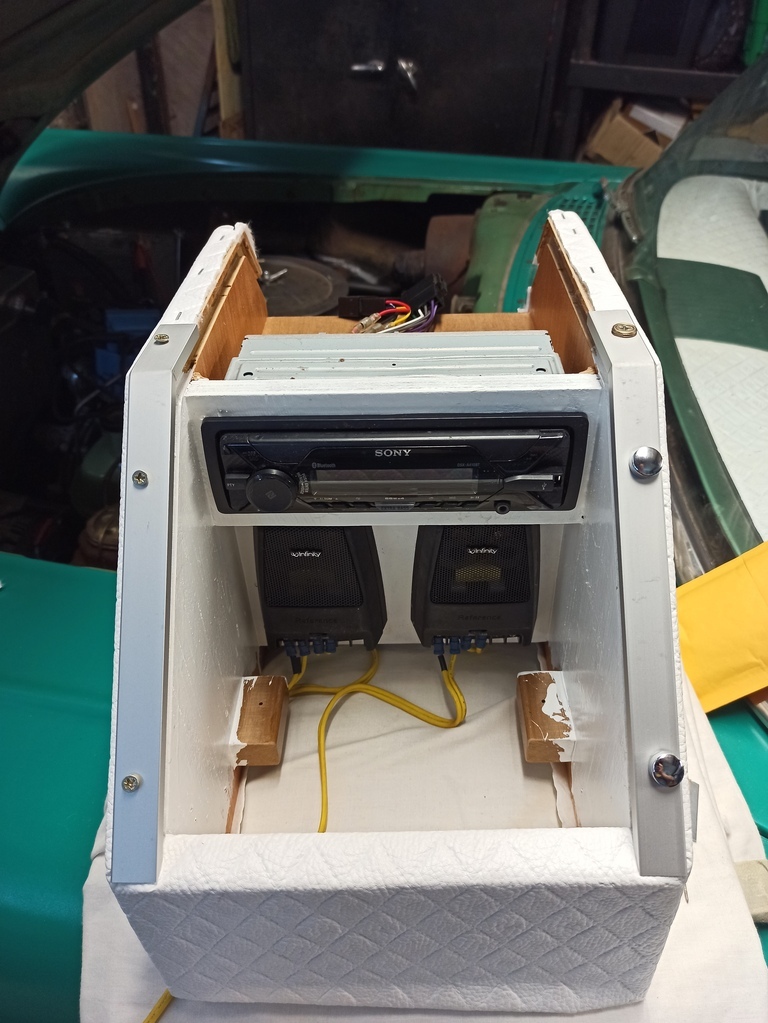 Hoping to tick off several jobs from my pre-RRW check list tomorrow, not many days left!! |
| |
|
|
mylittletony
Posted a lot
  
Posts: 2,420
Club RR Member Number: 84
|
1957 Ford Fairlane mylittletony
@mylittletony
Club Retro Rides Member 84
|
May 11, 2023 14:06:20 GMT
|
I got a bit distracted today by trying to sort out a puncture on my 'no-spare' daily which I need to go to the Midlands tonight... Bent rim ended that game though. So I attacked my cooling system again This is the inlet surface, it looks nice and flat thankfully 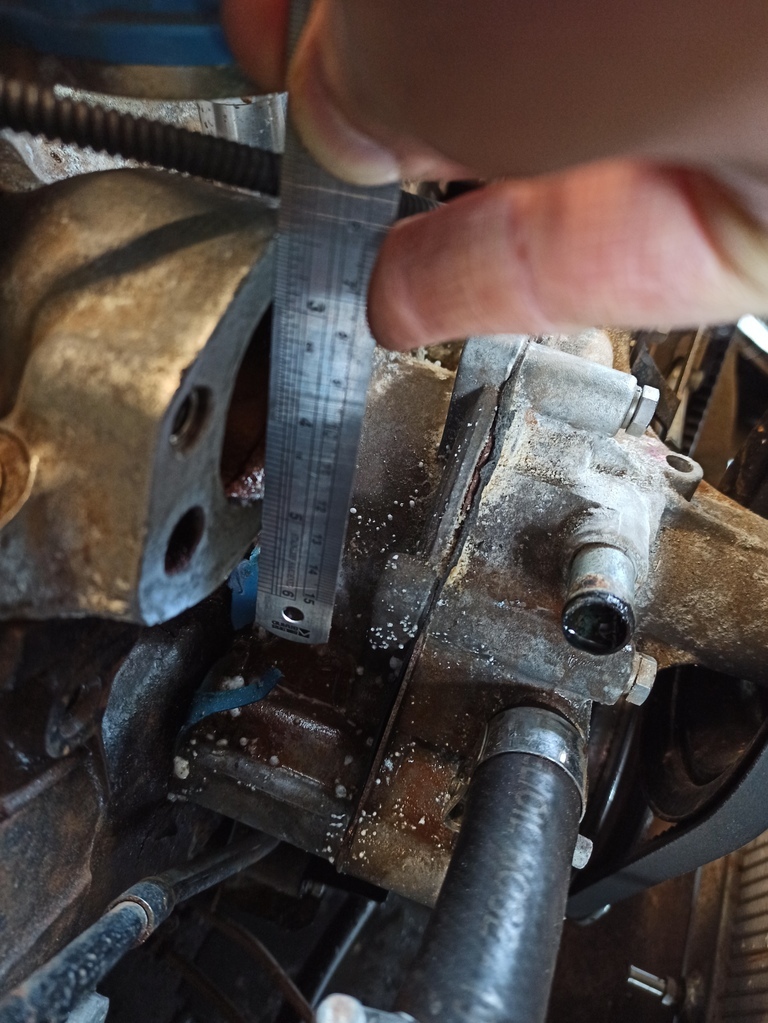 Although I was mildly worried about the small seal land at the bottom 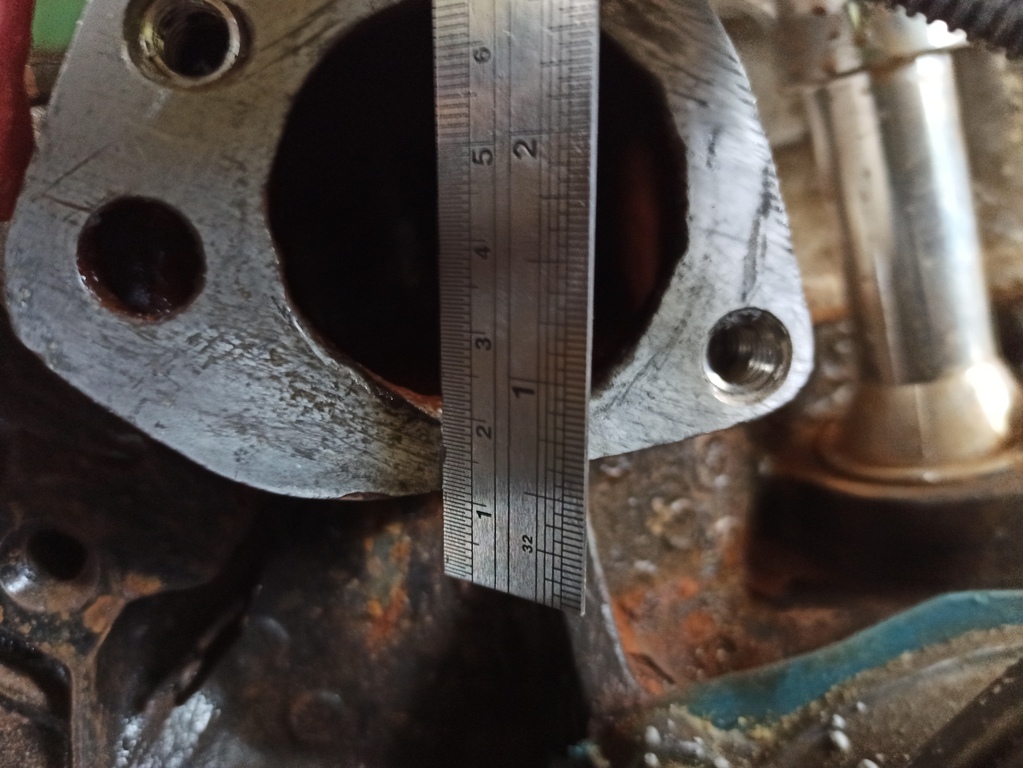 The thermostat is now underflush in the new housing 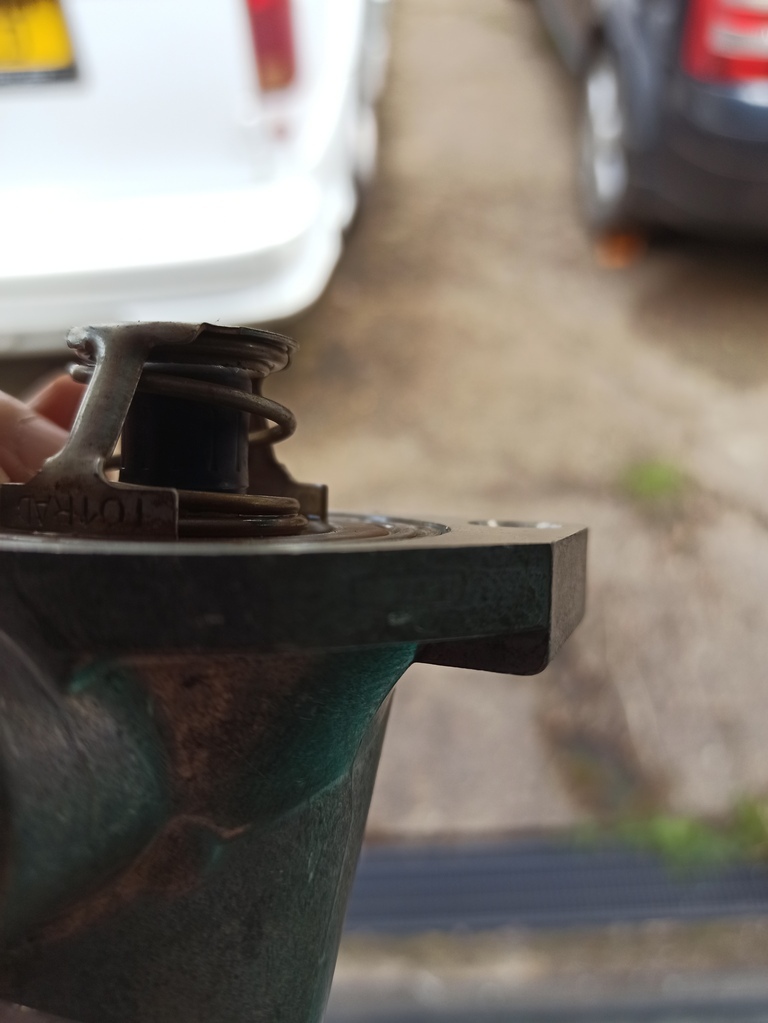 But it went together, despite the bypass channel not lining up with the gasket hole particularly well. And no leaks! It ran until the top hose got nice and hot, by then I'd smoked myself out. The only issue is the temp sender that was fitted in the old housing (from the original donor engine) is smaller than the thread in the new housing, but I've ordered an off the shelf adaptor. I refitted the now redundant radio 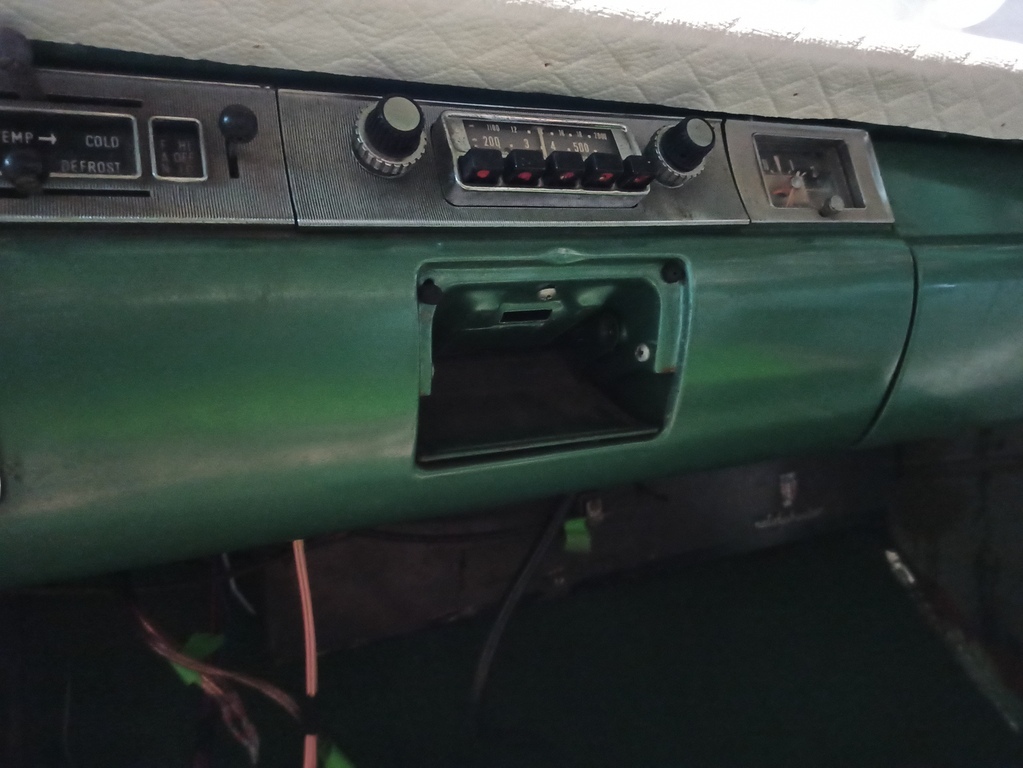 And made a little knob for myself 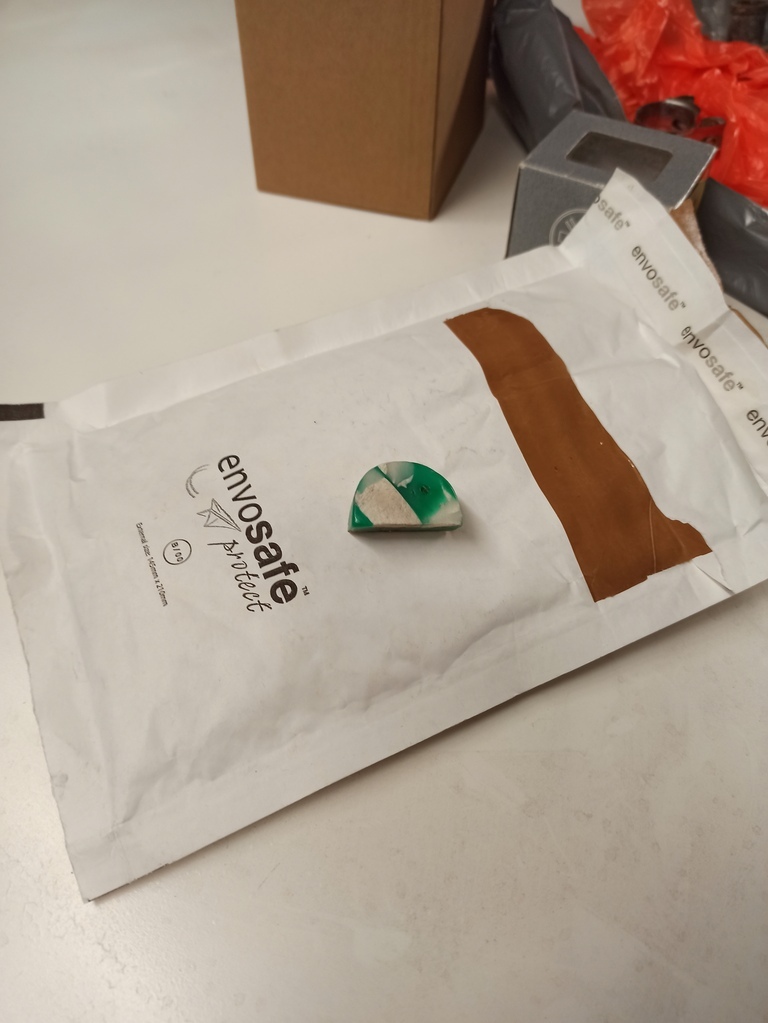 This is for the roller shutter on the centre console. I also did a DIY new front number plate, using some zinc steel sheet, vinyl letters and black paint 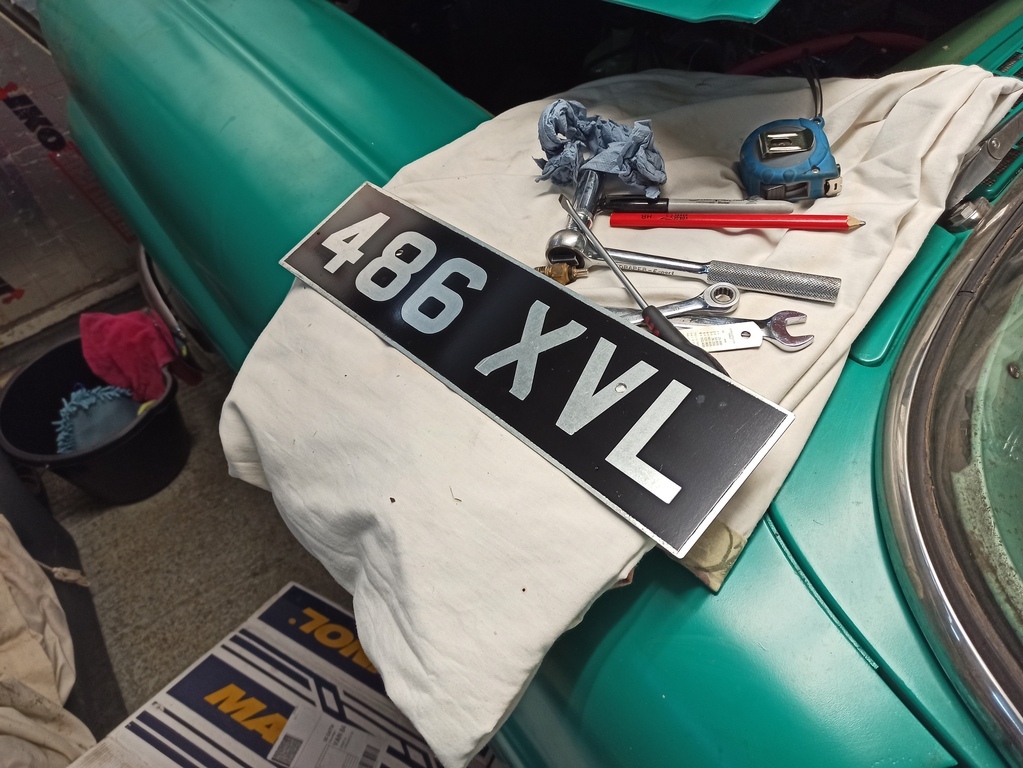 I'm off until the weekend now, at which point I need to get some materials to continue working through my tick list |
| |
|
|
|
|


