|
|
|
|
|
|
Thanks so much for the tutorial on polishing, Chris. I have a project here that I can, and have been, trying to get the finish back to a "pre abused over time" level of shine. As long as I don't burn through the clear, I can only do it some good!
other updates look fantastic....
way to go on that exhaust!
JP
|
| |
I know its spelled Norman Luxury Yacht, but its pronounced Throat Wobbler Mangrove!
|
|
|
|
|
|
|
|
|
|
Chris, I currently use Farecla G3/G10 then 3M Finesse it/3M Machine glaze.
How much better is the 3M fast cut/extra fine/ultrafine you show?
|
| |
|
|
|
|
|
|
|
|
A tip with the 3M sealant Chris, you are meant to stretch it as you apply it so it will go twice or 3 times as far. We use the same stuff at work on big rolls.
|
| |
|
|
|
|
|
|
|
Chris, I currently use Farecla G3/G10 then 3M Finesse it/3M Machine glaze. How much better is the 3M fast cut/extra fine/ultrafine you show? Mark I find it lot more versatile to use - it cleans up just so much easier - more than happy to shoot a sample of each for you to trial if you wish - its probably in the £25 a bottle region with vat and the pads are circa another £20 for a box of 2 (only come in 2's !) - I appreciate that others prefer different polishes / glazes but the 3M system is just in another league from my viewpoint - go to any high end bodyshop and you will find that this is the go to product - add to this I was at the Morgan factory a few years ago on a visit and every finishing / detail bay had all 3 products to hand |
| |
Last Edit: Feb 2, 2020 19:00:20 GMT by Deleted
|
|
|
|
|
|
|
A tip with the 3M sealant Chris, you are meant to stretch it as you apply it so it will go twice or 3 times as far. We use the same stuff at work on big rolls. Mark - That's what I would normally do - however this is 70 year old car design and there's a fair bit of difference between the panels / chassis rails - only 5mm at most but I left the caulking thick to take the differences into account - the floor panels have now all pulled down into the caulking nicely and I'm happy that I have done has much as possible to avoid water ingress between the chassis rails / sills & the floor panels |
| |
Last Edit: Feb 2, 2020 18:59:25 GMT by Deleted
|
|
|
|
|
|
|
|
Chris, I also use the Farecla waffle pads for polishing - are the 3M ones better as well?
I'm ok with the Farecla stuff till it runs out (but a small sample to try would be good) but I'll change over to the 3M after that. If its seriously better I'll dump the Farecla. Prices is about the same as well.
Ref the mastic - I mentioned it as I did not know if you knew it was designed to be stretched - it's not obvious from the packaging.
|
| |
|
|
Norman
Part of things
 
Posts: 449 
|
|
|
|
|
Ah, glad to see some progress again, watch and hopefully learn something new. Keep up the good work and the tutorials. All the best, Norman
|
| |
|
|
jules
Part of things
 
Posts: 75
|
|
|
|
|
Thank you for taking the time to post all your updates. Enjoy looking/ reading !
|
| |
|
|
|
|
|
|
|
|
Thanks for the info' Grumpy, would you use the same polish/compounds on a cellulose finish?
|
| |
|
|
|
|
|
|
|
Thanks for the info' Grumpy, would you use the same polish/compounds on a cellulose finish? Yes - Its good for all paint finish types |
| |
|
|
|
|
|
|
|
|
|
Chris, I also use the Farecla waffle pads for polishing - are the 3M ones better as well? I'm ok with the Farecla stuff till it runs out (but a small sample to try would be good) but I'll change over to the 3M after that. If its seriously better I'll dump the Farecla. Prices is about the same as well. Ref the mastic - I mentioned it as I did not know if you knew it was designed to be stretched - it's not obvious from the packaging. Hi Mark - personally the whole 3M range including the pads are just fantastic at the results that they achieve |
| |
|
|
jpsmit
Posted a lot
  
Posts: 1,274
|
|
|
|
Thanks so much for the lesson. I have all the equipment and the compounds. Sadly my prescription for brave pills is not yet filled. My one question is this: everyone speaks of taping edges and profiles. But doesn't that leave dull edges and profiles? Correct but these are then just undertaken by hand - on raised profiles I will avoid flatting them - just use polish alone but if a raised profile area requires more work other than just polish you can always up the grade of the flatting abrasive to a very fine one - hence if you using 1500 for the main panel areas but use something like 2500 or 3000 for the raised profiles thanks for this - this seems like the crucial missing detail |
| |
|
|
|
|
|
|
|
|
I'm only able to echo what everyone else has already said, brilliant work. I have read a few of your other threads but missed this one so have spent a few days catching up on it.
Can only be amazed by the work and attention to detail thats gone into the car, paintwork is a dark art to me so seeing the car come together as it has is great to see.
Havnt come across many Jowetts before but have to say they are a stunning looking car.
I'm off to gaze wishfully at ones i cant afford.
|
| |
|
|
|
|
|
|
|
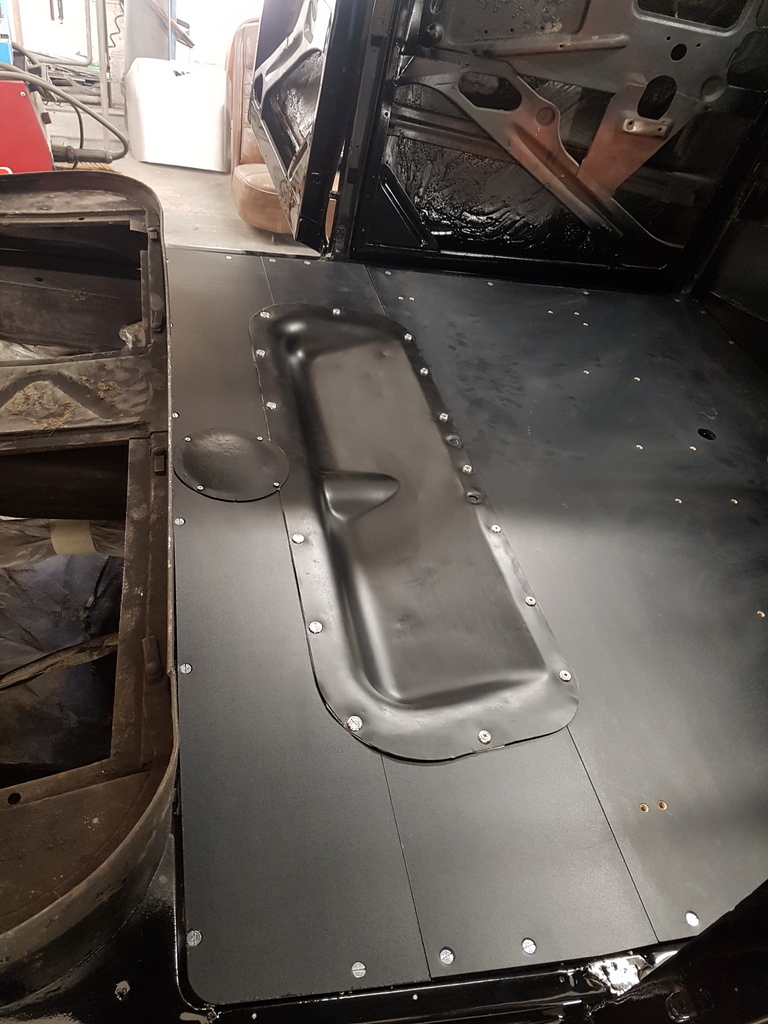 The rear footwell was cleaned up - painted and is now fitted again using the body caulking to seal between the flange edge and the floor 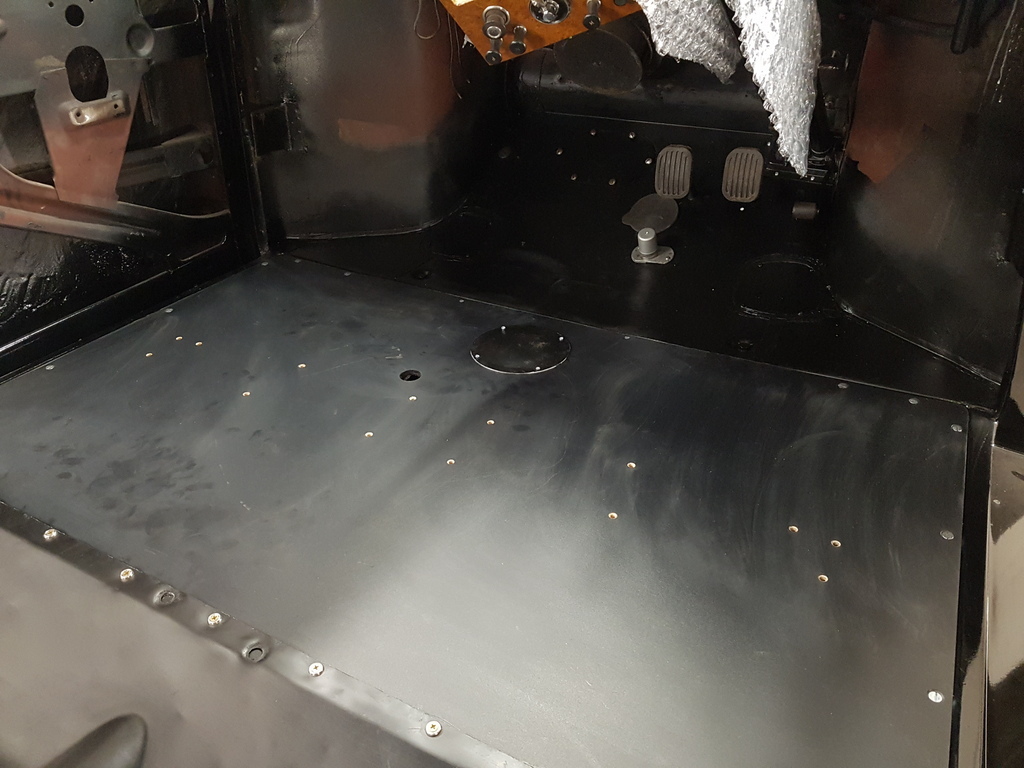 Front & rear inspection / access covers for the propshaft were also fitted to the floor panels  Offside rear door that I had previously flatted received its first stage polish  Then I flatted the front door & wing on the offside 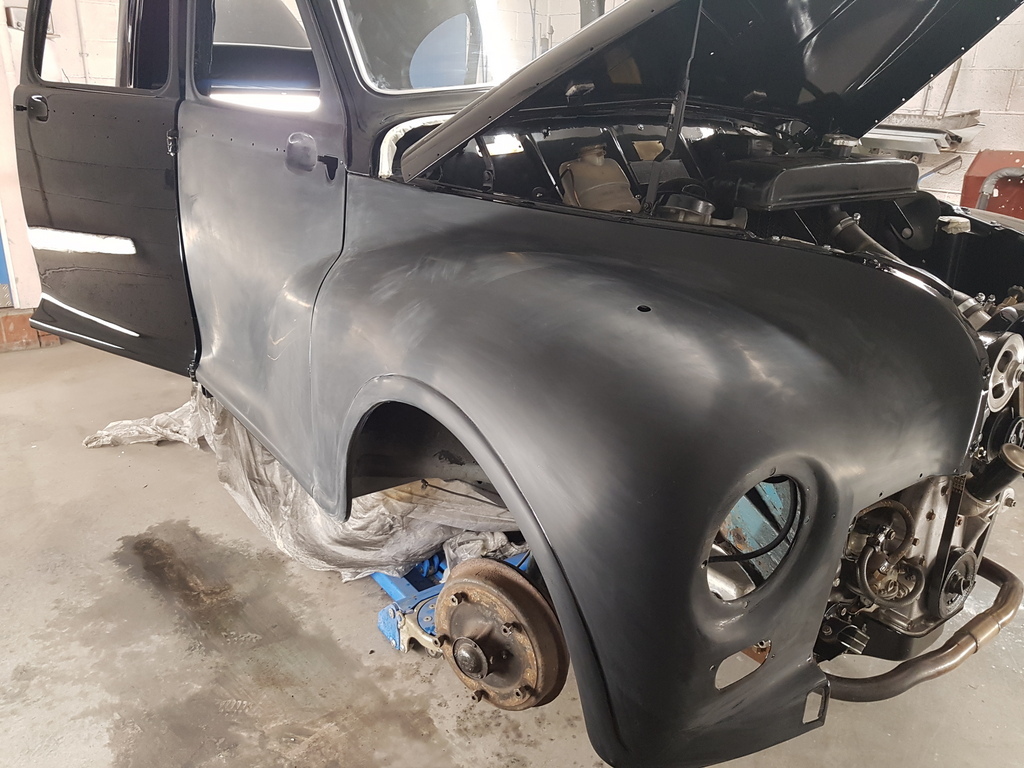 Also undertook a load of odd jobs that don't really make the cut for photos in the respect of spending a good few hours locating the correct bolts / fastenings etc for various components on the car - I have a system that I have always used in the respect of separating / labelling / placing to marked boxes / containers etc for fastenings / loose small parts - same system identifies at a early stage what requires replacement / sourcing / cleaning / painting - this in my book is by far the simplest method when it comes to reassemble things - let alone multiple components - hence its both frustrating & hard work when someone else comes along and just unbolts things in no real order - parts / fastenings just thrown in any box - unlabelled / unidentified - ok rant over - back to the workshop  |
| |
|
|
jpsmit
Posted a lot
  
Posts: 1,274
|
|
|
|
I have a system that I have always used in the respect of separating / labelling / placing to marked boxes / containers etc for fastenings / loose small parts - same system identifies at a early stage what requires replacement / sourcing / cleaning / painting - this in my book is by far the simplest method when it comes to reassemble things - Ok more questions.  Assuming this is different that the obvious - separating / labelling / placing to marked boxes / containers etc for fastenings - are there hints to share with someone who is pathologically unable to comprehend that I will not remember where I put it and where it goes six months from now (or even six hours from now?) Do tell!  |
| |
Last Edit: Feb 4, 2020 13:37:57 GMT by jpsmit
|
|
|
|
|
|
|
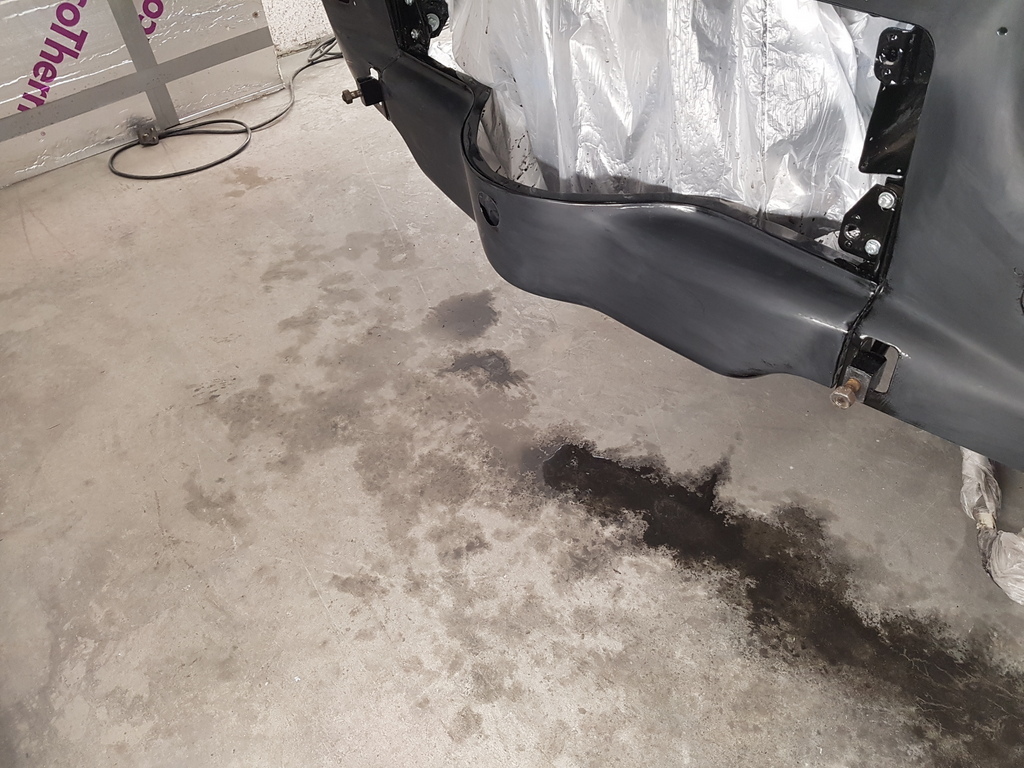 Front panel fitted along with the grille mountings and the front bumper irons 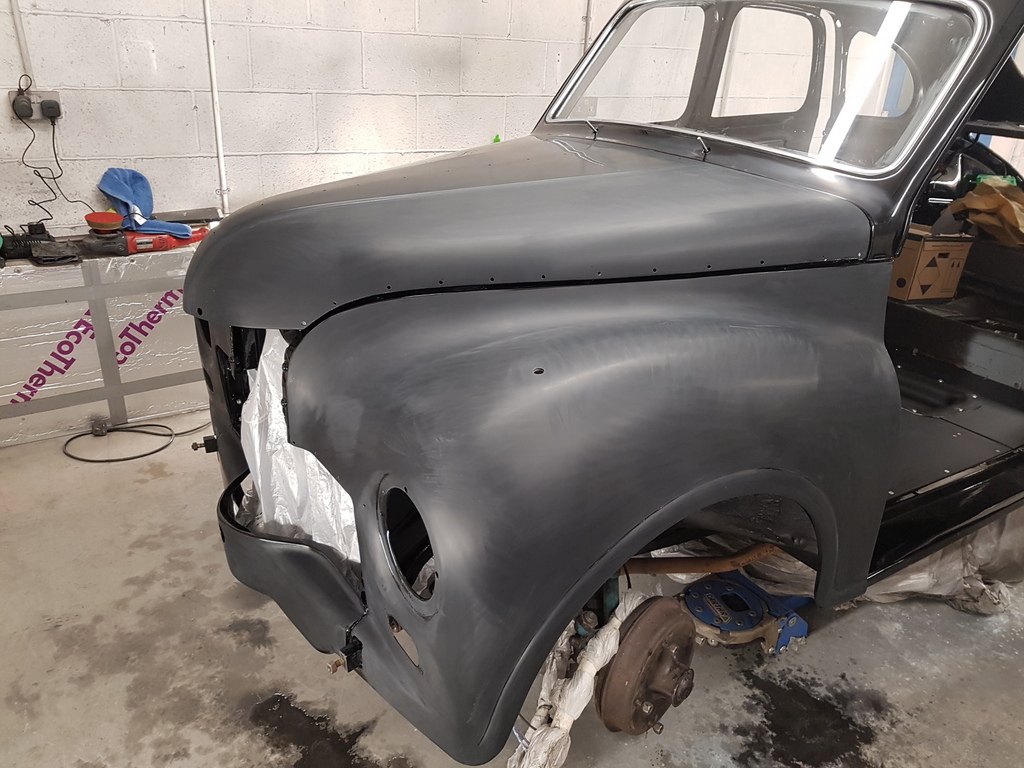 Then another paint flatting session for the bonnet / front panel & the nearside front wing 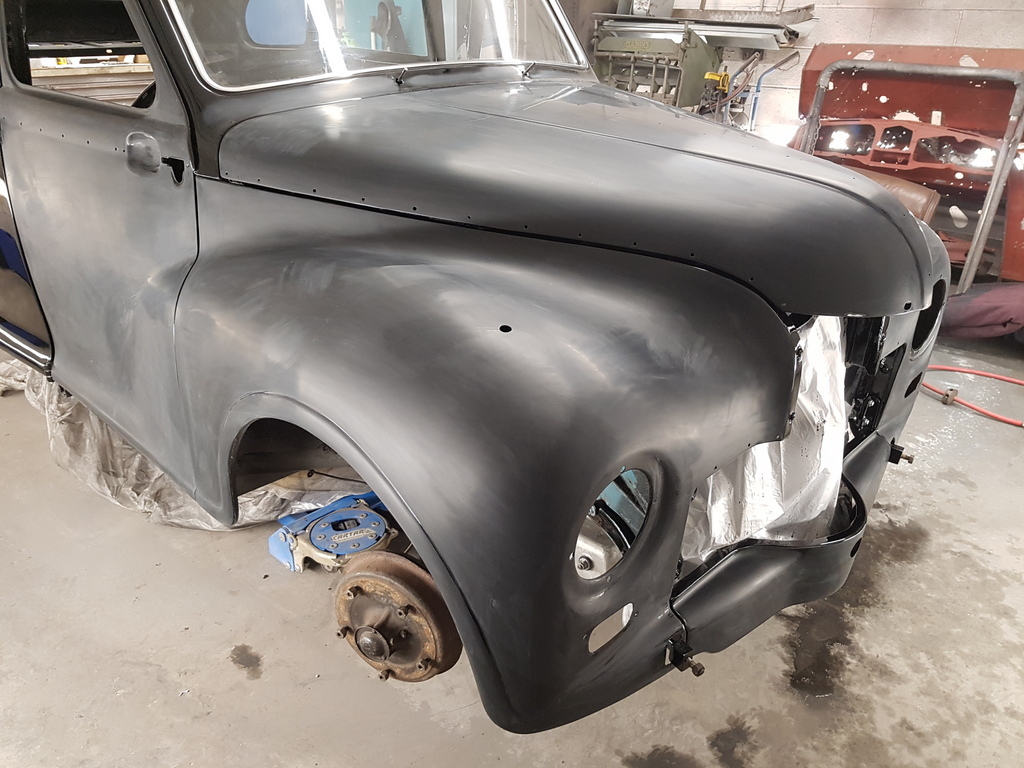 Then out with the first stage polish 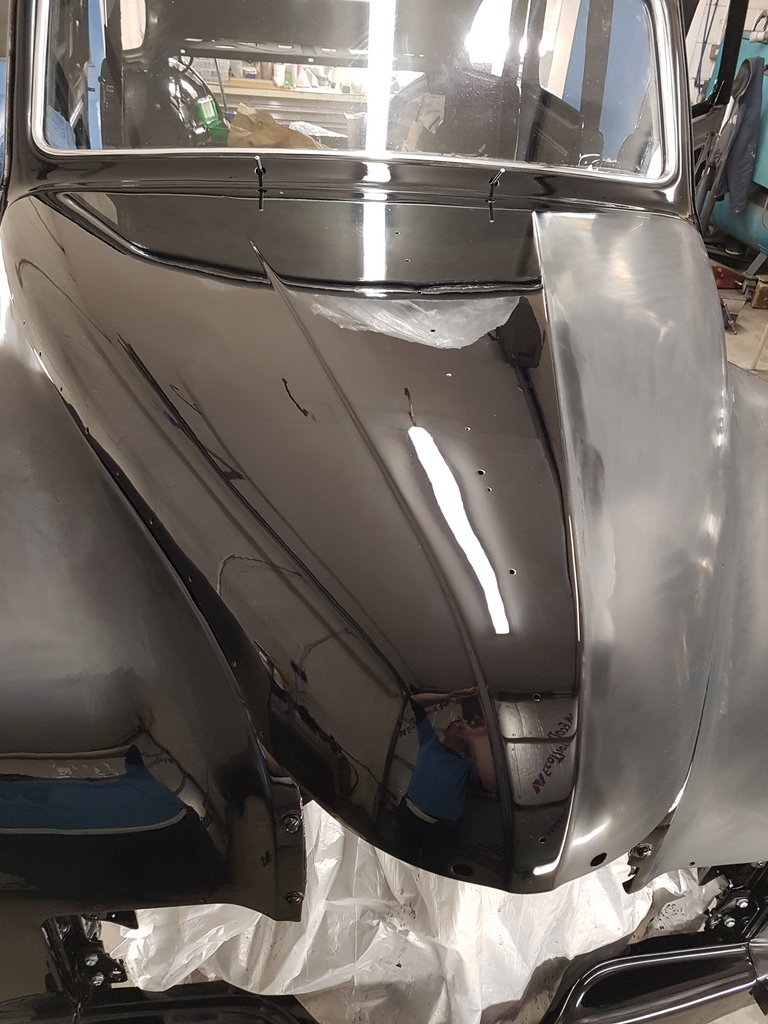 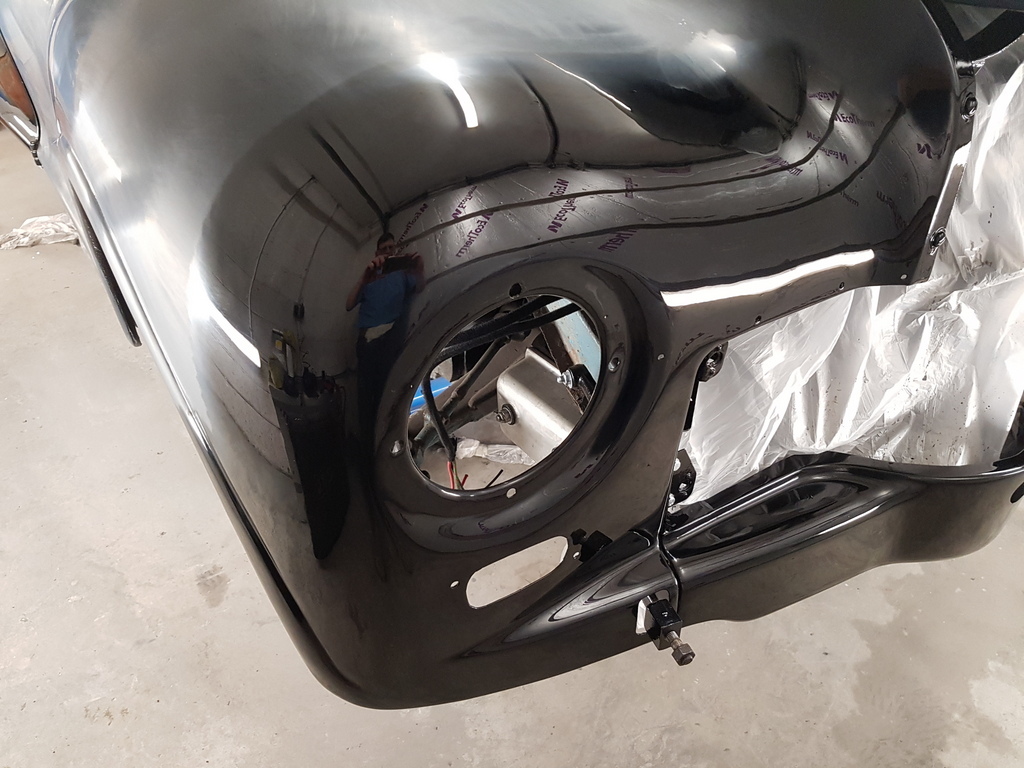 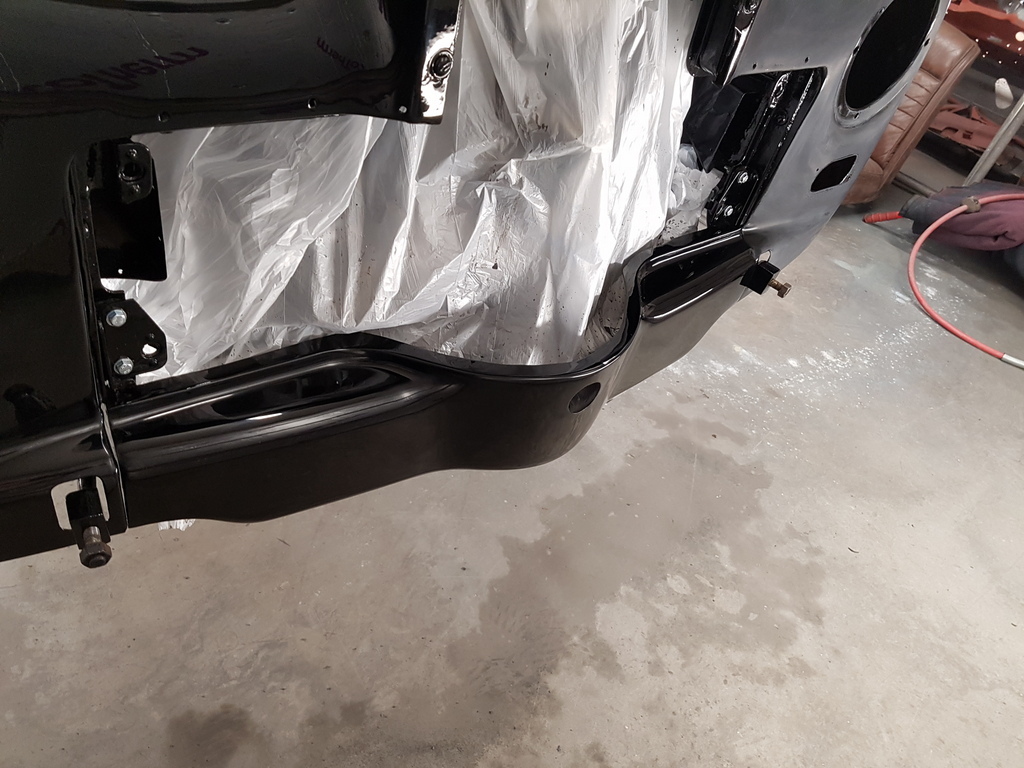 Which is yielding good results - still plenty left to do tomorrow in the polishing department though  There is a piping that goes between the front panel & wings which I will fit once I have the polishing completed 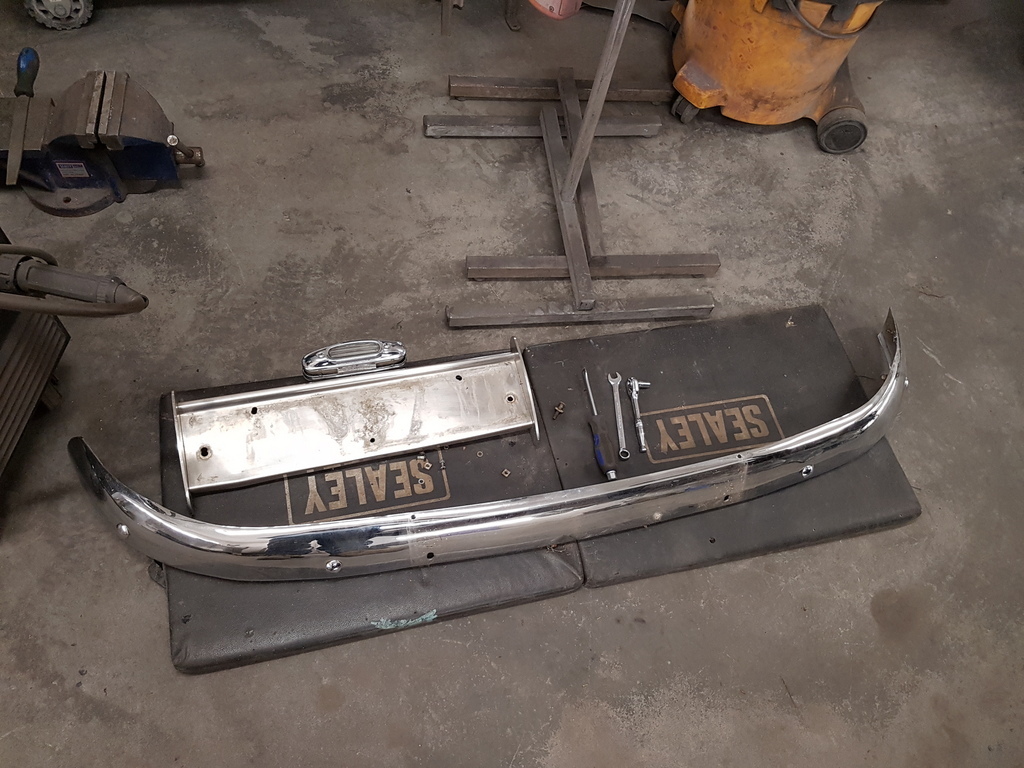  Started to gather the parts together for the rear bumper - I have removed the number plate plinth has this is pushed in and requires some straightening up prior to refitting - many other smaller issues addressed - one being that the feed for the reversing lamp has been deleted on the centre harness - its in the front harness & its in the rear harness - but not in the centre one - just has well that I not yet fitted the headlining has the harness runs over the offside roof rail - I have since run a feed through and that is now ready to be connected when the rear bumper goes on - the number plate lamp & reversing lamp are combined in the same lamp housing More tomorrow |
| |
Last Edit: Feb 4, 2020 21:06:36 GMT by Deleted
|
|
|
|
|
|
|
I have a system that I have always used in the respect of separating / labelling / placing to marked boxes / containers etc for fastenings / loose small parts - same system identifies at a early stage what requires replacement / sourcing / cleaning / painting - this in my book is by far the simplest method when it comes to reassemble things - Ok more questions.  Assuming this is different that the obvious - separating / labelling / placing to marked boxes / containers etc for fastenings - are there hints to share with someone who is pathologically unable to comprehend that I will not remember where I put it and where it goes six months from now (or even six hours from now?) Do tell!  A few notes / images of everything has it comes apart & zip loc freezer bags along with some boxes works for me 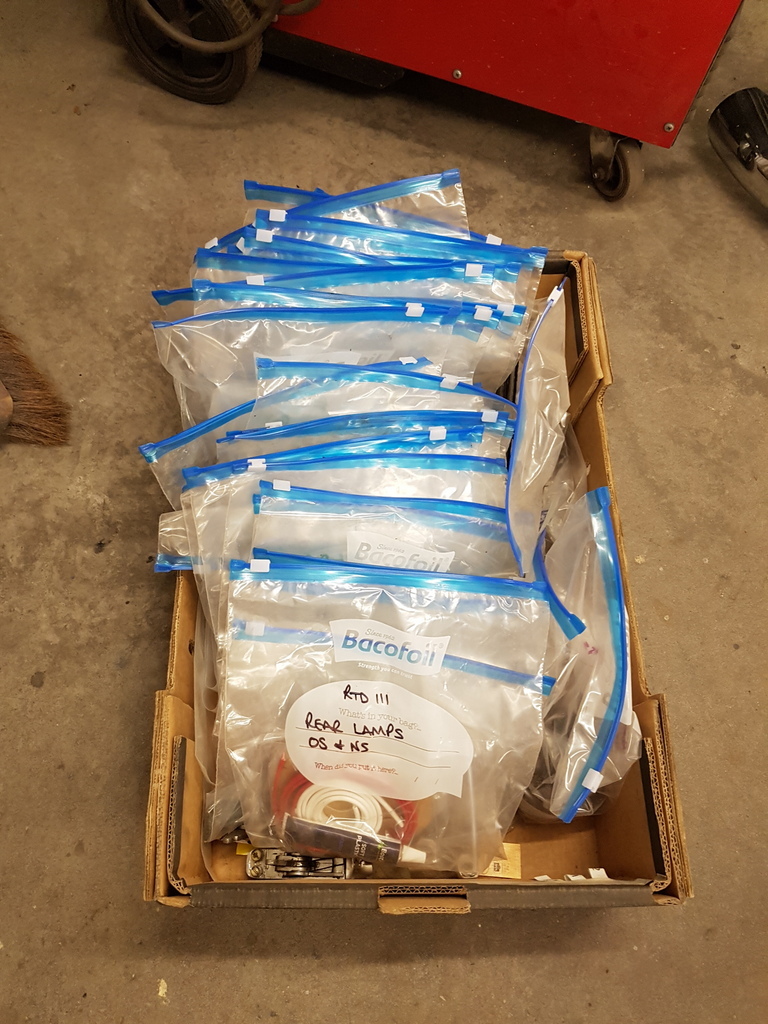 All smaller items / fastenings etc - I tend to mark anything up that requires replacement / painting / rechroming has it gets placed in the bag 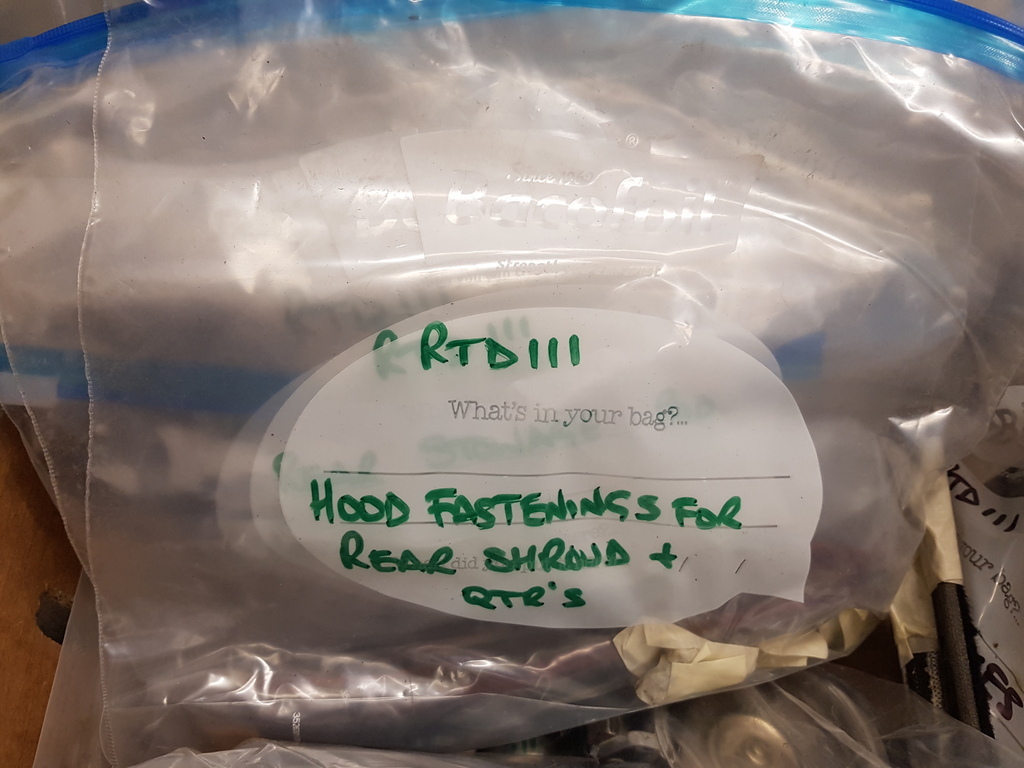 Every bag labelled  And placed to the box in front to rear location on the vehicle order - larger parts go into boxes and I label the box with the contents on the outside - I also mark for which vehicle its for - given that I probably have 3 to 4 projects on the go at anyone time - plus I go step a further than this - up my loft stores I have various bays of racked shelving - each project gets a bay or shelves marked up has required - the simpler I can make it the better - I hate wasting time looking for things that I know that I have removed from a car that I cant find several weeks / months later (possibly years in the case of my own projects)  |
| |
Last Edit: Feb 4, 2020 21:22:50 GMT by Deleted
|
|
|
|
|
|
|
|
He makes it look so easy.
A sight to behold very nice indeed.
|
| |
|
|
|
|
|
|
|
|
I strive for a similar level of organizing, labeling and storing a project's parts. Am not saying that to sound holier-than-anyone, but for me the "project management" element of this, my hobby, is as rewarding as the actual spannering. I also try to clean and recondition items on the way off the car to storage, so when I hit the final stretch I'm not cursing myself for putting off the dirty work. Either you want to do things this way, or you don't: my twenty something son is mechanical and has completed some really cool stuff but, OMG, how he gets there drives me nuts...messy, disorganized. Source of friction! John
|
| |
|
|
jpsmit
Posted a lot
  
Posts: 1,274
|
|
|
|
He makes it look so easy. A sight to behold very nice indeed. +1! Seriously, thanks for the pics - even if it is aspirational - it is inspiration and motivation. cheers! |
| |
|
|
|
|


 Assuming this is different that the obvious - separating / labelling / placing to marked boxes / containers etc for fastenings - are there hints to share with someone who is pathologically unable to comprehend that I will not remember where I put it and where it goes six months from now (or even six hours from now?)


