|
|
|
Mar 19, 2020 21:09:17 GMT
|
I simply don't know - I suppose he can do what he wants and a in very, very rare negative statement from me 'I don't care' I have had enough of being messed with - Don't worry it will get finished and delivered but someone else's engine build is not my problem and I am very tired of sorting other peoples issues in a situation that makes it very difficult to recoup any time expended in resolving other specialists failings - much to the point future works will be done under a 'terms & conditions policy'- It's genuinely not how I want to work or do business but I'm getting slightly sick of mopping up after others and getting nothing for it - Ok I'll climb down off my box now - let the gin kick in and tomorrow is a whole new day  Sadly there are a lot of people out there who claim to be professionals, make a bad job and then just tell the customer to go away.
On another forum i'm on a member proporting to be a professional rebuilt an engine for another member, it lasted less than 20 miles before siezing solid and amongst many other problems were that the bearing caps were in the wrong order, the intlet and exhaust valves were swapped over (which still astounds me and if they hadn't put up photos I wouldn't have believed it) and the sump was full of sawdust because they built the engine in a wood shed.
As long as there have been cars there have been cowboys and its very hard sometimes to sort the good from the bad as a customer as a lot of people can talk a good game so to speak.
This will hopefully be a picture of the head in question, yes the valves are the wrong way around. This was a surposed expert but we all know about experts, an ex is a hasbean and a spurt is a drip under pressure.
|
| |
|
|
|
|
stealthstylz
Club Retro Rides Member
Posts: 14,961
Club RR Member Number: 174
|
|
|
|
|
They're not even engine problems that you could blame on being unfamiliar with the marque, "make sure the moving things aren't touching the non moving things" is proper back to basics stuff. I've just finished remedying a "professionally rebuilt" engine that a customer brought in because it was "knocking". As soon as I ran it up I knew it was the crank hitting the (custom) sump and lo and behold, it had a nice ding in the Ally. What was more worrying at that point was there was evidence of the crank web being ground away, so I pulled the pickup pipe and oil pump and it was full of grinding dust, obviously been done in situ once the engine was built. Luckily on strip down it hadn't gone any further so was cleaned and reassembled with a new pump. However I then thought I best check the pickup position and lucky for them they'd welded it on the curse word as it was flat against the bottom of the sump on one side and a couple of mm off it on the other - enough to mean it hadn't run without oil on startup but wouldn't have done so for long if used. All rectified now, but it's just basic checks. No specialist tools needed.
|
| |
|
|
|
|
|
|
|
Seats then - its a Delux spec Javelin hence the seats are leather faced but the sides & back are Rexene (early type of vinyl) the standard cars were all Rexene - Delux spec also equipped the car with fold out armrests - with the seats being original & 68 years old they were showing their age - a few splits / cracks / a few holes along with some of the stitching letting go 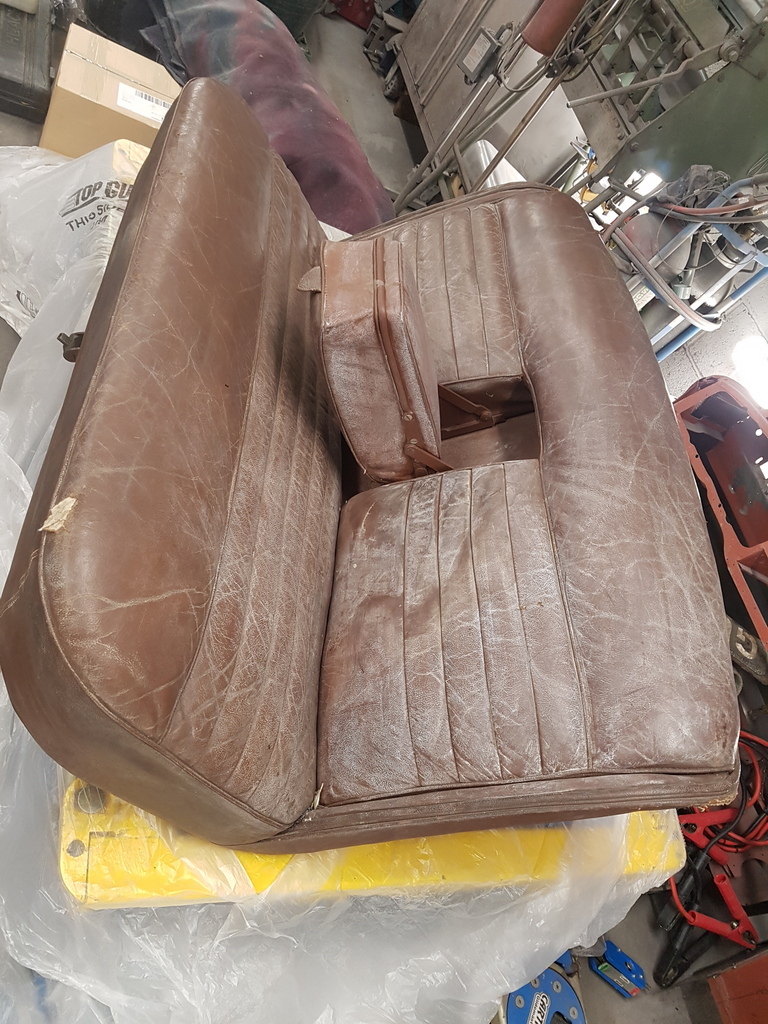 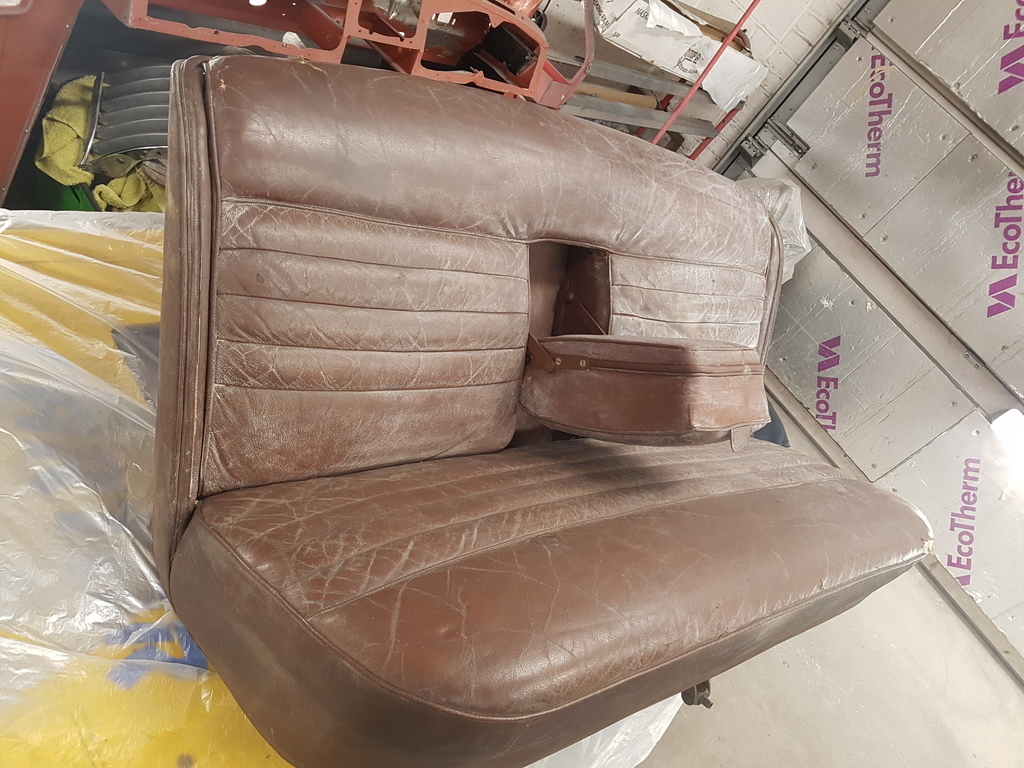 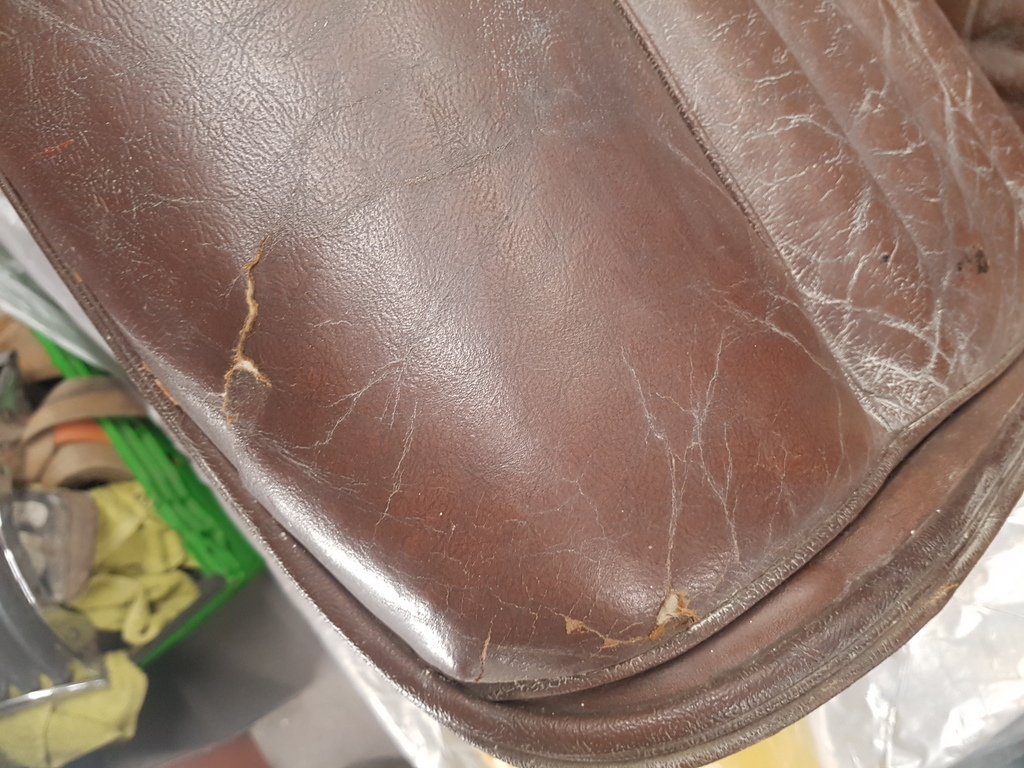 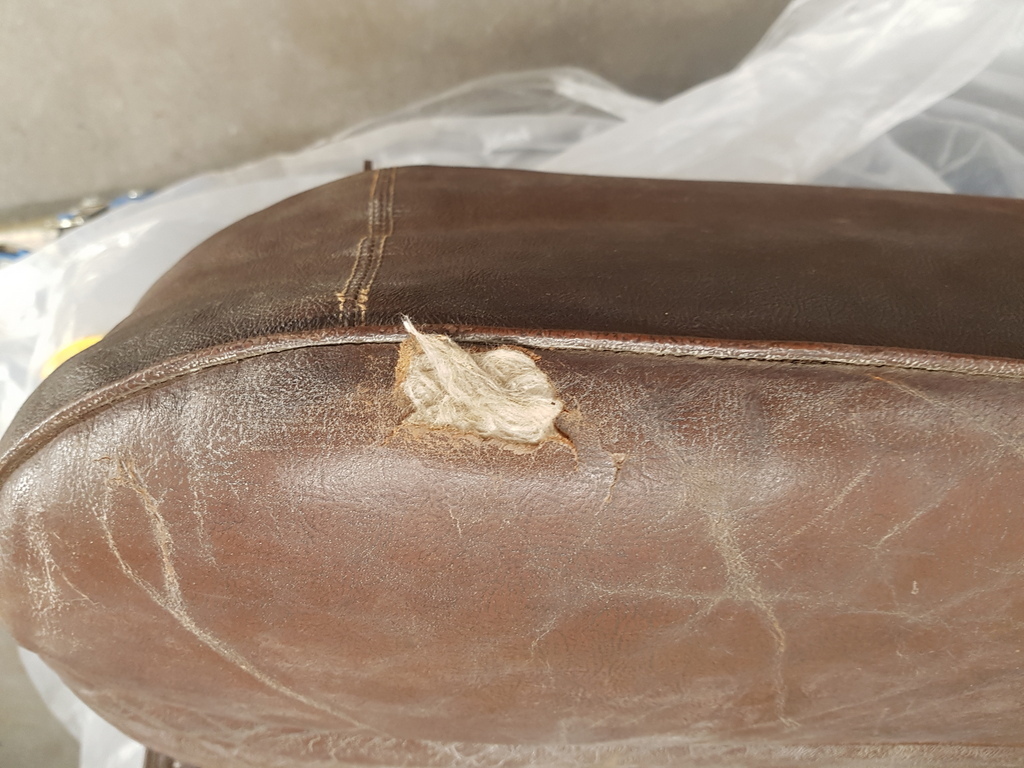 Now if you were restoring the car to concours standards you would have these retrimmed but its not being rebuilt to concours and the client does not have a budget for having the seats retrimmed 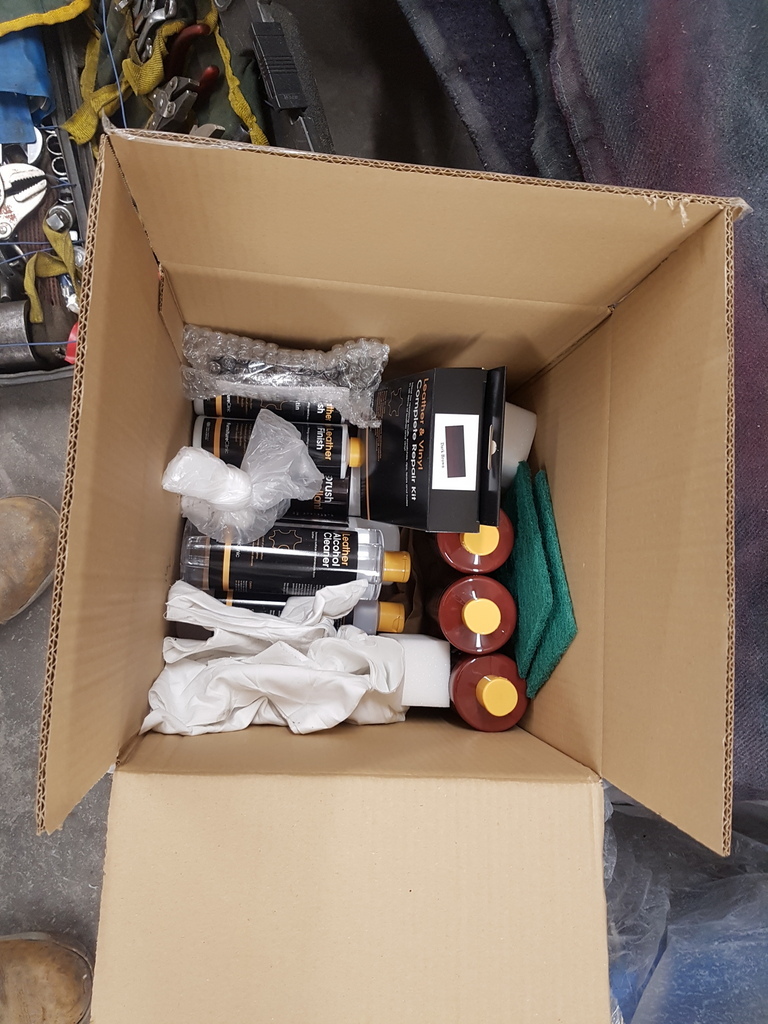 Repair & recolouring kit from 'The Furniture Clinic' (£150) 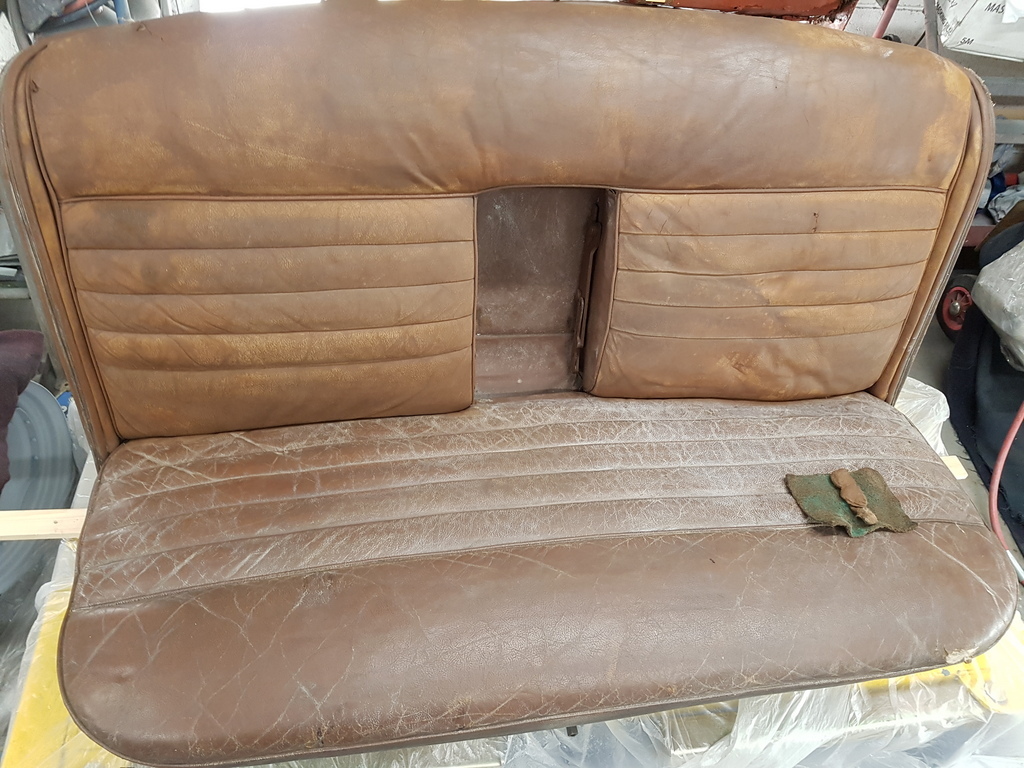 First job is to remove the existing sealants / colour base / residues etc 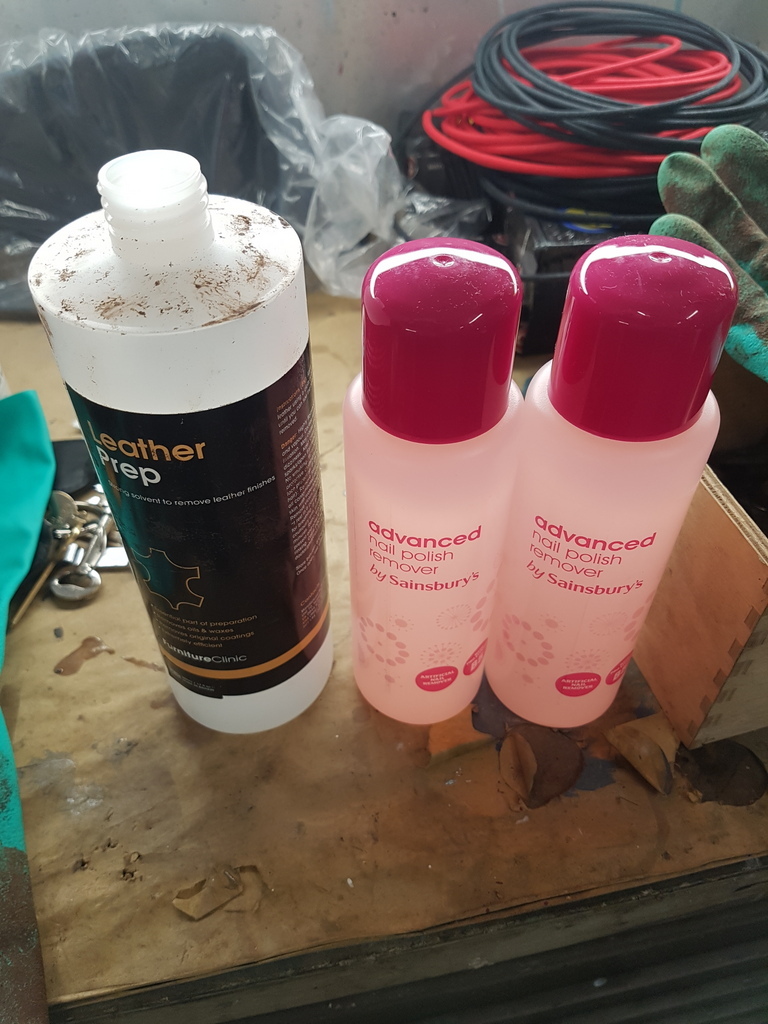 Undertaken with a leather preparation agent that is in the kit - effectively this is also marketed as nail varnish remover - so when you run out you just raid SWMBO's collection of lotions / make up etc or head down to the chemists / supermarket to achieve strange looks from others whilst you wonder around the ladies cosmetics shelf / counters looking for it 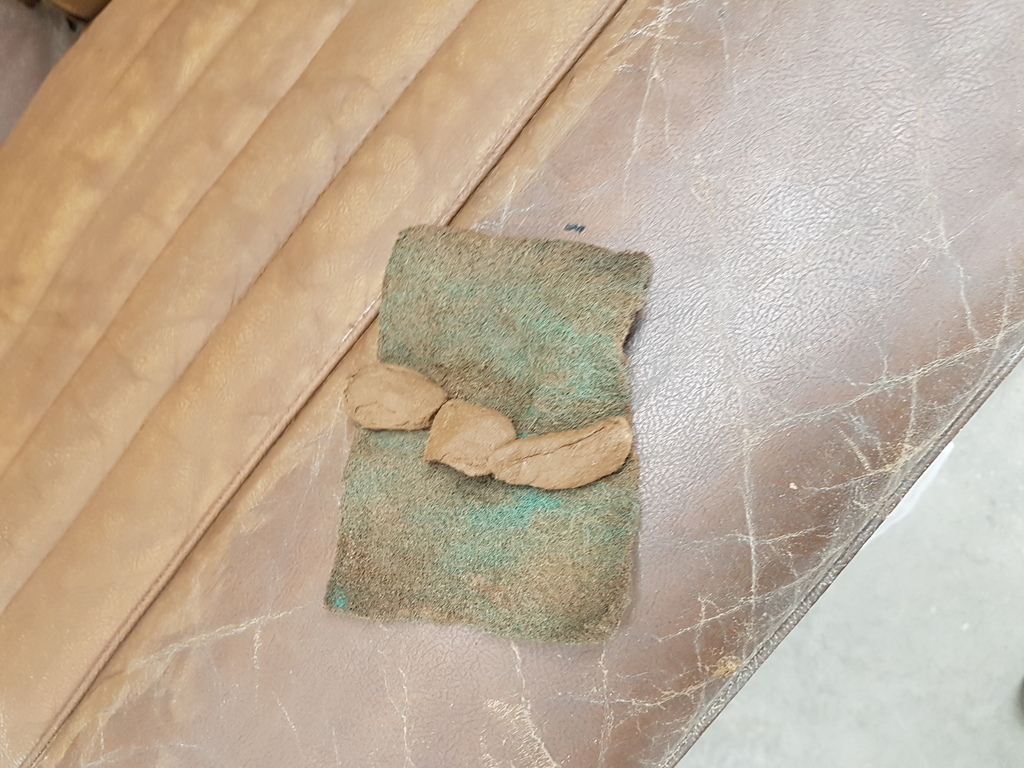 Soak the cotton wool pads (yes that's what they are) with the leather prep / varnish remover - wrap the scotchbrite over the pads and scrub the leather - you need good gloves of the marigold type / variety (more strange looks whilst in the supermarket cleaning isle - especially as by now you have two bottles of nail varnish remover in one hand and you have extra large dayglo yellow marigolds in the other) - You also need to do the job in a well ventilated area 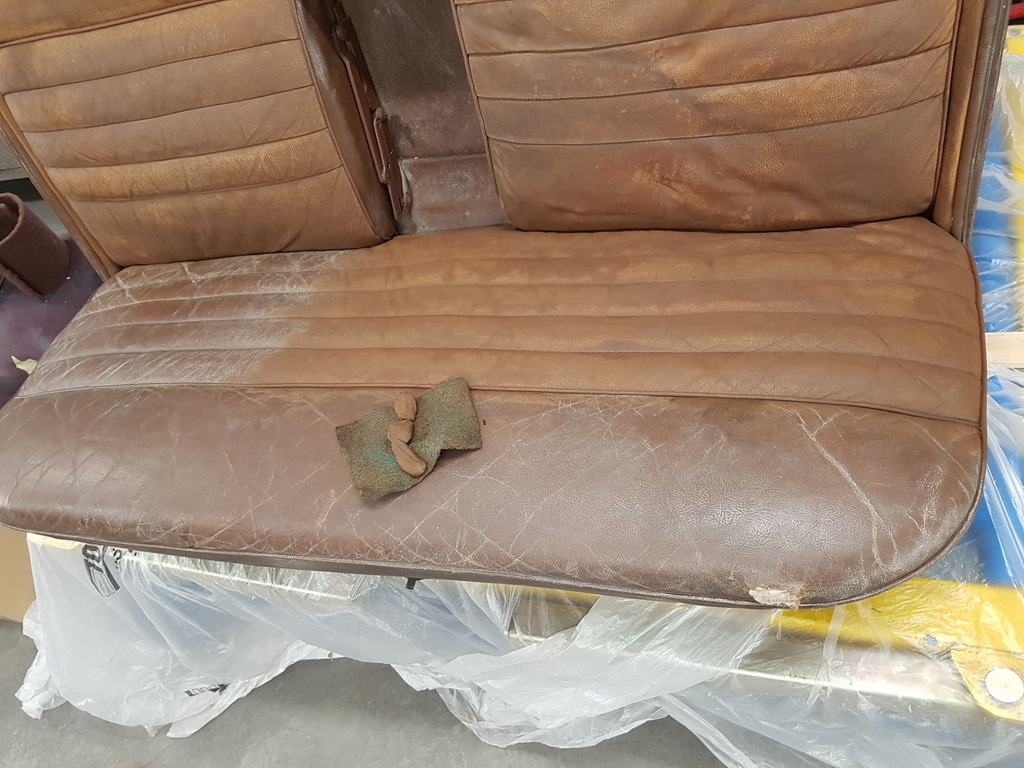 Cleaned area against a uncleaned area of the seat 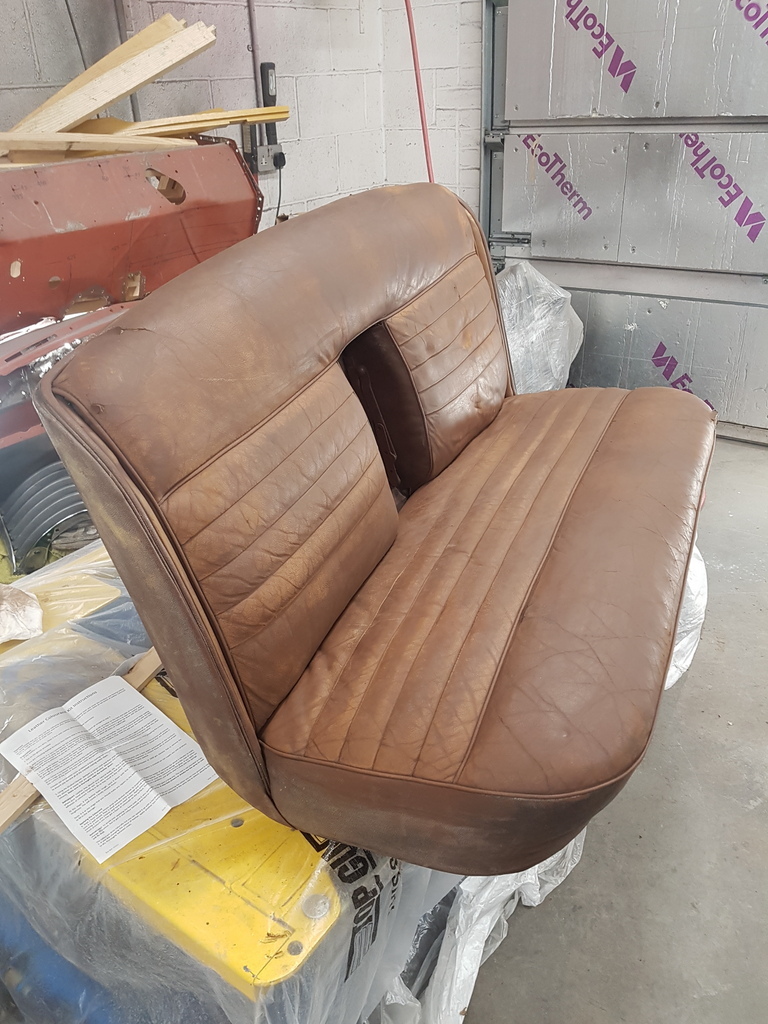 That's the front bench seat cleaned - I had already removed the fold out arm rests from the seats in order for ease of the process 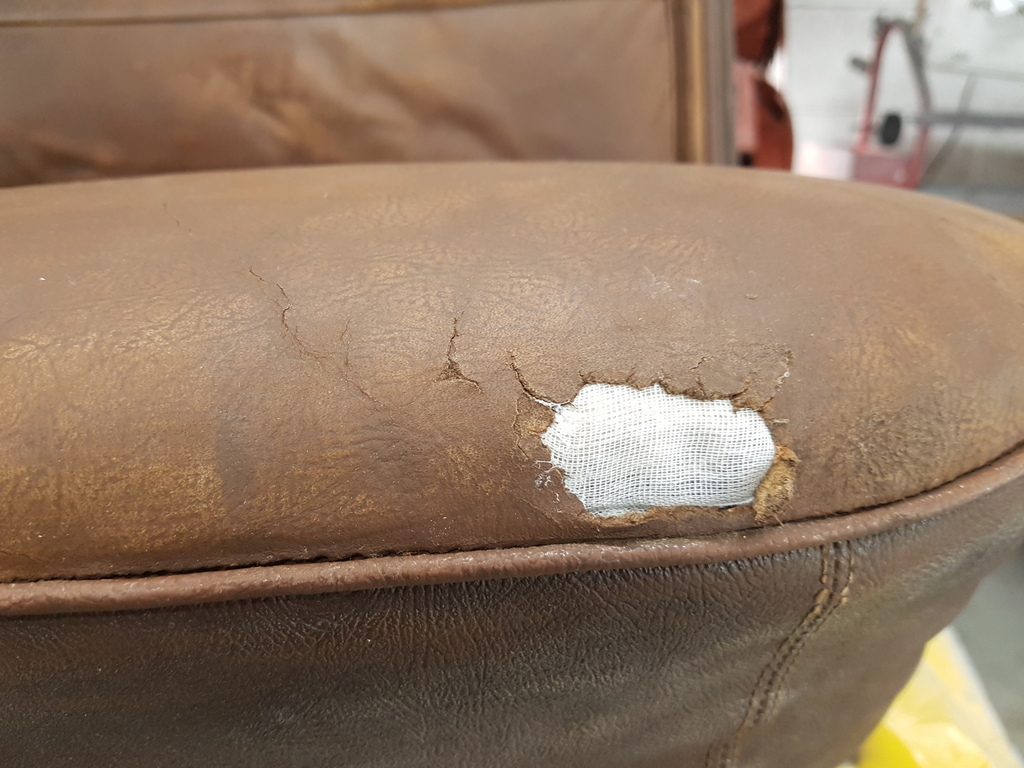 Repairs next - a reinforcing fabric is glued to the rear of the leather edges where holes / tears exist - its a fiddly process but readily achievable 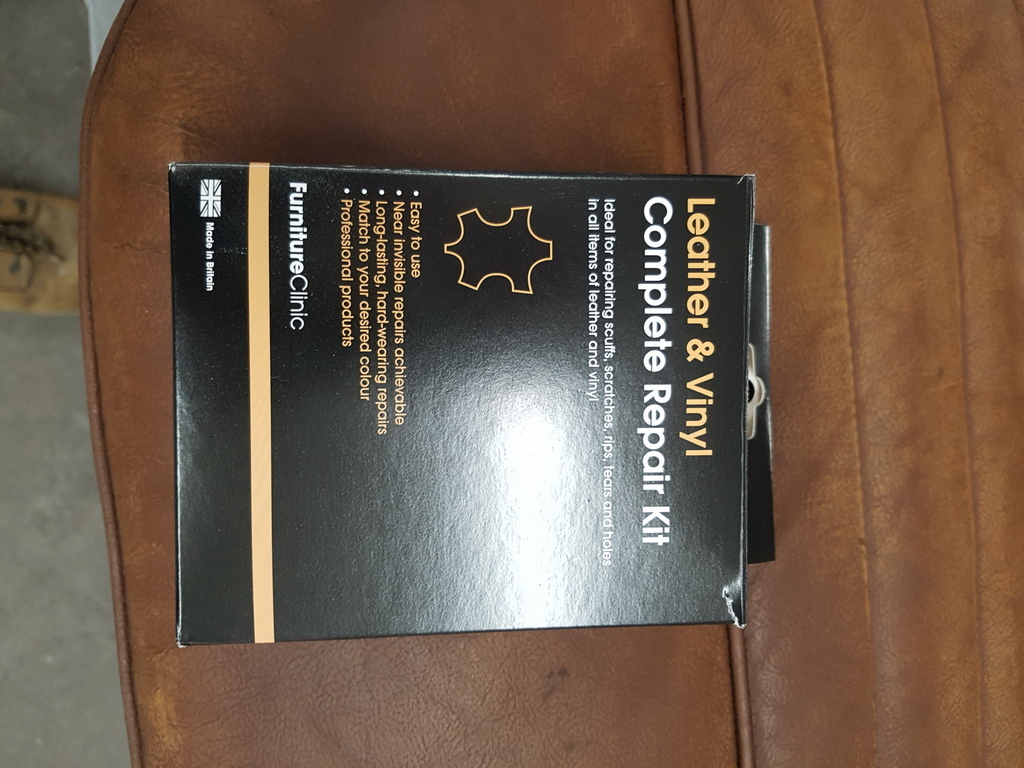 Repair areas are then filled with a flexible filler in thin layers and built up in stages - you accelerate the curing process with a hairdryer / hot air gun 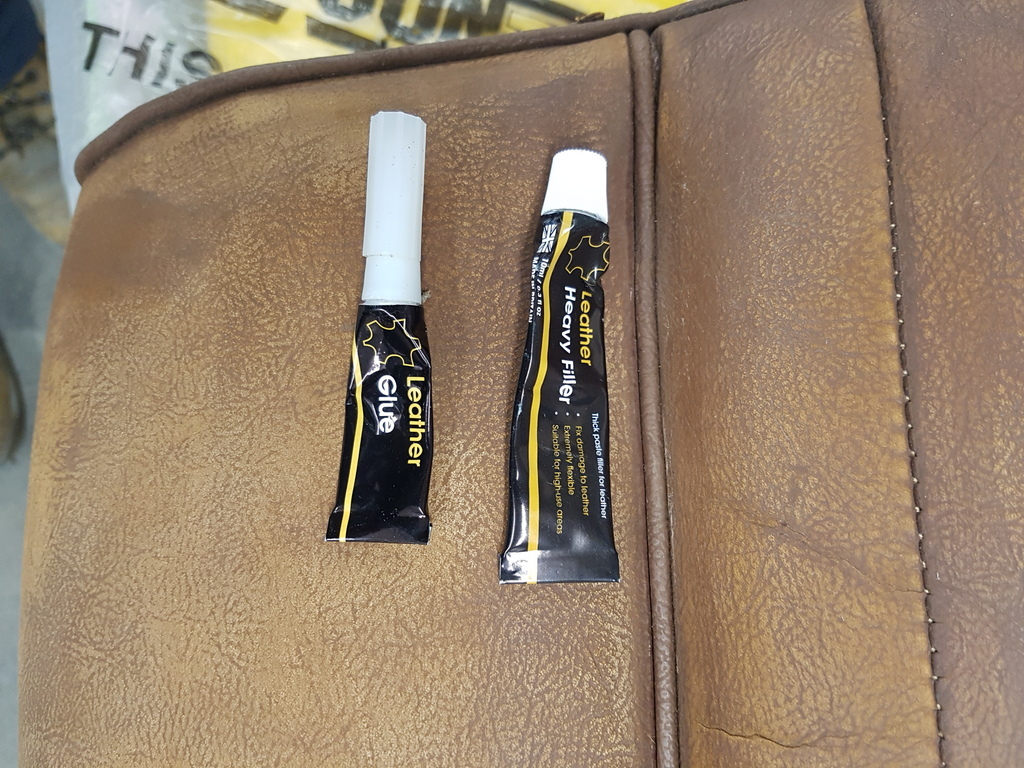 The glue & filler that comes in the repair kit are quite small - but with care will cover the repair of a full set of seats 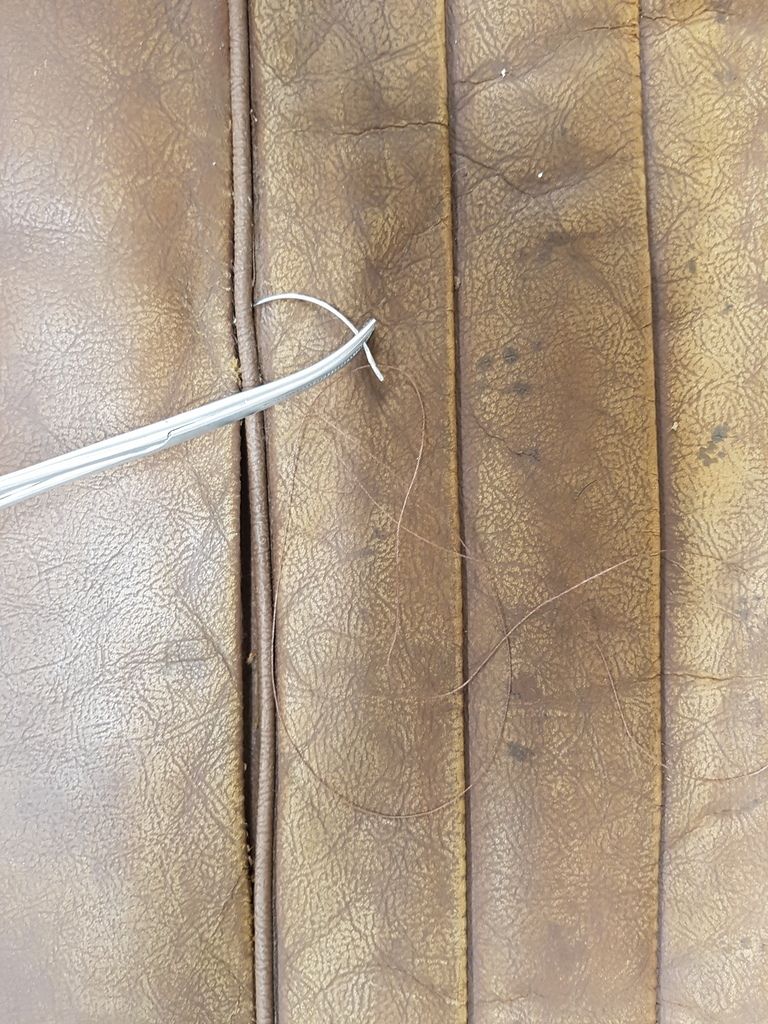 What it wont do is stich seams back together - but with a curved needle - some upholstery / strong thread 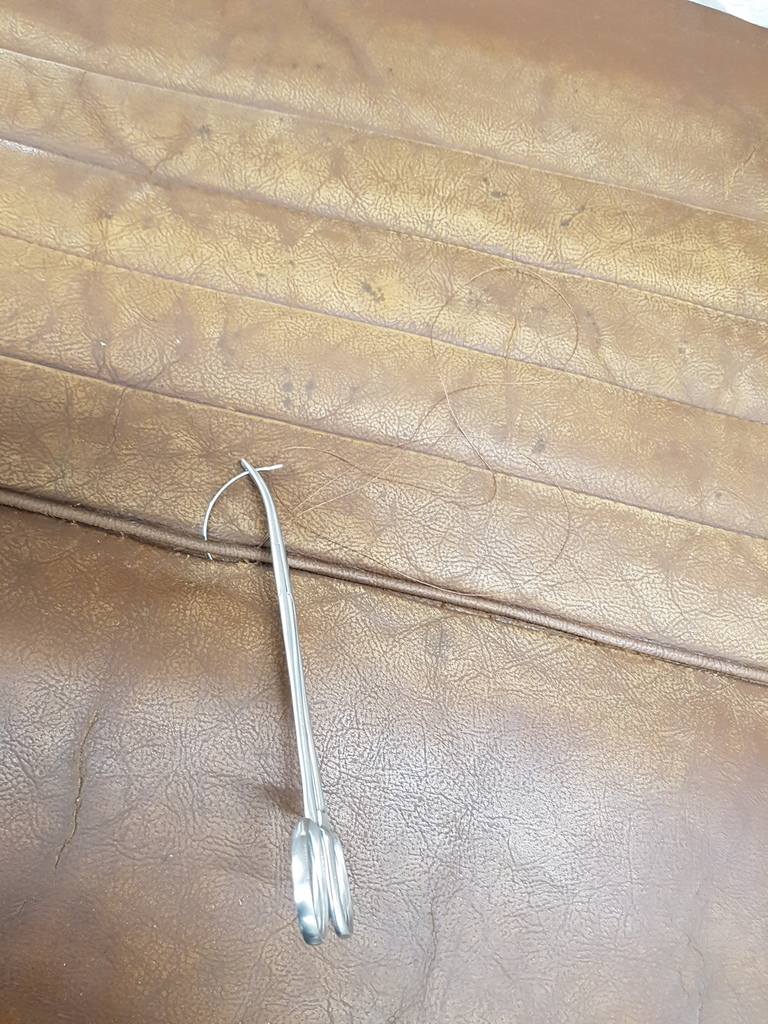 With a little time & patience there is no reason why you cant sort things like this yourself 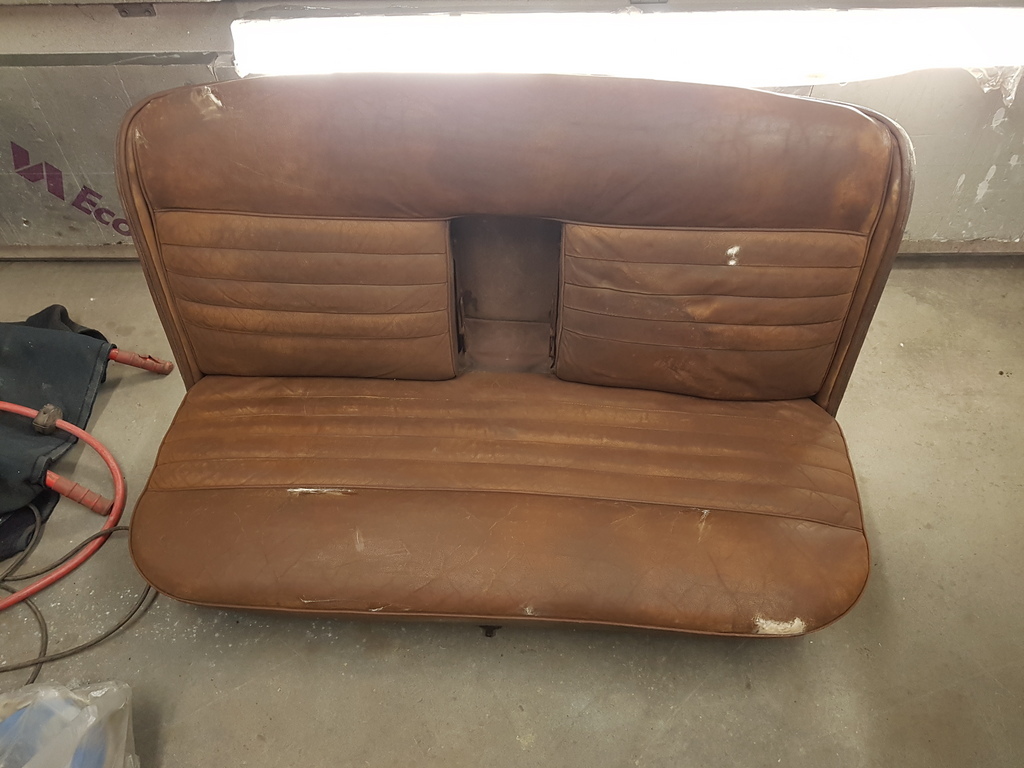 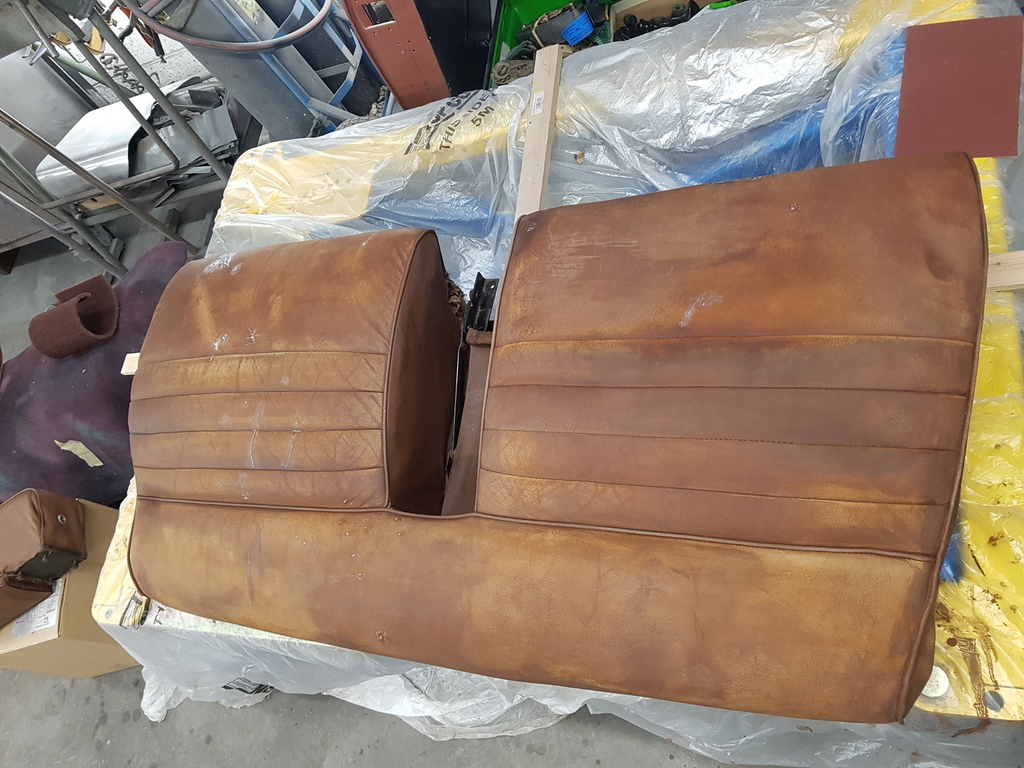 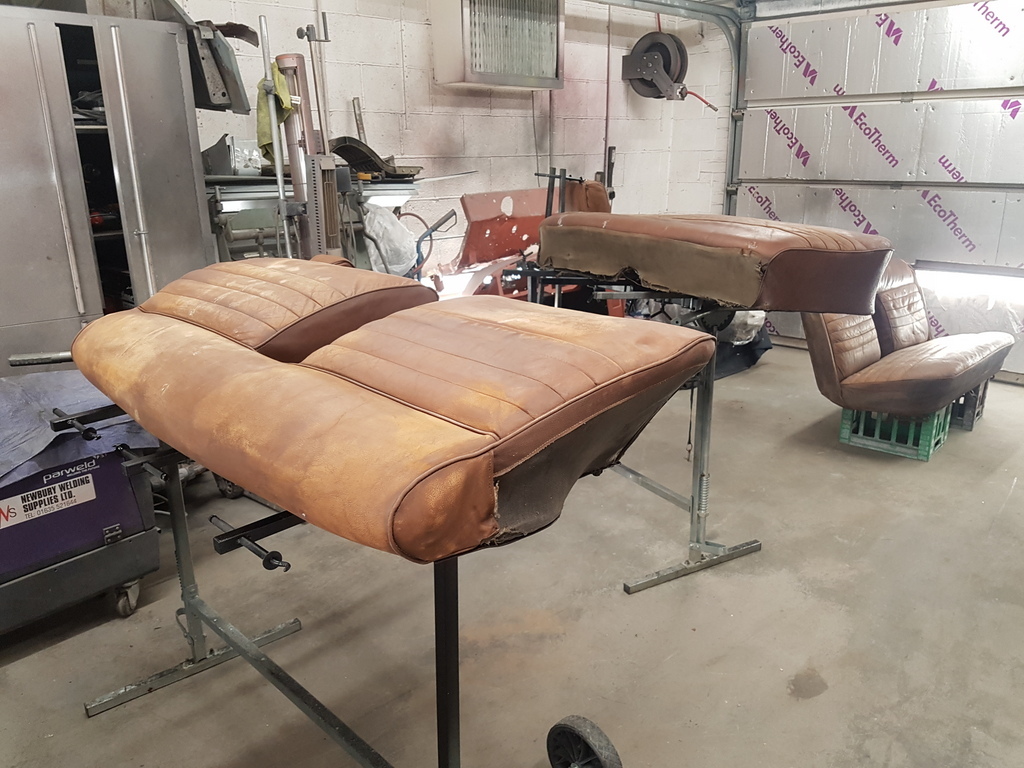 I completed the process with the rear seats & armrests it all gets washed off with a alcohol based cleaner prior to recolouring which I shall detail this evening when I update the thread |
| |
Last Edit: Mar 20, 2020 20:17:17 GMT by Deleted
|
|
|
|
|
Mar 20, 2020 10:04:39 GMT
|
|
I'm following the repair.
Yet another extremely useful the correct way how to do tutorial from the master.
|
| |
|
|
|
|
|
Mar 20, 2020 18:34:23 GMT
|
|
to correct the old adage , "jack of all trades...master of all"!!!
|
| |
'80 s1 924 turbo..hibernating
'80 golf gli cabriolet...doing impression of a skip
'97 pug 106 commuter...continuing cheapness making me smile!
firm believer in the k.i.s.s and f.i.s.h principles.
|
|
glenanderson
Club Retro Rides Member
Posts: 4,361
Club RR Member Number: 64
|
|
Mar 20, 2020 19:49:48 GMT
|
to correct the old adage , "jack of all trades...master of all"!!! The quote is: Jack-of-all-trades, master of none, is oft times better than master of one... 😉 |
| |
My worst worry about dying is my wife selling my stuff for what I told her it cost...
|
|
|
|
|
Mar 20, 2020 20:12:11 GMT
|
to correct the old adage , "jack of all trades...master of all"!!! The quote is: Jack-of-all-trades, master of none, is oft times better than master of one... 😉 Thereby proving everyday is a schoolday...never heard the last bit before. |
| |
'80 s1 924 turbo..hibernating
'80 golf gli cabriolet...doing impression of a skip
'97 pug 106 commuter...continuing cheapness making me smile!
firm believer in the k.i.s.s and f.i.s.h principles.
|
|
|
|
|
Mar 20, 2020 20:37:50 GMT
|
Ok time to recolour the seats & armrest - Furniture Clinic can mix any colour you wish but I choose one from their standard colour range 'London Tan' which suits the hue of the brown interior & carpets 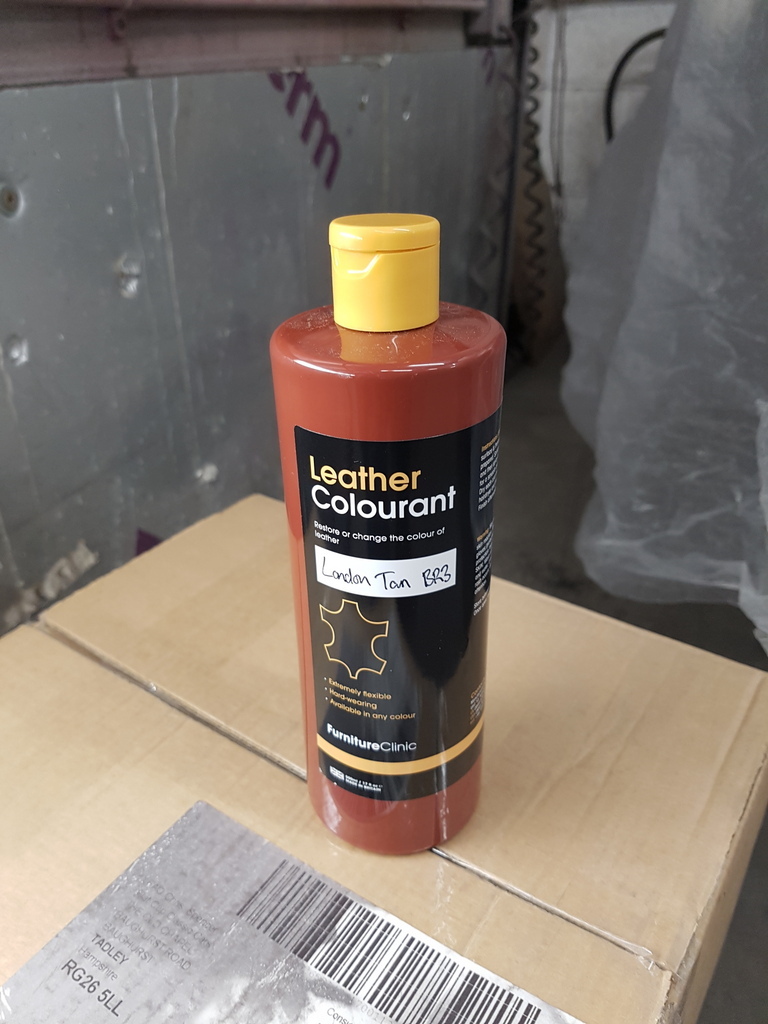 First job is to apply a basecoat by hand with a sponge - working the colour well into any creases / seams etc 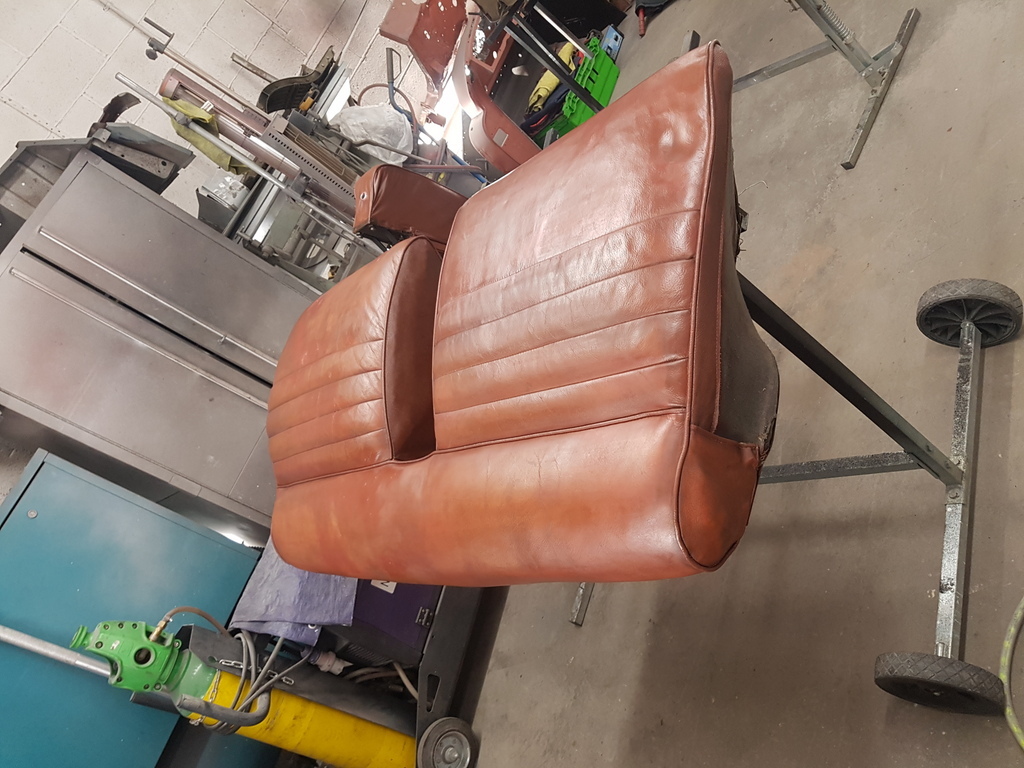 Comes up like this 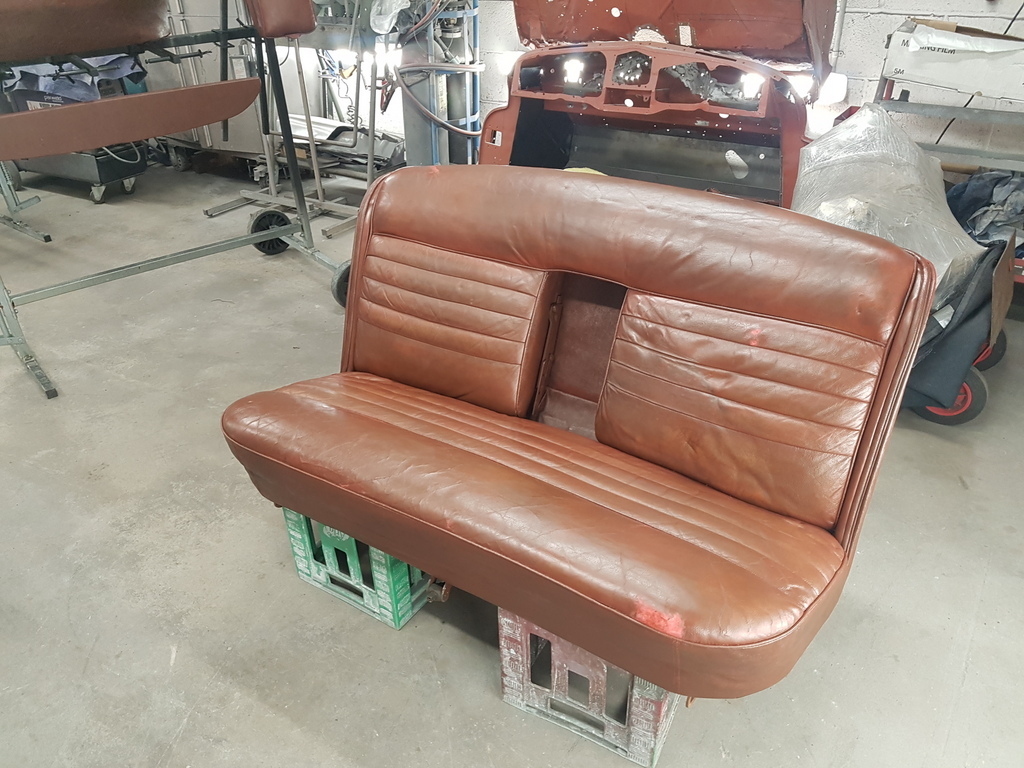 Further coats are then applied by spraying - the kit comes with a cheap air brush and several cans of aerosol propellent - which I don't bother with - instead I use my full size spraygun to apply it but at a lowish pressure 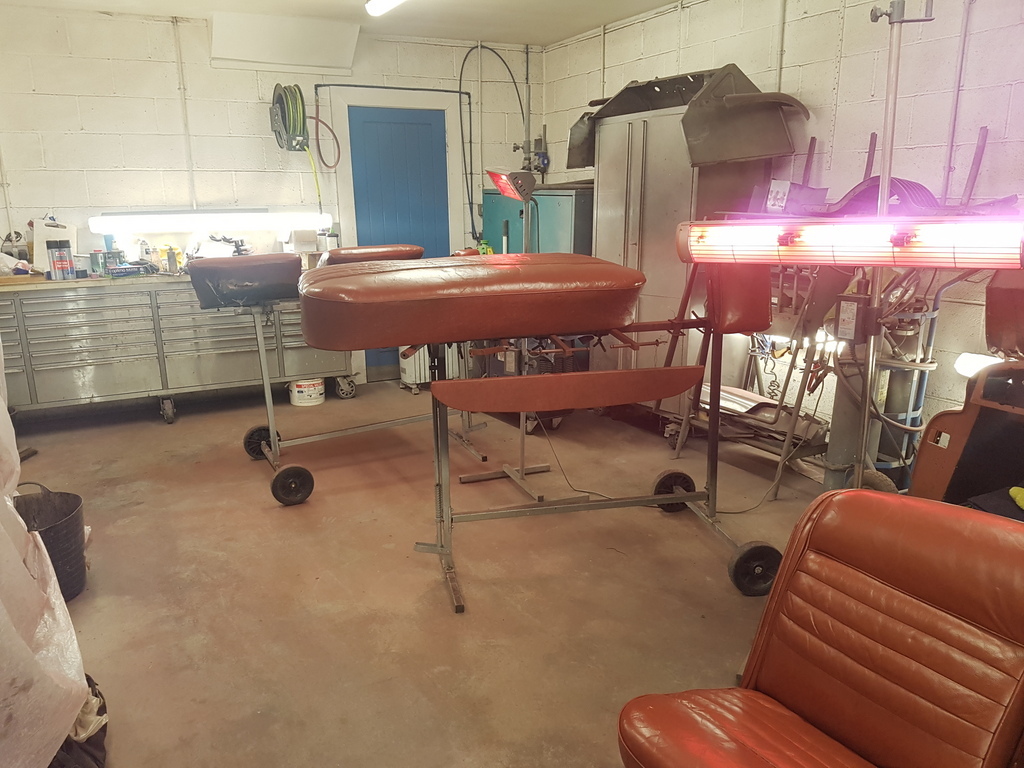 2 sprayed coats later 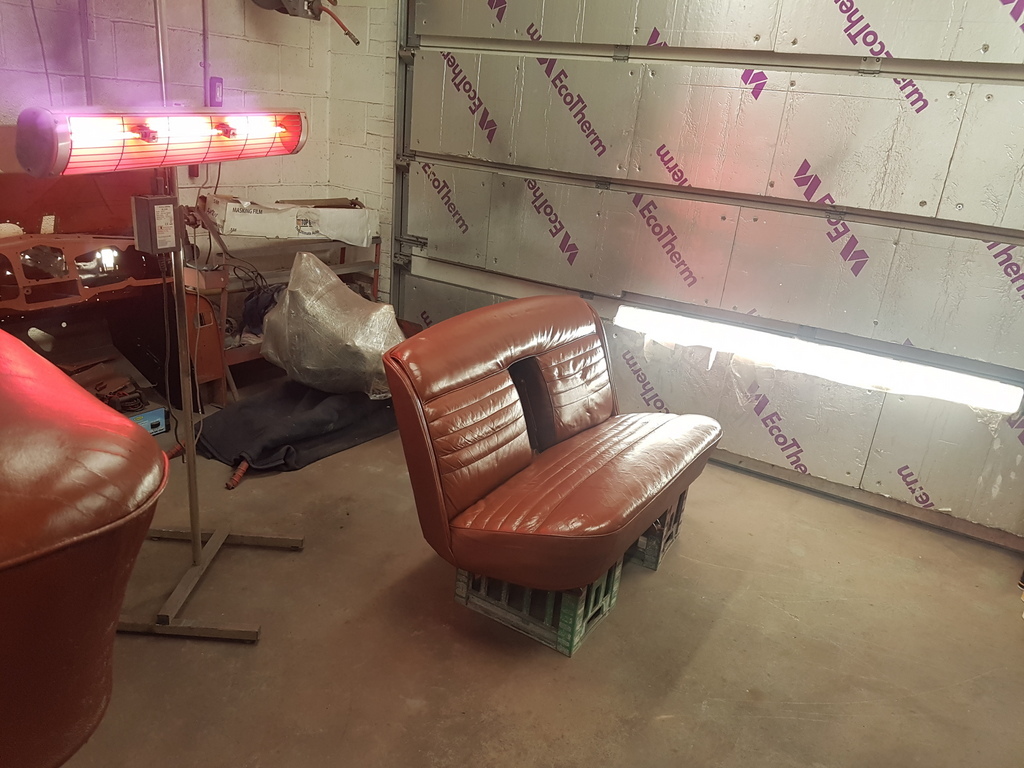 The colour is water based and dries fairly quickly - I left it a couple of hours 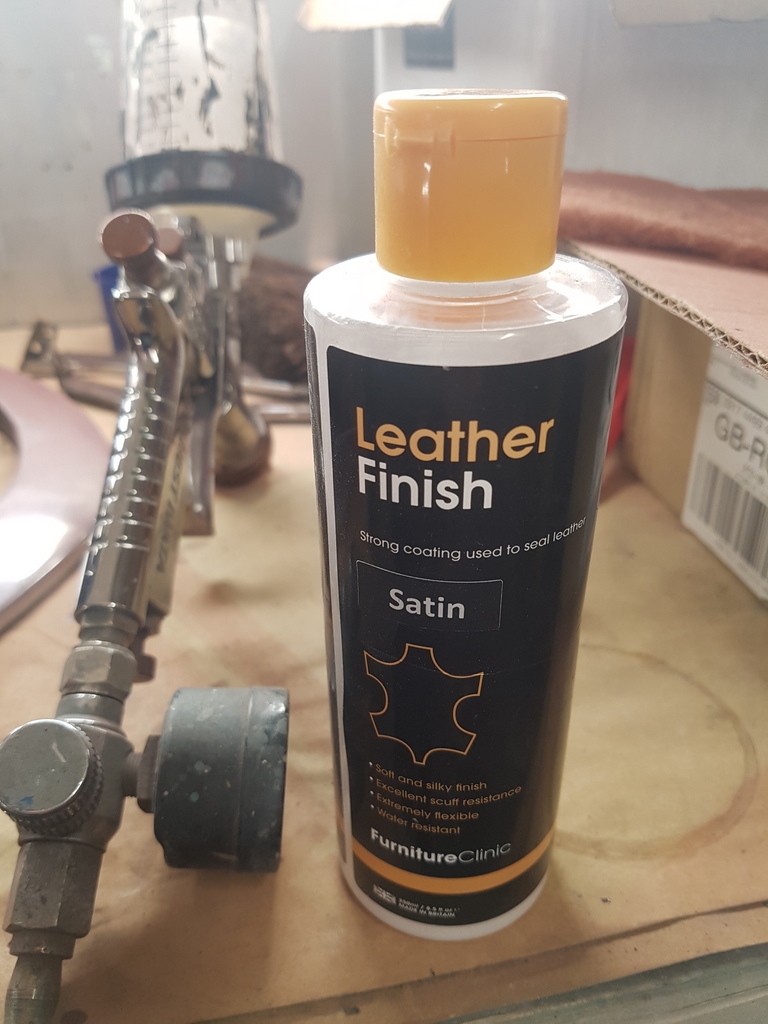 A clear sealer is then sprayed over the colour coats - its available in gloss, satin or matt - I normally go down the satin route 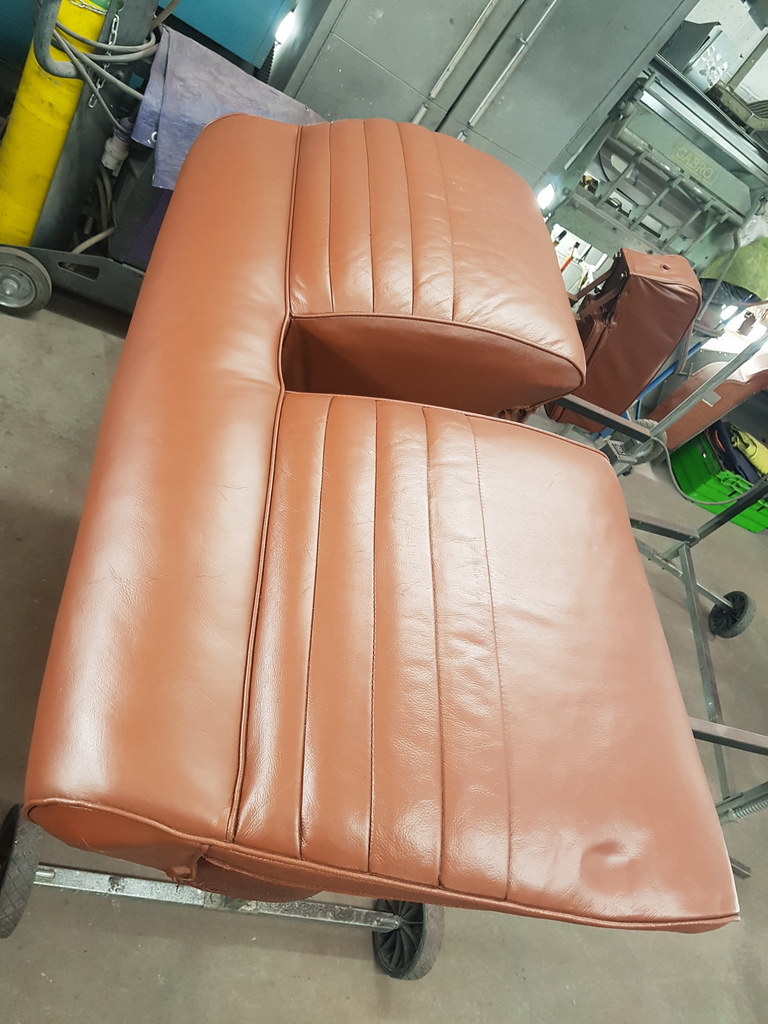 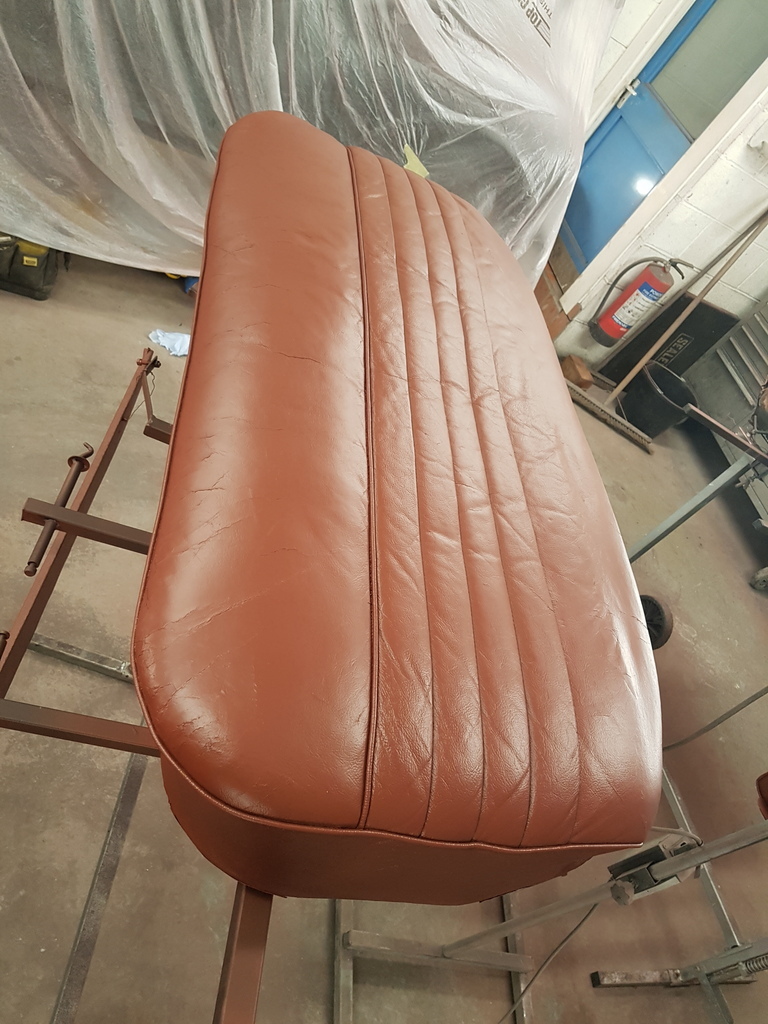 I applied 2 coats of the sealer 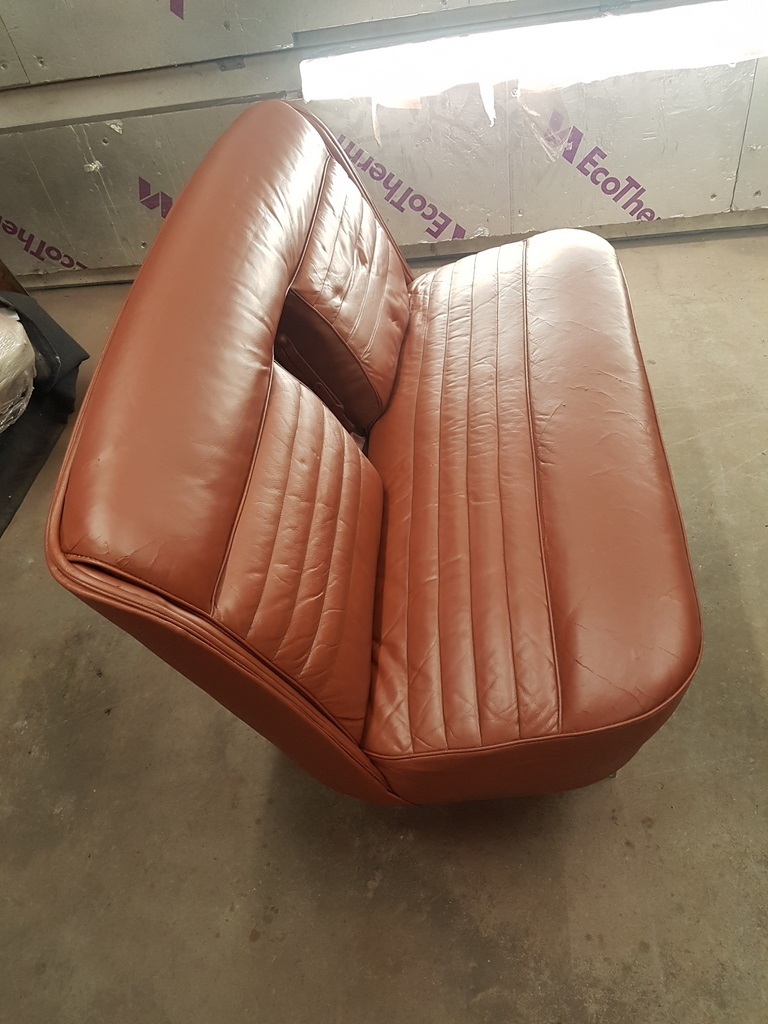 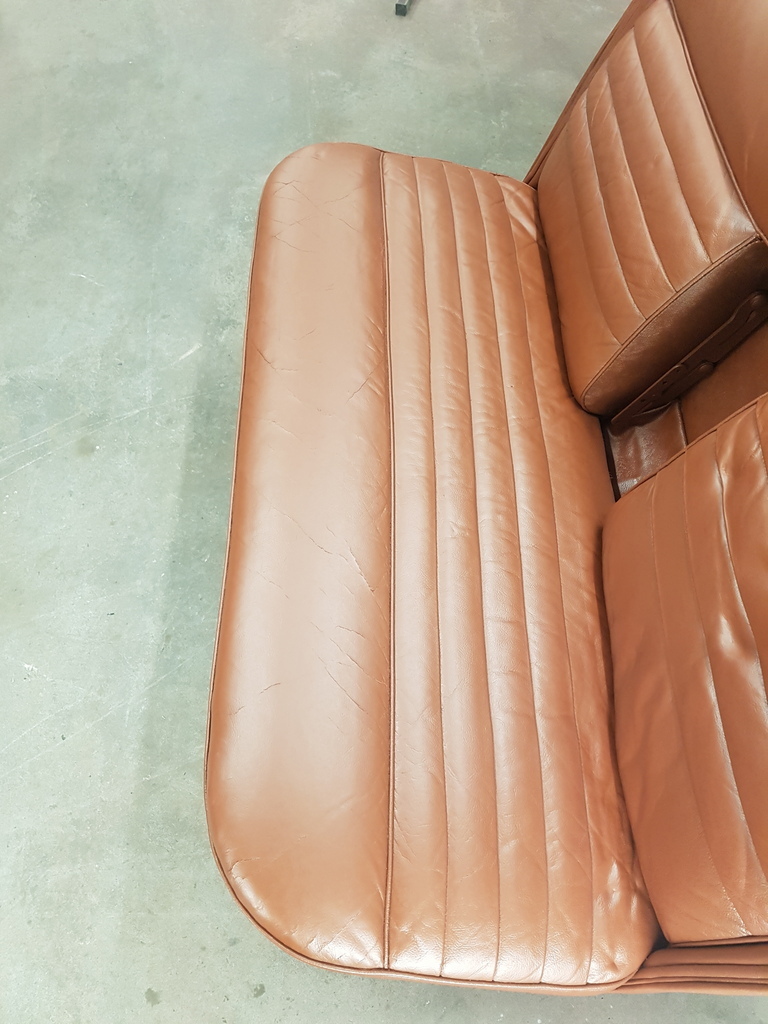 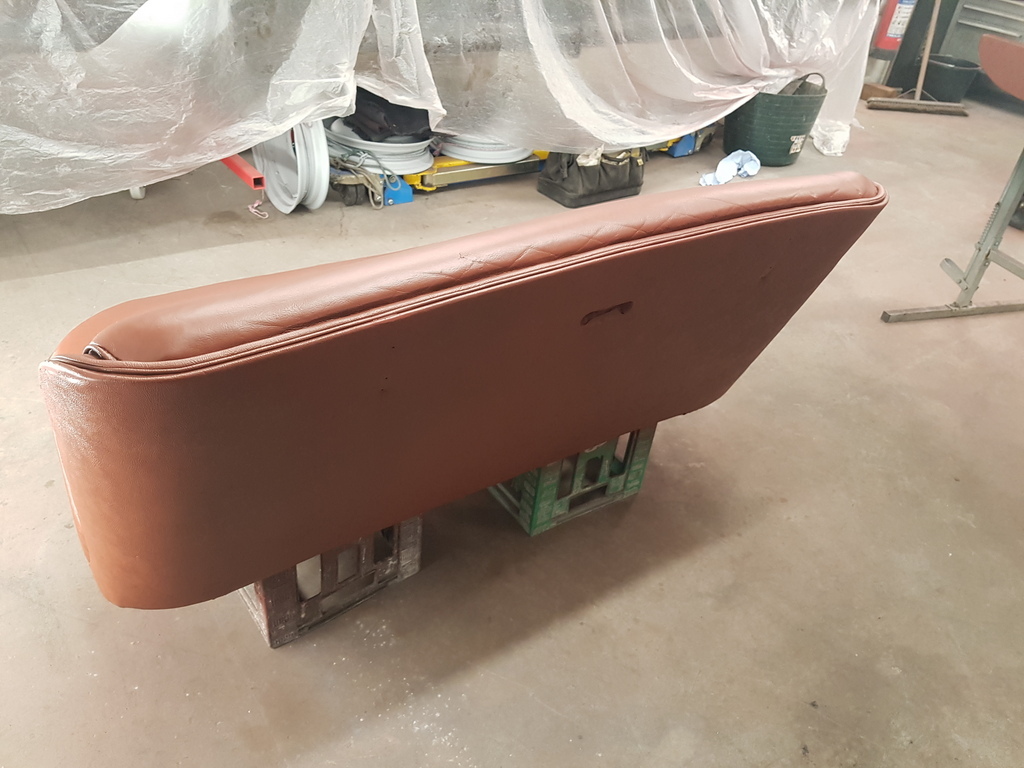 Once the sealer was cured - I placed the loose rear seats & the armrests in the house out of the way 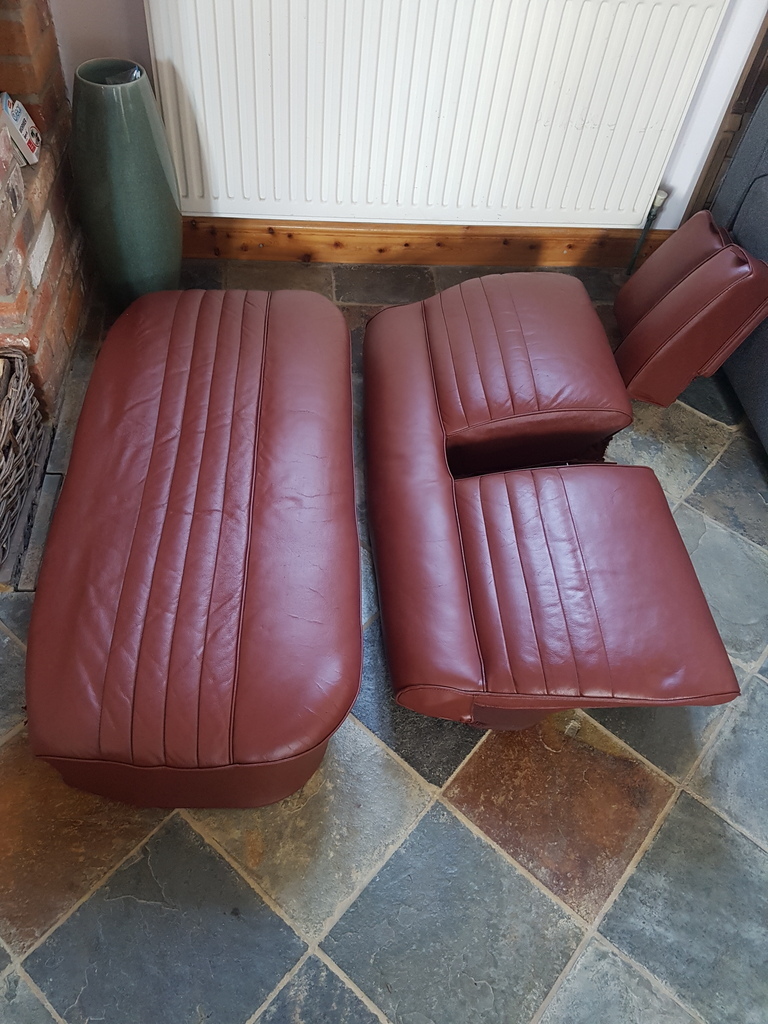 Its not perfect and its not supposed to be - but its extended the life of the original seats - once I refit them to the car I will apply a leather cream just to soften the finish up a little they look a little darker out of the brightness of the workshop - anyhow that is how to put a new lease of life into old leather / vinyl seats on a budget - you can also change the colour so if you find a set of seats in good order but the wrong colour then its quite viable to recolour them to match the rest of the cars interior More tomorrow |
| |
Last Edit: Mar 20, 2020 20:45:24 GMT by Deleted
|
|
|
|
|
Mar 20, 2020 20:44:05 GMT
|
|
WOW!
|
| |
'80 s1 924 turbo..hibernating
'80 golf gli cabriolet...doing impression of a skip
'97 pug 106 commuter...continuing cheapness making me smile!
firm believer in the k.i.s.s and f.i.s.h principles.
|
|
|
|
|
Mar 20, 2020 20:49:02 GMT
|
|
Spectacular. John
|
| |
|
|
|
|
|
|
|
Mar 20, 2020 21:02:41 GMT
|
|
i really must work out what i need to get from the furniture clinic to sort some scuffs on the drivers side bolster in swmbo's A4.
|
| |
'80 s1 924 turbo..hibernating
'80 golf gli cabriolet...doing impression of a skip
'97 pug 106 commuter...continuing cheapness making me smile!
firm believer in the k.i.s.s and f.i.s.h principles.
|
|
|
|
|
Mar 20, 2020 21:15:51 GMT
|
|
Thanks for the walk through and as ever excellent results.
|
| |
|
|
|
|
|
Mar 20, 2020 21:36:43 GMT
|
i really must work out what i need to get from the furniture clinic to sort some scuffs on the drivers side bolster in swmbo's A4. Pete - PM me a few pics and I will advise on what you need |
| |
|
|
|
|
|
Mar 20, 2020 21:40:40 GMT
|
|
Bloody hell 😳
|
| |
|
|
|
|
|
Mar 20, 2020 22:24:06 GMT
|
i really must work out what i need to get from the furniture clinic to sort some scuffs on the drivers side bolster in swmbo's A4. Pete - PM me a few pics and I will advise on what you need thanks chris. i'm trying...and failing to send from my phone! will try again tomorrow |
| |
'80 s1 924 turbo..hibernating
'80 golf gli cabriolet...doing impression of a skip
'97 pug 106 commuter...continuing cheapness making me smile!
firm believer in the k.i.s.s and f.i.s.h principles.
|
|
|
|
|
|
|
|
Now that is extremely useful. Thank you.
I'm off to have a look at their website.
Front seats on mine, specifically the drivers seat (obvs) are a little worse for wear, the rears are perfect. I know somewhere that'll do me a full retrim, at a cost, but I think I might just give this a go, having seen the results.
|
| |
|
|
jonomisfit
Club Retro Rides Member
Posts: 1,790
Club RR Member Number: 49
|
|
|
|
|
As always, the quality of work is inspiring.
|
| |
|
|
|
|
|
|
|
|
Bloody impressive!!!
|
| |
Proton Jumbuck-deceased :-(
2005 Kia Sorento the parts hauling heap
V8 Humber Hawk
1948 Standard12 pickup SOLD
1953 Pop build (wifey's BIVA build).
|
|
|
|
|
|
|
|
Wellllll.... Covid-19 is taking its toll.
Oversubscribed internet it seems.
Cannot upload update pics, but based on previous comments, I am missing out here.
As you were Chris.
And then magically the pics appeared.
Impressive stuff, well done and thanks fir sharing.
|
| |
|
|
|
|
|
Mar 21, 2020 11:02:57 GMT
|
|
That's an impressive result! Sure the owner will be over the moon with that.
|
| |
|
|
|
|


