|
|
|
Jan 14, 2023 19:28:57 GMT
|
Good heavens you all know your stuff. Thanks for the comments and thoughts. Rich, I mentioned this to Ian on Friday. Apparently one of the problems with those side lights is that they are very short from the back of the holder to the glass. Even some standard bulbs won't fit. I'll do some measurements and see though. Appreciate the suggestion. Thank you. |
| |
|
|
|
|
|
|
|
Jan 14, 2023 19:33:17 GMT
|
I realise I didn’t tell you all about my homework from the last visit. The first thing on the agenda is another bit of the cab floor. Under the driver’s seat is another piece of ply that sits in the angle iron frame. It had been bolted into the frame with countersunk screws and nylock nuts meaning it was impossible for anybody to get it out alone. To make matters worse there was a piece of Lino glued over the top covering the screw heads so you had no idea where they were let alone getting a screw driver in them. 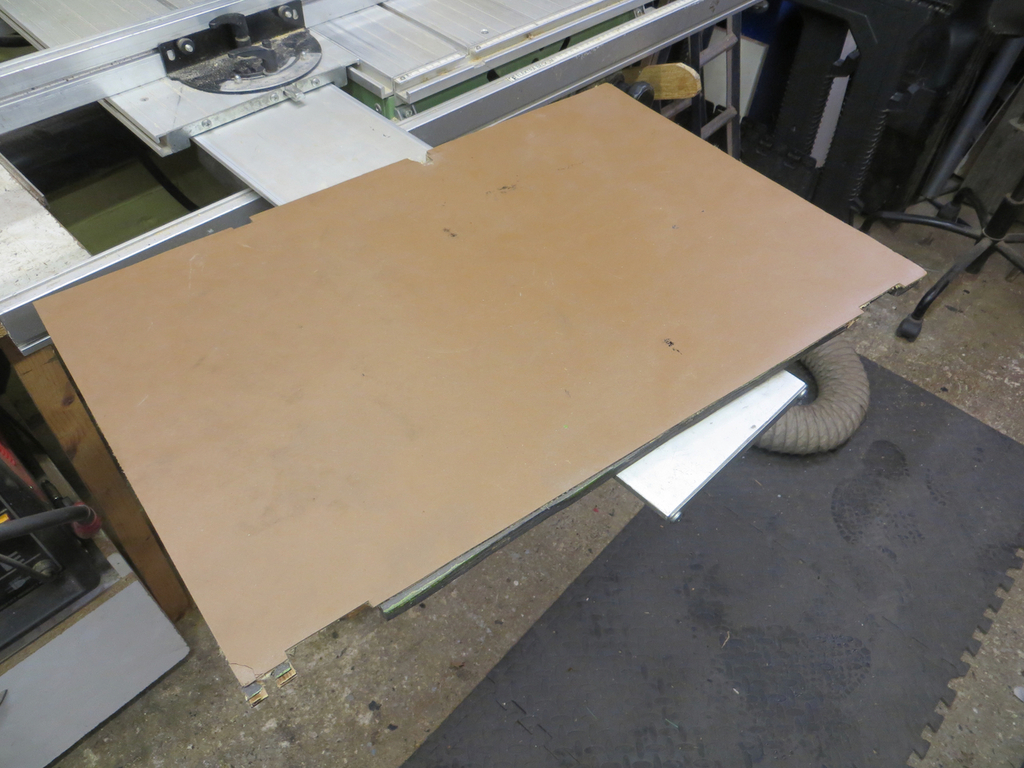 This meant that when it was removed it came to ‘unceremoniously’. 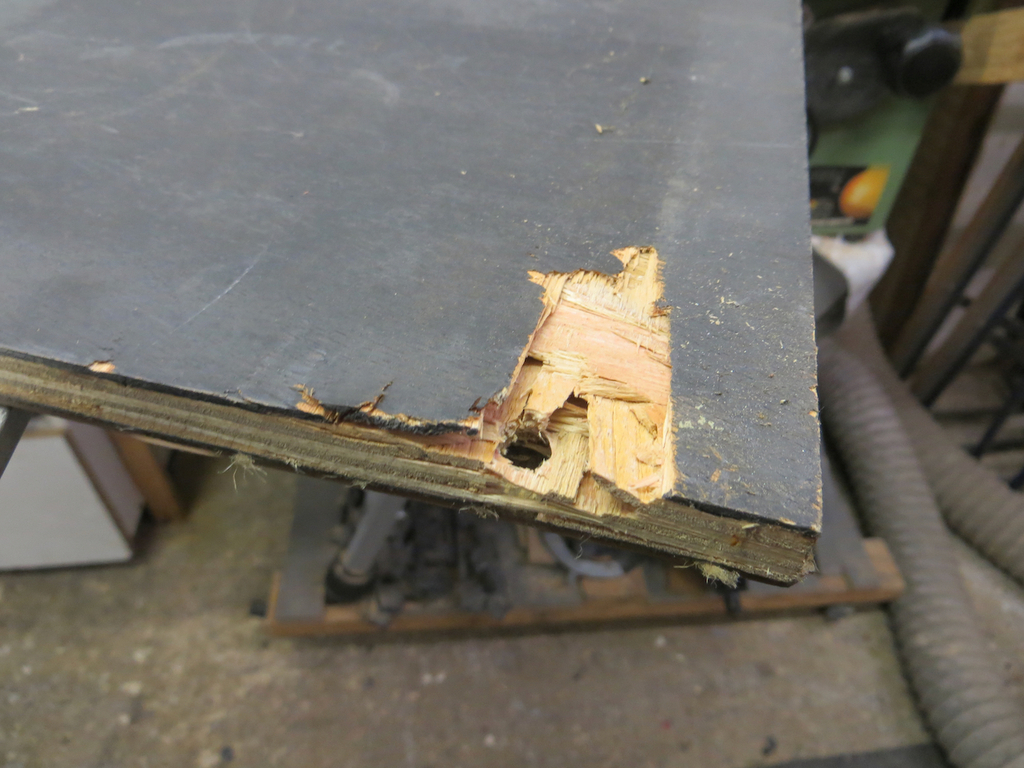 After my success with the front part of the floor I thought I’d have a crack at this. The Lino turned out to be well stuck and didn’t look like it’d come off so I thought we’d repair the wood rather than make a new floor. Basically I planned to clean the fragments out, flood it with wood glue (which I blew into the damaged area with the air line) and then clamp it down. 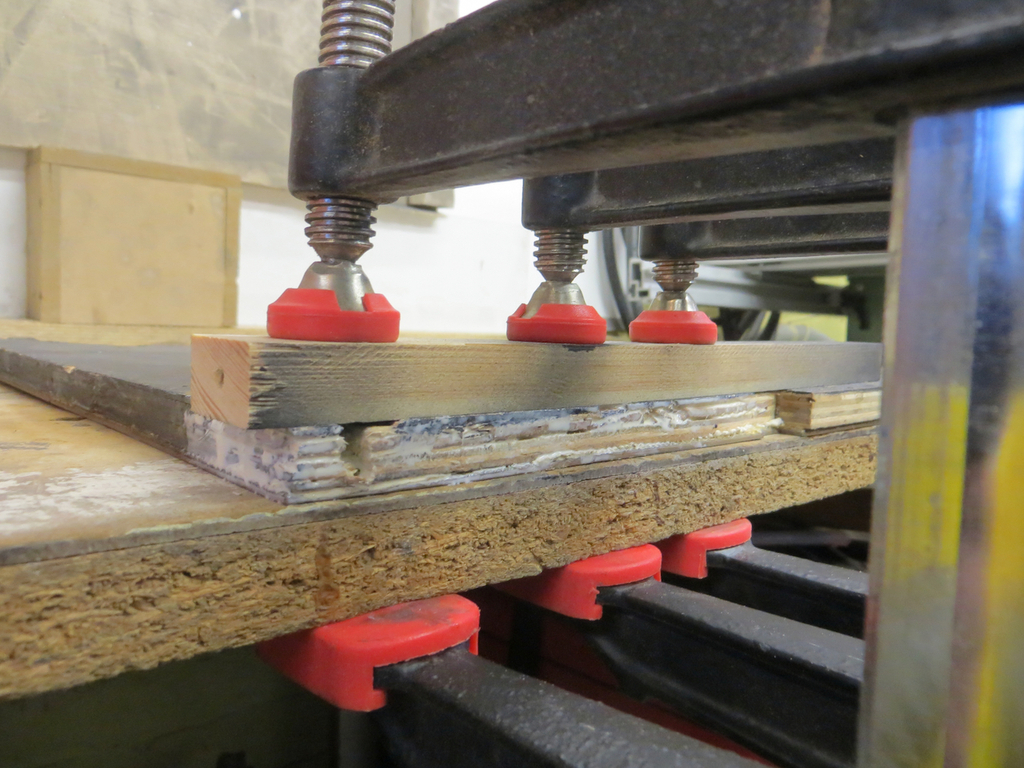 Once that had dried I just filled the remaining holes with wood filler. This was more to do with keeping the moisture out of it than anything else. 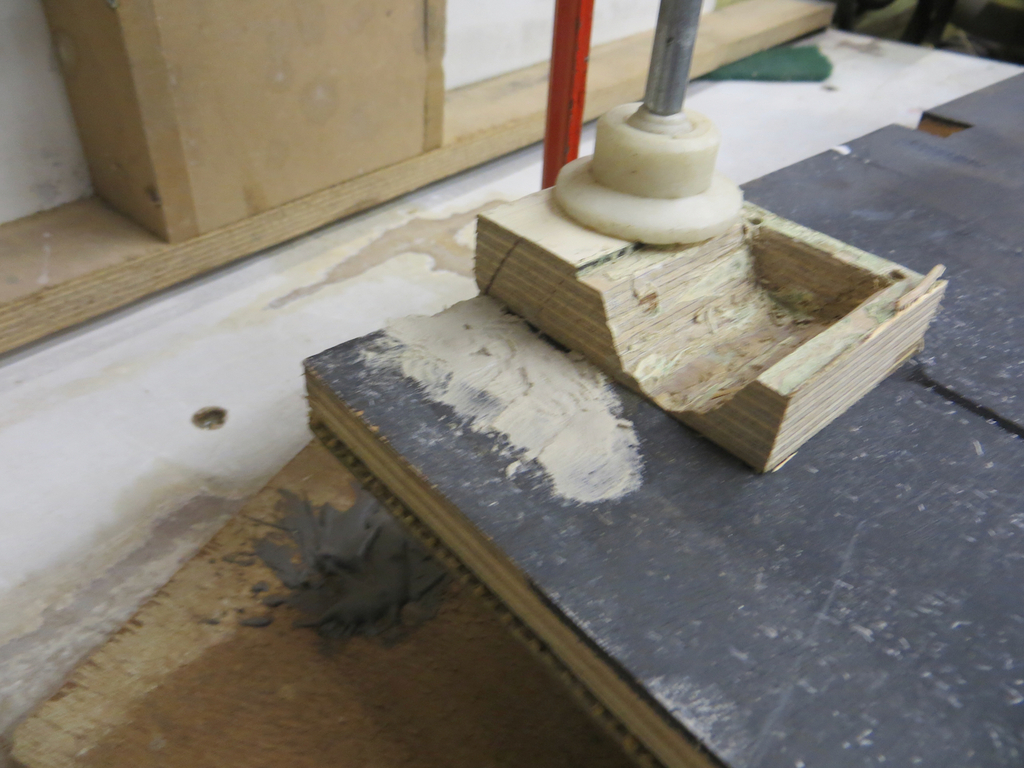 After that it was sanded, primed and eventually painted gloss black. 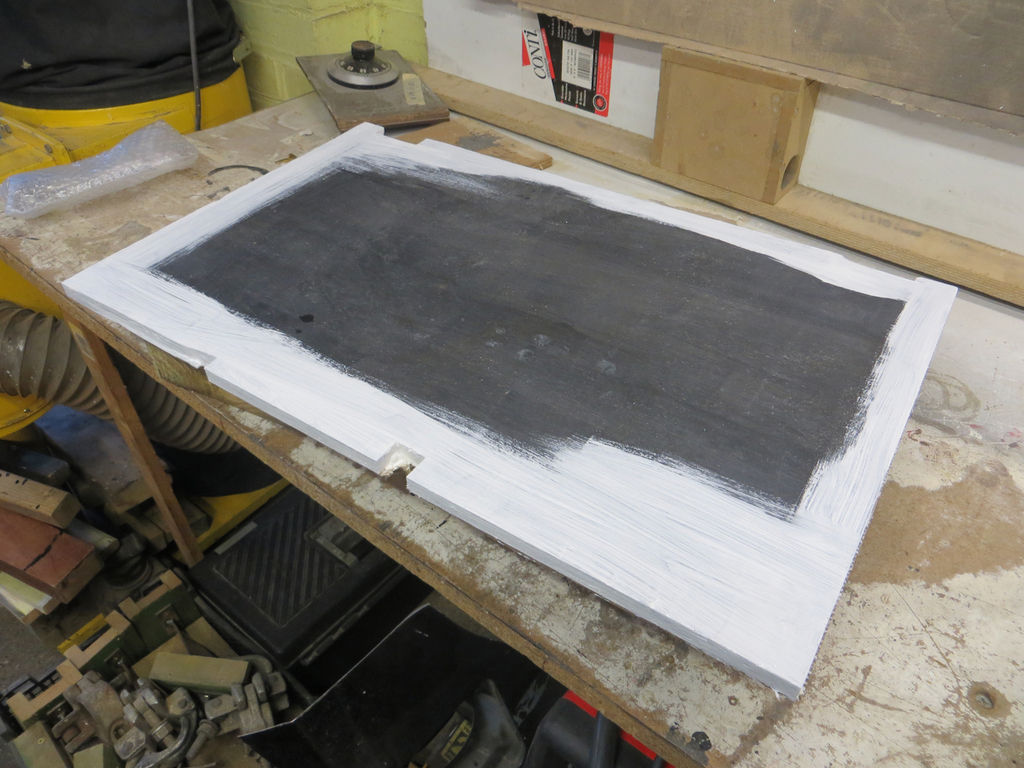 Well James, having filled up the broken holes how exactly do you intend on fastening this into the cab yer ding dong!? Fear not, I have a cunning plan. It turns out that the original threaded bolt holes are still in the cab floor frames. All I had to do was drop the wood in to position, mark the hole locations, and drill new holes in the floor. And so, as if by magic, here it is. Bolted down. 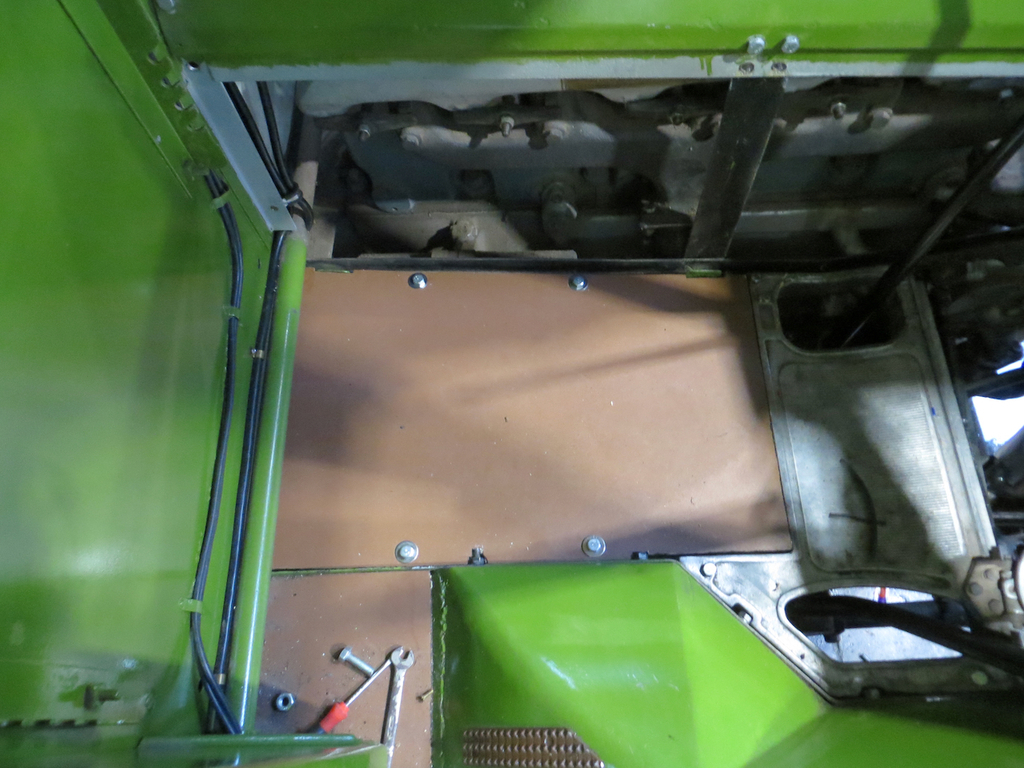 Right, best do my other bit of homework now. James |
| |
|
|
jimi
Club Retro Rides Member
Posts: 2,223 
|
|
|
|
Hi, The date for the change to amber was around 63/64, but if a car was an existing model it was excused the change in certain circumstances. If the car had a model update then it had to encompass the change. For instance the Ford Cortina Mk1 in '63 it had white side/indicators, when Ford updated to the aeroflow model in '64/65 with changes like the heating and ventilation and a different dash, the grille was changed incorporating the separate lighting arrangement. Cars like the Mini which was an existing model were allow to continue unless they updated the car. Some manufacturers embraced it some didn't. Colin My 1961 Mini had amber indicators, I don't remember any Mini's locally from around that time with white ones  |
| |
Black is not a colour ! .... Its the absence of colour
|
|
|
|
|
Jan 15, 2023 17:19:09 GMT
|
|
I never owned a mini. There is a part of my that thinks I've missed out.
A mini was never a practical car for me though. I always needed something that would cover long distances with a fair amount of space in it. It's only recently that I've been able to have a toy car and that's the MR2. What I need is much more room for more cars.
|
| |
|
|
|
|
|
Jan 15, 2023 17:28:28 GMT
|
All righty, Here’s an interesting conundrum to ponder. You may not remember but the rack on the fuel pump had jammed. This is the throttle mechanism if you don’t know what I was talking about. The pump is made up of a cam box with the pump body (including rack) bolted on top. So the pump top went off for refurbishment. This is the cam box with the pump top missing 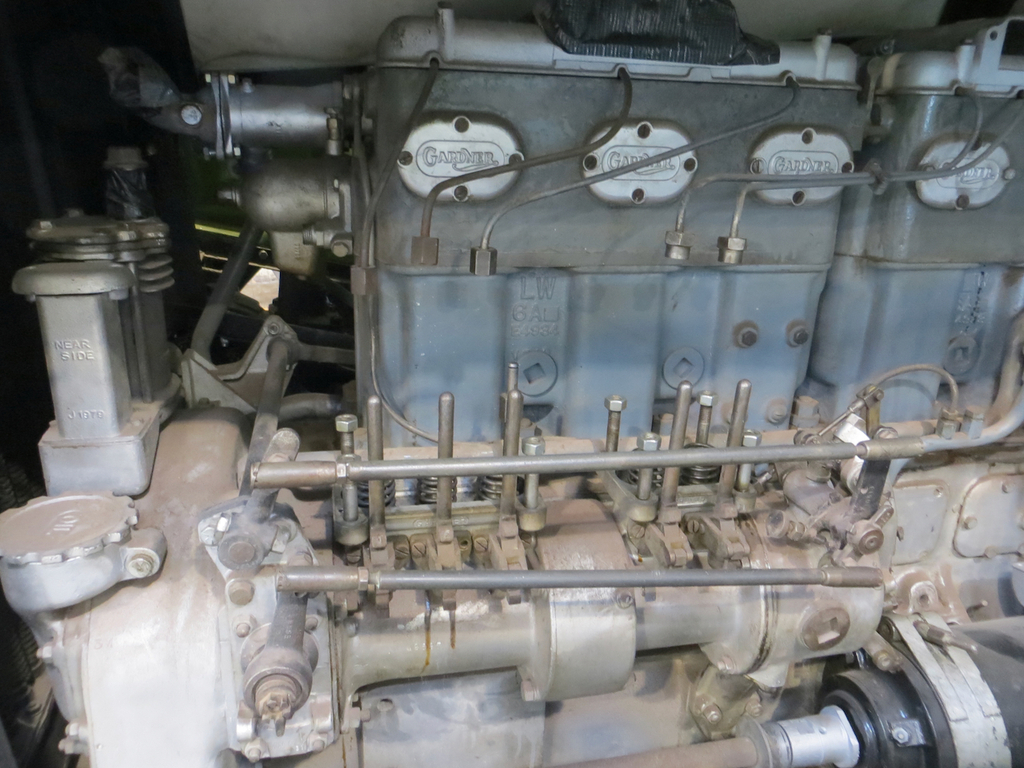 Well now it’s back and we should consider putting it back on. Here it is loosely attached. Looks good don’t you think? 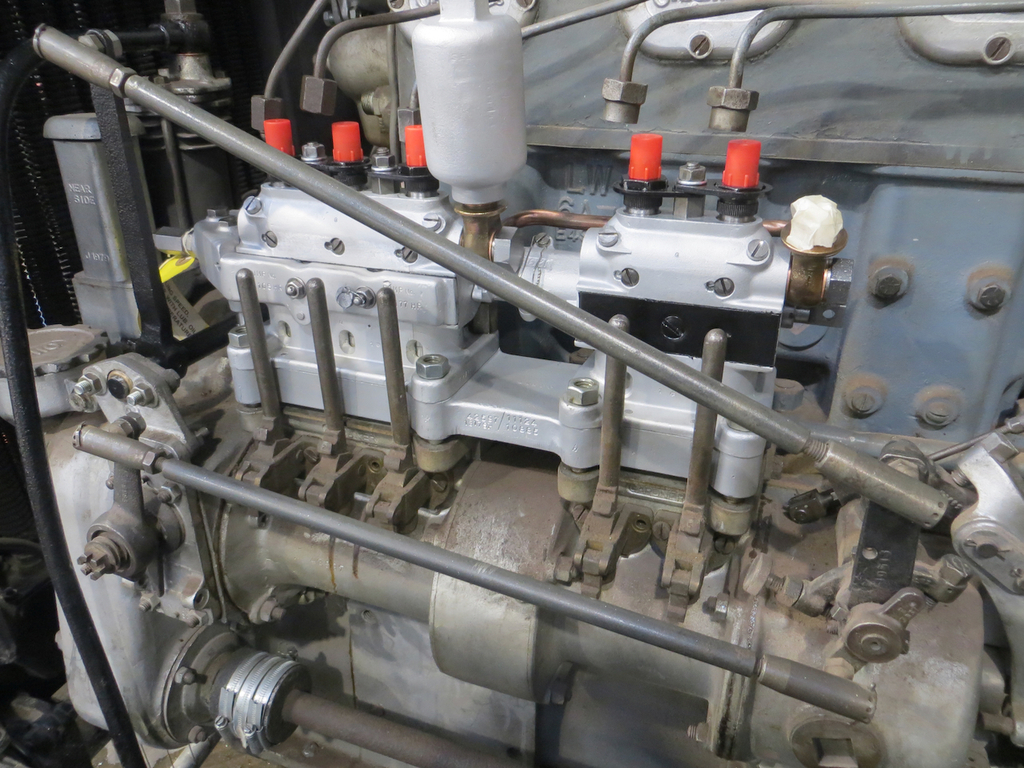 Sadly there is a problem with putting it back on. Probably several problems but one in particular. The pump top is bolted down with nuts on studs. You can use a spanner or socket on them. Apart from this one… 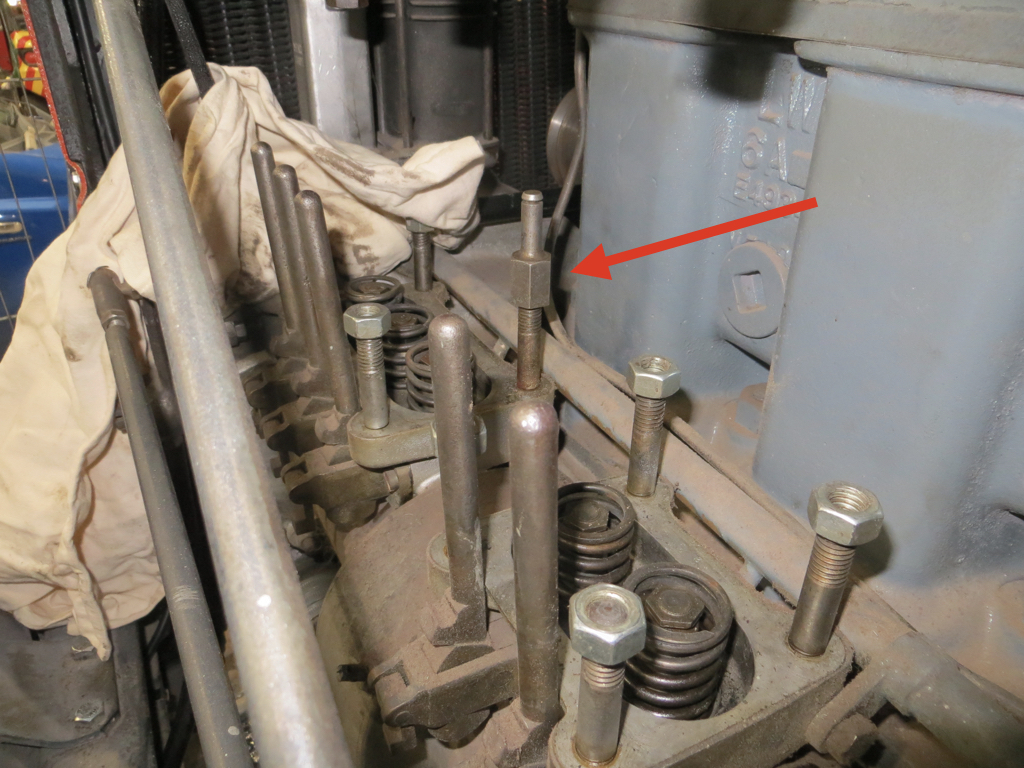 The sticky up bit is to hook the throttle return spring on. But it means you can’t use a socket on it. And you can’t use a spanner because it’s between the pump top and the engine block. 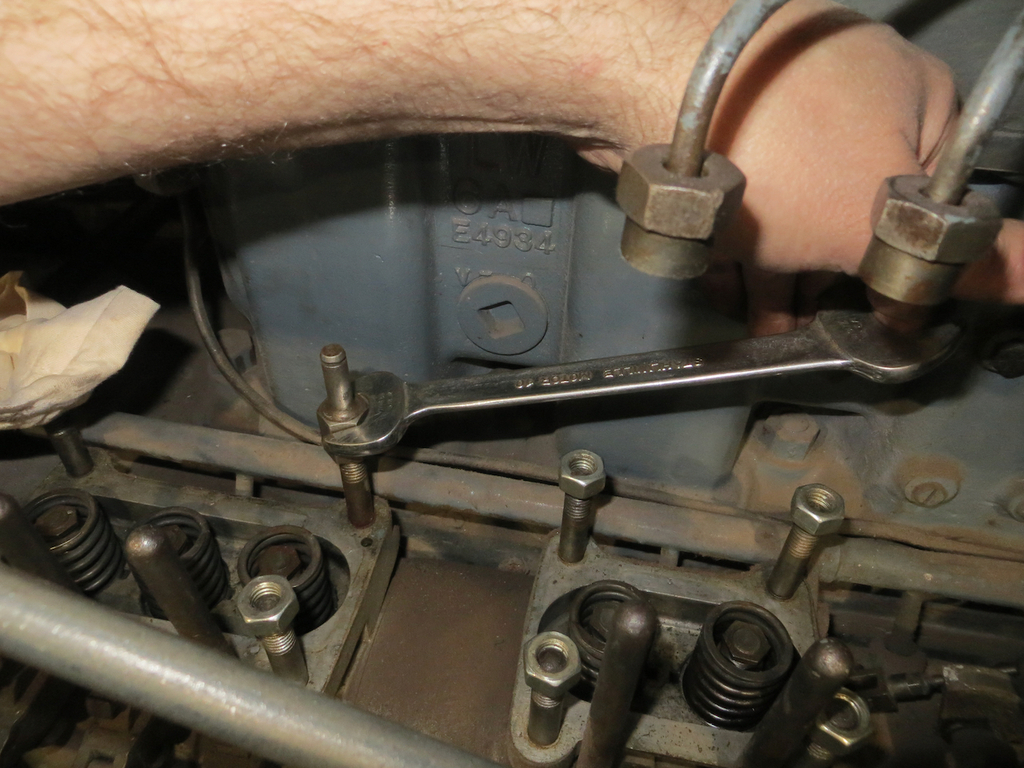 What we need is to make a tool. Or at least modify one. Some sort of handy bendy spanner thingy. As luck would have it the Friends of Chatham Traction have had a few tools donated over the years so one of them can enjoy a new life. 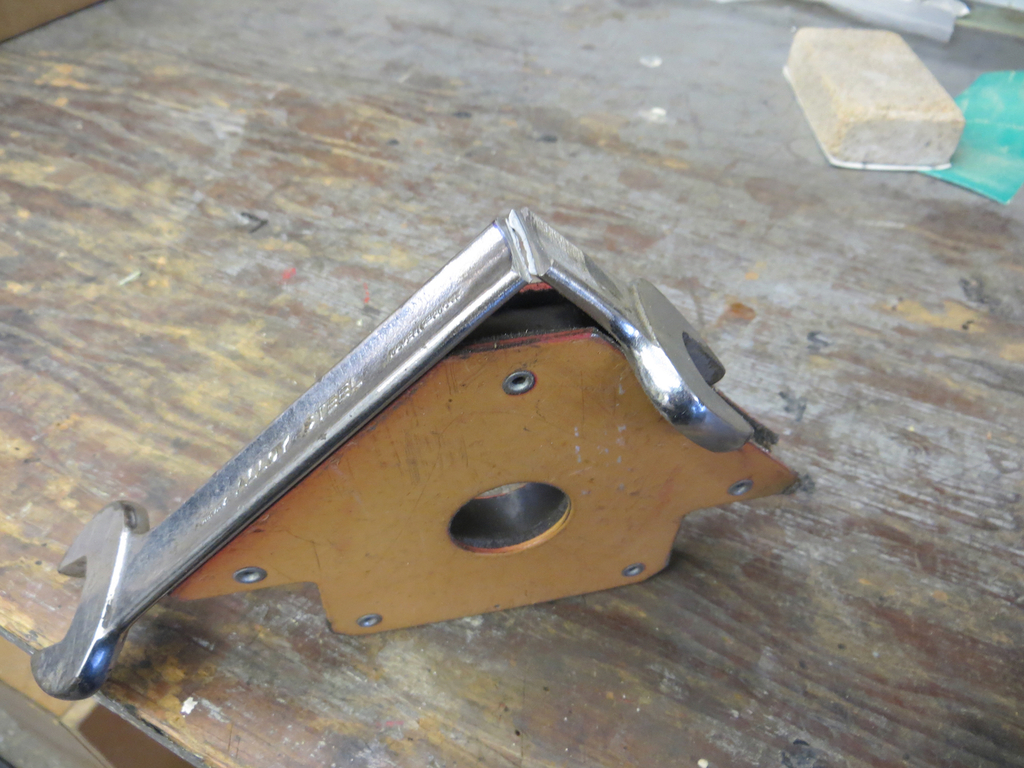 Well that’s definitely bendy. And spannery. But not useful. Out with the very hot glue gun. 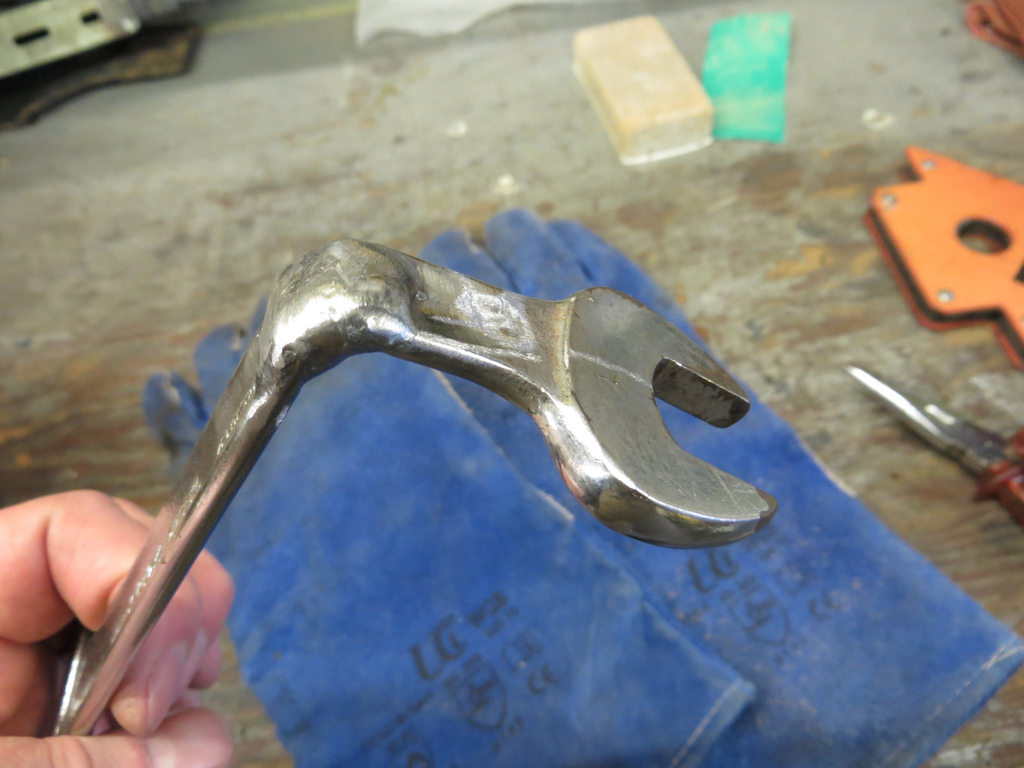 Now that’s what I call a spanner. And it looks like it’ll work too. 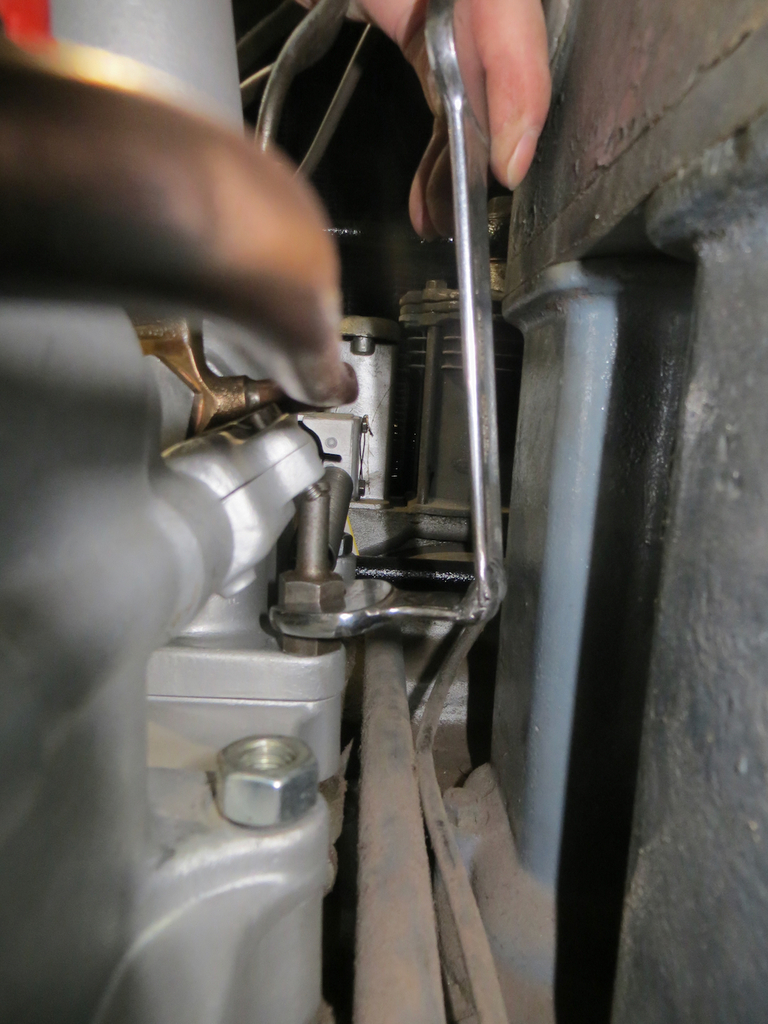 Nice. Apparently it’ll get a lot of use because in order to set up the pump you have to bolt the top down, take some measurements, take the top off, adjust, top on….. Etc ad infinitum. Or something like that. James |
| |
|
|
|
|
|
Jan 15, 2023 17:40:43 GMT
|
|
You just made a crow’s foot spanner. Nice job.
Forgive my weak memory, but does the Bristol bus have a Bristol-made engine?
So many bits and bobs on show on the engine and the chassis … subcontractors, including foundries, must have been kept very busy.
Kind regards, John
|
| |
|
|
|
|
|
Jan 15, 2023 20:02:20 GMT
|
|
Hi John,
This one has a 5 cylinder Gardner - a 5LW. About 7 Ltr and 85 HP I believe. I wouldn't be surprised if there is a Gardner part number for that spanner.
Bristol did make engines though. There was an 8 Ltr AVW and later an almost 9 Ltr BVW. Neither were very well regarded though.
James
|
| |
|
|
jimi
Club Retro Rides Member
Posts: 2,223 
|
|
|
|
Somewhere in my garage I have a set of these, we used them offshore a fair bit for similar awkward nuts/ bolts. Also have a couple of "custom" spanners similar to your creation 👍  |
| |
Black is not a colour ! .... Its the absence of colour
|
|
|
|
|
|
|
|
I suspect that the preferred tool for that inconveniently designed nut and stud is a tube spanner.
|
| |
|
|
teaboy
Posted a lot
   Make tea, not war.
Posts: 2,125
|
|
Jan 16, 2023 11:32:53 GMT
|
I suspect that the preferred tool for that inconveniently designed nut and stud is a tube spanner. It doesn’t look like you can get on it from above. |
| |
|
|
|
|
|
|
|
Jan 16, 2023 18:14:48 GMT
|
|
Well that's a bolly old jugger.
|
| |
|
|
|
|
|
Jan 19, 2023 13:11:02 GMT
|
Re: the indicator lights. Don't worry about it flashing white, the flash is what's most noticeable. Some people just won't notice. For instance yesterday, a bright signal yellow school bus, with 4 red brake lights (two are in housings the size of dinner plates, two in regular 2" housings), a flashing white strobe on the roof, large yellow reflective strips and a reflective sign that reads SCHOOL BUS, two wigwag red lights up top, another sign that folds out on a mechanical arm that reads STOP (also with two wigwag red lights on) was missed by the car directly behind it. Young girl, looking at her phone and not the road.  Even lit up like the Blackpool Illuminations you may be missed. I have no trouble with red indicators on the back and white on the front. I would, however, strongly suggest finding a way to hide a bright red eye-level brake light in addition to whatever the bus had originally. Stick on LED strips fit neatly on glass and contour to the seal. Just my $0.02 Phil |
| |
Last Edit: Jan 25, 2023 13:03:06 GMT by PhilA
|
|
|
|
|
Jan 21, 2023 20:31:35 GMT
|
I suspect that the preferred tool for that inconveniently designed nut and stud is a tube spanner. It doesn’t look like you can get on it from above. I believe you can because I understand the others are accessible with a socket. There may be a pipe in the way but that can be moved. What makes that one awkward is the spring hanger on the top. Tube spanner is an interesting thought. If I get involved in playing with the pump I'll report back. I would, however, strongly suggest finding a way to hide a bright red eye-level brake light in addition to whatever the bus had originally. Stick on LED strips fit neatly on glass and contour to the seal. Just my $0.02 Phil No photo 'cos I've not taken one but the rear brake / indicator assembly is a glass panel running across the back of the bus at eye level. However there is also a plan for a beacon on the back. Flat out it does 29 MPH and I suspect it doesn't get there too quickly even when there's no self loading cargo aboard. |
| |
|
|
|
|
|
Jan 21, 2023 20:47:10 GMT
|
Oh! Hello. Sorry I didn’t see you there. You’re just in time for the third part of the bus trilogy. Ian has been doing more wiring. This thing hanging off the cab wall is the dip switch for the lights and the horn I think. 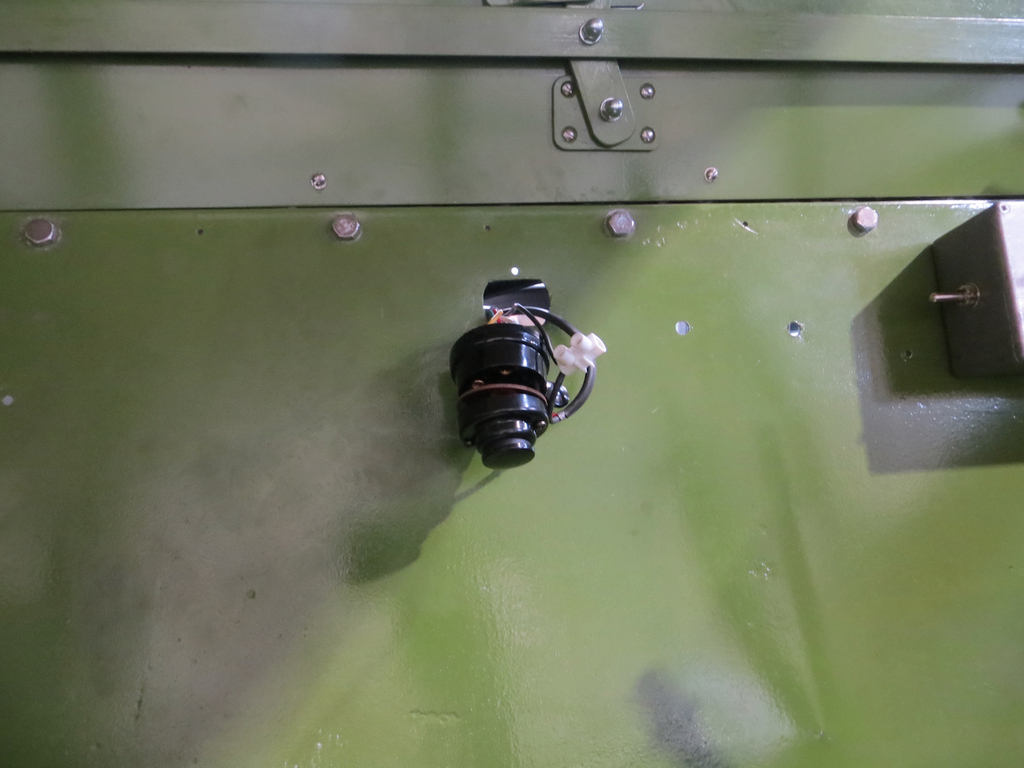 So I screwed that down. The box just out of shot in front has the indicator switch, some warning lights, a cut out switch for the semaphores (yes it’s getting semaphores), and something else I can’t quite remember. Next we beetle off to the battery tray where we have a cut off switch to fit. 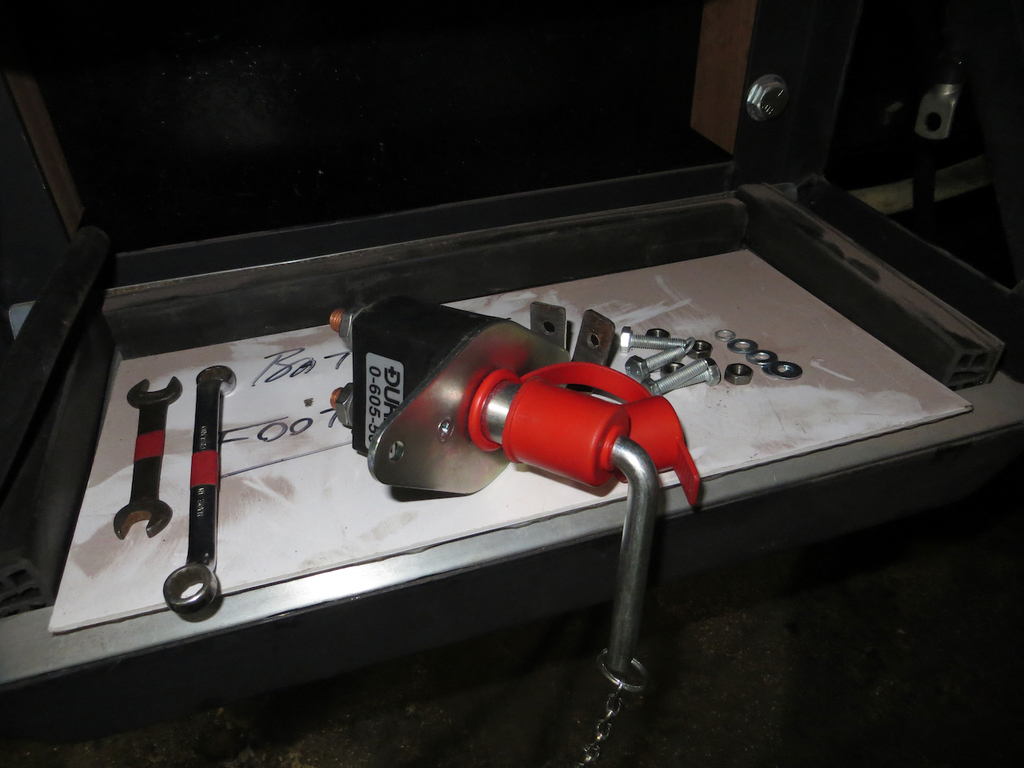 There were originally two 6V batteries fitted and there are two new trays. I think the plan is to fit one 12V battery with the option for a second on the other tray if needed. 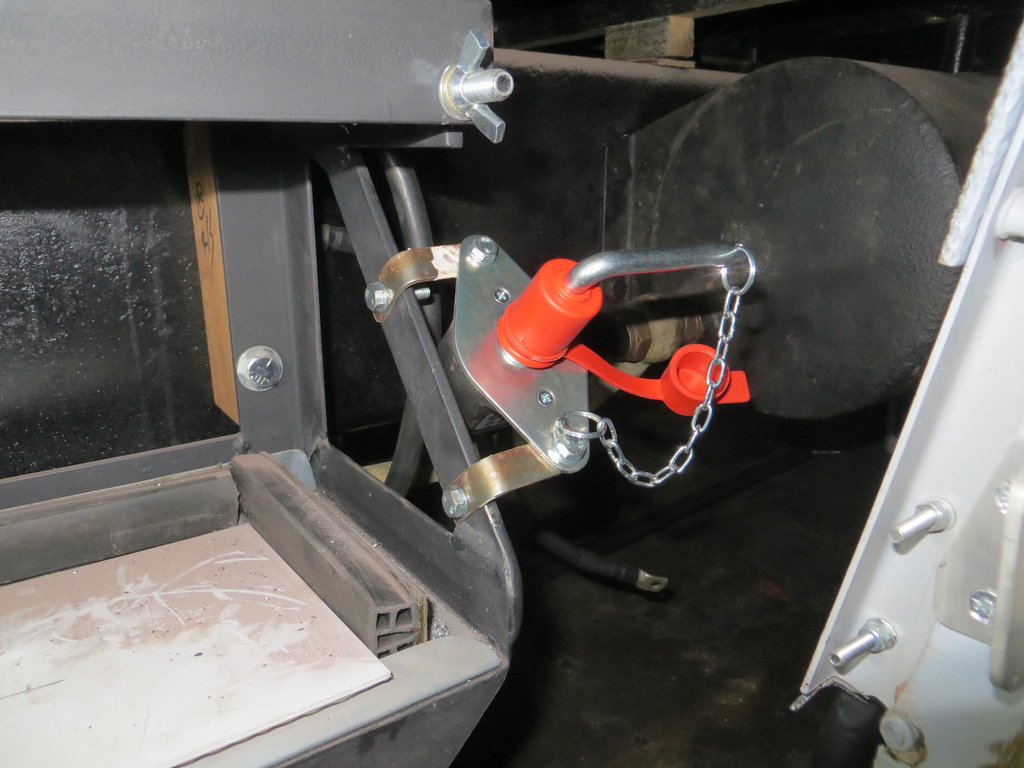 The batteries are behind a flap just behind the front wheel on the near side. The tank that you can see just behind the battery tray is the ‘not air tank’ for the brake servo. I say ‘not air tank’ because the brakes are vacuum assisted rather than compressed air. There should be literally nothing in the tank. Remember a few weeks ago I cleaned up the engine thermostat housing? We never actually fitted it so I thought I’d do that. 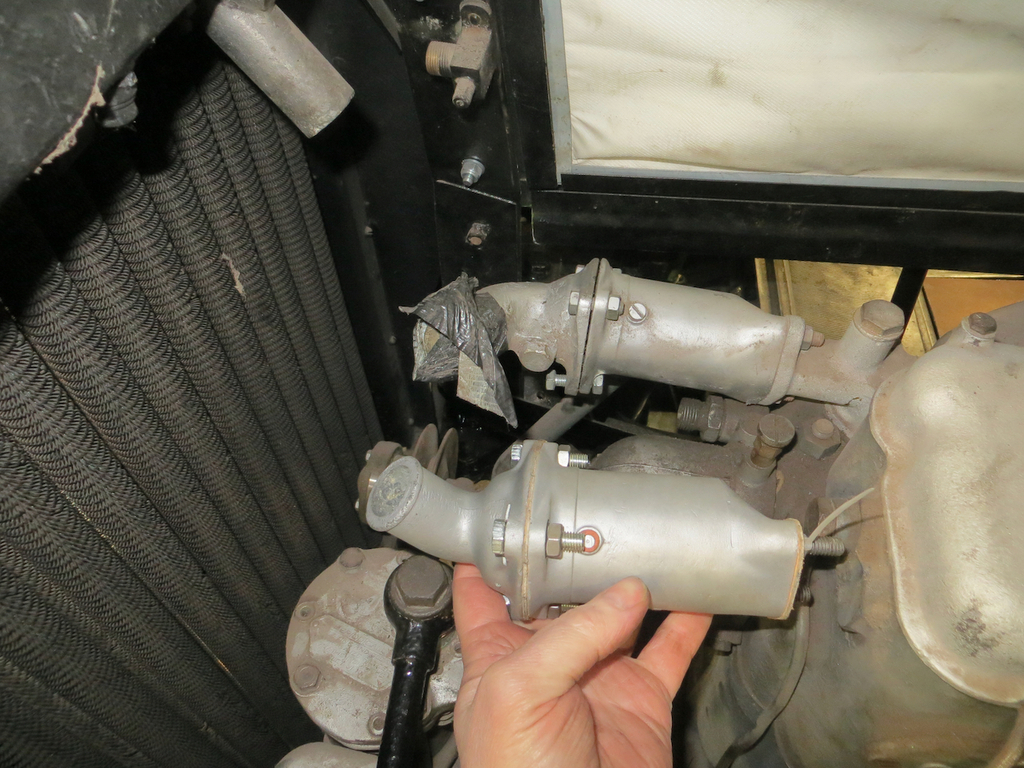 The big difference is that the outlet on the replacement points towards the top of the radiator. You can’t just clock the cover plate round on the old stat because it has three bolts and none of the positions point in the right direction. 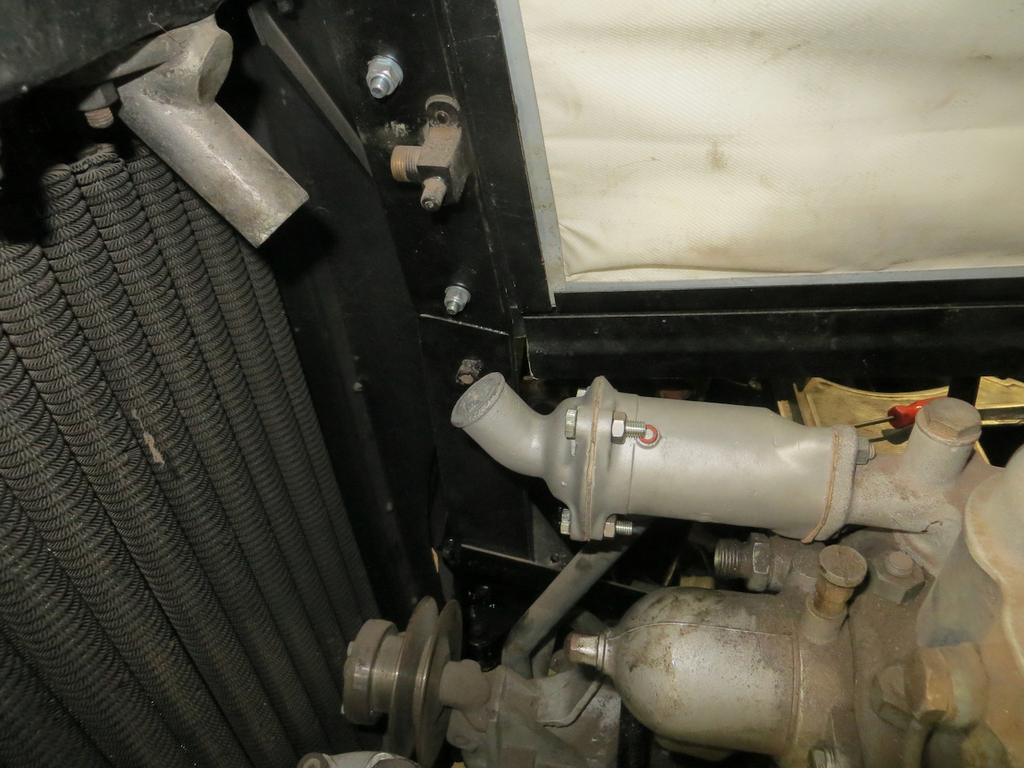 That just needs a length of hose. Of course one of the stat mounting bolts is inaccessible because of the doofer just underneath it. (See convenient red arrow. (No, not the RAF display team…)) I just unbolted it and dropped it out of the way. It looks like a fuel filter but Ian was plumbing up the fuel filter on the bulkhead the other week. I would show you a photo of it but I don’t seem to have one. Hmmm. “Ian me old mucker, what’s this thing that looks like a second fuel filter bolted to the front of the block?” “It’s a second fuel filter bolted to the front of the block.” “Oh, fair enough”. I don’t know why it has two fuel filters but I can’t imagine it does any harm. While I’m sitting with my feet in the engine bay there is something else that’s been bugging me. The rocker covers… 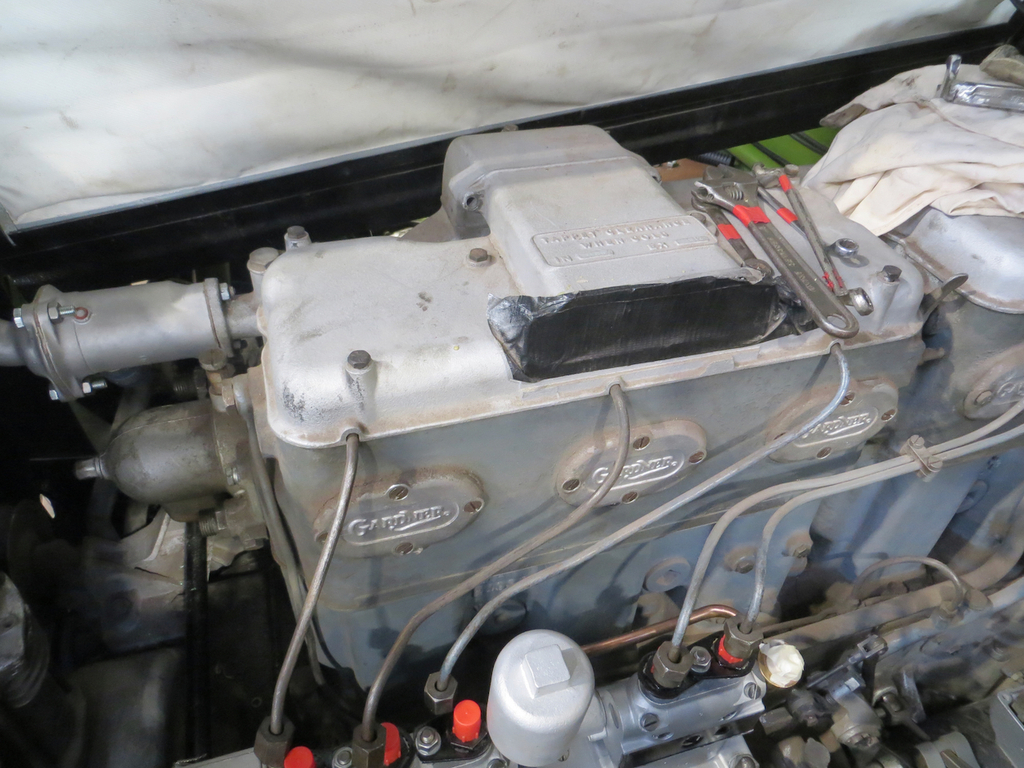 …are loose. If you look at this photo you can see the bottom of the bolt head isn’t touching the rocker cover but the bolt is actually tight. 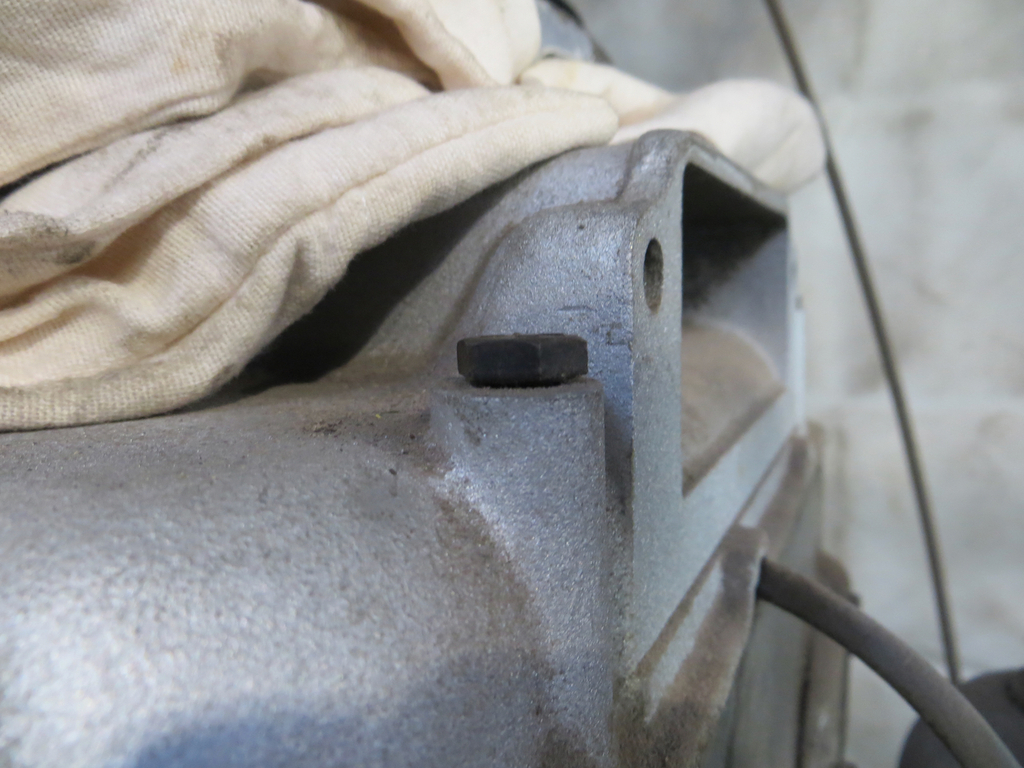 That, we all know, means the bolts have bottomed out in the holes. Best find out what’s going on eh? We wondered if there should be a gasket under the covers but according to the manual there isn’t. Our current thought is that the bolts are too long. They aren’t original. Ian found the length of the bolts in the manual so next time out we can measure them. But wait… What’s this I see on the front rocker cover? 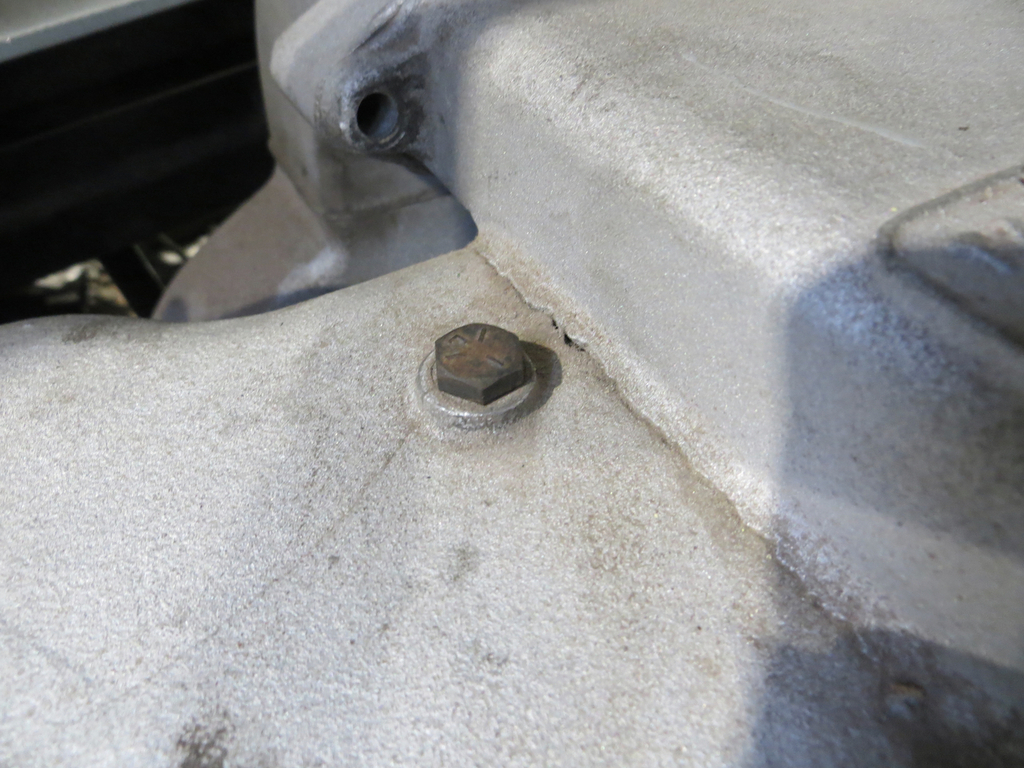 Is that a crack? Er, yeah. It’s a crack. 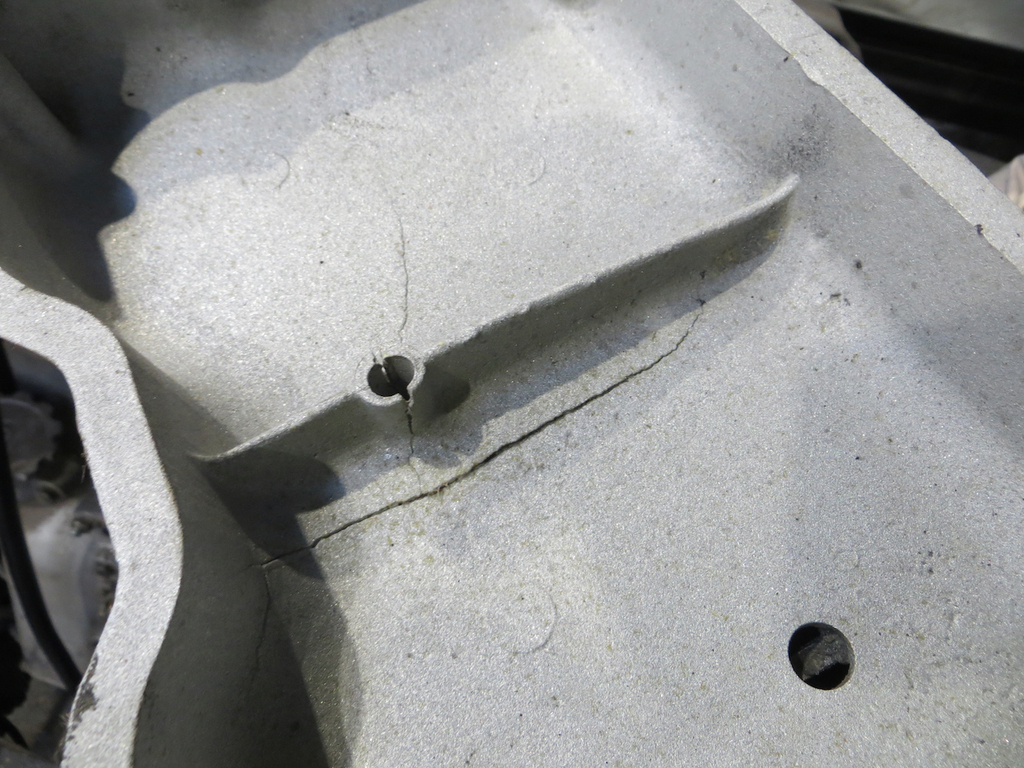 The bolt that goes through that hole threads into a head stud but there is nothing between the stud and the cover to support it. It’s been over tightened at some time. The cover is cast aluminium and I have neither the equipment nor the talent to weld it up. Doesn’t that just wilt your geraniums? Ah well, have a free photo of the rockers. 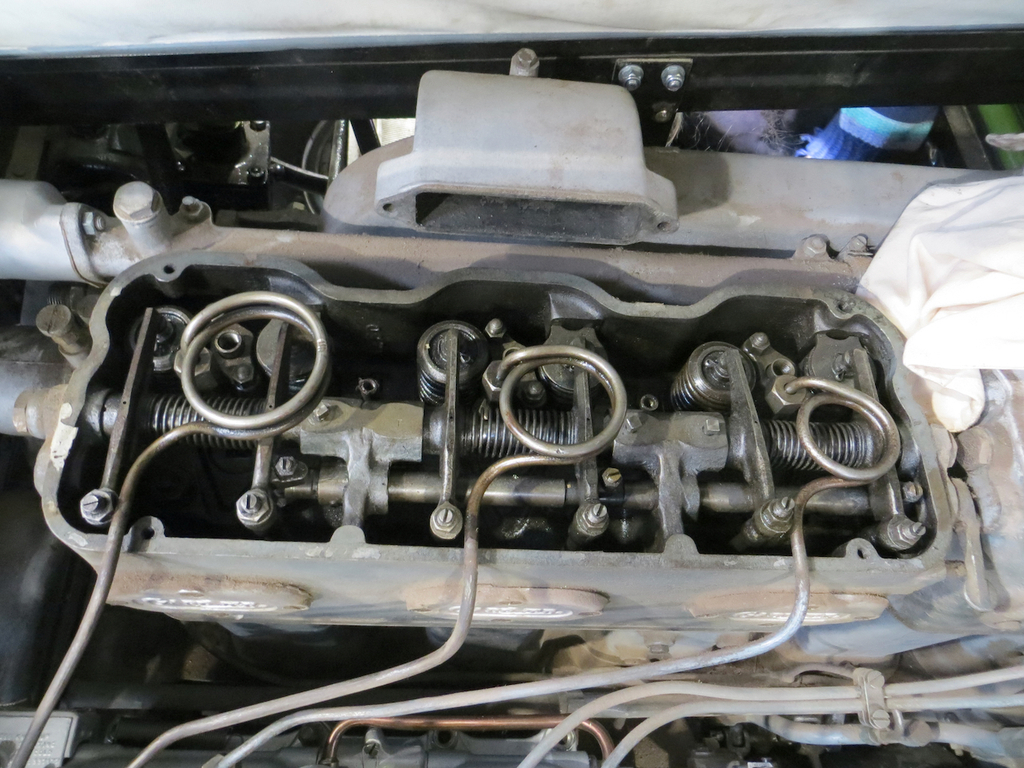 The bar that runs across in front of the rocker shaft with the lever on the right hand end is the decompressor. Ian’s not sure it’s working properly because he thought he was still feeling compression when he was pulling it over. If you look closely at the right hand rocker of each pair there is an extra adjuster just for the decompressor. And yes, there is a winding handle for hand starting it although, apparently, the dog is missing off the front of the crankshaft so we can’t use it. I think I might be relieved about that. Toodle pip. James |
| |
|
|
|
|
|
Jan 27, 2023 11:32:23 GMT
|
For the last few months most of my GKE duties have involved being upside down in the cab. Working on the throttle linkage, the cab floor, that sort of thing. In the last episode I did something different and got to curl up in the engine bay with the Gardner for a change. I mean, curl up with the Gardner engine, not with the person who does the gardening here at Sweetpea Towers. Although, saying that, the gardener at Sweetpea Towers is Mrs Sweetpea so technically it’s also true. All this screwing yourself round and working in tight awkward places, hanging upside down like an over grown bat, it gets tiring. (Just to be clear I'm talking about the bus again and not Mrs Sweetpew. OK?) It gets wearing on your old bones. I’m not as young as I used to be. I need a change. I need some light restoration work. 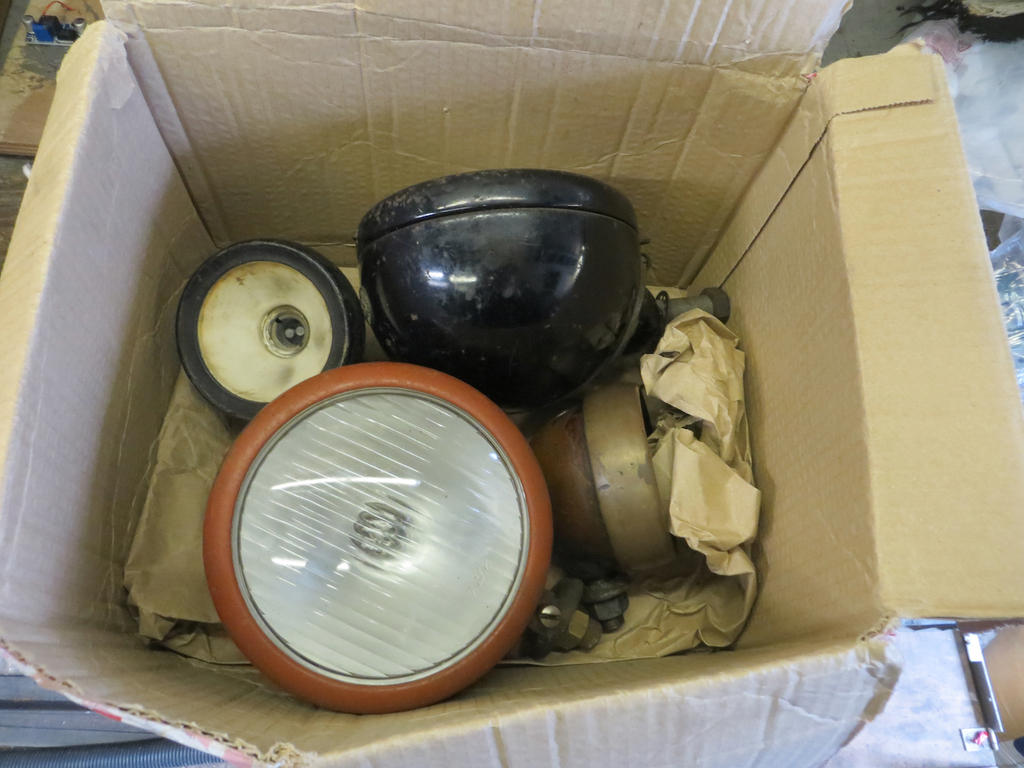 Aw come on! That was funny. Took me ages to dream that joke up. I laughed so hard I had hiccups for a week. Blimey, you’re a hard audience. James |
| |
|
|
|
|
|
|
|
Light restoration… Still not funny? Moving on then… Ian would like one of the side lights to get the new glass cut for them. I’m off to Maidstone this Friday so it’d be good to get one cleaned up and in primer, just quick, like a bunny for the moment. Here’s a side light in its component parts. 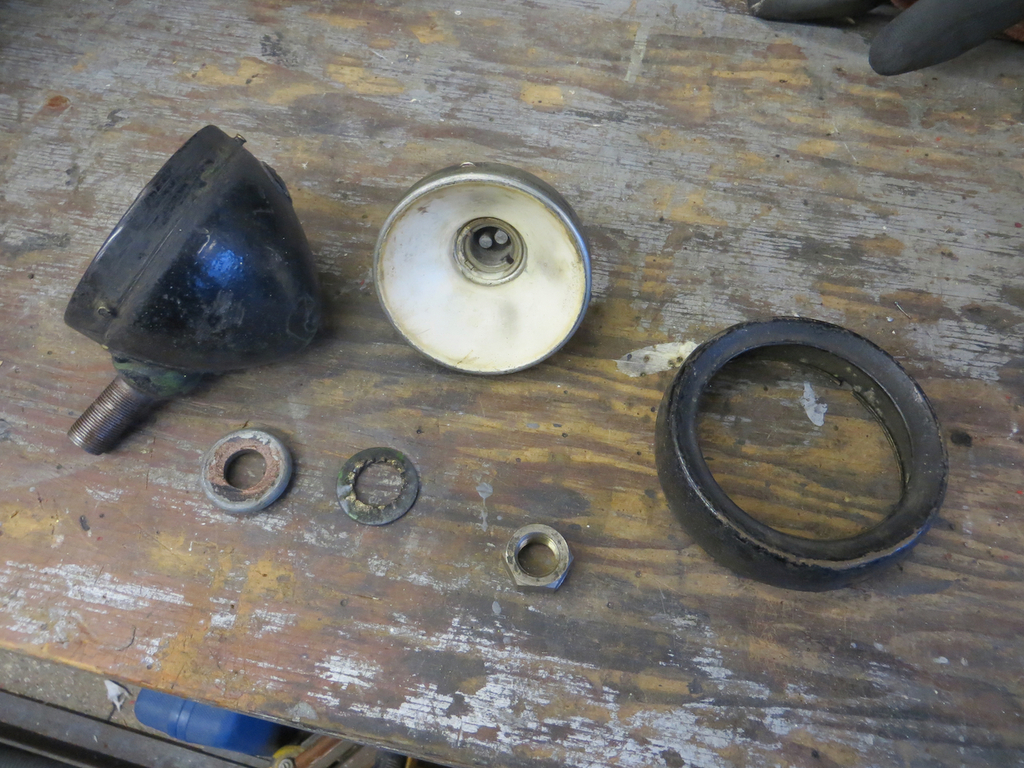 I’ll grab some photos when I do the next one, but there are 3 spring loaded pads in the housing. The reflector bayonets into the housing and pushes against the springs. Then the glass goes on and the outer bezel bayonets over the whole thing. This lamp is in reasonable condition so I chose to clean it up. The other will need a fair bit more lurvin’. The casing and the outer bezel went for a ride in the sand blaster. 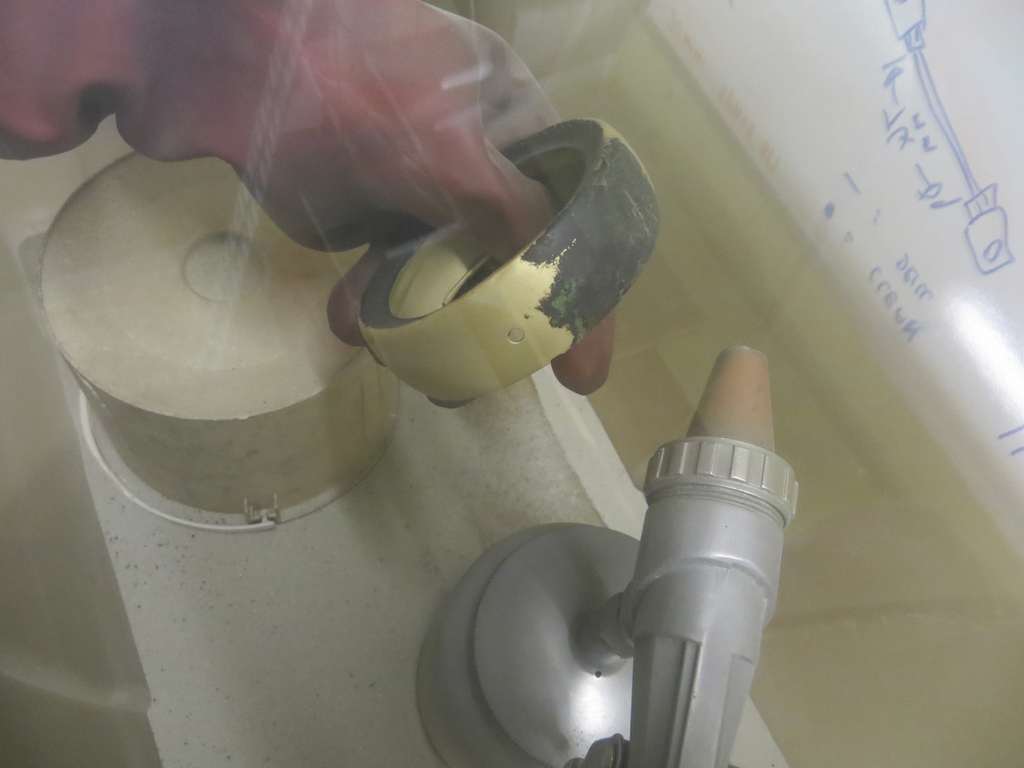 The bezel turns out to be brass (I think). God knows how they made it, it’s a lovely bit of work. The casing is steel. I put a magnet against it to check. But there is absolutely no rust on it. It’s pristine (apart a couple of small dents). 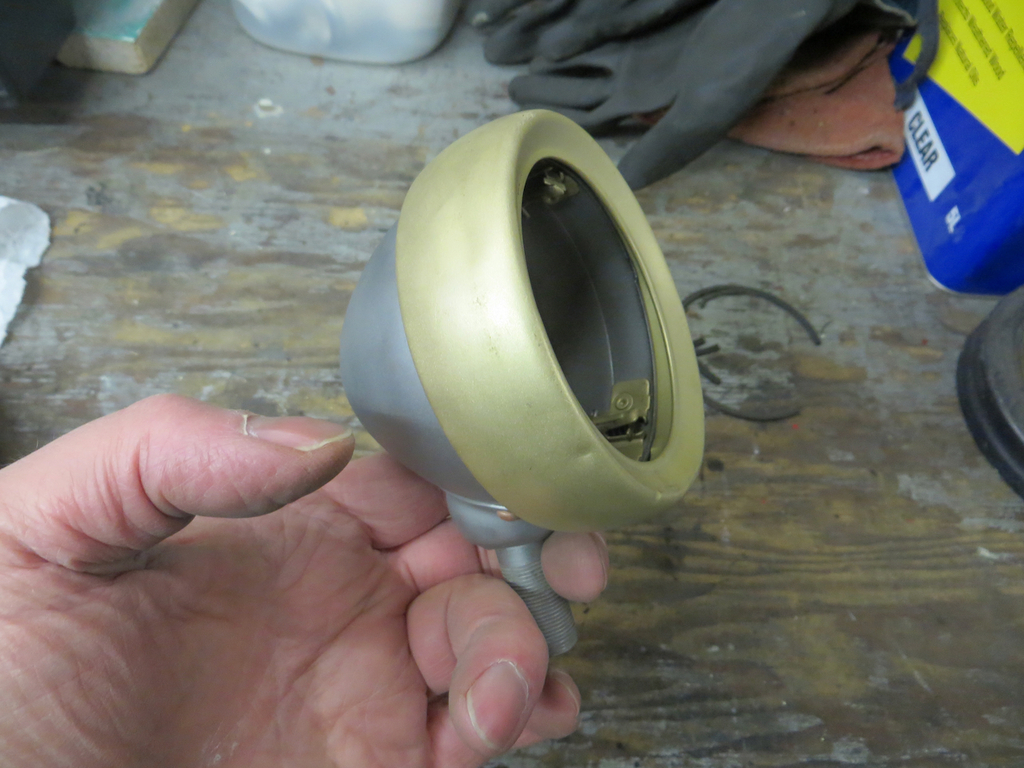 So what’s protected it for all these years? Zinc or tin plating? I don’t know but whatever is on it has been done very well. There is no paint on the back of the reflector and it’s completely perfect. 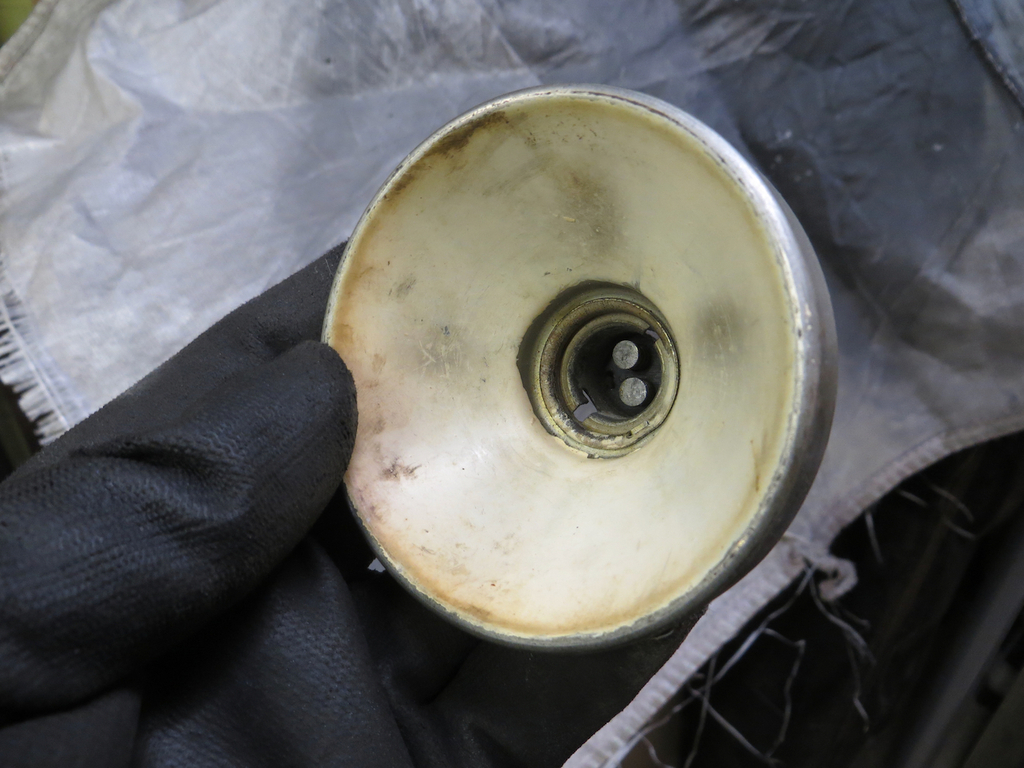 I don’t fave a photo of the back (sorry) so you’ll have to take my word for it for the moment. The reflector is painted. I’m not sure it would have been originally. It’s also very cream in colour although it could well have been whiter a few decades ago. The other reflector from the other lamp is in much worse condition so I’m leaving this one until I know what condition the other is in. Then we can decide what to do with them both. In the back of the bezel is a rubber gasket that seals against the glass. 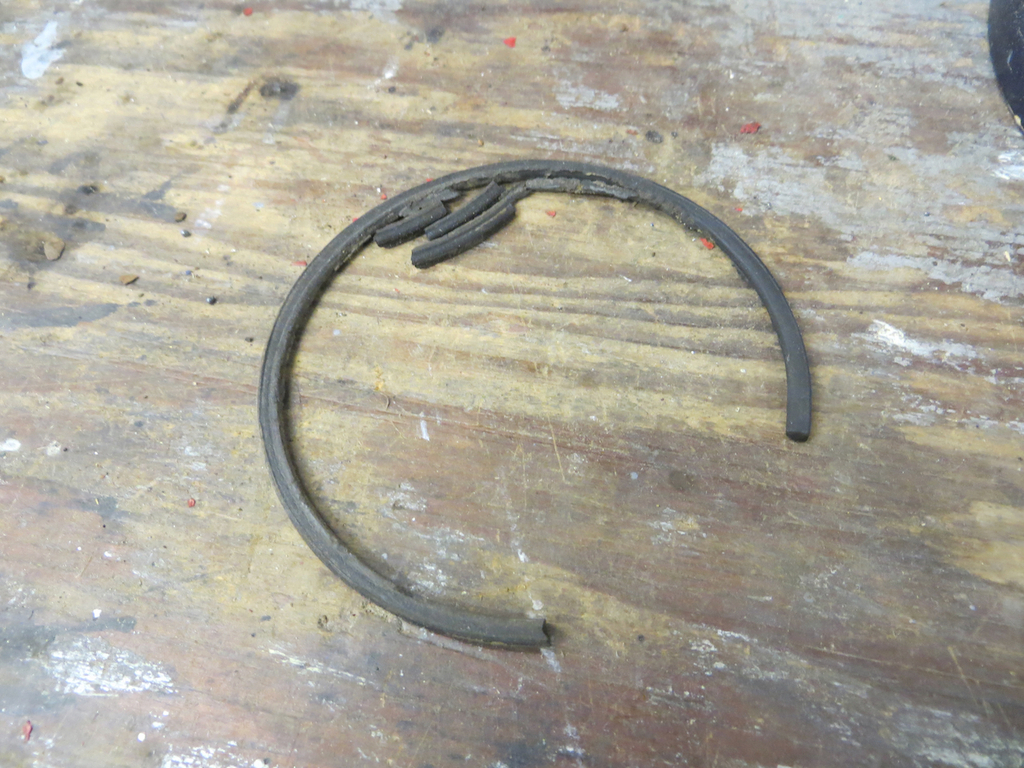 It’s not rubber anymore. I think I have some O ring material somewhere but I can’t quite lay my hands on it at the moment. Mostly because I don’t know where it is. Anyway, hang the bits up and give it a coat or two of etch primer. 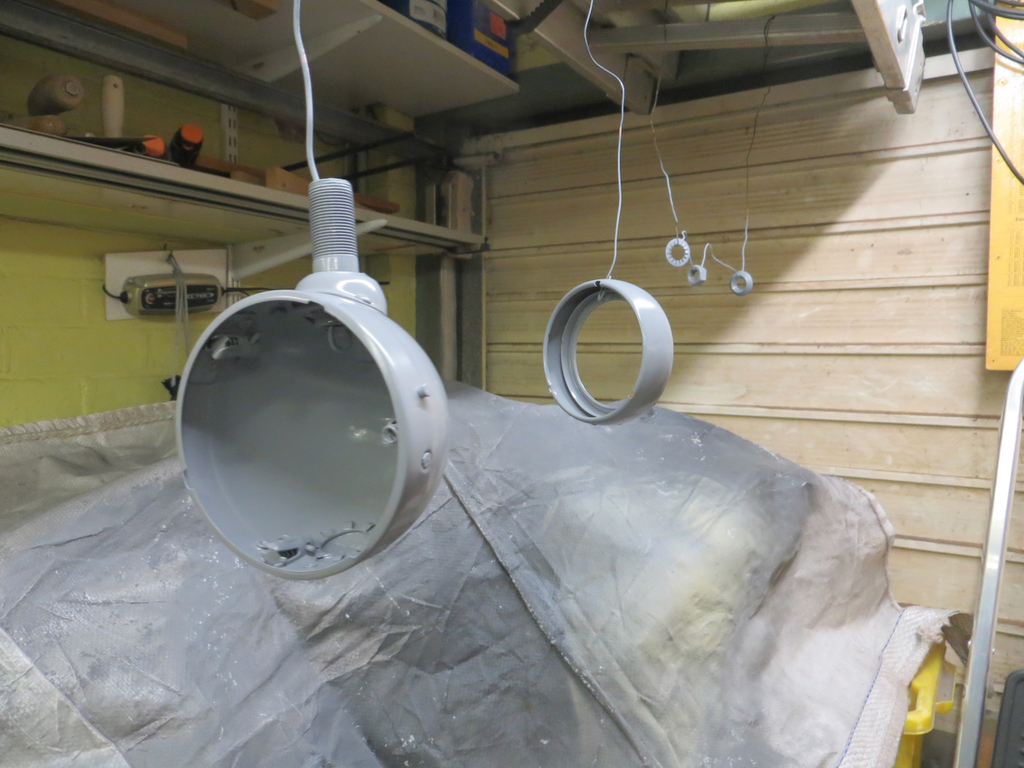 I did suggest to Ian that we could polish the bezels and he suggested that we wouldn’t be polishing them at all. To be fair I can’t imagine they’d have been polishing bus lamp bezels in WW2. They probably had other things to think about. They are getting painted. One of them has already been painted. That can go off with Ian to have some glass cut. Then I’ll need it back. One of the three springy bits is missing a part. I need to deal with the dents, probably a little bit of filler. And it needs a misting of black in the inside of the housing and bezel. I hope you all enjoyed this bit of light relief. Look, I’m going to keep making the same joke until you laugh… James |
| |
|
|
jamesd1972
Club Retro Rides Member
Posts: 2,921  Club RR Member Number: 40
|
|
|
|
Does a slight smile and an eye roll count?  What’s happening to the rocker covers? James |
| |
|
|
|
|
|
|
|
The bezel turns out to be brass (I think). God knows how they made it, it’s a lovely bit of work. The casing is steel. I put a magnet against it to check. But there is absolutely no rust on it. It’s pristine (apart a couple of small dents). James Same methods trumpets and other brass instruments are made with, though the rear cups were likely stamped then joddled. Were the reflectors originally painted white? |
| |
|
|
|
|
|
|
|
Does a slight smile and an eye roll count?  What’s happening to the rocker covers? James I’ll settle for a slight smile and roll of the eyes. Thank you. Rocker covers… Probably nothing in the short term. There has been talk of looking for another set on ’tinterweb. Or there may be a set on the ’spare engine’ which I think is the one from GKE 65 - the truck. You have to wonder if another set wouldn't be in the same state. It’s not as urgent as you might think. There are no gaskets under the covers. There is nothing where the injector pipes sneak under the covers. And they’ve probably been broken for decades. I suspect they aren’t going to leak anything much. Certainly not as much as the rest of the engine is going to dump on the floor. When the oil filler cap fell off the the MR2 it emptied about half the sump through the hole in the space of a few miles. I don’t think this is like that. Same methods trumpets and other brass instruments are made with, though the rear cups were likely stamped then joddled. Were the reflectors originally painted white? I guessed the bezel had been spun some how but it curves over the top then down the front and back so it can’t have been done over a form. However they did it, it’s very lovely. A craft that you don’t see on modern vehicles. I don’t think we know how the reflectors were finished originally. The other one is in much worse condition with a couple of layers of flaking paint. I’m planning to work it back and see what’s under it all. The back of the reflector is just tin or zinc plating I’d guess. The front could have been plated with something shiny. Or painted white or silver. Watch this space… James |
| |
|
|
|
|
|
|
|
I suspect they aren’t going to leak anything much. Certainly not as much as the rest of the engine is going to dump on the floor. As an old boy once said... "Good engines those Gardners, apart from the last bloke on the production line who fitted all the oil leaks" |
| |
|
|
|
|
 You aught to consider something like this:


