|
|
|
Oct 16, 2022 20:00:07 GMT
|
|
My wife has one of the cricut machines, pretty easy to use.
If you have a contrasting image(ie black on white etc) there is software which creates the cut lines for you.
|
| |
|
|
|
|
|
|
|
Oct 16, 2022 20:01:10 GMT
|
Guess who’s been to the bus garage again?  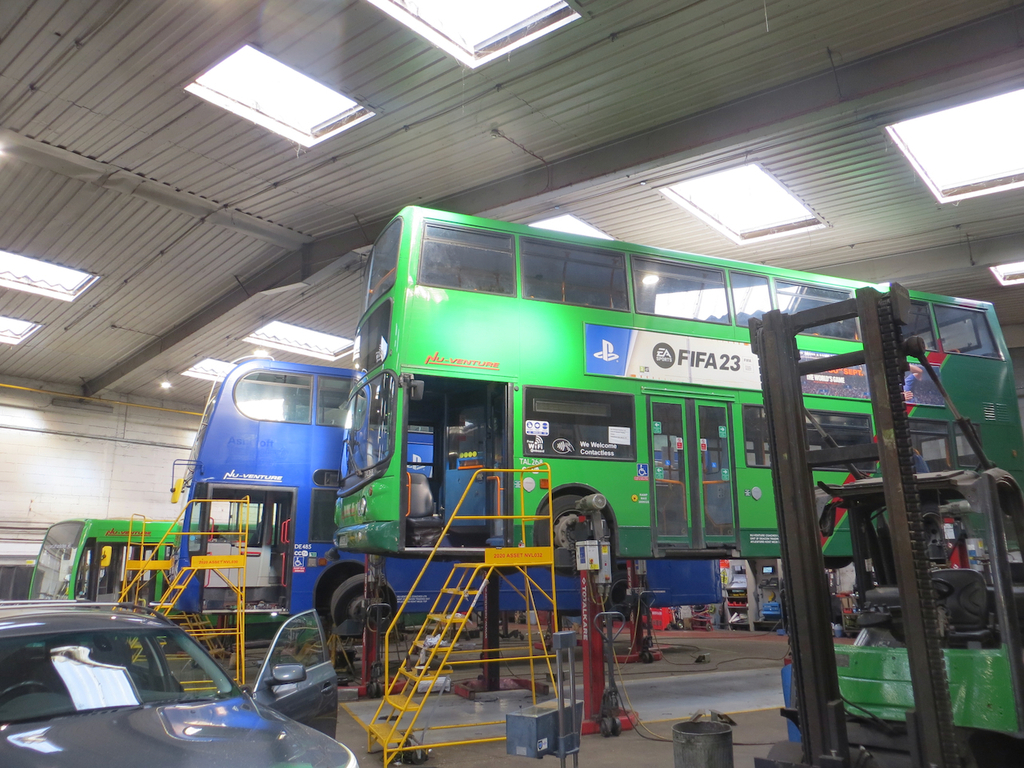 Oi! Over here! This is ours in the corner. The one with the puddle of oil under it.  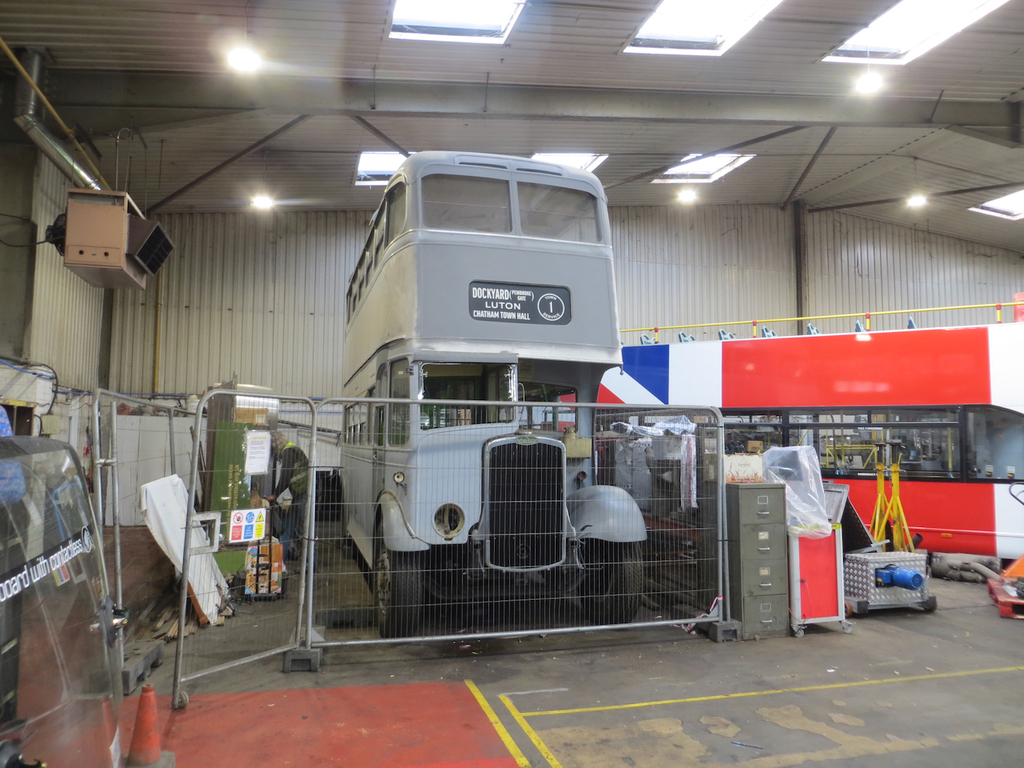 Every time I visit this place there’s always at least one bus in the air on those wheel lifts. Lots of people use them so I guess they aren’t as wobbly as they look. I expect you have to have a fair bit of confidence that your concrete floor isn’t going to break up though. That could get really sticky really quickly. Anyway, back in 1939 we were trying to get the throttle cross shafts to work. The one across the cab was too tight and binding so Ian cut the bracket off and had it modified to be a bolt on jobbie.   If you are going to tell me that I’ve put the bolts in all wibbley, Yeah, you’re right, I have. They are about as crooked as the hind leg of a donkey and totally not up to my usual standard of workmanship. But I did reuse an existing hole in the cab floor which, hopefully, explains my poor workmanship. If this was the MR2 I’d have welded up the hole and drilled a new one in the right place. But it’s not, I didn’t have a welder handy, so I didn’t. Remember the throttle arm was twisted where it had been broken and braised together? We were wondering how it would interact with the bottom of the pedal. Well it turns out that it’s a bit squint.  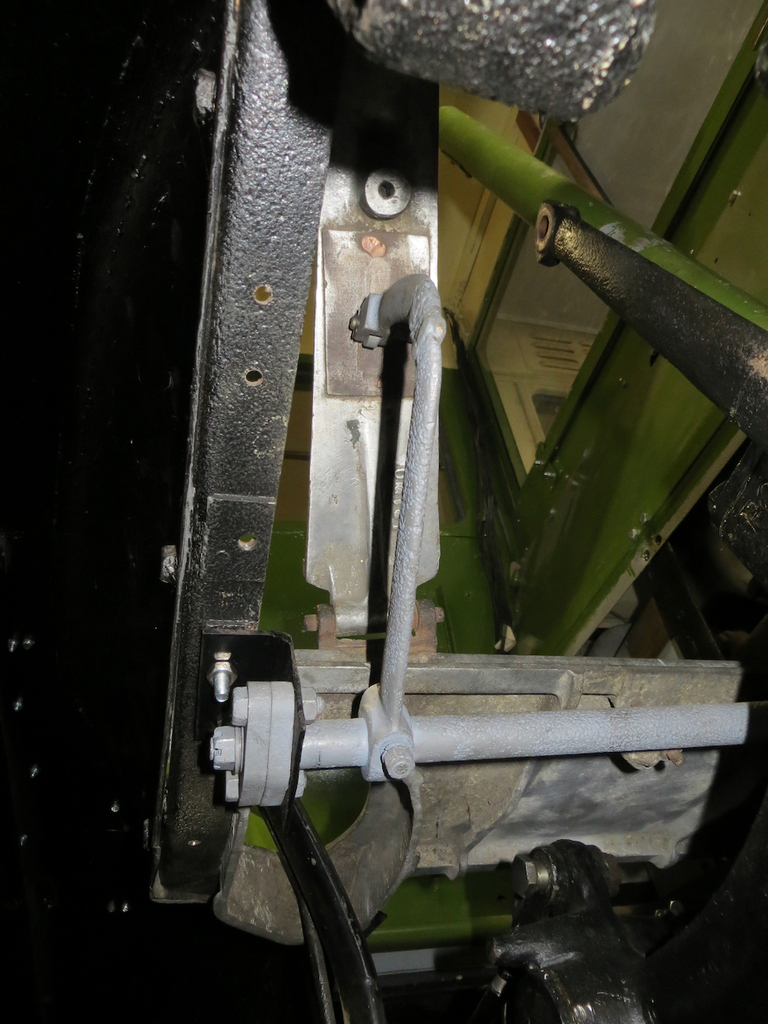 But it’s not so bad that we are going to anything about it. Another bit we were missing was the linkage between the cab cross shaft and the engine cross shaft. Ian had a spanking new one salted away somewhere.  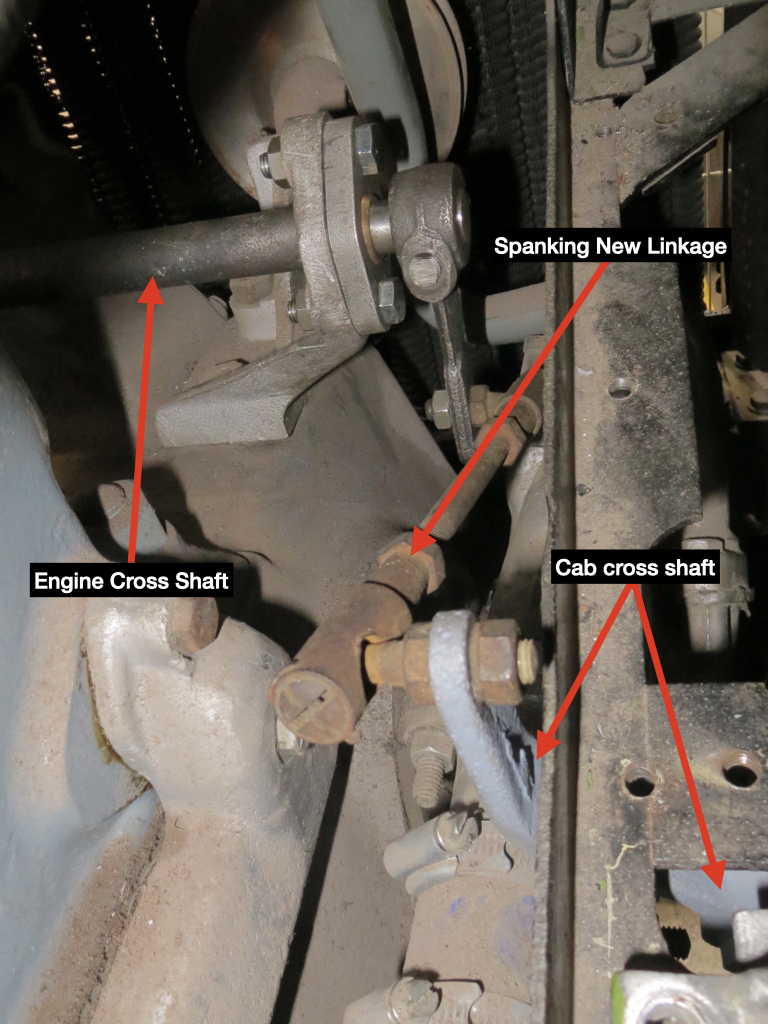 Ok, so it’s not spanking new. It’s got a bit of play in it to be honest but we can work some magic on it and it’ll be spot on. That lot was taken off again and is back in the garage at Sweetpea Towers. There is another bit of excitement to reveal about it all but I’m saving that for another episode as a way of increasing tension and interest in the story. Next on list is the cab floor.  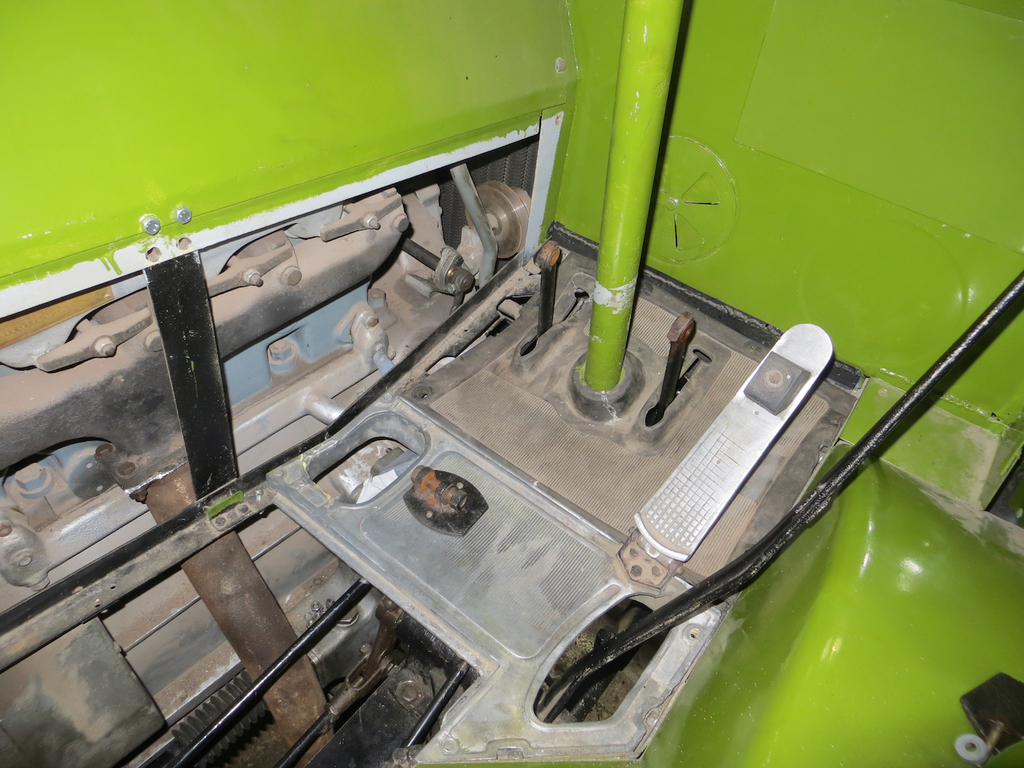 The rubber mat doesn’t appear to have anything under it for support and isn’t off this bus anyway. I did find that somebody had made a steel plate that was supposed to go under it but it doesn’t really fill the hole. So I’m going to make a wooden one and the mat will go over the top. To do that I need a pattern.  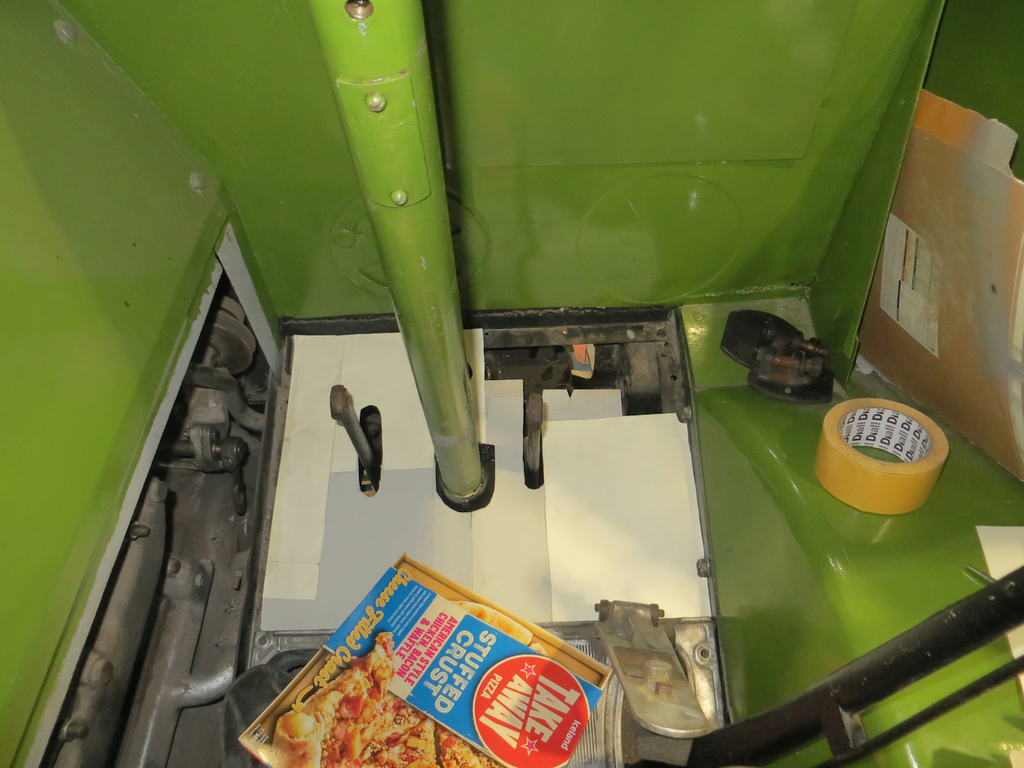 Hmmm. Pizza. Stuffed crust. Hmmm, making me feel peckish. I’ll be back when I’ve had something to eat. |
| |
|
|
|
|
|
Oct 16, 2022 20:11:12 GMT
|
While I was doing that Ian was battling with pipes.  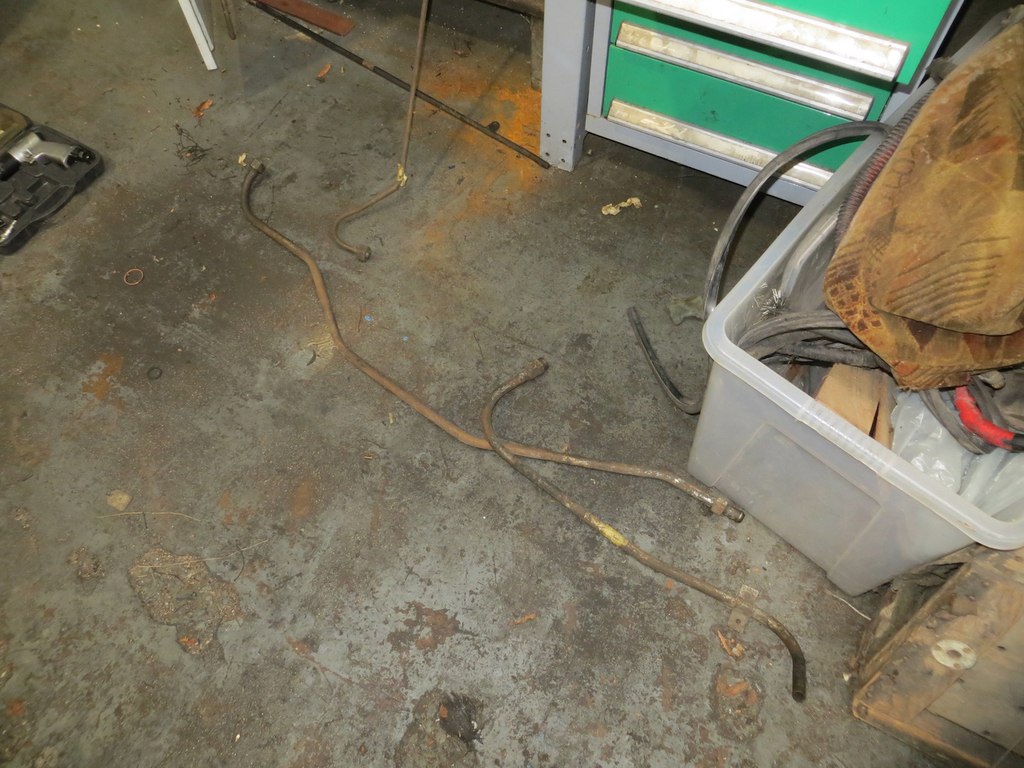 There is a shelf full of these things. Some will be fuel lines, some are vacuum pipes for the brakes. The brakes, you may remember, are vacuum assisted rods and levers on the rear and just vacuum on the front. None of those fancy modern hydraulics here. Ian was wondering where all the pipes went. I mean, he didn’t wonder for long. I think he holds all the blueprints in his head. There is a big fat pipe that runs across the bus from the vacuum tank on the near side to the brake servo on the off side. Of course that needed us to remove the down pipe for the exhaust yet again. Getting quite good at that now. The fuel sucky uppy thingy was back from being rebuilt so that got bolted on under the window on the near side.  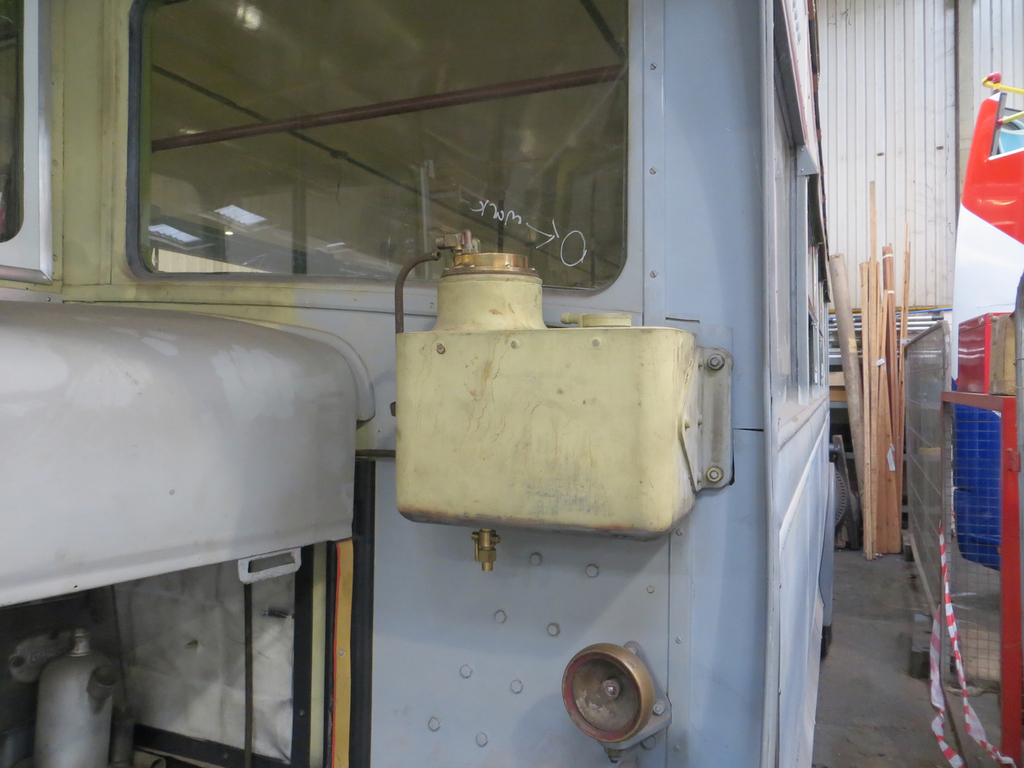 For reasons better known to the manufacturers they didn’t brand this as the ‘Fuel Sucky Uppy Thingy’ and went for the word ‘Autovac’ instead. Believe it or not, it’s the fuel pump. Want to know how it works? No? You don’t want to know how it works? Well I hope you take disappointment well ‘cos I’m going to tell you anyway. There are two chambers in the Autovac. The smaller float chamber is connected to a vacuum line from the ‘exhauster’ on the engine and has a fuel line from the tank.  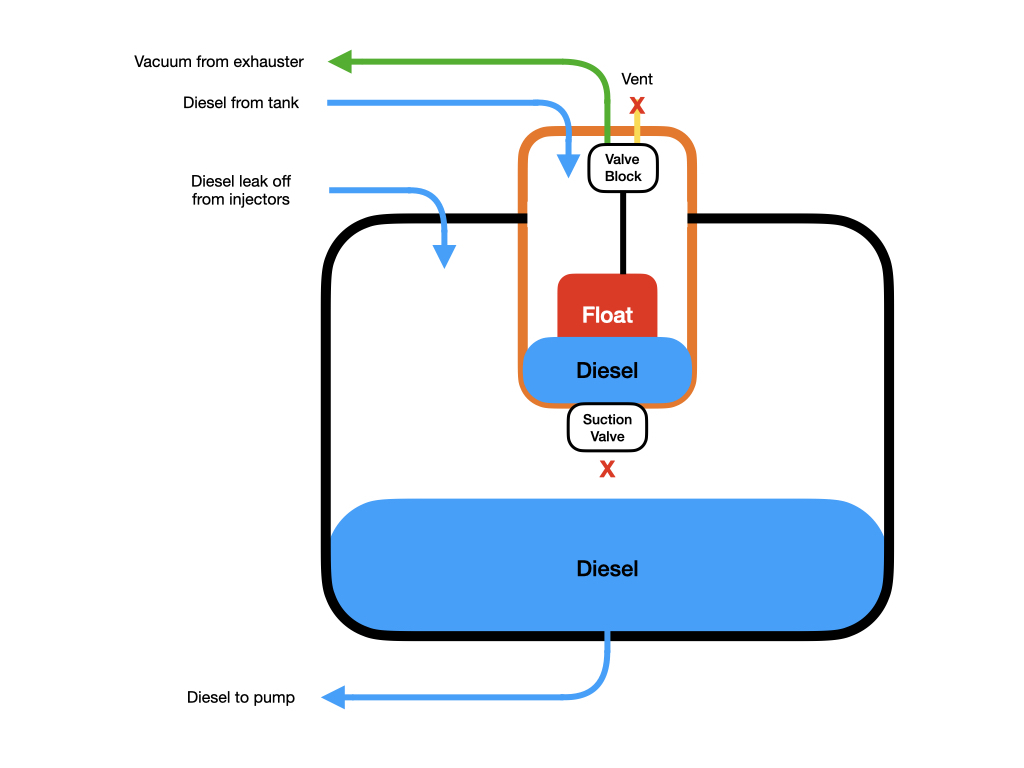 As it’s a sealed chamber this sucks diesel from the tank up into the float chamber. At some point the float rises to a point where it trips the valve block in the top of the float chamber. This does two things. It cuts off the vacuum from the exhauster and opens a vent pipe to atmosphere.  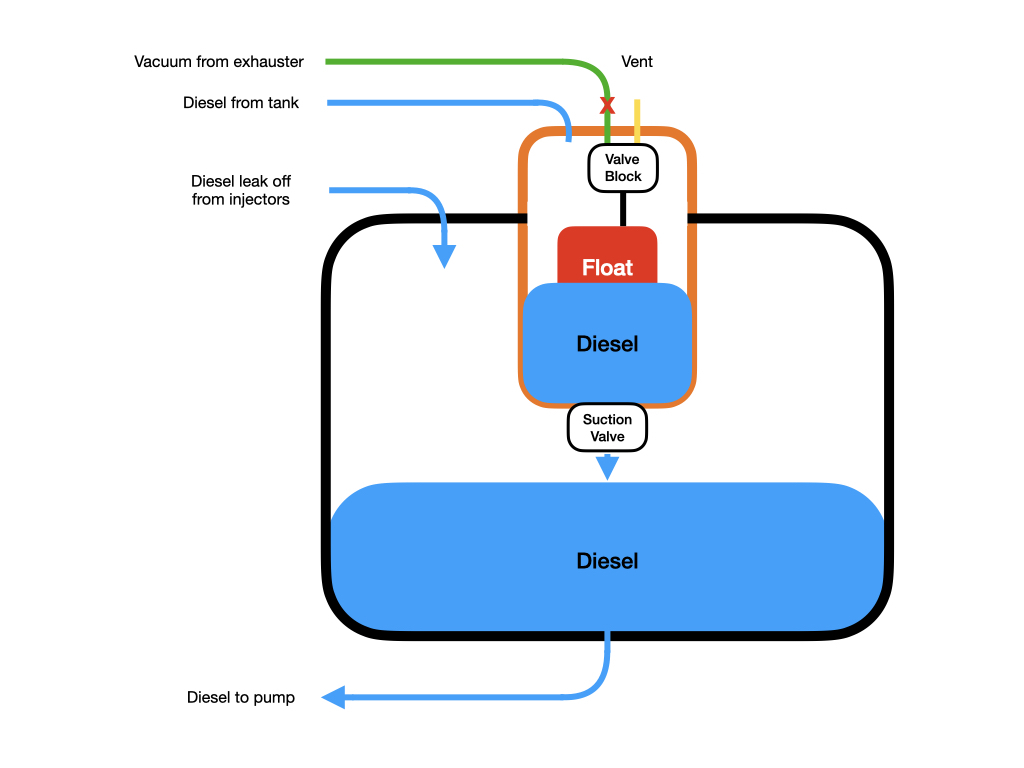 With the float chamber at atmospheric pressure it stops sucking diesel from the tank. In the bottom of float chamber is an outlet valve. It was being sucked closed by the vacuum but now that’s gone it opens and dumps the diesel into the larger chamber. The float falls and switches the valve block over agin and it goes back to sucking. The larger tank gravity feeds the injection pump from the bottom and also has the leak off pipe from the injectors going back into the top. See, you’re glad you know now aren’t you. Indeed, it has been said that the only disappointment is that I didn’t innocently get the phrase ‘sucked off’ in there somewhere. I know that was said because I said it. Back to the story, Ian had found the vacuum pipe to the Fuel Sucky Uppy Thingy but also found a dilemma. It has a T piece in it and we didn’t know where the pipe on the T should go. Or even where the pipe was.  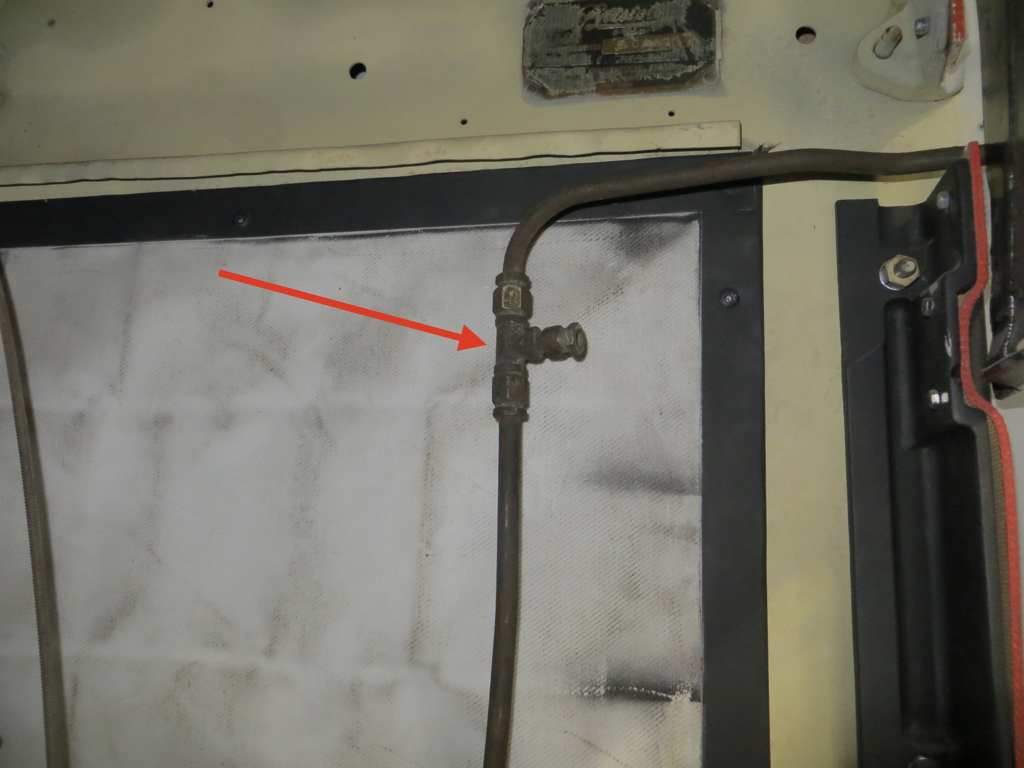 It’s a mystery worthy of an Agatha Christie novel. Indeed there is, but one, flaw. I have a photo with the answer.  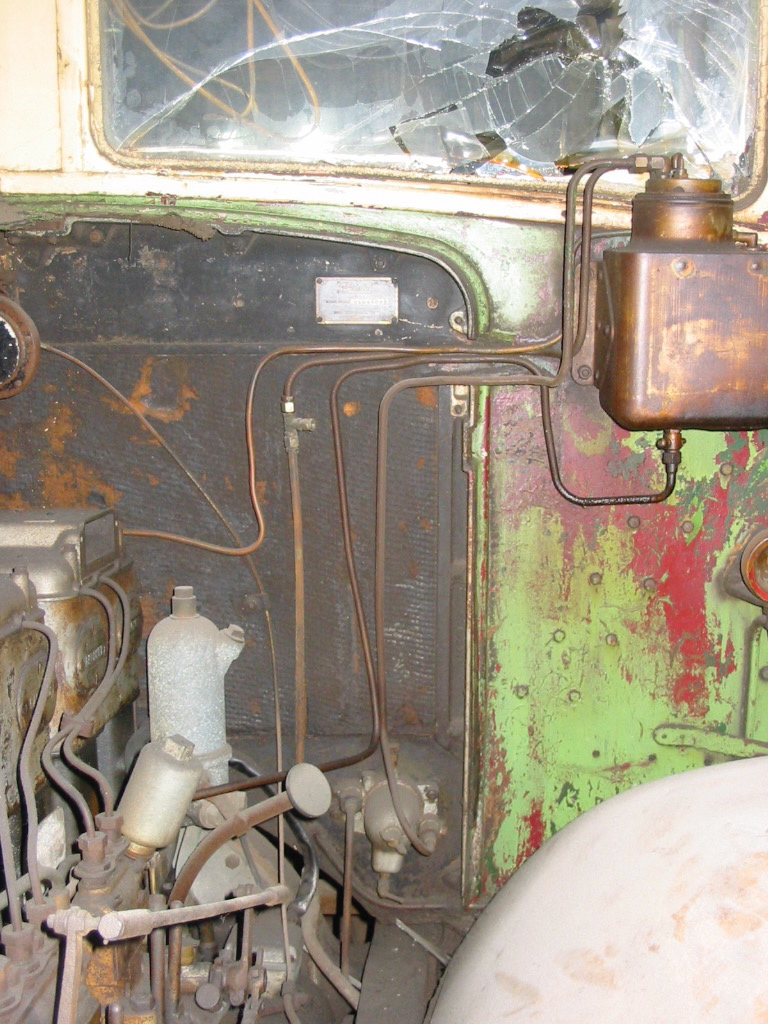 It goes nowhere. I guess the pipe got damaged and extended at some time. I guess they only had a T piece handy and used it. The old girl does look a bit tired in that photo doesn’t she. Looks properly sleepy in this one. 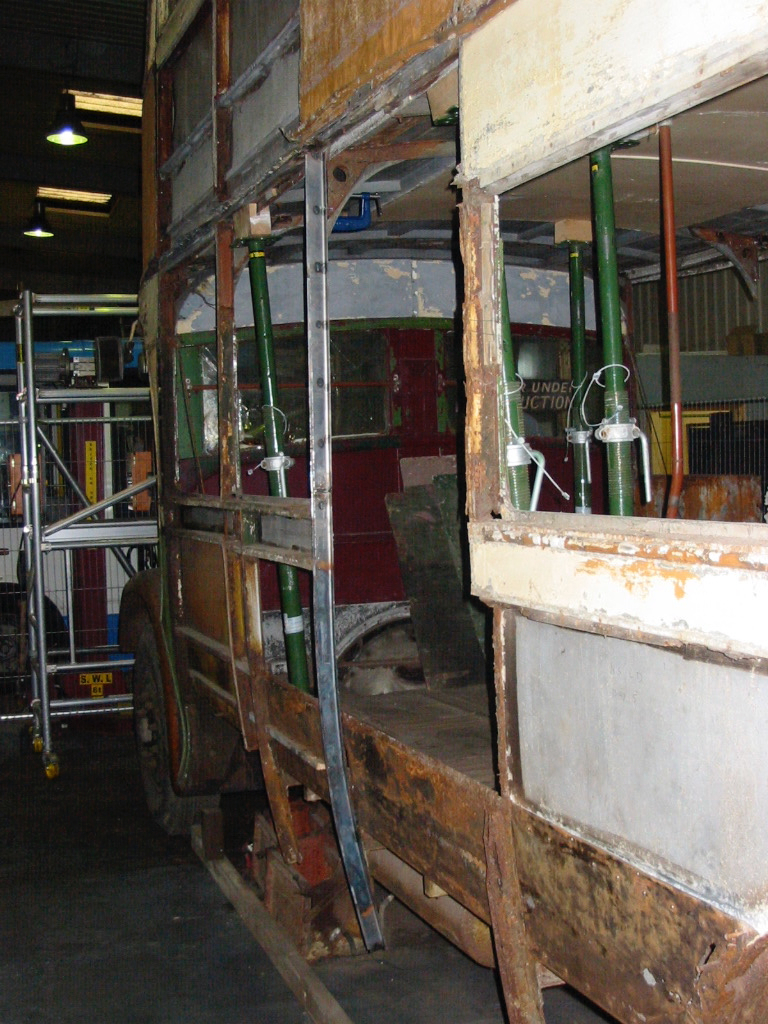  James |
| |
|
|
|
|
|
Oct 22, 2022 20:57:17 GMT
|
Welcome back to the world of vintage buses. Remember I made a template of the hole in the floor? Best turn it into a piece of wood and try and get the mat to fit over the top.   I just happened to have a piece of ply in the garage which I’m almost certain is proper marine ply. It’s getting painted anyway so it probably doesn’t matter a load. I chopped a bit off the end of the sheet and traced the holes from the pattern.  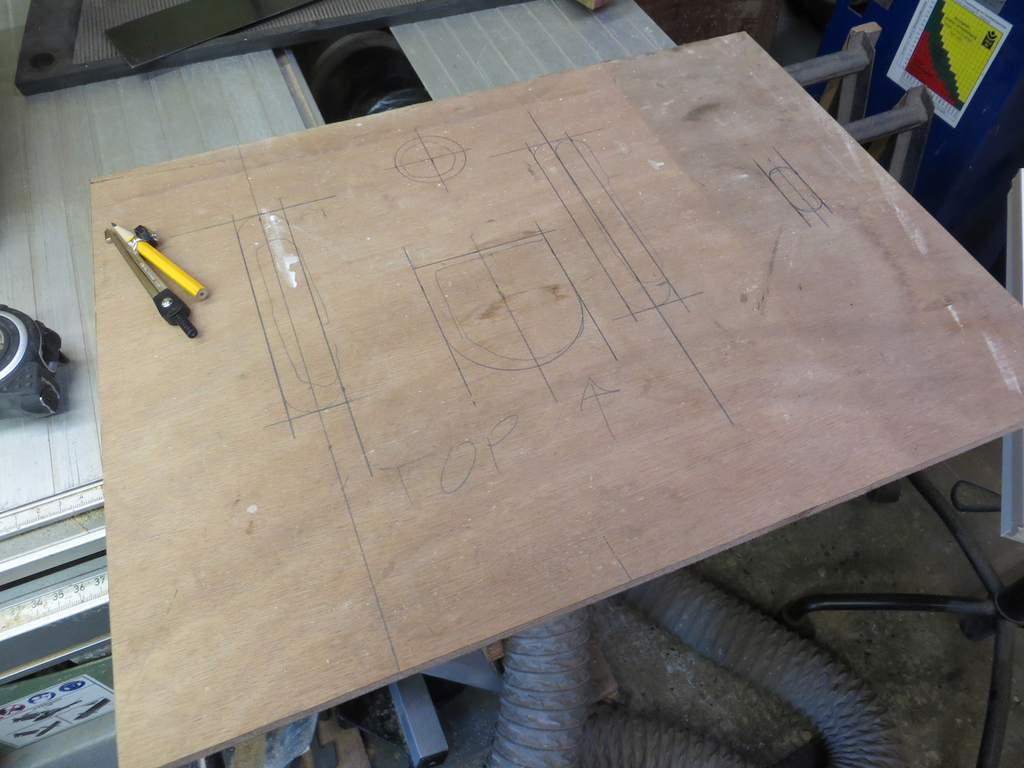 The template was a bit haphazard but I’d cut it fairly tight round the steering and pedals. The cunning plan was to draw it on the board and then square and centralise everything so that the holes I cut were tidy and included the areas from the pattern. Even if things weren’t spot on in the centre of the holes there should be a bit of wiggle room. And just to make sure, I’ll take the router next time I go to Maidstone so I can adjust it on site if I have got it wrong. Out with ‘Big Orange’ to cut all the shapes.  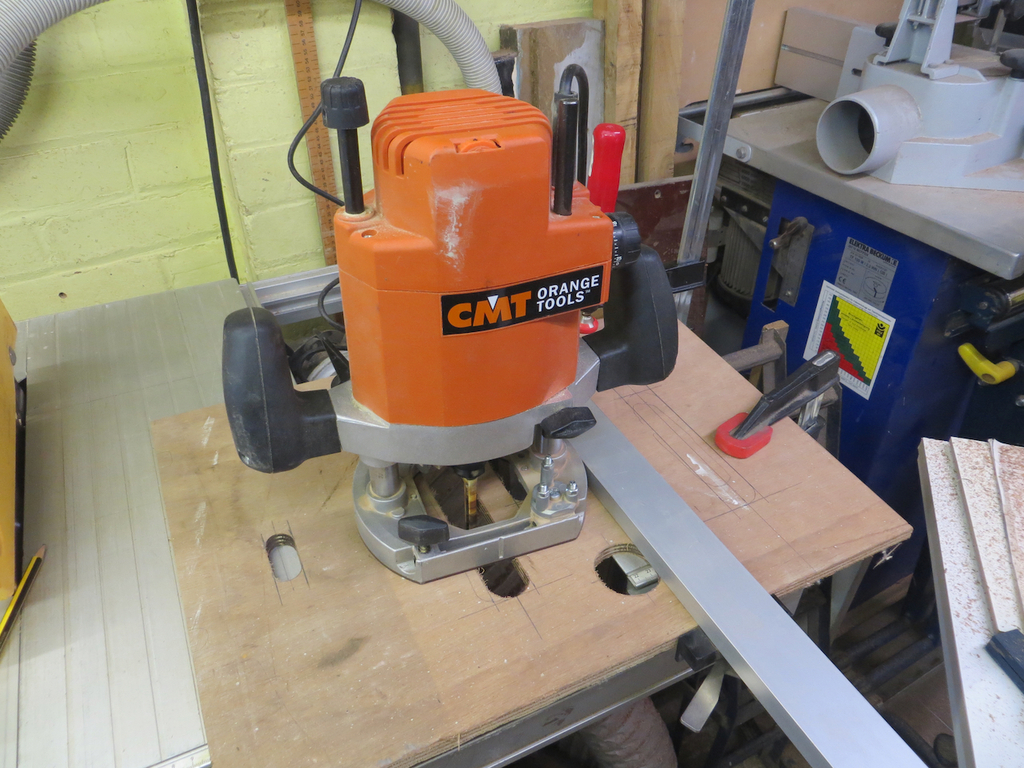 Big Orange has been working hard over the last few weeks doing the kitchen at the Gate House. It has a speed adjust and soft start. I had it flat out at the gate house and it wasn’t happy. I think the brushes are chewed up or bouncing when it’s turned right up. It seems fine at a slightly lower speed though so I’ll limp it along for a few weeks and then pop the lid off for an investigation. Hopefully it’s just full of dust and needs a bit of TLC. Once the holes were cut I made a side and front piece. These thicken up the board to match the thickness of the mat. It’s just to look pretty, nothing else.  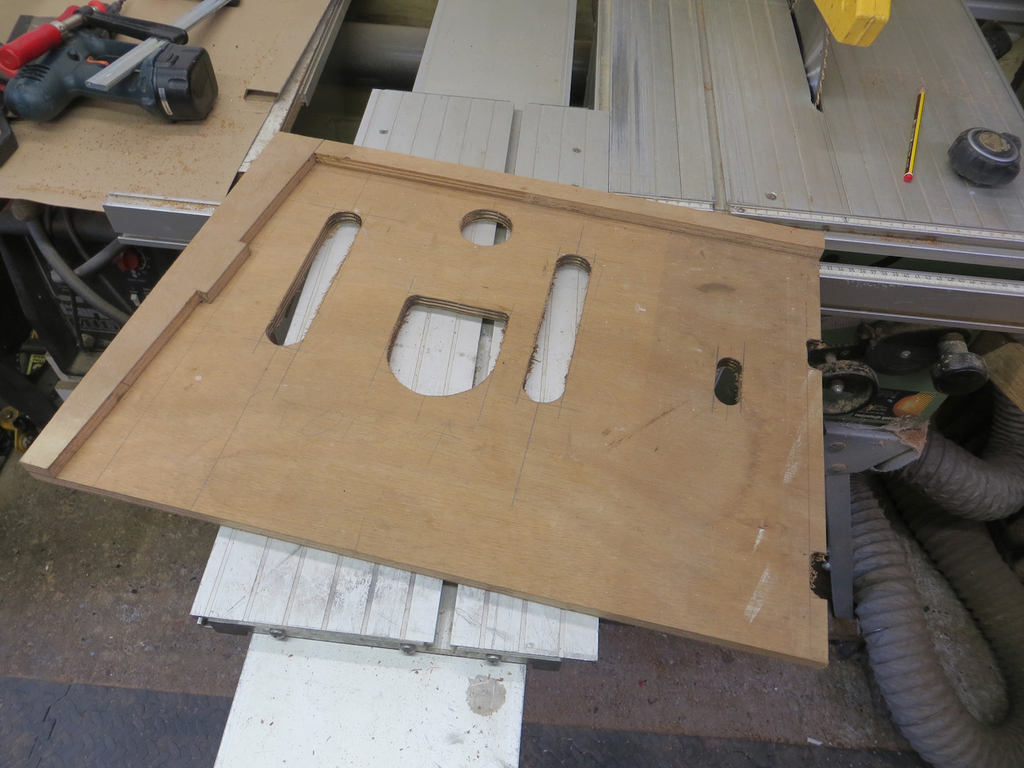 With the mat fitted it looks like this.  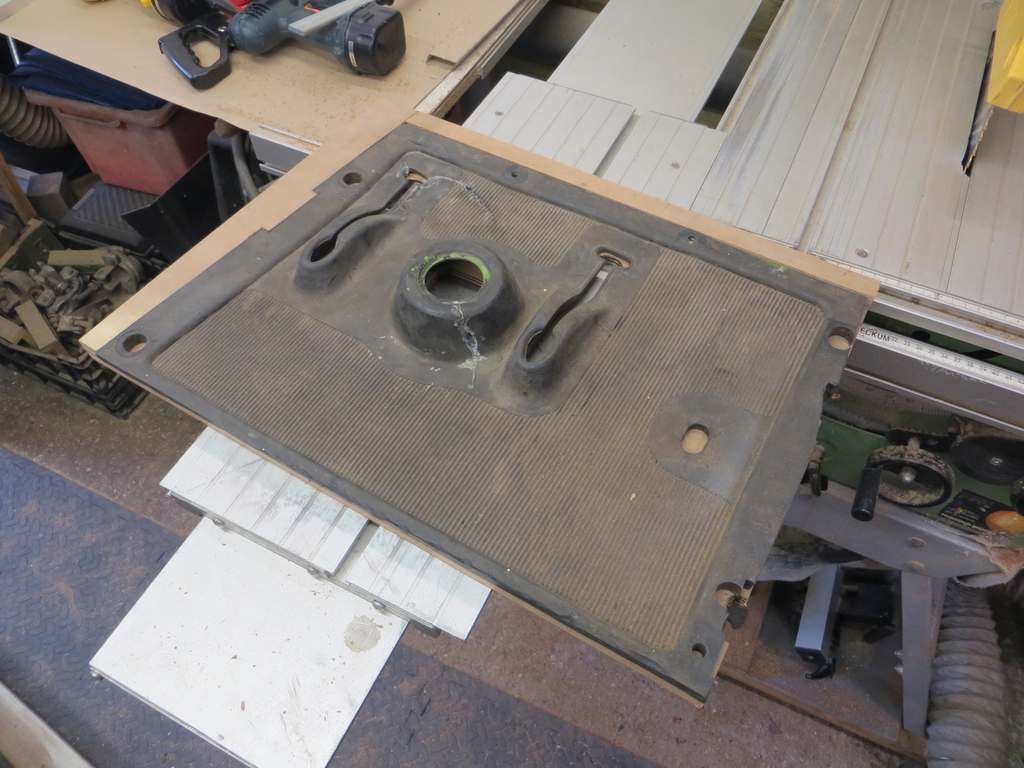 The mat is torn in a couple of places around the clutch and steering column. They have been glued but are coming apart again due to the lack of support and the fact that it’s been moved around a lot so they need gluing again and the whole thing needs a good clean. Then the wood needs fitting into the cab so fits nicely, and then it’ll come back to Sweetpea Towers for priming and paint. Also back at Sweetpea Towers are the linkages between the throttle pedal and the injection pump. Just behind the pedal is a roller that runs on the back of it. The shaft it runs on has a bit of a notch in it. 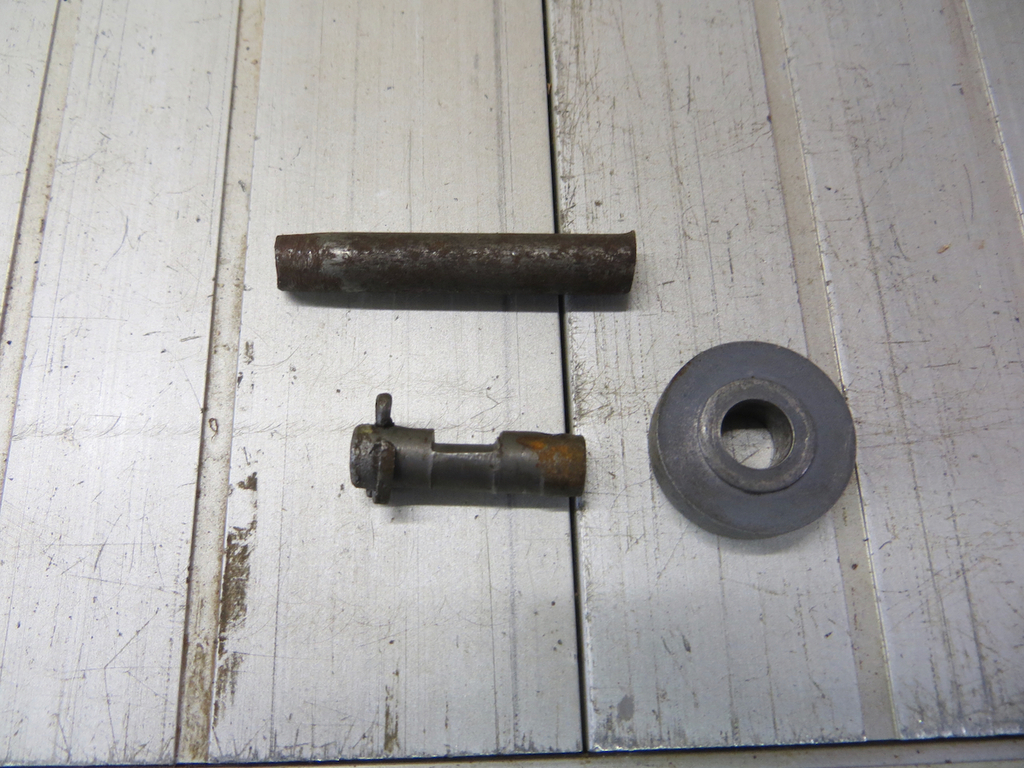 As luck would have it Ian had a piece of bar of the right size. It just needs a couple of holes drilled in it to take the split pins. So how do you drill a 2mm hole in a round bar that’s 1/4 inch (about 6mm) in diameter without the drill bit falling off the side? I pondered filing a flat on it but eventually decided to try this cunning plan.  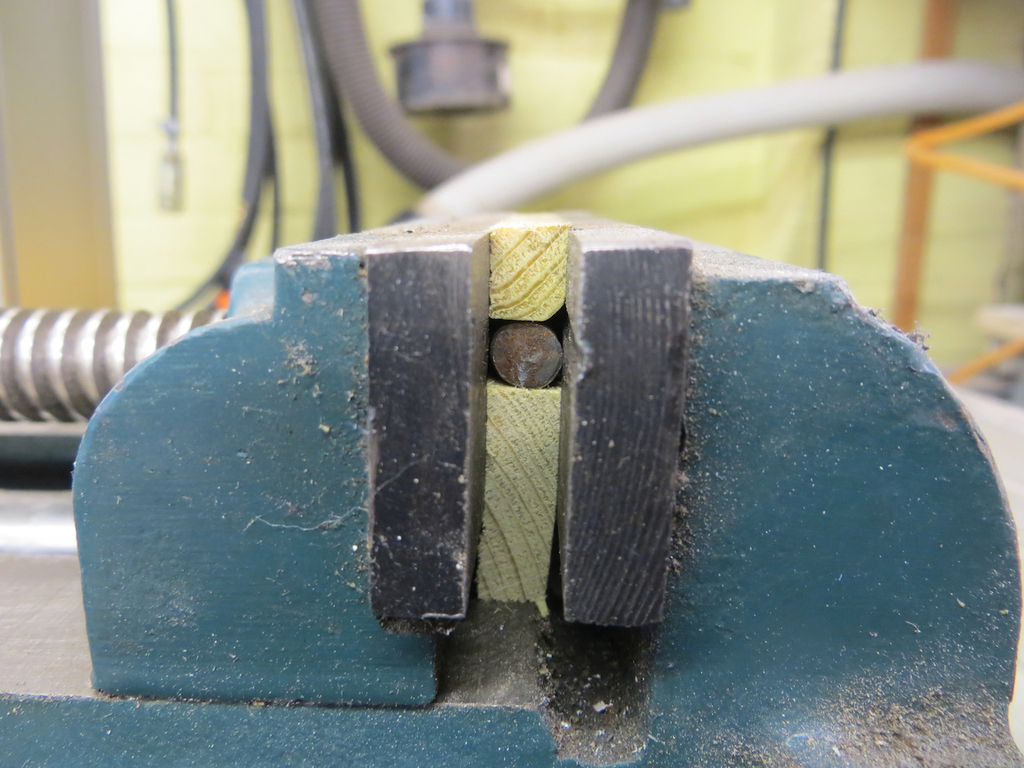 In the bottom of the drill vice we have a piece of wood with the work piece on top of it. The wood is just to stop the piece sliding through the jaws when the drill pushes on it. Another piece of wood goes over the top of the work. The idea is that I drill down through the middle of the top piece which then acts as a guide to stop the drill bit sliding off the side of the bar.  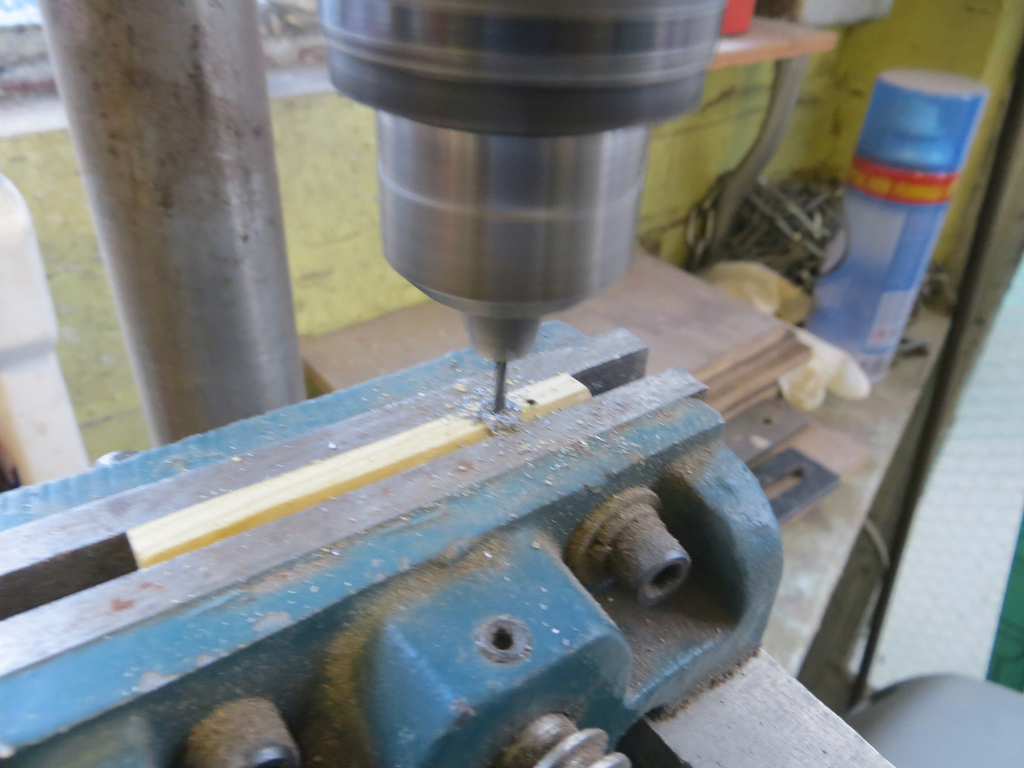 Drilling so fast even the vice is blurred… Or it could be a duff photo. Probably a duff photo. Did the cunning plan work? Well on the first attempt the bit broke off as it came through. Hmmph. But the second attempt worked pretty well.  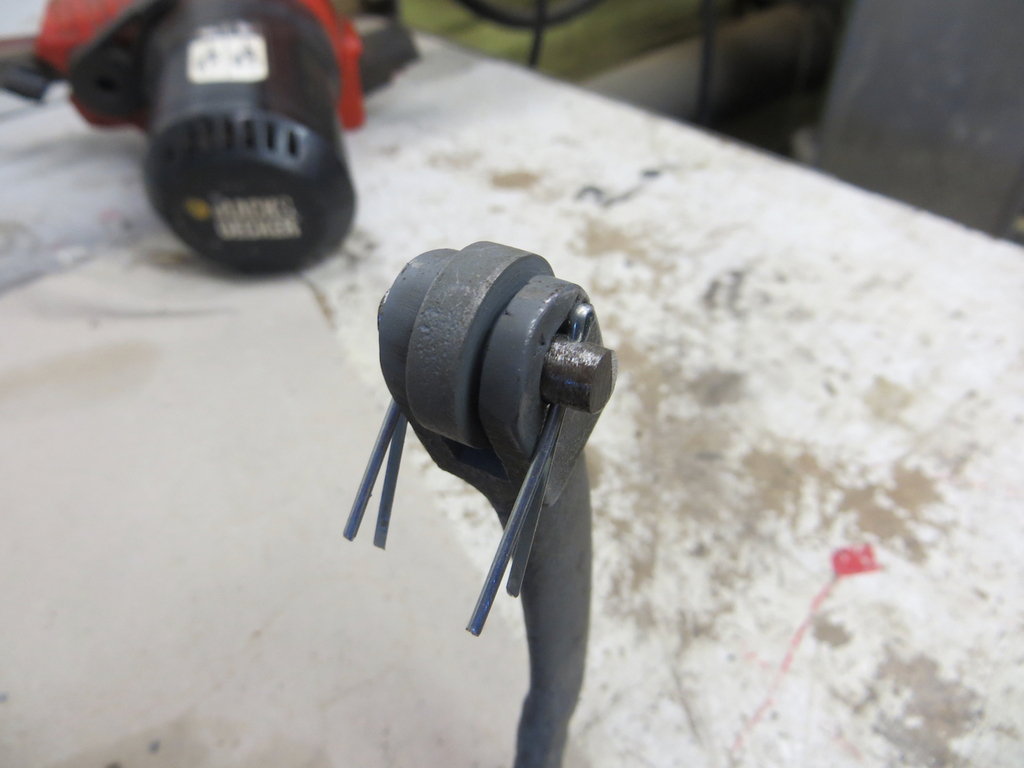 I mean, it’s not completely perfect but it’s pretty close. And given nobody will ever see it again, at least not for another 80 years I think it’ll be fine. I’ve realised that visualising how all these linkages connect up probably isn’t that easy for you folks. It’s ok for me but then I’ve spent a few hours looking at it from the comfort of a puddle of bus juice. There isn’t a good drawing in the manual either so I came up with this.  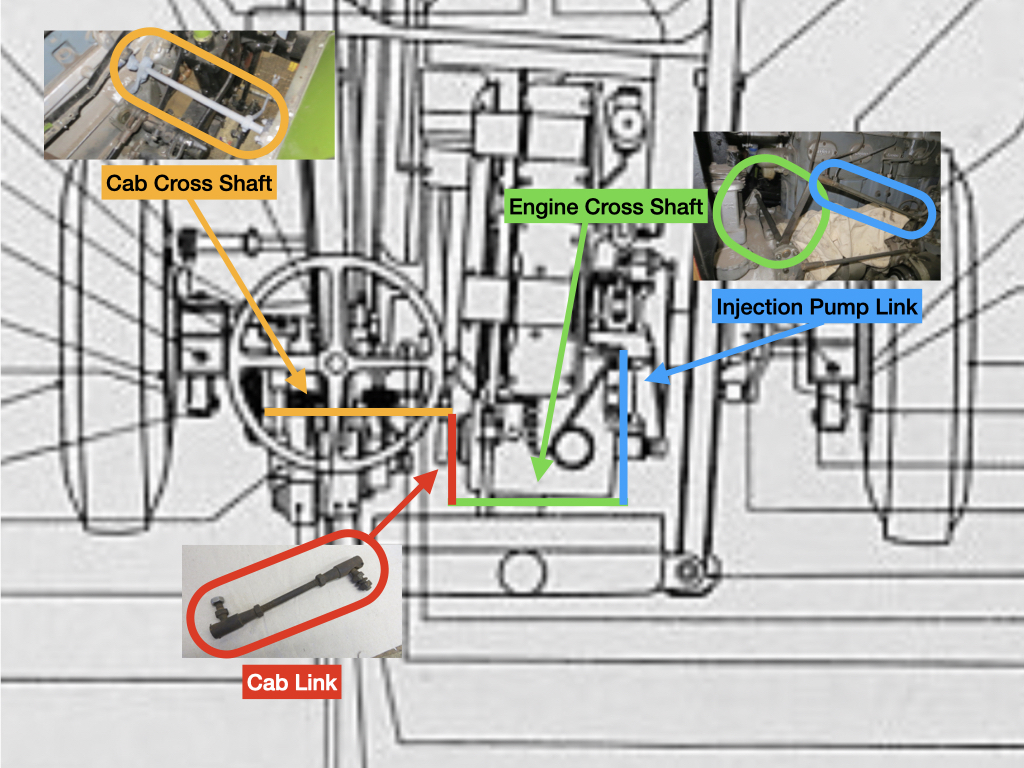 Is that better? No? Ah well, I tried. The next piece of the linkage I want to look at is the new cab link that connects the two cross shafts together.  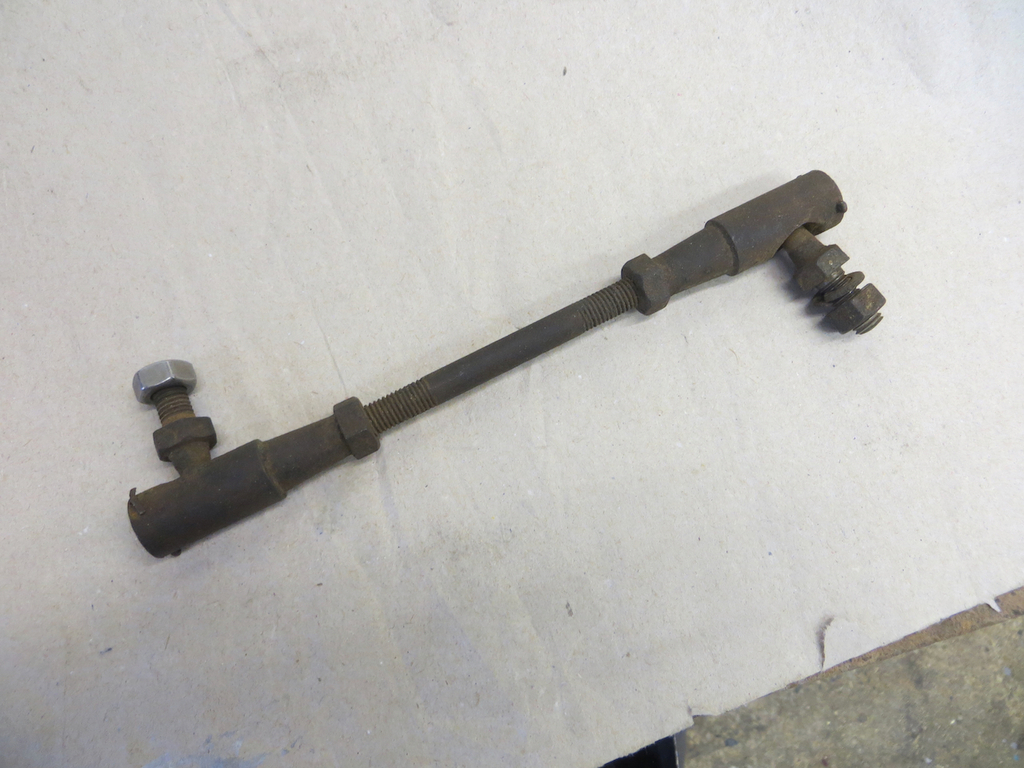 It’s not that new but when we trial fitted it it looks spot on in terms of length. The only problem (apart from needing a clean and paint) is that the ball joint on the right hand end is sloppy. But guess what, it’s adjustable!  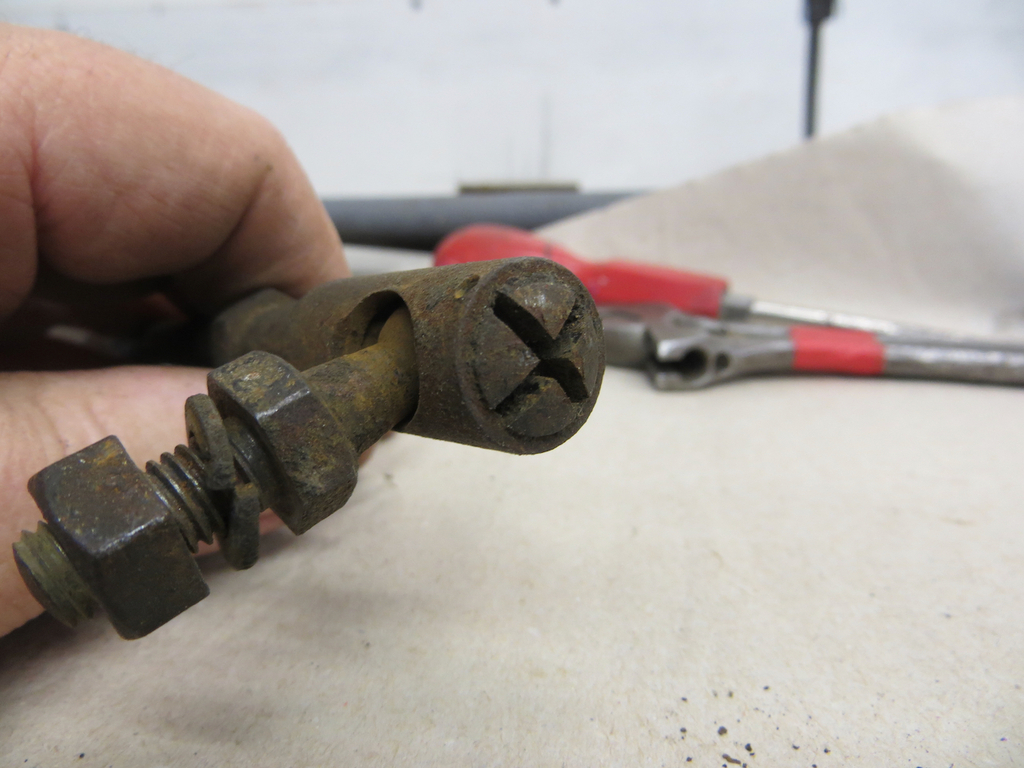 You pop a split pin out of the end and then you can screw the cap in to take up the slop. Well this cap hasn’t been adjusted for a while and is quite happy to stay exactly where it is. I expect we are going to have a battle of wills and I’m going to win. Maybe. Currently it’s doused in a top notch penetrating fluid. Well, WD40 because that’s what I have. If that doesn’t free it (and I doubt it will) then we might get some heat on it. James |
| |
|
|
|
|
|
Oct 24, 2022 21:46:42 GMT
|
In earlier posts I’d tried to add a little suspense and excitement to the story by suggesting that there was a problem with part of the linkage. Well there is. It turns out that the engine cross shaft has a couple of problems. Firstly the arms are held on with bolts somehow. They should be held on with tapered cotter pins like the ones that held the pedal cranks on your bicycle when you were a kiddie. 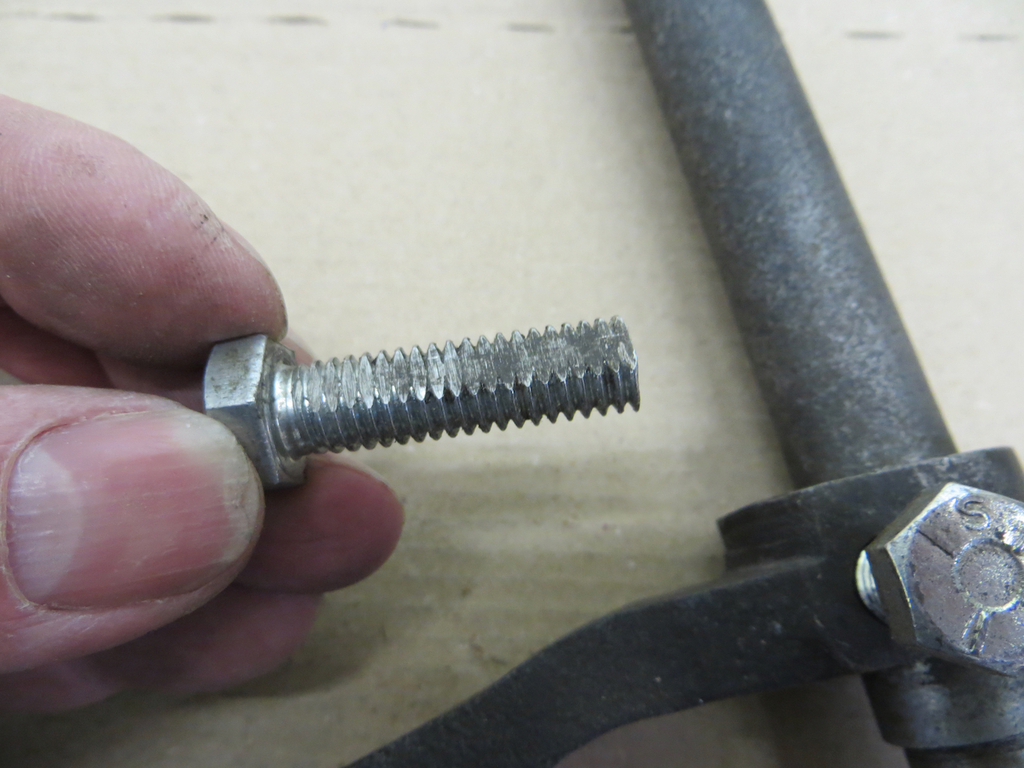 It turns out that somebody has made their own pins by flatting the side of a bolt. As luck would have it you can still get cotter pins from this new fangled thing called the interwebz. 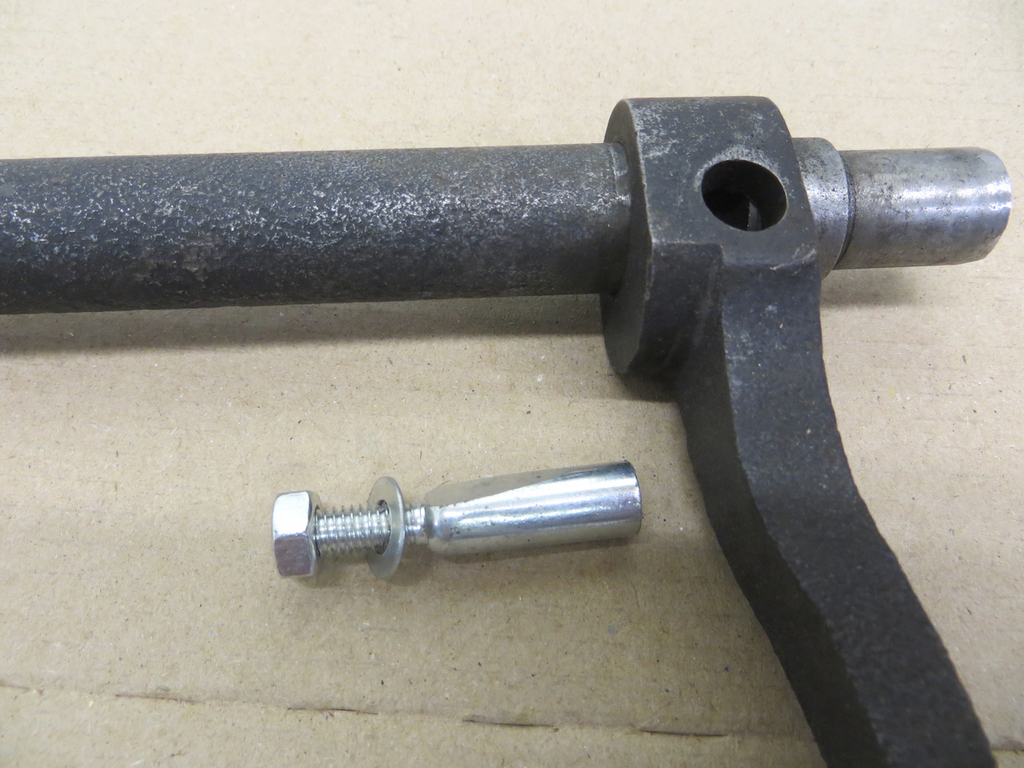 Who’d have thought it, spare parts for a vintage bus available on line via your confuser. Well that was hardly worthy of building suspense. Don’t fret, there is a more serious problem to get our teeth into. It turned out that the engine cross shaft was fitted the wrong way round. This long arm should be on the other side of the engine. 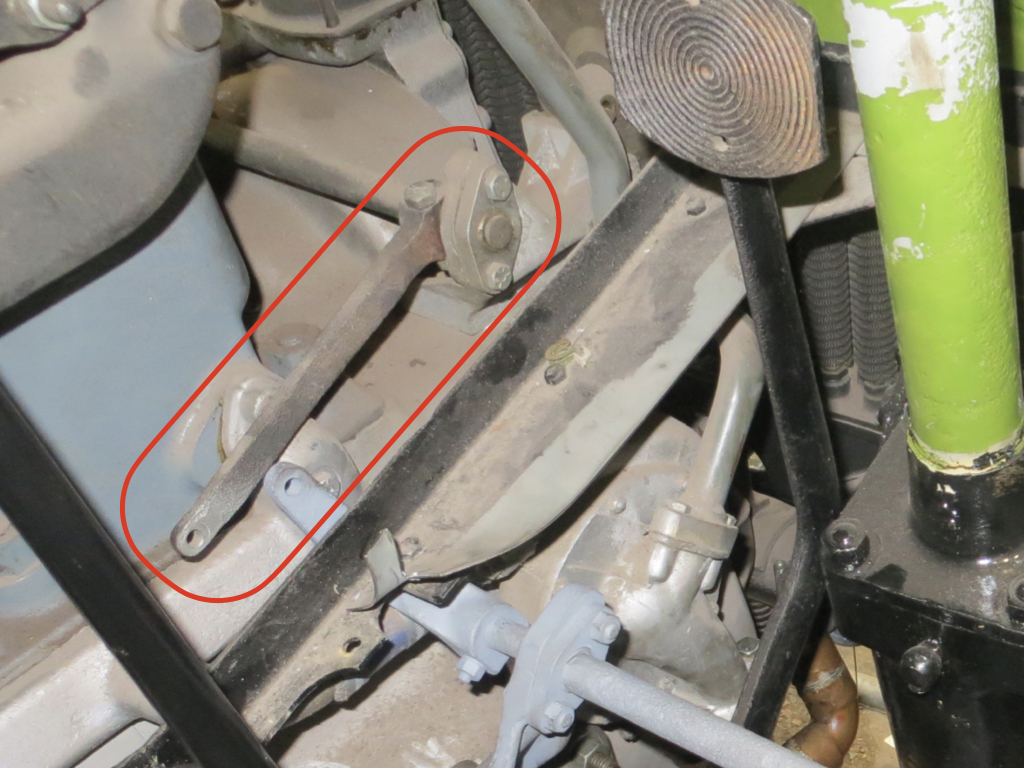 And on this side there should be a shorter arm. Much more importantly the two arms should be at roughly 180 degrees to each other. So, at rest, the long arm on the pump side should be roughly pointing upwards and the short arm on the cab side should be roughly pointing down. Well they were actually fitted at about 90 degrees to each other. But we’ve just said that the arms are fitted to the shaft with tapered cotter pins and you can’t get those wrong. They only fit in one position. So how exactly did they get an arm fitted 90 degrees out of position? 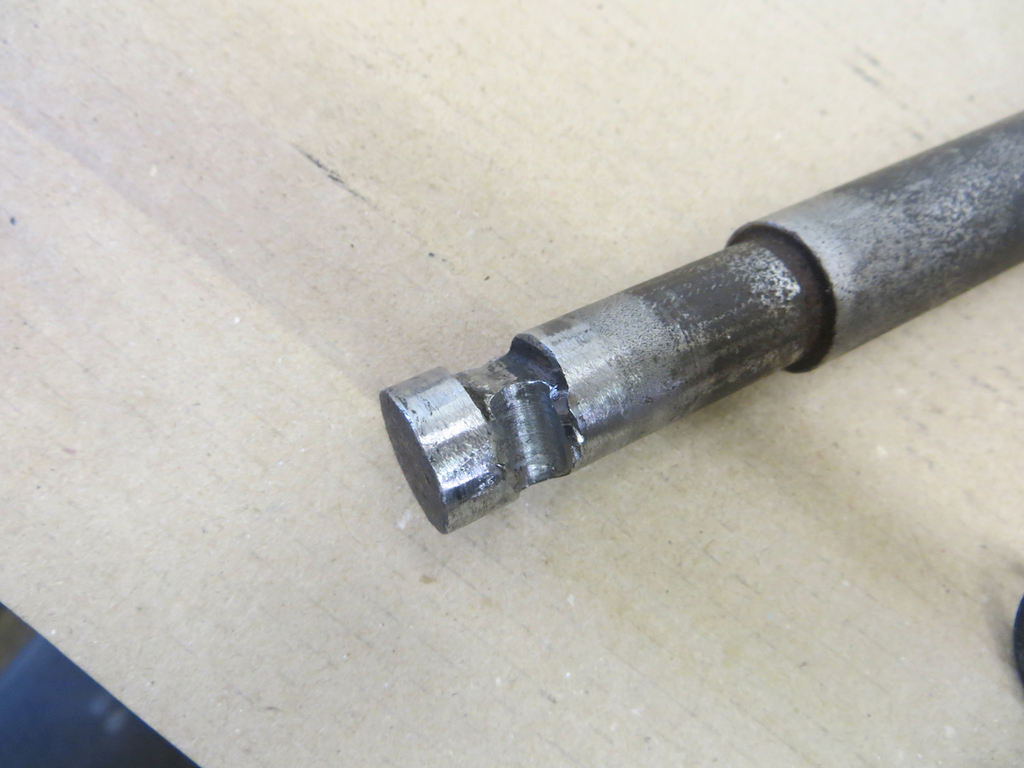 By drilling another hole across the shaft, that’s how. Are you asking why some dozy begger would do this? Yeah, I don’t know either. Never mind, there is still a flat side so we’ll just bolt the shaft on in the correct position. Nope, we won’t be doing that. When you try it the arm rotates on the shaft about 20 or 30 degrees because the cotter pin is falling into the new drilling. Right, so that’s a pain in the biscuits. What do we do about it? I reckon our options are… 1, Make a new shaft. 2, Run away in tears and hide behind the sofa. 3, Try welding it up? 1, I don’t own a lathe. 2, I am an emotionless genius and never cry. 3, But I do own a welder so let’s try option 3. 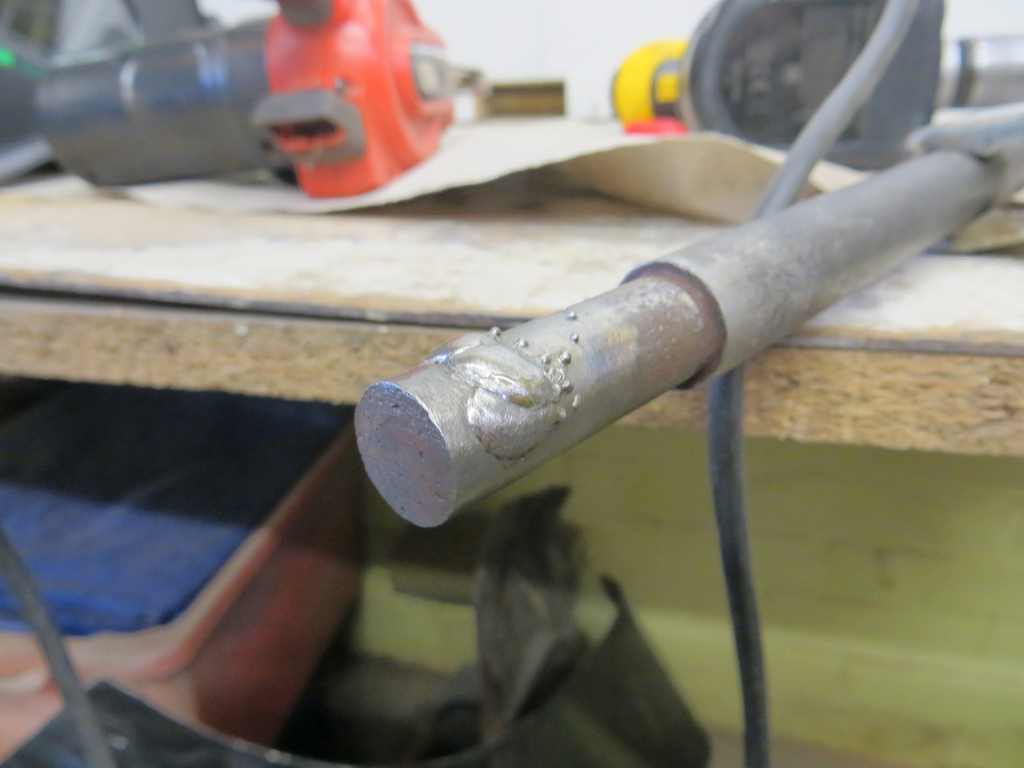 Well that looks ok. 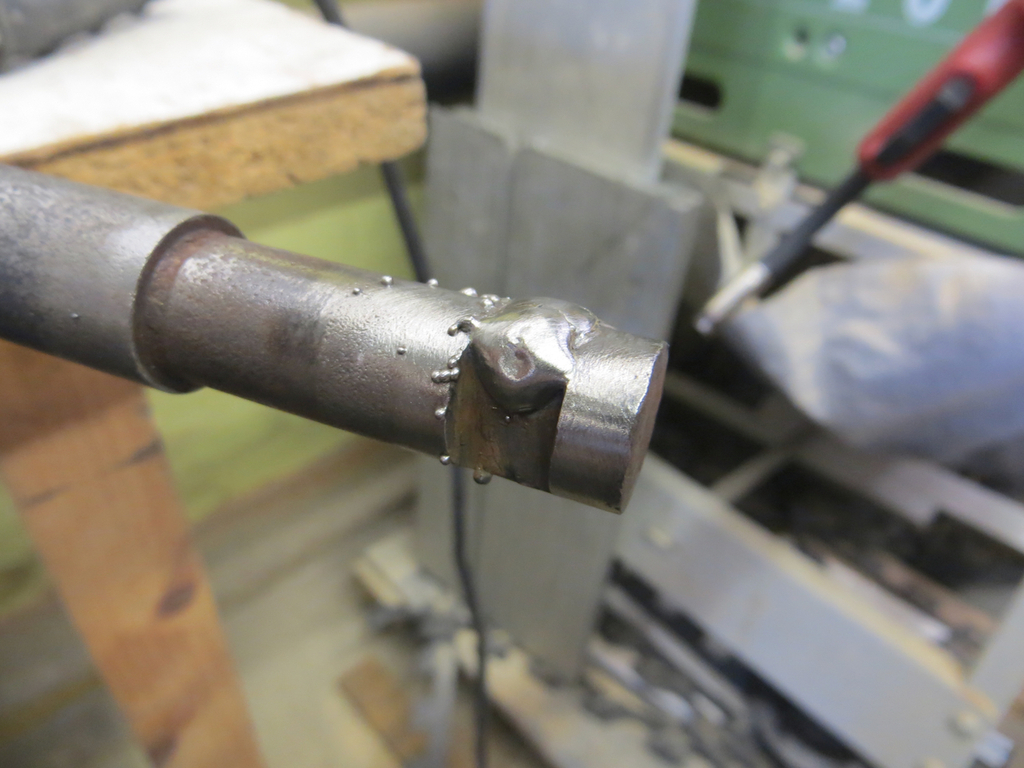 Don’t yer think? I used the Powerfile to carefully reshape the round bit and then filed out the slot by hand. 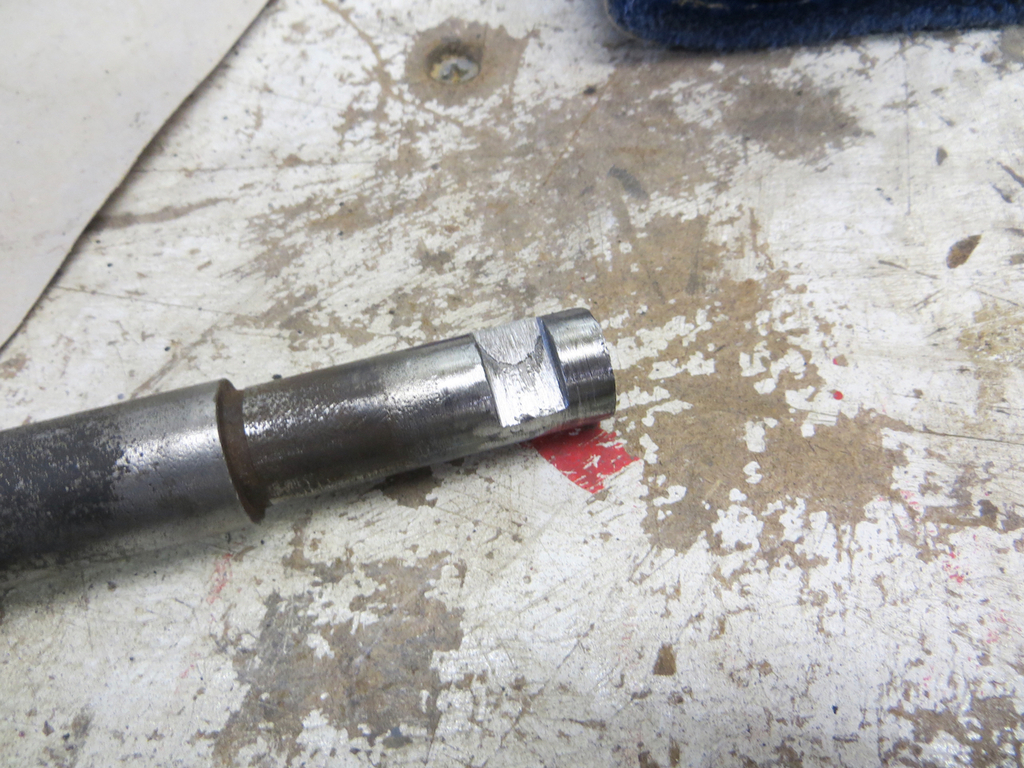 Sorted. Well, sort of sorted. There is still a problem. The cotter pin I have almost pulls through. It’s way too deep in the hole. I’ll get some photos so you can see the problem. Currently I have a shim between the slot and the cotter pin but that’s not ideal. A better bet would be to weld into the slot and file it flat again. Unless we can find another cotter pin. Or build up a pin maybe? These old vehicles are, apparently, sent to be a constant challenge and make us think. Tell you what, I’ll think about it. And I’ll chat with Ian so he can think about it too. If you also want to think about it please do and let me know what you’ve thinked. James |
| |
|
|
|
|
|
Oct 29, 2022 21:28:20 GMT
|
I grabbed a few pictures of the cotter pin that’s a bit deep in the hole.  It’s not so much ‘deep in the hole’ as ‘falling out the other side’. You can’t tighten the nut on the other side because the entire thread has popped out of the hole. One possible cause is if the hole has opened out a bit. Well it has opened a bit… 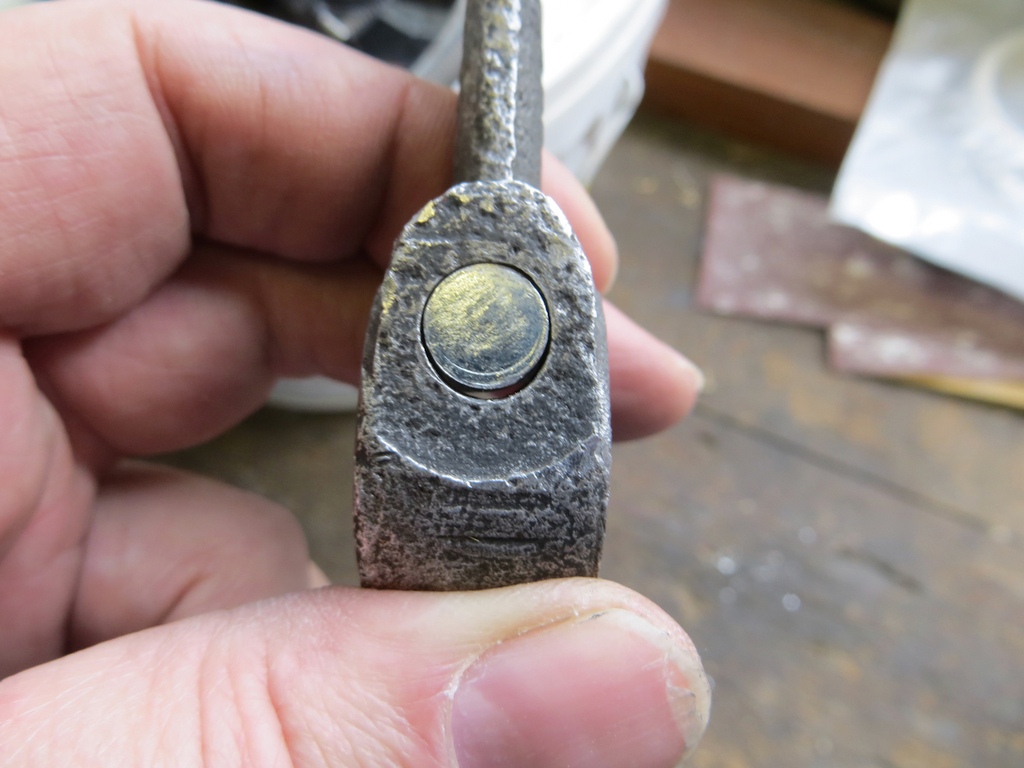 You can see it’s a bit sloppy but it’s not massively worse than the pin in the short arm on the other end. Partly as an experiment I made a thin shim to go between the taper on the pin and the slot in the shaft. It’s probably 1.5mm thick. 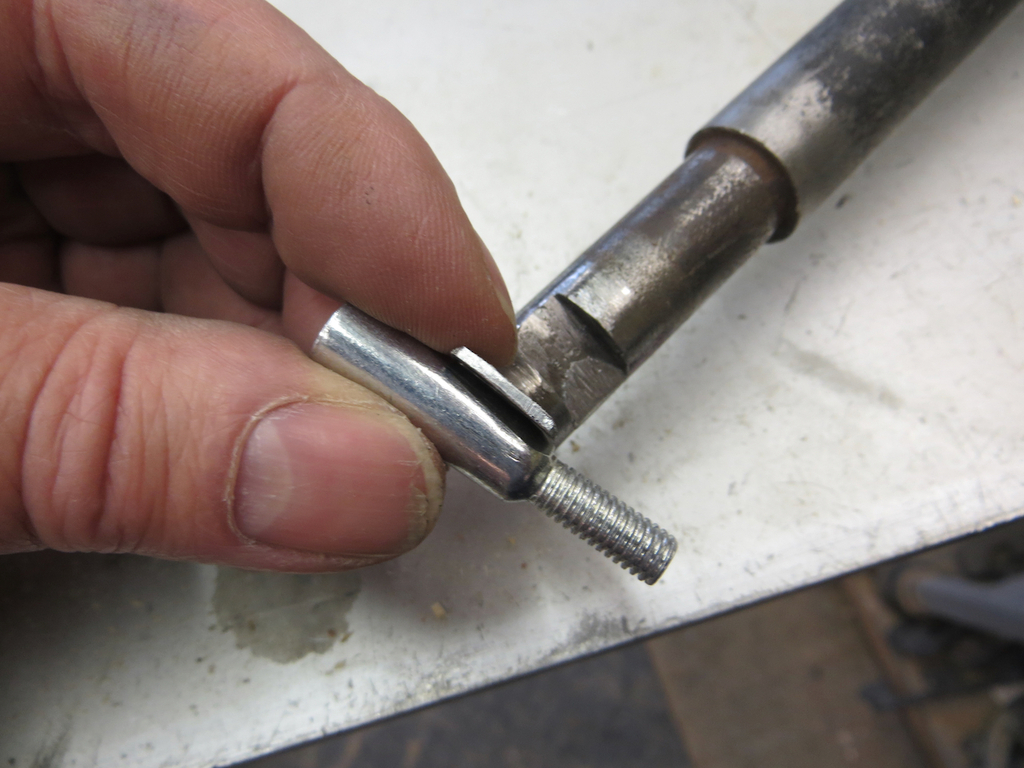 It’s too thick to be honest. I reckon we only need a mil on the taper. Keeping the shim is a bad option because the arm has to come off to fit it to the bus. Getting it back together in situ with the shim in will be a pain in the botty. So that leaves us with… 1, Build up the pin. 2, Build up the slot on the shaft. 3, Make a new, larger diameter pin and open out the hole in the arm. 4, Burst into tears and hide behind the sofa. If anybody want’s me I’ll be behind the sofa. James |
| |
|
|
glenanderson
Club Retro Rides Member
Posts: 4,353
Club RR Member Number: 64
|
|
Oct 29, 2022 22:11:12 GMT
|
|
I’d stick some weld in the slot and file it back to the right size. It’s not like you’ll be putting any serious torque through it. Those cotter pins take way more stress in bike crank sets and motorbike kickstarts than you’ll ever be asking this assembly to take.
|
| |
My worst worry about dying is my wife selling my stuff for what I told her it cost...
|
|
|
|
|
Oct 29, 2022 22:29:40 GMT
|
|
You could even use braze to fill the slot if you are worried about welding it.
|
| |
|
|
|
|
|
Oct 30, 2022 23:00:59 GMT
|
I’d stick some weld in the slot and file it back to the right size. It’s not like you’ll be putting any serious torque through it. Those cotter pins take way more stress in bike crank sets and motorbike kickstarts than you’ll ever be asking this assembly to take. You could even use braze to fill the slot if you are worried about welding it. Haven’t got the gear to braze it. Welding it is then. And I would agree that it’s probably not a massive challenge for a person with my outstanding skills with a welding contrivance. (He said modestly while talking complete tosh.) But strangely I was nervous about doing it. I don’t understand why. Anyway, as luck would have it an alternative solution popped up this morning. I assembled it again and must have put the arm on with the other face outwards. Wha’ d’ ya know, the pin fits properly. 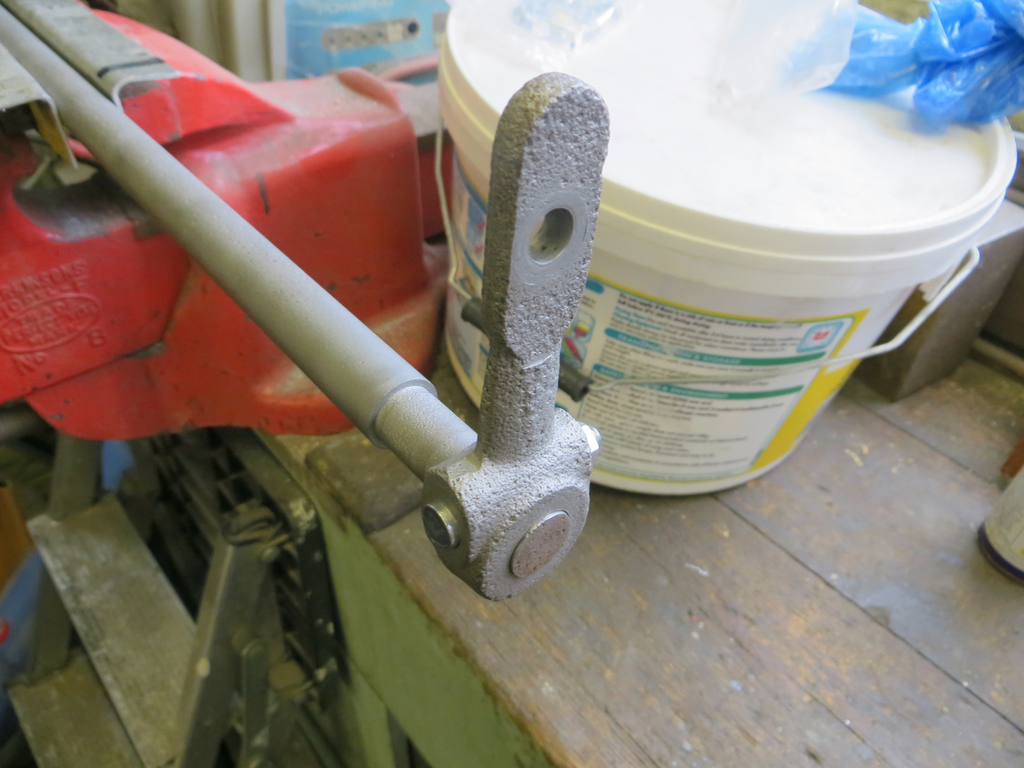 I’m guessing you are currently shouting at the screen that it shouldn’t matter whether it slides on the shaft this way round or the other way round. I’d agree. But with this face out it works, and with the other face out it doesn’t. I have no idea why. There may be a problem in the future. Ian was saying that the throttle on these old buses is quite heavy and is hard work if you are driving for a long period of time. But it’s also quite sensitive to having all the linkages all the right length. Swapping the cotter pin round alters the position of the arm on the shaft by a few degrees so we won’t know if this position happens to be correct until we go through the whole system. In other news the (not very) new link that I doused in WD40 actually came apart. 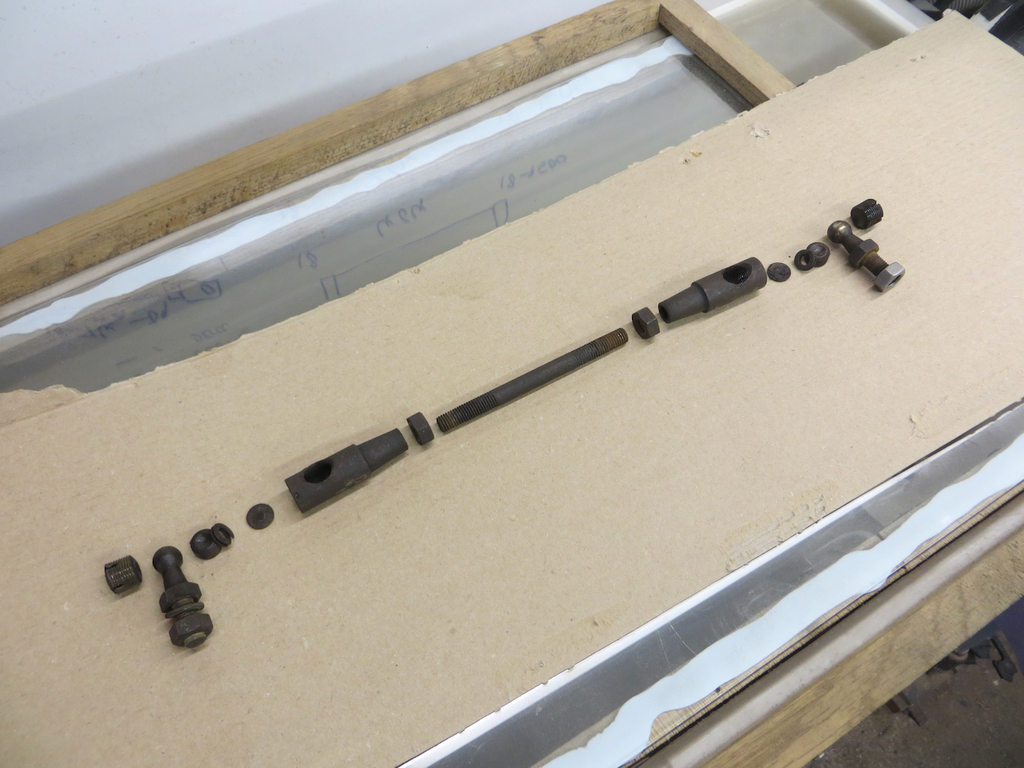 The ball joint is a little version of the steering drag link that I had apart a while back. Complete with little flat spring and everything. 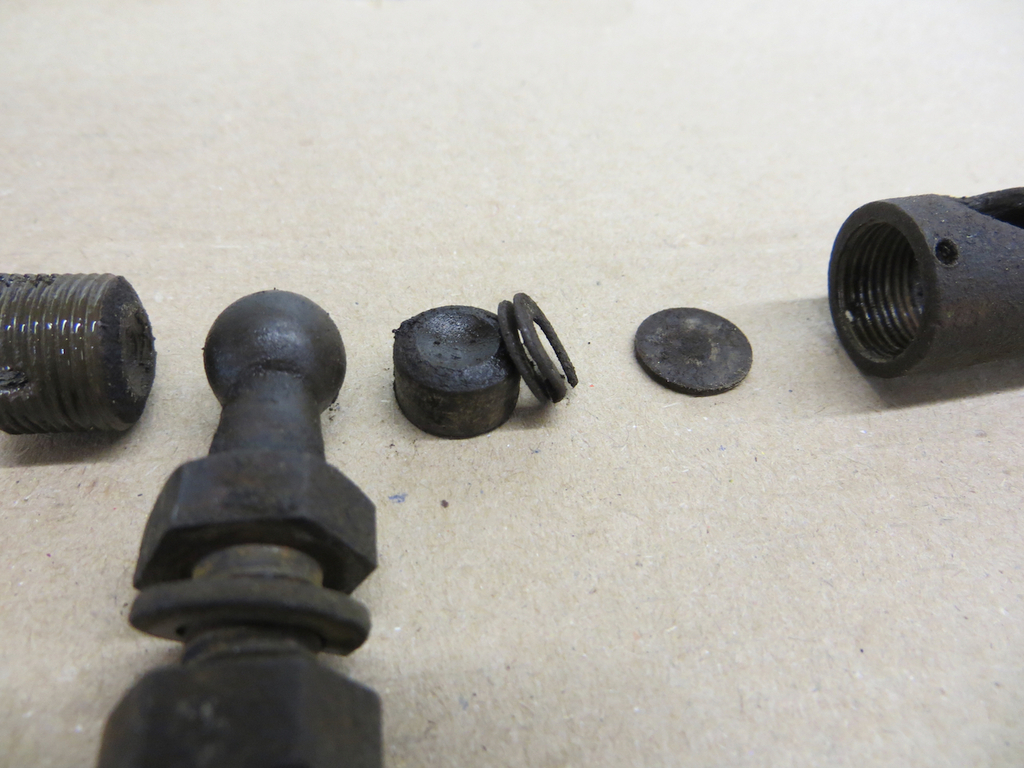 It all went for a trip through the sand blaster to make it look pretty. 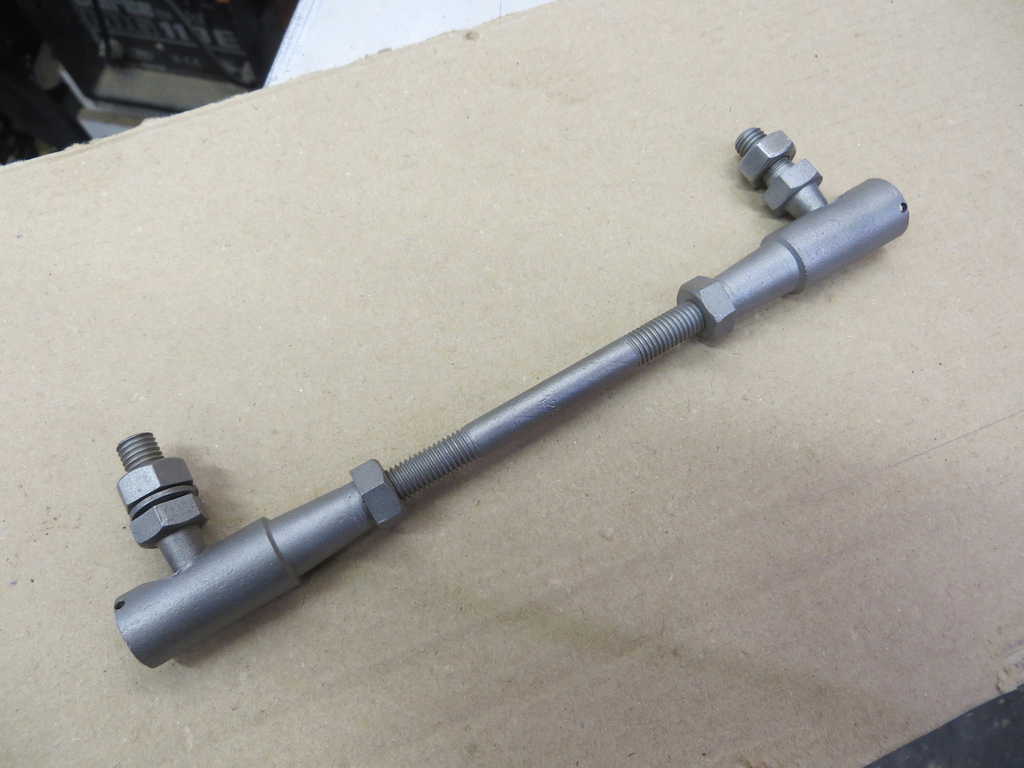 And then it all got hung from the garage ceiling for a coat of etch primer. So, I blew over the front side and then reached round the back to blow over the other side. So, think about this for a moment. If I’m looking at the front side and I reach round the back… What’s ten inches this side of the thing I’m spraying? Yeah, I gave myself a face full of etch primer. And what do you think I was wearing when I did this? Yeah, my brand new glasses. Frameless, varifocal, anti-reflective. They even go dark when it’s bright because it was a bit awkward having the footman swap my glasses every time the sun comes out. Sometimes life is hard. Especially when you are stupid.  If I’d hung this lot from a tree in Epping Forrest it’d be an art installation and it’d be worth millions. But, as it’s in my garage, it’s just a load of old bus getting painted. James |
| |
|
|
teaboy
Posted a lot
   Make tea, not war.
Posts: 2,125
|
|
Oct 30, 2022 23:52:00 GMT
|
|
Have you managed to sneak out unsupervised again, sweetie?
|
| |
|
|
|
|
jamesd1972
Club Retro Rides Member
Posts: 2,921  Club RR Member Number: 40
|
|
|
|
Have you managed to sneak out unsupervised again, sweetie? Sounds like he shouldn't have been... BTW safety glasses are relatively cheap as no VAT - when I remember I use them in the garage. Kind of work to buy them for me ! James. |
| |
|
|
glenanderson
Club Retro Rides Member
Posts: 4,353
Club RR Member Number: 64
|
|
Oct 31, 2022 10:43:22 GMT
|
|
I’ve ruined countless pairs of glasses over the years. The ones I’m currently wearing are like the surface of the moon with weld/grinding spatter. I have even spent significant chunks of cash on dedicated prescription safety glasses, only to ruin them in short order too. These days I just use mid-range Bollé overglasses as they’re significantly better than the cheapest ones, but still cheap enough to bin guilt free once they’re beyond use.
|
| |
My worst worry about dying is my wife selling my stuff for what I told her it cost...
|
|
|
|
|
Oct 31, 2022 13:25:48 GMT
|
Don't worry teaboy I'm safely locked away back at work where I can't do any damage. I own a full face visor which I'd definitely have worn had I been planning on painting my face. But what sort of idiot plans on painting their own face? Yes, hello, did somebody call me?!  PS, The glasses survived with a careful clean by the way. |
| |
Last Edit: Oct 31, 2022 13:26:58 GMT by Sweetpea
|
|
glenanderson
Club Retro Rides Member
Posts: 4,353
Club RR Member Number: 64
|
|
Oct 31, 2022 13:57:35 GMT
|
|
Oh, and I painted my watch blue once too…
|
| |
My worst worry about dying is my wife selling my stuff for what I told her it cost...
|
|
ToolsnTrack
Posted a lot
   Homebrew Raconteur
Posts: 4,128
Club RR Member Number: 134
|
|
Oct 31, 2022 14:24:11 GMT
|
|
You can actually see the speckle over my lenses on some of my workshop videos.
|
| |
|
|
jimi
Club Retro Rides Member
Posts: 2,224  Member is Online
|
|
Oct 31, 2022 17:07:50 GMT
|
I'd speculate that the way you have the pin in now is correct, if you look at the arm casting on the side you have the nut now, there's a recess cast in that looks like it was meant for a washer + nut  |
| |
Last Edit: Oct 31, 2022 17:08:42 GMT by jimi
Black is not a colour ! .... Its the absence of colour
|
|
teaboy
Posted a lot
   Make tea, not war.
Posts: 2,125
|
|
Oct 31, 2022 17:36:44 GMT
|
I'd speculate that the way you have the pin in now is correct, if you look at the arm casting on the side you have the nut now, there's a recess cast in that looks like it was meant for a washer + nut  How would he see that when he’s painted his specs? |
| |
|
|
|
|
|
Oct 31, 2022 18:52:39 GMT
|
I'd speculate that the way you have the pin in now is correct, if you look at the arm casting on the side you have the nut now, there's a recess cast in that looks like it was meant for a washer + nut  I'm not sure I'd put money on how well machined some of this stuff is. You can actually see the speckle over my lenses on some of my workshop videos. Oh, and I thought it was the workshop lights glinting in your blue eyes. (Or brown eyes. Delete as applicable. You'll be relieved to know I've not bothered to look that closely.) Seems strange to me that this thread takes off only when I accidentally paint myself. Still, I guess it's nice that you are all reading in the first place. Thanks for following the thread chaps! And ladies... Not forgetting the ladies... Who am I kidding? Thanks for following the thread chaps! |
| |
|
|
ToolsnTrack
Posted a lot
   Homebrew Raconteur
Posts: 4,128
Club RR Member Number: 134
|
|
|
|
|
They are blue, and I had a wee flutter until you corrected yourself. Oh well...
|
| |
|
|
|
|
|
|
|
Do you get the idea that I’m doing more work on the bus than on the MR2? The truth is that I’m either working to earn a merge crust or working on the kitchen and extension at the Gate House. Then, every now and again, I have a day off and do some bus work. The kitchen / extension at the Gate House is at that point where I’m doing the last 10 percent that takes 90 percent of the time. It’s taken months already so I reckon it’ll be done by Christmas. Christmas 2026. Hmmph. I think it was Pope John Paul II who said, ‘Life sucks and then you die’. Actually it could have been Winston Churchill now I think about it. I’m sure it was one of the two. Let me know if you can clear that up. Anyway… Before I cleared off to the Peoples Democratic Republic of Maidstone I managed to get some black paint on the throttle linkages. Most of them anyway. My first job was to get them fitted. 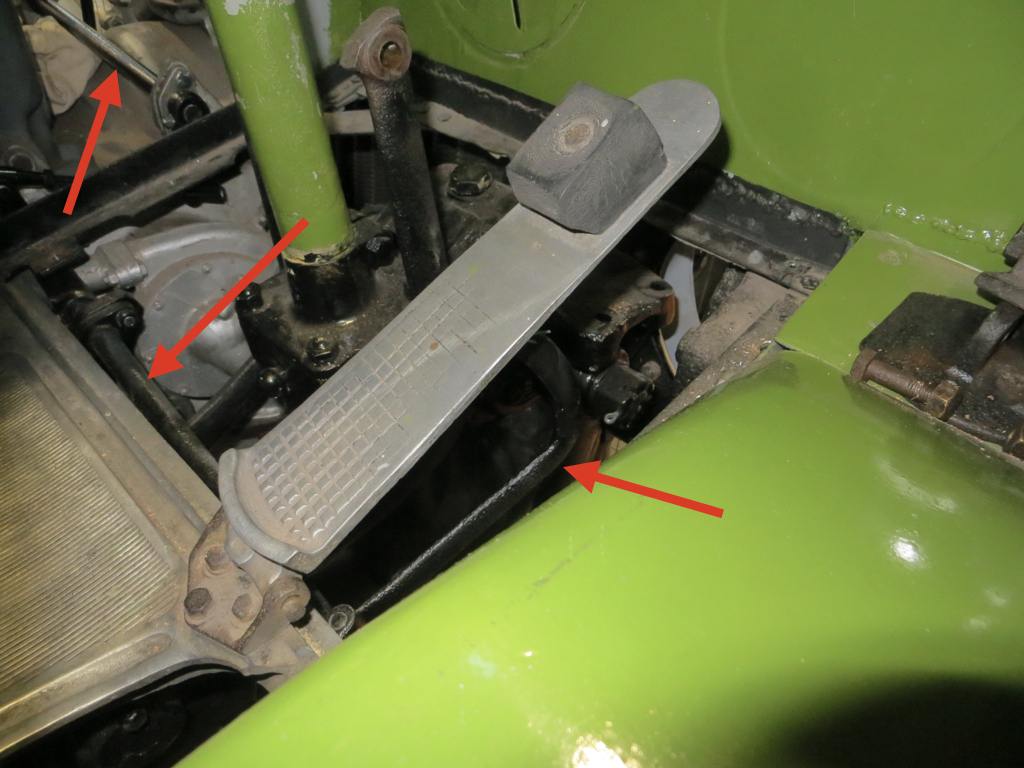 I’ve pointed them out with ikkle red arrows because they don’t show up so well. Black you see. This is the new-ish linkage between the two cross shafts. 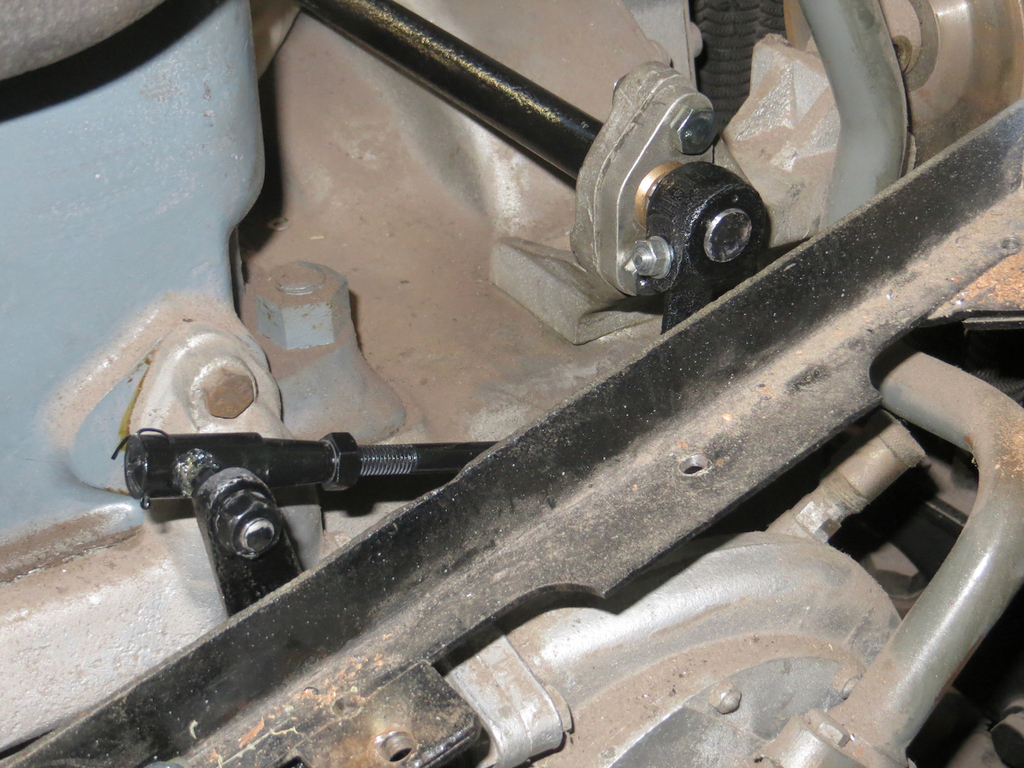 At the moment it’s set too long and not bolted up tight. We’ll have to go through all this and set the lengths when we get the injector pump top back on. (Which has been unstuck and turned up back at the garage by the way.) And lastly here’s the engine cross shaft taken from the engine side. 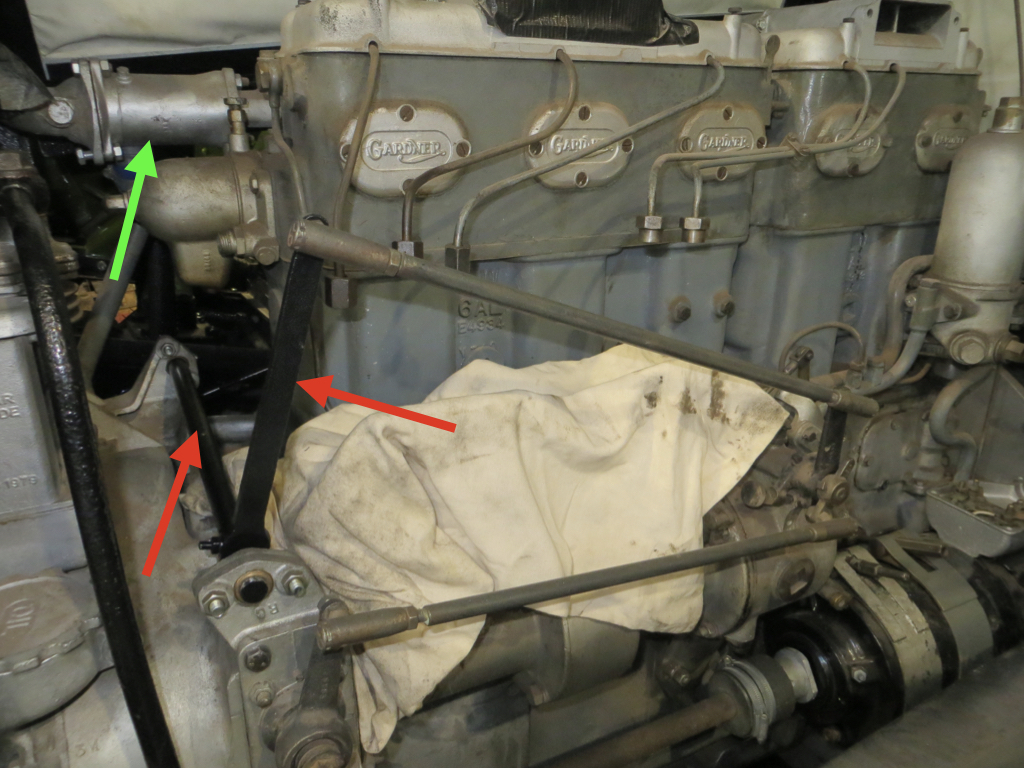 Again marked with ikkle red arrows because I’m a nice person. The green arrow is pointing at the thermostat housing. Remember I cleaned that up a few weeks ago? Well this isn’t it. This is the wrong one that came fitted to the engine. The outlet doesn’t point at the pipe on the radiator so you can’t plumb it up. Or is it the inlet? Hmmm. That’s going to keep me awake tonight working it out. Then I got to play with the cab floor I’d been creating. Would it fit? How close was my cardboard pattern? Well it needed a little trim but it’s wasn’t far off. 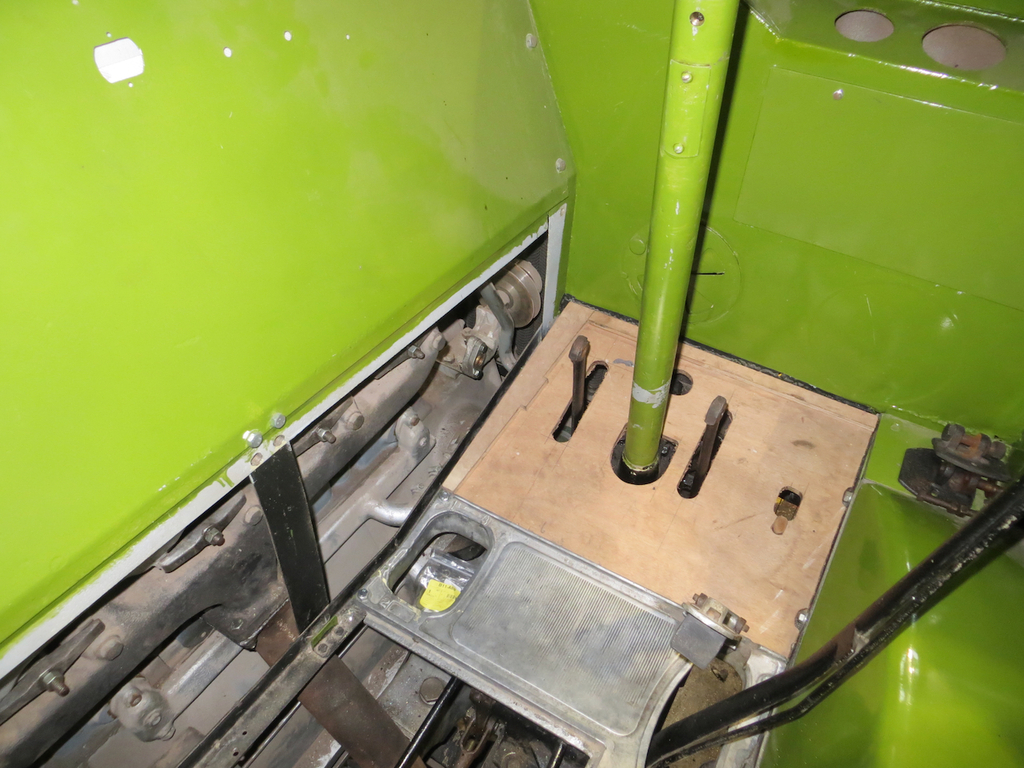 Still needs the pedal slots opening up a little. The pedals drag slightly on the right sides of the slots and, while it won’t make any practical difference, the pedal in the middle is the brake (you knew that I guess?) and I don’t want it dragging on the floor. I also had to open up the hole for the throttle to come through and I’ve drilled it for all the mounting holes. That bit of wood came back home with me for final fettling, sanding, gluing, priming, and painting. While I was doing that Ian was battling with the vacuum and fuel pipes. This is the fuel filter. Ian had taken it away to get the taps working and to clean it out. He also took the pipes away for painting. I’m not the only one who gets homework. 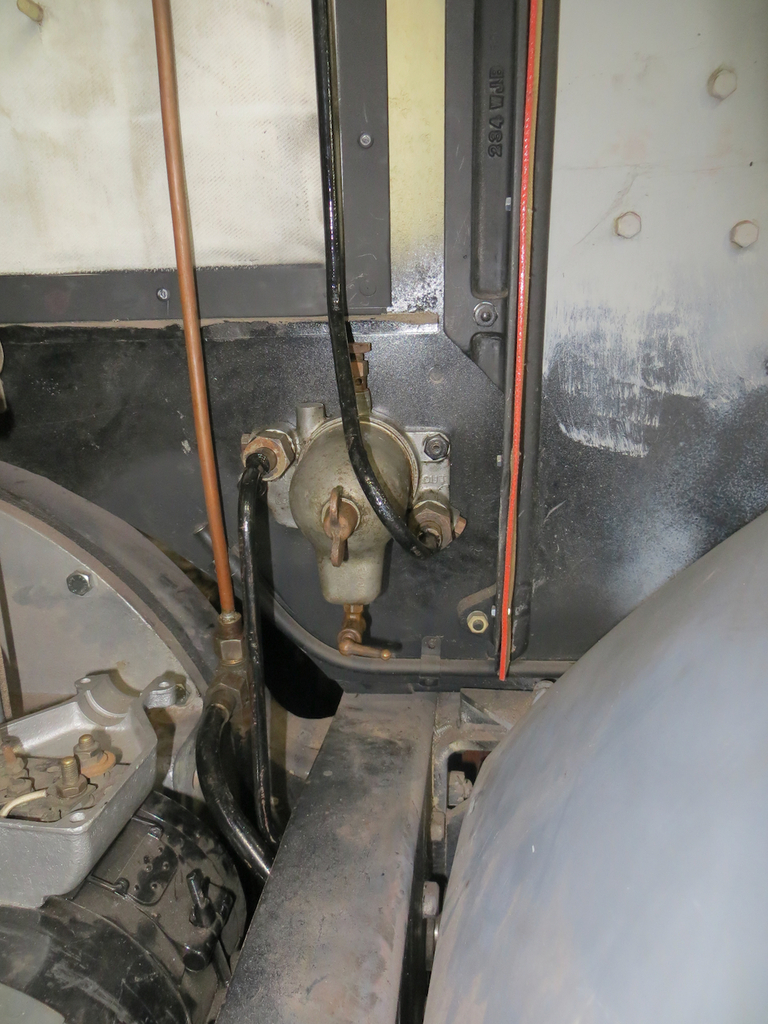 The pipe to the left of the filter is the vacuum pipe to the Fuel Sucky Uppy Thingy. Speaking of which, it’s now fitted. 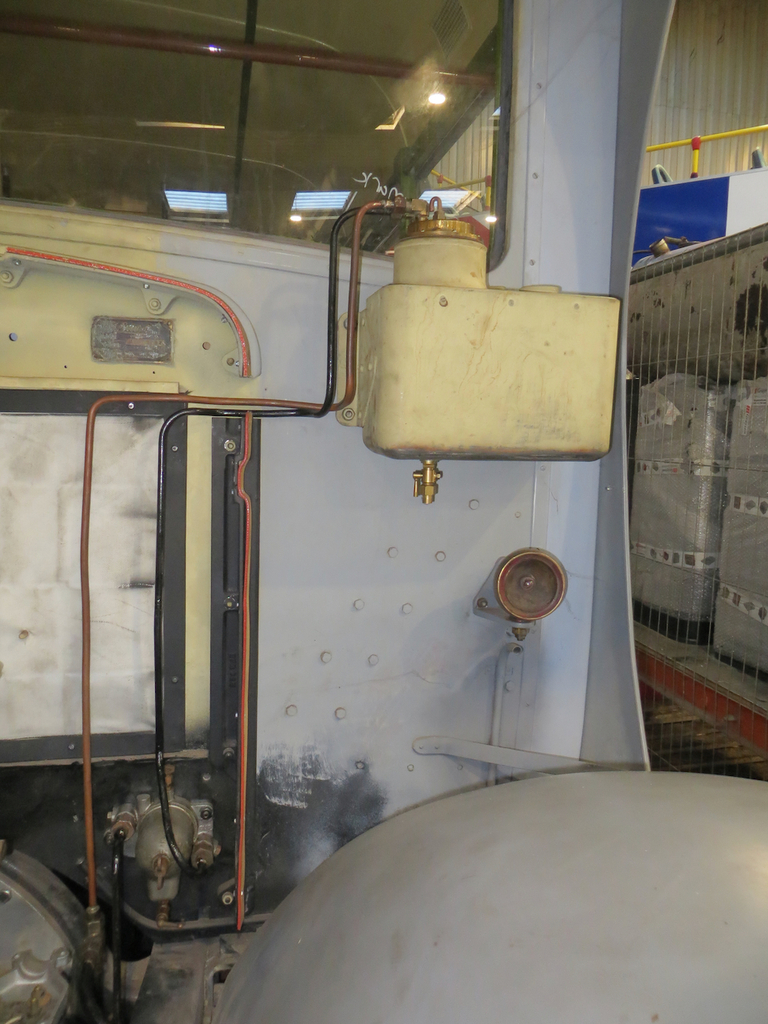 It still needs the outlet pipe to the injection pump and the leak off pipe from the injectors fitting. And lastly here is the vacuum pipe fitted to the vacuum pump, better known as the exhauster. 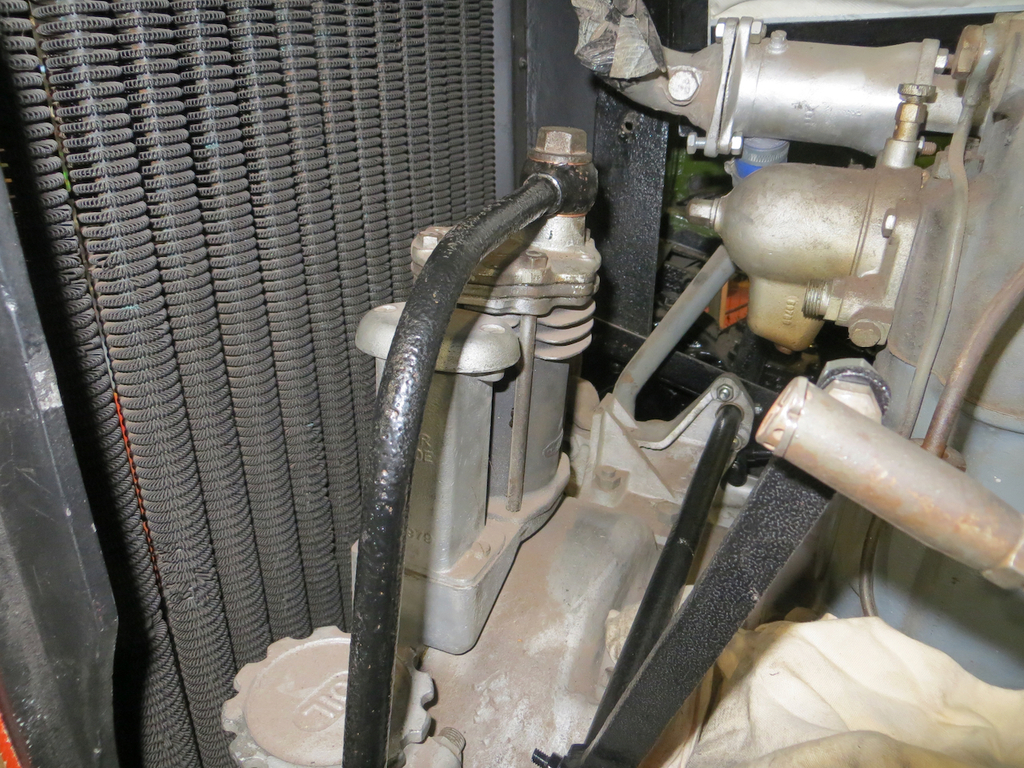 That last sentence was drivel. It’s not better known as an exhauster. It’s better known as a vacuum pump but it is the exhauster. Commonly exhausters are rotary vane types but this looks like a piston in a cylinder. I believe there is a crank on the end of the cam shaft that makes it go up and down. Certainly looks like a piston in a cylinder. Ian had a plan to get the fuel tank in but we are missing some really long bolts that run between the tank hanger and bottom strap. We discussed at great length the idea of rummaging through the entire contents of the shelving units but decided that life was too short and neither of us was getting any younger. That does mean you all get to look forward to a ‘fitting of the fuel tank’ episode at some point in the future. I’ll bet you won’t sleep for the next few nights ‘cos you’re all excited. James |
| |
|
|
|
|


