|
|
|
|
|
I just have to show a pic of the inside of the timing chain cover. 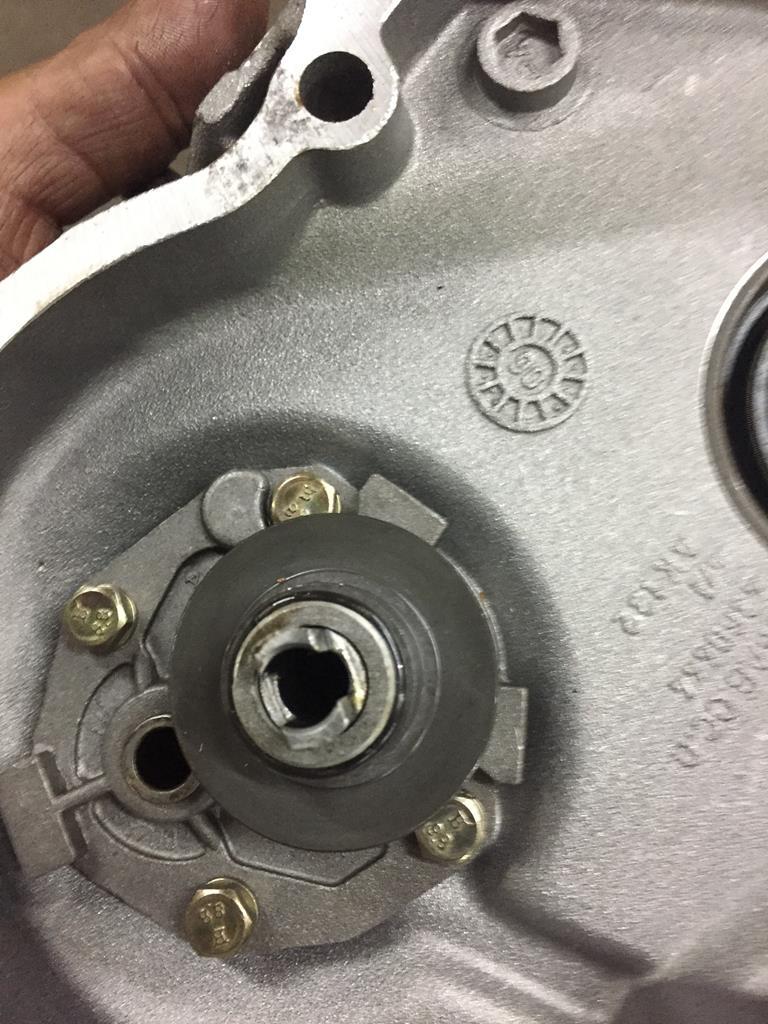 Its a Polish built 650cc 126 engine ( the largest stock size before they went to watercooling ). This engine is brand new, never been fired, never had any oil in the pan or fuel in the carb ( the carb I'm not using...  ) NOS, built going by the casting number, in 1990. I'm very happy with that...  It used to belong to my buddy with the Zagato, I traded some hours on his car for it. |
| |
|
|
|
|
dazee
Part of things
 
Posts: 96
|
|
|
|
|
Very interesting build,I like to see something a bit different. Your problem solving work is excellent.
|
| |
|
|
|
|
|
|
|
|
|
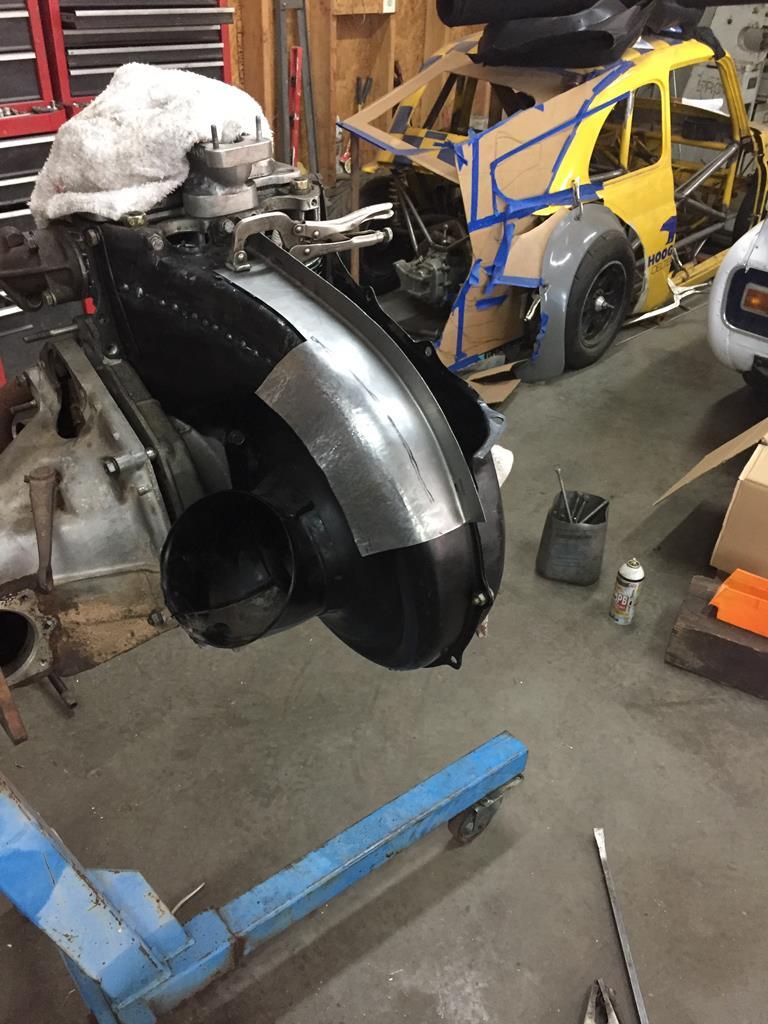
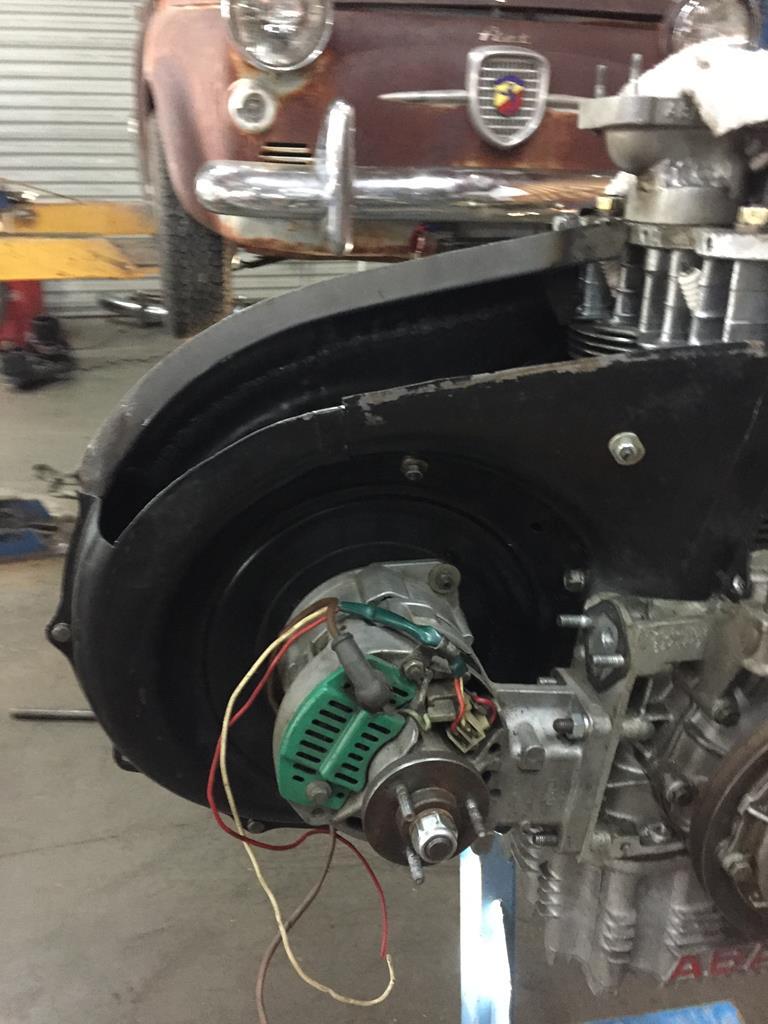
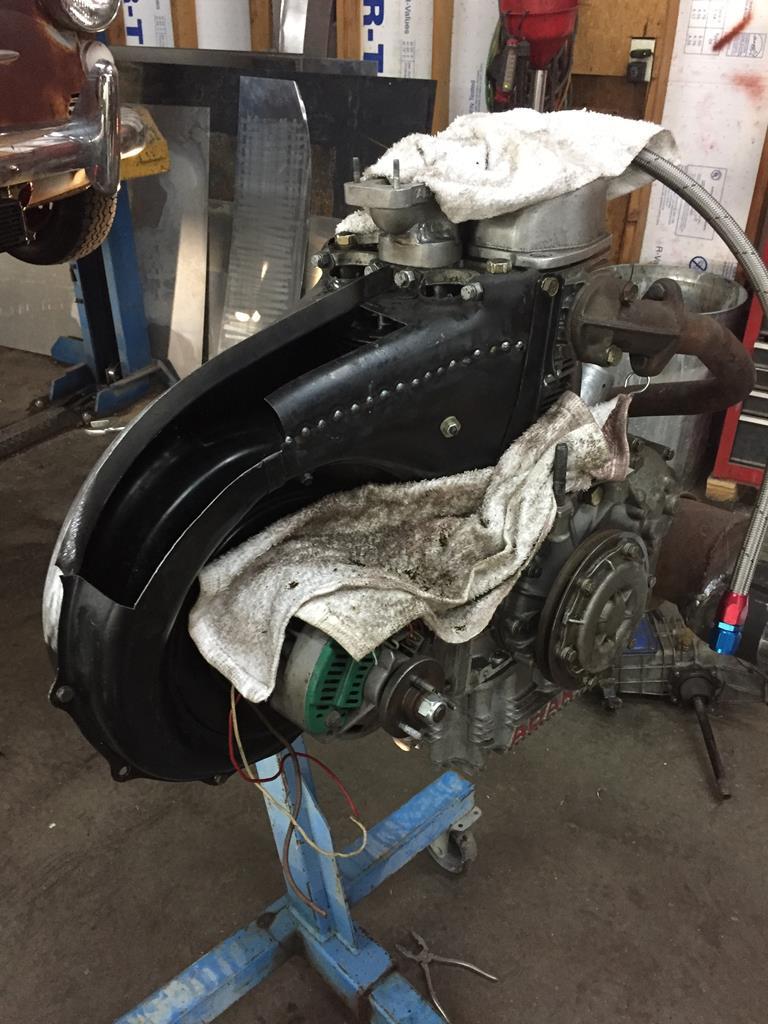
This next piece might be a little long, but I had to put a lot of thought into it, and doing it was tricky too... The original airfilter housing is attached to the cooling tin. It gets its air from inside the fan housing for a tiny little bit of supercharging ( in reality, it might make up for the restrictive paper airfilter). 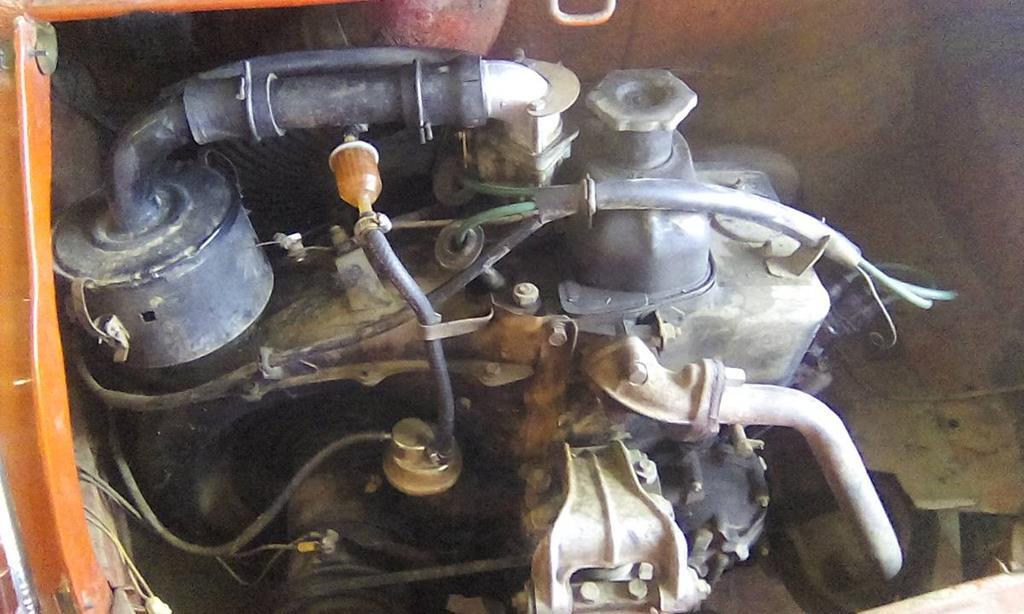 There is a way to plumb it into the Fiat 850 carb I'm using, but I did not see the point in doing that. Pretty much all racers I've seen eliminate the original filter system and just use a good aftermarket filter, or open ram pipes. The most common way is to cut the filter housing off the engine tin, and weld a patch on the round hole that creates. 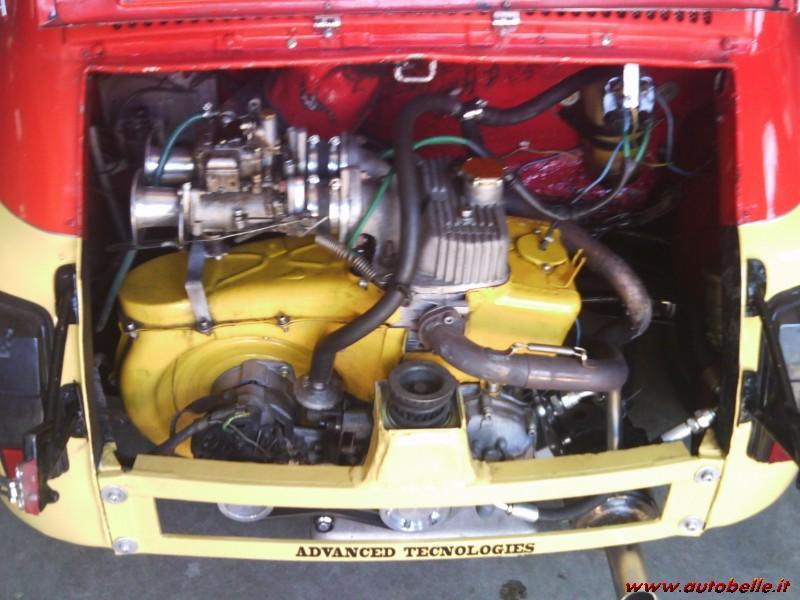 That leavers a lot of double layers of sheetmetal ( because of the routing of the incoming air), unless you gut the underside of it, and then you disrupt airflow. The next best thing is to make a new top cover in the shape of the underside of the stock cover. Better flow, less weight, but ugly. 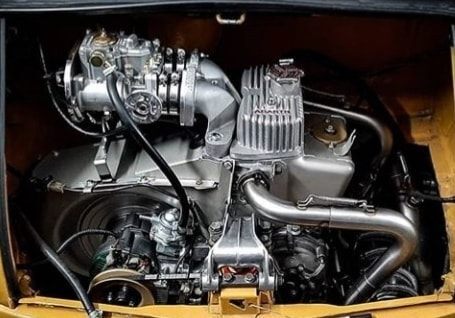 One last option is to get a cast aluminum piece. It is nice ( cant complain about a nice finned aluminum casting ) except its expensive, heavy, and flow wise no better than option 1. 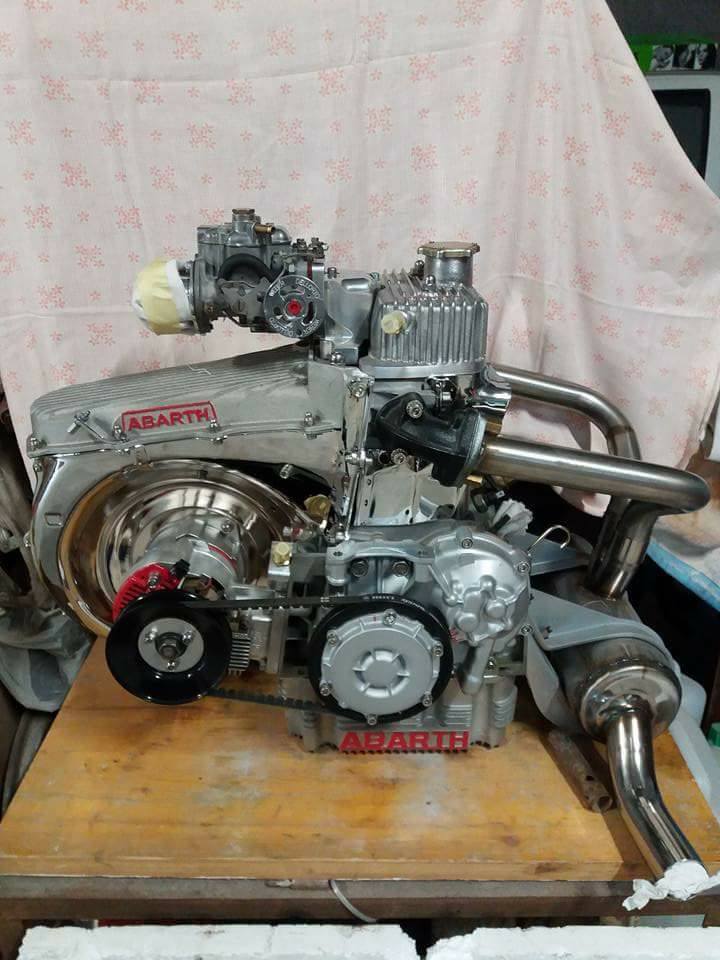 |
| |
|
|
|
|
|
|
|
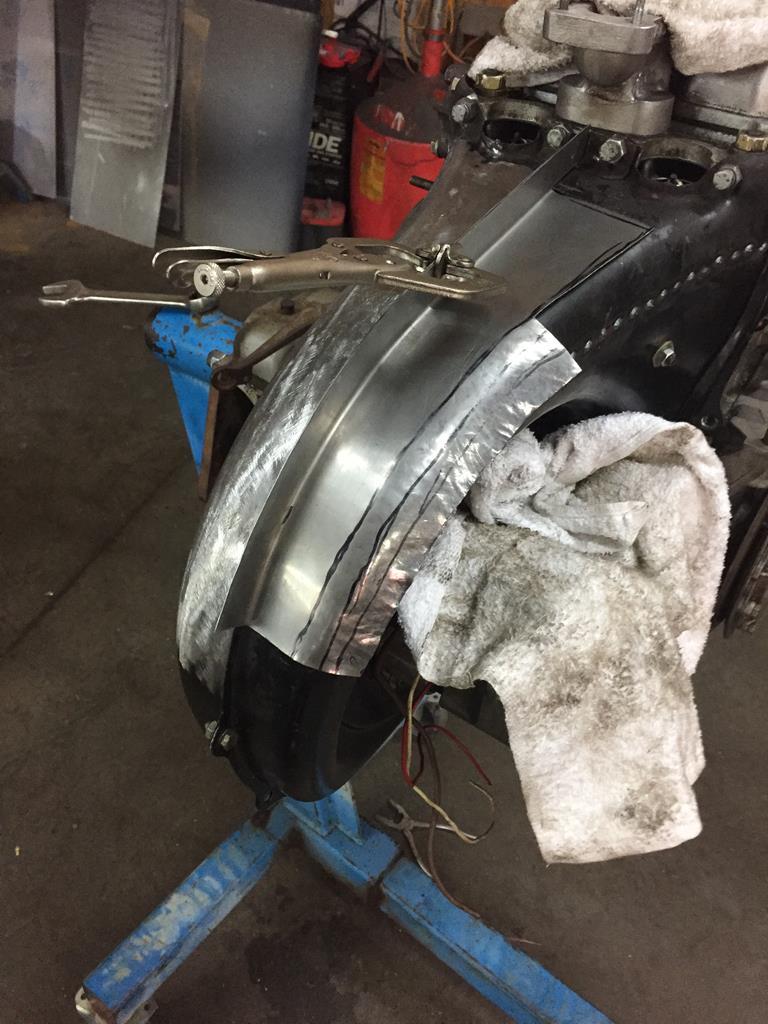
So I decided to do something different... I started with the stock setup 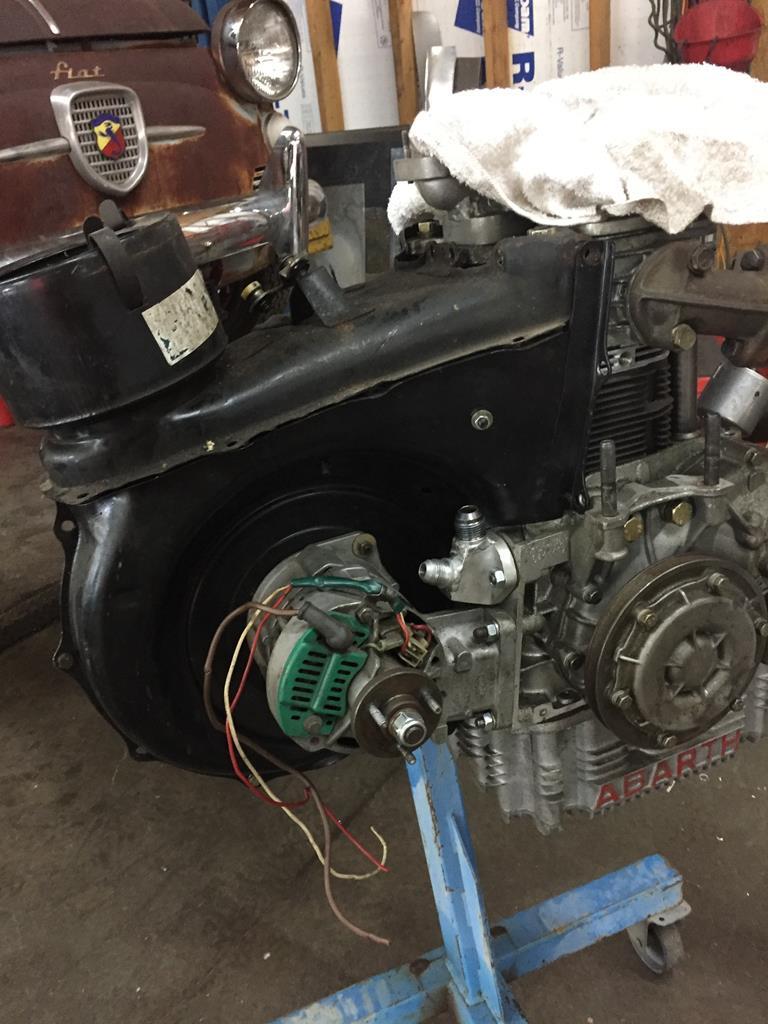 Turned the flange up on the lower parts, and cut away everything that wasn't right on the top part. 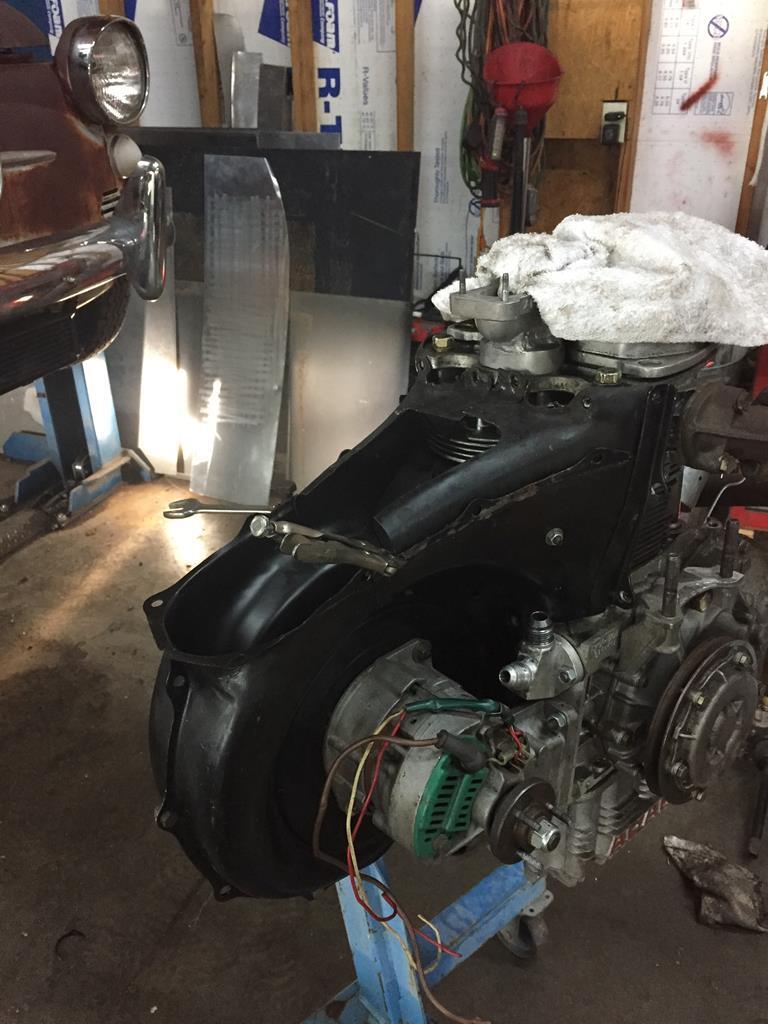 |
| |
|
|
|
|
|
|
|
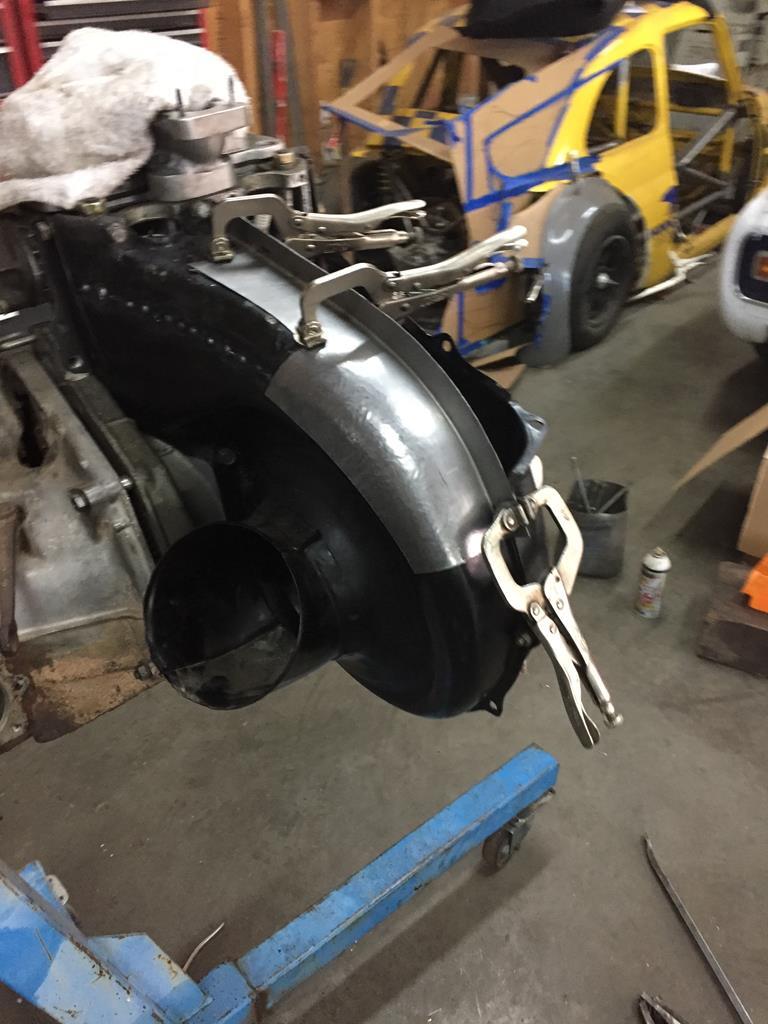
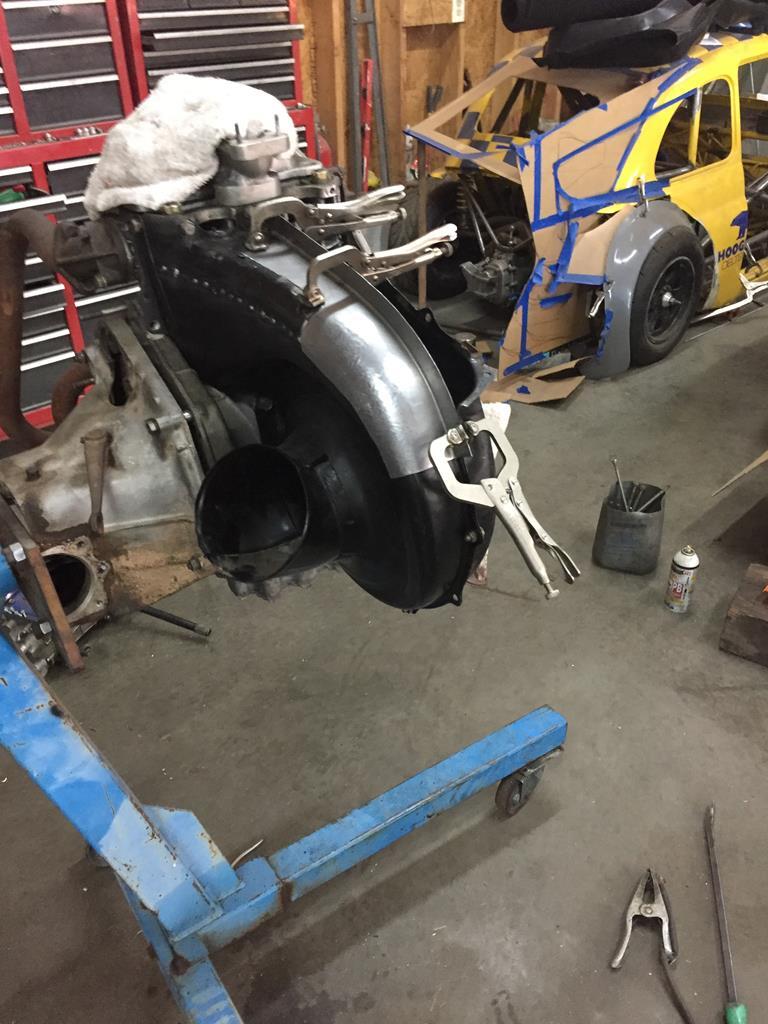
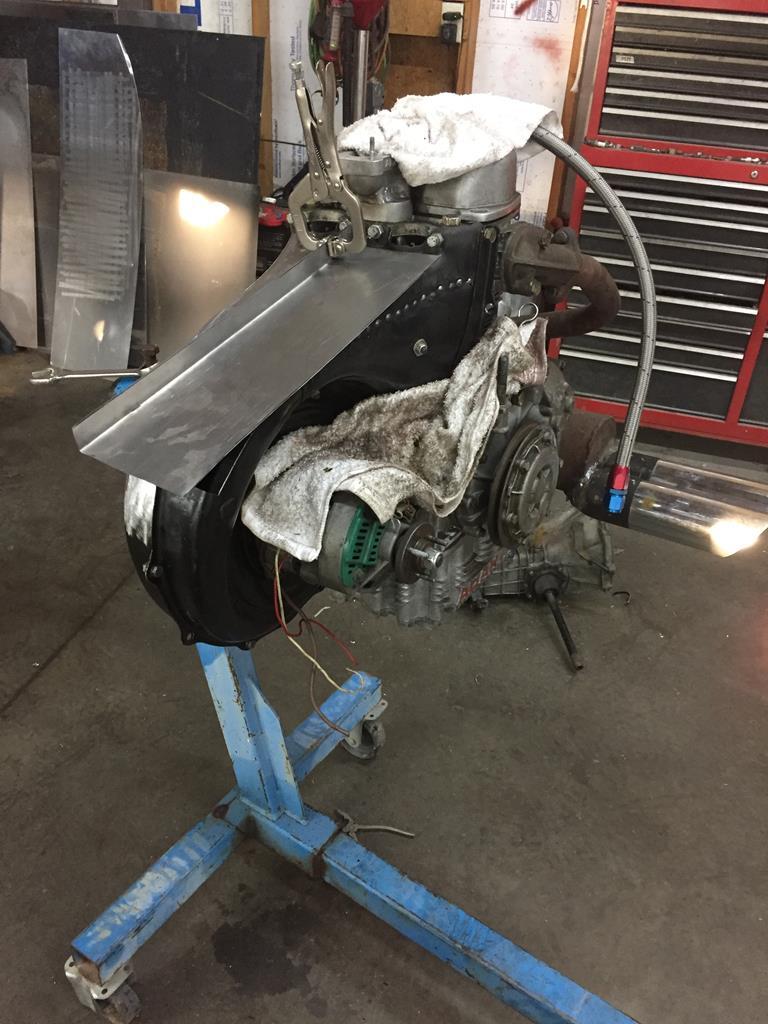
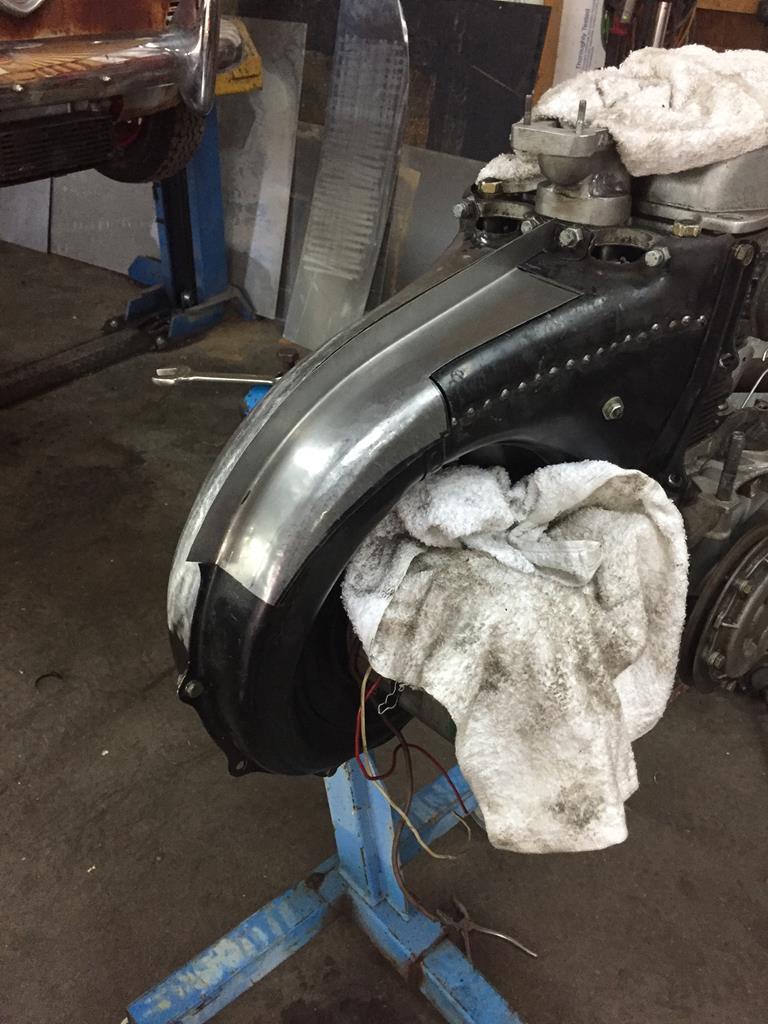
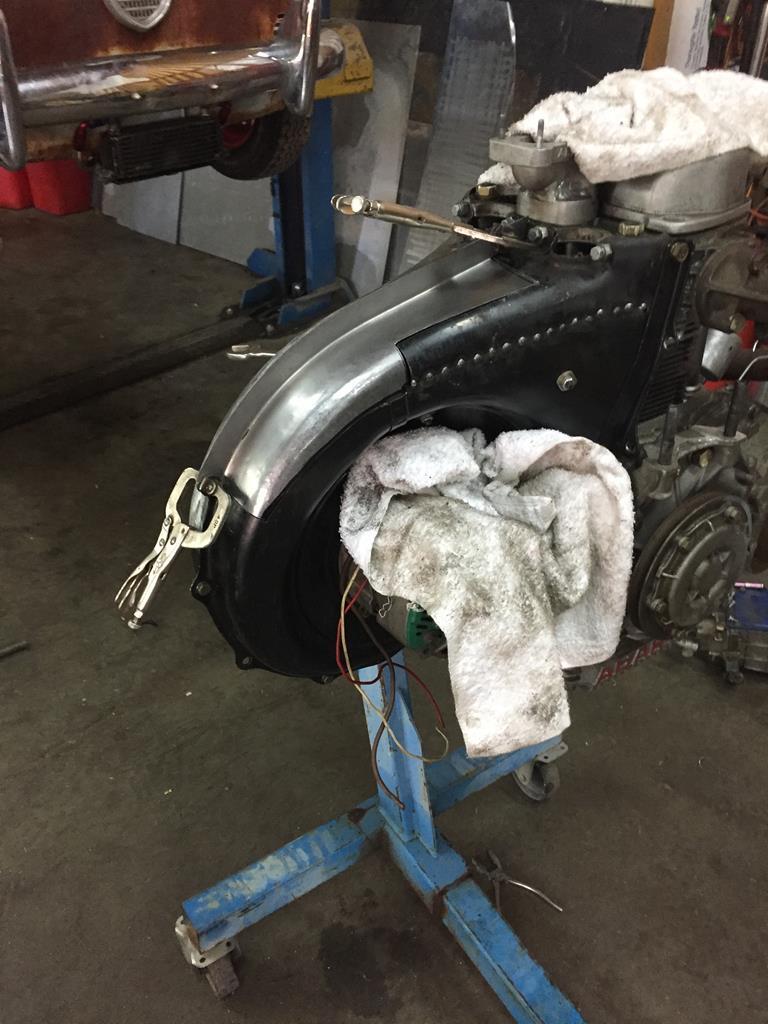
And I cut the part that flares out to meet the shape of the airfilter on the lower back side tin. 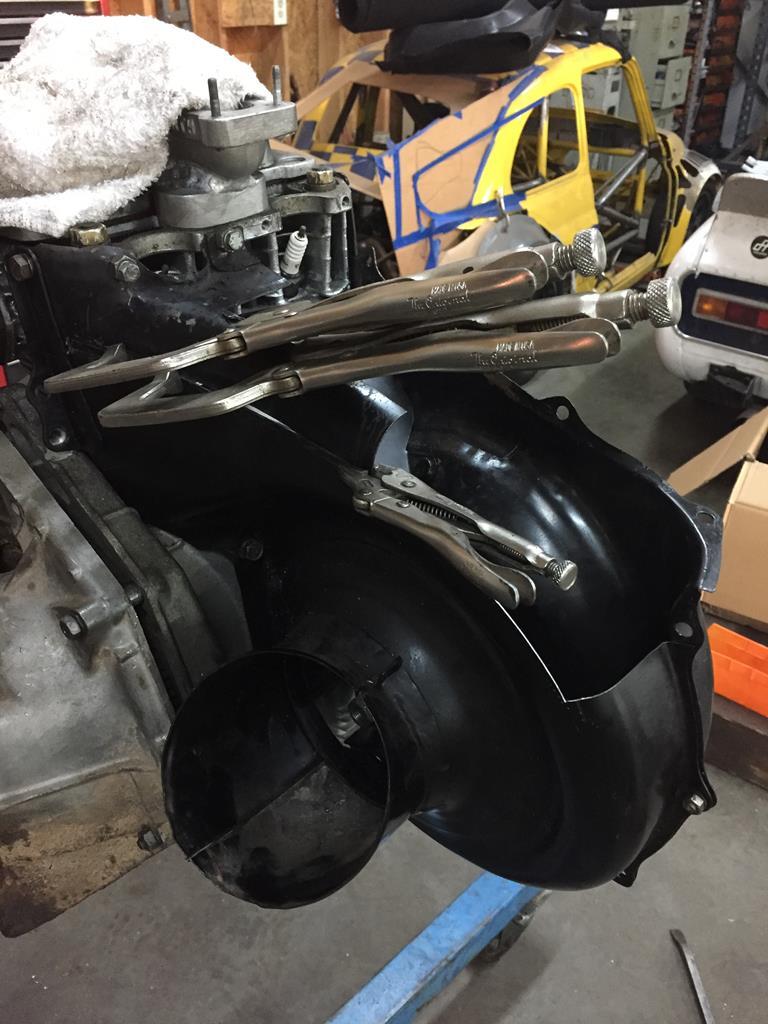 I tackwelded what was left of the top piece ( cut in 2, so I'm only working on the back part of it ), and I cut a piece of sheet oversize, and I put a 3/4" flange on it. 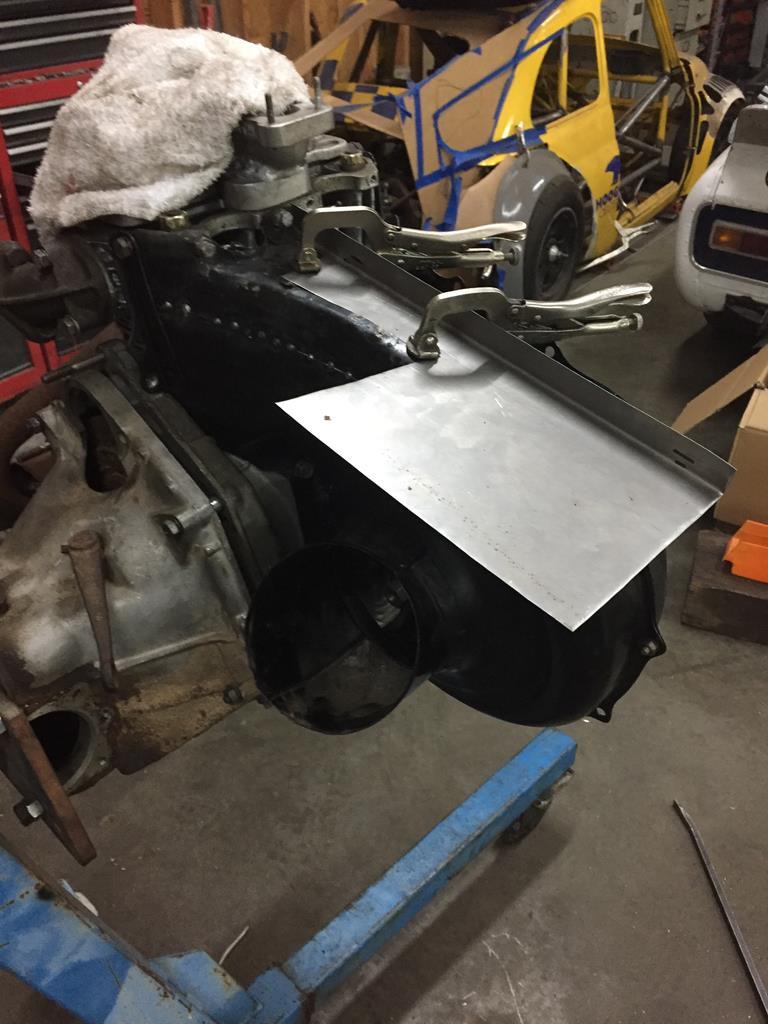 Stretched the flange to the correct outside shape of what the housing will be. 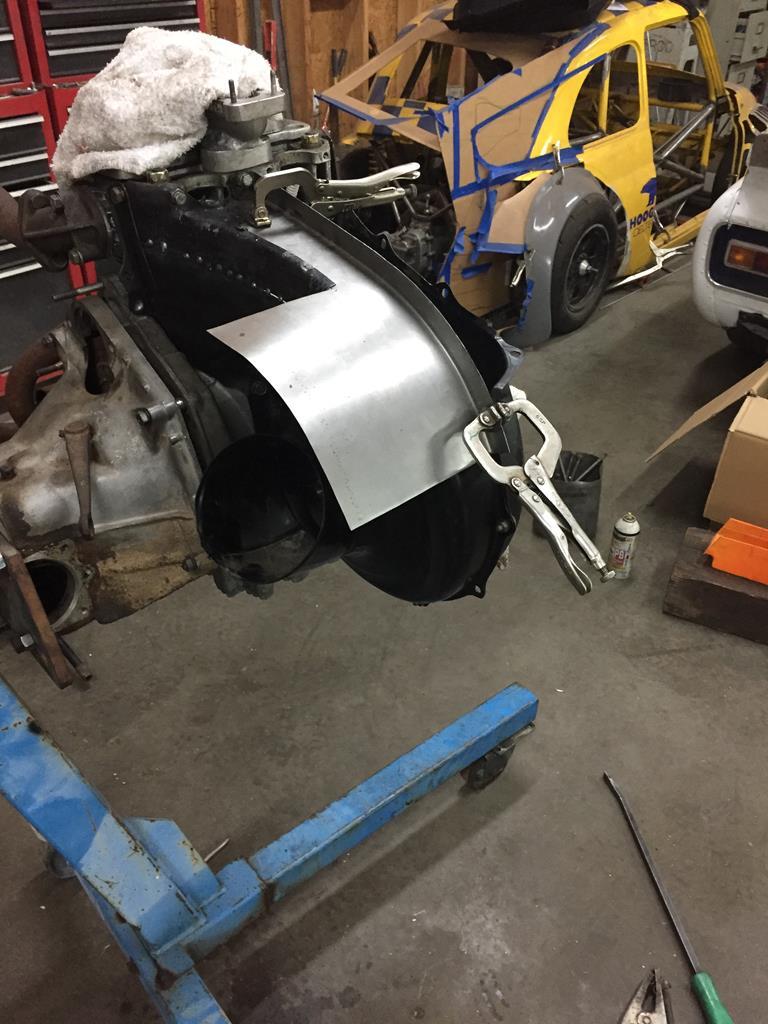 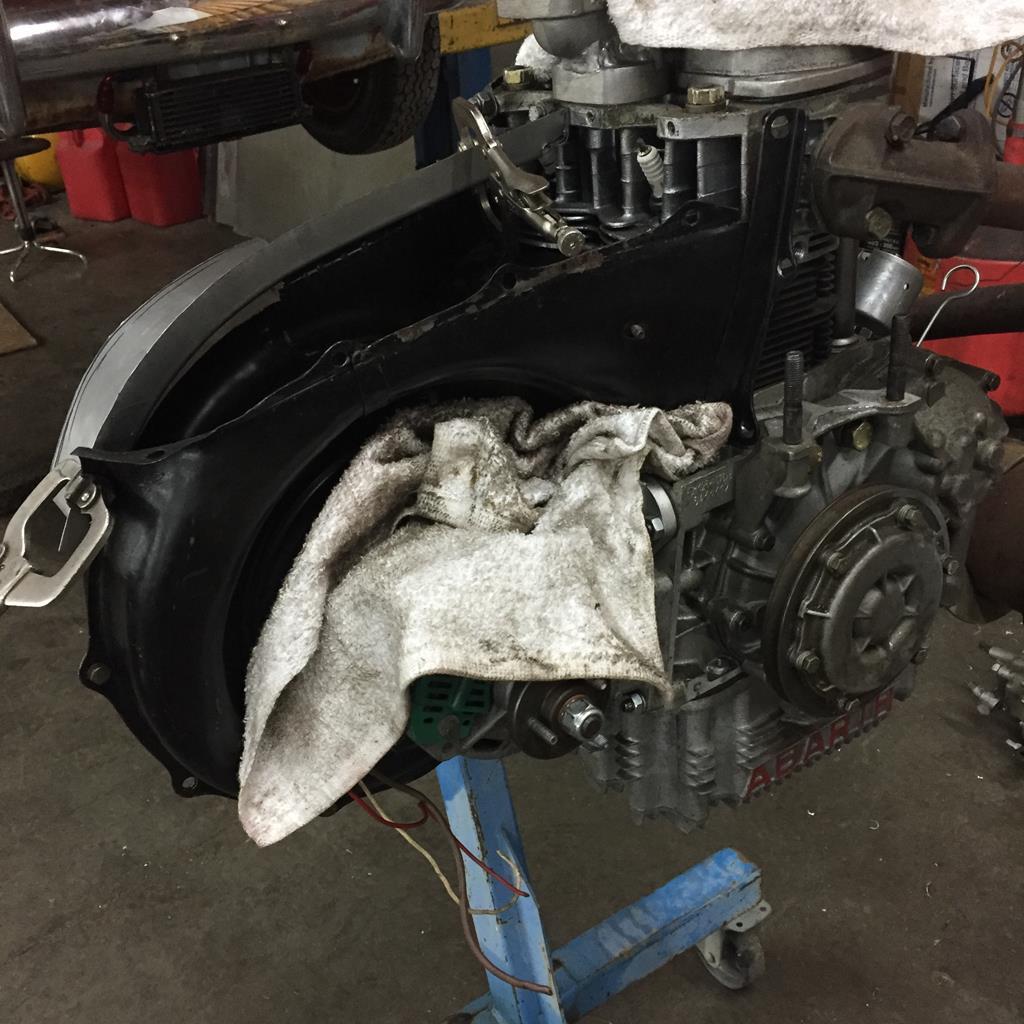 |
| |
|
|
|
|
|
|
|
|
|
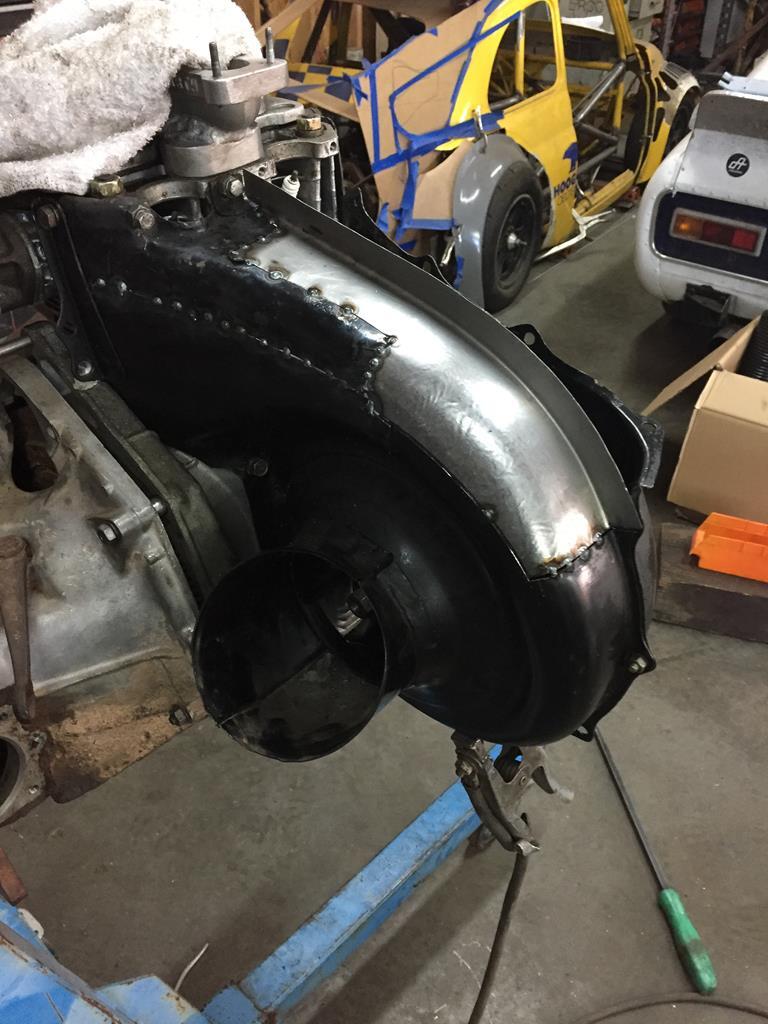
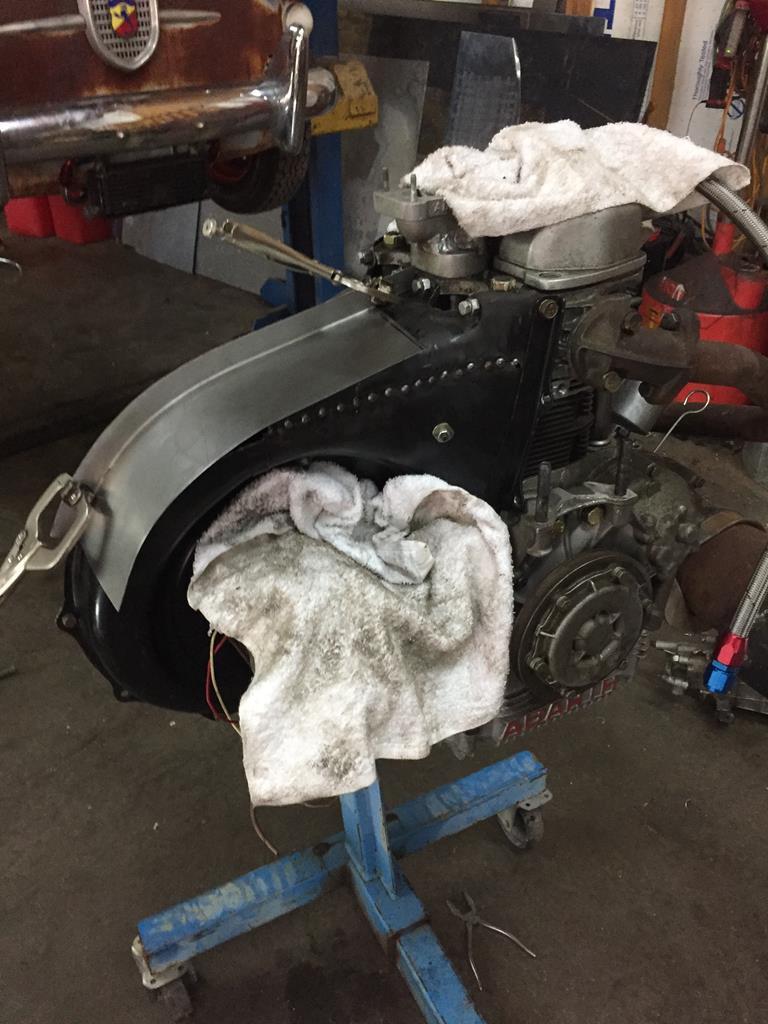
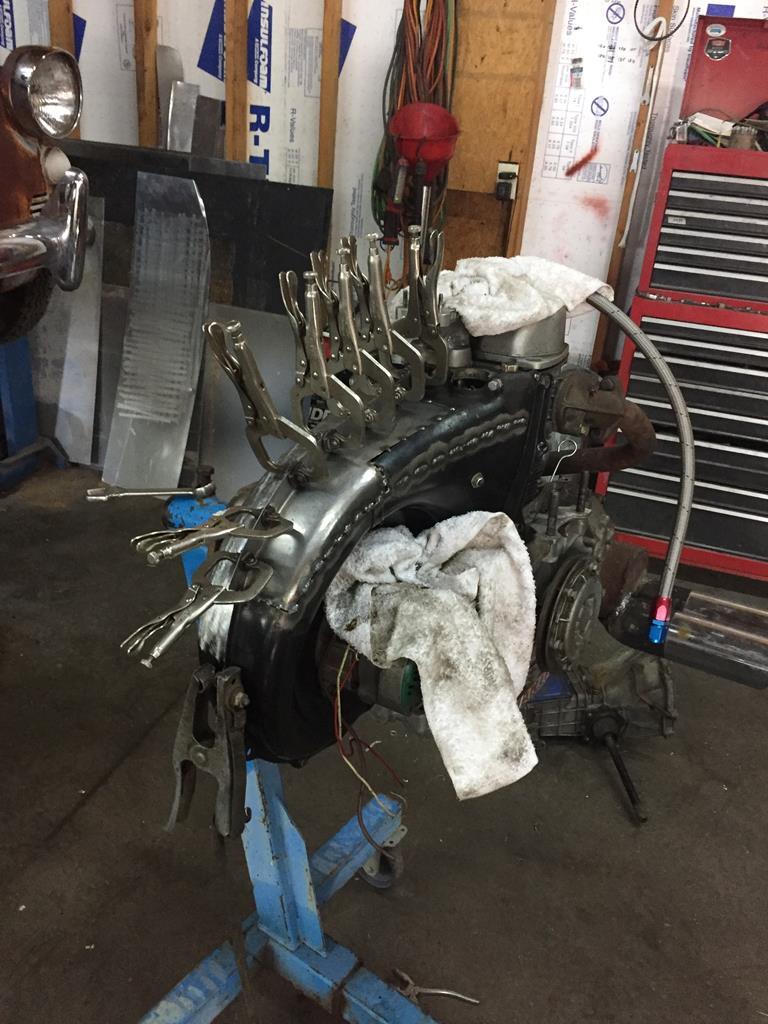
Welded. 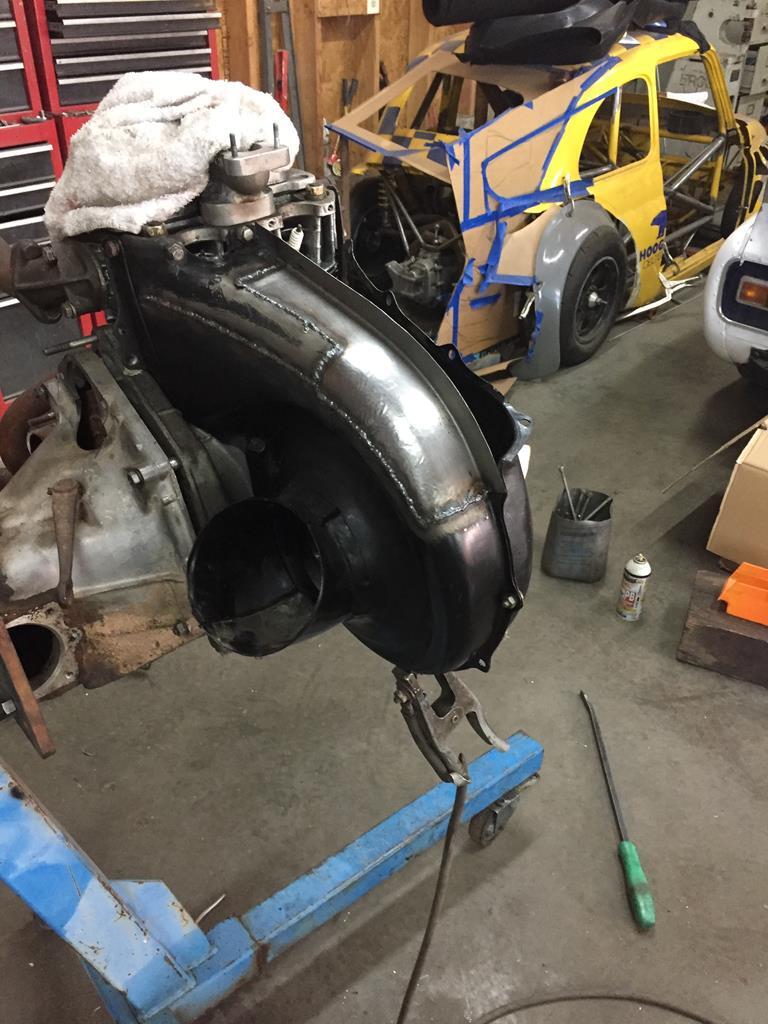 Welds ground down. 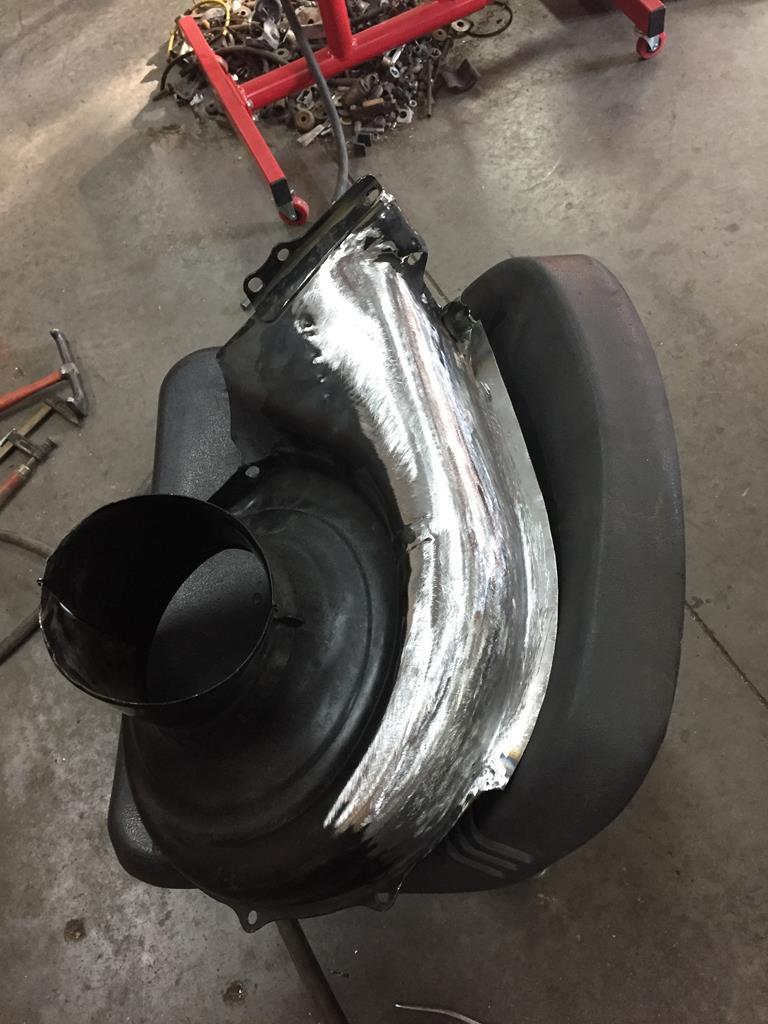 Inside. 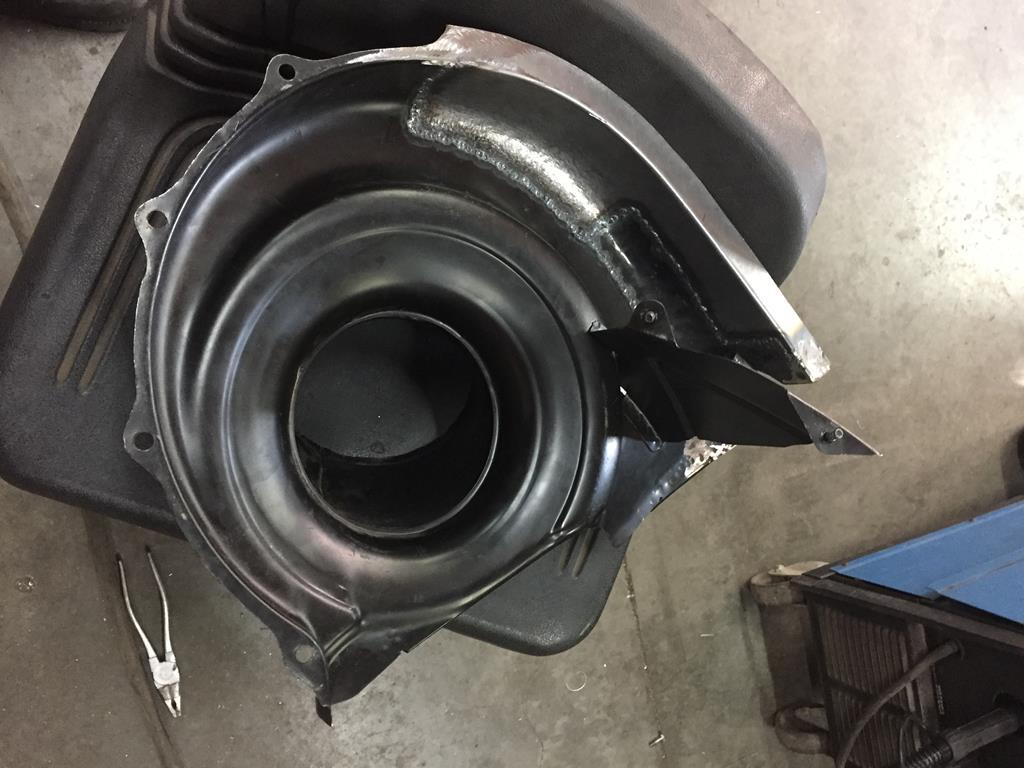 Back on the engine. 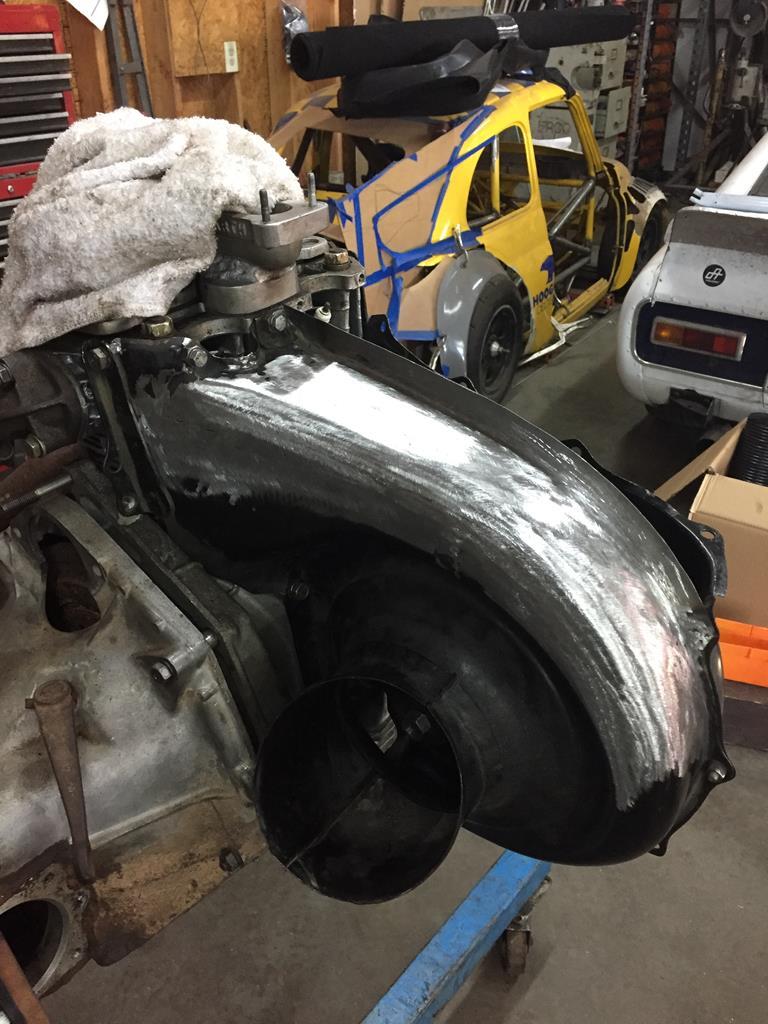 |
| |
|
|
|
|
|
|
|
|
|
|
|
|
|
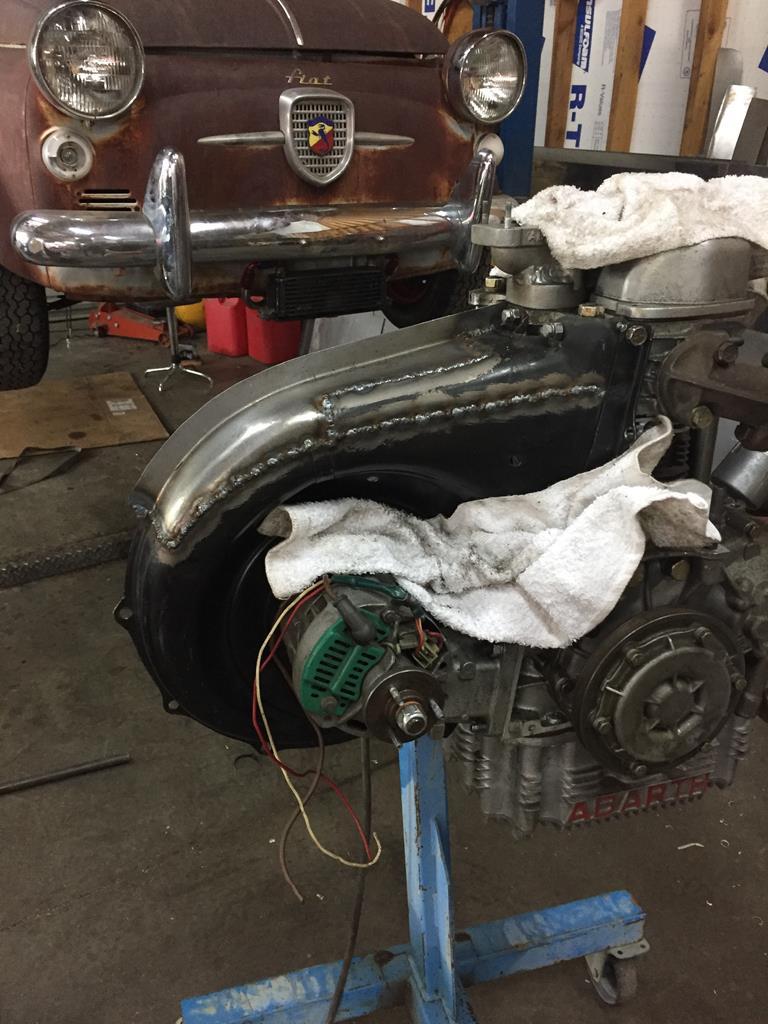 Ground down, and the flanges drilled and trimmed. 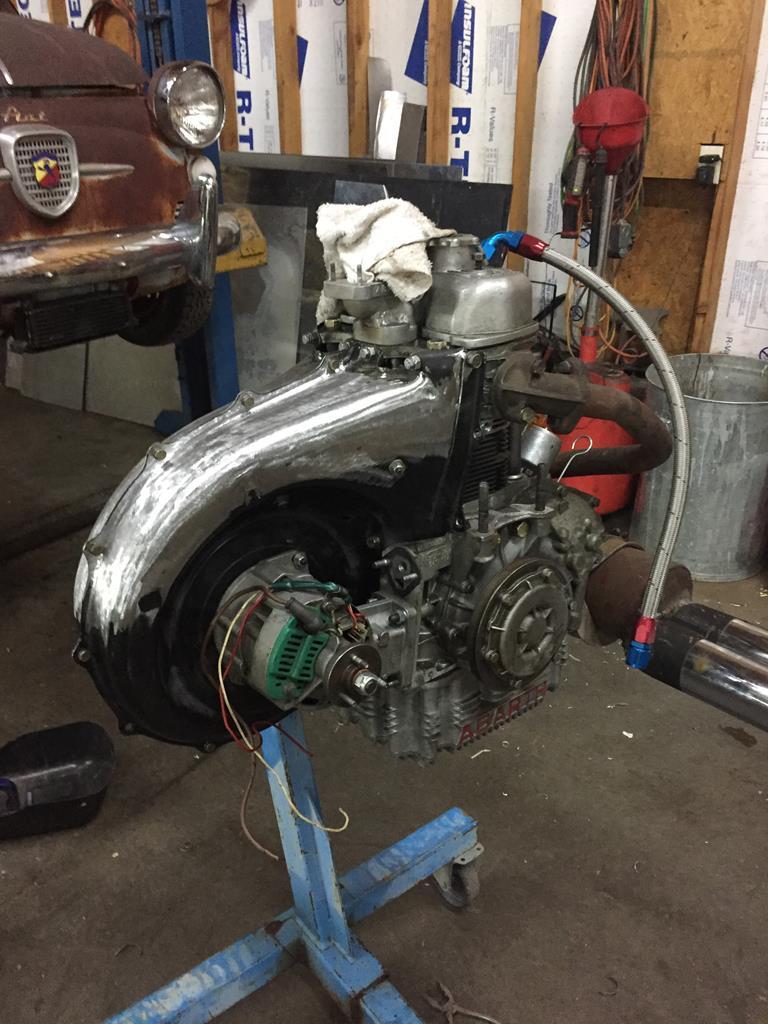 Pretty happy with how that came out. Now the lower corner ( more on that later... ) 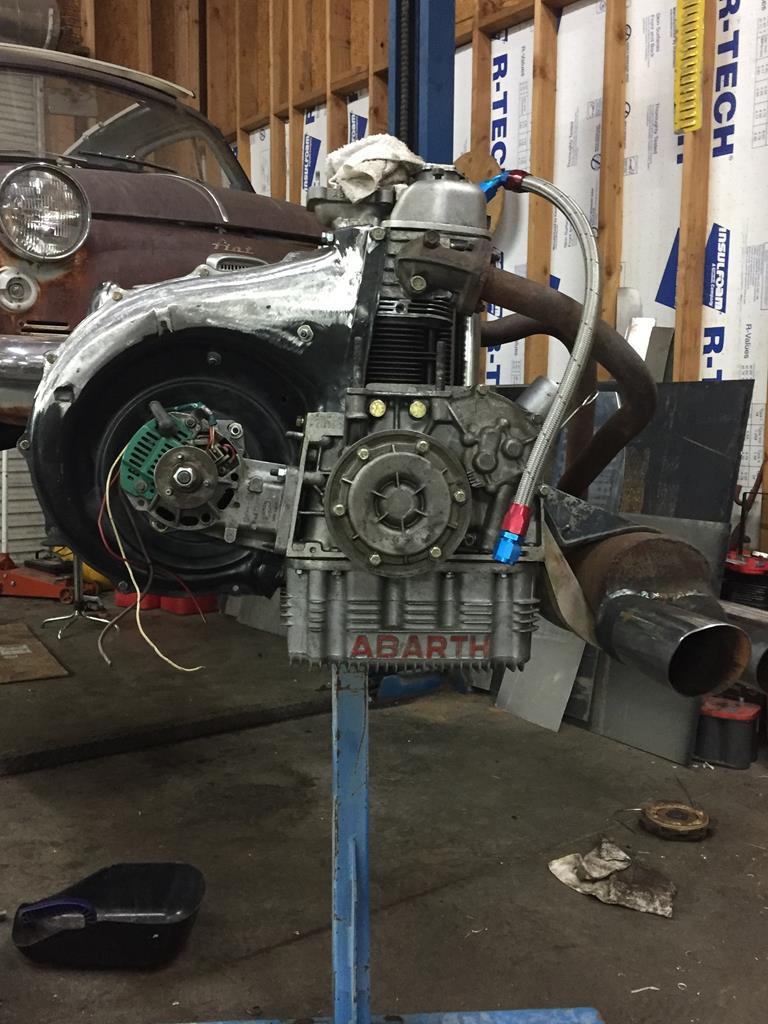 |
| |
|
|
braaap
Posted a lot
  
Posts: 2,744
|
|
|
|
Excellent sheet metal fabricating! (as long as I can judge this) or it was just sloppy machining... Maybe that, I always thought Italians are better cooks than engineers.  |
| |
|
|
logicaluk
Posted a lot
   Every days a school day round here
Posts: 1,373
|
|
|
|
|
An OEM looking solution, beautifully executed.
Perfect.
Dan
|
| |
|
|
|
|
|
|
|
|
|
|
Fantastic work as always!
Nice CAD teaser on your Yellow race car! I hope you are going to supply more information please?
|
| |
|
|
|
|
|
|
|
Thanks dadstaxi . Absolutely  As soon as the Nuova is on the road, I'm getting back to the yellow one. Actually, the break I took from it has been good. I've had time to do several different CAD ideas & leaving them on for some time to look if it was right or could be improved. Result is, there will be some changes. I'm going to re-do some of the cage ( which I've just redone... ) Right now I'm thinking about relocating the radiator from the front to twin side ones, and angle sectioning the car to get the nose down. And also,changing the back into sort of a fastback shape ( while keeping the rear of the roof intact underneath it, like they used to do on some Group 5 racers ), to clean up the aero on the rear of the car. I'll pick up the buildthread on that one as soon as I've made some progress...  |
| |
|
|
|
|
|
|
|
|
Looking forward to seeing more please!
Would it not be safer and more efficient to put all radiators / coolers etc in the new rear structure safely away from debris or impact and in channeled airflow?
|
| |
|
|
|
|
|
|
|
The main reason for me is managing airflow. Before I took the yellow 500 apart I was experimenting a bit with aero, and I was surprised about how much advantage can be had. ( I know aero is important, but that a amateur like me can take big steps like that, was unexpected) So the thinking about moving the rads to the side is that it is a lot easier to keep air from getting under the front if you don't let it in with a big hole for a rad. Also, with side rads, I can duct the air coming out of the rads into the engine bay which would help a little because that air will end up in the wake behind the car ( which could help with drag ) It will have tunnels under the car ( I actually built the suspension around the tunnels instead of the other way around ) ducts to get air out of the front wheel wells, and some other cool stuff I've been reading about. Its all a big experiment, but it will be fun to learn...  |
| |
|
|
|
|
|
|
|
|
Thanks for that. I look forward to seeing more of it.
|
| |
|
|
dikkehemaworst
Club Retro Rides Member
Posts: 1,636
Club RR Member Number: 16
|
1958 Fiat 500 Nuova Americadikkehemaworst
@dikkehemaworst
Club Retro Rides Member 16
|
|
|
Cheeky one, but i always wanted to put raised Abarth lettering at this place on the cowling. ( photo ) i even cut out the lettering from a welding plate wich filles the hole if you take of the airfilter housing. But i really lack any skills to achieve anything you are making..... Jezus, mn Engels zuigt echt vanavond. Sorry.  |
| |
|
|
|
|

 )
)

 )
)


