|
|
|
|
|
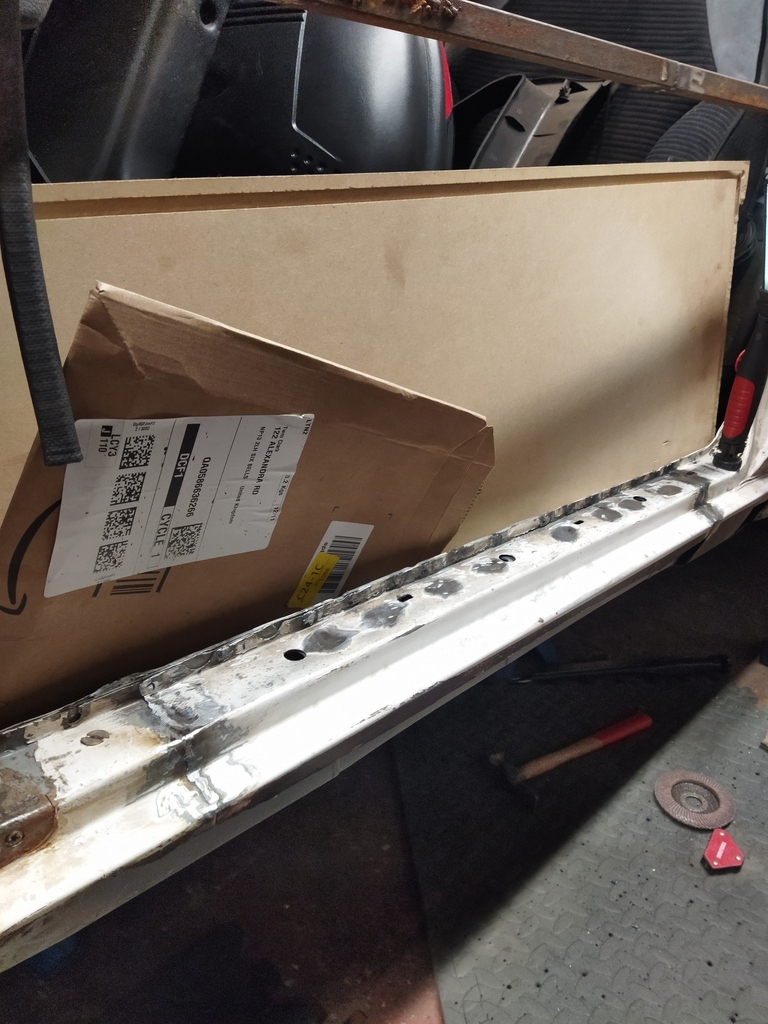
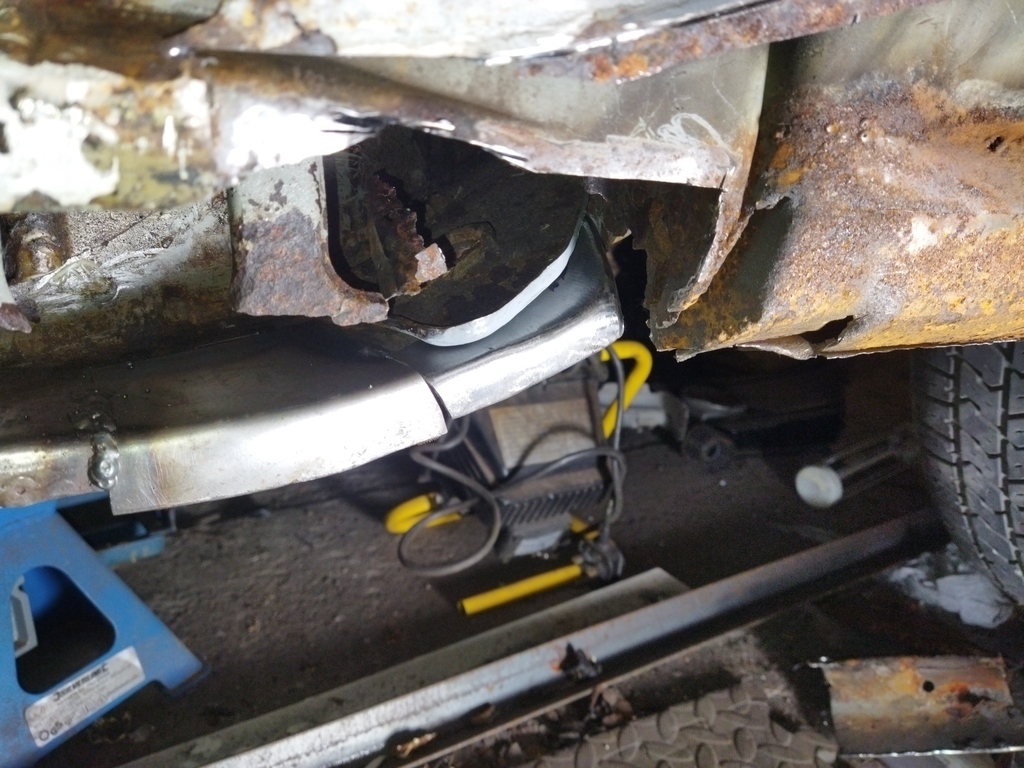
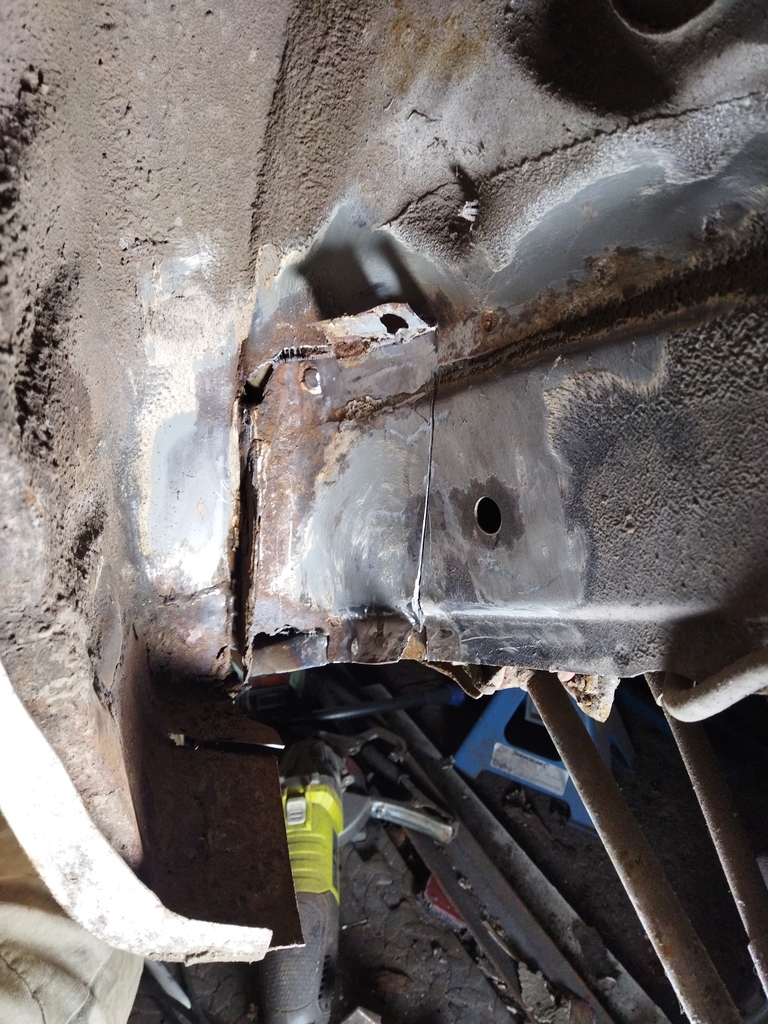
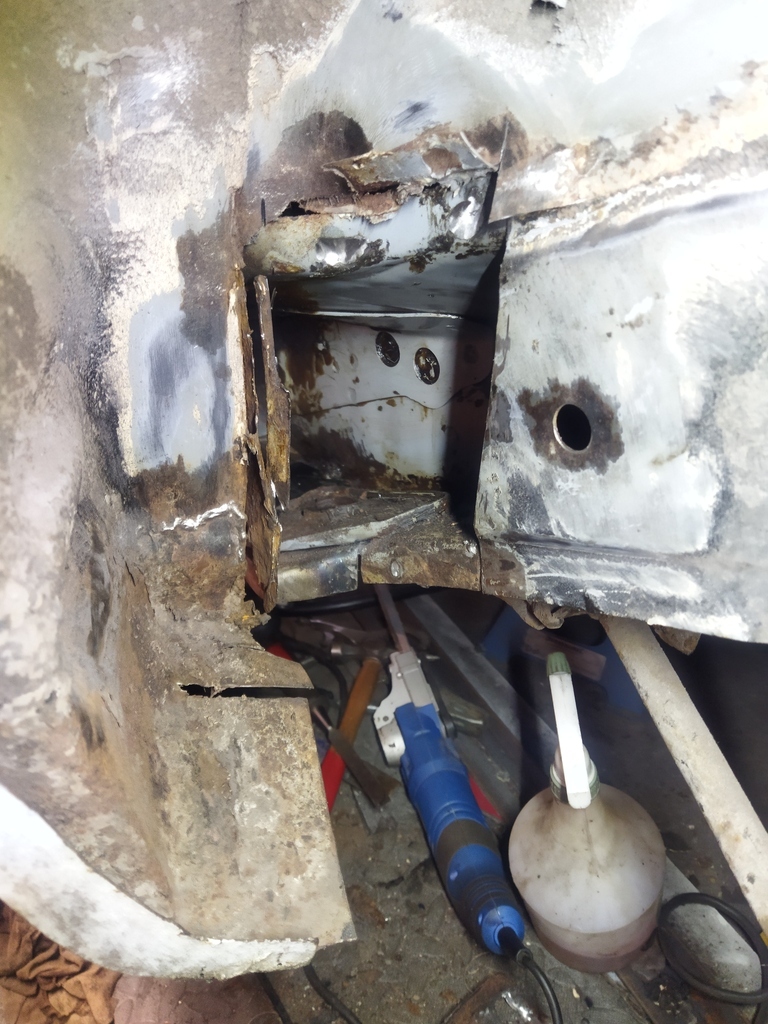
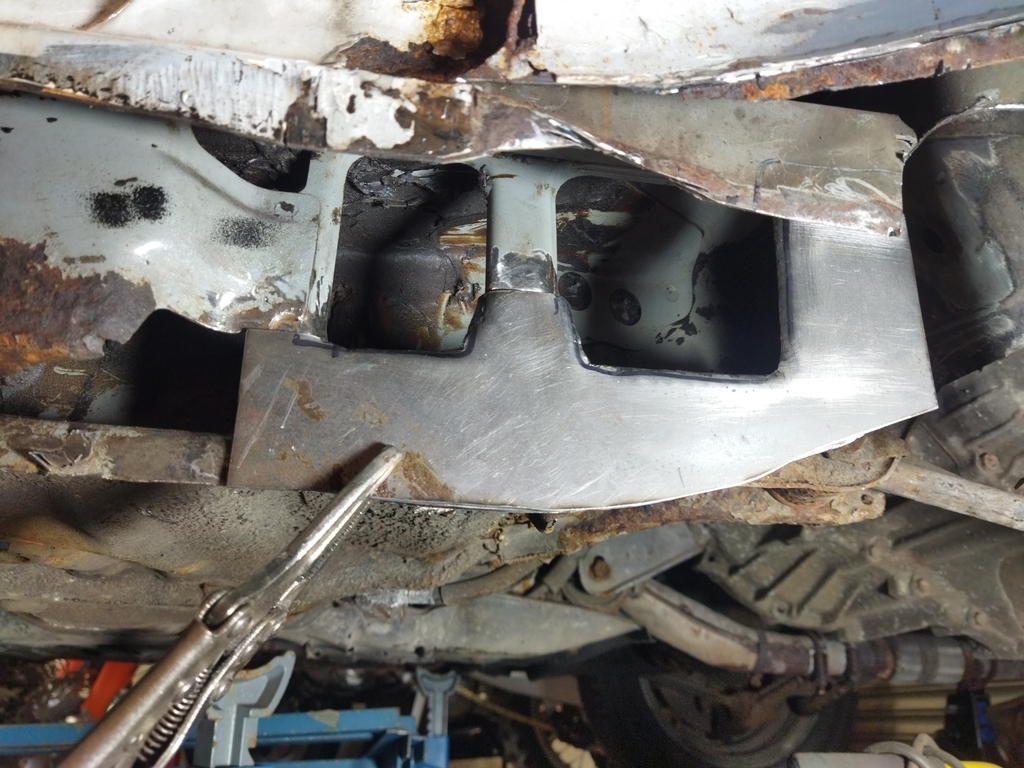
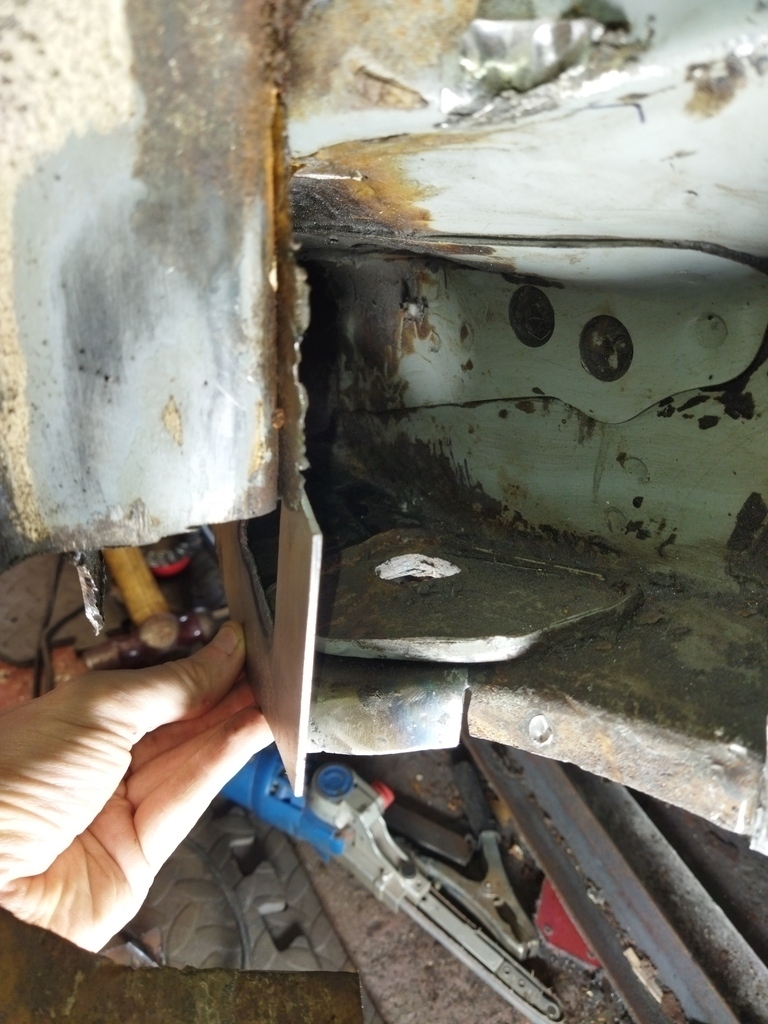
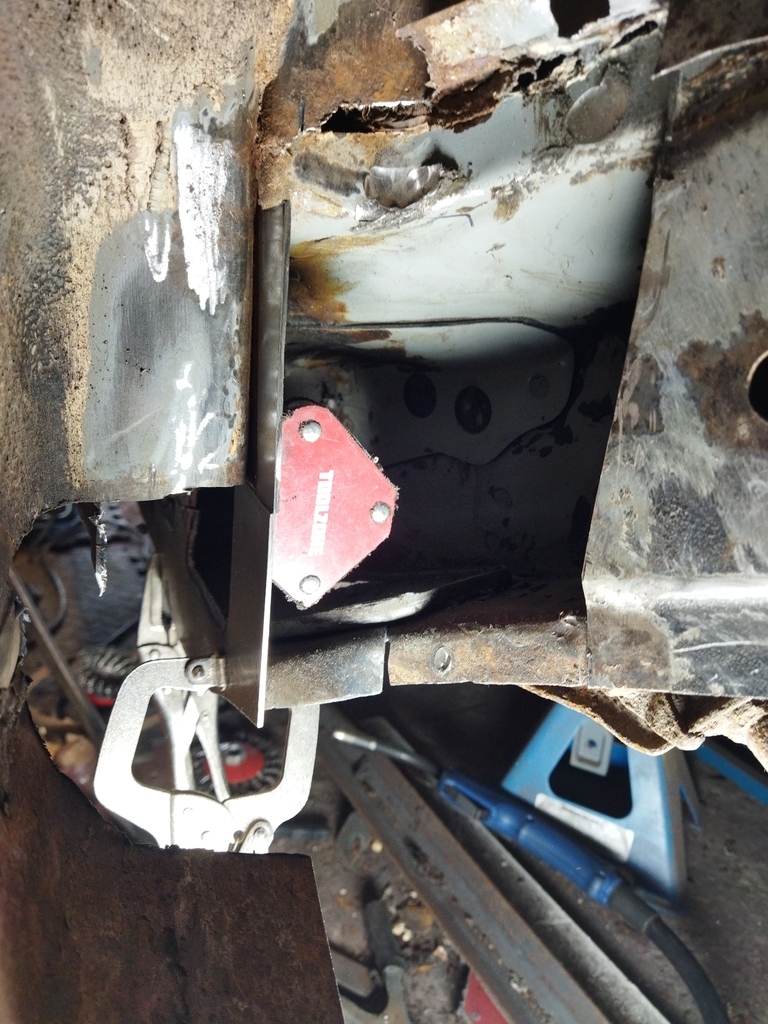
I cant believe it's been 4 months since my last update... I've spent the last few months fixing motorbikes so this has been sidelined again. I figured this lockdown is the perfect time to get a load of work done. Thought I would start by tackling the driver said chassis rail today. I had a look at the replacement section and that too has a bit of rust on it, so I think making a replacement panel would be a better option. This is my first time making replacement panels so I don't expect it to end up perfect. First I made a quick template with some cardboard. Then I realised it was curse word and made another :lol: Traced that onto some 2mm steel and I got this, which was then bent into shape using the vice and a big hammer.  Next up was to make a nice hole for it.  It fits ok. It could be a little neater, but I think I'll get better at that. I didn't realise at first that it's not a completely flat panel and bends right at each end, so a little more work with the hammer sorted that.  I'm not too happy with the rust that's still there on the wall of the box section as it's gone a little thin and I would need to sand it back quite a lot, so that came out too.  The rest of this panel seems to be just surface rust that I can grind out. My next job will be to make a patch to fill the other hole. I'm waiting for a finger sander to turn up so I can clean the rest of this rust off before I weld anything in. |
| |
|
|
|
|
|
|
|
|
|
Bit of a small update today. I was hoping to use this past weekend to finish welding in my front chassis section, but a few days ago I knocked over my gas tank and broke the gauge so I'm waiting on a new one. I keep forgetting the welder is connected to the tank and pulled it over when I was moving it. Instead I decided to tackle the front wheel arch areas. The drivers side has some pretty bad rust that you can see in a previous photo, but the passengers side is much better, with just some rust on the floor. here is how it looked  I'm sure it's probably common to just cut out the rusty areas, but I figured it's worth drilling a few spot welds to remove the panel so I can paint inside this area and stop this from happening again. My plan was to remove it in one piece including the circular bit, but after tediously doing half of it I decided to cut it off so I can see if it's worth doing the rest. ![[img]https://i.imgur.com/pb8K8hm.jpg[/img]](https://i.imgur.com/pb8K8hm.jpg) It's definitely better inside than I thought. I did stick my little camera probe into here before and I was expecting it to be a lot worse, but what I saw was all loose flakes of rust that came from somewhere. A peek inside what I didn't remove shows it has some surface rust, so I'll remove the rest of the panels. Part of me just wants to wire brush it and shoot some wax in there, but I think it will be worth the effort. ![[img]https://i.imgur.com/PXP5AAt.jpg[/img]](https://i.imgur.com/PXP5AAt.jpg) I've also been busy removing the panels off the other side, I've just got a few more spot welds to go. That one has a lot more rust damage, which is funny considering the chassis rail was actually much better than this side. |
| |
|
|
|
|
|
|
|
I've done a bit more work the last few days and removed the side panel from the drivers side. Doesn't look like much, but there was a fair few hours of hammering and hammering involved. I also bought a new spot weld drill bit which is more like a hole saw and it's far better than the other more normal style spot weld drill bits I've been using. The new one causes less damage to the rear panels and is larger so when I'm slightly off center I don't have to spend ages trying to break the weld. I really wish I had bought these to start as it would have saved me hours of work :lol: You can also see here that I already welded in one of the patches from before. I'm still waiting on a new gauge for my gas tank though so I cant do the other.  This part here is the worst of the rust, but I think I can fix it easy enough. It looks to me like water might be getting trapped in the gap between two layers here so I need to see how I can improve it.  The other bad spot is in the corner. This is also gives me a good look into the inner sills which seem to be pretty decent.  Overall this was well worth doing so I've decided to do the other side too even though it's not as bad, just so I can remove whatever rust is there and treat it properly. This whole area has previously been sprayed with both wax and some tar like product, so I want to be able to remove all that too. I'm desperate to actually start welding new stuff in though as all I've done so far is remove stuff. |
| |
|
|
|
|
|
|
|
|
I didn't realise that there was a double box section down there. Interesting.
There's a fair amount of work getting that apart. I stuck a camera down the chassis leg of mine (from the front where the bumper mounts) and there were rust flakes in the bottom.
I'm ignoring it at the moment but one day I might be following your example.
James
|
| |
|
|
|
|
|
May 11, 2020 19:42:10 GMT
|
I didn't realise that there was a double box section down there. Interesting. There's a fair amount of work getting that apart. I stuck a camera down the chassis leg of mine (from the front where the bumper mounts) and there were rust flakes in the bottom. I'm ignoring it at the moment but one day I might be following your example. James I think it's worth doing before things get too bad. I think cutting it off below the spot welds at the top and just seam welding it back on could possibly make it much easier. You do end up bending the remaining panels quite a bit sometimes when trying to separate things. Maybe this will encourage you. I finally got the passengers side off and it's worse than the other side was. Looking back at the photo I posted looking into this area previously I can actually see how what I thought was just rust flakes was actually this big hole... I'm very glad I spent a few hours getting this side off too, originally there was so little rust on the outside that I wasn't going to bother. Oddly there is a bunch of Mig welding wire stuck to the bottom of this, but I cant see any evidence of a repair.  |
| |
|
|
|
|
|
Sept 20, 2020 22:12:48 GMT
|
Once again time has flown by and not much has gotten done. I did weld in the patch I made, but I don't have any photos of that. I've been working on getting the new chassis rail cut to length so I can weld it in. I've been taking my time with it so I don't screw up the measurements but I've got it about right now. I do have a bunch of diagrams from Toyota with different measurements on the chassis so I can get it perfect Not welded in yet as I need to repair the frunk from cutting the old part out, but it's starting to look better.  For some reason I cut out this slice of the frunk too. I think at the time I didnt really understand how it all fit together with spot welds so I just cut it off. I ended up using the bottom piece that I cut off and remaking the top as it was in pretty poor shape. Still some pretty big gaps in it but I think I can bridge most of it up with some weld but I've been waiting on some large clamps to hold some copper behind it so that's my job for tomorrow.  |
| |
|
|
|
|
|
Sept 21, 2020 16:58:28 GMT
|
|
It might be less frustrating to make a new bit that to chase hoes around.
James
|
| |
|
|
|
|
|
Sept 22, 2020 22:07:59 GMT
|
It might be less frustrating to make a new bit that to chase hoes around. James Your probably right but I was getting a bit frustrated with this bit and figured it would be interesting to see how large of a gap I can reasonable weld. It's probably a bit of a bodge really. It's turned out ok so far.  |
| |
|
|
|
|
|
Sept 23, 2020 21:20:46 GMT
|
|
Ah well, I'll always support somebody who's learning what they can and can get away with. Nothing wrong with experimenting!
I also realise that I made a typo. I would like to make it clear that I don't normally chase "hoes". Well certainly not when Mrs Sweetpea is looking! "Holes" on the other hand are fair game.
|
| |
|
|
|
|
|
|
|
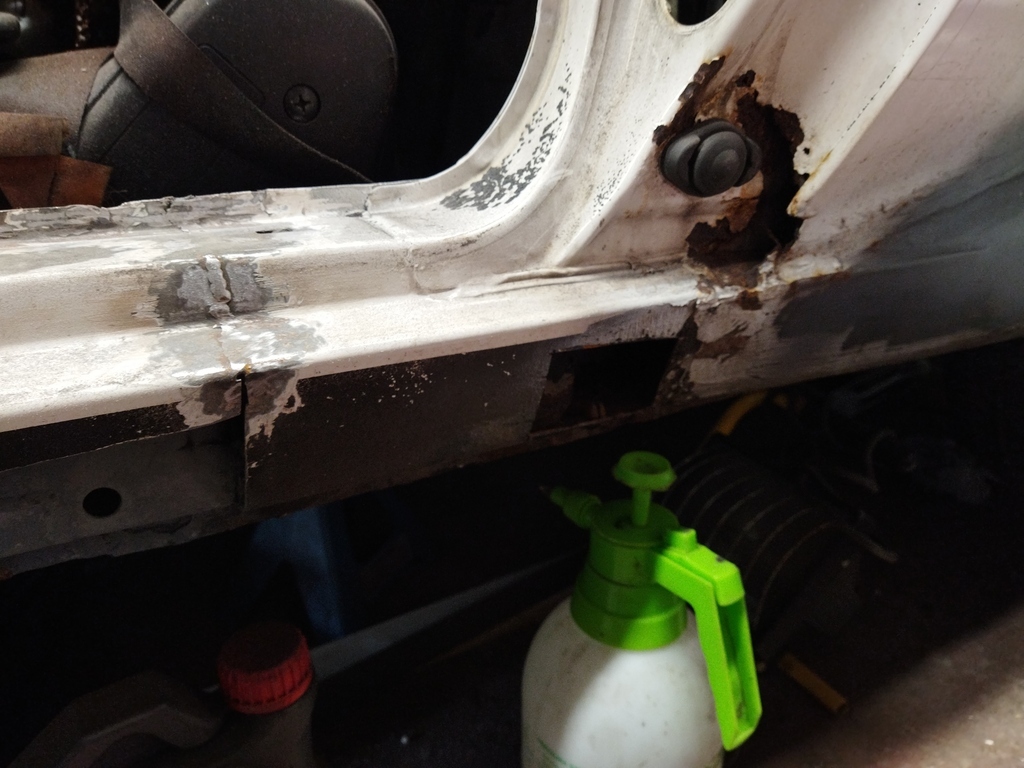
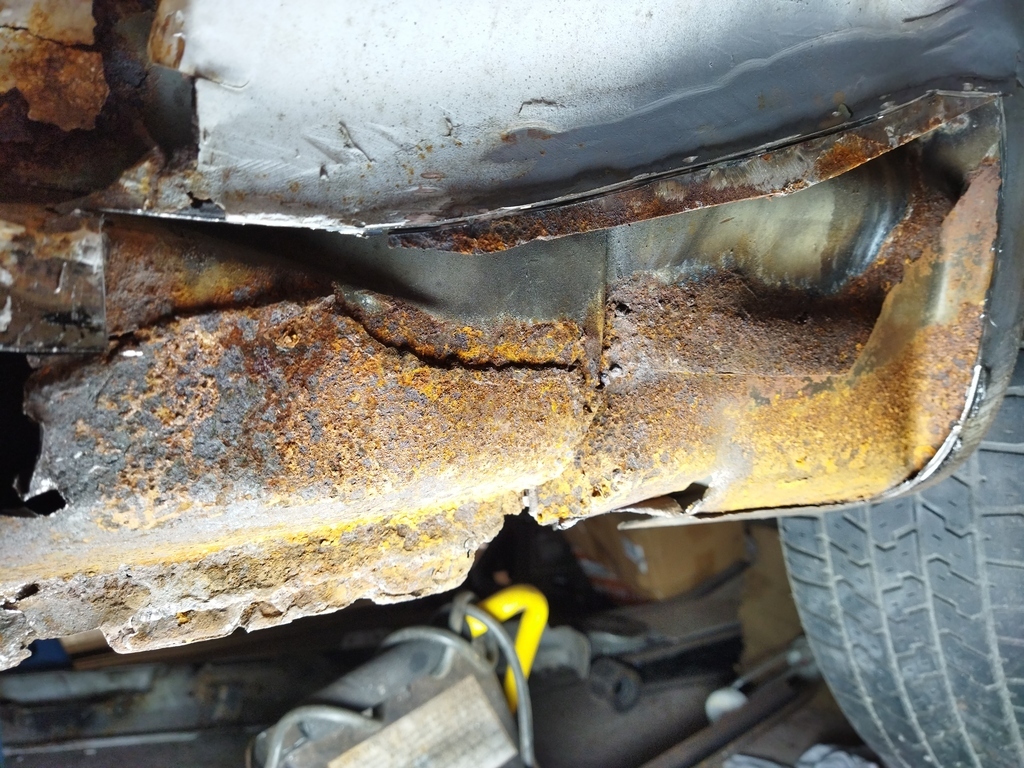
I suck at updating this thread, it's been another year already  Work hasn't stopped though so I'll post all the important bits. Finally got the new bit of chassis welded in, which gave me the opportunity to put the car partially back together for the first time in years. It took quite a bit of work and made me realise cutting a section from a donor car wasn't the right decision as I could have repaired it and it would have been a lot easier. Ignore the mess, the car has become somewhat of a storage area... It was really odd to see the car back together though. 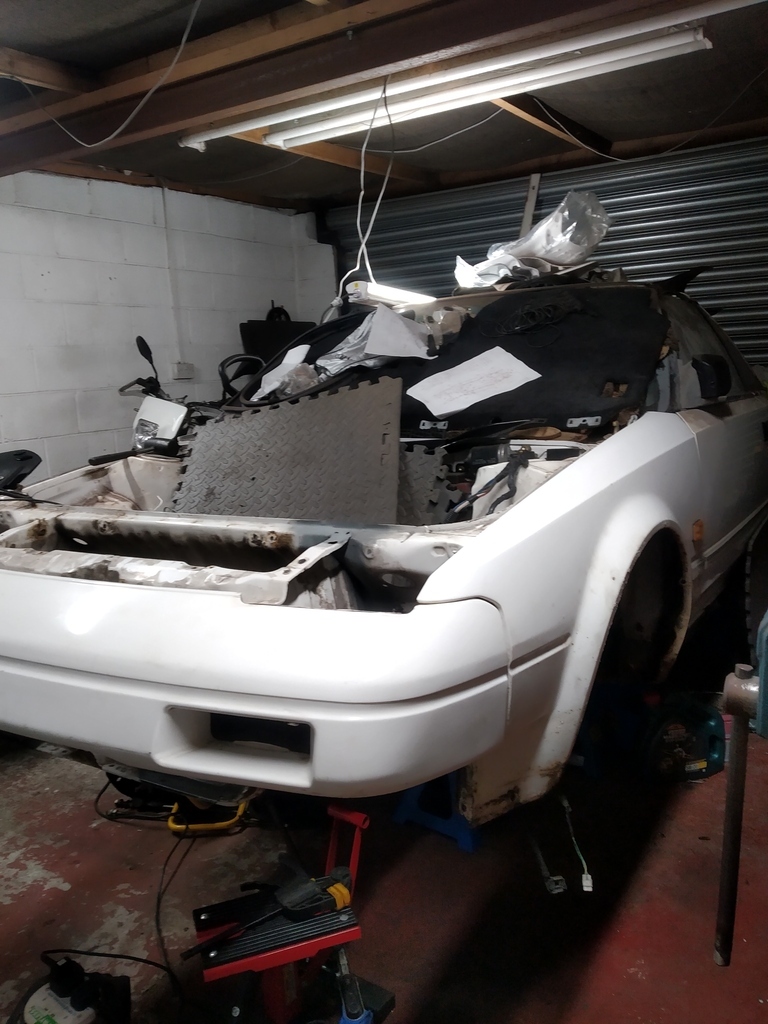 I also added these into end of the chassis as I'm sure it's where the water has been getting in. 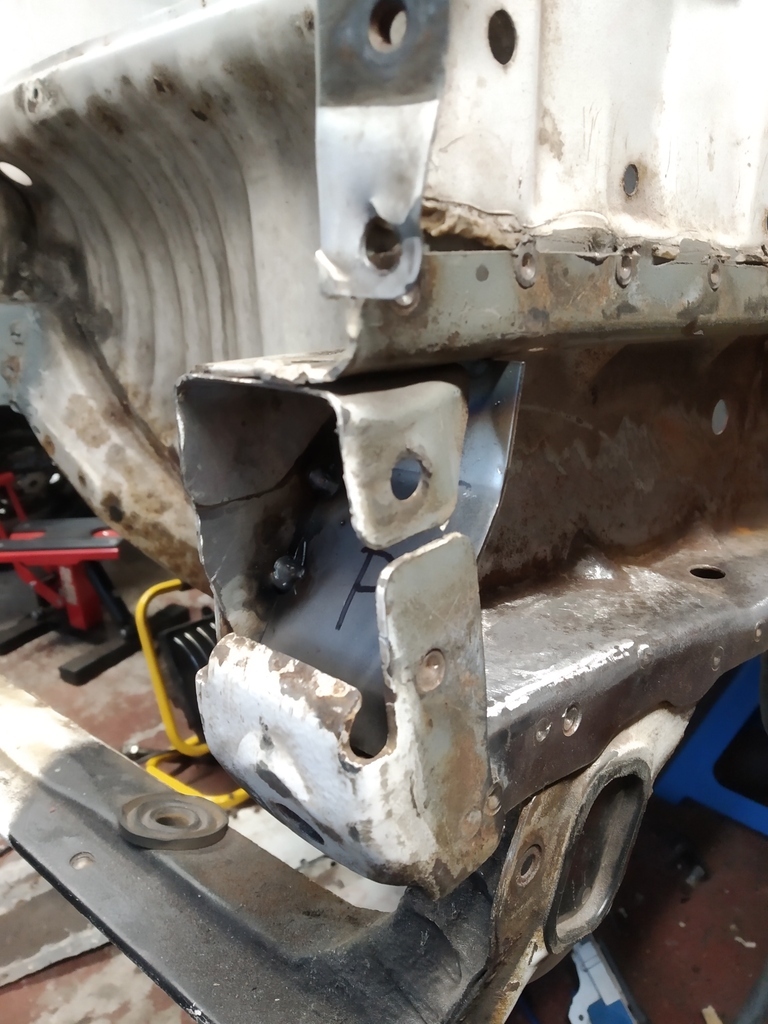 Next I tacked the passengers wheel well. 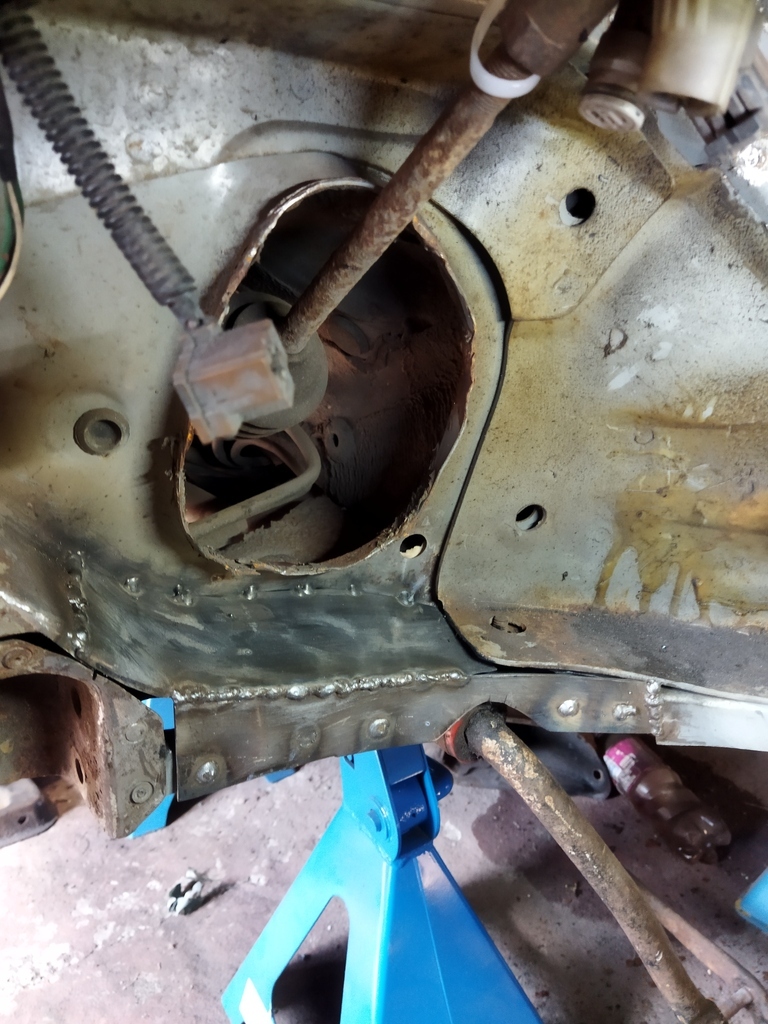 Next job was to replace this previous repair that joins onto what I've just done. Like most repairs on this car it was welded over the top of any previous rust. 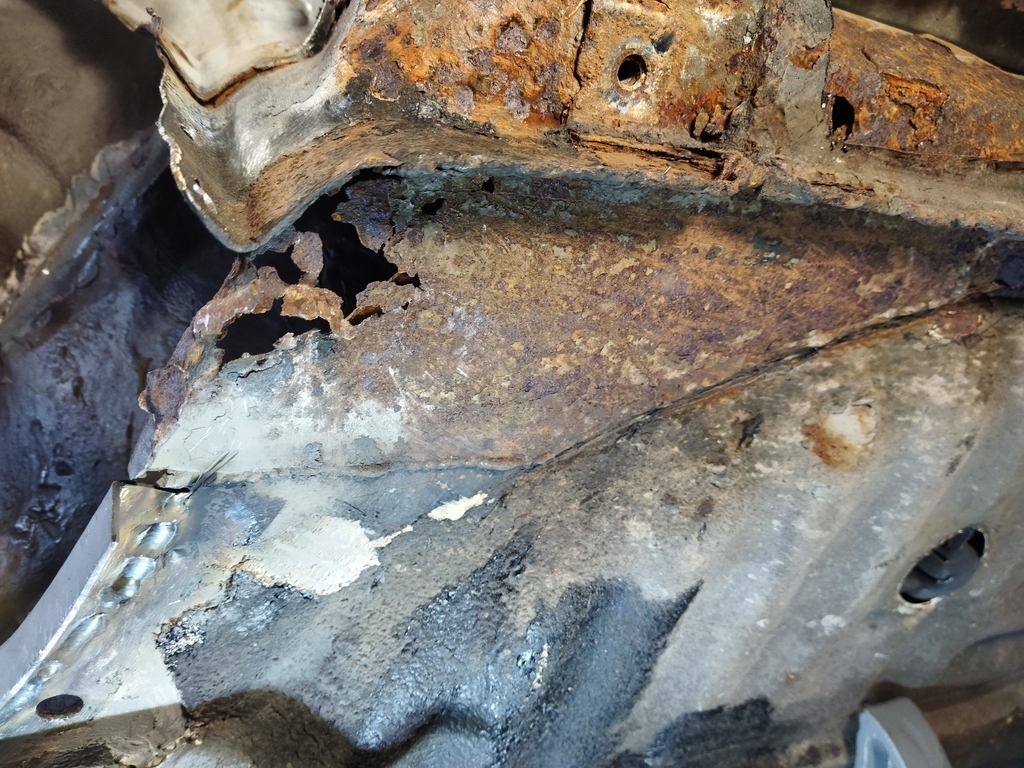 I then realised since it attaches to the sill lip I better tidy it up first. The sill didn't look too bad with just a few previous repairs that needed replacing so I cut a little hole to have a look and then kept cutting more out  Looks like it needs more than just the outer sill. 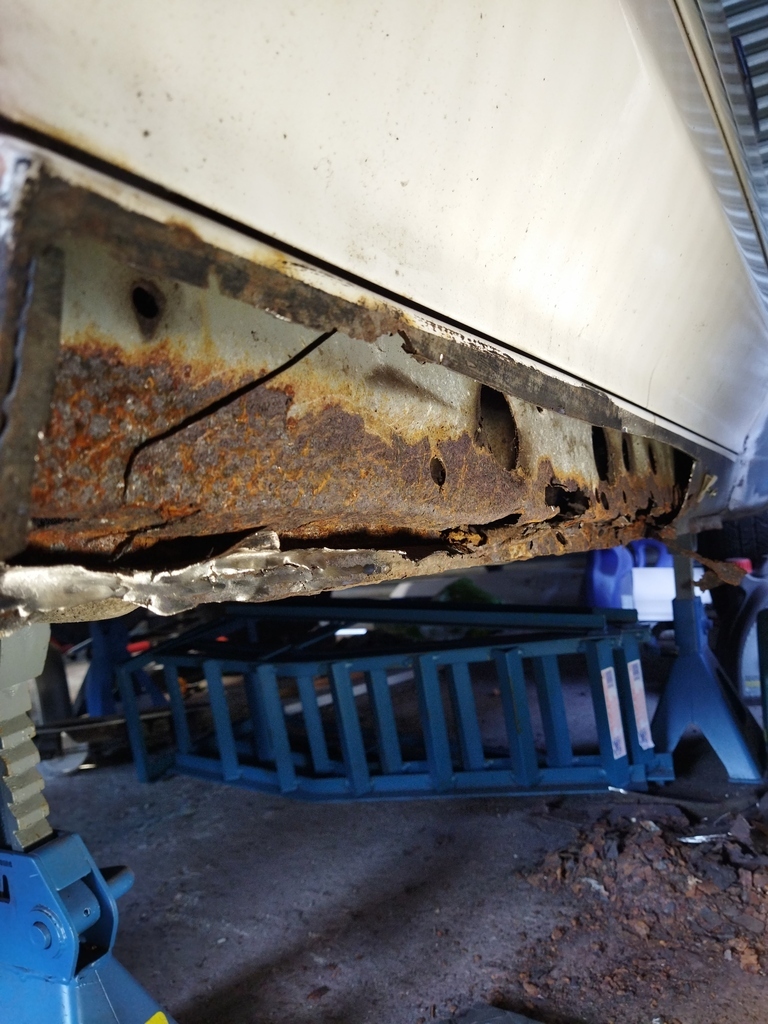 Decided to take the whole sill off since I've got new ones to go on. 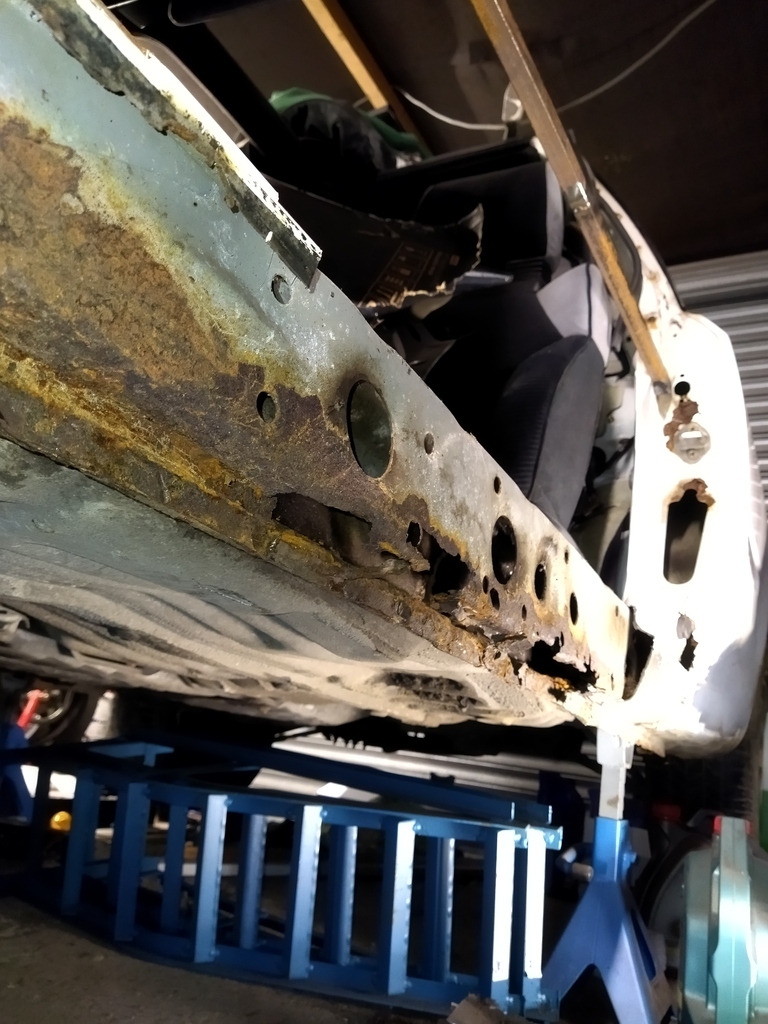 Also found this sanding belt stuffed into a repair and filled in. You can tell some quality work has gone into this car before... 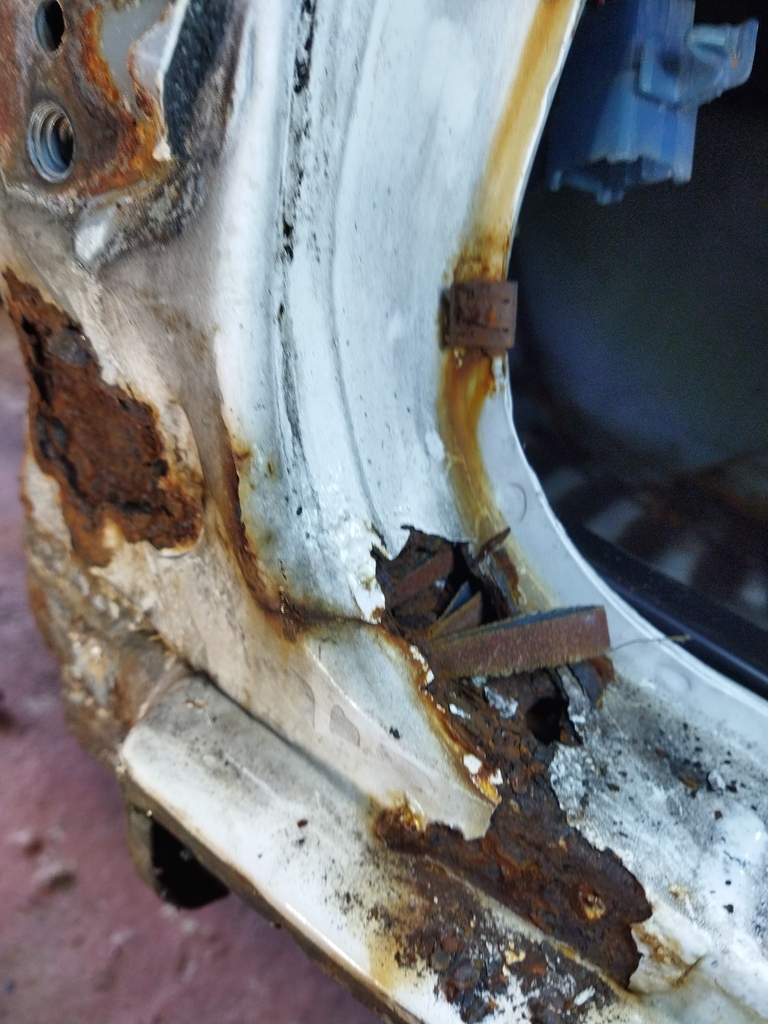 On with cutting out the rust next. 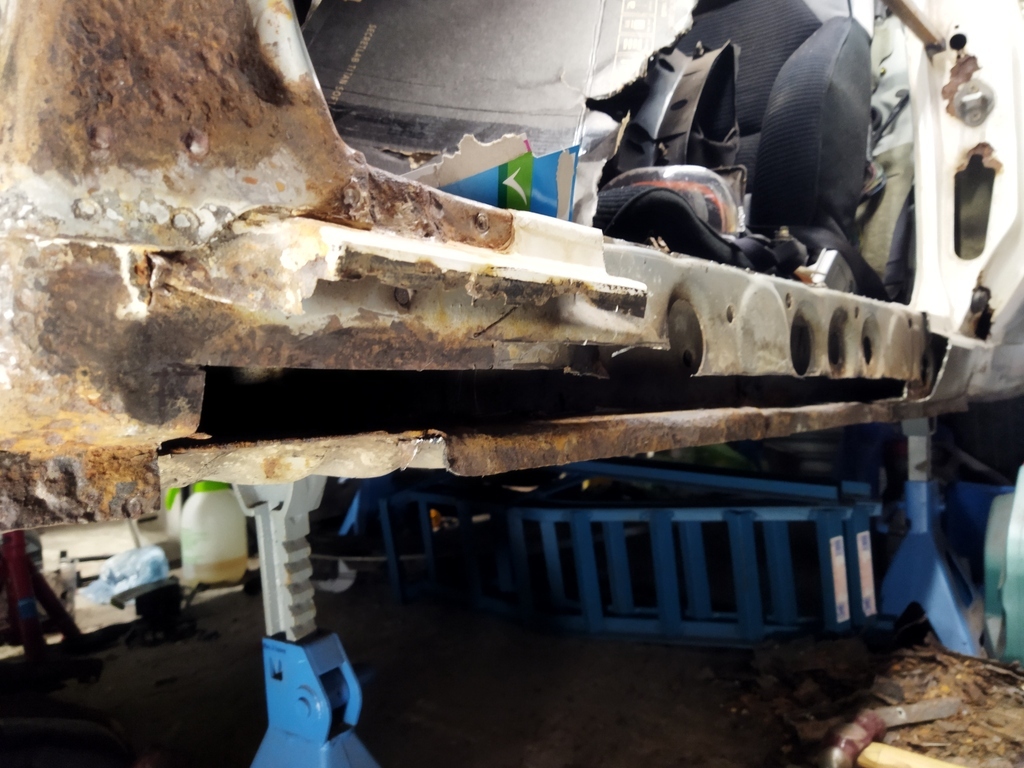 Spent a whole day trying to clean the old cavity wax out of the sill so I could paint it with some epoxy. Took me a while to figure out paraffin cleans it right off. Fabricated some new bits and started welding them in. I'm hoping over the next couple of weeks I can get most of this side of the car completed unless I find more surprises. 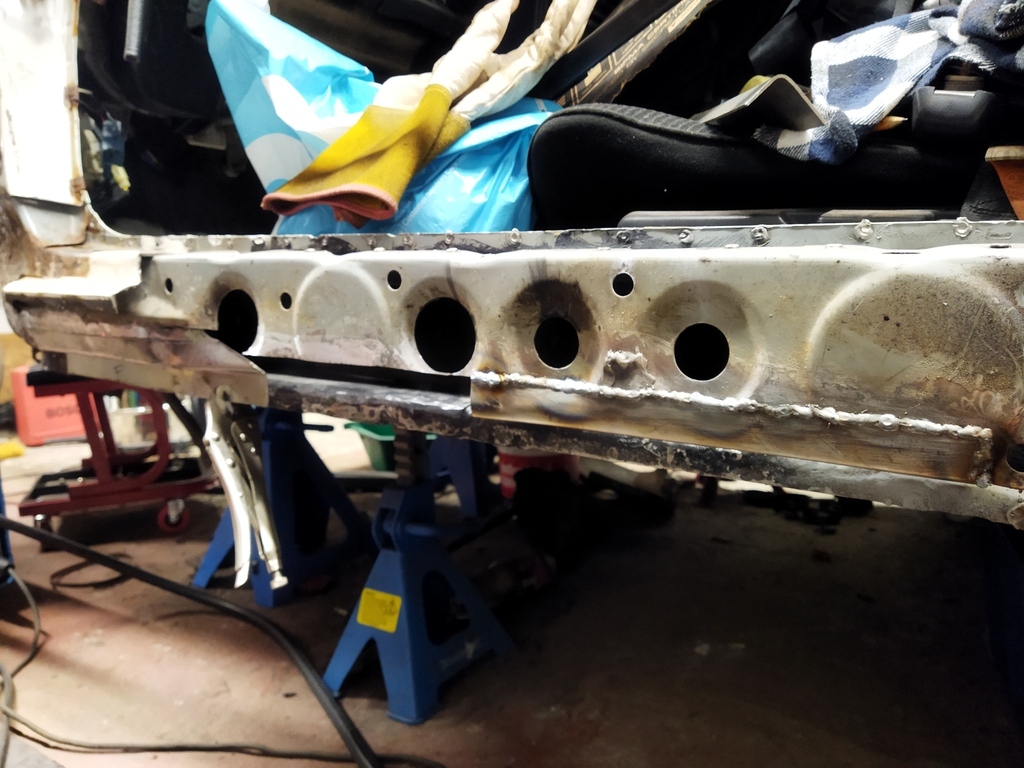 |
| |
|
|
|
|
jimi
Club Retro Rides Member
Posts: 2,223 
|
|
Dec 19, 2021 12:32:41 GMT
|
Coming along nicely, your getting all the standard MK1 corrosion hotspots. MK3 seats are a great upgrade, I've had mine for years, find them much better than the original seats 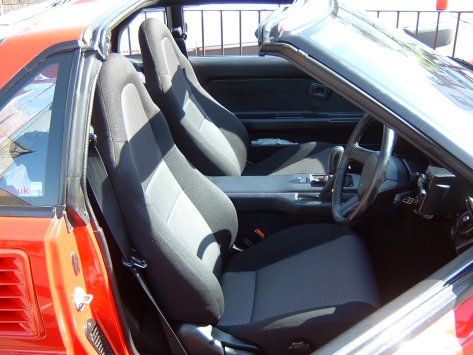 Info on fitting them here LINKY |
| |
Black is not a colour ! .... Its the absence of colour
|
|
|
|
|
|
|
|
Wow- some serious rust in this car. Good on you for rescuing it though. You'll be super proud when it goes back on the road.
I had a supercharged aw11 in about 1994-95. It was the last of the cars built, a 1990 and was super mint. Cost me 6000 quid at the time but was such an amazing car considering my other car was a triumph 2500.
Fantastic little cars! You'll love it. Good work. Keep the updates coming.
|
| |
|
|
|
|
|
|
|
Thanks guys. Been doing a bit more work over Christmas. Made up another piece to fill the one section and also welded in the end piece that was just clamped in place before. 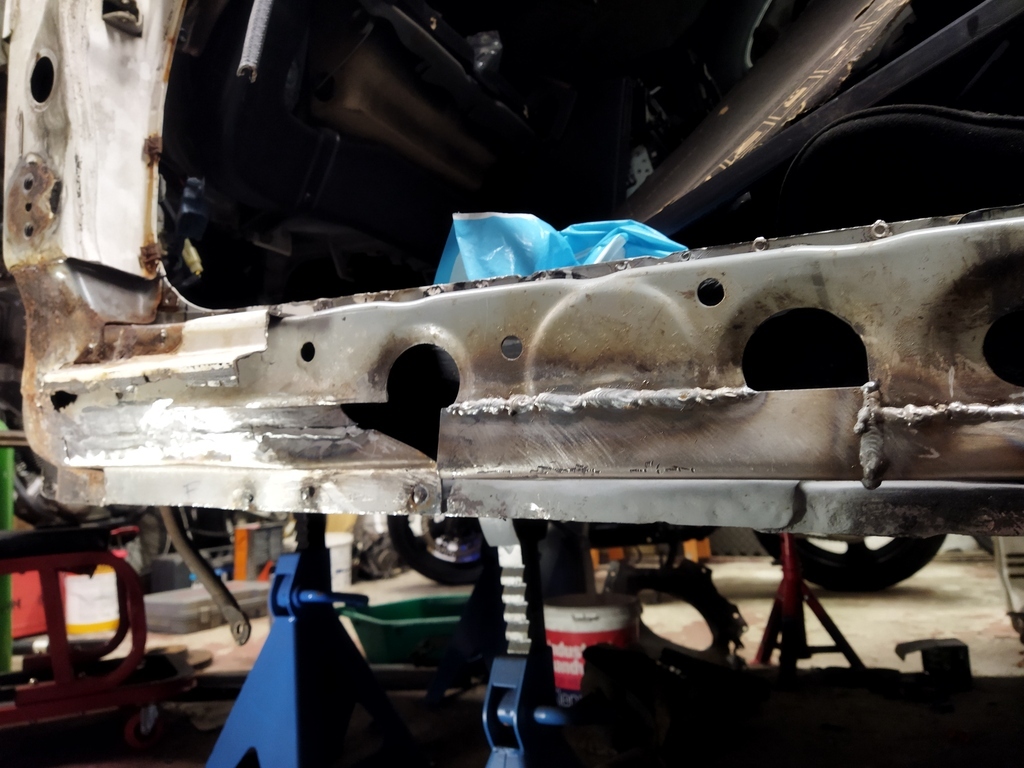 There's then another that sits ontop of that. Not welded in yet, but I think that should be the end of the inner sill work. Been having a think about how I've done it and if the other side needs the same work I'll do it in one piece and probably make a sheet bender to make it easier. I've been doing it in sections because I'm bending it in my vice with a hammer, but its just made things take longer. 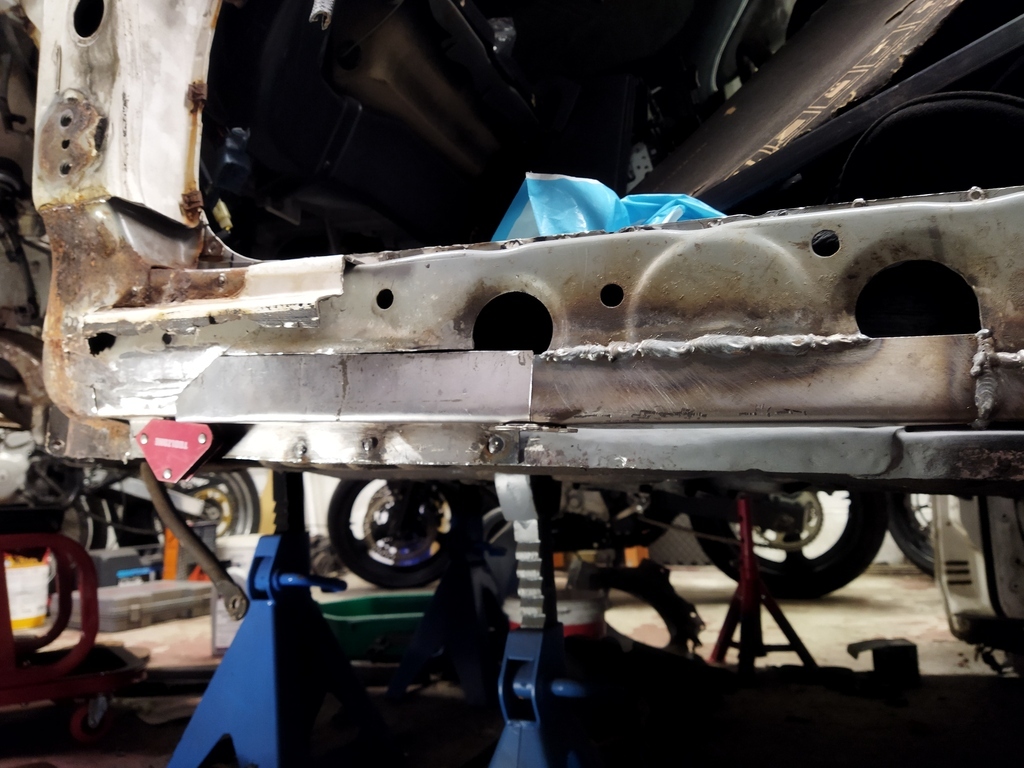 |
| |
|
|
|
|
|
Sept 20, 2023 17:20:59 GMT
|
Ok haven't been updating the thread much lately but I've still been doing little bits. Haven't got photos of it all so I'll just post what I have for now.
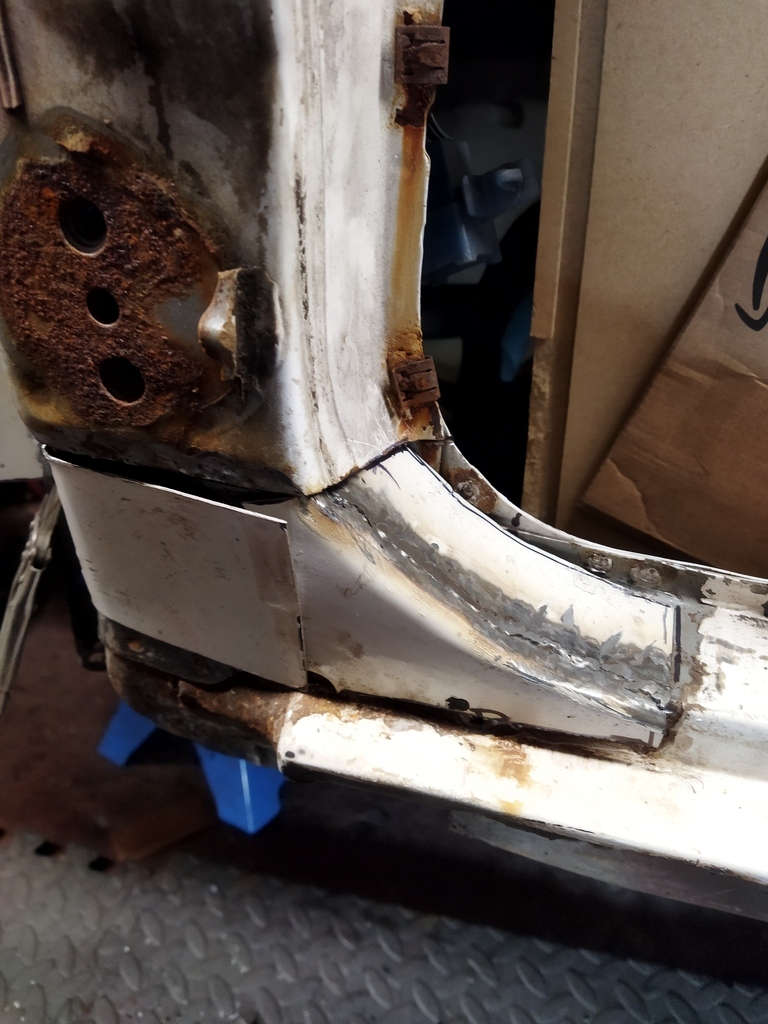
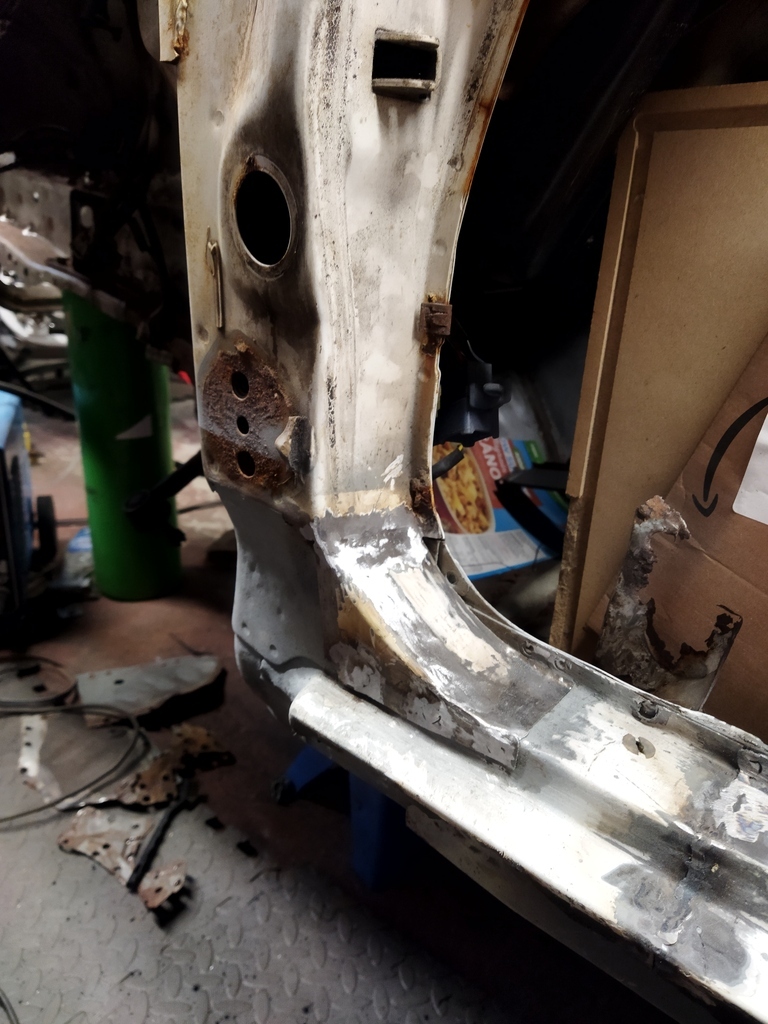
First was putting the top of the sill back on. At first I thought I'd put a whole new sill in but the one I bought is slightly bigger and doesn't match up all that well, plus I would have to make new holes for all the trim pieces to clip on. I'll use the bottom of it though. next up was this corner. I wasn't sure how to make this curved bit until I noticed a brace on the underside of my spare bonnet matched the profile quite well so I used that
 Looks alright I think  . Next up is this section right at the end of the sill. I think I was a bit optimistic in not removing this part and cutting a little window showed me that the inner sill continues all the way back to the wheel arch and is rotten like the rest of it... There's actually a new panel that's been fitted here just before I bought the car and I tried not to cut it all away since you cant buy these panels anymore but in the end I had no choice.Turned out to just be welded ontop of all the rusty old stuff and didn't even have a coat of primer to stop it rusting anyway. Someones been in here doing repairs before too but this isnt even what I wanted to fix, behind it is the rusty inner sill.
Started cutting stuff back 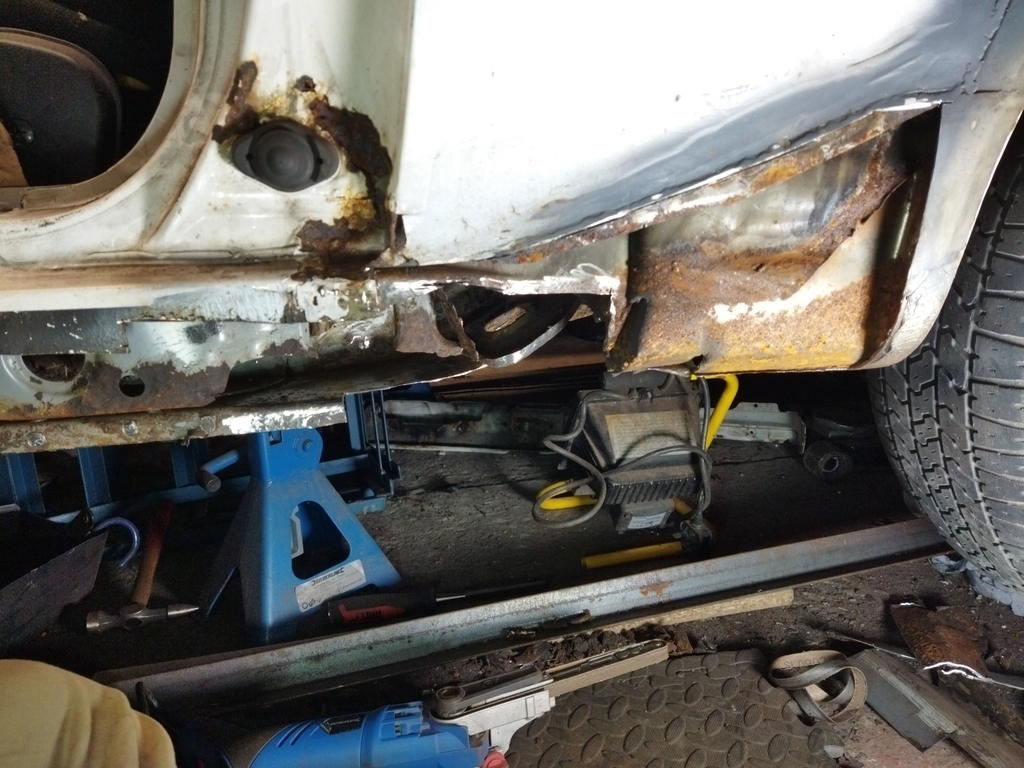 New stuff going in but I still have a little more work to do here, I was just finishing up for the day when I noticed a tiny hole that I missed. I have some time off work this week just to work on the car though so I'm hoping to at least get this section done. |
| |
Last Edit: Sept 20, 2023 17:21:54 GMT by croak3r
|
|
|
|
|
Sept 20, 2023 17:53:21 GMT
|
|
It makes me feel like I'm getting somewhere with mine.
Not what you wanted to hear but it makes me feel better about myself. Sorry!
James
|
| |
|
|
|
|
|
Sept 21, 2023 22:11:13 GMT
|
At least someone is benefiting from this  I would be a lot further ahead if I didn't go months without working on it tbh. Spent another day working on the car but you cant really tell by the progress. The morning was spent just welding in the panels I made yesterday and patching some more holes I found. Spent a while scratching my head trying to work out how it's all supposed to look without the rust and then realised I need to fix this bit of the wheel well first and then the missing bits then attach to that.
Didn't want to cut so much out but that's as far in as my grinder would go. Took me stupidly long to power file away the spot welds and chisel it out so spent some time cleaning out the cavity wax and left it there for the day. Tomorrow should be more productive, I just have a bit more cutting to do on the wheel well and then it's just a bit of simple metal fab.
|
| |
|
|
|
|
|
Sept 22, 2023 22:33:32 GMT
|
Three updates in a week, must be a new record for me (well even three a year would be) Started making the repair for the inner structure or whatever it's called. I took some creative liberties with this as I have zero idea what the bottom of it is supposed to look like because it all rusted away.
Inside the wheel well you can see that it has a lip that sticks into the well that the bit of chassis on the right that I cut off gets spot welded onto. The rest of the lip that you can see here also rusted away so I ground that back and make another piece to replace it.
You can see here I also cut a chunk out of the wheel well on the left just to get to this bit but the rest of it is pretty rusty so the next job is to replace that too and then I can finally get around to my original job of fitting the outer sill... Still have to clean all the cavity wax out of this section though and paint it before I weld this new panel in, I just hate doing it and It's not something I fancied doing on a Friday  Not been a bad week progress wise though, I think I have most of the tough jobs done now on this side of the car. |
| |
|
|


![[img]https://i.imgur.com/pb8K8hm.jpg[/img]](https://i.imgur.com/pb8K8hm.jpg) It's definitely better inside than I thought. I did stick my little camera probe into here before and I was expecting it to be a lot worse, but what I saw was all loose flakes of rust that came from somewhere.
It's definitely better inside than I thought. I did stick my little camera probe into here before and I was expecting it to be a lot worse, but what I saw was all loose flakes of rust that came from somewhere.![[img]https://i.imgur.com/PXP5AAt.jpg[/img]](https://i.imgur.com/PXP5AAt.jpg)


 Work hasn't stopped though so I'll post all the important bits. Finally got the new bit of chassis welded in, which gave me the opportunity to put the car partially back together for the first time in years. It took quite a bit of work and made me realise cutting a section from a donor car wasn't the right decision as I could have repaired it and it would have been a lot easier.


