glenanderson
Club Retro Rides Member
Posts: 4,258
Club RR Member Number: 64
|
|
Aug 28, 2021 23:13:05 GMT
|
Lovely work. Rather than all that effort making flanges to bond plastic windows in, which will be a nightmare to get out again if you need to replace them after the inevitable scratches, why not use Claytonrite profile rubber moulding to hold the windows? The side windows on the Land-Rover are held in with it, as are the windscreens of my lorry, and they’re both just flat 16swg aluminium skins.  |
| |
My worst worry about dying is my wife selling my stuff for what I told her it cost...
|
|
|
|
jonomisfit
Club Retro Rides Member
Posts: 1,781
Club RR Member Number: 49
|
|
|
|
|
1) I didn't know that type of product existed.
2) I am now likely to move to that product
😁
Thanks for the post. Very handy to know.
|
| |
|
|
glenanderson
Club Retro Rides Member
Posts: 4,258
Club RR Member Number: 64
|
|
|
|
Glad to have been able to help. 😃👍 You can get it from several sources, but after a bit of internet searches I bought my latest lot from COH Baines as they were the most competitive. You can get various different profiles for different thicknesses of panel and window. I would think that the stuff they list for Land-Rover side windows (4mm glass) would be ideal. link
You need the filler strip too, and you can get that in black or chrome effect. It’s a bit fiddly to fit, but plenty of soapy water and a dose of patience and determination and they’re in. You could even use toughened or laminated glass, but I’d think plastic best really while she’s little. |
| |
My worst worry about dying is my wife selling my stuff for what I told her it cost...
|
|
jonomisfit
Club Retro Rides Member
Posts: 1,781
Club RR Member Number: 49
|
|
Sept 3, 2021 15:30:32 GMT
|
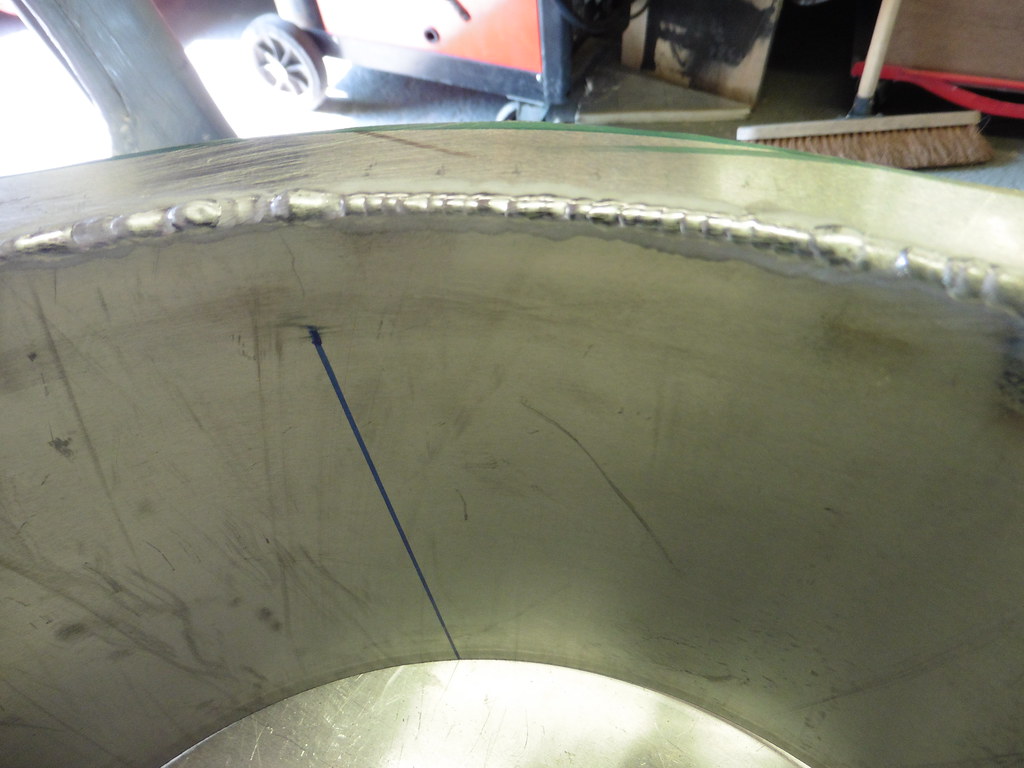
I ordered a new toy which arrived this week. I could really have done with it for all the wheel tubs, but usual issue of timings and money.  P1050660 P1050660 by jono_misfit, on Flickr Its only 300mm wide, and is reasonable duty. It's rated for 2mm steel / 3mm ali according to the spec. we shall find out on other projcts :-) The pear head mallet I bought also turned up, so filled the sandbag with dried sand and adjusted the shape of the wheel infill.  P1050661 P1050661 by jono_misfit, on Flickr Looks messy at this point, but I gave it a few good taps with the pear mallet to stretch the material, then dressed it back flatter with the spoon and dolly to get it smooth again. gave so  P1050662 P1050662 by jono_misfit, on Flickr which has a fair bit more shape to it what was 5mm clearance is now about 30mm clearance  P1050665 P1050665 by jono_misfit, on Flickr I gave the infill panel a light roll in two directions to get a better shape and trimmed it back  P1050663 P1050663 by jono_misfit, on Flickr a little bit of dressing and a trim next time and it should be weld the three parts into one  P1050664 P1050664 by jono_misfit, on Flickr |
| |
Last Edit: Sept 3, 2021 15:31:12 GMT by jonomisfit
|
|
jonomisfit
Club Retro Rides Member
Posts: 1,781
Club RR Member Number: 49
|
|
Sept 5, 2021 20:01:45 GMT
|
A bit more of a bash round, then tacked the parts together  P1050666 P1050666 by jono_misfit, on Flickr took them off and roughly welded them together  P1050667 P1050667 by jono_misfit, on Flickr back in situ  P1050668 P1050668 by jono_misfit, on Flickr onto the other side Cut out the piece that needs stretched, folded the edges then gave it a few hits on the sandback  P1050669 P1050669 by jono_misfit, on Flickr even relatively few hits puts a fair bit of shape into it  P1050670 P1050670 by jono_misfit, on Flickr start the surface with the spoon  P1050671 P1050671 by jono_misfit, on Flickr dressed some more  P1050672 P1050672 by jono_misfit, on Flickr whilst I havent got it back super smooth, the worst of the benting is out and it has a good arch to it  P1050673 P1050673 by jono_misfit, on Flickr in situ  P1050674 P1050674 by jono_misfit, on Flickr |
| |
|
|
jonomisfit
Club Retro Rides Member
Posts: 1,781
Club RR Member Number: 49
|
|
Sept 5, 2021 20:04:15 GMT
|
|
|
| |
|
|
jonomisfit
Club Retro Rides Member
Posts: 1,781
Club RR Member Number: 49
|
|
Sept 5, 2021 20:08:36 GMT
|
in situ ready for trimming  P1050682 P1050682 by jono_misfit, on Flickr trimmed  P1050683 P1050683 by jono_misfit, on Flickr made the infill piece  P1050684 P1050684 by jono_misfit, on Flickr tacked, removed, and welded up  P1050685 P1050685 by jono_misfit, on Flickr  P1050686 P1050686 by jono_misfit, on Flickr thats the main work on the tubs done, with just a few tweaks to make on the rears. Next job, steering. these  P1050687 P1050687 by jono_misfit, on Flickr need to attach to here  P1050688 P1050688 by jono_misfit, on Flickr A job for next time. I think i'll make an insert to bolt one of the UJ's to the steering stub, then work out what length I need between them and weld the UJ's together, then a steering column with some bushes. |
| |
|
|
jonomisfit
Club Retro Rides Member
Posts: 1,781
Club RR Member Number: 49
|
|
Sept 11, 2021 17:25:12 GMT
|
Today started with some lathe action....  P1050689 P1050689 by jono_misfit, on Flickr need to make it fit this  P1050690 P1050690 by jono_misfit, on Flickr Ended up with this  P1050691 P1050691 by jono_misfit, on Flickr bolts in like so  P1050692 P1050692 by jono_misfit, on Flickr and the lower UJ section clamps to it (i'll be welding it later as it'll never hold just clamped...  P1050693 P1050693 by jono_misfit, on Flickr remove the splined end  P1050694 P1050694 by jono_misfit, on Flickr having put it on the tot-rod I just doesnt need the two UJ's just one to get a bit of angle on the steering. It'll only be 1/8 turn each way so you'll never notice the lack of linieraity. a handy piece of tube  P1050695 P1050695 by jono_misfit, on Flickr I milled a small flat on the UJ rod and centre drilled it  P1050696 P1050696 by jono_misfit, on Flickr then started drilling to size  P1050697 P1050697 by jono_misfit, on Flickr bolts on like so  P1050698 P1050698 by jono_misfit, on Flickr forgot to take pics for a bit... Attacked some steel tube and some nylon and ended up with a column support  P1050699 P1050699 by jono_misfit, on Flickr sits in like so  P1050700 P1050700 by jono_misfit, on Flickr |
| |
|
|
jonomisfit
Club Retro Rides Member
Posts: 1,781
Club RR Member Number: 49
|
|
Sept 11, 2021 17:29:21 GMT
|
|
|
| |
|
|
|
|
|
Sept 11, 2021 22:57:11 GMT
|
|
Just the right style for a paddleshift
|
| |
|
|
|
|
jonomisfit
Club Retro Rides Member
Posts: 1,781
Club RR Member Number: 49
|
|
Sept 12, 2021 5:57:57 GMT
|
|
Its probably going to have a paddle throttle one side and brake lever the other.
But if it ends up with a bike engine...
|
| |
|
|
|
|
|
Sept 12, 2021 7:48:18 GMT
|
loving the build so far, have just read through and caught up. Definatly needs a bike engine, even if its a 50cc pitbike unit would still be good fun. You have some good skills and some nice toys, I'm not jelous one bit  |
| |
|
|
jonomisfit
Club Retro Rides Member
Posts: 1,781
Club RR Member Number: 49
|
|
Sept 19, 2021 19:01:15 GMT
|
thanks for the comments. I want the joint to clamp and not just rely on the bolt in shear. marked up.  P1050710 P1050710 by jono_misfit, on Flickr hole drilled through both side wider than the slot that will be cut.  P1050712 P1050712 by jono_misfit, on Flickr my arm moved when I took the pic so the slot looks like its closed up. it hasnt.  P1050713 P1050713 by jono_misfit, on Flickr This way the bolt will pull the two halves tight onto the spigot. Its rock solid now. then got the tig out and hot glued it all together solid  P1050714 P1050714 by jono_misfit, on Flickr  P1050715 P1050715 by jono_misfit, on Flickr welded solid, just needs a clean up  P1050716 P1050716 by jono_misfit, on Flickr  P1050718 P1050718 by jono_misfit, on Flickr Back in place 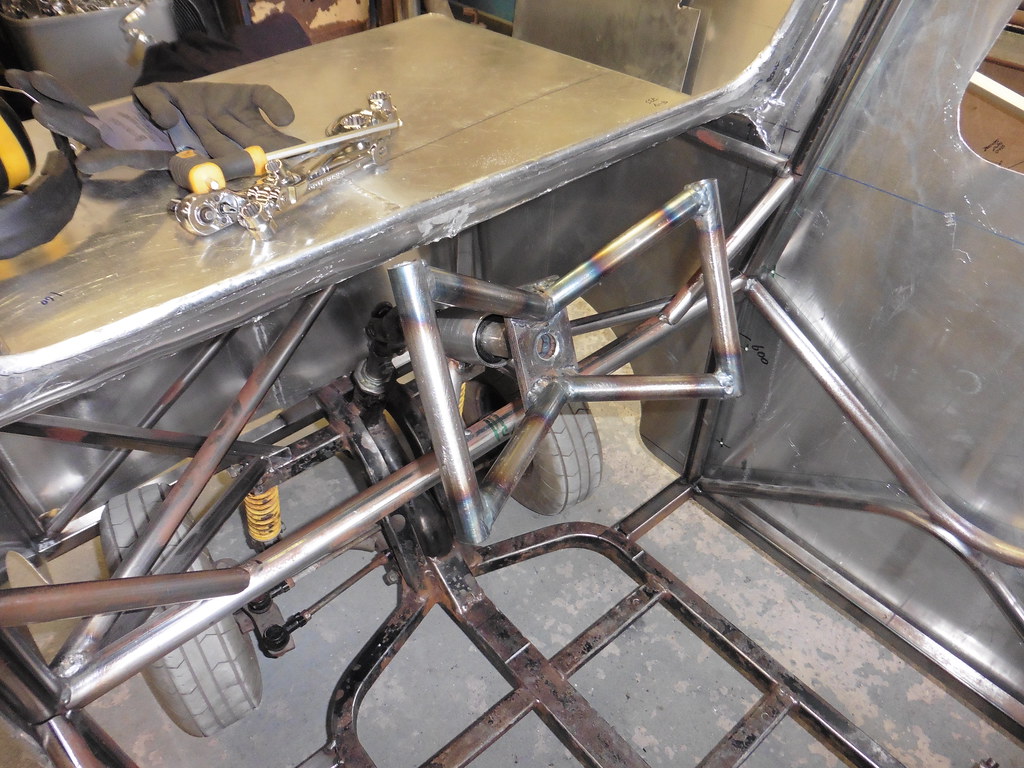 P1050719 P1050719 by jono_misfit, on Flickr I then added a plate to mount the fwd/rev selector, speed selector, and probably a button throttle. My plan of having a hand throttle is on the back burner at the moment. I'm struggling to get a pot of the right rating in 1/4 turn. I can gear it, but its effort....  P1050723 P1050723 by jono_misfit, on Flickr |
| |
|
|
jonomisfit
Club Retro Rides Member
Posts: 1,781
Club RR Member Number: 49
|
|
Sept 19, 2021 19:10:51 GMT
|
I need a mount for the seat  P1050720 P1050720 by jono_misfit, on Flickr some 19mm box welded together  P1050721 P1050721 by jono_misfit, on Flickr fixing holes with captive nuts  P1050722 P1050722 by jono_misfit, on Flickr I then tried it in the van to see if I like it or not. After consideration I don't think i'll use it. I'll probably make a bench seat (so we can both fit in), with an insert for when smallchild_misfit is driving to move her up and forward. I looked over it all to have a think on some of the next jobs. Finish panelling. seat back infill. This looks flat but there is a 15mm vertical offset between the lower part and the upper. 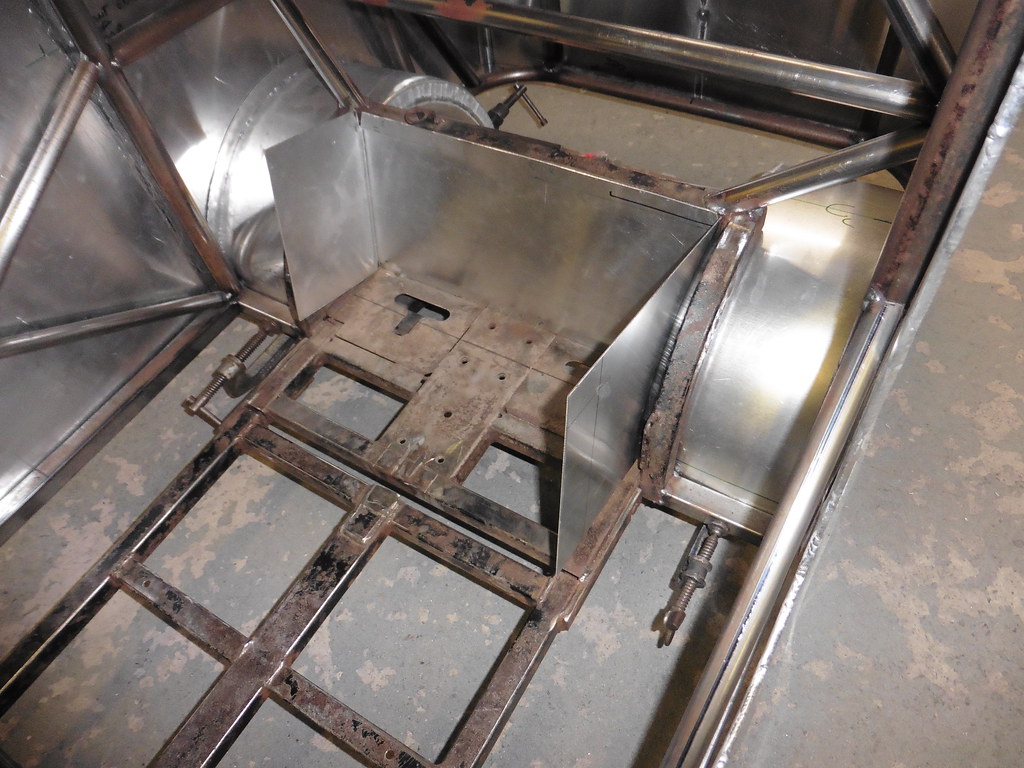 P1050724 P1050724 by jono_misfit, on Flickr trimmed to shape  P1050725 P1050725 by jono_misfit, on Flickr then onto the floor  P1050726 P1050726 by jono_misfit, on Flickr sheet marked up.  P1050727 P1050727 by jono_misfit, on Flickr Then I had a look at it again and realised it'll never go in as a single piece due to overhangs on 3 sides, so put a cut down the centre  P1050728 P1050728 by jono_misfit, on Flickr first piece in, just needs a few fettles  P1050729 P1050729 by jono_misfit, on Flickr  P1050730 P1050730 by jono_misfit, on Flickr |
| |
|
|
93fxdl
Posted a lot
 Enter your message here...
Posts: 2,013
|
|
Sept 19, 2021 19:34:46 GMT
|
|
I see this as next level fabrication, let alone just being a tot rod
Ttfn Glenn
|
| |
|
|
|
|
|
Sept 20, 2021 8:18:09 GMT
|
|
I totally agree. Some great fabrication and welding skills and a really well thought out project.
My son who is doing a Land Rover has sourced a 30cm wide steering rack from a Kart to give a better U/J angle than the standard mobility scooter set-up.
|
| |
|
|
jonomisfit
Club Retro Rides Member
Posts: 1,781
Club RR Member Number: 49
|
|
Sept 24, 2021 21:34:02 GMT
|
I may well change the steering angle when I get it all going. It'll depend how daughter_misfit gets on with it as it is. I made the second half of the floor  P1050731 P1050731 by jono_misfit, on Flickr section removed for where the seat mount will be  P1050732 P1050732 by jono_misfit, on Flickr body off for access  P1050733 P1050733 by jono_misfit, on Flickr looks the same as before, but in this one the suspension bolts are actually hightened up :-)  P1050734 P1050734 by jono_misfit, on Flickr i bought some cheap brake leavers  P1050735 P1050735 by jono_misfit, on Flickr to go on like so  P1050736 P1050736 by jono_misfit, on Flickr hmmm that position may not be right  P1050737 P1050737 by jono_misfit, on Flickr defintely not right  P1050738 P1050738 by jono_misfit, on Flickr cut and re-weld  P1050739 P1050739 by jono_misfit, on Flickr better  P1050740 P1050740 by jono_misfit, on Flickr |
| |
|
|
sonus
Europe
Posts: 1,391
|
|
Sept 25, 2021 2:20:02 GMT
|
|
Looking good! Just a suggestion, but would it not be better to lengthen the lever pivot bolt and use it to mount the lever? It would bring the lever closer to the steering wheel rim and be easier to use by small hands. As it is I would think the lever adjustment screw would not bring the lever in close enough?
|
| |
Current
1968 TVR VIXEN S1 V8 Prototype
2004 TVR T350C
2017 BMW 340i
Previous
BMW 325d E91LCI - sold
Alfa Romeo GTV - sold
Citroen AX GT - at the breakers
Ford Puma 1.7 - sold
Volvo V50 2.0d - sold
MGB GT - wrecked by fire
MG ZT 1.8T - sold
VW E-golf Electric - sold
Mini Countryman 1.6D -sold
Land Rover Discovery TD5 - sold
|
|
jonomisfit
Club Retro Rides Member
Posts: 1,781
Club RR Member Number: 49
|
|
Sept 25, 2021 6:12:40 GMT
|
|
Good suggestion. I'll look at that.
|
| |
|
|
jonomisfit
Club Retro Rides Member
Posts: 1,781
Club RR Member Number: 49
|
|
Sept 26, 2021 20:18:37 GMT
|
I re-mounted the brake leaver as per Sonus#s recomendation but forgot to specifically photo it But needed a cable adjsuter, so modified a bolt  P1050742 P1050742 by jono_misfit, on Flickr  P1050743 P1050743 by jono_misfit, on Flickr there is a 6mm hole circa 15mm deep, then a 3mm hole up the centre  P1050745 P1050745 by jono_misfit, on Flickr I made a bracket and mounted it. I have no idea what I did with the original bracket.....  P1050746 P1050746 by jono_misfit, on Flickr and temporarily routed the brake cable, plus you can see the re-mounted lever  P1050747 P1050747 by jono_misfit, on Flickr then onto the rest of the controls the "throttle" button Drill  P1050748 P1050748 by jono_misfit, on Flickr goes like so  P1050750 P1050750 by jono_misfit, on Flickr the other bits go like so (speed selector and fwd / rev)  P1050751 P1050751 by jono_misfit, on Flickr and mounted  P1050753 P1050753 by jono_misfit, on Flickr back to my favourite thing... electric spaghettii  P1050754 P1050754 by jono_misfit, on Flickr temporary connected up using connector block, but will be soldered / crimped when finalised.  P1050755 P1050755 by jono_misfit, on Flickr I need something to site the batteries on Cut Ali 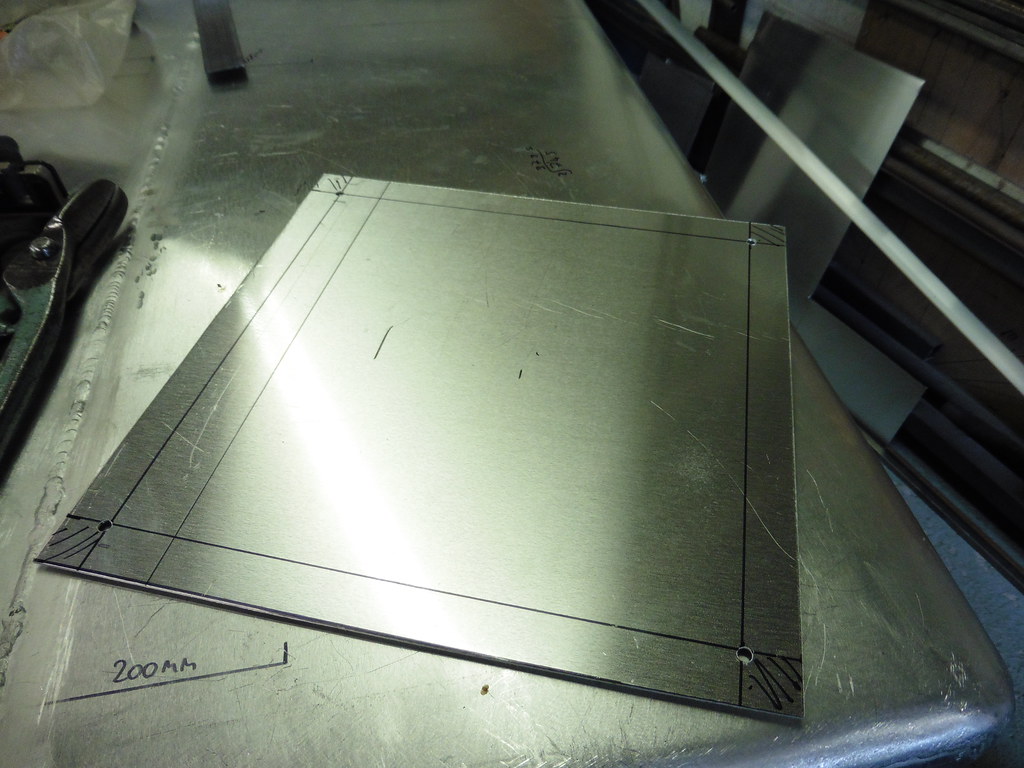 P1050756 P1050756 by jono_misfit, on Flickr folded up and in situ  P1050757 P1050757 by jono_misfit, on Flickr shonkily mount the electrics  P1050758 P1050758 by jono_misfit, on Flickr |
| |
|
|
|
|