bshaw
Part of things
 
Posts: 149
|
|
Jul 31, 2019 23:34:52 GMT
|
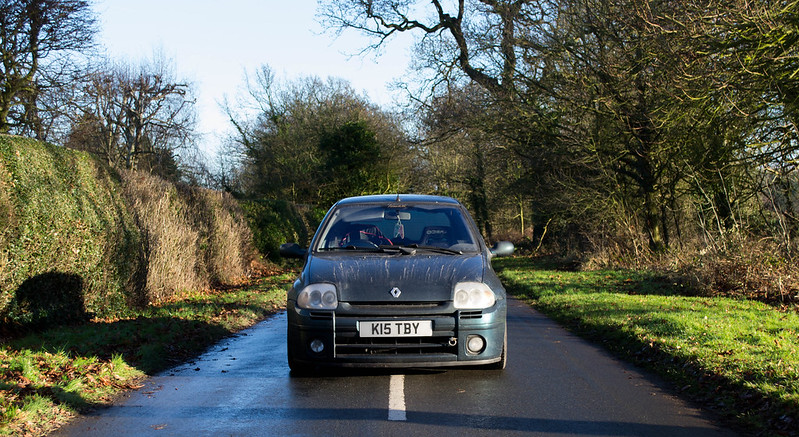
Pushing the line a little here  but hey, you guys let it on autosolo so.... Made I laugh It will probably make the hill at RRG if I get a few drop outs  haha! Since posting this I've spotted a few build threads for even newer stuff on here, least I'm not the youngest. May have also cheated on the spec I gave for the hill, some bits aren't fitted yet, All the front suspension stuff is going on weekend before the Gathering though  Hope it gets on though, ill pray for dropouts. Always thought the Clio would be good up there, just there isn't really anything on at Shelsley that caters for it, only thing I've found is if you want to do the training course they do, little expensive just to get a couple of runs up the hill mind. I ran the polo up there at RRG13 I think it was, 1st or 2nd time you were at Shelsley. Back when 50% of the runners were MX5's  |
| |
|
|
|
|
bshaw
Part of things
 
Posts: 149
|
|
Jul 31, 2019 23:40:36 GMT
|
Mad isn't it, those mounts are like £75 too. Wants to outlast the car for that price on an exhaust mount lol. They're Sparco Terra's, Made by OZ tho so I claim they're OZ's Not a clue what they weigh but they look nice so.. it's weird, mines on 124k and still on the OEM exhaust mount, albeit with a powerflex mount. I've noticed mine starting to bubble externally around the rear arches, I can only imagine what it looks like behind the rear interior panels. did you ever get around to doing anything about it? Have you had any issues with water ingress? I think the circular plastic bungs that the boot rests on were letting water into mine and that's caused some of the rot, they're siliconed in now and I haven't had wet floors since. I unbent a coat hanger and cleared out all the drainage spots along the sills and along the front scuttle, the amount of stuff that came out of the centre drain (that exits out behind the engine block) was insane, literally a 4" long log of partly decomposed leaves and dirt. I'd be surprised if it was actually the OE mount? lol Not yet, I'll get around to it sooner or later, hopefully before the end of the year. I had the same leak, sorted it a few years back, it only seemed to get into the spare wheel well though. And nope, not even looked, don't even know where they are haha. I'll have a look see if I can spot them next time I'm looking in those areas. Managed to remove the leaky PAS line this evening after work, took 3 hours to strip everything and get the curse word out. Taking it to work tomorrow (today now), hopefully start putting it back together on the evening.  Taking the Powerflex steering rack bushes with me, get those fitted whilst I'm there. One less thing to worry about when doing front suspension bits. |
| |
|
|
bstardchild
Club Retro Rides Member
Posts: 14,969
Club RR Member Number: 71
Member is Online
|
2001 PH1 Clio 172bstardchild
@bstardchild
Club Retro Rides Member 71
|
|
|
Made I laugh It will probably make the hill at RRG if I get a few drop outs  haha! Since posting this I've spotted a few build threads for even newer stuff on here, least I'm not the youngest. May have also cheated on the spec I gave for the hill, some bits aren't fitted yet, All the front suspension stuff is going on weekend before the Gathering though  That's OK - I've got entrants that haven't actually got an engine in the car yet  Hope it gets on though, ill pray for dropouts. See previous comment - I always get a fair few drop outs Always thought the Clio would be good up there, just there isn't really anything on at Shelsley that caters for it, only thing I've found is if you want to do the training course they do, little expensive just to get a couple of runs up the hill mind. agreed and this event works nicely - it's just stuff that is on the edge/limit of what we cater for has to wait for a space I ran the polo up there at RRG13 I think it was, 1st or 2nd time you were at Shelsley. Back when 50% of the runners were MX5's  Ahh that was the last year we sold on the day - for that very reason - two MX5 clubs came to the event on mass and hit the sign on as soon as it opened....... We now adopt where possible the Noah rule only two MX5's in the afternoon - slightly more in the morning but in balance with the number of Escorts  |
| |
|
|
bshaw
Part of things
 
Posts: 149
|
|
|
|
Thursday at work I tried to get the PAS line repaired, welded it up once, tested it, still leaked. Welded around it again, still leaked but less, ran out of time to do it again. This was the original bit before welding, weather that was a crack I don't know as I didn't bother testing before welding, but yeah...  Ran all the way around it and over the crack, wasnt the nicest stuff to weld, don't know what actual steel they're made from. used just normal mild wire at 1st.  Thursday night after work I decided to fit the rack bushes, as i had better access and couldn't do anything else.  These were a bit loose so banged them a bit tighter in the vice, had to hold with the spanner to undo the one.  Why they make them so long I don't know, so annoying when you're on your back with no room to move your arms.  Did them in a little under 3 hours, at a relaxed pace. Would be a lot quicker if I did it again now I understand how everything comes off and how to access everything. Hardest part was getting the one that has a locating pin off, and the new one on, as you can barely move it enough to get around it, then there's no room/not enough hands to pull it out. Half the time on a ramp I bet. Anyway, went into work early on Friday and managed to completely fix the leak. Used A32 wire and upped the amps more, did the trick.  Found some dark green hammerite, no brush though so my finger in a latex glove would have to do.  Really had had enough come Friday night, I was shattered from working almost none stop (straight from work to an hour of traffic and then 3 hours at the unit, was dead. Did a few hours, managed to fit most of the line back in, but because I was tired I was getting angry with it so called it a day. This is the absolute t**t of a nut you have to undo....   Cant see it in those pics but there is another line the other side of it. Getting a normal spanner on is impossible. When you get the modded spanner on, you have about an 8th of a turn before you have to rotate it to get it another 16th of a turn to get it back on the other way. The more you can do by hand the better, but even that's a pain. There's no way to get on it from below so down this gap is the only real way...  The heat stuff is fiberglas also, my hands and arms are red raw (was too hot yesterday to wear long sleeves) Everything gets in the way, you need a torch to see what you're doing but your arm blocks the light no matter where you put it, or the light just gets in the way. Its honestly the worst thing I've ever had to do :ROFLMAO: Broke an earth point to the gearbox when putting the line back in so really I had to stop anyway as I cant but box mount back on until I have a ring connector. Saturday came, didn't really take any pics, finished putting everything back together, fixed the broken earth and dropper her back on all 4s  Seem to be receiving parts for it now daily, and spending just as much  Driveshafts and gearbox oil arrived yesterday/today (convinced one of the CV's is curse word, and shafts are cheaper than a single joint, so the lot is being replaced whilst all the suspension is off) Massive amount of work to smash out this weekend, got Monday and Tuesday off work just encase something doesn't go to plan/to get tracking sorted. Also, my trimmer sent a pic of my wheel. It's on its way to me right now   Hopefully be some good updates this weekend Probably be some angry ones instead though |
| |
|
|
ChasR
RR Helper
motivation
Posts: 10,307
Club RR Member Number: 170
|
2001 PH1 Clio 172ChasR
@chasr
Club Retro Rides Member 170
|
Aug 10, 2019 10:56:29 GMT
|
|
The rear bungs do go. The movement is what causes it in them. They are meant to move, but only slightly. Over time, that movements becomes much more and the seal itself wears out.
The bungs are pence from Renault. On mine, I put my new ones in with rear light putty on a 944 ; it never goes hard.
Some nice work!
|
| |
|
|
Flynn
Club Retro Rides Member
Posts: 143  Club RR Member Number: 166
|
2001 PH1 Clio 172Flynn
@flynn
Club Retro Rides Member 166
|
Aug 10, 2019 14:26:44 GMT
|
|
What an enjoyable read and a great looking car.
I totally feel your PAS related pain - completely different car but similar level of ballsache... I changed the steering rack in my 322 range rover last year as it was leaking terribly, it took me pretty much an entire weekend and every step was just plain hell, captive nuts that weren't captive anymore so had to strip back loads more bits of car, then clean up and tack the nuts so that they were captive again, no easy access to anything, just a pain through and through. Replaced the leaking rack with a 'reconditioned' rack with 12 months warranty and felt relieved that it was the only time I'd have to do it and now it was good as new.
14 months later - PAS fluid pouring out exactly the same spot ARRRGH.
Anyway, great work so far and out of interest and if you don't mind saying, how much did you pay for the steering wheel retrimming (for both the original and the aftermarket one)? Looks really smart.
|
| |
1971 MGB GT
1983 Daimler Sovereign 4.2
1999 Jaguar XJR
|
|
bshaw
Part of things
 
Posts: 149
|
|
Aug 10, 2019 23:37:49 GMT
|
Saturdays progress... Arrived at the unit for around 12, later than I wanted but I'm never on time for curse word so expected I guess 😅 Literally got stuck at the 1st hurdle, shouldn't have even been a hurdle but it well and truly got me  This one spacer bolt was well and truly stuck, resulting in it rounding off. Tried both the gun and the bar, nothing got it. Tried mashing a smaller socket on, rounded it more Think these H&R bolts are made of cheese Was going to resort straight to the air chisel, mate suggested welding a bolt onto it though so... Welded a VW wheel bolt on, this was the result  Threaded a nut onto that, welded it on, that snapped off Did the same again, snapped the lot off the Bolt Welded another VW wheel bolt on, did a full run of weld all the way round, that snapped the bolt in half again Welded another nut onto that, again with considerably more weld BOOM, cracked it off.    This, as you can imagine, set me back a while and put me into a foul mood. Was angry and had lost all motivation. Still, I cracked on and stripped down brakes, rod ends, bottom ball joint, wishbone, ARB, coilover, hub etc. Wanted to get at least one thing back on before I went home. Went for what I expected to be the hardest job. If I can get that out of the way, it should be plane sailing. Turns out, it was a piece of curse word. I tried the longer bolt and clamping etc method, as I was doing it I noticed itd be better to clamp it down rather than clamping the mating faces... I mean I don't want to blow my own trumpet but I feel I had a stroke of absolute genius.  Not including the 1st attempt as per most people advise, I had them both back on in about 15 minutes, if that. No longer bolts, no trying to clamp it to stop it moving. Just 1 2" G clamp, a small screwdriver and a larger screwdriver and boom, bolt was in. Method... Clamp down with G clamp enough to get small screwdriver in the holes Loosen off, use screwdriver to pull it more in line whilst doing clamp back up. Repeat with larger screwdriver, it should then hold in place allowing you to get the original bolt straight in. Must be a small G clamp like my 2" as this allows you to still get the bolt in. a 4" would be in the way. Size isn't everything, sometimes small is better. I had to cycle home (12 mile) so I didn't stay too late, once these were on I tidied up and headed home.  Everything else sorted tomorrow hopefully. Back in my Mum's Up! so I can pull a late one and try get it back on its wheels before midnight :ROFLMAO: Oh and cause I thought it was cool, my trolley of goodies.  |
| |
|
|
bshaw
Part of things
 
Posts: 149
|
|
Aug 10, 2019 23:42:28 GMT
|
Anyway, great work so far and out of interest and if you don't mind saying, how much did you pay for the steering wheel retrimming (for both the original and the aftermarket one)? Looks really smart. Sounds like a nightmare dude haha, worse than mine. Retrim on the OE wheel was 170 Retrim on the Sabelt was 150 OE more because of embroidery. This was also about 4 years apart Drop me a message and I can pass you the details of the chap who does them. He either used to or still does trim for Bentley, his stitching is always perfect, way way better than Royal for example. |
| |
Last Edit: Aug 10, 2019 23:43:11 GMT by bshaw
|
|
bstardchild
Club Retro Rides Member
Posts: 14,969
Club RR Member Number: 71
Member is Online
|
2001 PH1 Clio 172bstardchild
@bstardchild
Club Retro Rides Member 71
|
Aug 11, 2019 13:35:00 GMT
|
|
Good lord that would have frustrated me too - sounds like you need some motivation assistance - check your email although it's not quite what you wanted..............
|
| |
|
|
bshaw
Part of things
 
Posts: 149
|
|
|
|
Good lord that would have frustrated me too - sounds like you need some motivation assistance - check your email although it's not quite what you wanted.............. Sooo, this will be on the hill in the morning, thanks to this man  Not many pics but a brief update Had to wait for my mom to go shopping before I could nab the car and go to the unit, was 3 before I finally got there. Drained box oil, swapped both driveshafts and tie rods drilled holes for top mounts and fitted them and the brace loosely fitted rod ends, hubs, wishbones. Wishbones were by far the most difficult thing I've done yet, trying to get the washers in either side of the bush when its tight as hell, killed me off, had enough and went home  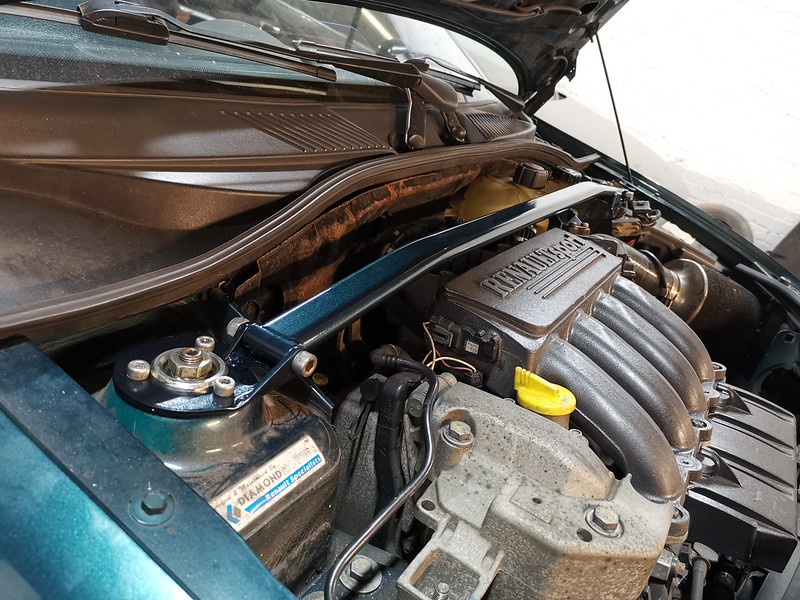  Be finished tomorrow, unless something goes tits up. Just realised I forgot to measure the bolt for the spacer to get the right one ordered |
| |
|
|
|
|
|
|
|
|
|
|
Is that roll centre/bump steer correction kit from PMS or from the guy on cliosport? Look's to be the job! Some good parts being added to this, should go well on track.
|
| |
1994 S1 106 Rallyé
1996 Mini Cooper 1.3 MPI (Rust bucket, currently in for surgery/resto)
2003 Renaultsport Clio 172 (Daily beater)
|
|
ChasR
RR Helper
motivation
Posts: 10,307
Club RR Member Number: 170
|
2001 PH1 Clio 172ChasR
@chasr
Club Retro Rides Member 170
|
Aug 12, 2019 11:11:54 GMT
|
That steering wheel looks top notch! I may have to go there for the M3 wheel! As for the bump steer kit, it looks good! If what @pinderwagon's experience of one works for you, it certainly should make for a big improvement  . |
| |
|
|
bshaw
Part of things
 
Posts: 149
|
|
Aug 15, 2019 20:59:54 GMT
|
Sooo as always, I've been having a bit of a mare with this lol! Hence me not updating, been too annoyed by it all to find motivation to write something up. By Monday evening everything was fitted and the car was back on all 4 wheels.  Decided to clean the wheels inside and out before getting the tyres swapped over. Luckily the guys I share the unit with are mad into their cleaning/detailing. So never short on decent cleaning products to steal.   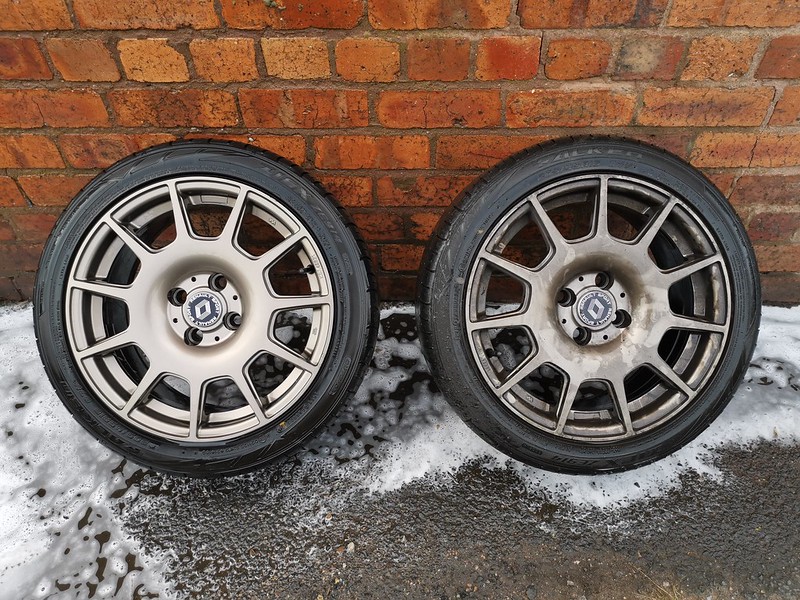 How to: fill your clio gearbox up easily   For some reason, the front sat lower after fitting everything. I'd actually forgotten about this until now with all the other issues I've had. Not sure if the top mounts may cause it to sit a little lower. I have seen this mentioned before.  Following day (Tuesday) I got to the unit early and raised the car by a fair amount. Everyone should buy coilover covers, look how mint these are after more than 2 years of daily driving  The increased castor had pushed the wheels toward the bumper, the widened track from the correction kit had also added to this, meaning it was pretty much sat on the bumper/inner arch. Once it was sat level, I couldnt help but notice the passenger side wheel looked further forward than the drivers, maybe it was the bumper, I persuaded myself it was the bumper and ignored it.   Got it to A-line for tracking and well, they confirmed the worst.  Passenger is indeed further forward for some reason. Was bang on before I fitted all of this, can only assume it's a wishbone. Noticed on the drive back, steering is very heavy and the wheel doesn't self centralise when you let go. Instantly jumped to it being the difference in castor. Almost swapped the wishbones back to the original ones. Whilst I was starting to remove the wishbone, I noticed how stiff the lower bearing was. Dropped Mark a message, we thing they may have seized a little. Steering is heavy with both wheels in the air, so this kinda confirms its a bearing issue rather than castor? Hes sending me some new bearings, so will see if this helps. Also think I may need new ones in the top mounts too, steering is still tighter than normal with both bottom bearings cracked off. However, this does seem to be getting better after driving too and from work a couple of times. Kinda hoping it fixes itself, and the castor difference I'll come to at a later date I think. May buy new cup wishbones and swap the bushes over, as these were a pair of used ones I cleaned up. Looks great with the wheels spaced out so far, but it's not usable so I'm changing my spacer setup.   Ordered PMS stud conversion today and 10mm spacers instead of the 20mm H&R spacers. This should put it back to how it was before without the correction kit fitted. Another thing I thought was a massive problem turned out to be only minor. The clunking noise I assumed was suspension related was still there, upon me trying different things whilst driving to see when it did it, and when it didn't. I got home and concluded it had to be the dogbone mount, despite checking it and it looking fine the other day. Had it on the ramp at the garage opposite work today and confirmed the Evol mount has given up. Waiting on a reply from him about replacement inserts. Honestly thought it was a clutch spring shitting itself, thought I was going to be pulling the box before Anglesey. Talking of boxes, put the actual correct oil in and the crunches into 3rd isnt half as bad as it was before. Ran oil for years that was recommended as being better than OE on cliosport.net by a fair few guys, certainly is not if your synchros are worn. Feeling a load better about the car today, after having a curse word few days with it. Mad how much it can get you down, after ploughing so much money and time in and it all feeling like its going wrong lol. Even treated it to some auto finesse products, its getting a full polish on Saturday ahead of the Gathering. If anyone could get pictures of this going up the hill, I'd love you longtime. Come say Hi too, talking to strangers helps pass time whilst waiting in the paddock lol. |
| |
|
|
bshaw
Part of things
 
Posts: 149
|
|
Aug 15, 2019 21:05:55 GMT
|
Is that roll centre/bump steer correction kit from PMS or from the guy on cliosport? Look's to be the job! Some good parts being added to this, should go well on track. Chap on cliosport, did consider the PMS one but worked out more expensive, and Mark is fairly local to me so went and collected it. That steering wheel looks top notch! I may have to go there for the M3 wheel! As for the bump steer kit, it looks good! If what @pinderwagon's experience of one works for you, it certainly should make for a big improvement  . I'll be fitting it before the Gathering, feel free to come take a look, itll be floating about the paddock all morning. Hoping so, I've not had chance to really push the car, I'll get a little bit on the way to Shelsley as it's a decent drive from me, but I guess the 1st proper test will be on the hill. Not ideal as there's no room for error  |
| |
|
|
|
|
|
|
|
|
Have you done the gearbox circlip mod? First time I was on track mine shat the bed, I've a renfort plate in it now.
|
| |
1994 S1 106 Rallyé
1996 Mini Cooper 1.3 MPI (Rust bucket, currently in for surgery/resto)
2003 Renaultsport Clio 172 (Daily beater)
|
|
bshaw
Part of things
 
Posts: 149
|
|
Aug 16, 2019 18:52:59 GMT
|
Have you done the gearbox circlip mod? First time I was on track mine shat the bed, I've a renfort plate in it now. No idea what this is, never heard of it. |
| |
|
|
|
|
|
|
|
|
|
| |
1994 S1 106 Rallyé
1996 Mini Cooper 1.3 MPI (Rust bucket, currently in for surgery/resto)
2003 Renaultsport Clio 172 (Daily beater)
|
|
bshaw
Part of things
 
Posts: 149
|
|
Aug 24, 2019 21:07:08 GMT
|
Been a little slow to update, had an absolute mad one Saturday before the Gathering, feel like I've only just recovered, ready to do it all again for Curborough this weekend. I'm gonna start with the time I finally locked the gate outside the unit ready to head home Sunday morning.  By the time i got home and into bed and set my alarm for 6, you know that little thing that pops up saying "alarm set for x hours x minutes... Well this said 2 hours 15 LOL Anyway.. Started Saturday at about midday, snowfoamed it  Shampood it twice, went to dry it and it was still dirty so went over it again. Covered the thing in fallout remover, washed off Got any tar off with tar remover and dried it all.  Already looking a million times better Pulled it into the unit to start on some other jobs. 1st up, studs 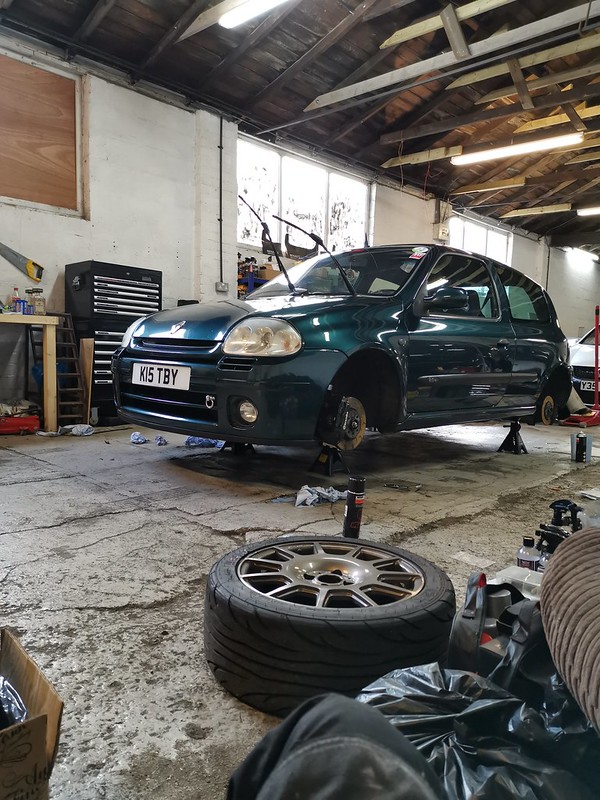 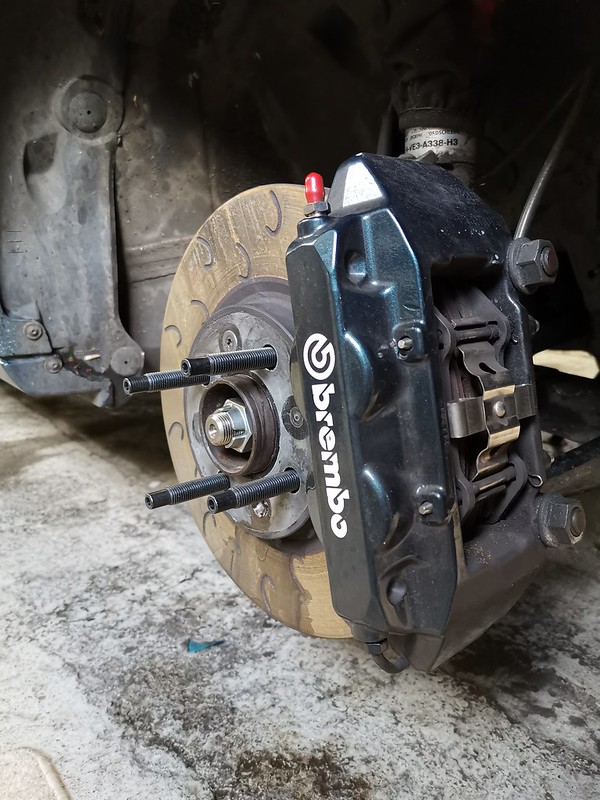 Spent 3 blasted hours claying the car, but my god did it make a difference, the paint is so smooth now its amazing 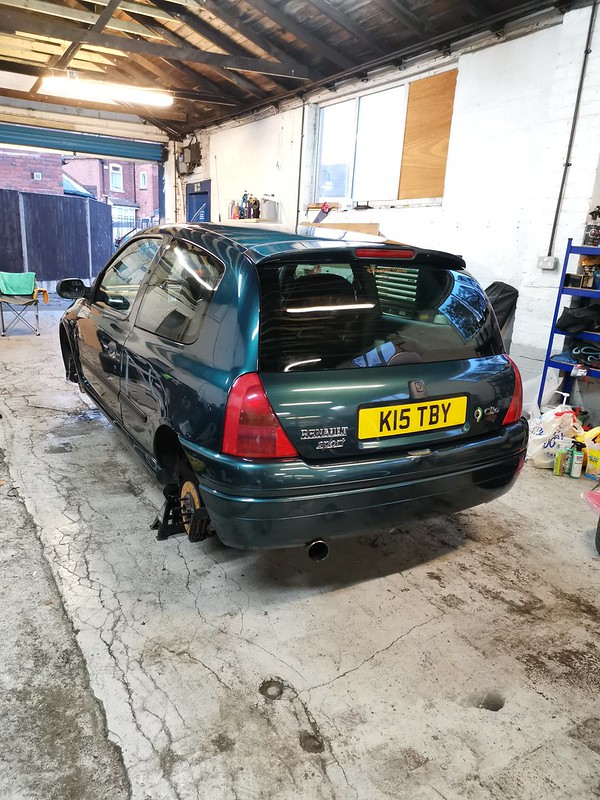 Time to start polishing, I didnt really get any pictures of this, one bad comparison shot  One of the guys I share the unit with popped by and did some polishing for me, whilst I sorted fitting the wheel.  It's getting very late now, so taking pictures is the last thing on my mind. But I wasnt going to stop half way through so i soldiered on, machine polished the entire car, sealed it, waxed it, hoovered it, put wheels back on and tadaaa, was done, by about half 2 in the morning. Some shots from the hill I got off of Stuart - capture your car photography. A little over edited for my liking, but I managed to grab the raw copies too to add my own touch, when I can be bothered.           Monday after work I popped to the unit to grab all my stuff as I'd left it all there in a mess. Whilst I was there, finally gotten round to fitting the new exhaust hanger  Aaand my ECU bracket/heat shield  Today I managed to sort the dogbone mount, as it turned out this was curse word too  As always with this car, this fixed one issue but highlighted another. I've still got a knock coming from something when i break/accelerate. So I guess further investigation is needed still. Maybe one day ill actually fix an issue and that'll be it, there wont be anything left to replace. Oh, fitted the smaller 10mm spacers when I did the studs. I now have no rubbing issues up front at all, which is nice. Fixed my gopro too so will have video footage from Curborough on Monday Shame I couldn't sort it before the gathering but I simply ran out of time. More to come soon I suppose  |
| |
|
|
bshaw
Part of things
 
Posts: 149
|
|
Aug 24, 2019 22:25:48 GMT
|
One other thing I forgot to say I owe a massive thank you to bstardchild for letting me go up the hill I know this is right on the edge, maybe shouldn't really have been allowed, I don't know. but yeah. I've wanted to take this up Shelsley for ages now, finally got to do it at the best show of the year. Set a tradition too now, 5 years ago I went up the hill with my mate in the polo  This year...  2024? Well, its given me a deadline for the 944 Please don't outgrow Shelsley Walsh, not that I don't want it to get bigger, I just wanna carry on tradition  I'll have 4 years of actually looking at some cars. Problem when you run the hill, always miss most of the show. So gutted I missed THAT quattro do its only proper run, also missed so many things in the clubs/retro parking. |
| |
|
|
|
|
|
|
 but hey, you guys let it on autosolo so....


 .
.


