|
|
|
|
|
And fast forward to... May 2017. Realising that there is absolutely no point having a car in storage indefinitely I decided to get it back on the road and make a decision about either keeping it or selling it. So two weeks before the date of a booked mot I visited the car (it was still there which is a good start and the garage roof hadn't fallen in which was a bonus) with its battery that had been on trickle charge for 19 months. After freeing off a seized bonnet cable enough to open the bonnet and a seized choke cable enough to make it operable it started after maybe 10 seconds of turning over and ran reasonably well. Fast forward two weeks to the 1st June 2017- mot day. Got to the garage fairly early, started it and drove out into the sunshine for the first time in 19 months. The car stalled whilst I was messing about with the bonnet (which wouldn't latch down), then wouldn't restart- turning over for ages. Then it wouldn't even turn over... suspected the battery, but connecting it to the car I arrived in made no difference, nothing when I turned the key. Called the AA and another enthusiastic bloke with a van full of tools arrived. I'd been tinkering with the starter motor whilst I waited for him to arrive (forum suggested that was the culprit) and had noticed a corroded spade connector that I broke during tinkering. AA man replaced that and it started straight away Off to a garage for some new fuel and to pump the tyres up and to the MOT! This going to be great! Except it wasn't that great... the car ran fine but the brakes were fairly terrifying- uneven braking and pulling to the left both during driving and worse whilst braking. I had deliberately taken the back route to the mot station rather than the dual carriageway and was glad I did- the brakes got worse and worse over the 10 mile journey and entering the village they completely failed, I put my foot on the pedal and there was no resistance as I pushed it to the floor . luckily by this point I'd started leaving a bigger and bigger gap in front and not driving that fast, so I was able to stop using the handbrake. I very slowly drove the car the remaining 1/4 of a mile to my parents drive and cancelled the mot appointment. Some research online suggested the master cylinder was probably at fault, further advice was to change the spider distribution block and all the rubber hoses. I had already bought a secondhand set of later front calipers for vented discs, so they were pulled out of the box... and one bleed nipple sheared off when I tried to loosen it. Great. Even better was snapping off a drill bit in the remains of the nipple. I made a trip to lakes volvo scrapyard and fairly reluctantly bought the last right hand side vented caliper they had which was suitable for a rebuild but not for use as is. The plan at that point was to transfer the pistons from the newer but ruined caliper to make one good one from two. After a bit more research online I realised brakesinternational.co.uk has new calipers for not all that much money and so in the interests of time, only wanting to do the job once and definitely not wanting to suffer complete brake failure again, I purchased two new front calipers. I also placed an order at the same time from Brookhouse Volvo for a new master cylinder, brake pipe distribution spider, a complete set of flexible brake pipes front and rear and a clutch flexible pipe. An order with Parts For Volvos completed the spending spree with oil filter, cambelt, tensioner pulley, clutch master cylinder and clutch slave cylinder rebuild kits and gearbox mount. Plugs came from a seller on ebay as they were cheaper and in stock. With the car not driveable and awaiting the arrival of parts to work on the brakes I tacked a few other jobs. The bonnet latch was easy to fix, just needed taking apart, cleaning and reassembly. The latch for the rear seat turned out not to be broken, just the wire had slipped off of it so that was relatively straightforward. The front section of the exhaust came off and the leak at the joint turned out to be cracks on both pipes just back from the weld making it uneconomical to repair, so I’ll replace it – hopefully the exhaust I took off the turbo car before the engine conversion will connect up to the rear of the exhaust on the 245 which is in good condition – haven’t investigated if the joints are in the same place yet (the one on the 245 was custom made apparently). The knocking sound when changing gear wasn’t cured by changing the engine mounts back before storage, so I took the rear section of the propshaft out and replaced the centre uj. The old one was rusty and dry and stiff, so even if the knocking sound isn’t cured by it’s replacement it needed replacing anyway. After that I pressure washed about 400 years worth of grime out of the engine bay, although it doesn’t look all that much different due to the factory applied underseal on everything. Garage was 'just' long enough - and this was with the towbar removed! 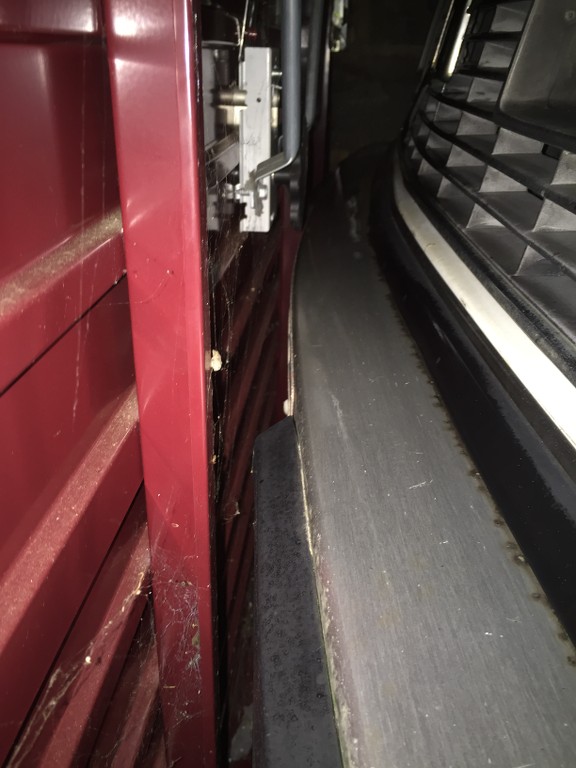 Fast forwards 19 months and this is the first time the garage door has been opened in all that time - it's still there 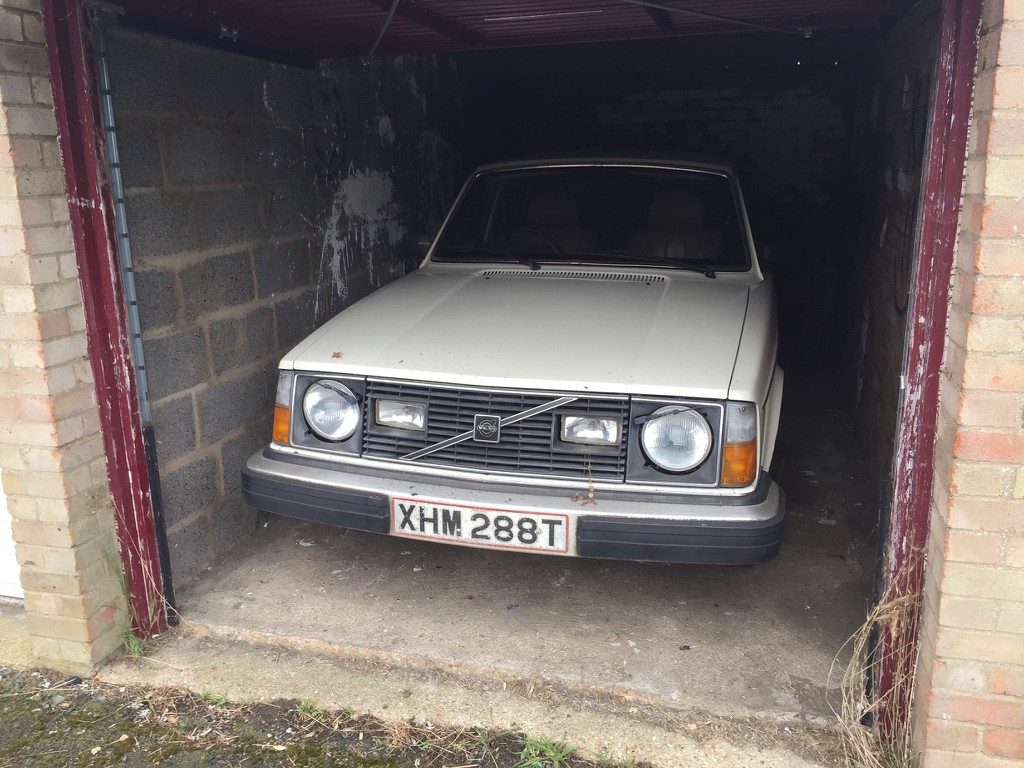 Broken down 10m from the garage door... the grill is removed as i wasn't able to get the bonnet to latch 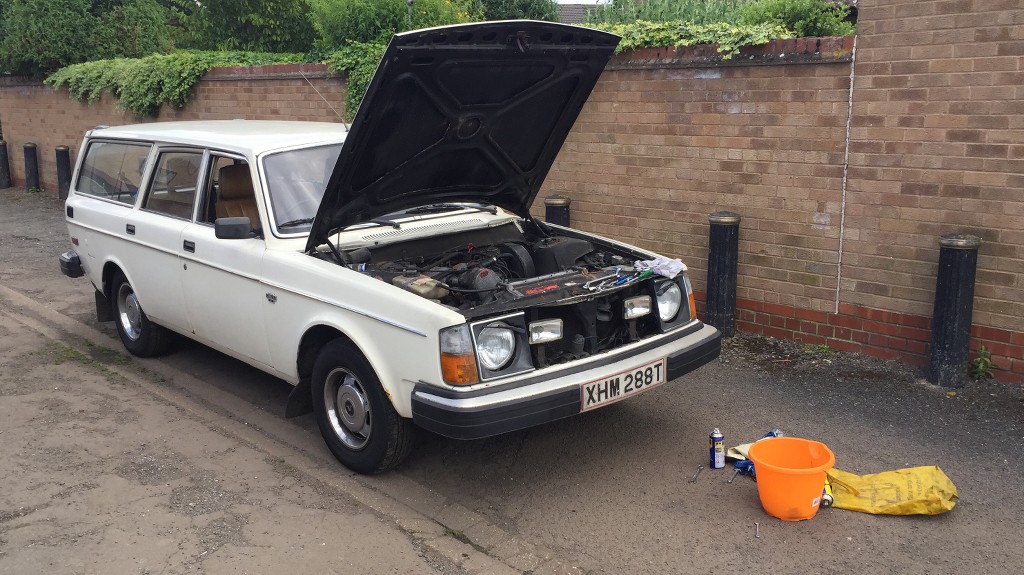 One replaced connector and I'm on my way 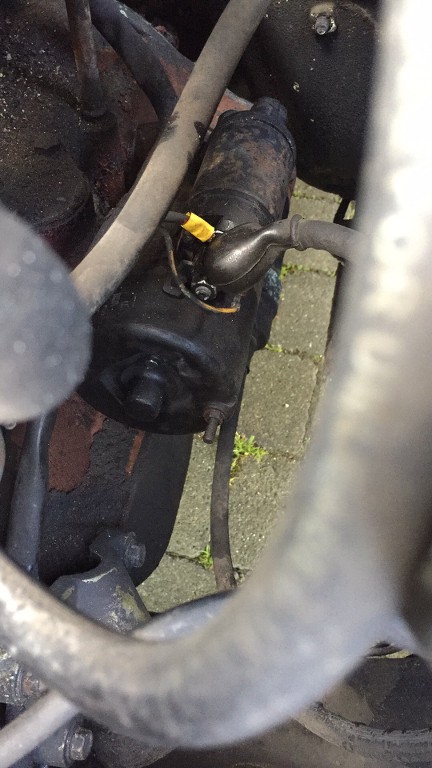 The scary light 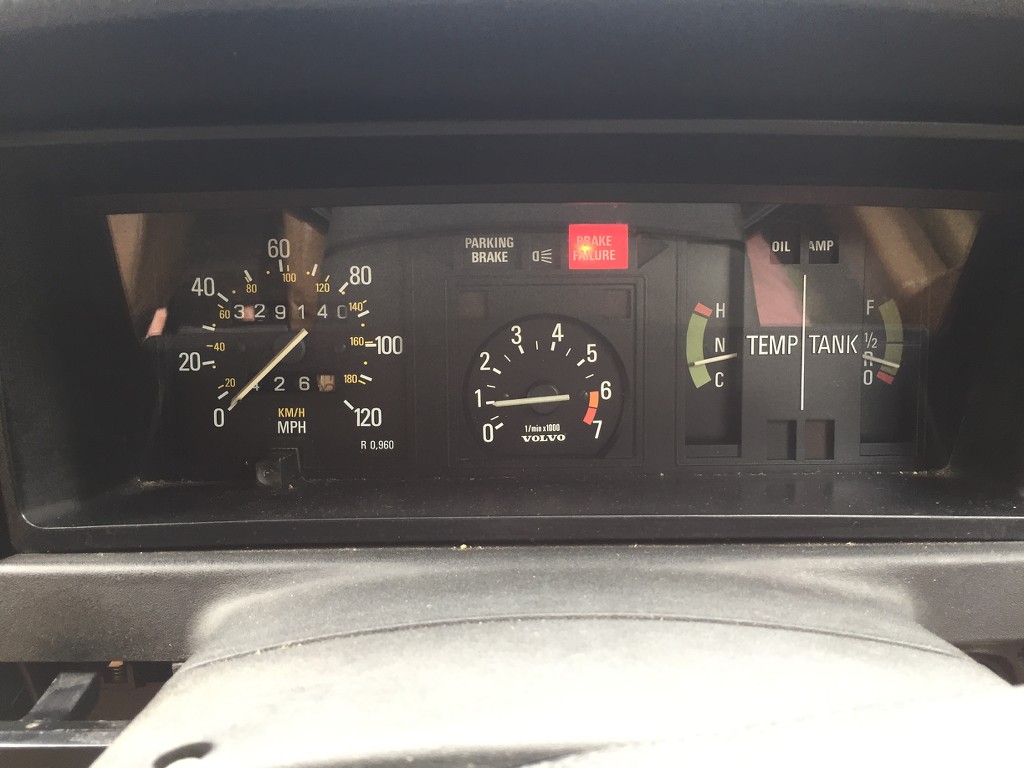 Uj replacement 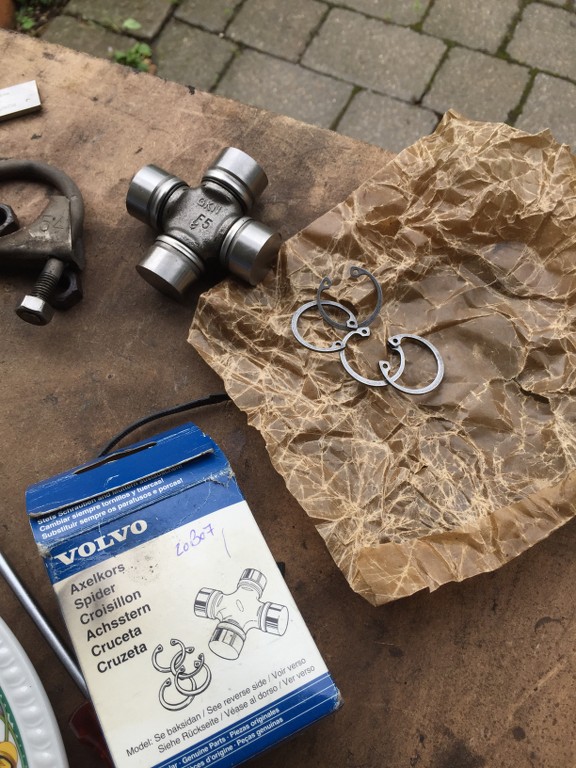 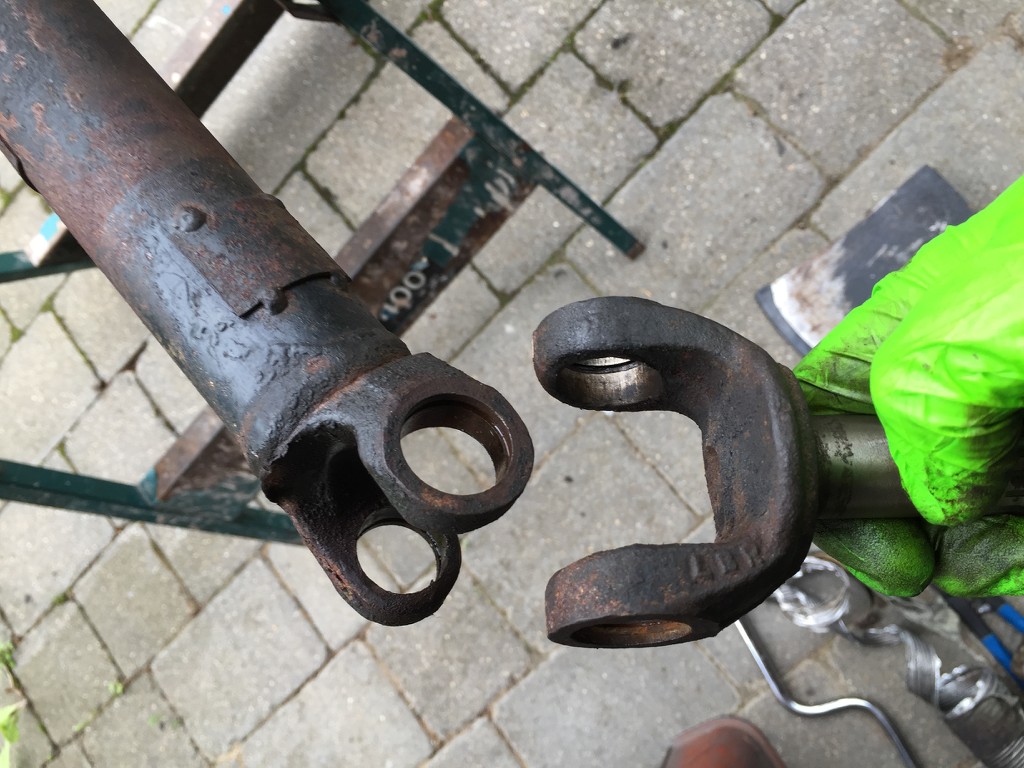 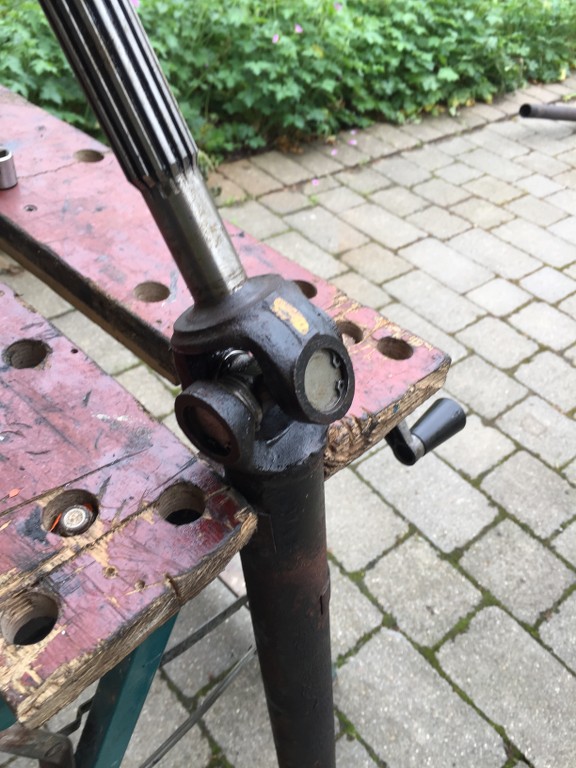 Cracked exhaust 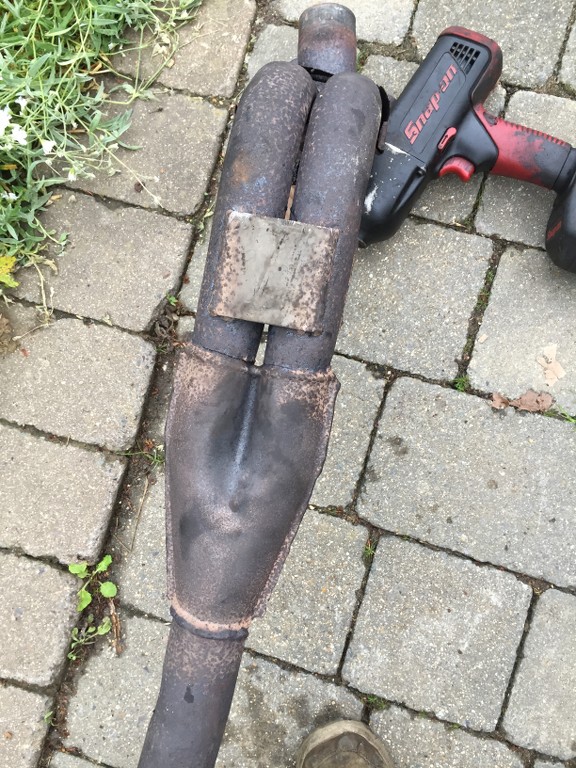 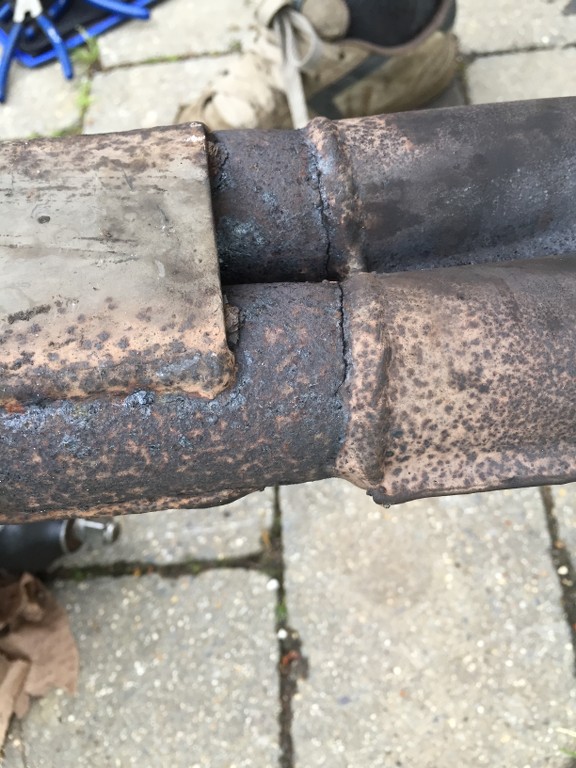 |
| |
|
|
|
|
|
|
|
|
|
Another day, more tinkering. Parts had started to arrive, so I replaced the master cylinder and cleaned the new looking master cylinder reservoir I had taken from a car at Lakes. Undoing all the joints to the spider wasn’t that fun… but not too bad. The problem I’ve found with undoing the brake unions isn’t that the nuts are totally seized – all of them have come undone with the aid of a brake pipe spanner and penetrating oil easily enough – but that the unions are stuck to the copper lines, meaning that undoing the nuts is twisting the lines. Some free off by wiggling the nut backwards and forwards just after it’s been loosened, some don’t. Those that don’t free off either shear the end of the line off or twist the last part of the line around into a spiral shape, either way any that did’t free off are now off the car and being replicated for replacement. Refitting nice shiny new parts is of course a lot easier. New discs, pads, calipers and flexible hoses on the front, new master cylinder and spider block under the bonnet and new rear flexible hoses all fitted. The rear calipers were next and I wasn’t planning to do more than push the pistons back in, clean the calipers out and refit the pads with new pins and anti rattle springs. The rear left went just fine and the rear right… snapped off the bleed nipple despite penetrating oil and heating the area with a blowtorch. Dammit. The knock-on problem that followed that was that the union on the end of the solid line connecting to that caliper wouldn’t release its grip on the line so the end of the line got sheared off by undoing the nut. Great. With the caliper off the car it was easy to see that the dust seals are split in several places and it wouldn’t be a matter of just fixing the sheared bleed nipple before I was happy to refit it… so another order from brakes international, this time for two new rear calipers, new rear discs and rear pads. So that’s how the car stands as it is now. Working on the brakes has taken longer than expected but at least I'll be confident they'll work when I finish! Next on the list are the MOT and servicing the engine, as well as looking into why the alternator isn’t charging – but that might just be the bulb in the dash that’s part of the exciter wire circuit. One advantage of the car being in storage for so long is that I’ve had a chance to find all the parts that I knew needed replacement, I have a replacement petrol tank (previous owner listed this as one of the faults, the current one leaks from the seam if it's filled over half way), replacement seats, the heater fan and a few other bits and pieces... fitting all that should keep me busy for a while, then there's the paint to do something about, yikes, hope nothing else major comes up *note for non-volvo nerds - the 240 has an interesting setup for the front brakes, with two lines going to each caliper each of which controls two pistons (front calipers are 4 piston, rears are two piston). The brake circuits are separated like this so that if you lose one circuit instead of losing one front brake and rear brake completely as in a conventional car, you'll only lose one rear brake and half a front brake and as a result have much more control whilst braking. A touch more complicated, but it is a Volvo so safety first  Old brakes 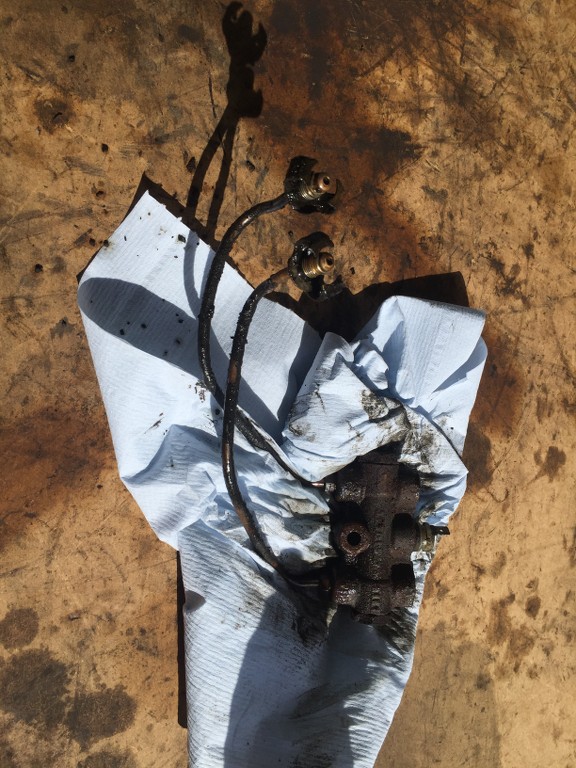 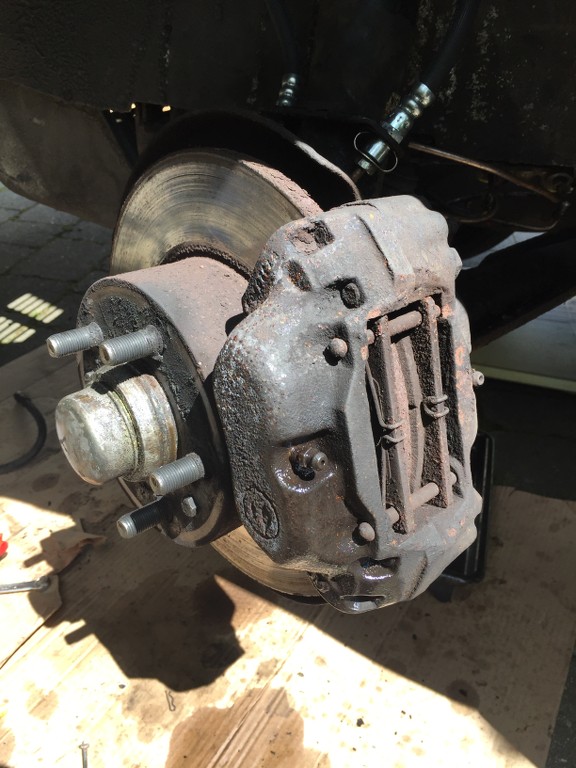 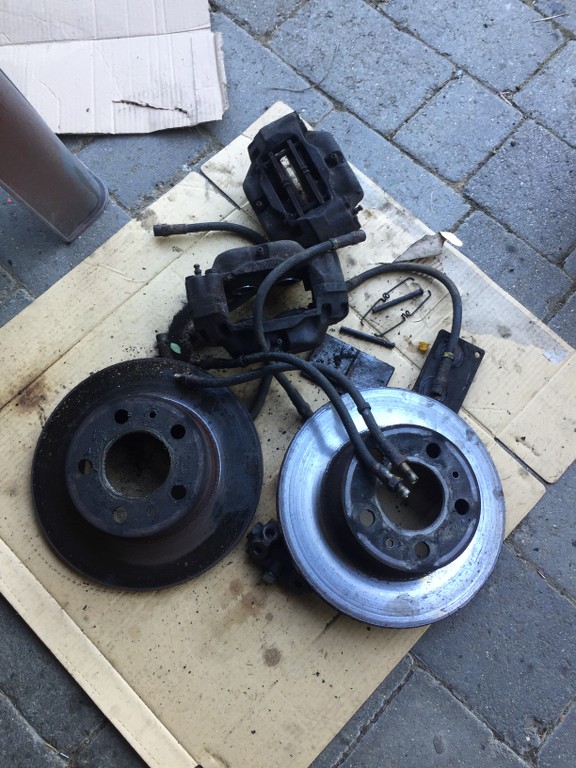 New brakes up front and spider 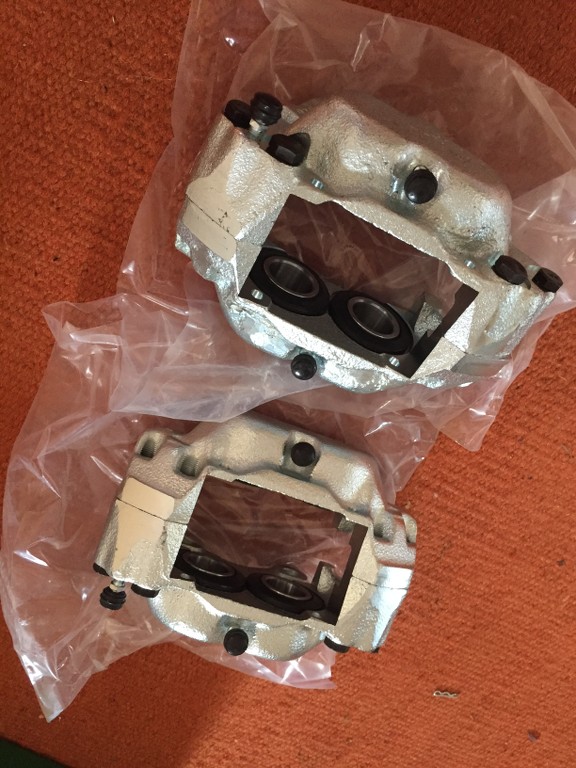 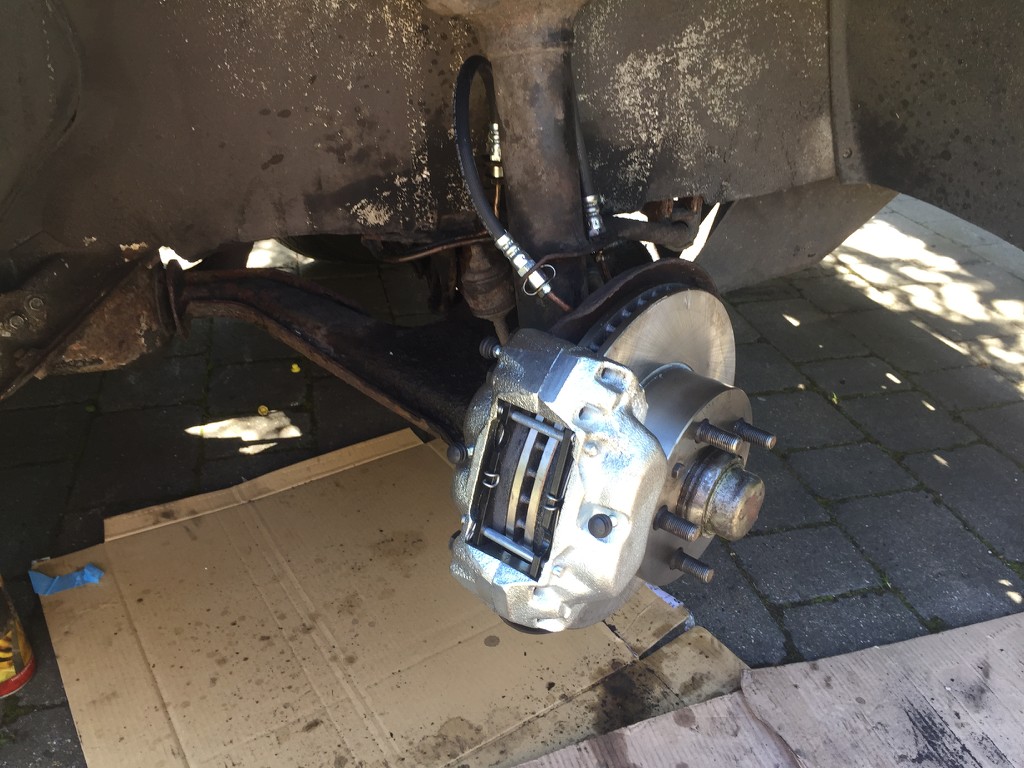 Dammit. 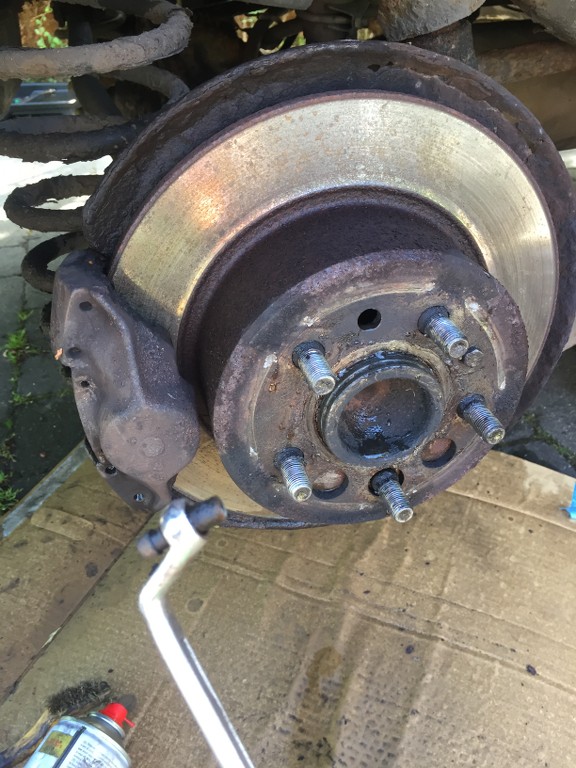 |
| |
|
|
|
|
|
|
|
Some more tinkering spread out over a weekend… First off, the exhaust – I pulled my spare downpipe out of the garage and it appeared to match, so the one on the car (which I had refitted without exhaust paste as I knew it’d have to come off again) was pulled off and compared – a perfect match. I must have mis-remembered what the previous owner told me, perhaps it was that the exhaust for guaranteed for life rather than custom made. With the exhaust off it was easier to remove the gearbox cross member, so that was taken off (with a jack under the gearbox!) and I replaced the gearbox mounting. The ‘new’ downpipe went back on ok, apart from a bit of filing required on the bracket at the bottom of the downpipe to make it fit. This wasn’t fitted before, which is probably why the other downpipe cracked there as it wasn’t properly supported. I then fitted three new copper brake lines that my local garage made for me to replace the ones that were ruined in various ways during disassembly. Replaced new rear discs, fitted new rear calipers and fitted new rear brake pads. The rear shocks are pretty ruined but I’d bought a replacement set, so I attempted to fit them which turned out to be quite a time waster… the top of the shock is held with a nut on the end of a stud that comes out of the bodywork at the top of the wheelarch, the bottom of the shock is held with a bolt that passes through the trailing arm, then through a spacer, then through the shock bottom, then through the other side of the trailing arm and then is secured with a nut. The nuts came off easily enough, but unfortunately the spacers are rusted onto the bolts, meaning that removal of the bolts was impossible. I tried various methods and then asked online – the solution is to cut through the bottom of the shock mount and the bolt, then cut the head of the bolt off on the other side of the trailing arm, meaning it can be removed in pieces. With limited space to work – the car is on axle stands rather than on a lift – I decided to source new bolts and spacers and leave this job to the garage that will be MOTing the car since they will have the car on a lift and have much more space to work. After that came bleeding the brakes… what fun. I made a DIY pressure bleeder from an old master cylinder cap and a piece of inner tube, which allowed me to pressurise the reservoir using a bike pump that has a gauge on it. I bled every caliper but the pedal still went to the floor without resistance. Asked online and with a completely empty system the spider distribution block needs to be bled first by loosening the inlet and then outlet unions until they drip fluid. With that done another round of brake bleeding didn’t make a difference – the pedal still went to the floor. Asked some more questions online and left that for the day… Next on the list – I set the engine at TDC, then stripped the front of the engine, removed the cambelt… and then called it a day. Back the next day I pressure washed off all the accumulated grime (but no fresh oil so no seals need replacement) from behind the cambelt cover, replaced the cambelt and tensioner pulley, then put the cover/belts/fan and shroud back on. I did make a small change, I swapped the alternator adjustment arm for a later one that has a tensioner bolt on it – this allows you to adjust the belt tension to the correctly before tightening the securing nut. The older version doesn’t have this extra bolt so you have to adjust the tension in the belts by levering the alternator away from the block and then do up the securing nut, presumably one handed. Set of new plugs also got installed. I had another go at the brakes and managed to get the pedal to have some feel, although still a bit mushy. Time to try starting it and it started straight away and settled down to a smooth idle. The alternator is now charging – it was just the bulb in the dash that needed replacement. I took it for a short test drive round the block and the brakes do work, despite the mushy feeling brake pedal. The clang when changing gear is also gone, so that was caused by the uj which I have replaced. So off for an MOT! A few things for the garage to sort – there’s a small isolated patch of welding needed on the left hand inner rear wheel arch, the brakes need another bleed all round, the rear shock bolts need to be cut off and replaced and the tracking needs checking – the front right tyre didn’t have any tread on the inside edge (I’ve replaced it with a spare I had). exhaust measuring 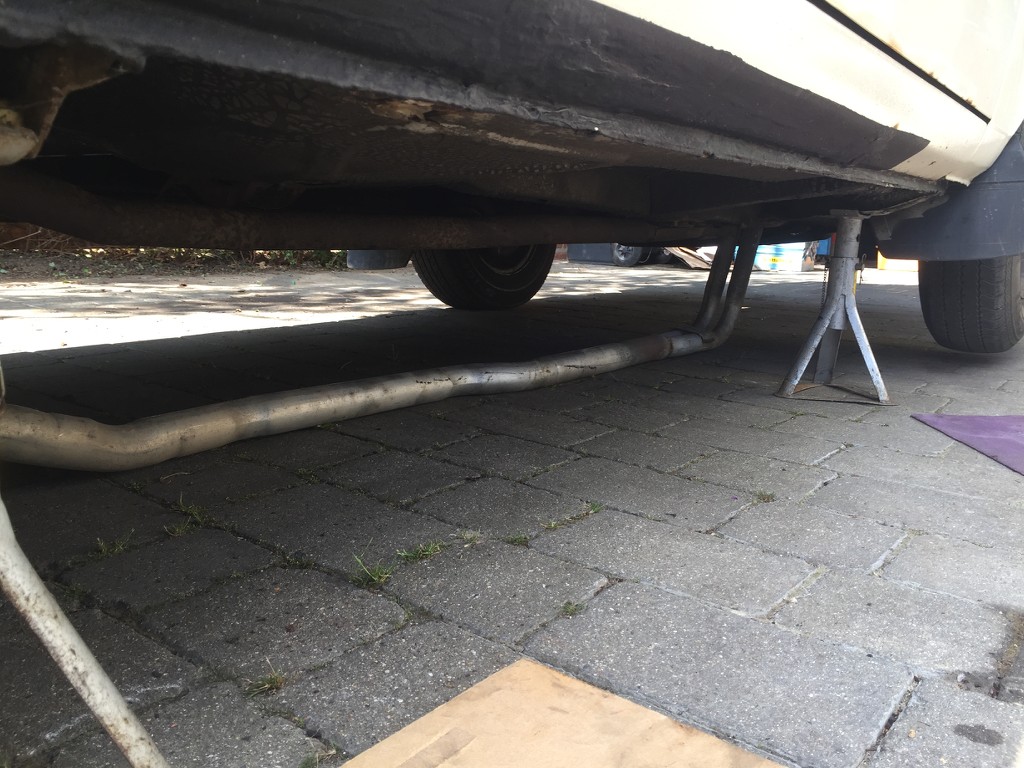 yep, that should work 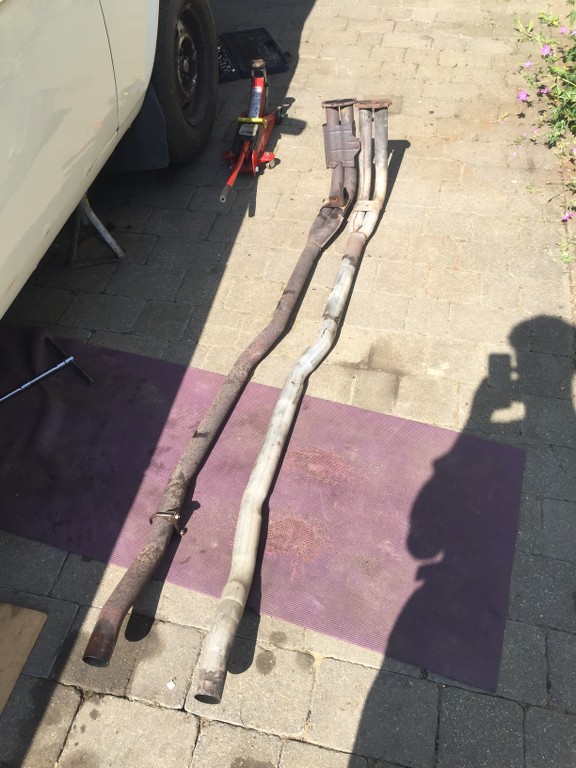 gearbox mount replaced 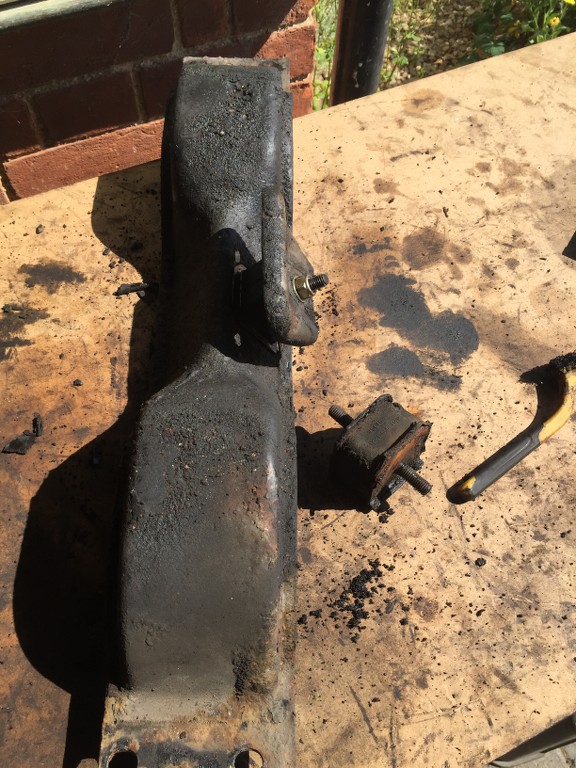 Bending brakepipes to match the originals 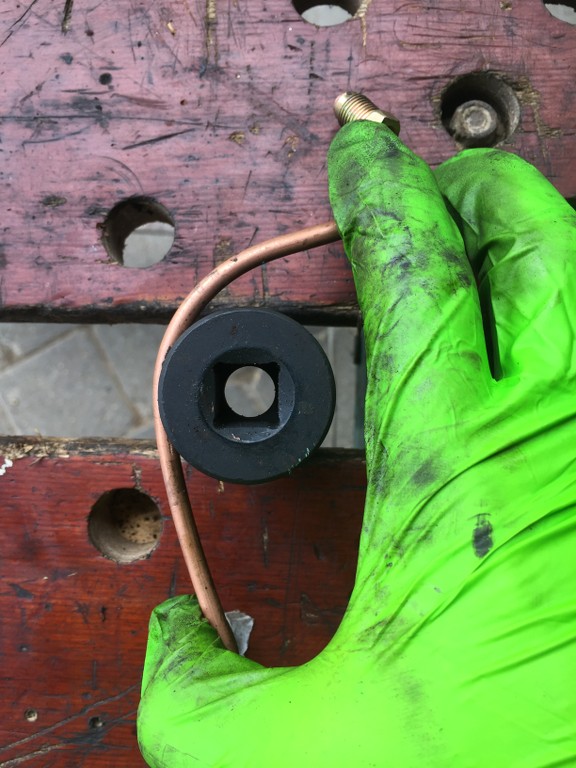 New rear brakes - note the very rusty rear shock upper 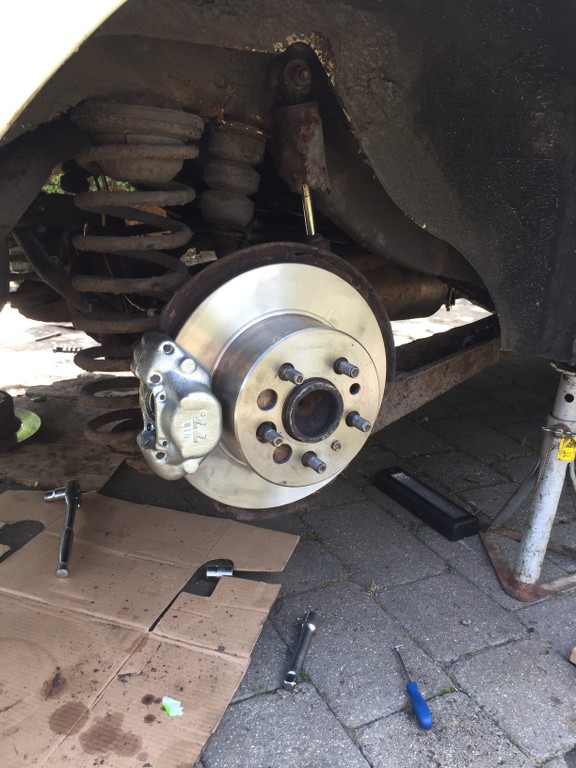 DIY brake bleeder 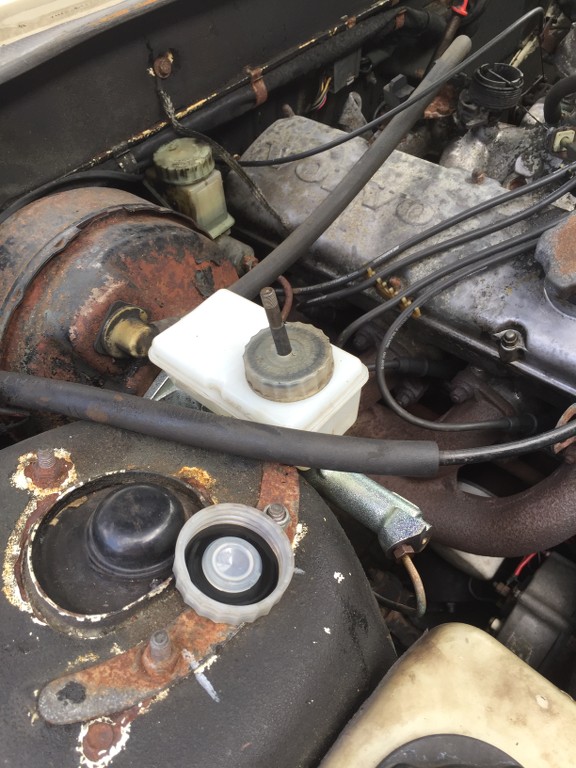 Front of engine stripped off and clean 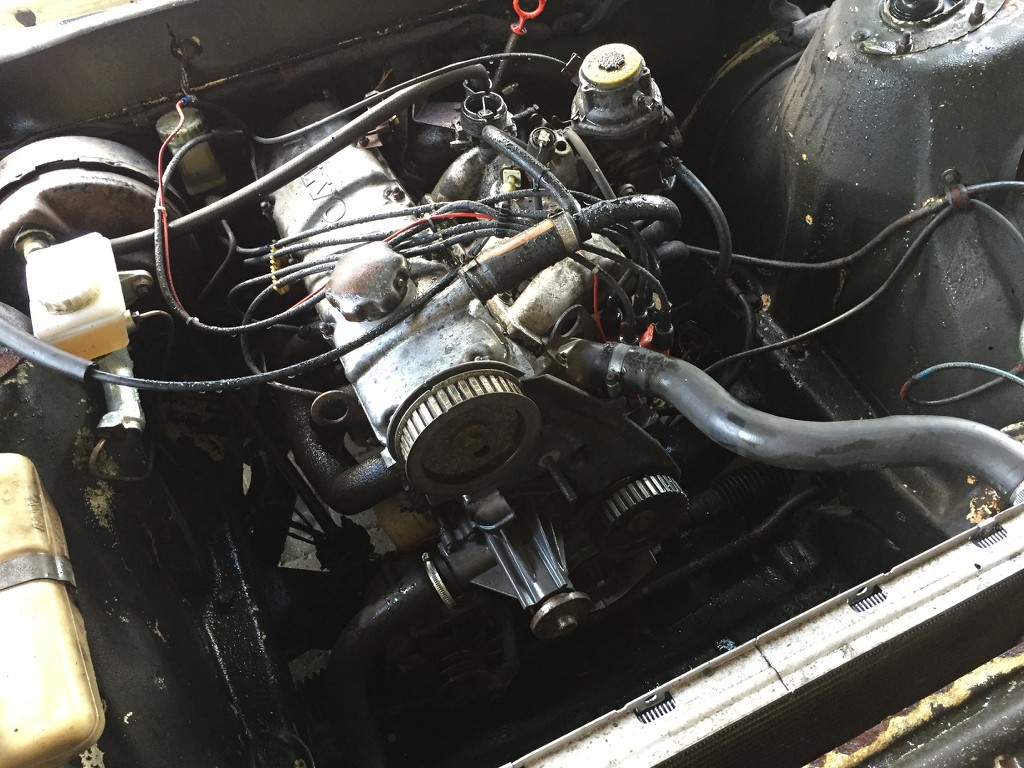 New pulley ready to go on 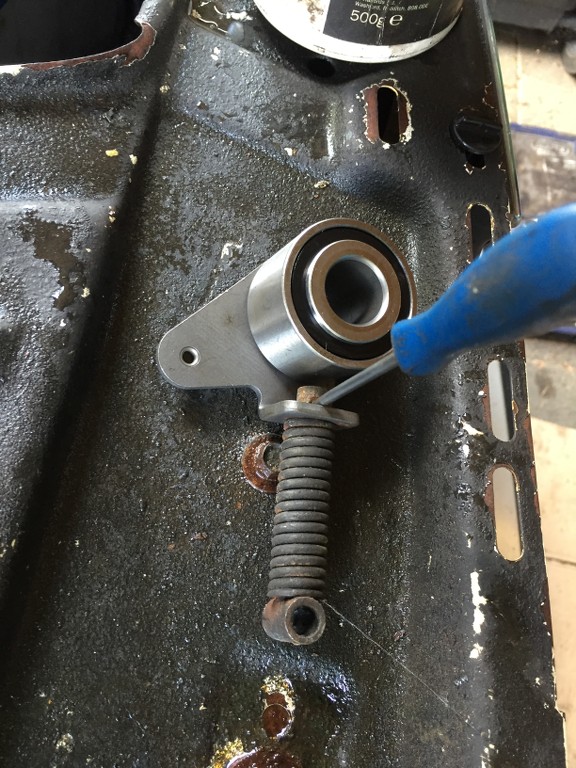 Replacement later alternator tension adjuster 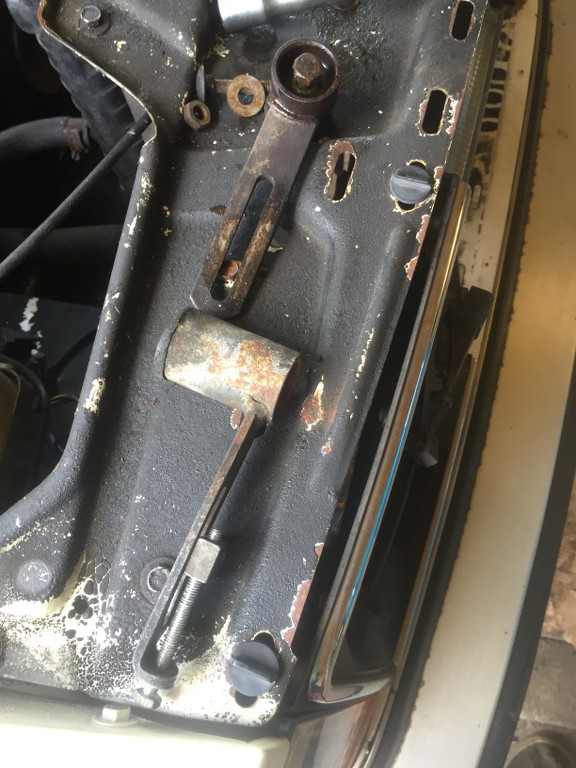 All back together 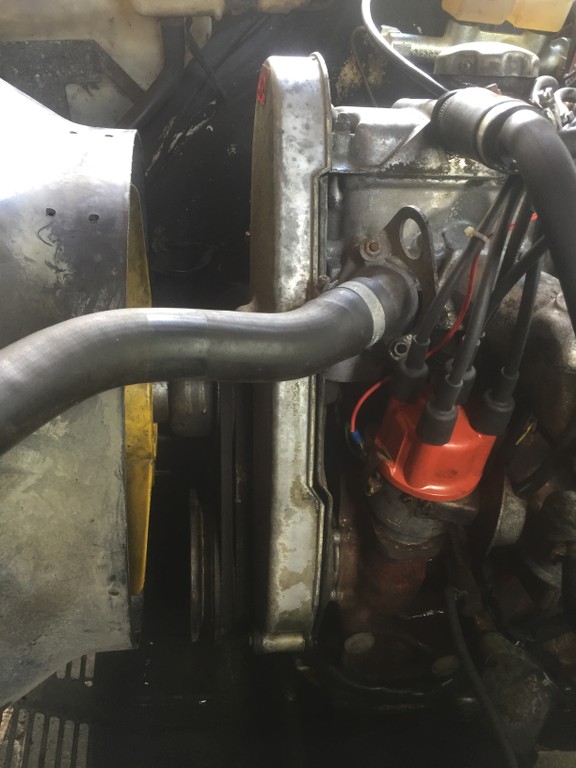 A quick wash and now it's ready for a trip to the garage for a few bits of work and hopefully an MOT... 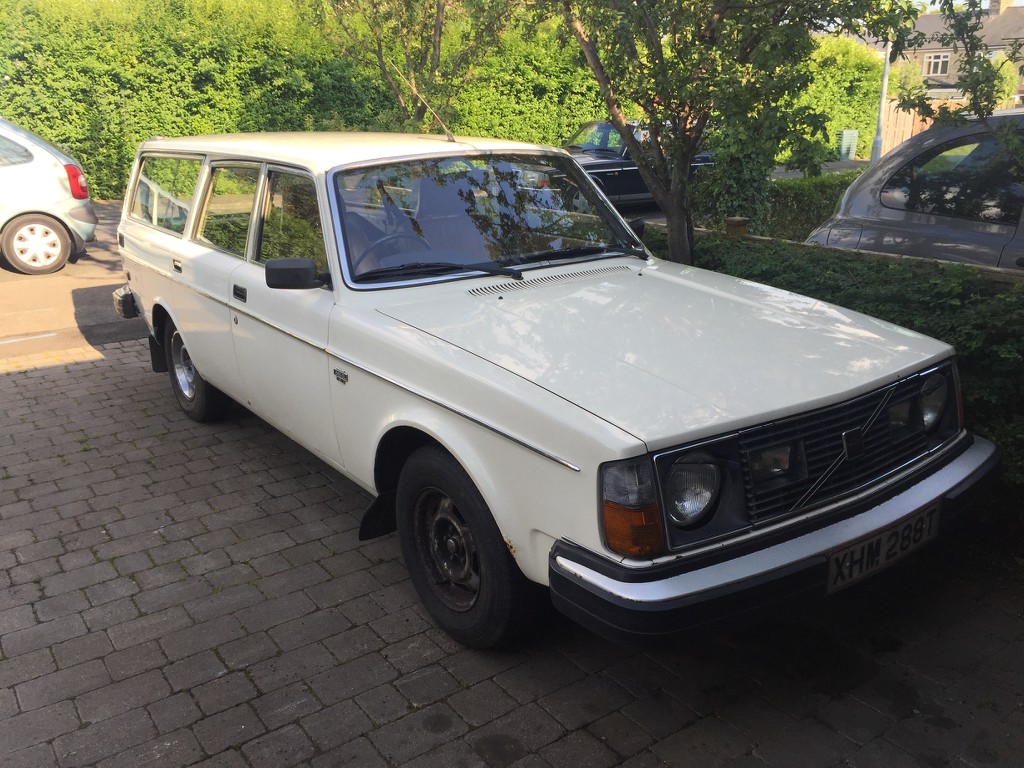 |
| |
|
|
|
|
|
|
|
|
So we're up to June 2017 - I'll try and copy paste some more over the next few days...
|
| |
|
|
paul99
Part of things
 
Posts: 417 
|
|
|
|
Got to love a 245  Started something of a revolution in my family, my dad had 3 (245, 240, V70) Brother 2 (S80, XC60) and I'm on my first (S60) |
| |
|
|
|
|
|
Apr 16, 2019 11:05:40 GMT
|
I really like those wagons. As classic cars go, they are one of the more usaable marques on todays roads. Perhaps not so much on your side of the pond, but there are drivetrain options that will make the car a lot more "interesting" while still flying under the radar by keeping full stock appearance .  |
| |
Last Edit: Apr 16, 2019 11:08:06 GMT by bjornagn
|
|
recarouk
Yorkshire and The Humber
Posts: 435 
|
|
Apr 16, 2019 11:54:10 GMT
|
Brilliant write up, really enjoying reading this keep the updates coming  |
| |
|
|
|
|
|
Apr 16, 2019 13:20:40 GMT
|
written in sept 2017: So a short update - I've had the car on the road since July and have done about 400 miles in it, during which time I've broken down twice... both for silly reasons. The first time it wouldn't start was just after this photo: 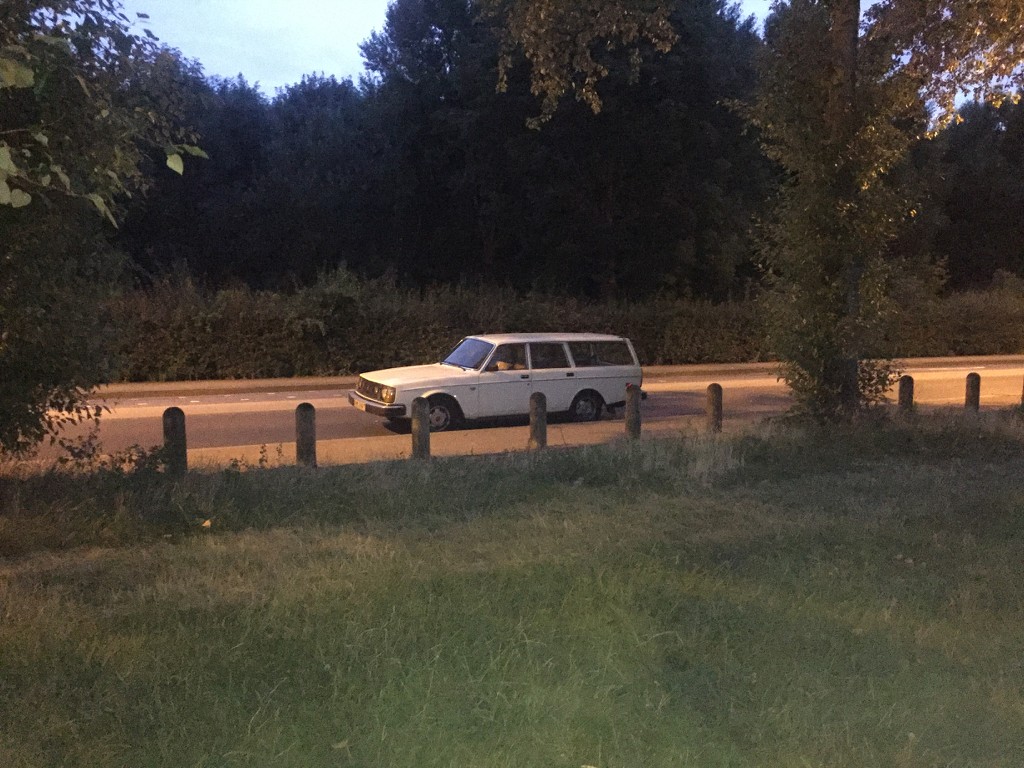 It turned out that the alternator adjuster had vibrated into separate pieces, all of which were still in the undertray 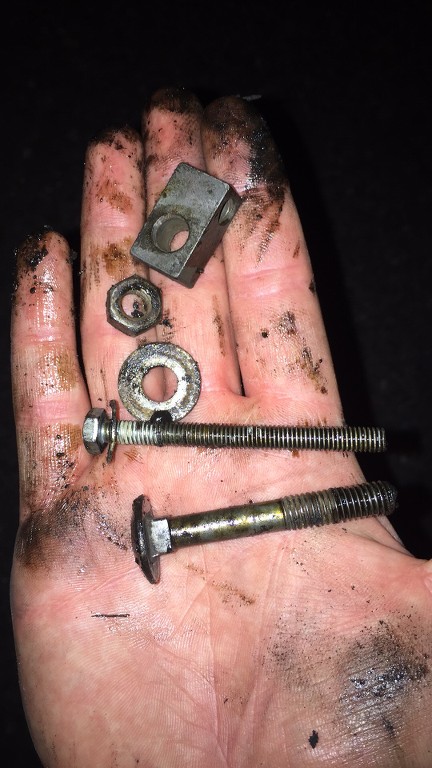 I called the AA thinking it was just a flat battery and diagnosed the fault whilst waiting for the van to arrive - guy was happy to hold the torch whilst I fixed my own car. I added another nut (that the AA man supplied) onto the mounting bolt to stop it doing the same again. Onto the next job...the lights were flickering a bit, some internet research suggested that the alternator regulator was at fault: 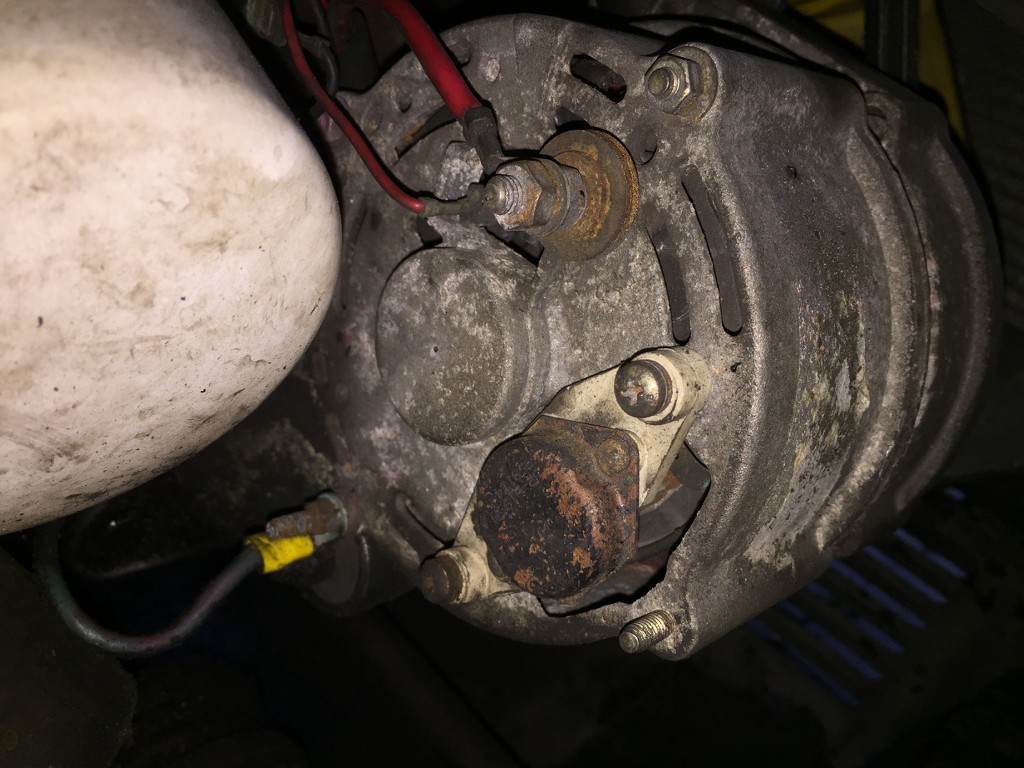 So I ordered a new one and undid the two mounting screws to replace it, one of which sheared off. Great. 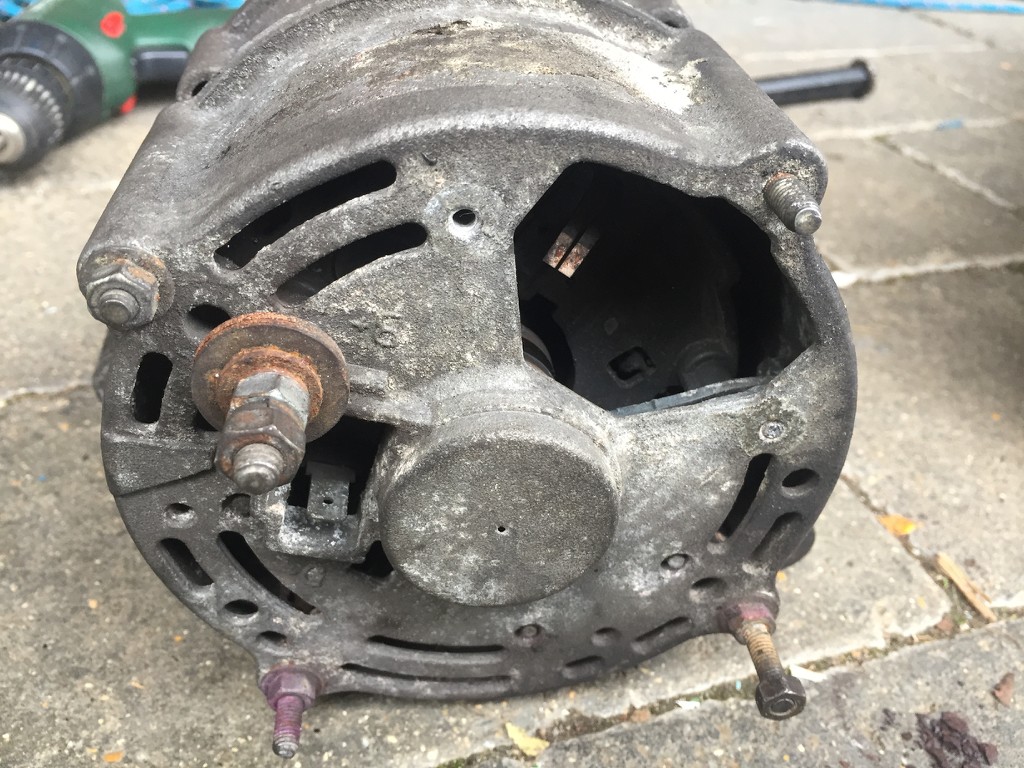 The slip rings inside also looked pretty worn. 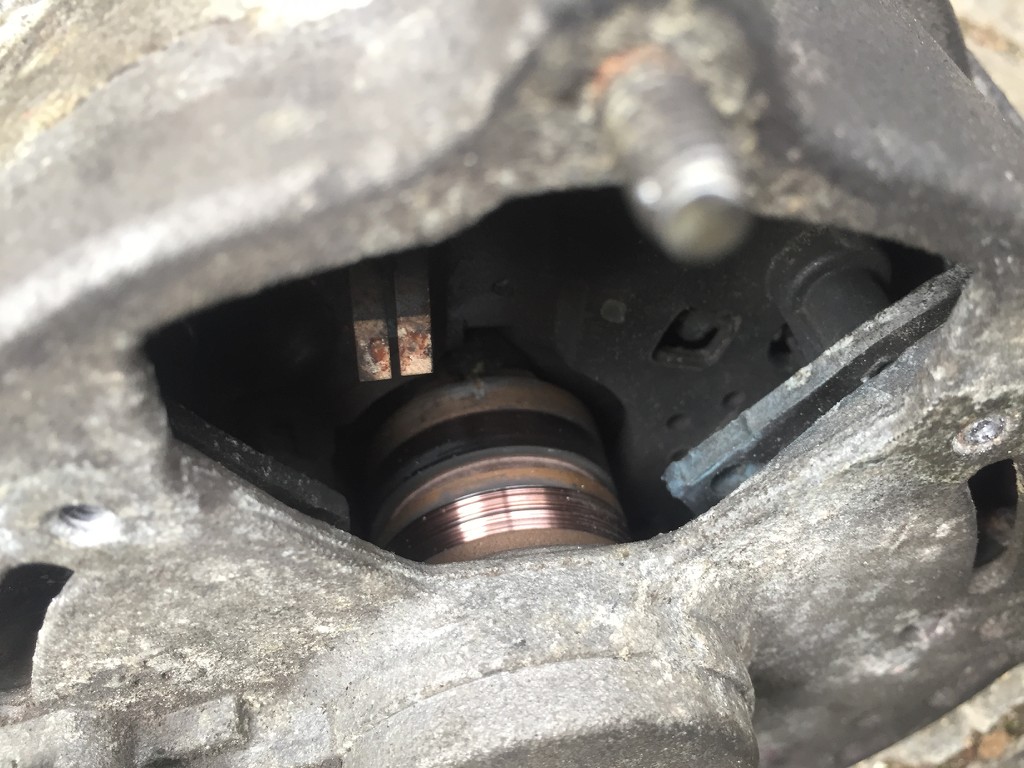 Whilst looking for a suitably sized drill bit to drill out the sheared off screw, I rediscovered the 100amp Denso alternator i'd bought for the 240... so I swapped the Denso into the 240, swapped in the new regulator and brushes to the Bosch alternator liberated from the 240 and fitted it to the 245 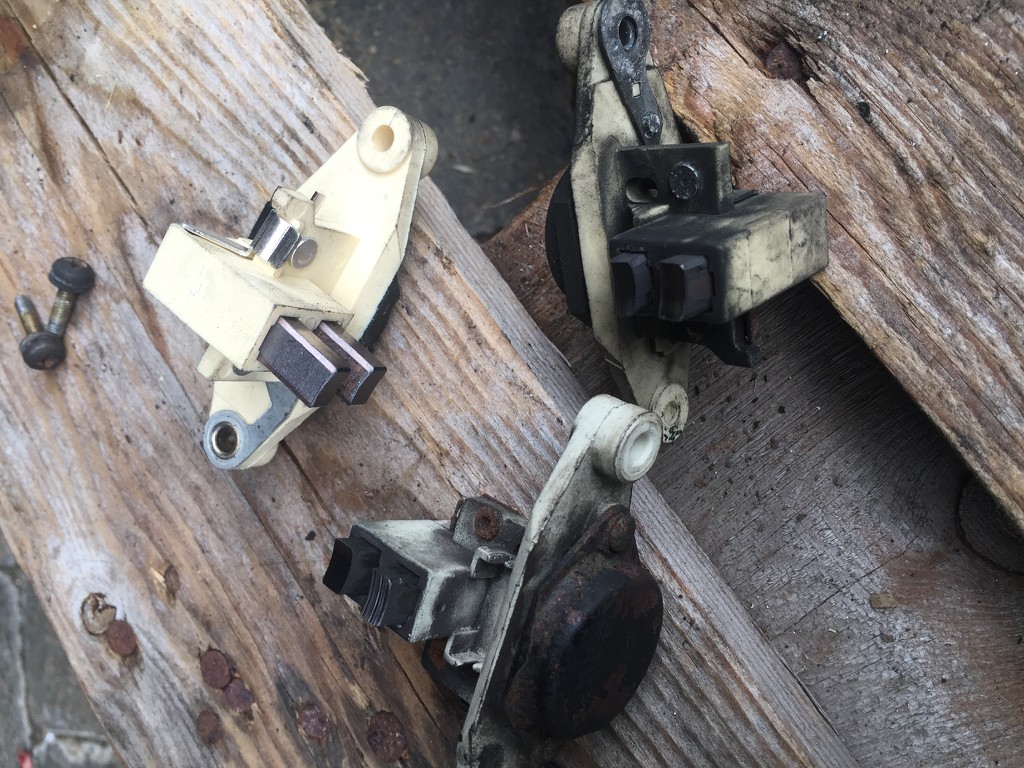 All working, happy days. I also swapped the right hand tailgate hinge which was sheared right through 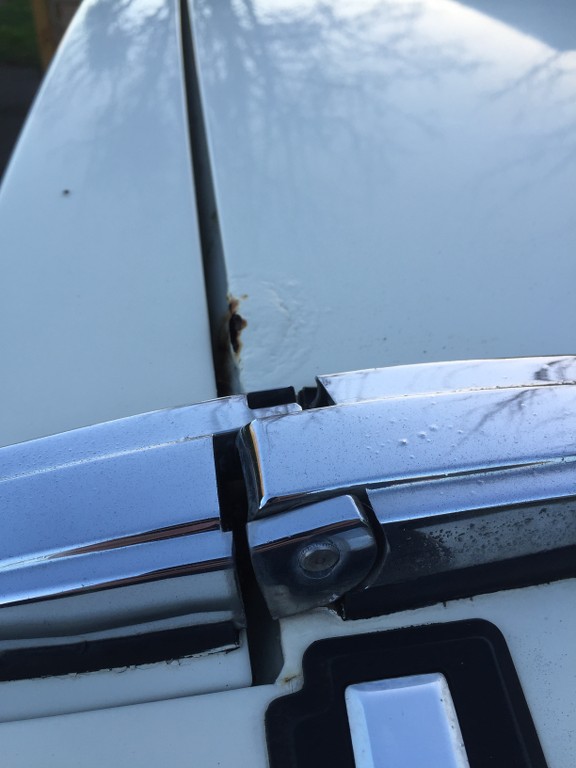 And that was it for a week or so. When I next came to start the car the battery was completely flat which a bit unexpected. I was wondering what on earth I could have got wrong with the alternator fiddling whilst messing about jumping it from another car, but then moving it I saw this and realised what had happened... 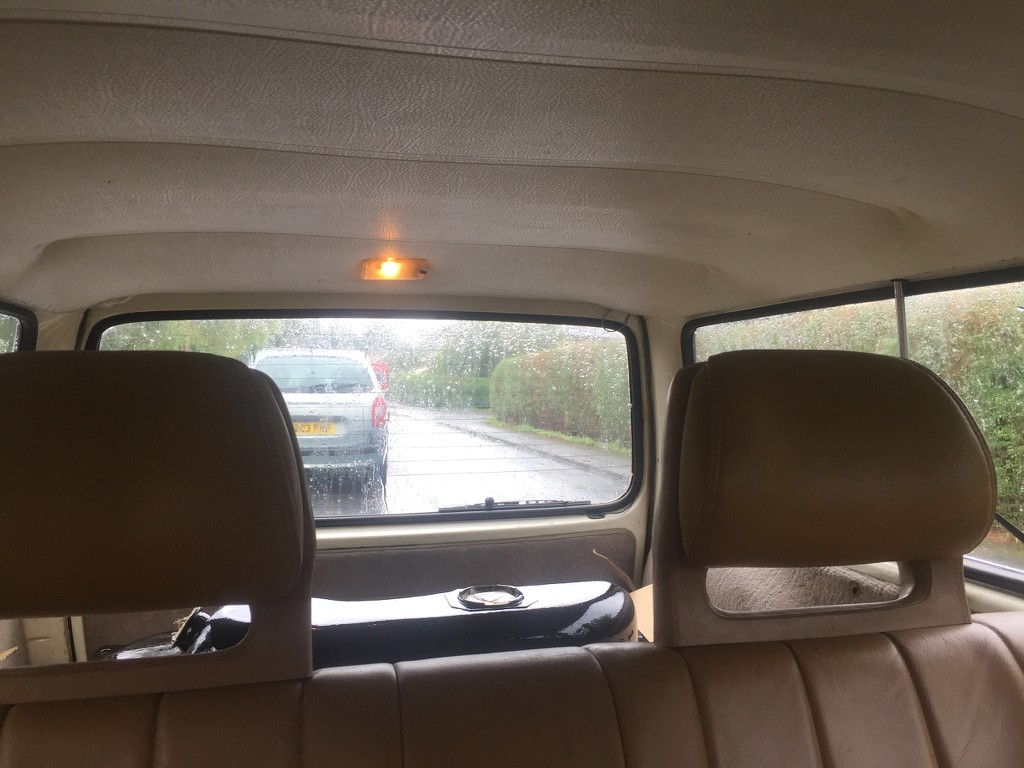 Changing the tailgate hinge had affected the switch for the interior light which now wasn't turning off. I've set the light to permanently off for now and have made a mental note to change the switch at some point. Other than that, I've sanded and repainted the replacement petrol tank - the current one leaks if filled above the seam. 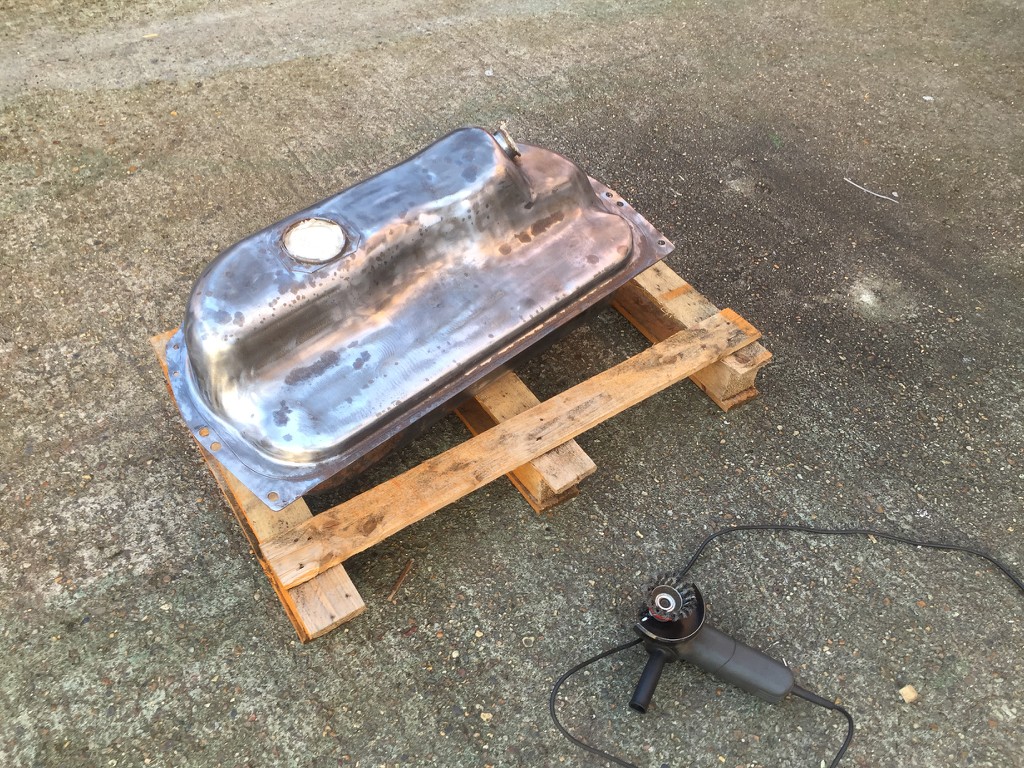 I was hoping to get that swapped before the evenings got so dark, but that hasn't happened... hopefully I'll find time soon. I also messed about with the rotating arm on the wiper motor to get rid of the slop in the windscreen wipers - there's a rectangular hole in the arm which fits onto a rectangular shaft, the rectangular hole on the arm had become slightly flared at the ends, a small amount of movement there lead to a lot of slop in the wipers. I'm not sure how long this will last, but I centre punched the rotating arm several times near the edges of the hole to close the gap. If it doesn't last I'll weld the hole up and carefully machine it out to the correct size again. 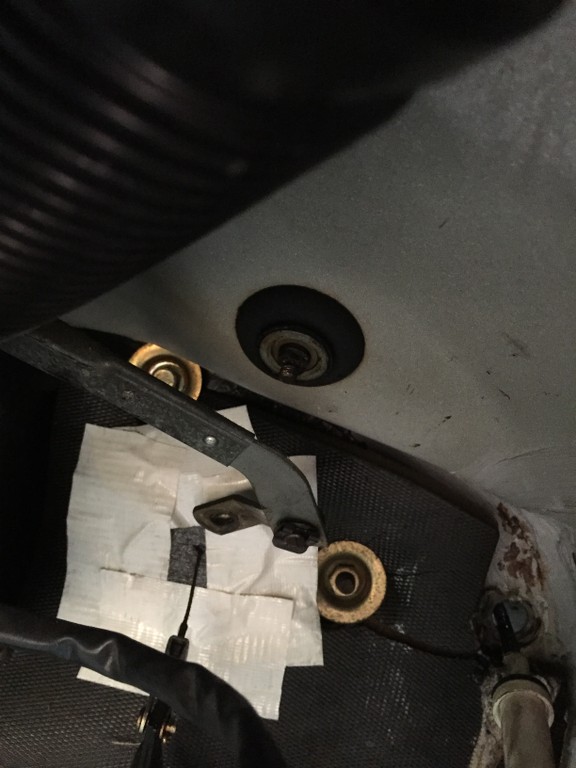 And that's it for now - It's running well and (two silly breakdowns aside) has been very reliable. Starts almost instantly and warms up quickly to normal operating temp. I have a few other jobs to do - the petrol tank and replacement heater/blower fan are top of the list. Then there's the wheels to paint and the small bits of rust on the body to sort out and... and... |
| |
|
|
|
|
|
Apr 16, 2019 13:32:29 GMT
|
Written in February 2018: So yet another update... moving through the list of faults and next of the list was the non-working heater fan. The previous time I changed a fan was in my 240 and that time I removed the dash, opened the heater box in place without disconnecting the heater matrix and swapped the replacement fan in from the top. I started out with that approach, but when I removed the foam backed underlay carpets they were wet which wasn't a good sign, so I carried on and ended up removing the dash, as well as the heater box etc. basically everything back to the bulkhead. Since I was convinced by this point that the matrix was leaking I removed it all to look for corrosion hiding anywhere, but you don't need to remove this much to take out the heater box - it can be removed with the dash staying in situ. With the dash completed stripped out there was a fair pile of parts in the back seat... front seats were removed and were in the boot for easier access to the dash etc. 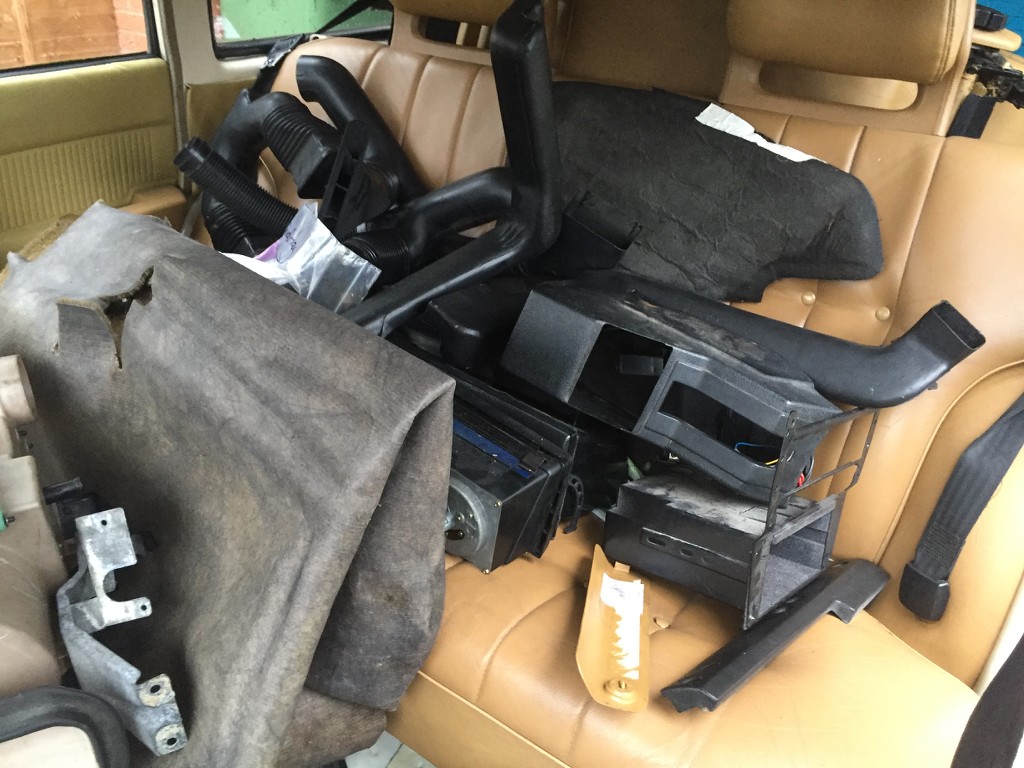 Which left me with this 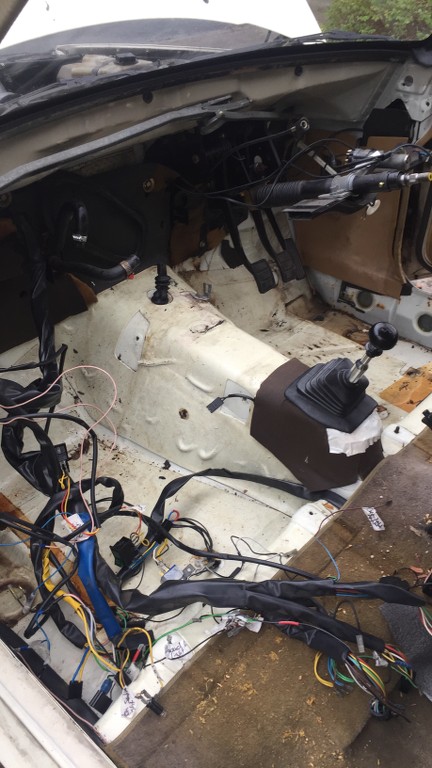 Heater box removed and yes the old fan was knackered - no picture but the motor shaft had almost completed seized. I took the heater matrix to the outdoor tap to test it... yep, that leaks like a sieve. No wonder the carpets were wet. Bodge-o-matic test rig assembled 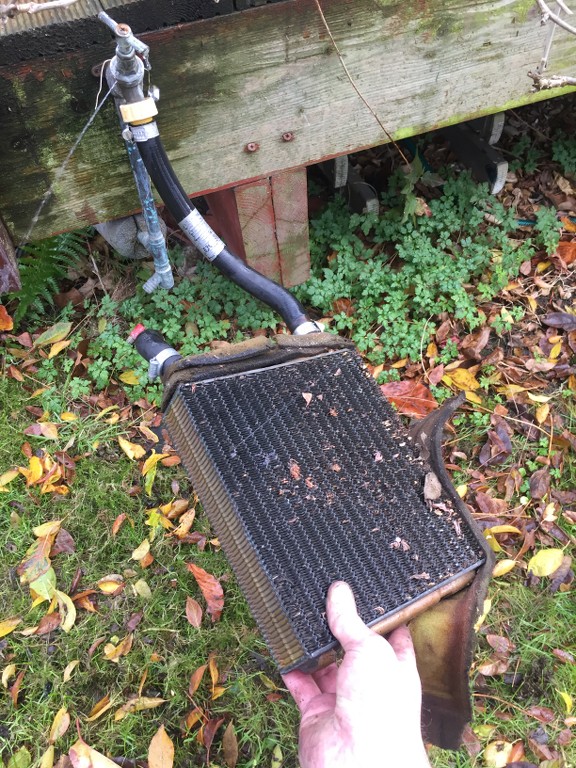 matrix pretending to be a sprinkler - there were other pin holes too 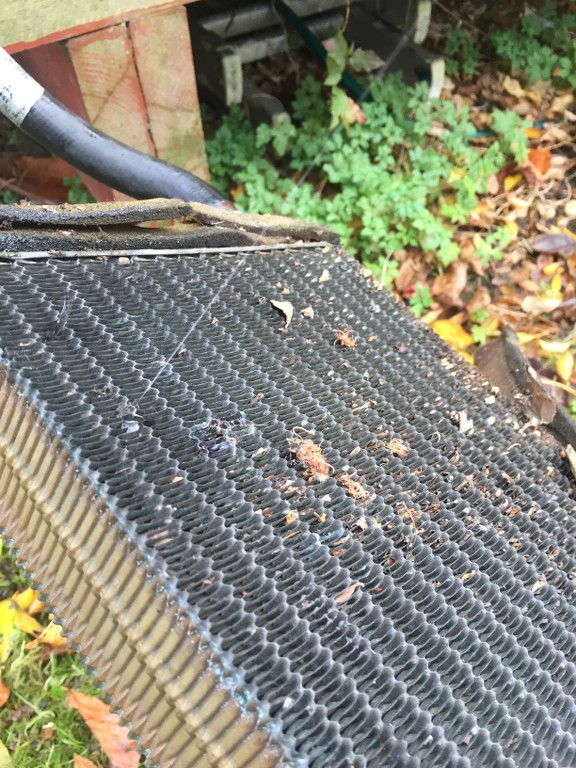 One phone call to Anglia Radiators in Cambridge later (highly recommended actually, a proper old school engineering place and very helpful) and it turned out they had an identical re-cored unit on the shelf. So I went and bought it. 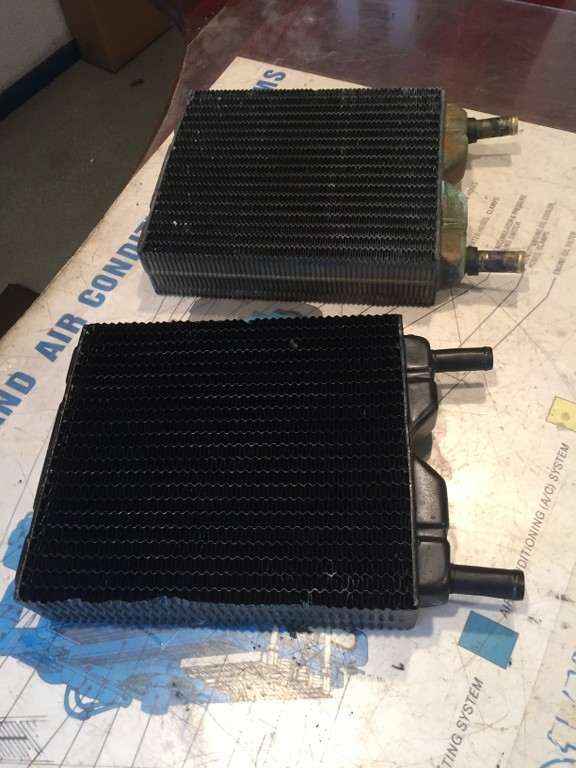 Then rebuilt the heater box with the new fan and the new heater matrix in place. 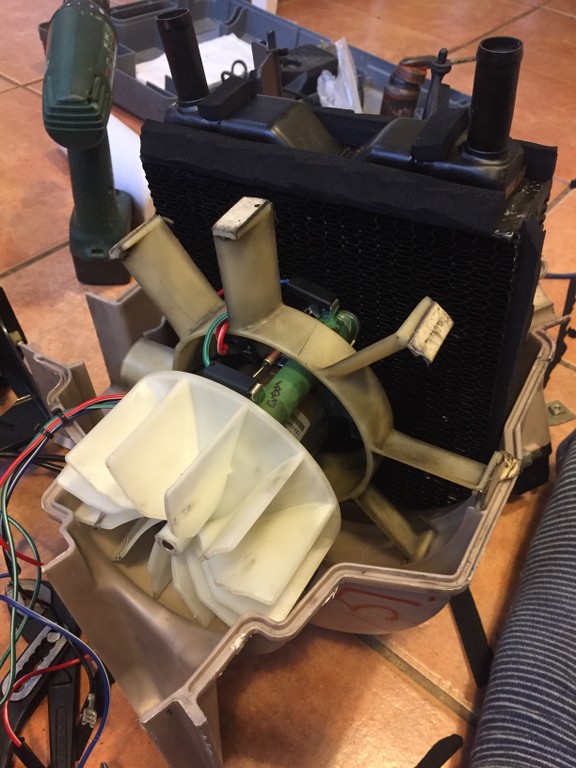 With the interior of the car stripped out I hoovered out the sills and discovered a small hole in the floorpan - where water from the leaking matrix had been sitting under the carpet... apart from that small patch the floorpans are in great shape. Hole visible to the bottom left of the circular stamp in the floorpan - you can see the drive through it! 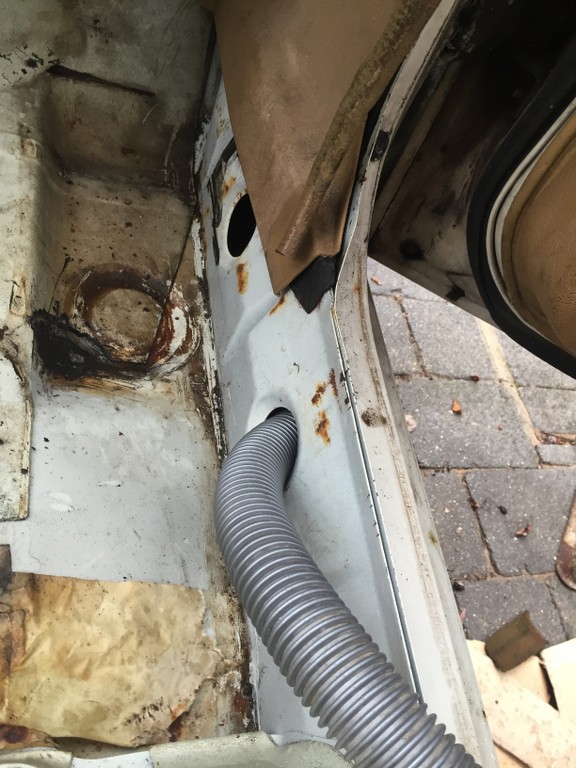 Around this time I paid yet another visit to Lakes for a propshaft (more later on) and it turned out they had just got in what I'd been holding out for - a lowish mileage 240 in white with the rear doors still attached. The front door hinges on the 245 has been fairly awful all the time I've had the car - the passenger door was super stiff despite all my efforts with WD-40 and equivalents, both doors had also lost their ability to hold open. So I removed all four hinges from the white car at Lakes - of course the 245 is actually ivory not white, but given that (as far as I'm aware) later cars weren't available in ivory the chances of tracking down a set of ivory hinges in good shape seems impossible and white is nearly there. So both doors got replacement hinges top and bottom. This isn't the hardest of jobs to do, but adjustment afterwards is fairly time consuming. Got there eventually though and both doors swing open and closed, hold in two open positions and close with a minimal push and a satisfying thunk. The dash wasn't in the car when I replaced the hinges, which made access to the upper hinge bolts easier but it could be done with the dash in the car. Replacement hinges - they fit the same, but the design of the hinge changed slightly at some point, the part on the right which bolts to the door wraps up and over in the original hinge (top), then around the side in the later hinge (bottom). 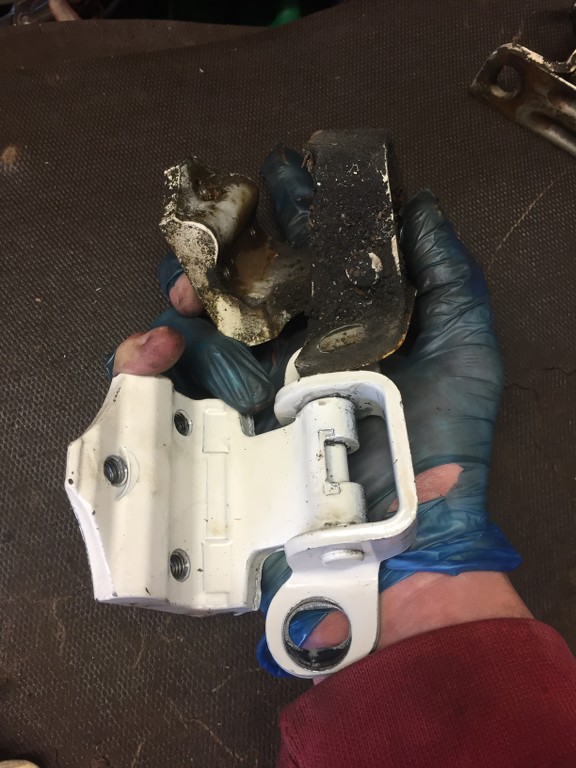 So after that was done I replaced the dash apart from the carpets (as I need to fix the hole in the floor) and started the car for the first time in a couple of months to see if the heater and fan worked... which they do, excellent With the car idling on the drive with the bonnet open I became aware of a strong smell of petrol... and looking under the bonnet revealed why, the pipe from the petrol pump (mechanical, it's on the side of the engine block) to the carburetor had randomly fractured and was now spraying fuel around like a fountain... fooooooook. I didn't disturb the petrol pipe during any of the previous work, so I guess it was just coincidence? Anyway, I was glad I had only just started the car and the engine had only barely got warm. Hard to see in this photo, but it cracked up at the top of the pipe just before it entered the carb. 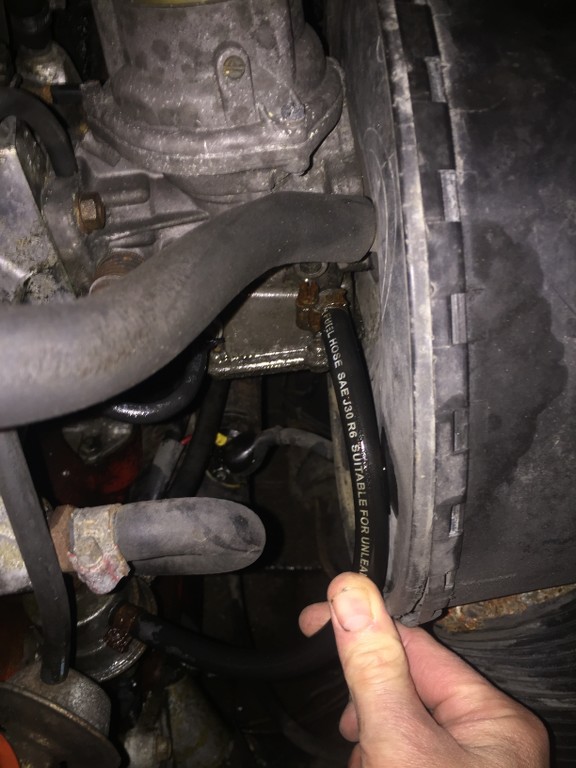 So onto the next round of fun - one of the reasons I went to Lakes was to pick up a 240 propshaft for someone else - they were going to turboswap their car, so had removed their existing engine and gearbox, which was a B21A (same as mine) with a 5 speed gearbox with a cable drive for the speedo - the cable drive bit makes it quite a find as Volvo only produced a 5 speed with a cable drive for a few years before moving to an electric speedo connected to a sensor on the diff cover. The 245 had a 4 speed gearbox and a not quite diagnosed driveline shudder whilst pulling away, so swapping to a far lower mileage 90K 5-speed was always going to be a good idea. The other guy needed a later propshaft to connect to his later turbo engine and gearbox, I needed the propshaft from his car to connect up to the early 5 speed as the output flanges are different (early cars have a 4 bolt connection between the gearbox and the prop, later cars have a three bolt connection)... so I brought a later propshaft to him and took away the 5speed and the matching propshaft. I also took his B21A, so now I have a spare 90K engine I did initially think that I could jack the car up and remove the gearbox from underneath it, but I have no idea how I'd manage that on the drive single-handed... so that idea was abandoned. Car jacked up... not sure this will work 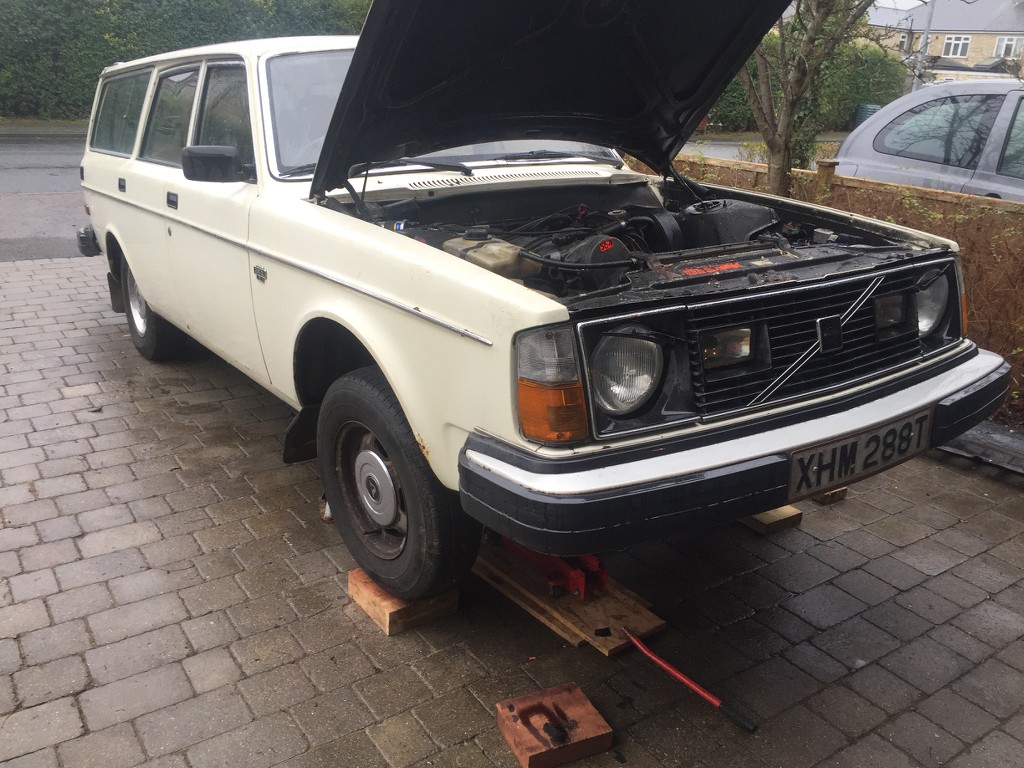 'New' Gearbox 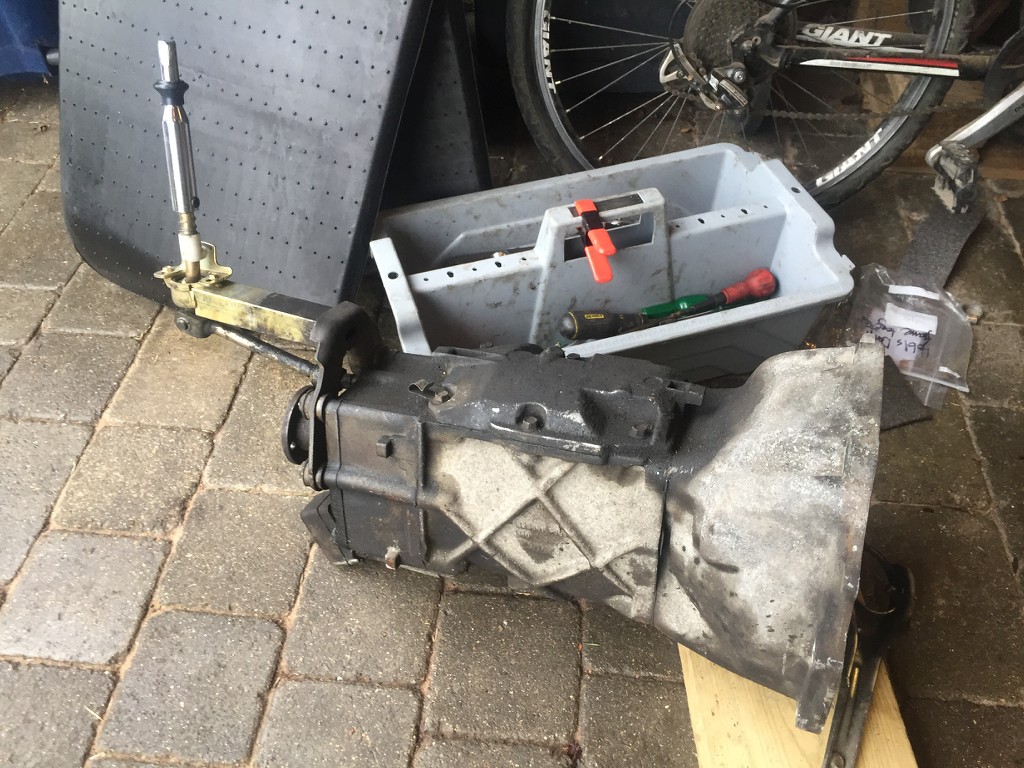 'New' gearbox getting new oil, since it's a doddle to change when it's not on the car. 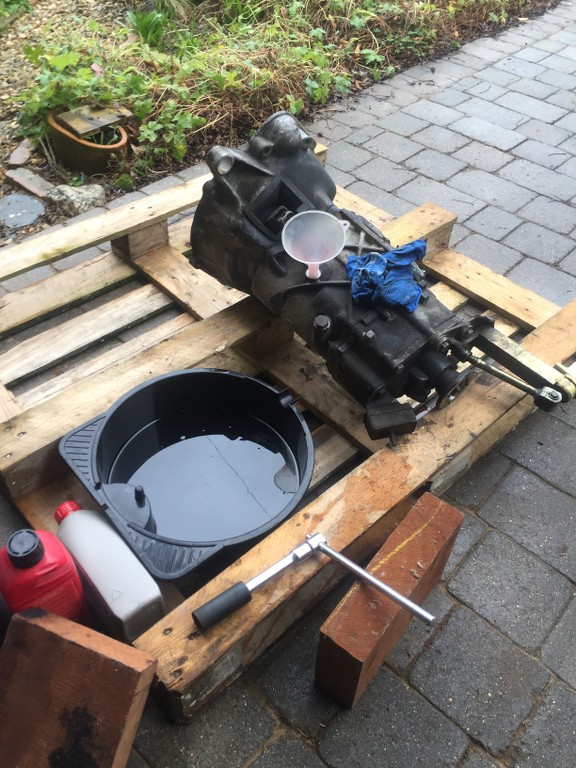 So I decided to just whip the engine out and change the gearbox out of the car. This sounds drastic, but the prop shaft was already disconnected, the gearstick was removed and the petrol pipes were going to be replaced anyway - that just left taking the radiator out, disconnecting the electrics connector at the bulkhead, stripping off the front bonnet slam panel etc and then disconnecting the throttle and choke cables and undoing the engine mounts. Also, there had always been a lot of oil on the back of the engine, leaking from somewhere and I couldn't quite tell where from with the engine in place... so much easier to tell with the engine out. I suspected the oil on the engine was connected to the driveline judder, so wanted to fix it. Started to get dark 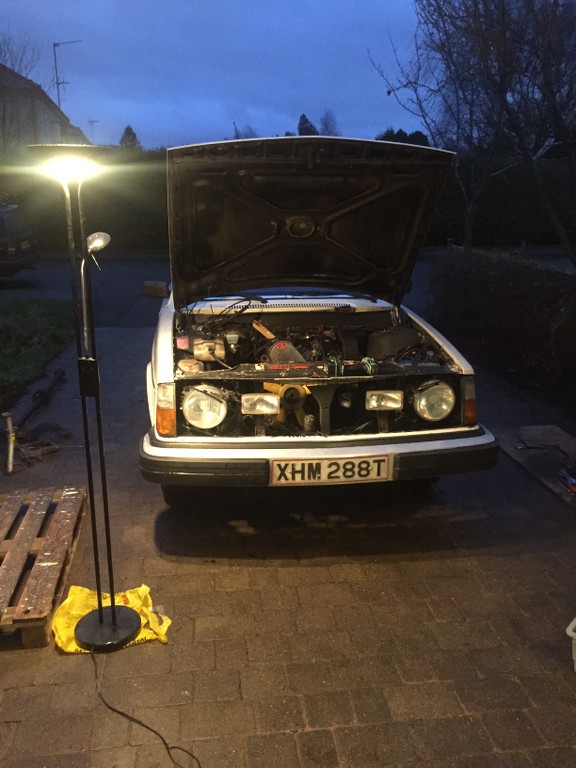 Engine out 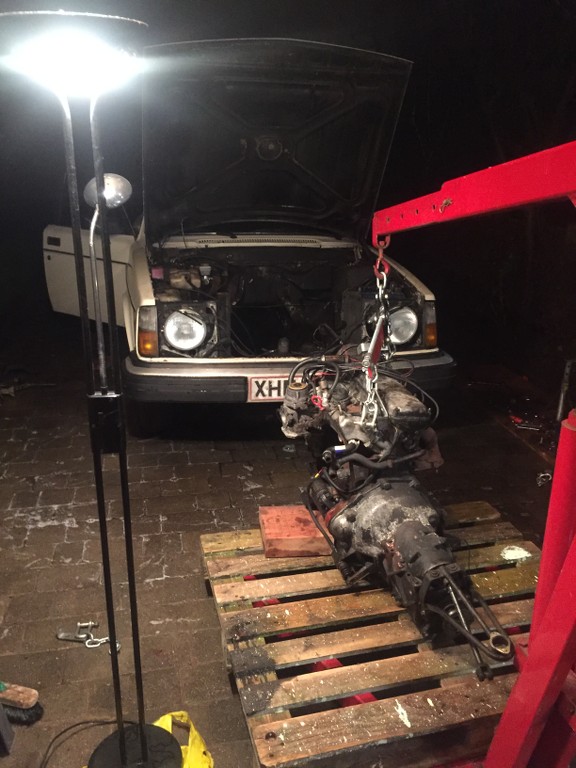 So oily 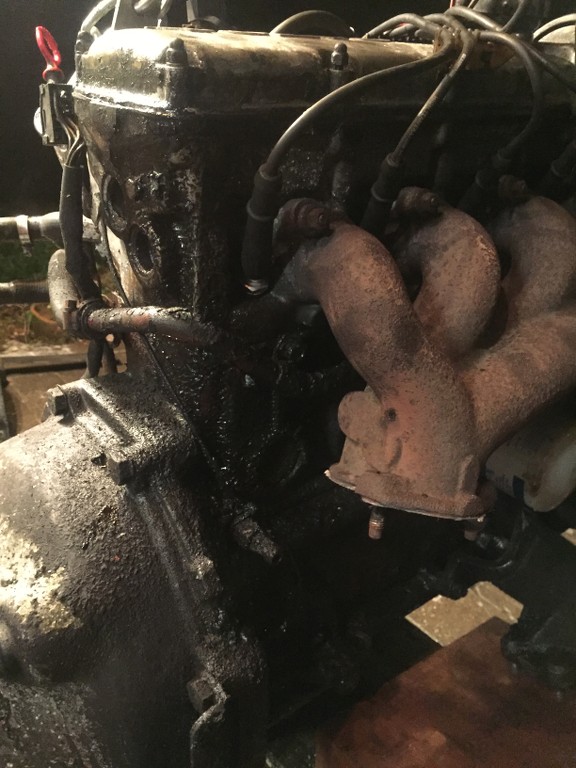 With the oil and grime going all the way up to the top of the engine there was only one culprit - the rocker cover gasket. This is what a leaking rockercover gasket can cause - a slick of oil down the back and side of the engine. It's hard to describe just how mucky it was - a thick covering of oily, slimy goo. The next day and some next-level cleaning and things looked a lot better. I haven't got a picture of it at the moment but the oil leak had leaked significant oil into the gearbox bellhousing through the joint between the block and the gearbox (there's no gasket there as it's not supposed to be a oil tight seal) and it had been flicked around by the flywheel and clutch. I cleaned everything and replaced the rear main seal since it was easy to access. Looking better 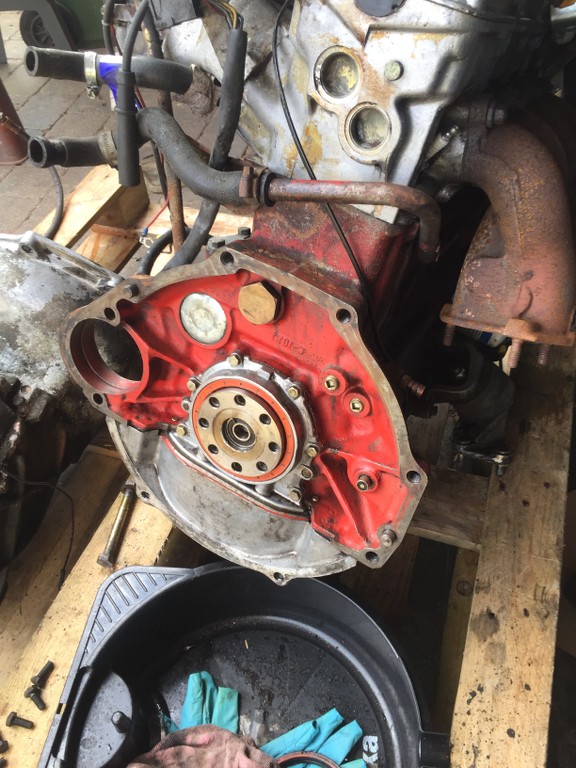 Also, the bearing in the back of the engine to support the gearbox input shaft was pretty notchy - lucky I had a spare engine just sitting there with a perfect bearing the 'new' bearing was easy to remove from the other engine, the notchy one in the current engine was harder to remove and required a slide hammer. That bearing had been replaced at some stage as there were marks around the outside on the end of the crank where someone had fought hard to remove the old one - a bit more investigation and I think I know the reason for the driveline judder - the input shaft into the gearbox has a worn bearing, which means that the input shaft can move side to side /up and down a bit. That movement explains the slight judder when pulling away and also explains why the bearing in the back of the engine had to be replaced previously, although that said the engine has 300k on it and I have no idea what the service life of those bearings is. New and old bearing - slide hammer in background 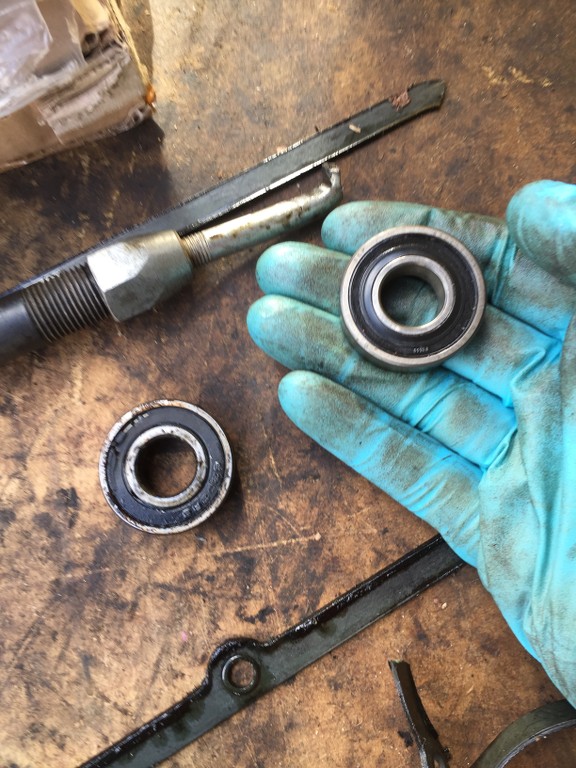 And then, investigations over it's onto reassembly... new sachs clutch three piece clutch kit, then a new genuine gasket for the rocker cover  A new engine mount - turns out that if you rest the engine on a pallet on just the threaded rod out of the bottom of the engine mount (ie without the lower metal part attached) it'll break and you'll need a new one. Oops. 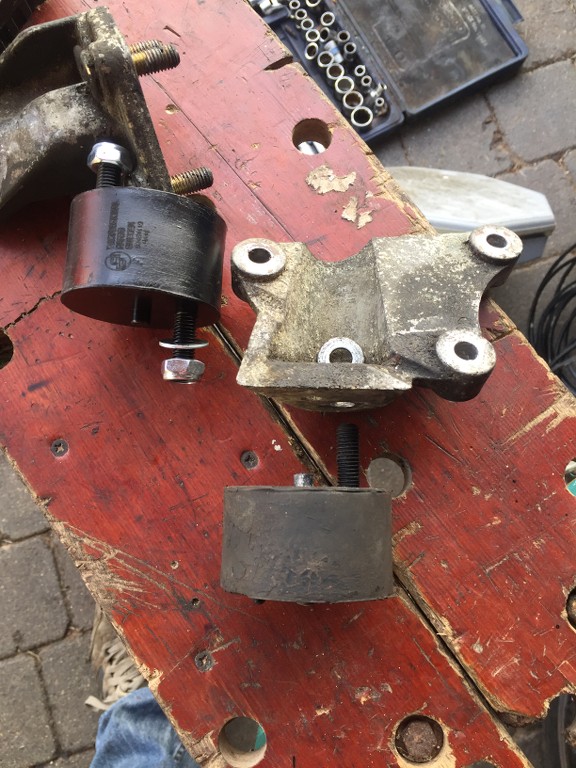 Whilst everything was out of the way I rebuilt the clutch slave cylinder with new seals and replaced the flexible hose too 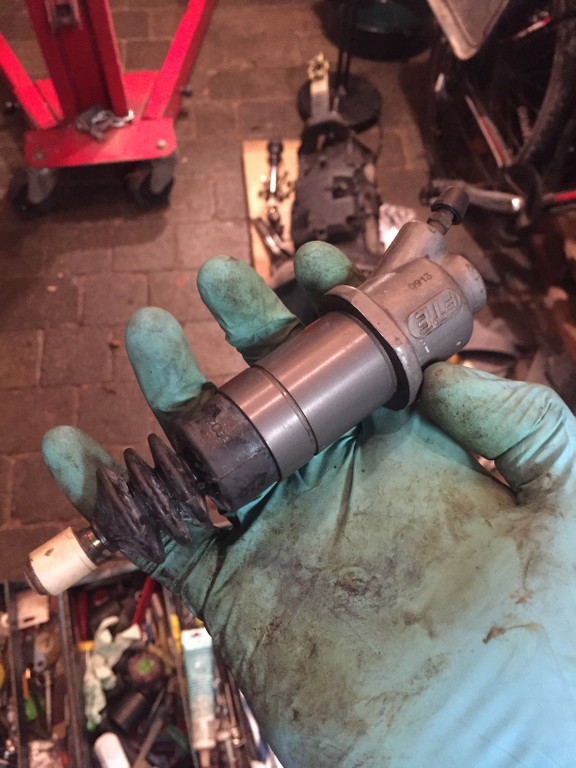 So I threatened the car with an engine 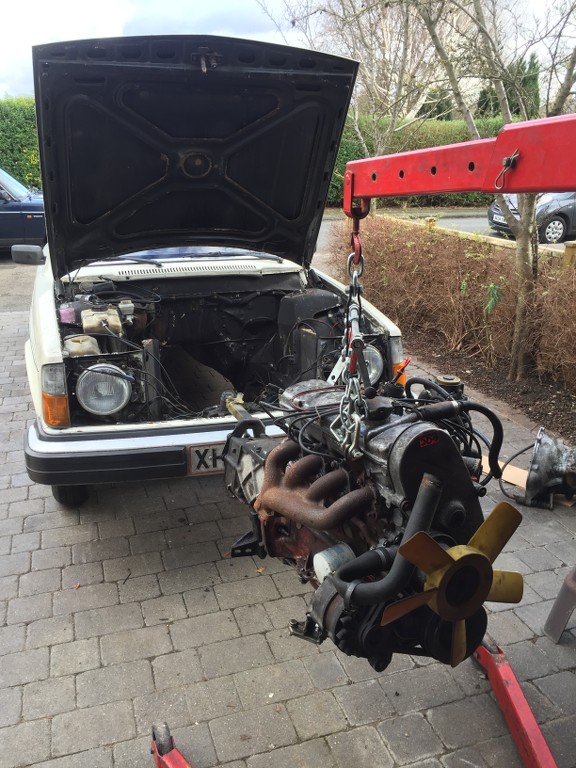 Got the correct propshaft - with the shorter front section, the longer front section is the 4-speed prop 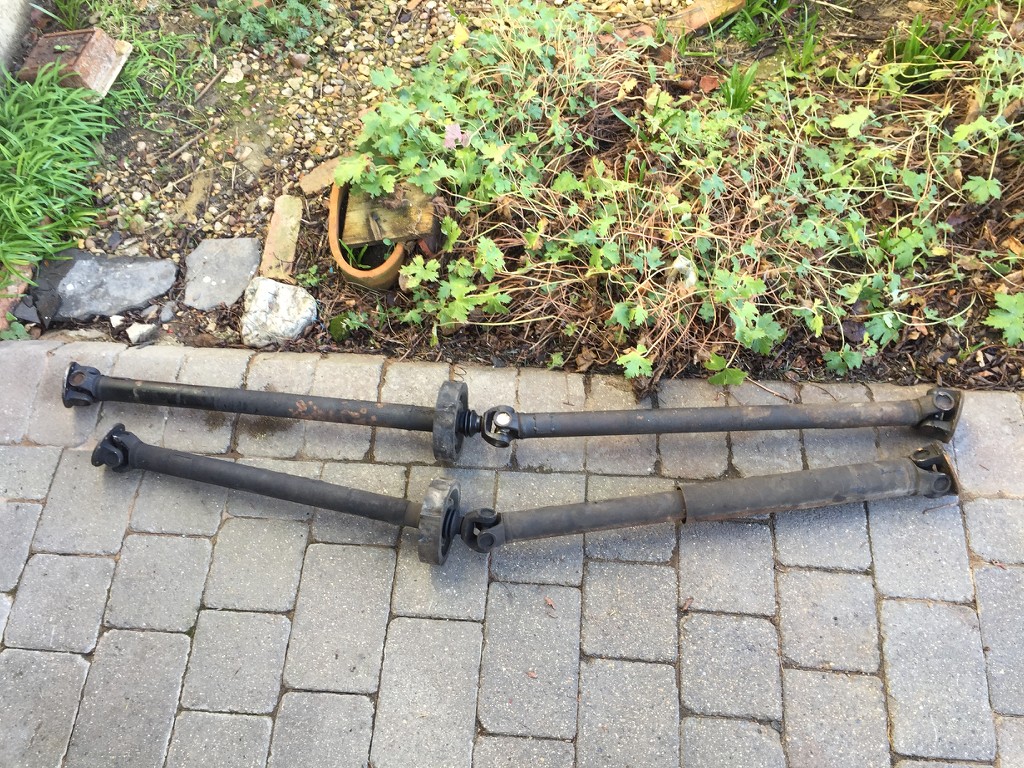 And put the engine back in... then this happened. So I packed up for another day. 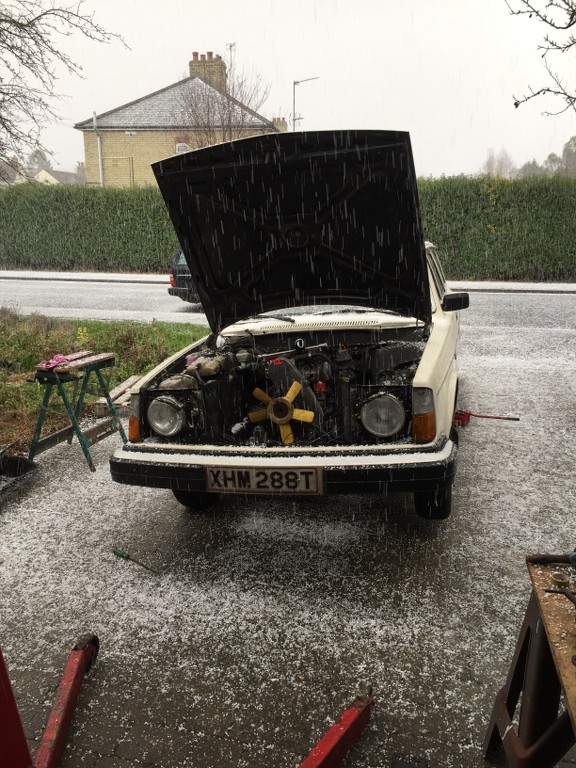 Back to it another day and... (it was dry until right at the end as i was packing up, honest) 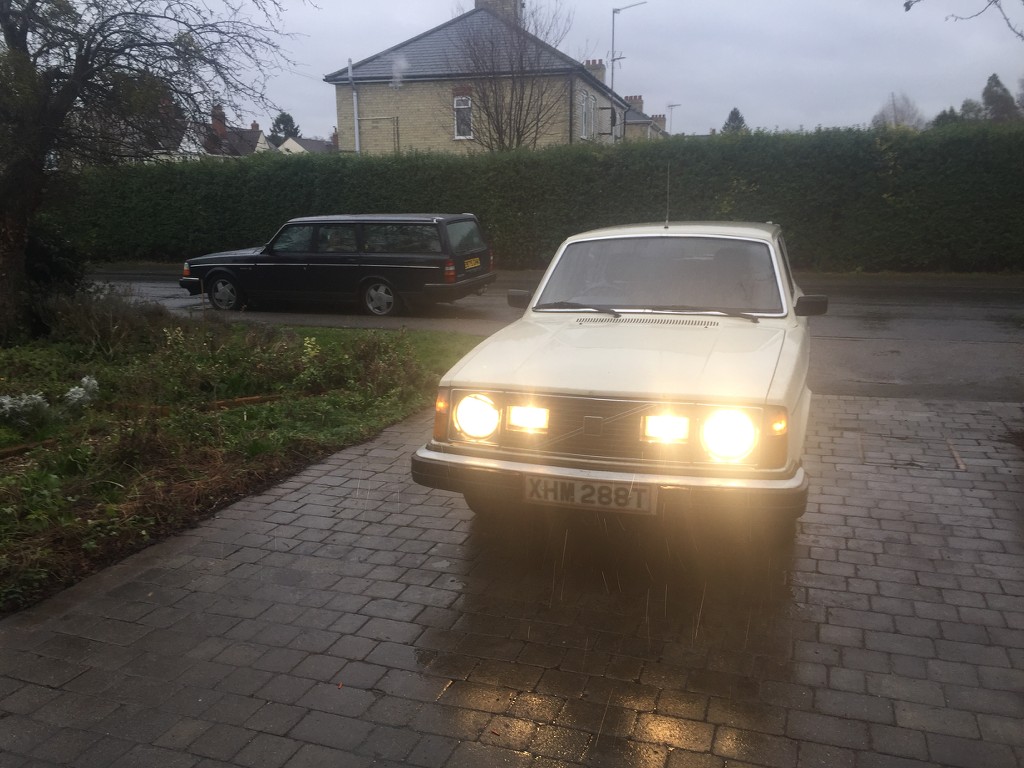 It's back together and running. The 5 speed gearbox is so light and easy to change gear, the clutch pedal is as light as a modern car. The interior isn't all back in as I need to fix the hole in the floor, but getting there. The judder when pulling away is gone and I fixed the spotlights too |
| |
|
|
|
|
|
Apr 16, 2019 13:55:48 GMT
|
So then what happened...? I checked the valve clearances and re-shimmed as necessary  And took some photos of it in the snow (remember when it snowed in February 2018?) 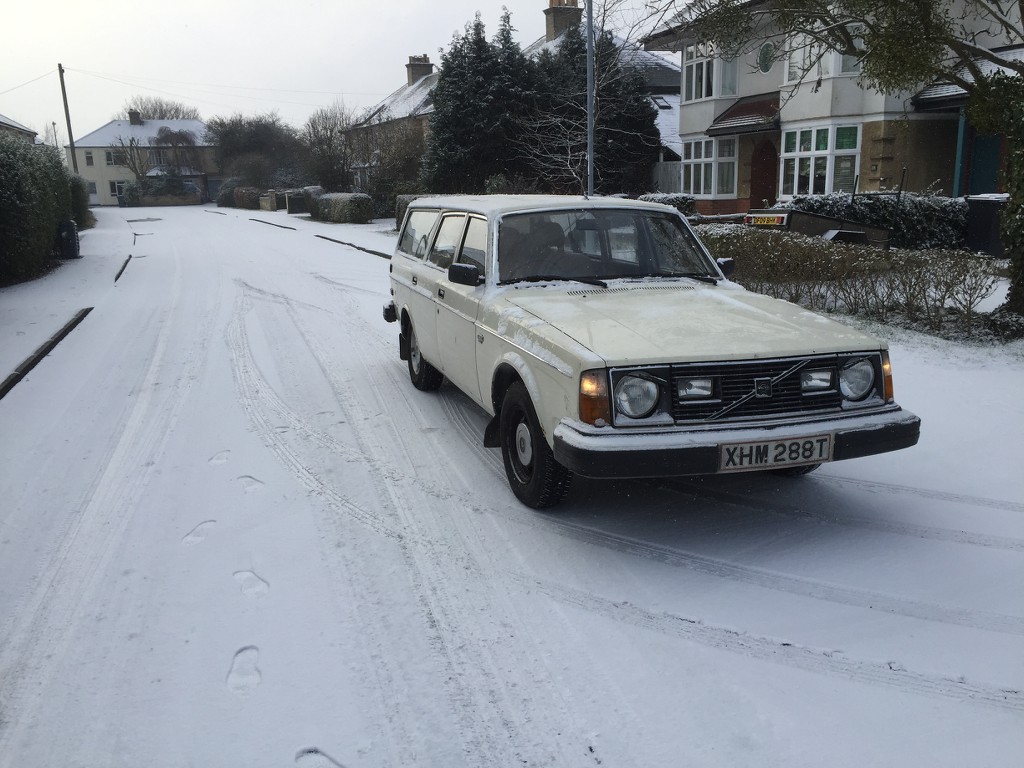 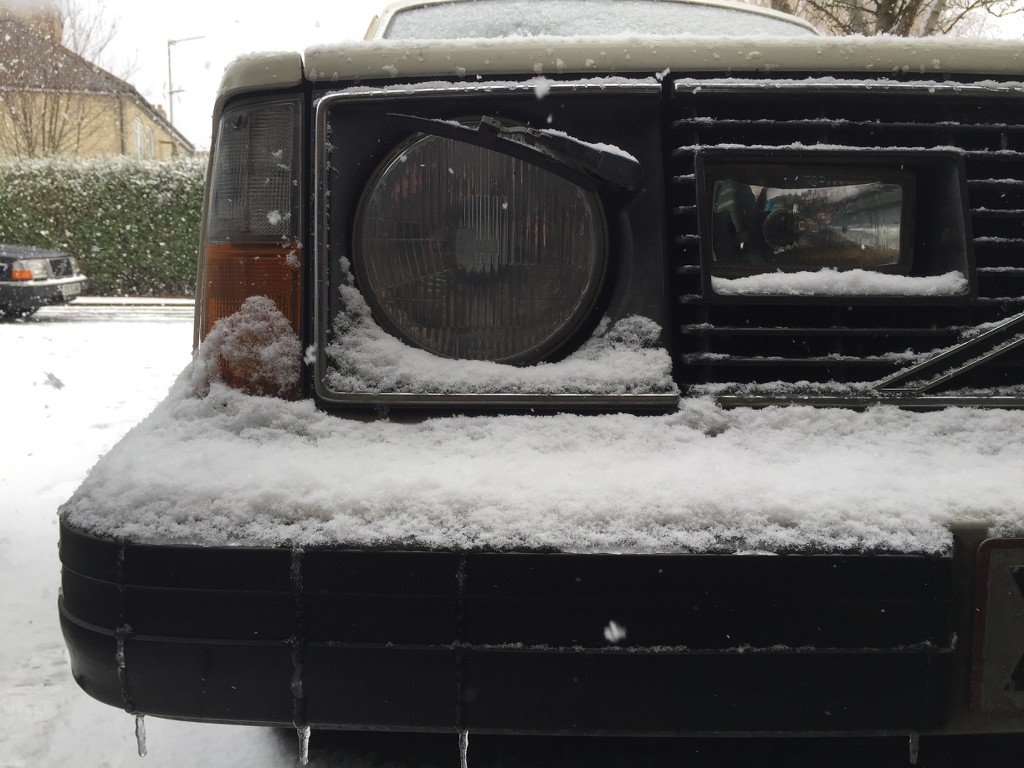 Then I took it to Duxford Airfield for a volvotuning (a facebook group) meeting 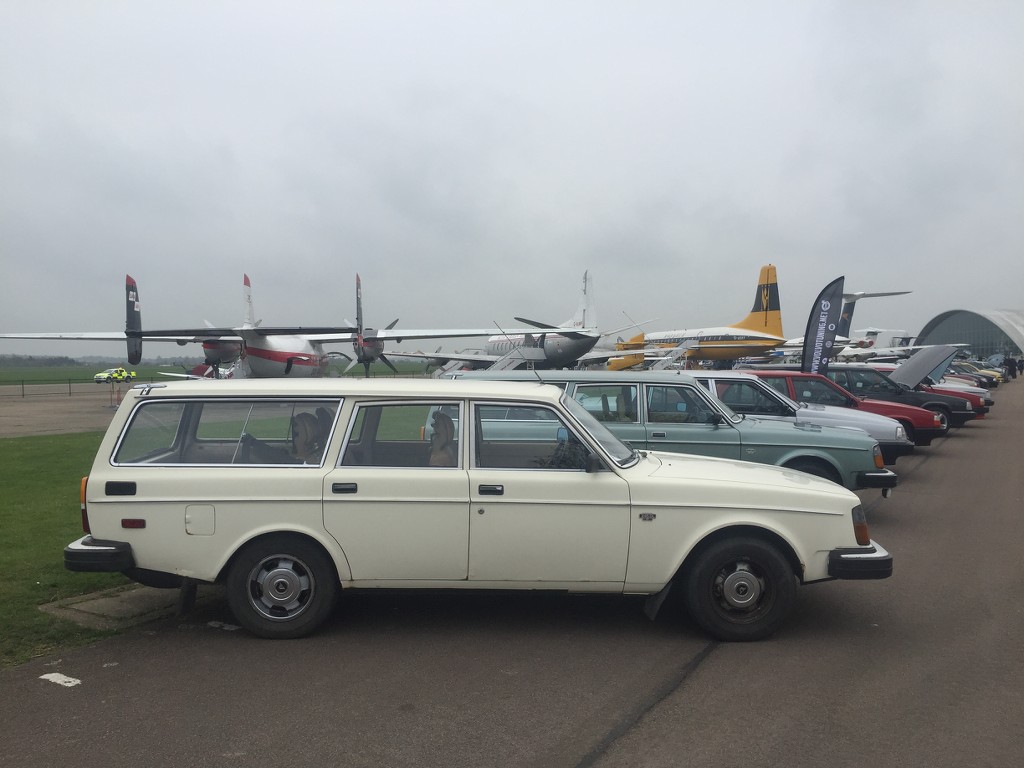 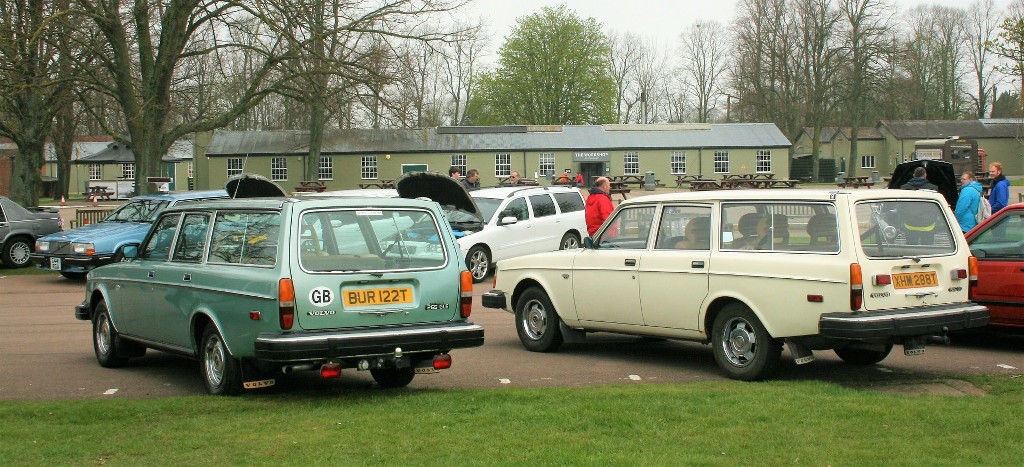 And someone else took and then created this photo 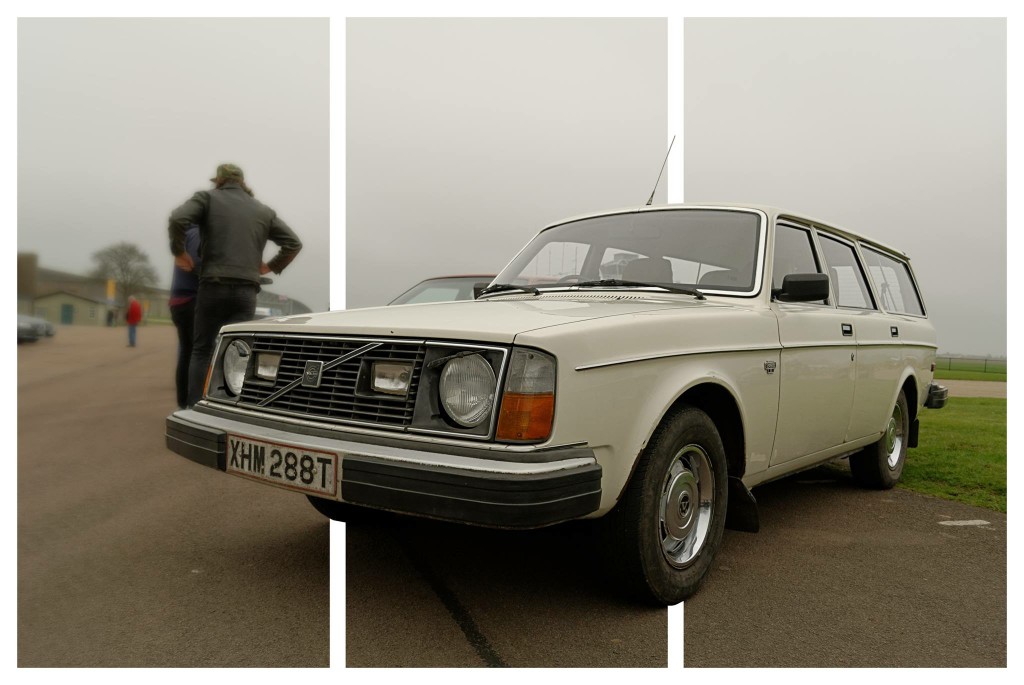 Then, written in April 2018: Then this weekend... I removed the fuel tank. The previous owner said when he advertised it that the tank was leaking and not to fill it over half way. I suspected it would be leaking from the seam, but it turned out not to be - road grime had sat on the top of the tank and rusted a hole in the upper section - the rest of the tank and the seam was pretty rusty as well. Removing the tank wasn't too hard, a bit fiddly though. I left the sender unit connected to the fuel pipe and when the tank was lowered enough I removed it through the access hole in the cargo area floor and tied it up so it isn't dangling on the fuel hose (which is probably long enough for it to drag on the floor) Unfortunately I broke the clamp holding the filler pipe to the tank and hadn't thought to order one in before starting, so as I type the car has no tank at all. After siphoning the remaining petrol out of the old tank I filled it with water to flush it out and for curiosity's sake to see if the seam leaked anywhere, which it didn't. Pretty big leak from the hole though... So, the obvious next step is to order a clamp and then fit the replacement petrol tank... Petrol tank being filled with water - the hole is visible at the bottom of the picture 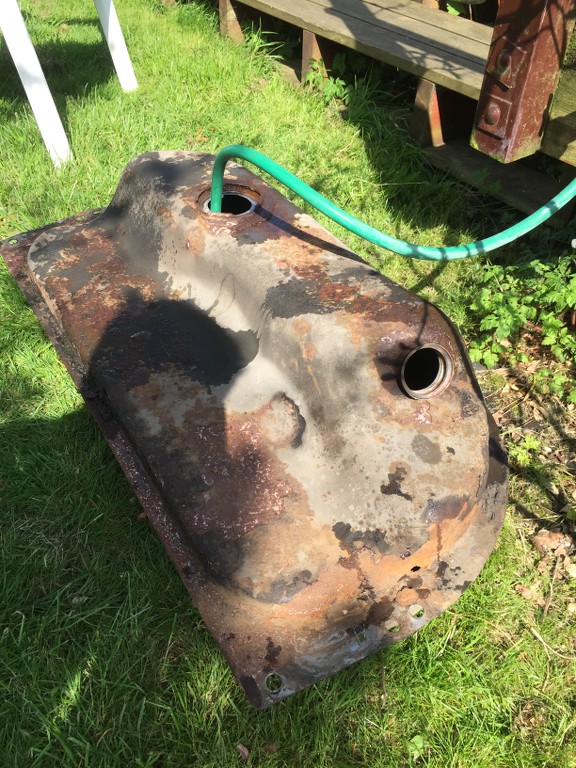 Quite a leak! 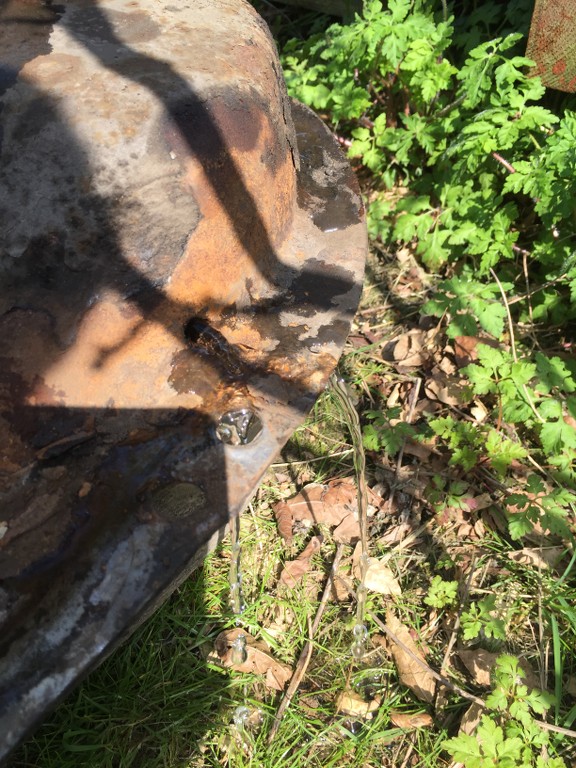 |
| |
|
|
|
|
|
|
|
Apr 16, 2019 14:00:30 GMT
|
Written in May 2018: A nice and sunny long weekend, with some time for a bit of tinkering… First off, the fuel tank. I figured juggling the sender unit hanging on the fuel hose, guiding the filler tube up to its position and positioning the tank itself would be a bit of a nightmare so I crawled under the car to see if I could disconnect the sender unit hose somewhere and take one thing out of the equation. The flexible hose meets the hard line with a fitting tucked up and out of the way above the rear suspension, I sprayed that with WD-40, left it 5 mins and then it undid easily, which was an unexpected bonus. With the sender unit and tank off the car, fitting the two together was relatively simple. I cleaned up the top and bottom of the sender unit, as well as the better condition locking ring I’d taken from a car at Lakes some time back, sprayed everything in lithium grease to allow the locking ring to slide into place as easily as possible and then reassembled with a new sealing O-ring. For the filling tube I sprayed everything in lithium grease and reassembled with a new o-ring and a new clamp (I broke the old clamp taking it off). The new clamp was a really tight fit until it had been screwed into place and released once, I had to use a set of grips to compress it enough to get the bolt started – this would have been impossible under the car. Refitting the tank with the filling tube attached was pretty fiddly – I needed a volunteer to help guide the filling tube into place from above, with me under the car manoeuvring the tank itself. We quickly realised that some extra manoeuvring would be needed, so the filler tube clamp was loosened just enough to allow the tube to twist (I’d predicted this, one of the reasons for the covering of lithium grease) and that made things easier. Once the tank was place there is just enough room to get a small ratchet up into the space above the tank to reach the clamp and tighten it fully. Back together, started the car on the 5 litres of fuel I had to hand and everything working. Great. Fitting connecting sender unit hose to hard line 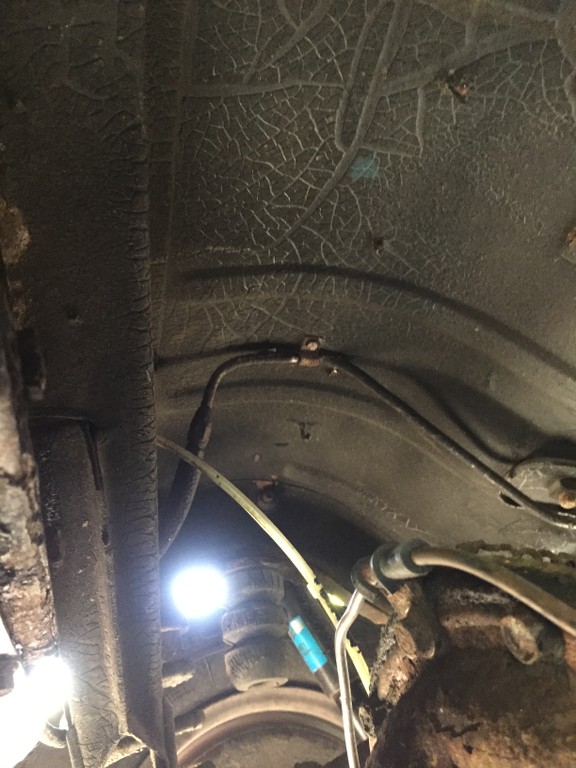 Sender unit undone (there is a filter on the end of the pickup tube, but it wasn't on the tube in this photo) 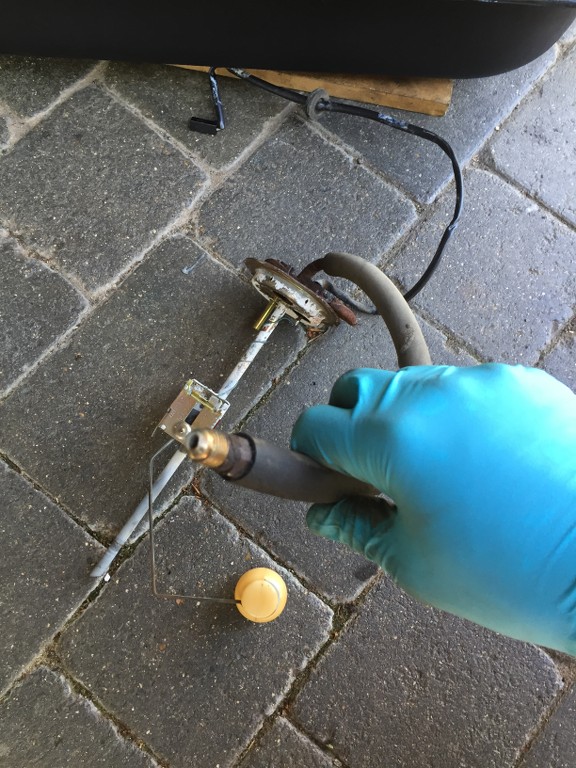 Tank with new seals and new clamp 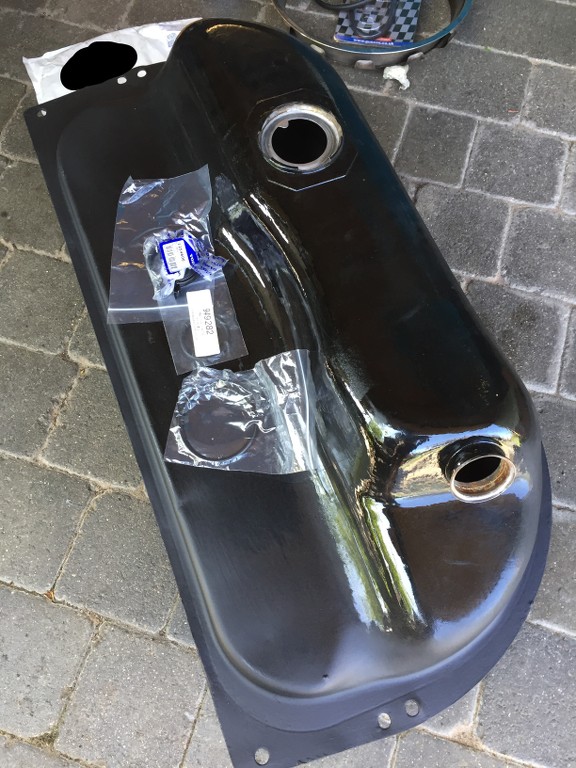 Tank in place 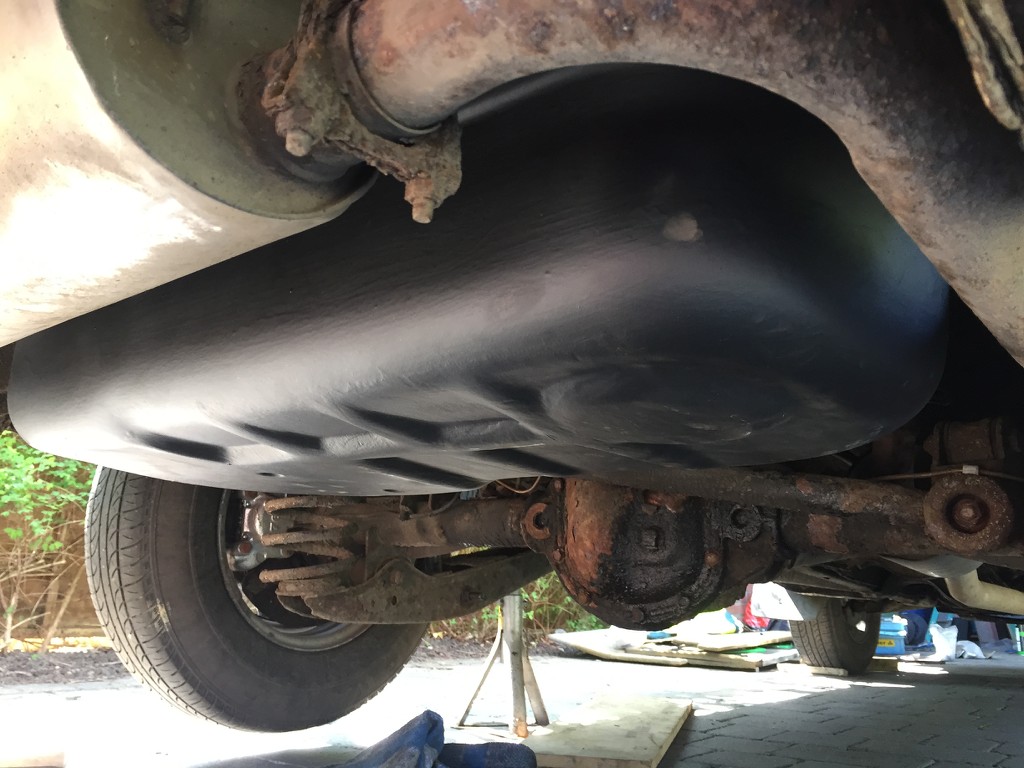 Next job – power steering. I bought a power steering rack and period correct pump (with integrated reservoir) some time back, along with a later steering column knowing that I’d need to change the column as well to fit the rack. You may or may not have noticed/realised that I’ve been planning this for a while – the photo titled ‘all back together’ on the first page shows an unused third pulley on the crank. The later cars have a one piece pulley with three grooves on it, the earlier cars have a pulley with two grooves and when necessary a third pulley is bolted onto the front of that. I added the third pulley back when I first serviced the car and got it running, in anticipation of this conversion. Fitting the pump wasn’t too difficult – I seem to have forgotten to take any photos though, I’ll add some later. The bracket bolts onto the engine side with three bolts, then the pump mounts on that. I’m not sure if the original fitment would have had a bracket with an adjuster bolt (same as the alternator bracket didn’t have an adjuster bolt originally) but I found a bracket in my box of spares that was suitable so it has one now. The bottom ball joints are different between manual and power steering – the power steering ones are cranked forwards to increase caster, the manual steering ones are straight. I replaced them both and… spot the difference? The top one in the photo came off the left hand side of the car and is correct for a manual car, the bottom one came off the right hand side and is incorrect for the right hand side of a manual car (but was correct for the right hand side of a powersteering car). This may explain the uneven wear on the inner side of the front right hand tyre when I first got the car. 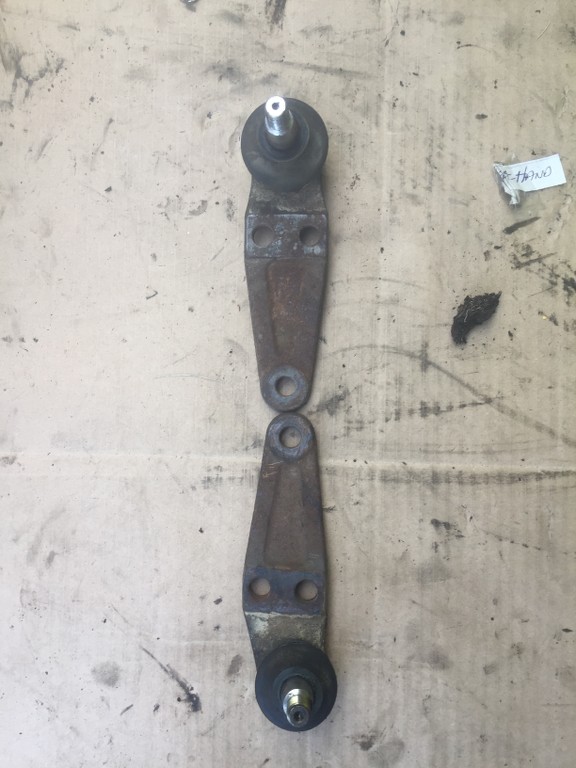 With the ball joints replaced, I took the manual rack off and bolted the power steering rack in place with new track rod ends connecting it to the steering arms. Then I removed the manual steering column and bolted the power steering one into place, all relatively straightforward. The manual column top universal joint was pretty stiff and the old rack was a bit notchy (neither easy to diagnose with the parts in place on the car) but that’s not that surprising after 40 years. Under the car with the manual rack removed 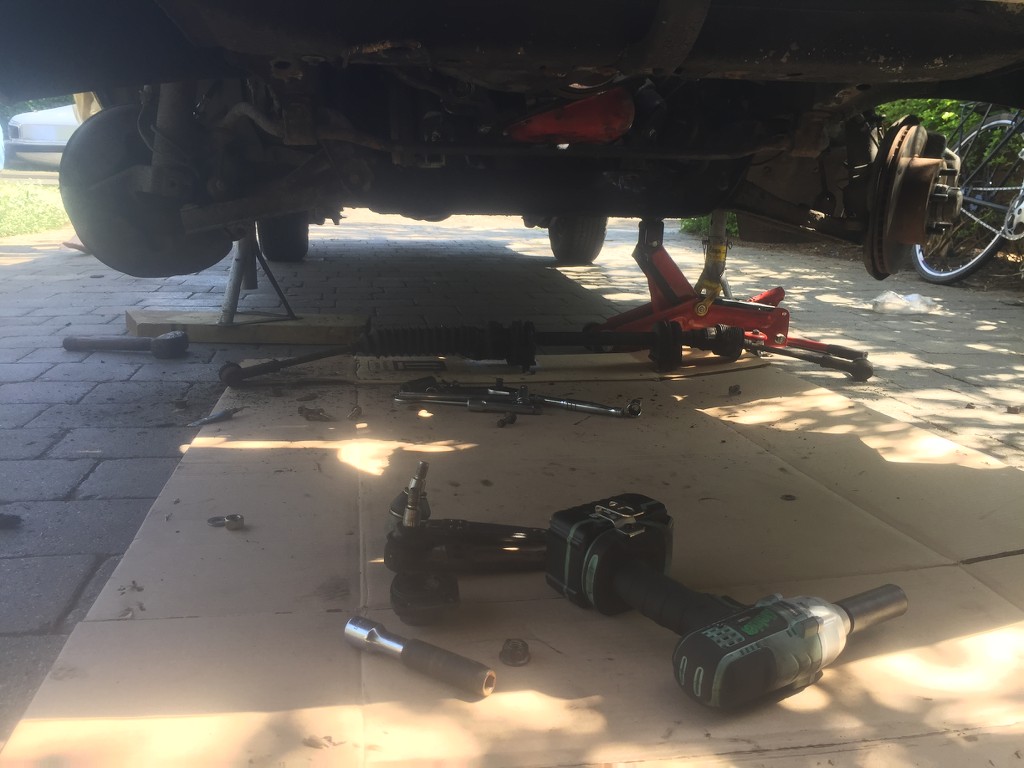 New ball joint and track rod end 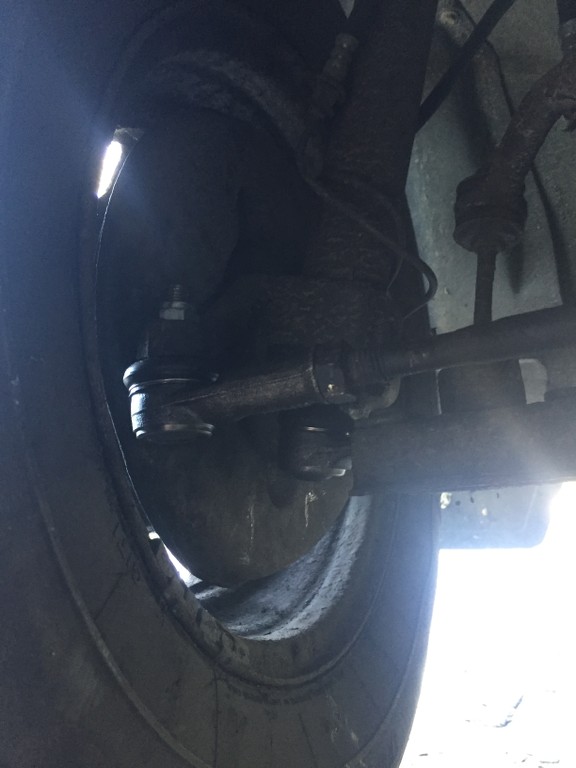 Old style steering column 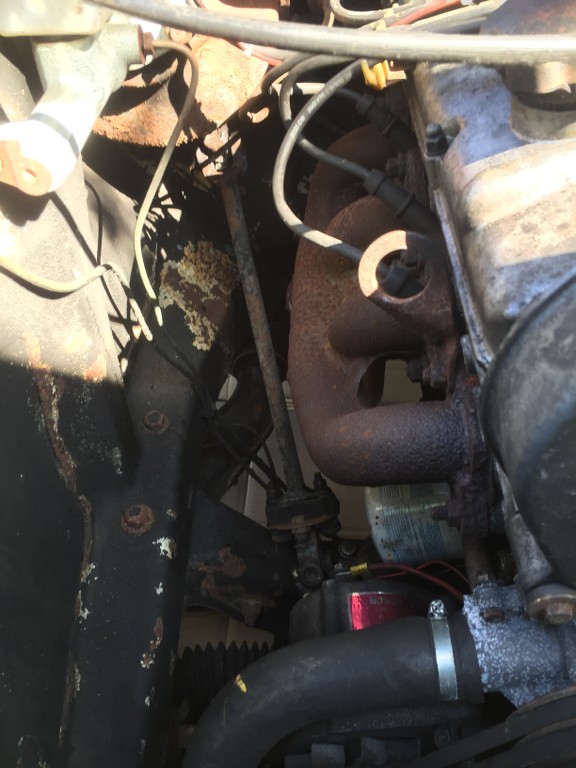 New style steering column 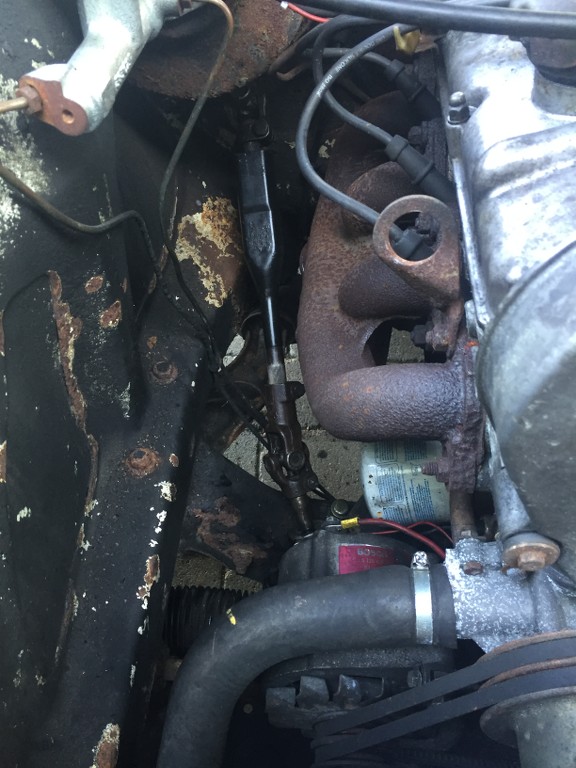 With the engine running and the front wheels in the air I tested the power steering and unsurprisingly it’s much lighter. Whilst still jacked up the car ran out of fuel and cut out… then wouldn’t restart after I put more fuel in the tank. Had to ask online what was wrong as I couldn’t quite diagnose - it turns out that the mechanical fuel pumps don’t start working until the car is at least idling – spinning the engine over on the starter isn’t quick enough to draw fuel through from the tank when the line and float bowl in the carb are completely empty. The solution is to take the airbox off and start the car using something flammable (easy start, or in this case brake and clutch cleaner which turns out to be a widely known substitute) sprayed into the carb inlet. This will allow the car to start and as soon as it’s running the mechanical pump will start working. Did that easily enough and now the fuel line and carb bowl are full of fuel again so back to normal. So that’s where I’ve got to – the car is booked into the local garage at the start of next week to weld up the small hole in the floor and set the tracking (set by eye! But it’s a 500 metre drive to the garage at most) and then I can put all the interior back in place, clean it thoroughly and then start advertising it for sale. It’s been fun and I’ll miss it, but I have two project cars and can’t quite justify more than one. Time to sell it on to someone who will enjoy tinkering with it and hopefully driving it a bit more than I’ve had a chance to. Perhaps I'll make time to take it on a trip somewhere before selling it on, at least a run to the seaside or something. |
| |
|
|
|
|
|
Apr 16, 2019 14:05:11 GMT
|
Written late May 2018: So another bank holiday weekend and another tinkering spree. The garage happily welded up the floor and set the tracking, so now it's time for the great reassemble. hole in floor welded up 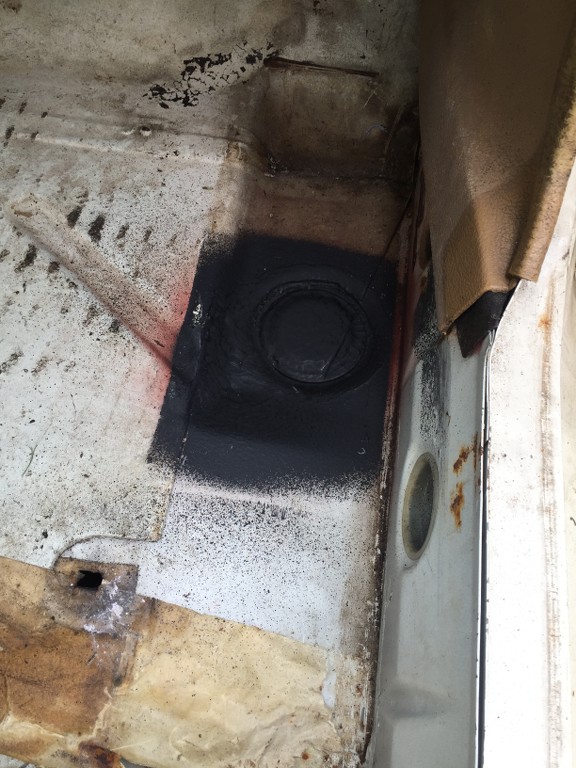 When I removed the engine and gearbox the tattered remains of a piece of foam sound deadening material fell out from the gearstick area. A couple of days later someone on a forum said they'd greatly cut down on noise from the same area by cutting a hole in a jumbo car washing sponge... so i figured i'd give that a try - it works! and a lot cheaper than a original replacement. sponge 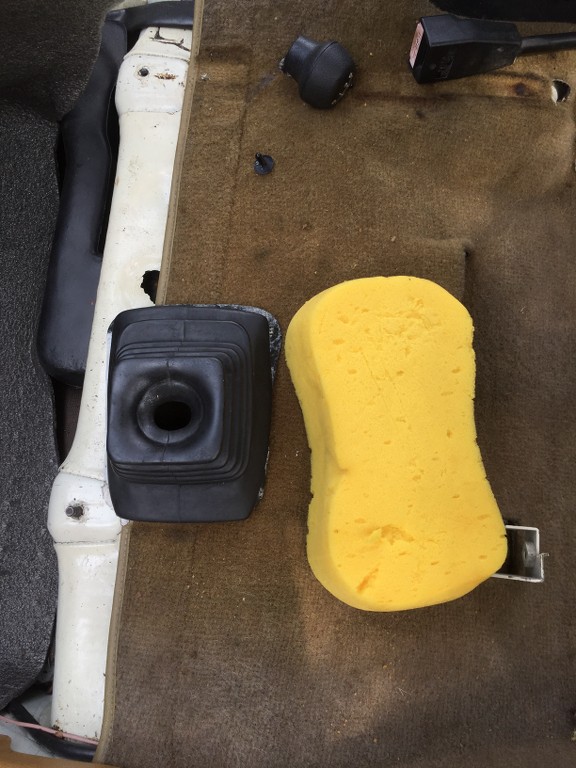 sponge cut to shape and in place 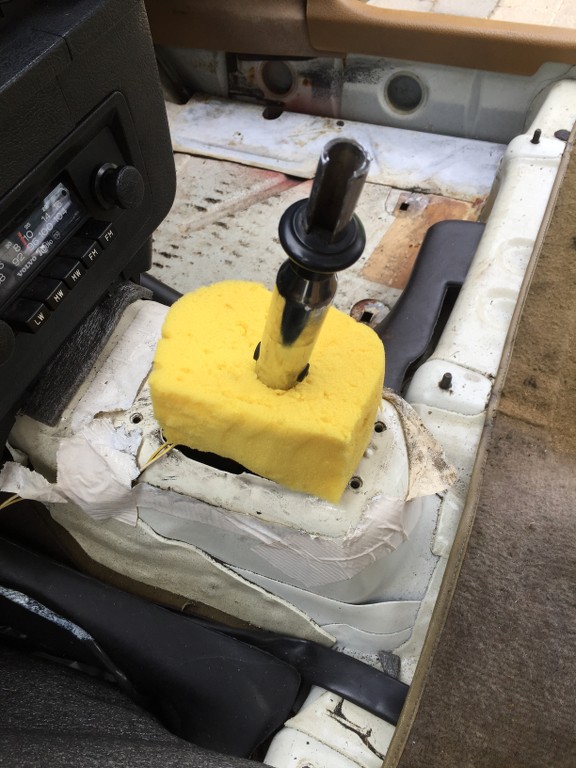 I always knew that the front seats in the car were in pretty poor condition, easily the worst bit of the interior. The previous owner did their best, cutting out sections of beige leather from other seats and gluing them over the worst parts but realistically they needed to be replaced. Luckily a set of much better condition seats came up for sale about 2 years ago (whilst the car was in storage) which I bought and stashed in the loft, so I got those out. The two better condition seats actually came with an extra front seat from an earlier car, which appears in the photo below - this has been passed on to a forum member with a matching interior. Note the earlier (A-frame) headrest shape on the extra seat and the slightly different shade of beige. Old front seats - extra patch glued onto the right hand bolster of the drivers seat (nearer) and the centre of the base of the passenger seat (further). Also note that both seat backs are from passenger seats, as the lumbar adjustment is on the left side of both. 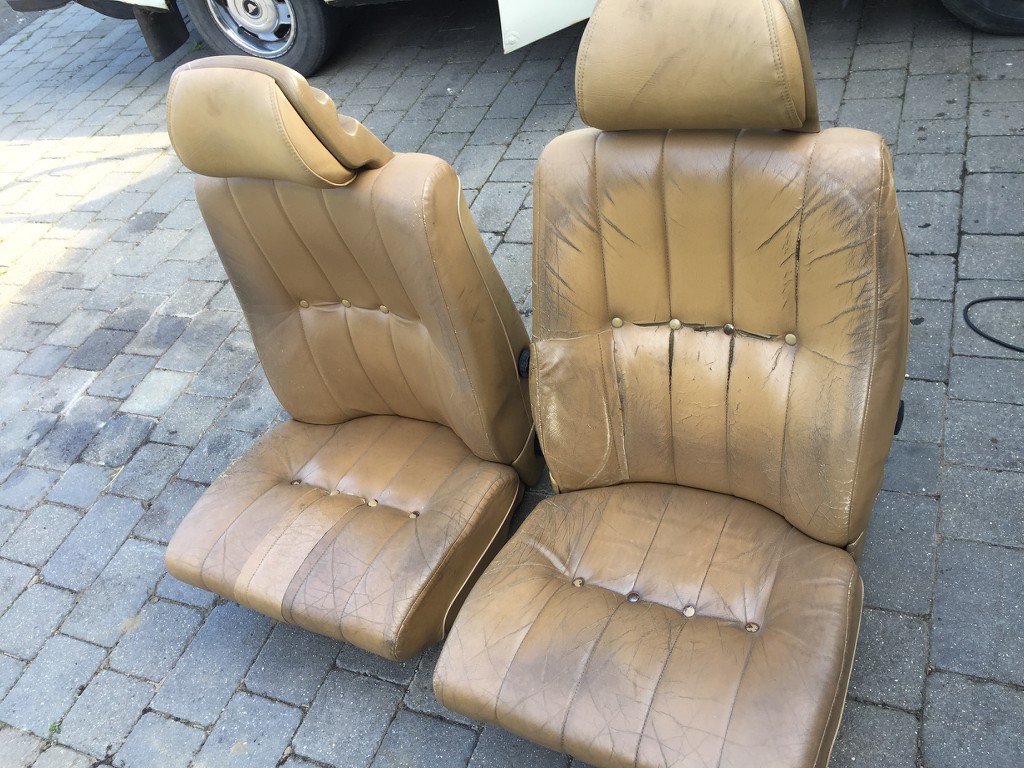 All seats in the sunshine 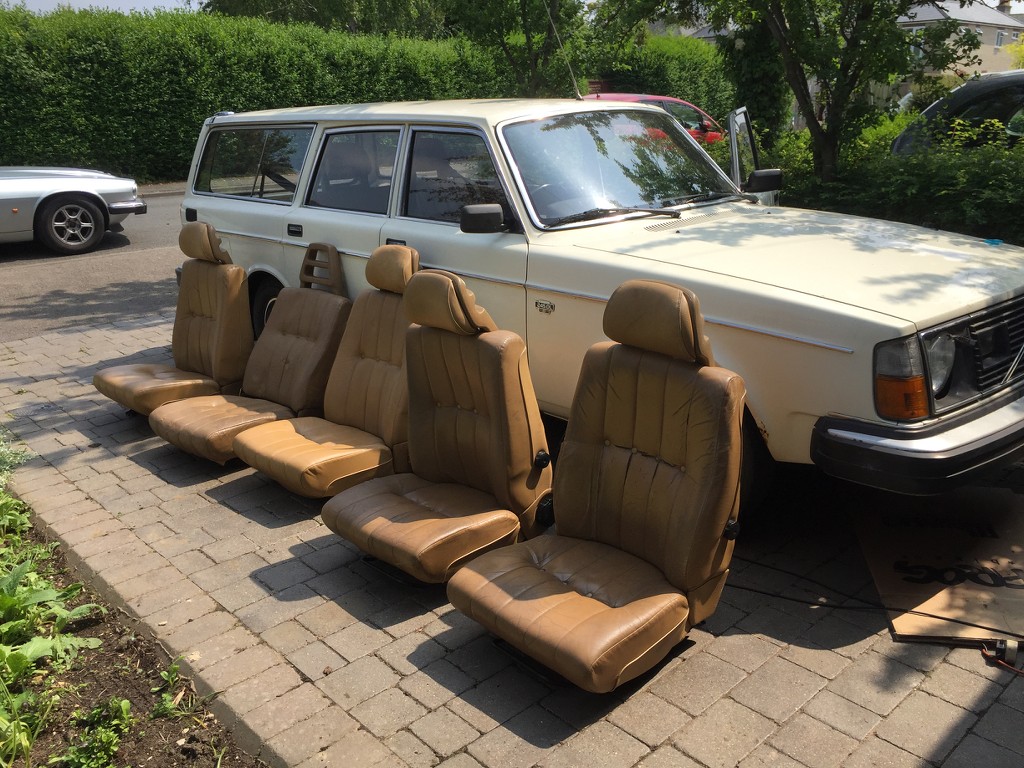 'New' seats in the car - much better condition that the old ones 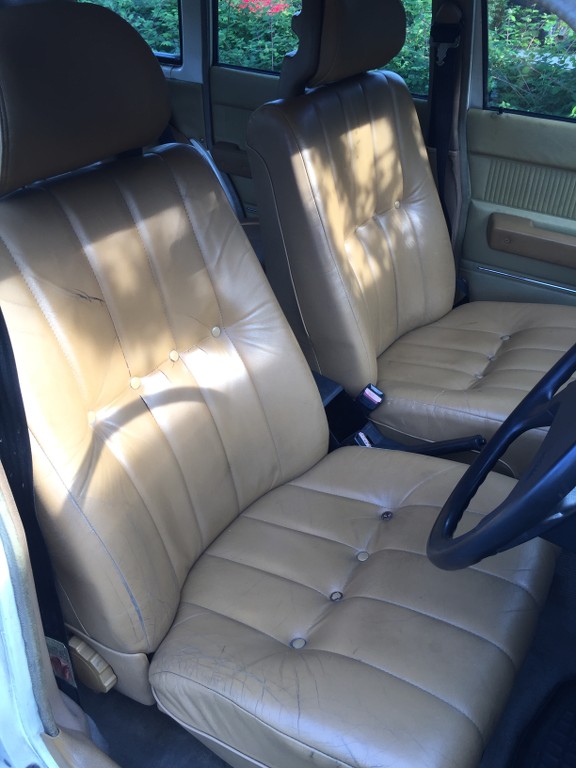 And the photo I forgot from last time - the powersteering pump in place. 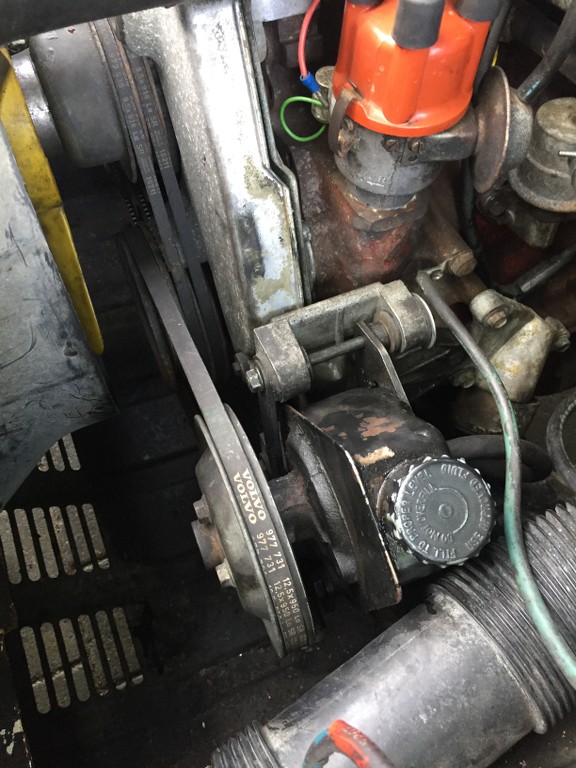 So then it was time for a testdrive - first time I've driven it since the powersteering conversion. Unsurprisingly the steering is much lighter and with new balljoints, trackrod ends and freshly cleaned and lubed universal joints in the steering column it's smooth and quiet. The whole car is really lovely to drive - the engine runs and pulls well, the clutch is light, the brakes are perfect and it's rattle free... arguably nicer to drive than my turbo converted 240 if i'm honest. Just a couple of final final things to do and then it'll be for sale. |
| |
|
|
|
|
|
Apr 16, 2019 14:06:41 GMT
|
Written late June 2018 - bit of a setback... Well, that wasn't the plan... the plan was to MOT the car and then put it up for sale. What actually happened was that it failed the MOT on quite a lot of stuff, some serious, some not and now I'm not quite sure what to do with it. 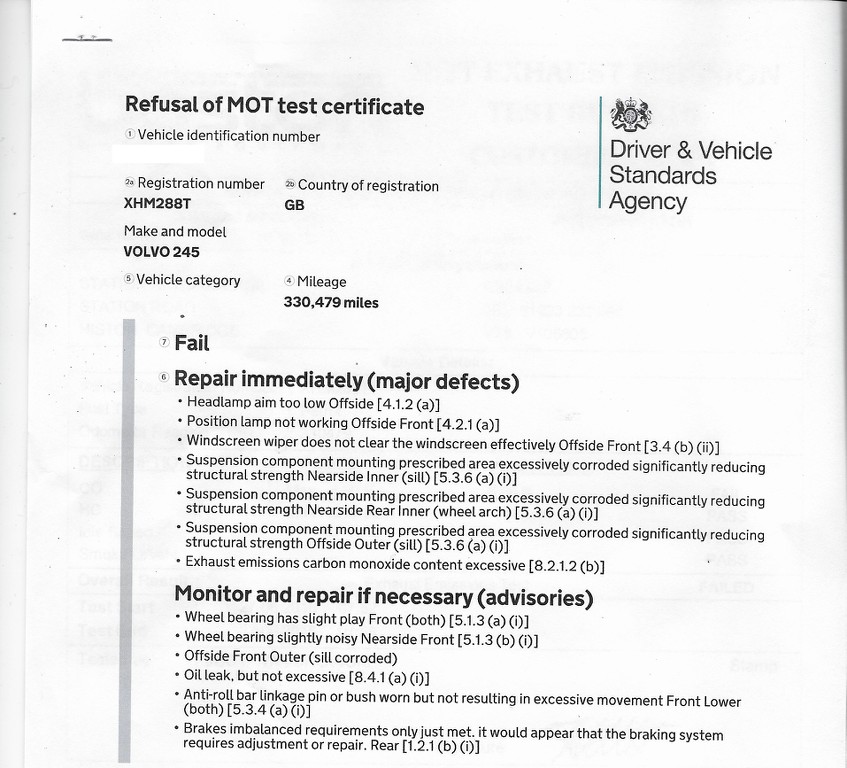 |
| |
|
|
recarouk
Yorkshire and The Humber
Posts: 435 
|
|
Apr 17, 2019 12:25:44 GMT
|
this is fab! I'm hooked.  |
| |
|
|
|
|
|
Apr 17, 2019 13:55:37 GMT
|
|
While I admit that I did not see it coming from the pictures posted, it seems that there are some significant rust repairs required. You up for that?
|
| |
|
|
mylittletony
Posted a lot
  
Posts: 2,429
Club RR Member Number: 84
|
|
Apr 17, 2019 14:38:17 GMT
|
While I admit that I did not see it coming from the pictures posted, it seems that there are some significant rust repairs required. You up for that? I don't want to be a plot spoiler, but the MOT fail was June 2018 and I can confirm Seb stills owns this   |
| |
|
|
|
|
|
Apr 23, 2019 20:06:25 GMT
|
While I admit that I did not see it coming from the pictures posted, it seems that there are some significant rust repairs required. You up for that? I don't want to be a plot spoiler, but the MOT fail was June 2018 and I can confirm Seb stills owns this   But you DID spoil the plot! |
| |
|
|
|
|
|
Apr 23, 2019 20:24:59 GMT
|
So, with no cliffhanger to err, hang off, I suppose I'd better continue the story. I posted the same picture of the failure sheet on the Volvo forum and asked for opinions, as well as saying if anyone wanted a project then now was the time to speak up. Some encouragement from people who had read the thread, but no offers to take on the car. I posted a few pictures of it and the same picture of the failure sheet on the Volvo 240 Facebook page and got a similar lack of interest, apart from some really low offers from banger racers. Hmmm. Then I lost my job. Ace. Still, on the bright side, so my thought process went - if i don't have to go to work everyday, then I could fix the car whilst looking for a job... and the weather is nice at the moment (this was July 2018). Right. Written in July 2018: So where were we? Ah yes, an MOT failure and me wondering what to do with the car. Well, after no responses to my post above saying that the car was for sale as a project if anyone wanted it, or any sensible responses to a similar post I put on a Facebook page for 240 owners, I kept an eye on a couple of early 245s for sale on ebay to see how much they sold for and figured that the sums just about worked if I could get my car to a similar condition (and therefore expect to sell for a similar figure). Also, I did want to practise welding after completing a welding course a while back… and this is a fun learning experience… or something. I also discovered a place very near my parents that rents out welders by the week which meant I could avoid the up-front cost of a welder - so renting a welder and getting on with replacing panels seemed like a totally sensible choice. Also, obviously enough, I didn’t really want to give up on the car after spending so much time on it already. So, before stopping to think (and perhaps realising that this wasn’t the sensible choice) I ordered a whole load of repair panels from Brookhouse – I don’t have the tools to start making panels from scratch, so even if I was only going to use a small section of a particular repair panel it was still going to be far easier for me to take this approach. A large box with rear arches L&R, rear arch inner repair sections L&R, inner sills L&R, outer sills L&R and spare wheel tubs L&R turned up. Not all of this will be used on the 245 – some sections are mainly for or will be shared with the 240 which has some similar work coming up, although luckily less extensive. Then off to get the welder… and I accidentally bought one. The rental shop had been taken over just two days before my visit, so it was full of people from the new parent company wandering about but no-one really knew what was going on. The manager guy I’d spoken to on the phone wasn’t there, I had to come back the next day… low level chaos. Anyway, first thing the next day the manager was there and as part of the apology for the aforementioned chaos and he offered to sell me an ex-rental welder. One decision made by the new management was to vastly reduce the stock of rental equipment – he offered it to me for the cost of three weeks rental, with a new torch, earth lead and let me test it out in their test area… so I accidentally bought it. Back home and it was time to fire up the grinder with a wire brush attachment – mission one, right hand side sill (as the car was parked that way round). Unsurprisingly enough the crusty bits of sill that I thought might be made of rust and filler were made of… rust and filler. The outer sill rear end had a hole in it that the car failed the MOT on, with an advisory about the condition of the middle/front part of the sill. So I stripped the paint off all of it – the bodge to pass the MOT a few years back (not during my ownership but I have a receipt for it in the paperwork from the previous owner) really was a bodge – looks like a plate was welded over the sill rear end and then skimmed with filler, then further up the sill a couple of paper thin areas and holes were filled/skimmed with filler… proper bodge territory. So deep breath and on with the cutting… I cut the corroded outer sill section off and then found a section behind that of the inner sill was paper thin and fell apart when touched with a wire brush so I cut that out as well. Sections of the front of the inner wheel arch followed swiftly afterwards. With the back of the sill off it was easy to see what the sill was full of… leaves. Despite my efforts to hoover out the sills when the interior was out of the car (see a page or two back), there were still a lot of leaves in there – which had trapped moisture and caused the sills to rot from the inside out. Now with a load more access it was relatively simple to get the last of them out. After playing with my new welder to get to grips with it I welded a replacement section of inner sill in, and coated it in exciting products such as red oxide, then welded in the outer section. Moving further up the sill I cut out three further holes and nearby rust (two medium sized and one small), making patches from the repair panel. I’ve left the back of the sill off deliberately for now, so that I can fully protect the back of all the patches with sealer and paint before sealing the sill end. Interestingly the inner sill (apart from the small piece at the back which I’ve already replaced) is solid all the way up the car and rust damage is limited to the outer sill. Annoyingly enough after months of sunny weather it started to rain when I wanted to get one with welding. Dammit. As I type the two remaining patches for the right hand sill are made and ready to fit but haven’t been welded in yet. Then there’s the sill end to finish and onto the left side of the car. So, will I be able to take the car to Retro Rides next weekend? That’s the challenge… place your bets now. I think I can finish the welding and the other things on the MOT failure sheet apart from the emissions – I can strip and rebuild the carb easily enough, but without a CO2 monitor I can’t do much about the emissions on the drive, I’ll see if I can book the car into the garage for an hour of workshop time and an MOT. If not I’ll take the blue car to Retrorides instead. Cheers Probably the largest box of Volvo bits I've ever received 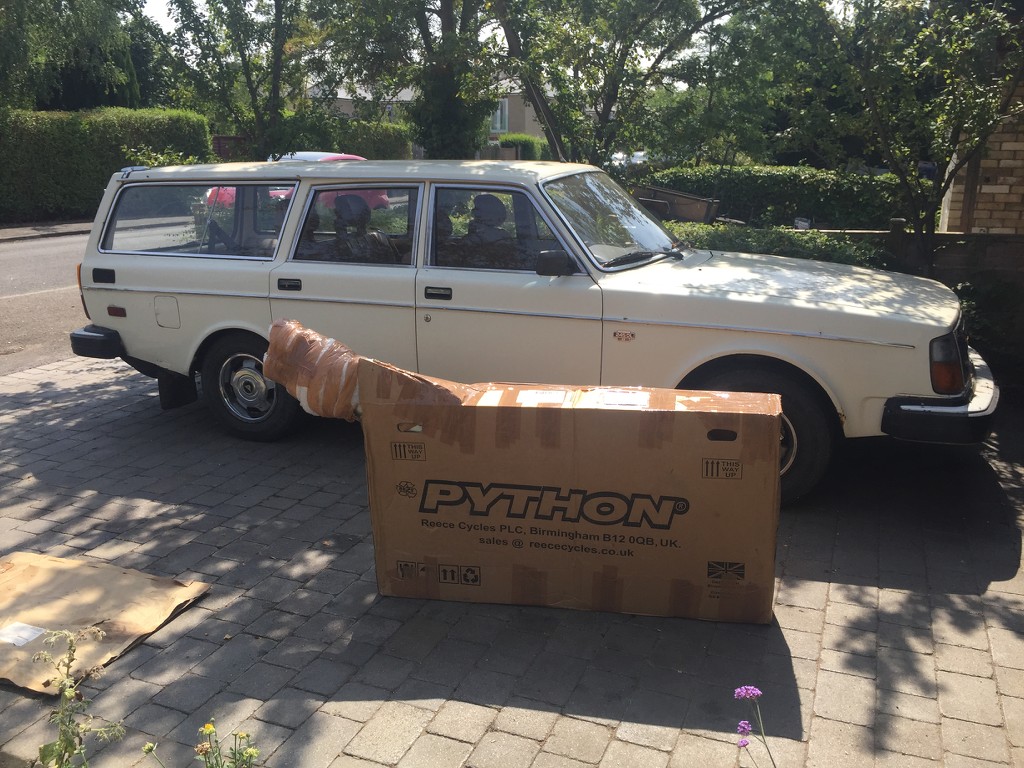 Hmmm, this doesn't look great does it 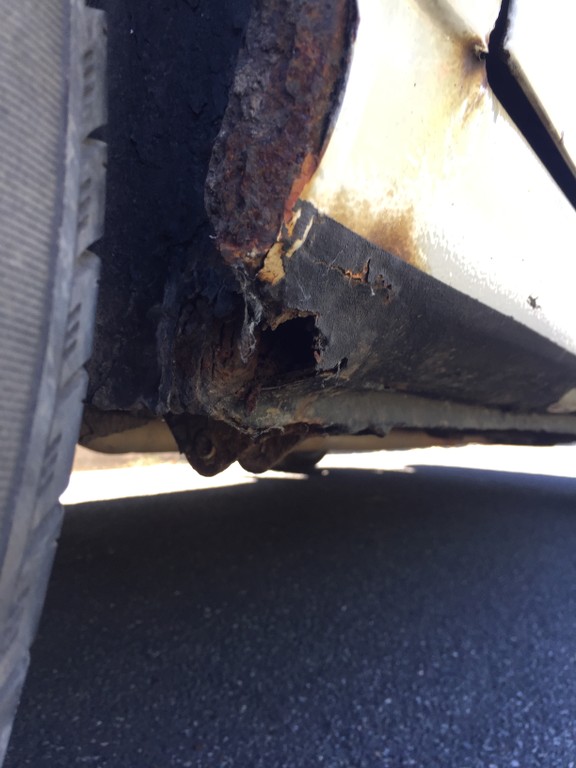 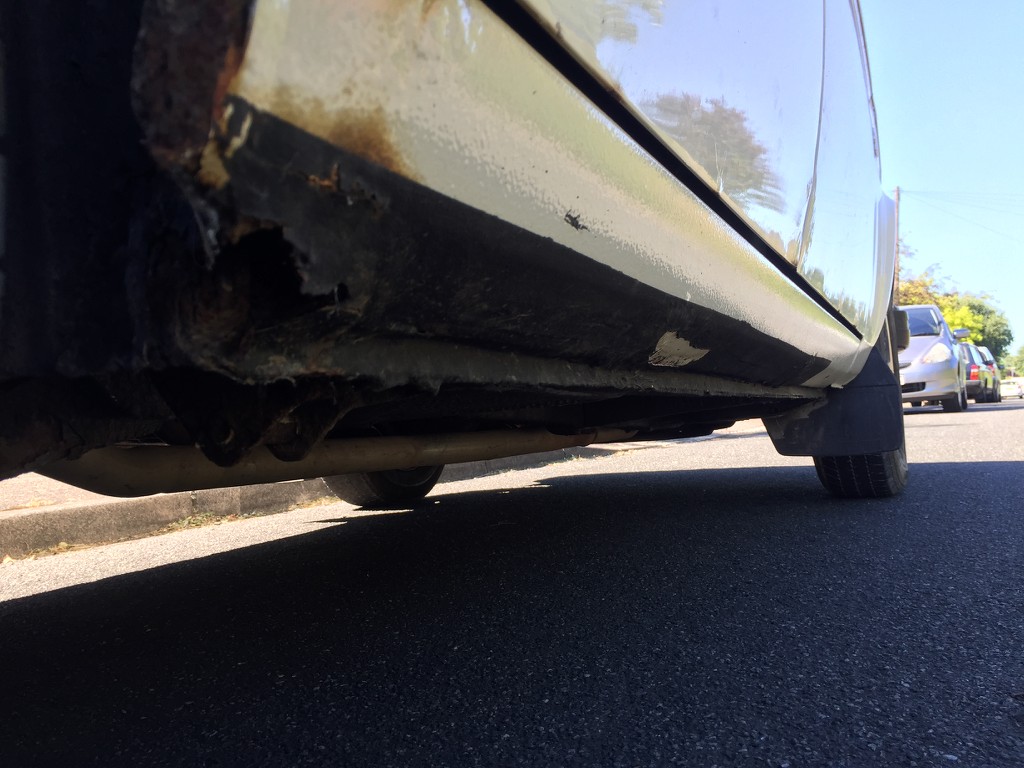 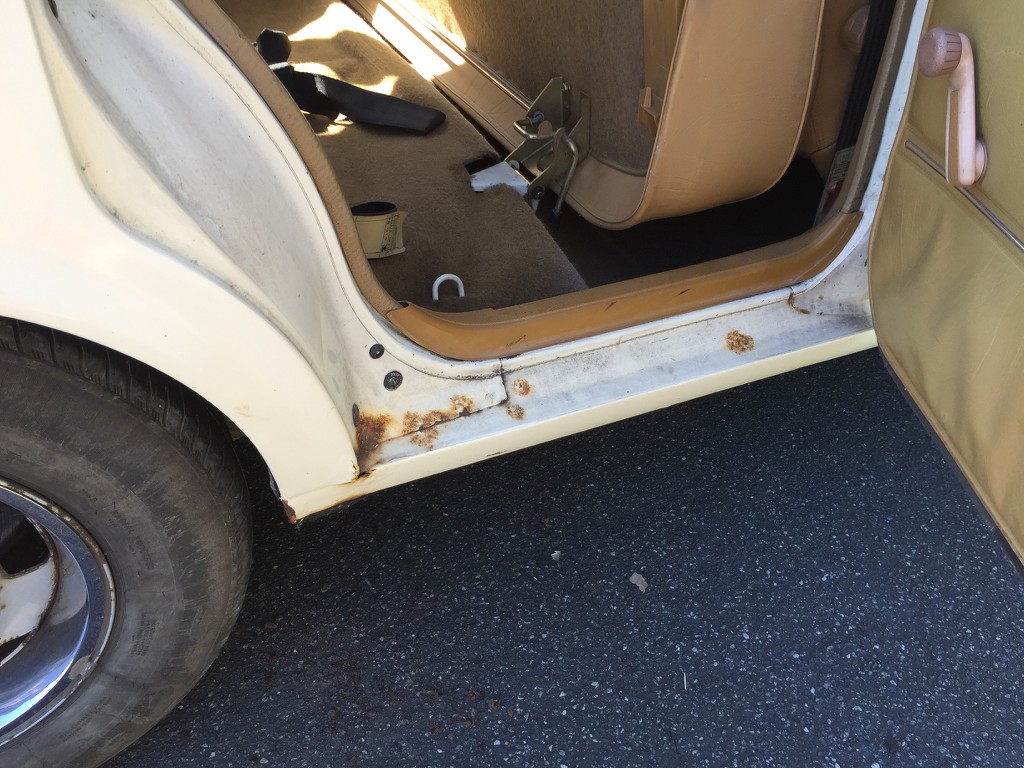 Sill end cut out 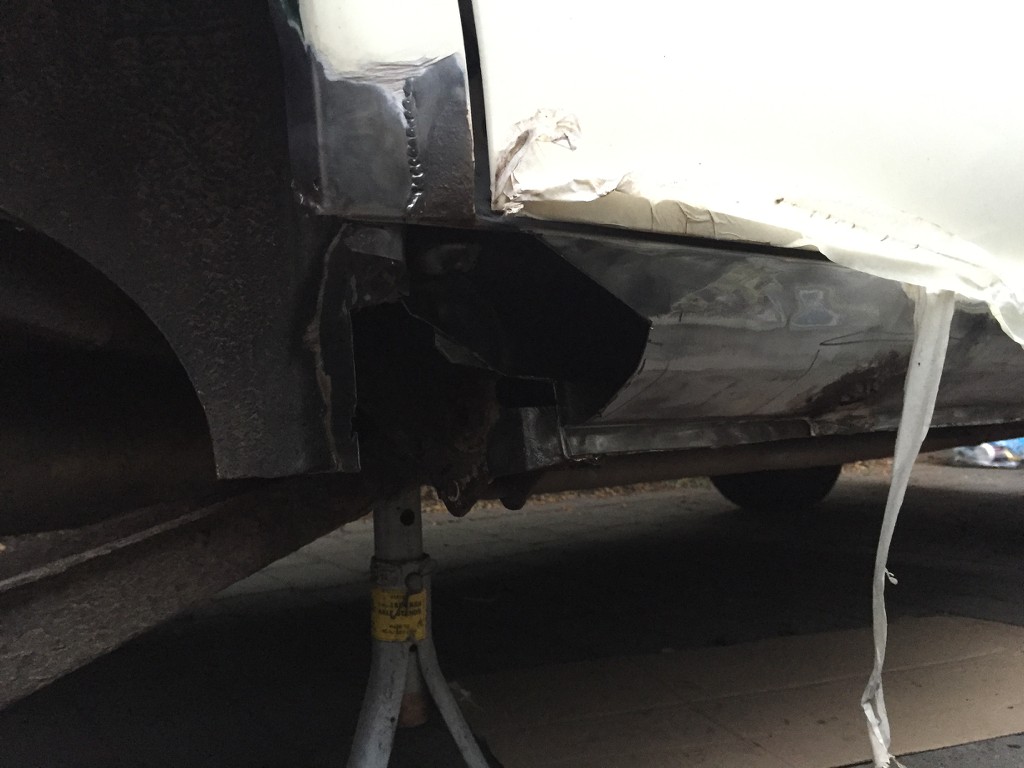 Remains of the outer sill end 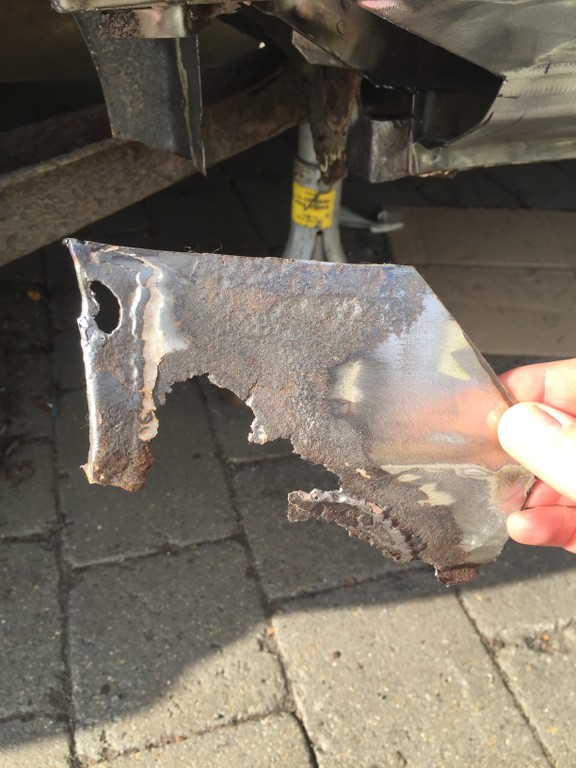 Remains of the inner sill from the same area  Inside the wheel arch 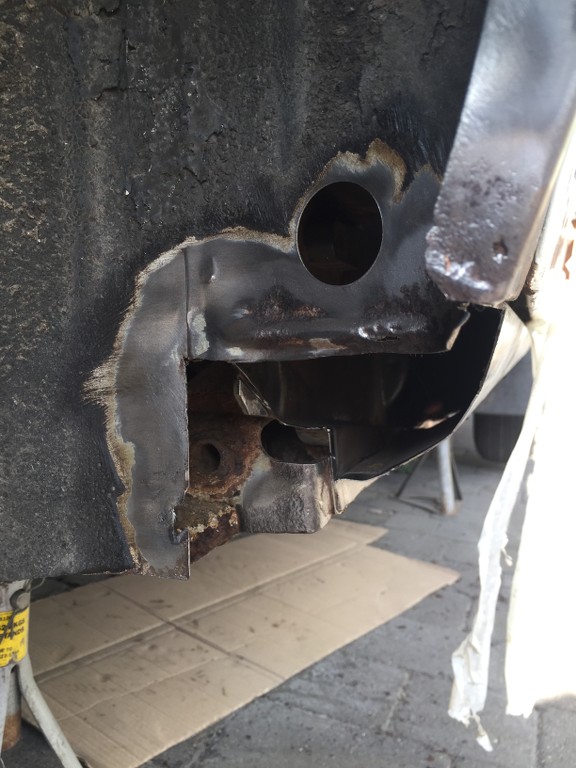 Leaves inside the sill 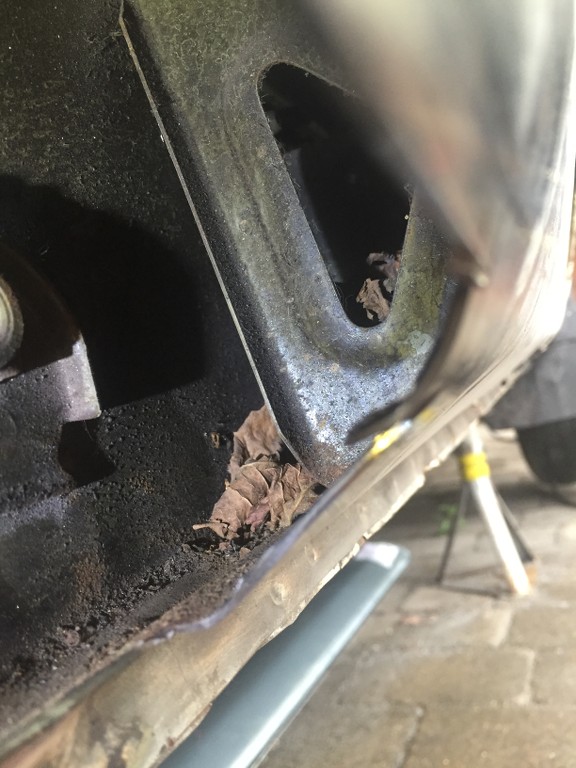 That pink blob that looks like a finger? it's not... 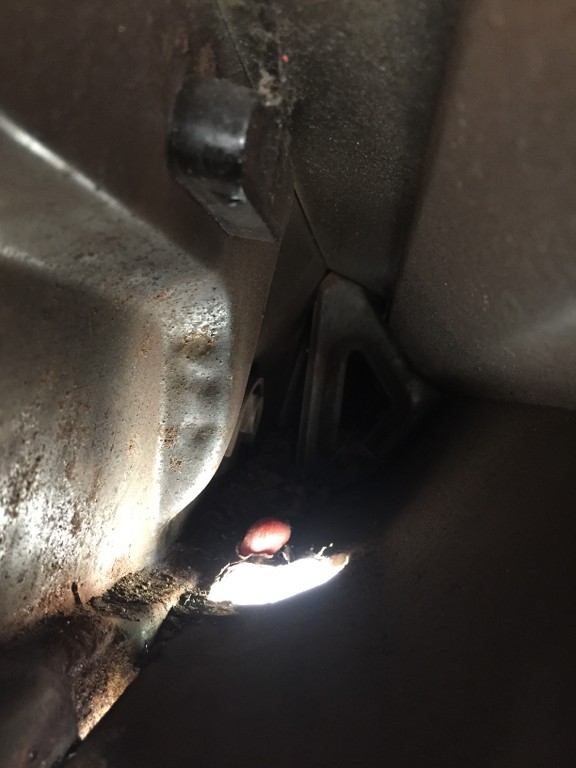 It's a blob of filler. Great work there whoever you were. 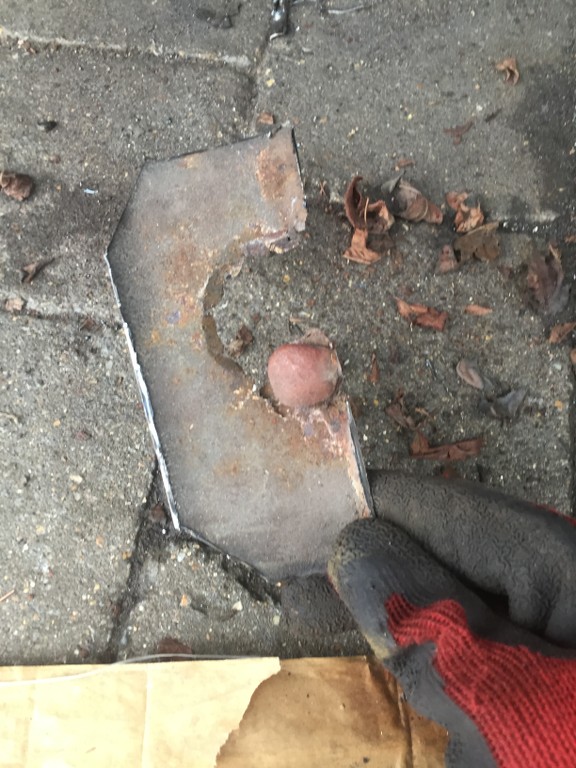 Inner sill in place and painted 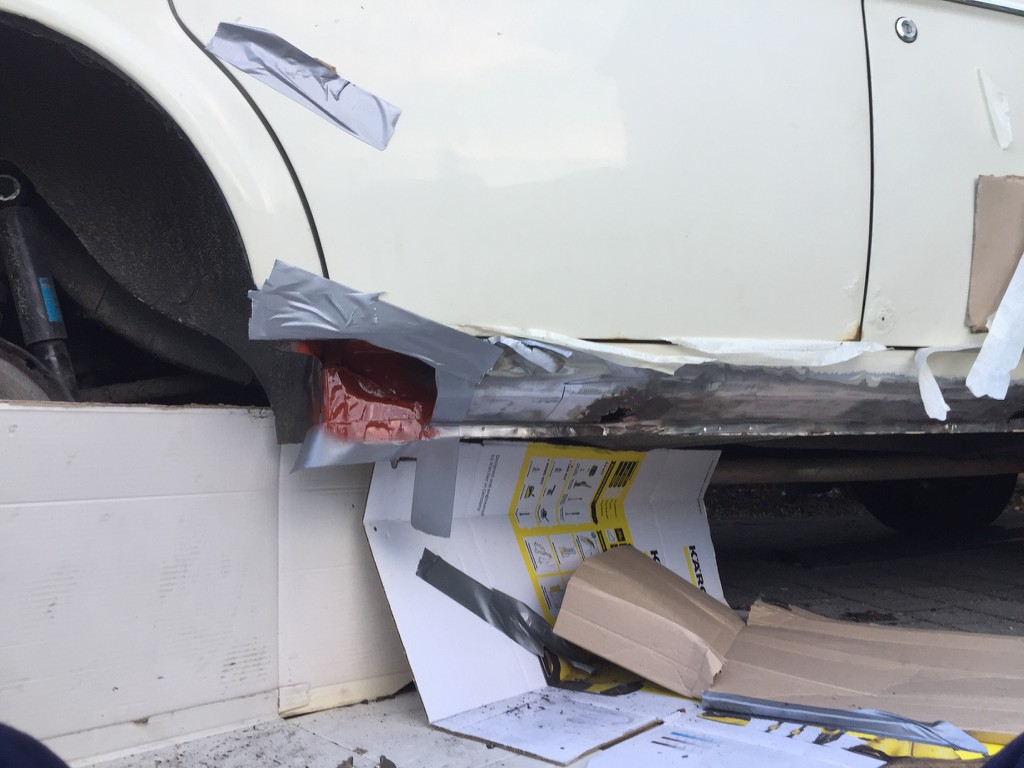 Moving up the sill, welding as I go... 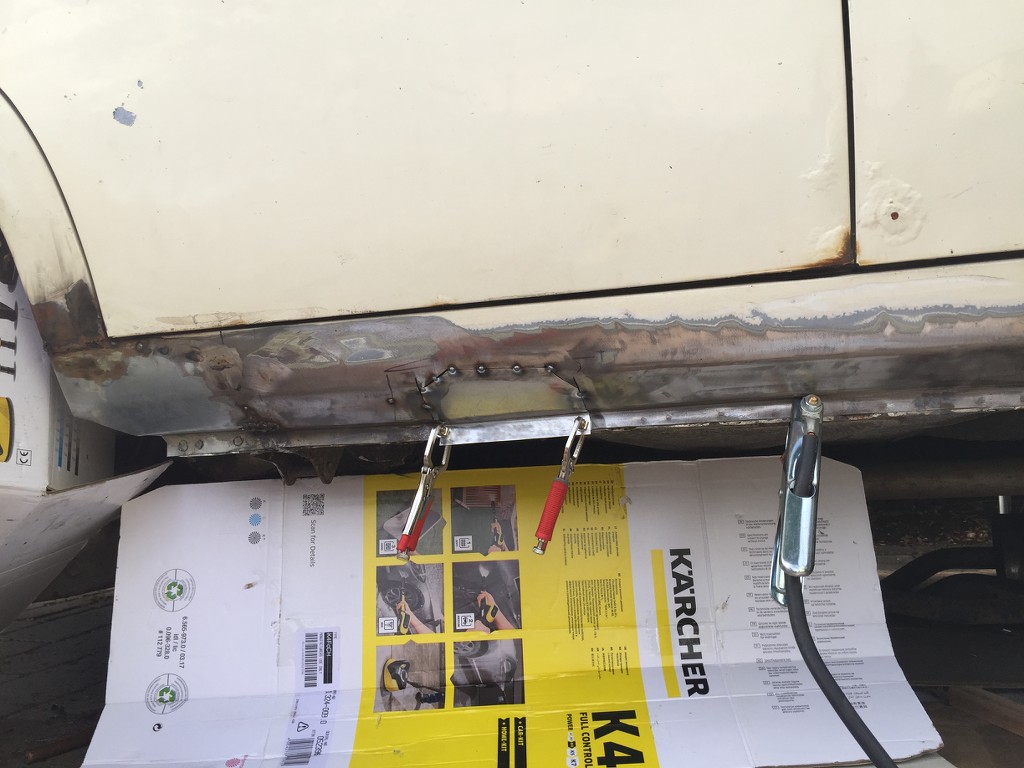 My patented hoover attachment for sill clearing - for a one off cost of a mere £49.99 you may use this design under licence. 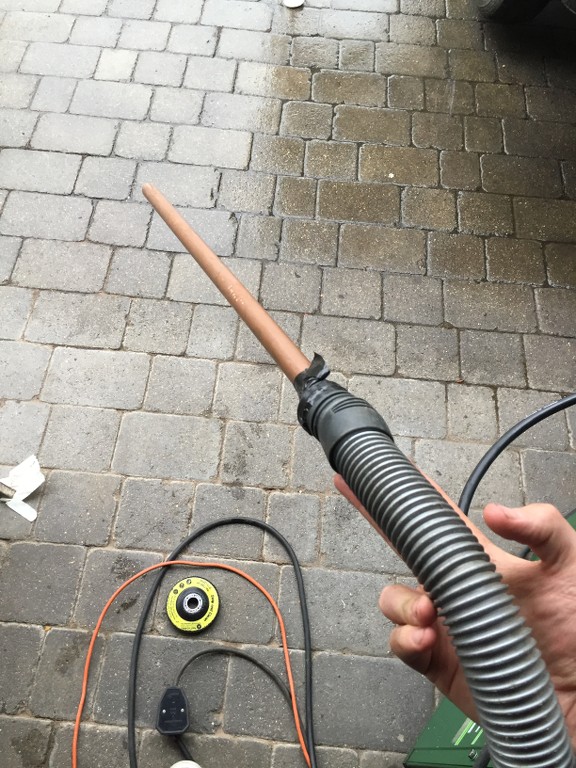 |
| |
|
|
|
|
|
Apr 23, 2019 20:55:46 GMT
|
Written in August 2018: So, back to the car and the weldathon. So I left the car with the right hand side sill inner repaired and two out of four patches to the outer sill welded in place. The patches for the remaining two holes were already made so the first thing upon return was to weld those in. That left me with something looking like this: 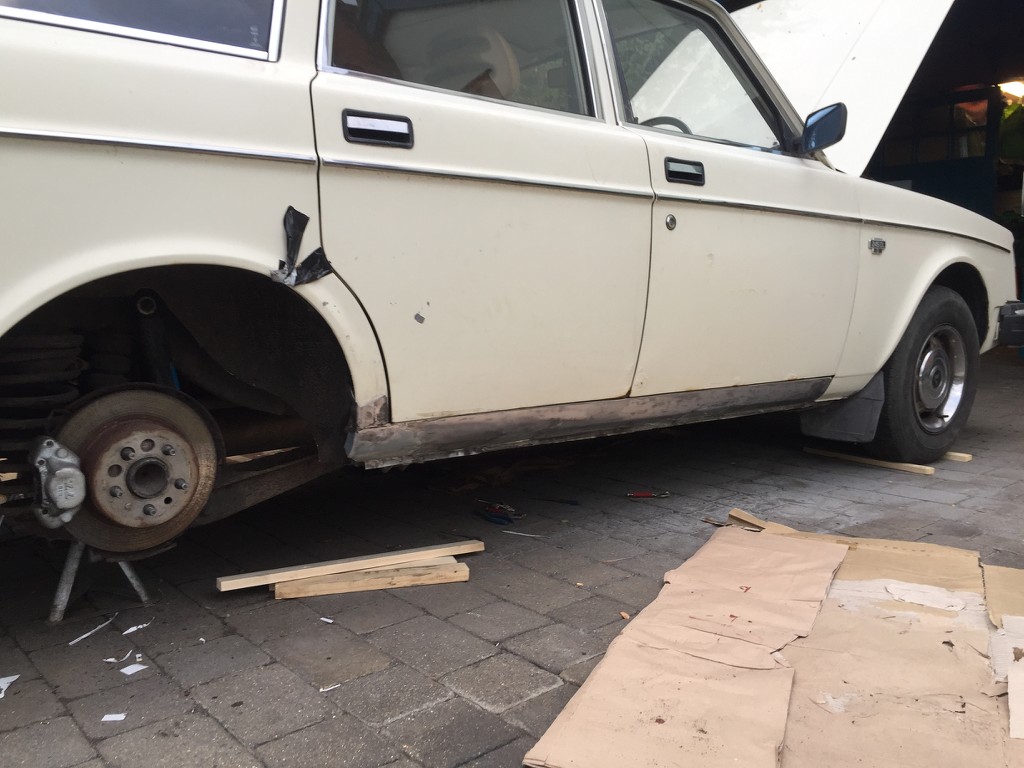 Then the welds and patches got a very light skim of filler 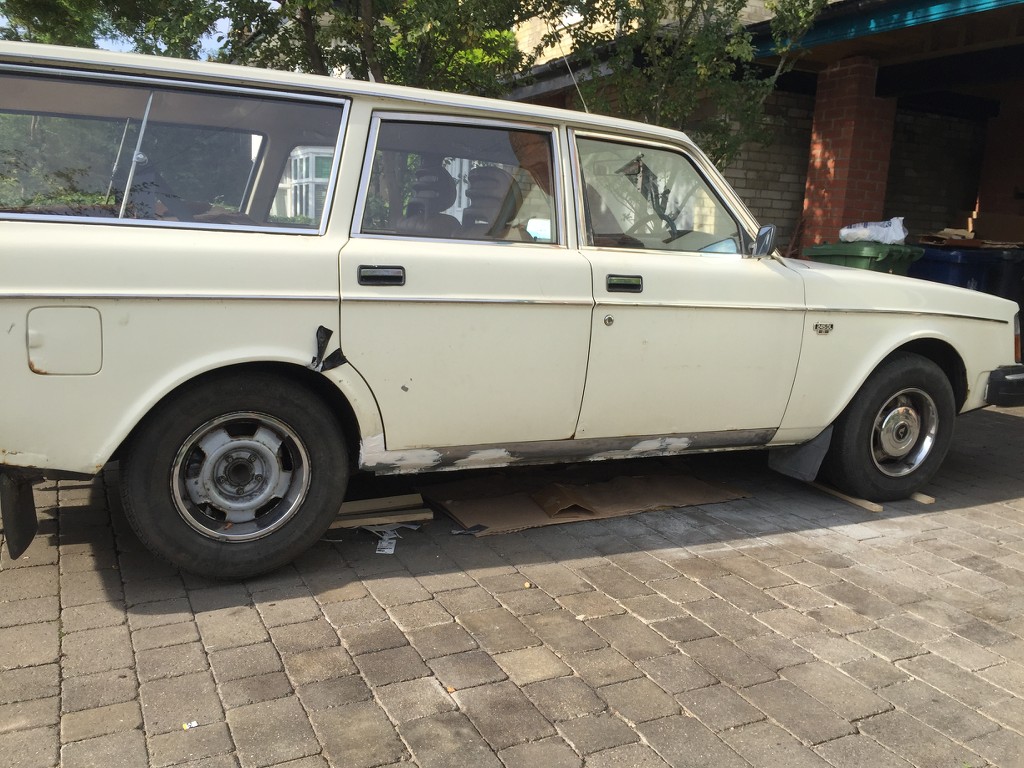 And then painted with red oxide primer - note the painting was done the day before, it was raining in the morning when this photo was taken 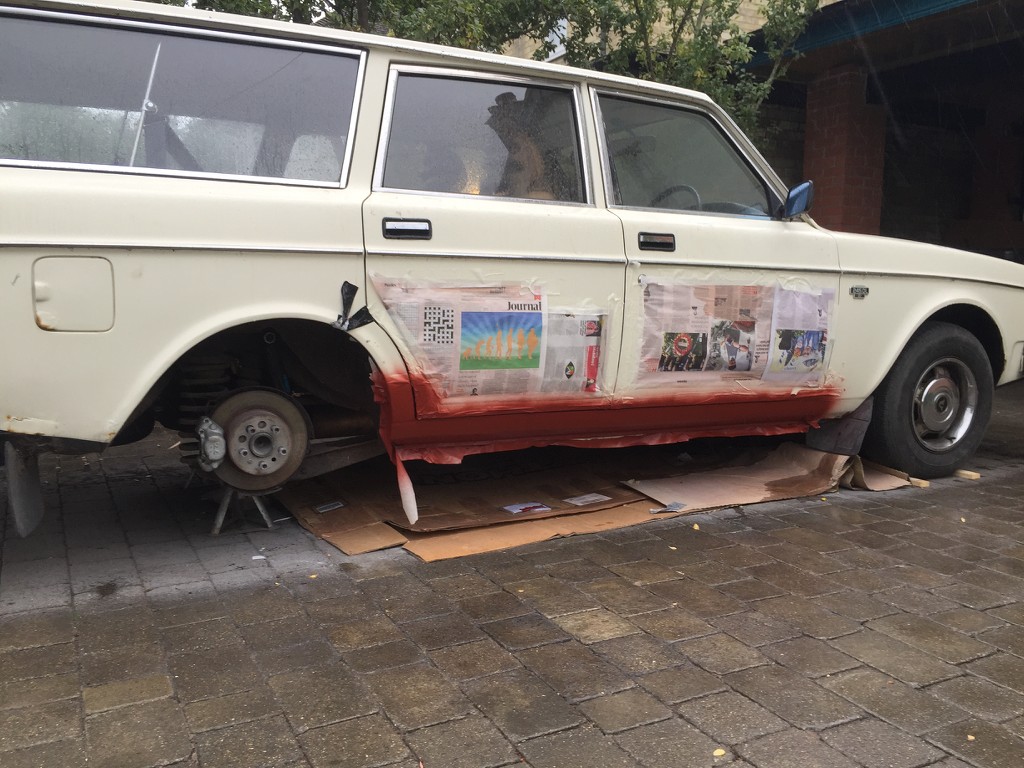 So that meant it was time to move to the left side of the car... which I knew wasn't quite as good. The car had failed on the inner sill being holed on this side, but the outer sill end didn't look all that great either... Not looking great 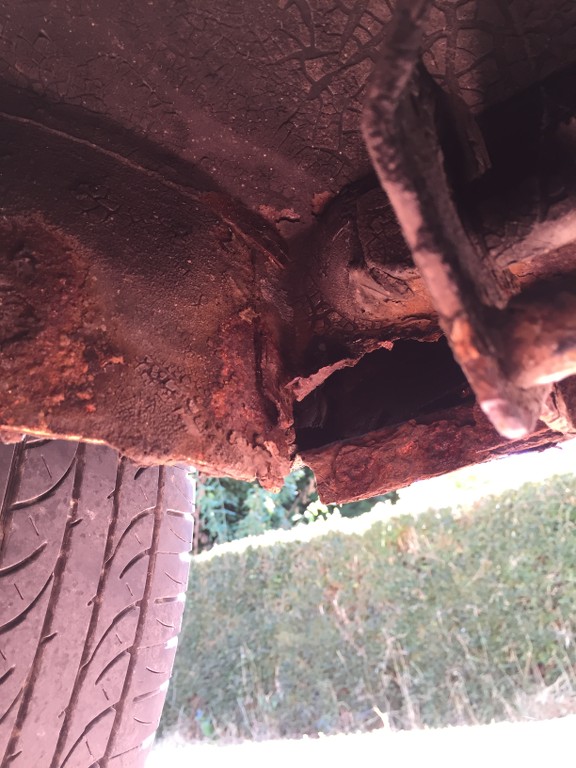 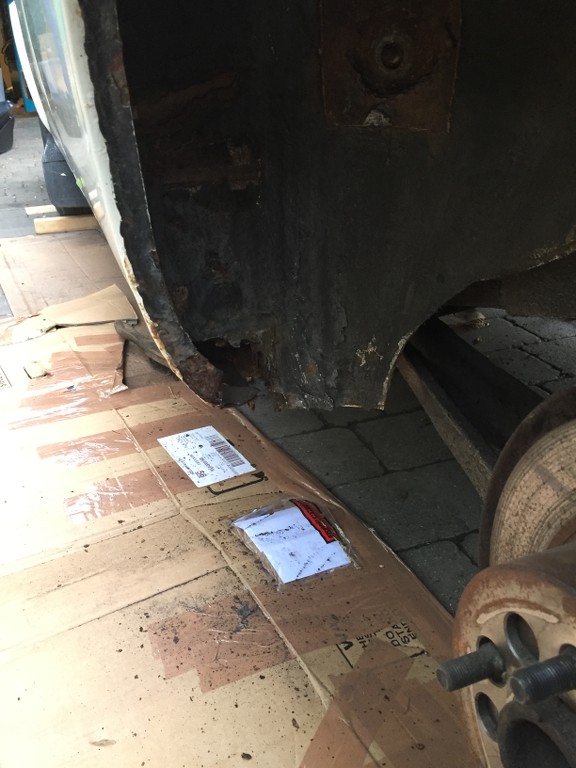 The merest touch with a wirebrush left me with this 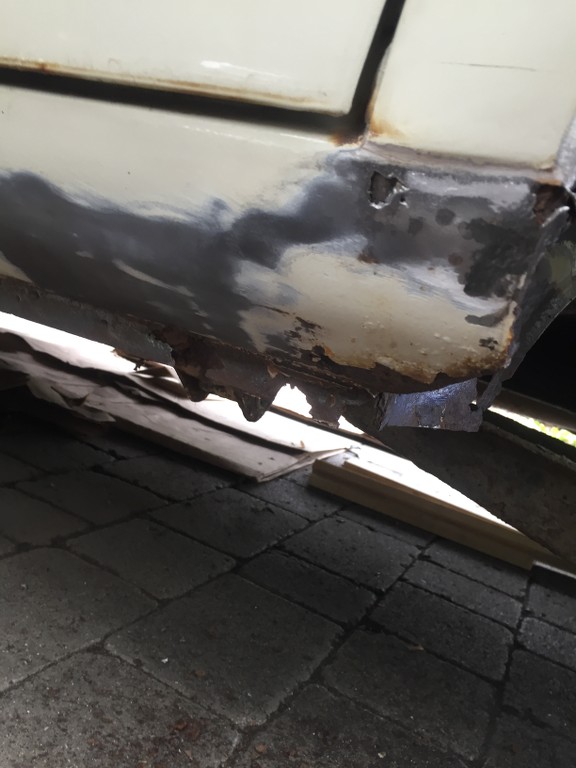 Hmmmm 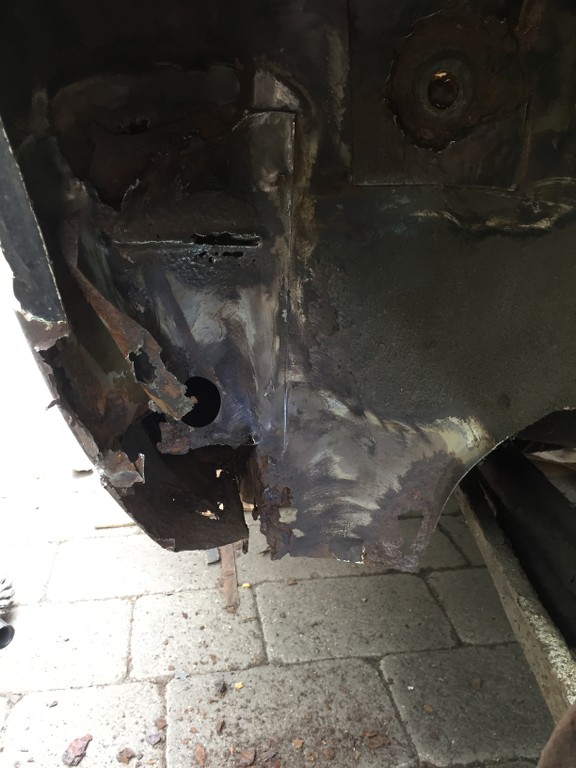 Uh-oh 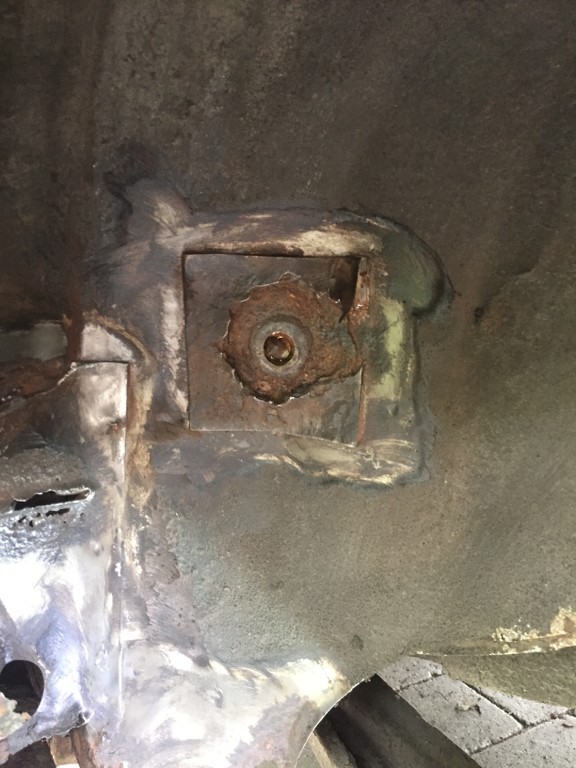 So obviously a lot of this had to be cut off. With the back of the sill outer cut off and a better look inside it became clear what had happened and why the spotwelded seam along the bottom of the sill this side was so rusty... 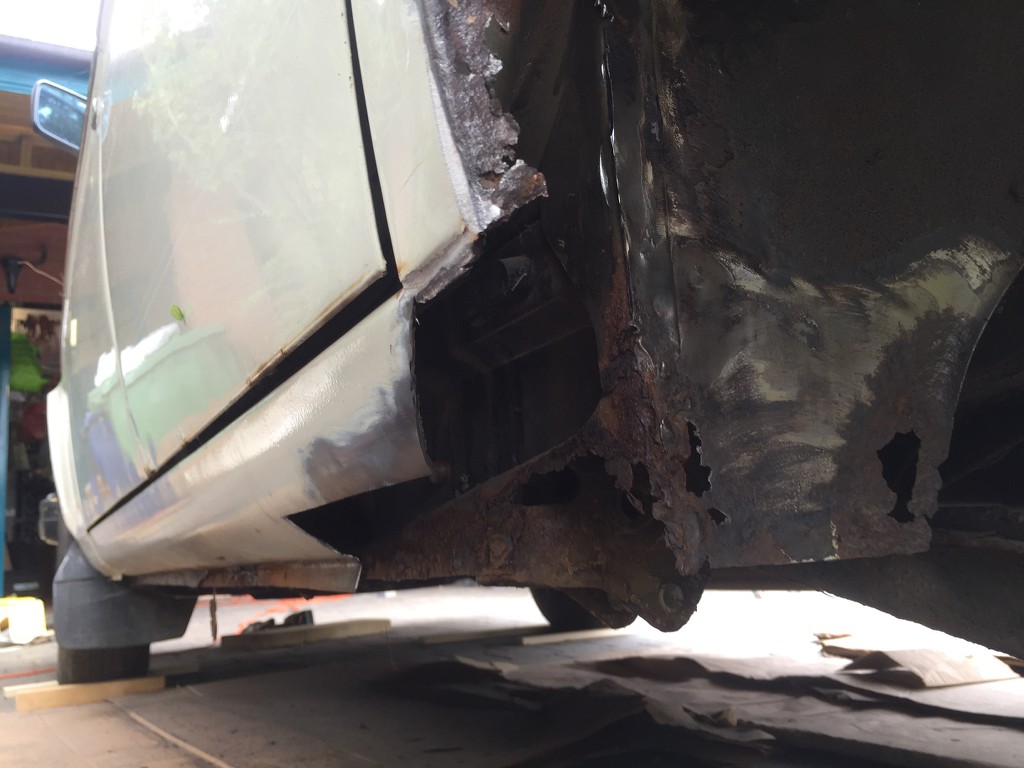  The left hand sill has been replaced previously - hence why the support about hand way down the sill has been cut through. Somewhat hard to see in the photos though was how the sill replacement had been done - they'd cut along the top surface of the original sill to cut it off, and then overlapped and plug welded it to the remaining section of the sill at the top. This joint is strong and well done. Along the bottom they'd cut off the majority of the sill but had left the very bottom strip of metal, the vertical section that has all the spotwelds to the inner sill, in place. Of course they'd ground all the paint off that strip to be able to weld the new outer sill to it and the result was a three layer thick sandwich of metal along the bottom seam, with the inner sill spotwelded to the strip of metal remaining of the original outer and then the new outer welded to that. And it was all very rusty as any moisture that got into the sill dripped through the multitude of gaps between the three pieces of metal and road grime was flicked up and jammed into the gaps by the front wheel keeping that moisture there to do it's dirty work. Hard to see - but there are three layers of metal in there 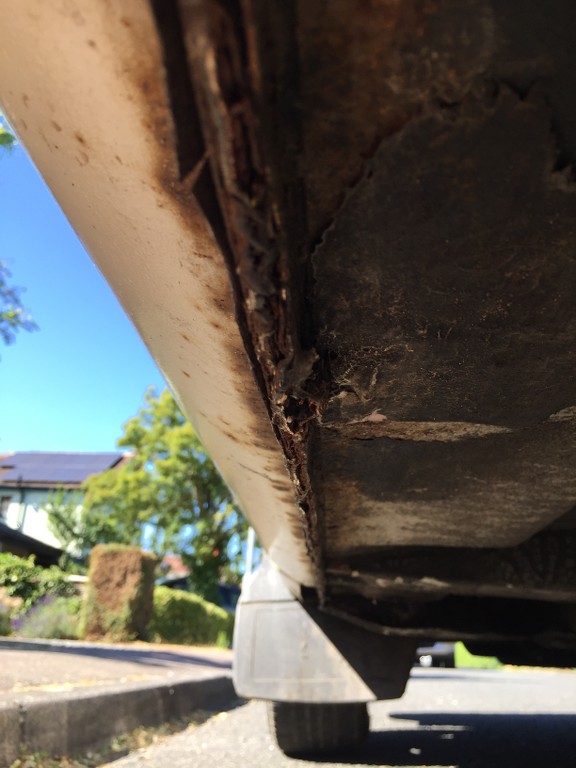 So obviously I wasn't going to leave it like that... I put a screwdriver into the rusty gap and twisted it and was rewarded with a dull 'booooing' as the spotwelds holding the inner sill to the remains of the outer or the plug welds holding the new outer to the remains of the outer let go. 'Drat.' I said. Along with 'Oh dear' and 'I'm really surprised that failed like that, given the quality workmanship involved in the repair'. Or something. The screwdriver of destiny meeting the sill repair of bodgery. 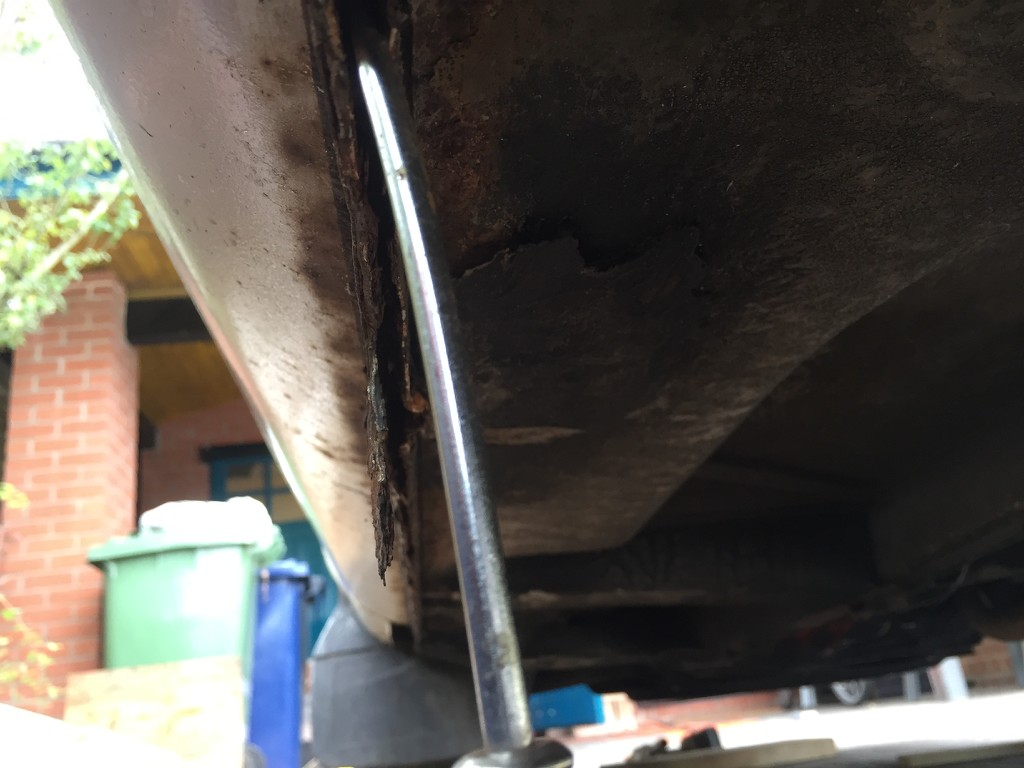 So... best get on with it then - I cut through, levered off or otherwise separated all the of the spot or plug welds that were still holding the two halves together and propped the gap open with little blocks of wood the whole way along. Then using a multitude of grinding discs, flapper sanding discs, wire brush attachments and other things, I removed all traces of the strip of original outer sill and got both the surface of the inner sill and the surface of the new outer sill back to clean shiny metal. Thankfully the rust was pretty much contained to just the now discarded strip of original outer, so I didn't need to repair any sections along the seam. Then I drilled out the plug welds in the replacement sill and drilled new holes in between each to double the number of welds along the seam. Clamped the two sides back together, plug welded all the way along and ta-da - I'm back at the point I thought I was several hours ago. Sill cleaned up and ready for rewelding 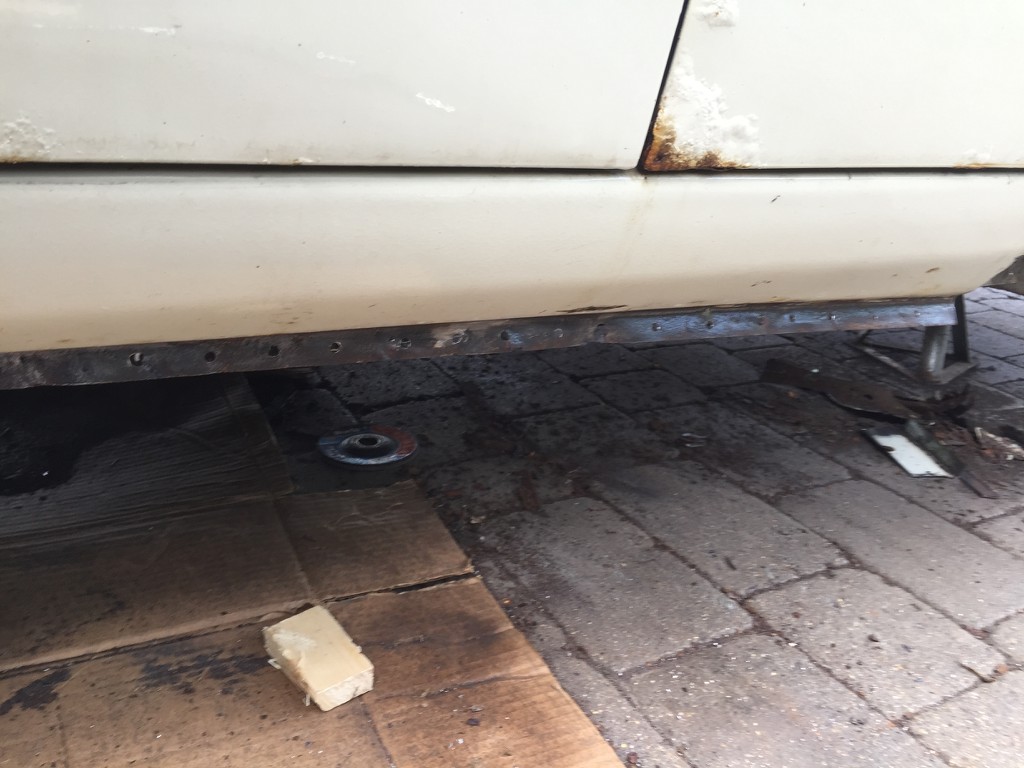 Clamping and welding 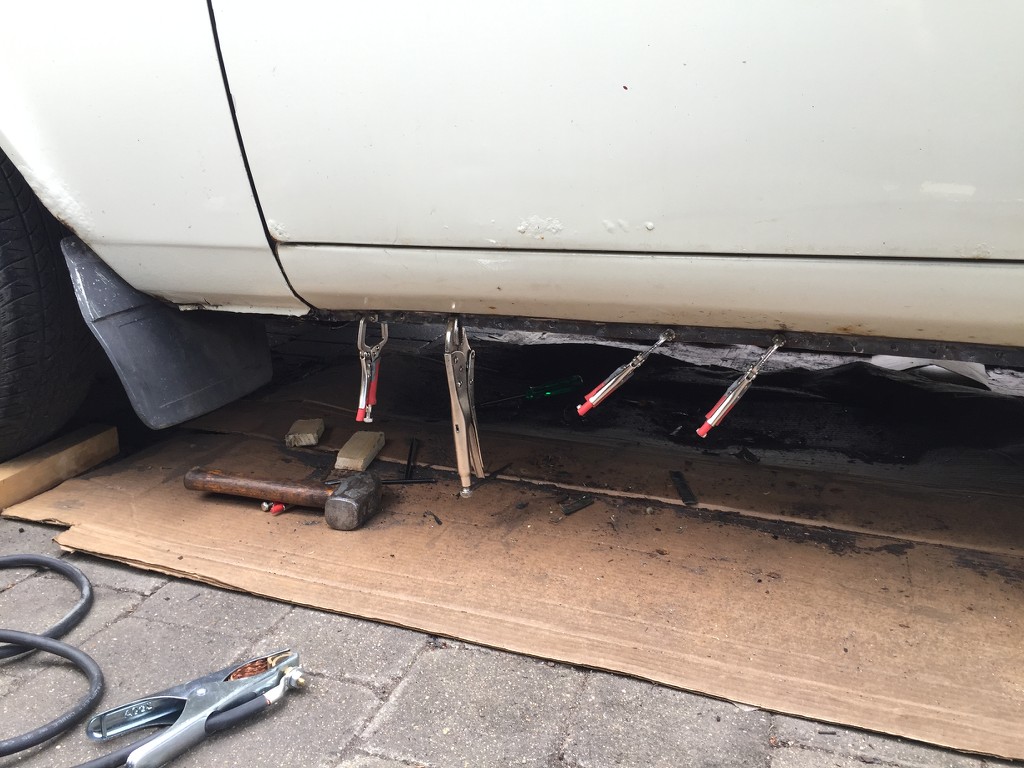 So that was fun. The back to the end of the sill. The next day it was raining, so I made use of the overhang at the front of the house... 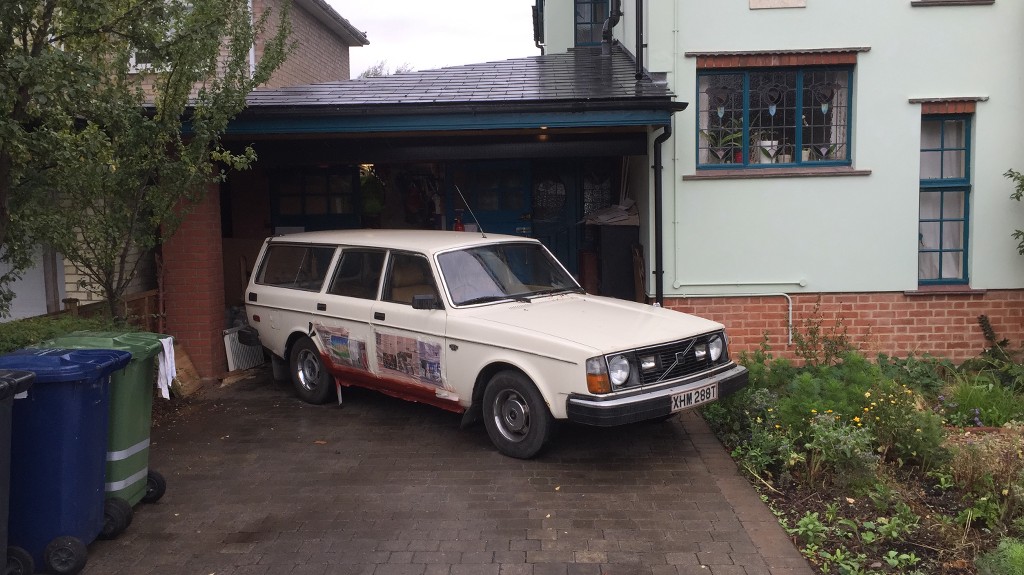 I seem to have forgotten to take any photos of the new section of inner in place, but this photo shows how much outer I cut off, and how much inner I had to cut off - more than the other side of the car 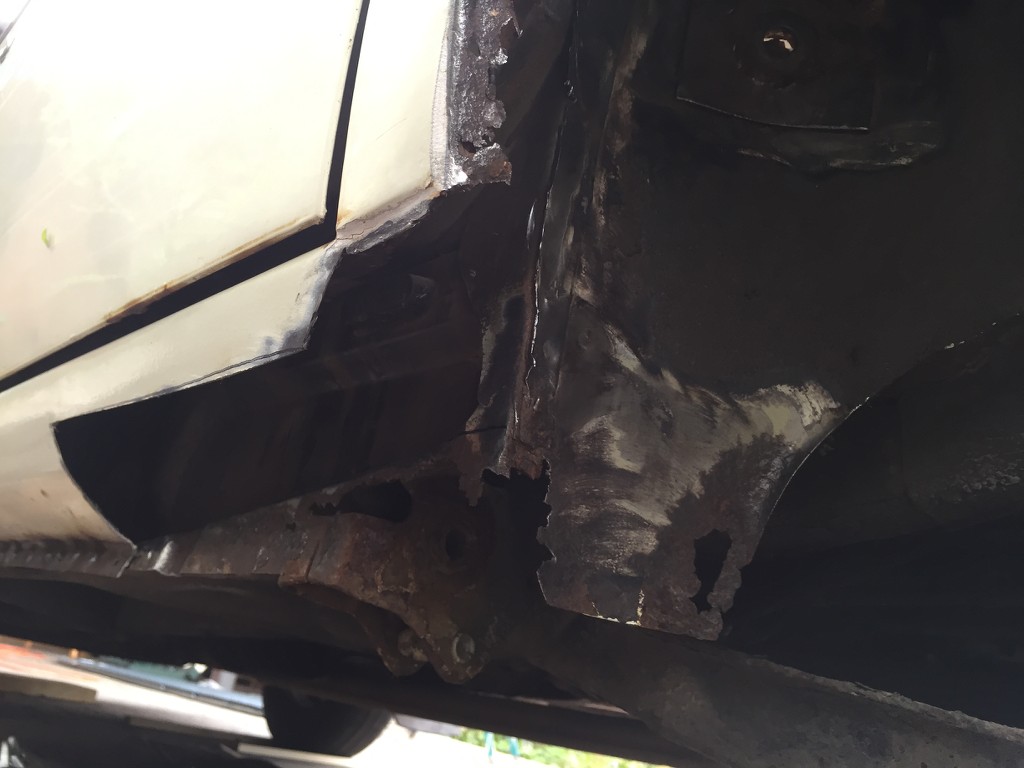 And this is inside the end of the sill with the outer section welded in place 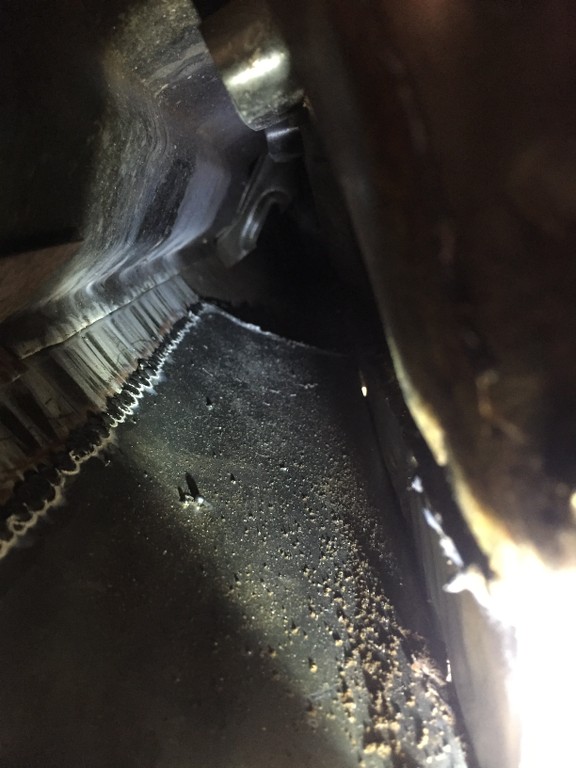 And then protected 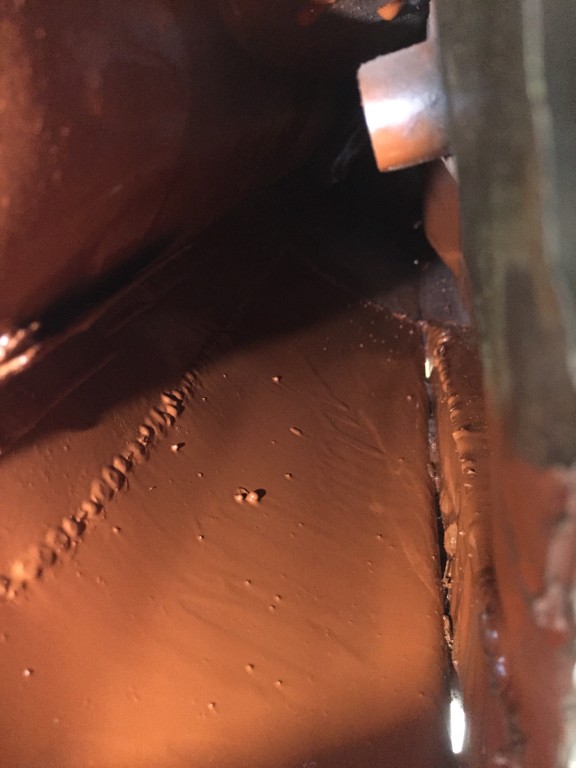 After that I 'merely' cut out all the remaining rusty metal that was the sill end/inner wheel arch and made a section to go back in. I also cut off the rusty reinforcing plate for the rear seatbelt that had fallen apart when looked at by a wire brush and replaced that - even if it wasn't an MOT failure I have a vested interest in rear seat passengers not becoming front seat projectiles in the event of an accident... 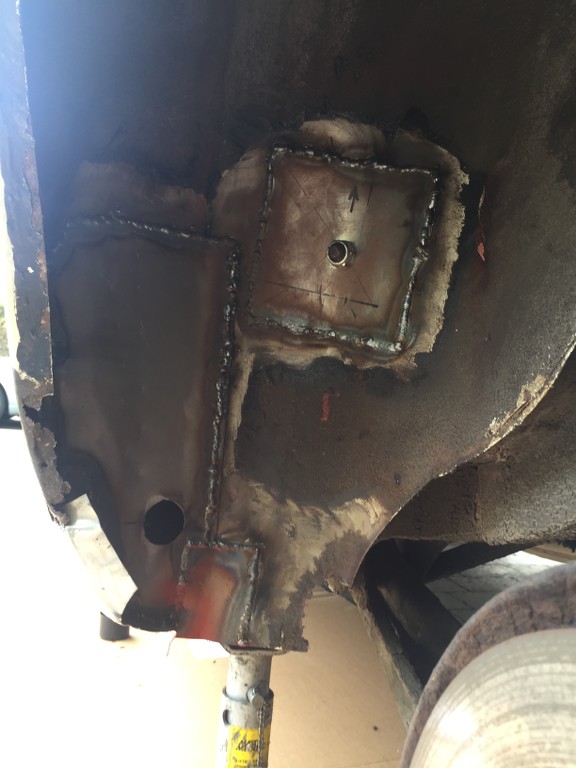 Another section of rust I'd cut out was the bottom of the spare wheel well, which took quite a lot of time given the size of the patch, due to all the curves... this isn't my best work but it's good and strong. I think the spare wheel well should be replaced complete really, hence why I didn't spend too much time making this pretty - but I didn't have time for that level of surgery... one for the next round. Inside the spare wheel well 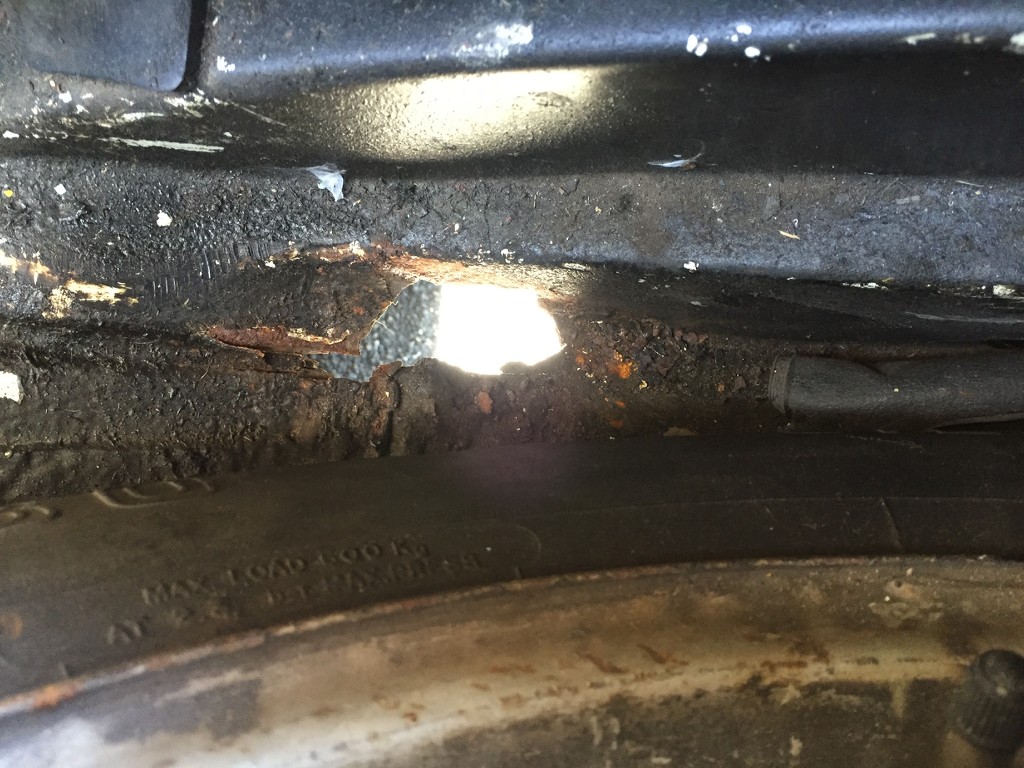 After cutting out 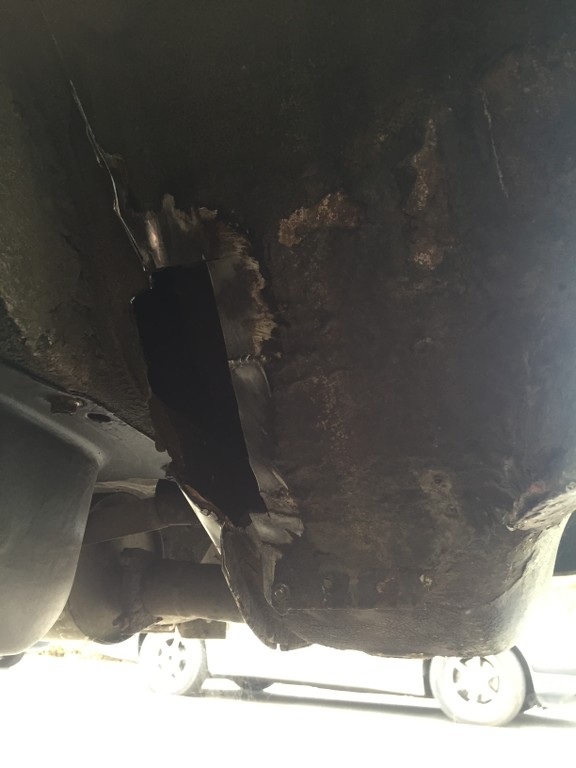 Patched 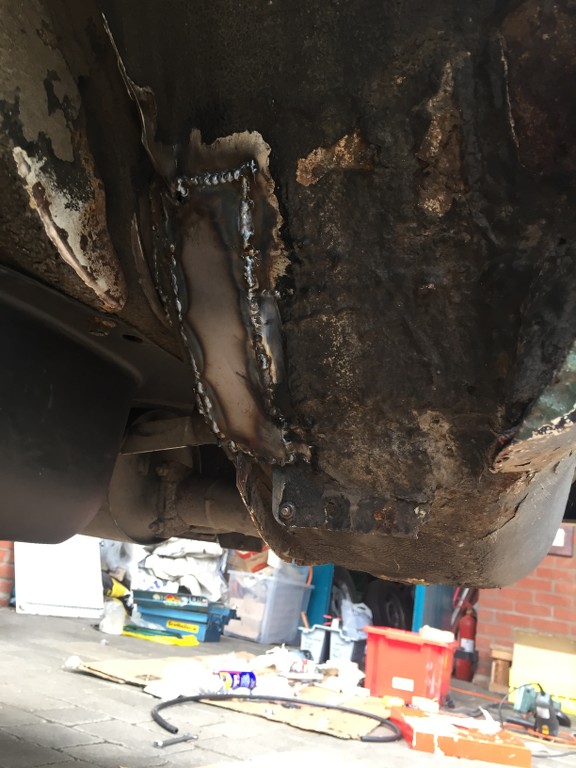 And then there was the right hand side sill end to finish now that the inside had being painted 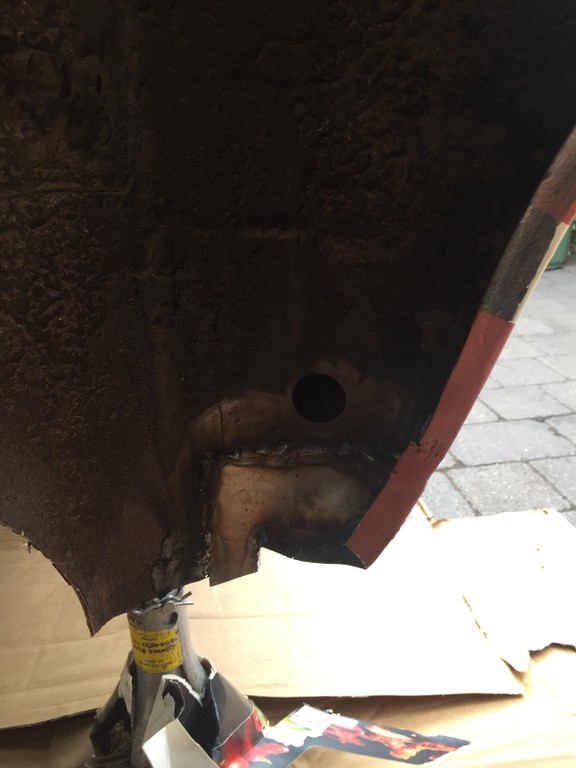 And... phew, that's the end of the welding. Only a couple more faults to fix before the looming MOT... after replacing the tank a while back the fuel gauge didn't work and then coincidentally a NOS sender came up on ebay so I bought it. This is scrolling back a few weeks, but after fitting the new sender unit I then had some difficulty getting the car to start which I eventually traced to the start of the hard fuel pipe (where the sender unit flexible pipe connects to it) which had fractured as a result of being disturbed after 40 years and was letting in air, which meant the fuel pump was sucking in air rather than fuel. The solution was to cut the fuel pipe on the first straight section, then take the old end to a local hydraulics place to have a replacement made up. The new piece was put in with a length of fuel hose overlapping the join by several centimetres on each side and secured with jubilee clips - note the fuel line isn't under pressure as the engine is carb fed, other (original) connections along the fuel line are made in this way with hose pushed over the hard line and secured with jubilee clips. The new and the old 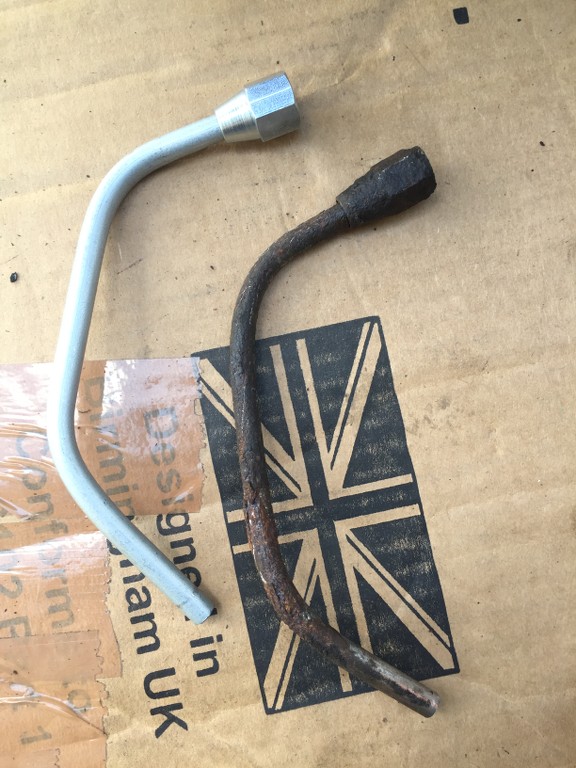 It was rust that had eaten through the top of the pipe, rather than it being fractured. 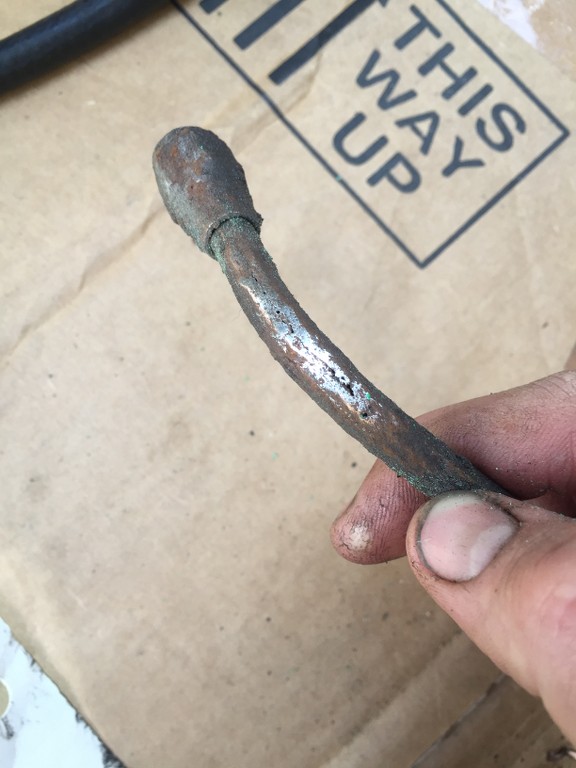 I also disassembled, cleaned and reassembled the carburettor and changed the auxiliary air bleed valve on the side with one from my spare carb, as it was stuck. 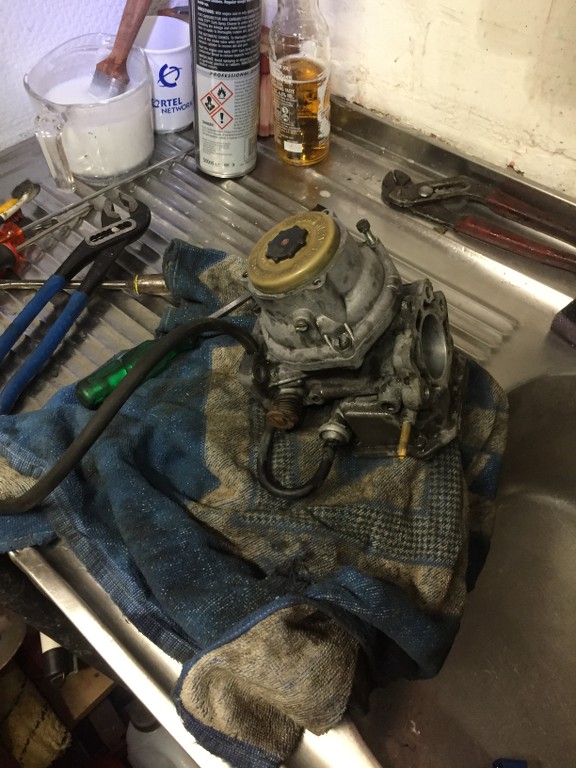 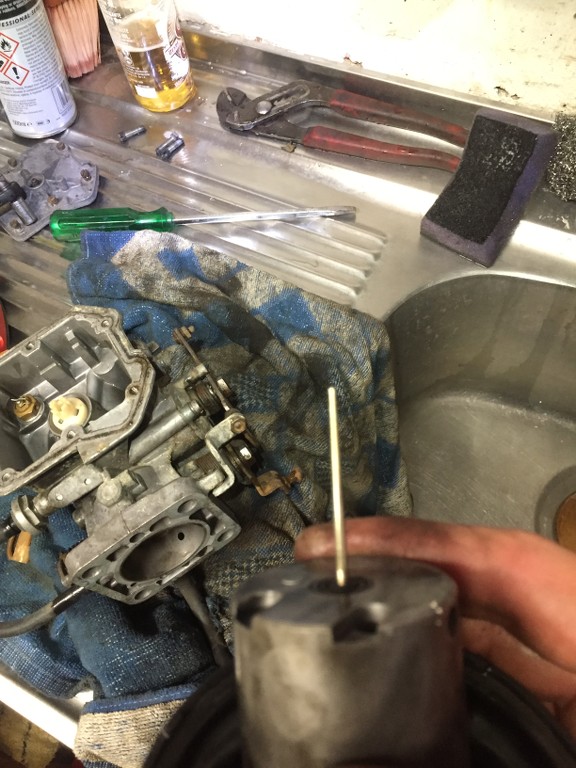 With the carb back on I topped up the dashpot oil and checked the timing then... it was time. 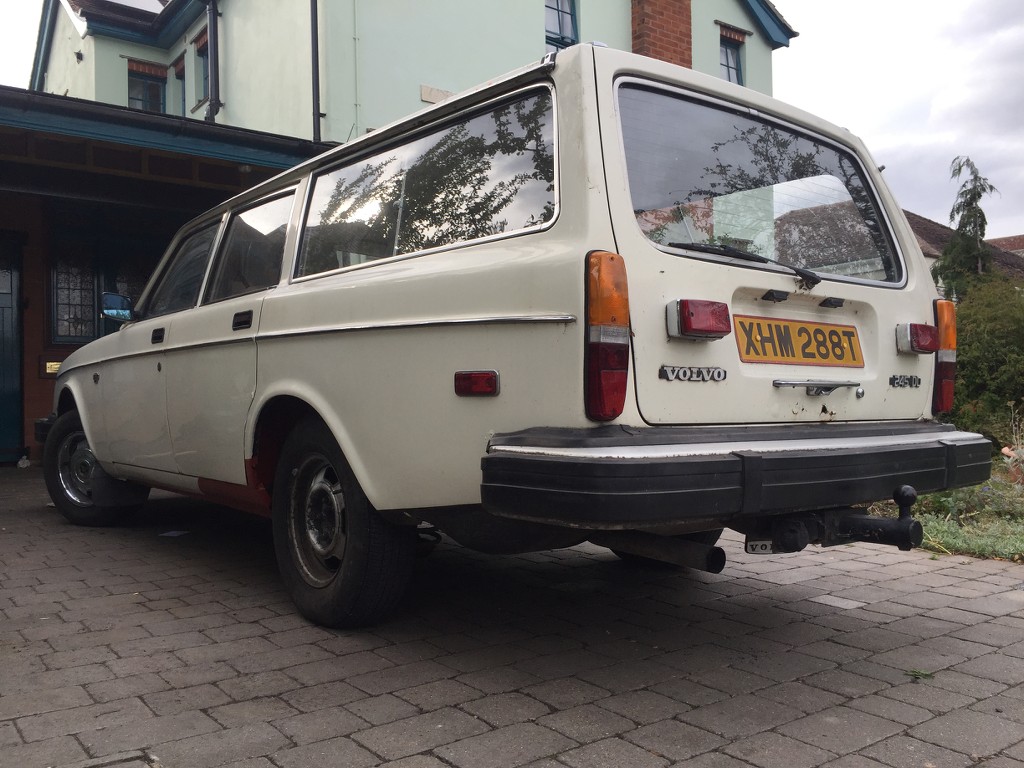 I took the car to the garage and with it idling on the monitor turned the mixture screw in until the co content was under the 4.5% limit (that it failed on last time) then headed off for an errand whilst the rest of the MOT test was carried out. It passed! wooo! A few celebratory beers were drunk whilst sitting in a comfortable chair and trying to forget all the crawling about on the floor. The next day I rebuilt and tightened the front wheel bearings (an advisory on the MOT) Left 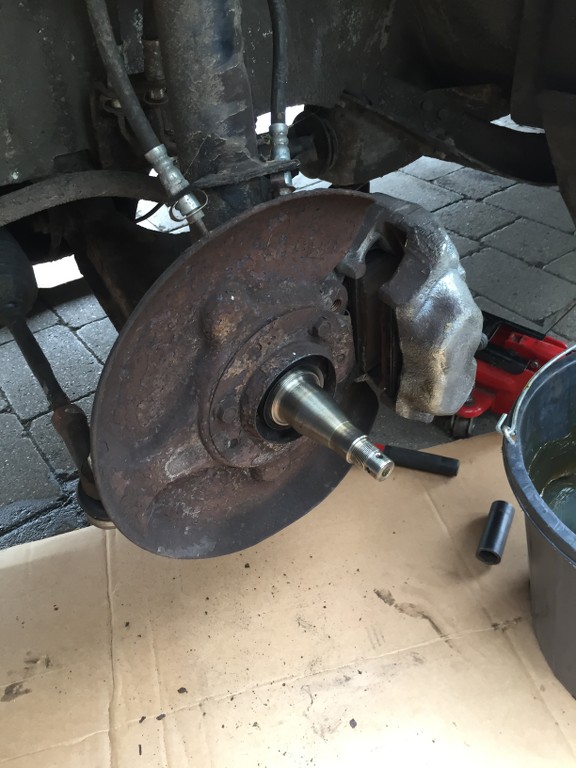 Right 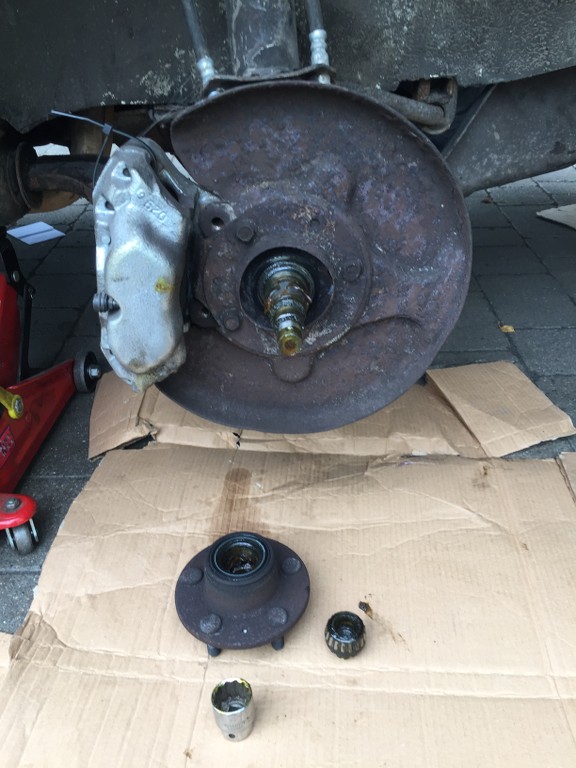 Right back together 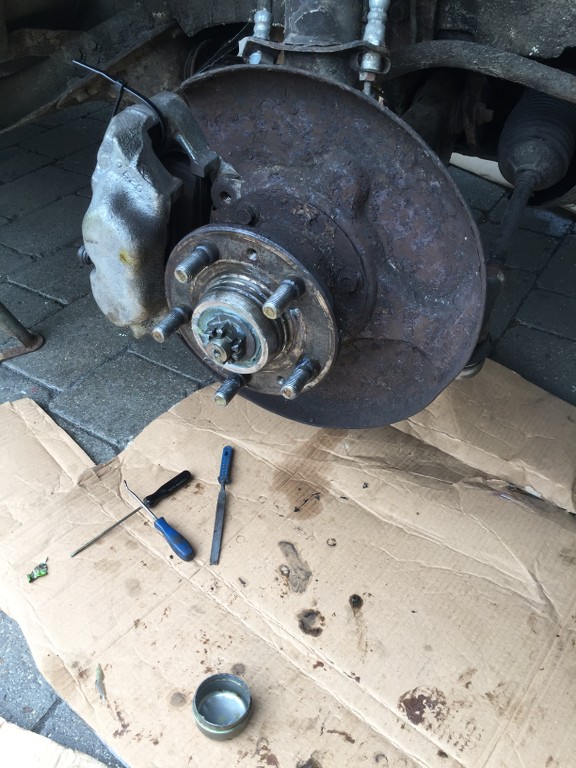 And then swapped over the wheels from my other car - two of the tyres on the original wheels had advisories from the MOT and after a puncture I put the spare on, which had 'sept 07' written on it in chalk which wasn't exactly confidence inspiring. Washed for the first time in ages and all set to go to retro rides... 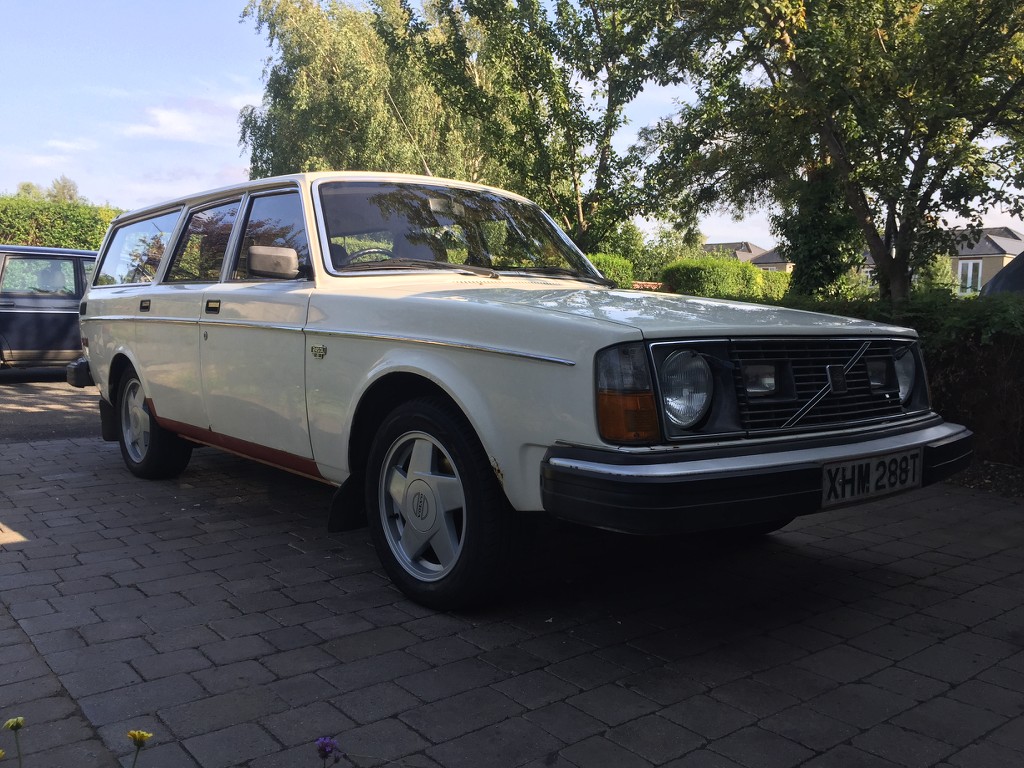 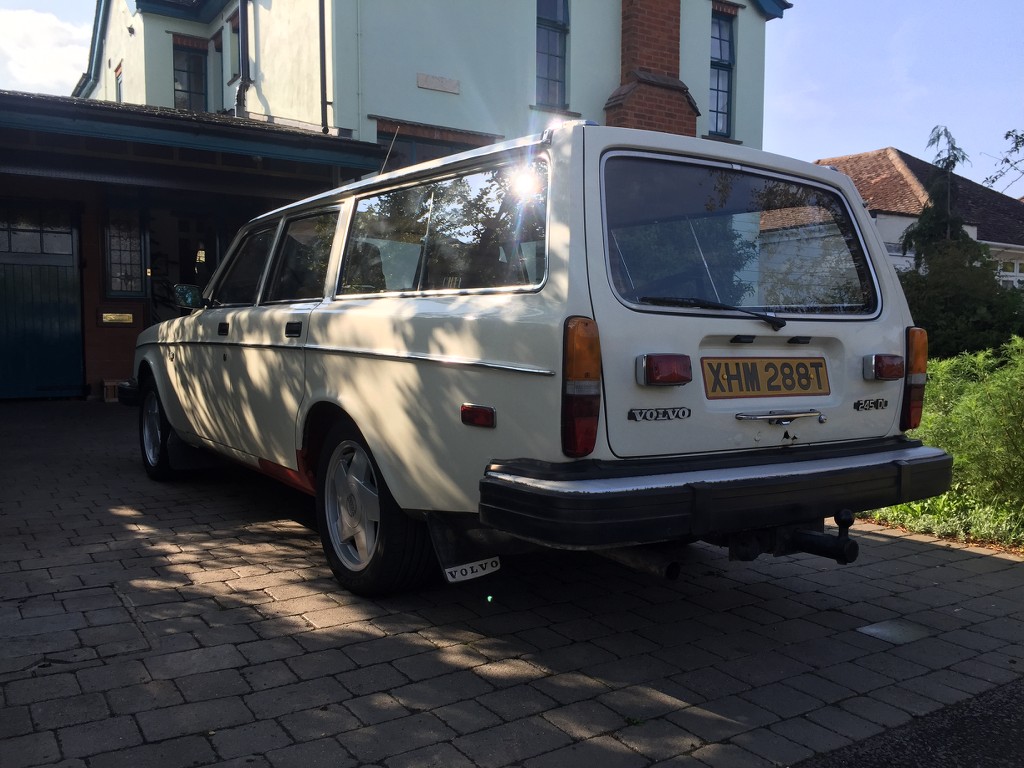 And then... failure at the final hurdle. I had declared the car SORN when it failed the MOT and when I called the DVLA to retax it (it'll be tax free next year) all the phone lines gave the same recorded message saying 'due to essential maintenance there will be no telephone service until Monday morning'. The website had a similar message. I tried all phone numbers and all had the same message... so that was that. After all that work to get the car ready, the DVLA blew my opportunity to go to retro rides in the car out of the water by not having enough foresight to keep either the telephone service or the website open but instead closed both at the same time. How are you supposed to predict something as dimwitted as that? There's not even any lesson to be learned from this, as it isn't like I did something I can change next time. I suppose if I'd tried to tax the car the moment I got it back from the MOT late on the Friday then I'd have been OK (assuming for a moment the systems outage was only for Saturday and Sunday) but there was no reason to suspect a government department in a supposedly developed country would be so dense. Yes I was annoyed. I'm typing this on the Wednesday following the Saturday in question and I'm still a tiny bit disappointed. (and I'm copy pasting this in April 2019 and I'm still annoyed) So I swapped the wheels back to the other car and took that instead. Retro Rides is a great show, you really should go if you haven't been before. I had a good time, met some great people... perhaps I'll still have the 245 next year and make it there in it. And someone took this photo of my other car, which is rather nice (I bought the photo from him, I haven't just nicked it) 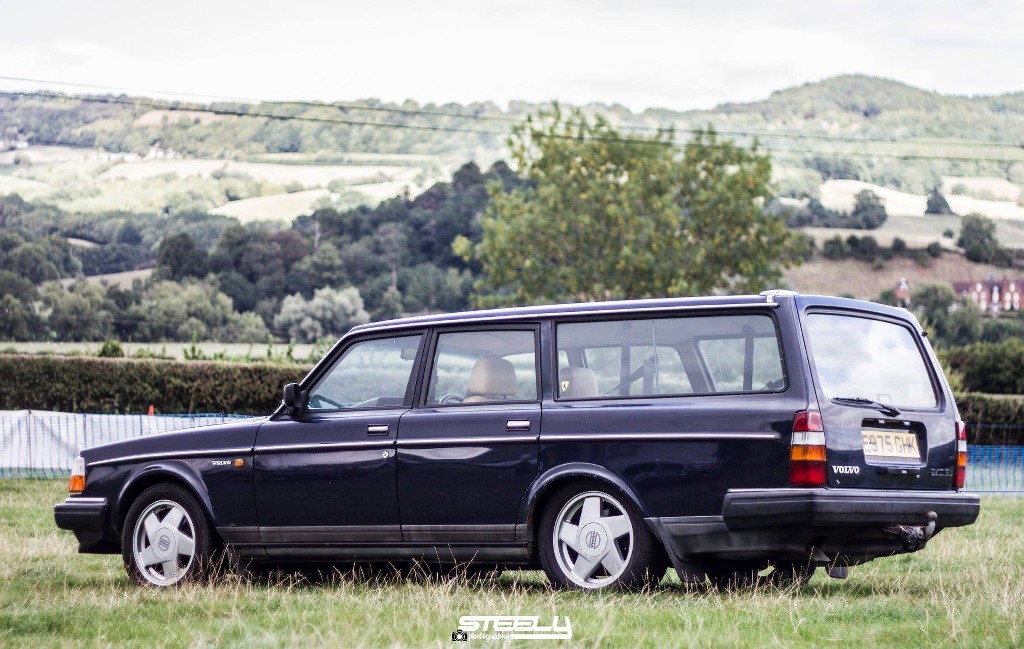 That's all for now, Cheers. |
| |
|
|
mylittletony
Posted a lot
  
Posts: 2,429
Club RR Member Number: 84
|
|
Apr 24, 2019 11:01:24 GMT
|
But you DID spoil the plot! Sorry! ...not sorry. You took too long to update.  |
| |
|
|
|
|


