j8tro
Part of things
 
Posts: 12 
|
|
Jan 28, 2019 10:57:56 GMT
|
Firstly I've fallen on "Garage Life" after a push email from Retro Rides and thought I'd have a nose around. Some new build garages going on but most posts are people looking for space to tinker. I don't want to come across as a dick as I'm lucky enough to have the space, but as the push email welcomed garage builds or fit outs, I thought id share my space for those interested.
I moved house back in 2014, I'd had a single garage previously and after a crappy relationship breakdown, I rented for a while before getting my own place. Top of the list............double garage.
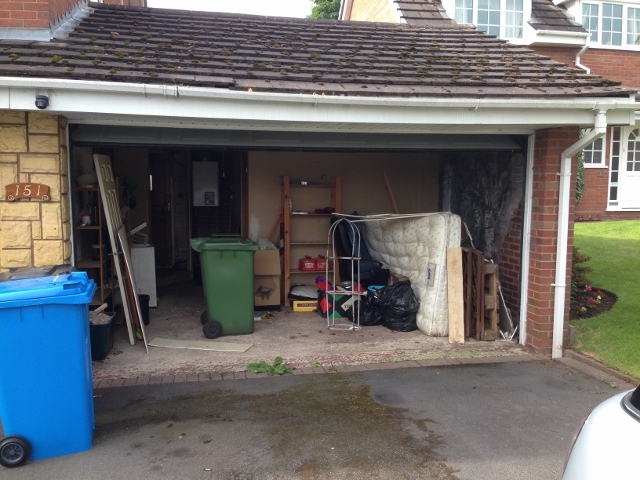
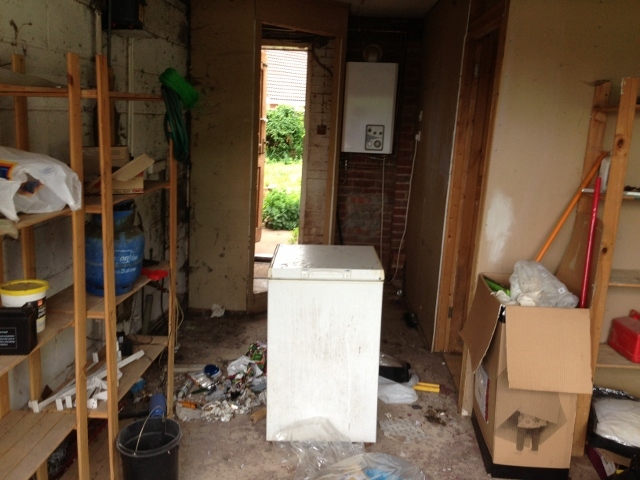
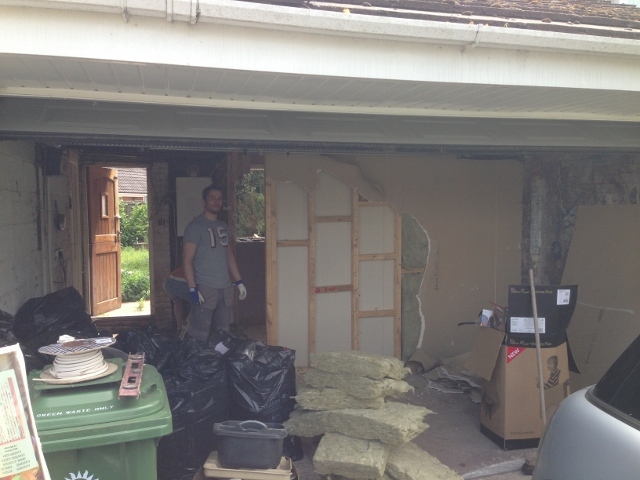
The house i bought although built in the early 80's was essentially lived in by some pretty dirty tramps (that's being polite). I got a good deal on the house as it was in a bad way, but i saw the potential and due to it being filthy and falling apart, ripping into it wasn't an issue. The week i got the house, with help from my bro we ripped a lot of stuff out. The garage had a room built within it, and was just grim. I'll let the pictures do the talking. ![]() |
| |
Last Edit: Jan 28, 2019 11:07:43 GMT by j8tro
|
|
|
|
j8tro
Part of things
 
Posts: 12 
|
|
Jan 28, 2019 11:16:16 GMT
|
|
|
| |
|
|
j8tro
Part of things
 
Posts: 12 
|
|
Jan 28, 2019 11:23:57 GMT
|
So the partitions came down and the whole place was cleared out. The garage had a rear external door and window, as well as an internal door to the house. With future planning for extending the house, the window wasn't required, this was blocked up and another external doorway created. The internal door was also blocked up as the existing external would eventually be internal once the extension was built a few years later. Image below shows the original set up. 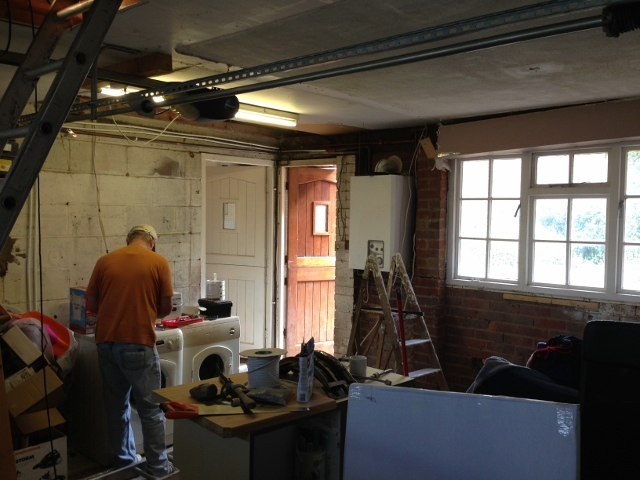 Rear window knocked out and new doorway formed. 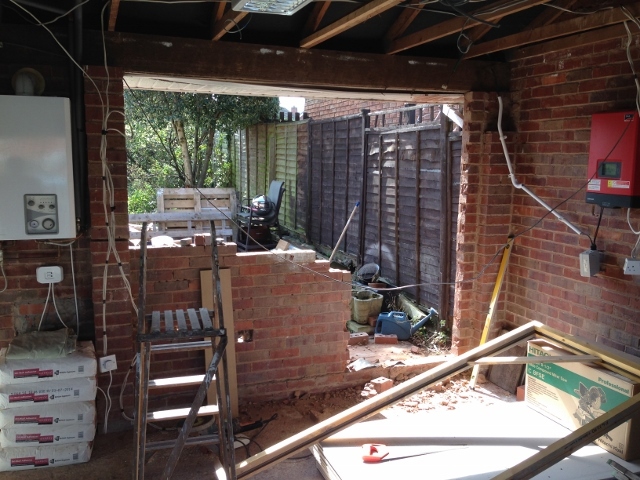 Blocked up: 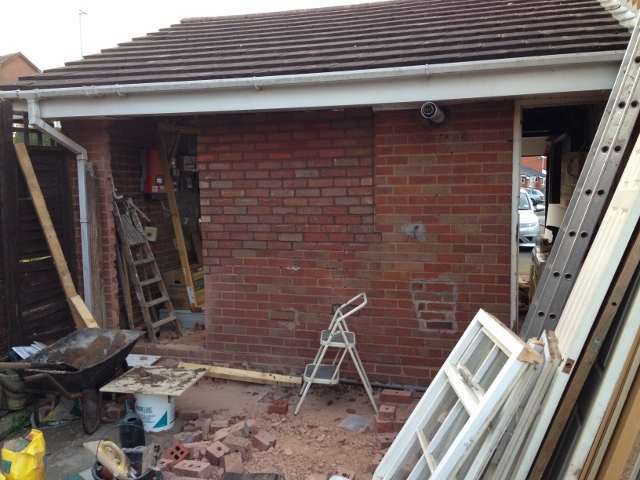 My first go at brickwork, it didn't really matter too much as in the future this would be internal and plastered. |
| |
|
|
j8tro
Part of things
 
Posts: 12 
|
|
Jan 28, 2019 11:34:20 GMT
|
The garage had some plaster work from the room that had previously been built, but the ceiling plasterboards were shot and the brickwork had various dodgy graffiti. In working on the rest of the house, the loft has some great weathered timber, the loft was cleared and insulated and the timber was used to create a few "rustic" walls in the garage so it was less clinical. Walls before: 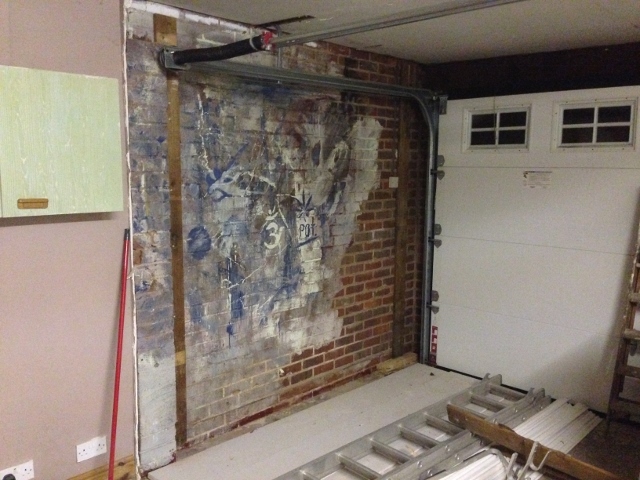 During: 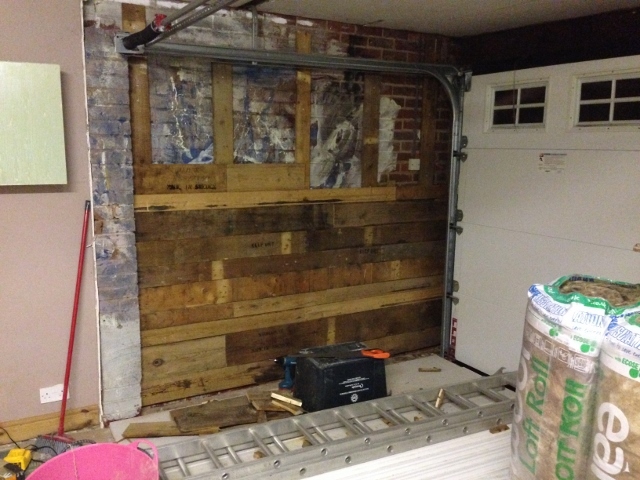 Complete: 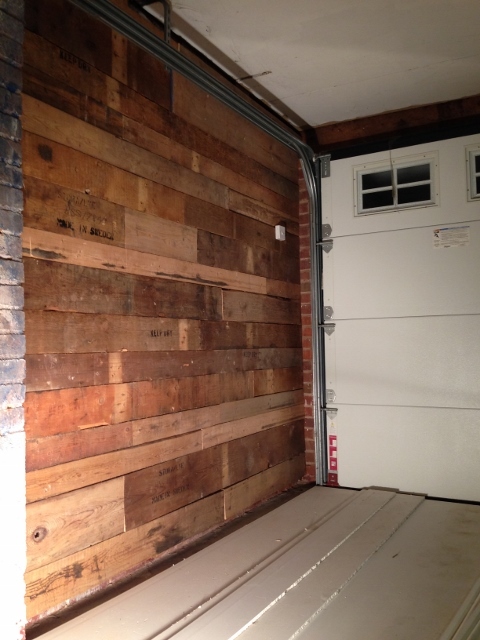 The ceiling was ripped down and replaced and the walls dot, Dabbed and plastered. I also fitted a decent size loft access hatch for storage. 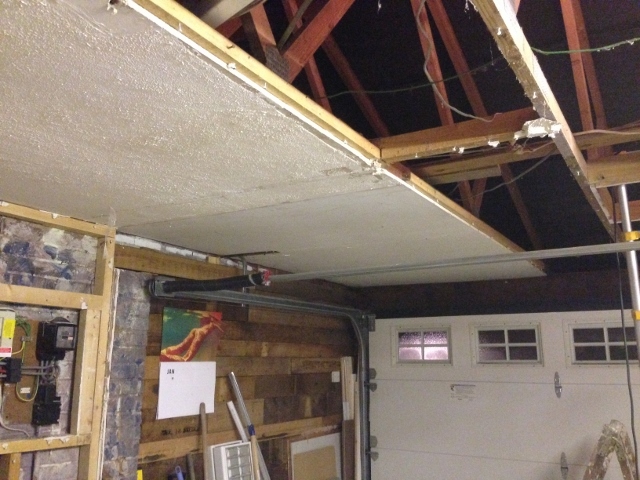 This was cladding built on the opposite side 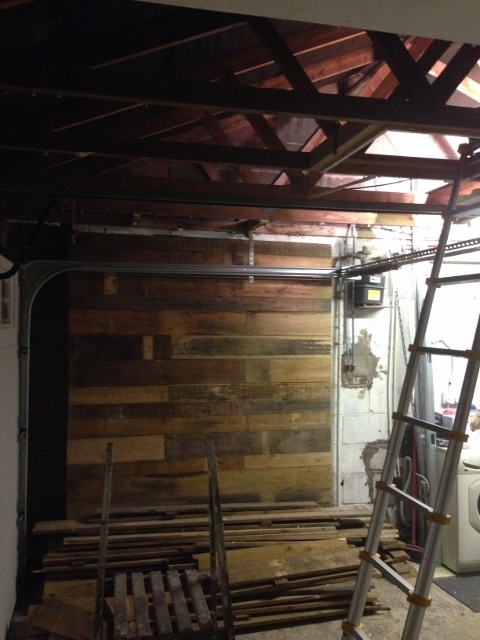 Dot and dab work: 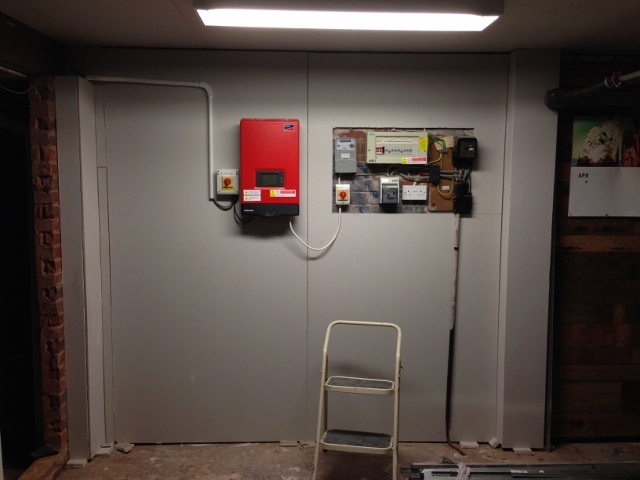 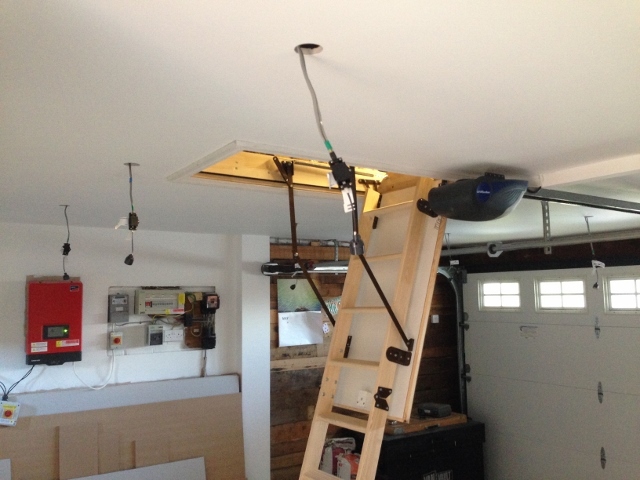 |
| |
|
|
j8tro
Part of things
 
Posts: 12 
|
|
Jan 28, 2019 11:41:13 GMT
|
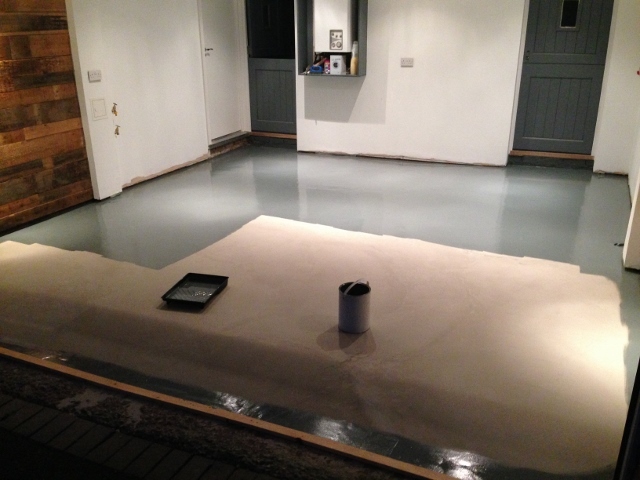
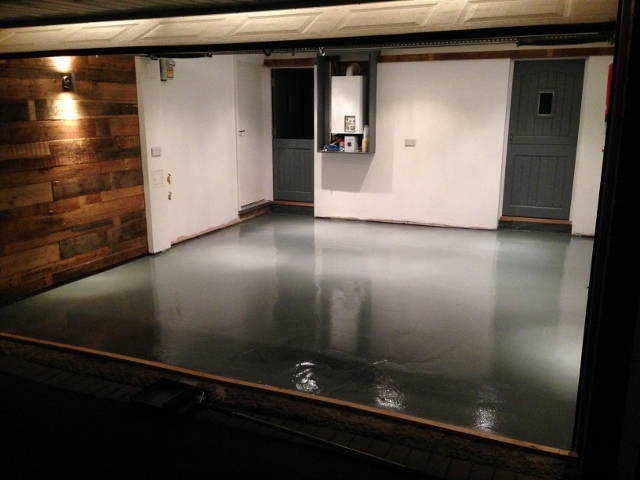
As can be seen on the photo above, the plasterwork was wash coat and painted. It was all done in white, in hindsight this was a bad idea for a garage and down the line would get changed. 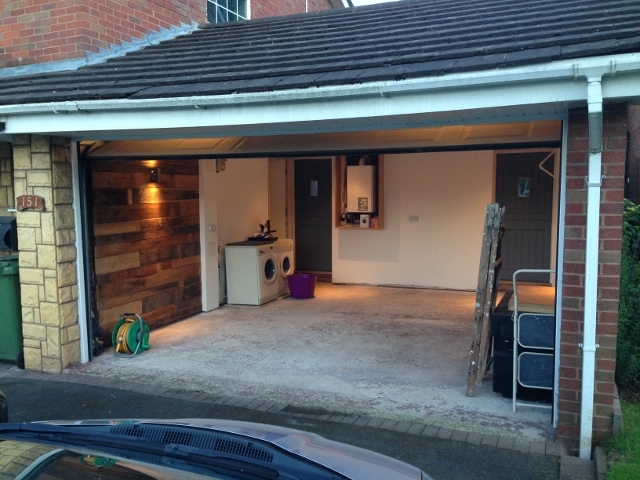 Next was to attack the floor which was breaking up in places and very dusty: Decent Latex: 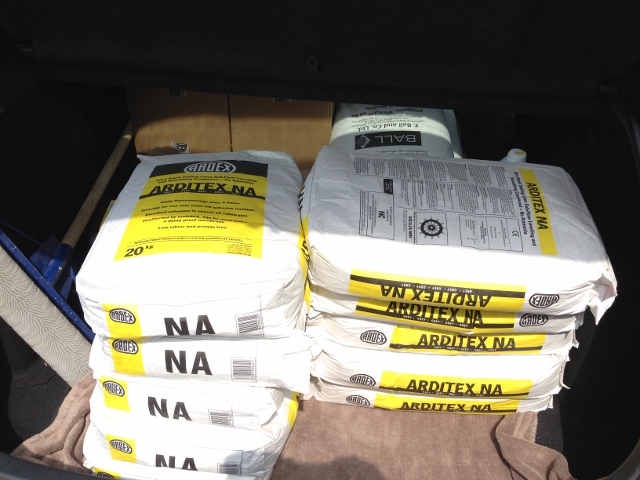 Priming: 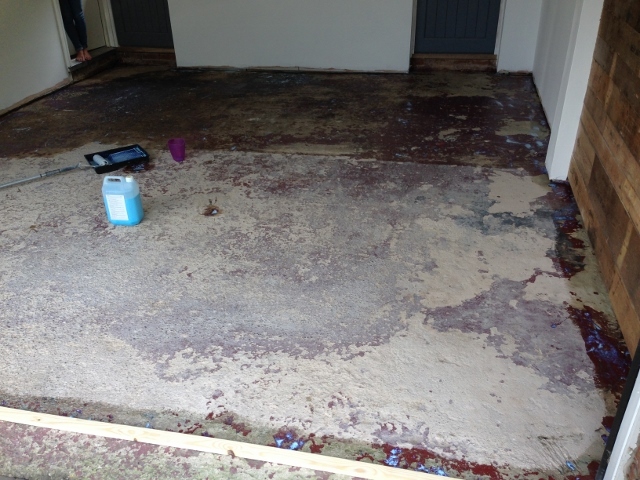 Complete: 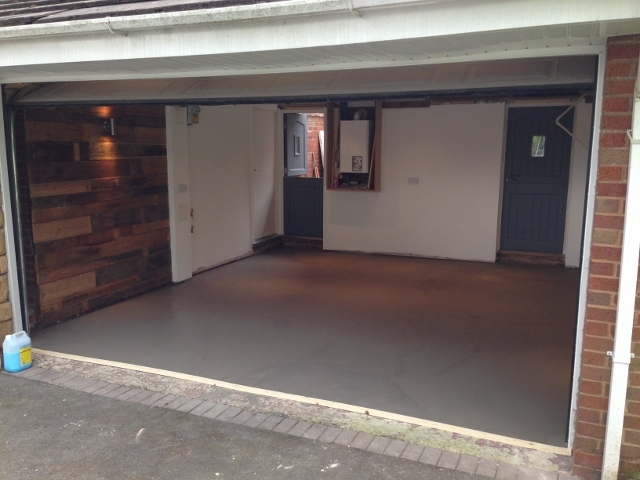 In hindsight, trying to level this area by myself was awkward. By the time i'd mixed up, then laid, the last set was going off. There are slight steps where the mixes went down. This is me being picky! |
| |
|
|
j8tro
Part of things
 
Posts: 12 
|
|
Jan 28, 2019 11:46:57 GMT
|
|
|
| |
Last Edit: Jan 28, 2019 11:47:50 GMT by j8tro
|
|
j8tro
Part of things
 
Posts: 12 
|
|
Jan 28, 2019 11:58:20 GMT
|
After putting down a few coats of clear and fitting the skirting, i could finally bring my car down and that's where it ended for a few years. We didn't have a kitchen or bathroom at one point and as long as the car was back home I was happy. The next few years we did a lot of work on the house (it bloody needed it). In the process the garage was used for storage and working. It got a little trashed, as would be expected. As part of the extension, the builders bought everything through the garage as walking around the house would have cost more time and money. At its best! 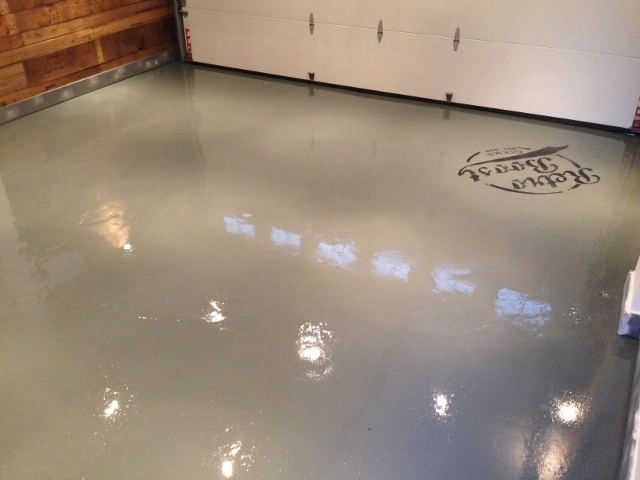 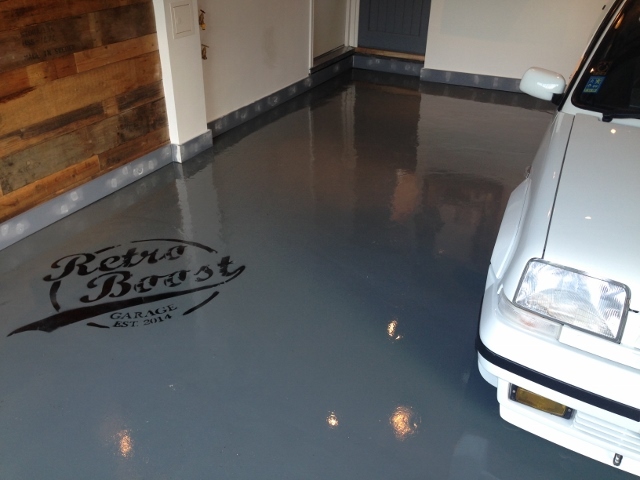 Then came a new addition........boosted as well (1.8T 20v) 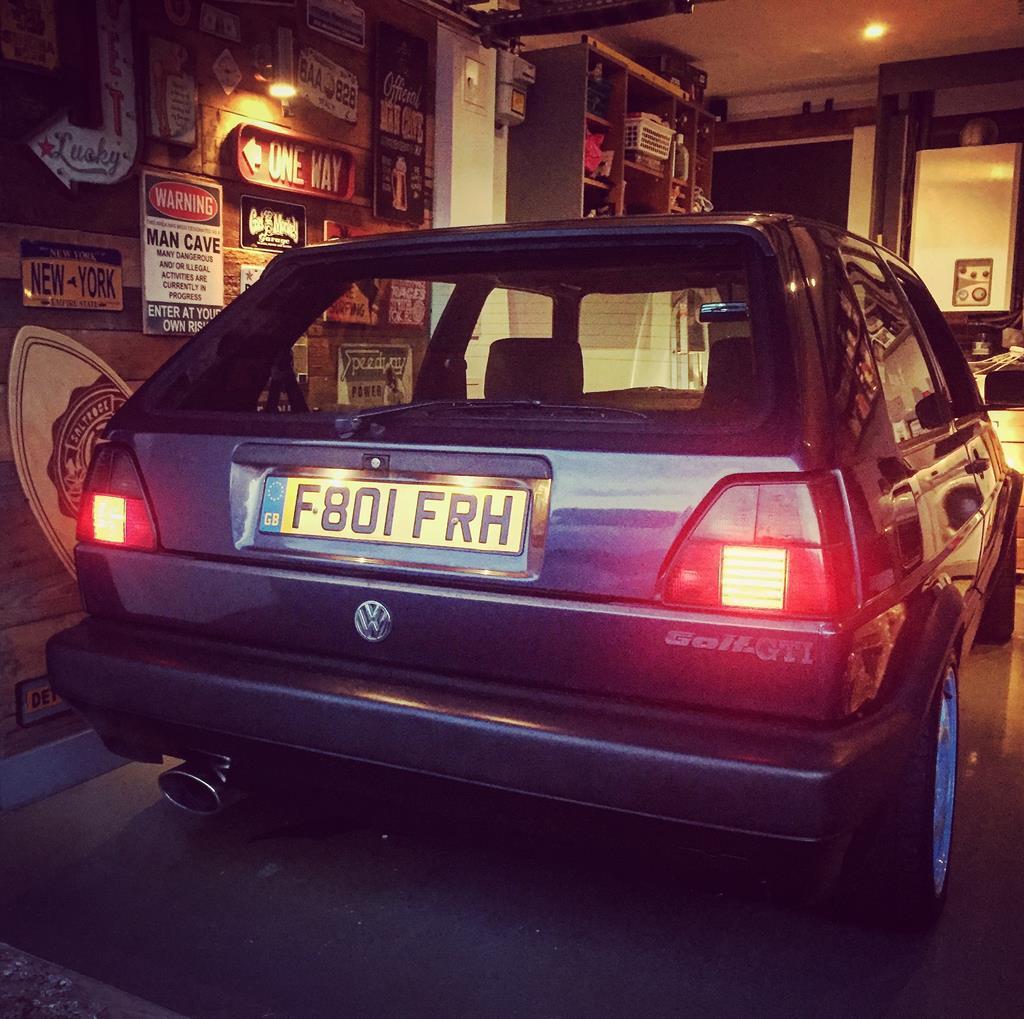 In reality, this is how it looked most of the time: 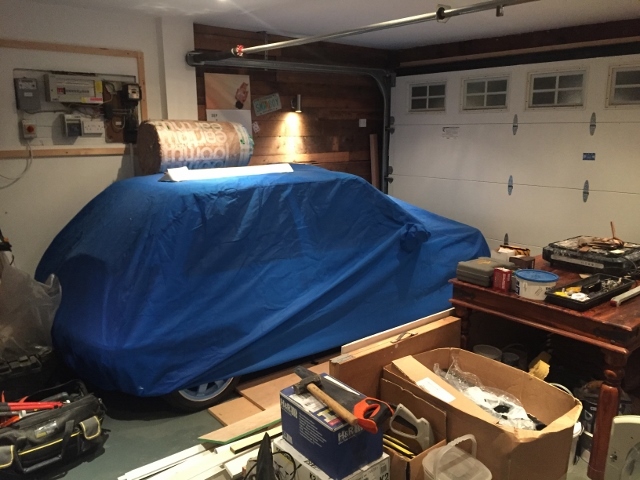 I hated having a washer and dryer at the back of the garage, but without the extension on the back it was a requirement. They finally went 4 weeks ago and i could finally get back in the garage to carry on. In the years it didnt move forward, a few extras were added. My bro ripped out his kitchen, so i got all the wall cupboards for storage. |
| |
|
|
j8tro
Part of things
 
Posts: 12 
|
|
Jan 28, 2019 12:22:21 GMT
|
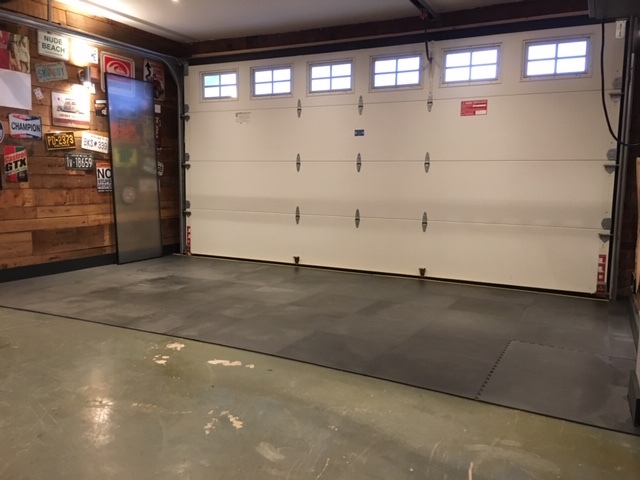
Jan 2019 and I'm currently working on the garage again. The walls have all been redecorated as white was a bad choice. The walls have gone a mid grey and the skirtings, frames and all the cupboards have been done anthracite grey. I've built a storage unit at the back of the garage for my tools and general garage items. I'll upload some photos of current progress but its not yet complete. The flooring although great when first done just wasn't practical. Any slight damp against the clear coat sent the flooring a greeny yellow colour. Also with jacks and engine cranes, it scratched as would be expected. I've currently laid a hard wearing vinyl lock tile to the front half of the garage which was being thrown off a job I ran. The rear half is about to have some left over carpet tiles laid. Hopefully this will look better than i'm describing. Both cars are currently out and being stored but I hope to have it all complete by the end of February. Example of trashed floor! 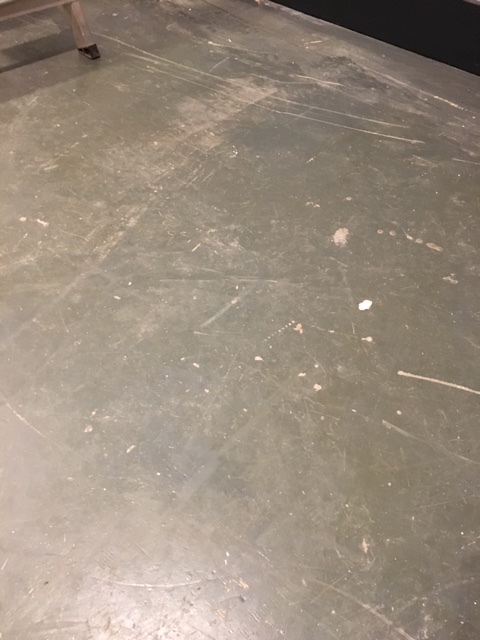 New (Old) vinyl 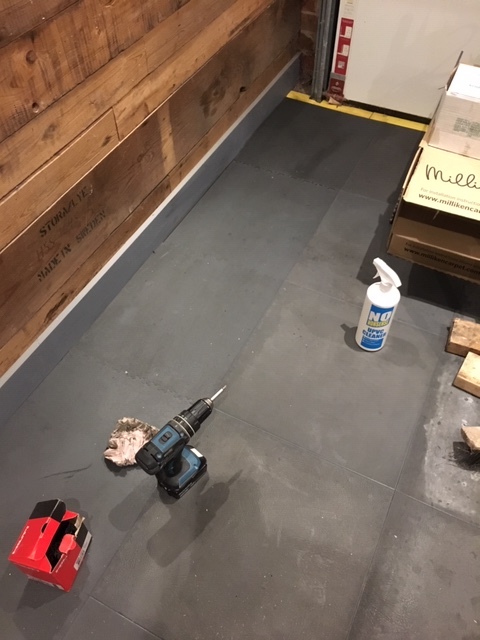 Storage: 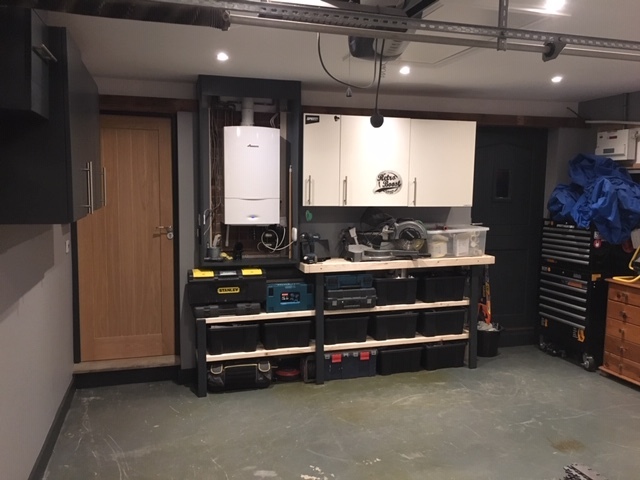 |
| |
|
|
|
|
|
|
|
|
Looks like a great space! Wish I had that size garage.
|
| |
|
|
ian65
Part of things
 
Posts: 276 
|
|
|
|
|
still looks great, a real transformation from how it was when you first moved in
|
| |
|
|
|
|
brachunky
Scotland
Posts: 1,339  Club RR Member Number: 72
Member is Online
|
Retro Boost Garagebrachunky
@brachunky
Club Retro Rides Member 72
|
|
|
|
You certainly transformed it even though it's not finished. Love your "feature" wall!
|
| |
|
|
|
|
|
|
|
|
Very nice! I'd love to have a parking only garage that looked something like this. The reality for me is that grinding dust, sawdust and bits of weld slag would ruin such a nice finish pretty quickly.
|
| |
|
|
|
|
|
|
|
Great work fella  |
| |
|
|
|
|
|
Feb 11, 2019 16:23:17 GMT
|
|
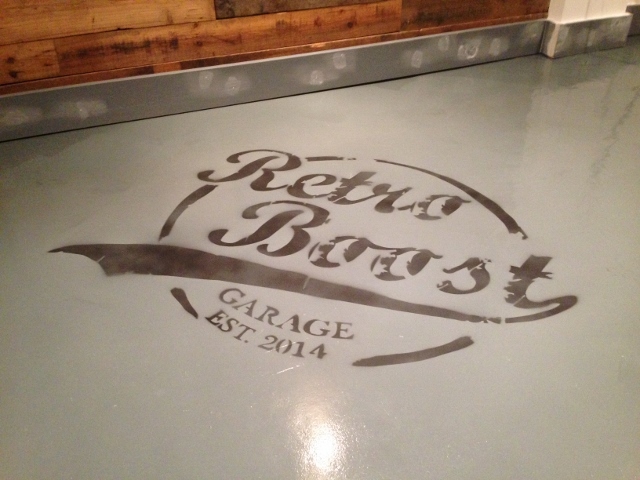
Love that... and the logo getting weathered actually suits it!
|
| |
|
|
j8tro
Part of things
 
Posts: 12 
|
|
Feb 22, 2019 14:42:01 GMT
|
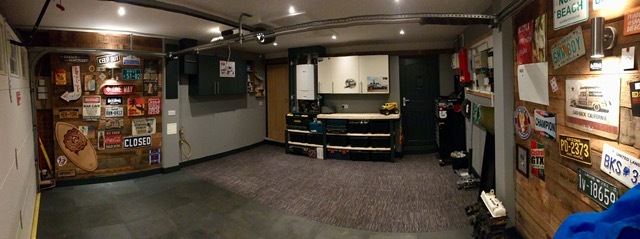
A few weeks down the line I've finally managed to (nearly) finish. I still have some cupboards to build over the distribution boards and meters etc, but both cars are now back home and filling the space nicely. Here is a few photos of the space.
Sorry about the double post..................photos were playing up
|
| |
Last Edit: Feb 22, 2019 14:50:53 GMT by j8tro
|
|
j8tro
Part of things
 
Posts: 12 
|
|
Feb 22, 2019 14:49:14 GMT
|
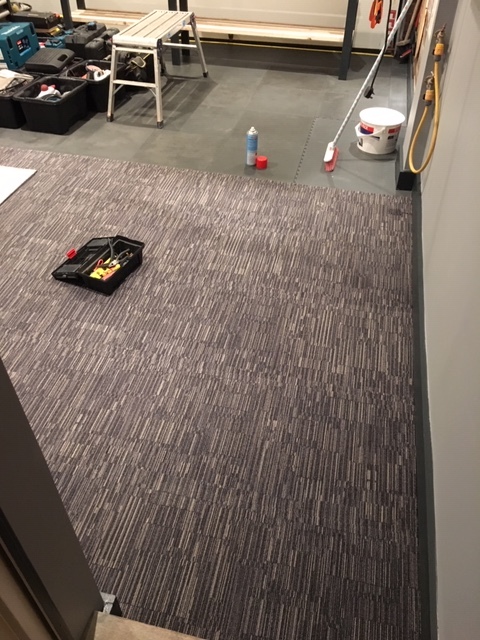
Ready For Carpet:
Carpet Going Down
Finished!
Cars coming home!   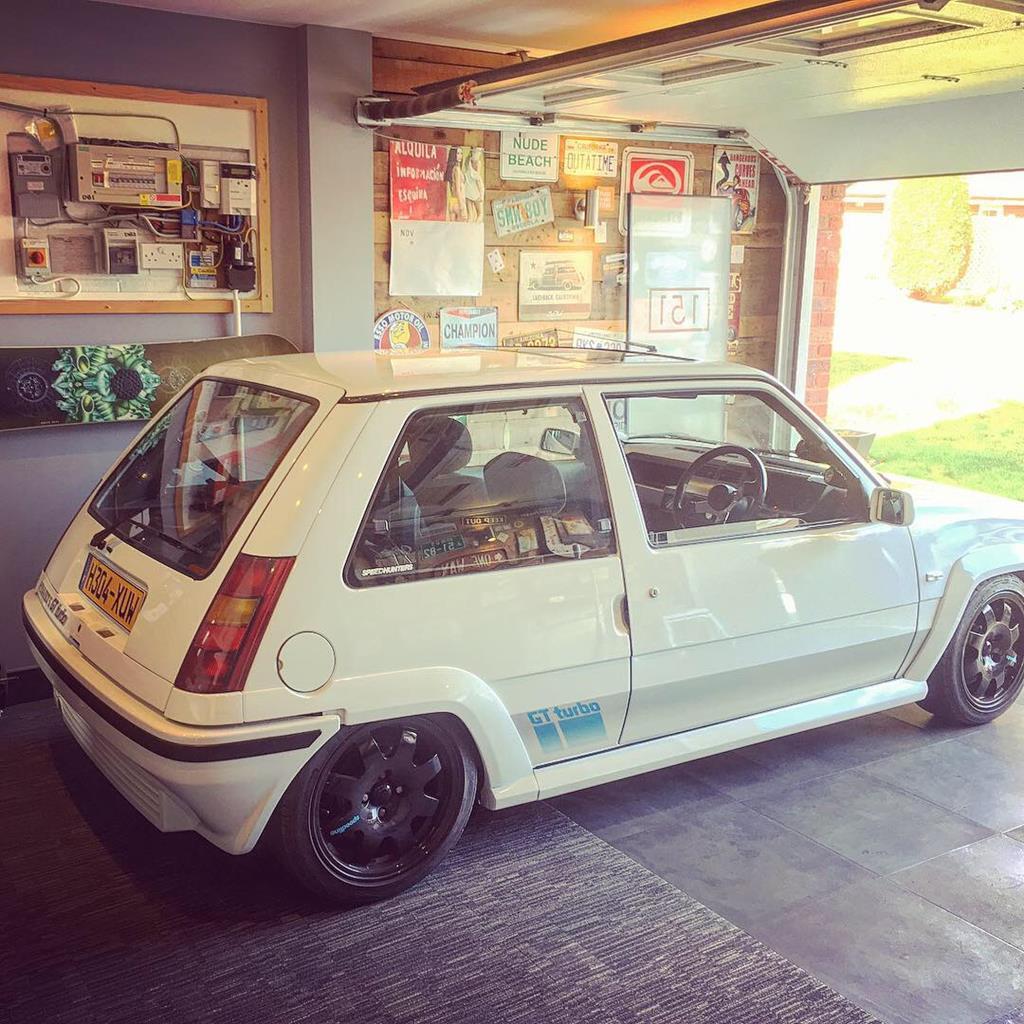  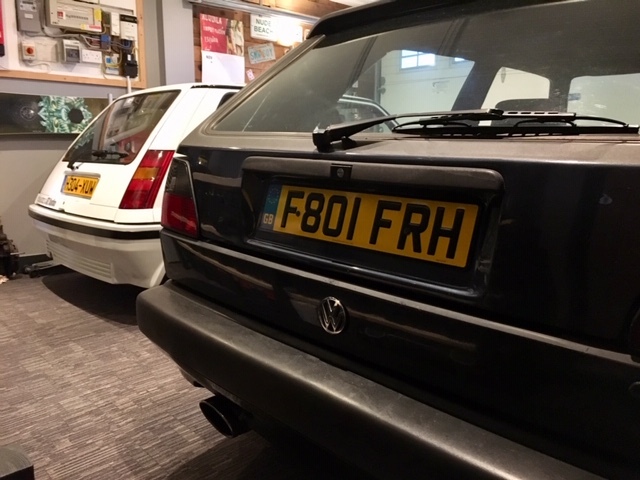 |
| |
Last Edit: Feb 22, 2019 14:50:12 GMT by j8tro
|
|
keyring
Part of things
 
Posts: 913
Club RR Member Number: 47
|
Retro Boost Garagekeyring
@keyring
Club Retro Rides Member 47
|
Feb 22, 2019 22:26:03 GMT
|
|
A great garage, and an awesome pair of cars!
|
| |
|
|
MiataMark
Club Retro Rides Member
Posts: 2,971
Club RR Member Number: 29
|
Retro Boost GarageMiataMark
@garra
Club Retro Rides Member 29
|
Feb 26, 2019 17:29:11 GMT
|
I really like the timber cladding on the walls, did something similar in my shed garden office then hid it all behind a desk  Capet tiles are great for insulation, I got some 'industrial' from an office clear out. |
| |
1990 Mazda MX-52012 BMW 118i (170bhp) - white appliance 2011 Land Rover Freelander 2 TD4 2003 Land Rover Discovery II TD52007 Alfa Romeo 159 Sportwagon JTDm
|
|
|
|
|
|
|
|
Great garage. I agree that the logo looks great weathered.
|
| |
|
|
j8tro
Part of things
 
Posts: 12 
|
|
Feb 27, 2019 18:35:23 GMT
|
Great garage. I agree that the logo looks great weathered. The photo of the logo was when it was brand new, it was designed to look distressed. The 3 - 4 years of abuse on the floor sure didn’t leave it like that. |
| |
|
|
|
|
![]()


