|
|
|
|
|
|
I did the same repair on the passenger side of my wife's bus last year. I had a section cut from an '86 that we broke that was virtually rot free (nice bus except for the roof and gutters had rotted away due to a leaky high top) so split it down and let it in in pieces.
Keep plugging away at it, you're doing a great job.
|
| |
1968 Cal Look Beetle - 2007cc motor - 14.45@93mph in full street trim
1970-ish Karmann Beetle cabriolet - project soon to be re-started.
1986 Scirocco - big plans, one day!
|
|
|
|
ivangt6
Part of things
 
Posts: 776
Club RR Member Number: 132
|
T25 Campervan - Weldathonivangt6
@ivangt6
Club Retro Rides Member 132
|
|
|
Well I haven't done anything on this for a couple of days but I have some pretty good excuses! 1) There was an incident involving a bushcraft knife, a sharpening stone and my finger 2) The drooping drivers door on the Range Rover was starting to damage the door card so spent a day shimming that instead of fixing the hinges and then got carried away getting the central locking and rear electric windows working 3) SWMBO's daily pile of VW Golf has developed a knock from somewhere on the LH front suspension. Spent a day trying to replicate said knock but so far unsuccessfully. I reckon it might be the strut top bearing but there's also play in the lower ball joint and all of the bushes on the car are old, soft and perished which doesn't help Excellent excuses I'm sure you'll agree! Anyway Bus So I left off with a solid B-post but with a big hole left in it. Said hole is to give me access to the inside of the B-post so I can sort out where the sill and lower B-post marry up. Once the wheel arch is on you lose access to all this so really the sill needs sorting next. Most of the inner sill is actually pretty good with just the front edge needing repair. The outer sill however is rubbish. Whats more, while a RH outer sill repair panel is readily available, a LH one isn't. I think most busses have a solid panel where my Rh sliding door is. The differences are easier to show than tell, but the panel type outer sill is available for the RH side but the sliding door type isnt First up, panel van type outer sill in yellow  And the type I have to make, in green 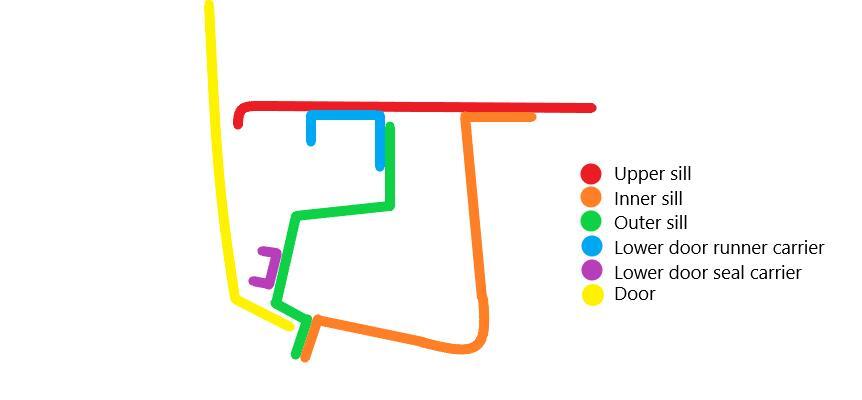 Well hopefully all that loads properly and I'll crack on with todays progress shortly |
| |
Last Edit: Jan 4, 2019 19:21:14 GMT by ivangt6
1979 Mini 1000
1972 Triumph GT6
2007 VW Golf GTi
1979 VW T25 Leisuredrive
1988 Range Rover Vogue SE
|
|
ivangt6
Part of things
 
Posts: 776
Club RR Member Number: 132
|
T25 Campervan - Weldathonivangt6
@ivangt6
Club Retro Rides Member 132
|
|
|
So. Sill Started off by making a cardboard profile template of the inner sill and scribed it onto some steel before realising the metal folder wasn't big enough... 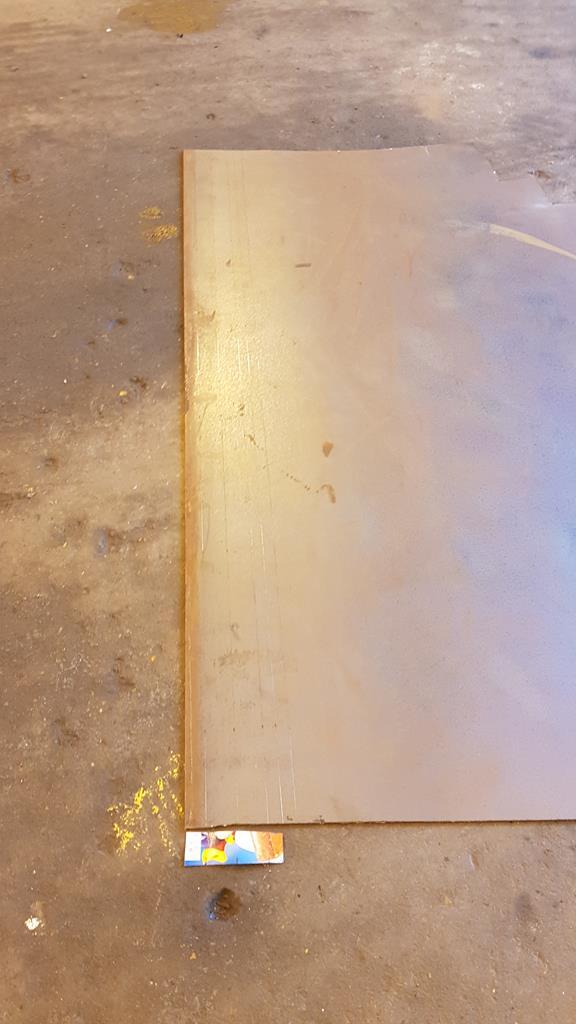 So I'll be making the sill in two parts then. First bit is the rear 3/4 of it 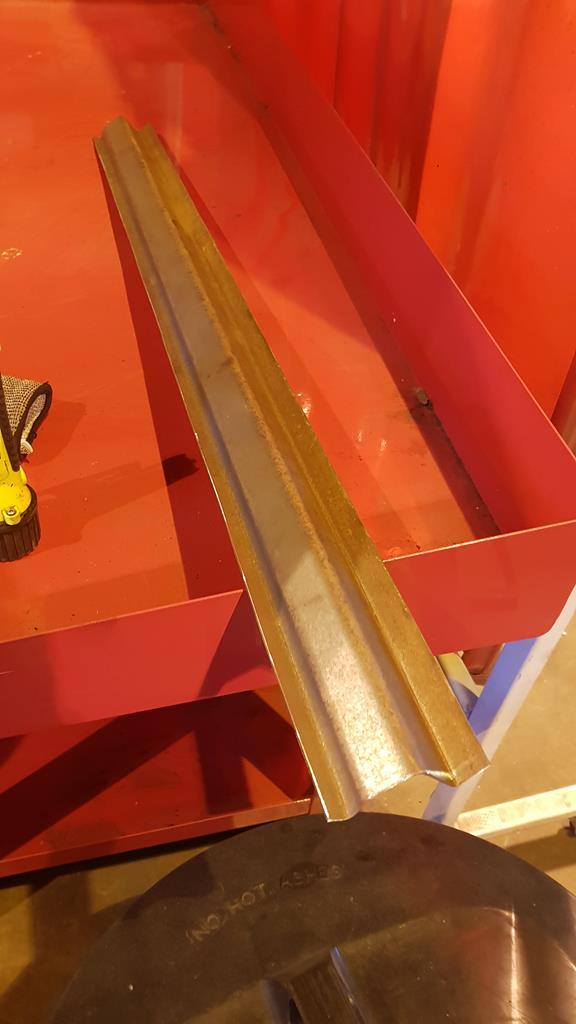 Next up, cut all this sh*** out. Easier said than done as its awkward to get a grinder in and there's not enough room behind for an air saw 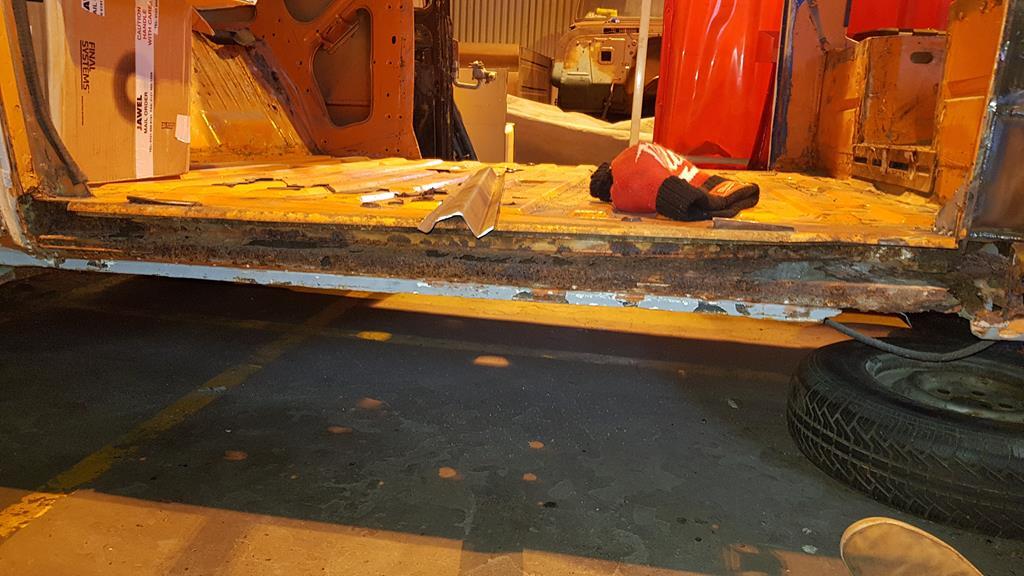 Got there in the end though and happy that the inner sill is good 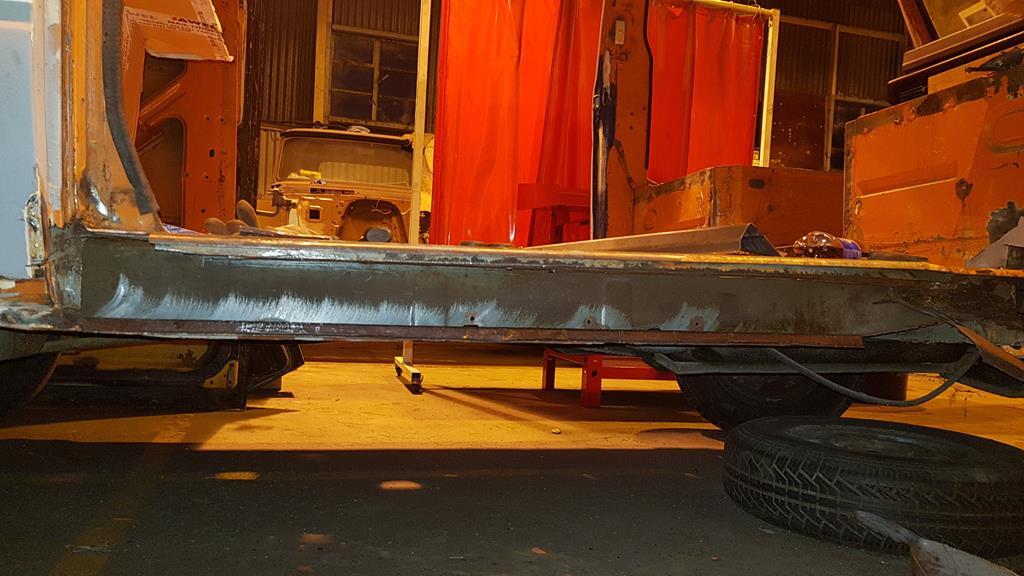 The outer sill gets bigger at the front where it follows the lower door runner carrier, so needed to mod the sill a bit 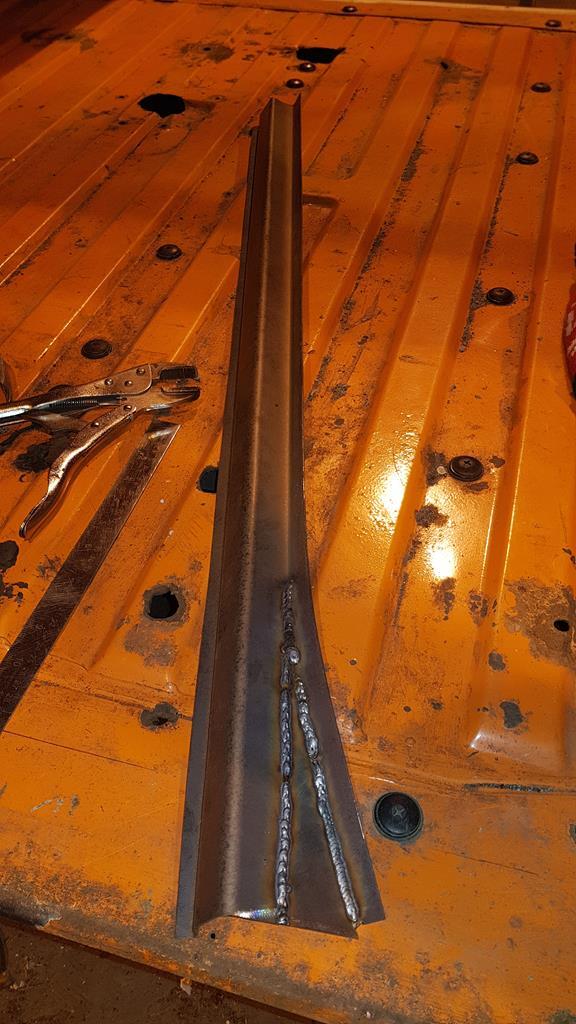 Test fit is pretty good 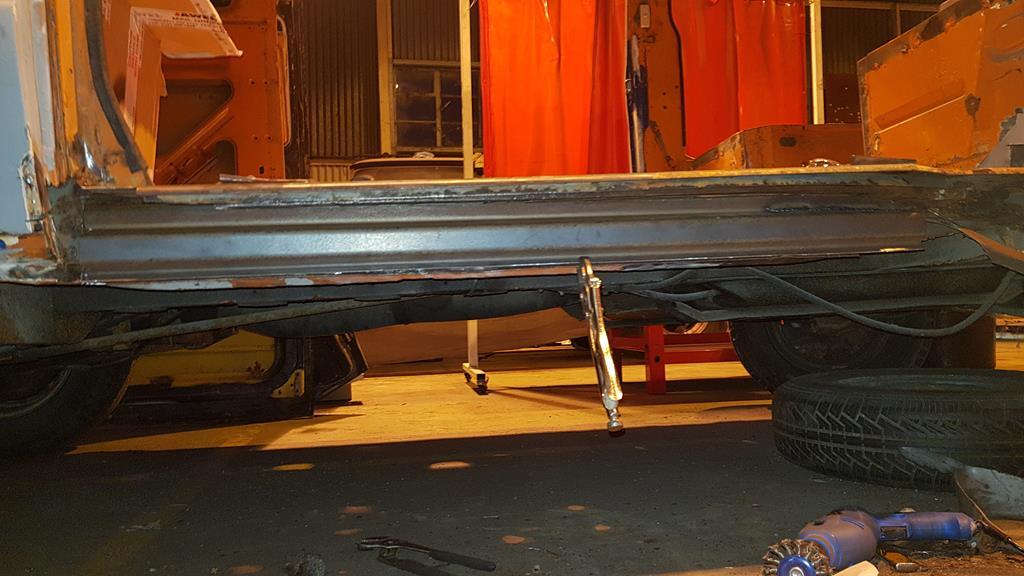 So with time running out, I coated the new panel in weld through primer and gave the van a good dose of Bilt Hamber Hydrate 90, ready for hopefully more progress tomorrow 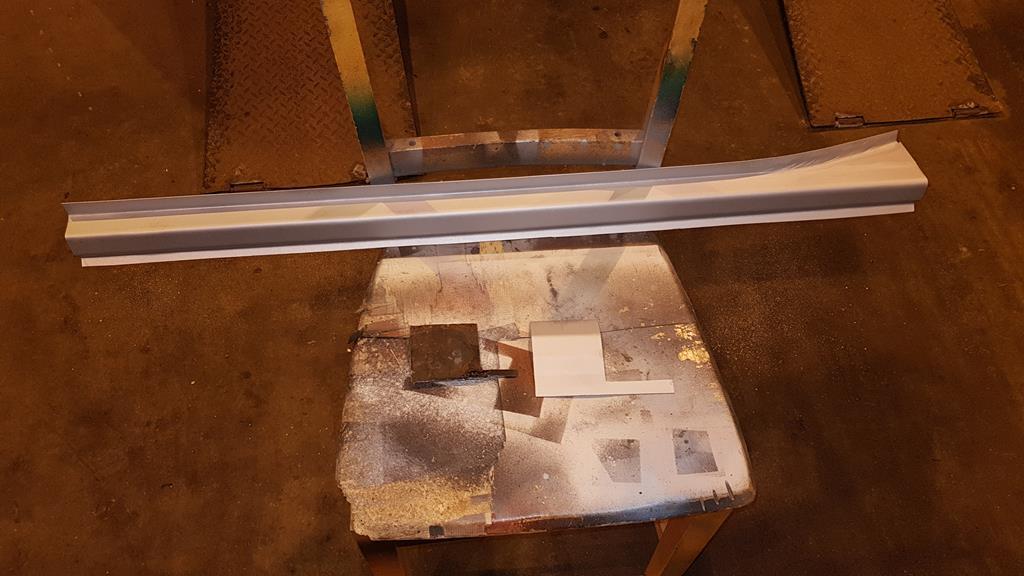 The insides of the sills are actually in better nick than outside and I found that it had been cavity waxed as you can see on this stiffener panel. I think the only reason this has rusted is because this door trapped moisture and dirt and was never opened 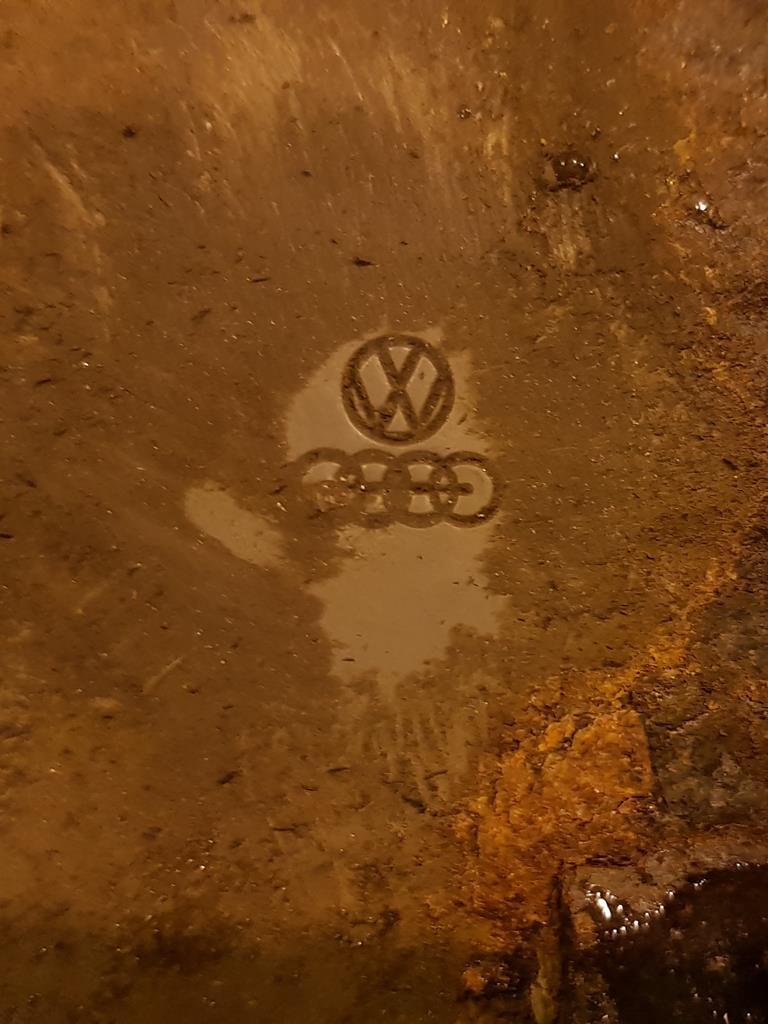 Well that's it for today. Hopefully this van will start to look less sorry for itself soon 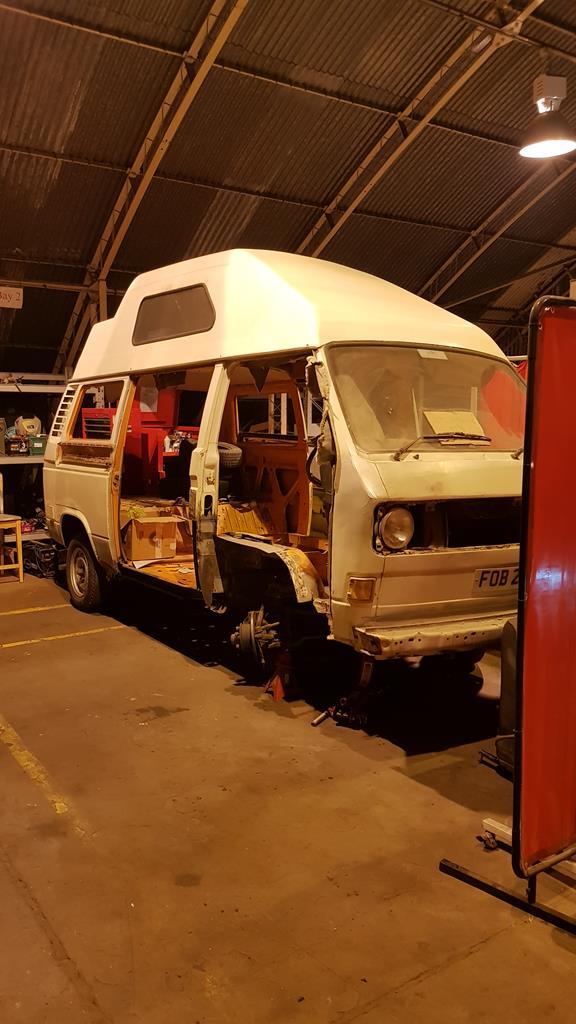 |
| |
Last Edit: Jan 4, 2019 19:37:40 GMT by ivangt6
1979 Mini 1000
1972 Triumph GT6
2007 VW Golf GTi
1979 VW T25 Leisuredrive
1988 Range Rover Vogue SE
|
|
ivangt6
Part of things
 
Posts: 776
Club RR Member Number: 132
|
T25 Campervan - Weldathonivangt6
@ivangt6
Club Retro Rides Member 132
|
|
|
Grabbed a quick couple of hours on the bus today to get that sill in 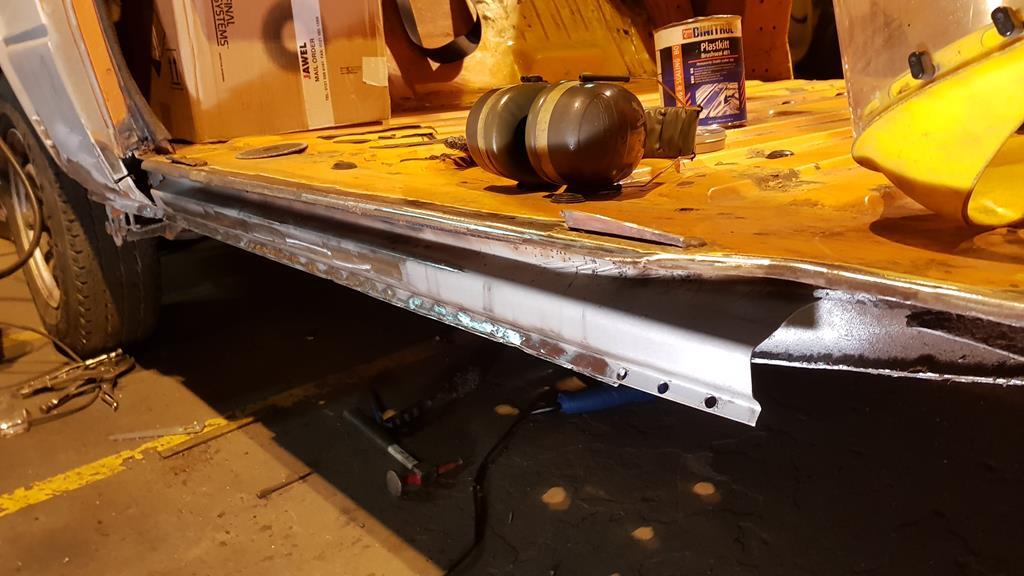 Just need to sort the front end now 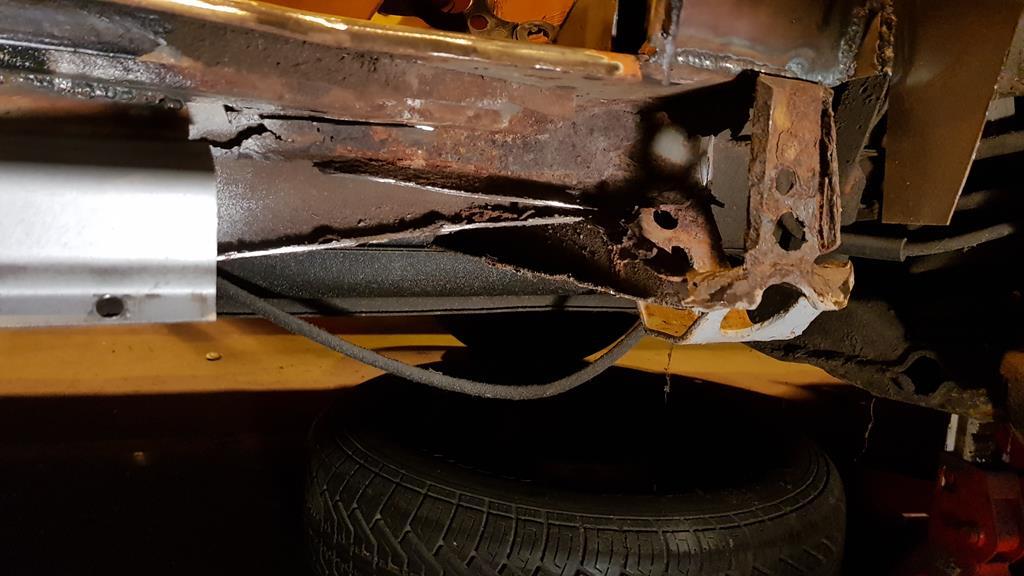 Then I had a poke around the front drivers side quarter and it is BAD. My phone ran out of battery so I don't have pics yet but it has been replaced before quite badly and has since rotted out along where it was welded just above the headlight. Also the panel that goes below the windscreen to the grill looks like its been shot. there's a hole and loads of distortion around it. I think both panels will need to be replaced in their entirety £££. I'll get some pics when I'm next down there |
| |
1979 Mini 1000
1972 Triumph GT6
2007 VW Golf GTi
1979 VW T25 Leisuredrive
1988 Range Rover Vogue SE
|
|
ivangt6
Part of things
 
Posts: 776
Club RR Member Number: 132
|
T25 Campervan - Weldathonivangt6
@ivangt6
Club Retro Rides Member 132
|
Jan 16, 2019 21:59:22 GMT
|
I've really been struggling to get time to spend on this recently, mainly due to SWMBO's modern Golf constantly needing work. This week its been both front strut top mounts and bearings, along with the rubber gaiters on the struts and anti roll bar links. And while doing that the bonnet strut went pop, slammed the bonnet and shattered the engine cover and battery cover....again! It says something that aftermarket parts are generally better quality than OEM VW bits. Anyway enough of this modern tat. Bus Firstly I knocked up this little piece to finish the front of the inner sill 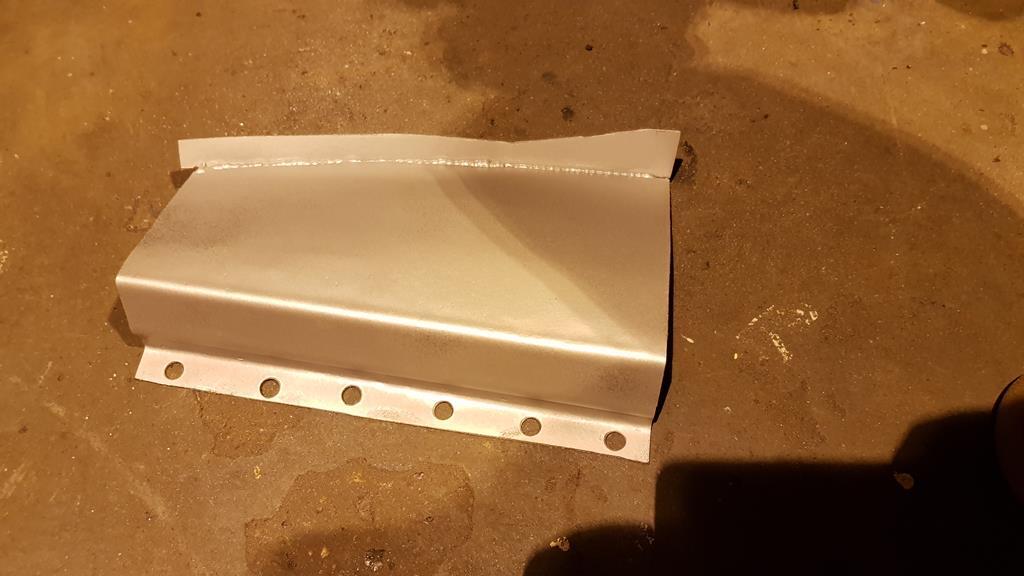 Got that in and added the base of the B-post too 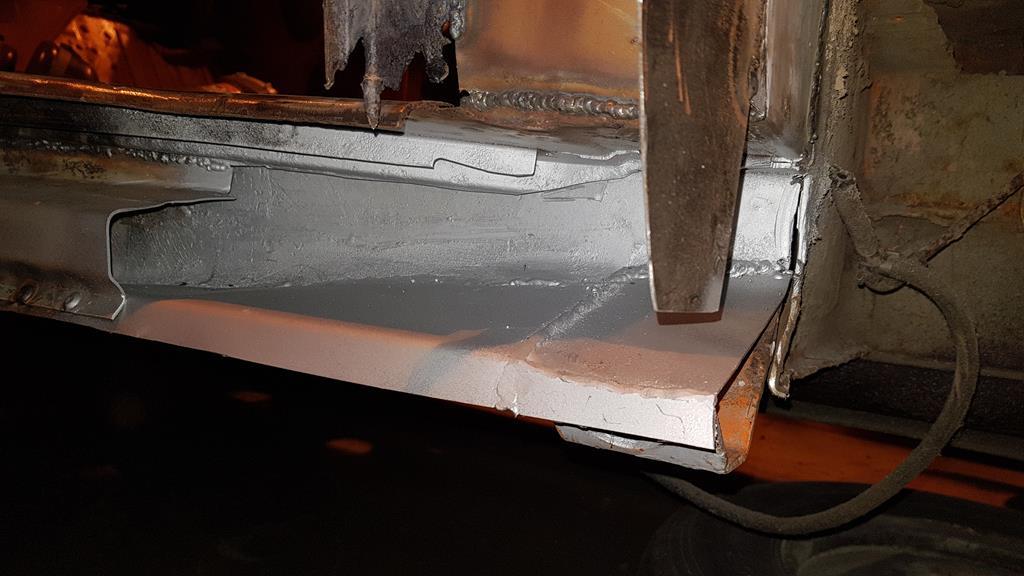 Apparently I didn't take any pictures of the outer sill piece I made. But here it is welded in, along with the jacking point strengthener 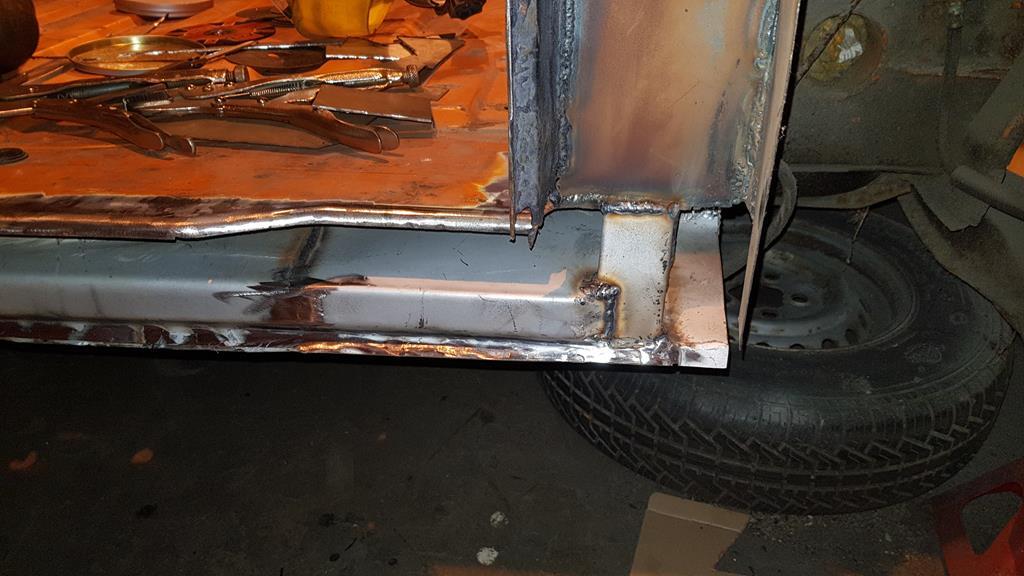 And from the front. I still need to close this off but I think I'll add a lip onto the lower part of the inner sill so that I can plug weld through to it 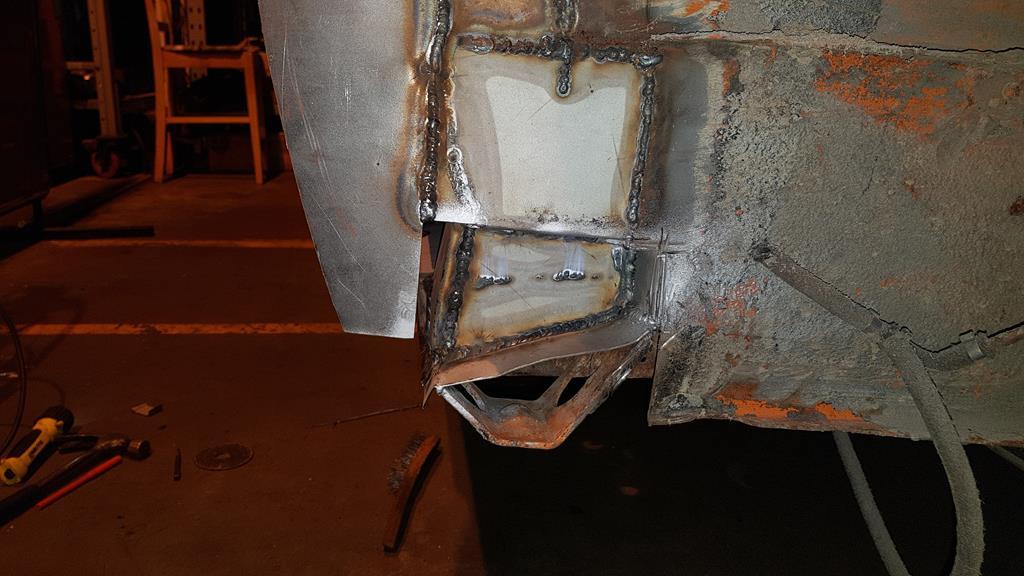 That marks the end of most of the welding needed to the RH sill and also means that this area has some strength to it now. All that the sill needs now is a seal channel welding in along its length. This is too long for me to form accurately so I'll buy that one. My next problem is that the available B-post repair skin only goes up to the swage line. I need it to go a lot higher than that which leaves me with a few options. Buy a complete B-post and chop it up, get a cut from a breaker or buy the available B-post skin and then make a fillet piece. I think I'd struggle to get a decent cut from a breaker as they all rot here but worth seeing whats about I suppose. Finally I gave the welds a good coat of seam sealer. When I get a chance I'll try out my new paint. Its a non isocyanide epoxy 2k primer. We'll see how we go with that one, hopefully its alright as I don't like the idea of spraying 2K without the proper breathing equipment. 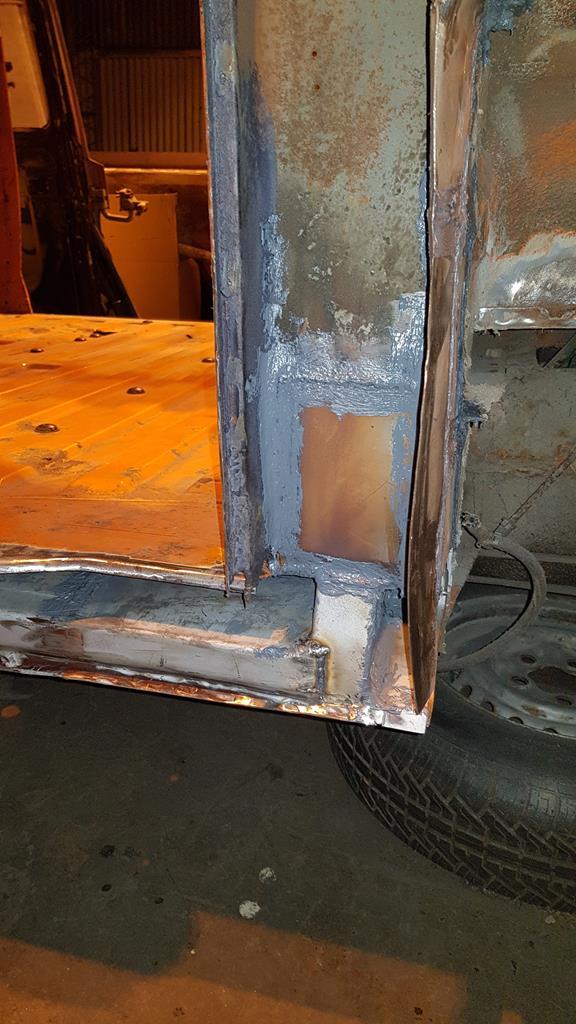 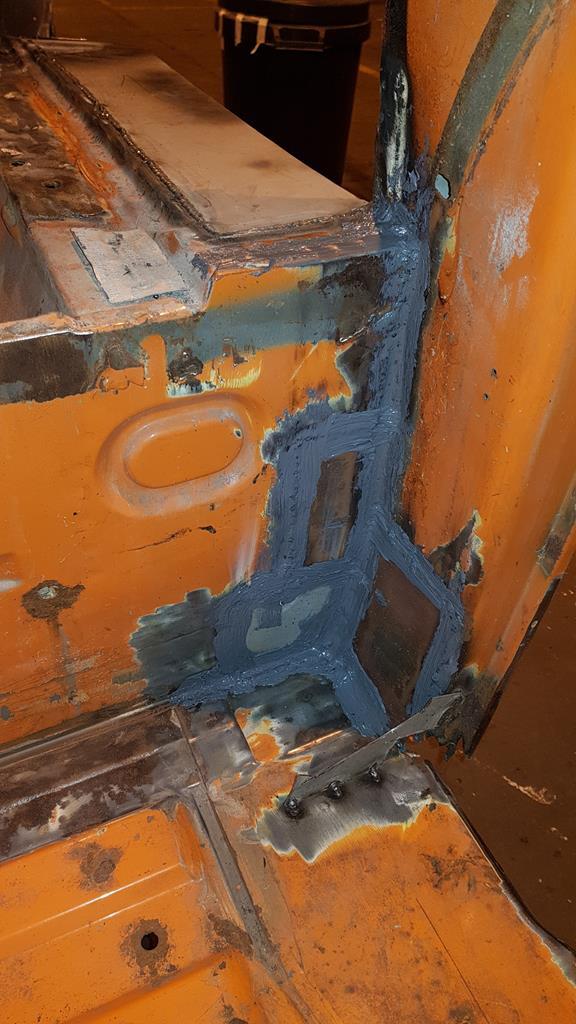 I'm not sure how much more I can get done before I move house and I'm not sure if I'll have anywhere to work on it when I do. Updates may be a bit sporadic for a bit unfortunately |
| |
1979 Mini 1000
1972 Triumph GT6
2007 VW Golf GTi
1979 VW T25 Leisuredrive
1988 Range Rover Vogue SE
|
|
|
|
|
|
|
|
Ahh so frustrating, i was enjoying this!
|
| |
|
|
ivangt6
Part of things
 
Posts: 776
Club RR Member Number: 132
|
T25 Campervan - Weldathonivangt6
@ivangt6
Club Retro Rides Member 132
|
Jan 18, 2019 16:31:11 GMT
|
A little bit more done on the bus Got that forward edge of the RH sill closed off and seam sealed inside and out 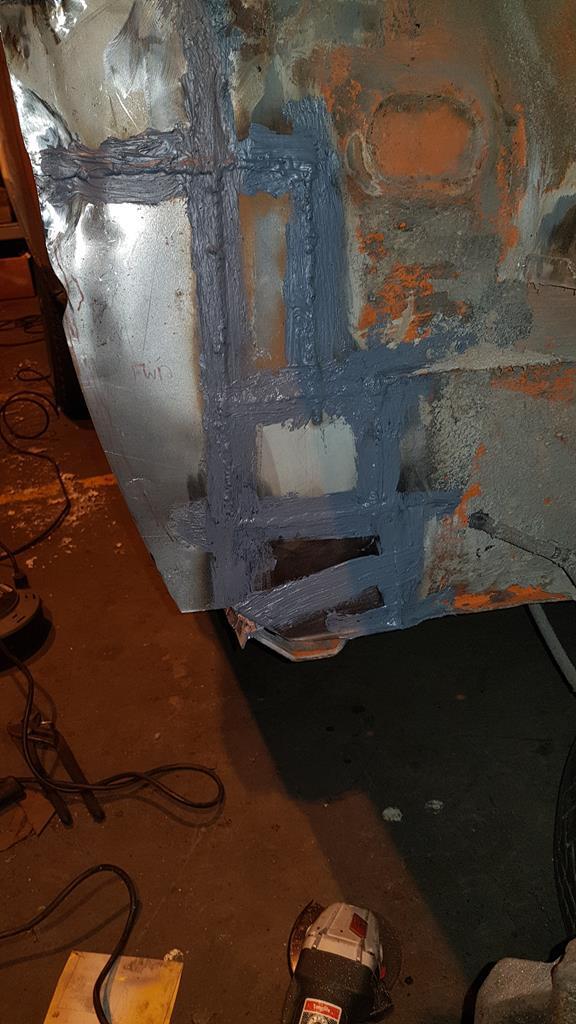 Next, as I cant do any more to this area until I can sort something for the B-post, I've moved onto the drivers floor which will need repairing before the new wheel arch panel can go on. It's pretty frilly and worse than it looks in the pictures as there's a layer of fibreglass resin hiding some holes 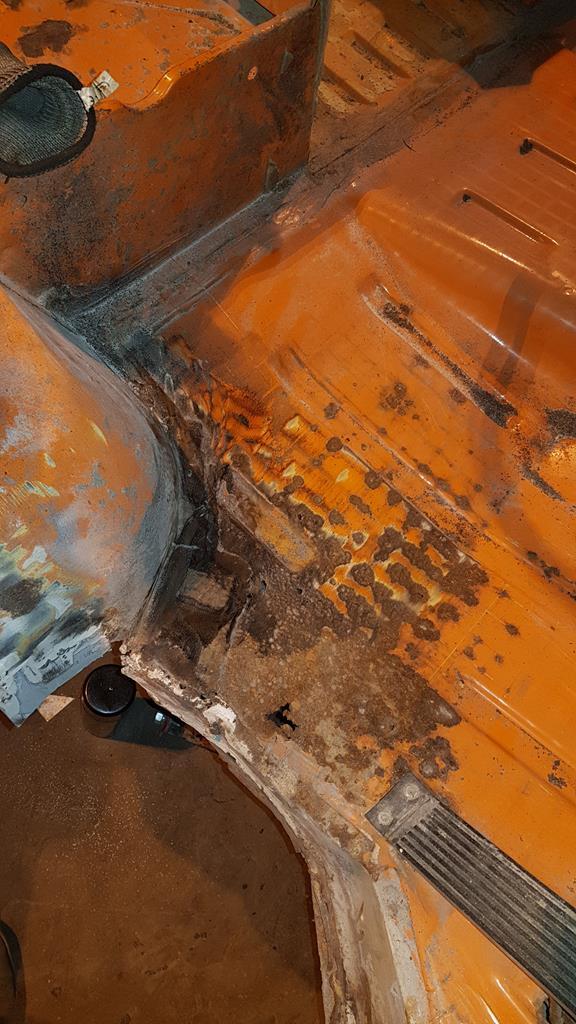 One repair panel made up and throttle bracket transferred over. I'll get this welded in next time 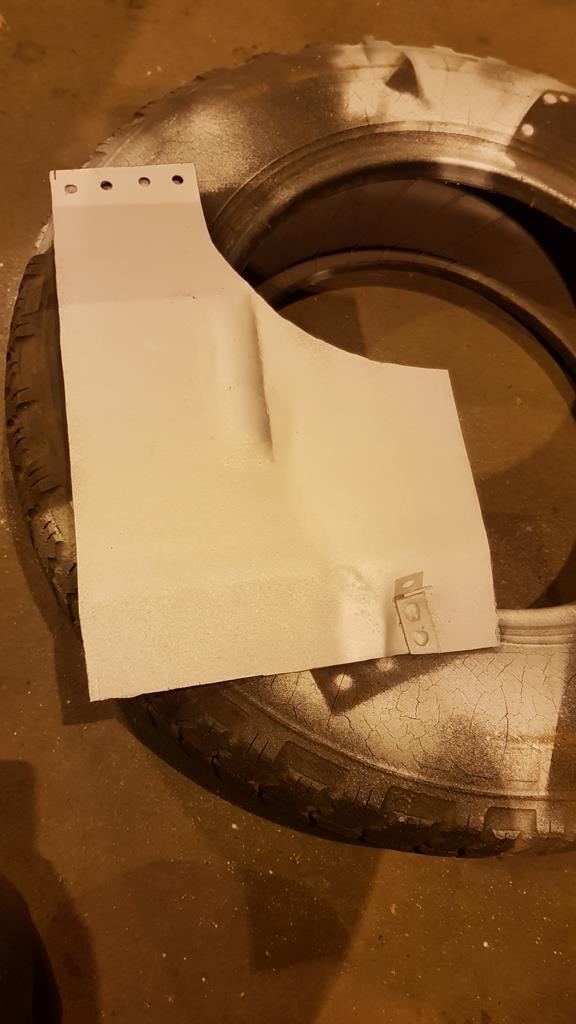 I did also strip the paint off around one of the rear quarter windows. They've hole in a couple of places along the bottom edge. Repaired with filler at some point so I wanted to make sure there was nothing else hiding. I'm a bit worried that there's a possibility that this may have to live outside for a bit so I'm aiming to get the rear window frames repaired so that the windows can go in, re-hang the doors that I have and paint any bare metal in the 2k primer. I do have a cover but I really don't want to have to re-visit any work that I've already done. On a brighter note, rumour has it that the Motor Club on the base that I'm going to is a much better facility and is less busy so hopefully there wont be too much interruption in work. More soon! |
| |
1979 Mini 1000
1972 Triumph GT6
2007 VW Golf GTi
1979 VW T25 Leisuredrive
1988 Range Rover Vogue SE
|
|
ivangt6
Part of things
 
Posts: 776
Club RR Member Number: 132
|
T25 Campervan - Weldathonivangt6
@ivangt6
Club Retro Rides Member 132
|
Jan 20, 2019 16:39:34 GMT
|
Yesterdays efforts. Well half a day. Spent the morning fighting with the Golf to replace a strut top mount and anti roll bar link. It still rattles... Anyway the afternoon yielded a fresh bit of floor on the drivers side along with some wheel tub 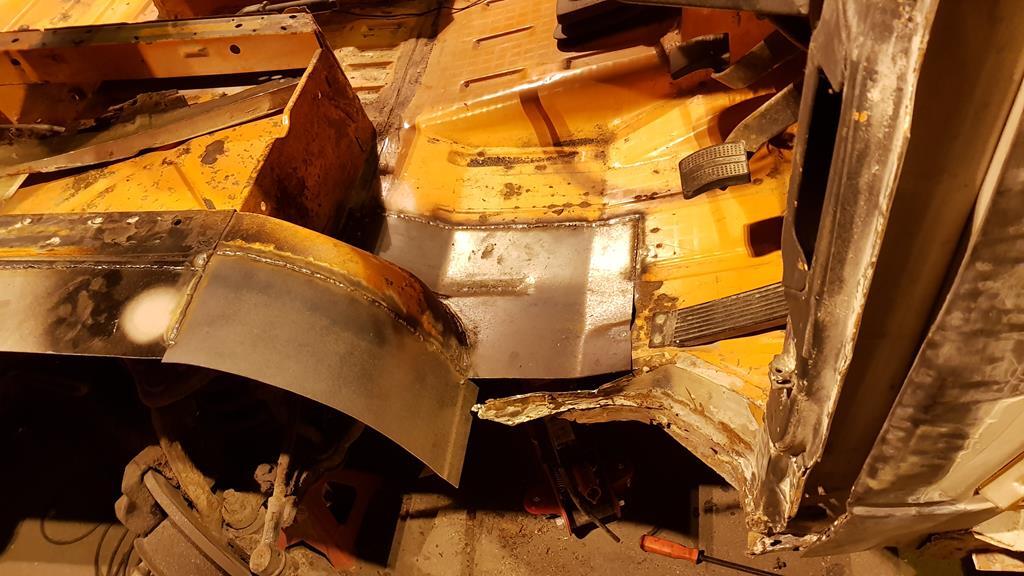 A couple of patches of rust in the rear quarter window frame where cut out 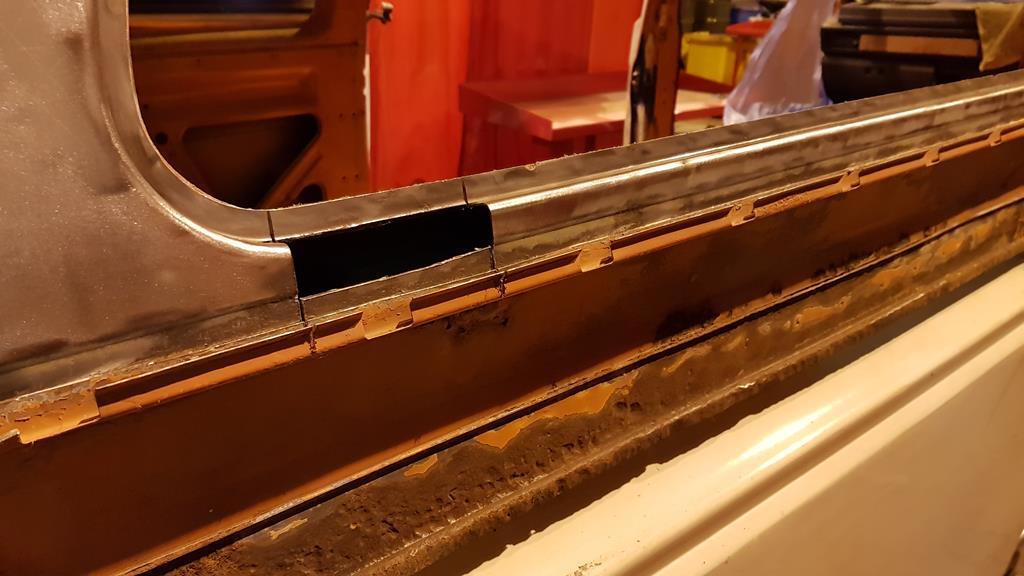 Some small, awkward to make repairs let in. Christ my welding looks awful in this pic. 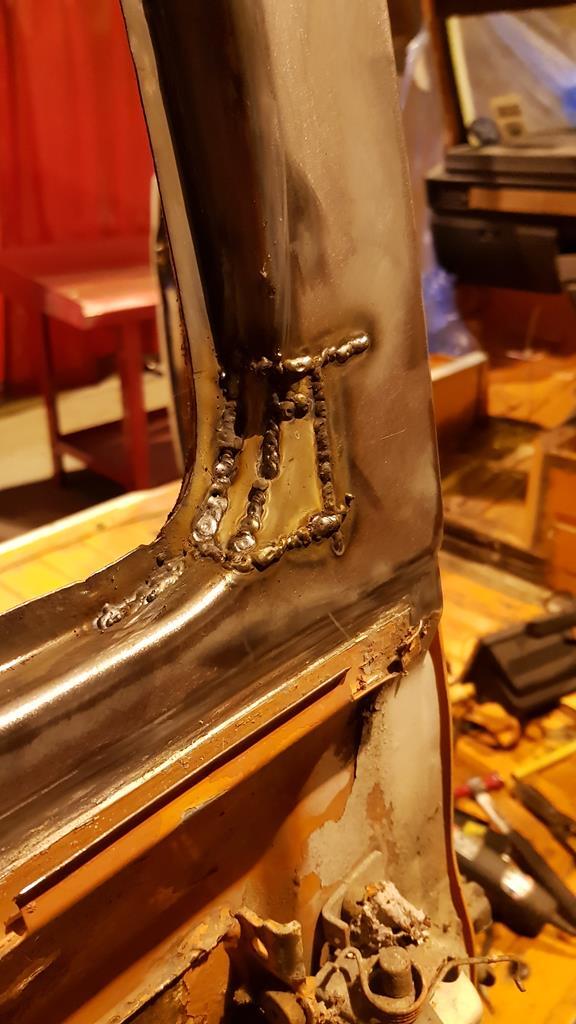 Anyway, partially dressed back and should make an almost invisible repair. Someone was using the airline so have some more welds to dress next time 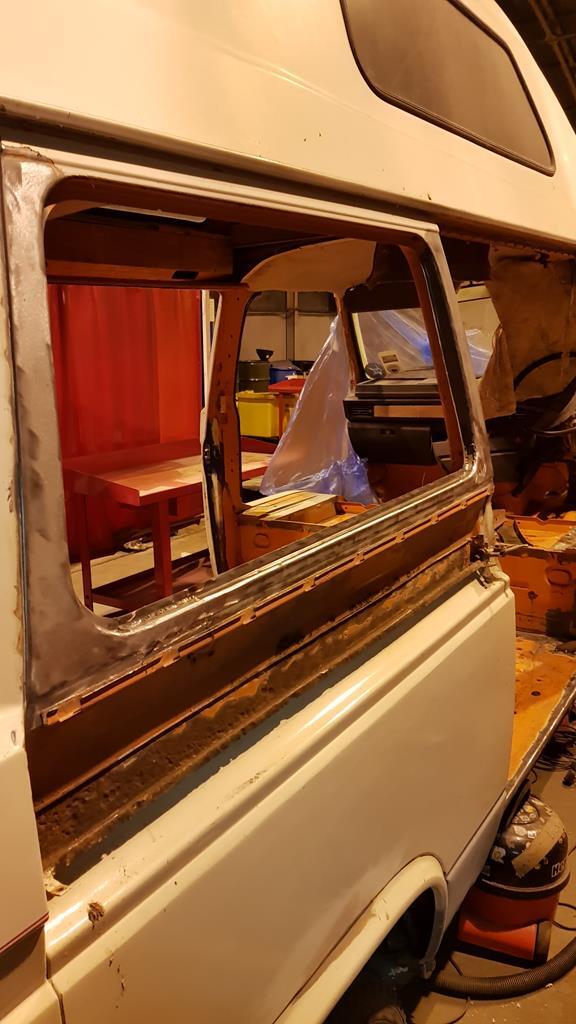 I should probably mention the front quarter and front valance 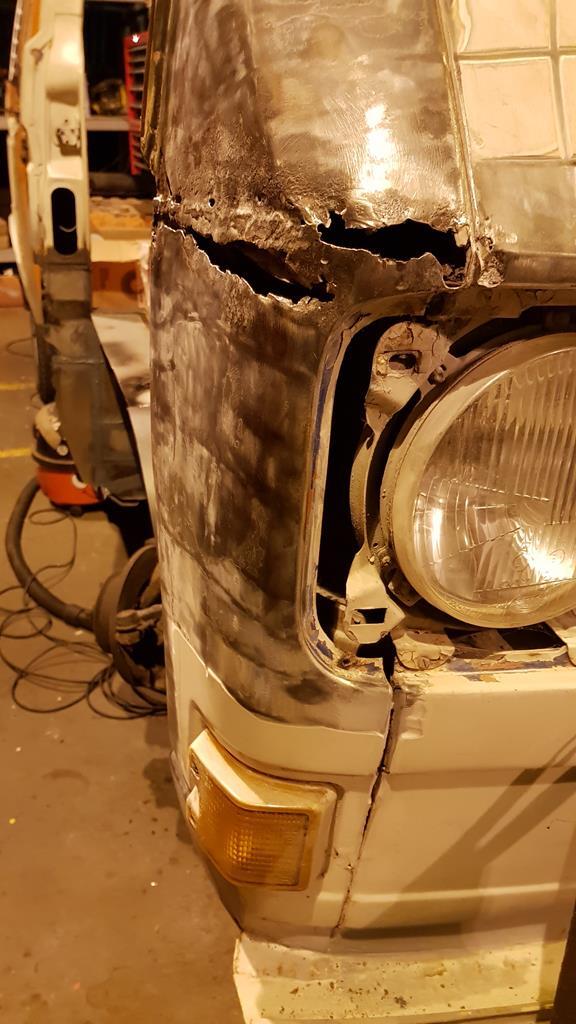 That big hole is where someone has welded a new front quarter on at some point and not treated it behind. I think this is pretty much the only place this is welded in. The new one will go from the bottom all the way up to the roof so will cover a lot of bad points in one go This is the other bit 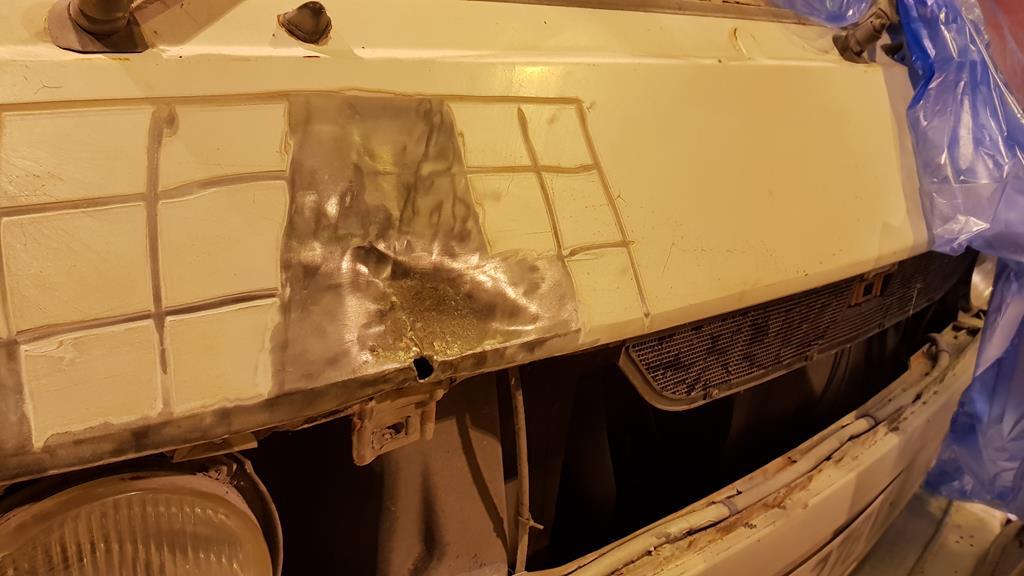 I'm not sure whats happened here. Easier to replace than repair and I'm pretty sure there's some rust under the windscreen rubber so it will cover that too. Should have got it dipped! |
| |
1979 Mini 1000
1972 Triumph GT6
2007 VW Golf GTi
1979 VW T25 Leisuredrive
1988 Range Rover Vogue SE
|
|
ivangt6
Part of things
 
Posts: 776
Club RR Member Number: 132
|
T25 Campervan - Weldathonivangt6
@ivangt6
Club Retro Rides Member 132
|
Jan 25, 2019 14:33:45 GMT
|
While the cats away, in the motor club I play... I'm supposed to be packing the house up ready for our impending house move but it is really boring so I had a play with the bus I left off last time with a few welds needing grinding back in some awkward corners which required the use of my air tools. the air line was free today so with that done I set about splashing some paint about. Now I've never used a paint gun before today, only rattle cans so a fair bit of learning took place. First go I went by the manufactures recommended mix of 2 parts of primer to one part hardener and 10 percent thinners. I wasn't getting a lot of paint coming out of the gun and it was going on with quite a bit of texture. I did have a good play with it though and learnt which bits did what etc. Anyway with this batch of paint I did the passenger side front quarter and RH sill. I got a hell of a lot of runs due to being too close with the gun, which I had to do because of how little was coming out of the gun. Front quarter 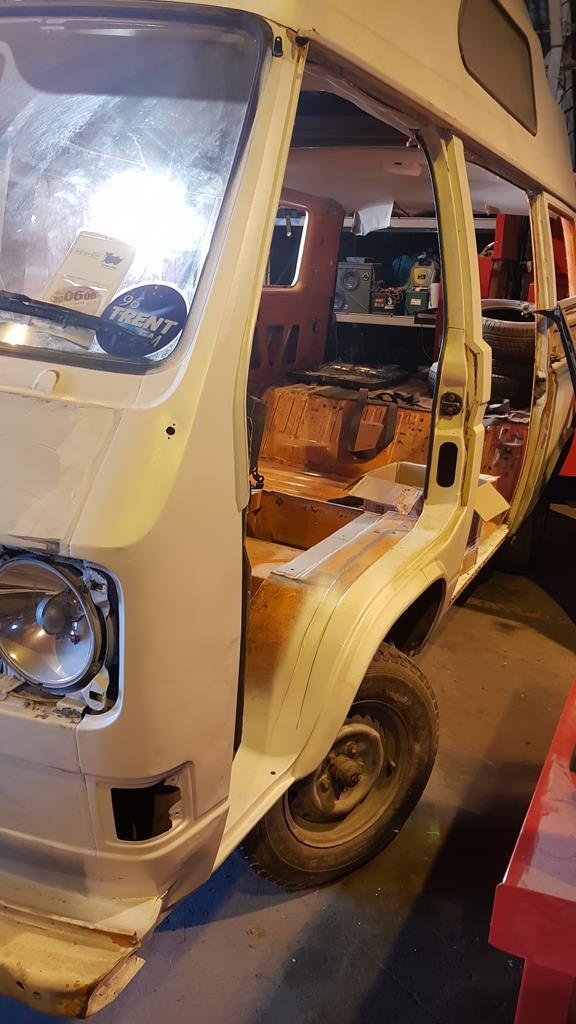 And RH Sill 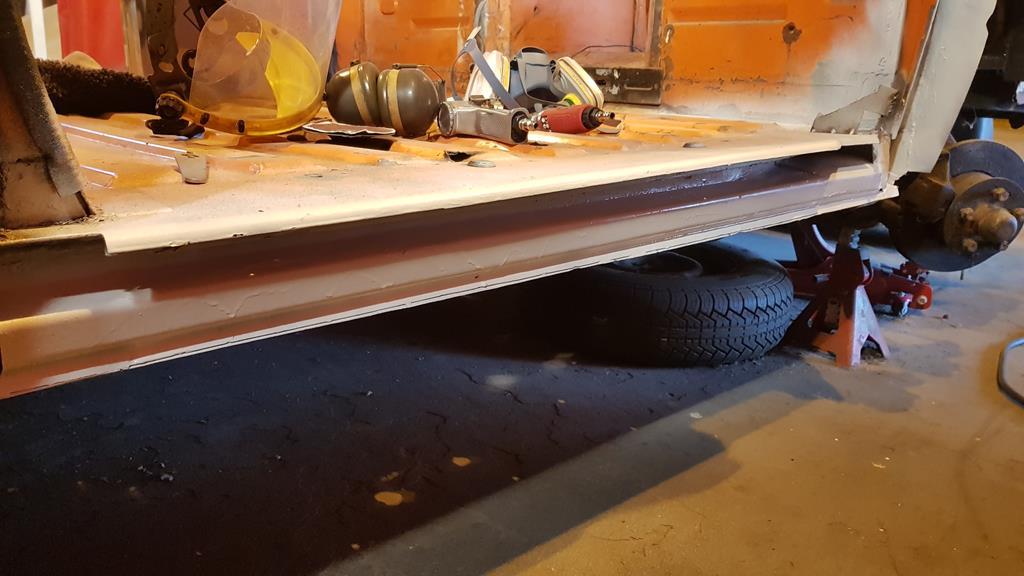 The next batch I pretty put in 20 percent thinners. I think you have to thin it down more when its cold and there is no heating in the motor club. This went on much much better. Sprayed very nicely and after a light first coat had gone tacky I could spray a bit heavier with subsequent coats. It's come out very smooth and run free. Like everything else I think experience goes a long way and I'm now more aware of what sort of viscosity the paint should have when mixed up to spray right. Muuuch nicer 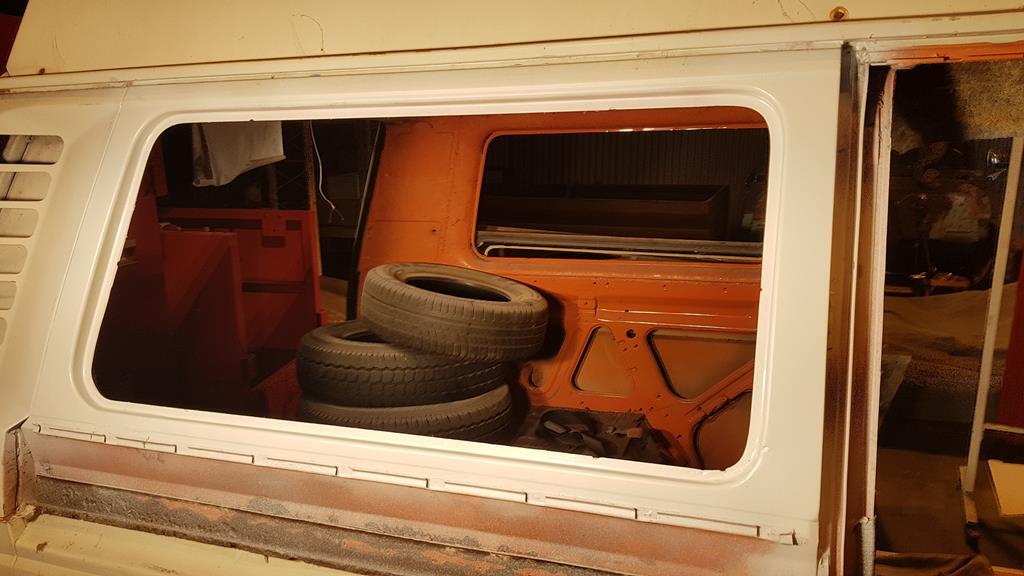 I had some paint left over so sprayed the bare metal in the drivers floor and wheel tub. This was the only bit I didn't wipe down with panel wipe prior to spraying and the only place I got some silicone spots. But again, other than that it went on nicely 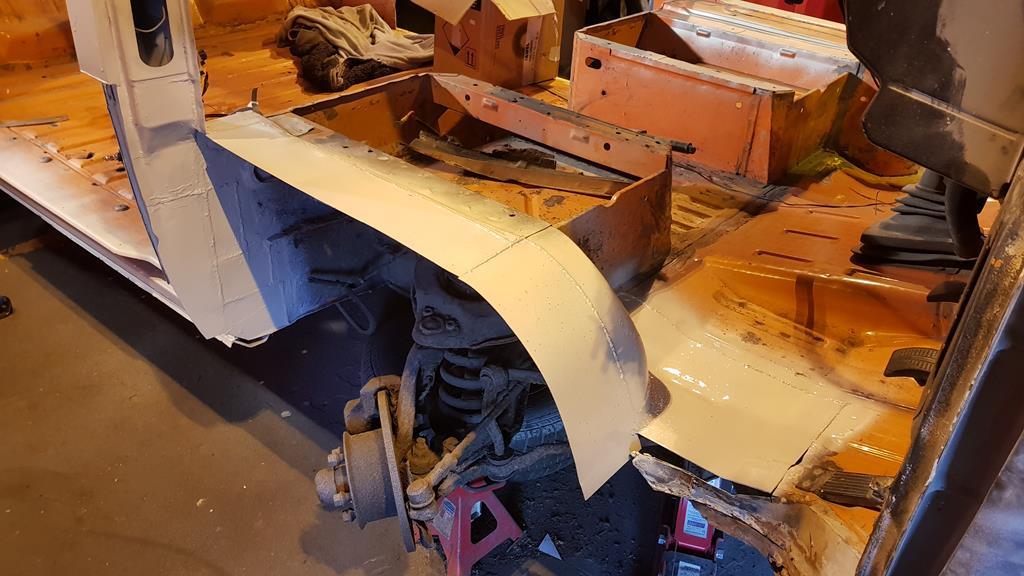 For anyone wanting to have a go at spraying, this is what I'm using for primer. I am by no means an expert in this so anyone who has any tips, tricks and sound advice, feel free to comment and correct any rubbish I may be spouting 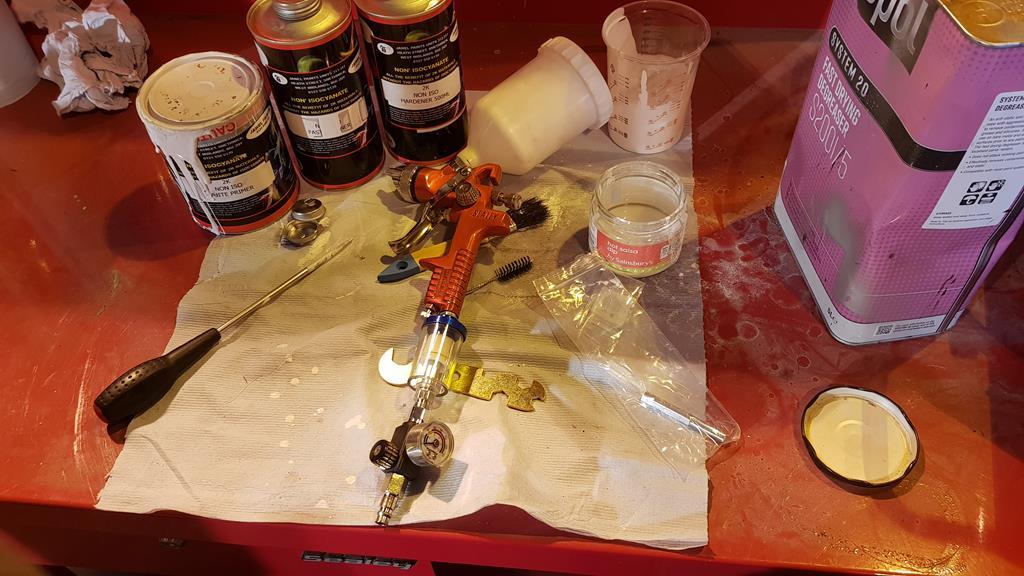 The gun is a Sealey HVLP with 1.3mm tip, link below www.ebay.co.uk/itm/SEALEY-HVLP-GRAVITY-FEED-SPRAY-GUN-1-3MM-SET-UP-HVLP741/253581460291?epid=1812691114&hash=item3b0aa20343:g:WrgAAOSwWhVa10z0:rk:1:pf:1&frcectupt=trueTo that I've added an inline water trap and pressure regulator. The paint is a non-isocyanide 2k primer and I'm using that with a 3M filtered mask in a well ventilated area. I don't have much experience with primers but this stuff has gone off rock hard. Certainly a lot harder to gouge with your finger nail than rattle can primer. I'm hoping it proves as water resistant as normal 2k primer as there's a chance that this may spend some time outside before I can work on it again but so far I'm impressed with it. Whats next? If I get a chance tomorrow I will be visiting the rust on the LH rear quarter window and possibly fitting the RH rear quarter window |
| |
1979 Mini 1000
1972 Triumph GT6
2007 VW Golf GTi
1979 VW T25 Leisuredrive
1988 Range Rover Vogue SE
|
|
|
|
|
Jan 25, 2019 18:17:31 GMT
|
|
Ive found epoxy primer sticks well and seems to protect against the weather, only issue is without an oven or a warm summers day it seems to need at least 24hrs to fully harden, as you say using modern primers highlights how poor the rattle cans are, also had problems with cracking paint using rattle cans, never had this with the epoxy.
|
| |
|
|
|
|
|
|
|
Jan 25, 2019 18:30:46 GMT
|
|
Great work - I think that normal 2k primer is porous so I wouldn't leave it outside, best to get it sealed asap - epoxy is a different animal.
Hope the house packing and move goes smoothly!
|
| |
|
|
|
|
|
Jan 25, 2019 23:01:03 GMT
|
|
Nice work
|
| |
|
|
ivangt6
Part of things
 
Posts: 776
Club RR Member Number: 132
|
T25 Campervan - Weldathonivangt6
@ivangt6
Club Retro Rides Member 132
|
|
|
It's been a while but work will be resuming on this soonish. After I've built some shelter for it The front driver side wing? Quarter? Arrived today. I'm impressed so far with the pressing, it has nice clean lines and folds. Hopefully it fits well! 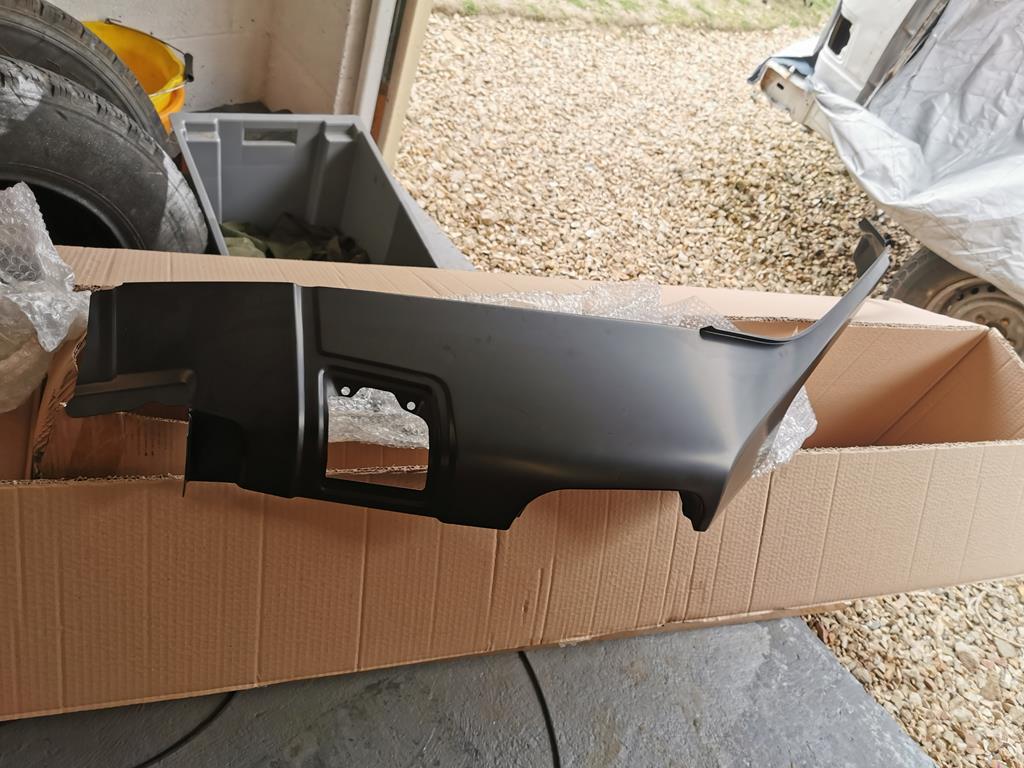 It'll take care of all this nastiness in one hit 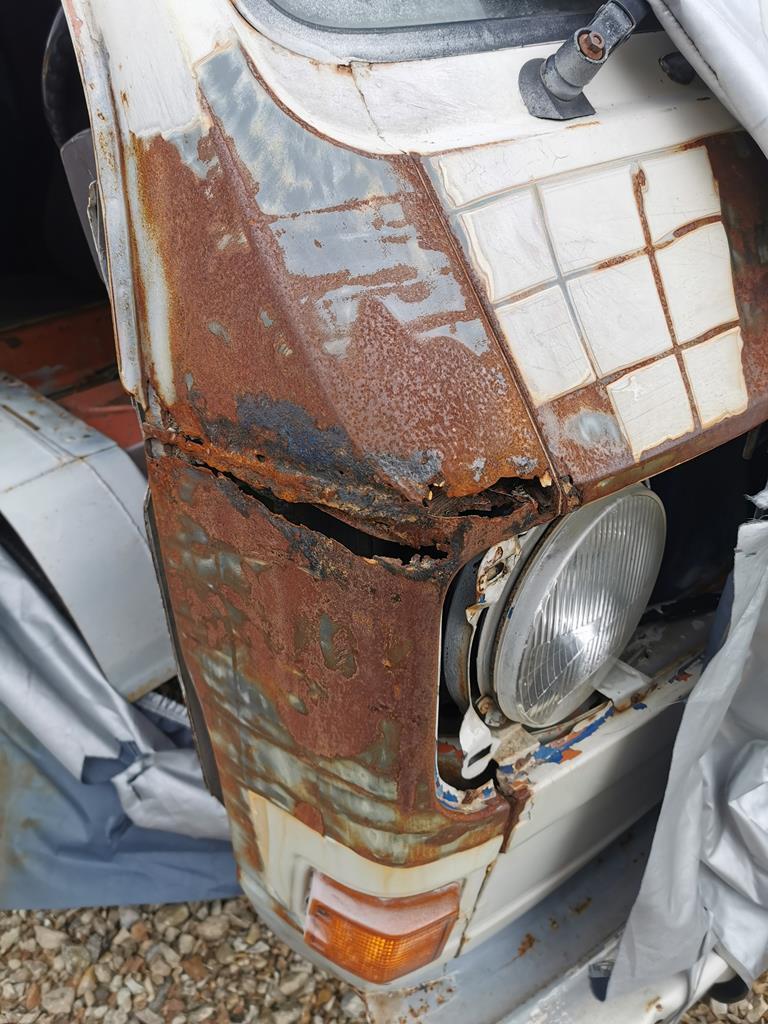 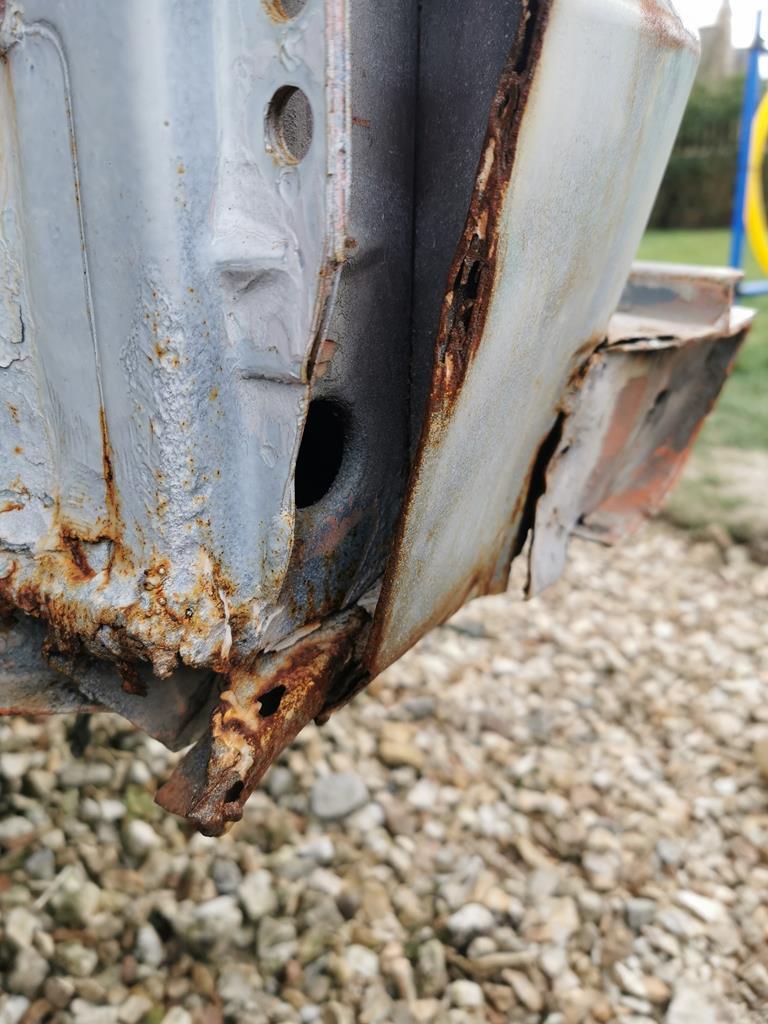 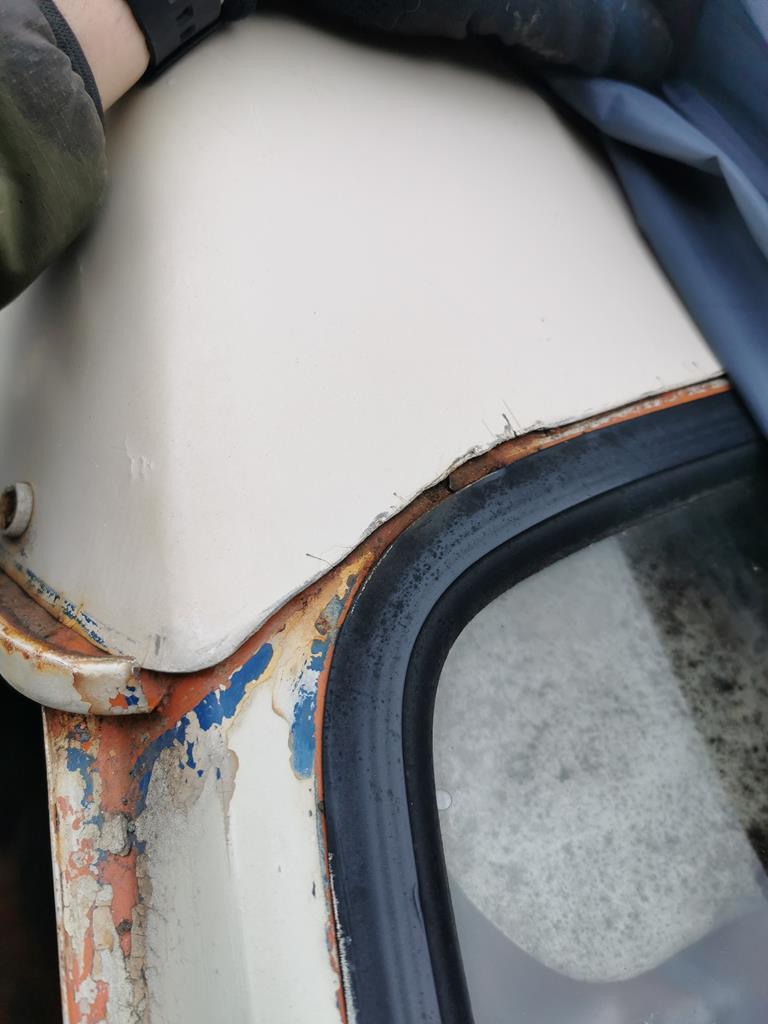 I'm having problems at the moment with this virus in order to get a drivers door so I can nail all these panels in the right place. There's a carport to build first anyway |
| |
1979 Mini 1000
1972 Triumph GT6
2007 VW Golf GTi
1979 VW T25 Leisuredrive
1988 Range Rover Vogue SE
|
|
|
|
|
|
|
|
And here's me thinking that you had entered it in the LOD (League of Dissownership)
|
| |
|
|
ivangt6
Part of things
 
Posts: 776
Club RR Member Number: 132
|
T25 Campervan - Weldathonivangt6
@ivangt6
Club Retro Rides Member 132
|
|
|
And here's me thinking that you had entered it in the LOD (League of Dissownership) Yeah I've moved twice since I bought it so it's sort of been shunted from one hidey hole to another. Can't wait to get back into it though, especially as she's going to be buying a lot of the parts. Almost like being paid to do it! I'm going to have to insist on going halves on an air compressor I think. For I cannot possibly proceed without my air tools. I've been told she wants it done by next summer! |
| |
1979 Mini 1000
1972 Triumph GT6
2007 VW Golf GTi
1979 VW T25 Leisuredrive
1988 Range Rover Vogue SE
|
|
|
|
|
|
|
And here's me thinking that you had entered it in the LOD (League of Dissownership) Yeah I've moved twice since I bought it so it's sort of been shunted from one hidey hole to another. Can't wait to get back into it though, especially as she's going to be buying a lot of the parts. Almost like being paid to do it! I'm going to have to insist on going halves on an air compressor I think. For I cannot possibly proceed without my air tools. I've been told she wants it done by next summer! You may has well stitch the holiday funds into to it - very sadly with current situation I cant see many of us getting any proper holidays in this year so lets look on the brighter side of things - has she come up with a colour scheme yet and is she going to get stuck in and do the soft furnishings / curtains etc for it ? |
| |
Last Edit: Apr 2, 2020 20:45:15 GMT by Deleted
|
|
ivangt6
Part of things
 
Posts: 776
Club RR Member Number: 132
|
T25 Campervan - Weldathonivangt6
@ivangt6
Club Retro Rides Member 132
|
|
|
|
@grumpynorthener
Were supposed to be in texas at the moment on a road trip in a big American pickup. All the hotels were free cancellation and we got the flights and car hire back. All of that has already gone on fencing, the carport and panels. Oh and she's treated herself to a new mirrorless dlsr camera 🙄. As you do.
Anyway. The original colour you can see in some of the photos is VW L20B orange. A very retro shade. I'm quite keen on getting some 70s style side stripes printed up. Maybe yellow brown and black. It works in my head anyway. Not sure on wheels yet but it'll be 70s themed as much as possible
As for the interior, she's in charge of that. I'll be fitting the hardware in there and she'll be doing all the furnishings. Her requirements from me are a fridge, oven, hob, sink, heater and table. She wants a white kitchen which is easy enough and I thinks she's going quite retro with the curtain material and flooring. She's keen to make all the rock-and-roll bed covers as well.
I'm secretly hoping for it to be quite hippie in there. It's a vw bus after all!
Up front it looks like it'll be quite Bland. Some comfortable black leather seats on swivel bases, black carpet etc. I'll have to have a think on this one
We're planning on doing a few lengthy trips throughout Europe so I'd like to upgrade the engine and gearbox a bit. I'm happy to stay air-cooled but I'd like to swap the barrels to make it a 2.2 litre and maybe a single weber downdraught carb. Also on the list is a 5 speed box.
|
| |
1979 Mini 1000
1972 Triumph GT6
2007 VW Golf GTi
1979 VW T25 Leisuredrive
1988 Range Rover Vogue SE
|
|
|
|
|
|
|
@grumpynorthener Were supposed to be in texas at the moment on a road trip in a big American pickup. All the hotels were free cancellation and we got the flights and car hire back. All of that has already gone on fencing, the carport and panels. Oh and she's treated herself to a new mirrorless dlsr camera 🙄. As you do. Anyway. The original colour you can see in some of the photos is VW L20B orange. A very retro shade. I'm quite keen on getting some 70s style side stripes printed up. Maybe yellow brown and black. It works in my head anyway. Not sure on wheels yet but it'll be 70s themed as much as possible As for the interior, she's in charge of that. I'll be fitting the hardware in there and she'll be doing all the furnishings. Her requirements from me are a fridge, oven, hob, sink, heater and table. She wants a white kitchen which is easy enough and I thinks she's going quite retro with the curtain material and flooring. She's keen to make all the rock-and-roll bed covers as well. I'm secretly hoping for it to be quite hippie in there. It's a vw bus after all! Up front it looks like it'll be quite Bland. Some comfortable black leather seats on swivel bases, black carpet etc. I'll have to have a think on this one We're planning on doing a few lengthy trips throughout Europe so I'd like to upgrade the engine and gearbox a bit. I'm happy to stay air-cooled but I'd like to swap the barrels to make it a 2.2 litre and maybe a single weber downdraught carb. Also on the list is a 5 speed box. Ivan - Busy for while then  You will have earnt the holiday in it by the time it's done |
| |
Last Edit: Apr 2, 2020 21:10:59 GMT by Deleted
|
|
ivangt6
Part of things
 
Posts: 776
Club RR Member Number: 132
|
T25 Campervan - Weldathonivangt6
@ivangt6
Club Retro Rides Member 132
|
|
|
|
@grumpynorthener
Our holidays are normally a disaster so this bus should be just the ticket!
|
| |
1979 Mini 1000
1972 Triumph GT6
2007 VW Golf GTi
1979 VW T25 Leisuredrive
1988 Range Rover Vogue SE
|
|
|
|
|
|
|
|
Engine plans sound interesting, I'm looking to upgrade our T25 engine at some point too. I'd considered 96mm pistons and cylinders, briefly thought of a little turbo, but settled on a pair of 36mm Dellorto DRLAs or Weber IDFs. I'm struggling to find short manifolds though. Long term I'll probably ditch the type 4 motor and build a big cc type 1 motor, possibly a 2276, maybe slightly smaller, depending on what parts turn up.
I'm looking at Mercedes steel wheels at the moment in either 15" or 16" but travelling to get them is tricky... Commercial or load rated tyres are so much easier to get in those sizes!
|
| |
1968 Cal Look Beetle - 2007cc motor - 14.45@93mph in full street trim
1970-ish Karmann Beetle cabriolet - project soon to be re-started.
1986 Scirocco - big plans, one day!
|
|
|
|


 You will have earnt the holiday in it by the time it's done