Darkspeed
Club Retro Rides Member
Posts: 4,668
Club RR Member Number: 39
|
|
May 31, 2020 20:31:33 GMT
|
List is getting longer ! 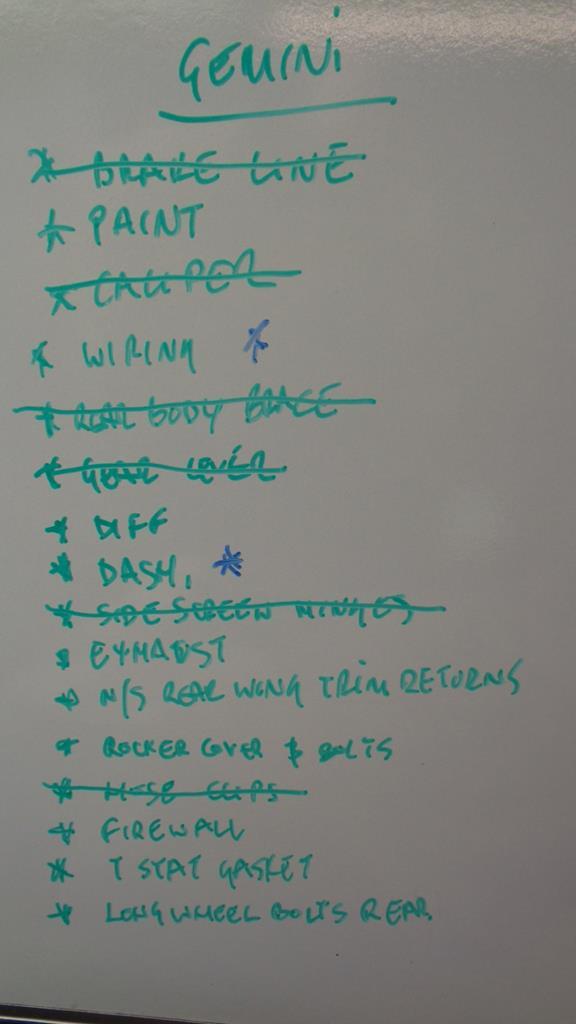 Went through the box of wheel nuts studs bolts and found two sets of longer studs - a measure up on them and that extra shank that you get of these extended bolts means that I only have 2mm before the nuts bind onto that shank. It should be okay but I would really like a bit more margin than that. 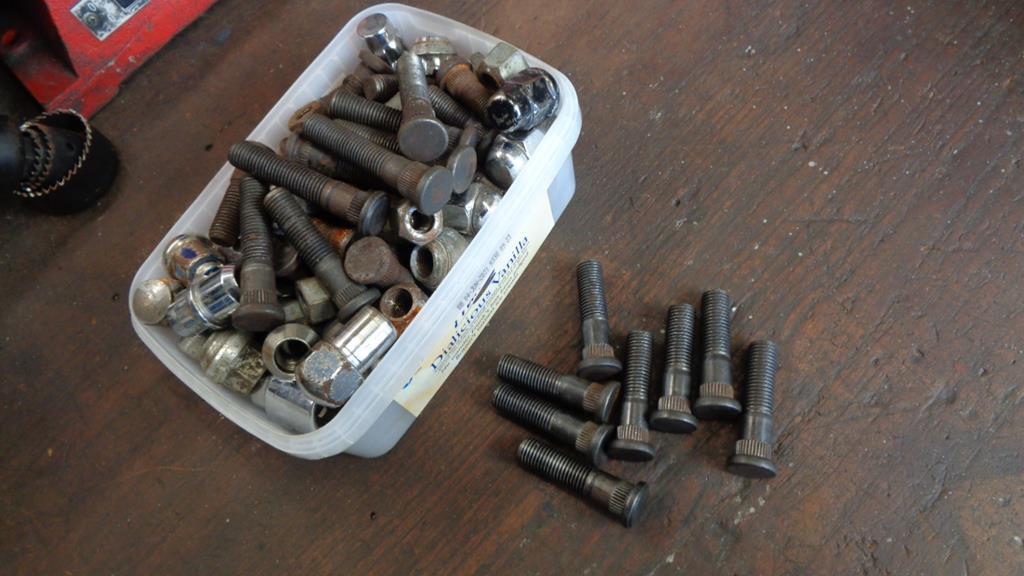 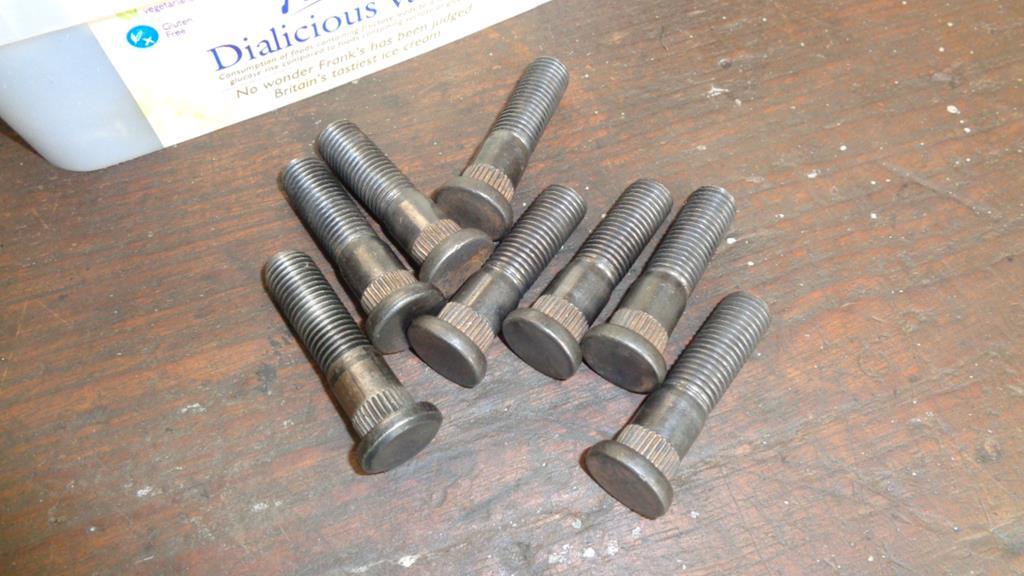 Knocked the half shafts out to change the diff and before removing the pigs head I checked the splines. All good. 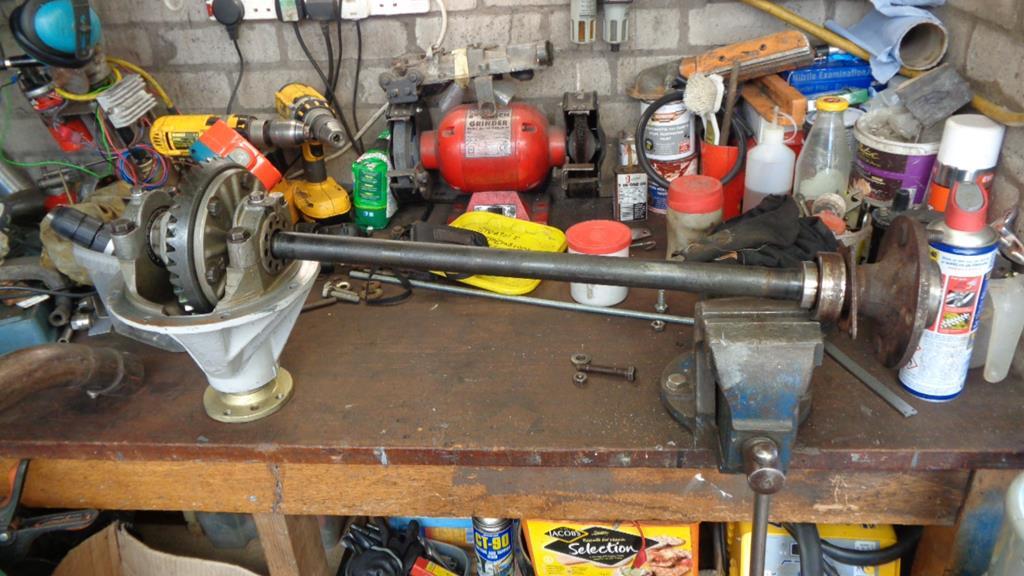 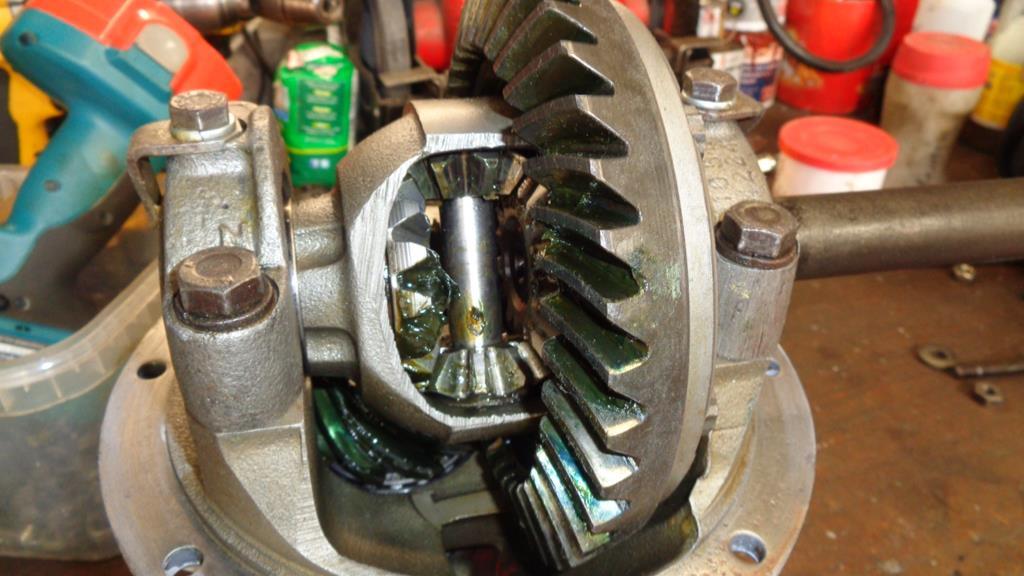 next job was undoing the prop bolts and  they were tight and an utter to get shifted. They eventually give in and thankfully the diff bolts showed no such resistance so with an armpit full of old Hypoid oil the diff was out. It still had a tag under one of the bolts - 3.54! - Now I know its not that - however I also did not expect it to be ....  9-35 - 3.89:1 ! - All my Tacho and road speed calcs told me 4.125 - Hmmmm - Oh well the new one is in much better condition as the existing one has a bit of wear on the pinion gear. Was not noisy at all - which is immediately obvious in these cars as you sit next to the diff and only have a 0.9 sheet of alloy between you and it. New one is in really good order and has the right ratio - 11-39 3.54:1 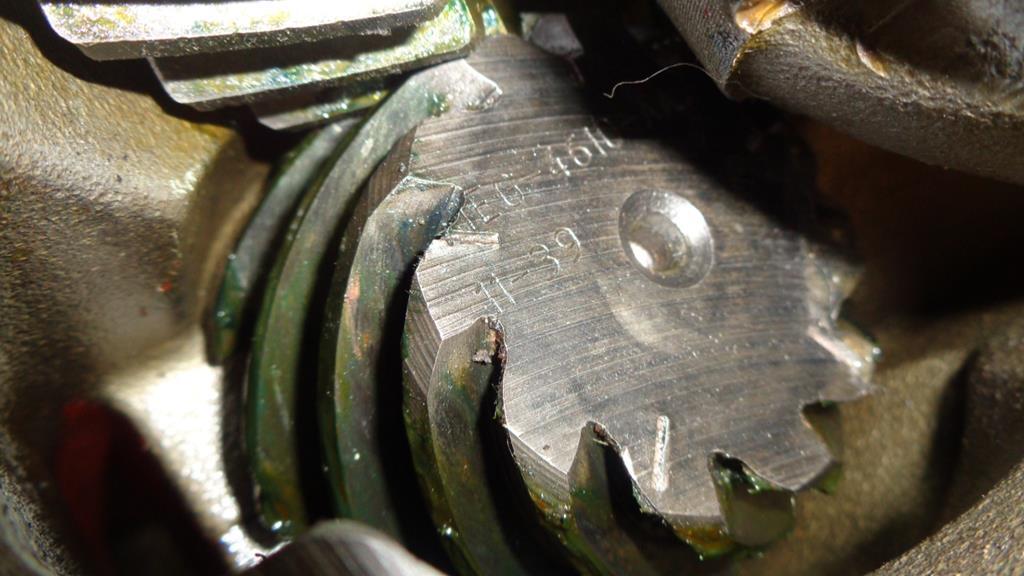 Whilst under there I noticed the fuel pipe was a little over secured! - yep that definitely needs to be hard lined all the way through - that way the fuel has a chance of adequate flow to the engine under full load. 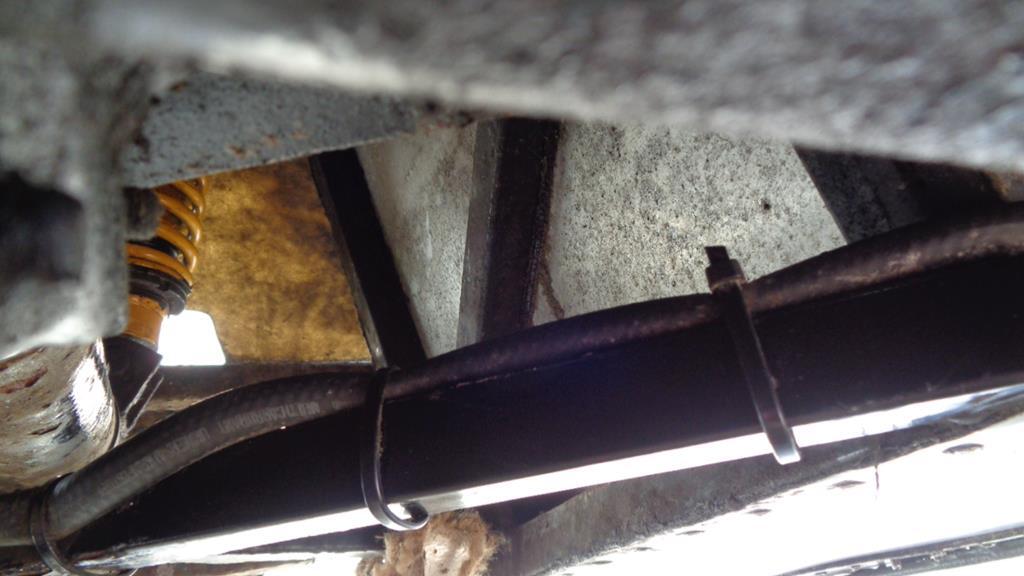  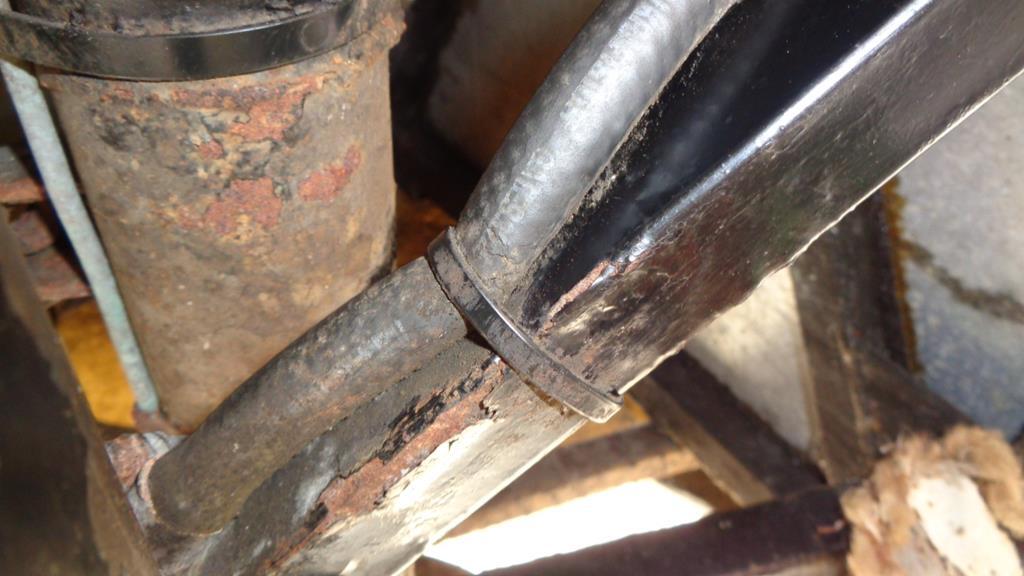 Could not finish the task today as the old diff gasket that I had hanging in the garage had dried out and shrunk! New one on order with a few other gaskets from Burton. Cleaned out the diff casing as final stinky task of the day. |
| |
Last Edit: May 31, 2020 20:34:04 GMT by Darkspeed
|
|
|
|
Darkspeed
Club Retro Rides Member
Posts: 4,668
Club RR Member Number: 39
|
|
May 31, 2020 20:50:30 GMT
|
|
|
| |
|
|
Tamber
Part of things
 Shattered. Held together by spite and tape.
Posts: 301
|
|
May 31, 2020 21:00:52 GMT
|
Yep - Doh! - Cut it off to do it again and nearly did it again as well!! - Gave myself a stern talking to and had a fresh brew. 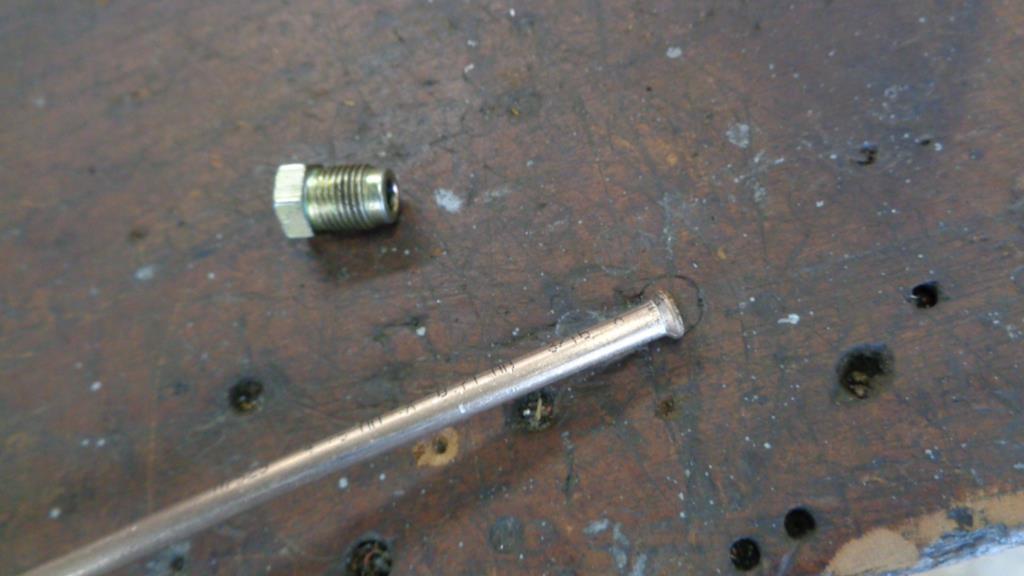 D'oh! Been there, done that, got very nervous what with only having enough to do the one full run down the truck. And inevitably, the second time you make the flare it never looks quite as good as the one you had to cut off...  As an aside, is that 5/16 line? EDIT: ...ah, no, I cleaned my glasses and it very obviously says 3/16. Nevermind! |
| |
Last Edit: May 31, 2020 21:01:22 GMT by Tamber
-< Welder. Allegedly a mechanic. Bodger of Things >-
* 1958? Bedford RL - Progress: Glacial.
* 1994 Skoda Favorit - It's baaaaaaaack!
* 2018 Herald Classic - Off the road, indefinitely.
|
|
Darkspeed
Club Retro Rides Member
Posts: 4,668
Club RR Member Number: 39
|
|
May 31, 2020 22:03:35 GMT
|
|
Yep - 3/16 kunifer - Have now written "IS THE NUT ON?" on the capstan - I will still forget...
|
| |
|
|
stealthstylz
Club Retro Rides Member
Posts: 14,829
Club RR Member Number: 174
|
|
May 31, 2020 22:51:38 GMT
|
You know me - I don't get spending on pointless fripperies like Marine leather trim, faffy wire wheels and headlamp stone guards and stripes. Money would have been better spent on a 5 speed box a 3.9 and lightweight flywheel IMHO - would make it a far better driving experience. Then again you would have to enjoy driving it rather than polishing it and parking it in a field to talk and endless stream of numpty strangers telling you the screen is off a Midget. When it's as good as it can get dynamically then worry about the Alcantara trim. Even with more baking heat - Brake line - Tick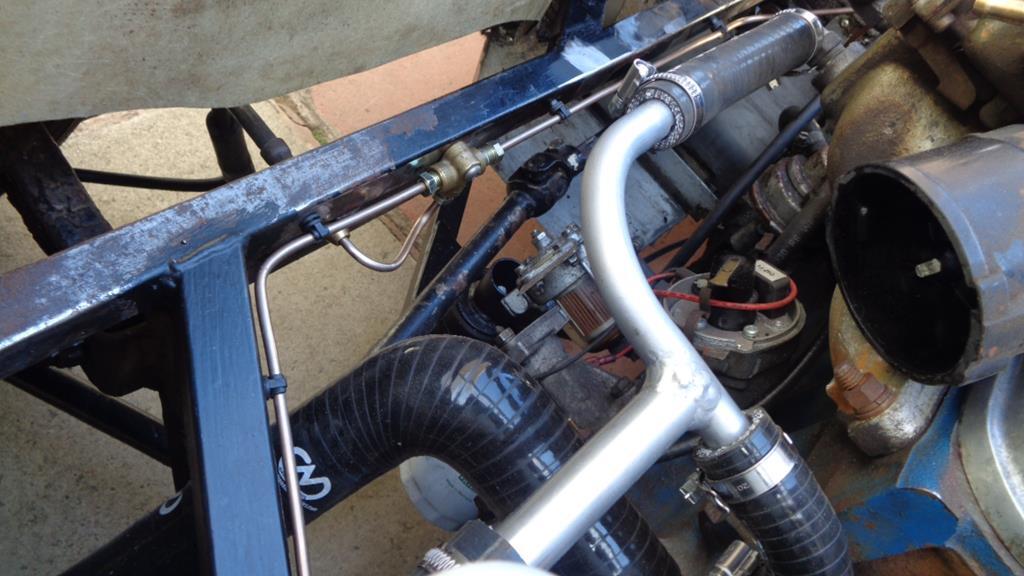 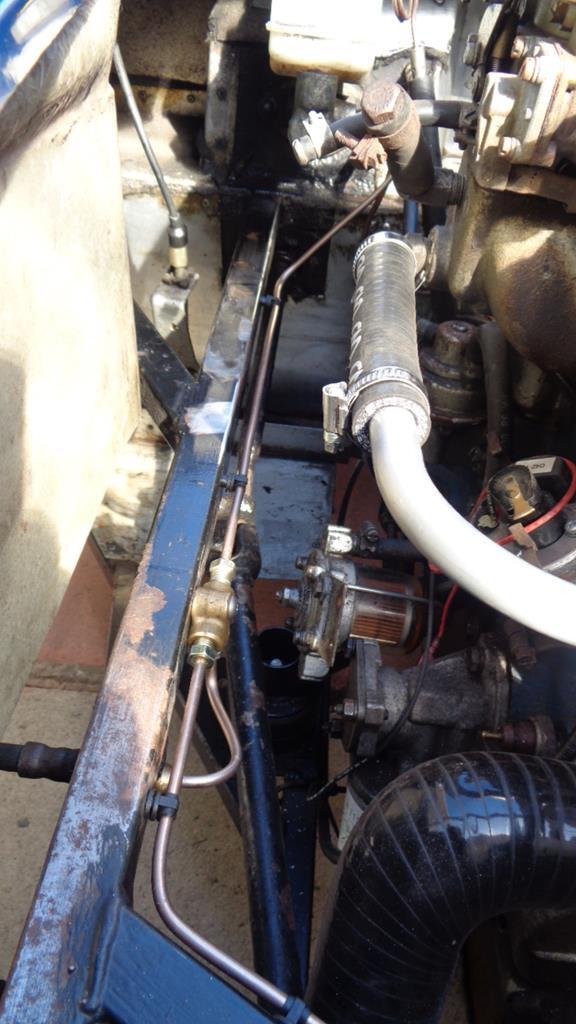 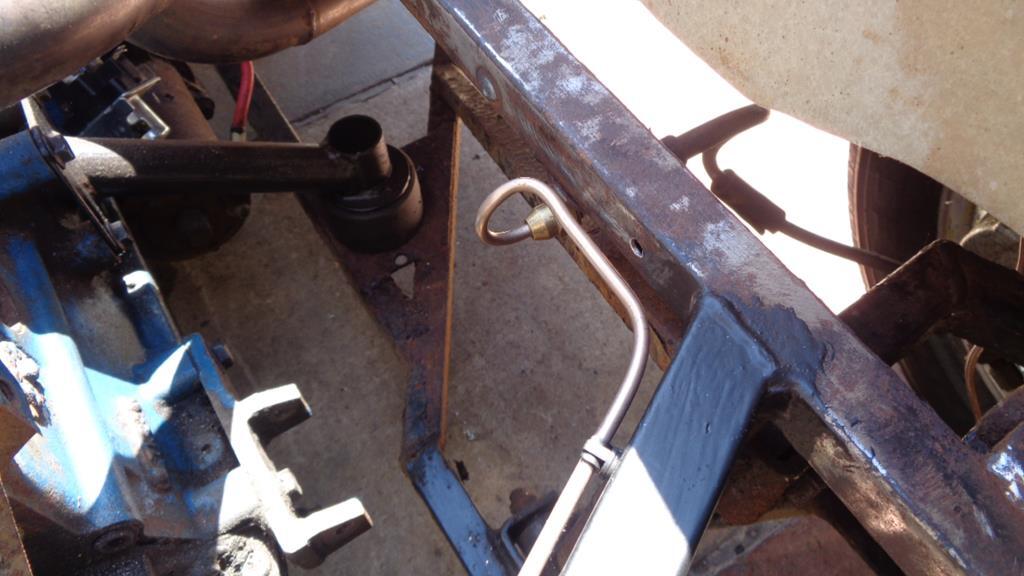 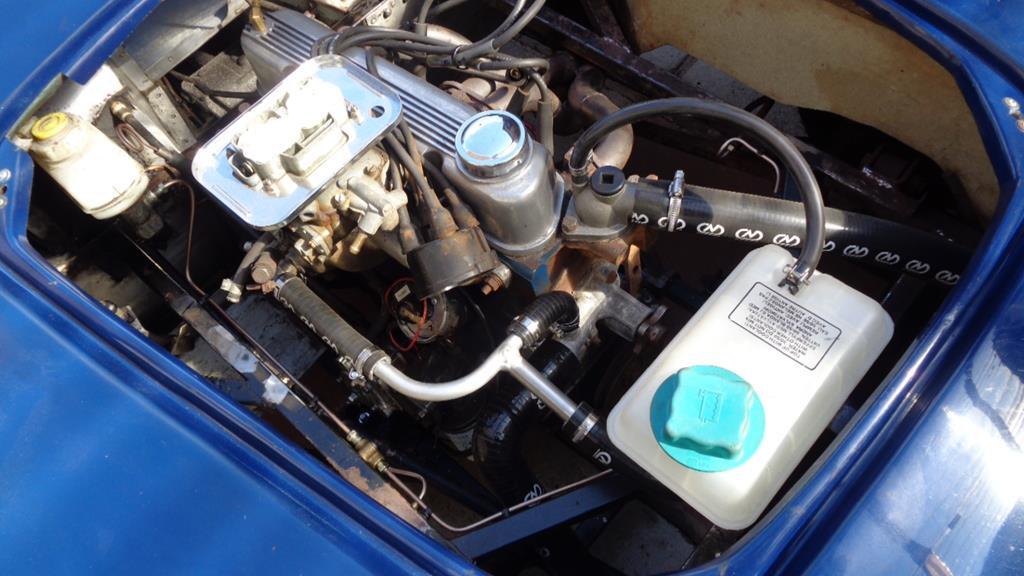 Yep - Doh! - Cut it off to do it again and nearly did it again as well!! - Gave myself a stern talking to and had a fresh brew. Mechanic at work went one better doing front to rear lines on a Range Rover - got right from one end to the other then realised he'd left the front union about 18" along the pipe from the rear union. It's now gaffer taped in place as when you turned it used to shoot from one side of the car to the other and tap on the chassis lol. |
| |
|
|
Darkspeed
Club Retro Rides Member
Posts: 4,668
Club RR Member Number: 39
|
|
|
|
After work this evening with the Sun away from the car and the temp dropping I made myself a brew stuck on a pair of gloves and grabbed the ceramic saw blade - saw slurp - saw slurp - saw slurp.... and the arch and the tea were finished about the same time so after that success I crossed that job of the list and treated myself to a fresh brew. 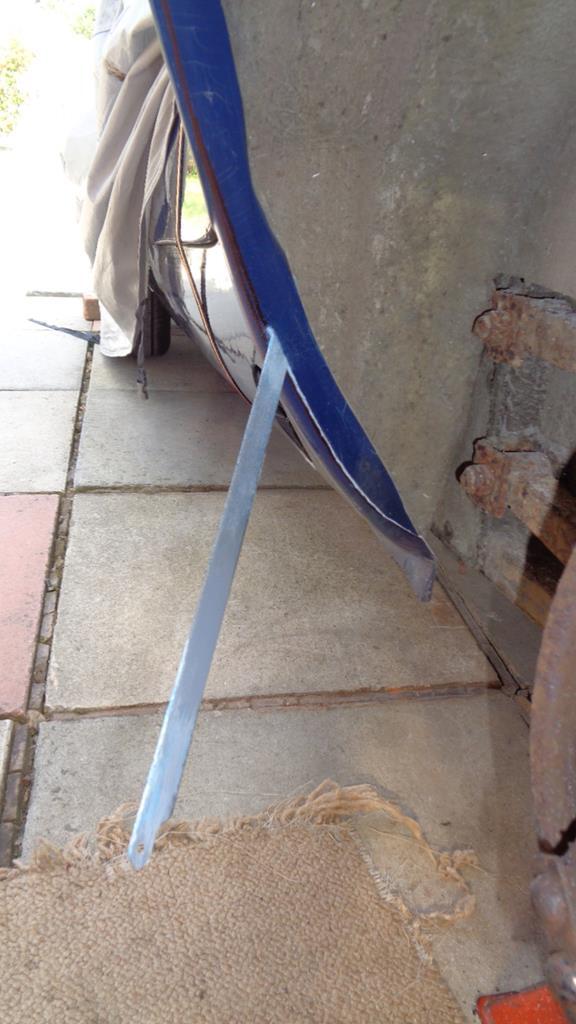 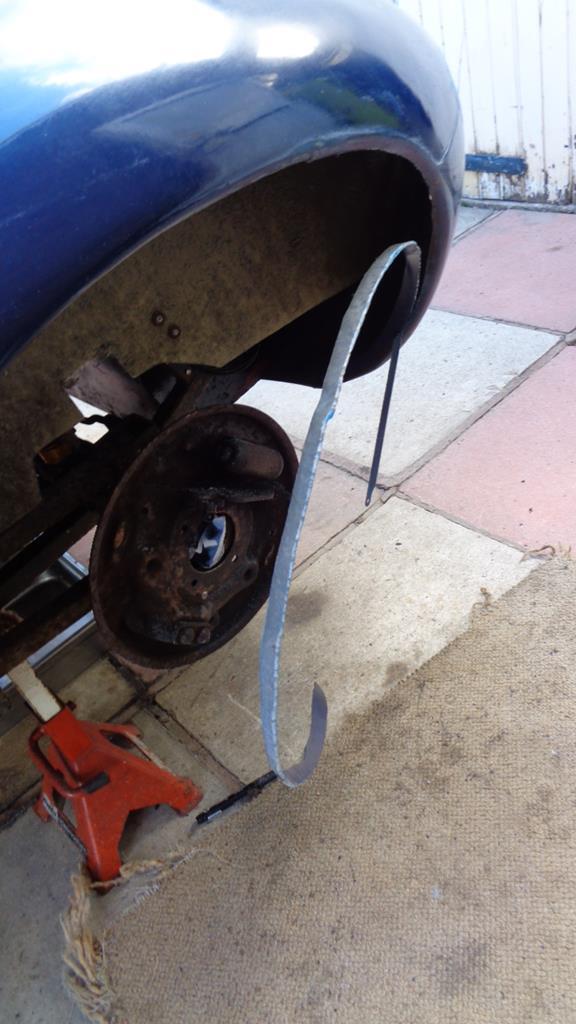 Placed an order for some Lucas switches and a few other odds and ends. |
| |
|
|
|
|
|
|
|
|
Are you going to bond a new lip in, or just smooth it off?
I'm guessing you've cut it away for clearance so probably not a whole lot of room for a lip...
|
| |
|
|
Darkspeed
Club Retro Rides Member
Posts: 4,668
Club RR Member Number: 39
|
|
|
|
Are you going to bond a new lip in, or just smooth it off? I'm guessing you've cut it away for clearance so probably not a whole lot of room for a lip... Towards the bottom of Page 23 - Lip not cut off - reduced to a more typical size. |
| |
|
|
Darkspeed
Club Retro Rides Member
Posts: 4,668
Club RR Member Number: 39
|
|
|
|
There has been ongoing work on the Gem. The diff is in TickEverything torqued up correctly and filled with the right amount of EP90 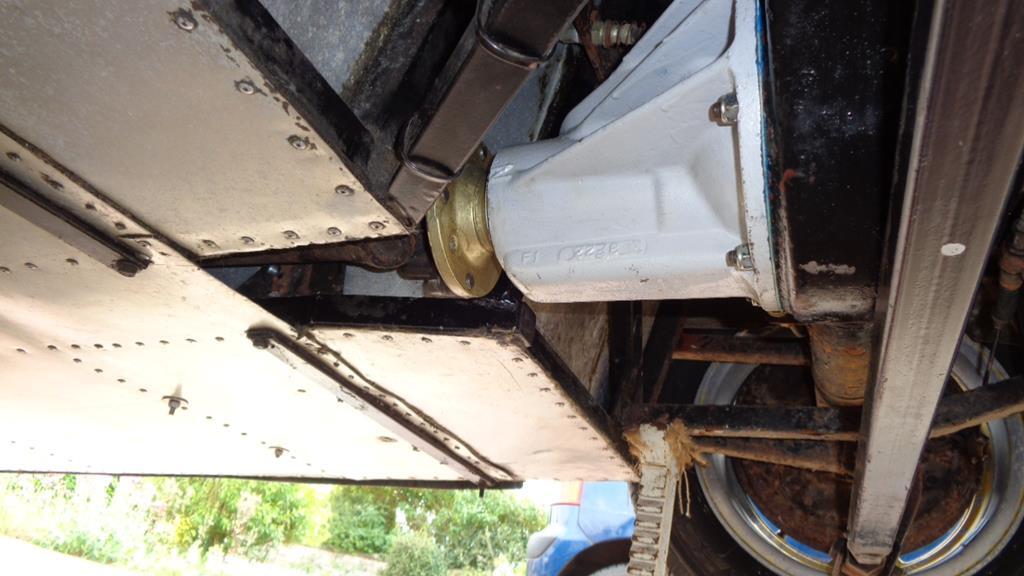 I did not like the long shank longer wheel bolts that I had and finding longer ones that did not have a long shank was proving rather tiresome I did what I probably should have done in the first place and ground down the spigot on the axle so that it cleared the step in the wheels. Not sure if this is a feature of the large brake axles but the spigots on the shafts of this axle seemed much deeper than on other Ford axles I have had. 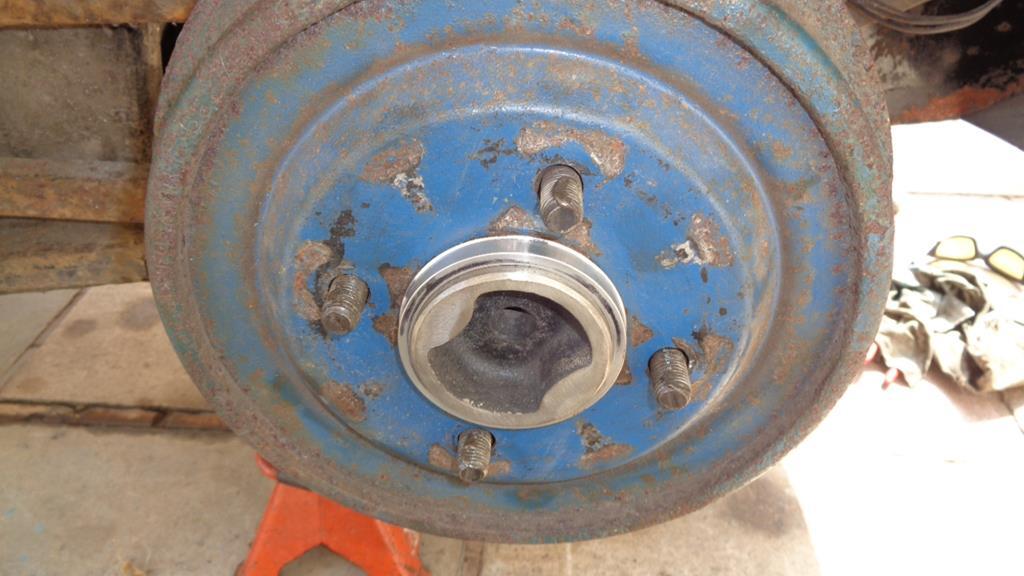 Spigot rings on but no spacers - plenty of clearance and 5mm more thread on the bolts 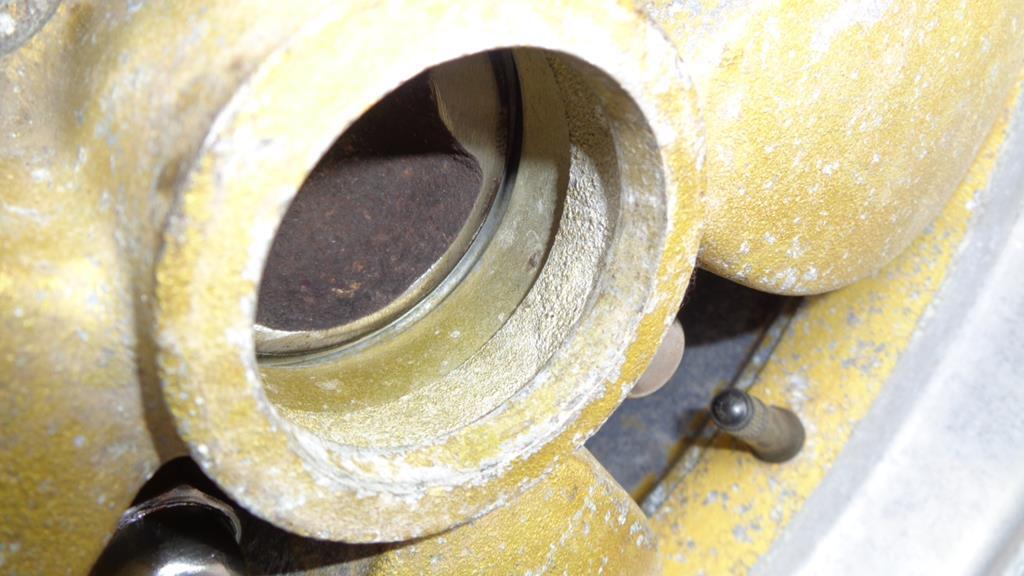 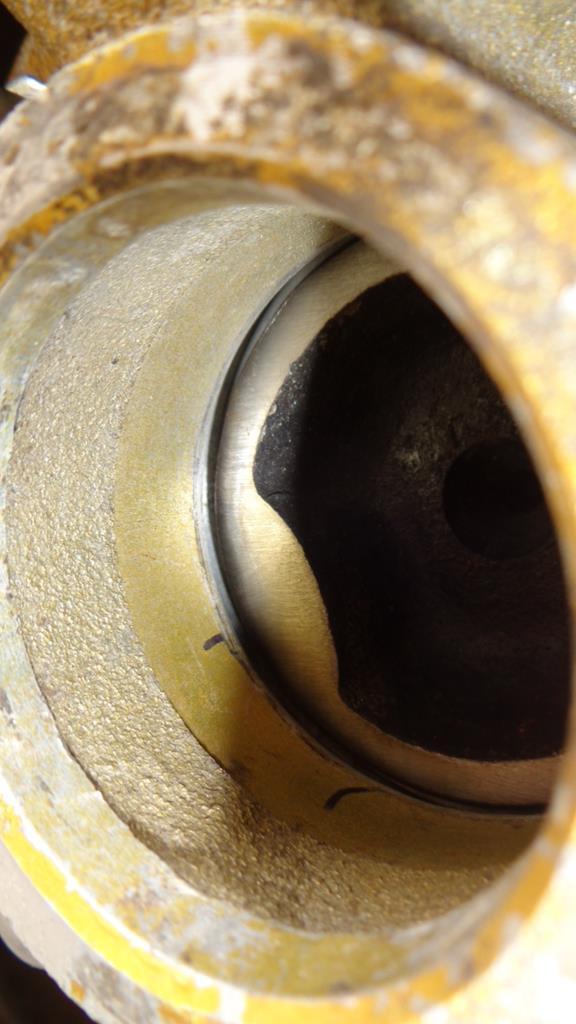 Also gives me back 5mm of clearance on the arches - loads of room now Small axle spigot - Lighter No spacers - Lighter Trimmed arches - Lighter Whilst in the boot with the axles works I took a bit of time to give it a clean up - Mid way through 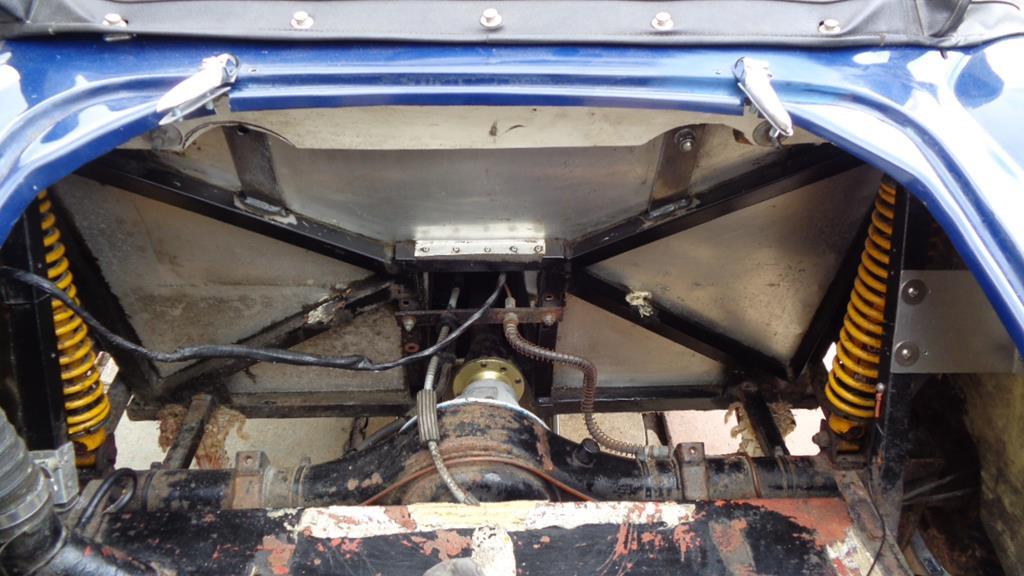 Dirt removed - Lighter Bits from the list T/Stat new gasket fitted and torqued down TickRocker cover bolts have arrived as has gasket - just want to check the valve clearances before I bolt it all down. Need to sort out the exhaust next which will probably mean going on the rob from the Red Gem for the time being and the wiring which I have still not started. Not much I know but I spent s bit of time organising a better storage solution in the shed and moving stuff around in the garage as well the usual gardening grass cutting chores. Another job on the list is to beef up this mounting bracket - Since doing the O/S it has highlighted what a poor attempt at a bracket the N/S has fitted. 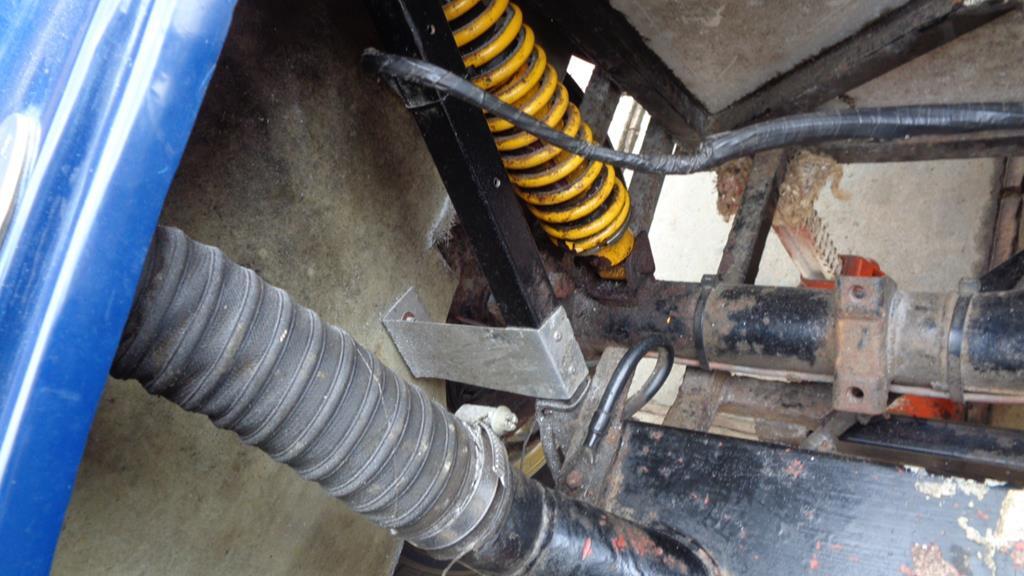 |
| |
|
|
|
|
|
|
|
|
i'm the type of guy that always remembers to put the nut over the pipe before flaring....
...and then find its backwards.
|
| |
|
|
|
|
Darkspeed
Club Retro Rides Member
Posts: 4,668
Club RR Member Number: 39
|
|
|
|
i'm the type of guy that always remembers to put the nut over the pipe before flaring.... ...and then find its backwards. Not sure I have ever done that one before  As my head was in the boot anyway I figured I would sort out the wiring as I did not like the way it was installed. When I stripped the mix of loom tape and electrical insulating tape back I found the cable looped back on itself to make it shorter and sections at the end repaired with black tape where those blue splice boxes had been used and chopped through the insulation of every cable. Took a while but it's now all in vinyl sleeving and I have two spare cables wrapped up and coiled for future use as I may well install an electric fuel pump in the future. Scraped off more sealant and dirt - Measured up for the new support bracket - noted more holes that will need to be welded up and a load more flaked powercoat that will need to be sorted. Once I have that welded up and painted I can fit the cable supports. List is a fair bit shorter now but still a way to go as the re-wiring is going to take some time. |
| |
|
|
Darkspeed
Club Retro Rides Member
Posts: 4,668
Club RR Member Number: 39
|
|
Jun 16, 2020 23:05:13 GMT
|
In between Thunder storms and water cascading into the garage I have managed to start the job of replacement bracket for the offside. Still need to drill the chassis fit rivnuts etc. etc. 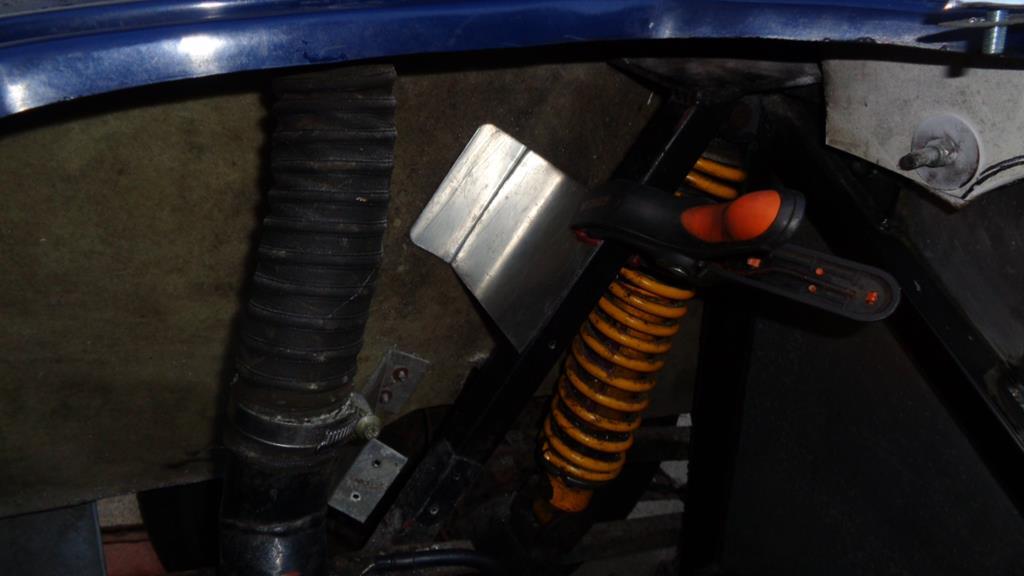 And a shiny stainless steel silencer arrived to replace the existing. Just needs the outlet connection modifying - tail pipe may need to be a separate item due to the body exit depends on what I decide to do re cutting the sill open to expose the silencer. 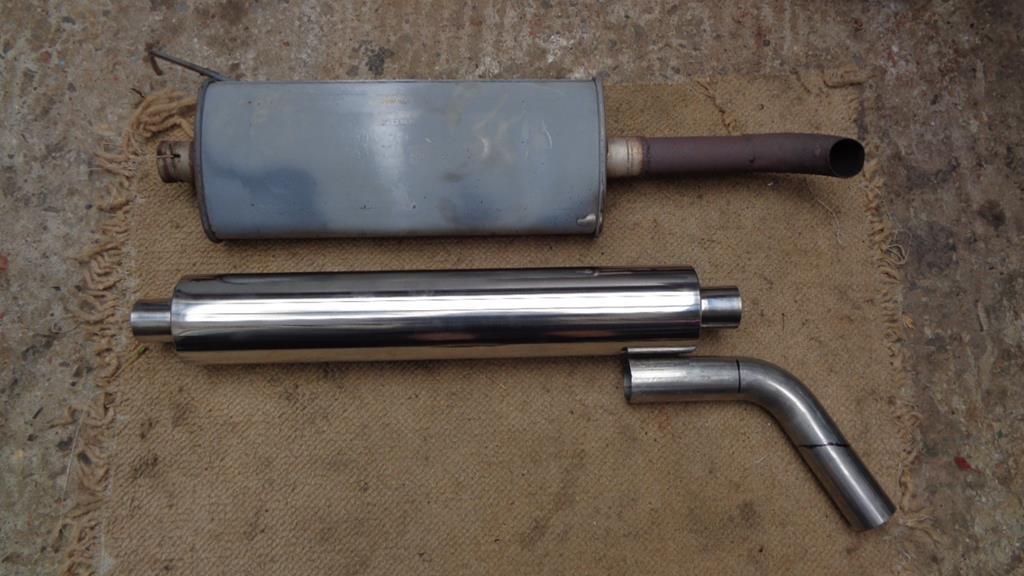 Amazing how many of these things never get built - A chassis kit has just turned up on ebay that is a good year or so older than this one. The mystery of the extended spigot hubs on the axle half shafts was answered whilst browsing around the net looking at Ford stuff - The RS axles had those for alloys. Stock non RS types just for steel wheels have a shallow spigot. Well, that's one theory and we all know how 100% accurate the web is..... |
| |
Last Edit: Jun 16, 2020 23:16:11 GMT by Darkspeed
|
|
Darkspeed
Club Retro Rides Member
Posts: 4,668
Club RR Member Number: 39
|
|
Jun 20, 2020 22:23:18 GMT
|
Right then, we are going to have a bit of a flash back to the start of this thread to the first Gemini that I purchased that made it through to page 4 before getting sidelined - Good old "Bomber" And that is where we will start - The name came about whilst on the drive back from collecting the car with me and captain Itchy killing time shooting the breeze, and Itchy finding an Aero stamp on an envelope in the paperwork that came with the car. 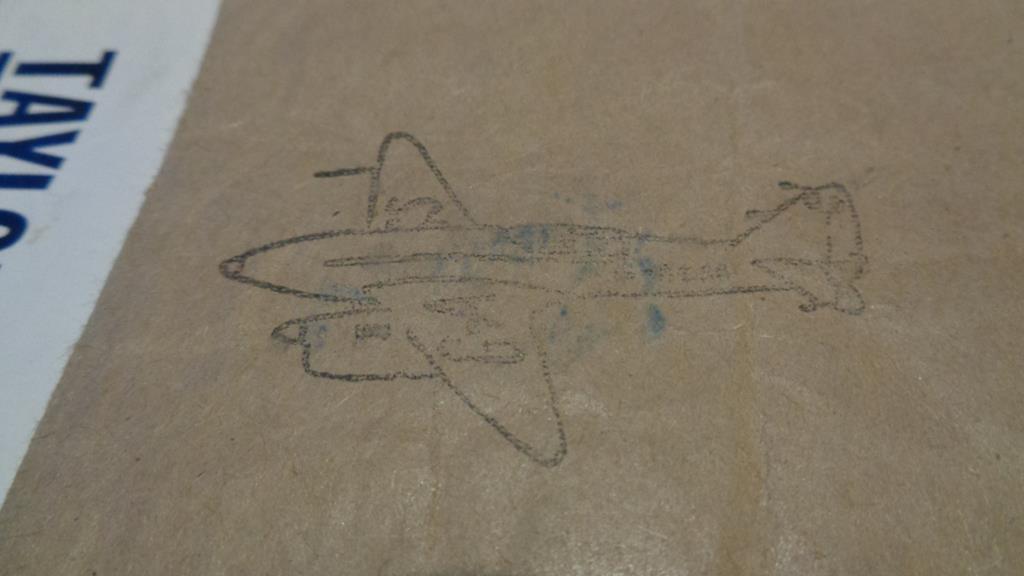 Later sleuthing identified the plane as a De Havilland DH88 Comet - not a Bomber at all but the name stuck. 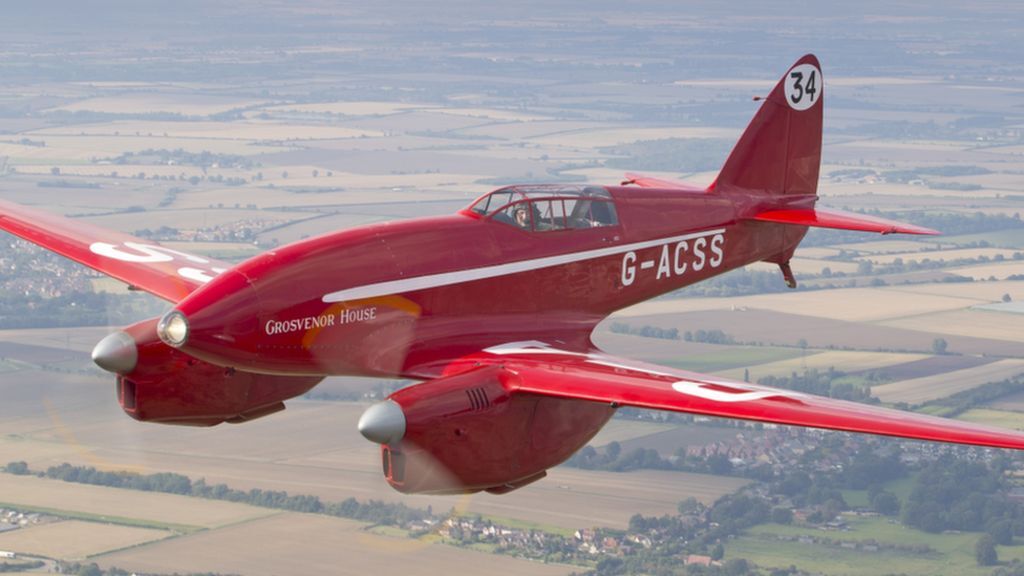 Too many projects and poor old Bomber has not progressed past having most of the "ugly" ripped out of it almost to the point of blank canvas.   And welding in a new dash tube was about as far as we got. 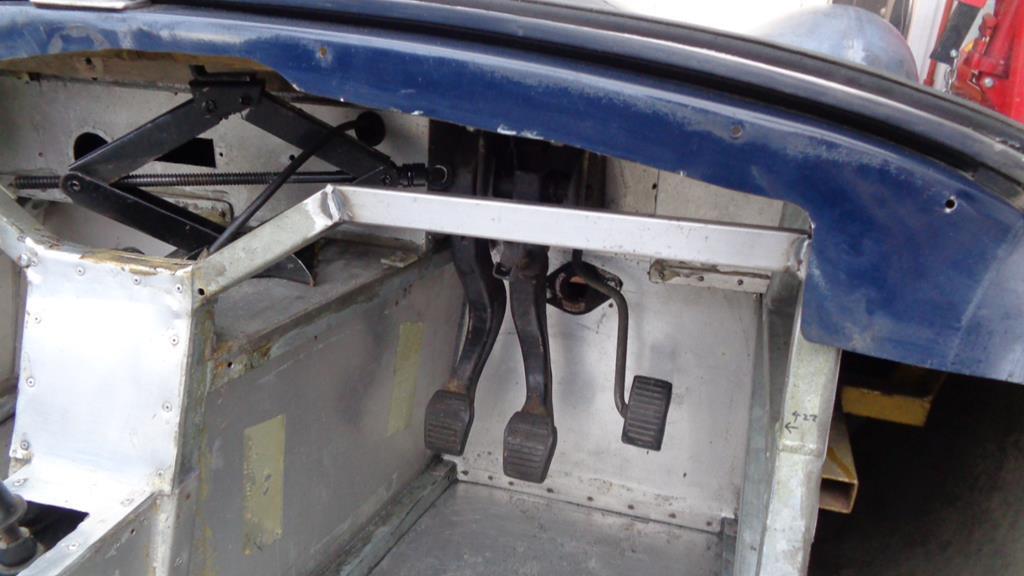 As its a Galvanised chassis with a plastic body and alloy panels - even with being left outside with just a cover thrown over it - It looks the same with no deterioration apart from being a bit dirtier. Why are we digging this up you may well be asking...... I have been thinking for a while about what I am going to do with old Bomber and the Red Gemini and it just so happened that I was contacted about some advice on kit cars, and subsequently an interest was expressed in the Gemini. Whilst the enquirer was not looking for a project, more looking more for a cheap enough road going car to have a bit of fun in the summer with, the price mentioned was enough to garner some serious interest. So there we go, there is an interest in the car and as I have said to the interested party, no problem at all if after a bit of thought it's decided that its not actually what is being looked for, as it has started me on the road that I really should have been on anyway. The two Gem projects really need to be moved on now so I can concentrate on the other projects. Getting the fleet down to the four cars would be good. So the task now is to get the car as a running roller - I feel another list coming on. 1. Steering - Finish that off in making the column mounts as I have with Gem 2 2. Fit a new O-Ring in the oil pump - I robbed the one out of "Bomber" when I was diagnosing an oil pump leak on Gem 2 - bought 3 new rings and not sure if I fitted one back in... 3. Get the engine running and give it a health check. 4. Make sure the brakes are all functional. 5. Run it up and down the road Get all the odds and ends together and say - "There you go - what do you think?" Wire it - fit the dash - bolt this that and the other in - Give it a good service and stuff it in for an MOT. It cannot fail on rust or any structural issues - it cannot fail on emissions (visible smoke only and even then it has to be a fair bit) or not having mirrors or fogs or reversing or hazards. It comes with new headlamps and bowls - and - well err. that's about it really. There will be a selection of old clocks to drop into a dash that will need to be sorted - the seat belts that were in Gem 2 will go in it as the belts that came with it are - very odd - indeed. Biggest expenses - Battery = 895 Ride on lawn mower battery - eBay £35 - Tyres - Toyo CF2 185/60/13 - Demon Tweeks - £150 - Elbow grease in getting the body to look reasonable - I was going to simply key it and paint it Dark Brunswick Green (will have to check what it says on the tin!) with minimal prep right over all the gel cracks and faults to retain the weathered aged look but really that's all personal - Like wise I was going for the flap down doors. You could just polish the heck out of the existing gel and paint the bonnet to suit or Satin black - its a replacement bonnet and a different shade of blue. Re-Cap on the mechanicals from page 1 **It's a bog basic Escort Mk2 711M6015AA 1300HC engine with factory fresh stump pulling output of 57BHP - However this firebrand has the additional feature of being fitted with a carb and manifold from a MK1 Mexico - so the notes say - and believe this to be correct. ** 550Kg means 100BHP/ton at the curb. Doing some work on Gem 2 in the morning and after that - Steering on Bomber. |
| |
Last Edit: Jun 21, 2020 9:05:28 GMT by Darkspeed
|
|
Darkspeed
Club Retro Rides Member
Posts: 4,668
Club RR Member Number: 39
|
|
Jun 21, 2020 13:07:25 GMT
|
Fathers day lunch break - large mug of tea - I think number 3 - and egg and bacon baguettes. I expect that the pace may well be a bit slower for the rest of the afternoon.. Work on Gem 2 this morning The exhaust 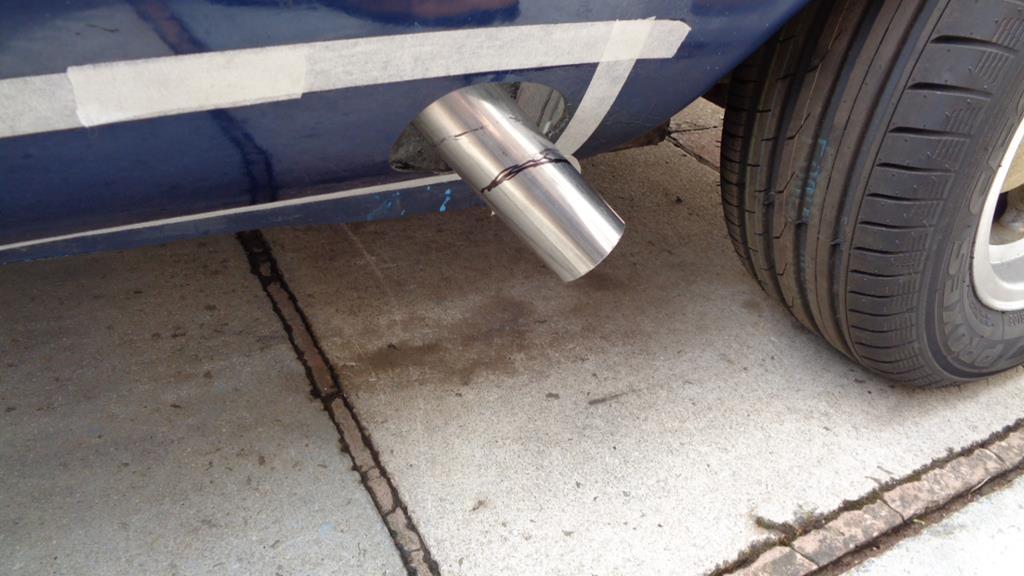 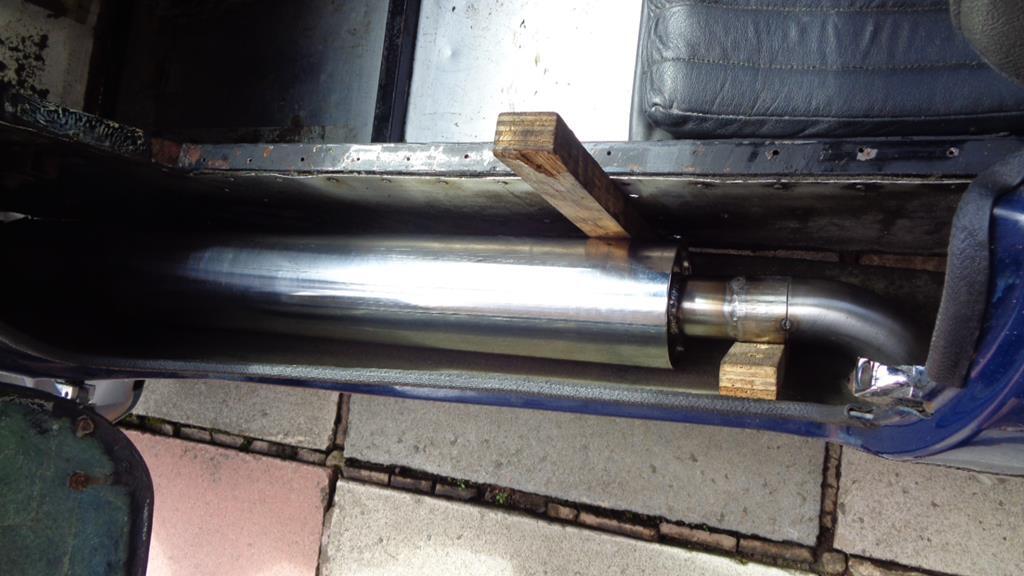 I cocked up the first time round so had to cut it off an extend - Note to self measure twice - then measure again as the joint has moved! Fully welded up and slash cut 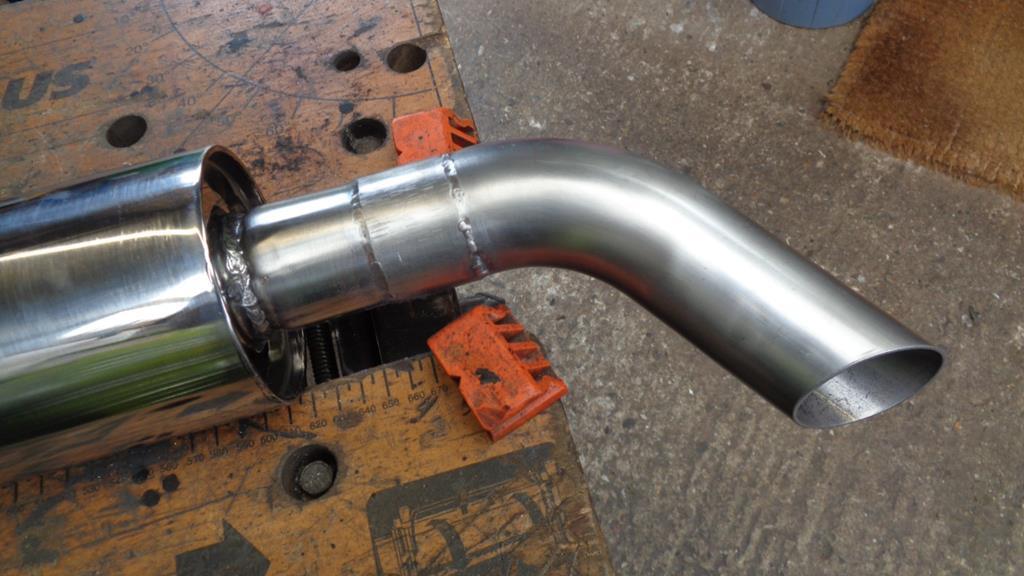 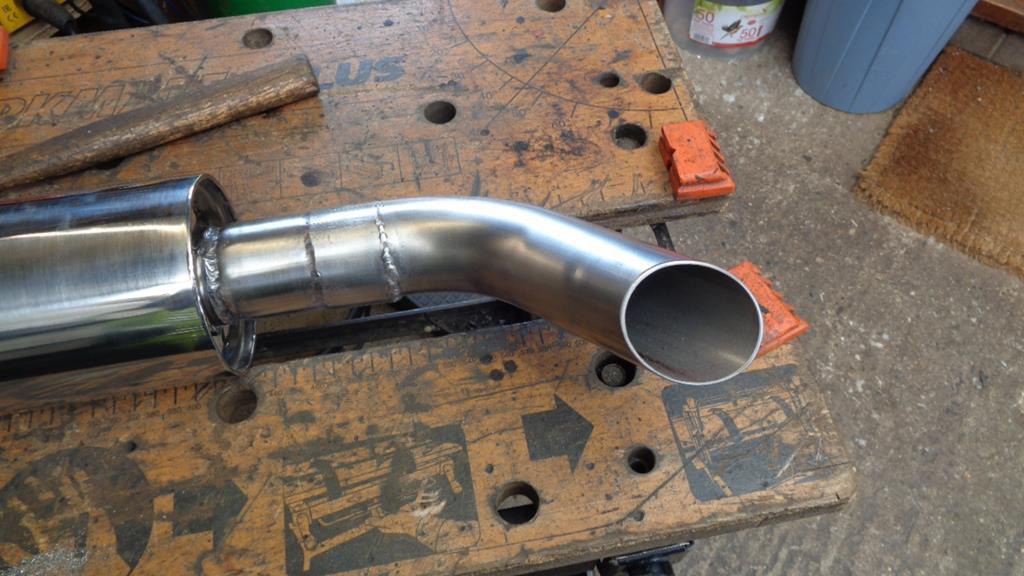 Now fits as I want it to and looks like I want it to as well. 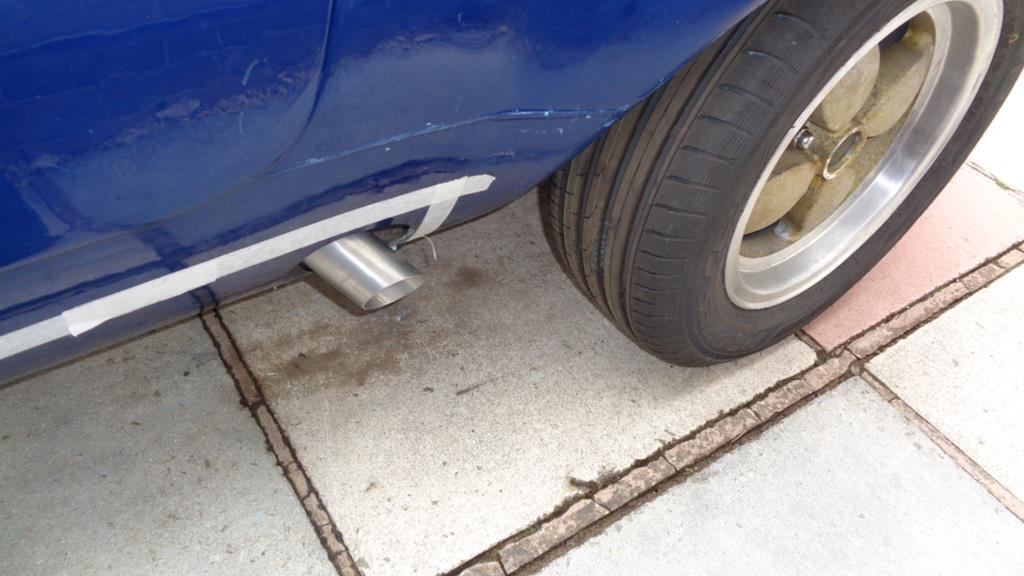 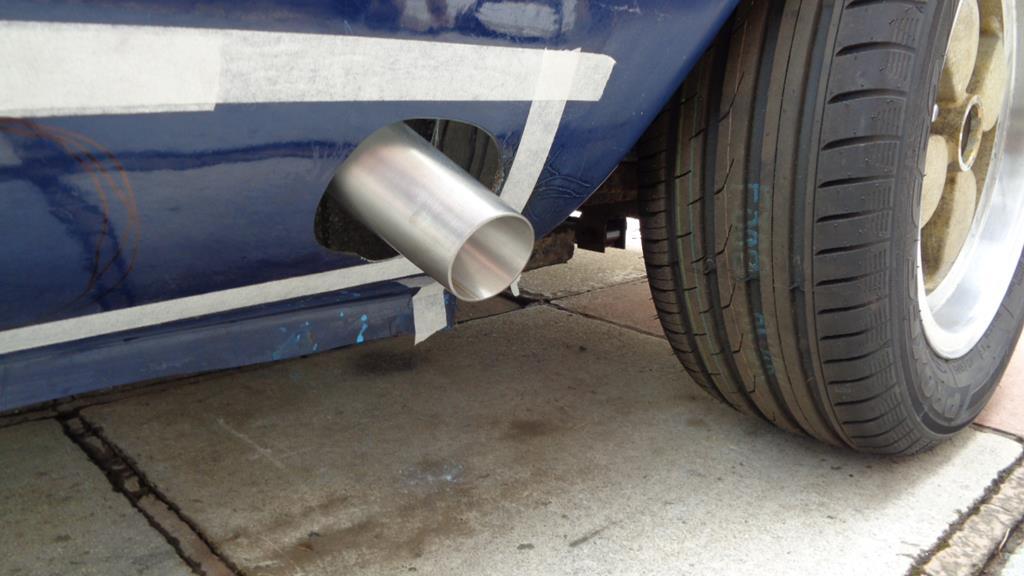 My slash cut tip fetish stems from my ownership of an Alfa 105 Guilia GTV - I just love the way the exhaust exits at an angle through the valance with the valance formed and rolled for the angle and then the tip slash cut.  Just the mount to sort out and what form of venting to use on the sill. Back to it - I want to finish the N/S body support at the rear - snapped up the nice reversible angle drill off eBay to assist me in the confined spaces - will also be invaluable when drilling for the rivets on the new panels. 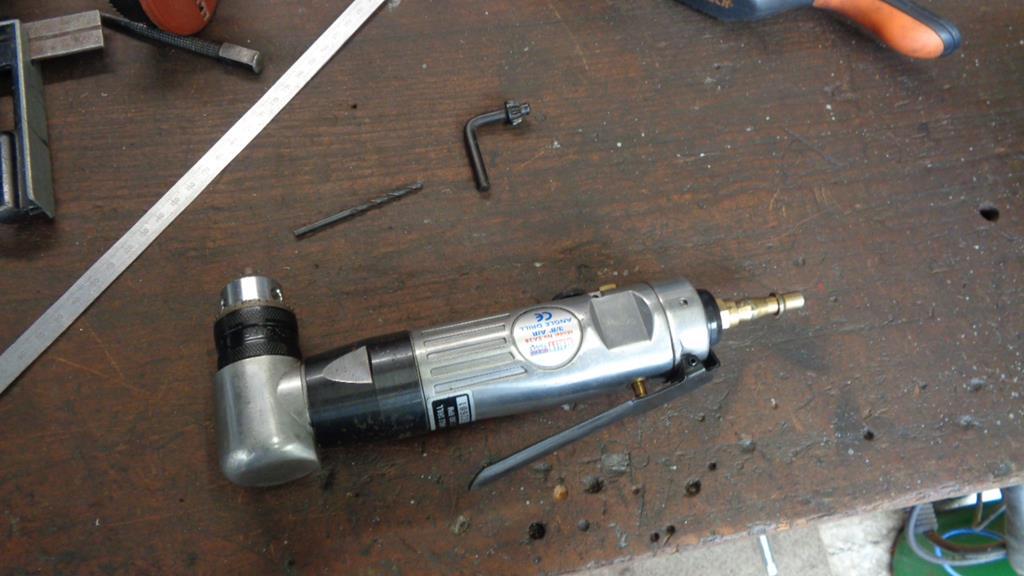 |
| |
|
|
Darkspeed
Club Retro Rides Member
Posts: 4,668
Club RR Member Number: 39
|
|
Jun 21, 2020 20:02:56 GMT
|
Finished the rear body support and added another earth point which completed the works on Gem 2 for the day. 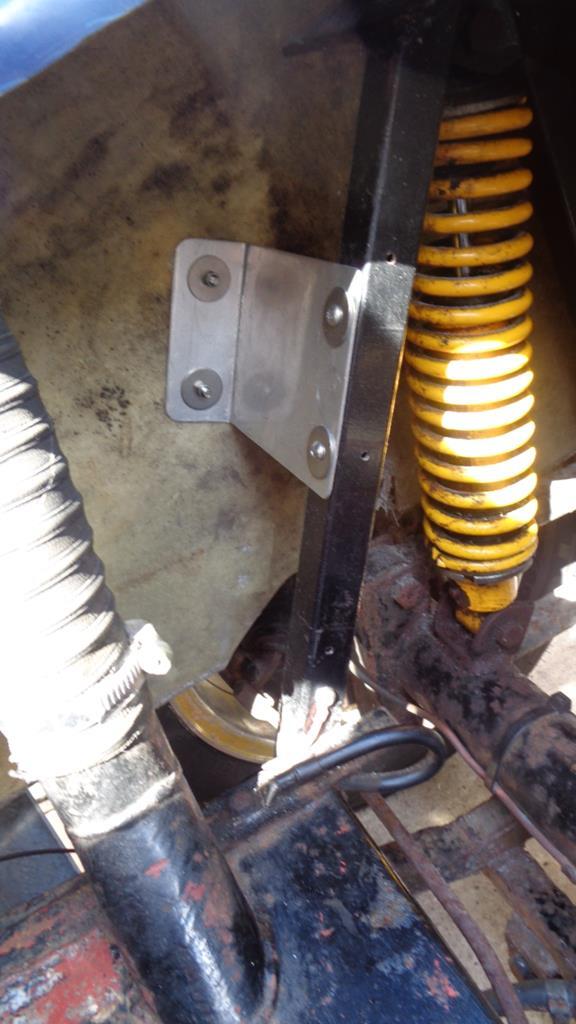 Over to Bomber Oil pump first - yep the bolts only being finger tight gave that one away 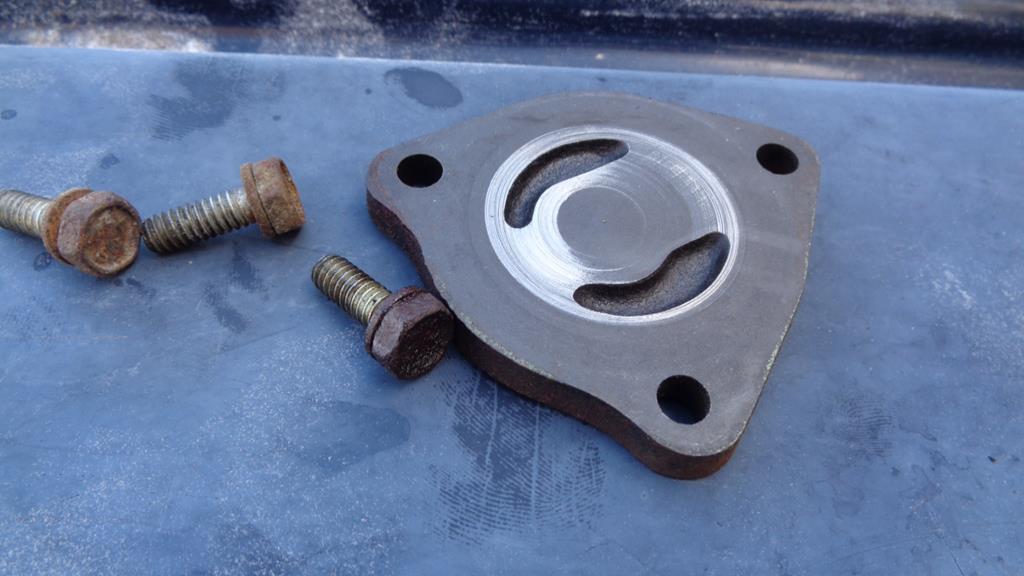 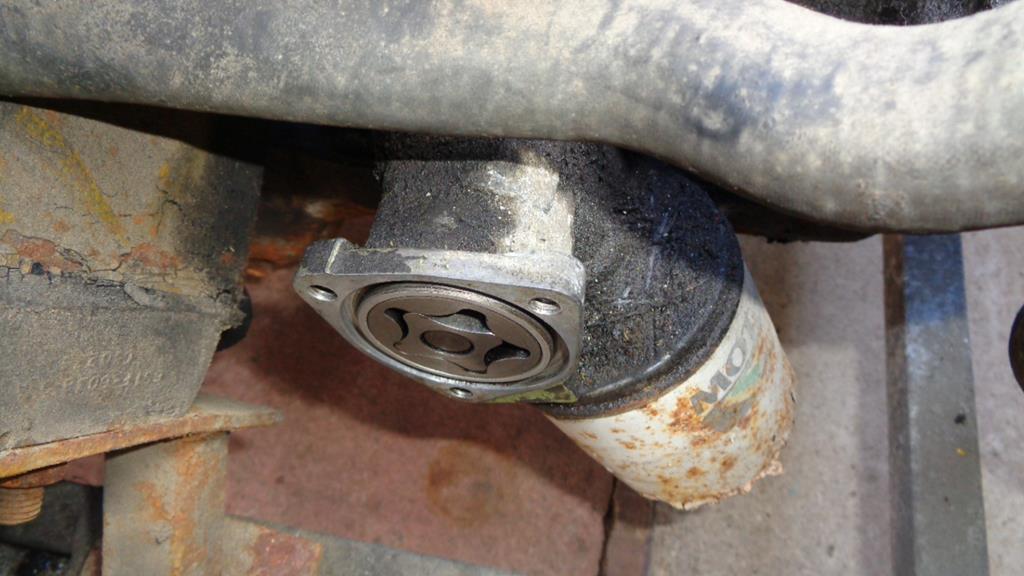 Found the packet of new o-rings 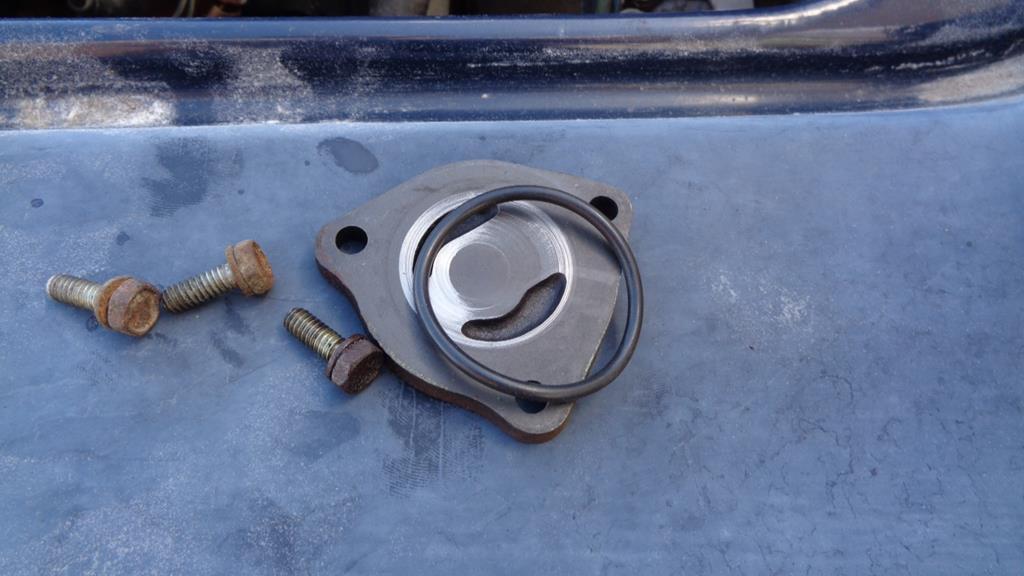 In and done. Dropped a ratchet on the front pulley - free and easy - so no problems there. Brakes - well it rolled over onto the drive nice and easy and when I pressed on the brakes it stopped and then freed off nicely again so they look to be functional. When its running a good run around the block will see if we have all pistons cleaning off a few years of surface on the disks. Steering - Made a support 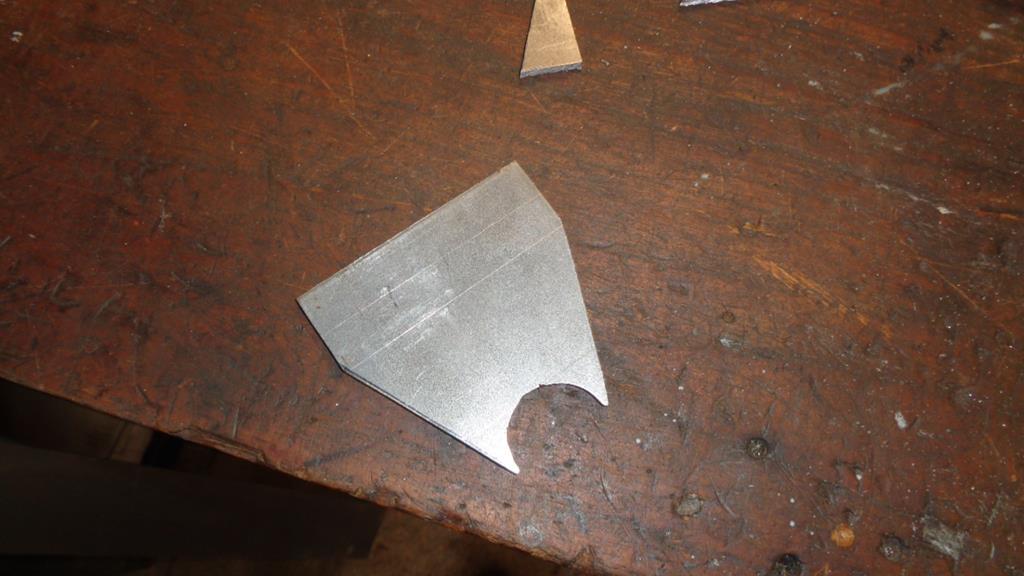 Checking. 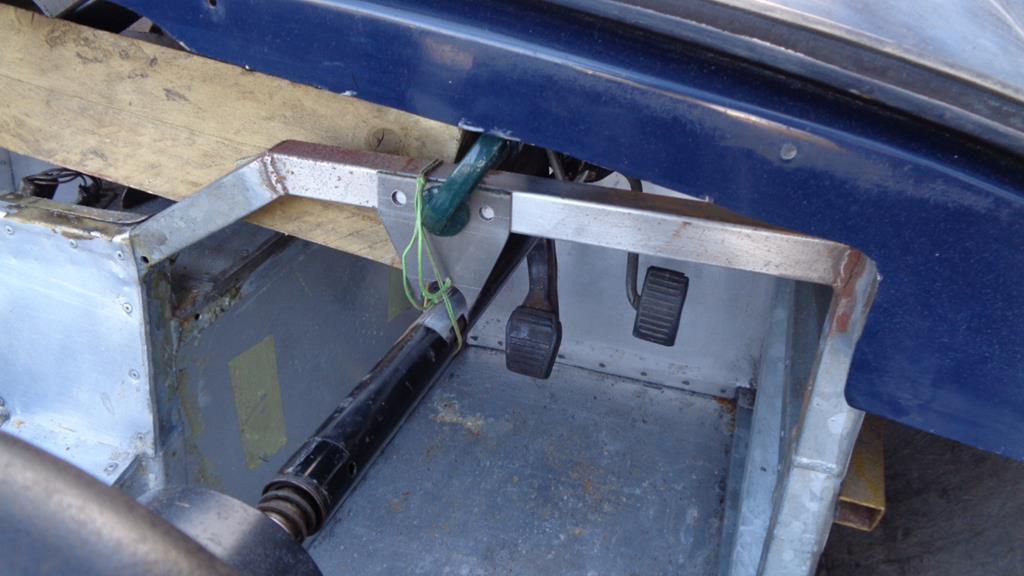 And then I started to remember where I was at with this car ..... But before that have some photo's 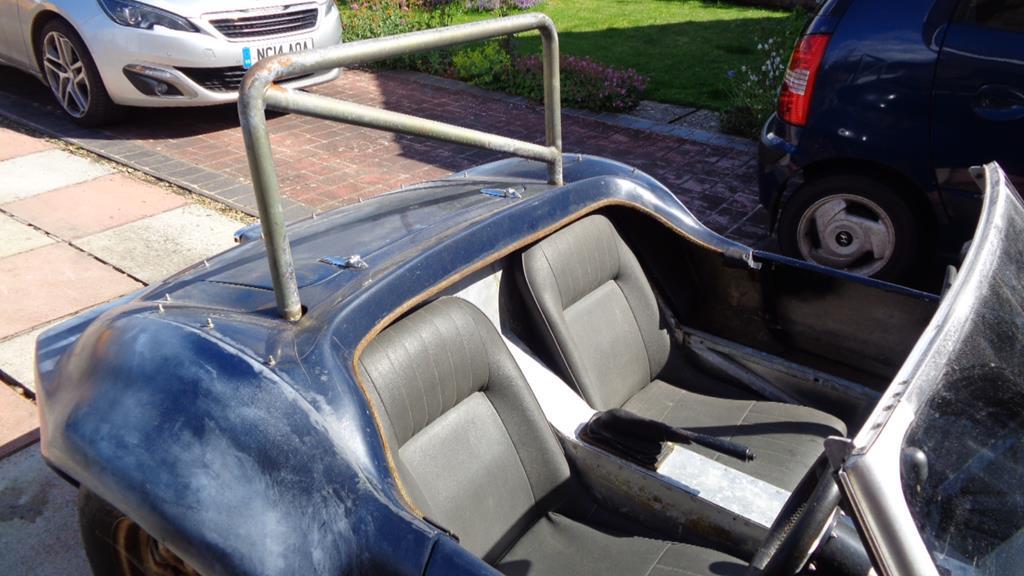 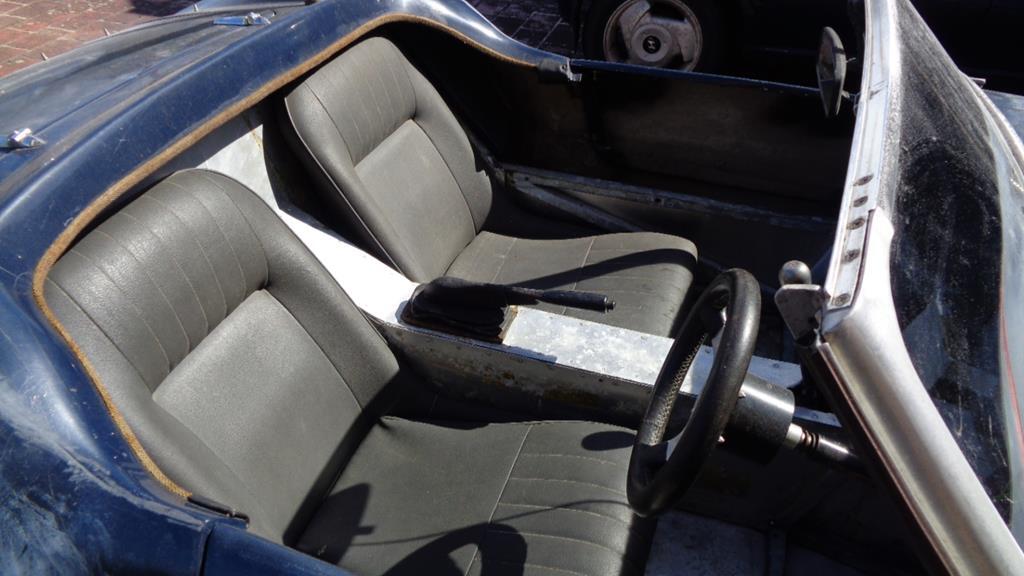     The gel has water marked and faded with the weather - Some 1200 G3 and MER ! - flatters its greatly  |
| |
|
|
Darkspeed
Club Retro Rides Member
Posts: 4,668
Club RR Member Number: 39
|
|
Jun 21, 2020 20:32:42 GMT
|
Ooops - pressed post rather than add pictures A rub over with 1200 paper 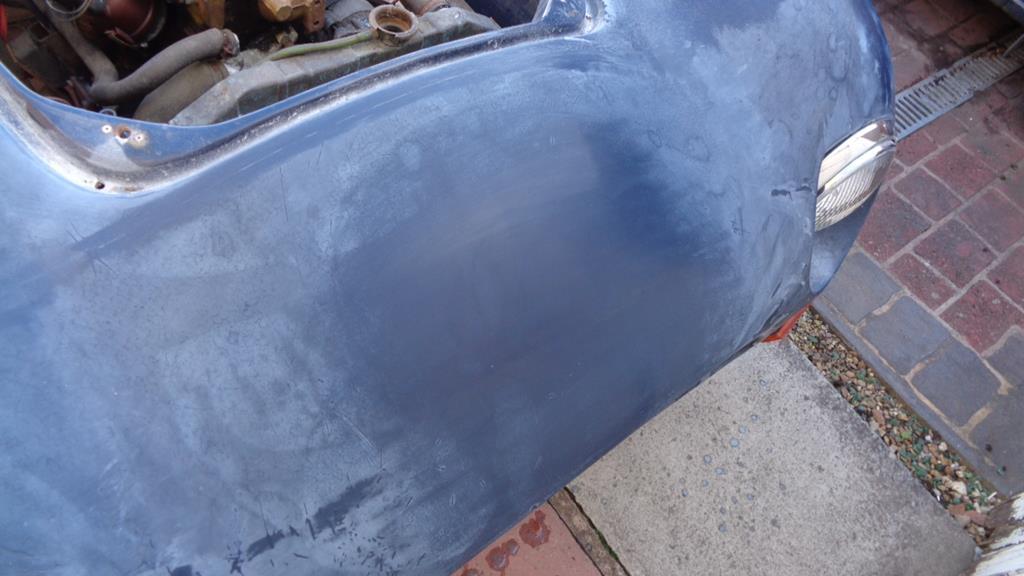 G3 and MER - and as I say - it flatters - but that was no real effort expended on it just to see if it would come back with a lot more work and I think it will. 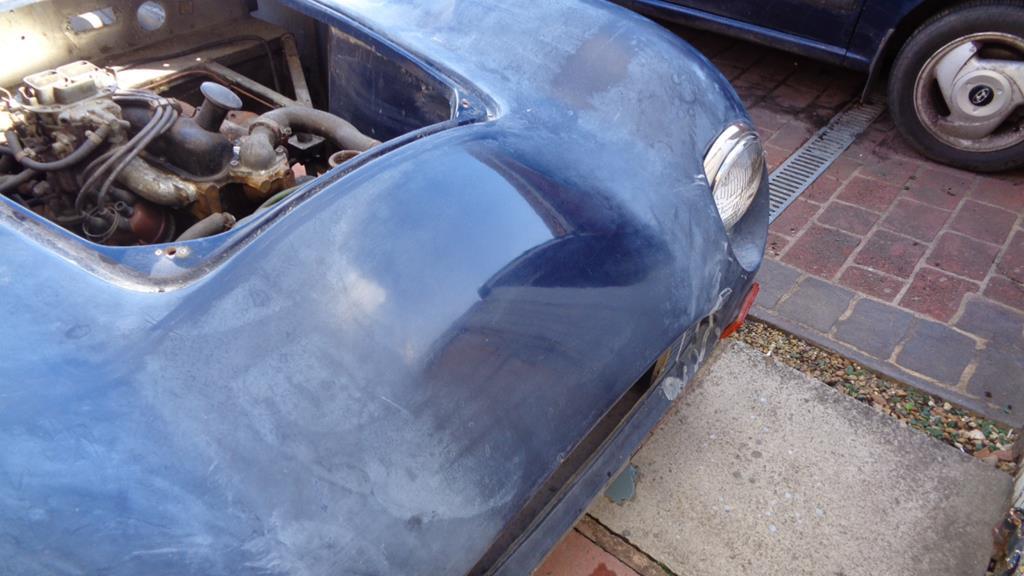 I mentioned above that I started to remember what stage I was at when work stopped and I moved to Gem 2. I was removing the body! All of the body fixing had been removed and I was stalled on the exhaust. The thing that made we wonder what I was up to on the car was wiper mechs being AWOL - Will have to see where I have hidden that. Rattled gunned off the manifold bolts and with a lot of effort and the body way up I got the exhaust out - would have been put in in sections - but no way it was coming out in sections. 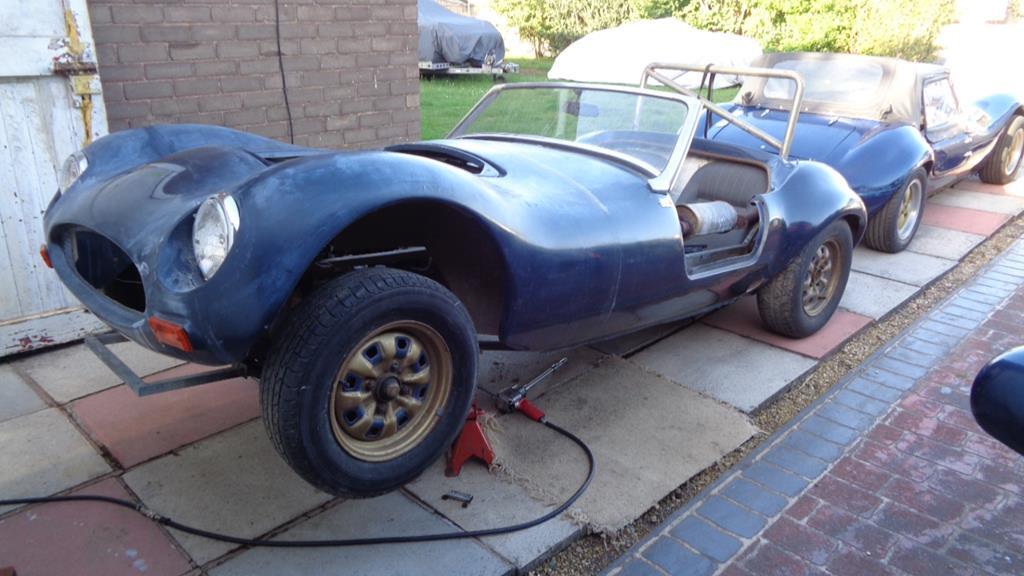 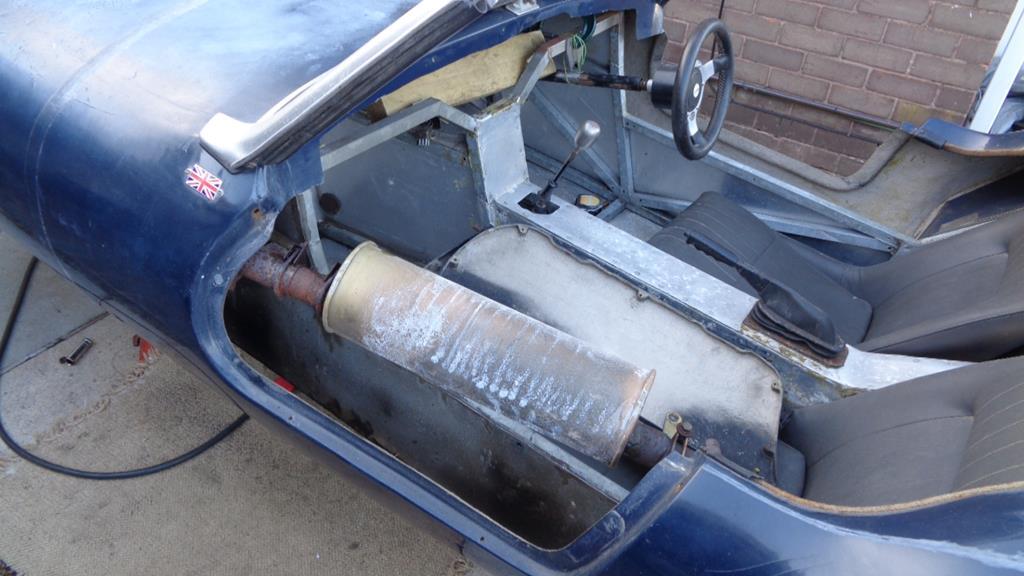 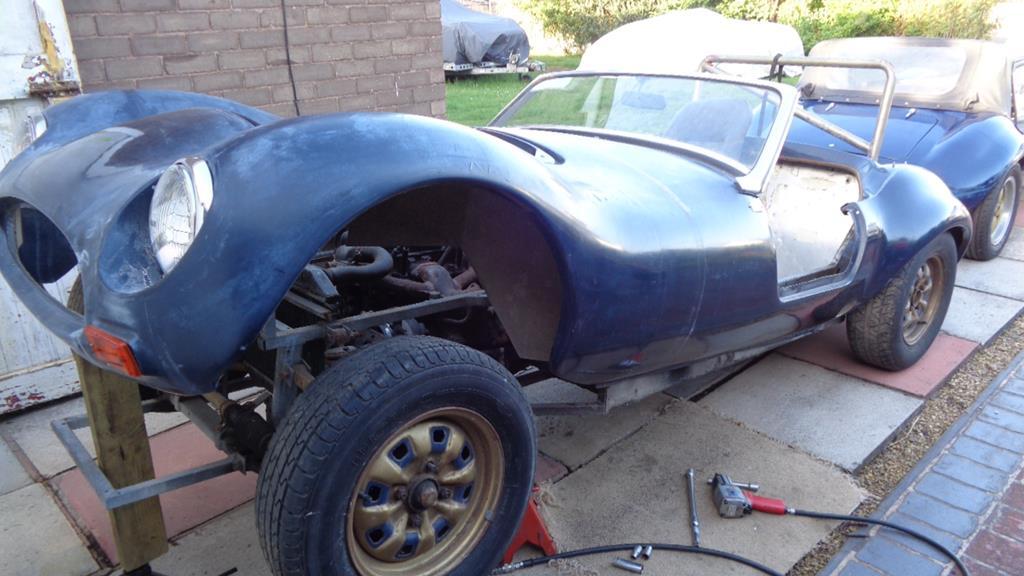 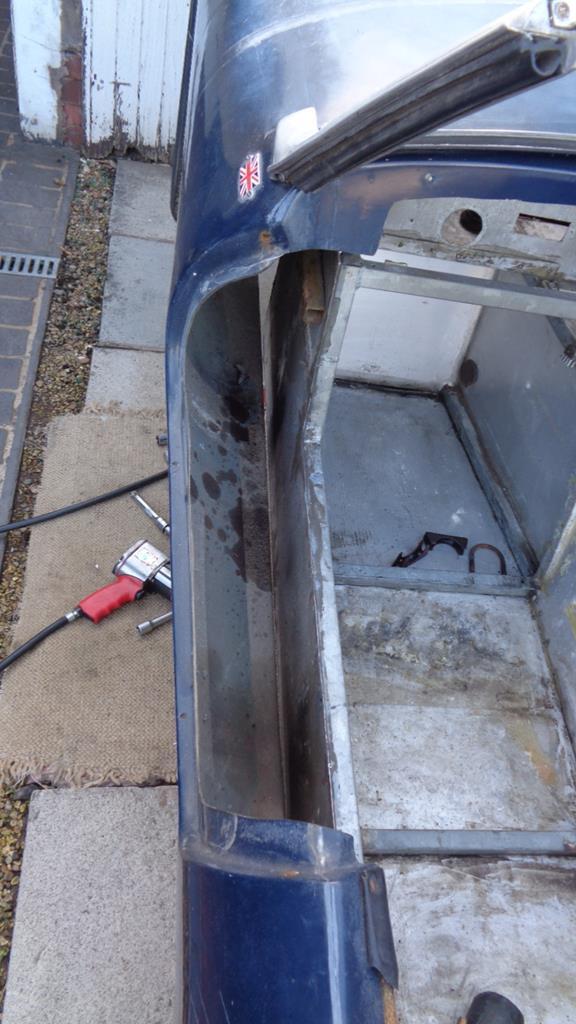 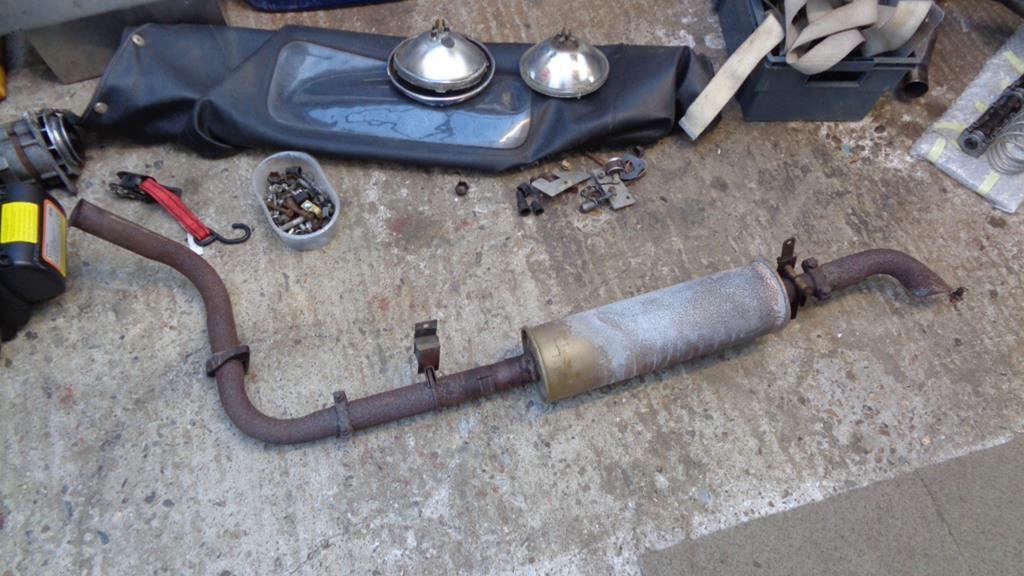 What it needs now is a nice stainless exhaust to replace that old mild steel jobbie  So why was it having a full body off? So I could get to the back side of the welding on that new chassis piece of course ! Re-instated the fuel supply to the carb after losing the Fuelsaver thingummybob doobry - just need to find a king lead to replace the one that I ripped the powerball out of. It is a cool old thing - and there is plenty of scope for dropping it as the shocks are wound up quite a bit. 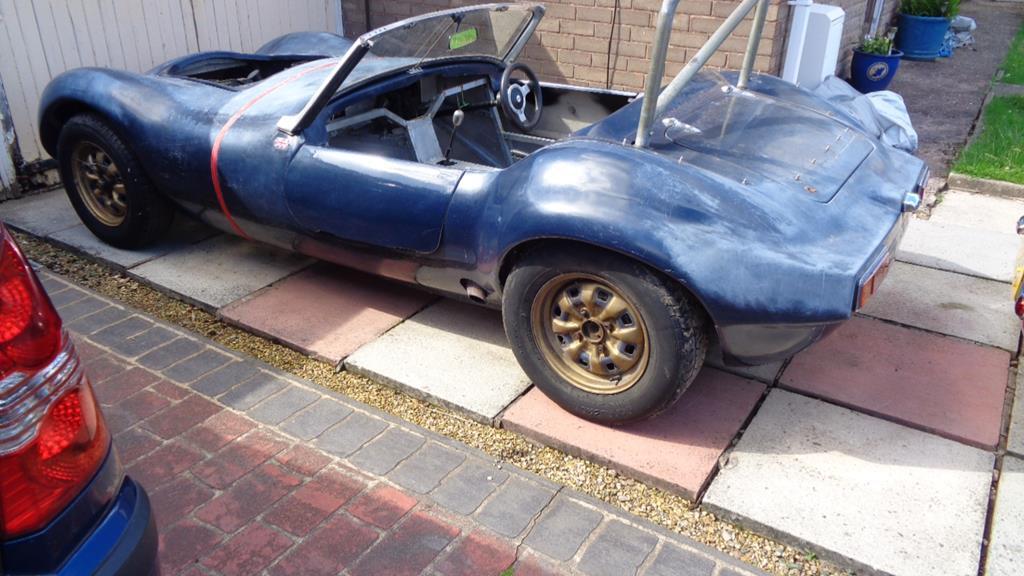 Its a darn sight cleaner in than back than Gem 2!! 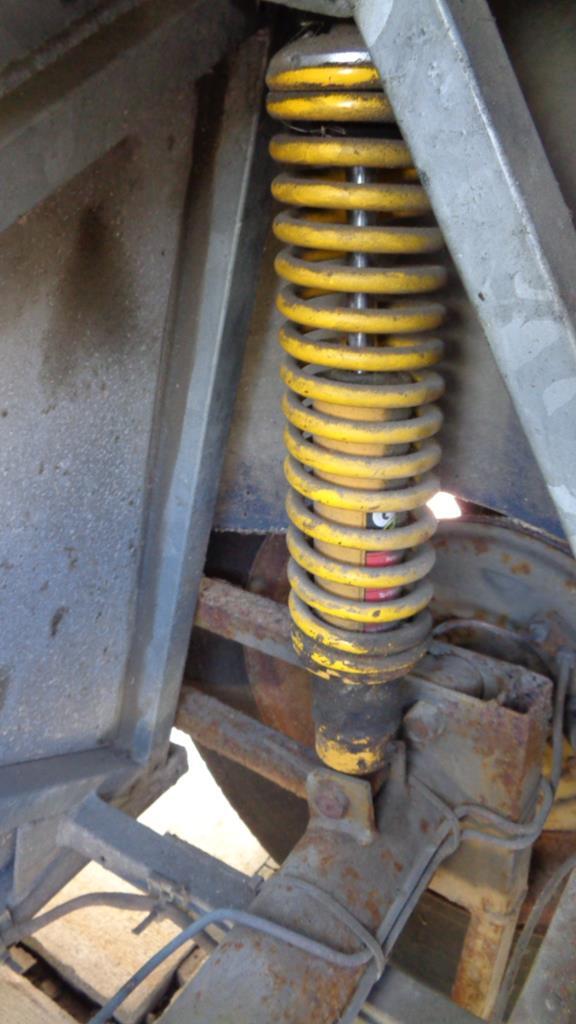 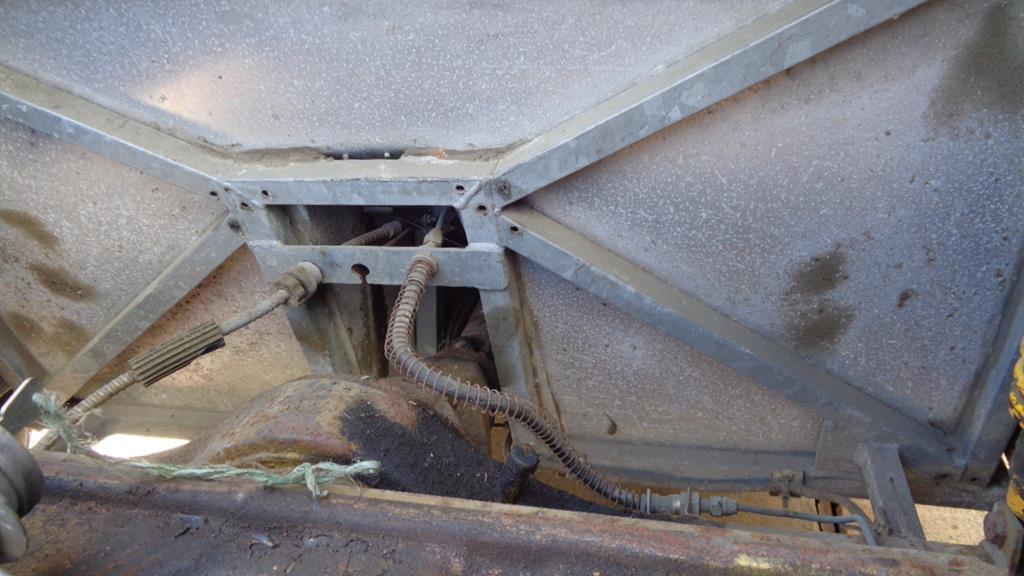 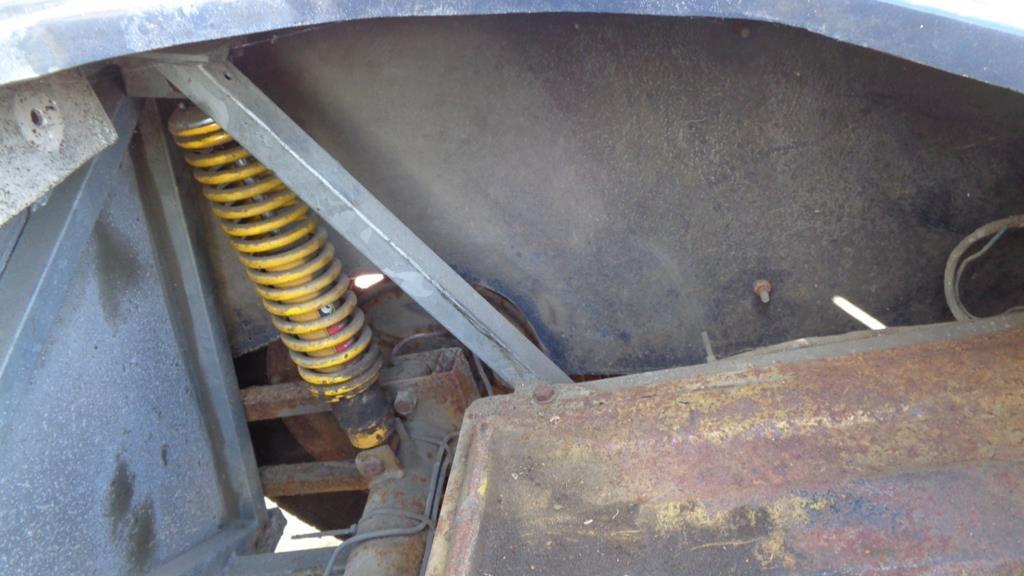 But Gem 2 - Well its looking pretty bloody cool these days  Then again I think its the company it keeps 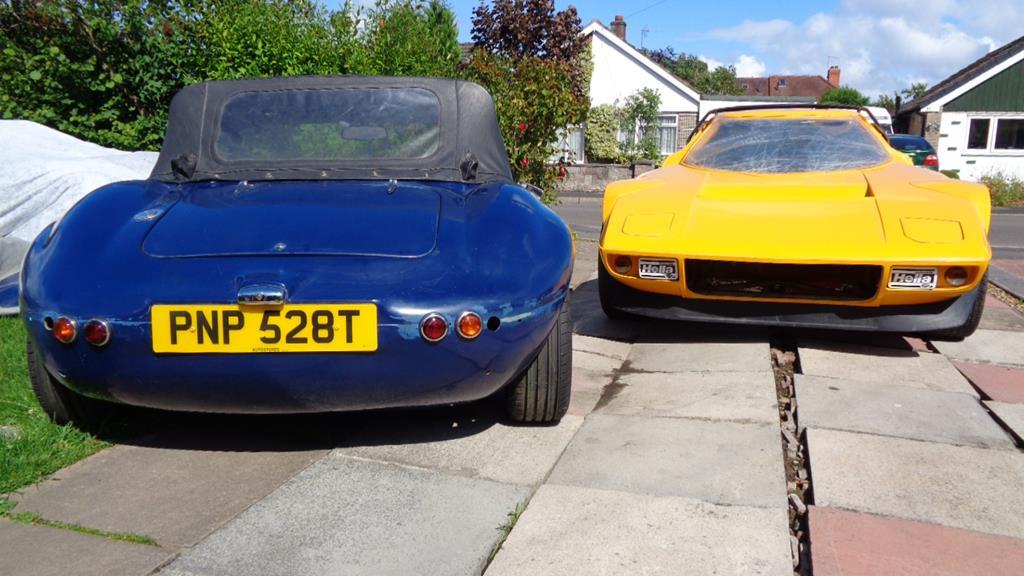 Hopefully the weather holds over the next couple of days so that I can get the dash rail fully welded in and the steering mount done. there was mission creep today. Exhaust hanger for Gem 2 tomorrow. Also had the task of being Barber for my son for the second time - looks like I now have that job until he leaves home! - better get another brew on and drift out to garage to do final tidy up. |
| |
Last Edit: Jun 21, 2020 21:59:43 GMT by Darkspeed
|
|
Darkspeed
Club Retro Rides Member
Posts: 4,668
Club RR Member Number: 39
|
|
Jun 21, 2020 20:57:13 GMT
|
The seat belts that were in Bomber are interesting, originally I thought that they may have been some sort of aircraft belt but turns out they are deffo car belts as I found some reference to them online. They are not for re-use as they are frayed and corroded - The belts that were in Gem 2 will be going with Bomber. 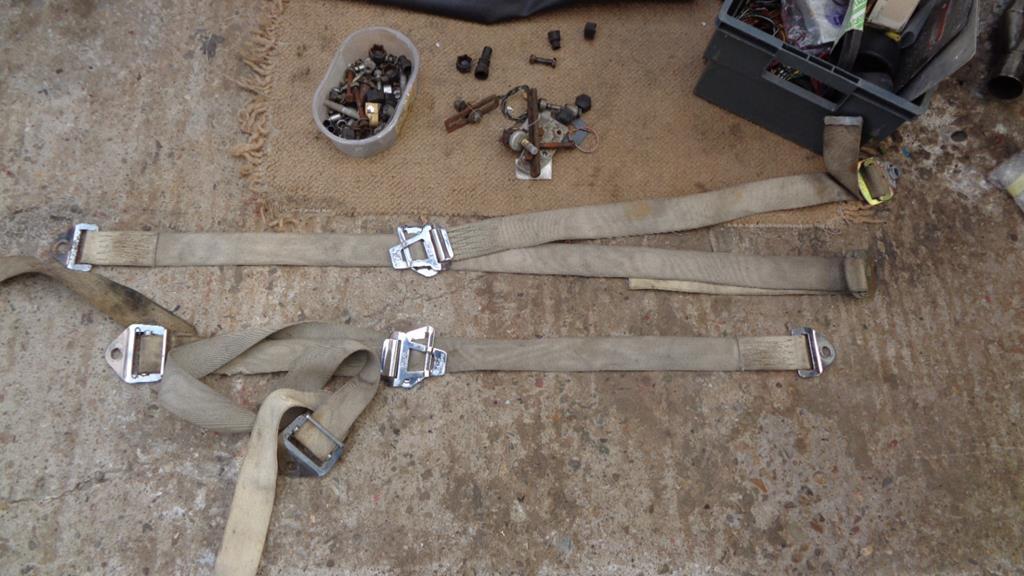 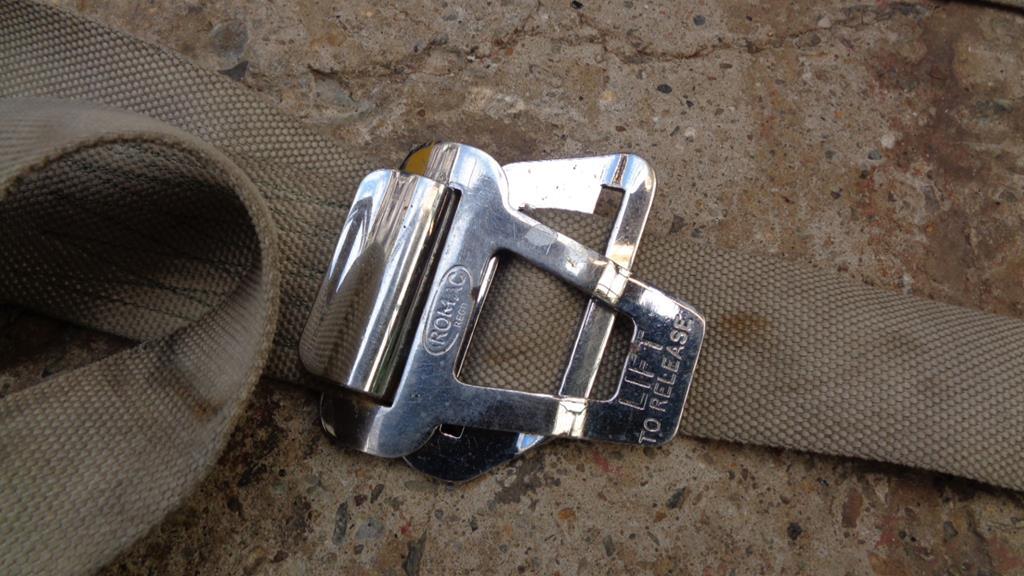 |
| |
|
|
Darkspeed
Club Retro Rides Member
Posts: 4,668
Club RR Member Number: 39
|
|
Jun 22, 2020 12:17:06 GMT
|
Moving Gem 3 - the Red one about today so that I could get a cut on the front lawn and something caught my eye. Bomber 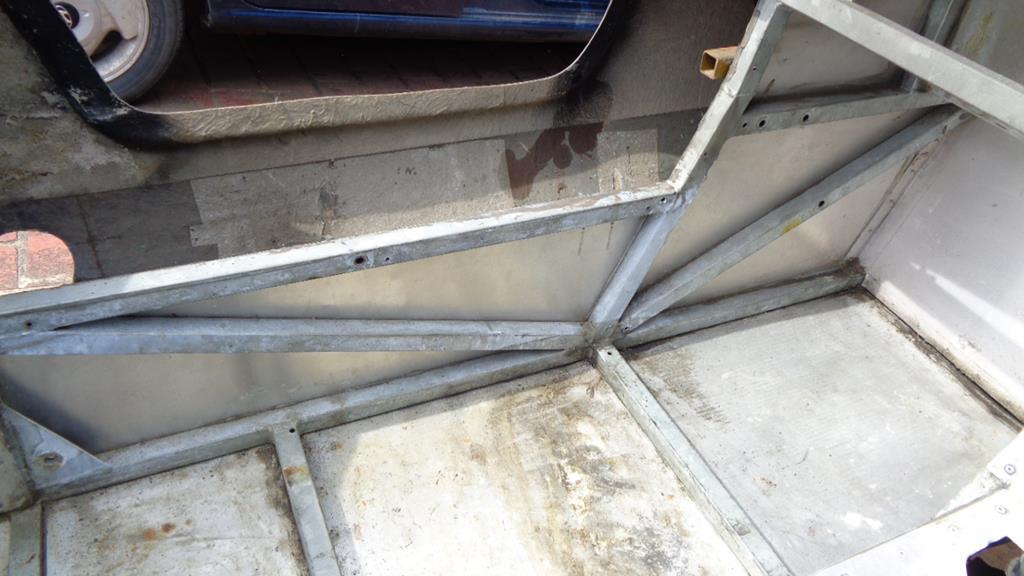 Gem - 2 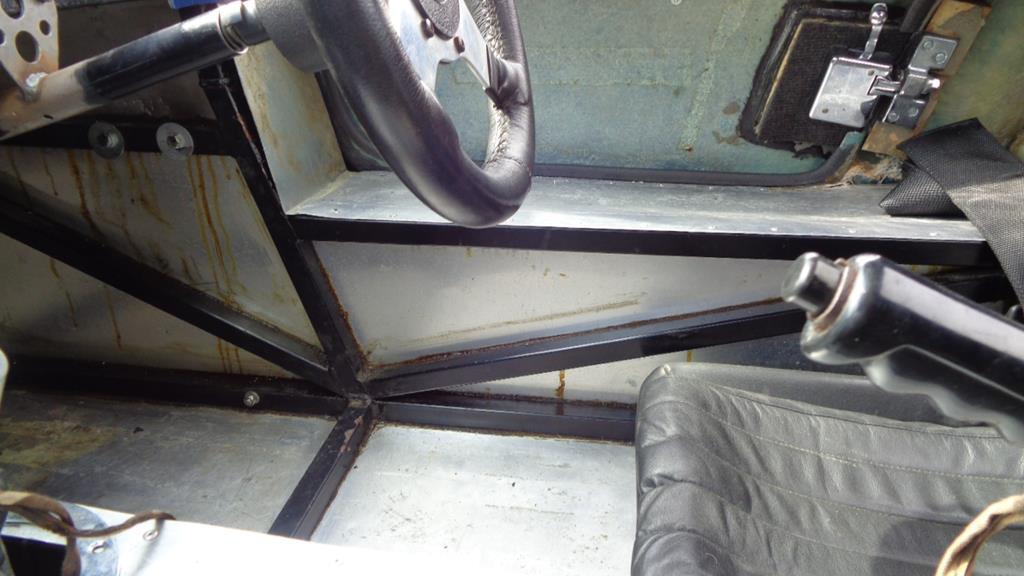 And Gem 3 the 2.8 V6 - with the "large capacity engine" chassis V8 V6. 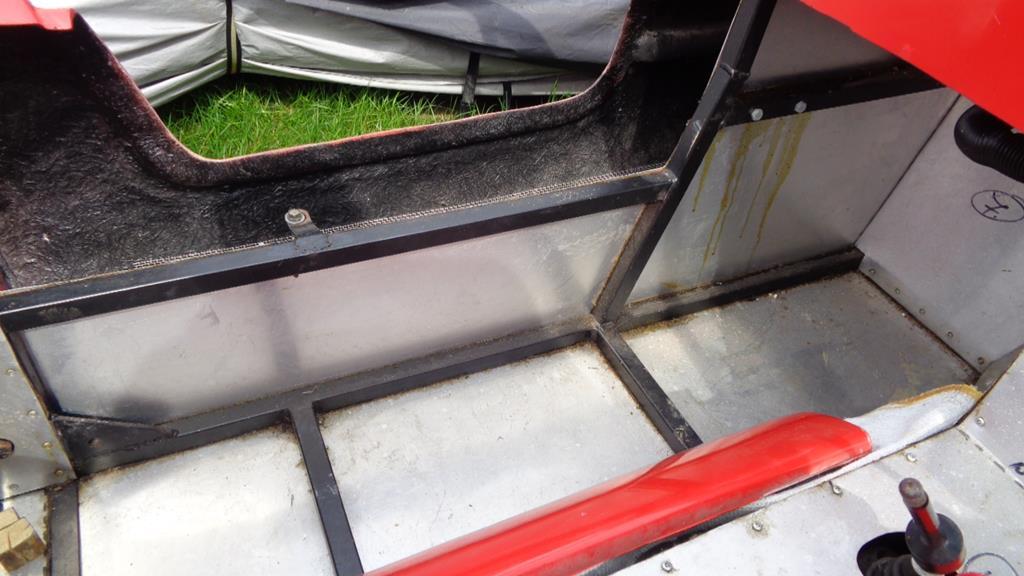 Yep all the triangulation completely missed off! - Nice one Autotune - The QA dept on holiday and stores completely out of attention to detail all that week. Good Grief. Anyways After cutting grass and ordering up a lunchtime visit from a mate of mine, the body was removed from Bomber. Nice easy socially distanced bit of labour as the car is about 4 meters long so double safety in place. Yes mate,it had a body off restoration only a few weeks ago 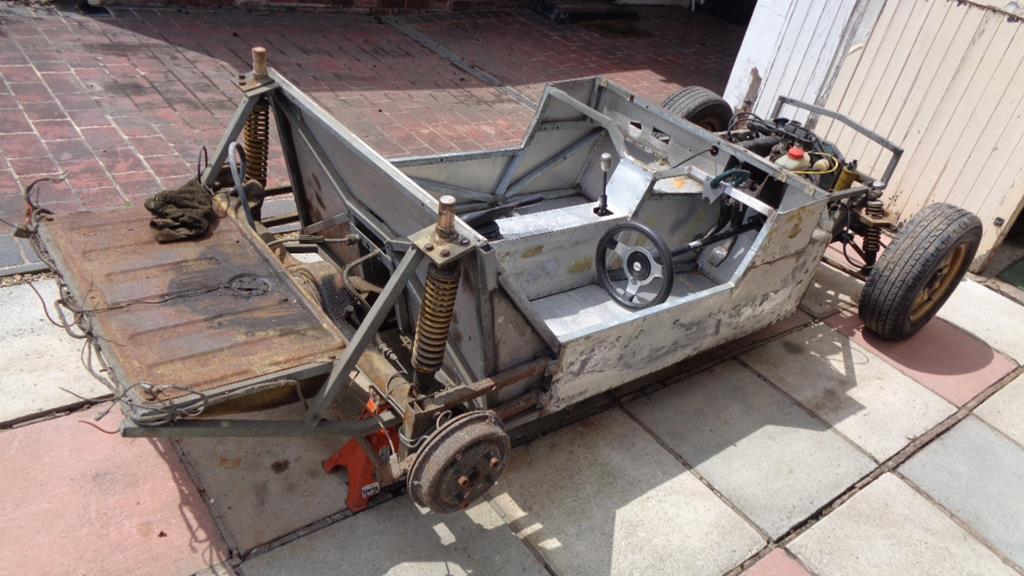 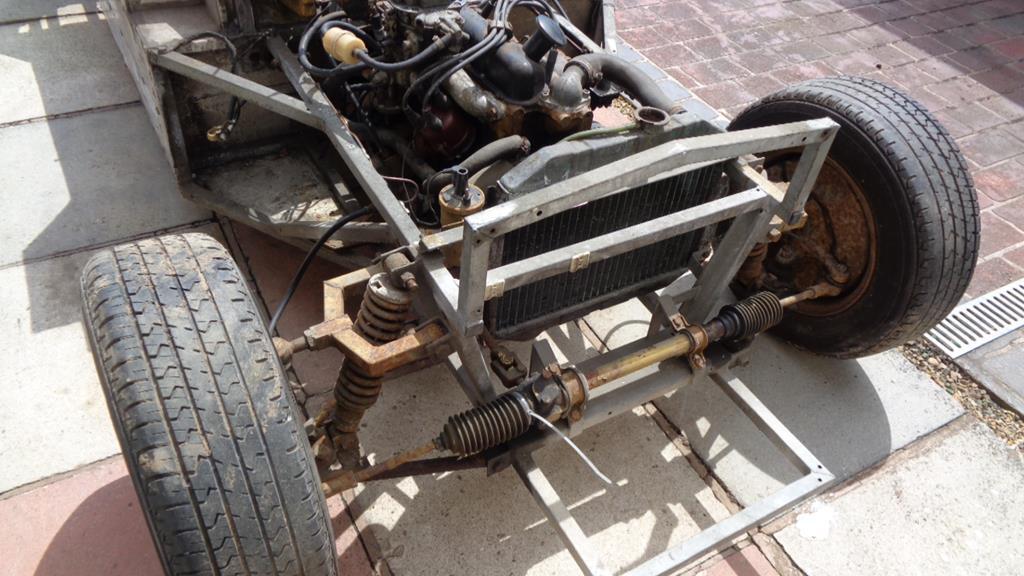 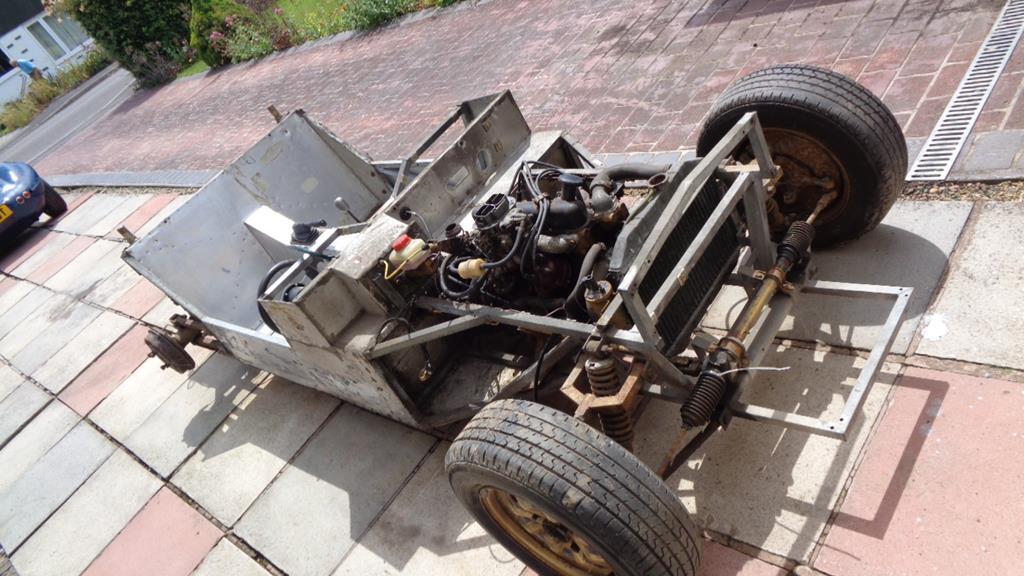 All for the sake of 3" of weld. - 2" here 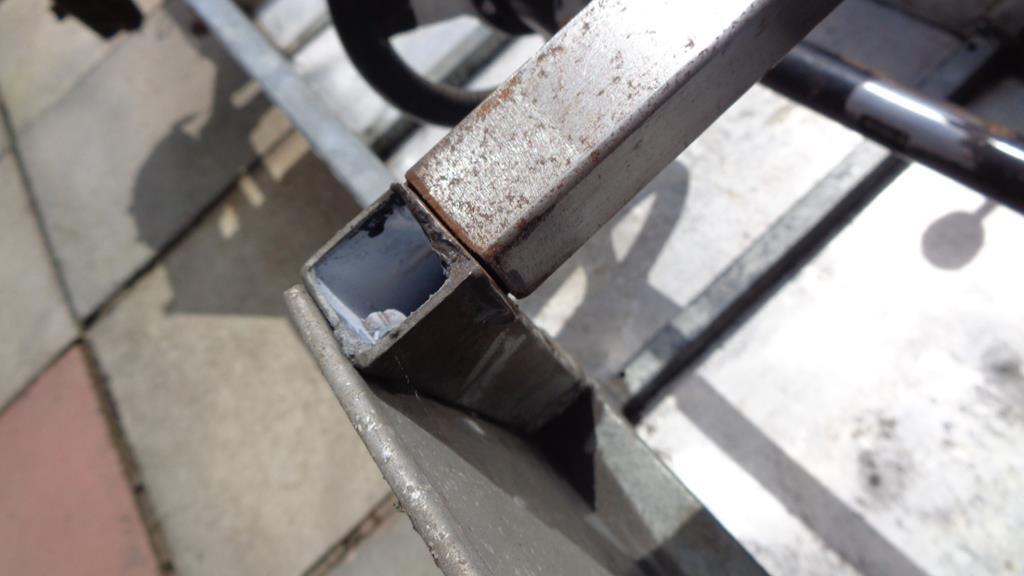 And 1" here 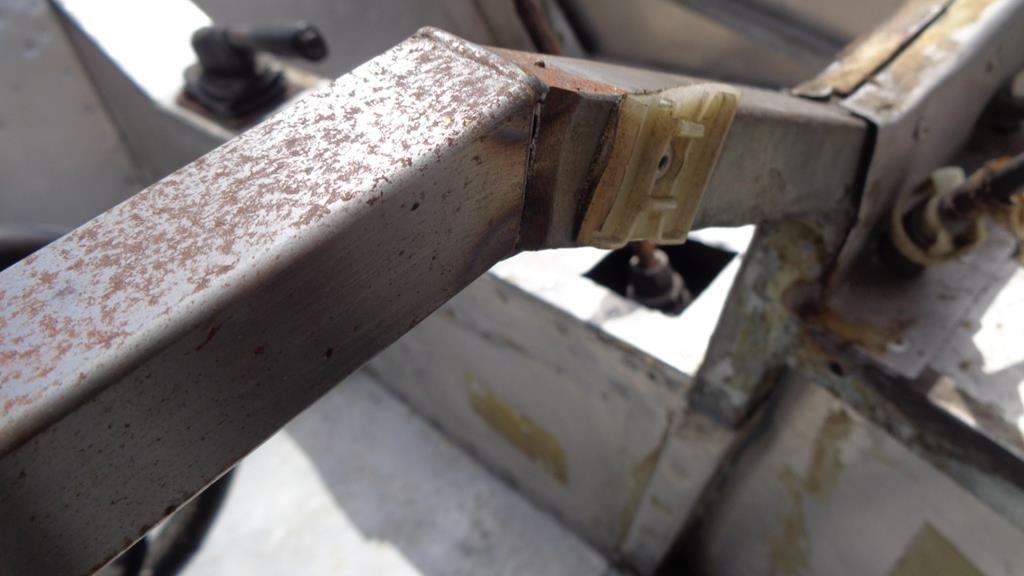 When Autotune were happy with this - 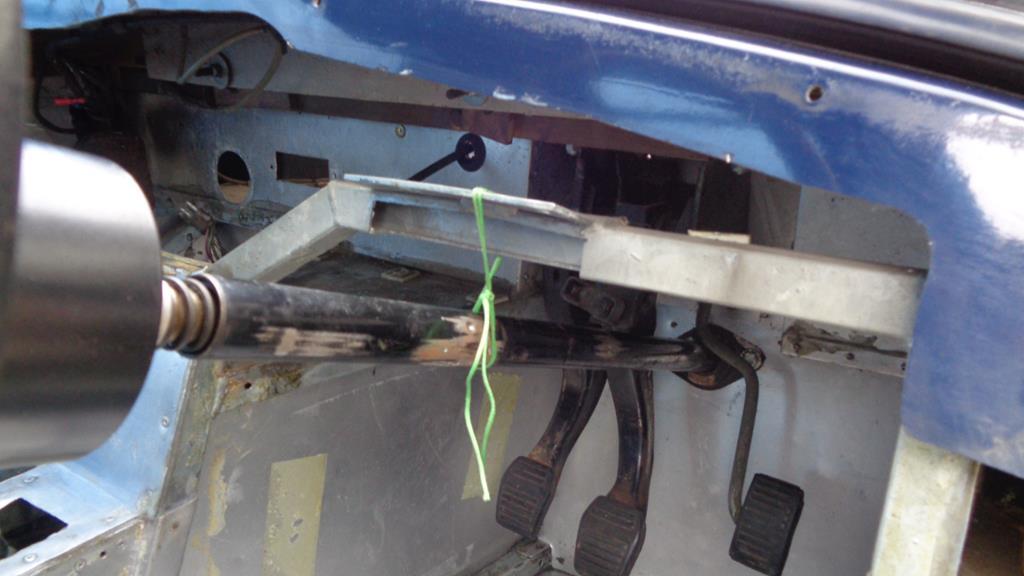 Right then - better get back out there and get these jobs done - I want that body back on today unless I get call asking me to fit a Red body to it..........  |
| |
Last Edit: Jun 22, 2020 12:19:36 GMT by Darkspeed
|
|
Darkspeed
Club Retro Rides Member
Posts: 4,668
Club RR Member Number: 39
|
|
Jun 22, 2020 16:17:56 GMT
|
Done and etch primed. 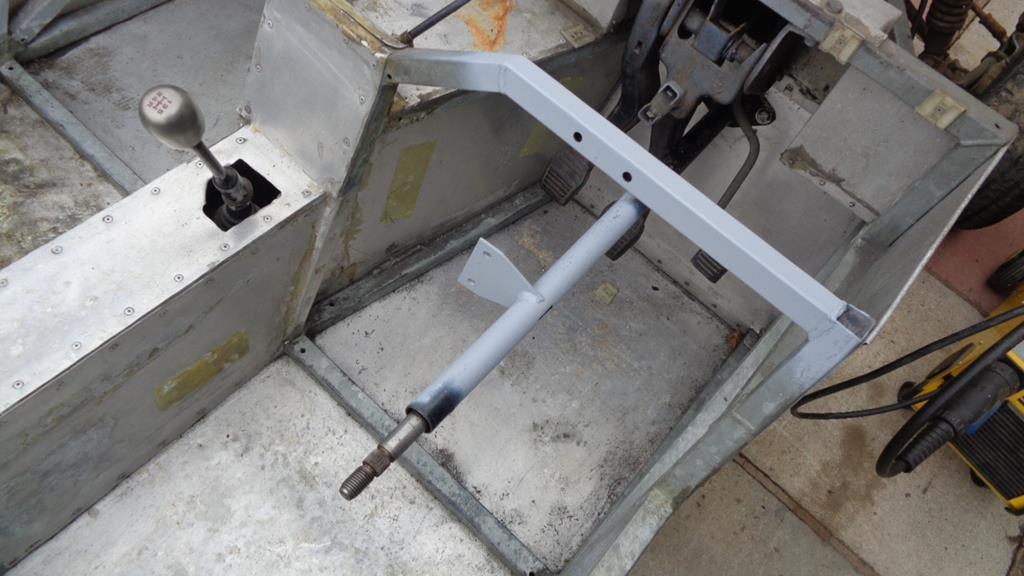 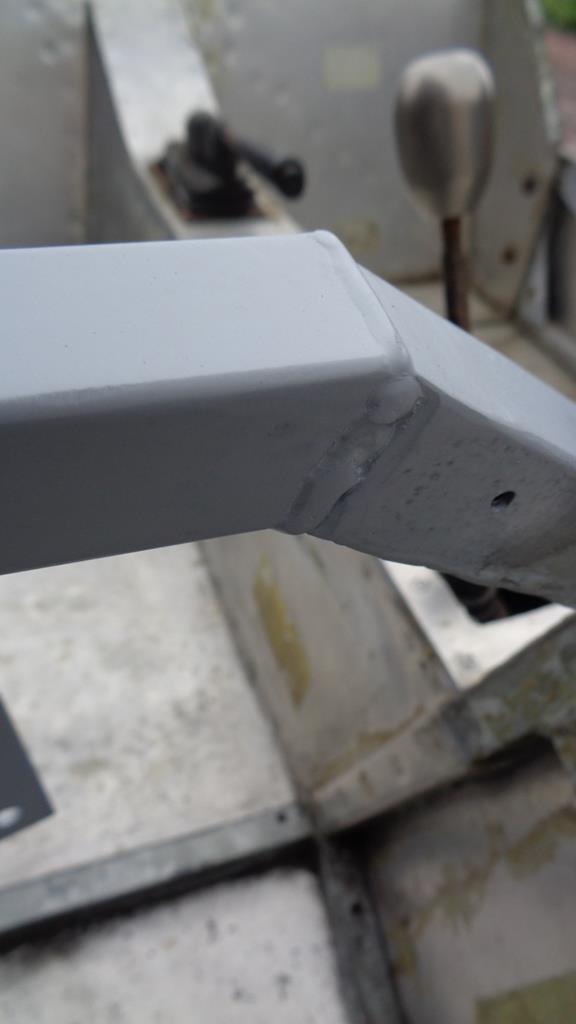  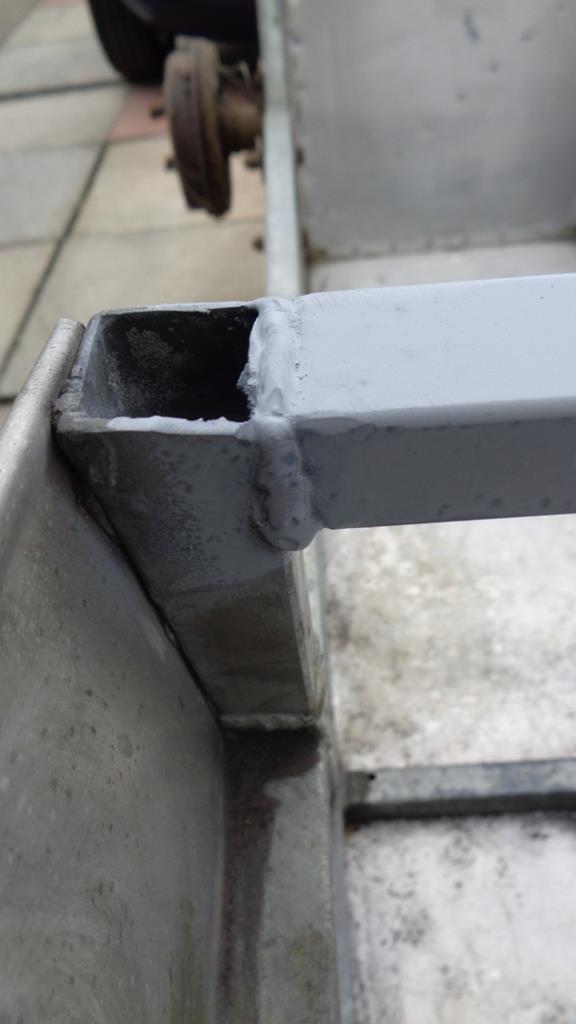 Running low on stainless fasteners 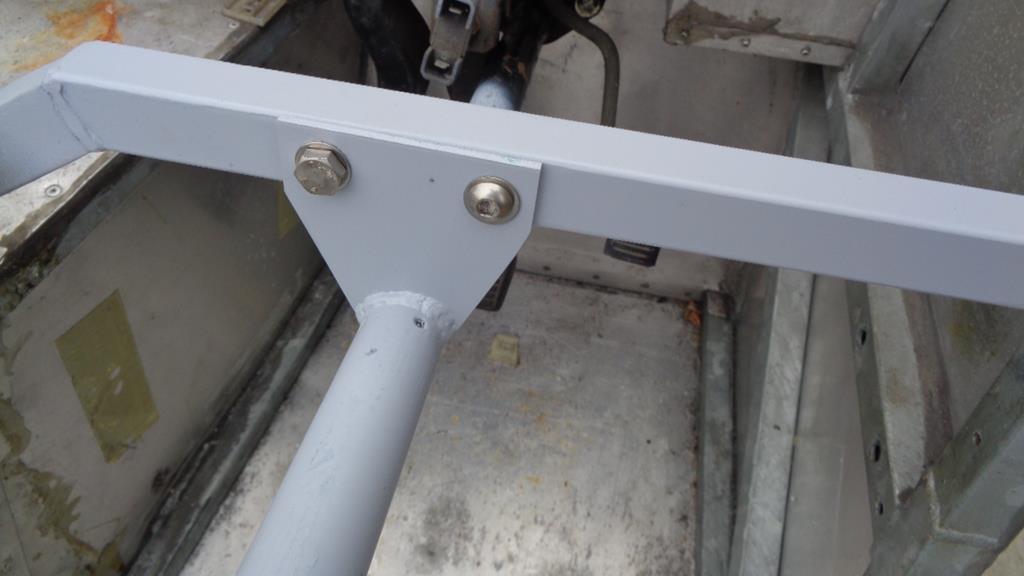 Took the easy route on checking to see what the back axle ratio is - Small drum 1100/1300 axle. 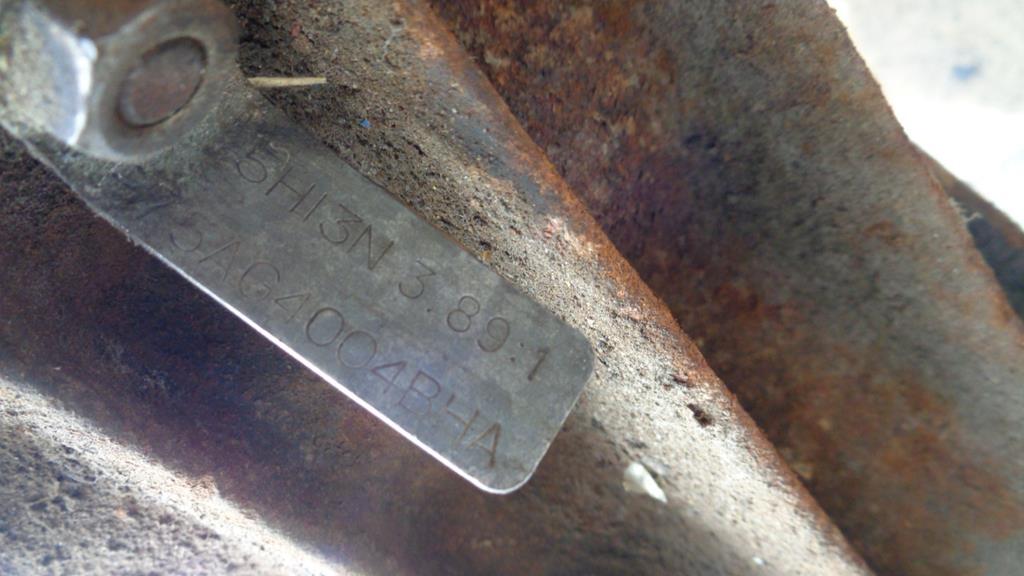 Wheels are Cortina/Capri 5.5J And under the dust and dirt its all pretty sound - I can see at least one of the front ball joint covers is perished and the fuel lines would be better being renewed.  Dropped a battery on it and it churned over well enough and brought plenty of fuel up and filled the carb in no time. Next stage is a bit of wiring to give me the Spark as I have the Fuel and the Compression. Race car dash 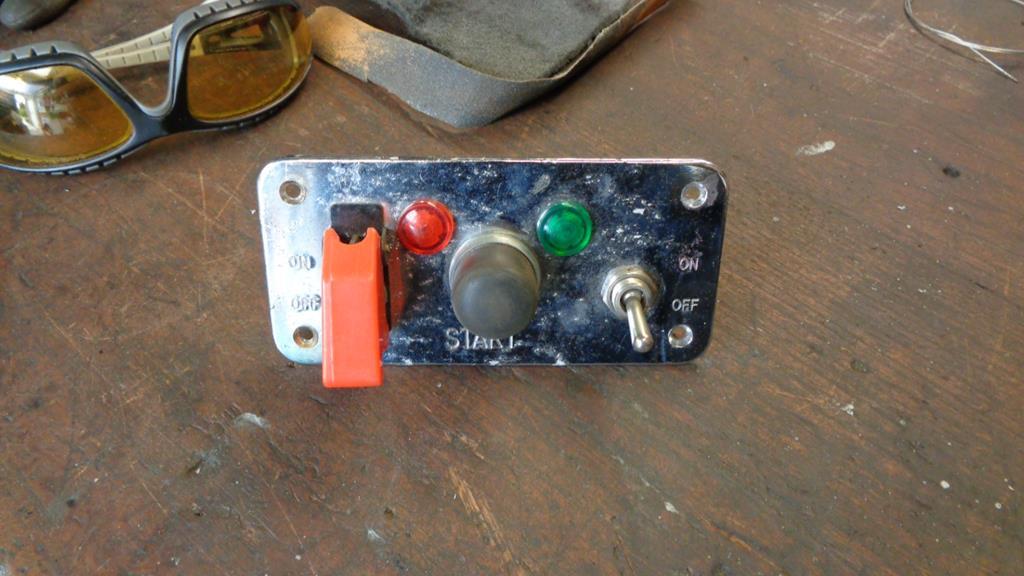 Then get this back in place and figure out some way of separating that exhaust and then putting it back in the car. 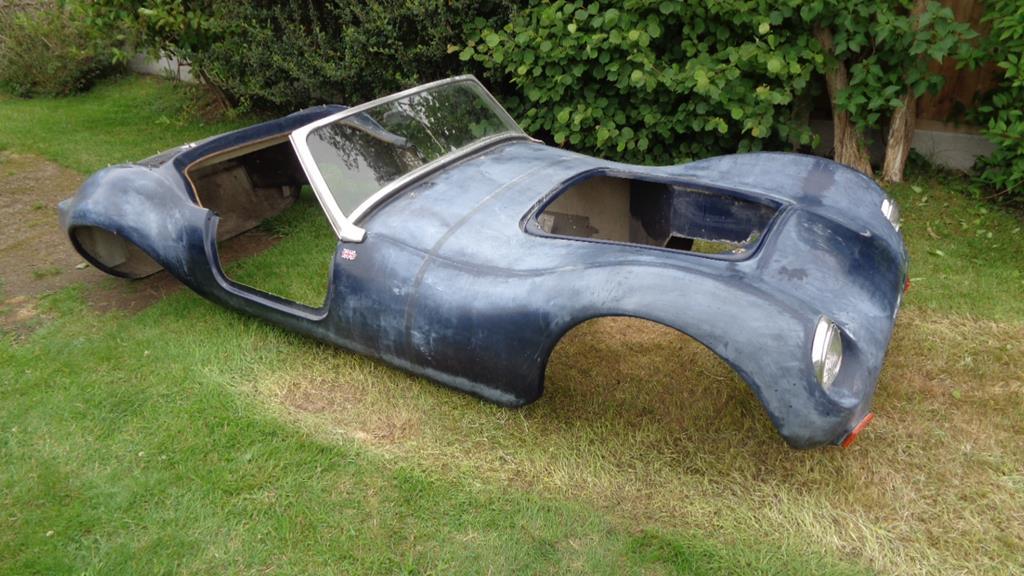 |
| |
Last Edit: Jun 22, 2020 16:19:54 GMT by Darkspeed
|
|
mk2cossie
Club Retro Rides Member
Posts: 2,946  Club RR Member Number: 77
|
|
Jun 22, 2020 16:22:19 GMT
|
Looking good with that steering column brace member in there  Any particular reason for using the stainless fasteners for the column instead of 8.8 or 10.9 bolts? |
| |
|
|
|
|


