pptom
Part of things
 
Posts: 475 
|
|
|
|
Really happy with the dash now that it's being built up, gave it a tickle with some 3000 then 6000 trizact, followed by 3 stages of polish. Converted the tacho to negative earth today and got that fitted. Before: 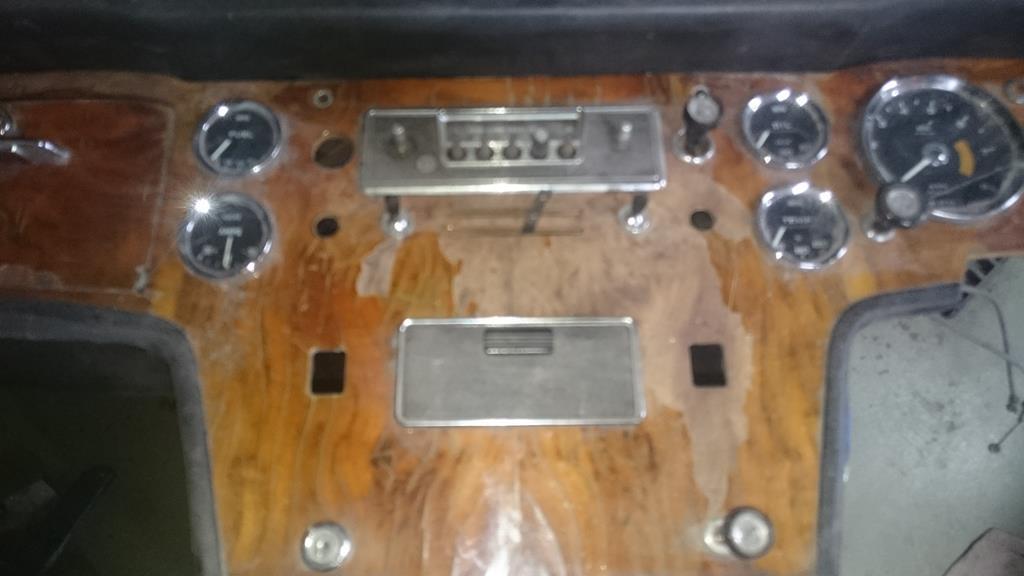 After: 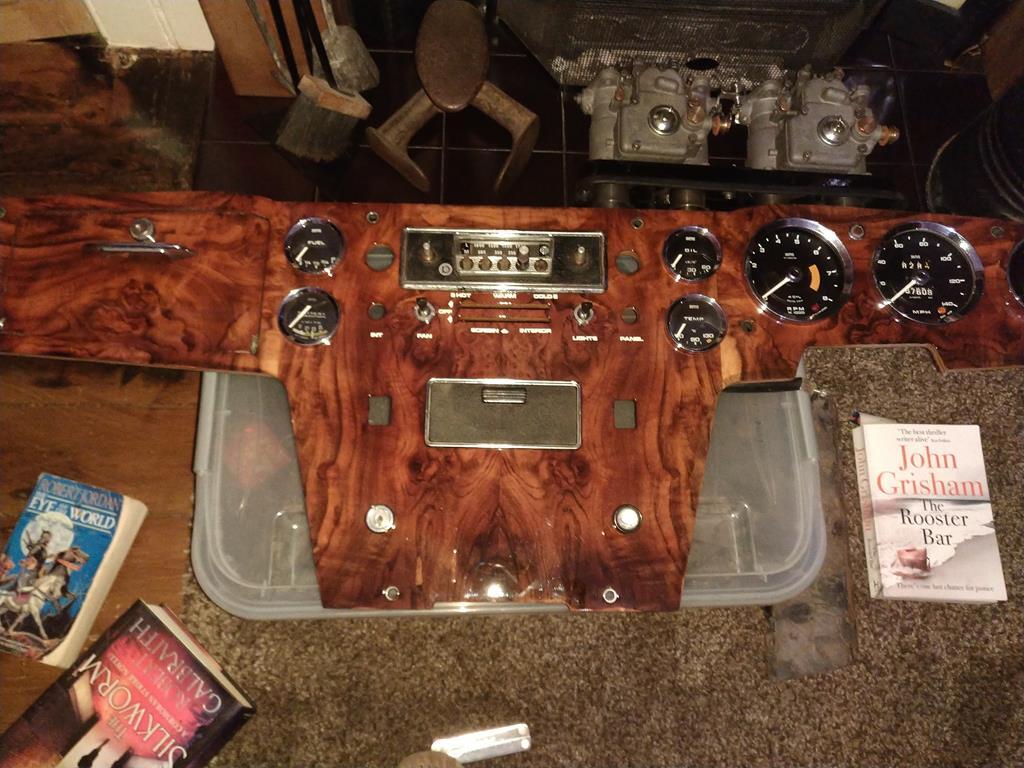 |
| |
|
|
|
|
|
|
|
|
|
|
Ref the ciclip grovees, If you shim behind the hub ( to the point you leave a few thou clearance)the bearings are fully retained anyway and the grooves redundant.
The gap the diff goes in is often tight because people have jacked underneath it, you may need to use a scissor jack with some blocks of wood to spread the load to open it up a bit before it goes back in.
For the diff make sure you get a new locking nut or use loctite on the pinion nut, the clamp against a crush tube and can loose clamp load causing the nut to come undone, mine did this, also worth checking the CROWNwheel bolt torque, they can come undone too.
Kev
|
| |
|
|
pptom
Part of things
 
Posts: 475 
|
|
|
|
Not the best of news on the suspension uprights. A mate has milled off the corrosion down to the bottom of the circlip groove on one and that's looking good, the other upright is slightly worse for wear though, It's been the recipient of some gorilla mechanic in the past who has bludgeoned it in what looks like an attempt to remove the damper tube. 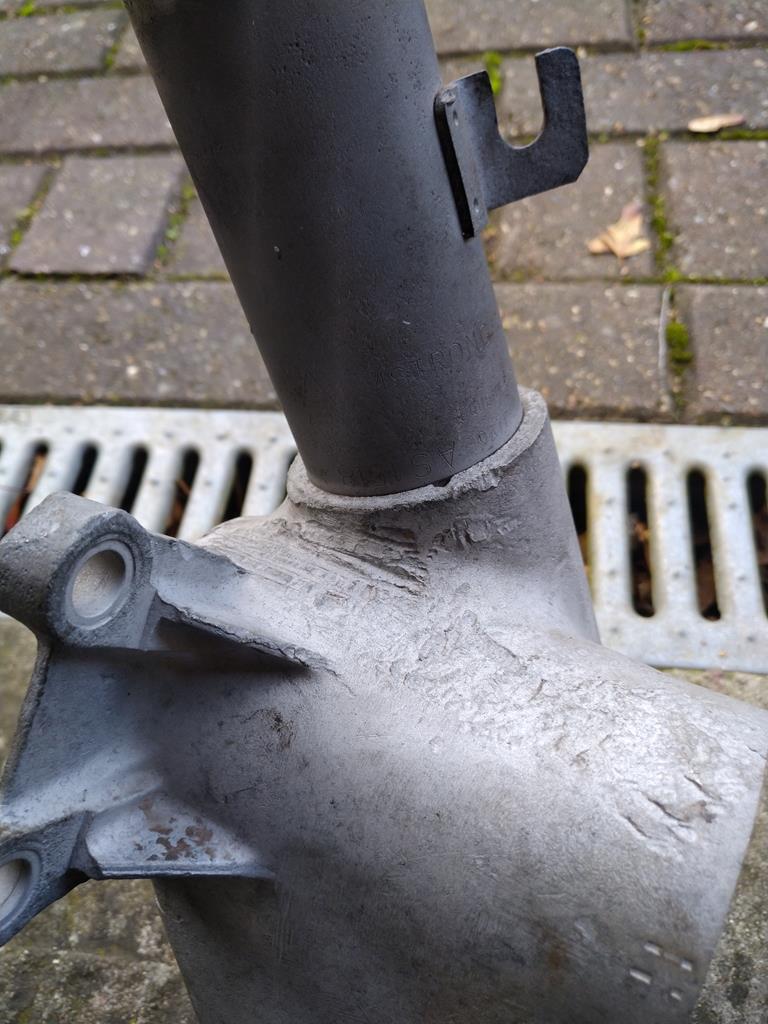 This has left it misshapen and I'd hoped didn't distort things too much. When we got the crumbling ally out of the way the interference fit wheel bearing, now cleaned of picture just dropped in, the recess is actually 0.5mm too wide, worse still was that the bearing shoulder which it sits against had been put out of shape so the bearing wobbled side to side. All in we've decided it's not salvageable without major surgery and even then it would still have the worrying deformation and possible cracks. Just stumped up for a pair of second hand ones. 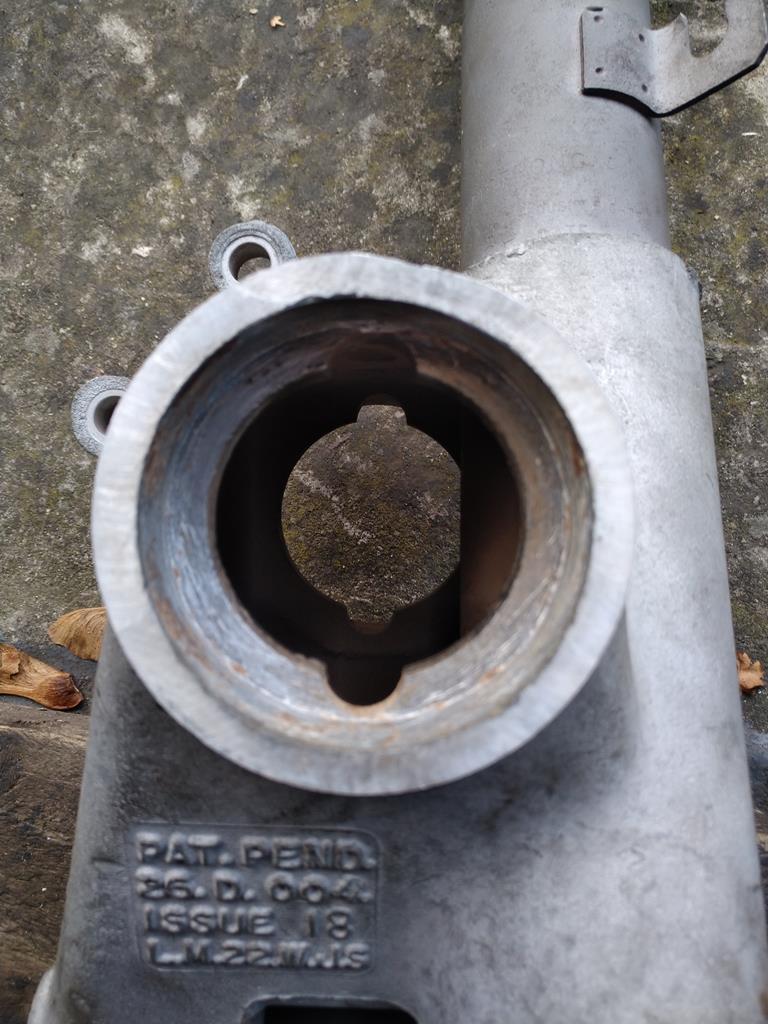 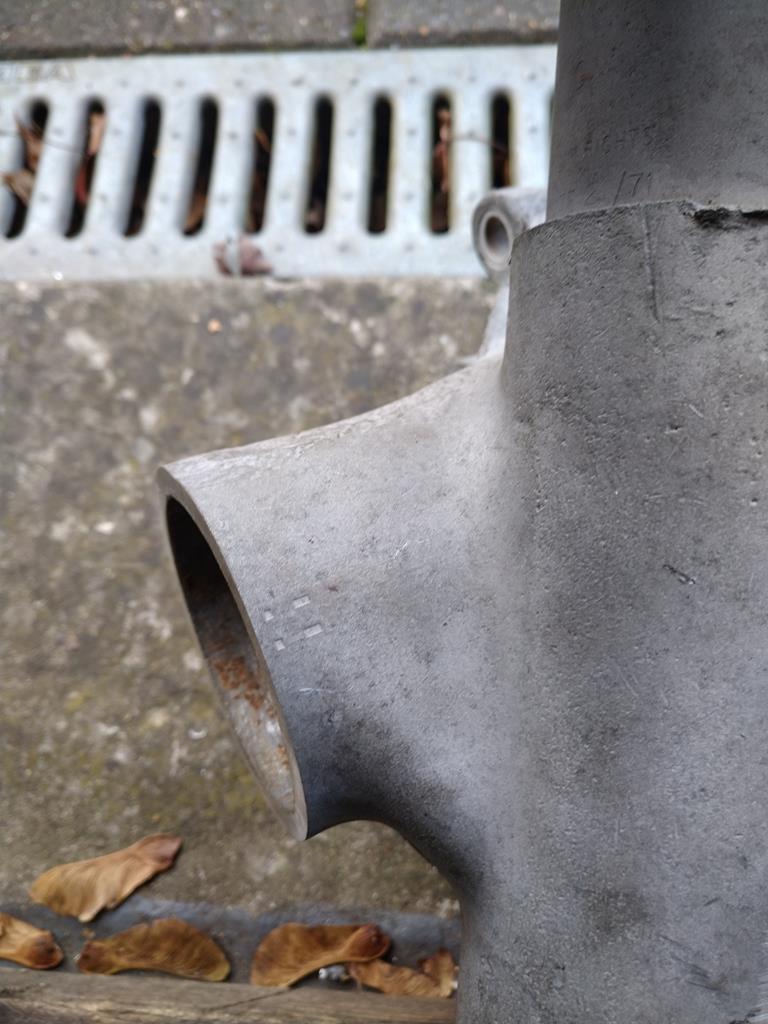 |
| |
|
|
pptom
Part of things
 
Posts: 475 
|
|
Nov 14, 2018 20:17:12 GMT
|
Whilst waiting for payday I've been keeping myself busy sorting out some sound deadening and having a look at the loom. Poking around in the wheel arches revealed these little beauties 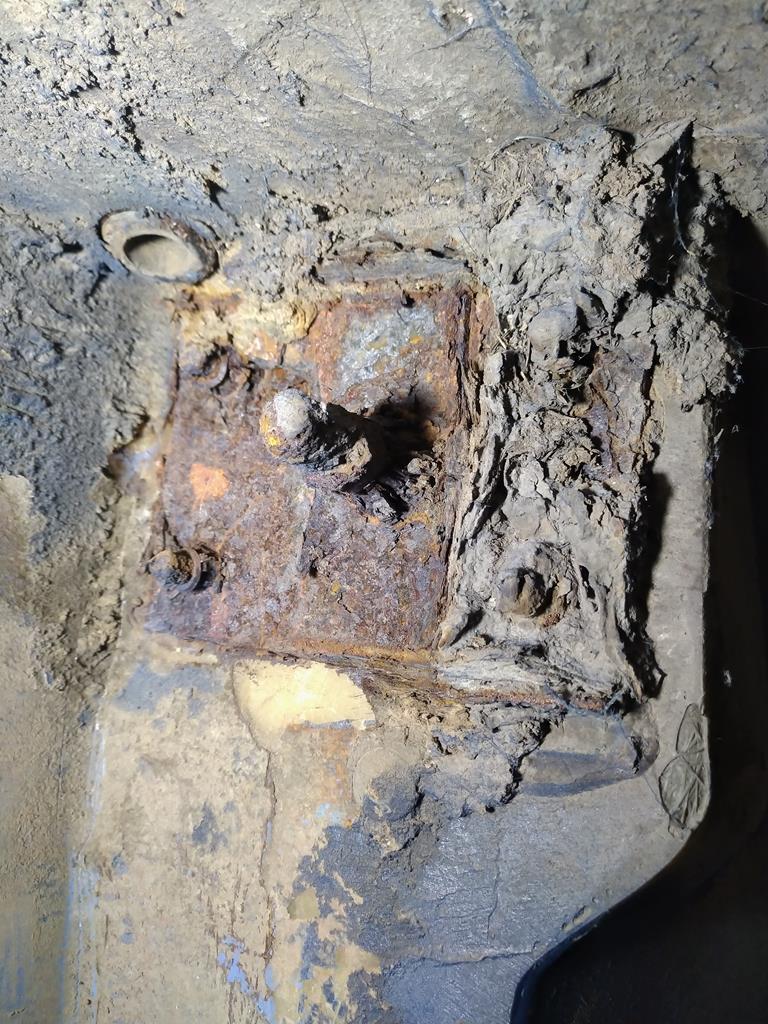 Which are the main attachment point and support brace for the seatbelts. Not that I'd expect them to be in any better condition. Realised the main car fund is running a bit low and looking for ideas when I stumbled on some rear brake calipers on ebay, £300 for a pair requiring a rebuild! then I remembered I have a spare set, brought in a box of bits for £20. So tonight's cost free work has been stripping both my sets for reconditioning with a view to selling one set. The spare set were cleaner and came apart easier than the set which came from my car |
| |
|
|
pptom
Part of things
 
Posts: 475 
|
|
Nov 14, 2018 20:27:37 GMT
|
Proper mucky, but got them all stripped and now soaking prior to cleaning. All 8 pistons were seized, but typically the last one was an absolute pig and I had to resort to plan z (last resort) 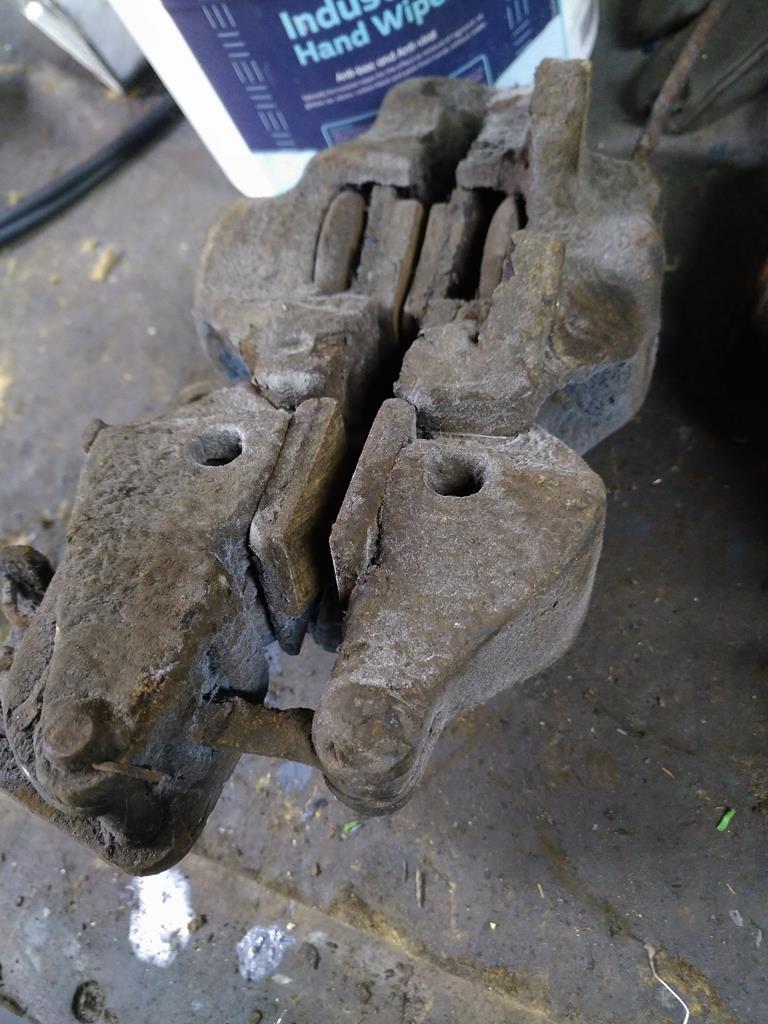 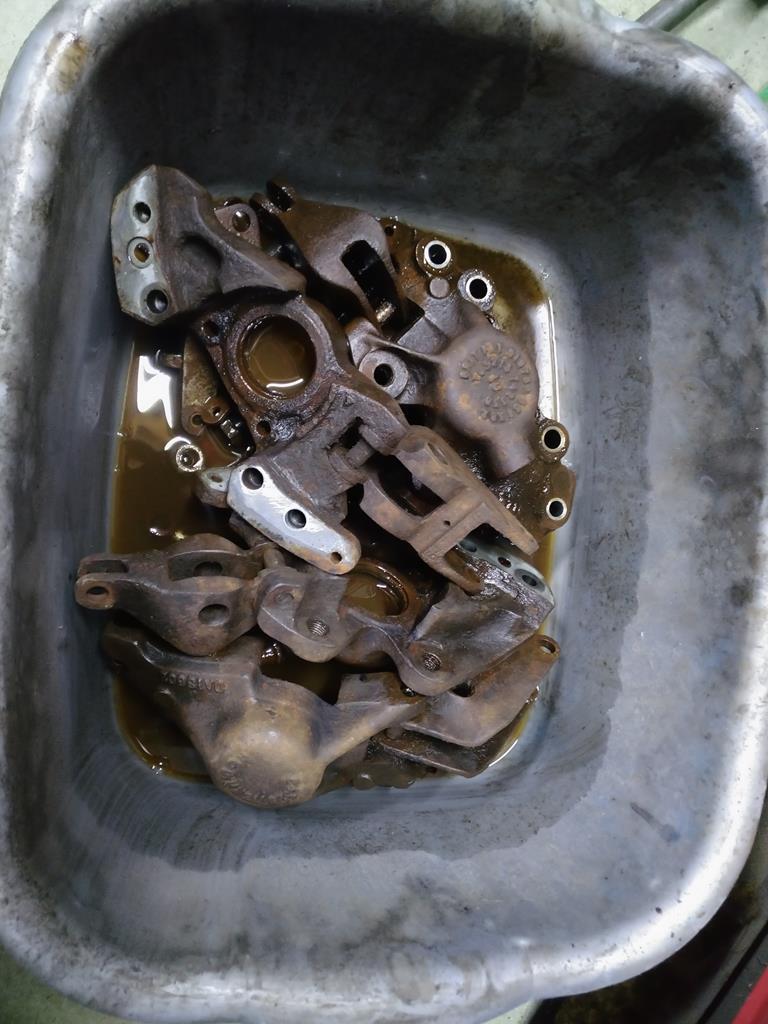 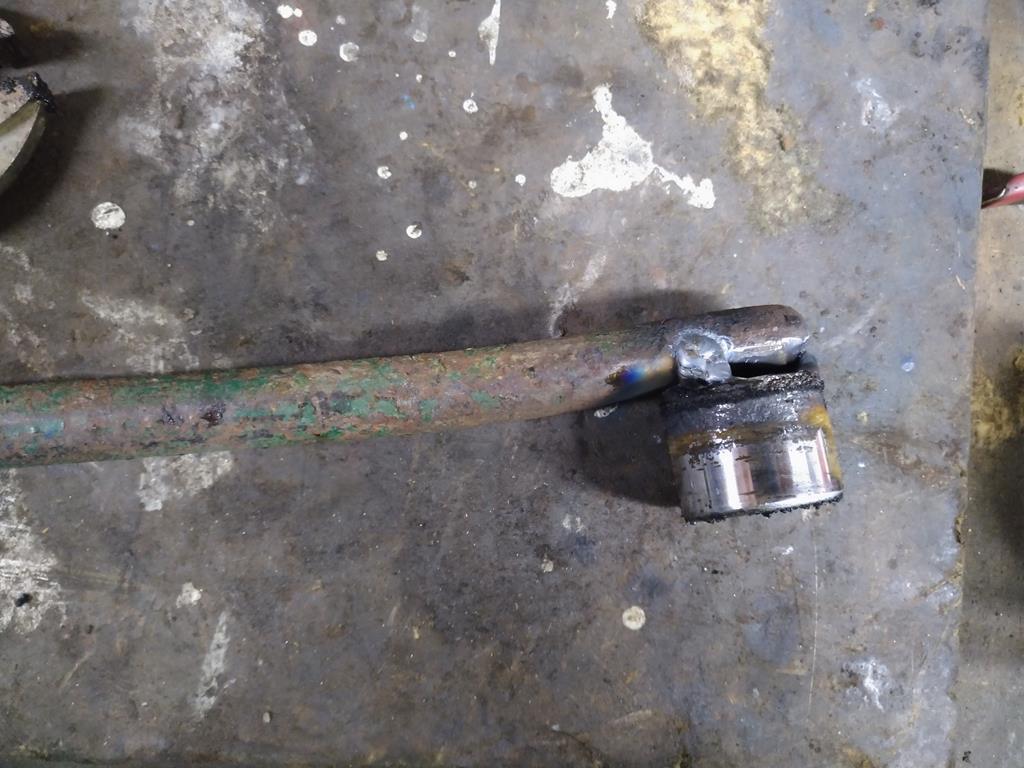 The plan is to get one set of calipers painted which i'll keep and have the others zinc plated along with all of the various pins and springs for the factory fresh look. Fit new pistons and seals to both and then one set should go a fair way to paying towards something like driveshafts or a water pump conversion |
| |
|
|
|
|
|
Nov 14, 2018 20:58:44 GMT
|
|
My seat belt mountings were the same as were the sills and seat belt plates bolted to them, replaced the whole lot with stainless.
I did the same to mv calipers a few years ago, the re-production return springs didn't have much spring!
I also manufactured my own cartridge water pump, did't cost much but took me ages to get right.
P
The price some of the parts go for is amazing, I sold the original steering wheel for a couple of hundred pounds.
|
| |
|
|
pptom
Part of things
 
Posts: 475 
|
|
Dec 17, 2018 18:21:33 GMT
|
It feels like a long time since i've made any meaningful progress and it been a frustrating 6 weeks or so. To recap, the rear suspension was stripped and partially knackered, fuel tank was a bit rotten and the diff mounts had disintegrated. I managed to save one suspension leg for peanuts and brought a second hand one from eBay, this turned out to be more knackered than the one I was binning, so that went back and fed up with worn out rubbish I stumped up £320 for a brand new one made in steel. This got lost for 2 weeks by dpd and when it did turn up I reckon half its weight was swarf trapped in the cavities. Anyway, the legs are rebuilt and waiting to go in 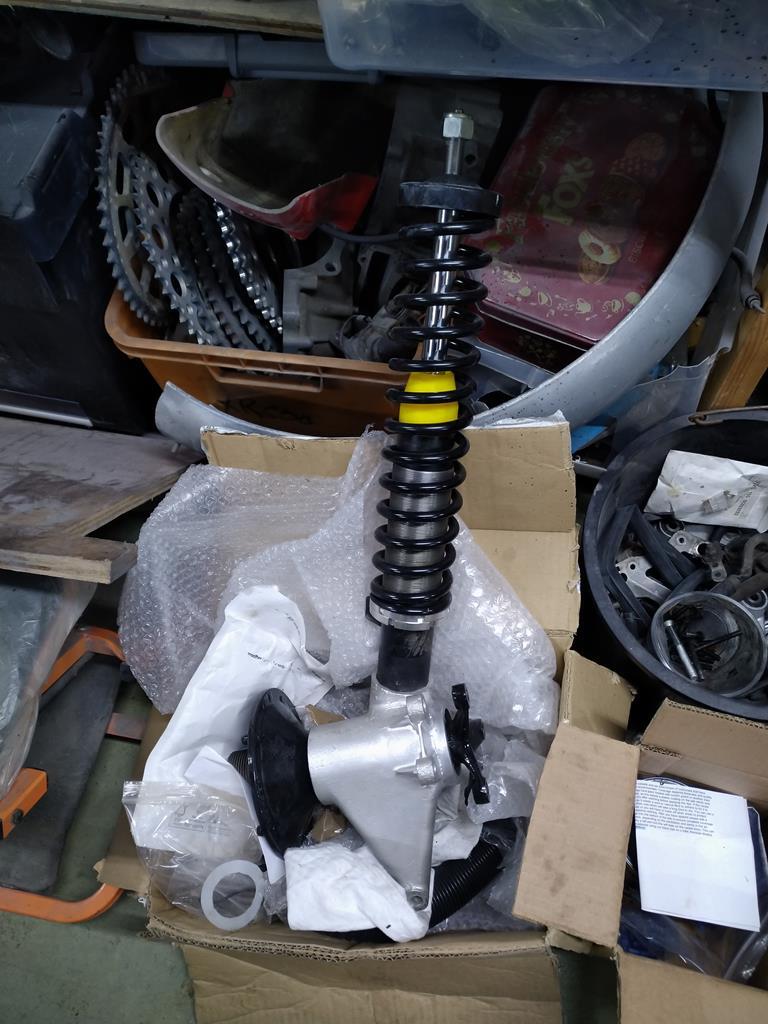 New shocks, springs and adjustable spring perches. |
| |
|
|
pptom
Part of things
 
Posts: 475 
|
|
Dec 17, 2018 18:39:17 GMT
|
Finally today my diff hardware turned up, this was the final piece of the puzzle as it is the first piece of the back end to go back in. As such I went with updated diff mounts and a strengthening bracket, the idea being that it's such a pain to get to in the future if anything fails. Of course, I replaced the bearings, seals and oil in the diff, but am rolling the dice a bit in that I'm not stripping and rebuilding the whole unit. 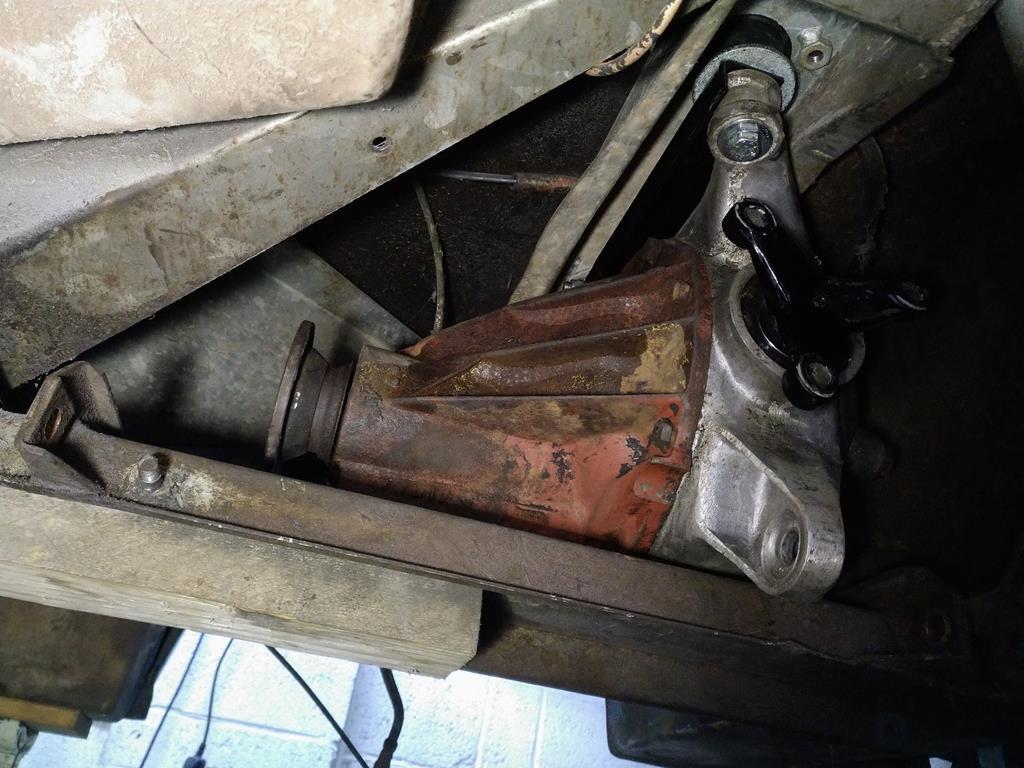 Put that back in tonight without much drama. Tomorrow will be the A frames and uprights, then the fuel tank can go back, followed by the handbrake mech. Although I was a bit fed up waiting and spending money I managed to keep busy, mostly funded by eBay sales of spare bits the from the garage. Reconditioned the rear calipers. 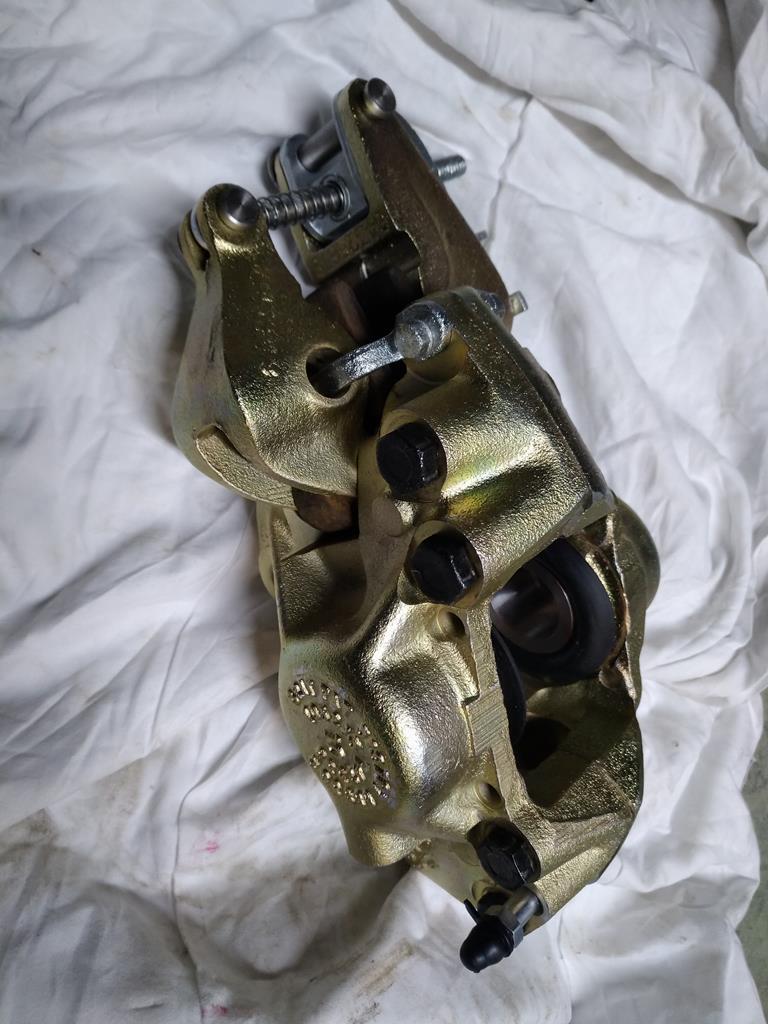 Painted the cam cover and mirror with crackle black 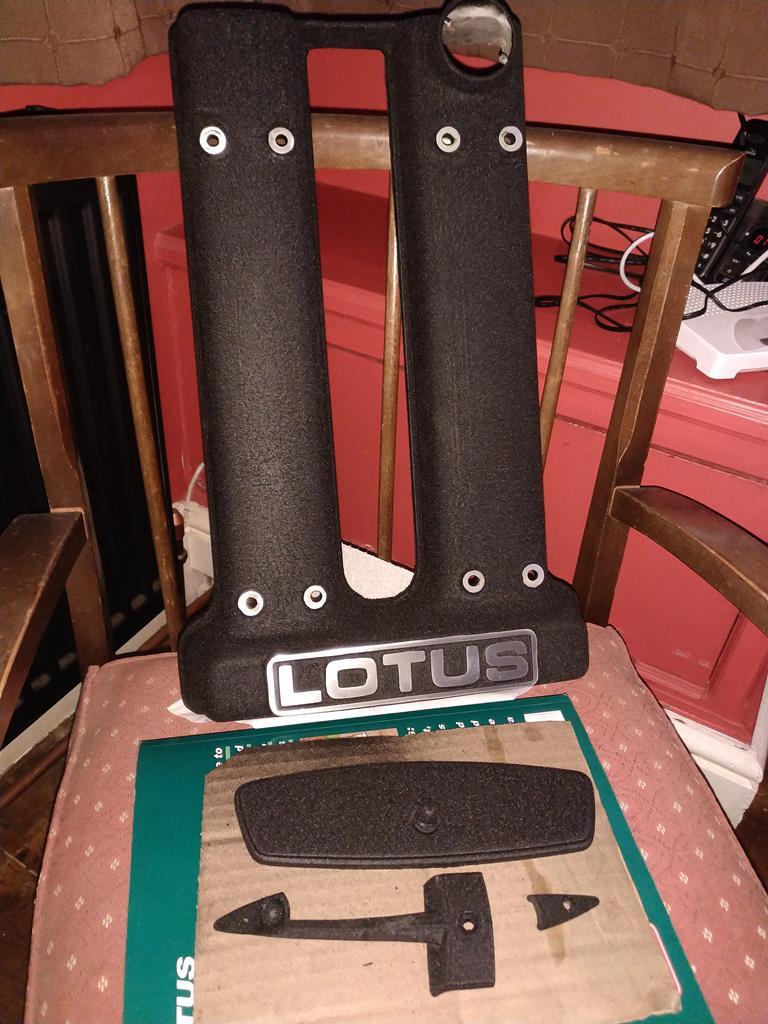 Sold off the vacuum operated headlight pods and made a bracket or two to take an mx5 headlight lift motor 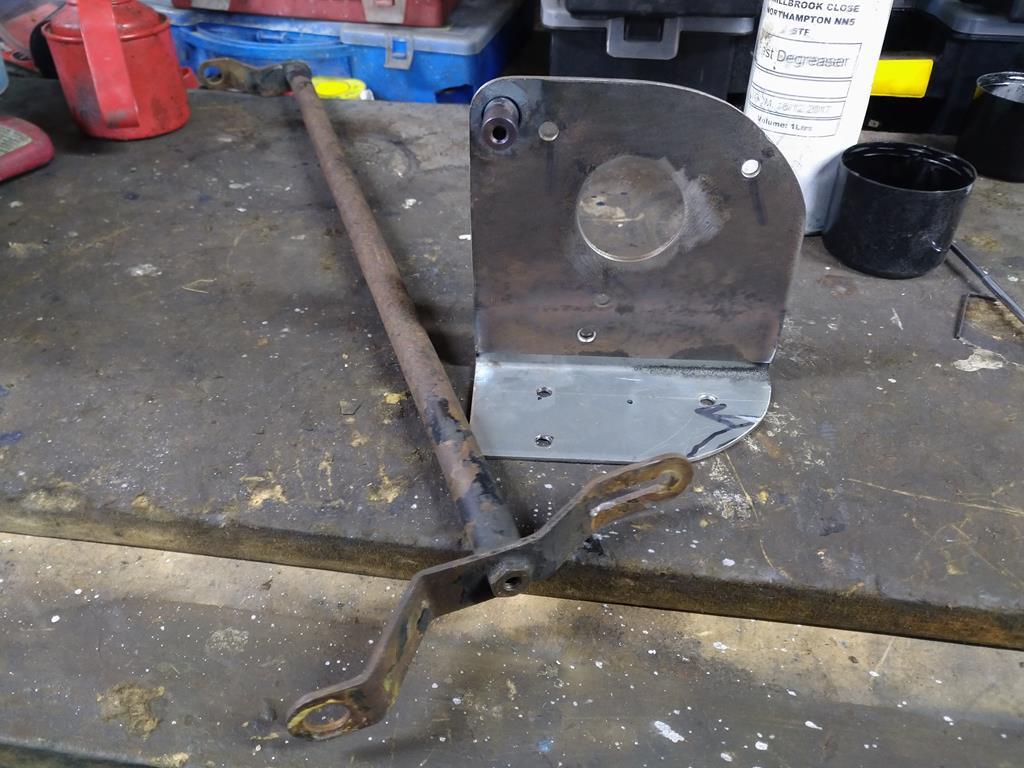 Repaired and got the headlight pods in primer, currently hardening up in the kitchen img]http://img.retro-rides.org/i/v/pptom/57d7194e18bd.jpg[/img And of course, kept on making use of existing hardware by keeping my electroplating mate busy 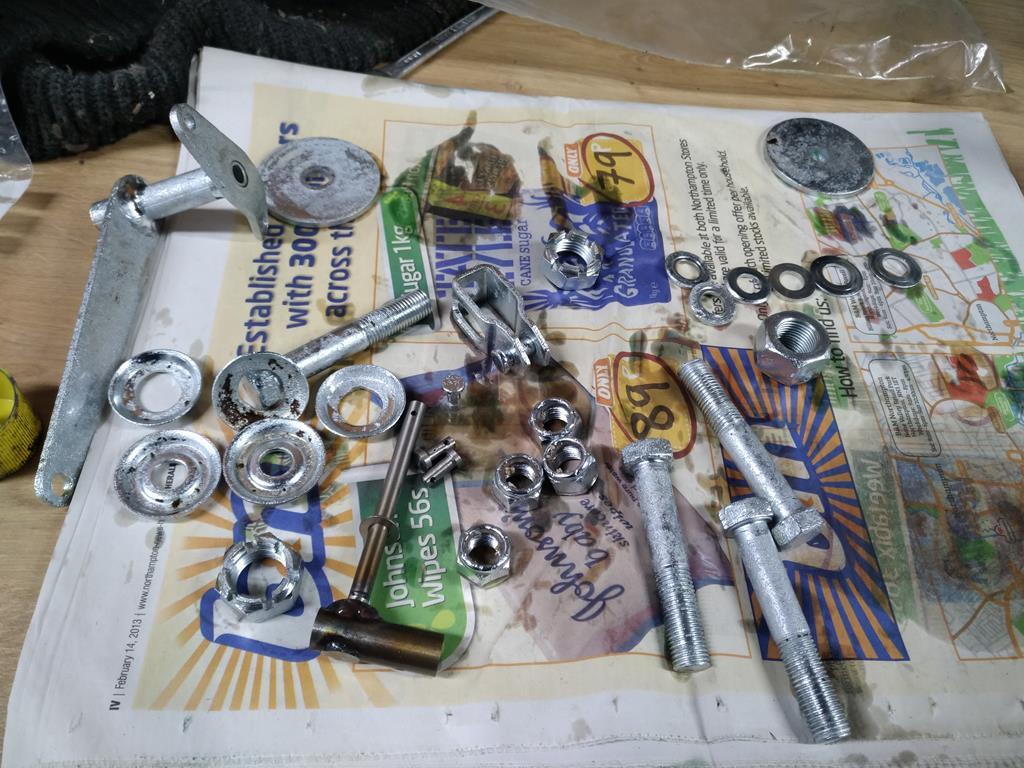 [] |
| |
|
|
pptom
Part of things
 
Posts: 475 
|
|
Jan 18, 2019 16:56:36 GMT
|
Lots of small jobs been done recently, not enough to merit posting, plus i did get a little sidetracked by this 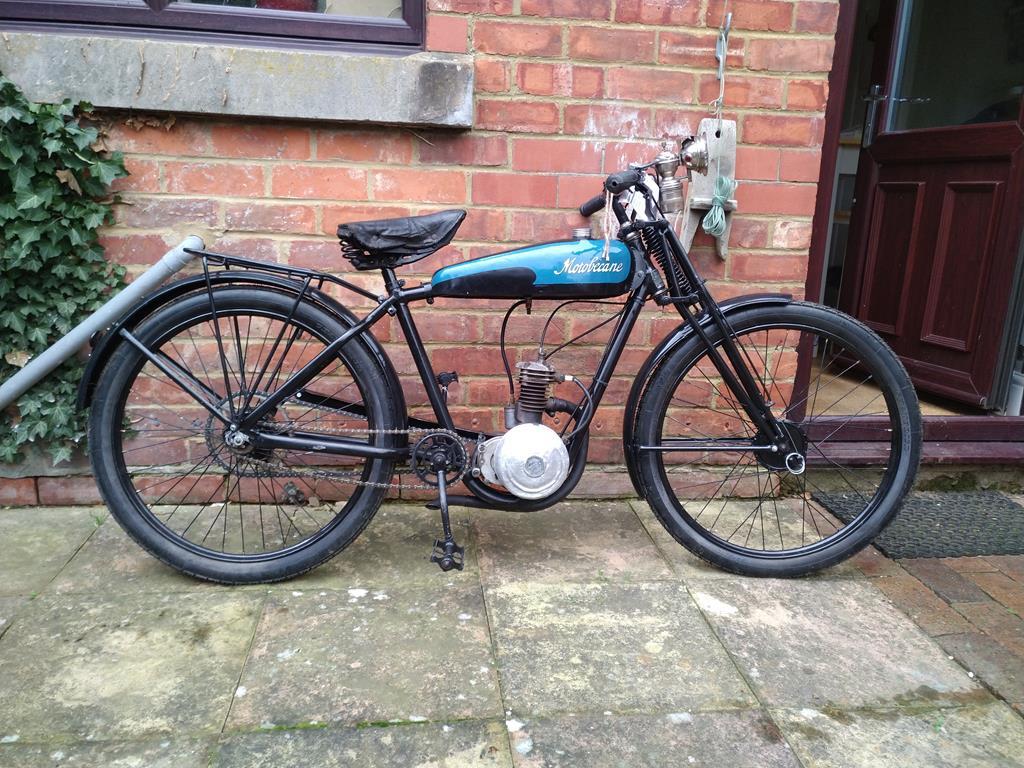 Should be fun puttering about in the summer. 1933 vintage too and surprisingly not that expensive for what it is. Back on the car and i've had a very exciting day, after quite a while i've picked up the various engine components from the machine shop and it appears they've done an exceptional job. Crank regrind on mains and big ends, block honed and decked, head has new guides, new seats which have been cut to give perfect cam clearances, converted to 'big valve spec' faced and finally its been ported and the combustion chambers smoothed and polished by someone who really knows their onions. I've also been supplied with new valves, shell bearings and pistons rings, all top spec. Obviously this hasn't been cheap, but aside from the porting it was all required as the engine was well worn out, plus being a fairly iconic engine it deserves the best. Its not as eyewateringly expensive as i was originally thinking. My theory is to build the important things as best as possible, i can go without carpets and trinkets for quite a while. Plus I'm saving a ton of cash by doing everything else myself. (Except recovering the seats, which should start this weekend) On the way home i dropped the crank, flywheel, pistons and rods with an excellent engine balancer near Lutterworth. Enough of me chatting 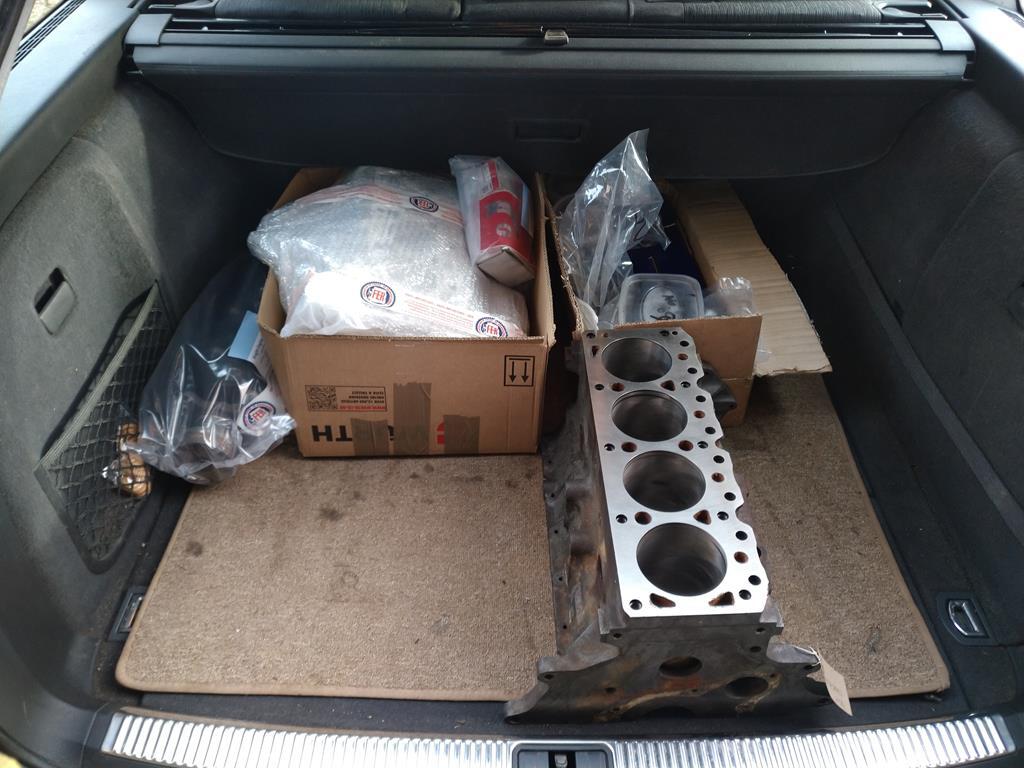 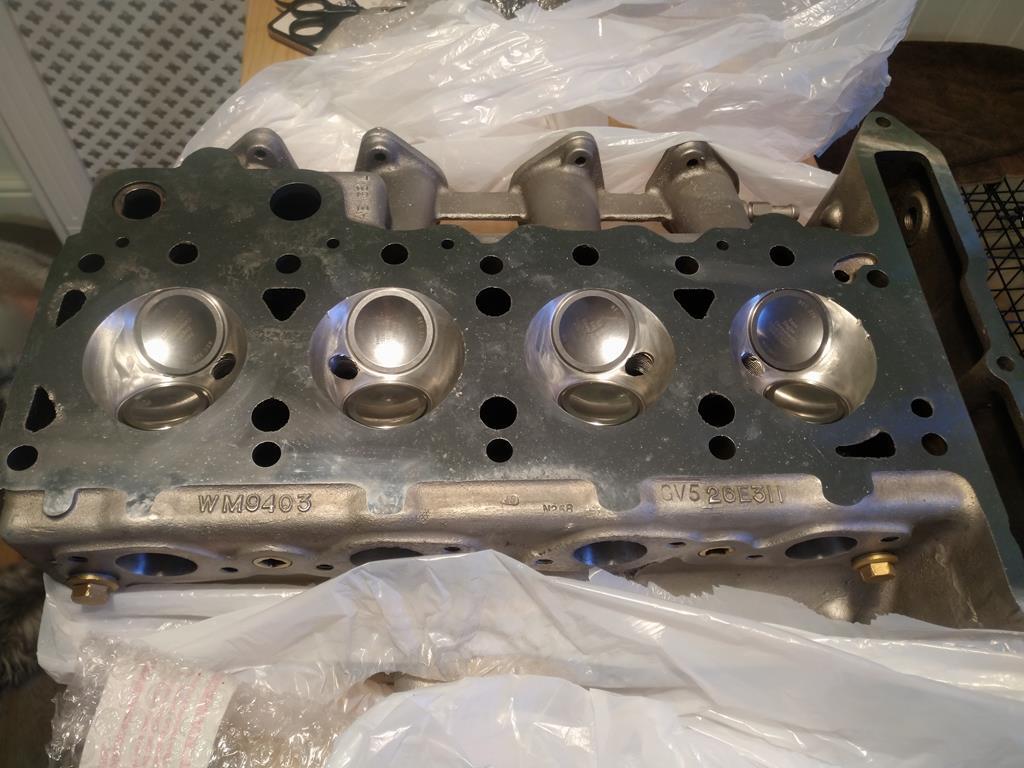 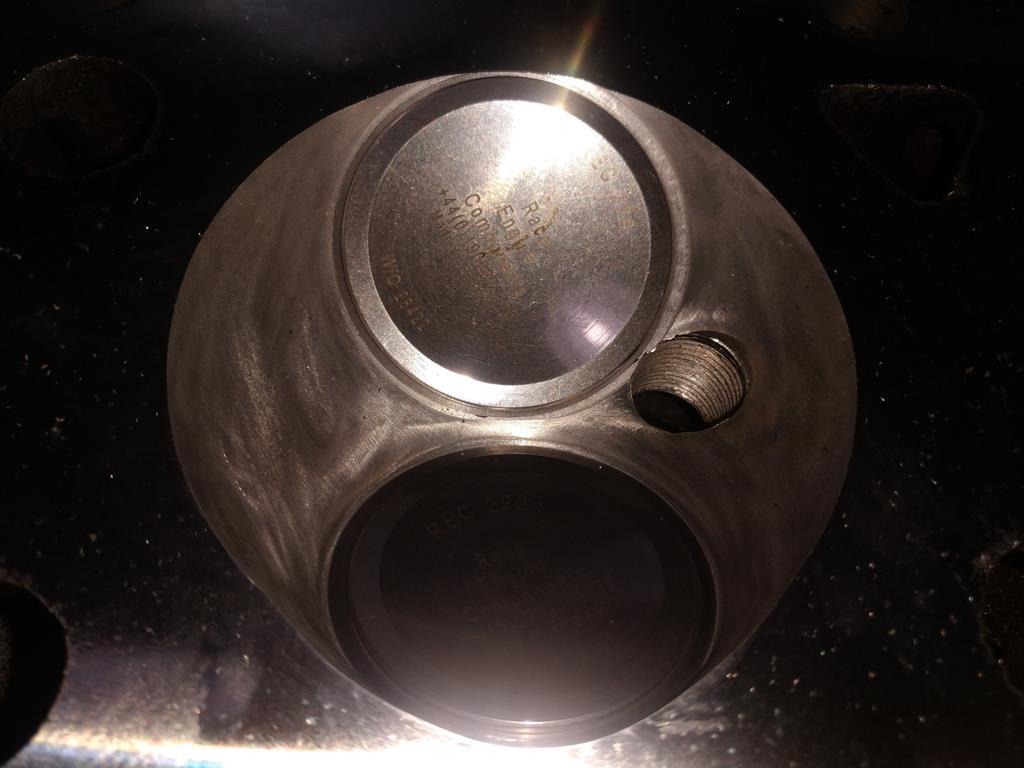 |
| |
|
|
pptom
Part of things
 
Posts: 475 
|
|
Jan 21, 2019 19:33:16 GMT
|
|
Hmm, tried to fit the windscreen tonight and had to give up after an hour and a half. Never done one before so i really don't know what to expect, but i've watched plenty of videos. I started at the bottom and never got close to getting either of the bottom corners in the rubber.
Time to give up for the night and regroup before anything gets damaged!
|
| |
Last Edit: Jan 21, 2019 19:46:27 GMT by pptom
|
|
|
|
|
|
|
|
|
Hmm, tried to fit the windscreen tonight and had to give up after an hour and a half. Never done one before so i really don't know what to expect, but i've watched plenty of videos. I started at the bottom and never got close to getting either of the bottom corners in the rubber. Time to give up for the night and regroup before anything gets damaged! I quess its not the best season assuming your workshop is a bit cold. It really makes a lot of difference with these screen rubbers when temps are low. The dashboard looks very nice and you made the best decision to get the engine rebuild properly and waiting with carpets ect. Keep up the good work Peter |
| |
|
|
pptom
Part of things
 
Posts: 475 
|
|
Feb 11, 2019 17:49:51 GMT
|
Front and rear screens are now in, i got the wrong rubber for the front, hence there was no chance of it ever fitting. Once the new rubber turned up i installed it with the cord method and after about 20 attempts, each one getting a bit closer, i succeeded. Rear was a piece if cake as uses a different seal, rubber in the recess, then ease the glass in. Made a start on the engine aftet painting the block 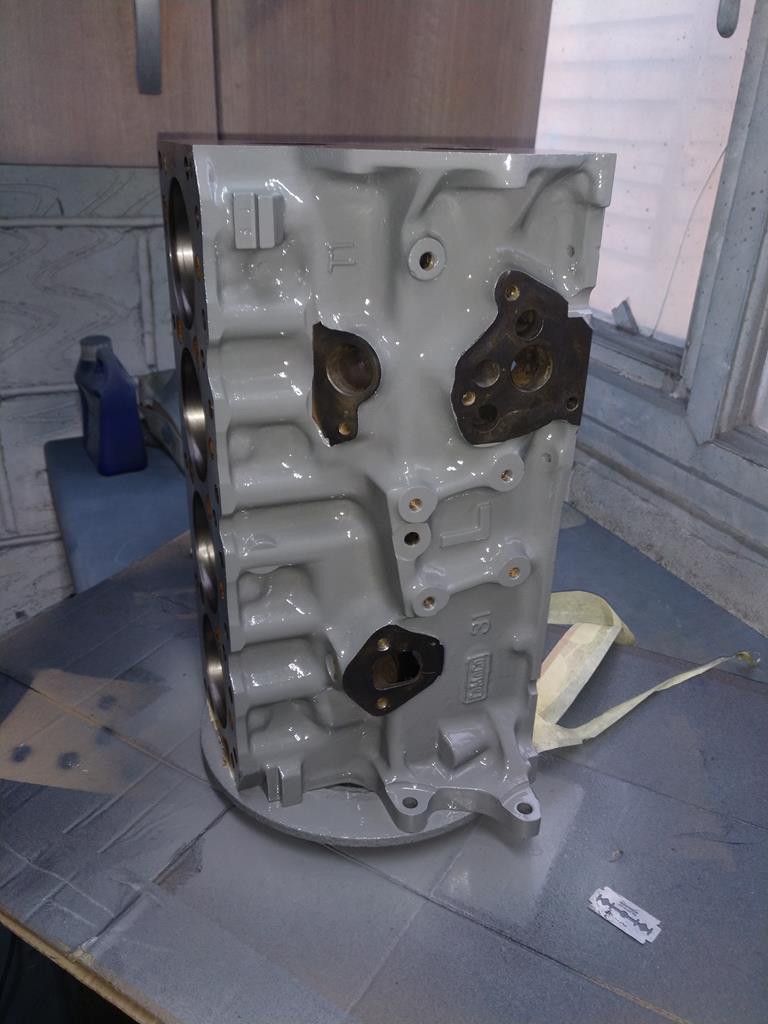 The crank and jackshaft are in and turning lovely, the i went to assemble the pistins and rods and noticed a problem with the gudgeon pins which i should have seen earlier. 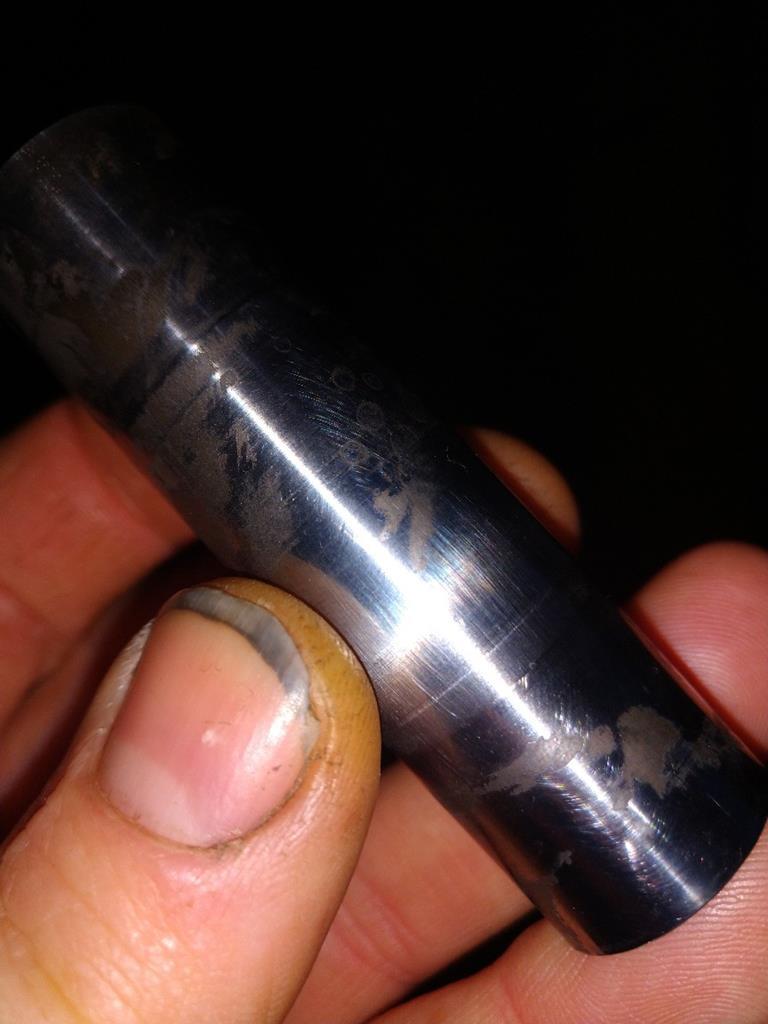 Its almost as if the hardened outer surface has delaminated leaving a rough finish, obviiusly i didn't want to fit these so started hunting for new ones. This turned out to be a pain as every piston manufacturer has their own length of gudgeon pin. My pistons are AE who no longer make them, i checked with the company who have taken over the name and they want £50 per pin, plus they're too long by 10 thou. Think i've scored some NOS Ford xflow pins which happen to have the same dimensions though, they should be turning up this week, all for £9. |
| |
Last Edit: Feb 11, 2019 18:06:34 GMT by pptom
|
|
pptom
Part of things
 
Posts: 475 
|
|
Feb 11, 2019 18:02:16 GMT
|
Again, along the £9 theme, i scored this stainless backbox months ago from ebay (with free postage!). Its cracked where the pipe enters the backbox, but it looked like a stress fracture rather than rust failure. 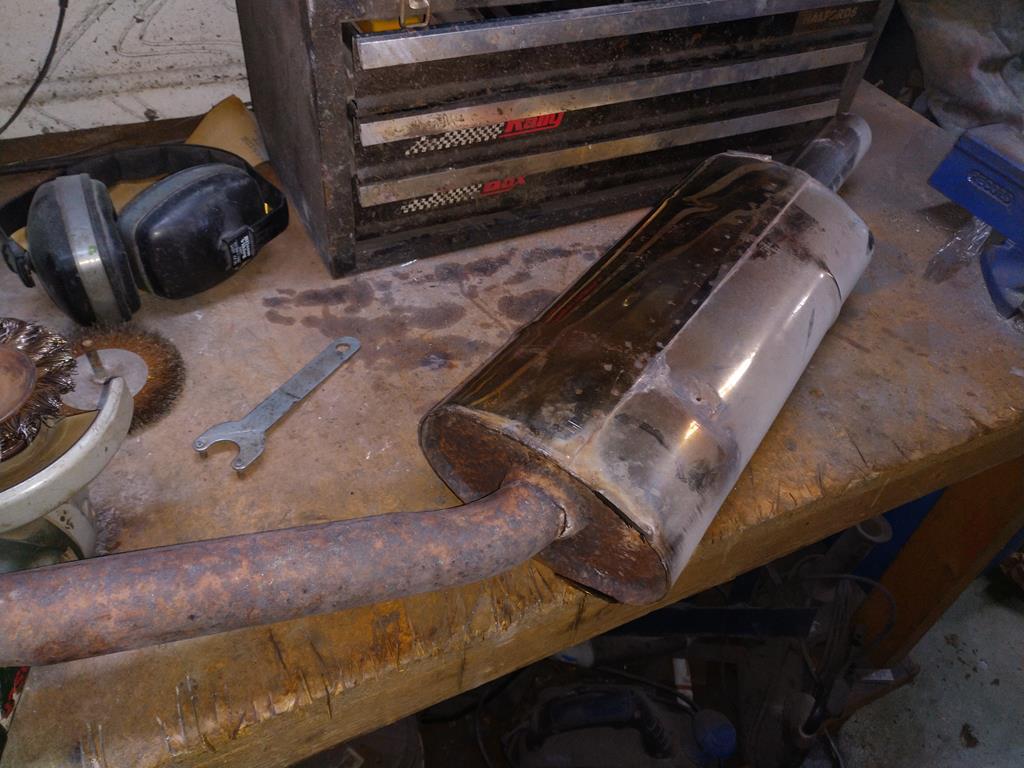 Turns out it was and i welded it up and gave it a quick clean tonight. Not perfect, but i can't grumble for that money and 45mins of my time 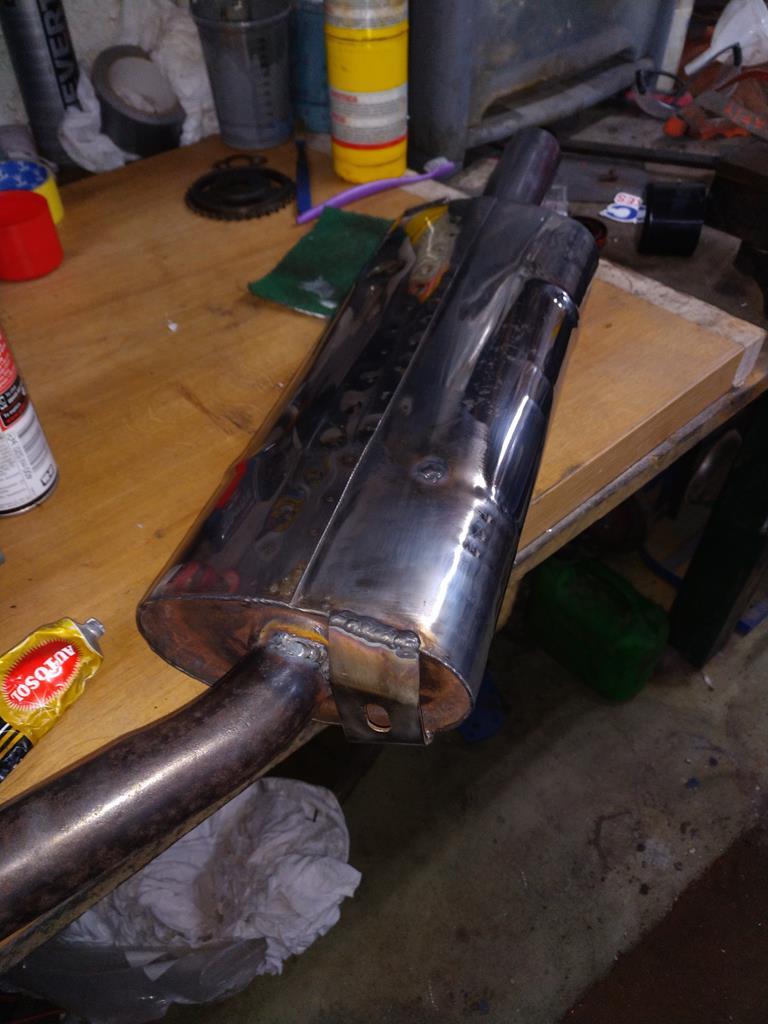 Thats the one good thing about doing a longer project, i generally do a bike in 3 months and the chances of nuggets like this appearing for sale are slim, so i end up paying over the odds or buying new. With a longer project, i've learnt to e a bit more patient and sooner or later the right part will turn up for the right price. I don't think i mentioned i also got hold of a set of CV driveshafts, brought by someone but never fitted courtesy of a facebook group. £200 cheaper than list, so they cost me about the same as renewing the 4 crappy rubber doughnuts |
| |
|
|
|
|
|
Feb 11, 2019 18:27:01 GMT
|
|
I love a bargain and agree with your statement about having time to look for them.
I've just stripped my front calipers and now wish I'd done so ages ago as they need new pistons and seals. Sadly it seems NZ suppliers want to charge £15 a side for one standard seal and dust cover!, whereas I can get them for £1 from Rockauto in the states. However I need them soon...
|
| |
|
|
|
|
|
Feb 11, 2019 21:50:13 GMT
|
|
Excellent work, and I admire both your patience, thriftiness and organized approach to the project. It's interesting to see how these were made and the challenges tthey throw back at you now. I wonder if the owner who commissioned the chassis swap ran out of shekels and couldn't afford to do all the other stuff it would have been sensible to do while it was all apart....suspension, etc? I'm also impressed you were able to get all of that gunge out of the block. As for the obligatory story, no my Dad didn't have one (he had a vile J-reg Maxi), but my friend's Dad had a JPS-liveried +2S I got to ride in as a 7-8'year old in Bristol. Thanks for documenting it. John, Connecticut/USA
|
| |
|
|
pptom
Part of things
 
Posts: 475 
|
|
|
|
Chipping away, just to bring this up to date 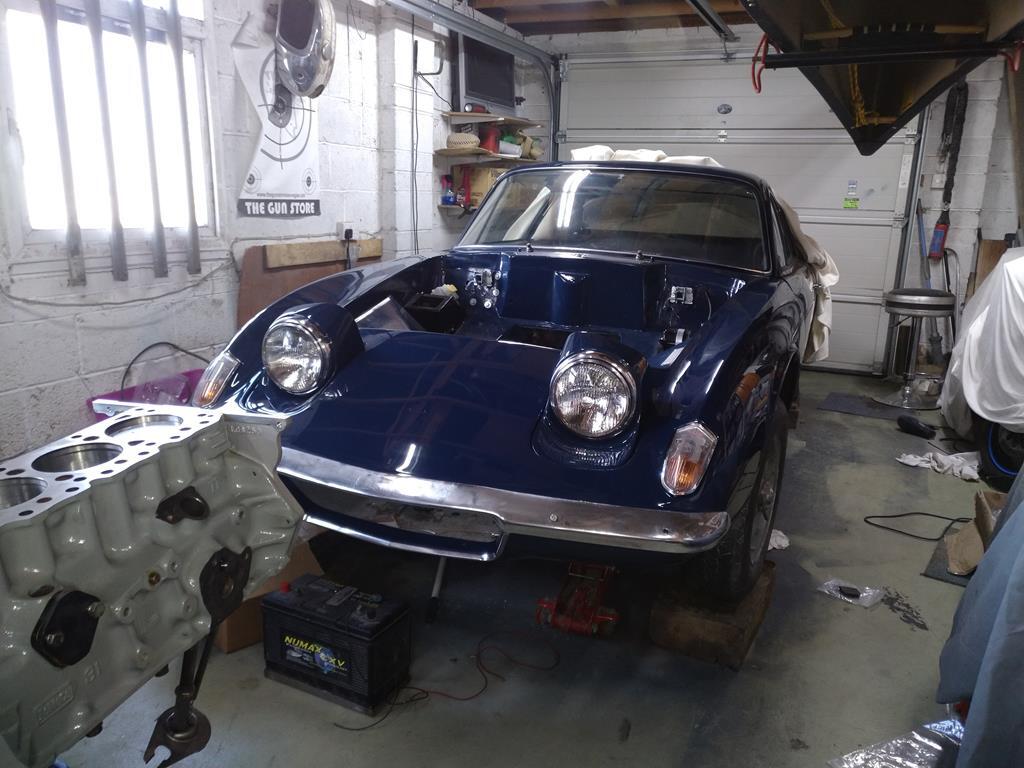 Headlight pods painted and polished eventually, had loads of problems with dust and contamination in the finish, but they turned out ok. I've now finished the conversion to an mx5 headlight lift motor which replaces the vacuum units. This turns out to be a cost saving mod as i'm about £50 up from selling the vacuum pods and buying the mx5 motor. The engines bottom end is coming together, still got to baffle the sump, but the engine is basically waiting for another cash injection so i can start on the cylinder head. Scored a Helix heavy duty clutch with very little use for about 1/4 the cost of new. 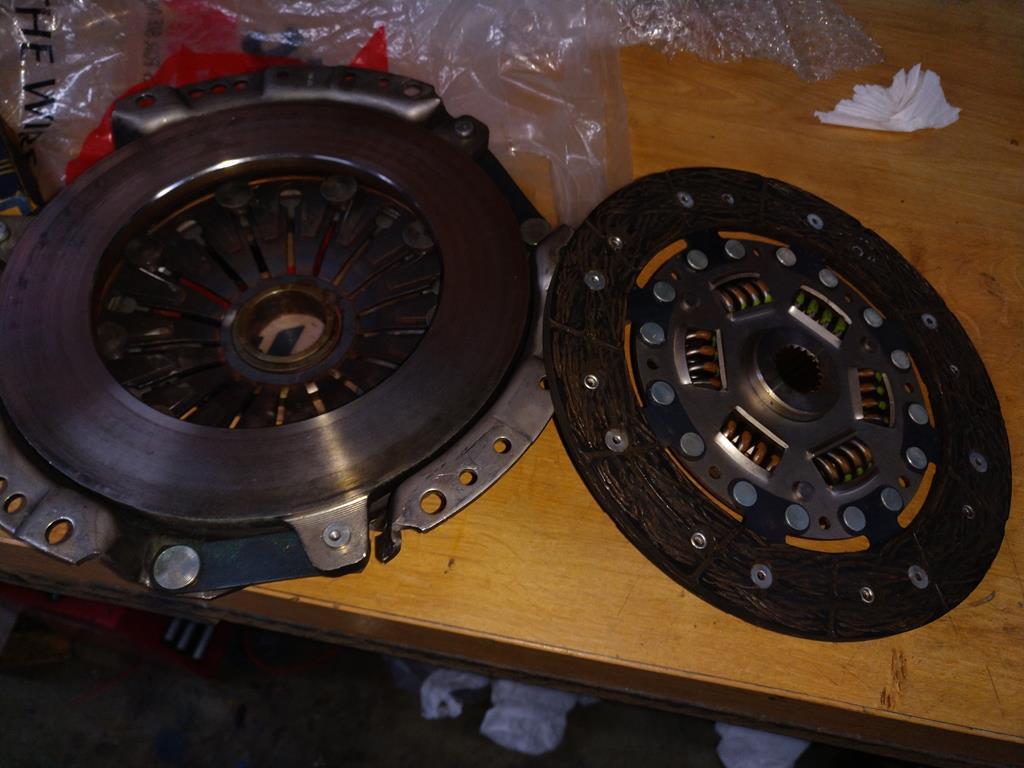 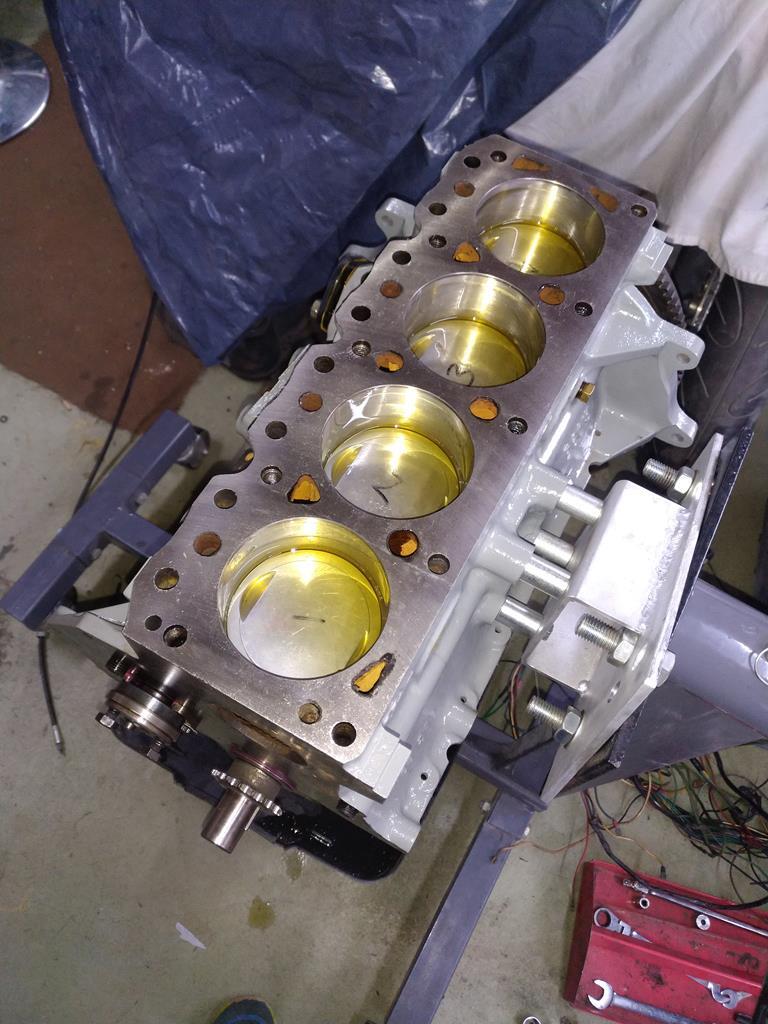 Ongoing jobs are sorting out the dash, its rewired now, but needs to be fitted, i'm planning on bringing the wiring up to date with some relays and several more than the standard 2 fuses. Also working on the bumpers, i've straightened out the front one, but the chrome is rubbish, the rear one is fibreglass and it needs patching and strenghtening. Toyed with the idea of a Chrome wrap on them, but i think i might struggle on the corners. An alternative is to put up with the front until a decent one comes up in the future (ford anglia) and just paint the rear? |
| |
|
|
pptom
Part of things
 
Posts: 475 
|
|
Mar 16, 2019 16:43:54 GMT
|
Thought i'd have a quick inspection of the gearbox today. The input shaft has a bit of a wobble and grumbles a bit when turning. Whipped the bellhousing and inspection cover off, no obvious nasties, so i took off the front seal / bearing cover 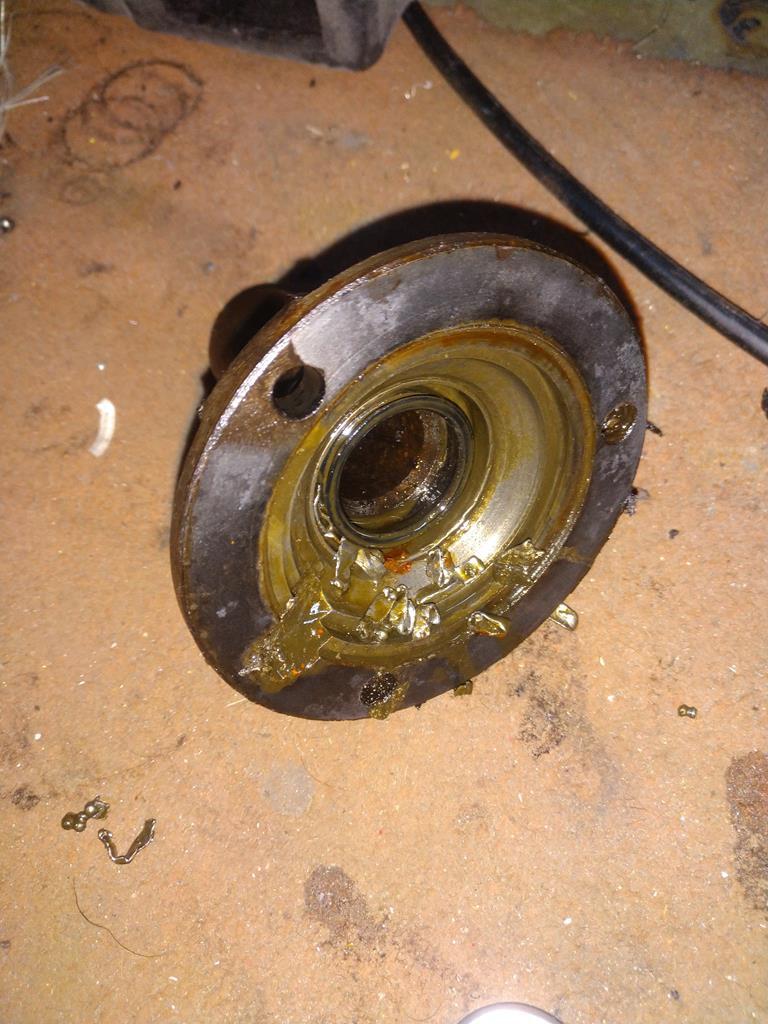 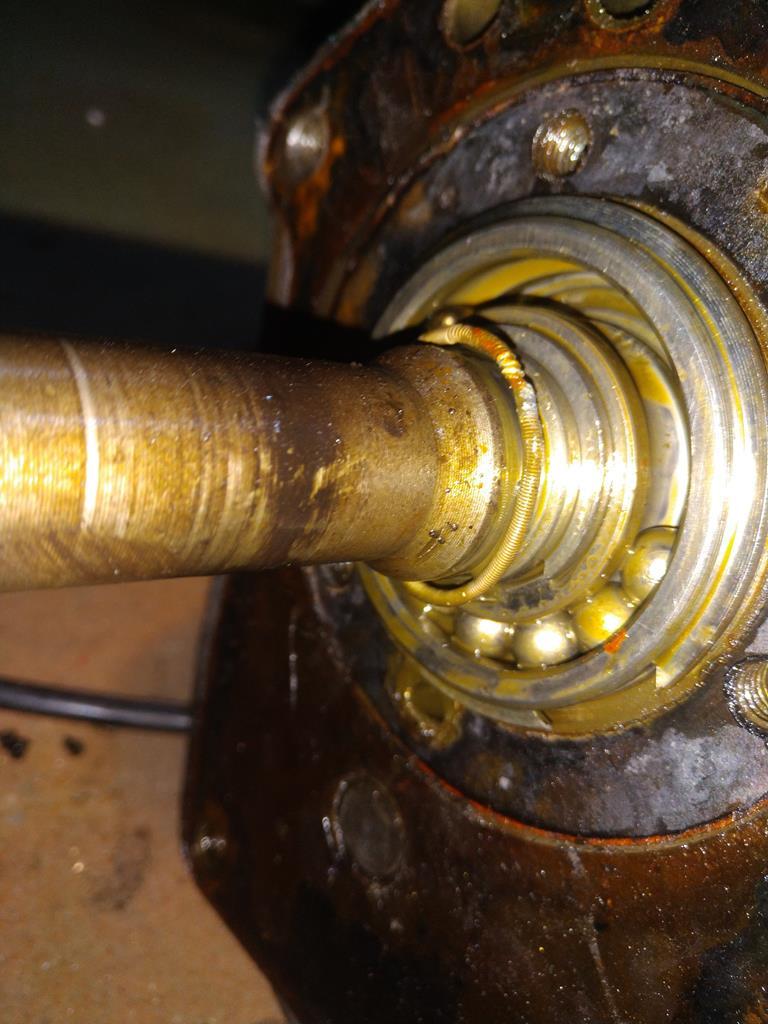 😣 So thats the input bearing cage disintegrated. Now, common sense says that the gearbox will need a rebuild as i don't know how long its been like that and what consequential damage has occured. On the other hand, there is no budget to pay someone to do it and gearboxes seem to be a bit of a dark art. So i'm trying to decide if i can just get away with replacing the bearing. I've tried to remove the bearing and while its free from the housing it seems to be stuck on the shaft, anyone have any experience or wisdom please? |
| |
|
|
briang
Part of things
 
Posts: 83 
|
|
Mar 24, 2019 21:48:25 GMT
|
|
The front bearing is a press fit onto the shaft. You will need to strip the gearbox to replace it. I would be concerned about the condition of the needle roller bearing between this shaft and the main shaft, and the synchro rings for 3rd/4th gears. Have you not got a workshop manual..Haynes from a mk1/2 Cortina would do. This is a relatively simple box to strip down..only special tool you need is a length of dowel to act as a dummy layshaft to keep all the little needle rollers from escaping!
Brian.
P.M. sent
|
| |
Last Edit: Mar 24, 2019 21:58:21 GMT by briang
|
|
pptom
Part of things
 
Posts: 475 
|
|
|
|
Gearbox back together, replacement tailshaft housing fitted (old one was crackedc) new bearings, seals, gaskets and 1 x selector fork. That lot was about £150 of unexpected expenditure, but the last thing i want when the car is finally on the road is to take the box out. The gearbox wasn't as much of a mission as i thought it would be, i suppose being a 50 year old design makes it relatively simple and actually getting stuck into it taught me alot. Don't fear the unknown! 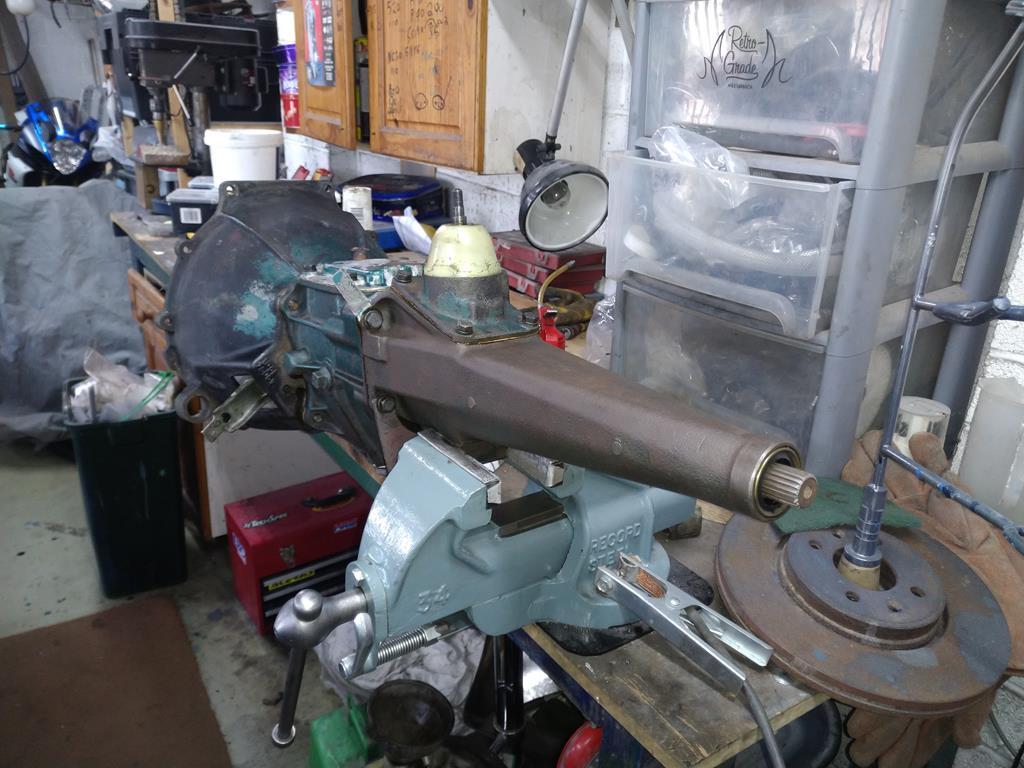 |
| |
Last Edit: Apr 1, 2019 17:23:09 GMT by pptom
|
|
pptom
Part of things
 
Posts: 475 
|
|
|
|
I've also been contemplating the wiring for a while and even looked at some of those modular systems which seem pretty good, but are expensive when you add in terminals and relays etc. Browsing ebay as you do there seemed a few factory versions which could be modified, so i've just got this mk6 fiesta one delivered for £12 which is not far off the cost of one relay and holder. 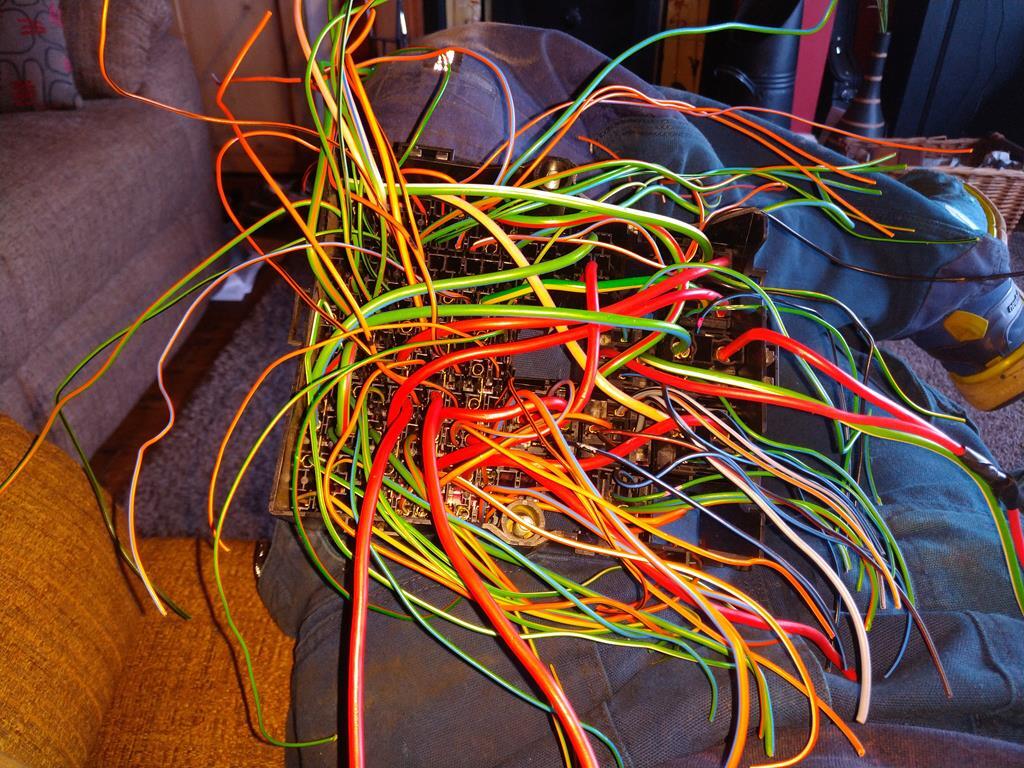 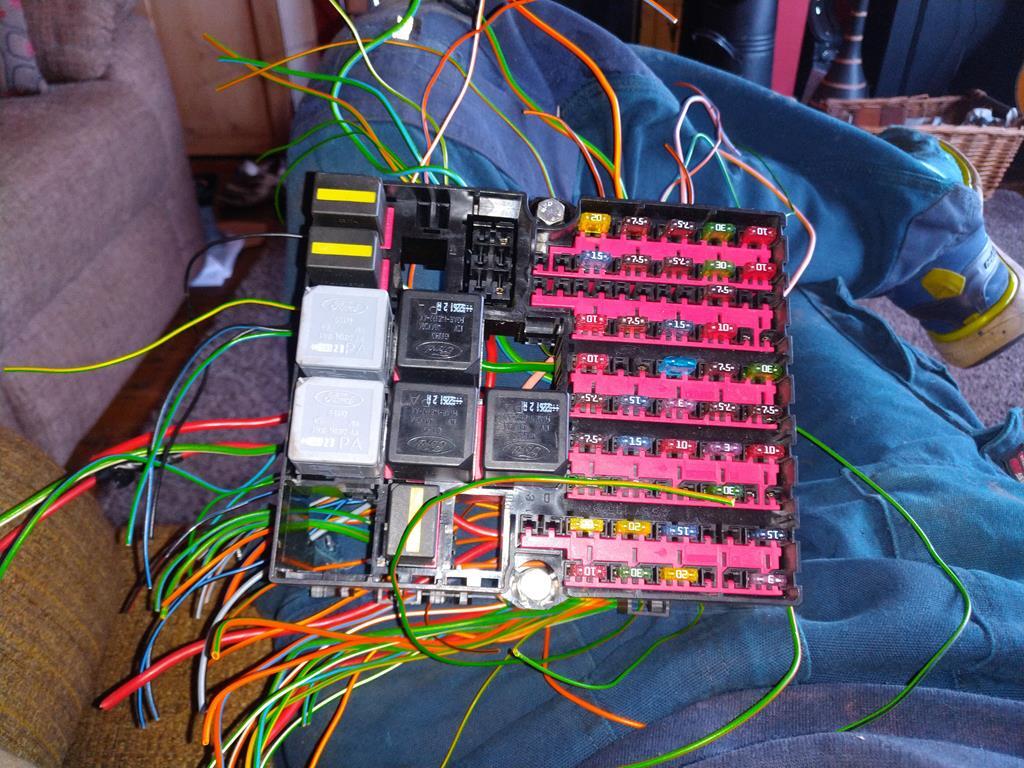 Of course, way more fuses and wires than i'll ever need and its scrambling my brain a bit trying to work out the way Ford have done it, but i think if i strip it back to basics it will do the job nicely. |
| |
|
|
|
|


 []
[] 


