|
|
|
|
|
This isn't a job I was looking forward to, but one that needed to be done. I had to replace the split outer CV boot. The boot was split and spewing grease everywhere. I probably could have tried to get through the inspection with it cleaned up a bit, but figured it was best just to change it out. 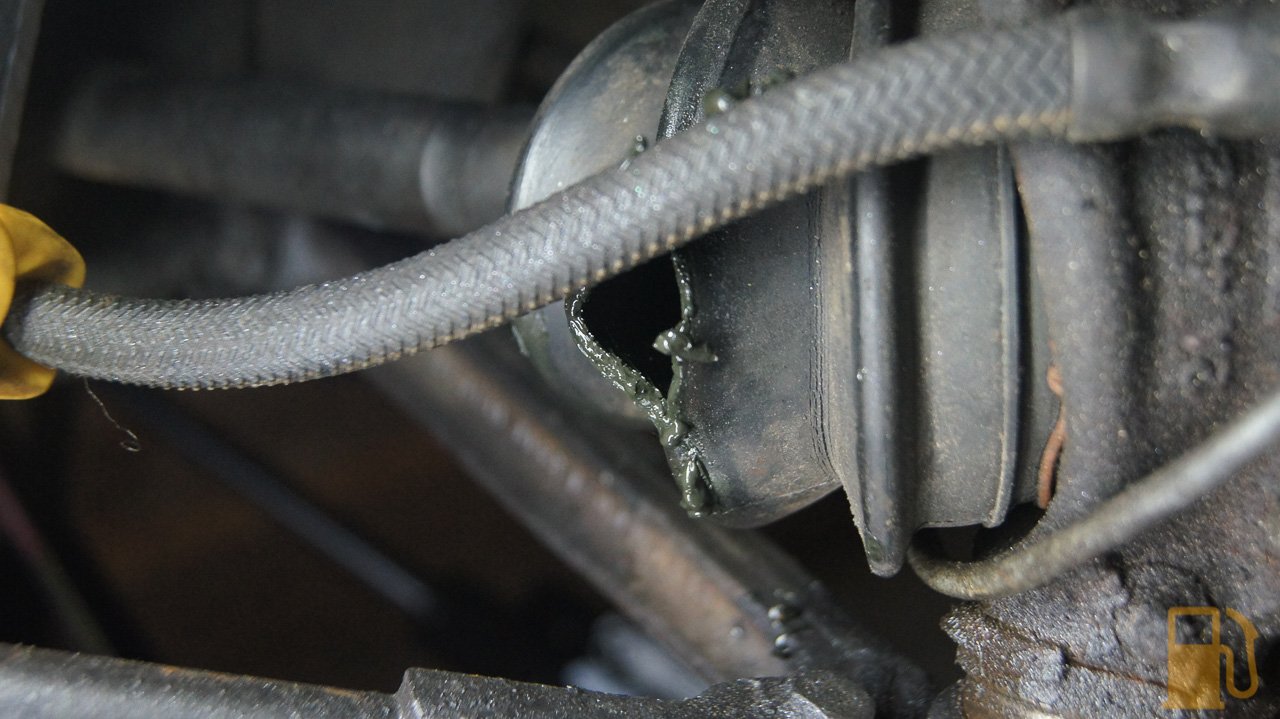 Step one, as always, is loosen the wheel nuts with the car on the ground. Also do what I failed to do, and remove the split pin and crack the main axle nut before you lift the wheel. It isn't torqued high, but you cant do it with a spinning wheel.  Jack the corner up and lower it onto a stand. Whip the axle nut and washer off  Next I loosened the nuts for the top ball joint and steering rod end. I gave the metal that the ball joints go through a good whack with a hammer but got nowhere, so I resorted to some WD40, winding the nut to the top of the thread and hitting the top of the nut. This broke both free without issue. I think I need a dead blow hammer.    Interestingly I found another grease point I didn't know about, on the underside of the steering rod end. Will need to get some grease in that nipple.  I left the lower ball joint and tie rod attached (later removed, to flip the bolt around, but it doesn't need to be removed) to the lower arm, and lowered the hub/drum complete. There was enough movement and slack in the brake hose to not strain it, but take care.  You can see the axle just slipped out of the hub, and with some wiggling out it came completely 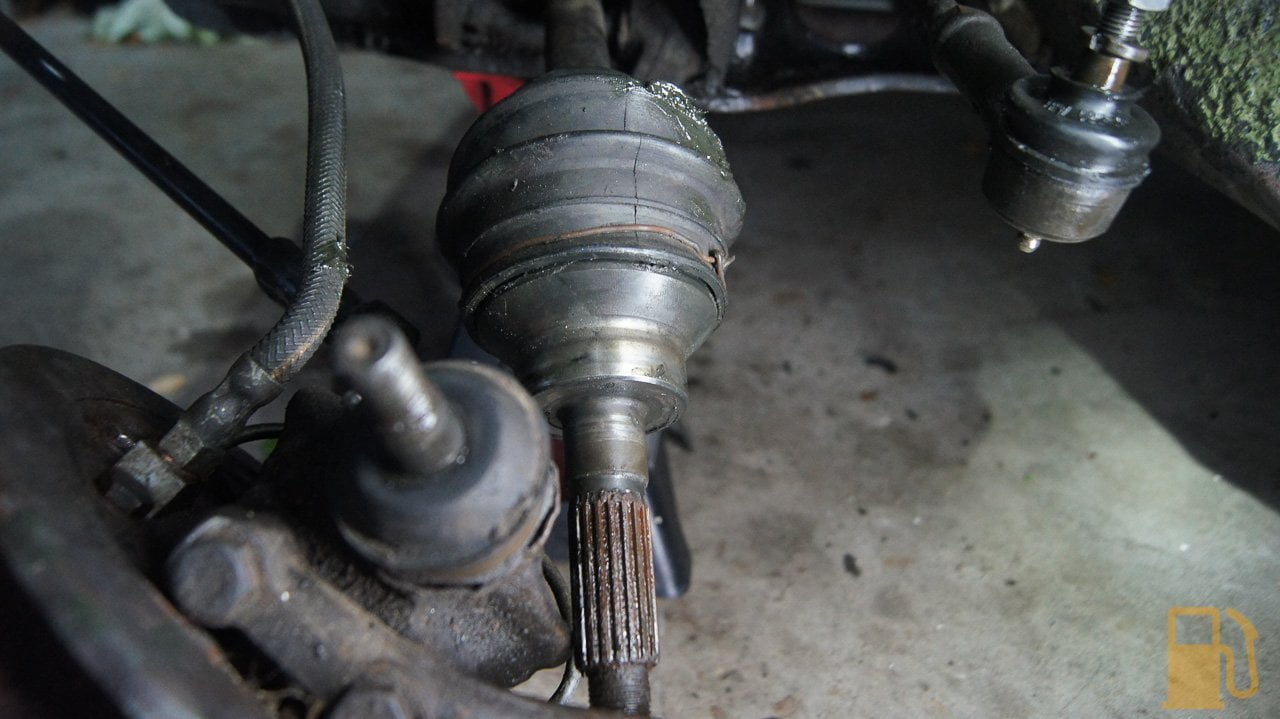 Now, I tried to be lazy, and leave the axle in the pot joint and remove the CV, but don't be lazy, it's a waste of time. Remove the large CV clamp on the gearbox pot joint, on the other end of the axle, and the whole lot will just pull out and be removed from the car. Be careful that the balls in the pot joint don't fall out when you remove it.  With the whole axle out, it's very easy to split the CV off. Just hold the axle CV downwards, put something soft under it to cushion the drop, and hit the CV with a mallet. It should just pop straight off.  Everything is full of grease; this is a very messy job. I have heard of people putting the pot joint into a plastic bag to limit the greasy mess, but I just stuck the joint into a box the CV boot came in. Seemed to work OK.  Remove old boot  Slip the new boot on and make sure the small end seats into one of the grooves in the axle  Refit the CV (I wont say how to do this as it varies. The Haynes manual gives some detailed instructions)  And then get really angry at the stupid flat metal clamps they supplied, and the fact you didn't think to get the proper tool for them. No, pliers don't work properly. The boot I got from Supercheap (listed as for "front drums" as I know the ones for the discs are different) seems to be a bit short on the CV end and doesn't sit completely in the groove. It seems to clip in though and doesn't just pop off at maximum angle, so hopefully its OK. Teaches me to not buy it from a Mini parts supplier. I ended up using zip ties to secure the boot, but I have ordered the correct tools, and more proper bands. If/when this boot fails me, I'll probably just get a universal stretchy boot and use that instead. Apparently the stretchy boots are quite common to use on the Mini as its quick and easy. Torque the nut up to the required torque (which is quite low on the standard cars, 81NM), fit a new split pin and away you go  Looking good after a quick spin (catch tray to catch the overflow from topping up the radiator)  Ok ok, I know it's a lot of posts, but I'm almost up to date now. Clearly I have done way too much work in a short space of time. |
| |
|
|
|
|
|
|
|
|
|
Really useful stuff there for those taking their first venture into the world of carbs and distributors. I'm the opposite and learned on timing lights, ears and feel whilst I saved up for a Colortune. In my dotage, I then had to get used to nifty stuff like resetting fuel trims, throttle position sensor voltages and so on by plugging in a box! Whilst that's fine, there's a certain satisfaction in getting a carbed motor running nicely.  |
| |
|
|
|
|
|
|
|
Really useful stuff there for those taking their first venture into the world of carbs and distributors. I'm the opposite and learned on timing lights, ears and feel whilst I saved up for a Colortune. In my dotage, I then had to get used to nifty stuff like resetting fuel trims, throttle position sensor voltages and so on by plugging in a box! Whilst that's fine, there's a certain satisfaction in getting a carbed motor running nicely. Its great fun. Years ago with my Marina I played around with the timing and the points gaps to make it the beast it was, but havent really messed with carbs before. I'm pleasantly surprised at how easy and simple SU carbs are to deal with. I agree completely, its cool to have all that info handed to you on a screen, but the satisfaction of getting this little Mini running properly is great. |
| |
|
|
|
|
|
|
|
Right, so clearly that was a lot of work done in short space of time. This post will bring me up to date now. I have been trying to split the previous posts out to make it easier to read and follow, since if I combined them all together it would be one huge MEGA-POST, and no one has the time to read that. This post is more of a brain dump of the other things I have done with the Mini that don't fit a particular category or are too small to be their own post. First up, is yes, the second replacement oil drain plug I fitted a few posts ago (with the thread tape and Rover crush washer) has successfully stopped the oil leak. I finally have oil only where it should be! Praise MOWOG the fickle god of British cars.  Secondly this arrived the other day. One monster of an Imperial socket  "Whats that beast for?" I hear you ask. Well, when I was in the engine bay the other day I randomly noted that the main subframe tower bolts were... loose. Not just loose, but barely even in their threads loose. 1-5/16" is the size of those bolts, so I got the socket to correctly torque them up.  I don't know if they just forgot to tighten them? They obviously had a socket that worked, because they had to remove them in the first place. Oh well. The car feels a bit more planted in the front now, but I'm actually amazed how little you could tell when they weren't tight. I guess it puts a lot of strain on the other mounts though. Another item that arrived is my utterly gorgeous new rocker cover. You have likely seen it in some other photos, but just look at it. MMMM.   Unfortunately being the idiot I am, I didn't notice the part that said "when you order this you will need longer bolts to hold it on". Well, I didn't get those bolts, but I did manage to make mine work by trimming down the new bushes. Its tight, but I got it torqued down correctly, and with no leaks!  A couple of other little items I had been waiting to fit were some washer jets (the old ones were WELL buggered)   And a new hazard relay, so now I have on demand hazard lights. Check out that lovely heatshrink.  I secured these two up onto the wiper motor to stop them rattling about, next to my new washer bottle 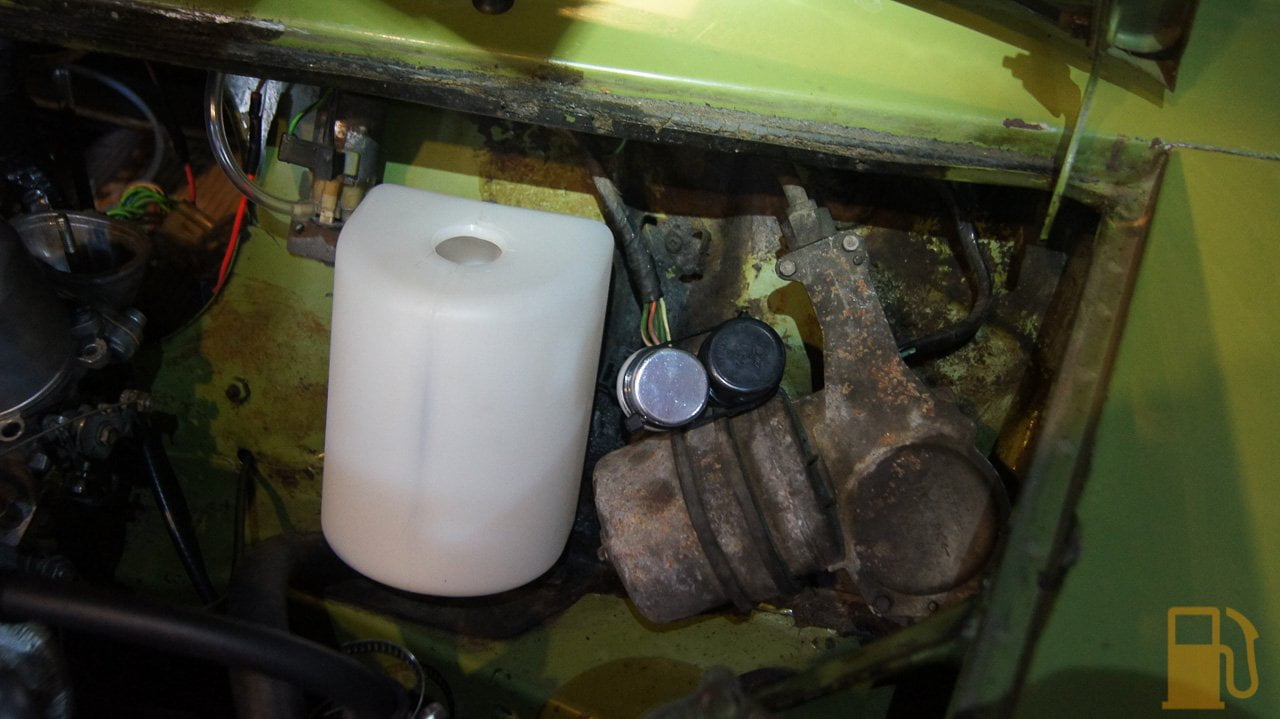 Speaking of washer bottles, the caps are proving bloody hard to get. No one does new ones, but thankfully I managed to source a good used one that will work.  Once I had run new hose to and from the washer pump, I found out that the original pump that came with the car, despite making the right noises, didn't actually move any water. I guess that is why it was removed... The replacement pump in the above photo is the pump that originally came fitted to Effie when I first got her. It works perfectly, and now I have two pathetic jets of water that kind of shoot onto the windscreen. Water drops as proof. 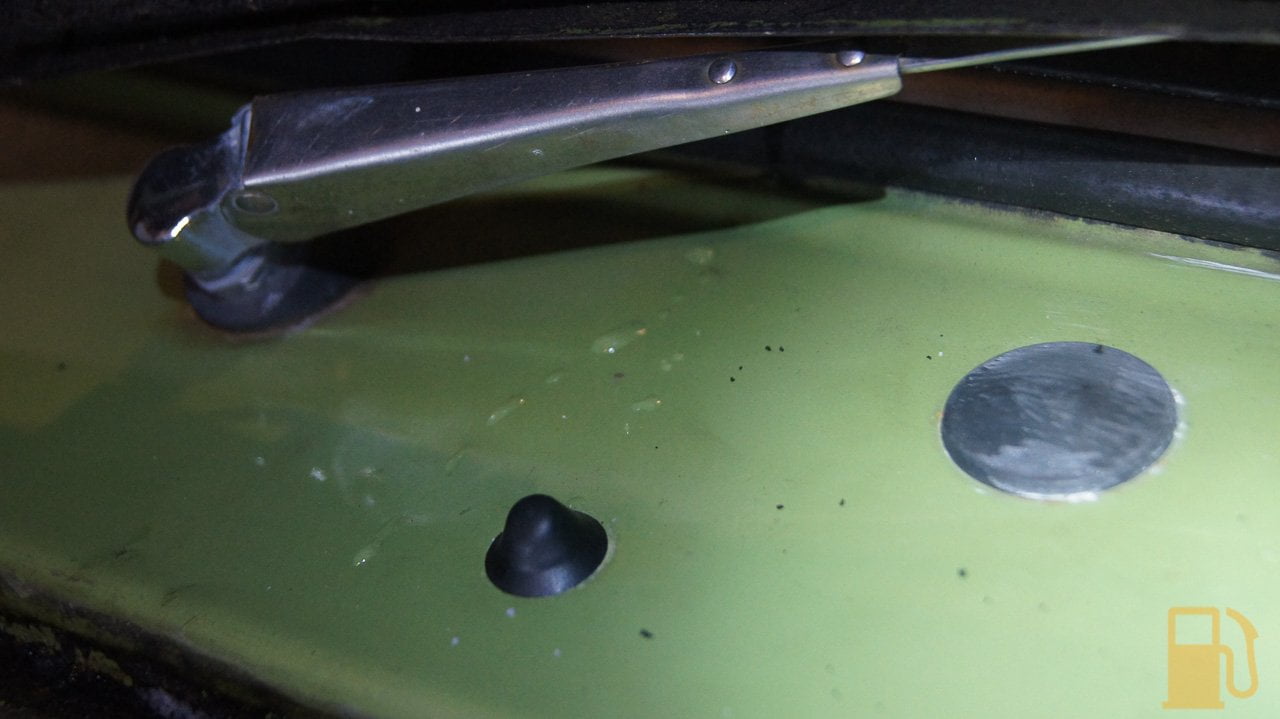 The last couple of items that also got changed out were the starter solenoid, and battery negative lead. The starter solenoid was absolutely coated in oil. I don't know how, but it was all over it and up in all the terminals. I tried to clean it, but gave up and sourced a replacement. It had also previously overheated the wires, causing some damage to the insulation, that was taped up. This is the trigger wire once I removed the tape. Lots of bare copper and a melted terminal cover  I cut the terminal off, crimped a new one on and covered the lot with heatshrink  I did the same to the other bare wire; the constant feed  I removed the old solenoid from the guard, and fit the replacement in its place. I used copper grease on all the terminals, to help keep corrosion away.   The car now starts much nicer. Previously it would be very slow and lumpy to crank, almost like the battery was almost flat, despite having a fully charged battery. Now it just whirrs over, and fires up. I doubt the battery ground lead made any difference to that, but it got replaced anyway. The old one, despite being a replacement already, had frayed badly where it met the terminal on the boot floor. I also wanted to fit a battery terminal with a wing nut for quick disconnection.  So that's where we are now. Once I have the rear light bulbs sorted, and the battery secured, we will finally be ready to go for the re-registration inspection. Exciting! |
| |
|
|
|
|
|
|
|
|
|
They're comparatively quite expensive here, and chances are if I took that knob out I'd lose it. With the terminal I have they are cheap and I can put the nut back on for safe keeping whilst still having the cable disconnected. |
| |
|
|
|
|
|
|
|
|
Nice to a original mini ... not many left like over here that have not been Cooperised or reshelled etc .
Lovely little car just needs a little love and attention.
|
| |
|
|
merryck
Club Retro Rides Member
Posts: 477
Club RR Member Number: 9
|
Kelvinators 1980 Mini 1000merryck
@merryck
Club Retro Rides Member 9
|
|
|
|
Going back to that heater take off valve, I was driving my Midget the other day and got stuck in some traffic in the hot weather. The car overheated and that bloody valve (less than six months old) split right open. I've just ordered one of those cylinder head take offs to replace it.
If you find it does split and you're stuck, I managed to pop mine back together and get home before the engine got fully up to temp again. Worrying that I could put it back together by hand, no wonder they burst open!
|
| |
|
|
|
|
|
|
|
Going back to that heater take off valve, I was driving my Midget the other day and got stuck in some traffic in the hot weather. The car overheated and that bloody valve (less than six months old) split right open. I've just ordered one of those cylinder head take offs to replace it. If you find it does split and you're stuck, I managed to pop mine back together and get home before the engine got fully up to temp again. Worrying that I could put it back together by hand, no wonder they burst open! Damn, that sounds like a pain. I'm guessing the back end popped out? What pressure radiator cap are you running? I'm wondering if replacement caps over the years are running the system at a higher pressure? Mines a 13PSI non-return cap. |
| |
|
|
merryck
Club Retro Rides Member
Posts: 477
Club RR Member Number: 9
|
Kelvinators 1980 Mini 1000merryck
@merryck
Club Retro Rides Member 9
|
|
|
|
I'm not sure, I'll have to check. The bit with the lever popped off entirely.
|
| |
|
|
|
|
|
|
|
|
|
|
Took the Mini for a quick drive. Compared to the last video, it runs solid now. Pulls well in all gears, and revs out to some undetermined RPM (still waiting on my tacho to arrive). I have a sticky throttle though. Its something to do with my new cable, so hopefully that isnt damaged.
I did add an additional ground to the engine today. I find it weird that the only engine ground goes from the engine to the subframe, and then the subframe is rubber mounted. Apparently a bad engine ground can fry the throttle cable as it heats up and melts the inner liner. I hope this hasnt happened, but we will see. Ill pull the cable out and see whats up.
Sorry for the mad shakes in the video, but the Mini vibrates just a bit. don't watch too hard if you get motion sickness.
|
| |
|
|
|
|
Kelvinators 1980 Mini 1000peteh1969
@peteh1969
Club Retro Rides Member 107
|
|
|
|
Does it pass the New Zealand 4"/100mm ground clearance test that's shown on most of the episodes of Motorway Patrol as one thing that stands out above everything else is how low it looks compared to the other vehicles on the road in your video?
|
| |
|
|
|
|
|
|
|
|
It is SUPER low, as a Mini is. Its on standard, albeit worn, suspension. The 100mm clearance only applies to modified cars. The NZ rules are weird; a car can be as low or loud as it wants, as long as it came from the factory like that (Harley Davidson motorbikes are a good example of being horrifically loud, but legal). If its modified, there are plenty of rules that need to be met. You can also go lower than 100mm, as long as the car passes a certification test.
|
| |
|
|
|
|
Kelvinators 1980 Mini 1000peteh1969
@peteh1969
Club Retro Rides Member 107
|
|
|
|
It's great to see it running well and on the road good work Sir well worth it.
Thank you for posting the video.
More to look forward to.
|
| |
|
|
|
|
|
|
|
Brrm Brrm, my tachometer arrived from China today, so I quickly wired it in so I can see how close to valve bouncing I am. Before I get to the tacho, first I have to mention my throttle issues. The last few times I have driven the Mini I have noticed the throttle sticking when pressing down on the pedal. It sticks so you need to apply more pressure to push it passed that point. The point is completely variable, it can happen at the bottom of the pedal or half way up. Thankfully it doesn't stick the throttle open, it just makes accelerating a bit jerky. I had heard that if the engine ground isn't good that the car can end up using the throttle cable as the main ground, and because the throttle cable is very thin it heats up a lot and melts the inside of the throttle cable liner. I had suffered a very similar issue with Effie a while back when the ground point was corroded, and the throttle cable did indeed start to smoke and get damn hot, but the cable survived that. My Mini only has one engine ground strap, which goes from the gearbox to the subframe. Only issues there is that the front subframe in the MK4 Mini is mounted to the car via rubber insulated mounts. This is meant to make the car less harsh than the older ones, with less vibration, but I doubt anyone would ever consider a Mini soft anyway. As most of you will well know, rubber is a terrible conductor of current, so relying on that to ground the engine isn't really good. I had some bits sitting around, so I whipped up a quick additional ground from the gearbox to the grounding point on the body. I was going to use some wire I had from a cheap subwoofer kit I had, but when I looked at the 8GA wire it came with I found that the whole wire, insulation and all, was thin enough to fit in the terminal. The actual copper in the insulation was about half of what my decent 8GA wire was. The proper 8GA wire, the copper its self is as thick as the whole insulated Chinese wire. Proper wire, back from when Dick Smith actually sold decent stuff  I crimped a terminal on each and, cleaned up the bolts and fitted it     It doesn't appear to have actually done anything, but I see no harm in it being there. The later injected Minis have another ground strap that goes along the top engine stabiliser to the body, likely as the injection system requires far better grounds. To see if the average grounds had damaged the throttle cable I disconnected and removed it from the car. Thankfully the cable slides freely in its sleeve, even when looped or gently bent. So the cable wasn't the fault. I also checked the carb, this operates freely and smoothly, so that wasn't the fault either. The next option was the throttle pedal assembly. I removed it from the car and had a look. This photo is from after I had lubed the pivot point up, but you'll get the idea. I found a lot of corrosion on the pivot point, where the pedal arm pivots on the firewall mount. It turned out the washer (green arrow) was corroded to the mount (orange arrow) and stuck to it. This meant that when the arm pivoted, the washer was binding on the little tab (red arrow) that stops the whole lot sliding over.  The washer needs to spin freely, so that even if it gets pushed against the tab it wont cause any resistance to the arm turning in the mount A quick dose of percussive persuasion quickly freed the washer up, but it had caused some damage to the arm, and the mount due to corrosion and wear. I thoroughly lubricated everything with WD40, and then smothered it in copper grease to help keep further corrosion away, and keep it free. This has reduced the binding in the throttle a lot, but it still doesn't operate completely smoothly. I suspect this is due to the corrosion it suffered. I'm amazed there is no bushing or anything in the mount, it's just metal on metal. I'll see how we go with it as it is, but in the future I may need to buy a replacement (which is thankfully available new) Whilst I was sorting the throttle, the courier arrived and left me a nice little package from China. It was my tacho. These old Minis don't have one standard, and just for my own interests I wanted to add one, but make it completely reversible (so no drilling holes etc). Installation was a piece of cake. I took power from the top fuse, which had a free spade terminal. This is switched power, and I used it for both main power and backlight, so the backlight is on whenever the ignition is on.  Ground I got from the washer pump spare screw (it's a spare now, as the outlet hose becomes friends with the airbox if its installed straight)  The only other wire was the signal from the negative on the coil. I was hoping to just pop it on a spare spade terminal like the positive has, but either it didn't come with one or someone had broken the extra spade terminal off the negative, so I used a much hated splice connector. These are kinda cool because you use a spade terminal to join the second wire into the connector, so it can be disconnected easily. 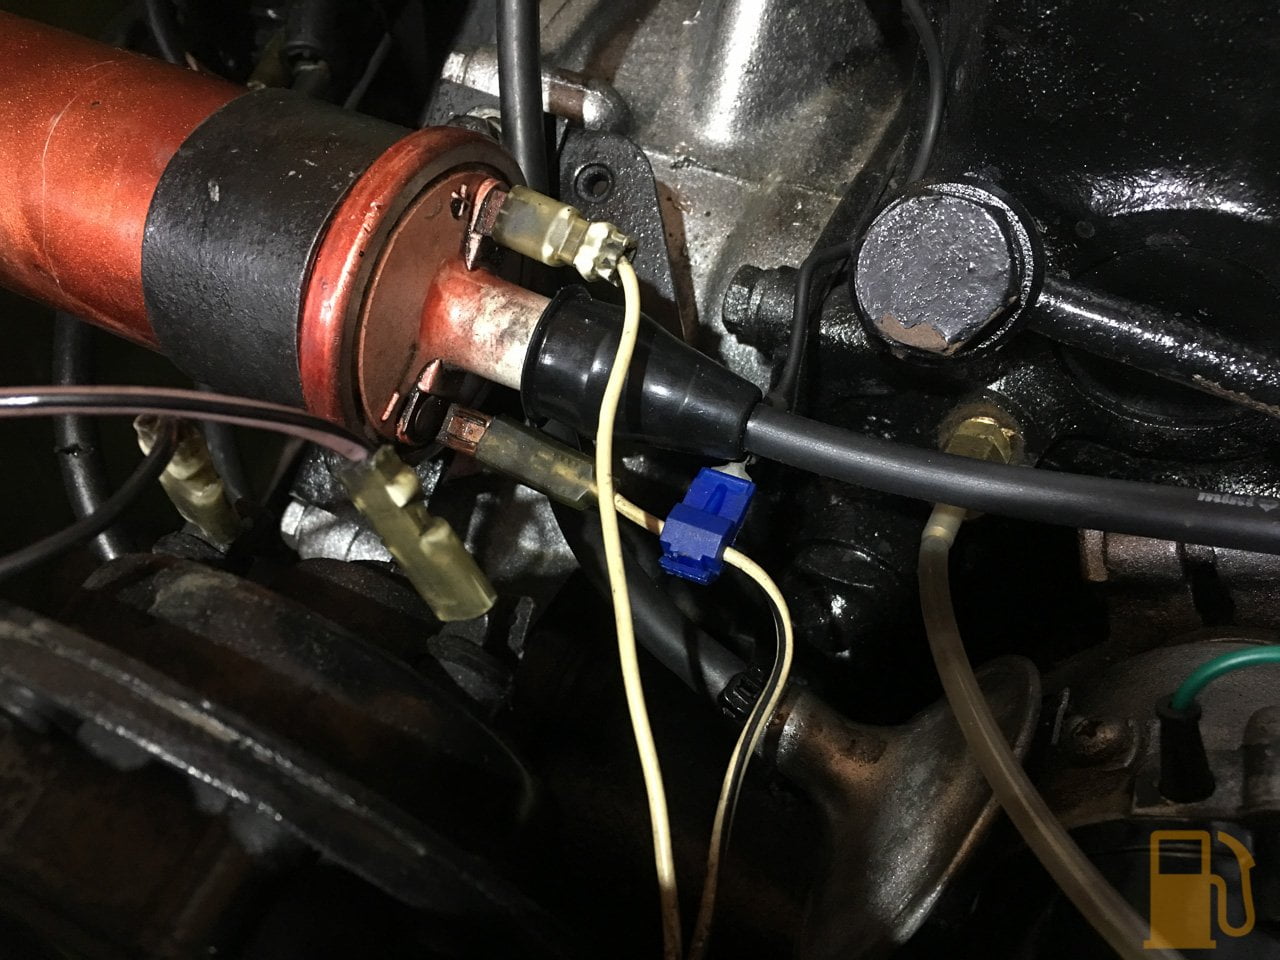 I wasn't sure where to mount the gauge, but knew I wanted it kinda in front of me, but not in the way of anything. I didn't want to drill holes anywhere, so it had to be mounted on something solid so I could use trim tape to stick it on. The top dash rail worked, although my tape didn't stick very well to it, so it may have to move again. It also gets a bit of glare from the side window.  Now, before you ask, yes, I did mount the gauge on the curse word on purpose. I don't care much for the lower RPM range, so I arranged it so that at the 12 o'clock position the needle will be at about where I should let off the throttle. The little A Series engine is apparently only good for 6000RPM or so, so if I see the needle at the top, its time to back off. Because race car. I'm not sold on this gauge, it seems a bit lazy to respond and looks cheap. It was cheap, so let's be honest I didn't expect miracles, but the plan down the line is to make a custom dash and integrate a couple of extra gauges (like tacho), but I wouldn't be reusing this gauge in that. It'll do for now. |
| |
|
|
geoffc
Part of things

Posts: 56 
|
|
|
|
|
My 1983 city e has a earth / ground lead running from the head to the bulk head where the top stabiliser is, it's quite a thick lead and common over here, pre dates the mpi minis so might me worth fitting on there.
|
| |
|
|
|
|
|
|
|
enjoyed reading your little BL bretheren thread so far the 1|4 on the flywheel for zero degrees, could mean 1 and 4, i.e cylidner 1 and 4 at TDC? |
| |
|
|
|
|
Kelvinators 1980 Mini 1000fr€$h&m1nt¥
@freshandminty
Club Retro Rides Member 99
|
|
|
Ooh I do like finding a new thread I’ve not read before. Thanks for sharing and writing detailed posts, I’m sure some of the universal info will come in handy to me. Impressive progress in short time to. Did the oil sump plug all work well or do you need to get some bonsai wire off @quatermass |
| |
|
|
|
|
|
|
|
Ooh I do like finding a new thread I’ve not read before. Thanks for sharing and writing detailed posts, I’m sure some of the universal info will come in handy to me. Impressive progress in short time to. Did the oil sump plug all work well or do you need to get some bonsai wire off @quatermass Thanks The latest sump plug is working perfect, with the SD1 copper crush washer and teflon tape. Not a drop leaked since. We should be going in for the re-registration inspection this week all going well. |
| |
|
|
ivangt6
Part of things
Posts: 776
Club RR Member Number: 132
|
Kelvinators 1980 Mini 1000ivangt6
@ivangt6
Club Retro Rides Member 132
|
|
|
Nice Mini It looks a very similar to mine 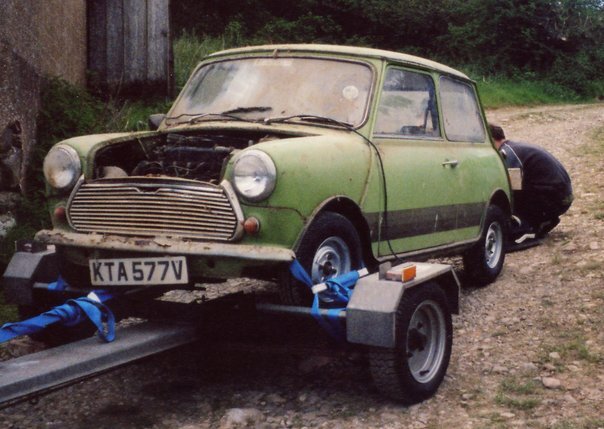 Have been there with the CV boots and like you, I didn't have the proper tool so ended up using cable ties which ended up very messy as the cv boots emptied their contents everywhere. As for the earth cable, Mine went from the gearbox to one of the rear mounting bolts on the subframe. The bolt went through to the body and never had a problem with earthing. It was a nice thick cable though. Never had a rev counter on it, I just used to rev it until the valves bounced! It was a great first car Good luck with it |
| |
1979 Mini 1000
1972 Triumph GT6
2007 VW Golf GTi
1979 VW T25 Leisuredrive
1988 Range Rover Vogue SE
|
|
|
|


