ChasR
RR Helper
motivation
Posts: 10,297
Club RR Member Number: 170
|
BMW E46 M3 : That's the ticketChasR
@chasr
Club Retro Rides Member 170
|
Jan 19, 2020 22:27:59 GMT
|
A few other things however, would catch me out Firstly, the exhaust, but I've covered how that was a pain. The second, the CV. I never knew that was the source of the noise. With that in mind, I went out spunked a small fortune on a new one from BMW. How much? £200. For a CV! Sounds alot until you bear in mind most pattern ones were £130 and a decent vendor was selling a 'decent' pattern item for £180. I didn't want to take any chances, and seeing that only GKN have the given to licence to only BMW to sell them, off I went to buy another one. I also bought some Redline CV2 grease. This has varied reviews, but seeing the success @pinderwagon has seen from it I thought, just do it  . 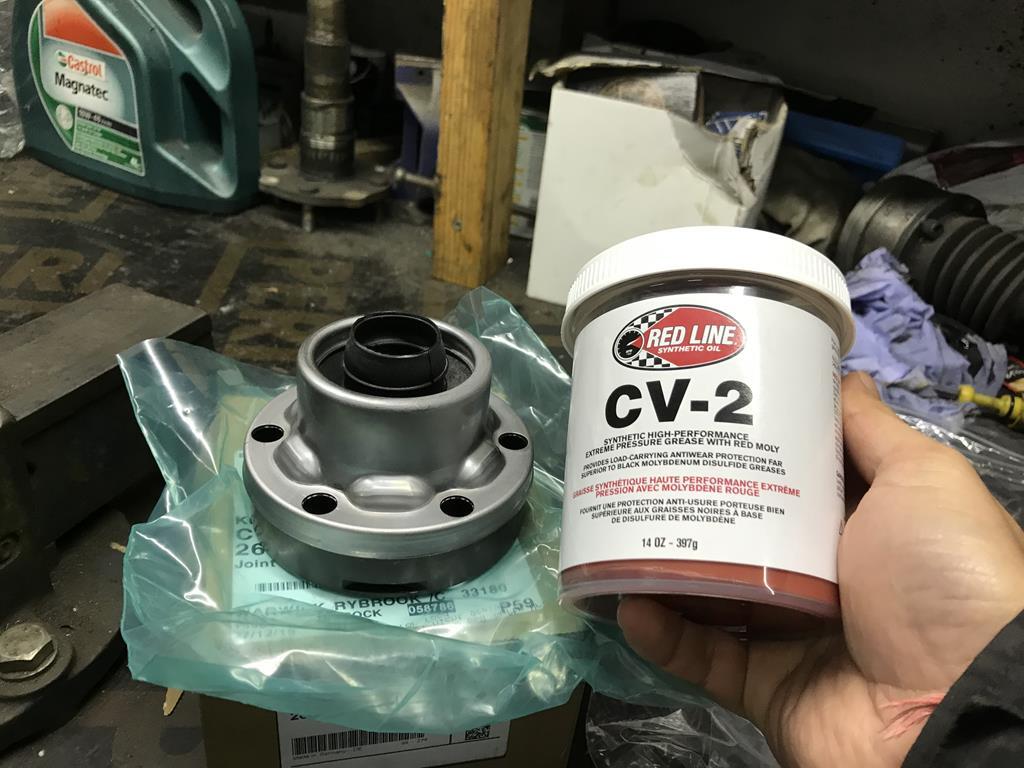 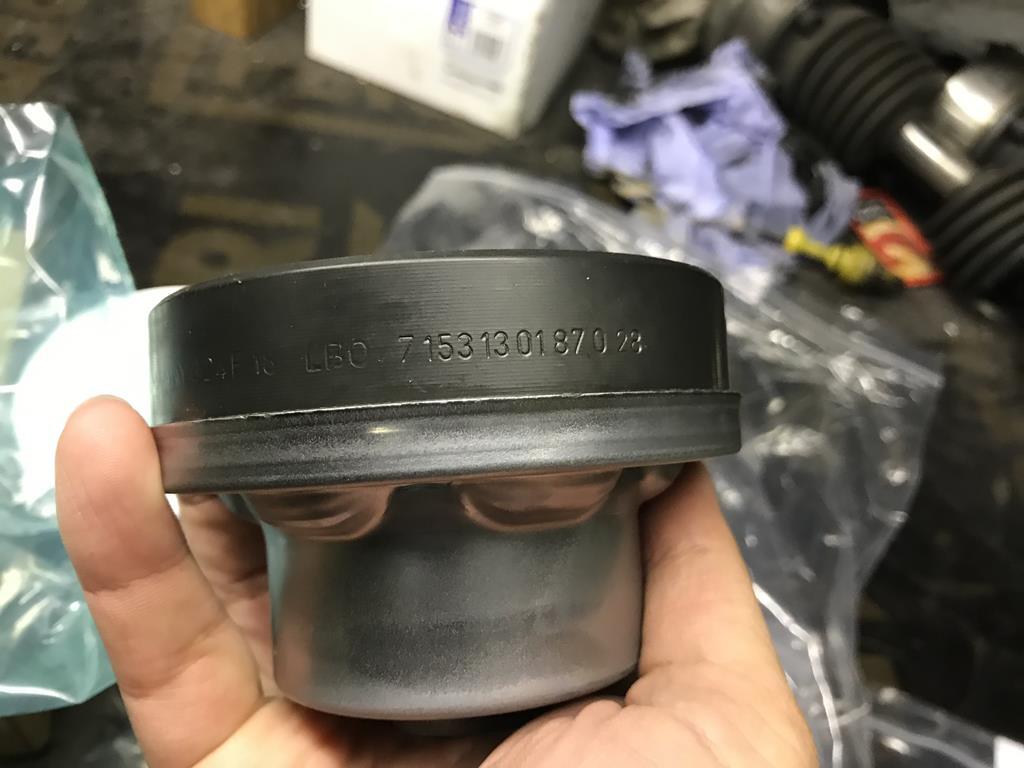 For those wondering, the part number between the old CV and the new CV is the same, despite BMW giving different numbers for both assemblies. However, the CV boot has changed in design ; it's larger and longer on the later number; this seems to have come in for the last of the line M3s and the Z4Ms, the only BMWs this CV seems to be fitted to. 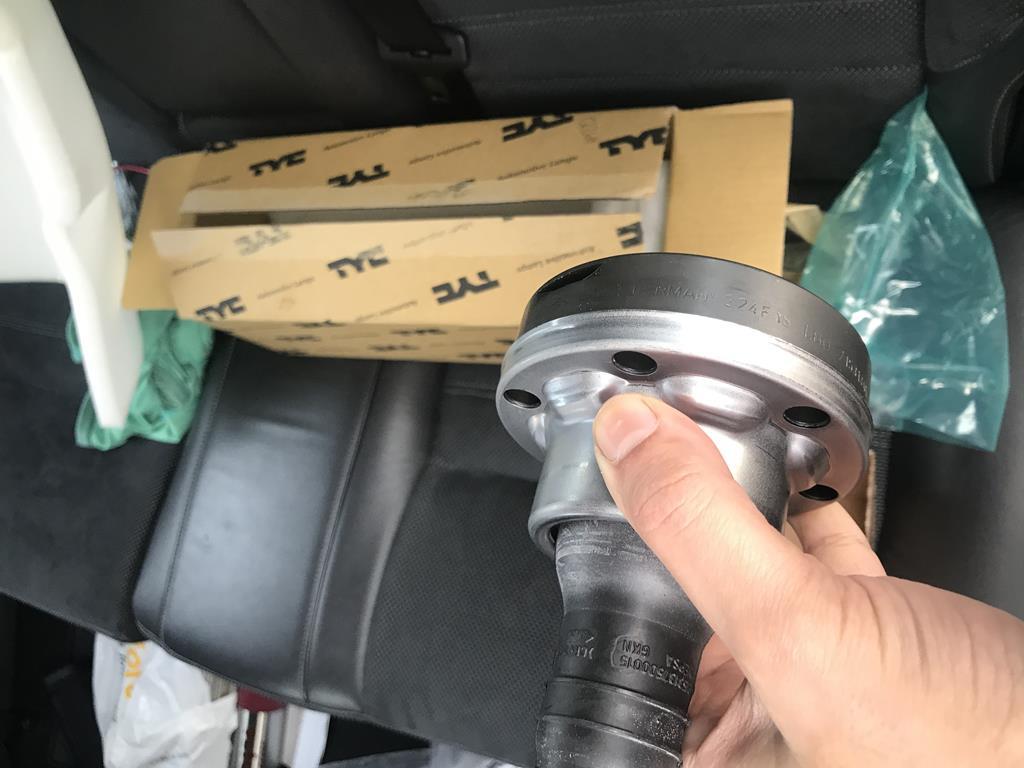 With this in mind, I packed the CV. I struggled to do the other side as the cover was on. Will it be fine? We'll soon find out. I hate packing CVs, but it's a messy job that has to be done. 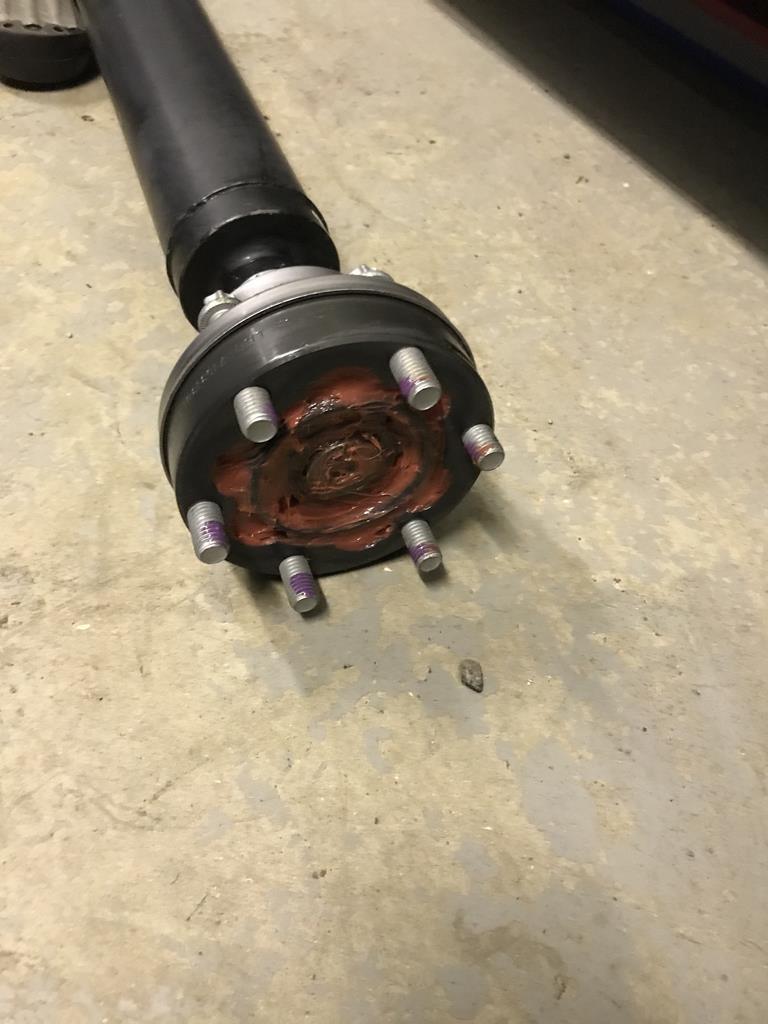 So, what about the guibo? That wasn't bad, but it had some evidence of cracking badly: 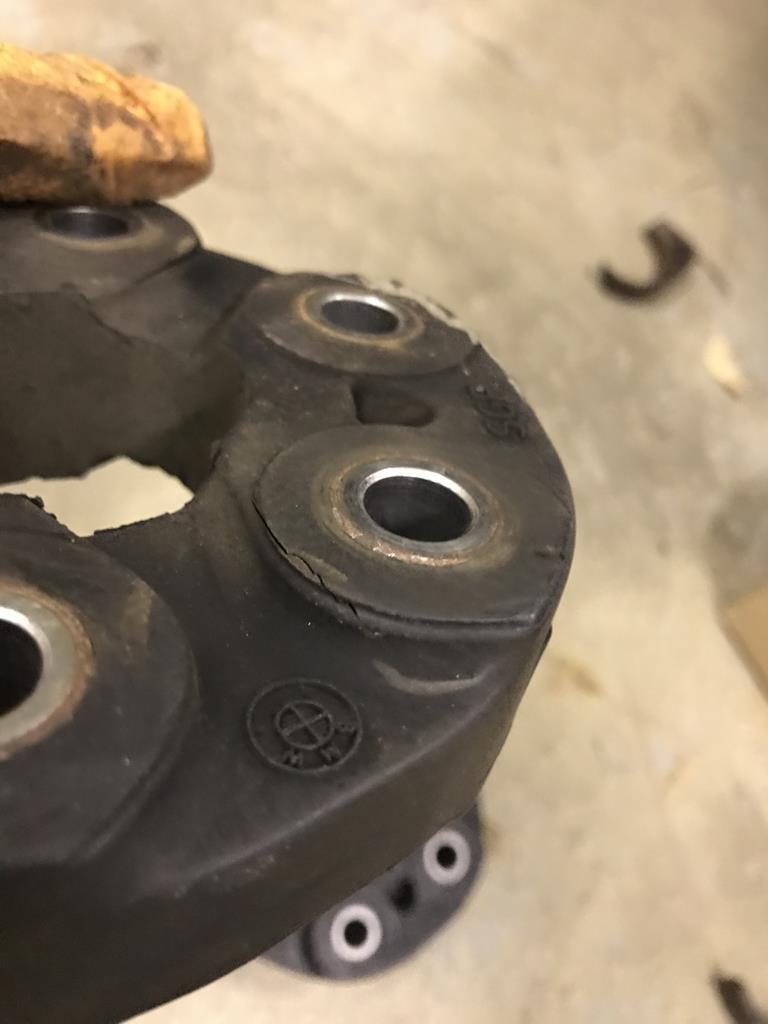 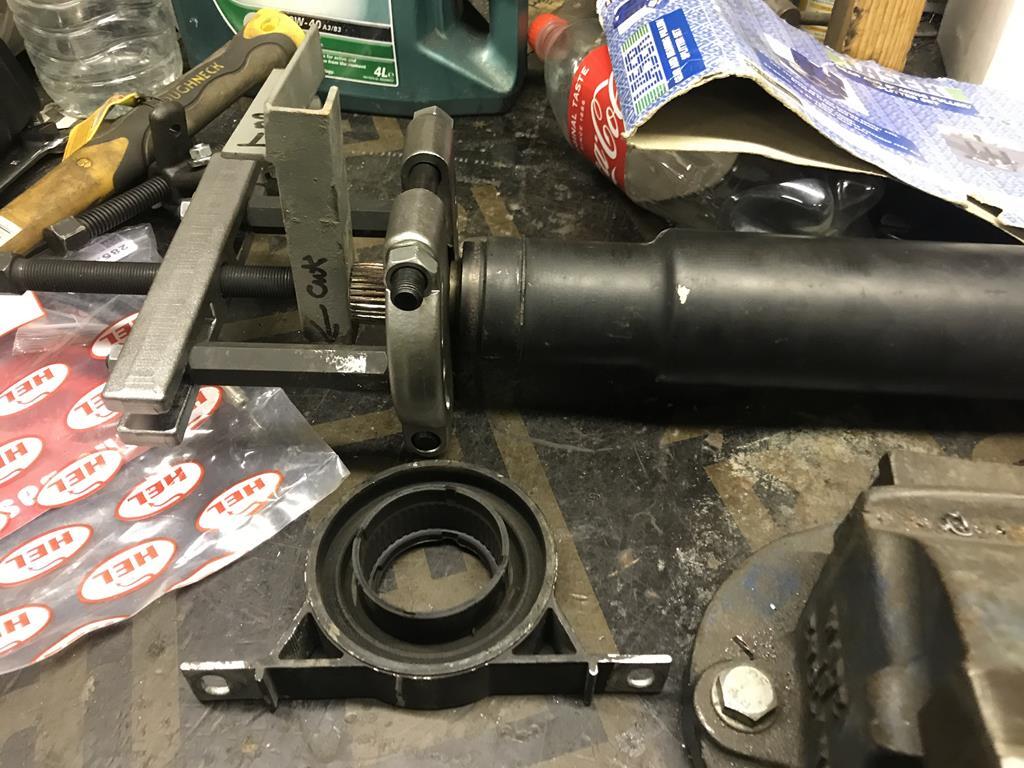 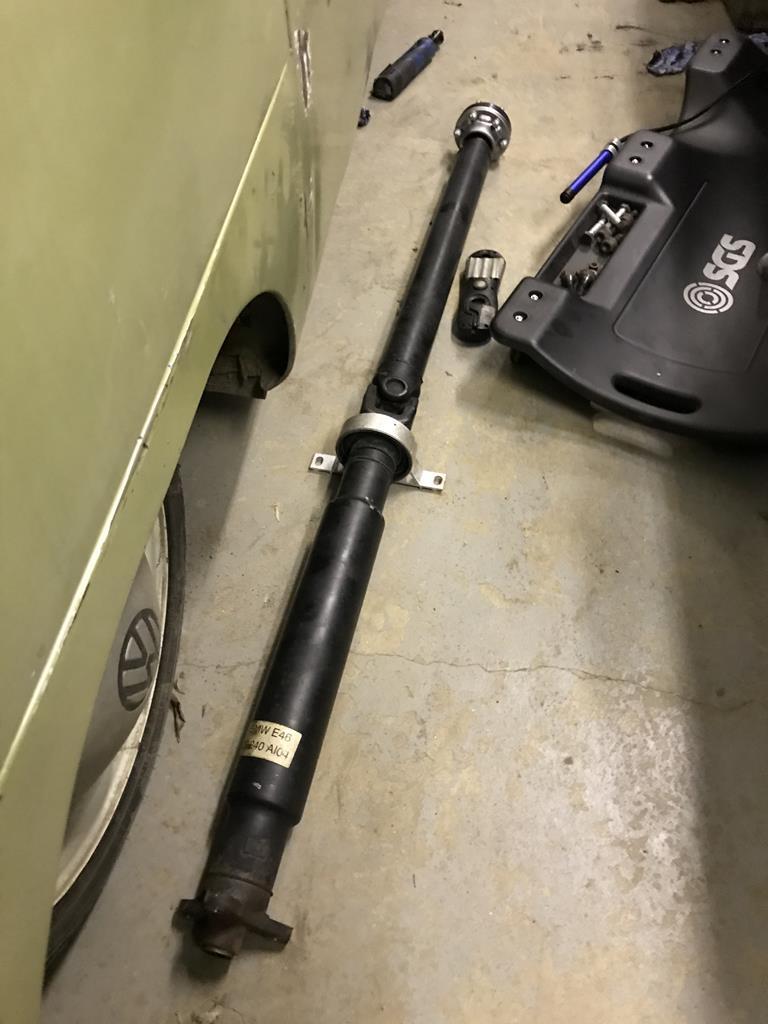 However, after enough effort the prop was rebuilt and ready to go into the car. Thankfully, it's now in, complete with new bolts and nuts! BUT, the braces needed some care and attention and in some cases, replacement! Who said M3s were too modern? These braces looked like they had come out of the North Sea and I know I'm not the first person to change them! 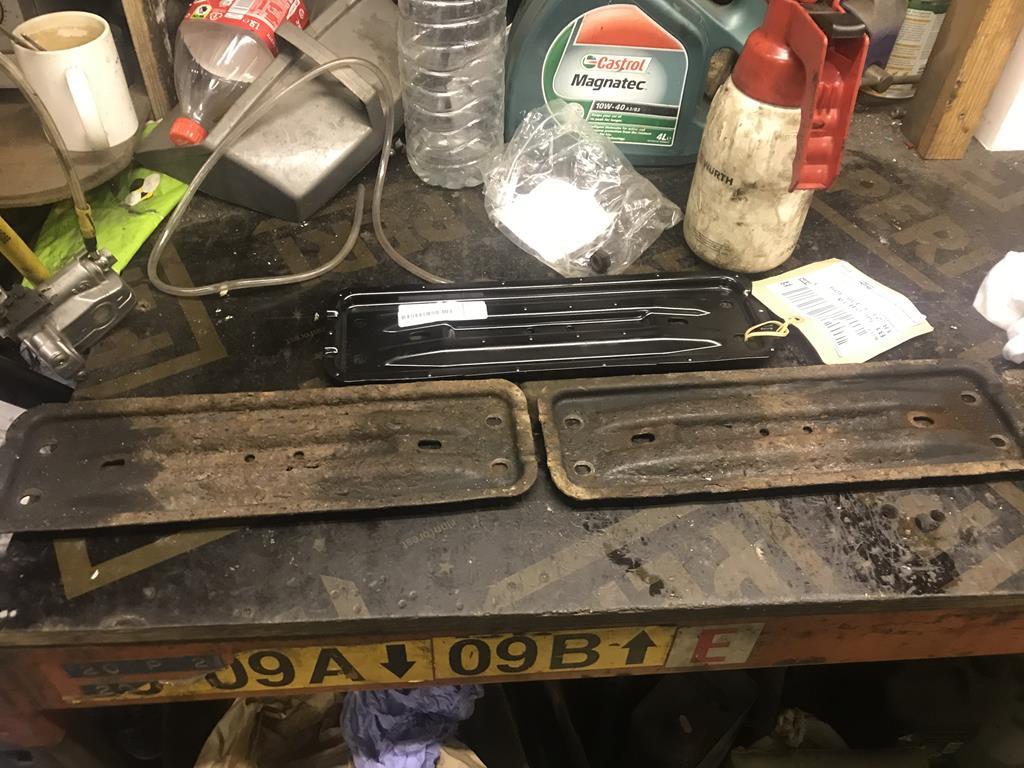 The plates don't look too bad until you look carefully at the line in the left hand plate? That line? It was actually a hole! 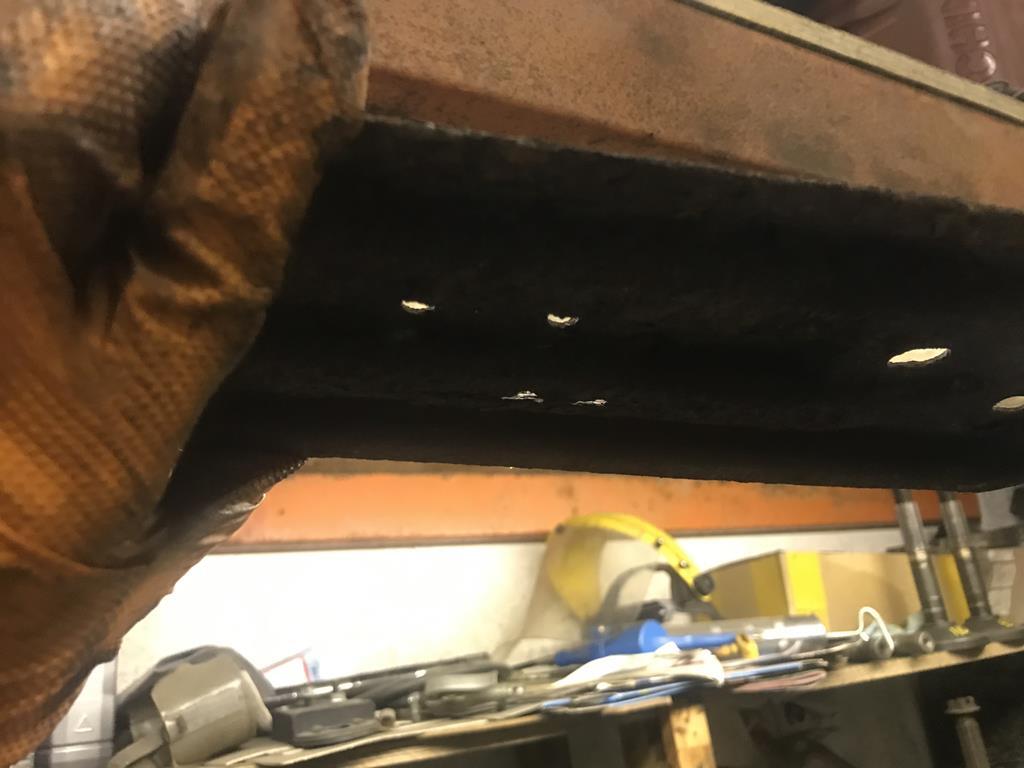 |
| |
|
|
|
|
ChasR
RR Helper
motivation
Posts: 10,297
Club RR Member Number: 170
|
BMW E46 M3 : That's the ticketChasR
@chasr
Club Retro Rides Member 170
|
Jan 25, 2020 10:39:51 GMT
|
That last reply was a little abrupt! Basically, the forum was being annoying and getting glitchy with the video link, and my PC decided it wanted to do updates before that was also working right! But, with regards to the last photos, I'm surprised at the state of those braces! I know the car's almost 20 years old but I wouldn't have expected those plates to be rotten! At least however, you can still buy them, albeit at a price! It's fair to say this month has been pricier than previously! There are other plans and things to do with this car, but I've had other cars keeping me busy, mainly the Merc, so that'll now get an update. However, a fairly glowing article here has driven me to hopefully have the car running again soon. It's surprising how different mine looks with the pre-2000/amber indicators, even if the LEDs on the rear are a modern twist on that:  The funny thing is, I almost supplied my car for that test. Basically, their original E46 M3 broke down 1 day before the test and so another car had to be found at short notice. I offered, and was approached by this, but of course, I decided to go to Germany a little earlier than anticipated, and so that was that. It's just as well I suspect as my car can be a little healthier now with some of the work done hopefully. |
| |
|
|
ChasR
RR Helper
motivation
Posts: 10,297
Club RR Member Number: 170
|
BMW E46 M3 : That's the ticketChasR
@chasr
Club Retro Rides Member 170
|
Jan 25, 2020 21:46:12 GMT
|
It seems crazy that this car has now been off the road for a month! But I guess if you start going a little too keen in some areas, this is inevitable. 1 month off the road just to change a few propshaft components? It's a little silly! But I guess the 'while you are there' jobs have got the better of me. With that in mind, more parts arrived for the recommissioning. The first thing for me to touch was the V-Brace. Given that these are just over £80 from BMW I do wonder why I would do what I'll now show. Basically, I went to take all of the rust off like above with a wire wheel, then treat the pitted/suspect areas prior to painting it. For the rust treatment, I used Bilt Hamber/s Hydrate 80: 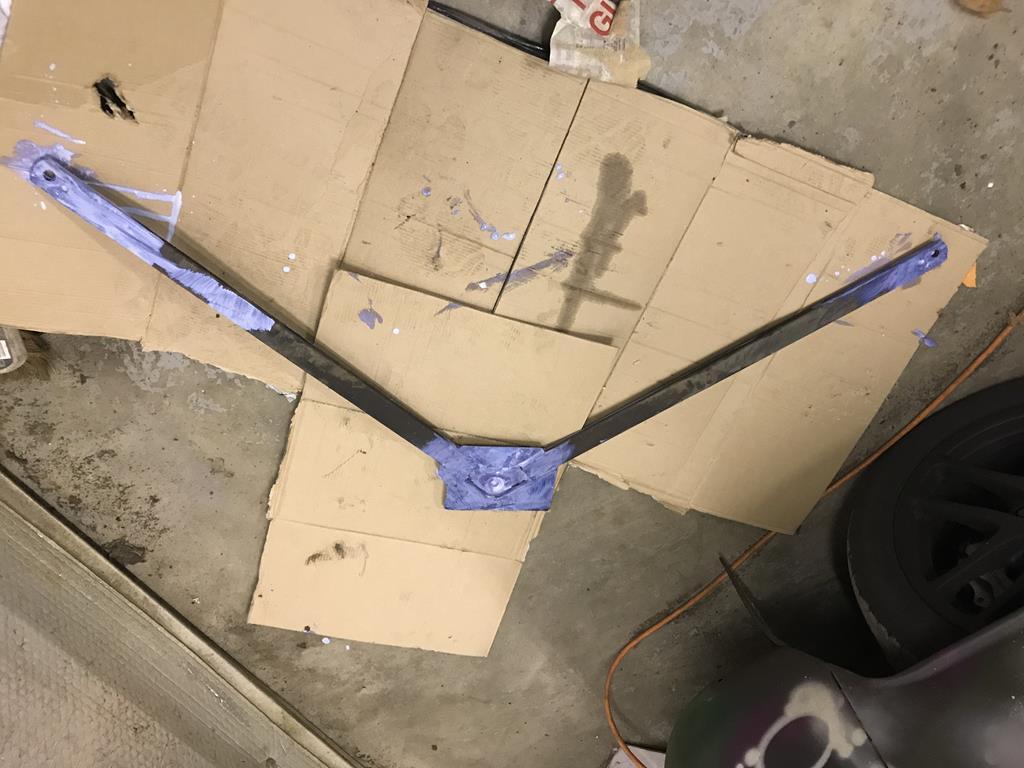 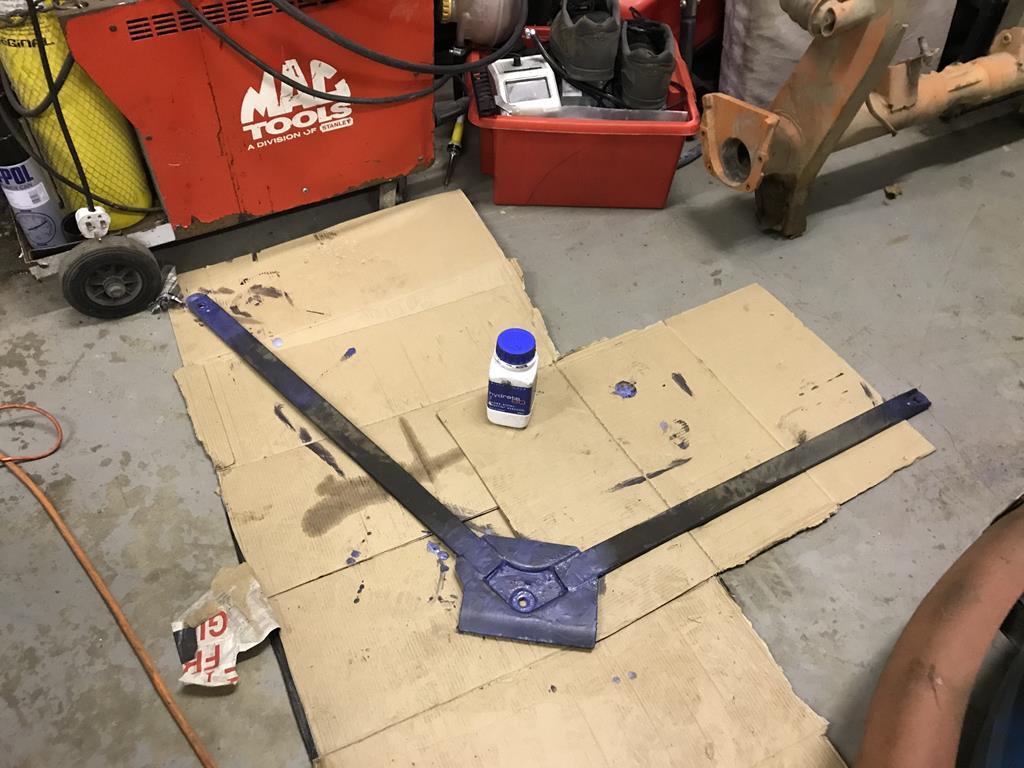 I know, it's nothing much exciting to look at! In one shot, it looks like I spilled Blueberry milkshake over it. In the next, it looks like it could be a prop for the Blue Men in Arrested Development! We shall see if my treatment of then sanding this once I've given the product the 24 hours required for it to cure, zinc/etch primer with a stonechip on top will suffice. Obviously, I didn't stand around watching the V-Brace become a Blue Men prop! I had things to do ; I still have the M3 on axle stands. Thus, I laid out the addition of new parts on the bench, consisting on a new brace no.2, nuts and bolts and a mini spray box so as to paint up some of the nuts and bolts on the car. 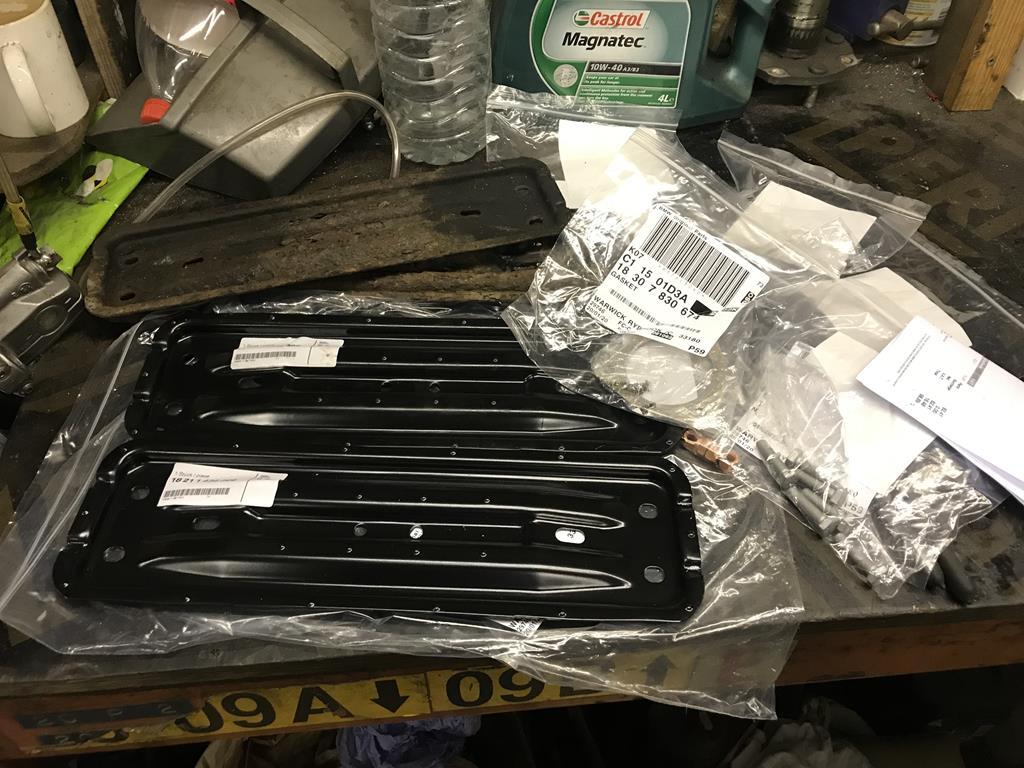 With me poking the old brace a little more, it became appaerant that even with zero screwdriver poking and just poking by hand, albeit with firm pressure, the panel had seen better days. The new panels weren't the cheapest for pressed bits of steel, but hopefully it will spruce the underside up a little! 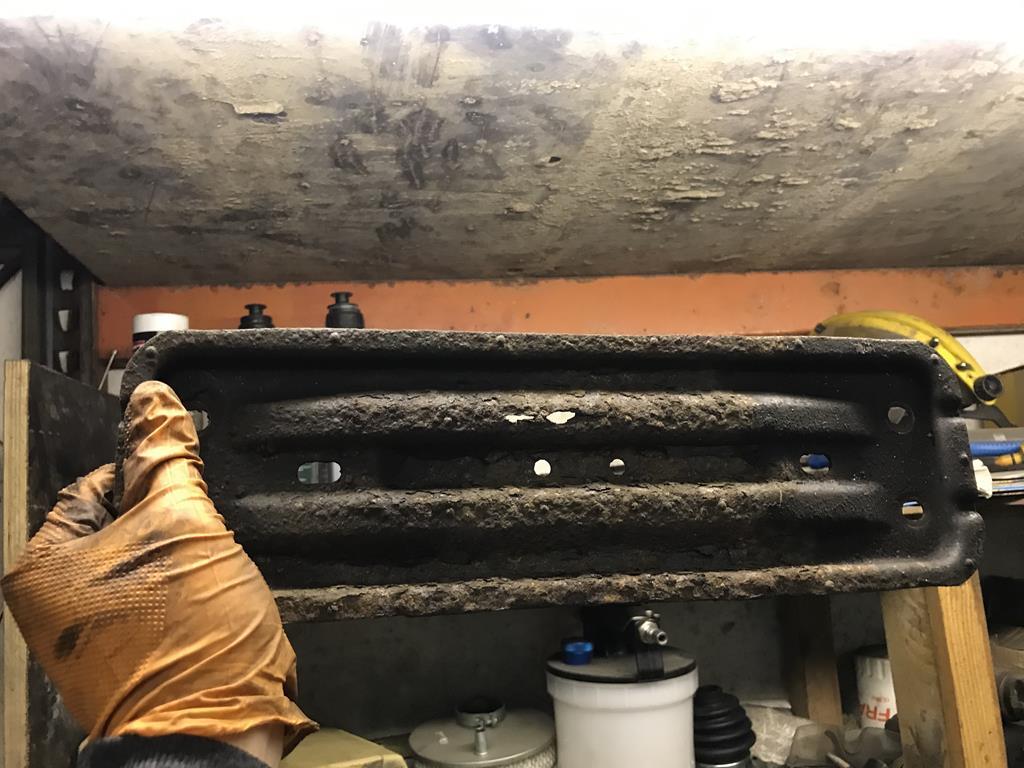 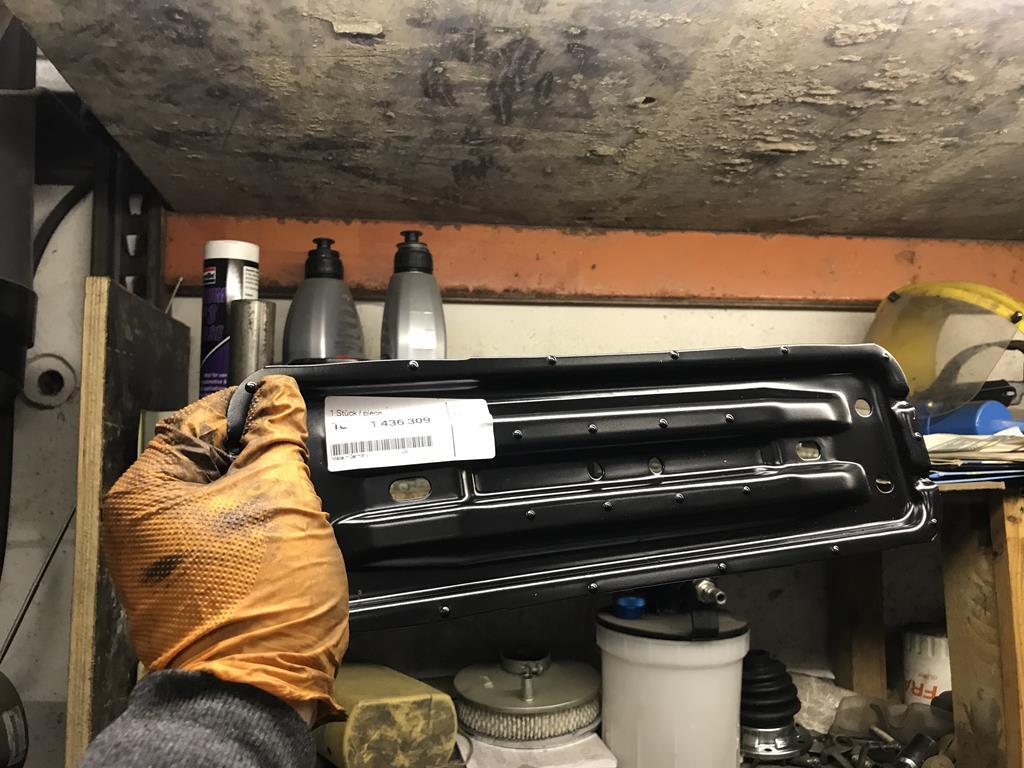 With these panels ready, I then went to prepare the downpipe flanges and fit on the new gaskets 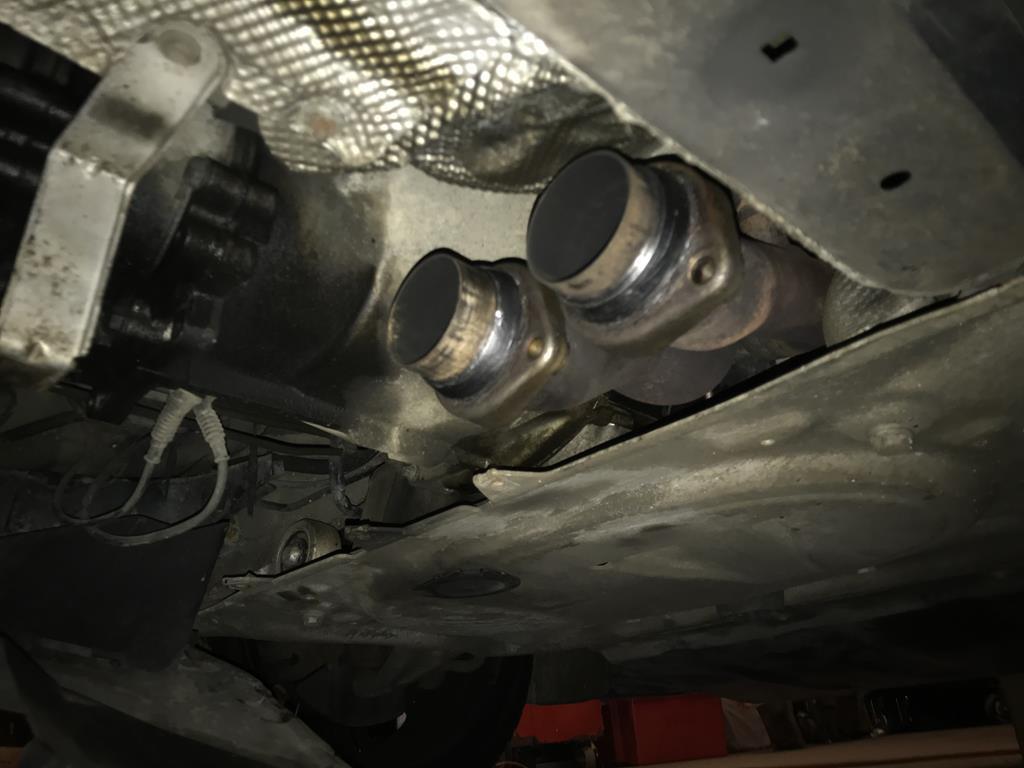 With this done, it was time to put on the centre section. Weighing over 10kg, it wasn't the easiest system to put into position while underneath the car, but I did manage somehow! 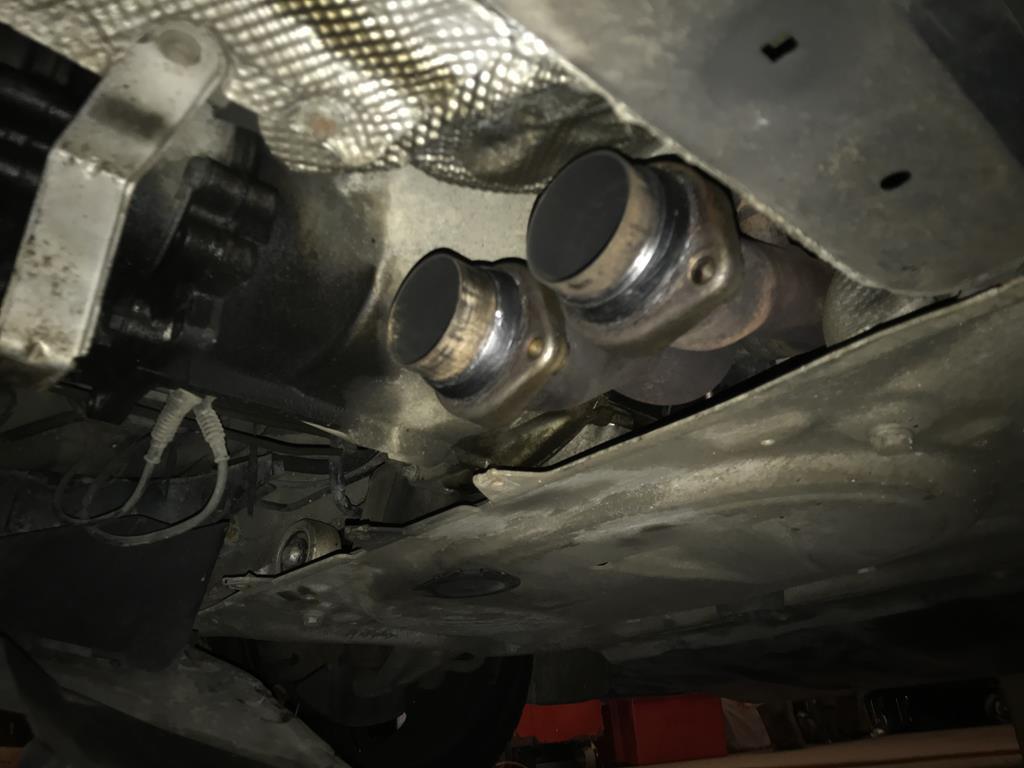 I think you'll agree the underside is looking OK under there  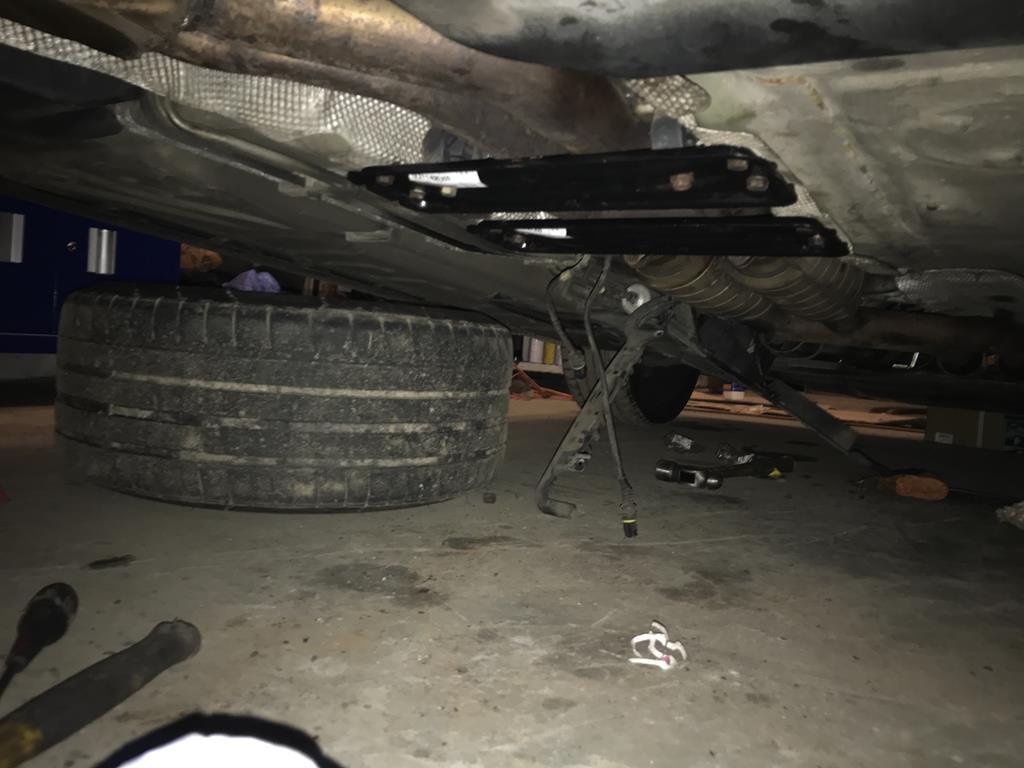 What's left now? Not alot, hopfully. The backbox will be the next thing to go on, but I may have a plan for that  . Furthermore, I need a new exhaust mount, where a friend is willing to provide me a new unused item he has from my his ex-M3 days. It's a little annoying that one of the mounts has ripped, given that it's one of the very first parts I've changed 4 years ago. Am I being a little hash about them given they have lasted 4 years carrying a 24kg backbox? Possibly. But, at least there are less parts on the unit floor, which is always a good thing  . |
| |
|
|
ChasR
RR Helper
motivation
Posts: 10,297
Club RR Member Number: 170
|
BMW E46 M3 : That's the ticketChasR
@chasr
Club Retro Rides Member 170
|
|
|
I may have been busy getting the Mercedes improved in various ways, but that's not to say I forgot about the M3! Far from it! It's the fact that the weather being a little poor and me spending my time on the Mec, sometimes useful and other times wasted, has not helped matters. With so little to do, I went on to try and finish off the refurb on the V-Brace. With this, I sanded back the brace, and then panel wipe the brace down. It was surprisingly dirty given that I wire wheeled it and then coated it in Hydrate 80 in affected areas. 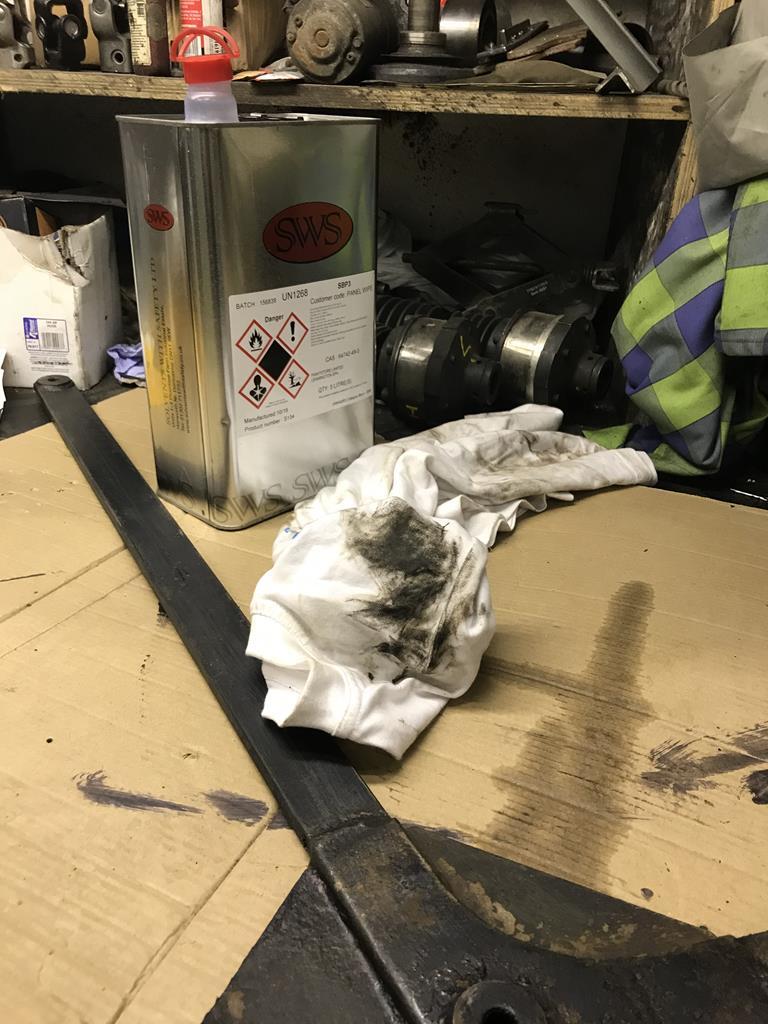 At this stage, I then decided to proceed with finishing off the prepwork, and so grabbed my can of etch primer to touch up some of the bare metal areas that I caught during the sanding process. This however would turn out to be a mistake: 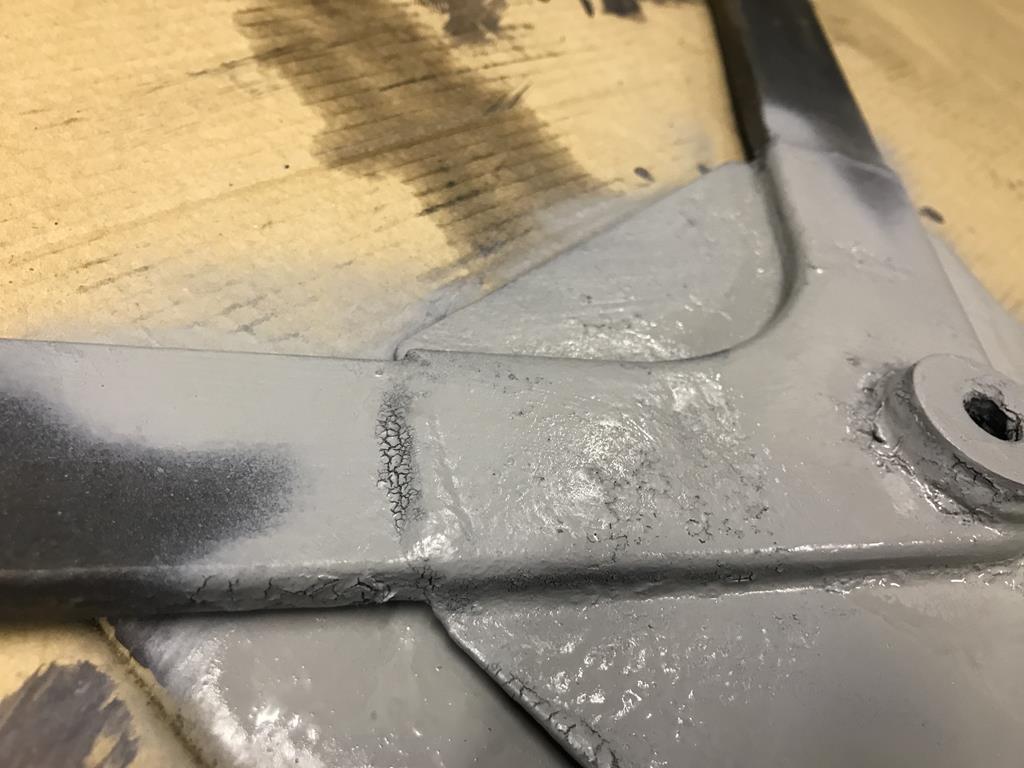 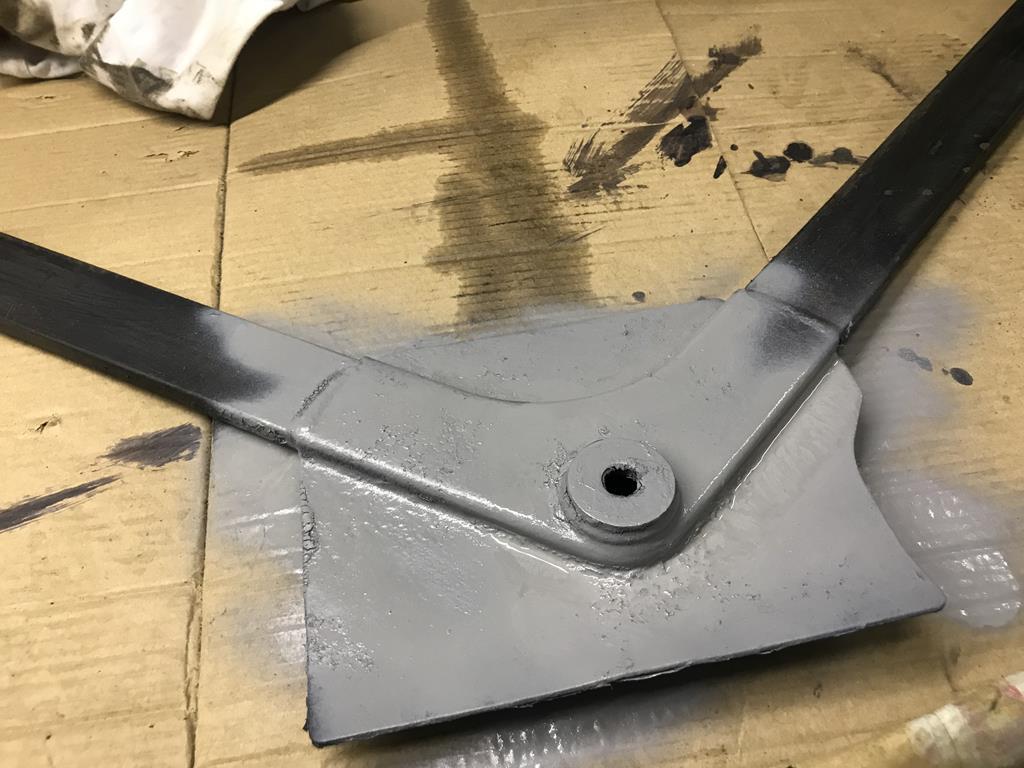 Yup, it reacted, badly! What is it with me and etch? It just flared up like mental! Part of me wonders if it is reacting with the panel wipe. Maybe it was simply too cold to paint, but I can't see why that would cause a reaction. In truth, I suspect it was reacting with the Hydate 80, which at the time I didn't realise also was a form of an etch primer. Ah well. With that in mind, I sanded it back and proceeded to paint up the rest of the bar, where I last left it drying While doing that, I went to admire a few of the new parts I bought for the car. Some of these are potentially unnecessary, others were down to help from unsuspecting sources, which is always great to see. One of the freebies I got was a rear exhaust hanger, to replace the 3 year old/22,000 mile broken item. This is handy! However, given how annoyed I was about the exhaust mounts being damaged, I actually ordered a set of Billet exhaust mounts from Hack Engineering, where these items are said to resolve the issue with the genuine hangers ; pattern ones are not useful in this application ; they only last a few months before failing. Which set will I fit? Who knows? I may well fit the Hack Engineering back box mounts, ableit drill out the Poly to allow for a little more movement. I believe bshaw has a similar set of mounts on his Renault Clio: 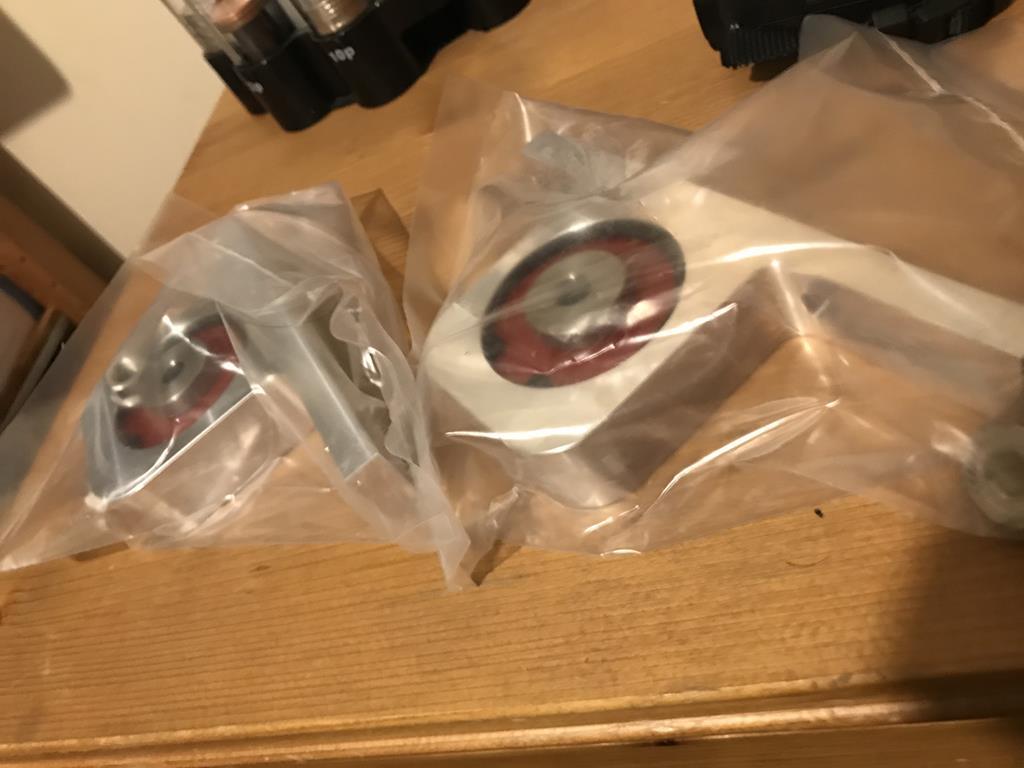 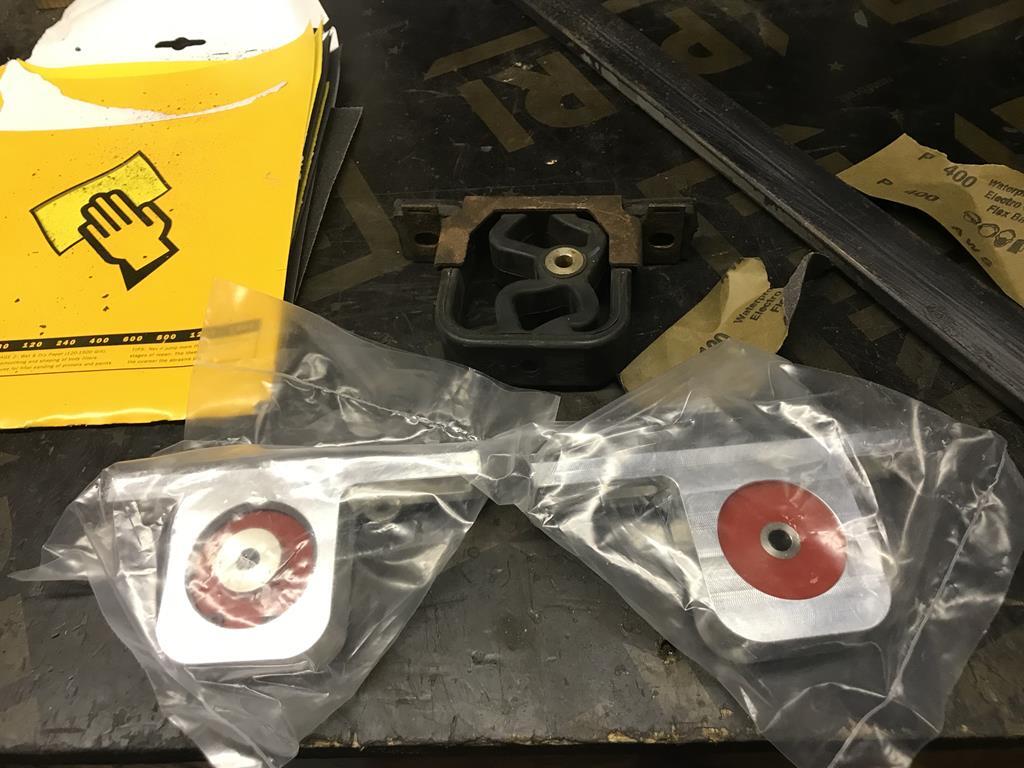 However, with a recent backbox change, the Hack mounts may well not be required  : 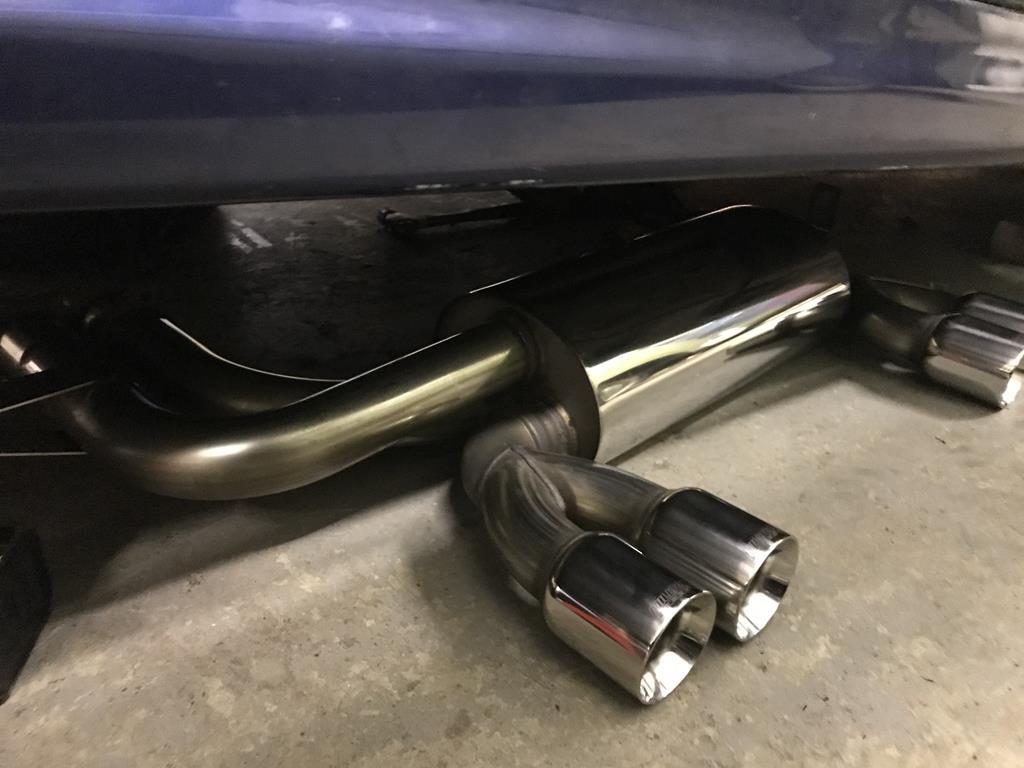 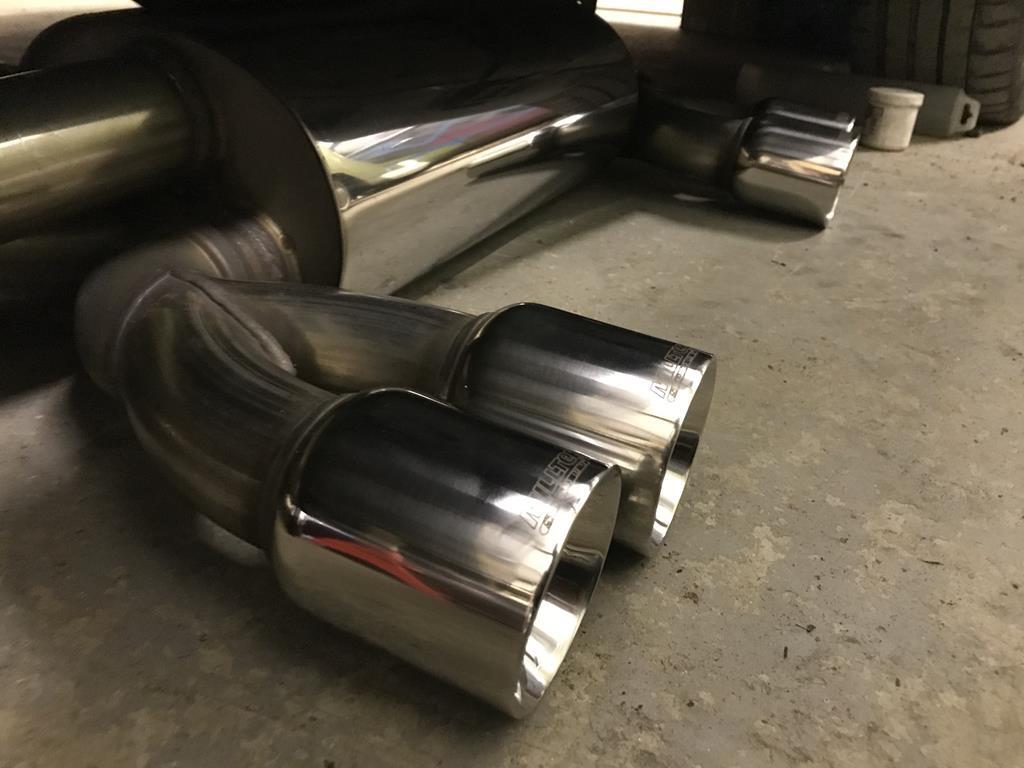 Yup, I got hold of a Milltek back box. With these weighing 12kg, they are much lighter than the factory back box at 24kg. Yikes! Why did I buy it? I've always fancied the M3 to be a little louder. I take it back, that's a lie. I always fancy every car I have being a little louder, but not to be too obtrusive. Which is where the Milltek may fall on its face. Various reports suggest that these backboxes can drone, along with the others in this price range (if you call £600-900 cheap!). However, this item was 8 months old and came up at a price I couldn't refuse. The way I see it, if I do get annoyed, I can always go back to stock, or splash even more cash and get an Eisenmann which are known to not drone. But that £1.2k for a backbox new and £800-900 secondhand, they're not what you'd call a bargain. But at least I won't have my work cut out putting the new backbox on right? We shall see what happens. But there's not alot to do now to get it roadworthy  . 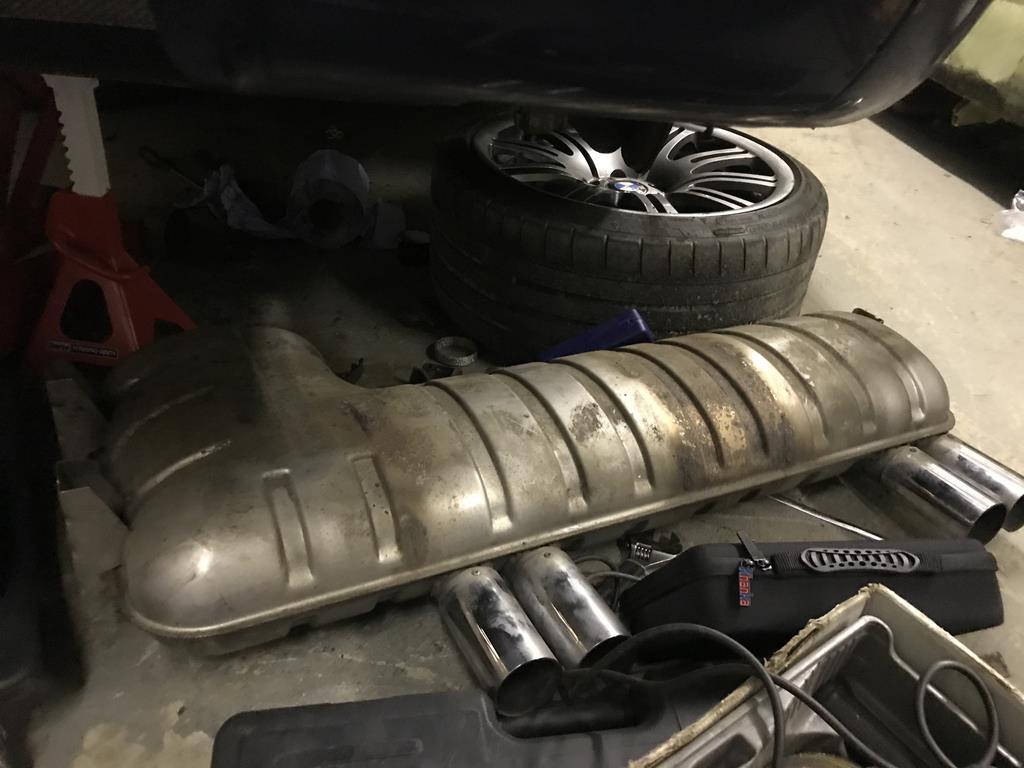 |
| |
|
|
ChasR
RR Helper
motivation
Posts: 10,297
Club RR Member Number: 170
|
BMW E46 M3 : That's the ticketChasR
@chasr
Club Retro Rides Member 170
|
Feb 10, 2020 22:50:23 GMT
|
This prop rebuild was beginning to hang around like a bad smell! Many people were wondering if they'd see my M3 again! That would be a yes for a number of reasons: - The M3 has never spent more than a couple of weeks off road with maintenance. 2 months has broken that limit
- Sure, some setbacks slowed me down, but 2 months is taking the Mick a little!/li]
[li]I wanted to drive it again! - Since 2006, this the first time the car has had the MOT expire.
With that in mind, I went down yesterday, with the intention of finishing off what I began. Firstly, I had to make a choice about the exhaust mounts. Which would I use? For me, it was like deciding between the blue pill and the red pill in Neo's shoes. Each has it's positive and negatives. Where do I start? 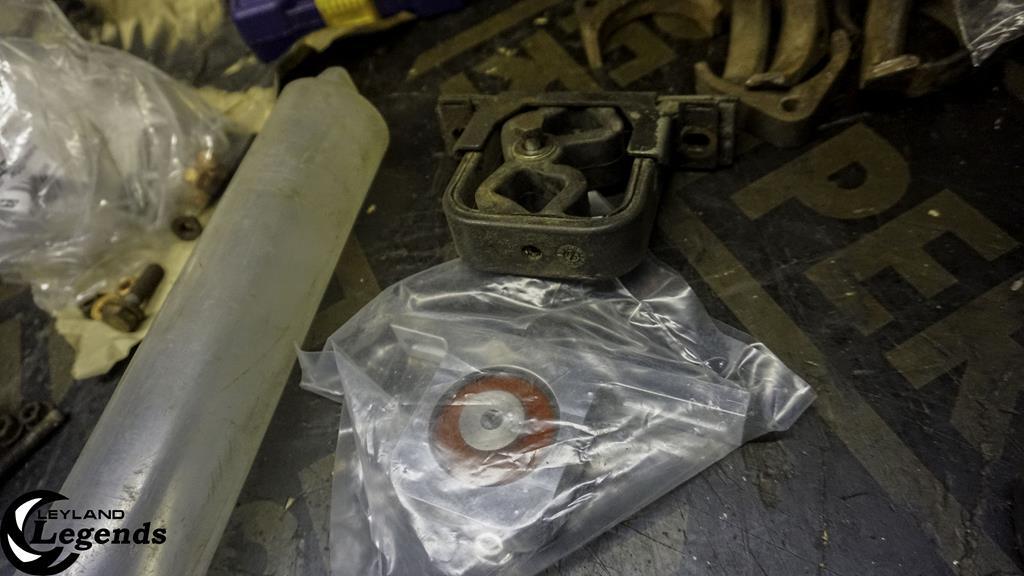 Hack mounts -They will never die -A little easier to fit OEM mounts -Factory item -Less NVH -Potentially longer exhaust life due to allowing more movement. I did and may still drill the Hack Engineering mount bushes. But for now, I've kept them for a rainy day. With the Milltek backbox weighing 12kg less than the factory M3 item, the mounts should have an easier time. Interestingly, my mounts are weaker than the mount my friend supplied me. With that in mind, I may change the engine mount as well ; the gearbox mounts I've done. 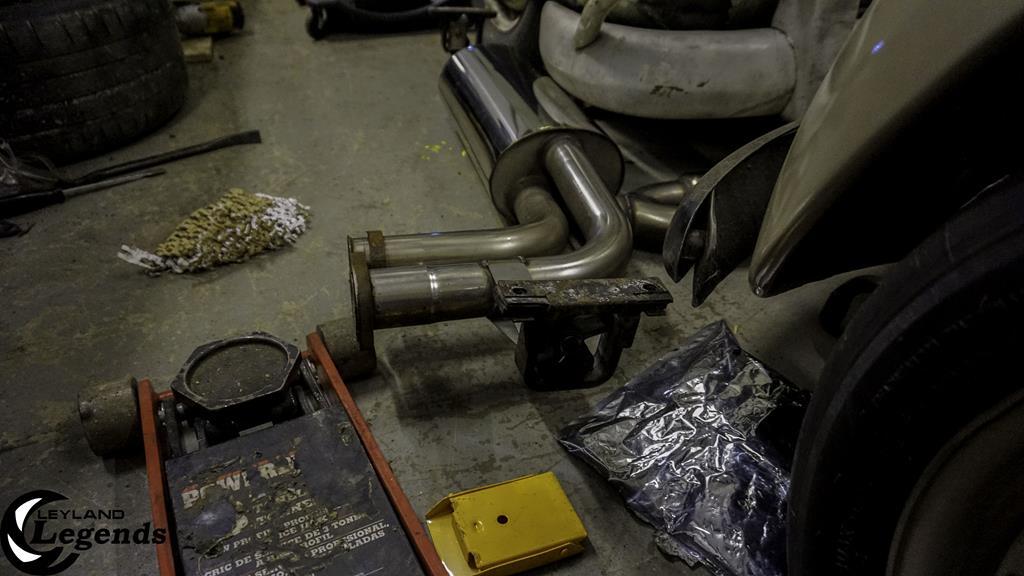 Then it was time to ensure the exhaust would go on well. Remember those flares I talked about? No, not the jeans from Night Fever, but the exhaust flares! Arrgh, I give up! Anyway, I utilised the X8R kit to build it back up. Did I hit issues? Yes! The bolts are not long enough ; some could use more engagement. I plan to get longer bolts for the clamp closest to the wheel, but in brass over the Stainless Steel items. 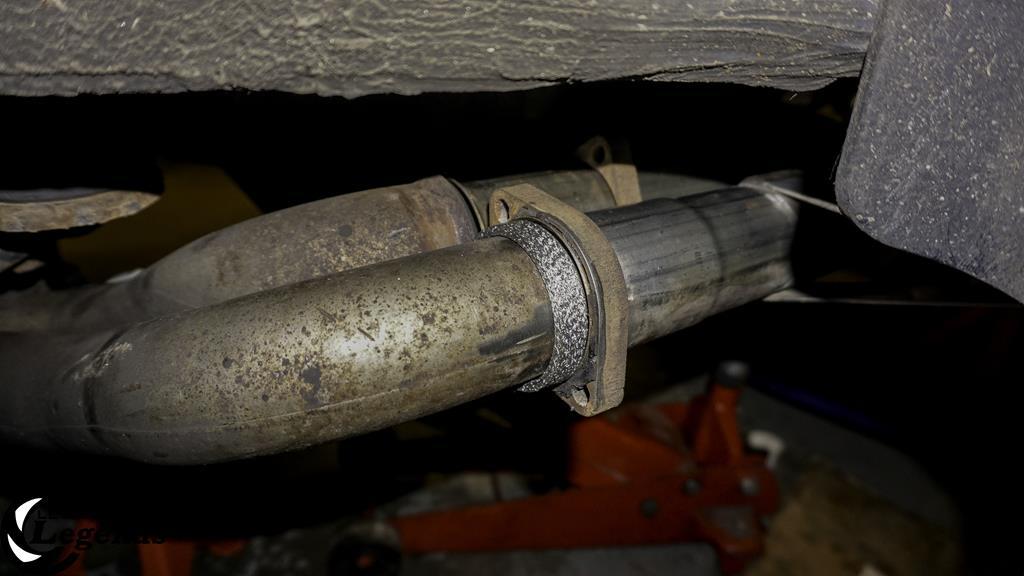 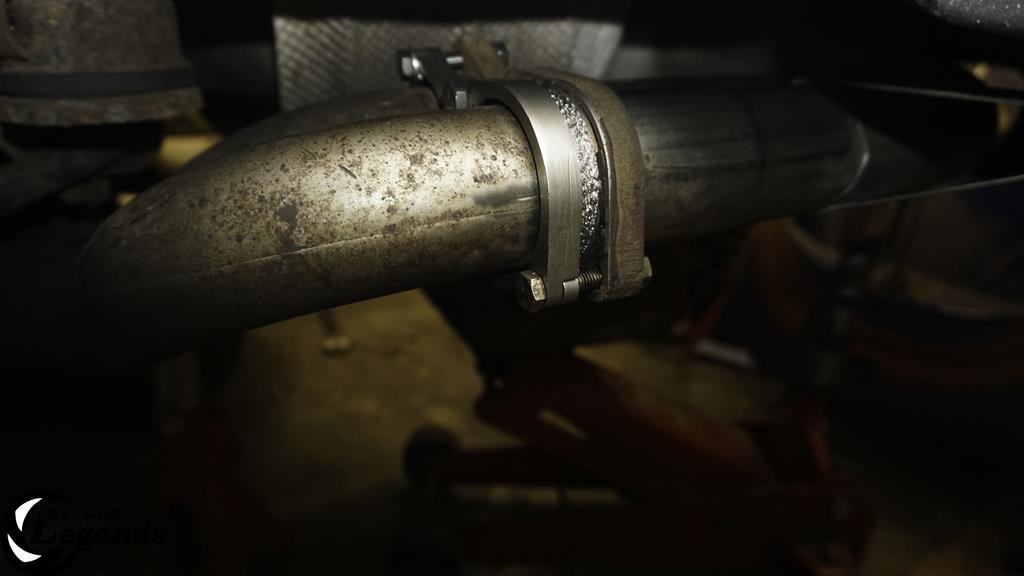 With that in mind, I also utilised the new copper nuts for the exhaust mounts. Mine after 3 years were not as great as I was expecting them to be. Hack Engineering supplied Stainless serrated nuts with theirs but worried about annealing, I did not use the stainless items. At least with the Milltek exhaust, access to the bolts is much improved over the stock exhaust regarding the exhaust mounts 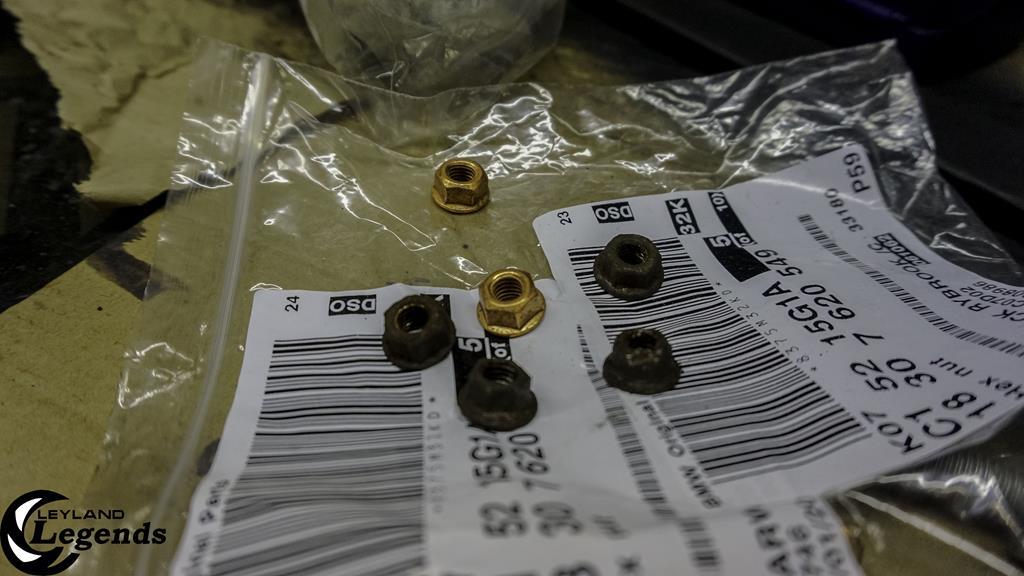 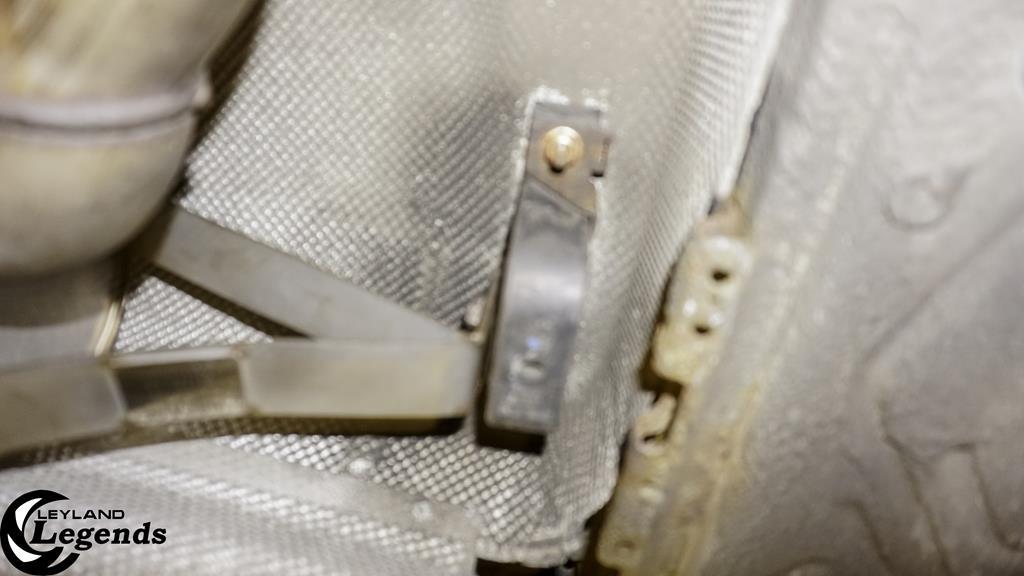 With that in mind, it was time to fit and admire the bling. Well, if that's your thing! 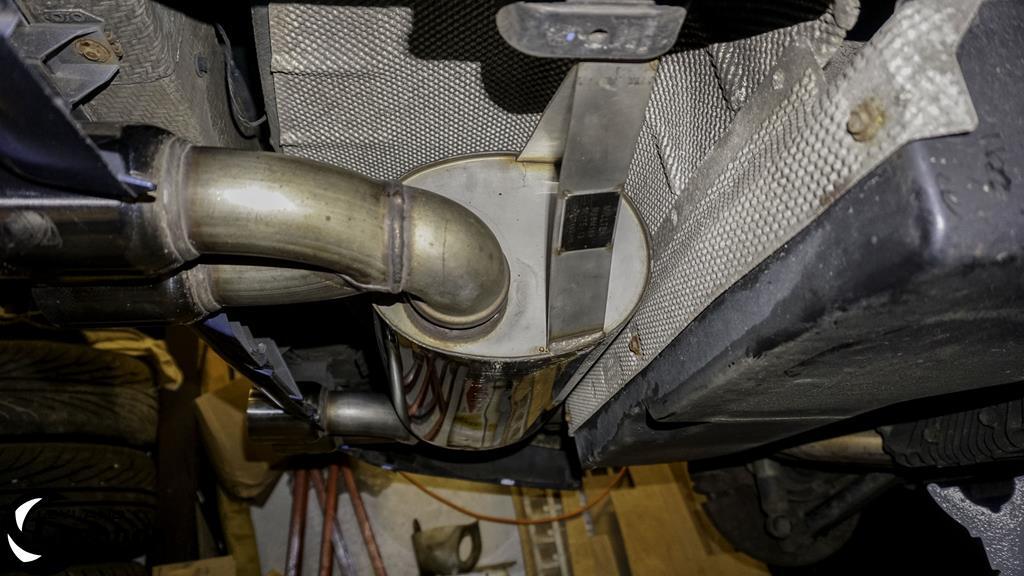 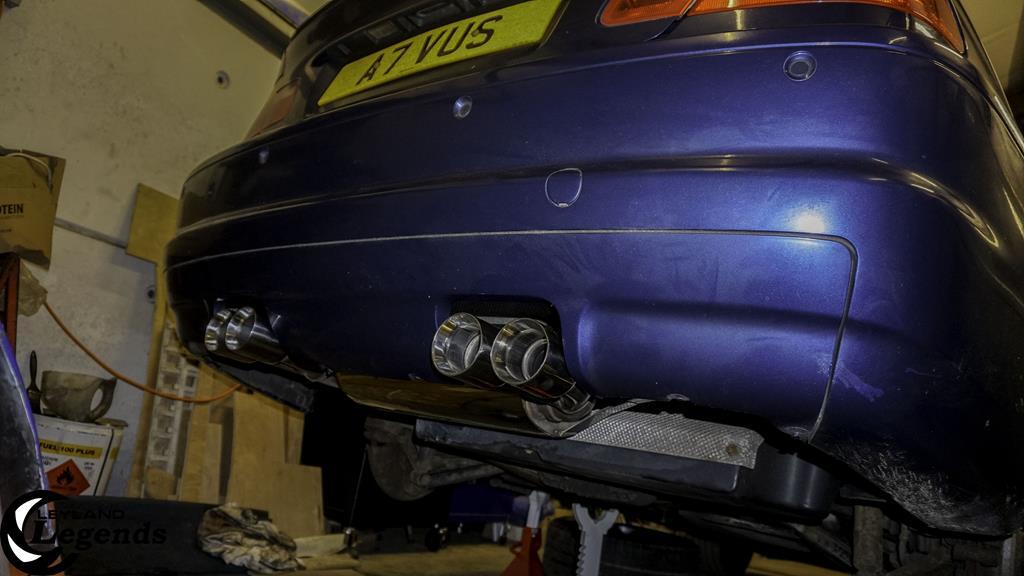 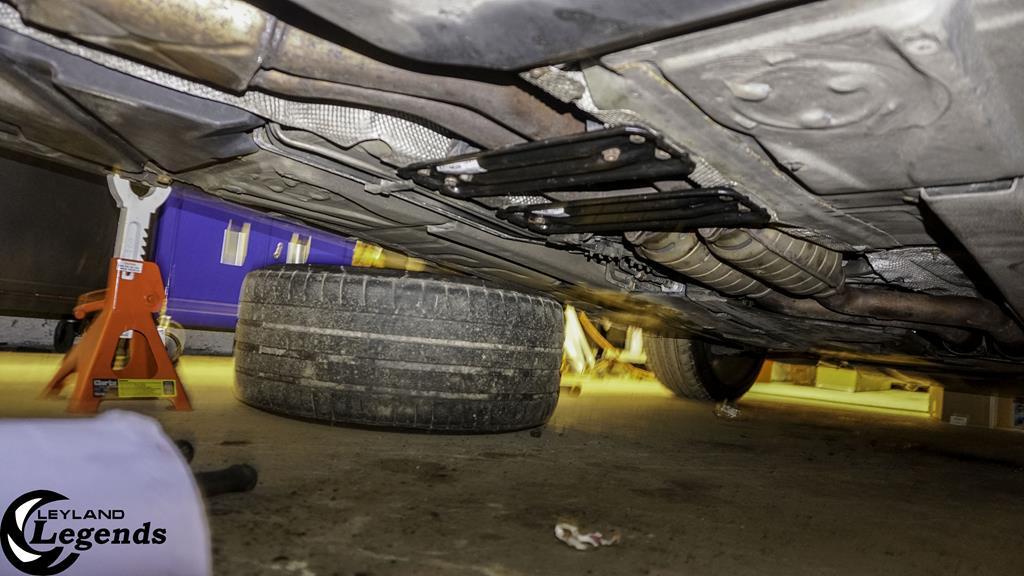 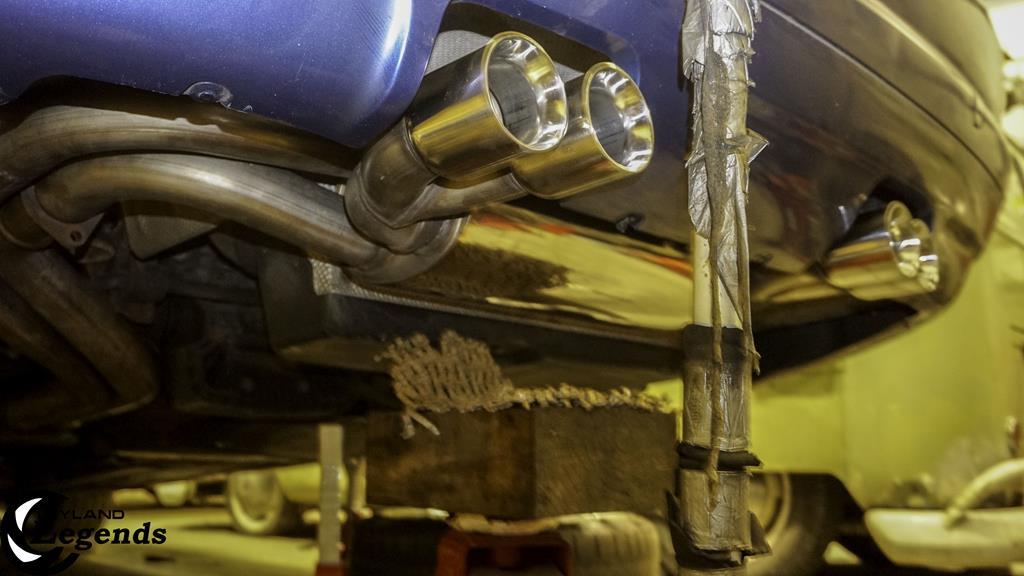 If the car's shinier underneath, it must be faster right? With the V-brace dried off, that also went back on too! 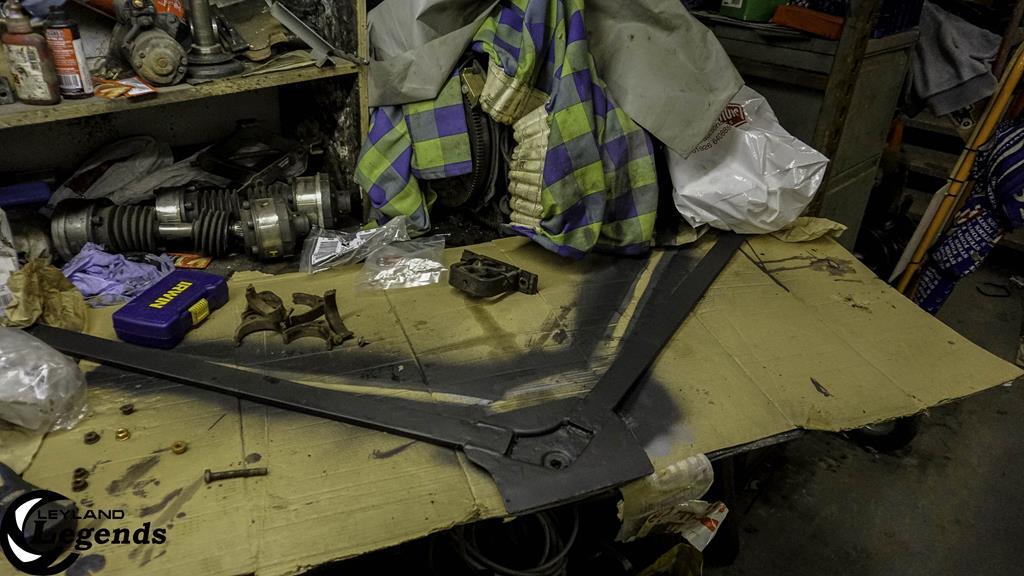 It was then time to take one last look at the broken exhaust clamps from the factory system. You can see that most of them were past it and were ready to break at any moment. 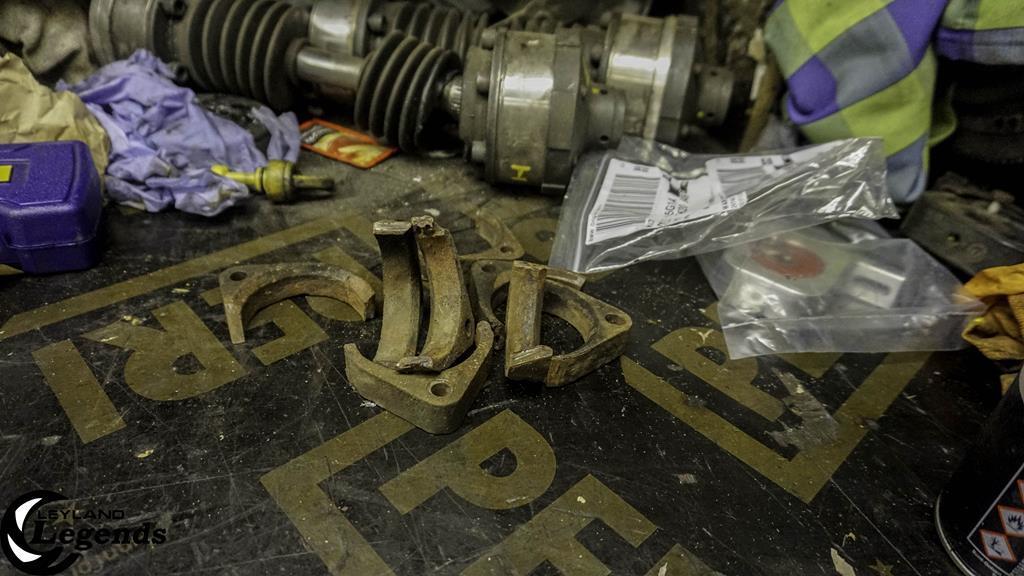 And then, it was time to put the vehicle down and take it out on a road test. In short, what a difference! I was worried about something not being right, but those fears were soon unfounded. Gone were the jerky shifts and in were much smoother ones. Furthermore, the vibrations have gone! It's such a lovely thing to drive! The car just talks to you more, responding that bit sharper to every input via the acelleration and the gear changes! This is what I wanted! Sure, it cost me more than I thought! But it's superb to taste that victory! While it's a dull video, here's a very minor taster on that victory. My joruney is far from over however. I still have an MOT looming! |
| |
|
|
ChasR
RR Helper
motivation
Posts: 10,297
Club RR Member Number: 170
|
BMW E46 M3 : That's the ticketChasR
@chasr
Club Retro Rides Member 170
|
|
|
Given that the M3 isn't really a daily anymore as much as it was, this thread really should be titled the 'Savior with woes and joy!' After all, if I recall the high and low points: -I've taken it to the Nurbringring twice without a hitch -Done a couple of track days -Gone on some great road trips with it. Sure, they're not quite as spectacular as some people's excursions on here, but they are something -At one point, it seemed one significant thing thing after another just kept on going wrong with it. -It became a daily last year where I literally had to semi-caress to get to work in a fashion, due to a faulty ABS sensor and zero time to diagnose it. Despite that, it soldiered on like a good soldier of war. I hated driving it in that state, but the car did oblige and just carry on about its business as usual, Christmas tree dash and all! It seemed it would become a saviour yet again. It's strange ; the last car to do this for me was also not alot older back then, with it generally becoming recalcitrant with a lack of use. I am talking about my old 205 GTi. So, where was I? Ah yes, the issues. Basically, we had a family issue lately, with an elderly member becoming very ill and deteriorating fast. This meant almost all of our evenings were consumed with driving up to near Leeds and back most evenings during a week, straight after work. Naturally, I met up with my dad and went up with him. After spending quite a few hours caring for said member, who was not in a good way at all, we knew we had to go back home. After all, we all had work and my mum was there to take care anyway, with us all a phonecall away. Naturally, my dad offered to take his BMW E61 535d up. However, that would not be easy. In short Day 1 of 10 : Refused to start; This was down to dirty battery connections, which oddly also affected the Merc, but I'll come back to that another time. So my Mondeo cruised up and back. Day 2 of 10: After driving 100 miles back, this warning appear  It was something like the above. We could have removed the air suspension, but given that time was very tight for the aforementioned reasons, we got an airbag, but would need to find time later to fit it. Obviously, this left us with problems, especially as another member of family has recently suffered with a nasty thing, which I really wouldn't wish on anyone (cancer). So, we'd need to split. I could have hired a car and gone nuts but again, this implementation would require time. So I decided the next morning to see if I could disable the compressor on the E61. Unfortunately, the drain valve on the compressor was working, so from one side lowering, both did:  Upon starting the car up with the fuse back in the compressor, the car raised again until a loud hiss was heard from the nearside as the car got to a certain height. Yup, it had blown an airbag. With this in mind, I tossed my dad my Mondeo keys, saying that it was his. Since I had sold the Merc, this left me without a car, for work and for family issues, should we need to be in two difference places at two different times; work we could get around (either of us drop the other off) despite a 50 mile increase onto either's commute, but the family thing could not. Enter stage Left: 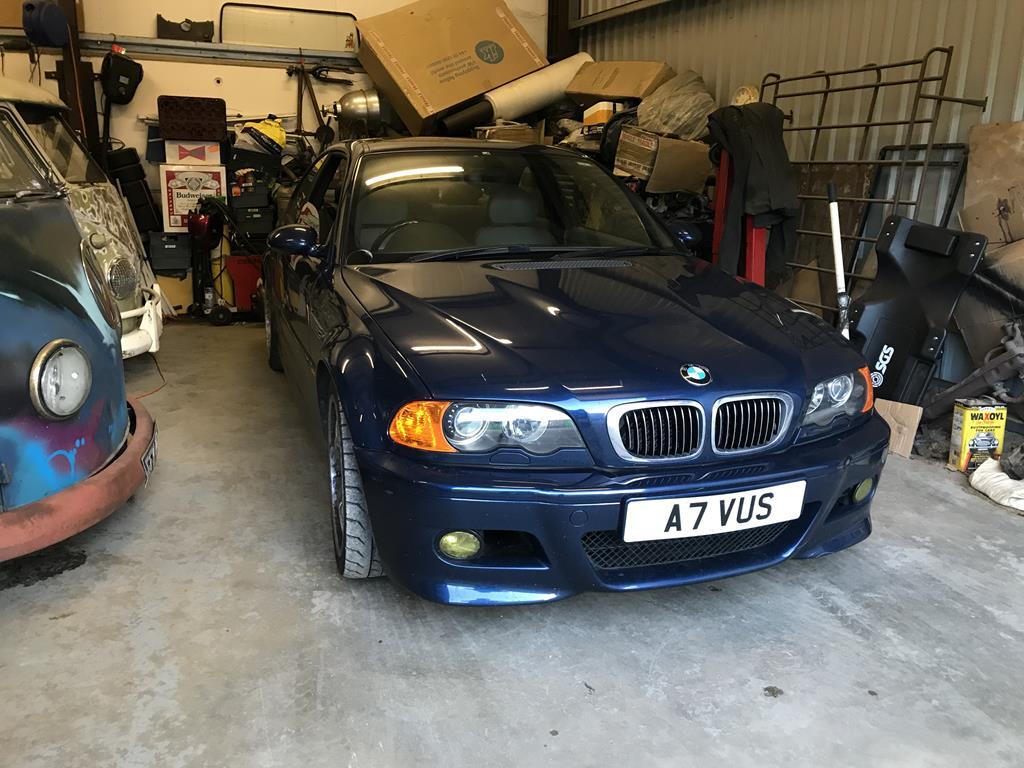 The M3 was roadworthy bar the rear tyres. Since they were an advisory last year, I put on my track wheels with the Kumho V70as. Was it wise? Probably not in these conditions. But they were legal, and the car would once again be mobile with some care. And so with my long suffering and understanding MOT tester, he took me under his wing and MOT'd the M3 for me first thing the next morning. The result? A pass! That was good. Besides the topics getting deep amongst us at times given the situation about people, we did notice that the M3 passed the emissions with zero coaxing required unlike previous times. Was the missing exhaust gasket the cause of the poor emissions or was it luck? Whatever it was, it seemed luck was 'sort on' on my side, at least from the Car Gods perspective. And so I was once again mobile, and both of us managed to see both family members on demand, for which I am really glad to have done in these times. Is there a takeaway point? Indeed, if your friends and family mean something to you folks, take the time to see them more often. It may only be or 30 minutes, let alone 3 hours when you do. But trust me, you'll appreciate it and be thankful for the times you have enjoyed in the long run. But anyway, enough of me getting a little mellow! It was good to be back in the M3 and well, I needed some cheer. The car was driving better than ever and besides the exhaust droning like crazy below 2.5kRPM, it sounds superb. Yup, I really am smitten with this old(ish) girl. It's tested me many a time, but it has always somehow pulled through whenever I've asked it to. A degree of luck is about this car I must admit. I've debated selling this many a time for a tidier example or a tidier car, but then I always remember that the grass is always green. It may look old and now pretty battered, especially on the scratched wheels, but it also looks purposeful and it has been! Yup, it's probably time I addressed the key issues like the bodywork, while it is slowly earning its keep again: 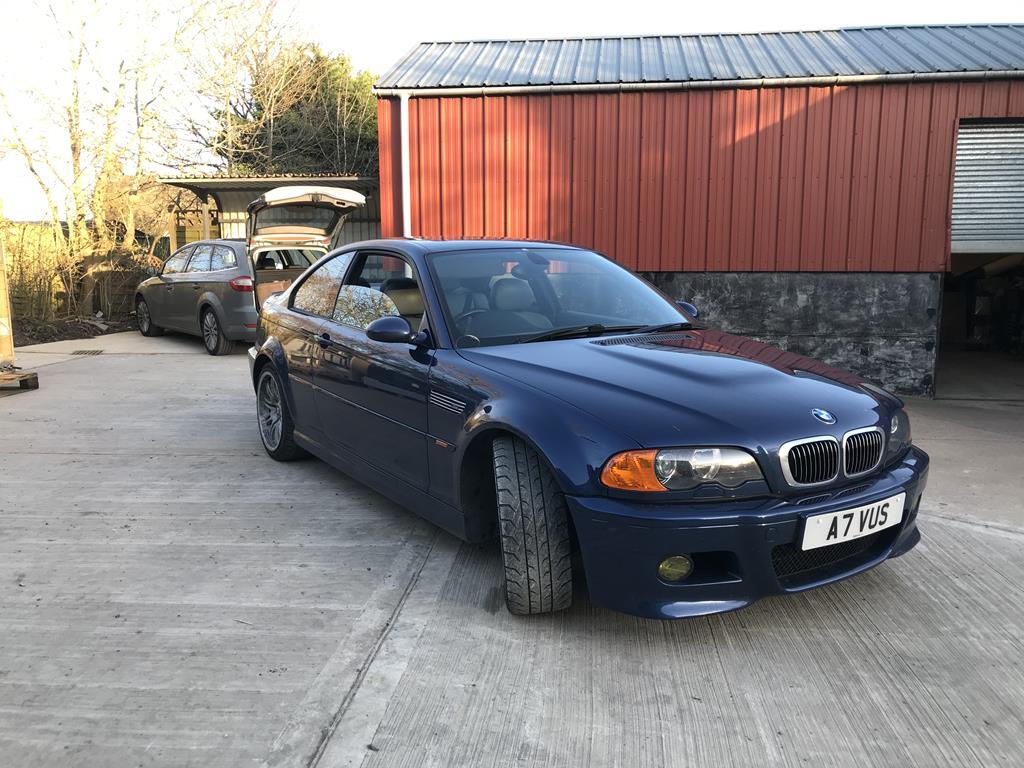 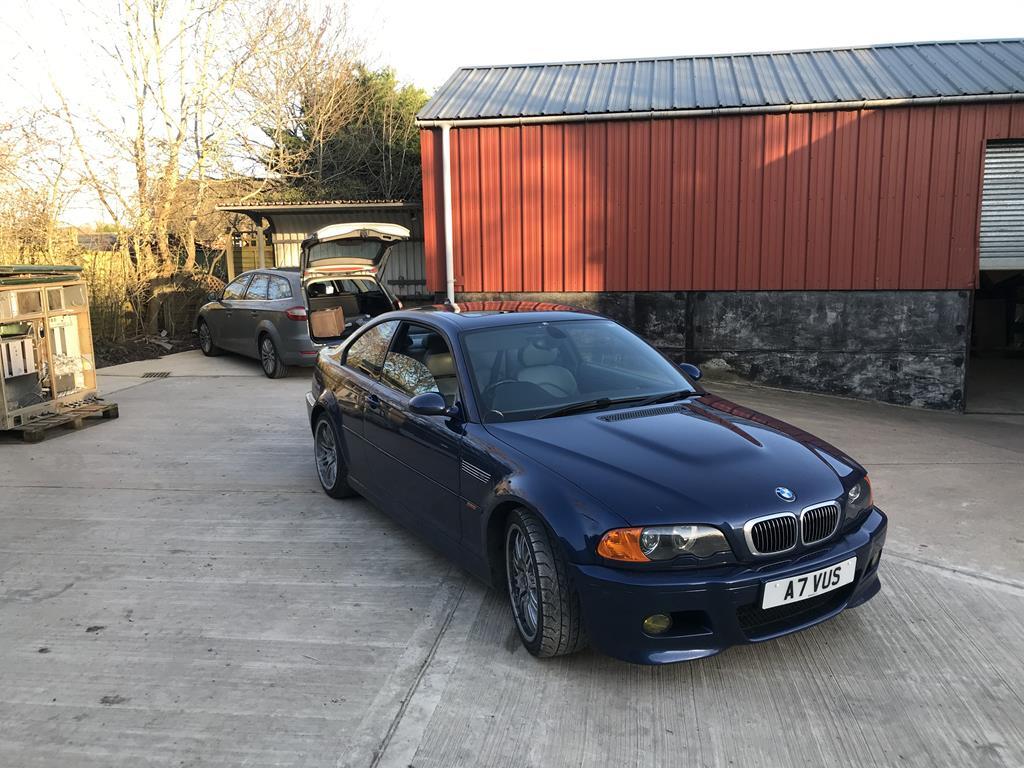 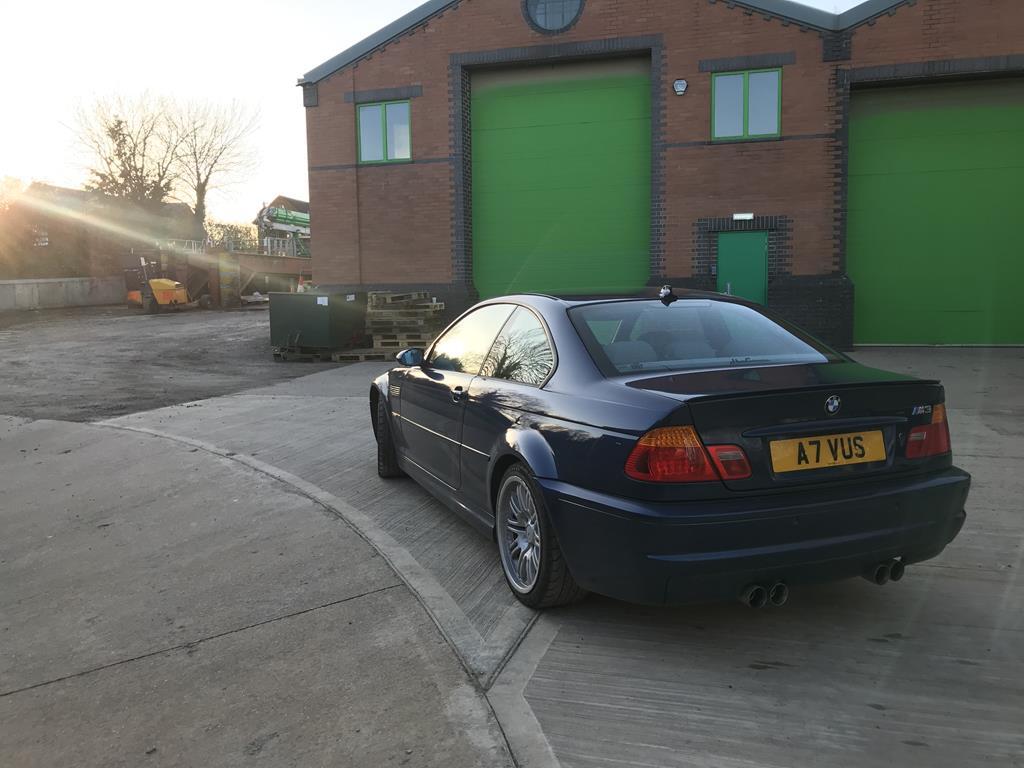 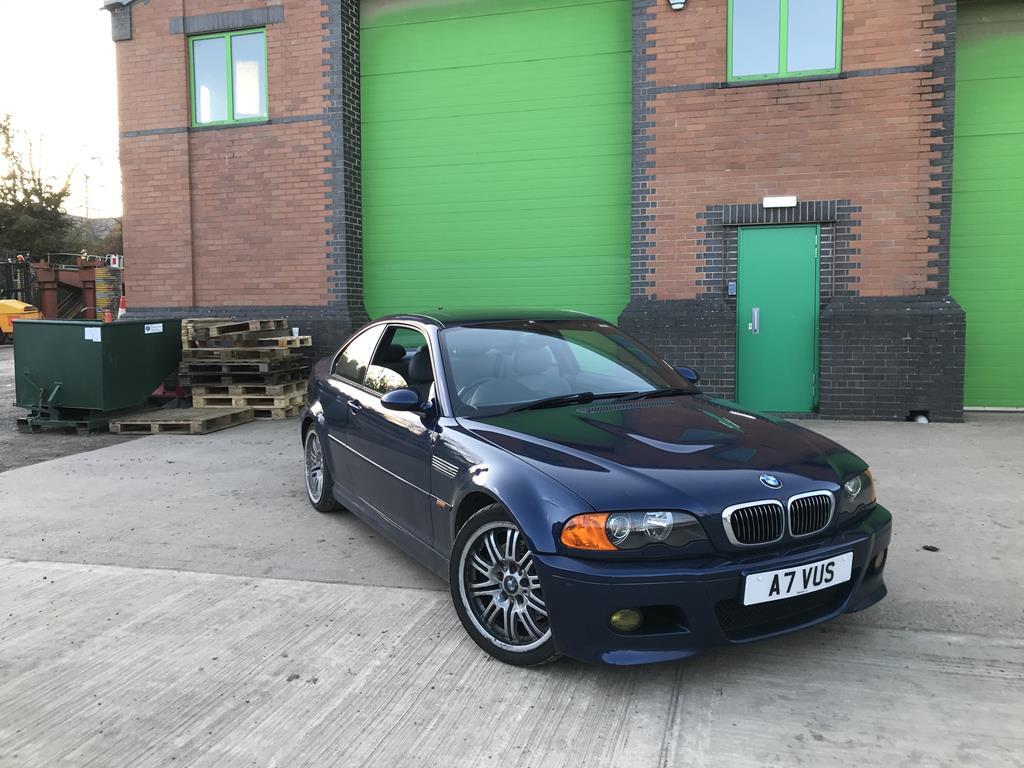 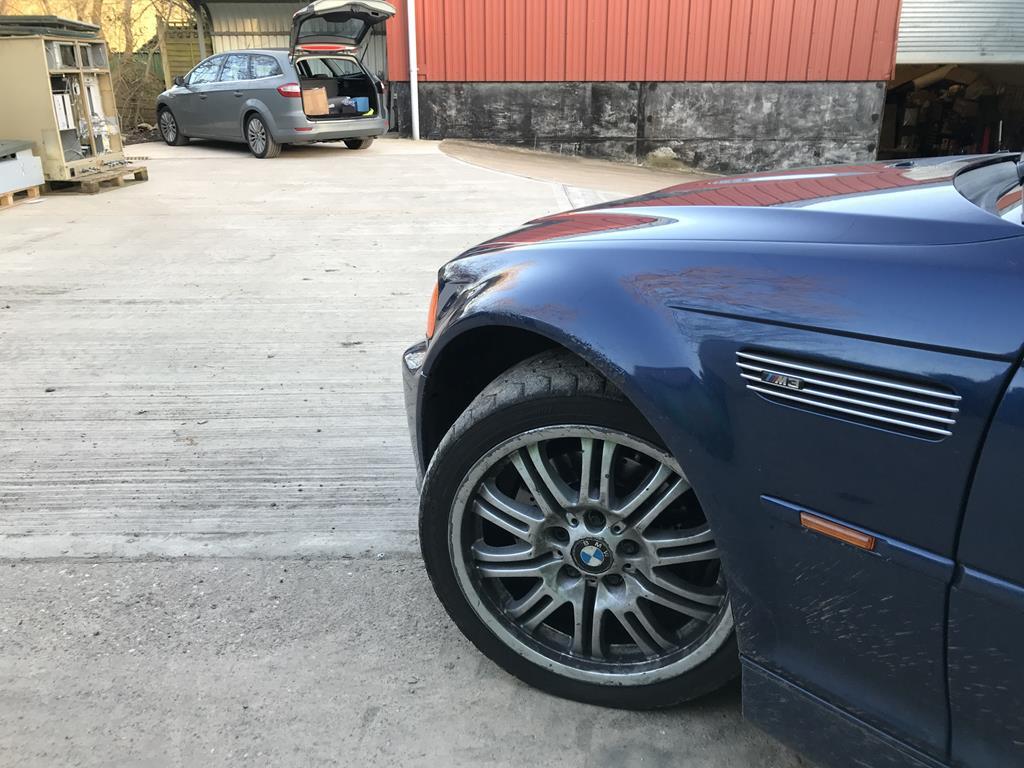 Another thing? With things calming down a little and the dust settling, I've made a start on the brakes again. With RetroWarwicK's suggestion, I'm soaking the brass sliders in oil prior to fitting them, in Valvoline's finest, naturally  ; 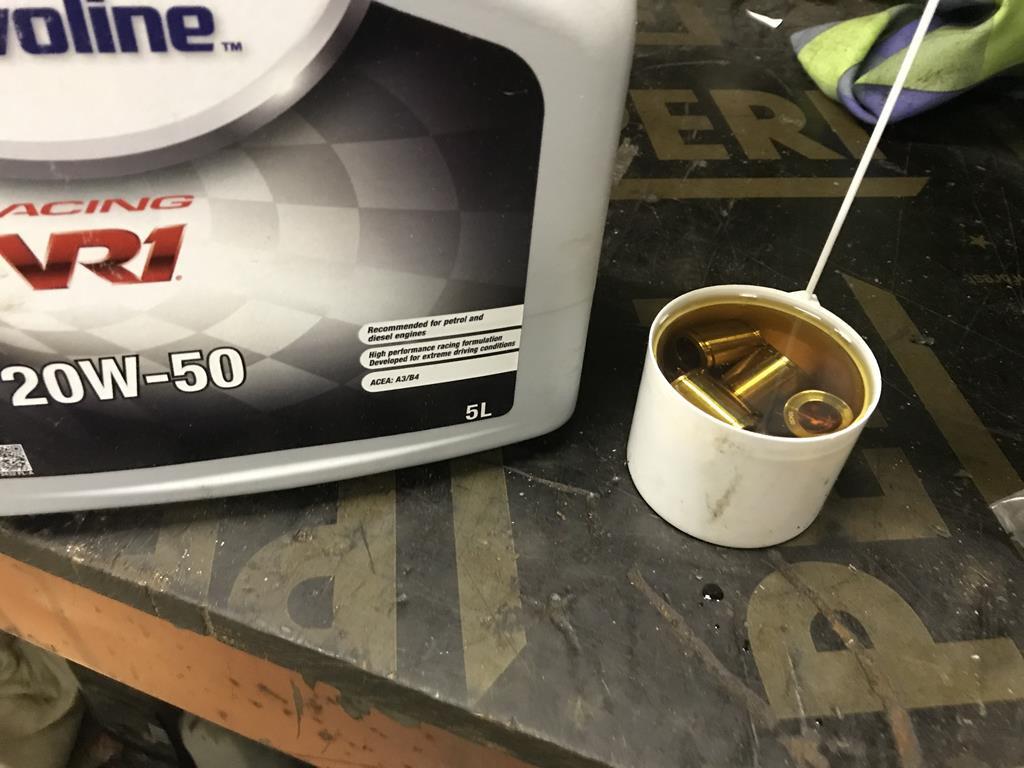 One downside is that the one of the brake calipers has a seized nipple within it. I previously tried to get this out with a reverse drill to no avail. It's stuck in there badly. With Big Redd apparently not touching calipers with broken brake nipples, I do need to somehow extract this out. Ideas here are very welcome. For now, I've soaked it in PlusGas. On the positive side, these calipers are the same as the front items on mine, so it's not the end of the world, albeit I would still prefer to use these items. Suggest away here folks  . 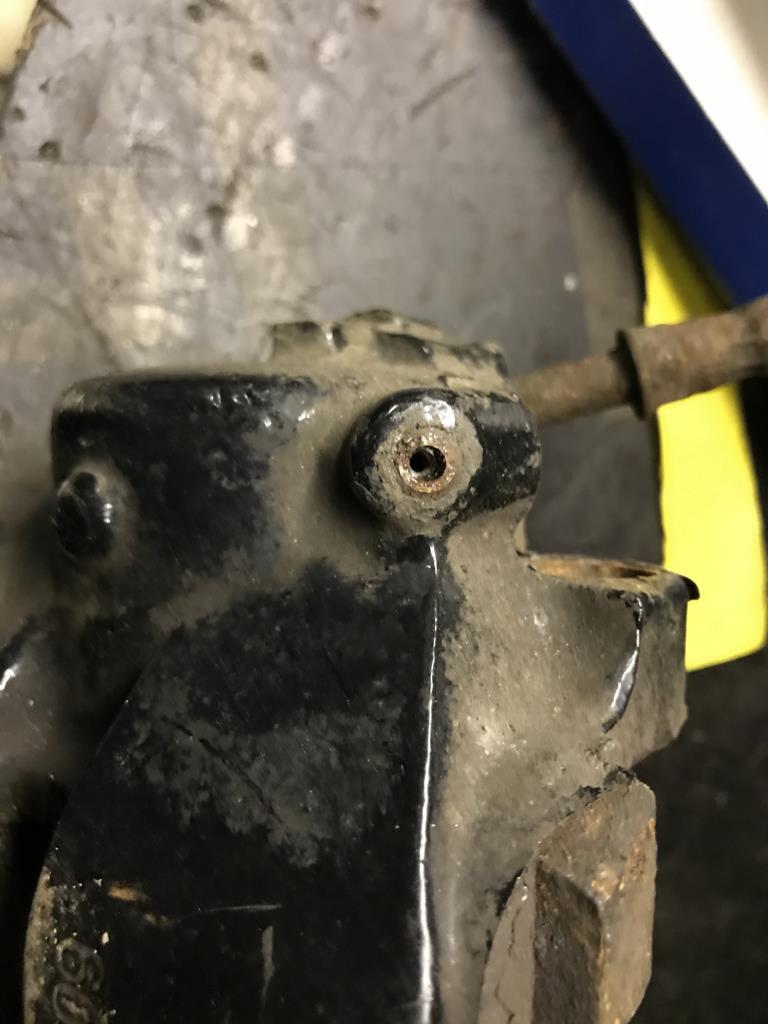 |
| |
|
|
|
|
|
|
|
|
A 'like' may have not been totally appropriate but thanksfor taking the time to write up, always enjoy your updates.
|
| |
|
|
pptom
Part of things
 
Posts: 473 
|
|
|
|
|
Got a snapped nipple off the other day by welding a nut to it.
However, it was a little more proud than yours and I consider myself very lucky that it went. Was bricking it. Had to keep wiggling the nut forwards and backwards and each time it freed off a little more.
|
| |
|
|
|
|
|
|
|
|
I got some badly seized nipples out recently with lots of heat (blowtorch) lots of wd40 to cool them down and a couple of taps with a small hammer,
Something similar might work with an eazi-out ??
|
| |
BMW E39 525i Sport
BMW E46 320d Sport Touring (now sold on.)
BMW E30 325 Touring (now sold on.)
BMW E30 320 Cabriolet (Project car - currently for sale.)
|
|
|
|
|
|
|
I had this... 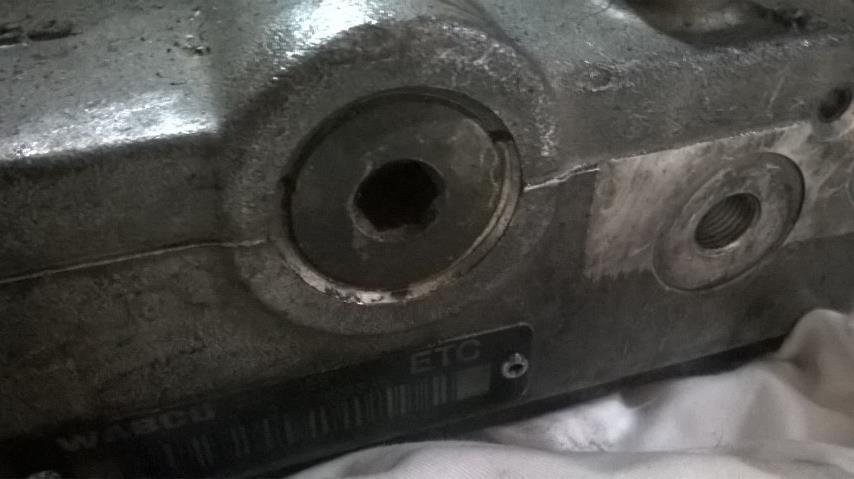 stuck well and truly in my brake modulator during stripdown. It takes a large allen key but wouldn't shift for love nor money. Destroying wasn't an option, it has to screw in exactly the same number of turns as it came out and getting a spare would be very difficult. This little tinker... 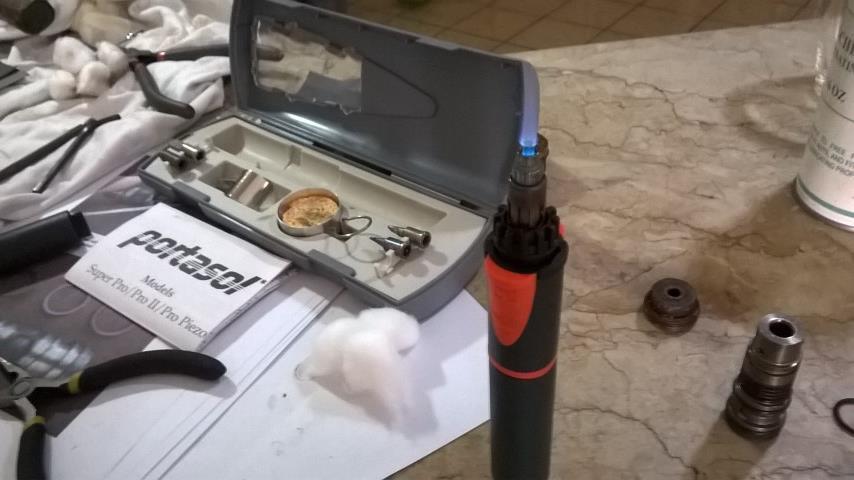 Finally got this... 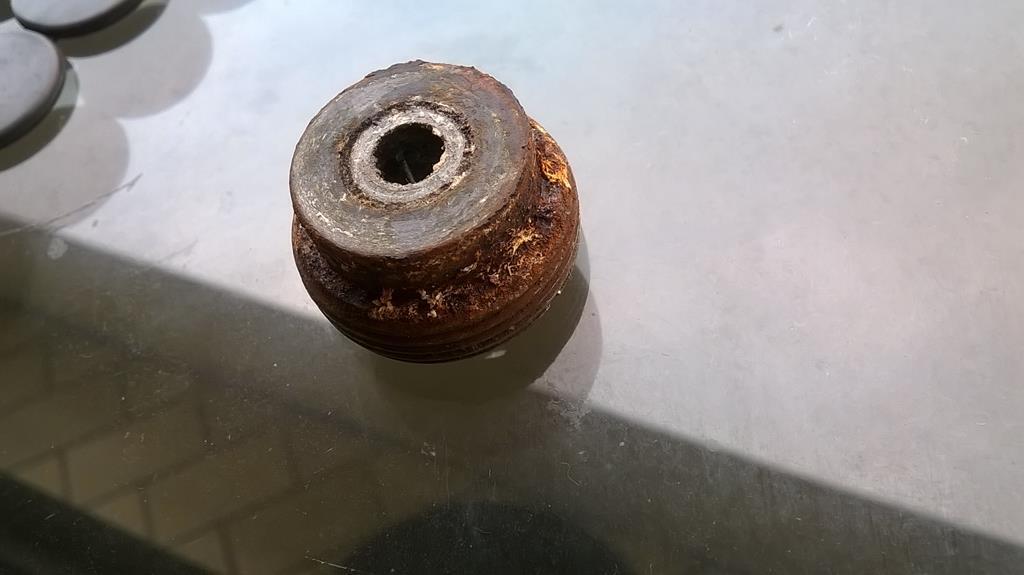 SOB out. It took many, many heat/cool cycles before it gave an inch. But the little torch meant you could concentrate the heat where you wanted it, i.e., on the steel plug, not the aluminium housing. Try the same, and then the eazi-out? |
| |
Last Edit: Mar 3, 2020 11:58:06 GMT by georgeb
|
|
|
|
ChasR
RR Helper
motivation
Posts: 10,297
Club RR Member Number: 170
|
BMW E46 M3 : That's the ticketChasR
@chasr
Club Retro Rides Member 170
|
|
|
Well, cheers for the thoughts gents A 'like' may have not been totally appropriate but thanksfor taking the time to write up, always enjoy your updates. Many thanks. I know what you mean about the like and it's appreciated. It's not something I wanted to bring up on the forum, but now and again I reckon it gives perspective on things, and a thought process. I felt a little bad for thinking about how we could get to places and why I didn't just hire a car, but I then thought: - Family is important but so is also logic and that can help situations even at tough times, and not having that can make the situation even harder, for everyone besides yourself
- It's a means to take time away from things ; I know at work I didn't really think about alot.
- It's still being productive and probably moreso than you think, especially if your mindset is in a strange place due to obvious events
I got some badly seized nipples out recently with lots of heat (blowtorch) lots of wd40 to cool them down and a couple of taps with a small hammer, Something similar might work with an eazi-out ?? I had this...  stuck well and truly in my brake modulator during stripdown. It takes a large allen key but wouldn't shift for love nor money. Destroying wasn't an option, it has to screw in exactly the same number of turns as it came out and getting a spare would be very difficult. This little tinker...  Finally got this...  SOB out. It took many, many heat/cool cycles before it gave an inch. But the little torch meant you could concentrate the heat where you wanted it, i.e., on the steel plug, not the aluminium housing. Try the same, and then the eazi-out? Cheers folks! I'm semi tempted to try a welder but there really isn't much left to weld to. Eazi-Outs give me the Heebie-Jeebies and rarely give me much luck. Are you referring to the screw-in type or the fluted examples? Heat cycles would work on it for sure  . |
| |
|
|
bricol
Part of things
 
Posts: 290 
|
|
|
|
|
Before you knacker it totally, gives Brakes International in Rochdale a call.
At the moment they can bore it out, fit an insert and new bleed nipple and refurb the rest of it.
|
| |
|
|
ChasR
RR Helper
motivation
Posts: 10,297
Club RR Member Number: 170
|
BMW E46 M3 : That's the ticketChasR
@chasr
Club Retro Rides Member 170
|
Mar 15, 2020 23:32:41 GMT
|
So, as I alluded to, the exhaust droned like a mo-fo! It was fine when not under load and when above 2.7kRPM. Great if you are enjoying the car. Not so great if you are sticking to speed limits, trying to not run people over in town, or best of all, stuck on an average speed camera section on the M1. So, yes, it did become a little testing. What's more, it wasn't as vocal as I thought it would be inside the car above 3kRPM. So, it was like a grumpy teenager. Annoying where you didn't want to it be, and compliant elsewhere. Obviously, it couldn't stay. A video will come soon for that, but that will take some editing  . Since someone needed the backbox for a trackday car, I decided to let it go. With them going from a single side exit, this would be the perfect backbox. And so off it came! So, it was back to work on the car in its familiar place: 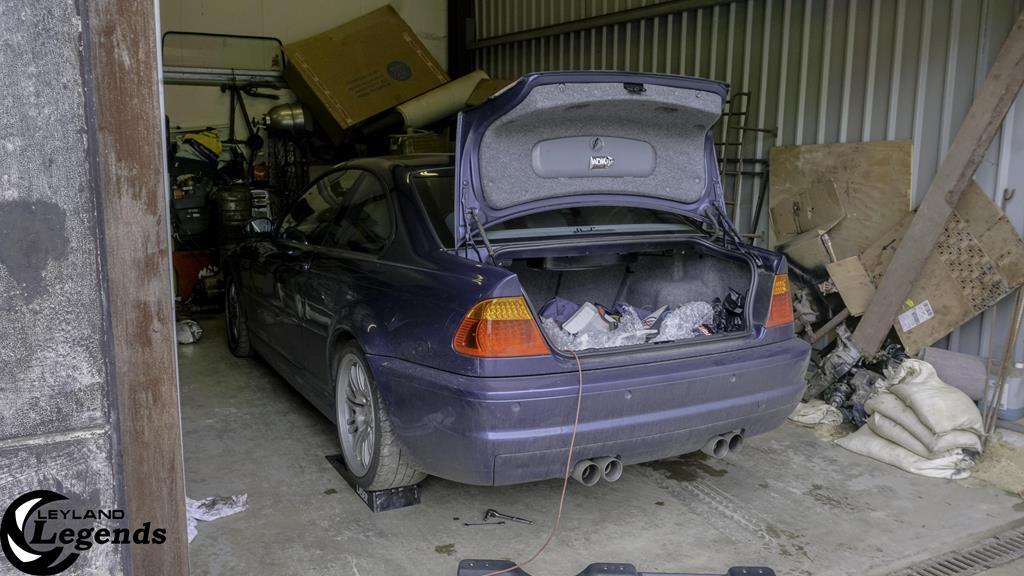 With the car on the ramps, it was a simple matter of removing the old system. Since I used new fixings it took all of 5 minutes to remove the backbox. Really, it wasn't that bad at all, especially now I know how to speed the process. For those tackling this, if your exhaust mounts are sound, don't remove them, you can just remove the mount-to-backbox nuts with some care, even on a stock midsection. This can speed up the removal nicely. On a small backbox like the Milltek, the extra access makes this much easier proposition. Who said upgrades complicate things? Given why I'm removing it, don't comment on that! 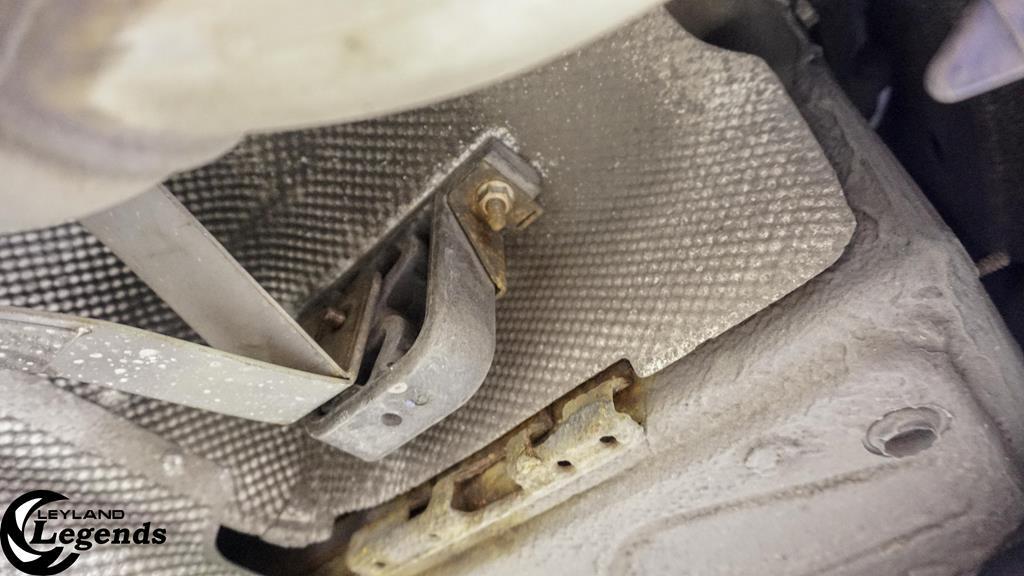 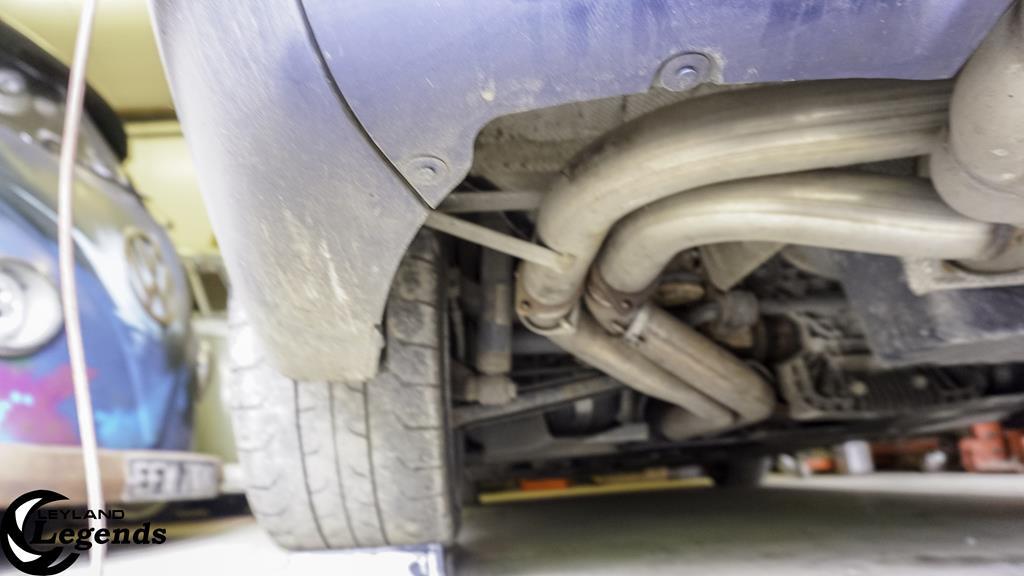 With the Milltek off, it was time to compare it to the other offerings I had. One including an Eisenmann Race backbox in addition to the stock midsection. The Eisenmann does look scruffy but it is very sound, and it was going for a half decent price. I'm told these don't drone but we shall see. However, note how the Eisenmann is similar to the stock backbox in many ways. You can see why the Milltek (and also similar backboxes like the Tegiwa, Scorpian and Cobra backboxes are said to drone ; there really isn't much silencing going on. Some claim the Milltek is restrictive, why may explain why it gets quieter inside the car when gunning it, but I couldn't really see any evidence of that. So, here are all of the backboxes. From left to right in the below shot we have a Milltek, an Eisenmann Race exhaust with the 83mm tips, in addition to the stock item. 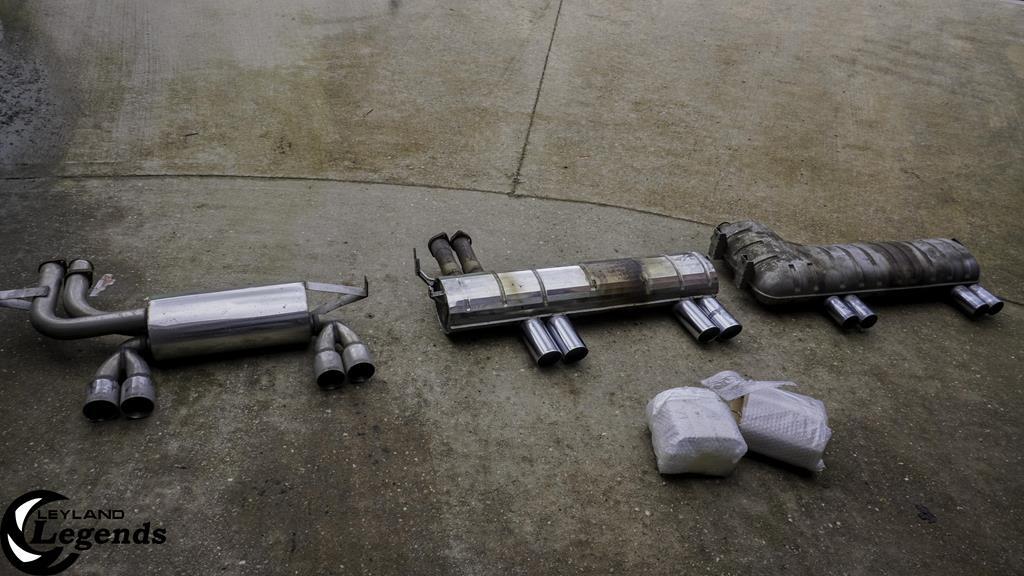 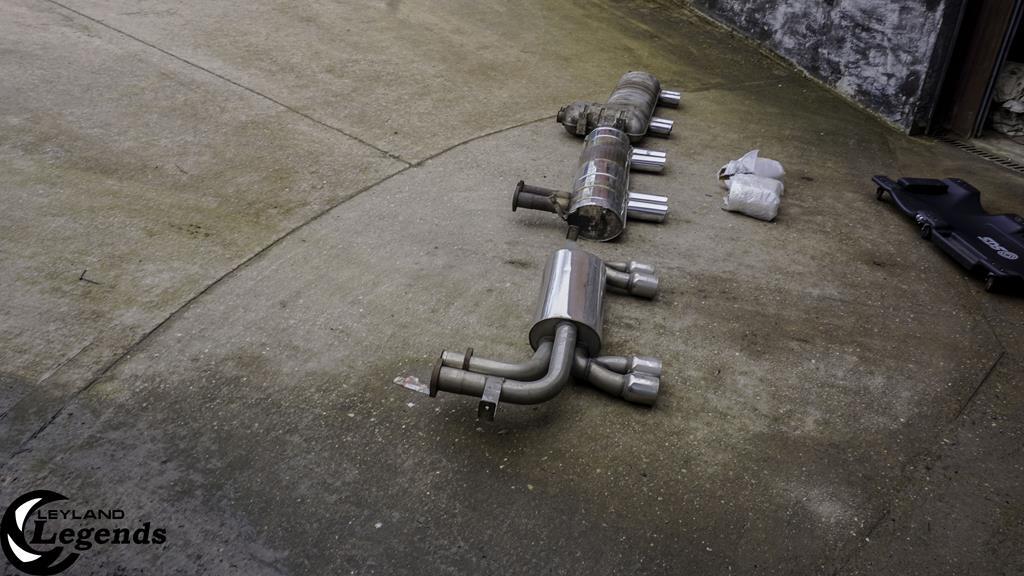 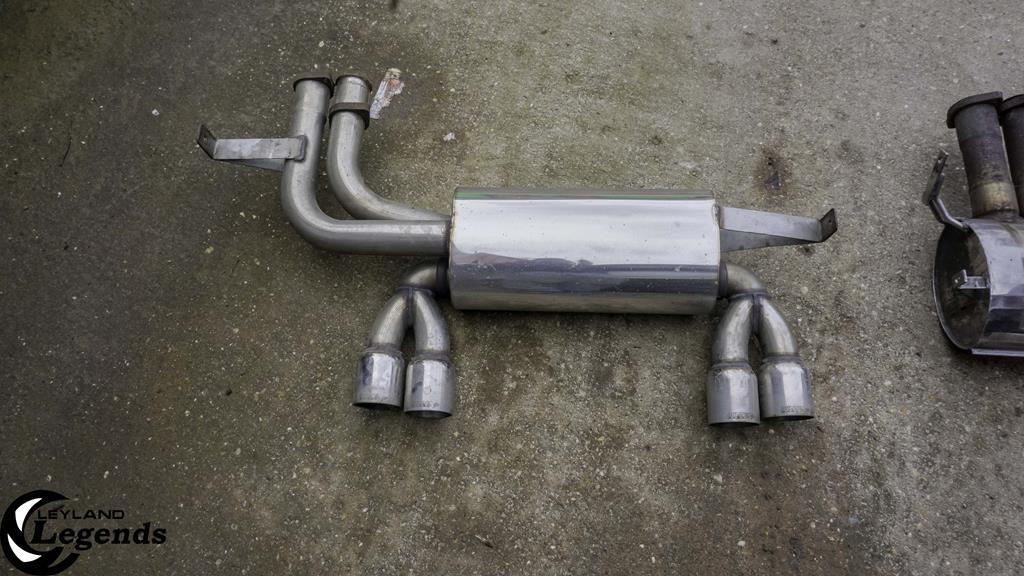 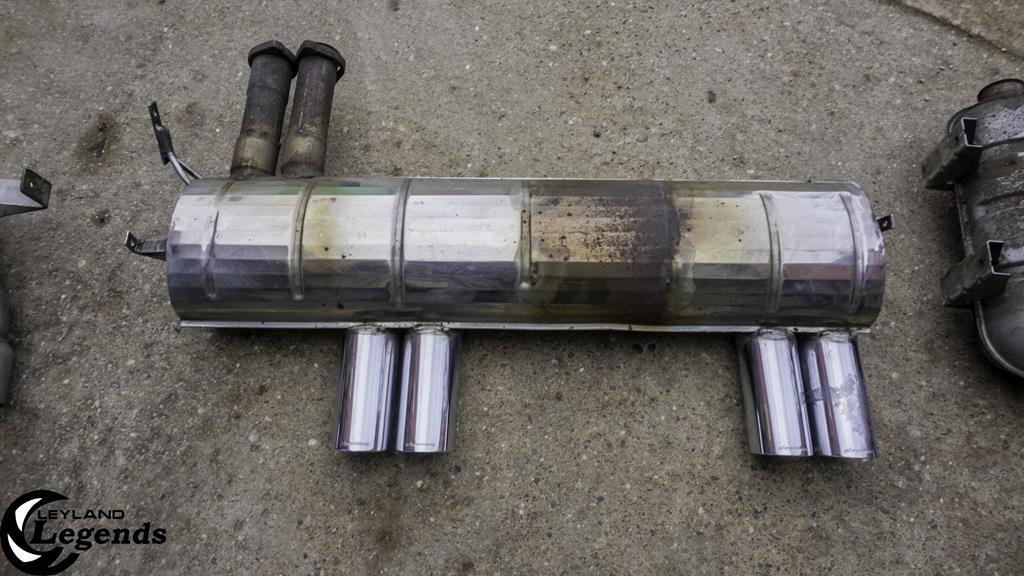 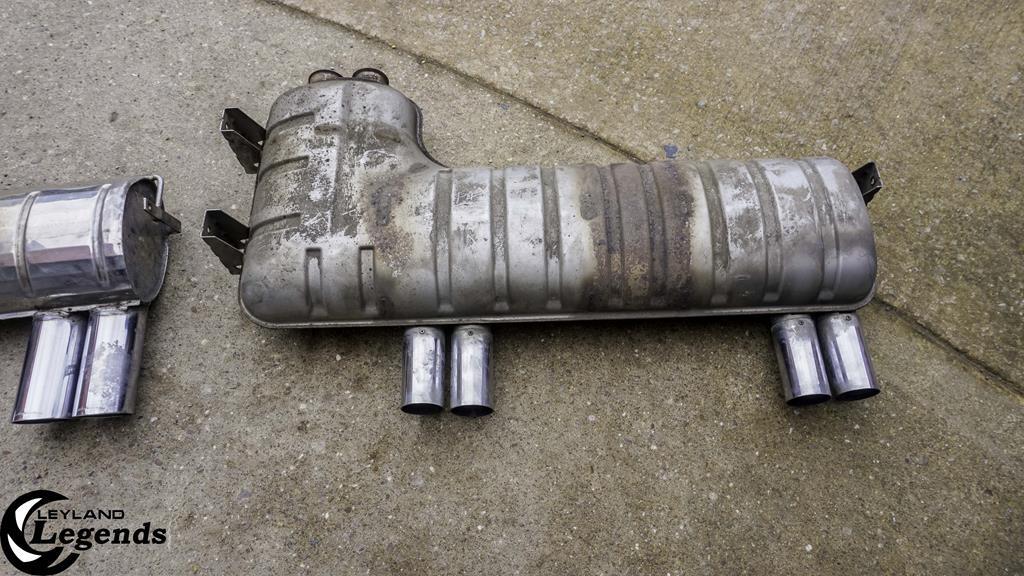 There is big difference in weight between these backboxes as the figures below show: -Milltek - 12.5kg -Eisenmann - Apparently around 16kg -Stock - 26kg! Yup, the Milltek was easier to fit due to it not weighing as much! But you do wonder if it will affect the weight distribution. Someone has offered to polish up the Eisenmann, so that will be done soon  . It's a shame as I really wanted to fit it then! But for the meantime, the car is just surrounded by backboxes. Is this madness or am I a hoarder? We shall see  : 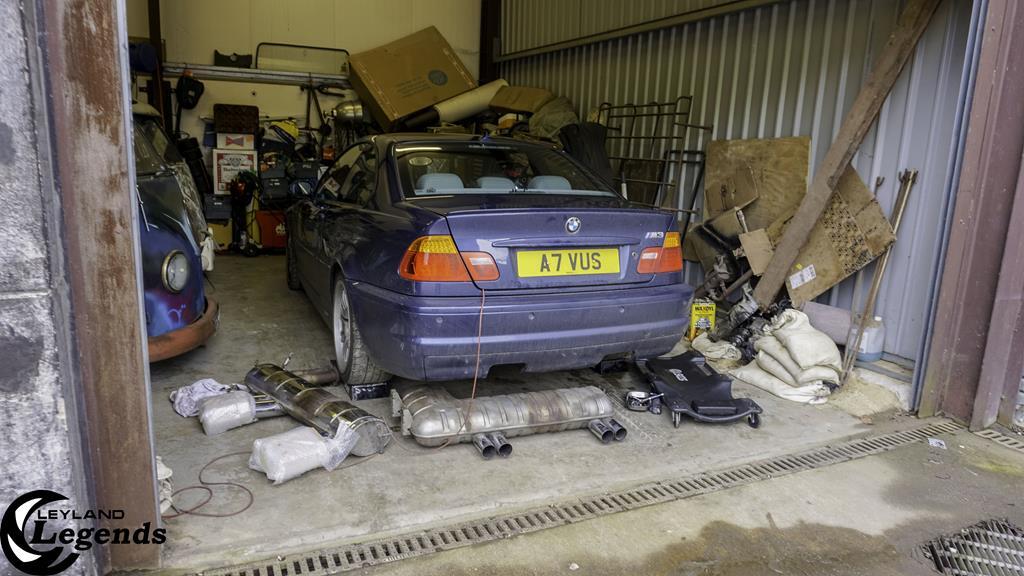 |
| |
Last Edit: Mar 16, 2020 10:17:48 GMT by ChasR
|
|
ChasR
RR Helper
motivation
Posts: 10,297
Club RR Member Number: 170
|
BMW E46 M3 : That's the ticketChasR
@chasr
Club Retro Rides Member 170
|
Mar 19, 2020 19:19:54 GMT
|
It's hard to believe that this post could have been 'the post' for this thread! Why? Prior to removing the Milltek backbox, I had created a video for the M3, which despite detailing the shortcomings, also detailed some great things like: -A Drive-by with some acelleration behind it. -A tunnel run! I mean, it has to be done right? Unfortunitely, the footage got deleted. Yup, yours truly managed to go from an awesome video to a damp squib at one! So, if you can bear to watch a boring video with some headphones to see why the Milltek isn't for the M3, here's a view. It may be a realistic video of what the car will be like, but, it's not a fun video to watch! Let's see if the Eisenmann can have that level of fun in it, pending storage issues (I need to find my HDD, which is somewhere) But, there has been progress with the Eisenmann backbox, which doesn't look quite as grotty as it did before  . |
| |
|
|
|
|
|
Mar 20, 2020 17:29:37 GMT
|
|
I like this thread, great car and all the realities of living with it.
EZ Out's are evil things, will likely snap and leave you 100% screwed. AMHIK.
Better to take it to a machinist/engineering shop.
John
|
| |
|
|
|
|
|
Mar 21, 2020 15:14:00 GMT
|
I like this thread, great car and all the realities of living with it. EZ Out's are evil things, will likely snap and leave you 100% screwed. AMHIK. Better to take it to a machinist/engineering shop. John I agree with this. I LOVE the IDEA of easy outs...but my experience with them has been less than consistently successful. Breaking them inside the drilled hole is less than inspiring. There is the LUCK factor, however. I have gotten lucky with them, but I would not call it much more than that. To me, it seems that they work with things that are NOT corroded in place badly. Heat and cold cycles may be the only DIY solution. A machine shop is the only stress free solution! JP PS, the car is looking great. nice work on the exhaust and related items. |
| |
I know its spelled Norman Luxury Yacht, but its pronounced Throat Wobbler Mangrove!
|
|
ChasR
RR Helper
motivation
Posts: 10,297
Club RR Member Number: 170
|
BMW E46 M3 : That's the ticketChasR
@chasr
Club Retro Rides Member 170
|
Mar 22, 2020 12:50:36 GMT
|
Many thanks chaps! I see I'm not the only one who has had EZ Outs go bad on them before. Since the last post, a few things have changed. Becuase the Milltek fell off so easily, I sold it the next day for near enough what I paid for it. I can't moan at that  . After that? Yesterday was a busy and stressful day due to something I mentioned in another post. Thankfully, the families took the threat seriously thanks to a nurse in their family and went back. While my sister is a pain, she will be on the front line in London's hospitals. For all her faults, thoughts are with her. Anyway, enough of that! I did manage to get some time to go down to the unit by myself and do a couple of things: The first one was to put the 3rd back box mount on. I removed this when I fitted the Milltek on, as that only uses two exhaust mounts; No doubt due to its design, it doesn't not need three mounts. The Eisenmann item however, just the factory 'box uses 3 mounts, as the photos in the previous shots show. Like the other mounts, new copper nuts with an application of copper grease was used: 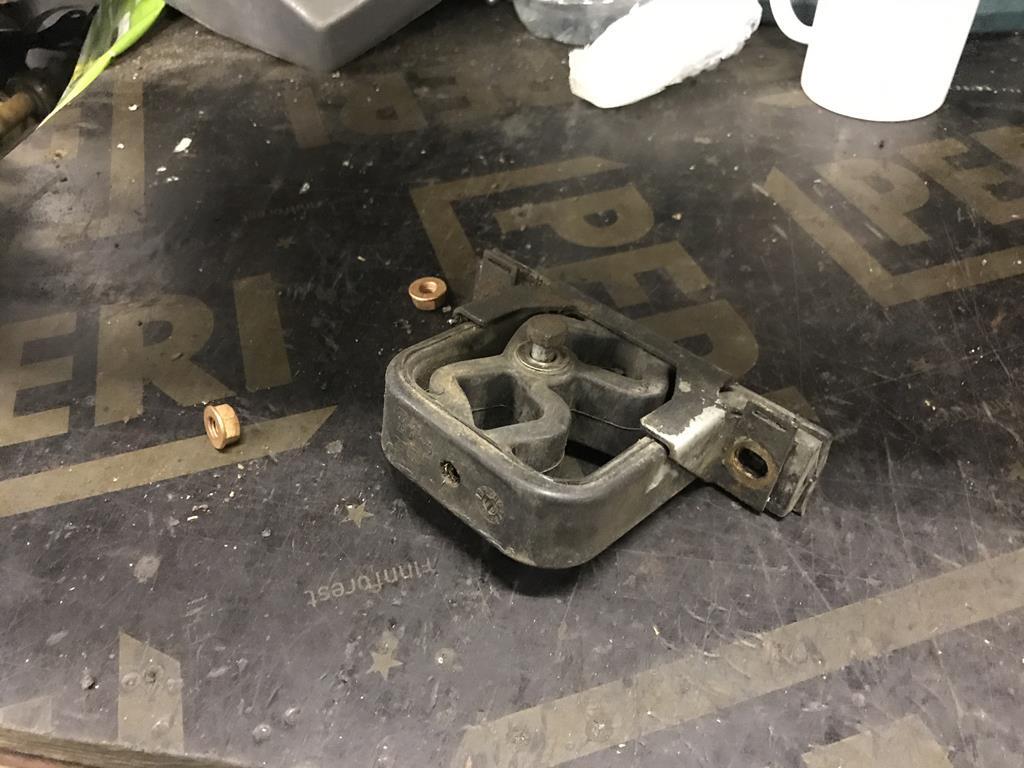 What then ensued was getting the backbox in position. It was almost as awkward as the factory one to jack up, but once I found its centre of gravity, it was easier. 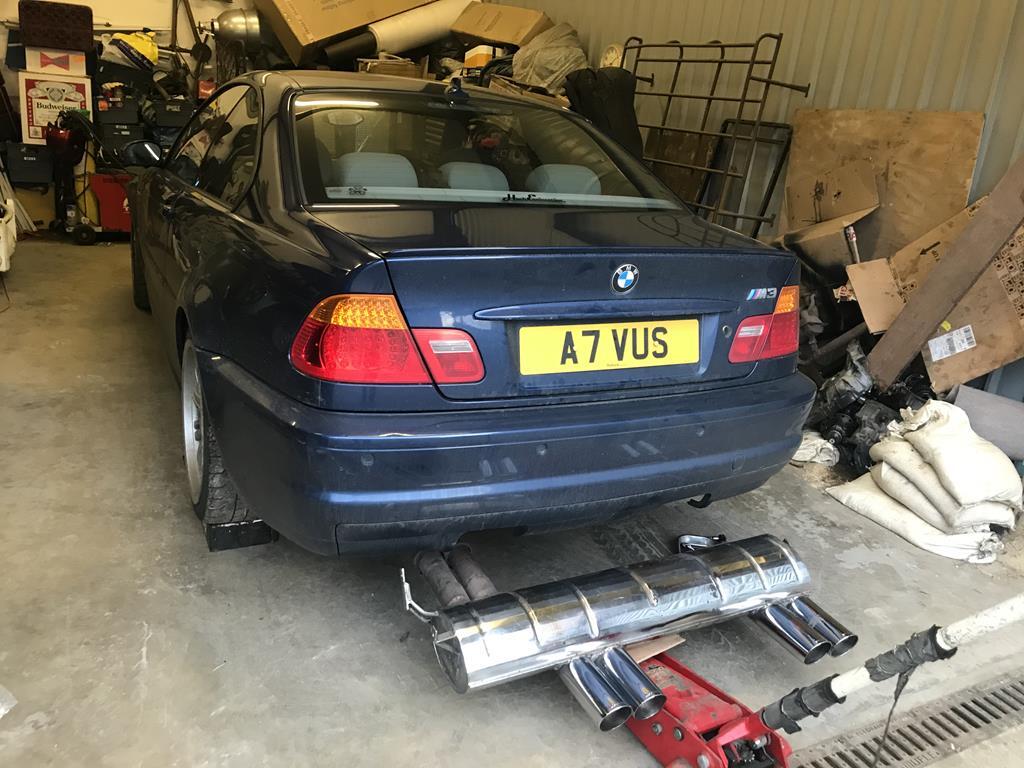 It was then a juggling act of putting in two of the three exhaust mount bolts, and then using the jack to get things mounted up. Again, like the OEM system, this was fiddly, but not quite as much, once some thought and logic were applied. The Milltek in comparison was a doddle to fit previously! And so, finally I had it on! As my Mirrorless camera needs charging, you'll have to make do with these images I'm afraid: 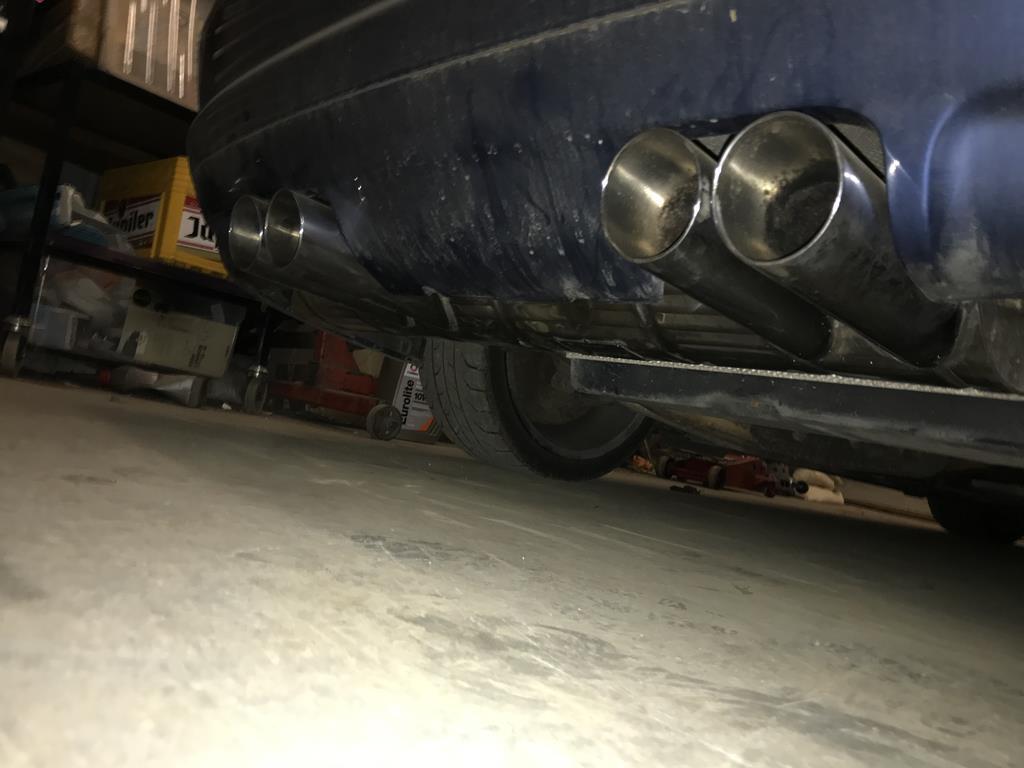 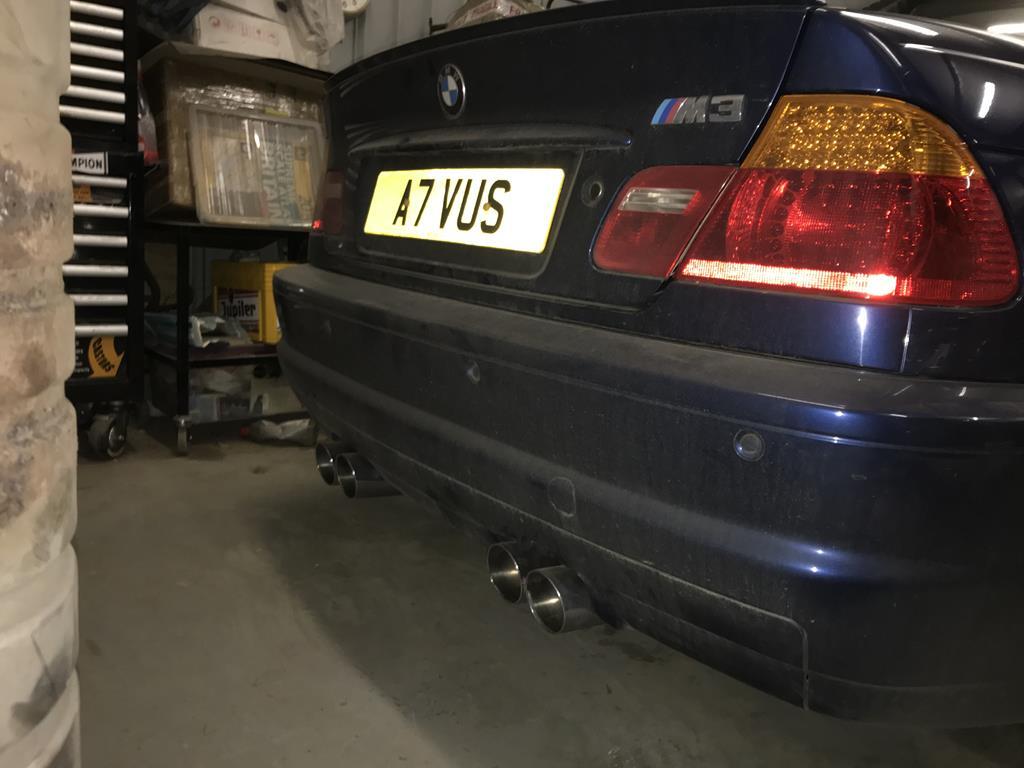 It doesn't look too bad eh! Yes the car needs a clean, which I may do. After all, my hands will be washed alot right? As for the sound, it's very different to the Milltek! But you've probably seen a theme about this exhaust as I was fitting it. That will hint at what it sounds like  . |
| |
Last Edit: Mar 22, 2020 12:51:46 GMT by ChasR
|
|
ChasR
RR Helper
motivation
Posts: 10,297
Club RR Member Number: 170
|
BMW E46 M3 : That's the ticketChasR
@chasr
Club Retro Rides Member 170
|
Mar 24, 2020 22:02:27 GMT
|
|
I suspect this thread may get quiet for some time. I had a choice of which car to have outside and in truth, the Mondeo won. Maybe it should have been the M3, but you never know when you'll need a car with a big boot, and something a little less obvious on the deserted streets.
But for now, I'll leave you folks with a video of the car on the new exhaust. This time, I managed to
-Make the video shorter (but I can do a review like the last video)
-Actually get the footage in that I wanted ; outside of the car.
I hope you enjoy folks and stay safe wherever you are:
|
| |
|
|
|
|
ChasR
RR Helper
motivation
Posts: 10,297
Club RR Member Number: 170
|
BMW E46 M3 : That's the ticketChasR
@chasr
Club Retro Rides Member 170
|
|
|
I warned of further updates arriving for this. The truth is there may be a few more than I bargained for! But first, let's talk about the brakes. I bought these back home with me to refurb, complete with a kit I got from Bigg Red. I almost let them do it until I had the prices: Electroplated/sprayed finish : £315 Enamel/Baked finish : £400 Not bad prices but more than I was willing to pay for what seemed like a simple job. Funny really, as I said last time that I'd never refurb calipers again, but here I am! Firstly, I got the caliper on the bench. Taking the piston out was done surprisingly with a bike pump and an adaptor! With a football needle put into the broken/cut brake line, I had the piston out in no time. I'm glad I am refurbing these. While the piston had cleaned up fine, it's clear the fluid was quite old in the caliper and that it was beginning to build up on the piston. But since I have new pistons and seals, that's not a problem. However, my plans have changed for the brake calipers. Originally I planned to do the following: Loose stuff off>>paint up the calipers>> fit new pistons and seals However, as you can see below, thing escalated rather quickly! 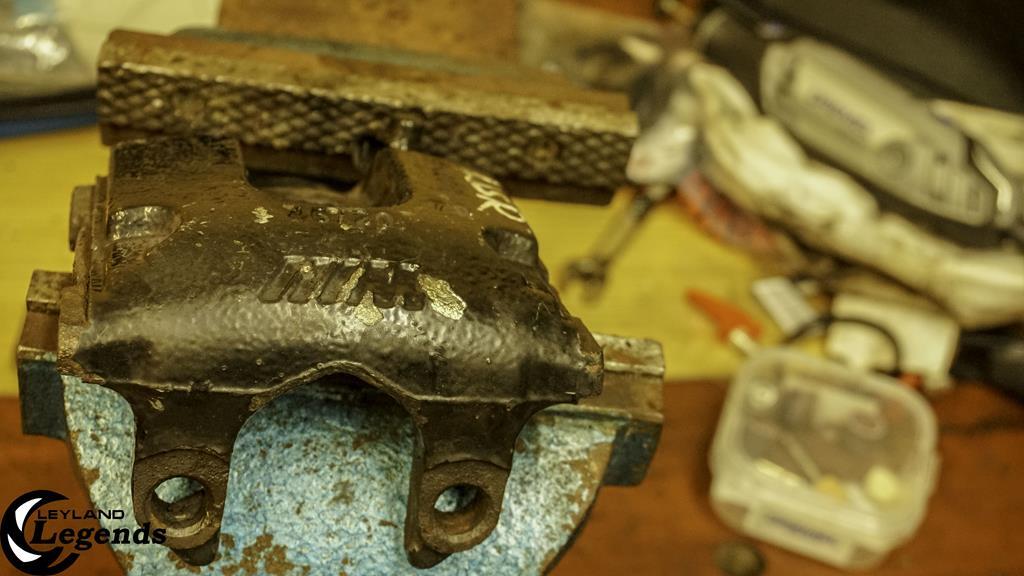 At this point I hadn't touched a thing 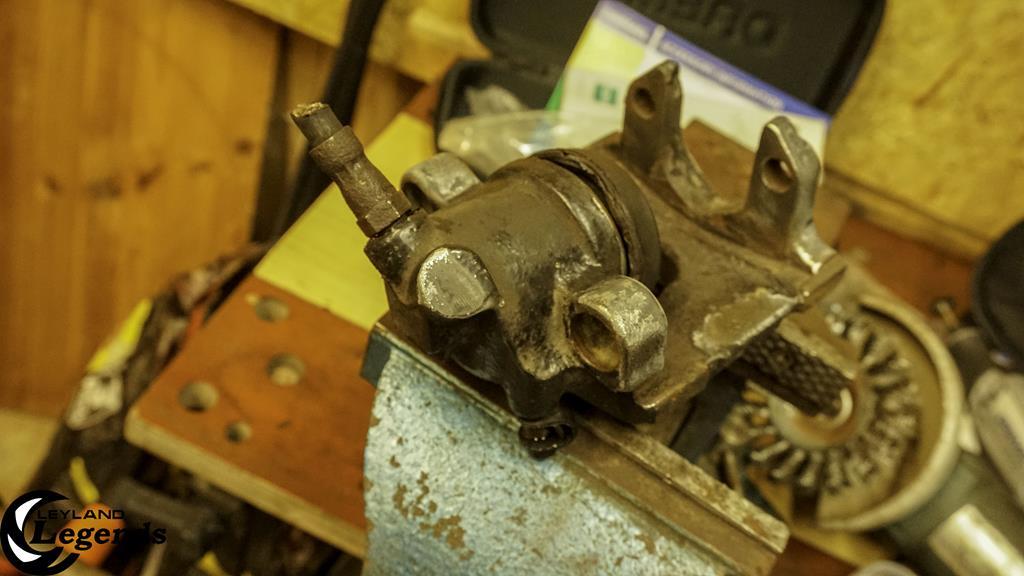 Here, an angle grinder with a wire brush attachment hit it. I also used the Dremel with a wire brush but with the limiting speeds set for the wire brush so as to not destroy it, it wasn't having much effect  With the grinder attachment on the Dremel, I was worried I hit it a little too hard! But it looks to be going in the right direction. It seems these calipers may have been painted with a caliperp paint kit in the past. 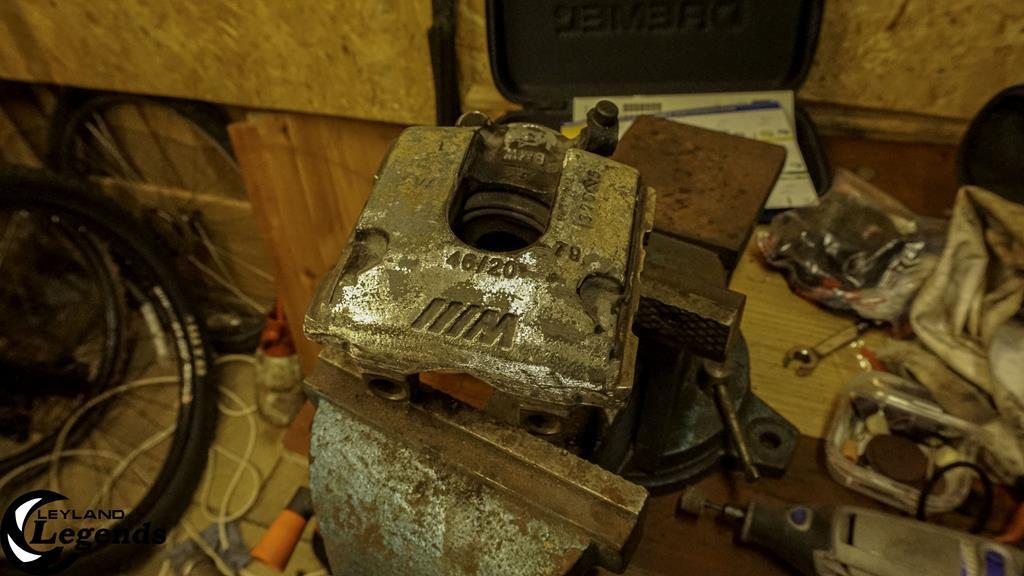 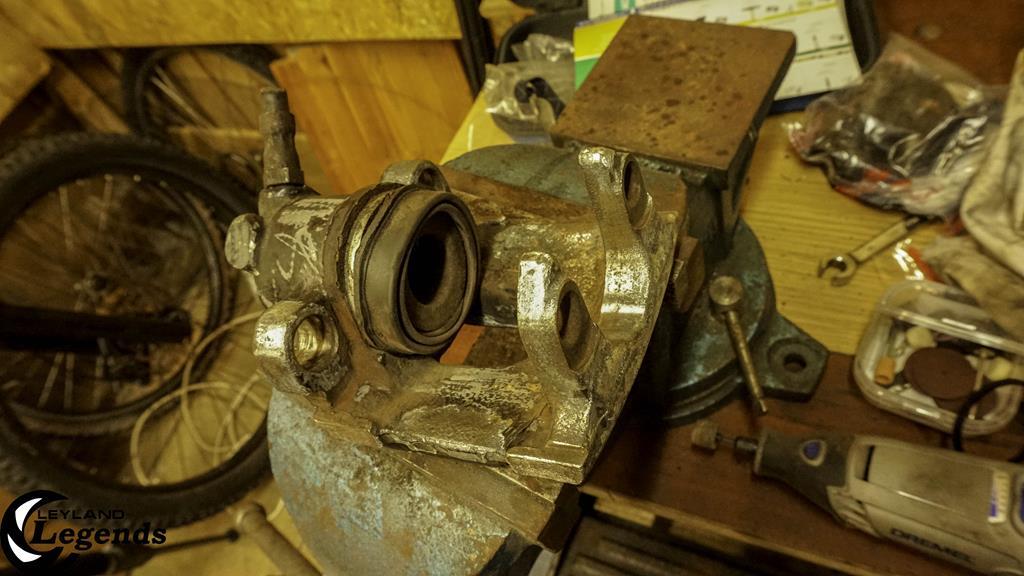 To get me through all of this? A trusty Workmate 2 bench! 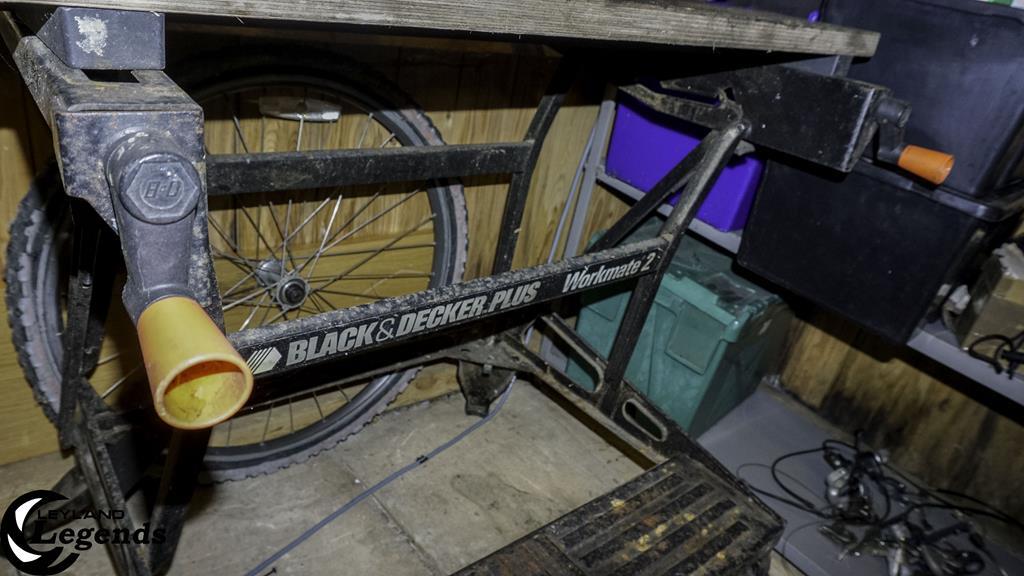 Have I gone too hard on the caliper or going the right way? I've now decided however to tackle them as follows: Grind and clean the calipers >> Paint strip them >> Deox Gel them >> Paint them >> Fit new Pistons and seals So, a little more intensive than before, but I should end up with a better result  . Compared to the Merc calipers, these look like a doddle to rebuild! As always, open to advice on the above. I've not ruled out purchasing a shotblasting kit as it would still be cheaper than if I went to Bigg Red. The issues however are that: -The unit is 10 miles away and I shouldn't really go there ; I don't have an airline at home unless the bike pump counts as one -It's still an expense for some kit I may not use that often, I hope! Choices choices eh? |
| |
|
|
|
|
 .
.


 .
.


 . Furthermore, I need a new exhaust mount, where a friend is willing to provide me a new unused item he has from my his ex-M3 days. It's a little annoying that one of the mounts has ripped, given that it's one of the very first parts I've changed 4 years ago. Am I being a little hash about them given they have lasted 4 years carrying a 24kg backbox? Possibly.


