|
|
|
Sept 14, 2020 19:16:56 GMT
|
Yes! Kevins is correct and wins a mighty fine peice of swarf!  I was about to look at ordering a subaru clutchpressure plate with measurements fitted the bill. But whilst out on a run, my head clear and thinking of things it suddenly dawned on me that those tension straps would now be in compression due to the Hondas anti-clockwise rotation (or clockwise when looking at the pressure plate) Luckily there's loads of clutch components avaliable for early Hondas with their anti clockwise engines and I ended up sourcing a new pressure plate from a mid 80s Honda accord/prelude that would fit the bill and suited the new subaru leone clutch disc I'd already bought. The pressure plate was cheap from Rockauto - turning up only 5 days after ordering. They always amaze me! Photos soon with next update. |
| |
|
|
|
|
|
|
|
Sept 17, 2020 1:54:52 GMT
|
|
Well done on spotting that before it bit you!
|
| |
|
|
|
|
|
Sept 17, 2020 9:55:36 GMT
|
|
It could have been messy - but would have made for a great story....
|
| |
|
|
|
|
|
|
|
Ooooh its been over two months since I updated this thread. I have not touched this engine since stashing all the bits under the bench out of harms way, throwing a blanket over the main block on the bench and spending most of my time since then buying up many Micras, working on the housetruck and building the mezzanine floor in the shed for when the truck leaves us. More info on that mezzanine project if you have not seen it can be found here... forum.retro-rides.org/thread/185938/alex-hannahs-bushblock-cabin-story Oh and some of that paid work thing too because we do have a mortgage to pay. However - I still have a little bit of progress up my sleeve to report before we get up to real time. So I can do an update and hopefully soon I'll be back into working on the engine. I'm very much looking forward to moving in upstairs because I can whittle away on the project even easier. Well at least I think it'll work out like that? There's still a load of sawdust to create yet before we can move in though. So where I left off last time was in making the start of the adaptor plate/engine side of the bellhousing. I needed a flywheel to work out its depth, due in part because I am intending on using a concentric slave cylinder, one that was left over from the Ford Mundano that we had robbed ages ago for its engine to fit into the Viva wagon (Viva wag plus all those duratec engine bits now sold) I had a Subaru Leone 1800 ring gear to suit the gearbox. I needed a clutch setup to suit and started hunting a variety of places. I found a brand new subaru Leone clutch disc going cheap on trade me so I snapped that up pronto. Now a suitable pressure plate. I was just going to buy a Subaru item but had realised that it wouldn't have worked, hence my question to you all in the last updated of which Kevin had answered correctly and won a bit of swarf (yet to be posted...) Clutch sorted and sitting on the bench. I could now measure up and start on a flywheel. I had a friend from oldschool.co.nz draw up a cad file of what I wanted- the right diameter and pilot holes for the adaptor bolts. He suggested that I get them to leaser cut pilot holes for the pressure plate bolts while at it and this saved some time. He had my plate cut via his work account and picked it up from his workshop- giving me a chance to check out his sweet project that is a Nissan Safari chassis/running gear with a Toyota Dyna crew cab on top  I first set it up and bored it out a 1/4 way through to fit perfectly onto my flywheel hub I had previously made. This hub also has the surface that the rear main seal runs against. .jpg) I could then seat the flywheel onto the hub, clamp them down and drill right through into the hub. Drill out to tapping size, tap the hub holes, clearance the flywheel holes and finally countersink and spot face the flywheel holes to suit some fancy bolts I bought - these need to sit near flush with the flywheel surface to clear the clutch disc damper springs. Pics... .jpg) .jpg) Flywheel now bolted to its hub I set it up in the lathe for machining... .jpg) Then gave it a skim. Checked it again, double checked it and then triple checked it. All good. Then machined the required step onto the face to suit the disc as per factory specs. Next thing was to add the ring gear I add. Now this was a bit tricky because my lovely old Mitutoyo vernier calipers (one of the first tools I bought when starting my apprenticeship) were not big enough to measure that diameter. My old work place I did my time at had some lovely 600mm Mitutoyo calipers in a lovely wooden case. They were one of the treasured items of the tool room and I used to love using them. I had priced up some 600mm items from a variety of other brands but wayyyyy too expensive for me. I'll still keep looking because they'd be handy for many jobs. Might find some secondhand. But that didn't help me when I wanted to do this flywheel now. So I made an extension from some stainless I tigged together, replicating the end of my calipers. Taped in place securely and hey presto- I had a new updated tool. .jpg) Never perfect like the real thing so I had to really triple check my measurements but managed to turn the flywheel down to give me just the right amount of interference fit I wanted from a shrink fit. .jpg) Into the bench top oven the ring gear went, heated up and it dropped on to my machined step nicely. Cooled down and its not going anywhere. With that in place I re-checked it all and got the throw out on the flywheel down to about 3 or 4 thou. Happy with that. My clutch kit now bolted on in place and I have something I can set my bellhousing depth to suit... .jpg) I have added the required dowels to suit and its all done. I'll get the flywheel, clutch and crank balanced together before assembly. So that will be the next update I think. Machining the spacers that will become part of the engine side of the bellhousing adaptor. Then I need to finish off making some chain tensioners to suit the oil pump drive chains. However I still have plenty of other jobs to do on the housetruck plus mezzanine and those are priority whereas this is just a fun little project. But I must mention that today whilst out on a bicycle ride we had about 50 various motorbikes pass us on part of a charity run. I spotted a bright metallic blue Goldwing 1500 go past and as it accelerated up the hill we were on it had that distinctive flat six exhaust note and just sounded superb! It certainly got me tingling and all I thought of was that sound coming from my Imp  A good incentive! |
| |
Last Edit: Nov 14, 2020 8:49:46 GMT by yoeddynz
|
|
|
|
|
|
|
|
Well, I don’t think I’ve seen anyone make their own flywheel before.....
Serious stuff!
Nick
|
| |
1967 Triumph Vitesse convertible (old friend)
1996 Audi A6 2.5 TDI Avant (still durability testing)
1972 GT6 Mk3 (Restored after loong rest & getting the hang of being a car again)
|
|
ovimor
North East
...It'll be ME!
Posts: 933
|
|
Nov 14, 2020 11:06:22 GMT
|
On 'large bike engines'.... I owned a 750L Panda and, once, in the queue at a fuel station (summertime in the Lake District) I let a hairy biker [... really nice guy] slide through for a top-up before me. "Well, your engines bigger than mine!" I quipped... This is all gr9 stuff  OVIMOR OVIMOR |
| |
Knowledge is to know a Tomato is a 'fruit' - Wisdom, on the other hand, is knowing not to put it in a 'fruit salad'!
|
|
|
|
|
Nov 14, 2020 12:49:47 GMT
|
|
Like the project and the engineering.
An idea to muse over, make it 4x4 with scooby 4x4 box (same bell housing?) and rear diff.
|
| |
Last Edit: Nov 14, 2020 12:51:06 GMT by subarupete
|
|
|
|
|
Nov 14, 2020 17:42:00 GMT
|
Yeah neat idea subarupete and would make for a good little rally car /balance the front to rear a bit more. But you'd need to change the front suspension - probably to mac strut. Would be a load more work and I've put enough on my plate already  |
| |
|
|
|
|
|
|
|
|
Great stuff as always!
There is a great story about Mac struts and Imps! During development they looked at using them, and built a prototype. Took it and a few others to the test grounds, everybody thought it was great exept one guy who said he didn't think it was any different to a normal Imp. Further examination showed that they'd brought the wrong car, and it was a normal Imp...
|
| |
|
|
|
|
|
|
|
I have a friend in Christchurch who has an imp with Starlet mac strut suspension and a 4age 20v blacktop in the front. Its quite tight in the front with the required transmission tunnel etc but other than that its quite a machine. I'll just be sooooo super happy to have this engine running and hear that flat six sound. Not really that bothered about the performance etc because it'll be more than quick enough for light hearted giggles  |
| |
|
|
|
|
|
|
|
|
Yes well a front-engined Imp is a completely different proposition! I'd be curious to investigate mounting a Mac strut off the end of the standard Imp swing arm (after I get my other Imp projects done that is...)
|
| |
|
|
|
|
|
|
|
|
Love it, mate! You'll never change with your mad projects!! Hope you're all keeping well. Cheers. Leigh.
|
| |
|
|
|
|
|
Jul 10, 2021 10:06:31 GMT
|
Far out! November last year was the last time I had tinkered away on this project. Time flies!!! Well both Hannah and I have been pretty busy with various things like having to get the housetruck finished off and road legal for sale and with that gone we had to build a place to live. The mezzanine build took a fair whack of time. That's all pretty much done, well at least to a point that we can happily live up there. I started losing a feel for time over summer with all that going on. Then a Micra/March turned up. A simple, cheap run about while the Imp is off the road eh. Then another Micra... and another. Oh - so now these are projects are they? FFS. Oh hey...what's that? Is that a Bedford TK truck in the yard. But hang on.. you've already got 4 other vehicles to play with, not to mention the old 4wd Hiace van that's getting bit rusty around the edges. Well screw all them. I just needed to get my 'flat six fix' so I dug out all the bits that had been hibernating under the bench and had some fun piecing them together in a sort of organised fashion on the table... 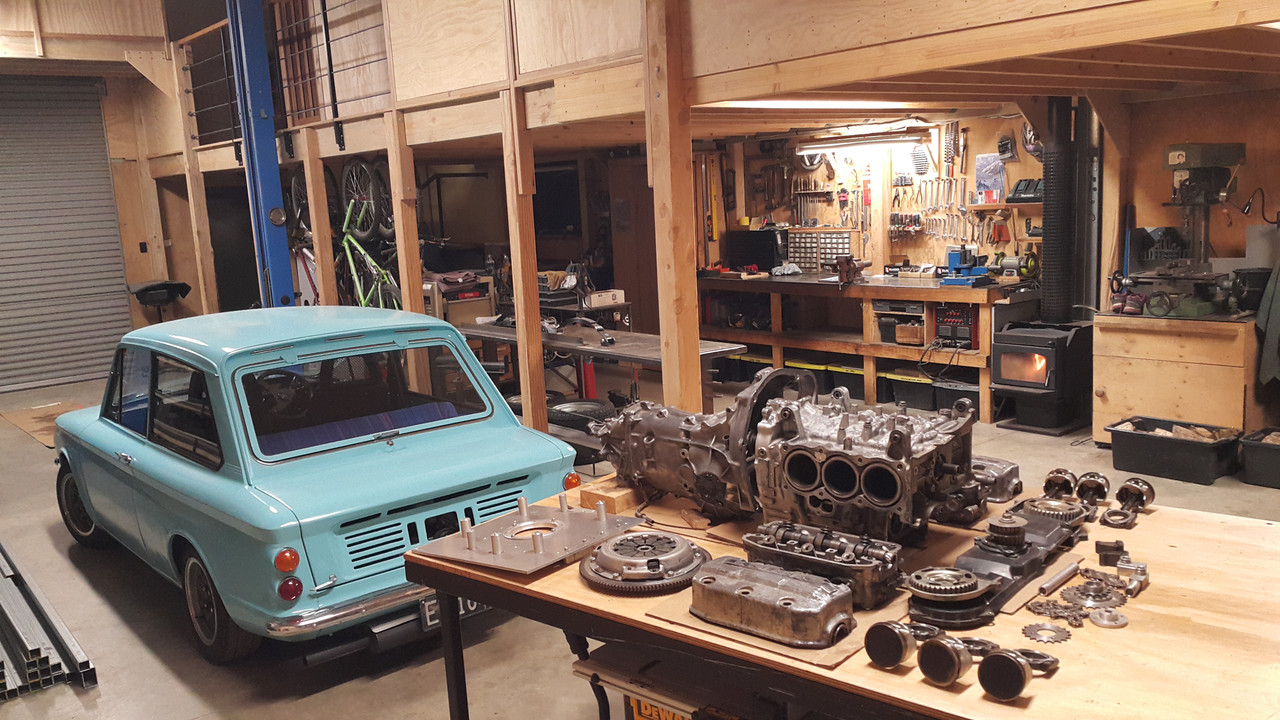 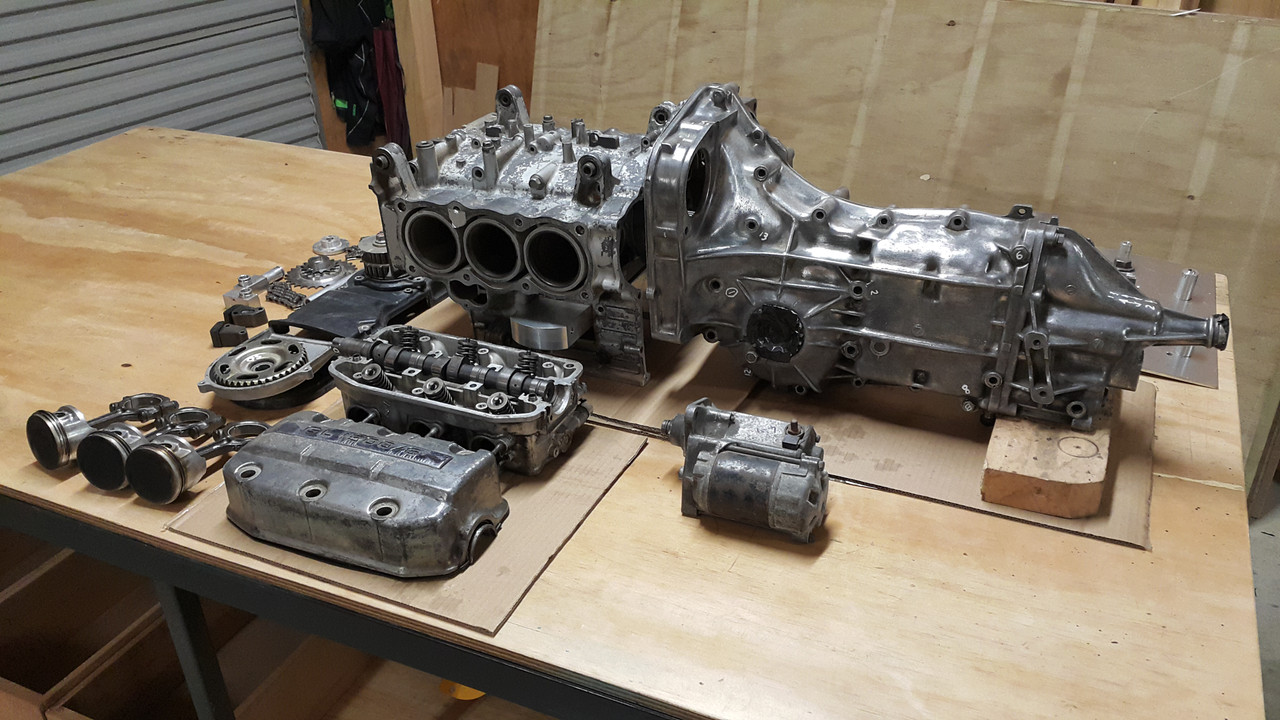 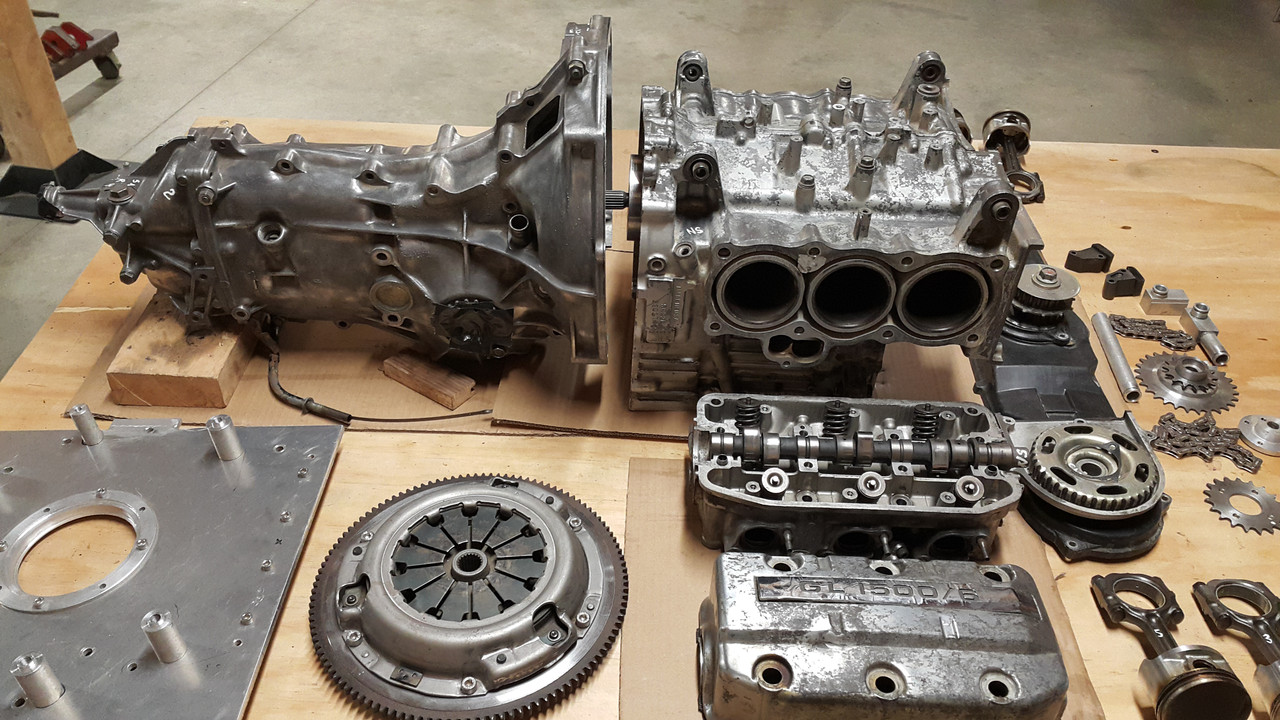 Now where does this bit go?.... 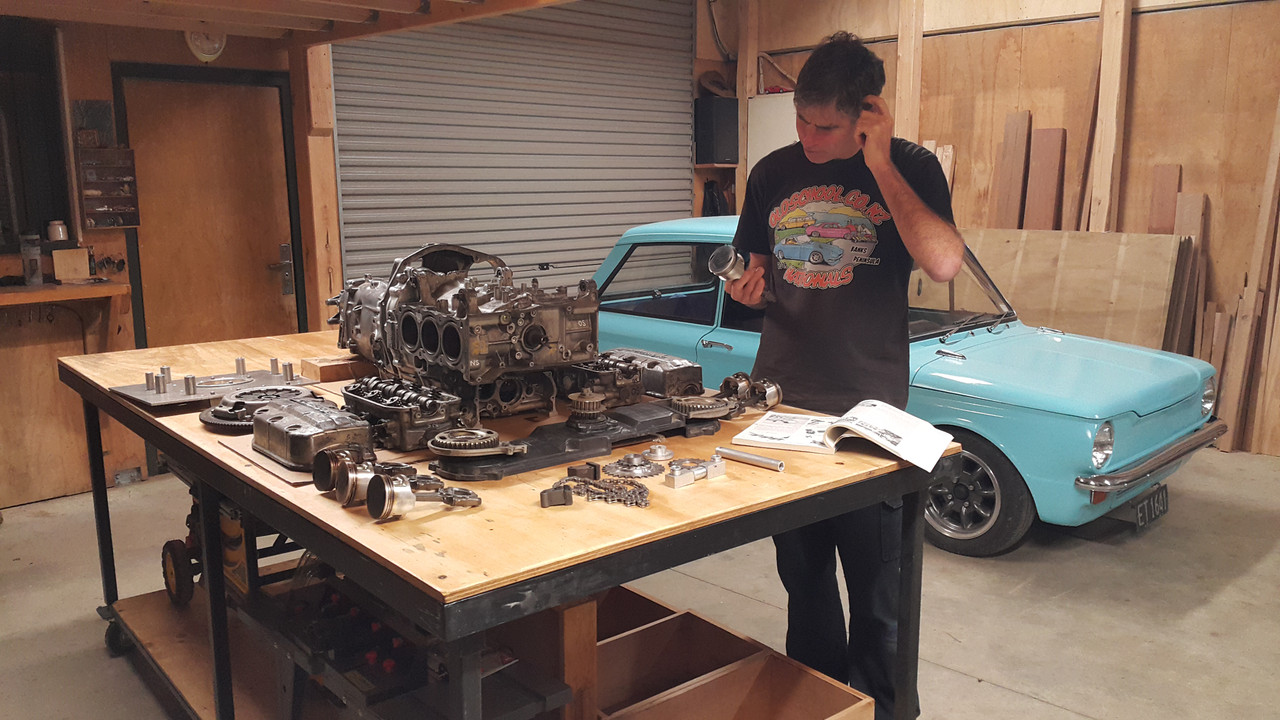 After having some fun taking photos I stashed some of the parts like the heads, cam gear, pistons etc that I wont need for a while back under the bench until needed. I had to confront a mini stumbling block I had with the oil pump drive sprockets. There is one small sprocket that slides onto the hub of a larger one and needed to be fixed in place. My initial thoughts were to weld it but I was worried that it would warp and cup. I sized it up for possibly bolting it in place using small cap screws but there just wasn't enough room between the chain and the hub, even for small 4mm screws. Welding it was going to have to be. I would get some advice though beforehand. But first I wanted to add a very slight taper to the teeth so there would be no sharp square edges that could potentially catch and rub against the inside of the chain plates. 3 of the sprockets were easy enough to pop in the lathe and give them a tickle with a flap disc. But the smallest I had to whip up a little hub to clamp it on... 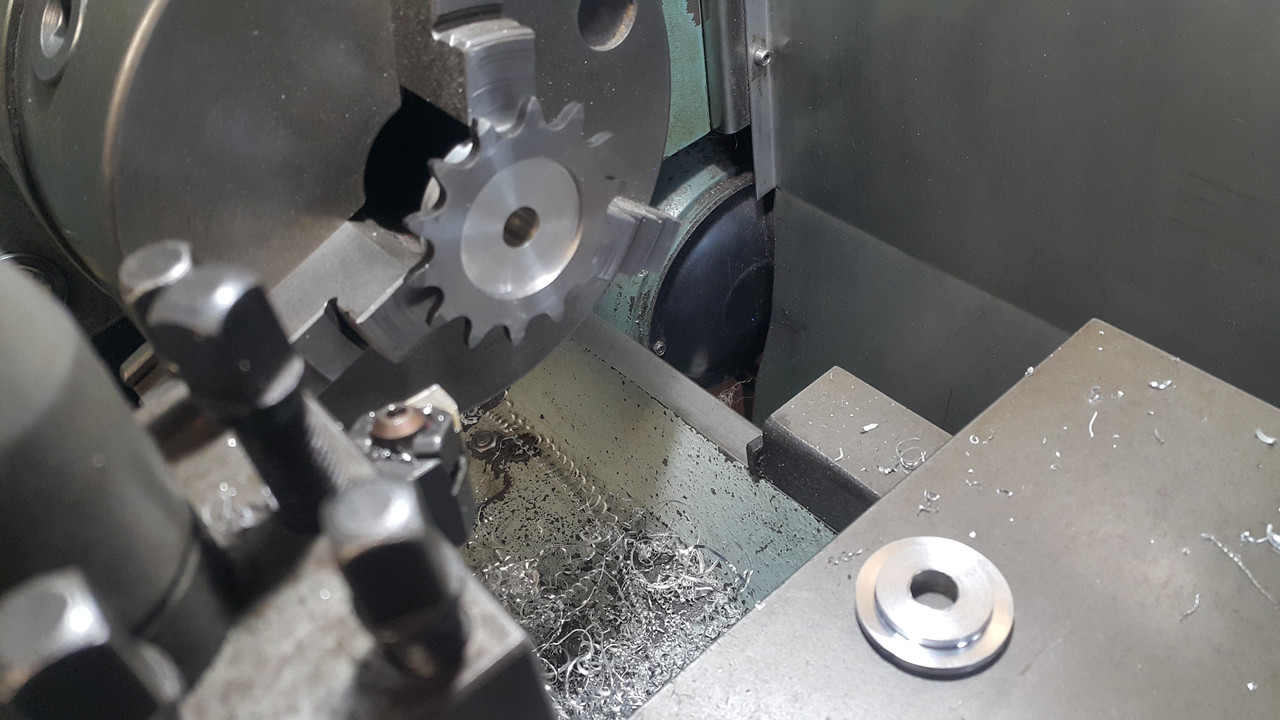 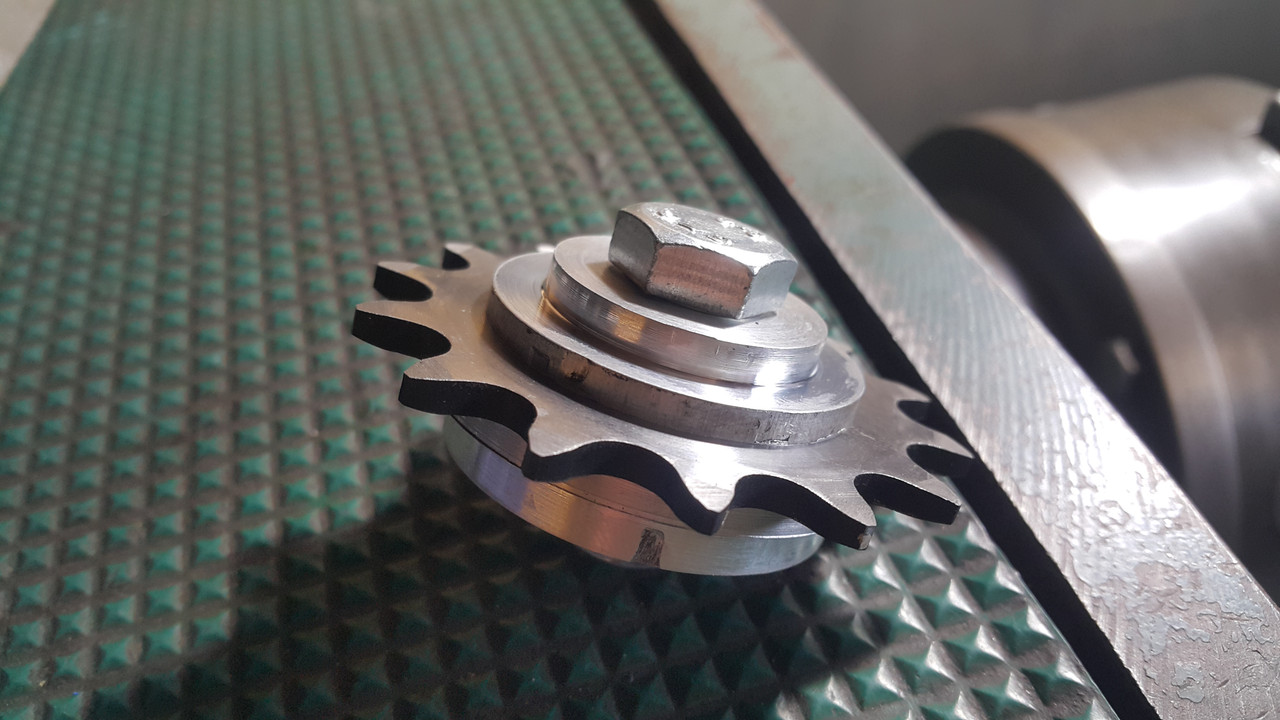 Trying to take a photo with one hand while holding an angle grinder in the other... 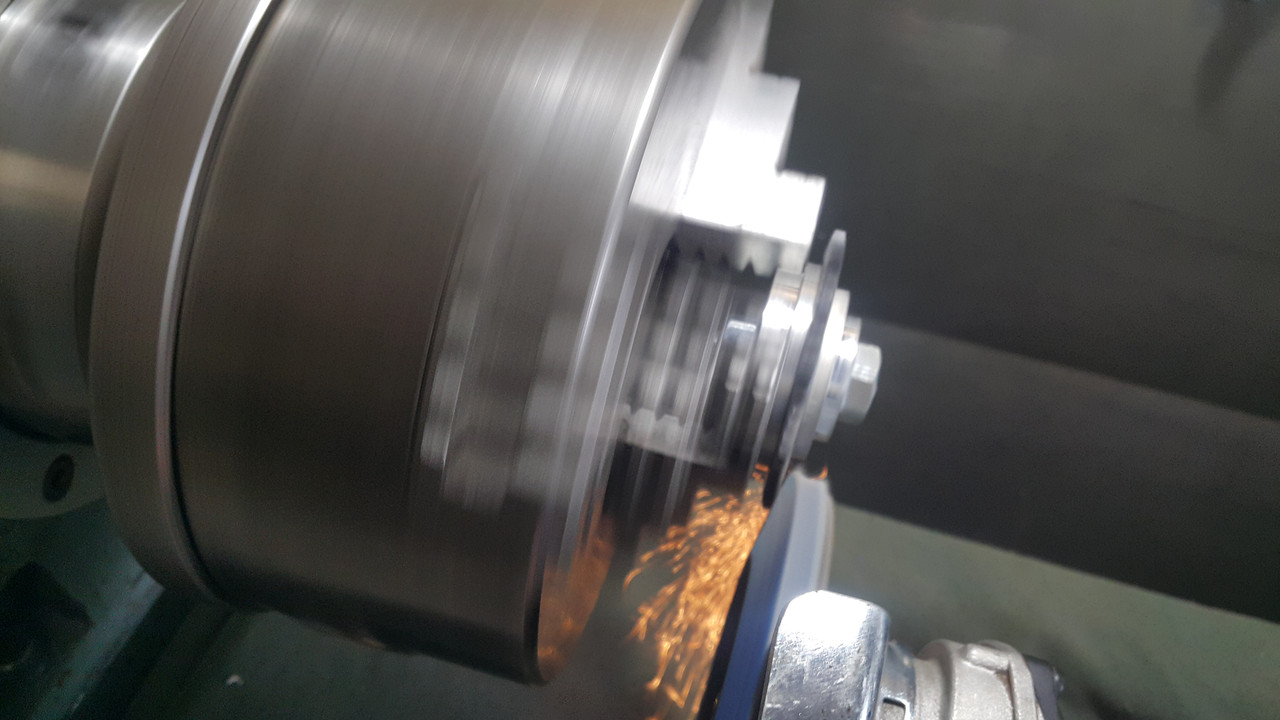 Then sitting in front of the fire and cleaning off any sharp edges... 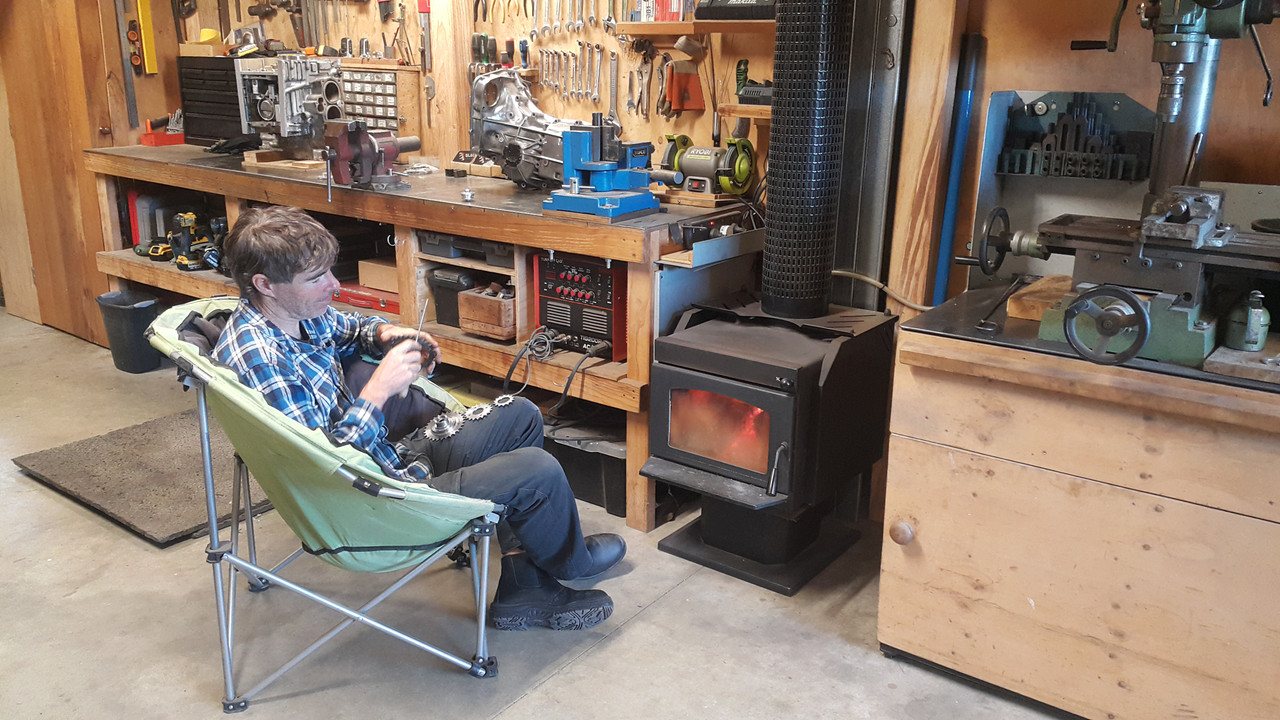 Now I had sprockets I was happy with I had to confront my welding issue. I popped over the hill and chatted to another engineer I know who has a lot more experience with welding of such things than me. He pretty much told me what I had already guessed and I decided to just go for it. But just to be sure I thought it prudent to machine up a fake sprocket and hub to see how they faired when welded. There was no cupping evident so I went ahead with the sprocket. First thing though was to heat both parts up gently. Not too hot. Just hot enough that I could touch them but not get burnt... 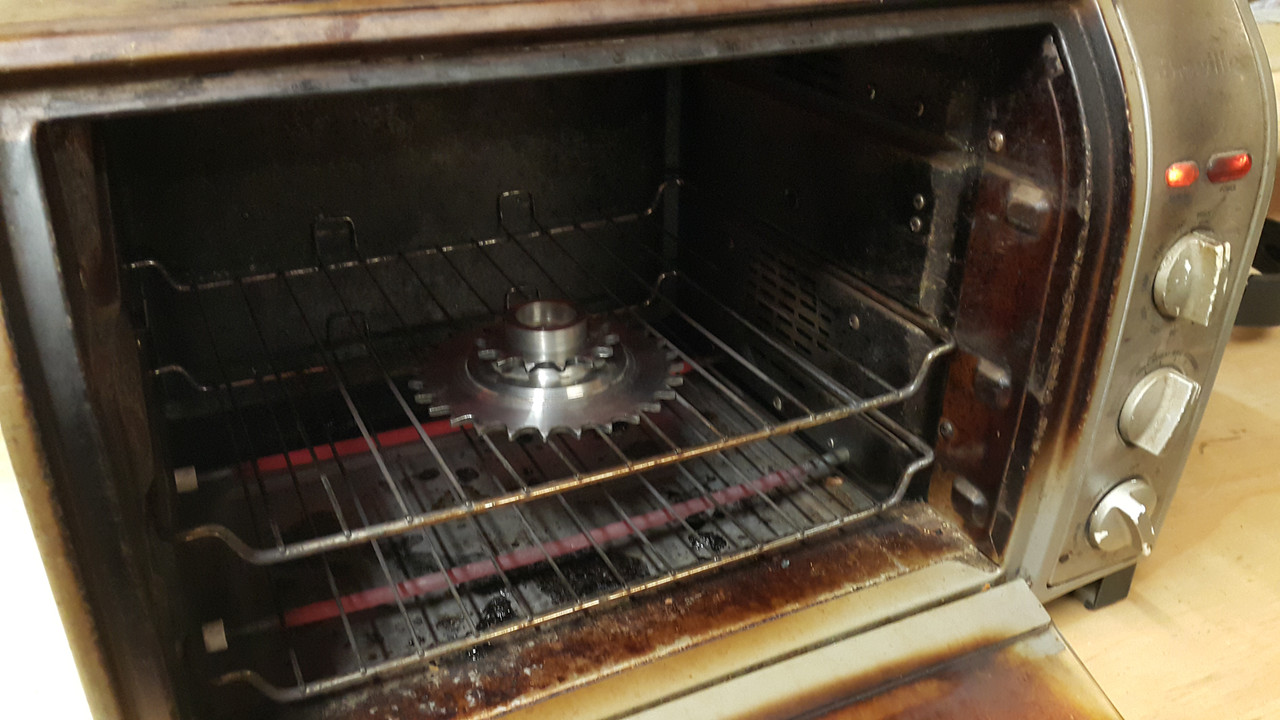 This way the welding could be quick and light without a mass of steel sucking the heat. But not so hot that shrinkage could be an issue either. I used the little tig welding table I had built ages ago for more comfort when doing such jobs... 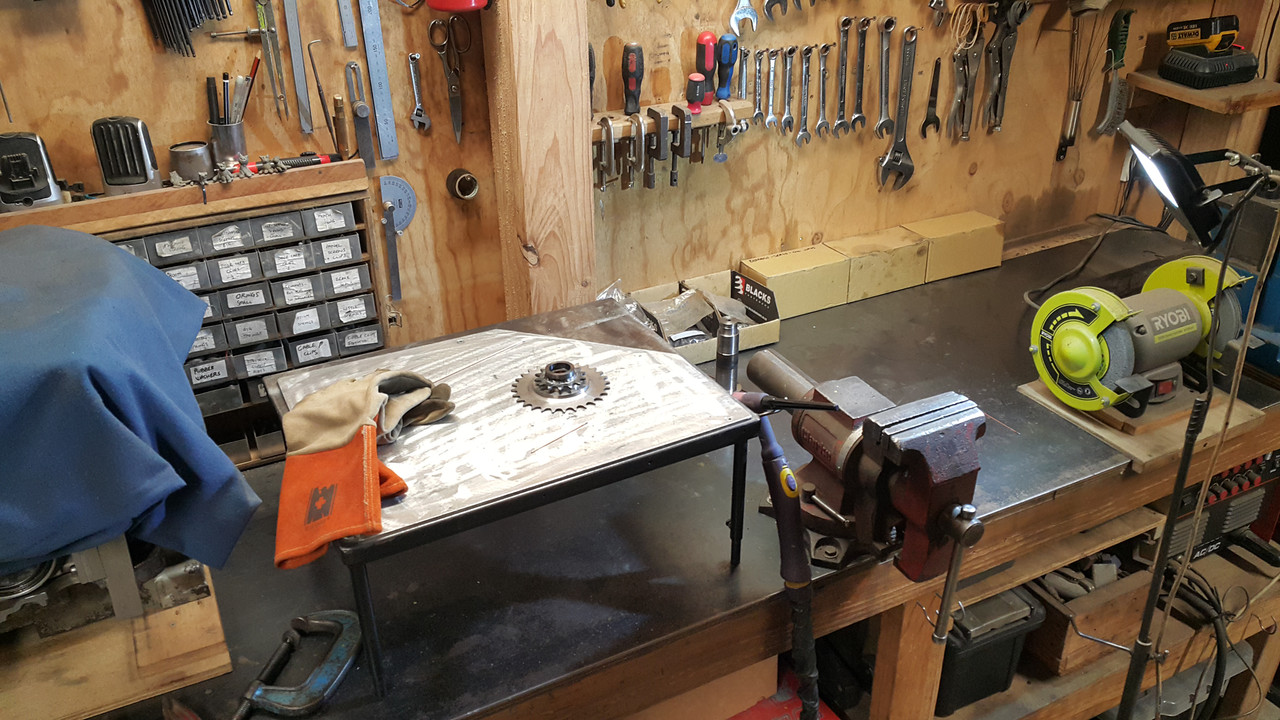 I'm certainly not a super neat tig welder like some artists out there (and never will be with only having decent sight out of one eye so judging the distance can be an issue) so I was very happy with the result and super happy that nothing pulled.. 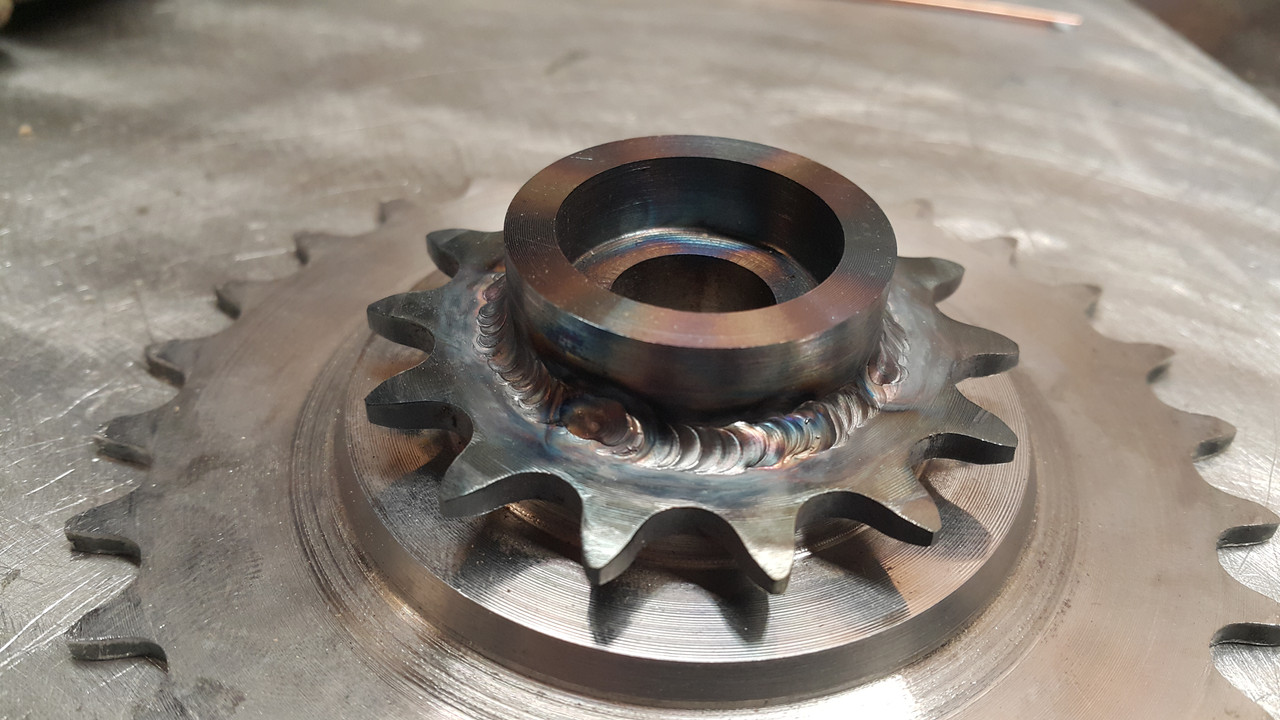 With this part finished I could concentrate on the chain tensioner design. I had a few ideas and had amassed a few bits to tinker with.... 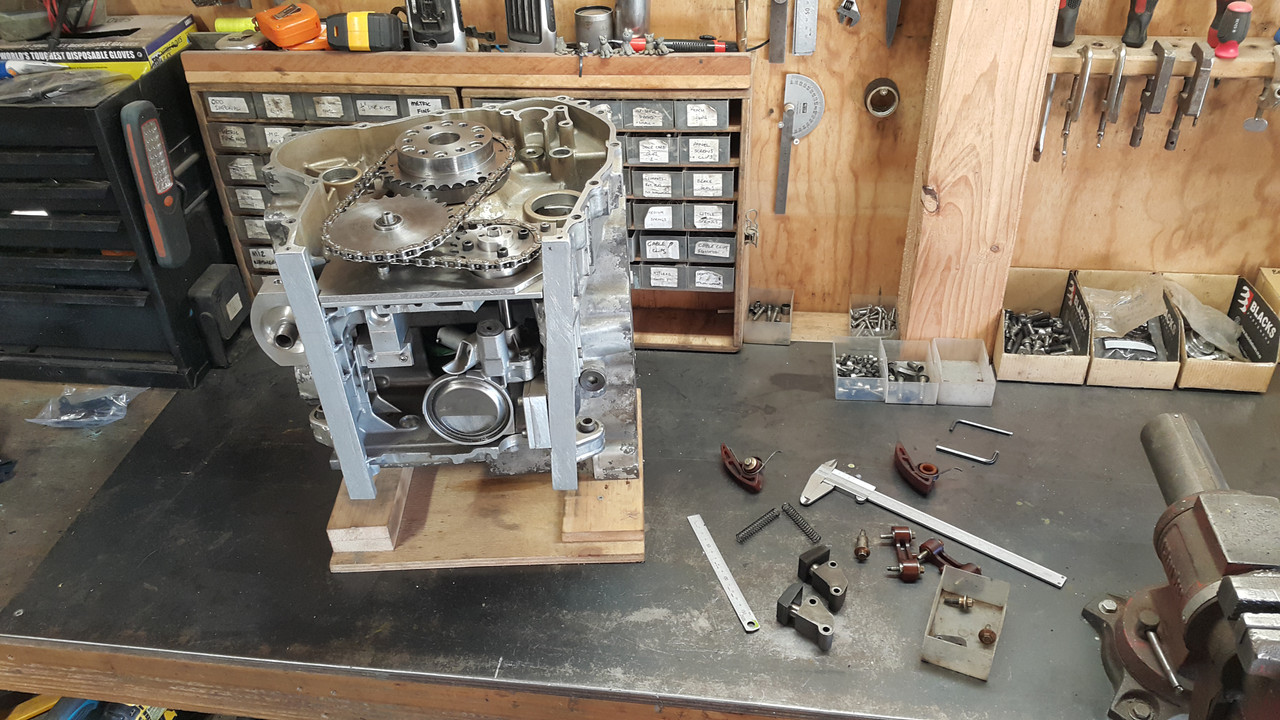 Being that the chains are under constant load and only turning a pump the tensioners are really only needed to stop excessive slap. Nothing to do with timing changes like a cam chain. I had two Datsun A12 tensioners to try out but no matter how I arranged them they conflicted with each other and there was no room for mounting bolts where I needed them.. 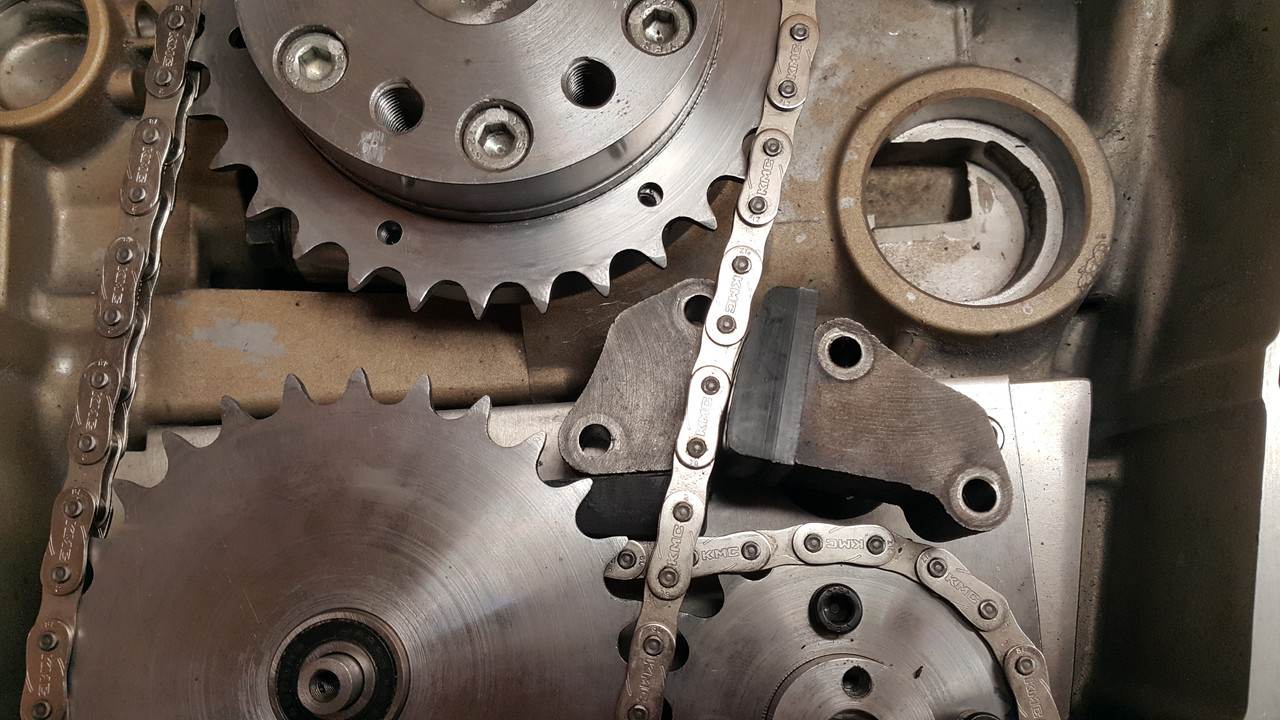 So I tried out some Mazda/ford 2.0 duratec tensioners and they show great promise... 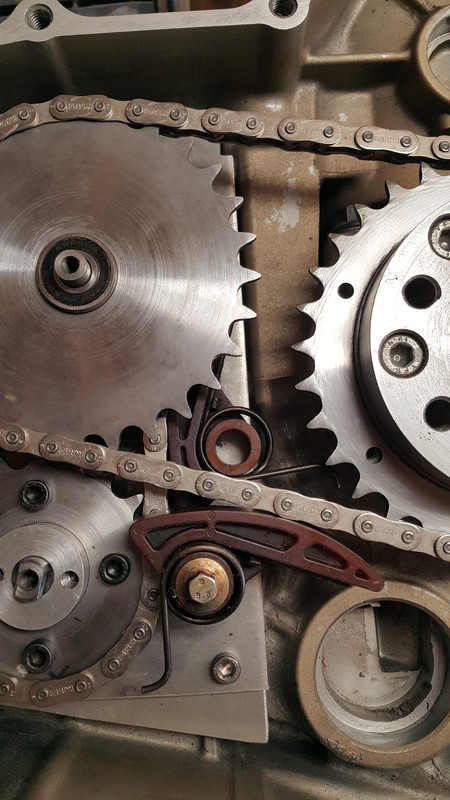 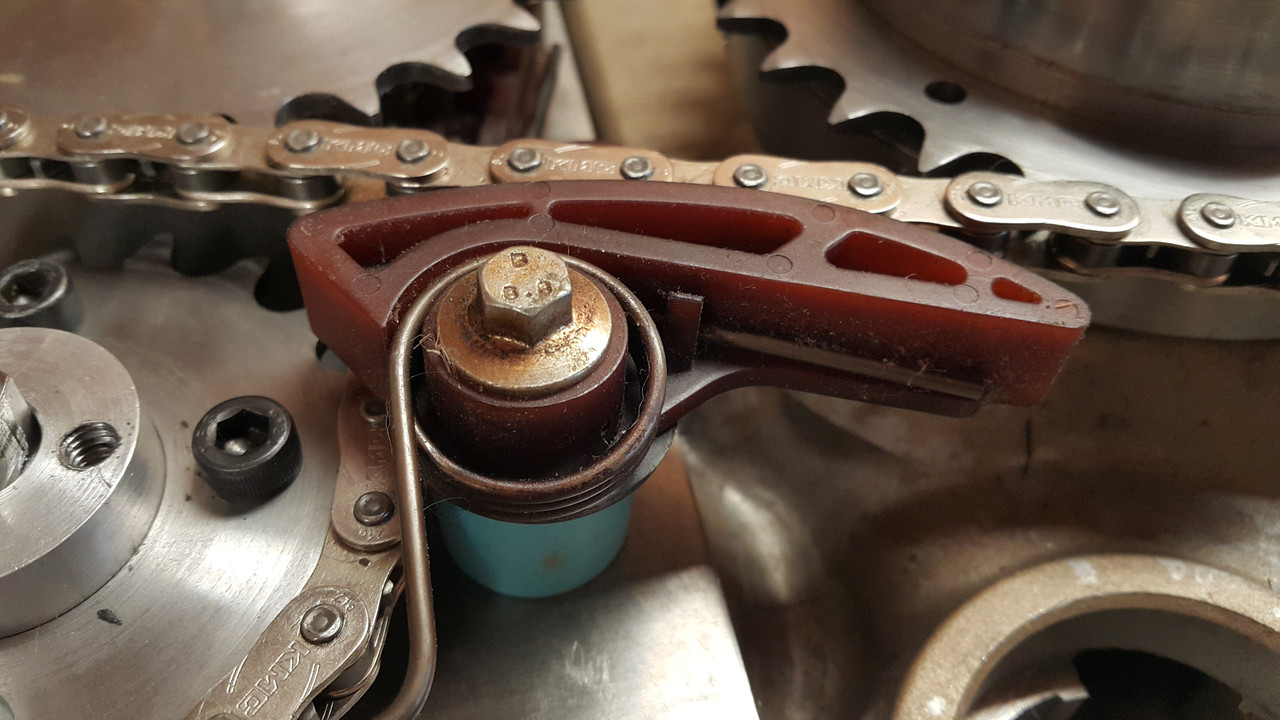 I will make mounting blocks to suit and knock this part of the build on the head! Then onto finishing the bellhousing. Hopefully some more updates soon although we have also started pulling one of the Micras down for the big swapsie game but that is mainly Hannah's project so I can keep working on this as I can. |
| |
|
|
|
|
|
Jul 10, 2021 10:34:23 GMT
|
|
Good to see an update again.
Your builds all are thoroughly enjoyable and educational. Thanks.
I have not got as many projects as you (or maybe I do) but I found myself looking lustfully at a 1946 Vauxhall car this morning, for £2k.
It was not easy to walk away…..
|
| |
|
|
|
|
|
Jul 10, 2021 11:17:18 GMT
|
Stay strong Grizz!  |
| |
|
|
stealthstylz
Club Retro Rides Member
Posts: 14,956
Club RR Member Number: 174
|
|
Jul 10, 2021 13:40:13 GMT
|
|
Those Duratec pump chain Tensioners are ace. Used them on all sorts of old curse word to take the slap out of the chains,really simple and work great.
|
| |
|
|
|
|
|
Jul 10, 2021 20:35:21 GMT
|
Cool. That's great to read. Yeah they are such a neat simple tensioner that just seems to be made for retro fitting into anything eh! I'm glad I nabbed them from the split down duratec engines before I flicked those off. I thought they might come in handy  |
| |
Last Edit: Jul 10, 2021 20:35:57 GMT by yoeddynz
|
|
|
|
|
Jul 11, 2021 23:06:24 GMT
|
|
been looking forward to these updates, love your work!
|
| |
@ CRX_IN_SCOTLAND
|
|
75swb
Beta Tester
Posts: 1,052
Club RR Member Number: 181
|
|
|
|
|
Great to see you back on this, and a neat looking solution. Looking forward to micra/march updates too.
On a side note I cycled the heaphy a couple of weeks ago, out and back, with some beers at the mussel inn on the way back to Nelson. Flying visit with friends so very little time, but how close did I pass to you?
|
| |
|
|
|
|
|
Jul 12, 2021 21:37:34 GMT
|
You would have passed about 6 km from us  Heaphy track is lovely eh. Did you get good weather for it? In and out from this end is the way we did it too. No mucking about getting shuttles/twice as much riding fun! |
| |
|
|


.jpg)
.jpg)
.jpg)
.jpg)
.jpg)
.jpg)
.jpg)


