|
|
|
Mar 11, 2018 20:05:42 GMT
|
On Thursday last week it dawned hot and sunny. This was good. The thought of trying to load an old car shell onto a trailer using a tractor and some pallets in the rain would be yuck. Instead.. we got blasted by sun. We got the shell onto the borrowed trailer, loaded the van up with more parts from another Imp (there's more to collect!) and made our way back home slowly along a now revised (thanks Cyclone Gita) very windy route. Once home this was our view as we sipped our lunchtime coffee... .jpg) I moved it up to the workshop entrance. My Viva wagon was banished downstairs.. .jpg) Cleaned out a load of old interior carpet and insulation.. .jpg) Sat inside it and made ( little) engine noises.. .jpg) It came with some patina attached.. .jpg) .jpg) .jpg) Then the clean began.. .jpg) It cleaned up nicely... .jpg) Then we moved it inside. Lifting it off the trailer was a lot easier than putting it on.. .jpg) I am now building a decent sized rolling table to lower it onto. More on that soon. Glad to have the shell here so I can crack on and cut out the rot. First job though is to clean all the mess out inside. Quite a fun job that. I might find some coins and so it can end up even cheaper :-) |
| |
|
|
|
|
|
|
|
|
|
|
Must have been so fun cleaning that shell Alex! We used to have a Beetle that had faded to a similar shade of blue - original colour was called marina blue
You should try post pics of some of your previous Imps! Vaguely remember you saying Hannah once had something quite sporty..
Hope you're recovering well from the floods
Steven
|
| |
|
|
|
|
|
|
|
|
Hey Steve. Hannah's was just a bog standard mk3 SuperImp. It was fun but we were pretty novice at Imps.
You'll have to tell your Dad that I know own 3 BritishPorsches.....
|
| |
|
|
eurogranada
Europe
To tinker or not to tinker, that is the question...
Posts: 2,556
|
|
|
|
|
Nice to see there's time for the car stuff again...
Dare I ask what is the story on the red boat? (love boats for some reason as well as cars)
|
| |
|
|
|
|
|
Mar 12, 2018 18:23:22 GMT
|
|
|
| |
|
|
Darkspeed
Club Retro Rides Member
Posts: 4,883
Club RR Member Number: 39
|
|
Mar 12, 2018 23:04:52 GMT
|
Datsun A12 has all the powers.... 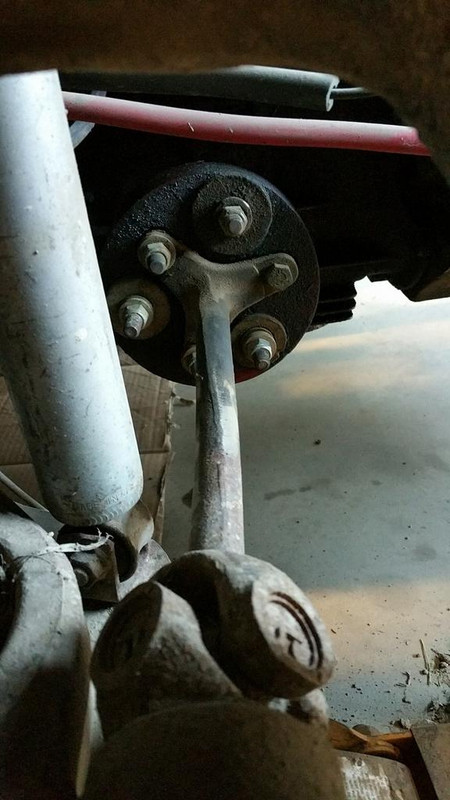 Maybe I could cane it in reverse and twist it back out?... I remember doing this to the shafts in my Chammy Coupe with a warm 875 sport engine - I found them with almost a half twist when dropping the engine out after the diff that had siezed solid, it made for fun drifting until finally gave in. A mate and I have just had some shafts built for our G15 projects that a bit OTT based on Elan spiders and 38mm tube shafts. 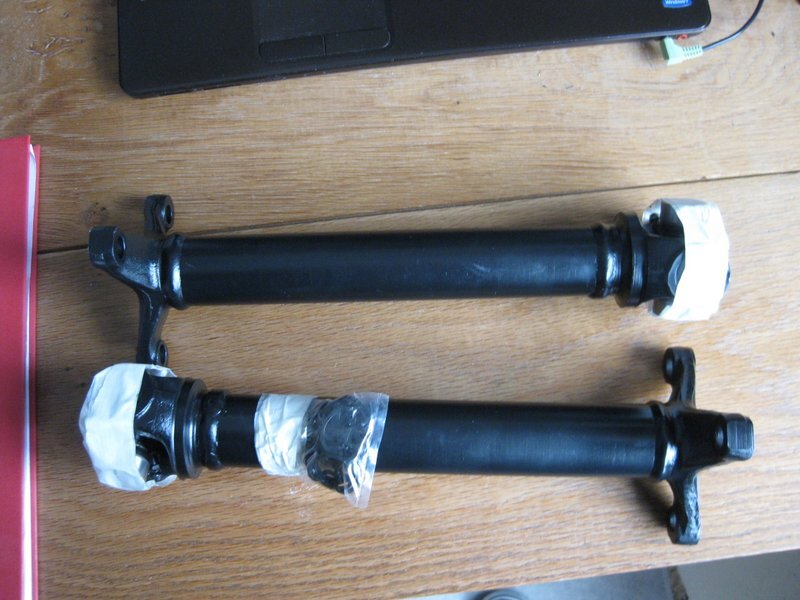 I will keep an eye out for some 1" shafts over the next couple of months should you still be trying to source some prior to your visit this summer. |
| |
|
|
|
|
|
|
|
|
Oh hey wow.. Yeah that would be great if you can keep a look out. I'll be over in July. Another option would be to use some datsun half shafts. I can get away with solid couplings each end as the clutch has a sprung centre.
|
| |
|
|
Darkspeed
Club Retro Rides Member
Posts: 4,883
Club RR Member Number: 39
|
|
Mar 13, 2018 17:57:24 GMT
|
|
The only thing to look out for with modifications away from the Rotoflex is the multi role of it not only taking up shock loads and providing articulation but also its function of driveshaft length compensation to maintain the seal of the gearbox output shafts and stopping them moving in and out.
|
| |
|
|
|
|
|
Mar 13, 2018 22:41:45 GMT
|
|
Ahhhh yes OK. I see. Because the axles can come out of the diff depending on which transaxle you have (I think earlier ones have inner circlips holding them in?)
The datsun half shafts I was thinking of using are two piece with sliding splines.
Anyway... I do like your above modification. Did you cut the shafts down to short stubs, then machine some step up sleeves to push the tube onto and weld the lot together?
|
| |
|
|
taz20
Part of things
 
Posts: 21
|
|
Mar 13, 2018 23:24:39 GMT
|
|
just read your thread start to finish sorry to hear about the cyclone , the imp cleaned up well. looking forward to seeing this progress
|
| |
|
|
Darkspeed
Club Retro Rides Member
Posts: 4,883
Club RR Member Number: 39
|
|
Mar 13, 2018 23:37:07 GMT
|
|
As for the above shafts we took an Elan shaft which has a spider on each end and cut them off and put the spiders in a lathe and prepped them for the new 38mm tubing as you say (Elans are 38mm tube as stock)- a new UJ Yoke was prepared in the same way and then the assembly was all welded up - one pair of Lotus shafts gave up the spider ends to produce two pairs of Imp shafts.
I suspect that the sliding splines when under power could lock up and the transaxle shafts not have enough retention to resist the suspension pulling and banging the shaft back and forth into the side of the transaxle as it moves - The Rotoflex cushions all of those actions. As the Imp transaxle always has both the Rotoflexes pushing it from each side its reasonably balanced in the mounts. If that balance was removed and the shafts allowed to vary in length and push and pull on the transaxle I think the mounts would fail quite quickly. Generally with the sliding shaft arrangements on a rear diff it is pretty solidly mounted which is not something that can be said of the Imp engine and transaxle assembly which is just held by two little wedge mounts and a rubber pivot. However your Datsun engine is rather better mounted by the looks of it.
|
| |
|
|
|
|
|
Mar 14, 2018 20:04:13 GMT
|
|
Yeah luckily the engine has typical side mounts so all together 4 mounts (which are all perished and failed...typical of the state of things I'm finding on this car)
The Datsun shafts are well known for being very...'slidey'? They are a popular swap in NZ Triumphs which always suffer the 'trump twitch' * - where the original shafts would indeed lock up under power/squat and then with a lift off of power unlock and suddenly extend.
I suspect the fitted red nolathane doughnuts don't have a lot of give either. Infact - I wonder how much sideways movement there is through the suspension travel?
*Nothing to do with that red headed idiot buffoon in the US.
|
| |
|
|
Darkspeed
Club Retro Rides Member
Posts: 4,883
Club RR Member Number: 39
|
|
|
|
.....I wonder how much sideways movement there is through the suspension travel? Having a look through a couple of manuals it looks like you have the early circlip retained shafts with bolt on spiders rather than the later floating type - Is it then an early MK1 box or is it a later box - identified by the -# number on the casing number or the addition of a breather grommet on the tail casing - modified to have the reatined shafts. If they are then you could conceivably go with the sliding spline or make adapters to go all modern with CV's. So many options. |
| |
|
|
|
|
|
|
|
|
Yeah it is a very early box but ill hopefully change it for a later stronger box.. If I can find one locally cheap.. :-)
I'll measure what lineal movement the axles go through when I reassemble the rear suspension and assess the joints it came with.
|
| |
|
|
|
|
|
Mar 16, 2018 20:16:40 GMT
|
Here's an update as things have been happening on the Imp front. I lowered the car off the hoist onto our old rolling steel table. I then removed the doors. Oh man was I expecting this to be a no go. Most of the screws were missing on one side suggesting someone had tried but gave up. Lots of wd40 and and an impact driver and I manged to get the rest to move. Then worked carefully away at them. I had to cut the retaining strap pins as they wouldn't pop out. Tools of the door removal trade... 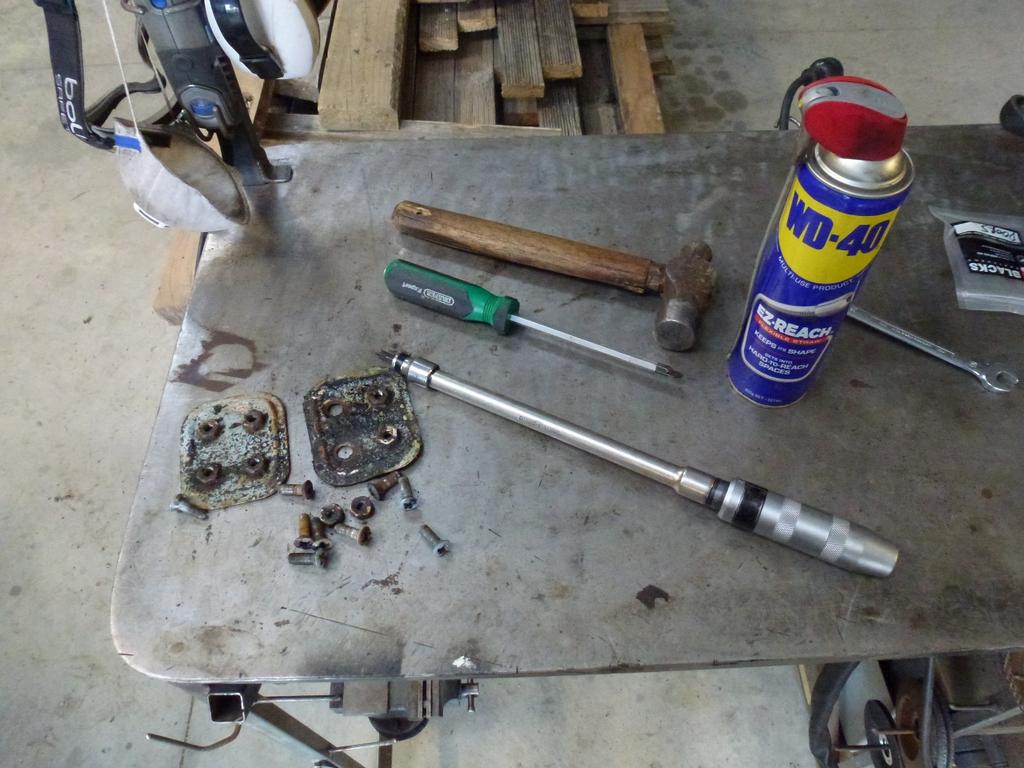 The doors are in excellent condition. No rot at all. Not even a bubble. Just some surface rust on the underside of one. Much relief!.. 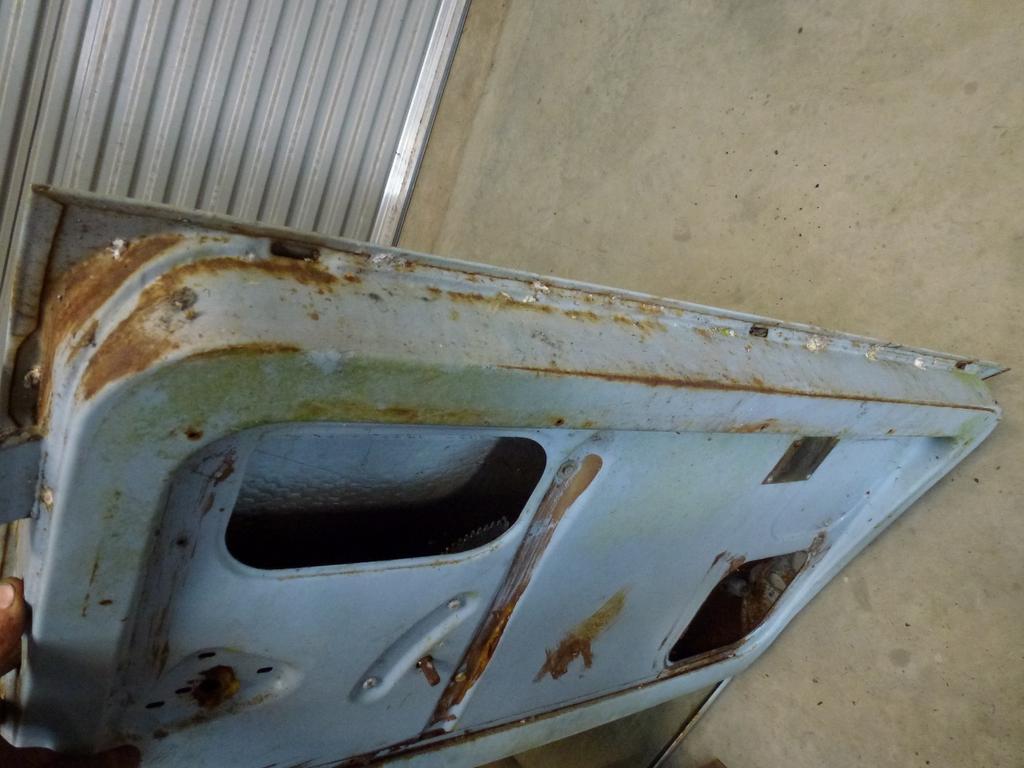 Last weekend I built a new rolling table. I can raise it up 200mm or higher if I swap the legs blue coloured legs out for longer ones. It'll carry 600kg so more than enough for an Imp shell :-) The shelf on the bottom is for all the panel bits and bobs and what not as they come off. The main 17mm sheet on the top can be flipped over for a clean side so we can use the table for woodworking projects :-) Cost was very little, using old steel offcuts and castor wheels on sale at Bunnings. .jpg) .jpg) So with that built I started cleaning out the inside properly. The floors came up pretty good with the rot mainly around the front. Nice photo from the back where you can easily spot the holes... .jpg) I'll fashion some repair panels to fix this. Toying with the idea of letting in an extra channel to allow the water pipes to run under the car- maybe widen the center tunnel slightly. Not sure yet. It's just pipe dreams at this point........ * With the shell up on the hoist I gave the underside of the car a look over and scrub. The underseal comes away nicely and reveals a really solid bottom..often with the original paint. Inner sills are great! This is nice. The majority is surface rust with localised patches of rot. The outer sills need to come off but I am hoping I might be lucky and get away with just patches as the tops and bottoms seem good. I shall see soon. I must add that I am really impressed with the way the car is built. Its a solid wee thing. And the steel seems to be really decent quality. I am guessing that earlier Imps, much like early Vivas, possibly used better steel than later cars? .jpg) The suspension units and rear subframe came off fine. I was really worried about seized bolts but they all freed up nicely! The Arms are just covered in surface rust and should clean up well then get smoothered in Por15. .jpg) Yesterday we went back to where this shell came from and picked up more stuff in a bid to keep the race car shell rolling. I now have an even better set of rear arms plus a working transaxle. Back to this car. The windscreen pretty much fell out as the seals had gone all gooey in the sun. Due to this I expected to find rot but its solid as!.. .jpg) Then I had this lot to deal with... .jpg) wow -what a nice design!? Rust trap with leaky rear windows. Now most of this will be cut out as re-built due to the opening that will exist there for the Datsun engine rocker cover to pop its head through. But I wanted to expose enough decent steel on the section to be removed that I might be able to use as repair bits for the other areas here. Nasty job. So many spot welds and I couldn't see them for the rust. So I cut out the strips and then chisel away at the remains. So much rust dust and flying metal chips. Yeah- I'm the Friday night party animal, sitting in my Imp chiseling rust... 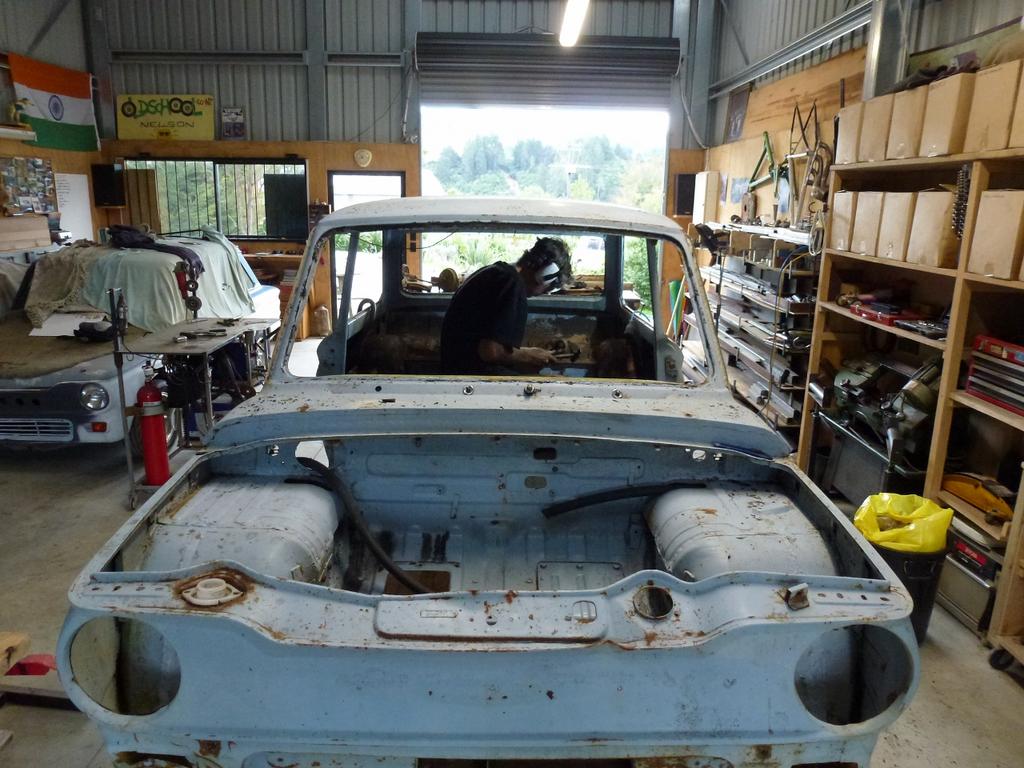 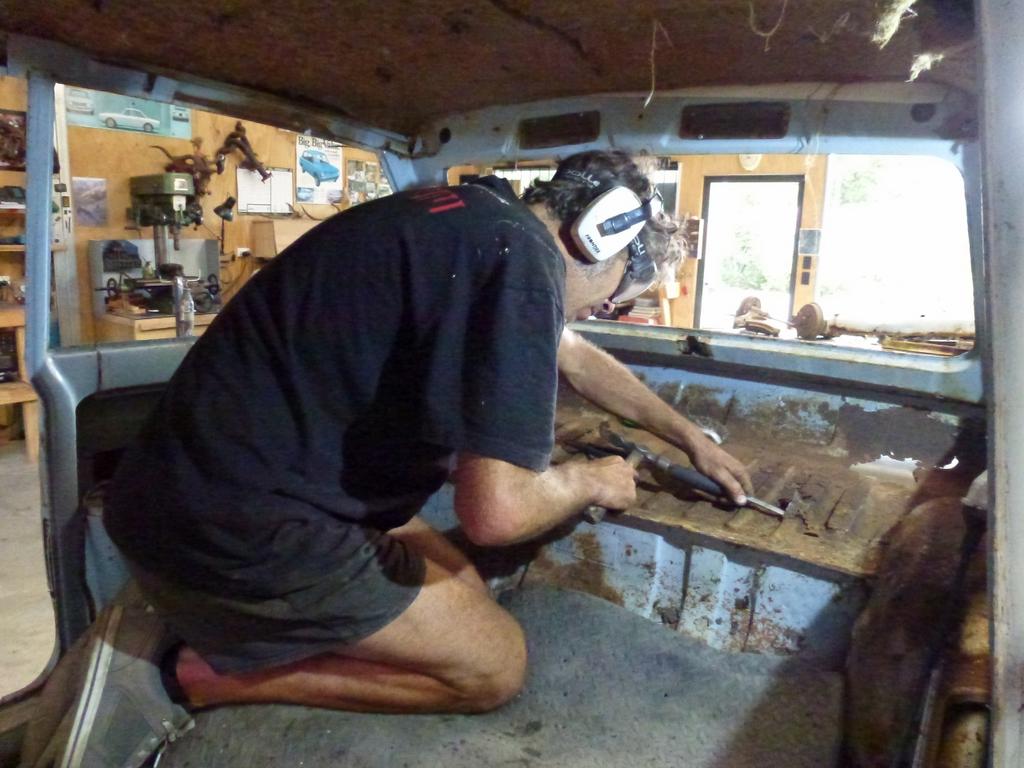 Next job is to start the sills. Lets see how bad they really are. I may well put a mattress on the ground and roll the shell over on its side to make the job nicer. The shell is so light now! *see what I did there.. |
| |
Last Edit: Mar 20, 2018 1:32:06 GMT by yoeddynz
|
|
|
|
|
Mar 21, 2018 21:07:25 GMT
|
Started on the rot removal over the weekend. Its going well. Trying to sneak in time here and there between jobs but did some good hours on Sunday. As usual I am finding it super addictive and very satisfying. I had no idea what I was expecting to find under the outer sill skins so straight into it.. .jpg) and luckily the drivers side is in really good condition. Just surface rust. 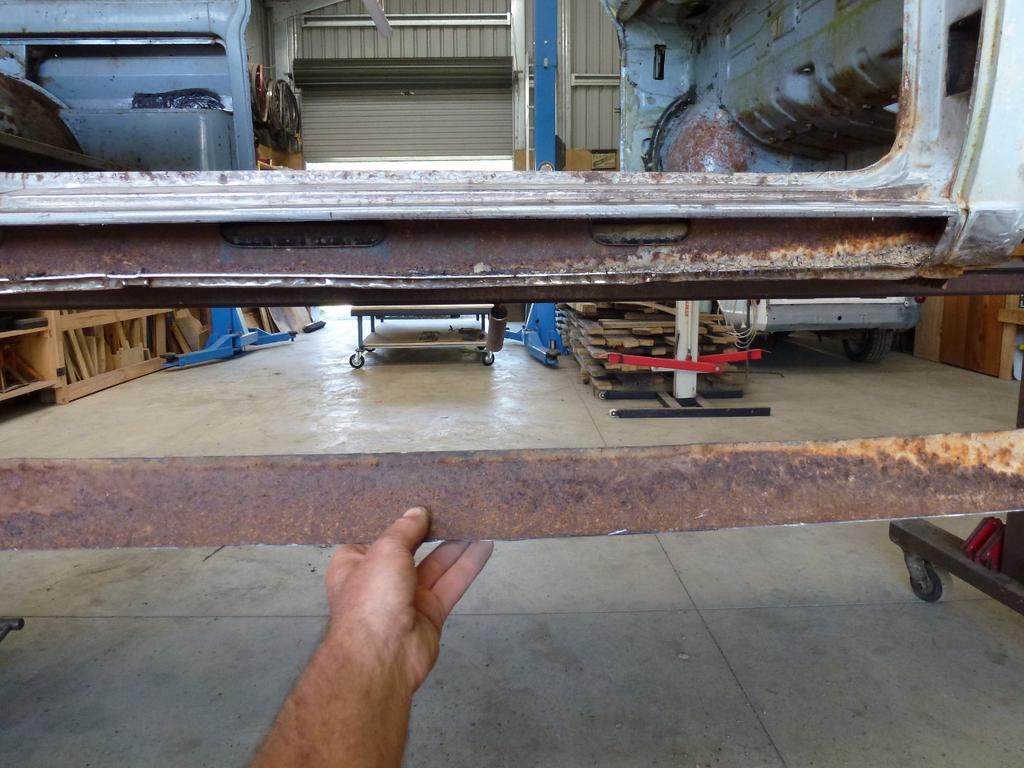 .jpg) Glad to have peeled off the skin though. Gave me a chance to clean it out and paint it. Then a new outer sill - which I have to make in two sections because my folder is only 600mm :-) .jpg) Also had to make new 'rear sill' or is it lower B pillar ? was clean as under there luckily so again just a new outer needed. .jpg) The passenger side though.. Oh dear. curse word. The rot had taken out the bottom half of the heater pipe boxing. The inner sill/floor edge had one small section with rot I had to cut out as well. Nothing for it but to chop it all out and let in some new steel. .jpg) Before I went any further I had to remove the long heater hoses- one on each side. I can see these being a right mare to re-install. I'm sure there are some secrets you fellow Imp old timers know about. .jpg) Then new boxing.. .jpg) New vertical sill piece. Lots of holes for plug welding.. .jpg) Welding in place. I must say I was happy that the shell was empty and resting on the table neatly along its length. There was enough decent upper sill including decent vertical sections to hold the shape of the doorway :-) .jpg) .jpg) 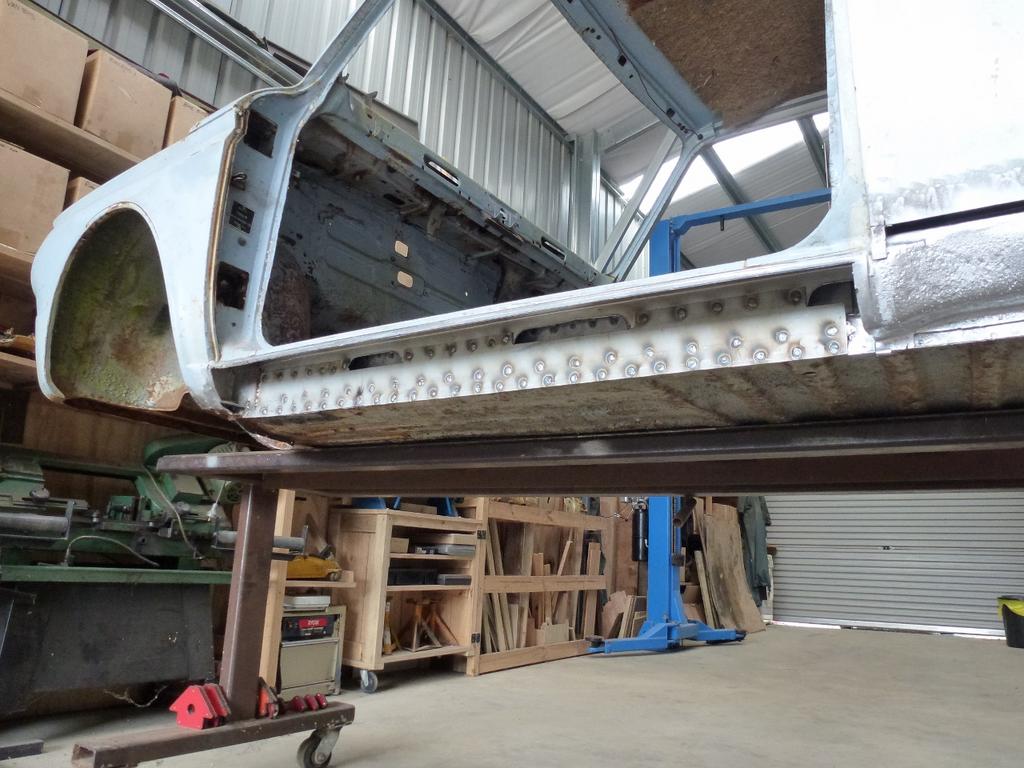 With that lot fixed I painted it all in a heavy zinc rich paint and then welded on the new outer. I butt welded the whole lot because I didnt want any little seams that might collect moisture. I'll fill the lot with cavity wax later on (always a fun job..) .jpg) .jpg) I then carefully shaped up a new 'LowerB pillar, guard bottom sill end' (what is this bit called...just the sill I guess..) and was about to weld it in place after having treated and painted the inner section. .jpg) But I was not feeling happy about the look of that inner bit. I just had to delve deeper and I'm glad I did. I knew the floor corner was rotten but I was going to deal with that later. However it made more sense to do the lot in one go. I cut the curved inner sill off and then there was this.. .jpg) Hmmmm... what's under here ?.... .jpg) Rebuilt it all.. 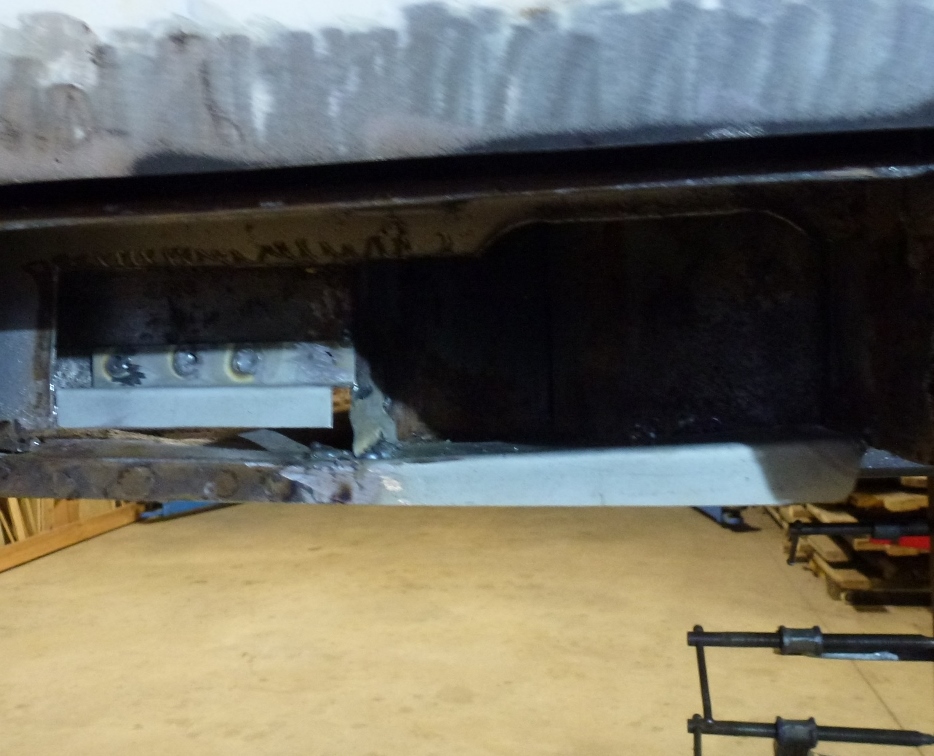 New inner cover... 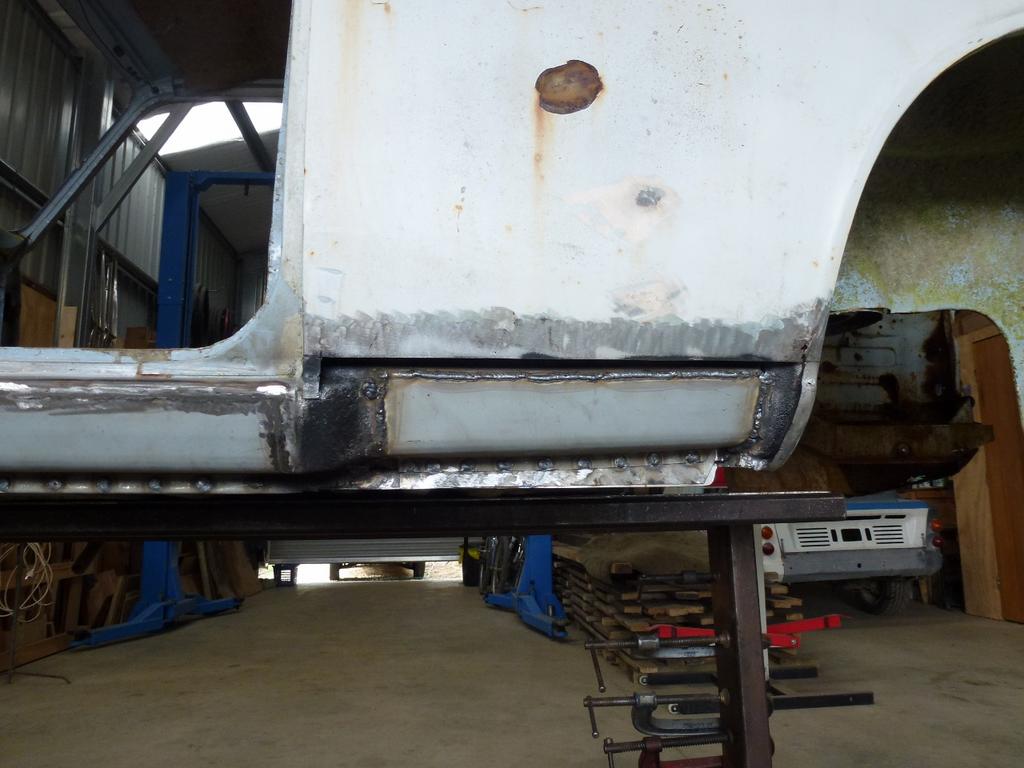 Then on with that outer..finally. Both sills complete, rot free and strong again :-) They are sort of the most critical of repairs to get right on this car. The rest is just about rot removal and letting in steel with having to use heaps of filler (I don't really enjoy sanding filler so I'd rather get the repair as close as possible and just allow for a skim if any ) .jpg) I was going to do the floor next but this lot was right there, laughing at me. I had to cut it out and see what gives.. .jpg) Note the factory carefully installed bags of foam, designed to absorb sound...and moisture... .jpg) Shaped a new piece to suit. Luckily not as tricky as I was expecting. Given the awkward shape around the corner I'll break these corner repairs down into sections. The wheel arch rot visible will be dealt with afterwards. .jpg) Drilled a new drain hole for future cavity wax applications and then painted the inner with Por 15.. .jpg) Ready in place to weld. .jpg) And that is where I was last night. Its welded in now and I'll continue on around the corner, then do the other side. The battery box is rotten but the battery will be moved up front anyway in order to redistribute the extra 20kg of the Datsun engine. Work will slow down on the Imp for now as I have sold on our family Datsun 120Y 2 door wagon on to a friend from Oldschool. I'll be doing a fair bit of rot removal on that before it gets taken away. That earns me money where as this Imp doesn't. So Datsun wins the time allocation. But I'm sure I'll sneak time in here and there. Plus Hannah can do work on either car to help with progress (when she's not at the beach swimming with her sister who's visiting - pfff....priorities..) I have also eventually come to realise that it might well be a slightly tall order to try and get this Imp on the road for the nationals in 2 weeks time....... :roll: So Viva HB wagoning we shall be for that fine event. But hey- I'll continue as is and at least I should have done the vast amount of rot work by then :-) |
| |
Last Edit: Mar 21, 2018 21:17:29 GMT by yoeddynz
|
|
|
|
|
Mar 21, 2018 21:19:46 GMT
|
|
Really nice detailed update there. Great work. Thanks
|
| |
14 Audi A3 Sportback - Easy driver
05 Audi TT MK1 3.2 DSG - Damn quick
73 Triumph 2000 - Needs work
03 Range Rover 4.4 V8 petrol. Had to get it out of my system.
|
|
|
|
|
Mar 21, 2018 21:36:19 GMT
|
|
Cheers man. I do enjoy doing thread updates... less grinding dust inside when on the computer :-)
|
| |
|
|
|
|
|
Mar 21, 2018 21:40:58 GMT
|
|
Show off. LOL
That is great work in creating the new panels.
|
| |
|
|
|
|
|
Mar 21, 2018 21:53:28 GMT
|
|
great panel repairs and welding
|
| |
|
|
.jpg)
.jpg)
.jpg)
.jpg)
.jpg)
.jpg)
.jpg)
.jpg)
.jpg)
.jpg)
.jpg)
.jpg)
.jpg)
.jpg)
.jpg)
.jpg)
.jpg)
.jpg)
.jpg)
.jpg)


.jpg)
.jpg)
.jpg)
.jpg)
.jpg)
.jpg)
.jpg)


.jpg)

.jpg)
.jpg)
.jpg)
.jpg)
.jpg)
.jpg)
.jpg)
.jpg)
.jpg)

.jpg)
.jpg)
.jpg)
.jpg)
.jpg)


.jpg)
.jpg)
.jpg)
.jpg)
.jpg)
.jpg)
