MiataMark
Club Retro Rides Member
Posts: 2,971
Club RR Member Number: 29
|
|
Jul 22, 2018 14:00:16 GMT
|
I must admit that I'm tempted to buy myself a welder and learn how to weld for myself. It's the initial outlay that puts me off, especially if I can't get the hang of it! I had exactly the same quandary and ended up waiting for a Machine Mart VAT free day and buying a Mig plus a few bits for about £320*. Only had the chance to play with it for a morning since though. I did go and have a platy with somebody eases welder first to see if I could get the hang of it. * I wanted to buy new so i wasn't worrying about if it was the cheap secondhand welder or me that wasn't working. Depending on how much of a hurry you're in and you don't mind coming to Wiltshire come and have a play, although it will be the blind leading the blind :-) |
| |
Last Edit: Jul 22, 2018 14:01:50 GMT by MiataMark
1990 Mazda MX-52012 BMW 118i (170bhp) - white appliance 2011 Land Rover Freelander 2 TD4 2003 Land Rover Discovery II TD52007 Alfa Romeo 159 Sportwagon JTDm
|
|
|
|
Sammo
Club Retro Rides Member
Posts: 1,461  Club RR Member Number: 103
|
|
Aug 10, 2018 16:11:48 GMT
|
Sooooo, I've bought myself a welder  It's a second hand sealy MIG welder. I'm just waiting for pay day again so I can buy a mask, gloves etc etc and then I'm going to give it a bash. I've watched plenty of videos on YouTube of how to get started so fingers crossed I'll get the hang of it and then I can start doing my own welding  |
| |
Follow Me On Instagram - @parttimecartinkerer
|
|
Sammo
Club Retro Rides Member
Posts: 1,461  Club RR Member Number: 103
|
|
|
|
Still haven't done any welding and still don't have any engine mounts, however I do now have a low entry trolley jack  I've wanted one for ages but always had more important things to spend the money on. Anyway, I decided it was to splash out on one. I wasn't sure what size to go for and it's quite difficult to gauge an idea of size online. So to be safe I went for the 3 tonne version. Well, it's pretty big haha. The delivery guy nearly gave himself a hernia carrying/dragging it down the path. Once I was set up I tested it out straight away and got the engine back off the steady bar so I could try and do a bit of measuring up for mounts.  |
| |
Follow Me On Instagram - @parttimecartinkerer
|
|
Sammo
Club Retro Rides Member
Posts: 1,461  Club RR Member Number: 103
|
|
|
|
I’ve got a very small update  I will admit that recently I have completely lost interest in the van. I couldn’t find anyone to make the engine mounts for me without me having to try and mock something up (which I haven’t had time to do) and the list of things that needed doing were just never ending! Thankfully I have found a company pretty local to me that have agreed to take the van and make me some engine mounts  It’s going over there in a couple of weeks time to have that all sorted and then hopefully it’ll spur me on to get the rest of the list sorted a bit quicker  Seeing as the van is going to have to move it means it’s going to need a steering wheel! Today seemed like a good day to do interior stuff so when my daughter fell asleep watching Harry Potter earlier (I was enjoying it and had to pause it!) I nipped outside in the pouring rain to try and tidy the interior up slightly! This is how it was left last time I worked on the dash  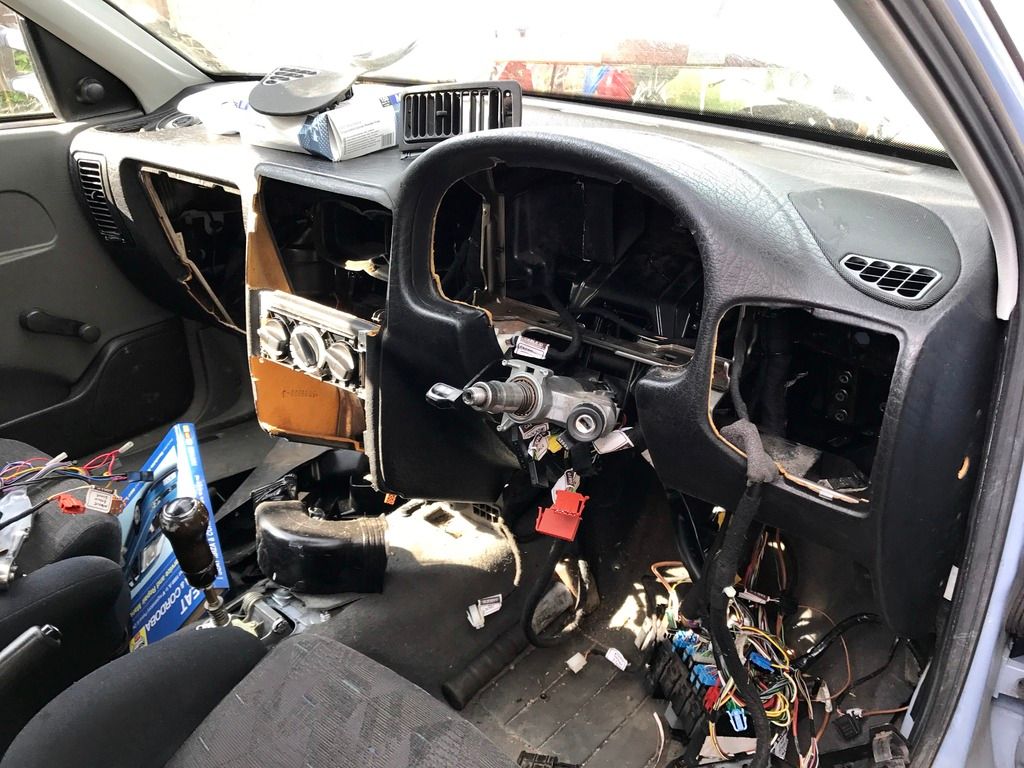 Then I lost interest! Today I managed to get the dash centre panel fitted, although it’s pretty knackered so I’m on the look out for another one. I got the Polo centre console fitted and got the steering wheel in place at least. 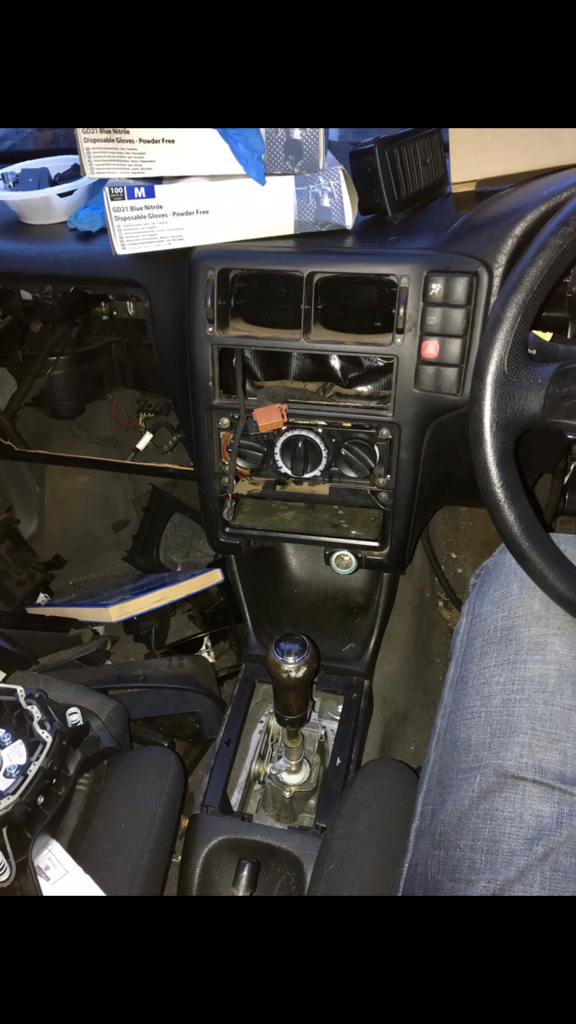 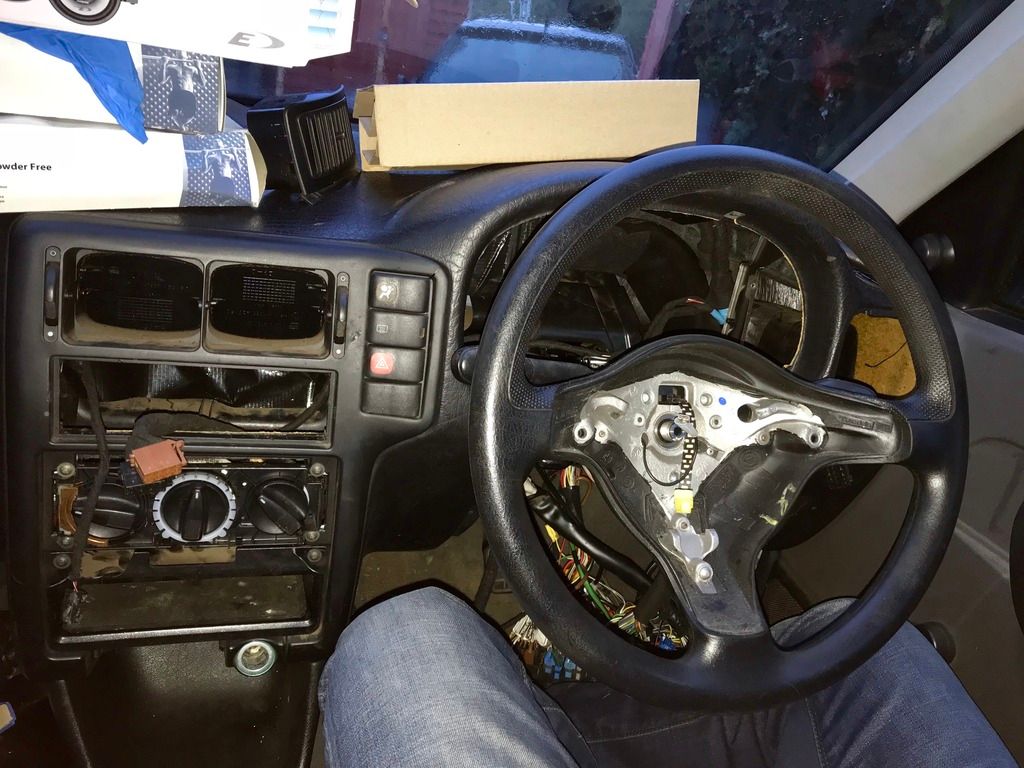 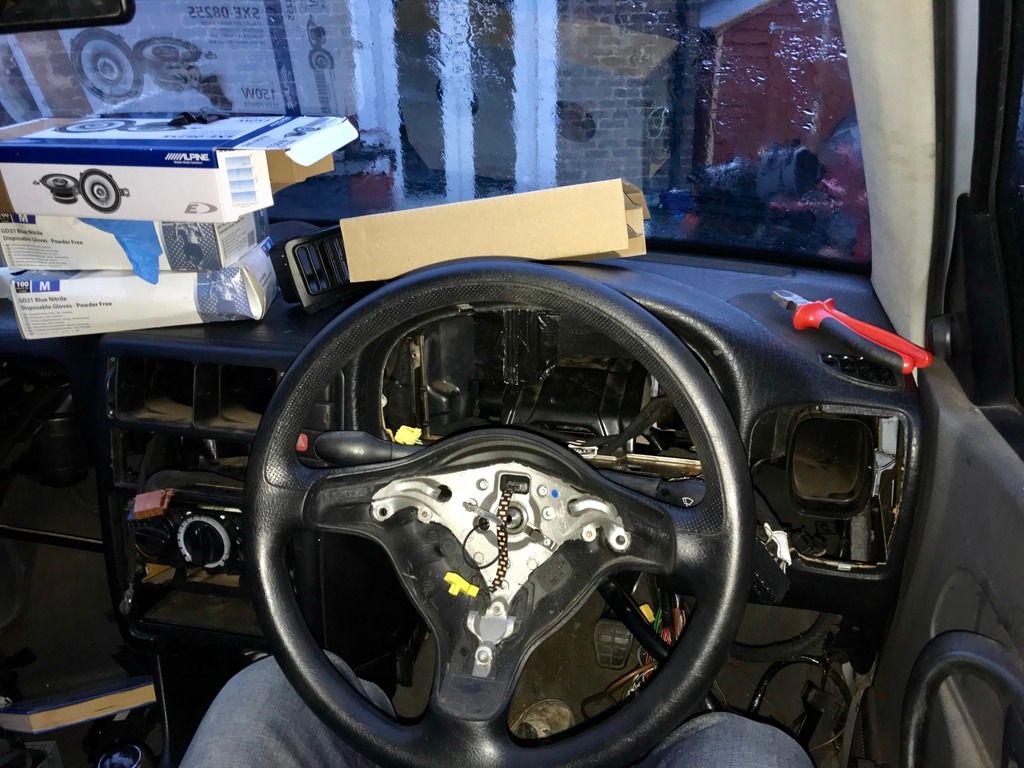 |
| |
Follow Me On Instagram - @parttimecartinkerer
|
|
Sammo
Club Retro Rides Member
Posts: 1,461  Club RR Member Number: 103
|
|
|
|
Spent a little more time on the interior today. I got the centre console secured down properly, fitted the handbrake lever gaiter, gear lever gaiter and found an old Momo gearknob to chuck on there for now. I also refitted the instrument cluster and then the steering wheel. It’s not much but it’s suddenly made the pile of bits in the footwell much smaller and the interior actually looks like an interior again  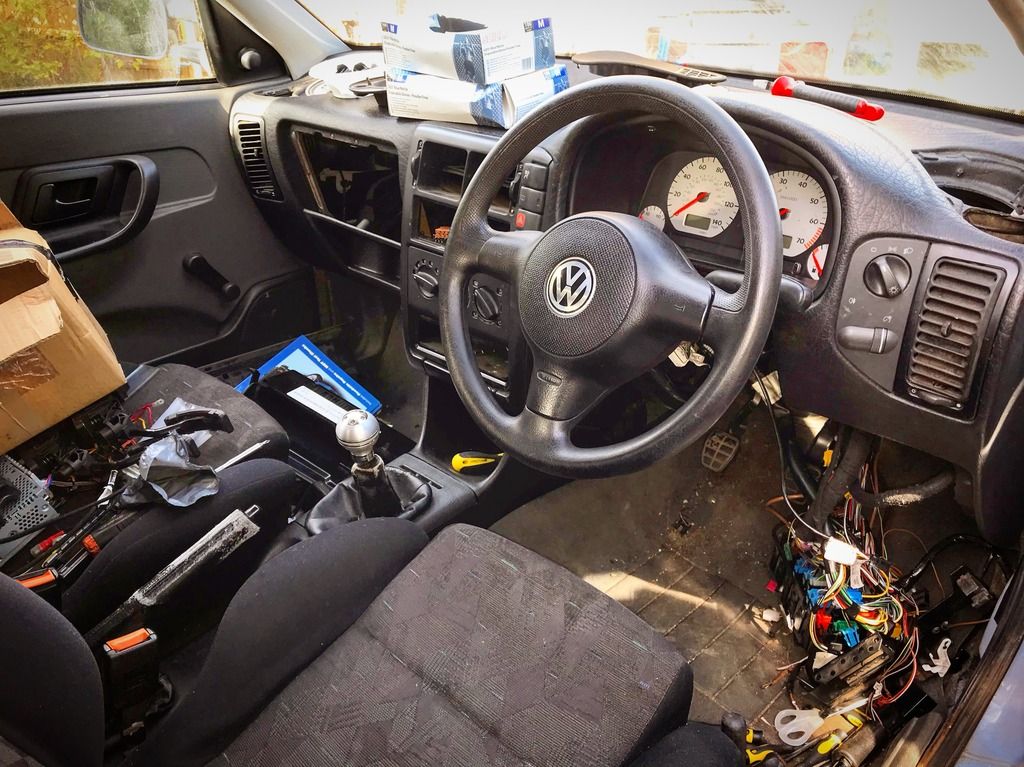 |
| |
Follow Me On Instagram - @parttimecartinkerer
|
|
Sammo
Club Retro Rides Member
Posts: 1,461  Club RR Member Number: 103
|
|
Oct 21, 2018 21:43:30 GMT
|
Today was a day of tidying up and getting the van ready to go and have it’s engine mounts made  I started off with clearing all the curse word out of the back that I’ve been hoarding in there for the last couple of years. Once I’d cleared it out and thrown a lot of stuff away I refilled the back with the remaining parts of the van  This should make things much easier when it comes back! 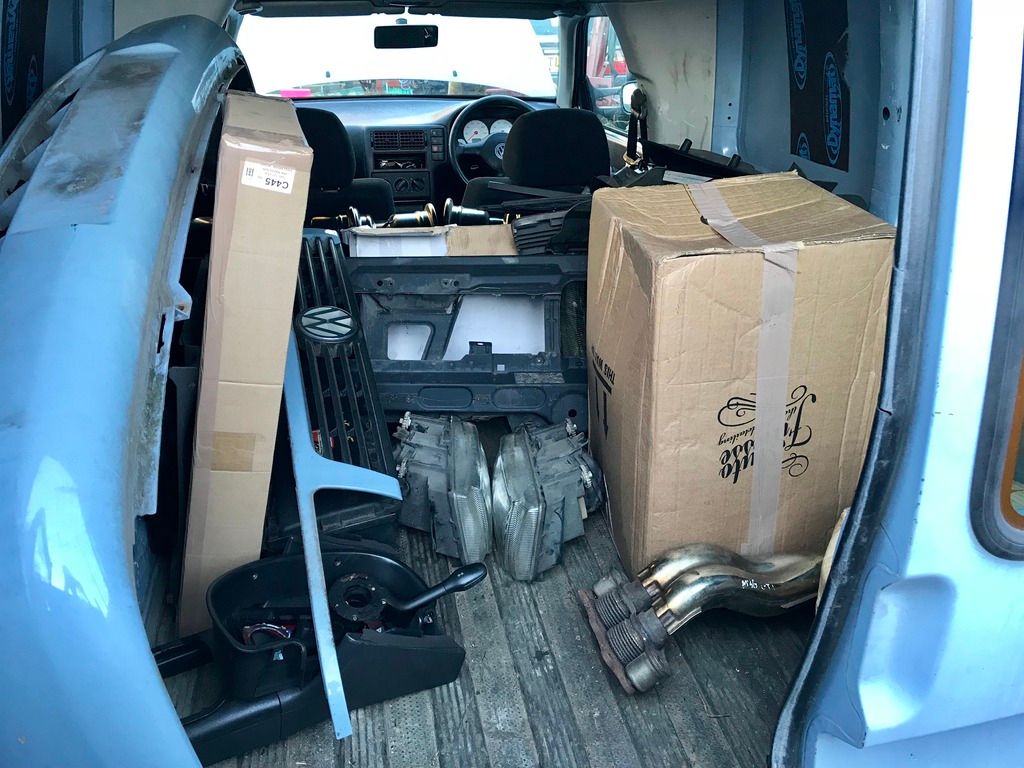 Once that was done I needed to get the engine back onto the support bar so the van can be moved. I then removed any nuts and bolts I had resting in the engine bay! 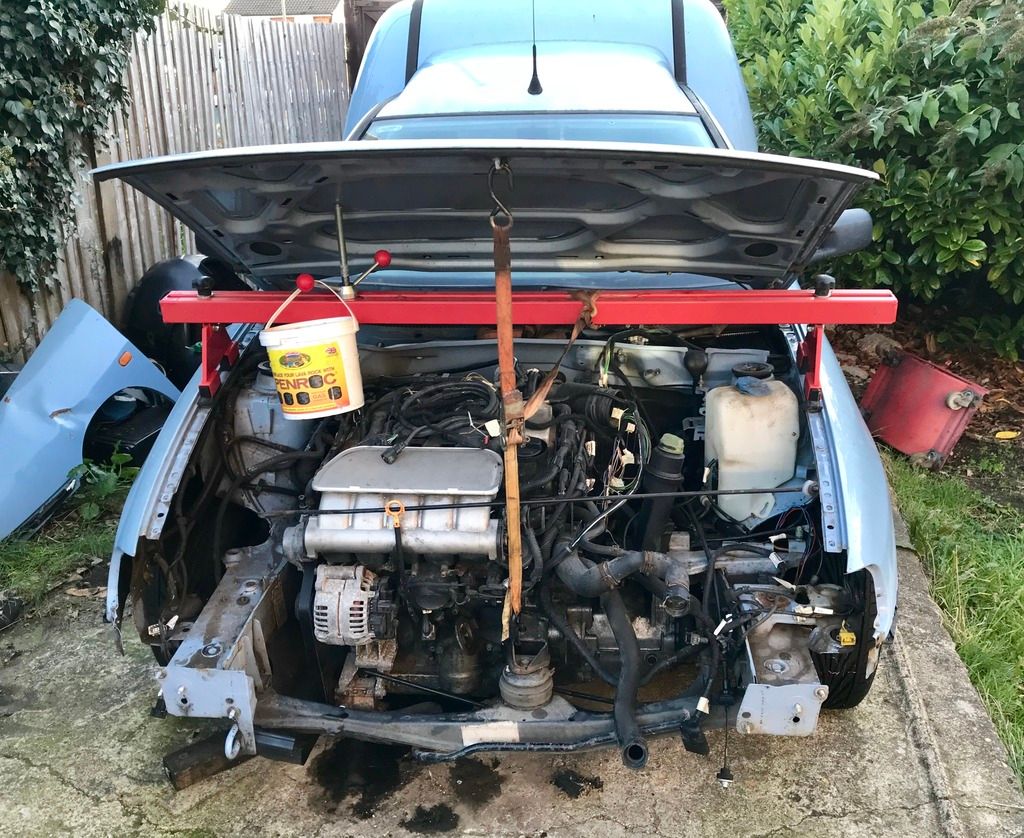 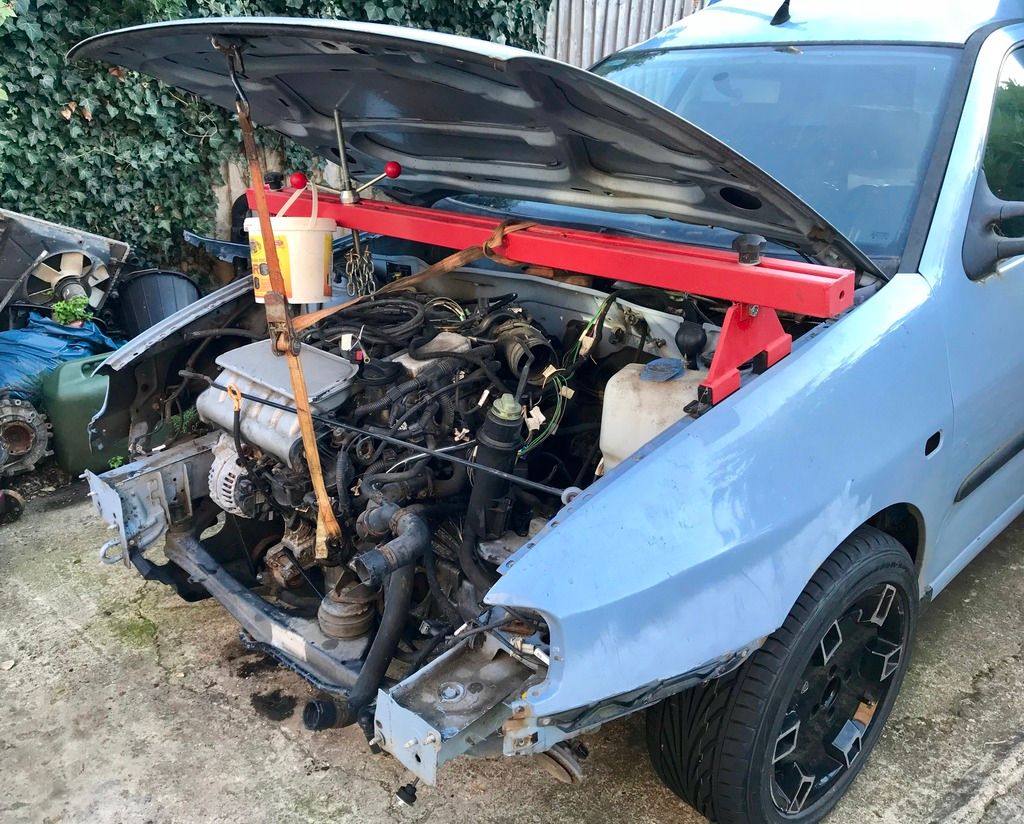 Last but not least I have the cabin a clean  It’s been full of interior bits, screws, rubbish, foam, more rubbish and all sorts of other things for as long as I can remember! I cleared everything out, threw away some more bits that weren’t needed and then gave it a much needed hoover. The last thing to do before packing up for the day was to put my vast array of engine mounts inside for the fabricator to take inspiration from haha! 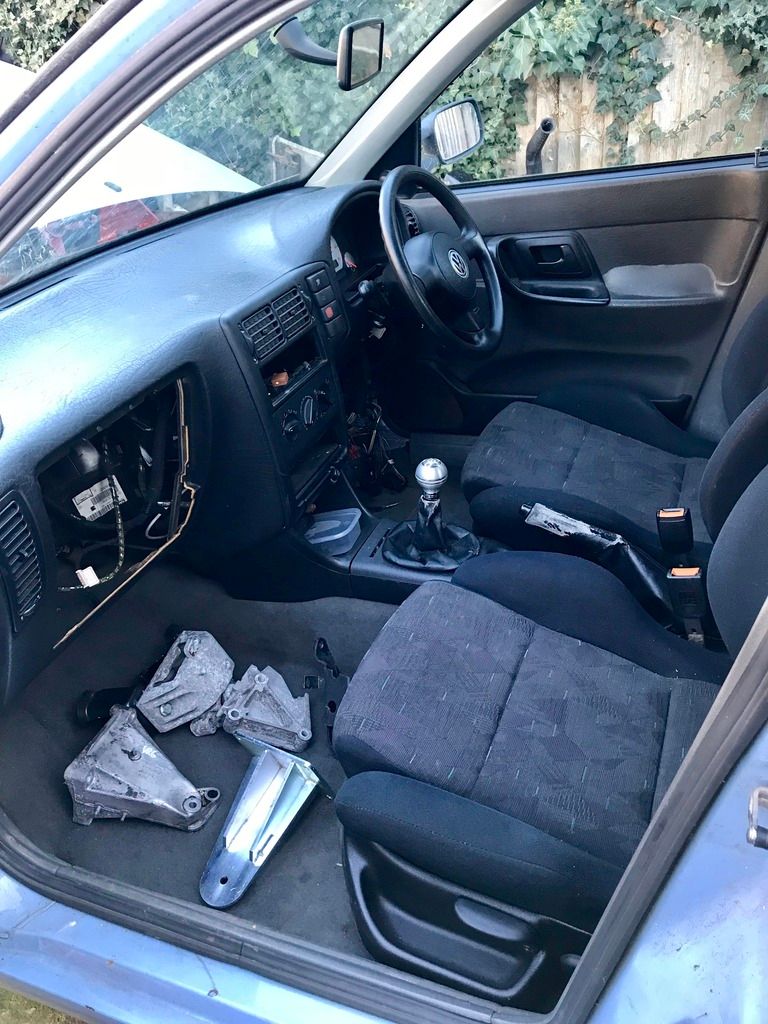 That’s it for today. The van is being collected on Wednesday and I expect to have it back by the weekend  Although I’m working next weekend so nothing will be happening then anyway. |
| |
Follow Me On Instagram - @parttimecartinkerer
|
|
Sammo
Club Retro Rides Member
Posts: 1,461  Club RR Member Number: 103
|
|
Oct 24, 2018 12:47:29 GMT
|
We have another update. The van has gone to have its engine mounts made  It was collected at about 10am this morning and off it went  We had a slight issue getting it off the driveway (which turned out to be a flat rear tyre!) but apart from that it rolled out fine. I should have it back in a couple of days and then the fun begins! 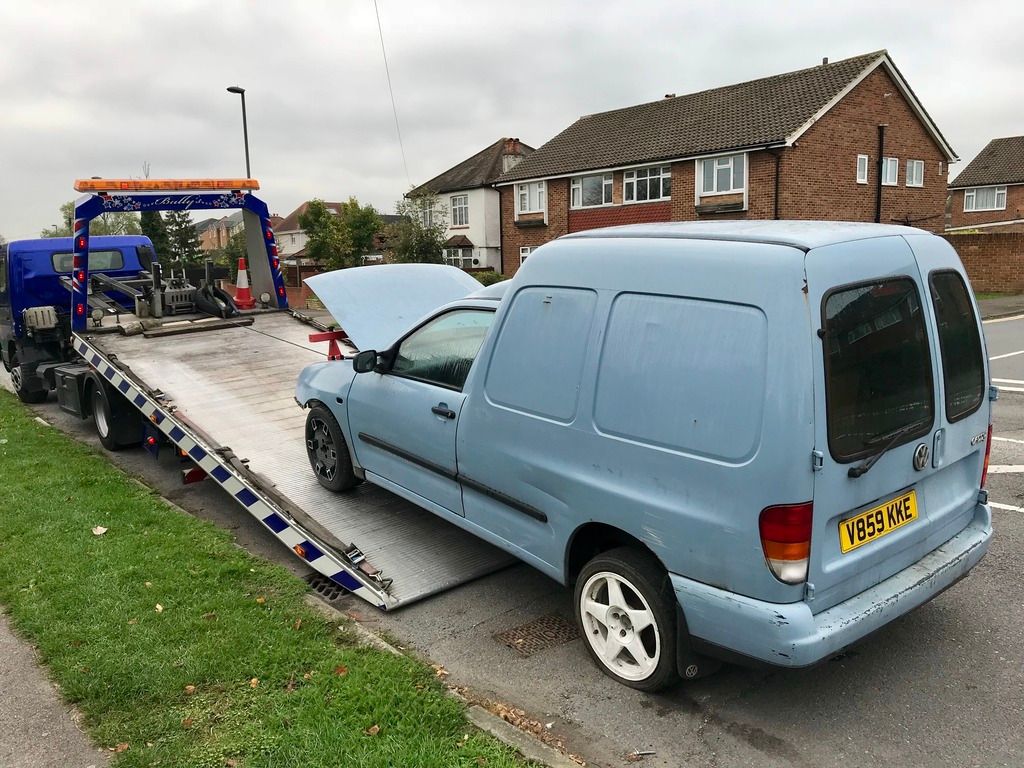 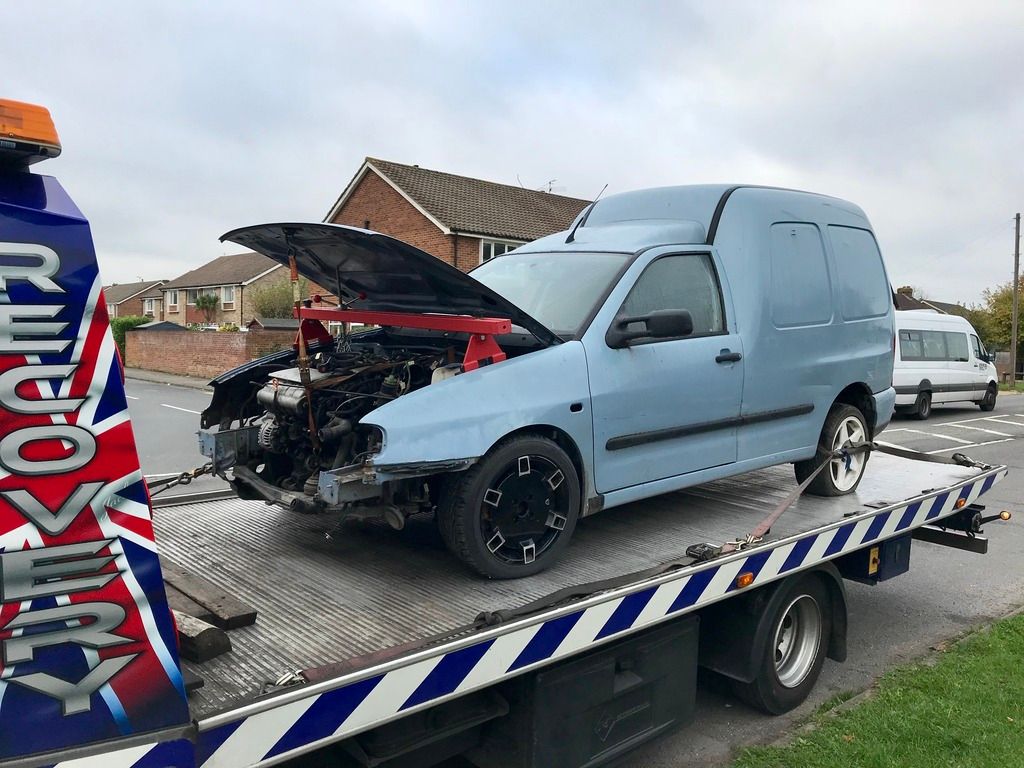 |
| |
Follow Me On Instagram - @parttimecartinkerer
|
|
|
|
|
Oct 24, 2018 16:16:50 GMT
|
Good to see you moving on with this ! All to easy to get bogged down and loose momentum  |
| |
|
|
Sammo
Club Retro Rides Member
Posts: 1,461  Club RR Member Number: 103
|
|
Oct 24, 2018 19:21:13 GMT
|
Good to see you moving on with this ! All to easy to get bogged down and loose momentum  I’ll admit that I well and truly lost momentum with this for quite a while. I’m just getting my enthusiasm back for it and I’m bloody determined to get it finished and driving! |
| |
Follow Me On Instagram - @parttimecartinkerer
|
|
Sammo
Club Retro Rides Member
Posts: 1,461  Club RR Member Number: 103
|
|
Oct 26, 2018 20:11:28 GMT
|
A quick update just to say, the engine mounts haven’t been started yet. I’ve told the guy not to rush and make sure he takes some photos that I can show you lot  |
| |
Follow Me On Instagram - @parttimecartinkerer
|
|
|
|
Drizz
Part of things
 
Posts: 337
|
|
Oct 27, 2018 12:31:32 GMT
|
|
I built a vr6 polo saloon a few years ago. Went like a rocket!
Great to see you're cracking on with it. Look forward to the updates!
|
| |
MGF VVC 160
MG Midget
Metro Turbo
200 BRM
Range Rover Classic TD5
Discovery Premium 300TDi
Defender 90
Rover 420 GSi Sport Turbo
Discovery Extreme 300TDi
Range Rover P38
|
|
Sammo
Club Retro Rides Member
Posts: 1,461  Club RR Member Number: 103
|
|
Nov 12, 2018 21:54:56 GMT
|
I have an update  I got a call while walking home this evening to say the engine mounts are all but done and the van will be ready to collect tomorrow  That creates a slight space issue on the driveway with my Mk2 Golf currently residing there but I’m hoping to get that moved to work in the next couple of days and then the van can come back  |
| |
Follow Me On Instagram - @parttimecartinkerer
|
|
Sammo
Club Retro Rides Member
Posts: 1,461  Club RR Member Number: 103
|
|
|
|
I got a call on Thursday morning to say the van was being collected and would be dropped back to mine later that day  I popped home from work a bit later and helped get the van back onto the driveway. BDS Performance in Dorking have done an excellent job with the mounts and have managed to use as much of the factory engine mounts as possible  When I popped to Bruno’s (owner of BDS) house the night before to pay him he was telling me about the amount of interest that had been shown in the van while it had been sat in the workshop. Keeping in mind some of expensive racing cars etc he has going through his place and the owners were interested in a rather knackered looking old van haha. Here are a couple of pictures of the mounts. He’s left them in primer so I can spray them when the time comes.   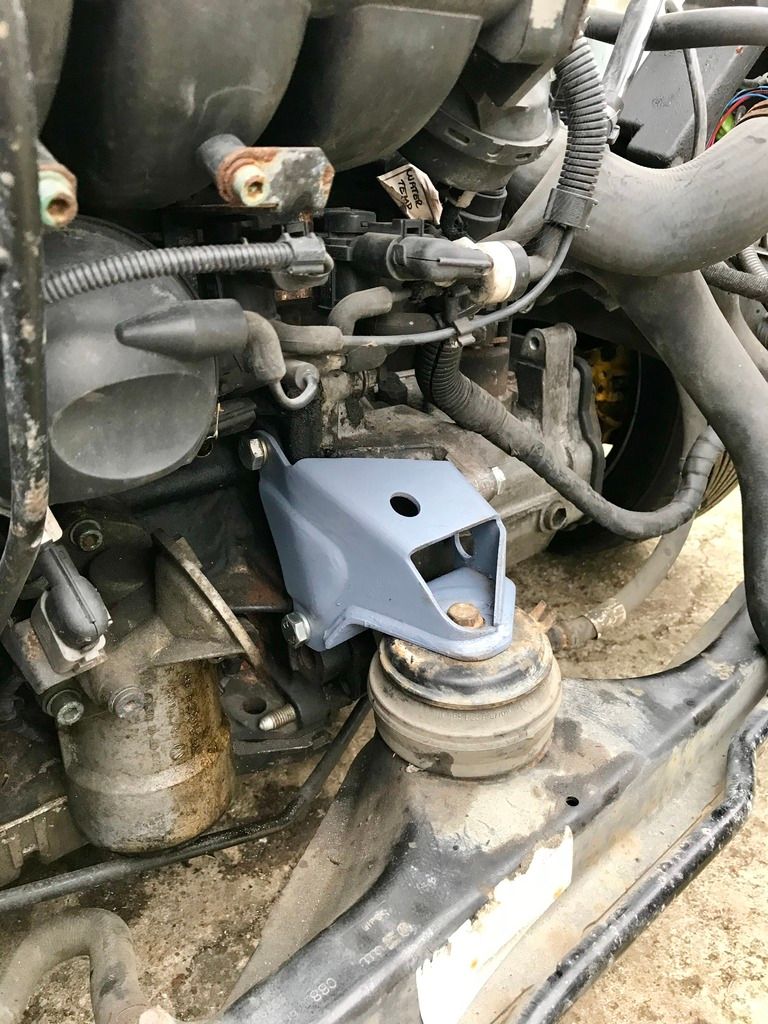 Now that the van is back I need to remove the engine to replace some gaskets, bits of rubber hose, the big plastic coolant hose on the front of the block and finish making the EGR blanking plate. Then it can go back in, driveshafts in, finish the wiring and see if it starts. Doesn’t sound like much but with the curse word weather it might take a little while. |
| |
Follow Me On Instagram - @parttimecartinkerer
|
|
|
|
|
Nov 17, 2018 10:35:02 GMT
|
You could use it for shows when the van is finished or for the Golf.
Just a thought.
|
| |
Last Edit: Nov 17, 2018 10:36:14 GMT by peteh1969
|
|
Sammo
Club Retro Rides Member
Posts: 1,461  Club RR Member Number: 103
|
|
Nov 17, 2018 12:55:31 GMT
|
You could use it for shows when the van is finished or for the Golf. Just a thought.
I used to have a marquee over the driveway when I was bringing a very high mileage, ex driving school BMW Mini back to life. After 18 months of standing strong the wind finally got it and ripped it to shreds haha.  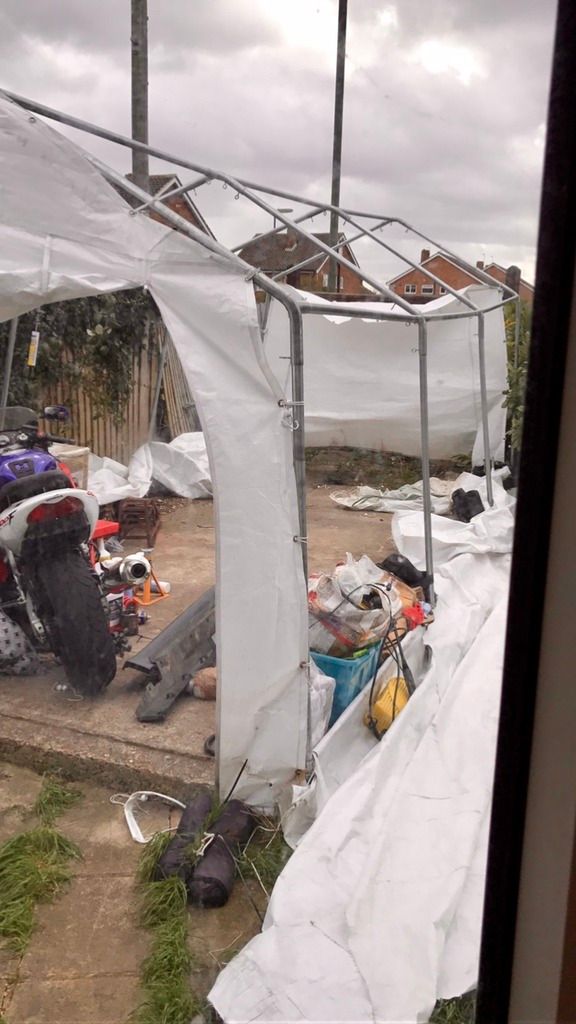 |
| |
Last Edit: Nov 17, 2018 13:00:55 GMT by Sammo
Follow Me On Instagram - @parttimecartinkerer
|
|
|
|
|
Nov 17, 2018 13:30:30 GMT
|
|
Pity you cannot get new canvas for it.
It won't keep the cold out but it would keep you dry.
|
| |
|
|
Sammo
Club Retro Rides Member
Posts: 1,461  Club RR Member Number: 103
|
|
Nov 17, 2018 17:10:14 GMT
|
|
|
| |
Follow Me On Instagram - @parttimecartinkerer
|
|
Sammo
Club Retro Rides Member
Posts: 1,461  Club RR Member Number: 103
|
|
Jan 20, 2019 14:07:22 GMT
|
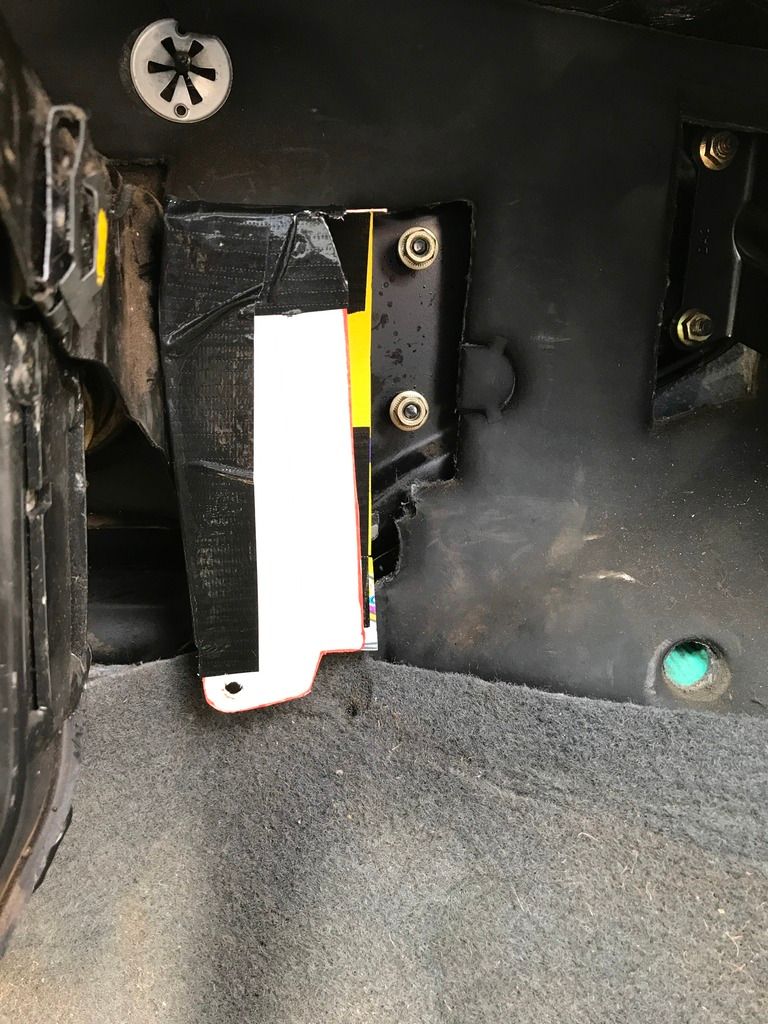
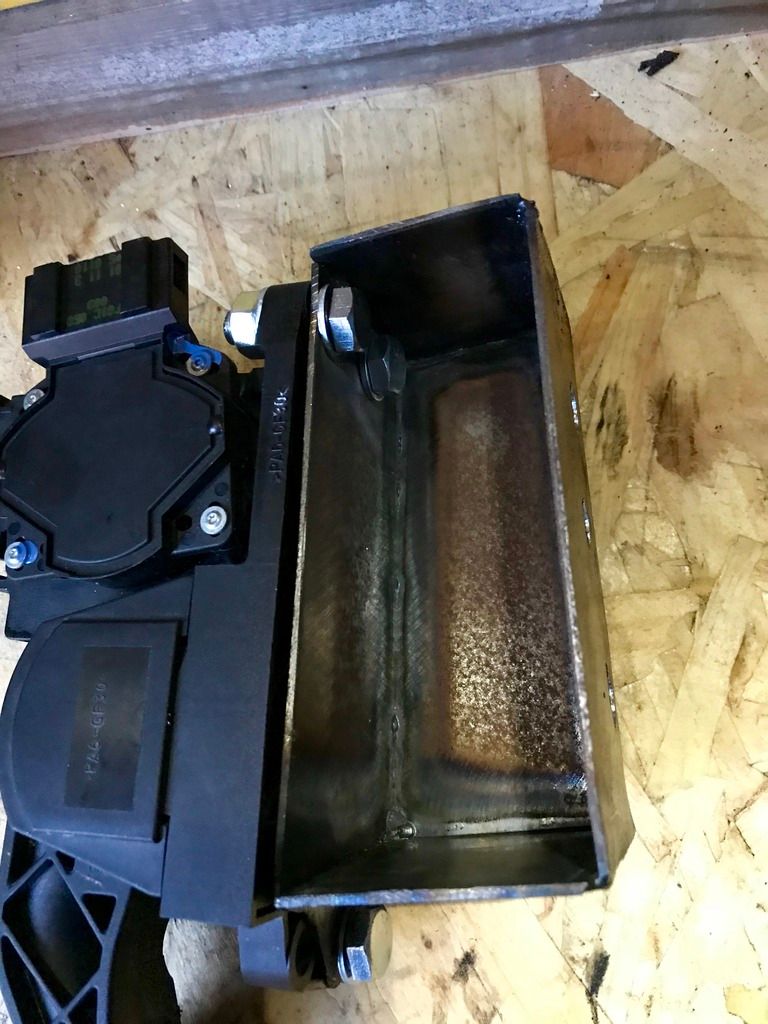
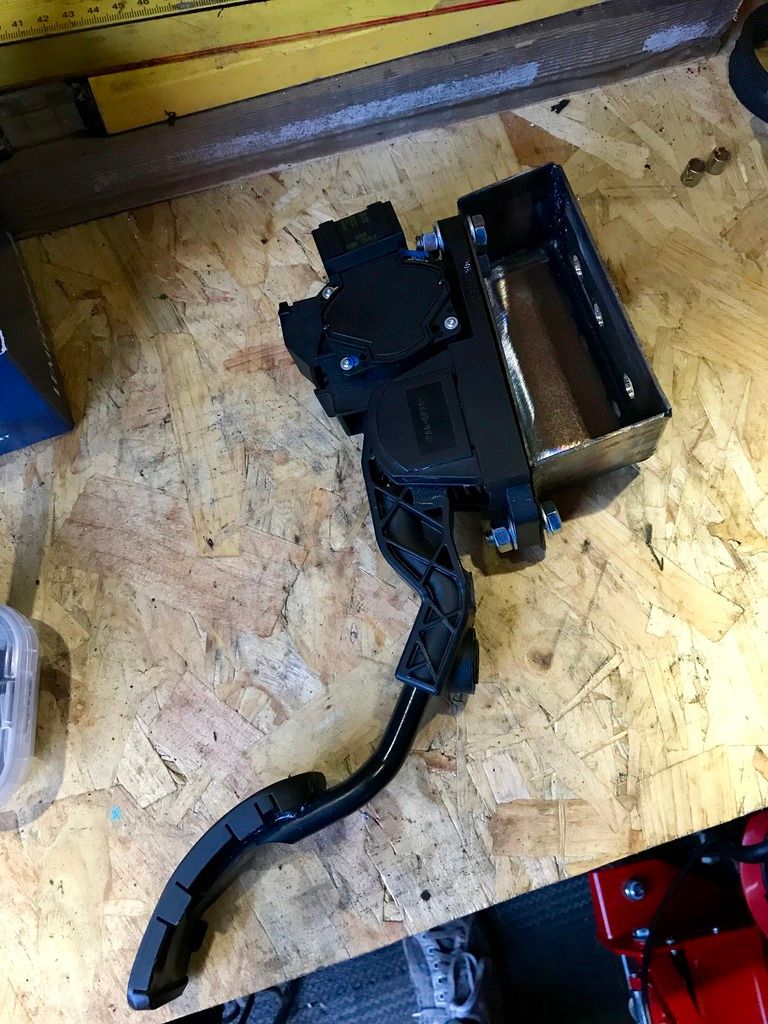
Another little update. Due to the awful weather we’ve had over the last few months I haven’t been near the van! However today it was sunny outside. Unfortunately we’ve got the family coming round later which has stopped me being able to do anything really. Anyway, I was putting some stuff in the shed and spotted my accelerator pedal box sitting on the side. A while ago I’d sprayed it in black Hammerite and then left it there. Apparently I didn’t take a picture of it sprayed. So heres one in bare metal.  While I was in the shed I figured I’d spend a couple of minutes just bolting the pedal to the box. They were both sat there so why not. Once I’d finished that I thought to myself “well the van is just there on the driveway. I might as well fit the pedal!” So I did   I’m happy to say that my CAD (cardboard aided design) designed pedal box fits perfectly and the pedal is in exactly the right position! I even got the angle right!!! That’s it for today. Hopefully it will stop all this winter nonsense soon and I can start getting back out there  |
| |
Follow Me On Instagram - @parttimecartinkerer
|
|
Sammo
Club Retro Rides Member
Posts: 1,461  Club RR Member Number: 103
|
|
Jan 21, 2019 15:24:43 GMT
|
At about 3am this morning I woke up feeling rather unwell and then proceeded to spend the next five hours being sick! I rang in sick at about 6am and stayed in bed / continued running to the bathroom for a couple more hours. Thankfully I stopped being sick and got a few hours sleep, eventually waking up at about 1pm. After having some dry toast (possibly the most boring piece of food in the world!) I decided to get on with extending the small piece of loom for the DBW throttle pedal. Due to the size of the plugs on each end of this loom I had to cut it, solder on an extension, feed the extension through the hole in the bulkhead and then solder the other plug back on! Anyway, I got stuck straight in, chopped the loom and started getting it ready to extend. I forgot to take a picture of the loom beforehand. This was it after being cut and clamped ready to extend.  My soldering has improved massively over the years. This could actually be considered tidy now   Six wires and some heat shrink later and we had this.  With the extension wiring attached it was time to head outside and find a hole to feed it through. I found this one which I think is for the bonnet release cable. It was in the perfect position so it’s been hijacked for this instead. I’ll find another way of routing the bonnet release.  I fed the cable through from inside.    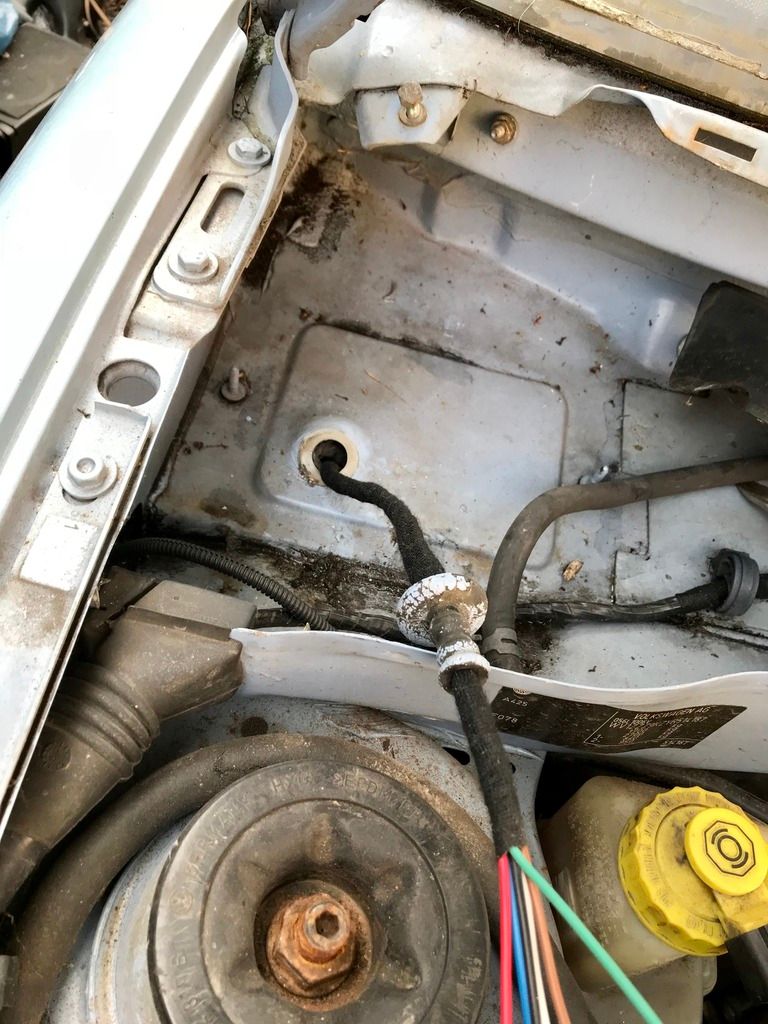 With the bare wires now in the engine bay it was time to crack out my gas powered soldering iron. It’s a handy little thing but takes an age to heat up!  It was really cold outside so I didn’t waste any time and just got on with it as quick as possible!  All done and heat shrinked  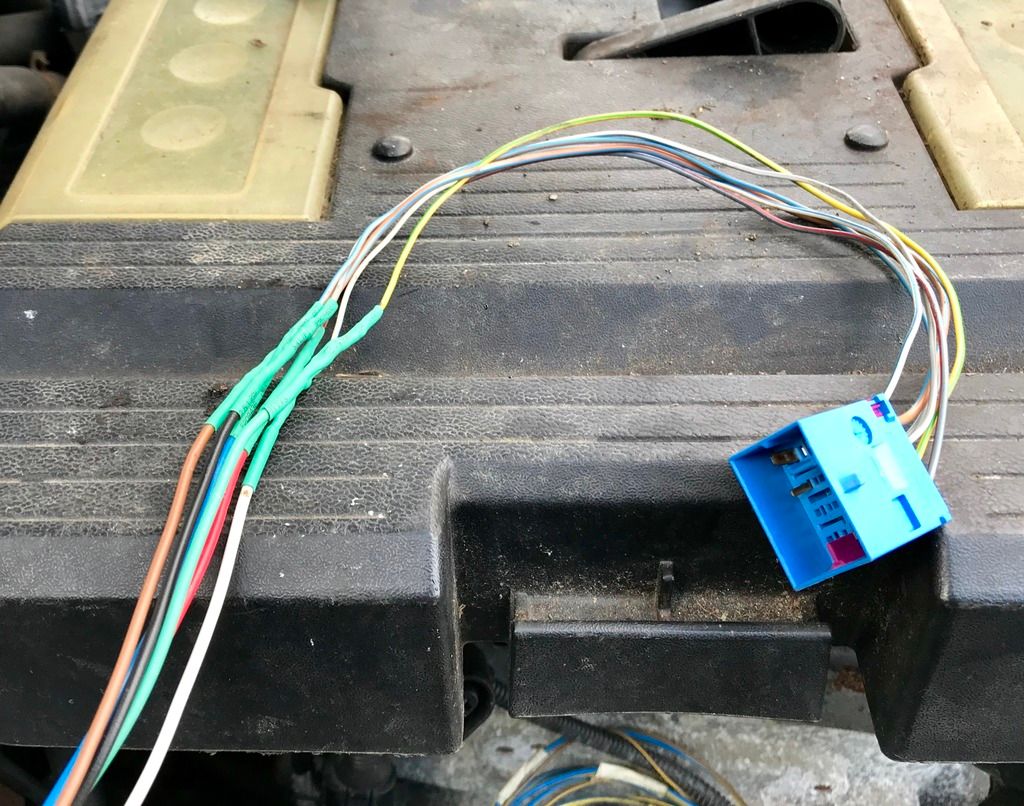 All that was left to do was to wrap the loom in loom tape and then get back indoors and defrost!  Only a small step again but at least it’s another thing I can cross off the list  |
| |
Follow Me On Instagram - @parttimecartinkerer
|
|
|
|
|
Jan 21, 2019 17:11:24 GMT
|
This time of year it’s all about chipping away at it, bit by bit Well done on doing stuff  (Ironically said after having a meh weekend and us not doing anything  ) |
| |
|
|
|
|


 It's a second hand sealy MIG welder. I'm just waiting for pay day again so I can buy a mask, gloves etc etc and then I'm going to give it a bash. I've watched plenty of videos on YouTube of how to get started so fingers crossed I'll get the hang of it and then I can start doing my own welding


