|
|
|
Nov 13, 2017 22:28:02 GMT
|
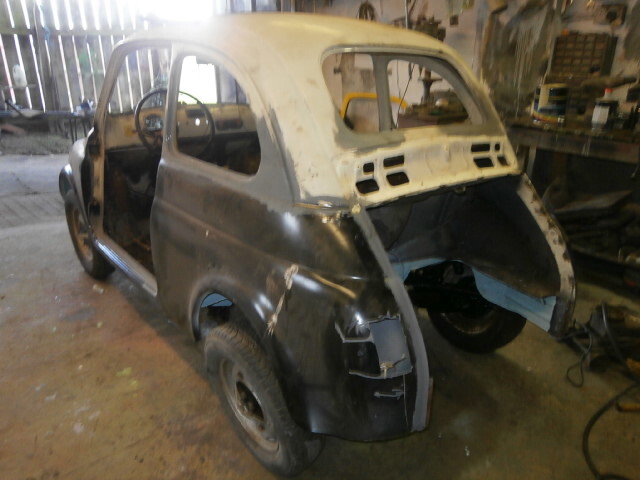
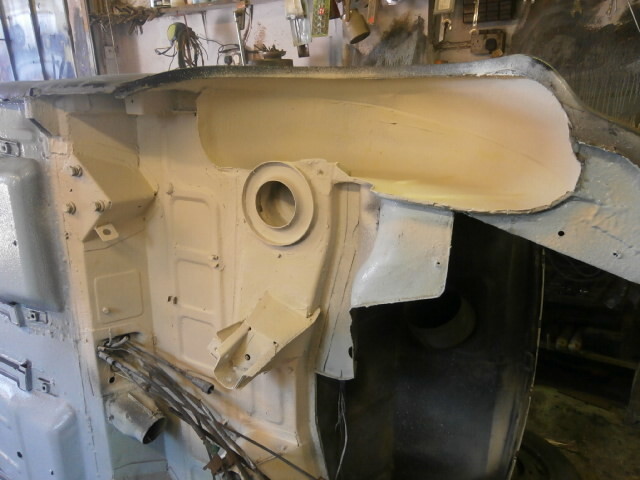
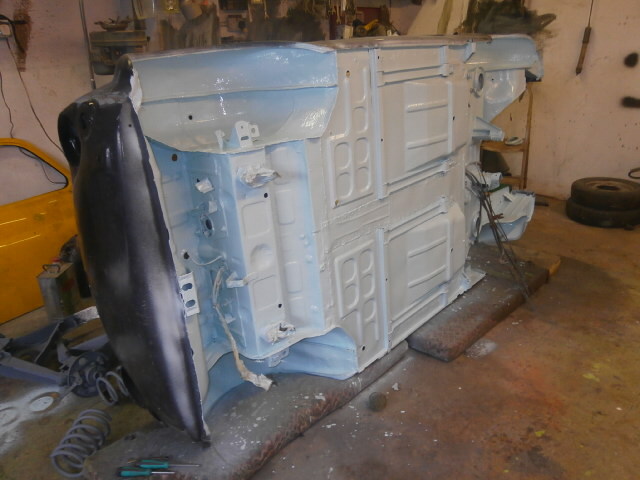
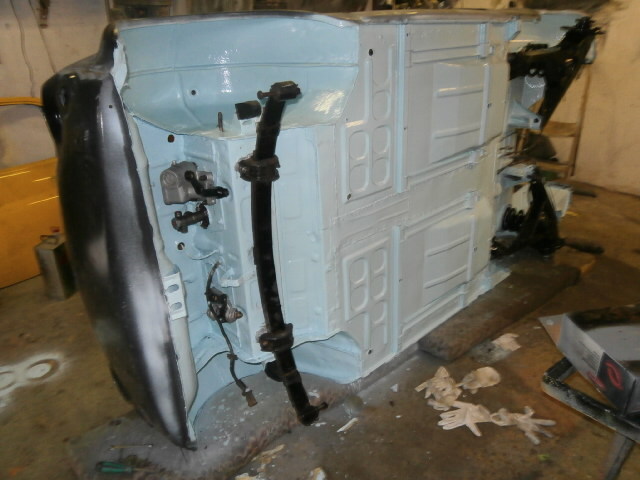
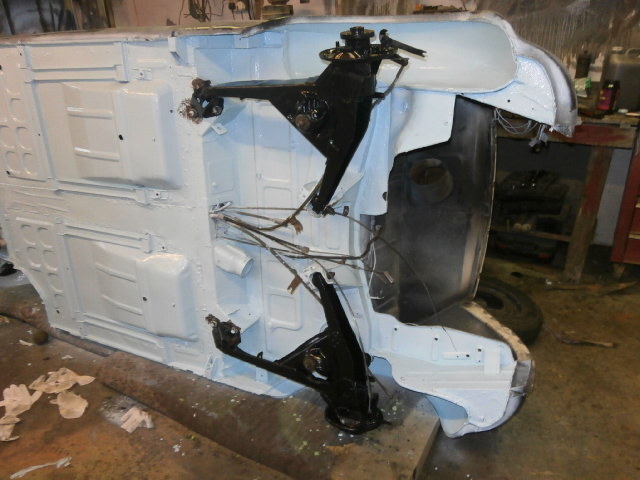
Peter has placed the inner wing repair sections on order but reported back that they will not be with me until January has they have to be hand made I took a 2 page shopping list with me to the NEC show and came back with the car fully loaded - one of the items on the list is a method of getting the bodyshells off the ground to reasonable working level - has a minimum say 500mm - this makes working the panels so much easier when repairing / profiling - I had looked at one of the smaller hydraulic vehicle lifts that can raise a vehicle to about 1 metre in height - problem with them is once a vehicle is on them you cannot move them - my workshop is not huge and I need flexibility hence everything in the workshop is on industrial casters - means it can be moved out for ease / cleaning etc so I purchased this 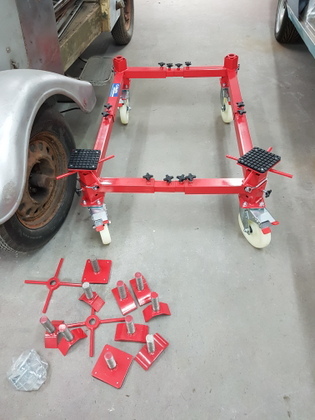 Comes with various adjusters & pads plus I have set of higher pads on order Configured it so that I had the correct support / balance on the shell 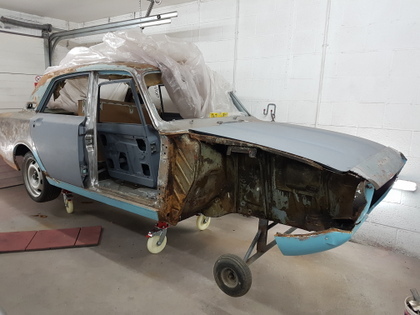 Checked it for level 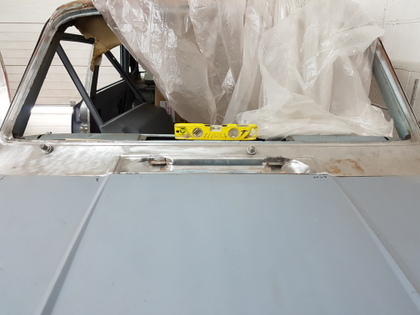 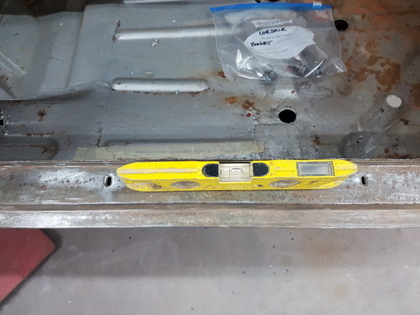 Made sure that allowed me enough room to work on the sills with the spot welder etc 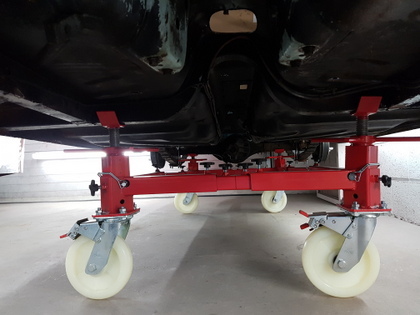 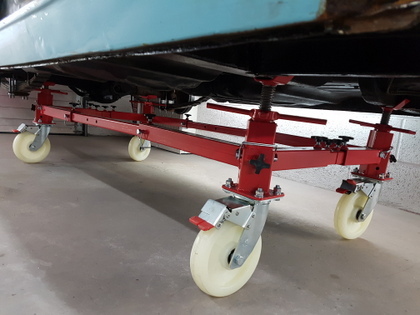 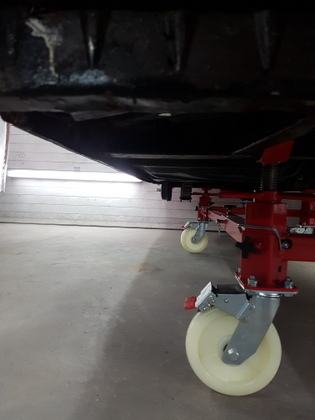 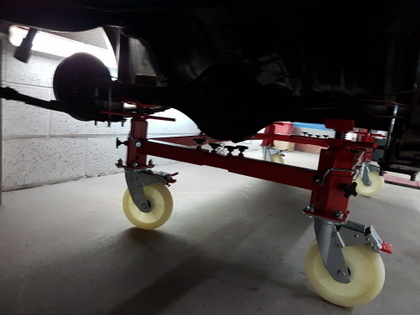 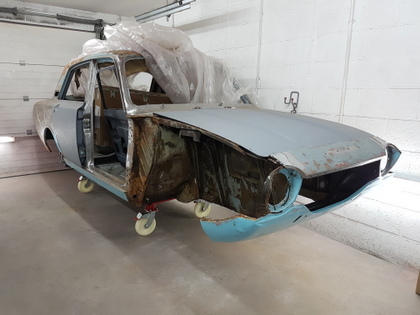 Pleased with this - gives me the flexibility that I need in the workshop whilst keeping the car at reasonable height but not that high that I cant reach the upper sections / panels (with exception of the roof) - drooped the wheels off the rear axle and removed the front dummy axle off the shell to allow better working access |
| |
Last Edit: Nov 13, 2017 22:34:42 GMT by Deleted
|
|
|
|
vulgalour
Club Retro Rides Member
Posts: 7,287
Club RR Member Number: 146
|
|
Nov 13, 2017 23:35:29 GMT
|
|
This should be a satisfyingly educational thread, I've long been curious about how Corsairs are put together and where they rot.
|
| |
|
|
|
|
|
|
|
|
wow, thats a handy little dolly....nice find...
JP
|
| |
I know its spelled Norman Luxury Yacht, but its pronounced Throat Wobbler Mangrove!
|
|
|
|
|
|
|
wow, thats a handy little dolly....nice find... JP Isn't it just. Looks like a handy bit of kit. |
| |
|
|
|
|
|
|
|
|
I could have built it myself but by the time I purchased the steel, casters, pins etc - cut everything to length, welded it together & painted it + allowed for my time it would have cost me £600 plus - so at £275 in a ready to go format I thought that I could not go wrong - unlike most forum members I have to take in account how much time I have to offset for building things like this vs what workshop time that I am loosing whilst doing so
|
| |
|
|
|
|
|
|
|
This should be a satisfyingly educational thread, I've long been curious about how Corsairs are put together and where they rot. This one by & large is a decent bodyshell I have seen far worse - but it should give you a good idea - like all production cars of this era they were not particularly treated with any form of rust preventative. |
| |
|
|
|
|
|
|
|
I could have built it myself but by the time I purchased the steel, casters, pins etc - cut everything to length, welded it together & painted it + allowed for my time it would have cost me £600 plus - so at £275 in a ready to go format I thought that I could not go wrong - unlike most forum members I have to take in account how much time I have to offset for building things like this vs what workshop time that I am loosing whilst doing so And that's why I love this site. You've got guys who put as much love and ingenuity into building a spit, as many do into their cars. Then you have professionals who know when to say, "Enough, my time and skill is better used elsewhere." Couple that with people working on their drive under basic conditions, often only learning. Then some turn out brilliant results. The mix is fantastic. I use that word because my brain won't let me type 'Whoresome'!  |
| |
Last Edit: Nov 14, 2017 7:25:55 GMT by georgeb
|
|
|
|
|
|
|
|
Bookmarked.
the only problems now is, I'm going to have to make one of them dollys, or bite the bullet and buy one.
|
| |
Take the Next slot right coming up on the left.
|
|
|
|
|
Nov 17, 2017 23:21:45 GMT
|
Collected the front wings from the blasters - they have cleaned up well and without too many losses - obviously some repairs will be required 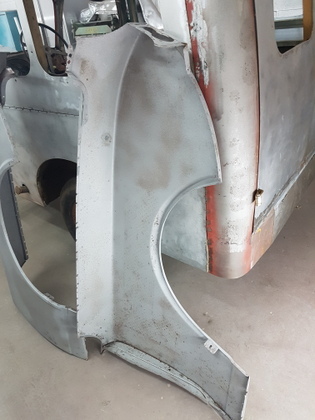 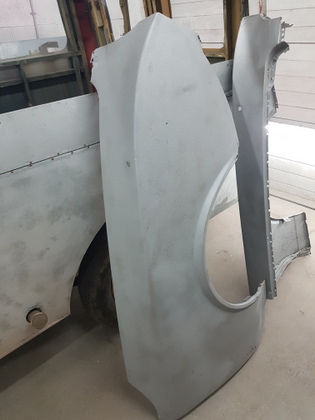 I will get them into construction primer over the next few days so that they are protected until I need them Meanwhile I made up and fitted the temporary bracing to the offside of the bodyshell 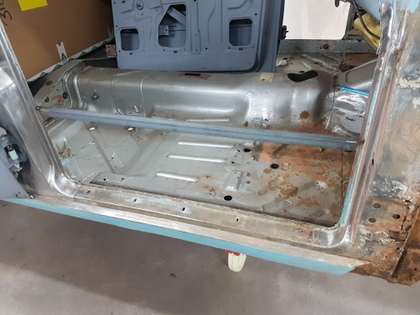 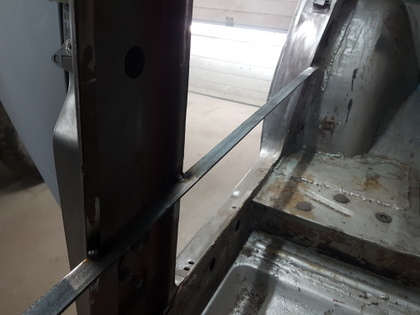 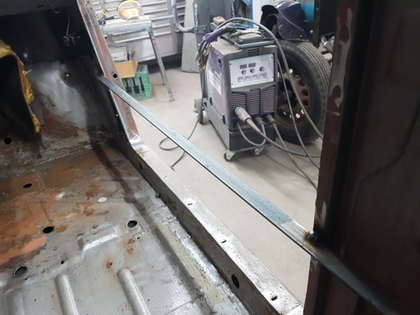 I used equal angle across the door apertures and tacked them into place - I took care to allow enough room for me to remove & refit the new sills / A post & bulkhead return / flitch panel 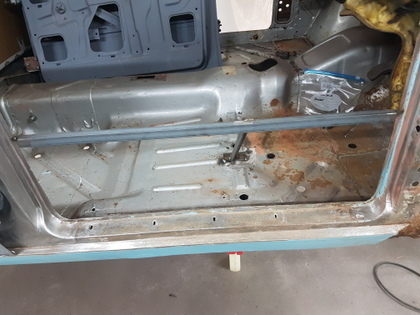 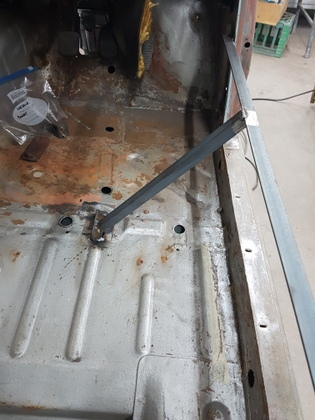 Then added a diagonal brace down to the floor pan but over the top of one of the chassis outriggers - this will give the required support whilst the shell is weakened by removing structural elements of it - you could argue that it's a belt & braces approach and I would agree - But I am not one for taking shortcuts having seen too many failed restoration attempts by others over the years - all for the sake of a bit of work & planning at the commencement of a restoration. |
| |
Last Edit: Nov 18, 2017 9:14:48 GMT by Deleted
|
|
|
|
|
|
|
I could have built it myself but by the time I purchased the steel, casters, pins etc - cut everything to length, welded it together & painted it + allowed for my time it would have cost me £600 plus - so at £275 in a ready to go format I thought that I could not go wrong - unlike most forum members I have to take in account how much time I have to offset for building things like this vs what workshop time that I am loosing whilst doing so Can you post a link to the supplier of that dolly please? My Googling skills have failed to find it. |
| |
|
|
|
|
|
|
|
I could have built it myself but by the time I purchased the steel, casters, pins etc - cut everything to length, welded it together & painted it + allowed for my time it would have cost me £600 plus - so at £275 in a ready to go format I thought that I could not go wrong - unlike most forum members I have to take in account how much time I have to offset for building things like this vs what workshop time that I am loosing whilst doing so Can you post a link to the supplier of that dolly please? My Googling skills have failed to find it. CJ Autos - link below - mine is the heavy duty 2 ton model - they also do a 1 ton model that is currently on special offer www.cjautosheywood.co.uk/movers.shtmlAlternatively if any one requires further images or measurements to build their own just send me a pm |
| |
|
|
|
|
|
Nov 21, 2017 22:53:14 GMT
|
The A post covers a pair of strengthening plates for the door hinge mounting points which in effect form a double skin - I wanted to investigate how the plates are located & retained - so the removal of metal is a slow process - I removed the bulkhead return panel to allow further access 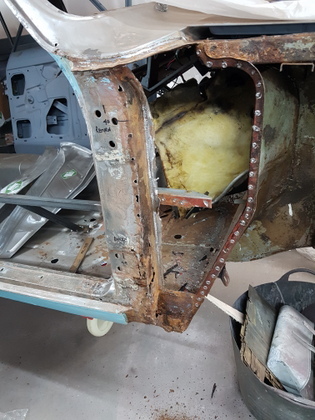 Taking care not to chop through the under dashboard parcel self bracket which requires retaining 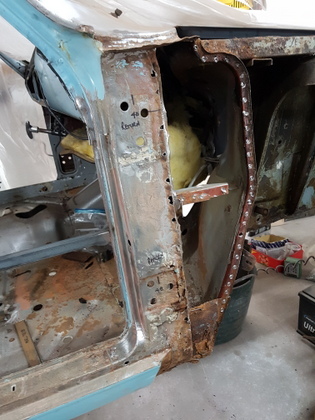 There is another closing panel on the inside face of the A post hence access is difficult - I will now need to add some additional bracing to ensure that the upper bulkhead section remains stable whilst I remove the A post outer skin Meanwhile the front wings were put into primer 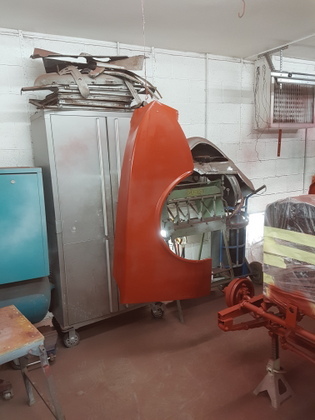 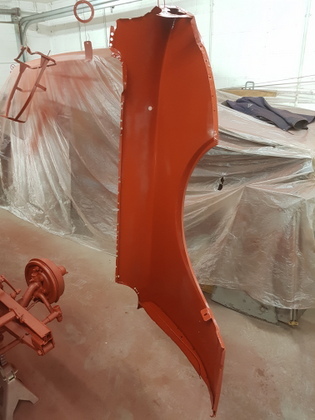 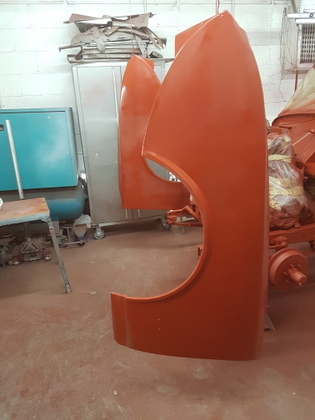 |
| |
Last Edit: Nov 21, 2017 22:54:40 GMT by Deleted
|
|
|
|
|
Nov 21, 2017 23:24:48 GMT
|
|
busy little shop!....
thanks for showing how you investigated those inner areas....I should have done more on my projects....but live and learn!
JP
|
| |
I know its spelled Norman Luxury Yacht, but its pronounced Throat Wobbler Mangrove!
|
|
|
|
|
Nov 22, 2017 23:01:04 GMT
|
Cut to length some equal angle to form a vertical support brace whilst much of the A post is removed 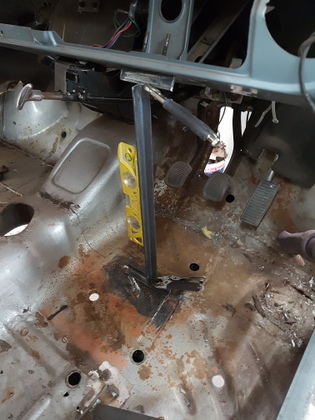 Utilised the steering column mounting on the underside of the dash - bolted through into the mounting 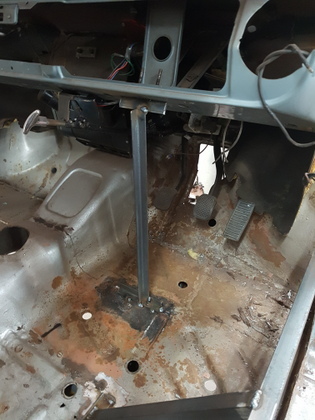 Then added a horizontal cross brace to the closing panel on the A post - I opted to bolt this in has I will have to temporally remove it on occasions to gain access to some of the repair areas 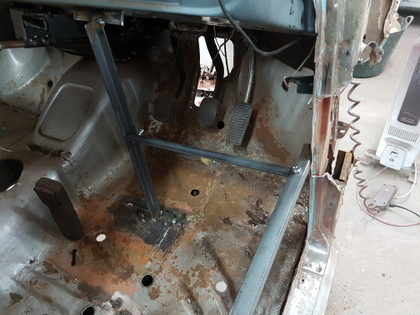 Then made a start on dissecting the original A post 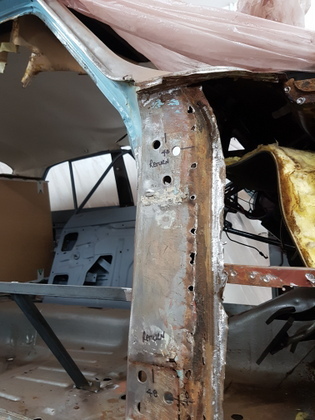 Taking care not to cut into the strengthening plates 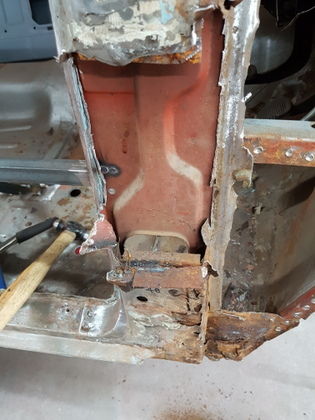 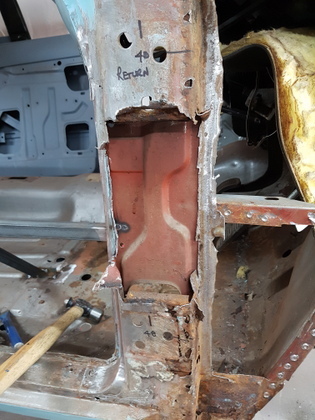 Finally removing them 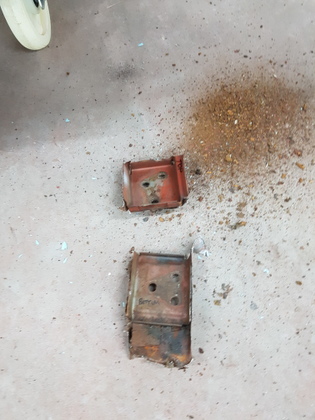 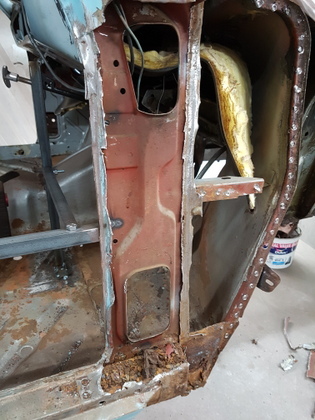 The plates will have to be cleaned up and reused - they are not fitted to new A post section 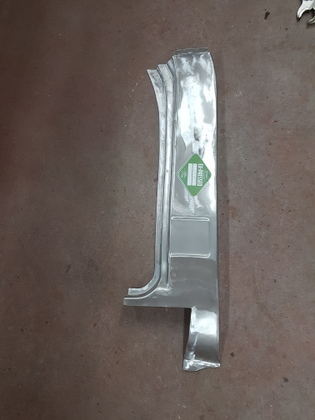 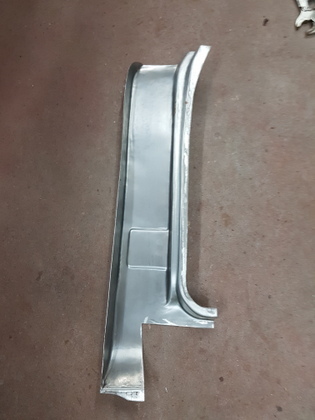 Before commencing any of the work I took & noted the critical measurements from the original panel in order to transfer to the new one 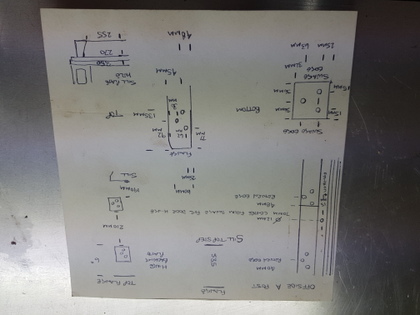 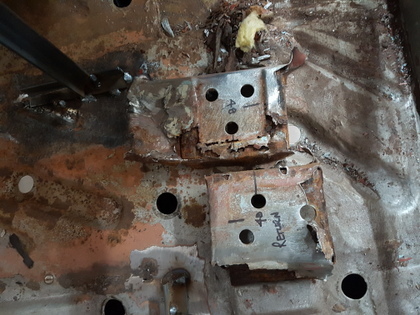 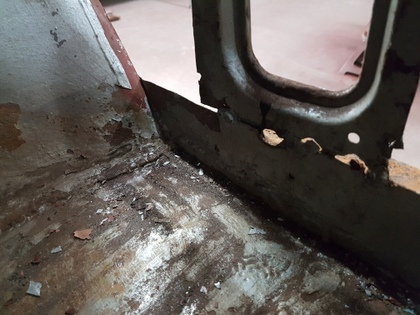 Also marked several offsets on the sill to ensure that sill to bottom of the front wing alignment would be achieved Next job before I can start on refitting the A post is to sort out the forward section of the outer & inner sill - inner sill has been poorly plated and in doing so has just encapsulated the rust that was in front of it - plan is to carefully remove the nose section of the outer sill and use it has a pattern to remake it (this does not come on the pattern sills that we have) then I can remove the section of inner sill / rust and remake that area with fresh steel - the A post closing panel is directly supported off this so until I sort this area out it's a bit difficult to proceed with anything else 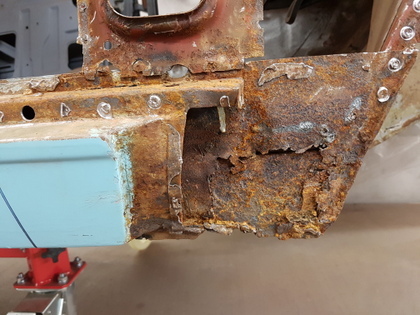 |
| |
Last Edit: Nov 22, 2017 23:54:17 GMT by Deleted
|
|
|
|
|
Nov 23, 2017 11:07:30 GMT
|
|
cracking work as usual , i paint the inside of all repair panels before i need them , prevention is cheaper than the cure
|
| |
|
|
|
|
|
Nov 23, 2017 14:27:46 GMT
|
cracking work as usual , i paint the inside of all repair panels before i need them , prevention is cheaper than the cure I use a zinc rich primer on the underside of new panels - further to this I always ensure that I treat all cavities once repaired with a good quality anti corrosion wax (Dinitrol) who have a couple of products that do the business - there are plenty of other brands on the market but not many are has proven to work has good - equally important is that wax creeps into seams & joints once it's applied. |
| |
|
|
|
|
|
Nov 23, 2017 19:00:26 GMT
|
|
daunting work...one wrong move and....you have it all supported...so one wrong move and nothing happens in your case!....
thanks for showing us areas of concern and how you shore them up when planning repairs, knowing that you will be chopping out critical sections...
JP
|
| |
I know its spelled Norman Luxury Yacht, but its pronounced Throat Wobbler Mangrove!
|
|
|
|
|
Nov 23, 2017 19:33:48 GMT
|
|
Wow.....a proper resto
Respect...fantastic work
Thanks...for taking time taking pics and posting on here
|
| |
Fraud owners club member
2003 W211 Mercedes E class
1989 Sierra sapphire
1998 ex bt fiesta van
|
|
|
|
|
Nov 23, 2017 19:51:49 GMT
|
|
i to use zinc primer and red lead , bare metaled everything zinced seam seal stone chip 2k paint ,
|
| |
|
|
|
|
|
Nov 23, 2017 19:53:44 GMT
|
|
|
| |
|
|


