jonomisfit
Club Retro Rides Member
Posts: 1,788
Club RR Member Number: 49
|
|
|
|
New bolts arrived, so bolted the bearing carriers on  P1070524 P1070524 by jono_misfit, on Flickr  P1070525 P1070525 by jono_misfit, on Flickr both on  P1070526 P1070526 by jono_misfit, on Flickr I gave the nuts a few dugga duggah's with the impact gun, but it'll need to wait till on the car to tighten the hub nuts to the required 315NM I got the pinion seal out, everything looks clean in the bearing  P1070527 P1070527 by jono_misfit, on Flickr 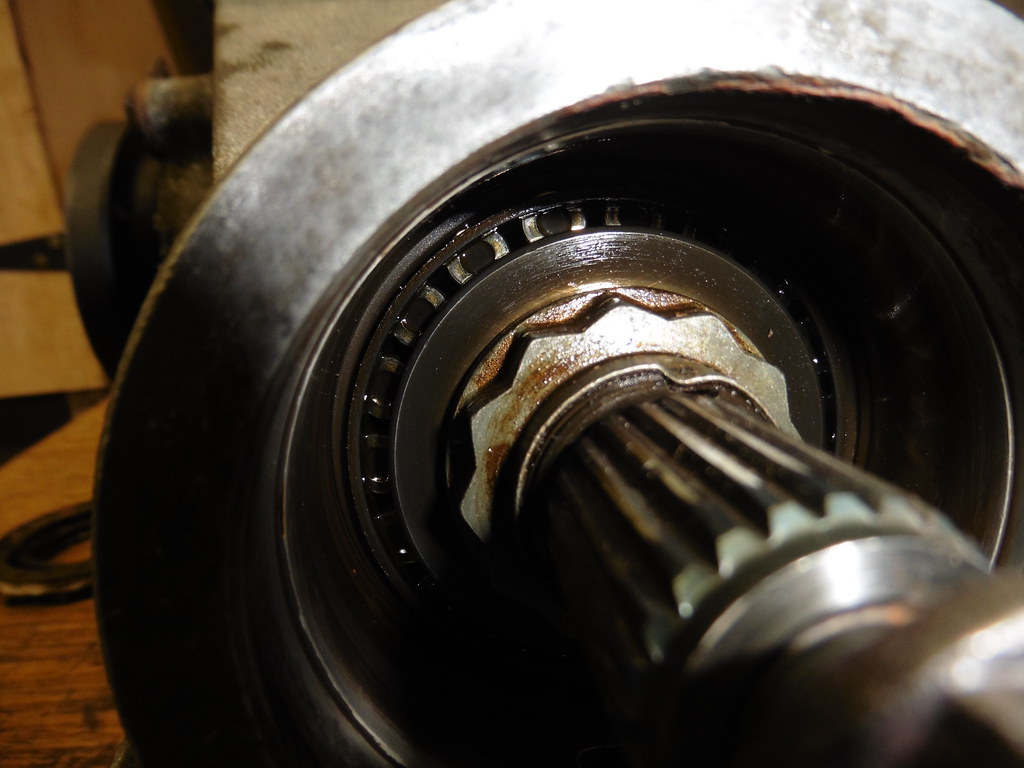 P1070528 P1070528 by jono_misfit, on Flickr new pinion seal in  P1070529 P1070529 by jono_misfit, on Flickr prop drive flange on, I gave the nut and exposed threads a coat of zinc primer to stave off rust. 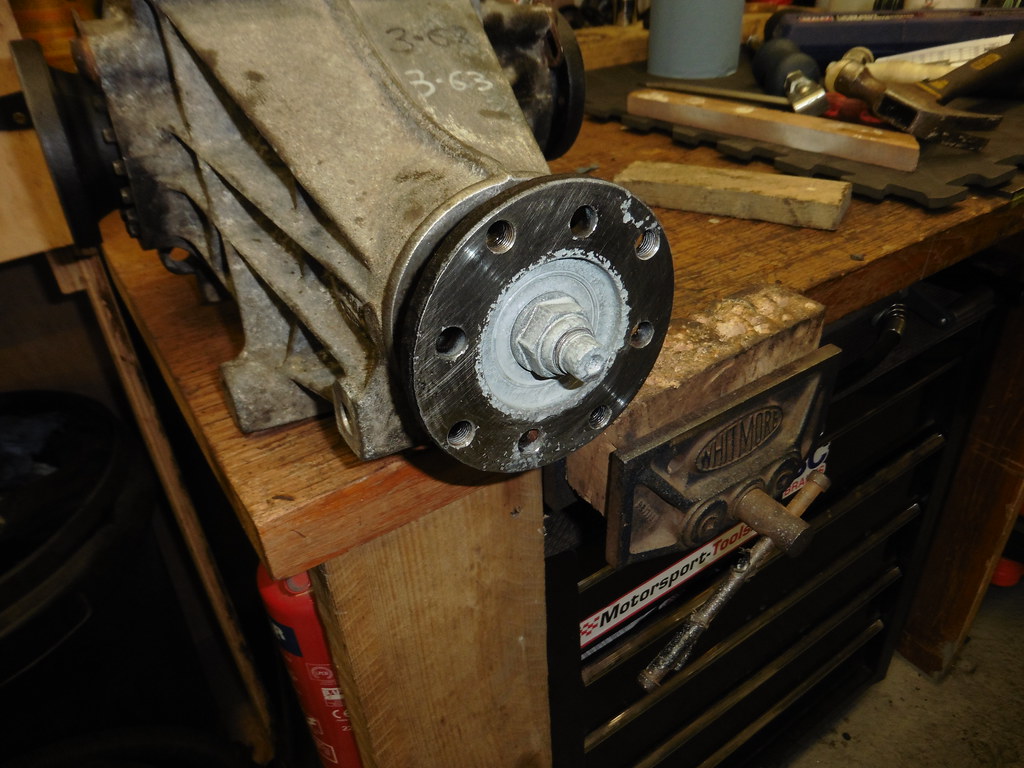 P1070530 P1070530 by jono_misfit, on Flickr diff attached to beam, although I'm waiting on some 220mm long bolts arriving so I can bolt it up finally.  P1070531 P1070531 by jono_misfit, on Flickr this is a 7" diff on a 7.5" beam, so there is spacer needed here. The 7.5" diff is about 17.5mm wider on the top mounting flange  P1070532 P1070532 by jono_misfit, on Flickr pulled tight to check my measurement  P1070533 P1070533 by jono_misfit, on Flickr turned up a spacer 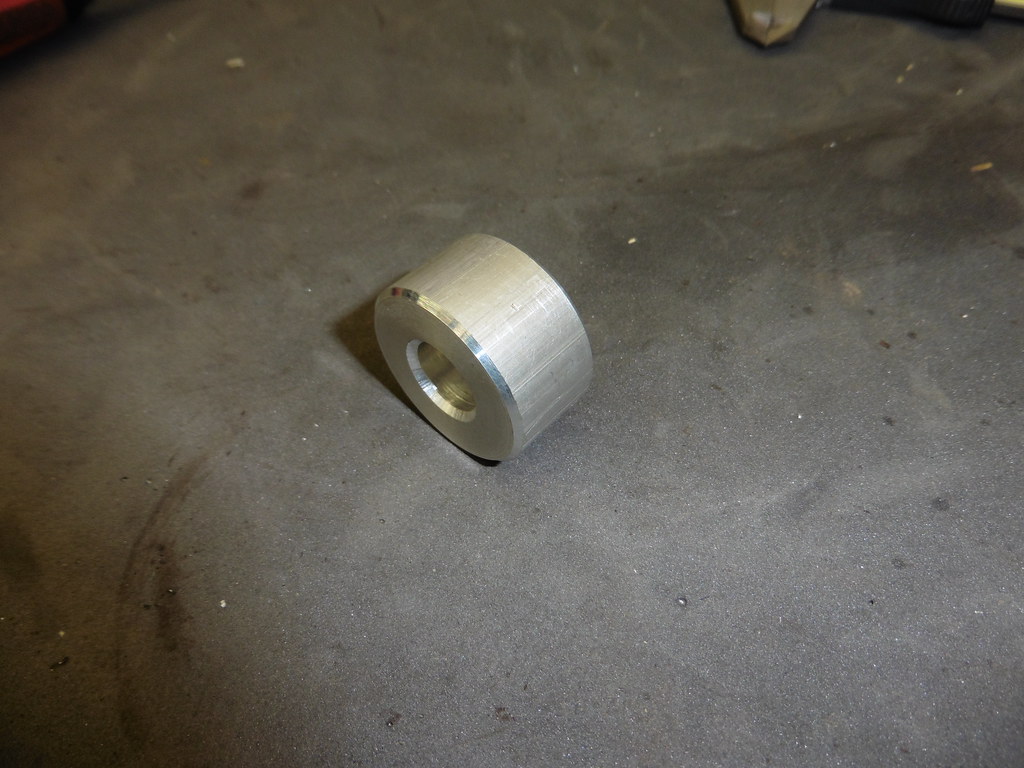 P1070534 P1070534 by jono_misfit, on Flickr  P1070535 P1070535 by jono_misfit, on Flickr ready for bolting up  P1070536 P1070536 by jono_misfit, on Flickr arms bolted on  P1070537 P1070537 by jono_misfit, on Flickr  P1070538 P1070538 by jono_misfit, on Flickr then started bolting the driveshafts in  P1070539 P1070539 by jono_misfit, on Flickr  P1070540 P1070540 by jono_misfit, on Flickr  P1070541 P1070541 by jono_misfit, on Flickr I need to torque up still, but will do that next session. |
| |
|
|
|
|
jonomisfit
Club Retro Rides Member
Posts: 1,788
Club RR Member Number: 49
|
|
|
|
Well.... that involved a lot of swearing I torques up the driveshaft nuts, then got the beam in.  P1070542 P1070542 by jono_misfit, on Flickr trying to get the solid mounts aligned at all three points was a pain. I got there eventually with a little application of a second jack and the medium fitting tool  P1070543 P1070543 by jono_misfit, on Flickr I got the top shear plates in  P1070544 P1070544 by jono_misfit, on Flickr I've got a rear anti roll bar to fit, which needs a clean up, but its only a temp fit until i make a new stiffer bar.  P1070545 P1070545 by jono_misfit, on Flickr Its missing its brackets though.... better make some 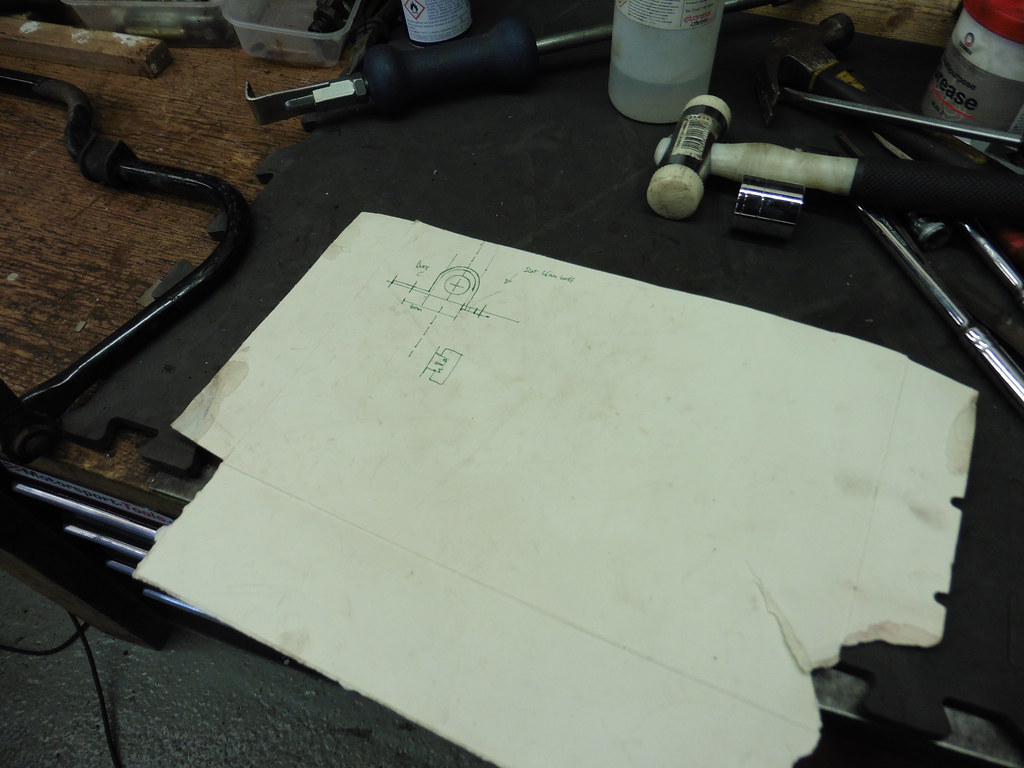 P1070546 P1070546 by jono_misfit, on Flickr couple of bits of steel 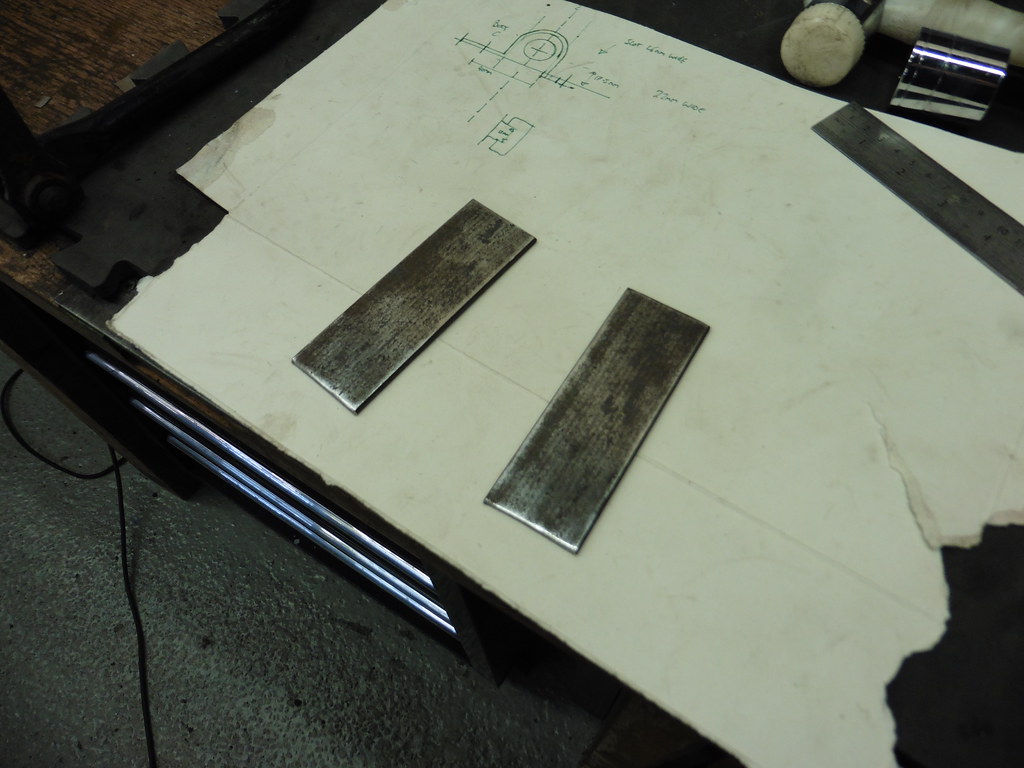 P1070547 P1070547 by jono_misfit, on Flickr turned into narrower pieces of steel 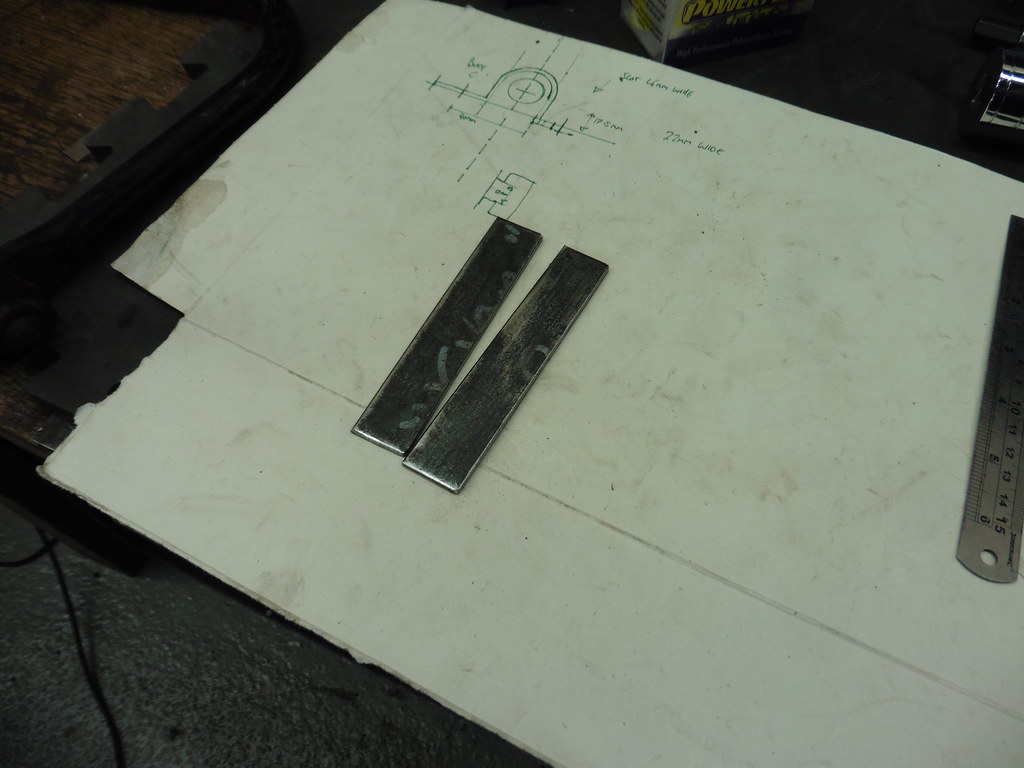 P1070548 P1070548 by jono_misfit, on Flickr 90 deg bends added via the application of a vice and a hitting stick  P1070549 P1070549 by jono_misfit, on Flickr formed round a piece of tube and checking with the bush  P1070550 P1070550 by jono_misfit, on Flickr  P1070551 P1070551 by jono_misfit, on Flickr final bend in  P1070552 P1070552 by jono_misfit, on Flickr  P1070553 P1070553 by jono_misfit, on Flickr and second one made  P1070554 P1070554 by jono_misfit, on Flickr bolt holes added 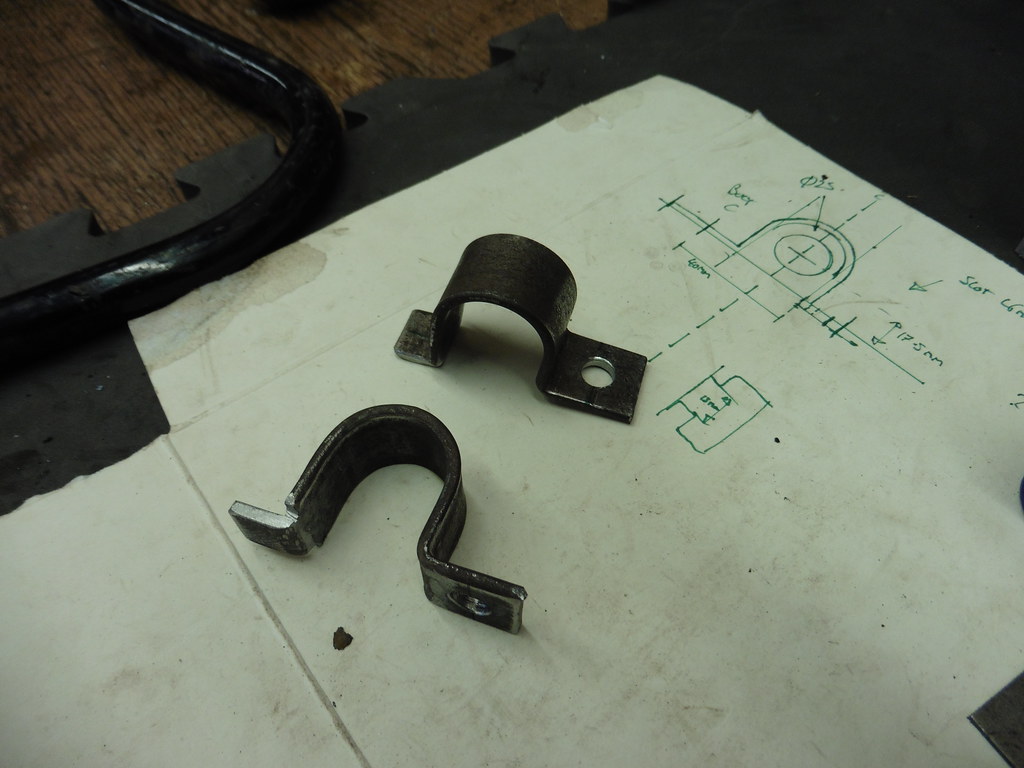 P1070555 P1070555 by jono_misfit, on Flickr primed and painted  P1070558 P1070558 by jono_misfit, on Flickr and in situ  P1070561 P1070561 by jono_misfit, on Flickr  P1070563 P1070563 by jono_misfit, on Flickr It needs to come back out again as I need to fit new drop links. I dug out the handbrake rubber and cleaned it, then eventually found the retaining bracket. Which was looking manky so blasted it, then primed it  P1070557 P1070557 by jono_misfit, on Flickr Let it dry then painted it  P1070564 P1070564 by jono_misfit, on Flickr  P1070565 P1070565 by jono_misfit, on Flickr ....and forgot to take a pic of it fitted. started fitting the handbrake cable  P1070559 P1070559 by jono_misfit, on Flickr  P1070560 P1070560 by jono_misfit, on Flickr put the rear calipers in temporarily  P1070566 P1070566 by jono_misfit, on Flickr  P1070567 P1070567 by jono_misfit, on Flickr There is something funky going on with the handbrake cable as its very tight on length. I'm hoping that a few yanks once I have discs on will sort it all out and it'll stetch relax a bit. Also... why do I have a cable handbrake when I have a hydraulic handbrake... as it needed for the MOT. I continued on with fitting heat barrier to the tunnel.  P1070556 P1070556 by jono_misfit, on Flickr and below where the fuel tank is  P1070568 P1070568 by jono_misfit, on Flickr  P1070569 P1070569 by jono_misfit, on Flickr  P1070570 P1070570 by jono_misfit, on Flickr this would all have been so much easier if i'd done this when the shell was bare and upside down.... never mind... Next on the list will be cleaning up the damper mounts  P1070571 P1070571 by jono_misfit, on Flickr they are a bit manky  P1070572 P1070572 by jono_misfit, on Flickr  P1070573 P1070573 by jono_misfit, on Flickr |
| |
|
|
jonomisfit
Club Retro Rides Member
Posts: 1,788
Club RR Member Number: 49
|
|
Mar 10, 2023 21:02:17 GMT
|
Lots of little odds and sods today. My diff bolts turned up. I need two, but it was wasnt much more for 10 v's two, so I have 10  P1070574 P1070574 by jono_misfit, on Flickr There's meant to be two different lengths, however I'm going to make a diff guard so the extra length will be used on the shorter bottom one.  P1070575 P1070575 by jono_misfit, on Flickr I packed out with a few extra washers until I fit the guard  P1070576 P1070576 by jono_misfit, on Flickr blasted, primed and painted the rear suspension mount  P1070577 P1070577 by jono_misfit, on Flickr and refitted it  P1070582 P1070582 by jono_misfit, on Flickr  P1070583 P1070583 by jono_misfit, on Flickr  P1070584 P1070584 by jono_misfit, on Flickr and blasted the other side  P1070585 P1070585 by jono_misfit, on Flickr  P1070586 P1070586 by jono_misfit, on Flickr and primed, painted and fitted it  P1070594 P1070594 by jono_misfit, on Flickr  P1070595 P1070595 by jono_misfit, on Flickr Took the rear roll bar out again, ready to fit my ridiculously expensive for what they are geniune ford roll bar links.  P1070578 P1070578 by jono_misfit, on Flickr The bushes were a pain to get on, but some copper slip worked in the end. Refitted into the car 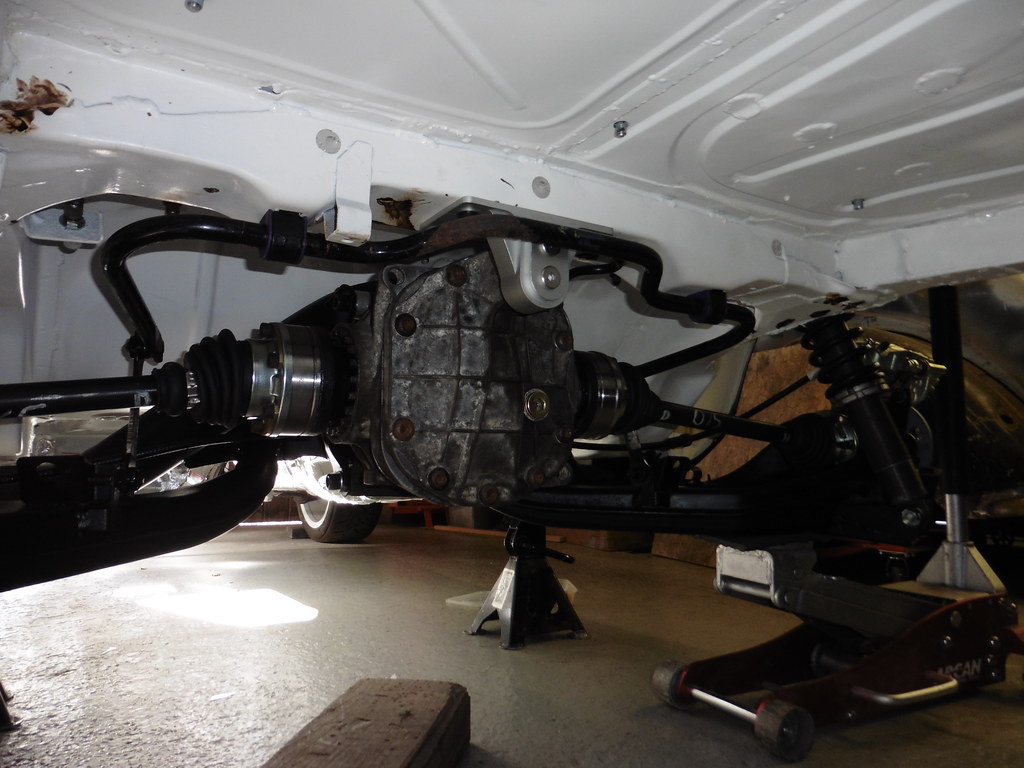 P1070579 P1070579 by jono_misfit, on Flickr  P1070580 P1070580 by jono_misfit, on Flickr  P1070581 P1070581 by jono_misfit, on Flickr I then moved onto the rear sill stand points. The tubes are slightly too short v's the side skirts so I need to extend them I machined a slight step to get the tube lined up on the existing one  P1070589 P1070589 by jono_misfit, on Flickr Like so  P1070587 P1070587 by jono_misfit, on Flickr trim point marked out  P1070588 P1070588 by jono_misfit, on Flickr trimmed and welded in  P1070590 P1070590 by jono_misfit, on Flickr  P1070591 P1070591 by jono_misfit, on Flickr A light clean and coat of black  P1070592 P1070592 by jono_misfit, on Flickr sits like this in the side skirt  P1070593 P1070593 by jono_misfit, on Flickr It'll have a flap of HDPE sheet over it eventually to stop it filling with rubbish. started making the other side  P1070596 P1070596 by jono_misfit, on Flickr Just need to drop the skirt off and weld it on when I get a chance. |
| |
Last Edit: Mar 10, 2023 21:03:43 GMT by jonomisfit
|
|
jonomisfit
Club Retro Rides Member
Posts: 1,788
Club RR Member Number: 49
|
|
Mar 12, 2023 20:39:11 GMT
|
Where to start today...... hmmm....... brake hoses  P1070597 P1070597 by jono_misfit, on Flickr hose made  P1070598 P1070598 by jono_misfit, on Flickr spira wrapped to stop it chaffing on things  P1070599 P1070599 by jono_misfit, on Flickr fitted  P1070600 P1070600 by jono_misfit, on Flickr I added some heat wrap to the piece that runs the closes the the disc.  P1070601 P1070601 by jono_misfit, on Flickr and made amd fitted the other side 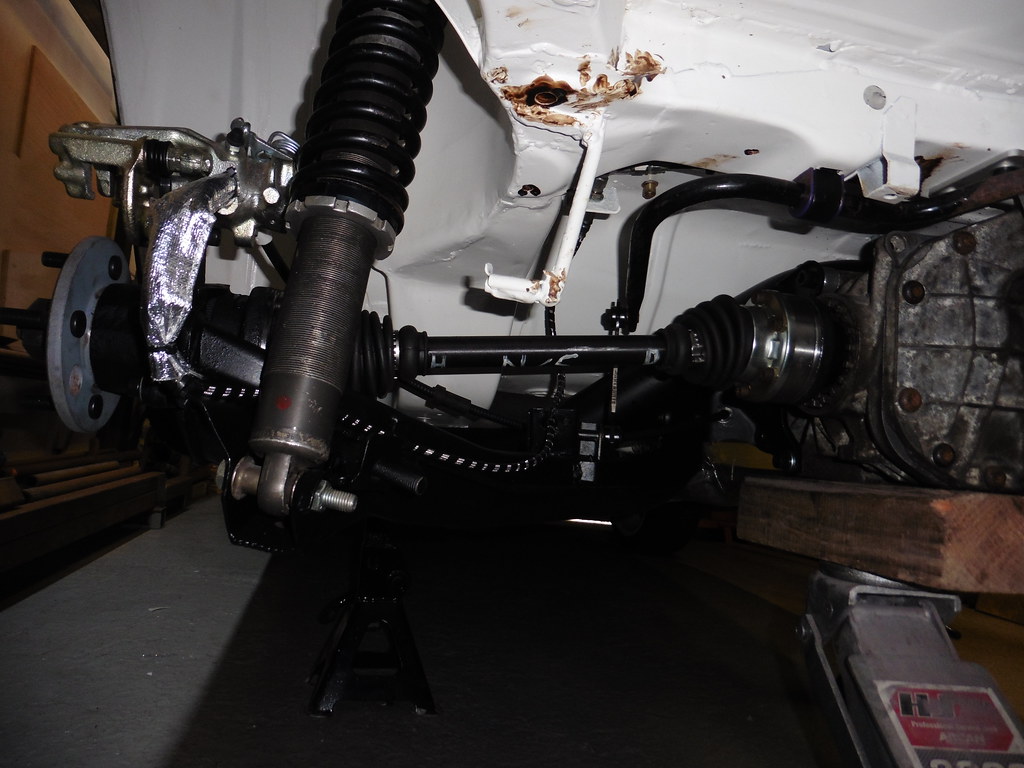 P1070602 P1070602 by jono_misfit, on Flickr again heat reflective hose shroud fitted  P1070603 P1070603 by jono_misfit, on Flickr then time to fill the rear diff with fresh oil  P1070604 P1070604 by jono_misfit, on Flickr using something that looks like its for insemminating cattle  P1070605 P1070605 by jono_misfit, on Flickr Worked really well..... appart from the bit where i pushed the plunger without have the hose in..... cleaned it out then onto the gearbox  P1070608 P1070608 by jono_misfit, on Flickr the transfer case needs to be filled to 18mm below the fill hole... Thanks ford.... I made this bent piece of ali with a marking 18mm below the right angle.  P1070609 P1070609 by jono_misfit, on Flickr It worked well, i snuck up on the level and didnt over fill. Which was good. Gearbox was more straight forward. Fill till it leaks out the hole.  P1070610 P1070610 by jono_misfit, on Flickr  P1070611 P1070611 by jono_misfit, on Flickr Took off the side skirt and fitted the sill tube extension  P1070607 P1070607 by jono_misfit, on Flickr then lowered the car down. I still need to lower the rear suspension another 50mm or so 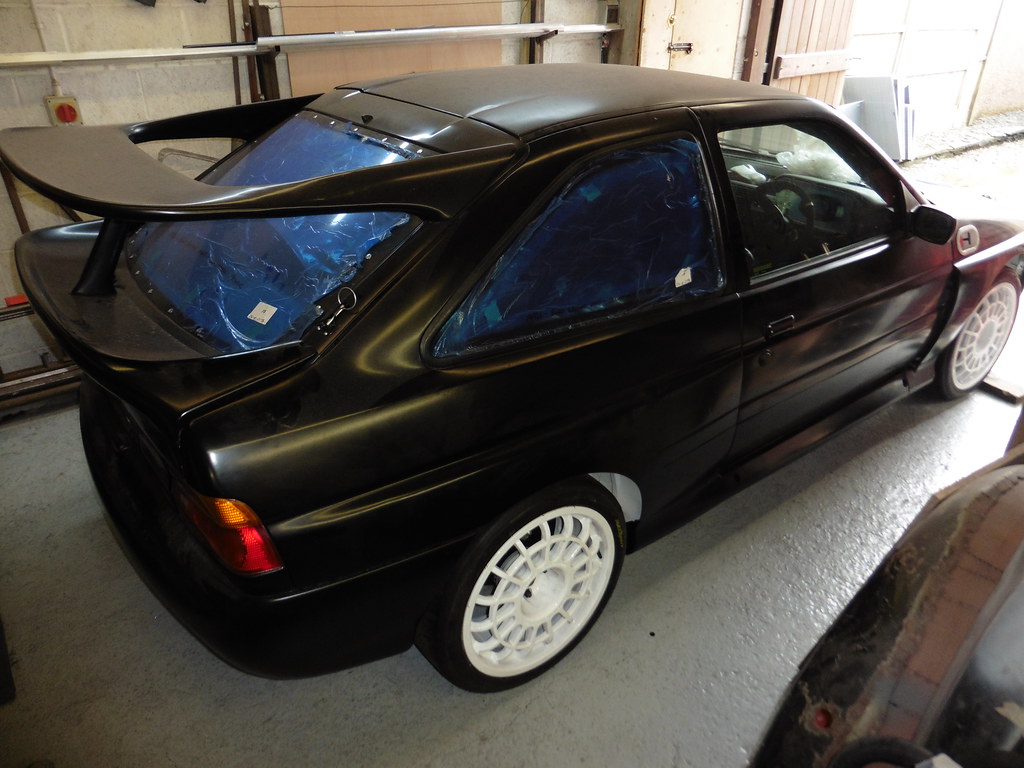 P1070606 P1070606 by jono_misfit, on Flickr |
| |
|
|
jonomisfit
Club Retro Rides Member
Posts: 1,788
Club RR Member Number: 49
|
|
Mar 12, 2023 20:46:59 GMT
|
The started prep for putting the engine in. The current trolley is far too high  P1070612 P1070612 by jono_misfit, on Flickr I got some more casters to drop it down  P1070613 P1070613 by jono_misfit, on Flickr new trolley will be like this 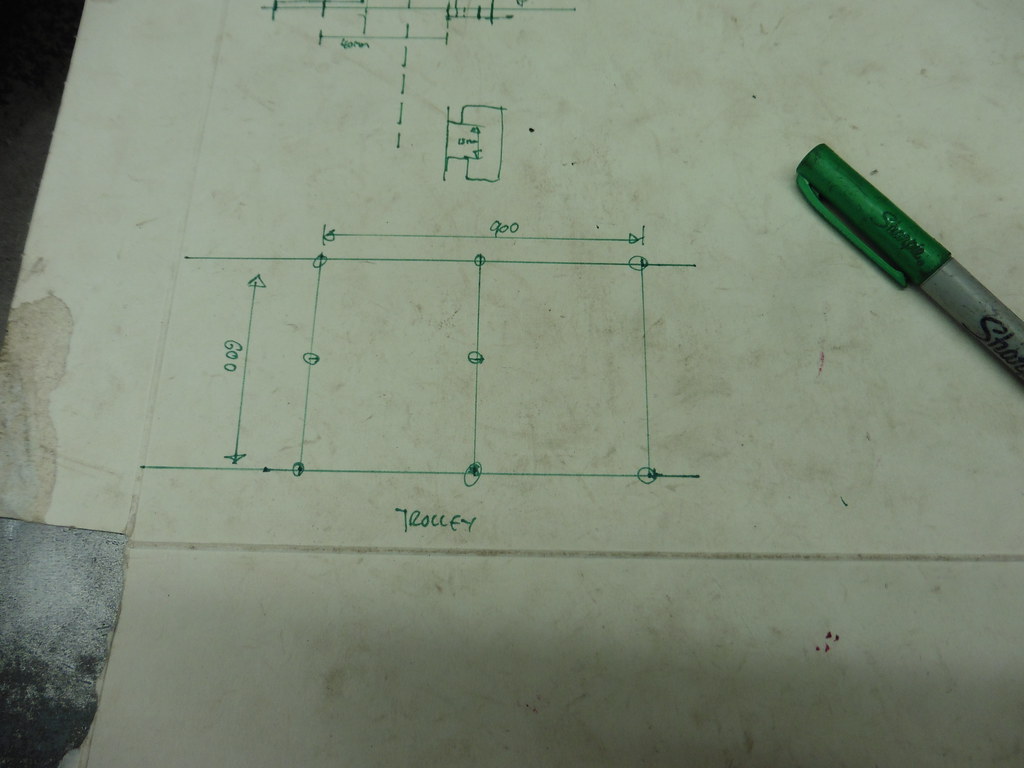 P1070614 P1070614 by jono_misfit, on Flickr cut some tube  P1070615 P1070615 by jono_misfit, on Flickr position it  P1070616 P1070616 by jono_misfit, on Flickr and weld  P1070617 P1070617 by jono_misfit, on Flickr casters fitted  P1070618 P1070618 by jono_misfit, on Flickr  P1070619 P1070619 by jono_misfit, on Flickr some ply and OSB slung on  P1070620 P1070620 by jono_misfit, on Flickr engine and bearbox swapped onto this  P1070621 P1070621 by jono_misfit, on Flickr quite a difference in height 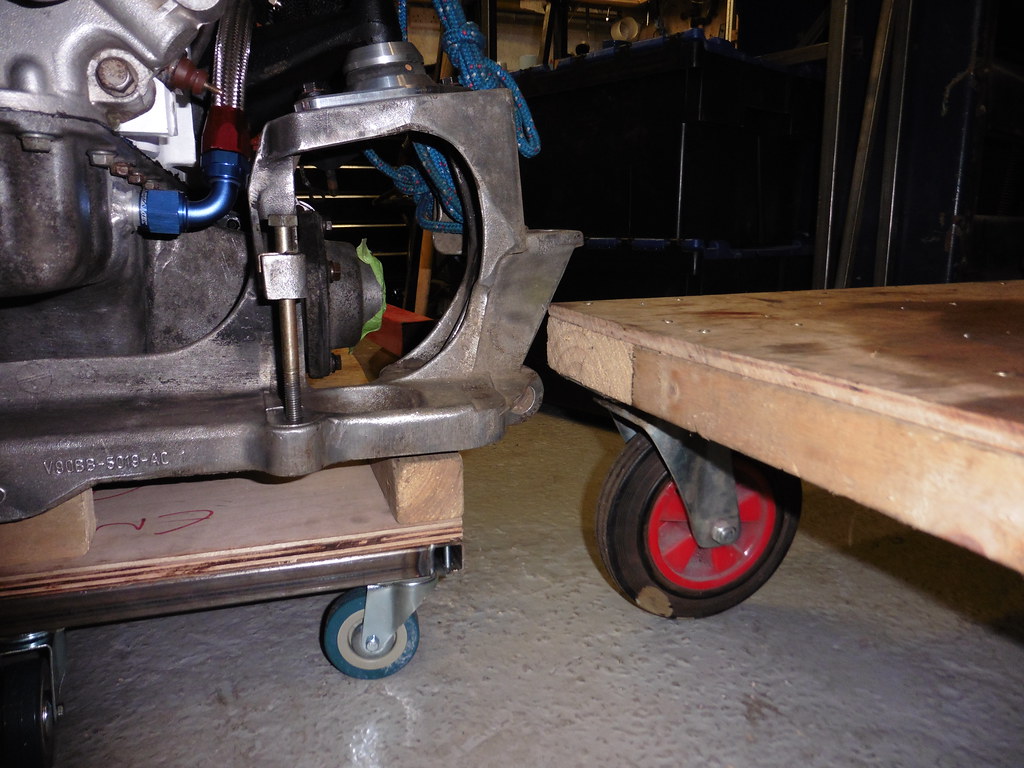 P1070622 P1070622 by jono_misfit, on Flickr I pushed it into the corner out the way, then started strippig bits off the front 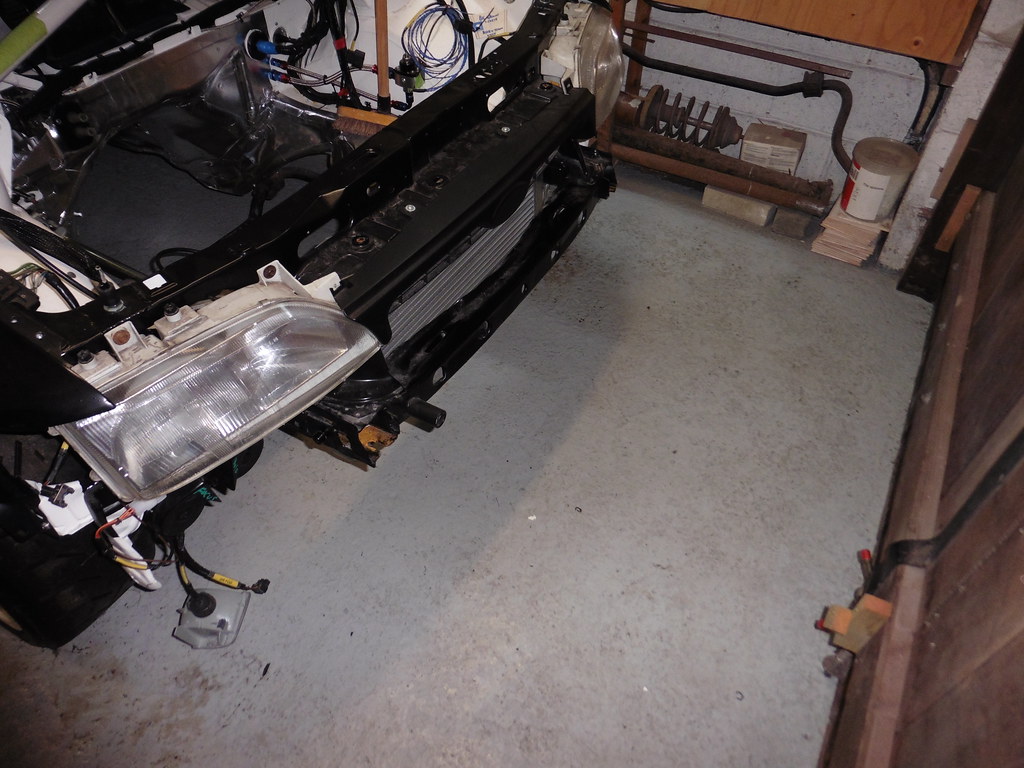 P1070623 P1070623 by jono_misfit, on Flickr The orange bit in the chassis leg is rust from the bumper bracket that I havent painted yet. Thankfully. |
| |
|
|
teaboy
Posted a lot
   Make tea, not war.
Posts: 2,125
|
|
Mar 12, 2023 23:10:45 GMT
|
|
Everyone is obsessed with lowering stuff on here.
Even engine trolleys…
|
| |
|
|
jonomisfit
Club Retro Rides Member
Posts: 1,788
Club RR Member Number: 49
|
|
|
|
Everyone is obsessed with lowering stuff on here. Even engine trolleys… 😀 |
| |
|
|
jonomisfit
Club Retro Rides Member
Posts: 1,788
Club RR Member Number: 49
|
|
Mar 18, 2023 22:00:46 GMT
|
My brake disc are lost somewhere in the land of parcel force delivery depots, so need to find some other things to do Front wings back off so I can finish putting in the cavity wax  P1070624 P1070624 by jono_misfit, on Flickr  P1070625 P1070625 by jono_misfit, on Flickr which went everywhere and took a fair bit of cleaning up The re-fitted wings and fully bolted up  P1070626 P1070626 by jono_misfit, on Flickr I'm going to fit the new suspension soon, so thought i should do a final check over and paint the compression strut brackets I spotted this wasnt welded....  P1070627 P1070627 by jono_misfit, on Flickr and on the other one they'd welded that but hadnt welded this corner  P1070628 P1070628 by jono_misfit, on Flickr Nicely positioned for max stress and the weld is missing.  P1070630 P1070630 by jono_misfit, on Flickr Cleaned up the brackets  P1070631 P1070631 by jono_misfit, on Flickr and did the missing welds  P1070632 P1070632 by jono_misfit, on Flickr put the car up onto the front sill stands  P1070633 P1070633 by jono_misfit, on Flickr and began stripping suspension off ready for re=builds  P1070634 P1070634 by jono_misfit, on Flickr removed the bits that needed removed  P1070635 P1070635 by jono_misfit, on Flickr engine and box wheeled under neath  P1070636 P1070636 by jono_misfit, on Flickr lifted the engine in  P1070637 P1070637 by jono_misfit, on Flickr 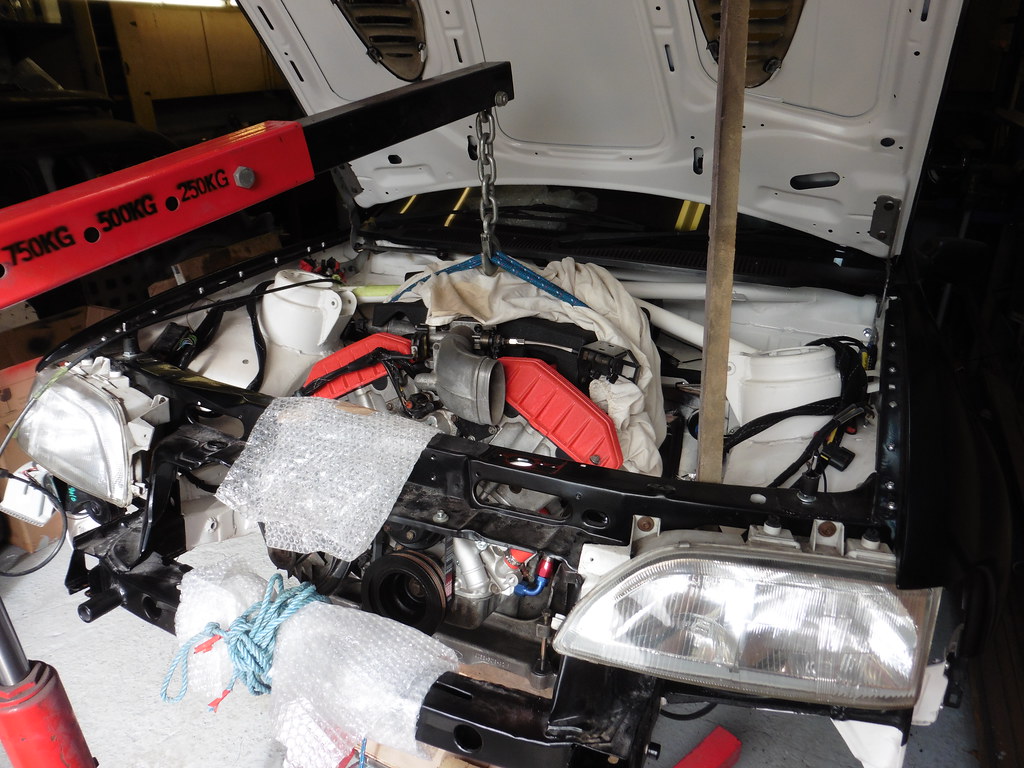 P1070638 P1070638 by jono_misfit, on Flickr all the mounts bolted in 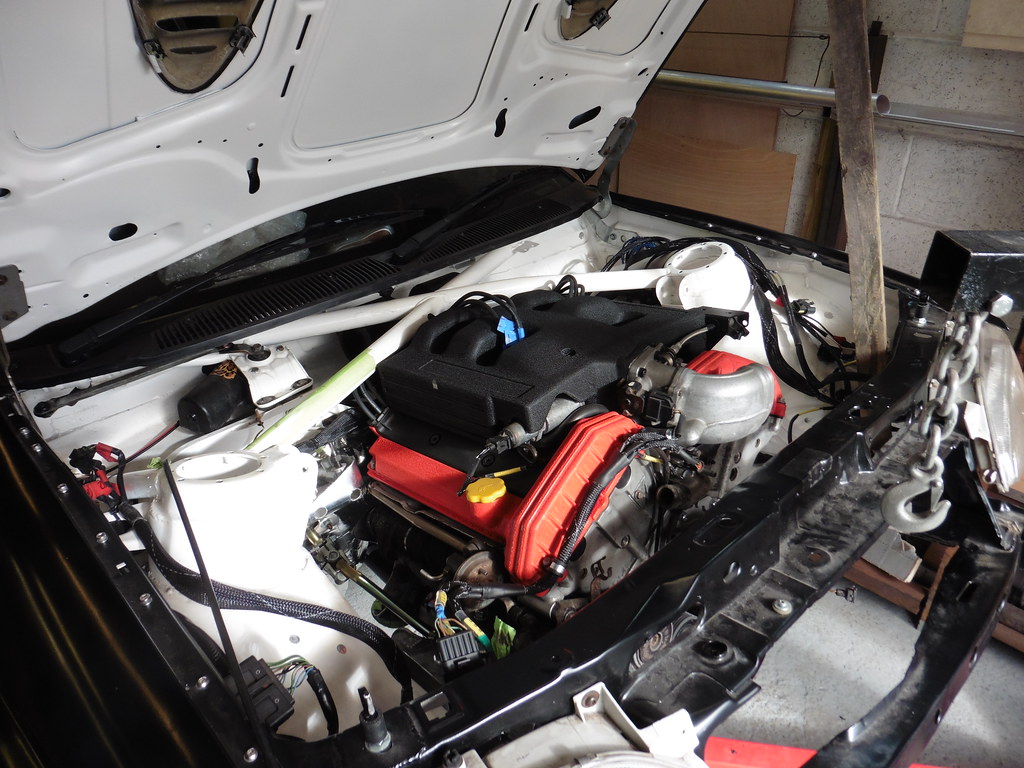 P1070639 P1070639 by jono_misfit, on Flickr compression struts brackets painted  P1070640 P1070640 by jono_misfit, on Flickr I need to slightly modify the adjustable top mounts to allow me better adjustment range ]  P1070641 P1070641 by jono_misfit, on Flickr marked out for trimming  P1070642 P1070642 by jono_misfit, on Flickr trimmed  P1070643 P1070643 by jono_misfit, on Flickr onto the second one. I used the hacksaw to cut off the main part, then into the mill to tidy up.  P1070645 P1070645 by jono_misfit, on Flickr comes out ok, ready for deburring  P1070646 P1070646 by jono_misfit, on Flickr And refitted  P1070647 P1070647 by jono_misfit, on Flickr I started bolting in the suspension  P1070644 P1070644 by jono_misfit, on Flickr Loads more to do. |
| |
|
|
jonomisfit
Club Retro Rides Member
Posts: 1,788
Club RR Member Number: 49
|
|
Mar 24, 2023 20:41:30 GMT
|
I only had a short afternoon in the workshop. First up front hubs. Took the old bearing out (which are shot) but left eh shells in to protect the mounting faces.  P1070648 P1070648 by jono_misfit, on Flickr gave them a run through the blast cabinet  P1070649 P1070649 by jono_misfit, on Flickr  P1070650 P1070650 by jono_misfit, on Flickr  P1070651 P1070651 by jono_misfit, on Flickr I gave some of the stubborn bits a tickle with the fibre cleaning discs, then cleaned them down and primed them.  P1070652 P1070652 by jono_misfit, on Flickr left them to dry  P1070656 P1070656 by jono_misfit, on Flickr The onto the output flanges. This confused me.... paint applied to the mounting faces..... whick looks liek hammerite 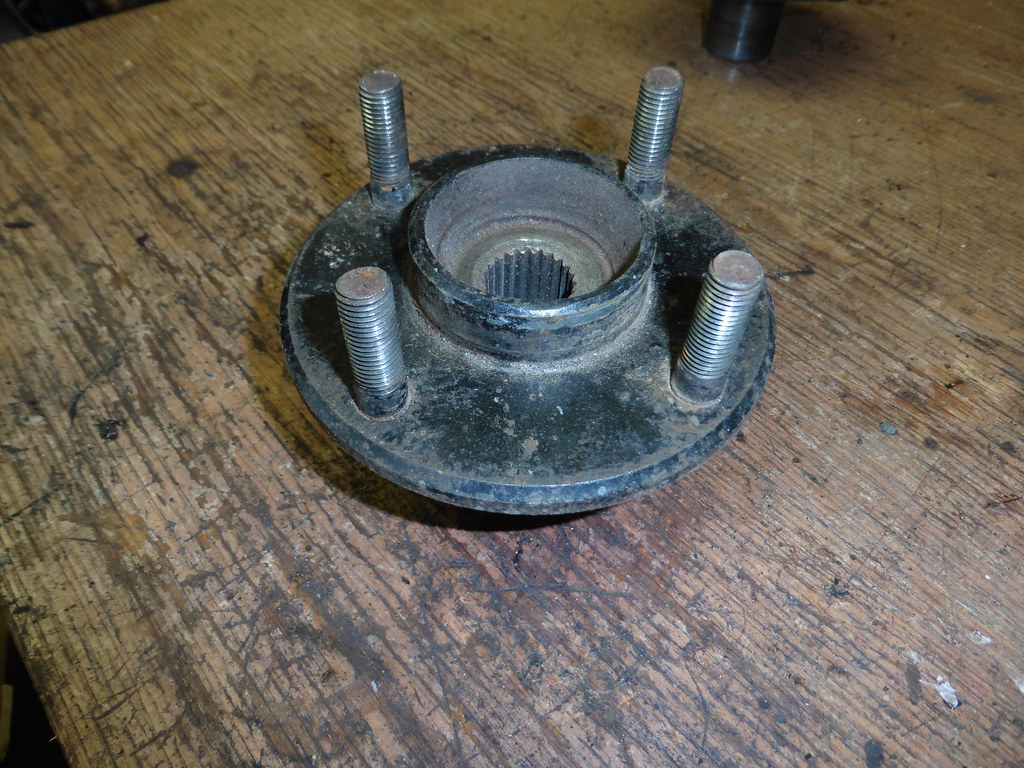 P1070653 P1070653 by jono_misfit, on Flickr and the back face left un protected....  P1070654 P1070654 by jono_misfit, on Flickr protected the bits that needed protected and blasted the flanges  P1070655 P1070655 by jono_misfit, on Flickr primed the back faces  P1070657 P1070657 by jono_misfit, on Flickr a coat of black on the hubs  P1070658 P1070658 by jono_misfit, on Flickr and the back of the drive flanges 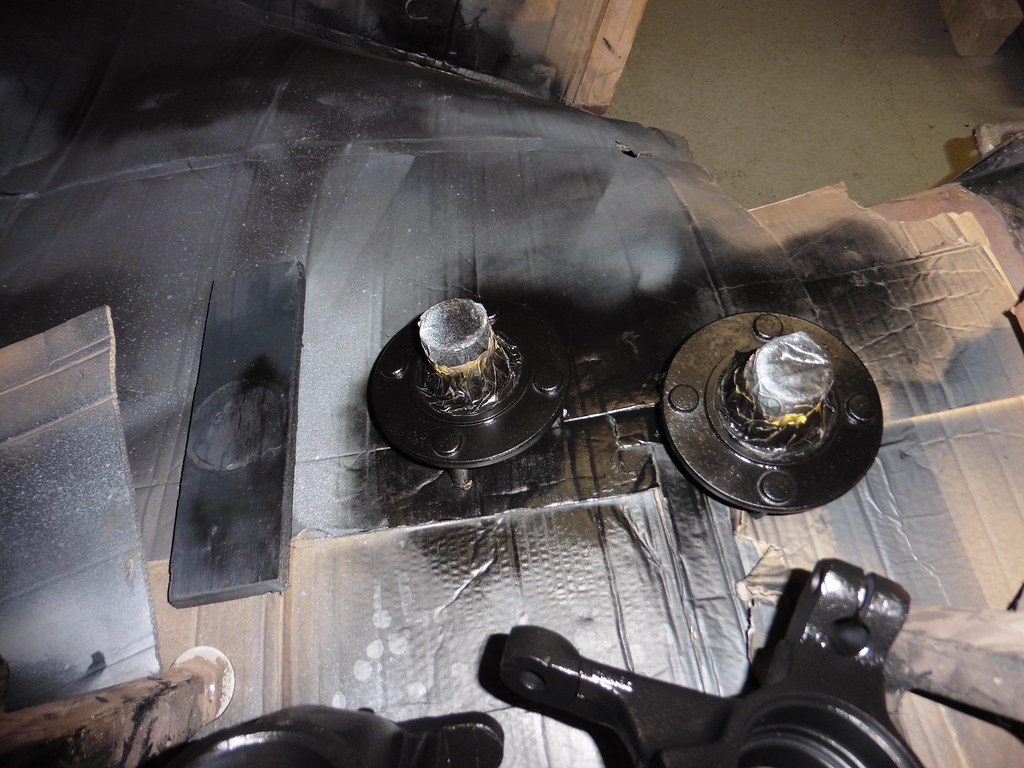 P1070659 P1070659 by jono_misfit, on Flickr and my rear brake discs finally turned up. The driver was saying they have some 20k packages backlog in the depot.... its not a city. This is bonkers backlog....  P1070660 P1070660 by jono_misfit, on Flickr |
| |
|
|
jonomisfit
Club Retro Rides Member
Posts: 1,788
Club RR Member Number: 49
|
|
Mar 26, 2023 19:56:57 GMT
|
paint has had a couple of days to cure  P1070661 P1070661 by jono_misfit, on Flickr  P1070662 P1070662 by jono_misfit, on Flickr tapped out the bearing shells  P1070663 P1070663 by jono_misfit, on Flickr  P1070664 P1070664 by jono_misfit, on Flickr I then pressed in the new shells. Doing the rear one was easy as I could put it in the press, but to do the front was a bigger challenge. I used various bits out of the press tool kit to get them in  P1070665 P1070665 by jono_misfit, on Flickr i got them in though  P1070666 P1070666 by jono_misfit, on Flickr  P1070667 P1070667 by jono_misfit, on Flickr bearings packed with grease and uprights assembled  P1070668 P1070668 by jono_misfit, on Flickr bolted on the caliper brackets  P1070669 P1070669 by jono_misfit, on Flickr  P1070670 P1070670 by jono_misfit, on Flickr |
| |
|
|
jonomisfit
Club Retro Rides Member
Posts: 1,788
Club RR Member Number: 49
|
|
Mar 26, 2023 20:26:55 GMT
|
put the new driveshafts in  P1070671 P1070671 by jono_misfit, on Flickr then assembled the front upright / suspension onto the car  P1070672 P1070672 by jono_misfit, on Flickr and the other side  P1070673 P1070673 by jono_misfit, on Flickr onto the brake discs. Hmmm can you spot some issues....  P1070674 P1070674 by jono_misfit, on Flickr yes... thats one rust plain nut, and one Nylock nut..... rather than the proper aerotite nut. And all the bolts that have aerotites on them are 5mm too short so the aerotites wont work....  P1070675 P1070675 by jono_misfit, on Flickr Oh and two of the bolts are zinc plated steel rather than stainless.... The disc got a trip through the blast cabinet to clean it up, and the mouting plate got a go over with scotchbrite to clean it up  P1070678 P1070678 by jono_misfit, on Flickr The other disc is new  P1070676 P1070676 by jono_misfit, on Flickr has the full set of aerotite nuts, and the bolts are the right length  P1070677 P1070677 by jono_misfit, on Flickr discs temporary onto the car as I want to do the brake lines 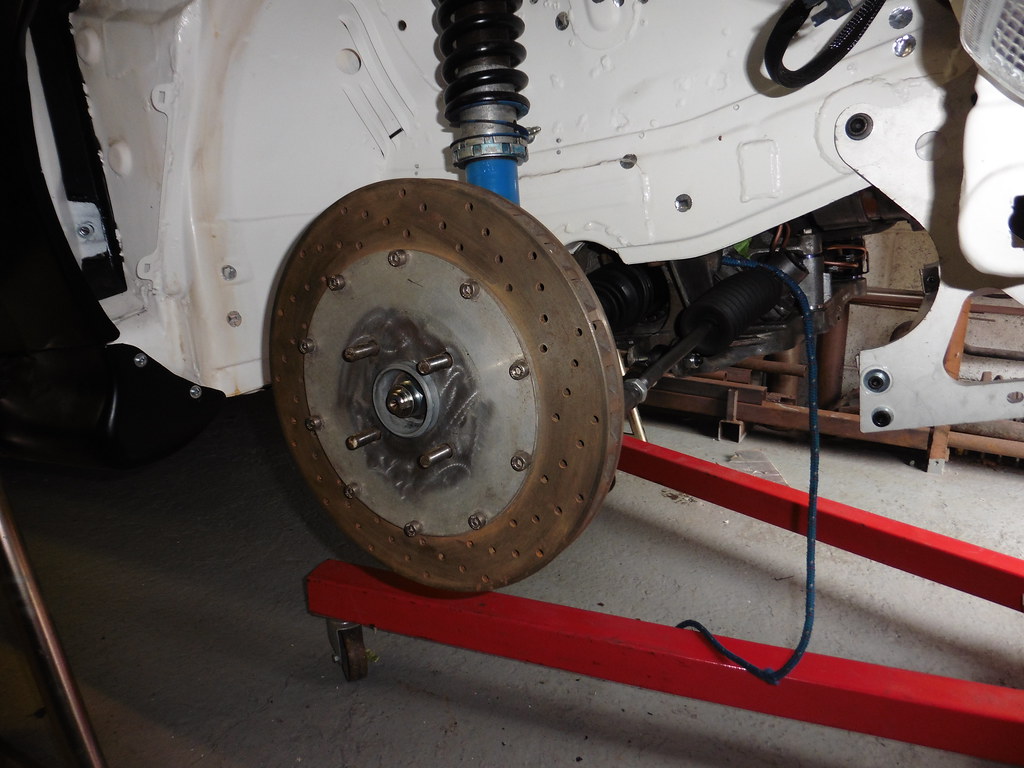 P1070679 P1070679 by jono_misfit, on Flickr calipers next, but they need a clean up  P1070680 P1070680 by jono_misfit, on Flickr Then put them on..... or rather.... put the passenger one on Note on the passenger side there is a 3mm step on the disc 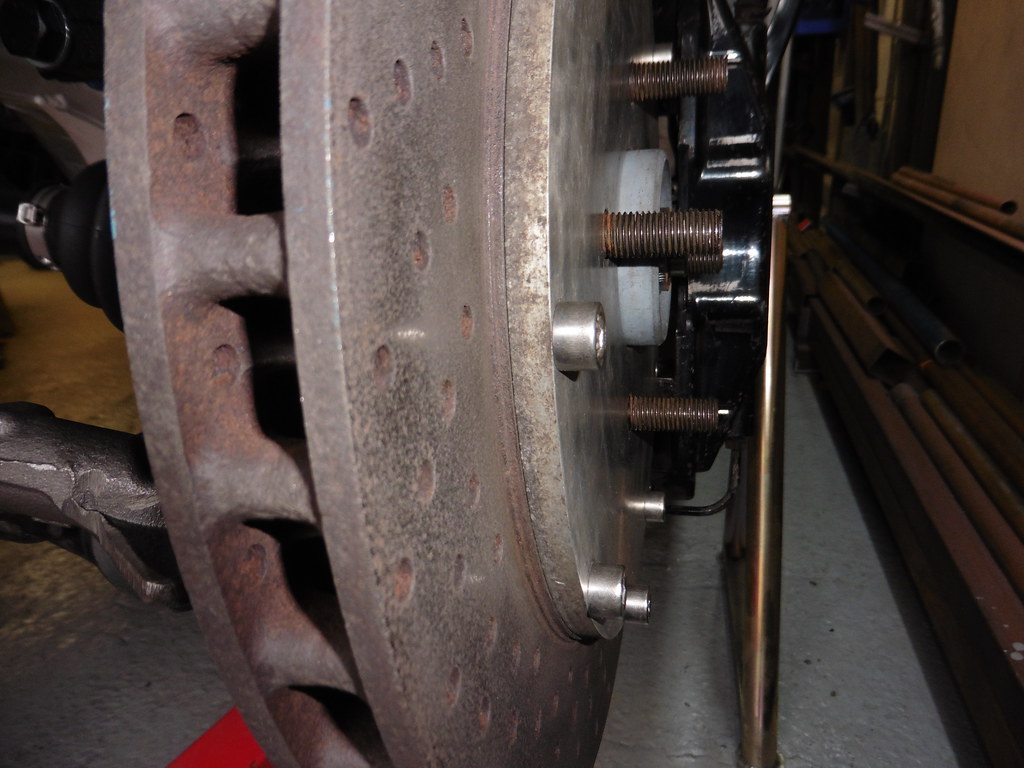 P1070681 P1070681 by jono_misfit, on Flickr The caliper mounts are designed to work with this offset.  P1070685 P1070685 by jono_misfit, on Flickr the drivers side disc doesnt have this step so the calipers wont fit on the disc and fit to the mounts. I've put in some 3mm washers I had lying about, but I will need to find the right type of disc  P1070682 P1070682 by jono_misfit, on Flickr With these in the caliper fits the disc and bracket  P1070683 P1070683 by jono_misfit, on Flickr  P1070684 P1070684 by jono_misfit, on Flickr Might have to do something with the steering joints as they will likely cook like this....  P1070686 P1070686 by jono_misfit, on Flickr onto the brake lines  P1070687 P1070687 by jono_misfit, on Flickr working out the routing  P1070688 P1070688 by jono_misfit, on Flickr  P1070689 P1070689 by jono_misfit, on Flickr Line made  P1070690 P1070690 by jono_misfit, on Flickr put spirawrap on and fitted to the car  P1070691 P1070691 by jono_misfit, on Flickr 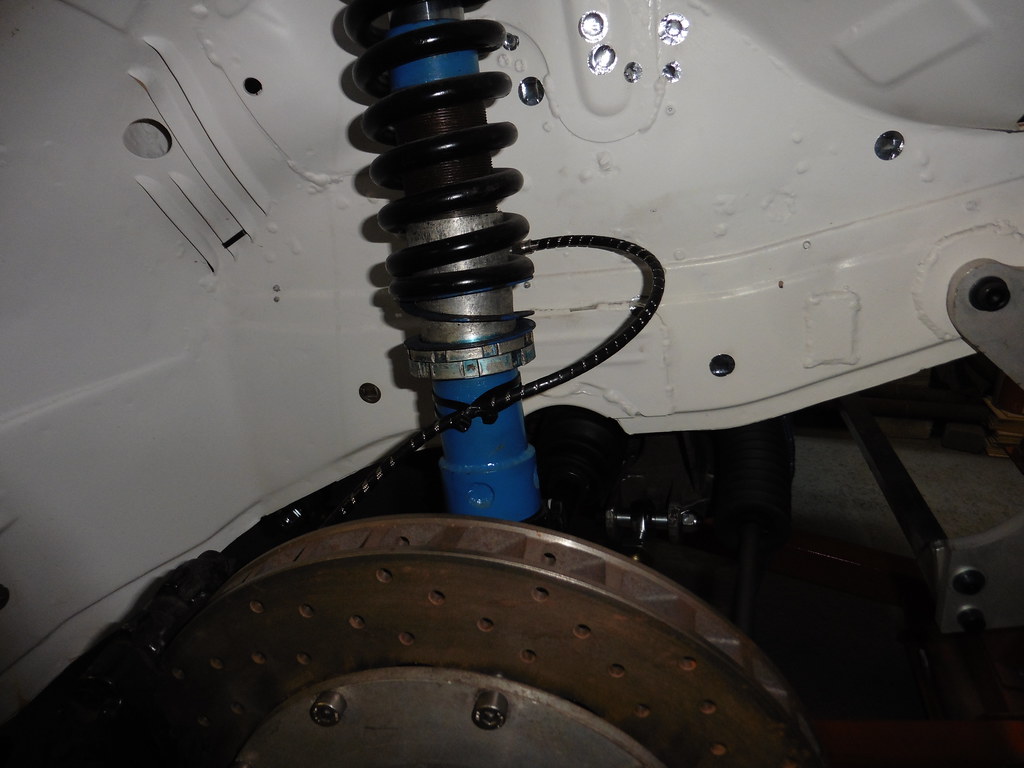 P1070692 P1070692 by jono_misfit, on Flickr and passenger side  P1070693 P1070693 by jono_misfit, on Flickr Wheel on to check clearance  P1070694 P1070694 by jono_misfit, on Flickr huge clearance on the calipers  P1070695 P1070695 by jono_misfit, on Flickr I could likely go to a 380mm disc and caliper with ease in these wheels. clearance to skirt is OK  P1070696 P1070696 by jono_misfit, on Flickr Drive shaft doesnt look healthy at that angle of steering though  P1070697 P1070697 by jono_misfit, on Flickr brake line has plenty of clearance though  P1070698 P1070698 by jono_misfit, on Flickr |
| |
|
|
mk2cossie
Club Retro Rides Member
Posts: 3,061  Club RR Member Number: 77
Member is Online
|
|
Mar 26, 2023 22:12:30 GMT
|
Nice progress  Discs look a good size and thickness, but I'd fit them to the opposite sides. The vanes usually face towards the back of the car on the top edge (if that makes sense) |
| |
|
|
jonomisfit
Club Retro Rides Member
Posts: 1,788
Club RR Member Number: 49
|
|
|
|
|
Good spot. I had disc direction on my list of things to check.
I spent 3hrs last night looking for brake rotors
The good news... I found the rotors I need. They're made by tarox, and I've found the part number.
The bad news... tarox have completely changed their numbering system for products and don't list these any more for sale.
I've message them about their specials service. But specials usually equal £££ so I may be buying a new beake kit.
Sad face.
|
| |
|
|
|
|
|
Mar 27, 2023 18:59:31 GMT
|
|
This might be frowned upon, but....
Could you get a 3mm thick spacer ring (mild steel will do the trick, nothing fancy) laser cut to re-create the step in the disc? You've got 10 bolts on what looks like a 200mm pcd. With the car doing 1G braking with all the weight (1200kg?) on both front wheels with 600mm diameter, that is [thinks] 12000N/2 braking force per wheel at a 300mm radius. So 3 times that at the bolt radius of 100mm equals 18000N divided by 10 bolts. 1800N per bolt in shear. at friction coefficient 0.6 that needs 3000N of clamping force per bolt which an M6x1 will easily do almost 3 times over. And I guess you have fine thread M6's in there
Tl;Dr: don't be afraid to use a steel spacer. torque bolts to 10Nm and call it done.
|
| |
|
|
jonomisfit
Club Retro Rides Member
Posts: 1,788
Club RR Member Number: 49
|
|
|
|
|
Thanks for that Sebastiaan.
Its one of the things I've thought about doing to sort it. For the limited cost of it I may just give it a go and see how it works out. My main concern isn't strength, its the flatness of a laser cut steel shim. Well see how it does.
Tarox came back to me saying they offer the part number I found still, but it has different dimensions than I've given. Which is impressive as I took the dimensions from a tarox chart on the daemon tweeks website.
After more trawling I found other rotors that would work. But... they are £980 a pair. This is a substantial proportion of the cost of a whole new brake kit.
Hmmm
|
| |
Last Edit: Mar 28, 2023 11:12:46 GMT by jonomisfit
|
|
jonomisfit
Club Retro Rides Member
Posts: 1,788
Club RR Member Number: 49
|
|
Mar 28, 2023 11:02:59 GMT
|
|
A quick quote through xometry says £56+VAT delivered for some laser cut spacers (actual cost is only £38 but min order price is £50), or £114+VAT for a new aluminium top hat with the 3mm rotor to hub offset machined into it.
Fractory is effectively the same price for the spacer.
I may as well roll the dice on the £80 spacers before thinking about £1000 for new rotors, or more for a new brake kit.
|
| |
|
|
|
|
|
Mar 28, 2023 12:11:39 GMT
|
|
If it's that close i think i would have a new top hat made.
|
| |
|
|
jonomisfit
Club Retro Rides Member
Posts: 1,788
Club RR Member Number: 49
|
|
Mar 28, 2023 20:55:38 GMT
|
|
I thought about it, tweaked the dimensions a little bit, and bit the bullet and ordered. new rotor bell arrives in about 3 weeks.
|
| |
|
|
jonomisfit
Club Retro Rides Member
Posts: 1,788
Club RR Member Number: 49
|
|
Mar 31, 2023 20:22:37 GMT
|
after a small fight I got the prop in  P1070699 P1070699 by jono_misfit, on Flickr  P1070700 P1070700 by jono_misfit, on Flickr lowered car back down  P1070701 P1070701 by jono_misfit, on Flickr Quite a bit of negative camber  P1070702 P1070702 by jono_misfit, on Flickr bonnet clashes with engine in a few spots.  P1070704 P1070704 by jono_misfit, on Flickr This vent to throttle bracket, which can be relieved a bit  P1070703 P1070703 by jono_misfit, on Flickr a quick check with some playdough shows these as well  P1070705 P1070705 by jono_misfit, on Flickr  P1070706 P1070706 by jono_misfit, on Flickr inlet manifold to strengthening rib  P1070707 P1070707 by jono_misfit, on Flickr If you go about 20 pages back it all cleared when I test fitted, but I've fitted new competition spec engine mounts, so I suspect the old ones allowed a bit more sag and the engine sat 5/10mm lower. I can resolve it by trimming some clearance in the bonnet rib, but thats a job for another day. fitted the rear discs  P1070708 P1070708 by jono_misfit, on Flickr added the helper spring to the rear damper, reset the ride height and lowered the car down  P1070709 P1070709 by jono_misfit, on Flickr I can drop it about another 40mm at the rear, but that will be looooooow Brake looks tiny v's the front ones.  P1070710 P1070710 by jono_misfit, on Flickr I'll see what the balance is like when I get the car running, but I can get larger rear discs and calipers if needed. car looks nice back on its wheels  P1070711 P1070711 by jono_misfit, on Flickr  P1070712 P1070712 by jono_misfit, on Flickr  P1070713 P1070713 by jono_misfit, on Flickr  P1070714 P1070714 by jono_misfit, on Flickr  P1070715 P1070715 by jono_misfit, on Flickr Still a long way to go. this is the front v's rear suspension height in the arches Front  P1070716 P1070716 by jono_misfit, on Flickr rear  P1070717 P1070717 by jono_misfit, on Flickr front is about 20mm higher than rear. I'd lower the front a bit, except the adjusters are on full low. I think i'll need to get a shorter front spring most likely. It is also stttttiiiiiiifffff. |
| |
|
|
jonomisfit
Club Retro Rides Member
Posts: 1,788
Club RR Member Number: 49
|
|
|
|
The workshop was a state so spent an hour tidying up and putting things away. I should do this each time.... The decided to split the exhaust pipe front pipes so I can see how they fit in the car. this piece was well adheared.  P1070718 P1070718 by jono_misfit, on Flickr  P1070719 P1070719 by jono_misfit, on Flickr But after a mild bit of brutalising they came appart.  P1070720 P1070720 by jono_misfit, on Flickr condition is surprisingly good considering its something like a 92 car and these are original down pipes. I thought the triangualr shaped boxes were cats, but it turns out when you lok up the pipe they are empty, so assume they are resonators. No cats in the car. I lifted the car back up onto the rally stands  P1070733 P1070733 by jono_misfit, on Flickr then put the downpipes in  P1070734 P1070734 by jono_misfit, on Flickr they poke down quite low (driver side about 20mm lower), and run too tight to some bits of the engine, notably the prop.  P1070735 P1070735 by jono_misfit, on Flickr I think i'll remake them, or at least adjust them. I think there is enough space to raise them up above the bottom of the sump guard. Will need to order some material. |
| |
|
|
 P1070524 by jono_misfit, on Flickr
 P1070525 by jono_misfit, on Flickr
 P1070526 by jono_misfit, on Flickr
 P1070527 by jono_misfit, on Flickr
 P1070528 by jono_misfit, on Flickr
 P1070529 by jono_misfit, on Flickr
 P1070530 by jono_misfit, on Flickr
 P1070531 by jono_misfit, on Flickr
 P1070532 by jono_misfit, on Flickr
 P1070533 by jono_misfit, on Flickr
 P1070534 by jono_misfit, on Flickr
 P1070535 by jono_misfit, on Flickr
 P1070536 by jono_misfit, on Flickr
 P1070537 by jono_misfit, on Flickr
 P1070538 by jono_misfit, on Flickr
 P1070539 by jono_misfit, on Flickr
 P1070540 by jono_misfit, on Flickr
 P1070541 by jono_misfit, on Flickr
 P1070524 by jono_misfit, on Flickr
 P1070525 by jono_misfit, on Flickr
 P1070526 by jono_misfit, on Flickr
 P1070527 by jono_misfit, on Flickr
 P1070528 by jono_misfit, on Flickr
 P1070529 by jono_misfit, on Flickr
 P1070530 by jono_misfit, on Flickr
 P1070531 by jono_misfit, on Flickr
 P1070532 by jono_misfit, on Flickr
 P1070533 by jono_misfit, on Flickr
 P1070534 by jono_misfit, on Flickr
 P1070535 by jono_misfit, on Flickr
 P1070536 by jono_misfit, on Flickr
 P1070537 by jono_misfit, on Flickr
 P1070538 by jono_misfit, on Flickr
 P1070539 by jono_misfit, on Flickr
 P1070540 by jono_misfit, on Flickr
 P1070541 by jono_misfit, on Flickr


