jonomisfit
Club Retro Rides Member
Posts: 1,788
Club RR Member Number: 49
|
|
Apr 16, 2021 19:58:40 GMT
|
My crimp tool arrived, so made off the main power cables  P1050261 P1050261 by jono_misfit, on Flickr continued plugging bits together  P1050262 P1050262 by jono_misfit, on Flickr buttoned up the centre console  P1050263 P1050263 by jono_misfit, on Flickr ive got some neatening up to do still  P1050264 P1050264 by jono_misfit, on Flickr Someone on the escort cosworth forum pointed me to a place selling reproduction side lights 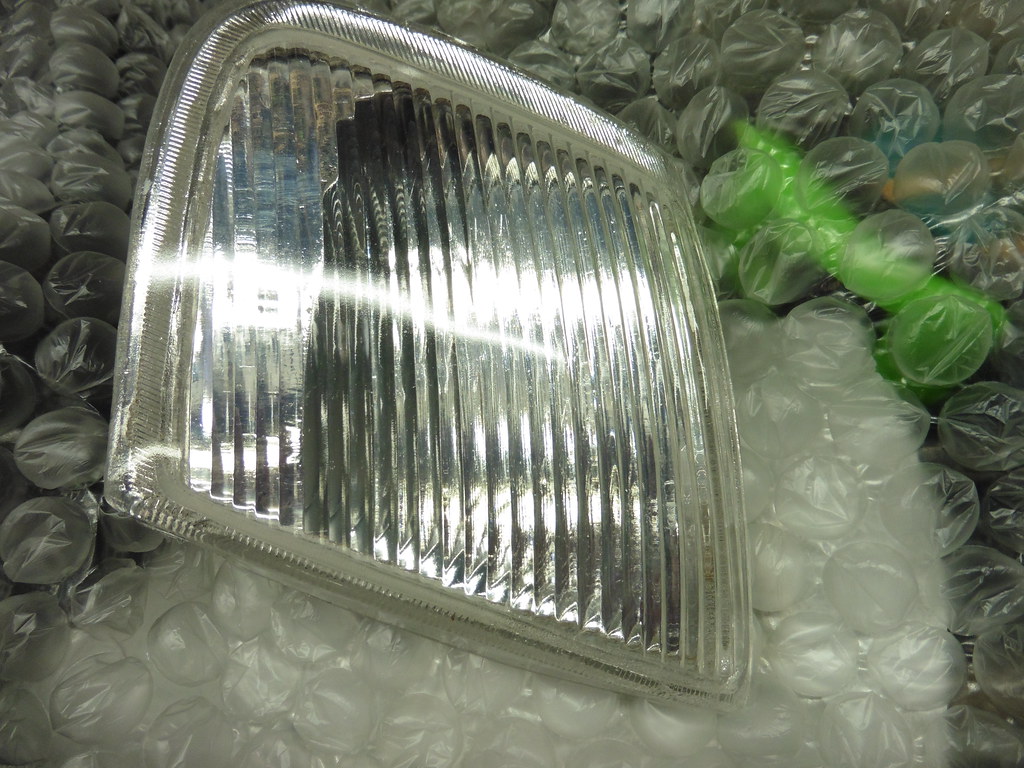 P1050265 P1050265 by jono_misfit, on Flickr  P1050266 P1050266 by jono_misfit, on Flickr  P1050267 P1050267 by jono_misfit, on Flickr They are good enough for me, however I suspect on the high end cars the owners would have issue with them. They are not as good as the originals, but what reproduction bits are? In situ  P1050268 P1050268 by jono_misfit, on Flickr  P1050269 P1050269 by jono_misfit, on Flickr I spent some time tidying up various bits of loom, then made a start on the rear brake lines. feed in points to rear  P1050270 P1050270 by jono_misfit, on Flickr  P1050271 P1050271 by jono_misfit, on Flickr then measure up for the line  P1050272 P1050272 by jono_misfit, on Flickr That was the end of play today. |
| |
Last Edit: Apr 16, 2021 19:59:43 GMT by jonomisfit
|
|
|
|
jonomisfit
Club Retro Rides Member
Posts: 1,788
Club RR Member Number: 49
|
|
Apr 18, 2021 19:52:12 GMT
|
Finished running in the brake line  P1050273 P1050273 by jono_misfit, on Flickr i've ordered a smaller diameter of spiral wrap, so these will be replaced with a smaller diameter  P1050274 P1050274 by jono_misfit, on Flickr  P1050275 P1050275 by jono_misfit, on Flickr But fitted as braided stainless hose will happily cut through everything like a saw! and made up the passenger side rear brake line feed  P1050276 P1050276 by jono_misfit, on Flickr i think i need to add in an extra fixing  P1050277 P1050277 by jono_misfit, on Flickr spiral wrap is needed here to protect everything, plus have cable tied it all together to prevent any relative movement.  P1050278 P1050278 by jono_misfit, on Flickr then started prep for the cable management / brake line routes in the engine bay  P1050279 P1050279 by jono_misfit, on Flickr and wiring in place  P1050280 P1050280 by jono_misfit, on Flickr There will be a thermal shield fitted to protect it from the heat of the exhaust and the upper route  P1050281 P1050281 by jono_misfit, on Flickr and passenger side  P1050282 P1050282 by jono_misfit, on Flickr mounted the EDIS 6 module  P1050283 P1050283 by jono_misfit, on Flickr  P1050284 P1050284 by jono_misfit, on Flickr drilled for the brake fitting transit  P1050285 P1050285 by jono_misfit, on Flickr and feed line in  P1050286 P1050286 by jono_misfit, on Flickr It was a short day as had to turf a bit of ground for smallchild_misfits play area |
| |
|
|
|
|
|
|
|
It was a short day as had to turf a bit of ground for smallchild_misfits play area That sort of behaviour leads to reduced car storing space! |
| |
|
|
jonomisfit
Club Retro Rides Member
Posts: 1,788
Club RR Member Number: 49
|
|
|
|
|
It has! But it was also space I was unable to realise for car storage due to previous threats of divorce.....
|
| |
|
|
jonomisfit
Club Retro Rides Member
Posts: 1,788
Club RR Member Number: 49
|
|
Apr 23, 2021 20:21:54 GMT
|
In order to be certain on whats needed for the brake lines I need to fit the brake calipers. If you look about 25 pages back I bought some cheap second hand brakes. This is one of the brackets. This is the bolt that wouldnt remain in one piece for the previosu owner. It is stttttuuuuuuuccck.  P1050287 P1050287 by jono_misfit, on Flickr i gave it a warm with the blow torch for a bit and double locked some nuts to try and turn it.  P1050288 P1050288 by jono_misfit, on Flickr This did not work.... not hot enough heat into the ali to expand it. I applied some thinking, then got the tig set out and spent a couple of minutes on a lowish power putting heat in the end of the bolt..... It did the trick nicely. I had to work it back and forth a bit with occassional sprays of WD40 to get it fully loose and the aluminium oxide out of the threads  P1050289 P1050289 by jono_misfit, on Flickr I then spent some time cleaning up the rust on the brackets, cleaning the threads etc. I then quickly put the calipers on the car..... No wait. I spent a hour tryign to figure out which way round the combination of bits go... I got it on eventually.  P1050290 P1050290 by jono_misfit, on Flickr Loads of room in the wheels  P1050291 P1050291 by jono_misfit, on Flickr Like Loooooaaadss  P1050292 P1050292 by jono_misfit, on Flickr This is the difference between motorsport wheel and road wheels. Designed for a load of space. Bare in mind these are 355mm disc. They are massive, but don't look that big in the wheels really. You can just see the calipers have had a light relieving previosuly..... I'm guessing there was not as much clearance. Anyway. Putting it on it took me 30 seconds to confirm its all good. So I put in the other front brake line  P1050293 P1050293 by jono_misfit, on Flickr  P1050294 P1050294 by jono_misfit, on Flickr I did a few other odd jobs I didnt take pics off, then finished the return hose to the tank.  P1050295 P1050295 by jono_misfit, on Flickr I've given it a good spiral wrap as I don't want it cutting into the tank at any point...  P1050296 P1050296 by jono_misfit, on Flickr  P1050297 P1050297 by jono_misfit, on Flickr Once the tank is final fitted and the fuel pump etc. is in then I have some bond on cable clips I'll put onto the tank to stop it moving. Then started the sealing rubber strip on the tank cover. Cleaned back the flanges with degreaser  P1050298 P1050298 by jono_misfit, on Flickr marked out and punch some 1mm rubber strip  P1050299 P1050299 by jono_misfit, on Flickr cleaned and dried the rubber, then using supper sticky 3m tape I started fixing on  P1050300 P1050300 by jono_misfit, on Flickr  P1050301 P1050301 by jono_misfit, on Flickr The tank cover still needs a paint, but it may wait until the car is mobile. Unlikely to be another update this week as I'm going to the pub :-) and I don't think i will be operable on my day |
| |
|
|
jonomisfit
Club Retro Rides Member
Posts: 1,788
Club RR Member Number: 49
|
|
|
|
a box arrived.  P1050302 P1050302 by jono_misfit, on Flickr with a nice random note written on the inside. It was appreciated  P1050303 P1050303 by jono_misfit, on Flickr side windows  P1050304 P1050304 by jono_misfit, on Flickr fitted  P1050305 P1050305 by jono_misfit, on Flickr The drivers side fought me a bit, but the passengers went in fine.  P1050306 P1050306 by jono_misfit, on Flickr I then fitted the passenger seat and harness so I could check clearance for the fuel filler  P1050307 P1050307 by jono_misfit, on Flickr and mocked up a fuel filler route  P1050308 P1050308 by jono_misfit, on Flickr Fuel filler will go in about here  P1050309 P1050309 by jono_misfit, on Flickr I stripped off the spoilers, cleaned everythign down, and bonded in the rear screen  P1050310 P1050310 by jono_misfit, on Flickr I then did loads of small jobs, most not pictured. Put a first coat of paint of the roof fill strips  P1050311 P1050311 by jono_misfit, on Flickr and bonded on a few bits of plastic that had been snapped off.  P1050312 P1050312 by jono_misfit, on Flickr  P1050314 P1050314 by jono_misfit, on Flickr All of this in the aim of getting the car weather tight. |
| |
|
|
jonomisfit
Club Retro Rides Member
Posts: 1,788
Club RR Member Number: 49
|
|
|
|
I gave the roof strips and wing mirrors a coat of black  P1050315 P1050315 by jono_misfit, on Flickr  P1050316 P1050316 by jono_misfit, on Flickr  P1050317 P1050317 by jono_misfit, on Flickr Not a great job, and will liekly need a do over at some point fitted  P1050325 P1050325 by jono_misfit, on Flickr  P1050326 P1050326 by jono_misfit, on Flickr  P1050327 P1050327 by jono_misfit, on Flickr made up a couple more brake link pipes  P1050319 P1050319 by jono_misfit, on Flickr wrapped in spira wrap  P1050320 P1050320 by jono_misfit, on Flickr go here  P1050321 P1050321 by jono_misfit, on Flickr link from the rear bulkhead transits to the rear axle brake hoses and the other  P1050322 P1050322 by jono_misfit, on Flickr I was going to go spray the car with cavity wax, but then noticed it said if <15 degC then keep inside for 24hrs to ensure a consistent consistency.  P1050323 P1050323 by jono_misfit, on Flickr I put a couple of bits of tape on so I know how close I am to the end of the tube, so I don't spray myself....  P1050324 P1050324 by jono_misfit, on Flickr |
| |
|
|
jonomisfit
Club Retro Rides Member
Posts: 1,788
Club RR Member Number: 49
|
|
|
|
I need to blank this, the hole for the old fuel filler  P1050330 P1050330 by jono_misfit, on Flickr I was hoping to re-use it, but its just too low to get a sensible run to the tank.  P1050331 P1050331 by jono_misfit, on Flickr I don't want to buy a filler just to use as a blank, so better make something.... 10mmn Aluminium  P1050328 P1050328 by jono_misfit, on Flickr trimmed  P1050329 P1050329 by jono_misfit, on Flickr marked out using my accurate guage....  P1050332 P1050332 by jono_misfit, on Flickr measured and drilled  P1050333 P1050333 by jono_misfit, on Flickr trimmed to closer to round  P1050334 P1050334 by jono_misfit, on Flickr doggily mount in the lathe  P1050335 P1050335 by jono_misfit, on Flickr end up with this  P1050336 P1050336 by jono_misfit, on Flickr drilled out on the PCD  P1050337 P1050337 by jono_misfit, on Flickr sits like so  P1050338 P1050338 by jono_misfit, on Flickr  P1050339 P1050339 by jono_misfit, on Flickr needs shorter bolts  P1050340 P1050340 by jono_misfit, on Flickr Its quite large, due to the size of filler used, and 10mm is over kill. I've ordered a piece of 6mm plate, and I think i'll re-make it thinner, and take more weight out of it as well. At try and make it look "lighter" as its fairly hefty at the moment. |
| |
|
|
jonomisfit
Club Retro Rides Member
Posts: 1,788
Club RR Member Number: 49
|
|
|
|
|
Maybe i'll put in on the mill and mill half the material off, to save re-making it.......
|
| |
|
|
jonomisfit
Club Retro Rides Member
Posts: 1,788
Club RR Member Number: 49
|
|
|
|
this weekend had no car stuff, as I decided i "have" to reconfigure the workshop to see if it makes the space more useable.... Cut out the old shelving above the vice bench.... it was full of woodwormthen  P1050341 P1050341 by jono_misfit, on Flickr then bench out and tidy up.... it was thick in dirt and detritus under there  P1050342 P1050342 by jono_misfit, on Flickr emptied the shelves  P1050343 P1050343 by jono_misfit, on Flickr whcih it turned out had a lot of stuff on it 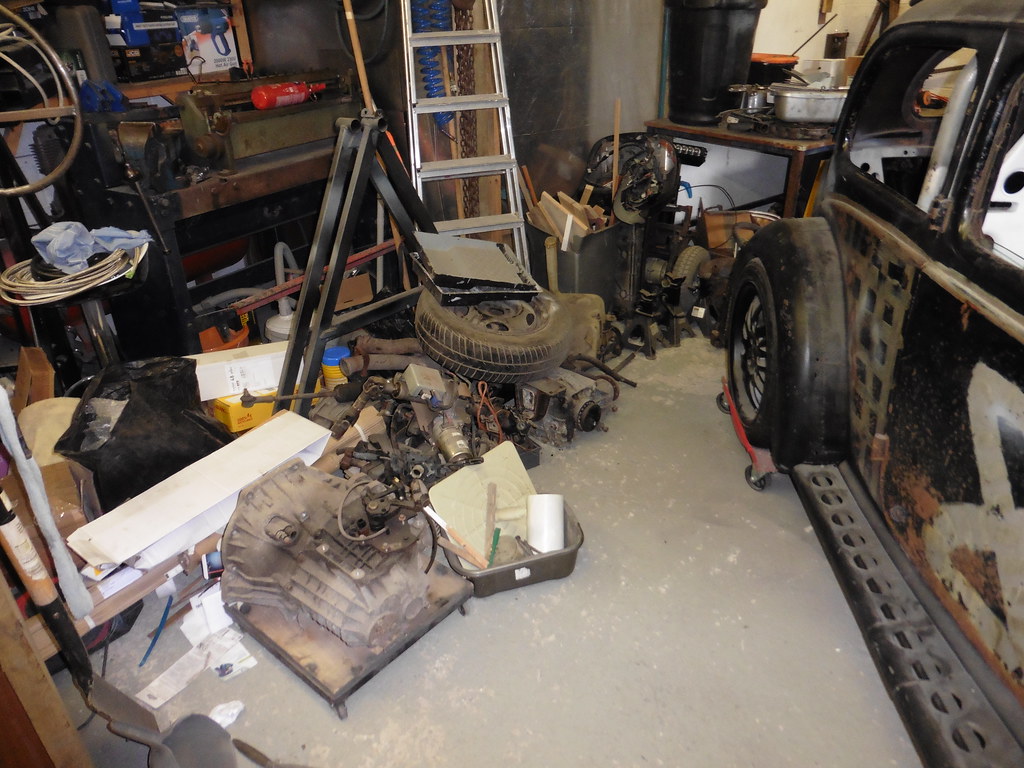 P1050344 P1050344 by jono_misfit, on Flickr a LOT of stuff....  P1050345 P1050345 by jono_misfit, on Flickr moved it round and lowered the top shelf by 6 holes, and fixed to the wall  P1050346 P1050346 by jono_misfit, on Flickr started re-packing and found this, which i've been hunting for for ages! it was hidden in a plastic bag, in a box, in another box, and covered with junk. 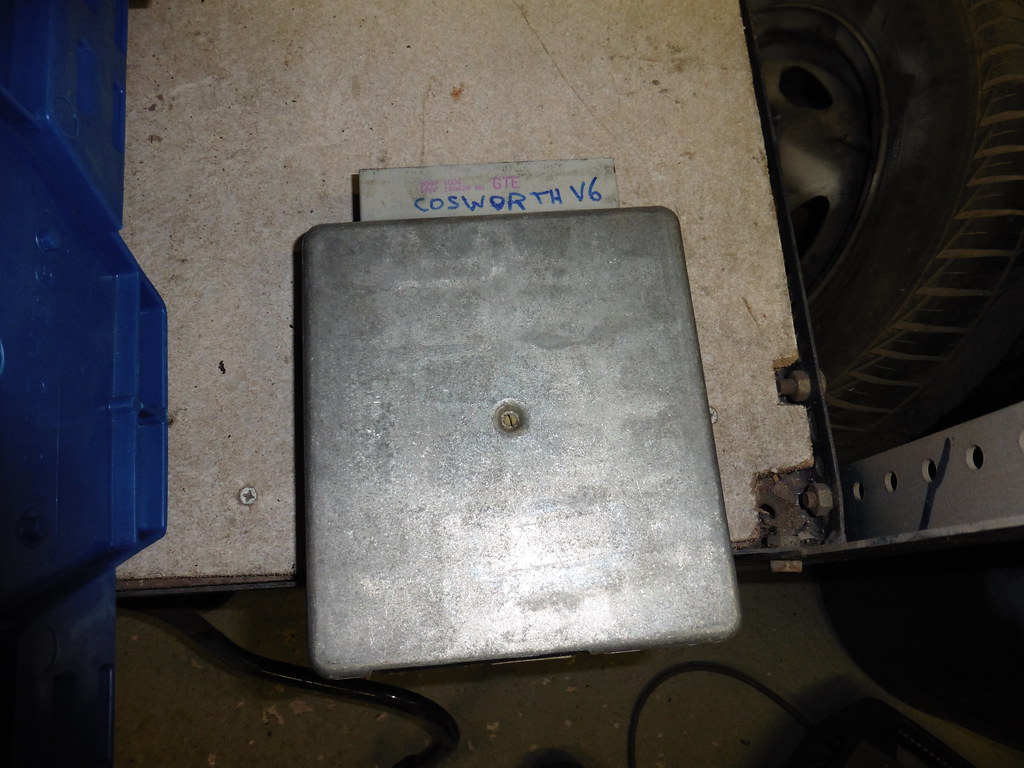 P1050347 P1050347 by jono_misfit, on Flickr then remembered I needed to get the floor clear again so I can get the car back in.... so packed the shelves again.  P1050348 P1050348 by jono_misfit, on Flickr it looks a mess, but once I have a tidy through some of the bits it should get better. I have a LOT of brake calipers.... 3 full car sets (2 escort and 1 MX5). None of which I will be using so i think they may go for sale. slowly getting there  P1050349 P1050349 by jono_misfit, on Flickr  P1050350 P1050350 by jono_misfit, on Flickr there is a fair bit of stuff for the metal recycling point of the tip escort back in, and space is no worse, mig will go back in its space once I get rid of the junk  P1050351 P1050351 by jono_misfit, on Flickr and started emptying back these shelves as well.  P1050352 P1050352 by jono_misfit, on Flickr |
| |
|
|
820
South East
Posts: 793
|
|
May 10, 2021 14:43:28 GMT
|
|
Great work on the Escort. Really like the brake hoses, I want to do mine now.
|
| |
|
|
jonomisfit
Club Retro Rides Member
Posts: 1,788
Club RR Member Number: 49
|
|
May 15, 2021 17:22:54 GMT
|
operation tidy up / re-configure continues I removed the old home made draws and bought a cheap storage cabinet to go in the space.  P1050353 P1050353 by jono_misfit, on Flickr Theres actually enought space to put two in there side by side. I'm tempted to buy a second and do this. Rather than rip out the old shelves in this corner (at least at this point, i may do it later) I set about making them a useable size and fitting a shonky cupboard door to it all.  P1050354 P1050354 by jono_misfit, on Flickr shelves are now double the height they were, so can take actual stuff in them  P1050355 P1050355 by jono_misfit, on Flickr I filled the cupboard but forgot to take another pic then spent ages boxing things up and putting them on the mezanine, and then re-packed the shelves above the bench in a more useable way  P1050356 P1050356 by jono_misfit, on Flickr I also wrote on the wood what things were if it wasnt imediately obvious. fitted an additional light into this corner so its now possible to see things... And started building up another pile of things to go to the recycling centre (having been there friday afternoon with a full van of things)  P1050357 P1050357 by jono_misfit, on Flickr slowly getting there, you can at least see the floor again now.  P1050358 P1050358 by jono_misfit, on Flickr and almost there on the bench.  P1050369 P1050369 by jono_misfit, on Flickr I'll need to see what I do next. Back to the escort, or buy in some steel and make the new metalwork bench. There's still some more changes to make on layout 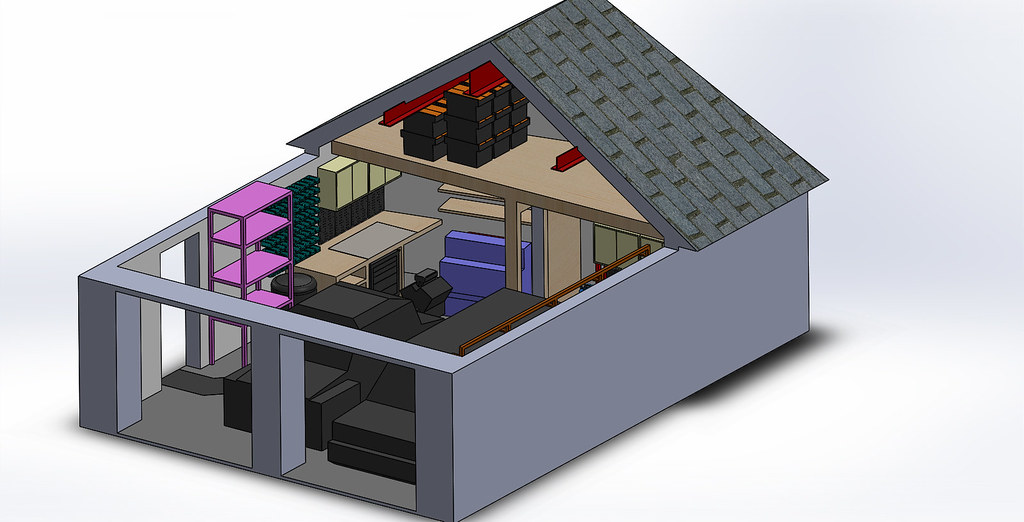 Garage Layout - 2 - 6 Garage Layout - 2 - 6 by jono_misfit, on Flickr  Garage Layout - 2 - 7 Garage Layout - 2 - 7 by jono_misfit, on Flickr New workbench i'm intending to make  Workbench_Assy Workbench_Assy by jono_misfit, on Flickr I'm also giving consideration to buying a two post ramp, so may well model that up and see how it all works space wise. Objective has been achieved so far, as it does feel like theres more useable space... at least there will be when I've exited the new recycling pile.... |
| |
|
|
jonomisfit
Club Retro Rides Member
Posts: 1,788
Club RR Member Number: 49
|
|
May 23, 2021 20:05:09 GMT
|
This weekend was spent not working on the escort. Mrs_Misfit and Nolongeratoddler_misfit were away for the weekend, so I spent 3 days painting where new windows etc. have been fitted and patched plaster etc. This took up most of the time. I had this afternoon free, so after failing to get the mobility scooter running ( forum.retro-rides.org/thread/210182/toddler-misfits-tot-rod?page=2) I knocked up a "quick" job for my dad. My dad dropped in for a quick stay for the first time in 9 months (covid + scotland) and produced out of his van a piece of inner wing from a ford consul. And nonchalontly asks, any chance you can make me the inverse of this, the other side is missing. the part to copy  P1050376 P1050376 by jono_misfit, on Flickr made a cardboard template  P1050377 P1050377 by jono_misfit, on Flickr transfered it to steel  P1050378 P1050378 by jono_misfit, on Flickr rough trimmed it  P1050379 P1050379 by jono_misfit, on Flickr started to bend the flange  P1050380 P1050380 by jono_misfit, on Flickr bend bend bend, hitty stick hitty stick  P1050381 P1050381 by jono_misfit, on Flickr drilled the mounting holes and put in a bead (smaller than original as I don't have the right size dies, and its only a stiffener)  P1050382 P1050382 by jono_misfit, on Flickr and gave it a clean  P1050383 P1050383 by jono_misfit, on Flickr It came out OK. Not perfect, but will work well enough. As I now have batteries I can use as a tester, I think i might connect one to the escort and try out the electrics and see if they work..... |
| |
Last Edit: May 23, 2021 20:06:44 GMT by jonomisfit
|
|
jonomisfit
Club Retro Rides Member
Posts: 1,788
Club RR Member Number: 49
|
|
May 30, 2021 19:29:49 GMT
|
As part of the clear out I sold a few things I didnt need that were just taking up space. And converted them into something else that will take up space 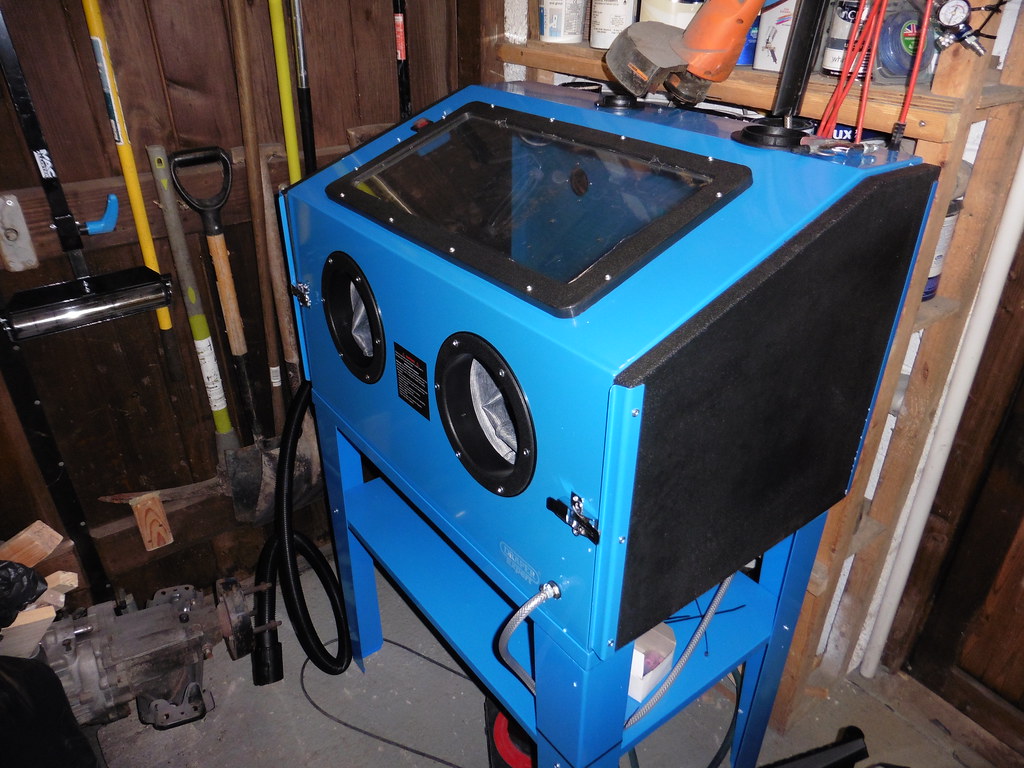 P1050384 P1050384 by jono_misfit, on Flickr Which came as a box of bits and I spent ages putting it together, then even longer trying to get it all running well. One of the big isues is dust affecting visibility and as such an extractor system was needed. If you just connect a vacuume to the exhaust port you fill the the bag very quickly. So I got a cheap cyclone seperator, and plumbed it in. Size wise I couldnt find any tube that was the right size, so the closest was some 50mm drain pipe which then got modified a bit to make an exhaust. I then taped all the joints to try and keep the vacuum sealed as I could.  P1050385 P1050385 by jono_misfit, on Flickr unlike the really cheap ones from ebay (this is still cheap just not as cheap) it didnt need mods to the pickup pipes, and the seals were fairly decent. Does it work? A beam clamp before  P1050386 P1050386 by jono_misfit, on Flickr  P1050387 P1050387 by jono_misfit, on Flickr scabby as anything. After  P1050388 P1050388 by jono_misfit, on Flickr  P1050389 P1050389 by jono_misfit, on Flickr  P1050390 P1050390 by jono_misfit, on Flickr I was still getting a technique to do it, as i've never don't any real blasting before. This was with aluminium oxide media, I'll try getting some glass at another point as see what thats like. Works quite well, and I was a bit worried my compressor tank is too small, but once up to pressure it keep running well enought to hold about 80psi with continuous blasting. |
| |
|
|
|
|
|
|
|
|
We got around the dust issue by plumbing in a shopvac, but with a 20l oil drum full of water in the middle.
Using glass, it filters pretty much all of it out and turns it in to mud.
Added benefit that it only really pulls the dust out which is too fine to be useful.
Usually they benefit from a bigger nozzle, too.
|
| |
|
|
jonomisfit
Club Retro Rides Member
Posts: 1,788
Club RR Member Number: 49
|
|
Jul 24, 2021 19:32:01 GMT
|
My Dad turned up last weekend for a few days and brought with him a rear diff from one of the sheds. No idea what ratio, so I put some paint marks on it and turned the fropnt flange 10 times and counted the rotations. Its a 3.625, which is the right one for what I need.  P1050583 P1050583 by jono_misfit, on Flickr It was filthy, having sat in a shed for something like 15 years... so I gave it a de-grease and a wash down. It still needs a buff with wire wheels to lift the oxide off. I noted the fill / drain plug was mullered. After some attemps with hand tools and using the impact gun I gave up and welded on a large nut. Which with the heat from the welding and somethign to grip to it just wound out nicely.  P1050584 P1050584 by jono_misfit, on Flickr Daughter_misfits tot-rod is taking longer than I hoped, so I'm itching to get back on with this. |
| |
|
|
stealthstylz
Club Retro Rides Member
Posts: 14,960
Club RR Member Number: 174
|
|
Jul 24, 2021 20:00:11 GMT
|
|
Once you've blasted it to that sort of finish stick the part in some TFR overnight and it'll clean the rust pits out too.
|
| |
|
|
|
|
|
|
|
|
nice to see some progress
|
| |
|
|
|
|
|
|
|
|
All i seem to do with mine is walk under it while its raised up on the hoist
|
| |
|
|
jonomisfit
Club Retro Rides Member
Posts: 1,788
Club RR Member Number: 49
|
|
|
|
|
Mine currently on hiatus whilst I get the postman pat van finished. I'd like to be back on with it ASAP as I'd like to drive the thing!
|
| |
|
|
 P1050261 by jono_misfit, on Flickr
 P1050262 by jono_misfit, on Flickr
 P1050263 by jono_misfit, on Flickr
 P1050264 by jono_misfit, on Flickr
 P1050265 by jono_misfit, on Flickr
 P1050266 by jono_misfit, on Flickr
 P1050267 by jono_misfit, on Flickr
 P1050268 by jono_misfit, on Flickr
 P1050269 by jono_misfit, on Flickr
 P1050270 by jono_misfit, on Flickr
 P1050271 by jono_misfit, on Flickr
 P1050272 by jono_misfit, on Flickr
 P1050261 by jono_misfit, on Flickr
 P1050262 by jono_misfit, on Flickr
 P1050263 by jono_misfit, on Flickr
 P1050264 by jono_misfit, on Flickr
 P1050265 by jono_misfit, on Flickr
 P1050266 by jono_misfit, on Flickr
 P1050267 by jono_misfit, on Flickr
 P1050268 by jono_misfit, on Flickr
 P1050269 by jono_misfit, on Flickr
 P1050270 by jono_misfit, on Flickr
 P1050271 by jono_misfit, on Flickr
 P1050272 by jono_misfit, on Flickr


