jonomisfit
Club Retro Rides Member
Posts: 1,787
Club RR Member Number: 49
|
|
Mar 20, 2021 20:21:42 GMT
|
I started sanding of the lower spoiler to get rid of some of the damage on it.  P1050046 P1050046 by jono_misfit, on Flickr some of it wasnt in good condition  P1050047 P1050047 by jono_misfit, on Flickr The moved on to the upper spoiler. It didnt feel right where the damage had been repaired, so gave it a light wobble and this happened  P1050048 P1050048 by jono_misfit, on Flickr Whats that? Thats the sight of a compsosites repair by someoe who either doesnt know how they work or doesnt care. Its polyester resin that has been poured into a joint..... it has no strength. I started cleaning it back out  P1050049 P1050049 by jono_misfit, on Flickr  P1050050 P1050050 by jono_misfit, on Flickr 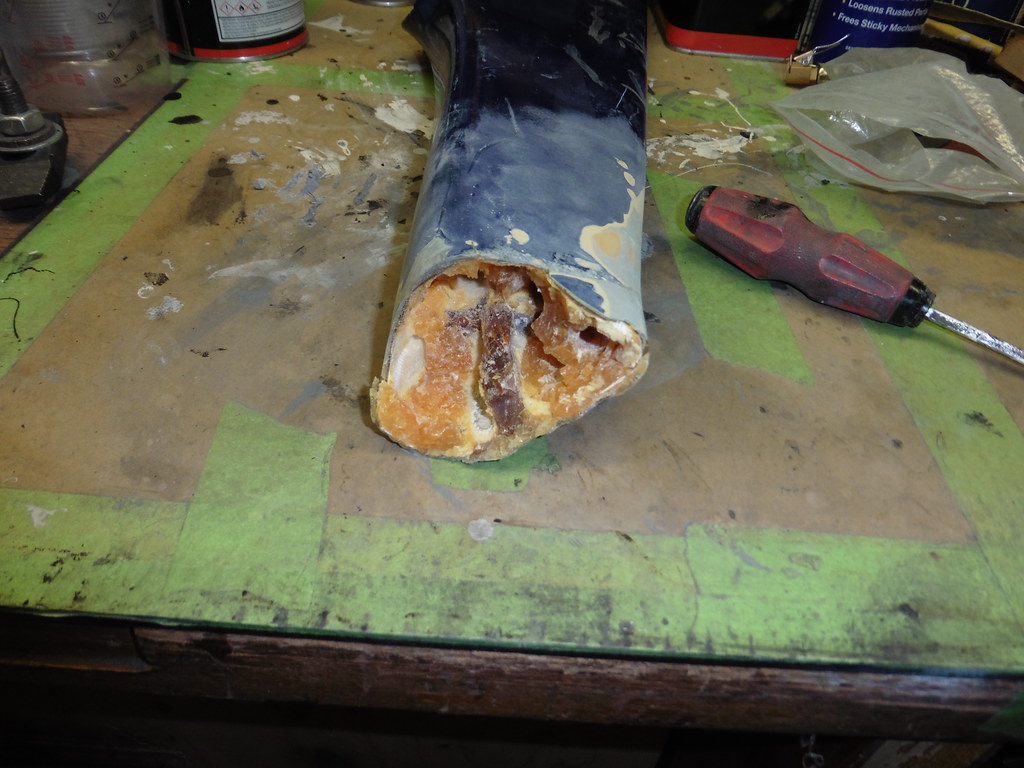 P1050051 P1050051 by jono_misfit, on Flickr I'm pretty certain the dark seam is the original part impregnation route, the lighter crystally yellow is the polyester the other side  P1050053 P1050053 by jono_misfit, on Flickr  P1050054 P1050054 by jono_misfit, on Flickr I used the die grinder and cleaned back the worst of the splintered damage and excavated some of the foam in there  P1050055 P1050055 by jono_misfit, on Flickr the bolted it all onto the car to check how much repair is needed  P1050056 P1050056 by jono_misfit, on Flickr the answer.... is a lot 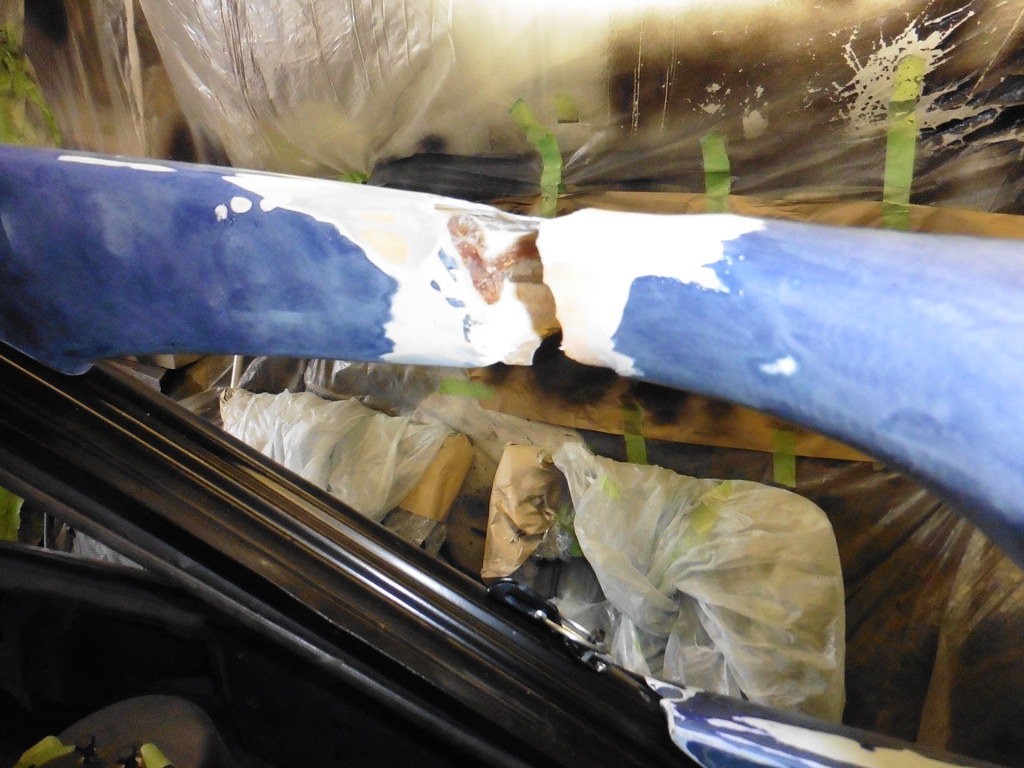 P1050057 P1050057 by jono_misfit, on Flickr  P1050058 P1050058 by jono_misfit, on Flickr Which looks like a fair bit to close up.... I had a look at the other side and there are a couple of flat areas. So strapped it up to give it some consideration.  P1050059 P1050059 by jono_misfit, on Flickr  P1050060 P1050060 by jono_misfit, on Flickr Its not pretty. I contemplated for a bit about giving up on this and just using the other wing. After a bitmore thought, I decided I will try a repair on this first and see how it goes. To that end I've bought some carbon fibre tube, some 200gsm twill carbon and some epovy. I'll bond in the tube (or two) to add some strength / rigidity to it, then try and make a socket joint on one half. I'll cure this then slide it into the other side and bond it in. Then I'll drill a hole and fill it with expanding foam to add some support. At least, thats the plan. If that fails, then I'll sort the other wing and use it instead. As it was getting late on i decided on a quick job of fitting the bonded screen in. I've never fitted one before so it was a learning experience. First stop, clean the inside face of the screen well  P1050061 P1050061 by jono_misfit, on Flickr remove the all PU adhesive  P1050062 P1050062 by jono_misfit, on Flickr  P1050063 P1050063 by jono_misfit, on Flickr clean it up again, mask off, fit the trim strip  P1050065 P1050065 by jono_misfit, on Flickr then prime it, let that cure, and ruin my hand by had squeezing the PU bead around the screen. Then with a small amount of trepidation, fit the screen.  P1050066 P1050066 by jono_misfit, on Flickr  P1050067 P1050067 by jono_misfit, on Flickr I can reach in (just) between the screen and the body, so I also smeared the sealant from the inside to try and ensure its a good fit / seal. Will see how its worked once its cured. I may take it outside and put the hose over it before I build the car up. Just in case its not sealed and I need to remove it and fit it again. I really hope not thoguht. In all honesty if I does leak somewhere there is a good chance I'll try pumping PU into any areas from the inside first. |
| |
|
|
|
|
|
|
|
|
|
|
Liked for the screen fitment, not the broken whales tail.
|
| |
|
|
jonomisfit
Club Retro Rides Member
Posts: 1,787
Club RR Member Number: 49
|
|
Mar 26, 2021 21:06:22 GMT
|
My carbon cloth and tube arrived. The tube is 16mm OD, 1mm wall and is RIDICULOUSLY stiff. it weigh nothing. and I tried but I couldnt snap it. 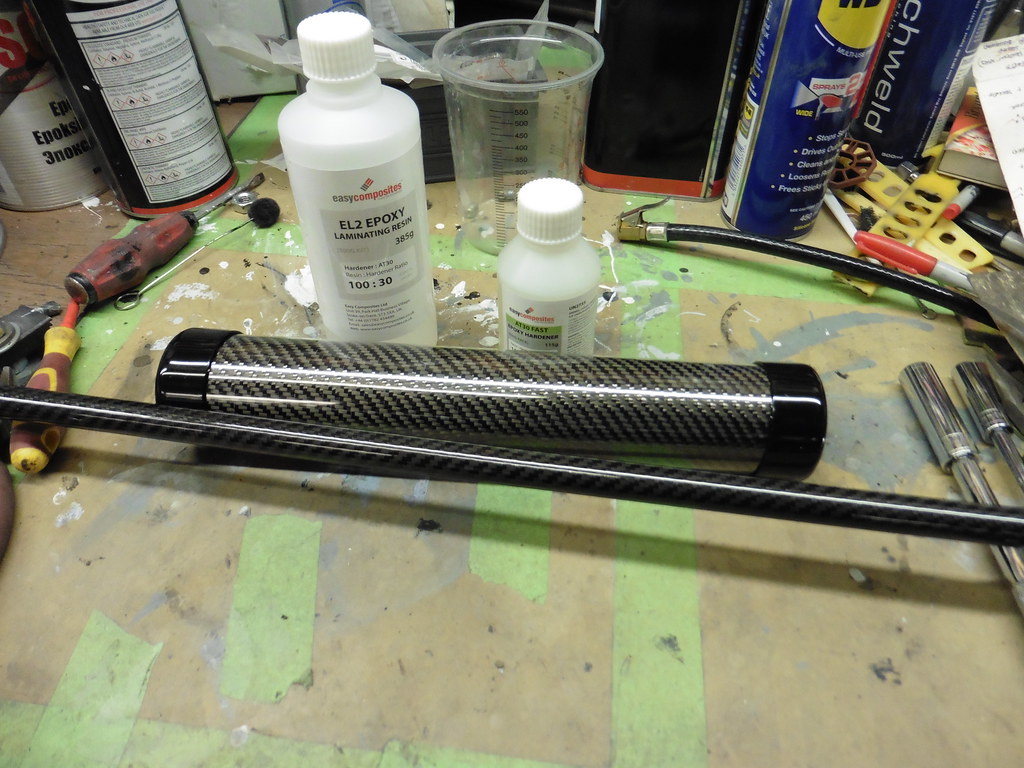 P1050068 P1050068 by jono_misfit, on Flickr cut to length and i roughened the surface so it'll bond better.  P1050069 P1050069 by jono_misfit, on Flickr goes in here something like this, still needing aligned at this point.  P1050070 P1050070 by jono_misfit, on Flickr  P1050071 P1050071 by jono_misfit, on Flickr high strength quick set epoxy to bondd it all in. 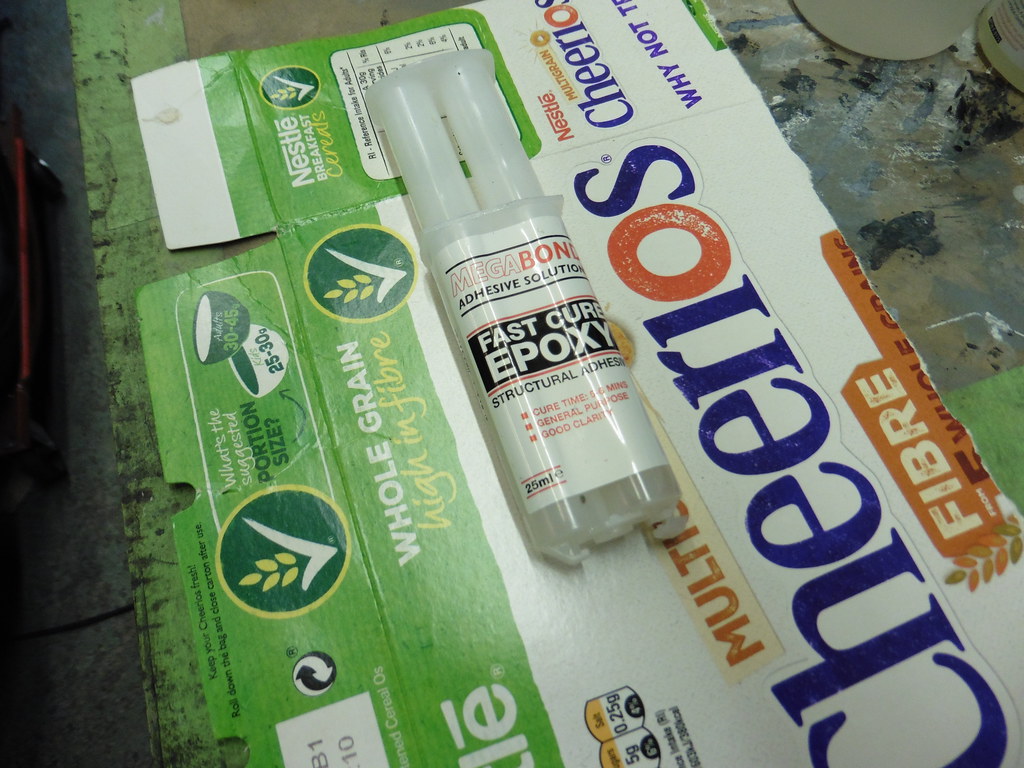 P1050072 P1050072 by jono_misfit, on Flickr starting to goo it up  P1050073 P1050073 by jono_misfit, on Flickr  P1050074 P1050074 by jono_misfit, on Flickr  P1050075 P1050075 by jono_misfit, on Flickr  P1050076 P1050076 by jono_misfit, on Flickr Epoxy set in about 5 mins flat and the joint is rock solid now. I cant have a void, so need to fill it. I used some expanding foam which will also boond onto the carbon tubes and hopefully help bind it all together nicely.  P1050078 P1050078 by jono_misfit, on Flickr As I had the foam can open I needed to use it all up rather than waste it  P1050077 P1050077 by jono_misfit, on Flickr As I've got GRP skirts, and they sit low i'm pretty certain they will crack from any stone impacts. so sprayed in some foam at the low point. I'm hoping this will act to dissipate impacts a bit. We'll see.  P1050079 P1050079 by jono_misfit, on Flickr the foam kept growing for a while  P1050080 P1050080 by jono_misfit, on Flickr I also ran out on the second skirt, so need to get some more tomorrow.  P1050081 P1050081 by jono_misfit, on Flickr Once its cured i'll trim it back a bit to make sure it doesnt interfere with anything. As I was waiting for things to cure I took the chance to get back on with my favourite task of blanking holes that could attract water, rubbish, etc. . Made some discs  P1050082 P1050082 by jono_misfit, on Flickr fitting them  P1050083 P1050083 by jono_misfit, on Flickr  P1050084 P1050084 by jono_misfit, on Flickr  P1050085 P1050085 by jono_misfit, on Flickr  P1050087 P1050087 by jono_misfit, on Flickr  P1050088 P1050088 by jono_misfit, on Flickr  P1050089 P1050089 by jono_misfit, on Flickr  P1050090 P1050090 by jono_misfit, on Flickr It'll also mean when I spray the cavity wax it wont spray out over everything. More tomorrow. |
| |
|
|
jonomisfit
Club Retro Rides Member
Posts: 1,787
Club RR Member Number: 49
|
|
Mar 27, 2021 22:51:01 GMT
|
The foam had all set so trimmed it back  P1050091 P1050091 by jono_misfit, on Flickr  P1050092 P1050092 by jono_misfit, on Flickr and in the side skirts  P1050093 P1050093 by jono_misfit, on Flickr and fitted the passenger side one again.  P1050094 P1050094 by jono_misfit, on Flickr givig it a hard tap you can hear its taken some of the shock out of it, so hopefulyl they wont crack up so easily. I covered the escort and started feathering the joint lines.  P1050095 P1050095 by jono_misfit, on Flickr  P1050096 P1050096 by jono_misfit, on Flickr  P1050097 P1050097 by jono_misfit, on Flickr hopefully layering in the carbon this way wont leave it with a hump. trimmed the carbon, 6 plys in increasing width  P1050098 P1050098 by jono_misfit, on Flickr (not to self you cant put tape on the cut line of raw carbon fabrix the way you can with pre-preg as when you pull the tape off it distorts the weave.....) then mixed up the resin, got sticky, and laminated it  P1050100 P1050100 by jono_misfit, on Flickr  P1050101 P1050101 by jono_misfit, on Flickr Its not perfect, but hopefully once cured it'll be strong enought and I can also flat ti back to shape. I got a new bottle of expaing foam and squirted it into the other GRP parts  P1050102 P1050102 by jono_misfit, on Flickr 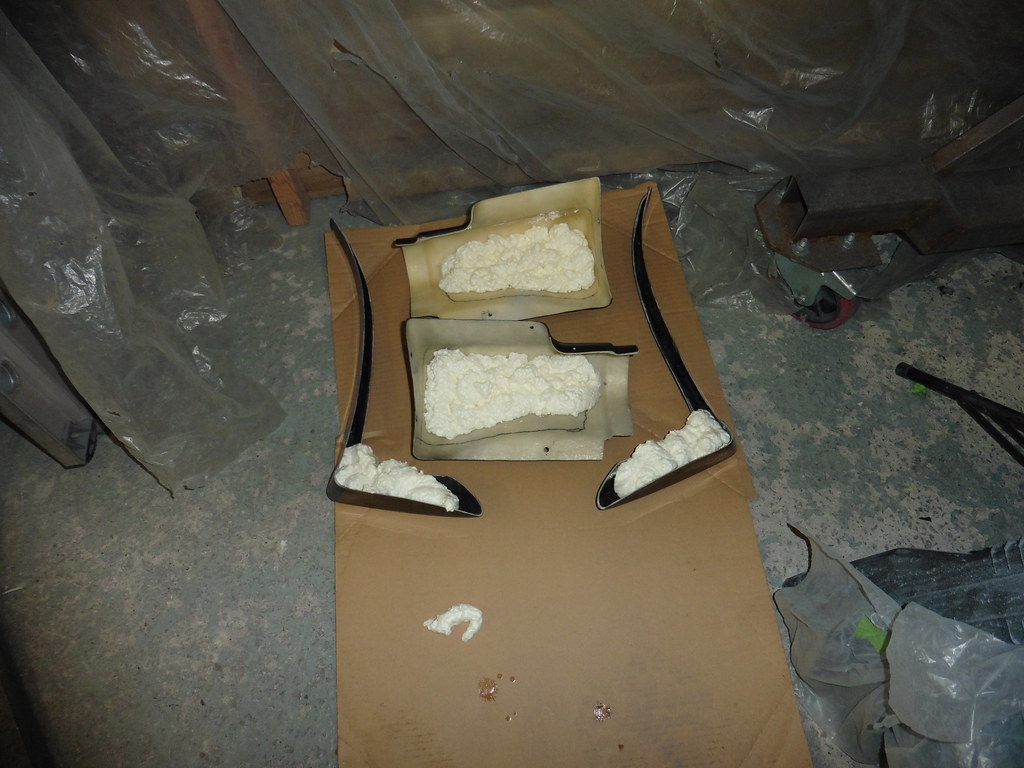 P1050103 P1050103 by jono_misfit, on Flickr I gave the fire extinguisher pull box a lick of paint.  P1050099 P1050099 by jono_misfit, on Flickr |
| |
|
|
jonomisfit
Club Retro Rides Member
Posts: 1,787
Club RR Member Number: 49
|
|
Mar 27, 2021 22:55:25 GMT
|
I was then stuck waiting for the epoxy to cure, and foam to go off, so found some other jobs to do. foil covering holes  P1050104 P1050104 by jono_misfit, on Flickr 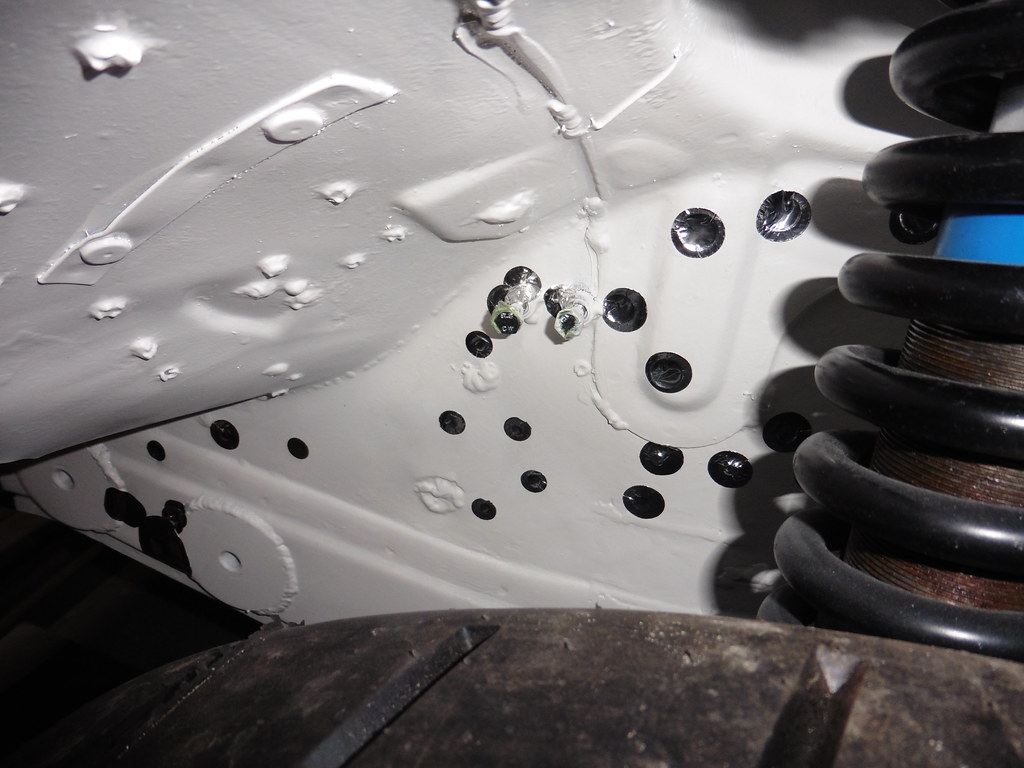 P1050105 P1050105 by jono_misfit, on Flickr  P1050106 P1050106 by jono_misfit, on Flickr I may have been a bit over zealous.... Then fitted the pedal box and master cylinders  P1050107 P1050107 by jono_misfit, on Flickr tried to find a location for the master cylinders 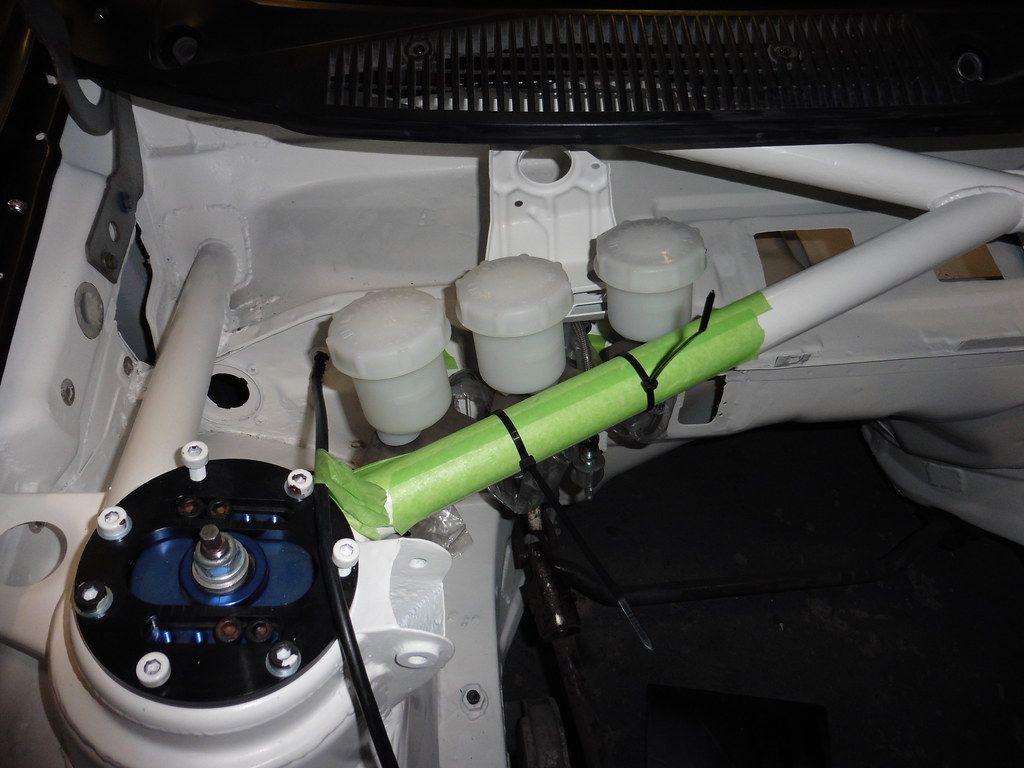 P1050108 P1050108 by jono_misfit, on Flickr and started the process of mocking up the brake lines Reservoir feeds in so I know where they end up  P1050109 P1050109 by jono_misfit, on Flickr Handbrake in  P1050110 P1050110 by jono_misfit, on Flickr rear brakes split  P1050111 P1050111 by jono_misfit, on Flickr and start putting in unions so I can see where the lines will go  P1050112 P1050112 by jono_misfit, on Flickr I also dropped the heater and foot rest in so I can make sure the bulkhead fitting doesnt end up in the wrong place  P1050113 P1050113 by jono_misfit, on Flickr Next session will involve seeing if my repairs worked on the rear wing and routing brakes. |
| |
|
|
jonomisfit
Club Retro Rides Member
Posts: 1,787
Club RR Member Number: 49
|
|
Mar 28, 2021 19:52:14 GMT
|
|
I checked on cure progress tonight.
The surface is still tacky, but it feels solid and a tap reveals its sounding consolidated. I'll see how it does over the week, but I may need to point a heater at it for a bit to get it to cure off fully in a decent time frame.
|
| |
|
|
mk2cossie
Club Retro Rides Member
Posts: 3,058  Club RR Member Number: 77
|
|
Mar 28, 2021 20:00:55 GMT
|
At least the rear wing is already looking significantly better than it was now  Is it a genuine Ford Escort Cosworth spoiler? |
| |
|
|
jonomisfit
Club Retro Rides Member
Posts: 1,787
Club RR Member Number: 49
|
|
Mar 28, 2021 20:05:43 GMT
|
|
Its getting there. Hopefulyl with a sand and some filler it wont look terrible.
It is, which is why it was worth trying to fix. Its just much better made than the replica one I have which is a bit warped, and just doesnt seem to fit particularly well.
|
| |
|
|
jonomisfit
Club Retro Rides Member
Posts: 1,787
Club RR Member Number: 49
|
|
|
|
I trimmed back all the excess foam from the skirt and the lower bumper / splitter. Whilst it doesnt add massively to the strength, hopefully it'll crack less and if it does hit anythign, hopefully not shatter.  P1050114 P1050114 by jono_misfit, on Flickr Carbon felt fully dried, so gave it a light rub to check.  P1050115 P1050115 by jono_misfit, on Flickr Pushed the car outside to bask int he sun for a bit, and fitted the door retaining bolts, then made a start dressing the door. I want to get the car "dust tight" before it ends up manky inside. Especialyl as I start to build it back up.  P1050116 P1050116 by jono_misfit, on Flickr fitted the door lock  P1050117 P1050117 by jono_misfit, on Flickr door release fitted  P1050118 P1050118 by jono_misfit, on Flickr seals in, glass in, external handle will be coming back off for a re-paint at some point.  P1050119 P1050119 by jono_misfit, on Flickr and the other side  P1050120 P1050120 by jono_misfit, on Flickr then onto dressing the repair. There's a bit of a bulge on the underside  P1050121 P1050121 by jono_misfit, on Flickr so gave it a dress back. This thinned through a ply of carbon on the bottom, but I have replaced circa 1mm of chopped glass, with circa 2mm of carbon, so a bit of thinning isnt going to be an issue. Especially with the internal reinforcing I fitted as well.  P1050122 P1050122 by jono_misfit, on Flickr then I started prep for the other minor repairs needed on the wing. The rear vertical stay is bonded in as a seperate part and the bond was cracking. So drilled the end of the cracks 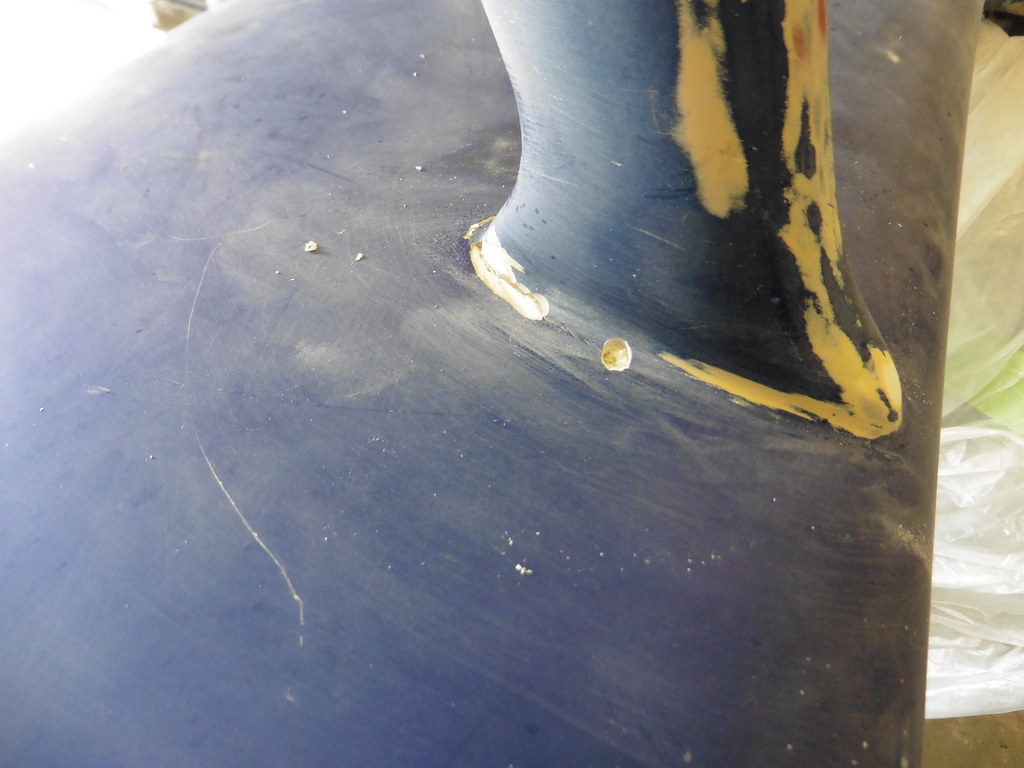 P1050123 P1050123 by jono_misfit, on Flickr  P1050124 P1050124 by jono_misfit, on Flickr not shown but I then used the die grinder to cut a bevel down into the joint. This will allow it a better bond. Then started cleaning back the foot of the stay. It was suffering with a common problem. Water had got into the aluminium insert, and split the grp and cracked it. I removed the damaged bits and cleaned it up.  P1050125 P1050125 by jono_misfit, on Flickr I then lightly coated a bolt with copper grease and bolted it in. Then made a mix of epoxy glue and some chopped up carbon strands and pressed it into the void.  P1050126 P1050126 by jono_misfit, on Flickr messy, but packed in well and has filled the worst of the gap. The good thing is when cured it'll have bonded well to things, and the carbon should give it some level of strength. I then poored in some epoxy into the vertical stay / wing joint  P1050127 P1050127 by jono_misfit, on Flickr and put a first pass of filler on the joint. 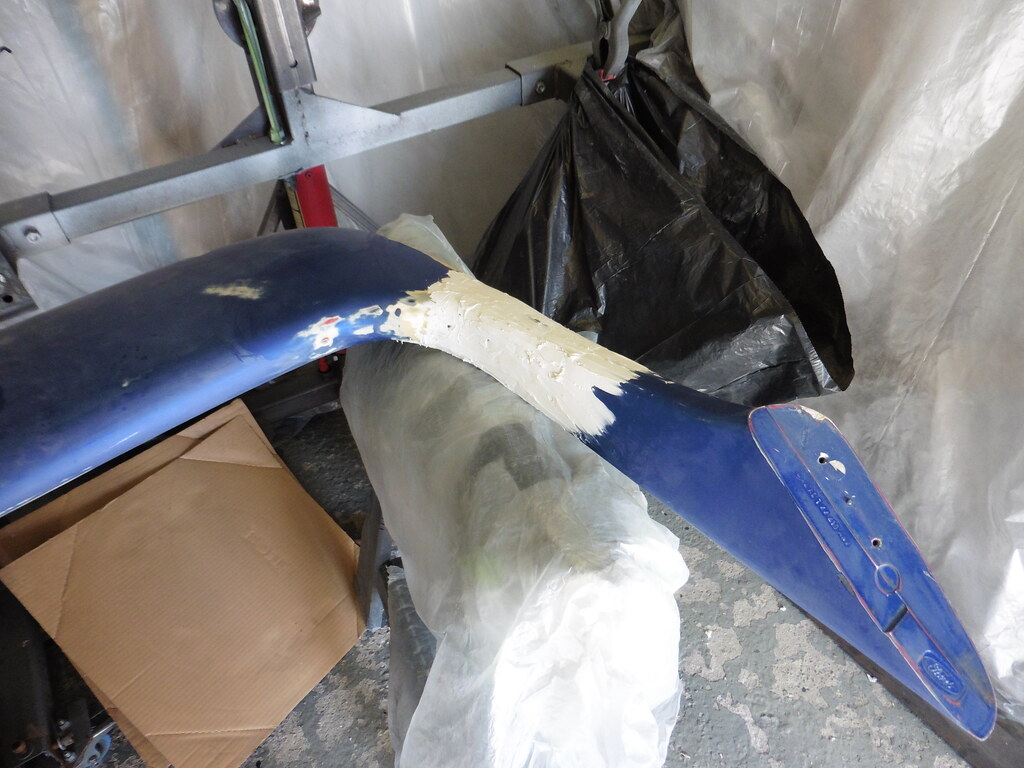 P1050128 P1050128 by jono_misfit, on Flickr which should be cured ready for a sand back tomorrow. The epoxy i used on the repairs sets solid in 15 mins, so was ready for a sand back.  P1050129 P1050129 by jono_misfit, on Flickr  P1050130 P1050130 by jono_misfit, on Flickr Ready for a light filling tomorrow and a paint. As i'd put copper grease on the bolt it nicely undid wihtout any drama. :-) I've seen someone not do this, along with the drama that then ensued trying to get the bolt out, so learned from their mistake. |
| |
|
|
jonomisfit
Club Retro Rides Member
Posts: 1,787
Club RR Member Number: 49
|
|
|
|
Started sanding back the wing  P1050131 P1050131 by jono_misfit, on Flickr  P1050132 P1050132 by jono_misfit, on Flickr It needed another coat of filler.  P1050133 P1050133 by jono_misfit, on Flickr  P1050134 P1050134 by jono_misfit, on Flickr  P1050135 P1050135 by jono_misfit, on Flickr Starting to get there with the shape I put some more filler on,  P1050137 P1050137 by jono_misfit, on Flickr  P1050138 P1050138 by jono_misfit, on Flickr then whilst waiting for it to cure pushing the car over two steps has been nearly killing me, so caved in a put slabs down as a ramp  P1050136 P1050136 by jono_misfit, on Flickr The filler had cured so sanded it off again  P1050146 P1050146 by jono_misfit, on Flickr 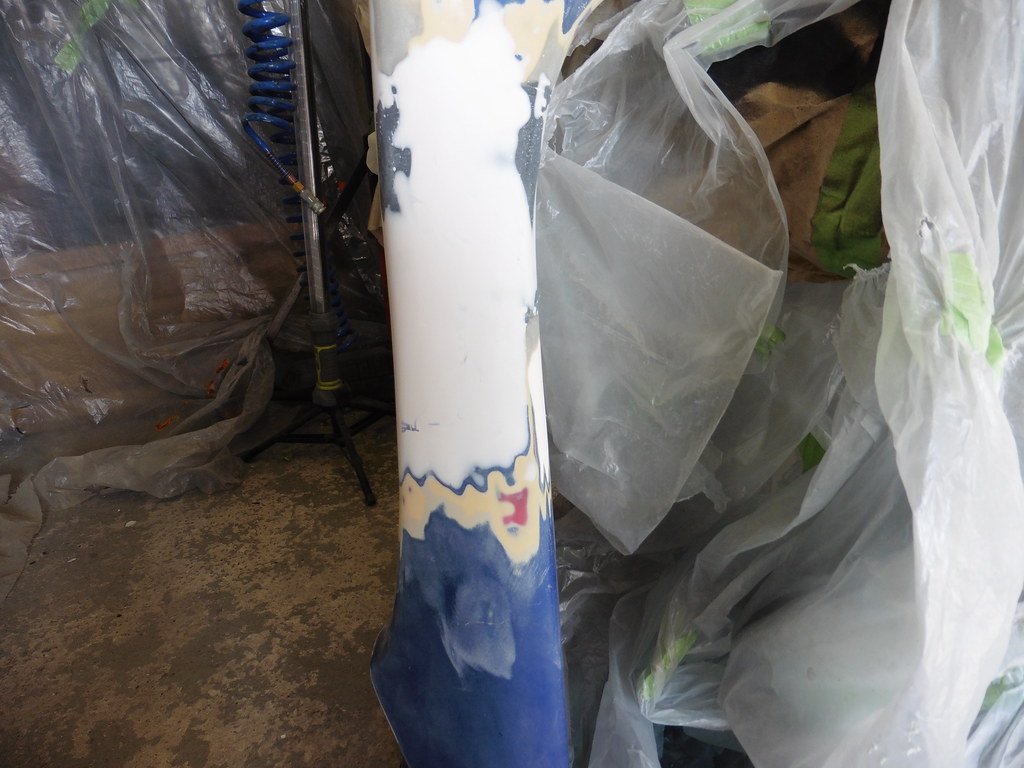 P1050147 P1050147 by jono_misfit, on Flickr Nice smooth finish. Its not perfect shape wise, but its better than it was. Next time I shoud hopefully get it into paint. |
| |
|
|
jonomisfit
Club Retro Rides Member
Posts: 1,787
Club RR Member Number: 49
|
|
|
|
As there wasnt enought time to get some paint on it I started the next job. Fuel lines from tank box to bulkhead. Bulhead fittings in tank box 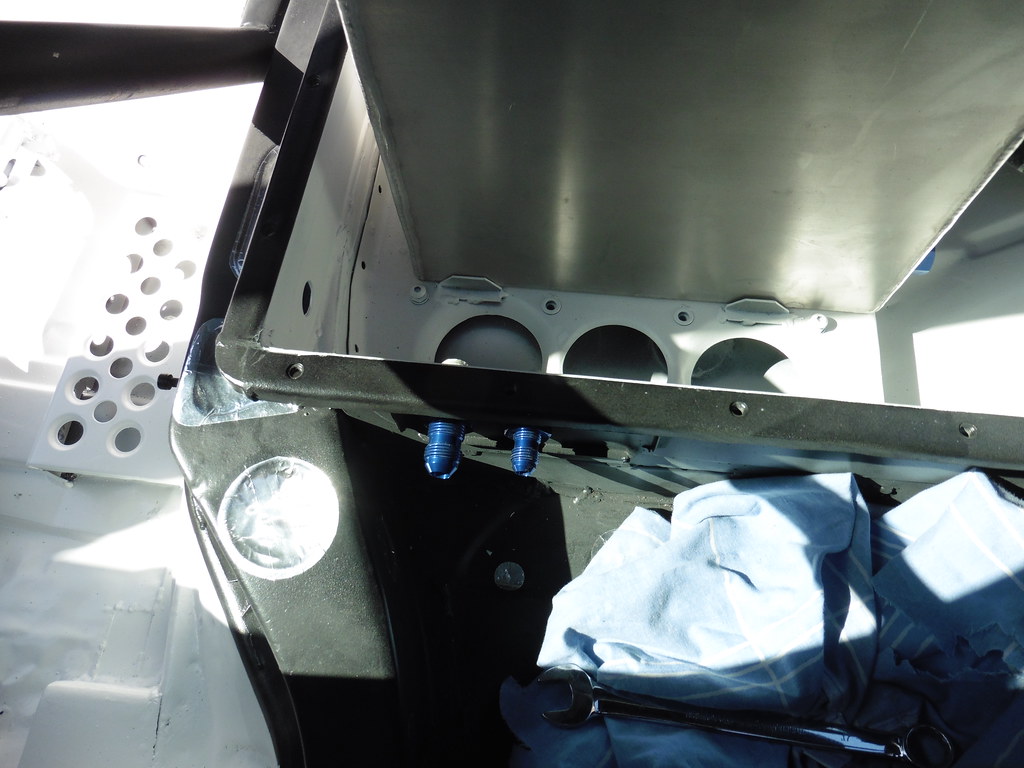 P1050139 P1050139 by jono_misfit, on Flickr bulkhead fitting in the bulkhead  P1050140 P1050140 by jono_misfit, on Flickr start the first hose fitting  P1050141 P1050141 by jono_misfit, on Flickr cut the end square, olive in  P1050142 P1050142 by jono_misfit, on Flickr fitting fully tightened  P1050143 P1050143 by jono_misfit, on Flickr mocked up in place  P1050144 P1050144 by jono_misfit, on Flickr working out the cut point for the other side.  P1050145 P1050145 by jono_misfit, on Flickr and start terminating the other end  P1050148 P1050148 by jono_misfit, on Flickr getting the barb into the hose on the -8 fittings is pretty tough, but got there in the end  P1050149 P1050149 by jono_misfit, on Flickr fitting all tightened up  P1050150 P1050150 by jono_misfit, on Flickr routed back through the car  P1050151 P1050151 by jono_misfit, on Flickr  P1050152 P1050152 by jono_misfit, on Flickr the -8 fitting this end doesnt look like its sitting right so may strip it to check it over. |
| |
|
|
jonomisfit
Club Retro Rides Member
Posts: 1,787
Club RR Member Number: 49
|
|
|
|
I put the mechanical handbrake in, just to check where the brake lines would have to be routed to clear it.  P1050153 P1050153 by jono_misfit, on Flickr I then was looking at the pedal box and was thinking, thats a bit tight  P1050154 P1050154 by jono_misfit, on Flickr I'm pretty certain i'm going to need to modify the pedal here. Its designed to work with a fixed column, not the colapsing one I have, which is a lot more slender. Hmmm. this is anoying. the reason I'll need to modify it (or change the column) is the brake pedal will have to sit back a long way to clear...  P1050155 P1050155 by jono_misfit, on Flickr It then doesnt have much movement to the floor. Another job for the list. I decided the best course of action is to ignore it for a bit and hope it goes away. I need to run both the rear brake line and the rear wiring down the tunnel, so the tape is to get a sense of where it'll go and that it clears things.  P1050156 P1050156 by jono_misfit, on Flickr should suitably clear everythig there. then a final flat over and hang the spoilers  P1050157 P1050157 by jono_misfit, on Flickr start the clean down  P1050158 P1050158 by jono_misfit, on Flickr and some more cleaning down  P1050159 P1050159 by jono_misfit, on Flickr  P1050160 P1050160 by jono_misfit, on Flickr  P1050161 P1050161 by jono_misfit, on Flickr  P1050162 P1050162 by jono_misfit, on Flickr first coat of epoxy on  P1050163 P1050163 by jono_misfit, on Flickr  P1050164 P1050164 by jono_misfit, on Flickr  P1050165 P1050165 by jono_misfit, on Flickr  P1050166 P1050166 by jono_misfit, on Flickr I put on a second coat, and left it to cure. I've never tried it.... but the epoxy is meant to be paintable within 20 mins. Basically enough time for the thinners to evaporate then the primer cures by chemical reaction. This means its non reactive with other things.... Lets try that out... first coat of paint on  P1050167 P1050167 by jono_misfit, on Flickr  P1050168 P1050168 by jono_misfit, on Flickr  P1050169 P1050169 by jono_misfit, on Flickr straight out of the gun and all looks OK so far. coats 2 & 3  P1050170 P1050170 by jono_misfit, on Flickr  P1050171 P1050171 by jono_misfit, on Flickr hmmm.... lower spoiler is starting to react.  P1050172 P1050172 by jono_misfit, on Flickr  P1050173 P1050173 by jono_misfit, on Flickr It looks like whatever the lower spoiler was painted with things are not happy. It has had two layers of paint previously. Something in one of them is not happy. At some point I'll flat it all back, paint it with epoxy, leave it a week to cure, then paint it again. The upper spoiler had no such issues.... go figure.... I gave it an hour with the heaters on to drive out most of the thinners and try and get it to settle out. it was a nice day so rolled up the sheets to get some air through the workshop. 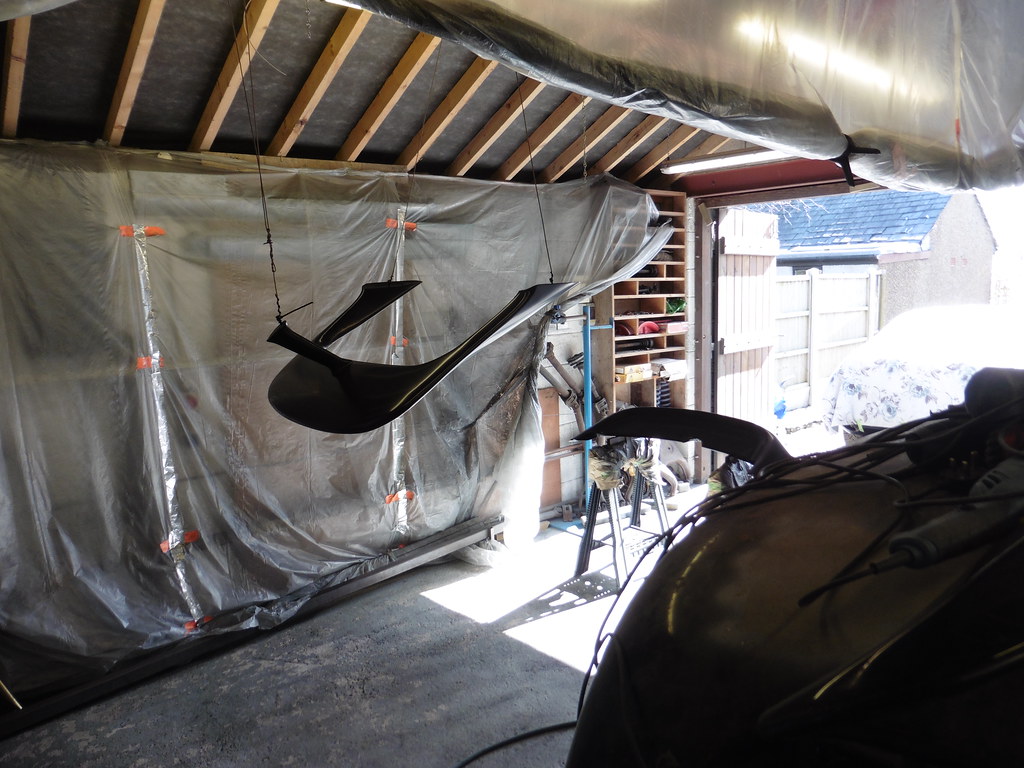 P1050174 P1050174 by jono_misfit, on Flickr |
| |
|
|
jonomisfit
Club Retro Rides Member
Posts: 1,787
Club RR Member Number: 49
|
|
|
|
<cont> You can see here the reactions  P1050175 P1050175 by jono_misfit, on Flickr If you go back to the first couple of pics, its where i've had to flat back down the gel coat that appears to be the issue. Not everywhere, but in a number of places. Ah well. Before putting in the bulkhead penetrator for the brakes I want to make sure its going to clear the heater bulkhead transit. But the retainer plate was manky so gave it a clean back.  P1050176 P1050176 by jono_misfit, on Flickr  P1050177 P1050177 by jono_misfit, on Flickr disinfected it from scab worm, then gave it an uber prime.  P1050178 P1050178 by jono_misfit, on Flickr  P1050179 P1050179 by jono_misfit, on Flickr this stuff needs some time to cure so will give it a bake then top coat tomorow. I needed to put the car back inside so very carefully put the spoilers back on  P1050180 P1050180 by jono_misfit, on Flickr I know its mine, and I'm biased, but what a rear end.... 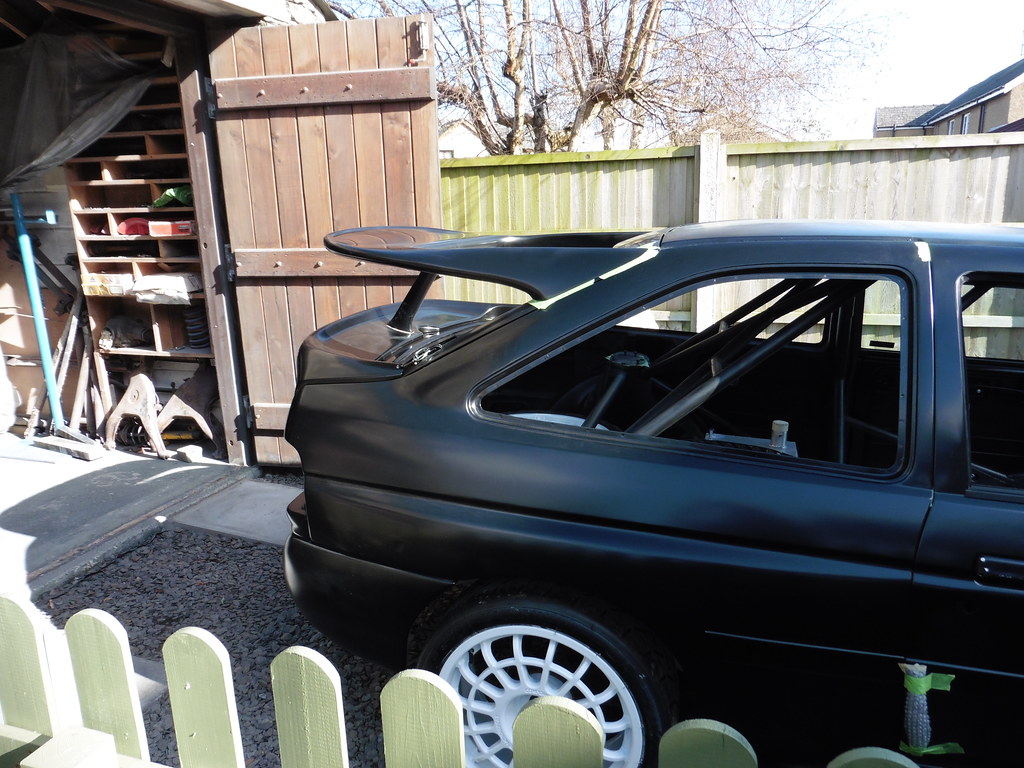 P1050181 P1050181 by jono_misfit, on Flickr it seems to me fitting the spoilers shortens the look of the wheelbase  P1050182 P1050182 by jono_misfit, on Flickr you can see the repair to the spoiler has some ripple to it  P1050183 P1050183 by jono_misfit, on Flickr  P1050184 P1050184 by jono_misfit, on Flickr but looking the other way it looks ok  P1050185 P1050185 by jono_misfit, on Flickr I quickly gave the skirt closer that had bloomed a flat and a fresh top coat  P1050186 P1050186 by jono_misfit, on Flickr amd same with the other skirt that had the same problem  P1050187 P1050187 by jono_misfit, on Flickr  P1050188 P1050188 by jono_misfit, on Flickr  P1050189 P1050189 by jono_misfit, on Flickr Dat rear end, looks like I may have killed another camera with dust as well....  P1050190 P1050190 by jono_misfit, on Flickr  P1050191 P1050191 by jono_misfit, on Flickr I think satin black and white looks good, and with some graphics on the car should have a fair meanness to it. |
| |
|
|
jonomisfit
Club Retro Rides Member
Posts: 1,787
Club RR Member Number: 49
|
|
|
|
I repainted the front grill as this was another part that had bloomed.  P1050192 P1050192 by jono_misfit, on Flickr I also notched the front skirt closers to go past the sill stands, and gave them a re-coat. 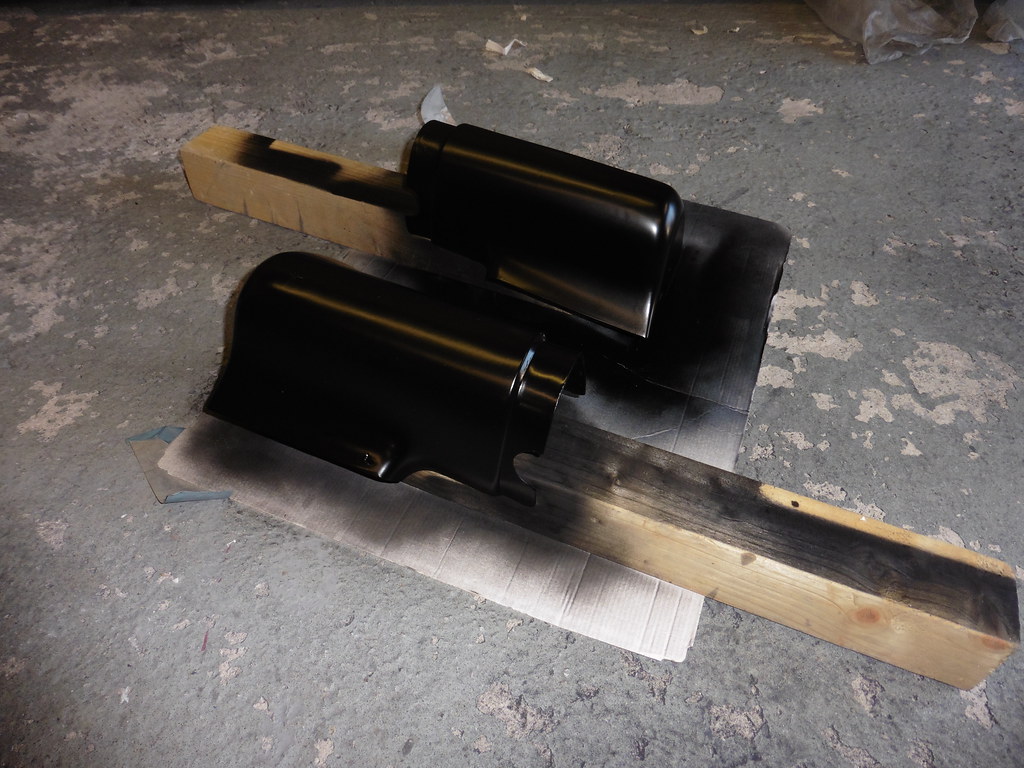 P1050193 P1050193 by jono_misfit, on Flickr  P1050194 P1050194 by jono_misfit, on Flickr and fitted them  P1050195 P1050195 by jono_misfit, on Flickr the GRP has moved a bit over time and the fit isnt amazing....  P1050196 P1050196 by jono_misfit, on Flickr  P1050197 P1050197 by jono_misfit, on Flickr I may need to look at tweaking it at some point re-painted the front bumper  P1050198 P1050198 by jono_misfit, on Flickr Put in the wiper motor, the fetching leopard print duct tape is because the housing is cracked. I could have glued it, but if I can find it there is a better one somewhere else in the mess that is the workshop  P1050199 P1050199 by jono_misfit, on Flickr I then stripped a good condition wiper I had for the arms.  P1050200 P1050200 by jono_misfit, on Flickr If you notice the right hand arm looks funky...  P1050201 P1050201 by jono_misfit, on Flickr this is because its been modified to clear the rollcage. Luckily it came with the car. its close... but clears  P1050202 P1050202 by jono_misfit, on Flickr They'll come back off for a propper clean up and paint I fitted the heater hose bulkhead transit.  P1050203 P1050203 by jono_misfit, on Flickr then marked in where the hole needs drilled  P1050204 P1050204 by jono_misfit, on Flickr goes in like so  P1050205 P1050205 by jono_misfit, on Flickr and like this on the inside  P1050206 P1050206 by jono_misfit, on Flickr although may flip it round the other way to have the fitting closer in to the bulkhead. marked up for the brake hose / wiring clips 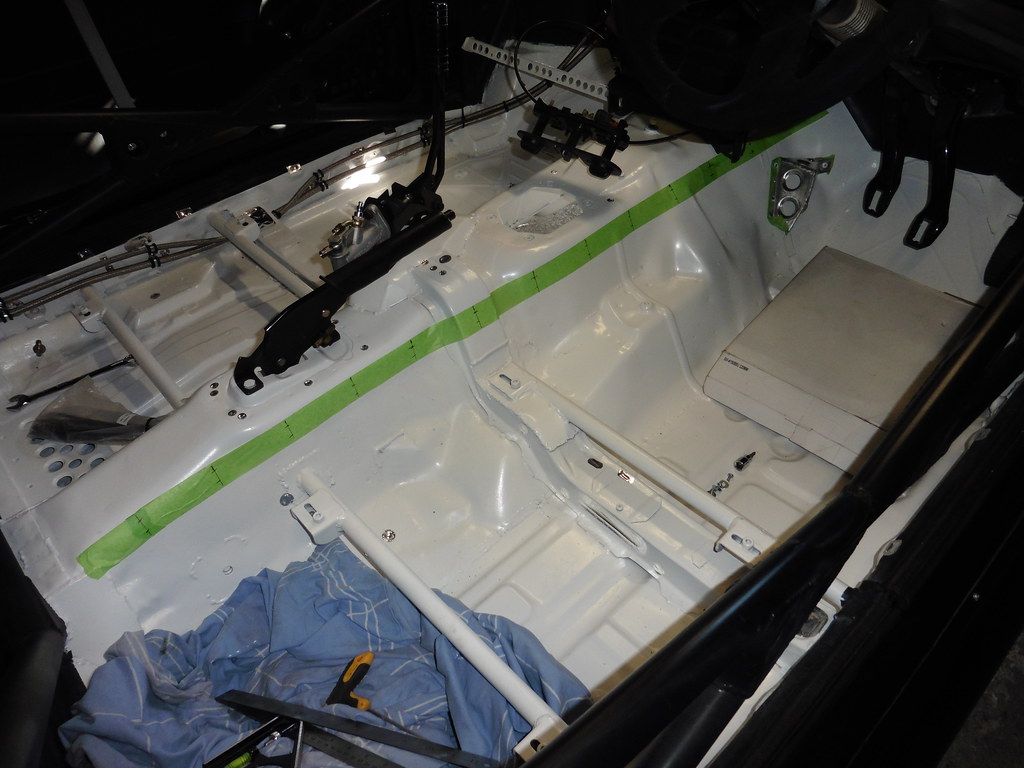 P1050207 P1050207 by jono_misfit, on Flickr and drilled.  P1050208 P1050208 by jono_misfit, on Flickr I have have over killed the amount of fixings at this point i'm using these types of saddles.  P1050209 P1050209 by jono_misfit, on Flickr and these close end rivets 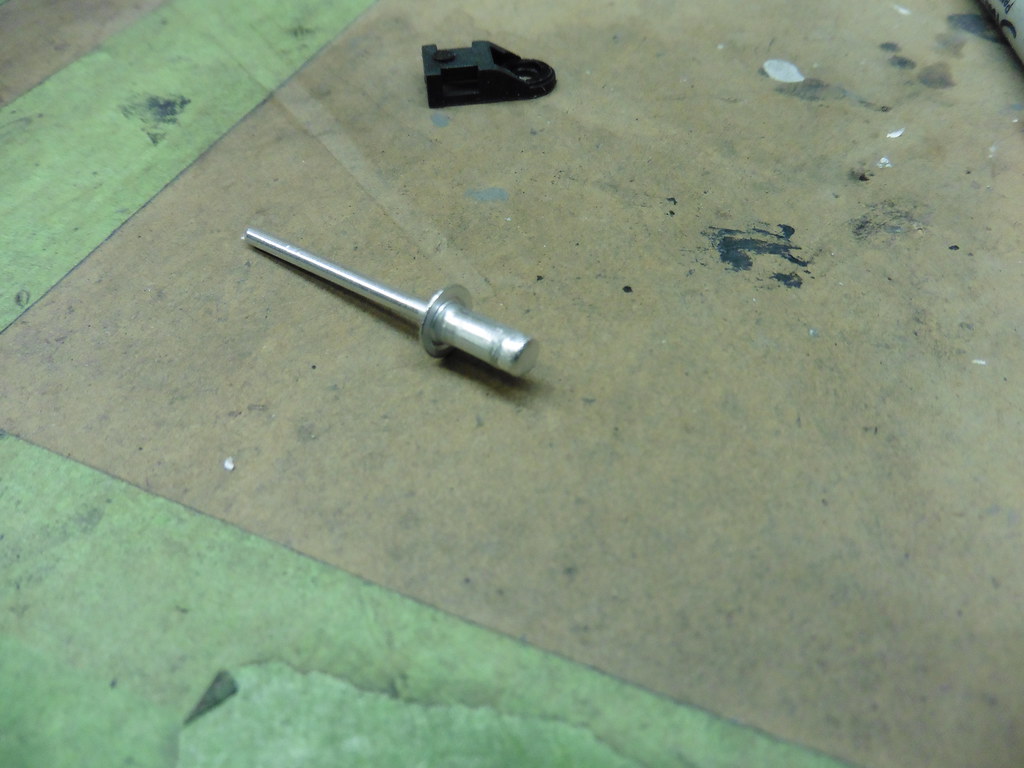 P1050210 P1050210 by jono_misfit, on Flickr as I've drilled through paint and left bare metal, I've got some paint to wipe round the holes and dip the rivets in before pulling all in  P1050212 P1050212 by jono_misfit, on Flickr ends up with rivets with paint on ans sealing the metal and themselves into the holes  P1050213 P1050213 by jono_misfit, on Flickr |
| |
|
|
jonomisfit
Club Retro Rides Member
Posts: 1,787
Club RR Member Number: 49
|
|
|
|
I looked at the brake reservoirs and thought, they will probably fit on the master cylinders. They do.  P1050214 P1050214 by jono_misfit, on Flickr which is neater I'll need to trim the flanges a bit though as they're fractioanlly too tight.  P1050215 P1050215 by jono_misfit, on Flickr Assembled the first fitting onto the hose  P1050216 P1050216 by jono_misfit, on Flickr and ran in the first hose  P1050217 P1050217 by jono_misfit, on Flickr and the second  P1050218 P1050218 by jono_misfit, on Flickr and the rear feed hose  P1050221 P1050221 by jono_misfit, on Flickr  P1050222 P1050222 by jono_misfit, on Flickr Put the bumper back on as it was getting in the way 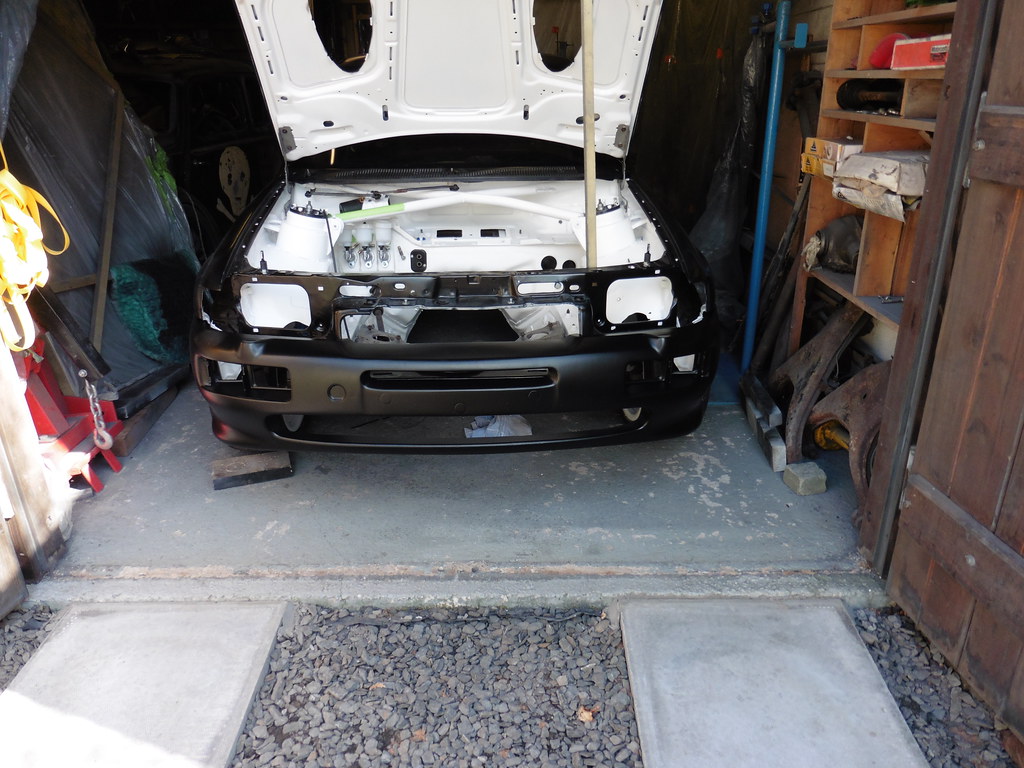 P1050219 P1050219 by jono_misfit, on Flickr  P1050220 P1050220 by jono_misfit, on Flickr and front grill and lights  P1050223 P1050223 by jono_misfit, on Flickr the bumper isnt sitting right as there is a huuuuge gap here  P1050224 P1050224 by jono_misfit, on Flickr rear lights in  P1050225 P1050225 by jono_misfit, on Flickr  P1050226 P1050226 by jono_misfit, on Flickr then started routing in the wirring  P1050227 P1050227 by jono_misfit, on Flickr  P1050228 P1050228 by jono_misfit, on Flickr  P1050229 P1050229 by jono_misfit, on Flickr 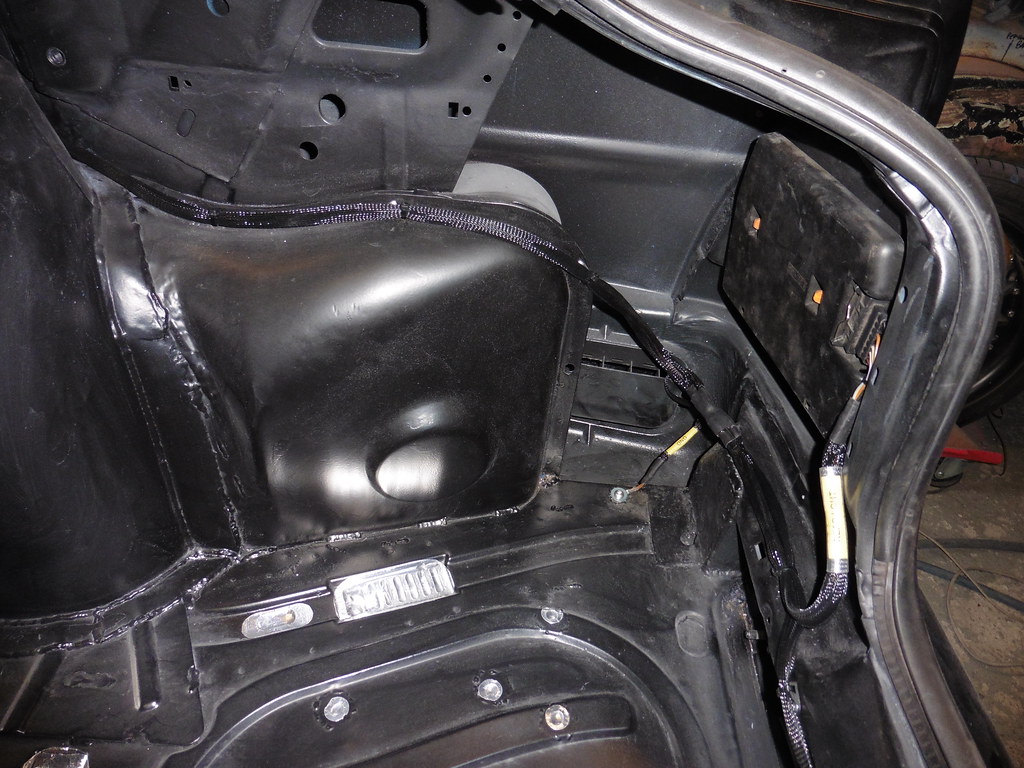 P1050230 P1050230 by jono_misfit, on Flickr  P1050231 P1050231 by jono_misfit, on Flickr Probably saturday before I'm back on it. |
| |
|
|
ian911
Part of things
 
Posts: 13
|
|
|
|
|
Loads of progress going on, very jealous of your car.
|
| |
|
|
jonomisfit
Club Retro Rides Member
Posts: 1,787
Club RR Member Number: 49
|
|
Apr 10, 2021 19:35:12 GMT
|
I spend a few hours on Thursday de-dusting the workshop. Fans on, blowing down all the surfaces and extracting all the dust out. Lots of sweeping down etc. The air in there feel much nicer, and much its defintely a lot cleaner. I rolled all the sheets up and set so I can roll down again when needed next  P1050232 P1050232 by jono_misfit, on Flickr continued on with cleaning up  P1050233 P1050233 by jono_misfit, on Flickr  P1050234 P1050234 by jono_misfit, on Flickr benches have been de-dusted, but I need to put the tools away still  P1050235 P1050235 by jono_misfit, on Flickr power tools dusted down and ready for putting away  P1050236 P1050236 by jono_misfit, on Flickr the dashboard was filthy so gave it a first clean over with detergent and a car wheel brush to scub it. It took off the worst of the dirt.  P1050237 P1050237 by jono_misfit, on Flickr its still not the best dash, so will likely need a paint and a flock at some point.  P1050238 P1050238 by jono_misfit, on Flickr I inserted the bulkhead penetrator for the power feed.  P1050242 P1050242 by jono_misfit, on Flickr  P1050243 P1050243 by jono_misfit, on Flickr put in the first piece of engine bay wirring loom 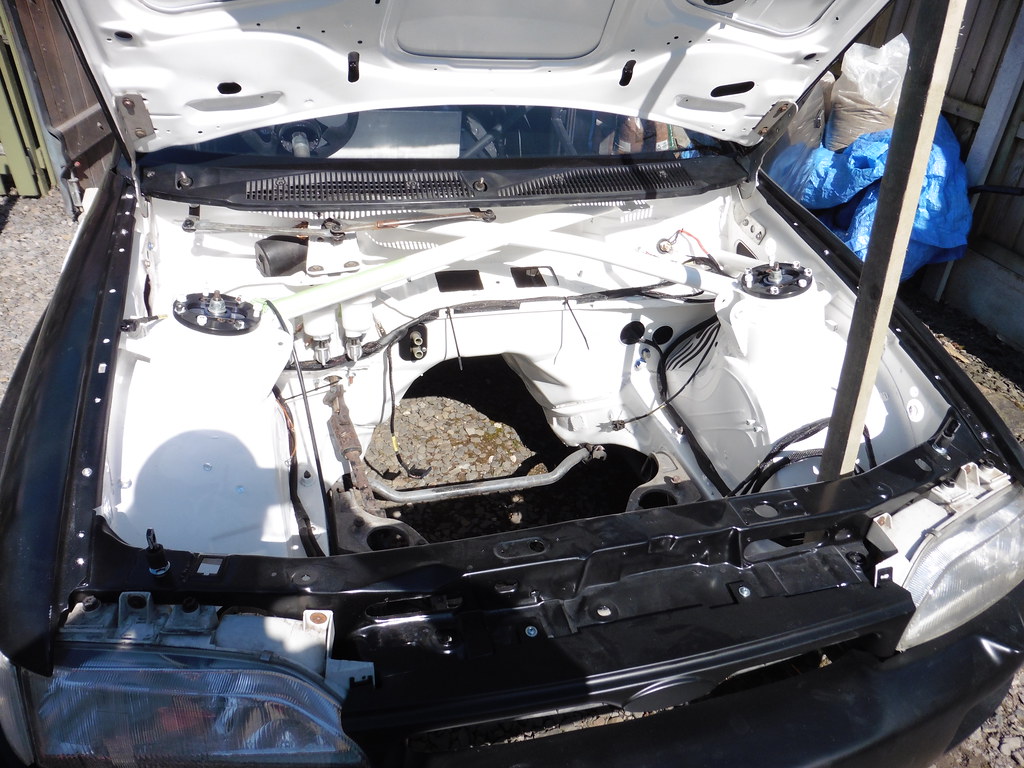 P1050244 P1050244 by jono_misfit, on Flickr hmmm. I should have made the earth stud longer.  P1050245 P1050245 by jono_misfit, on Flickr power and earth cables in from battery position to isolator  P1050246 P1050246 by jono_misfit, on Flickr and the connections from the isolator to the bulkhead penetrator  P1050248 P1050248 by jono_misfit, on Flickr  P1050249 P1050249 by jono_misfit, on Flickr The orange tape everywhere is because the crimps are just taped on, as i'm waiting for my crimping tool still. and I don't have a battery yet, so the ends are left long.  P1050250 P1050250 by jono_misfit, on Flickr more wiring going in the engine bay  P1050251 P1050251 by jono_misfit, on Flickr thats a lot of wires....  P1050252 P1050252 by jono_misfit, on Flickr  P1050253 P1050253 by jono_misfit, on Flickr thats a lot even morerer wires!  P1050254 P1050254 by jono_misfit, on Flickr  P1050255 P1050255 by jono_misfit, on Flickr and more! I don't remember there being this many before... I think they've bred  P1050256 P1050256 by jono_misfit, on Flickr  P1050257 P1050257 by jono_misfit, on Flickr and quickly plonked in the dash to help me be more certain on routes  P1050258 P1050258 by jono_misfit, on Flickr  P1050259 P1050259 by jono_misfit, on Flickr It'll need to come back out so I can crimp the feed cables. I also realised I still need to get a decent blower as this is toast....  P1050260 P1050260 by jono_misfit, on Flickr |
| |
|
|
jonomisfit
Club Retro Rides Member
Posts: 1,787
Club RR Member Number: 49
|
|
Apr 10, 2021 19:46:44 GMT
|
I was also looking at the workshop layout and thinking it needs a change up. Its pretty awkward for space the way I have it set at the moment. I think i may go for somethign like this  Garage Layout - 2 Garage Layout - 2 by jono_misfit, on Flickr This is the biggest change, I'm thinking of moving the benches round and extending the mezzanine by about 750mm. I'm also thinking about putting in some decent cabinets that are more useable than the shelves I have.  Garage Layout - 2-2 Garage Layout - 2-2 by jono_misfit, on Flickr the second bench will shift over to in front of the lathe / mill area  Garage Layout - 2-3 Garage Layout - 2-3 by jono_misfit, on Flickr there's a bit more space for getting around the cars  Garage Layout - 2-4 Garage Layout - 2-4 by jono_misfit, on Flickr plus if I push the cars over, there is also space to do a bit of other stuff..  Garage Layout - 2-5 Garage Layout - 2-5 by jono_misfit, on Flickr I'll see how I get on contemplating. |
| |
|
|
|
|
|
Apr 11, 2021 13:56:38 GMT
|
|
Fantastic progress on the car!
I do not like shelves as all the dust gets on items on the shelf and its a lot of work to clean them. I have lots of steel cabinets which were all different color so the cabinets were all painted red which looks a bit more organised. Only ppainted the outside of the cabinets
Peter
|
| |
|
|
jonomisfit
Club Retro Rides Member
Posts: 1,787
Club RR Member Number: 49
|
|
Apr 11, 2021 15:25:38 GMT
|
|
That's what happens with me, which is part of the thinking for a change up of the place. All the shonky shelving was in when I bought the place and I've been too lazy to swap it out.
I've made use of what there is, but I'd be better served putting in what I actually need I think.
|
| |
|
|
 P1050046 by jono_misfit, on Flickr
 P1050047 by jono_misfit, on Flickr
 P1050048 by jono_misfit, on Flickr
 P1050049 by jono_misfit, on Flickr
 P1050050 by jono_misfit, on Flickr
 P1050051 by jono_misfit, on Flickr
 P1050053 by jono_misfit, on Flickr
 P1050054 by jono_misfit, on Flickr
 P1050055 by jono_misfit, on Flickr
 P1050056 by jono_misfit, on Flickr
 P1050057 by jono_misfit, on Flickr
 P1050058 by jono_misfit, on Flickr
 P1050059 by jono_misfit, on Flickr
 P1050060 by jono_misfit, on Flickr
 P1050061 by jono_misfit, on Flickr
 P1050062 by jono_misfit, on Flickr
 P1050063 by jono_misfit, on Flickr
 P1050065 by jono_misfit, on Flickr
 P1050066 by jono_misfit, on Flickr
 P1050067 by jono_misfit, on Flickr
 P1050046 by jono_misfit, on Flickr
 P1050047 by jono_misfit, on Flickr
 P1050048 by jono_misfit, on Flickr
 P1050049 by jono_misfit, on Flickr
 P1050050 by jono_misfit, on Flickr
 P1050051 by jono_misfit, on Flickr
 P1050053 by jono_misfit, on Flickr
 P1050054 by jono_misfit, on Flickr
 P1050055 by jono_misfit, on Flickr
 P1050056 by jono_misfit, on Flickr
 P1050057 by jono_misfit, on Flickr
 P1050058 by jono_misfit, on Flickr
 P1050059 by jono_misfit, on Flickr
 P1050060 by jono_misfit, on Flickr
 P1050061 by jono_misfit, on Flickr
 P1050062 by jono_misfit, on Flickr
 P1050063 by jono_misfit, on Flickr
 P1050065 by jono_misfit, on Flickr
 P1050066 by jono_misfit, on Flickr
 P1050067 by jono_misfit, on Flickr


