jonomisfit
Club Retro Rides Member
Posts: 1,787
Club RR Member Number: 49
|
|
|
|
|
|
| |
|
|
|
|
jonomisfit
Club Retro Rides Member
Posts: 1,787
Club RR Member Number: 49
|
|
|
|
It was all touch dry, so I started un-masking the car.  P1040646 P1040646 by jono_misfit, on Flickr  P1040647 P1040647 by jono_misfit, on Flickr  P1040648 P1040648 by jono_misfit, on Flickr The inside has got a fair coating of dust in it from all the sanding.  P1040649 P1040649 by jono_misfit, on Flickr  P1040650 P1040650 by jono_misfit, on Flickr  P1040651 P1040651 by jono_misfit, on Flickr  P1040652 P1040652 by jono_misfit, on Flickr  P1040653 P1040653 by jono_misfit, on Flickr  P1040654 P1040654 by jono_misfit, on Flickr  P1040655 P1040655 by jono_misfit, on Flickr there are two small runs to fix. Back end of the passenger quarter above the rear light and the drivers side at the B pillar at the window apperture corner. 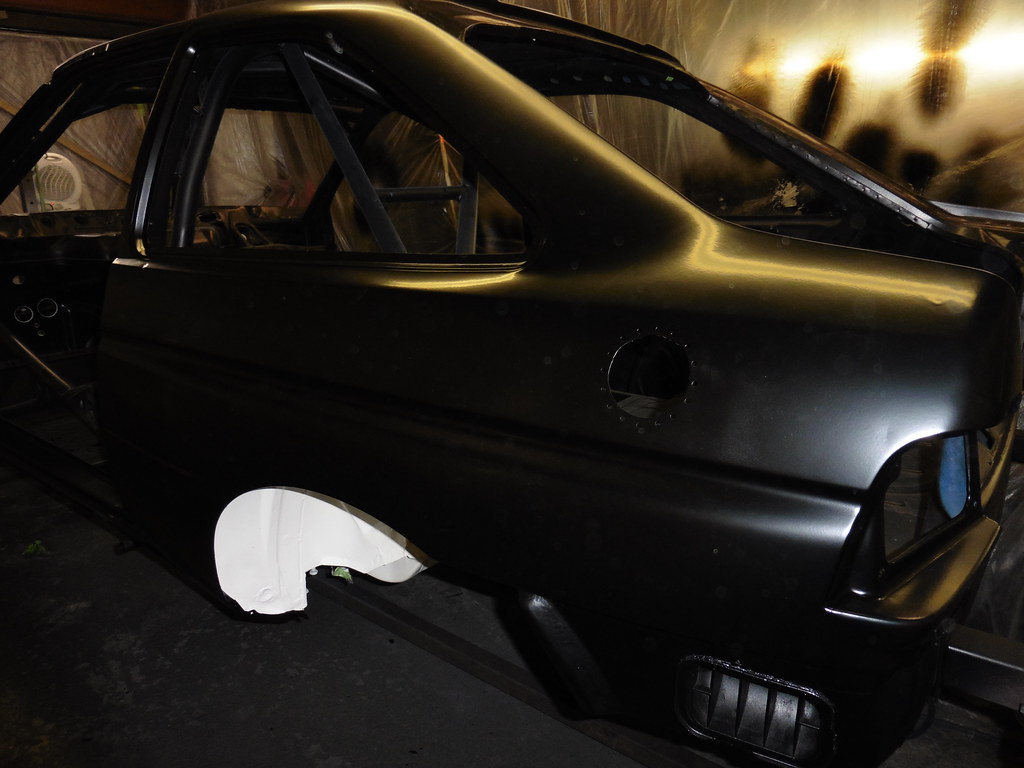 P1040656 P1040656 by jono_misfit, on Flickr  P1040657 P1040657 by jono_misfit, on Flickr  P1040658 P1040658 by jono_misfit, on Flickr  P1040659 P1040659 by jono_misfit, on Flickr  P1040660 P1040660 by jono_misfit, on Flickr 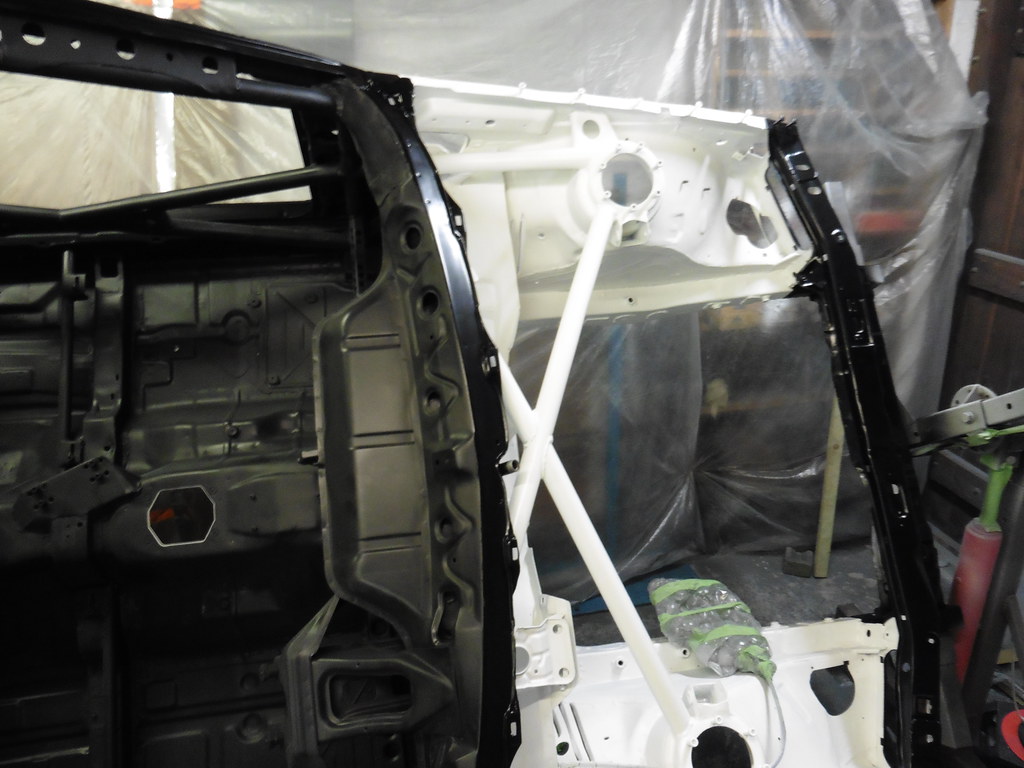 P1040661 P1040661 by jono_misfit, on Flickr  P1040662 P1040662 by jono_misfit, on Flickr 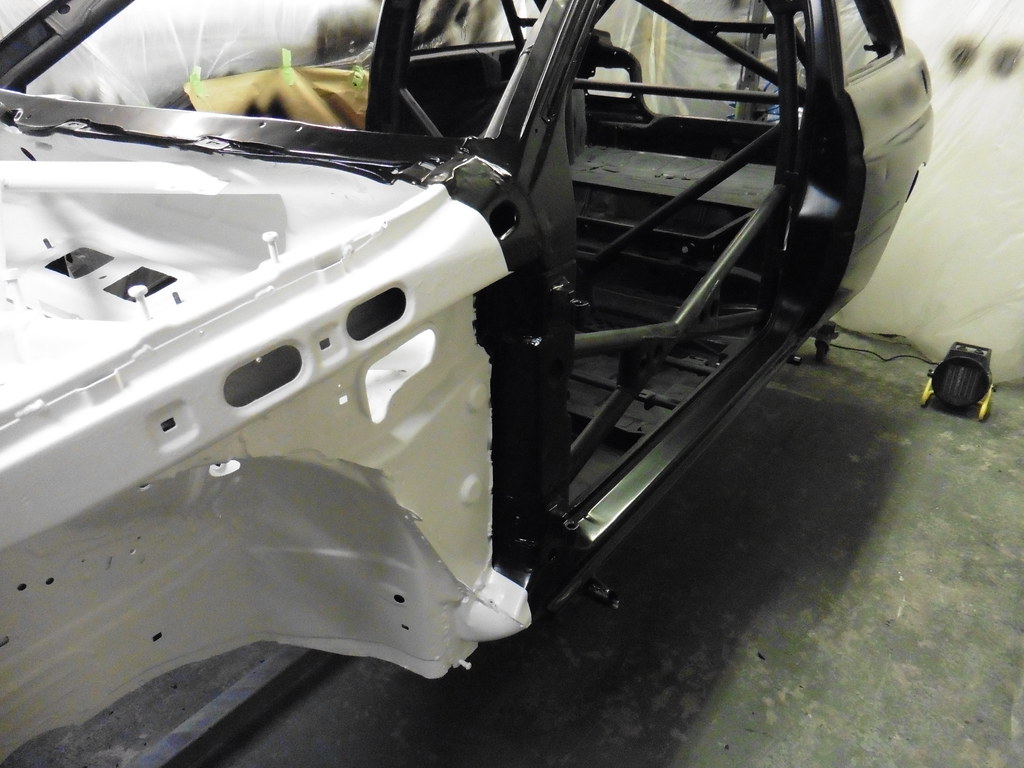 P1040663 P1040663 by jono_misfit, on Flickr I'm fairly happy with it now. It'll need a flat back and polish to get a smooth finish, but thats something that can wait. There are a few things to paint inside the shell, like the inside of the fuel tank box, boot floor, and footwells, then onto the boot, bonnet, doors, and bumpers. |
| |
|
|
|
|
|
|
|
|
Very nice. I think the black suits the shape of the mk5. I bought a black RS2000 for the engine, but even though it was rotten it still looked stunning.
|
| |
|
|
jonomisfit
Club Retro Rides Member
Posts: 1,787
Club RR Member Number: 49
|
|
|
|
|
Thanks.
My second car was a mk5 3 door so I have a soft spot for them. In fact it's still living in one of the sheds at my dad's place. Possibly for resurrection at some point.
|
| |
|
|
jonomisfit
Club Retro Rides Member
Posts: 1,787
Club RR Member Number: 49
|
|
Jan 11, 2021 21:15:22 GMT
|
i headed out to the garage tonight to check how the paint was hardening and make sure nothing was reacting. All good. So took the chance to seal up the fuel tank box seams  P1040664 P1040664 by jono_misfit, on Flickr 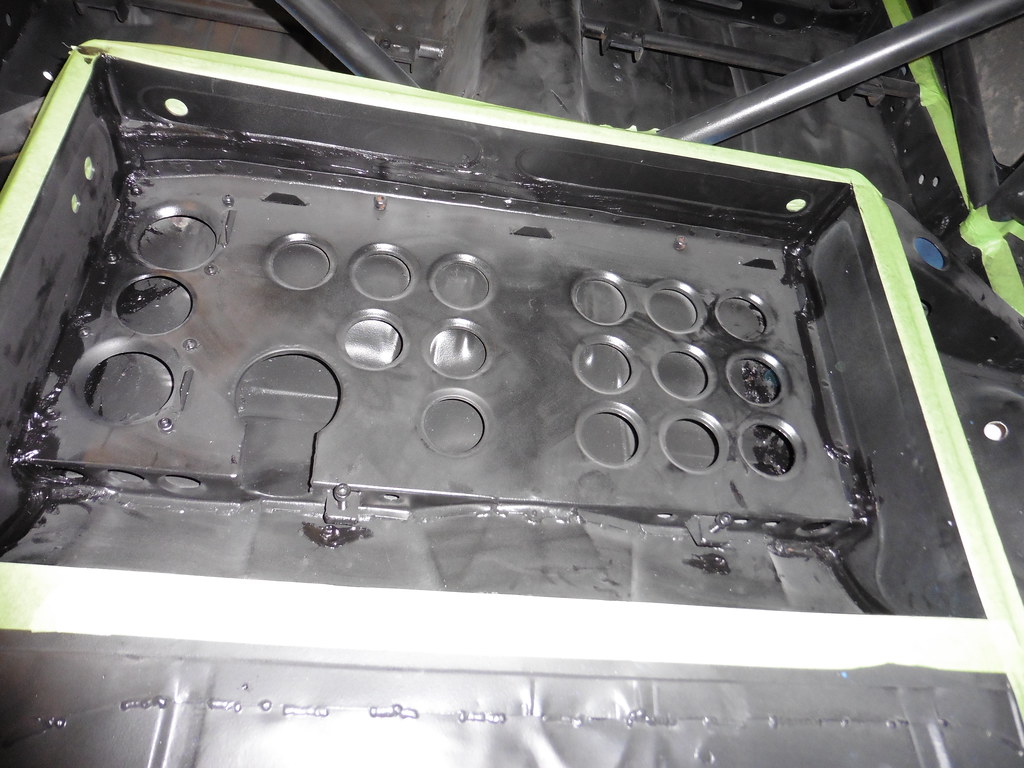 P1040665 P1040665 by jono_misfit, on Flickr some of it was a right pain in the backside to get into....  P1040666 P1040666 by jono_misfit, on Flickr mainly all the bits inside the holes as I couldnt really get my hand inside. 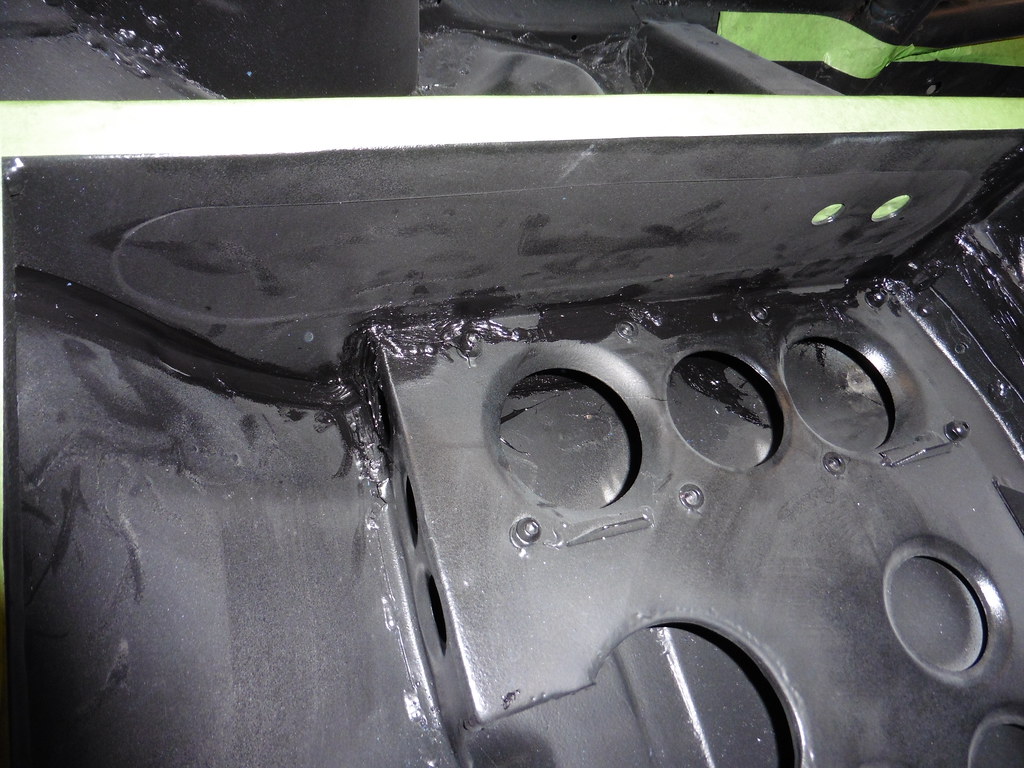 P1040667 P1040667 by jono_misfit, on Flickr Not the prettiest, however all the seams were sealed, so should keep any spilled fuel in.  P1040668 P1040668 by jono_misfit, on Flickr I masked off the top flange as well, as i'll be spraying inside the box white so I can see any fluid spills. Then moved on to masking off the footwells so I can paint them white as well.  P1040669 P1040669 by jono_misfit, on Flickr  P1040670 P1040670 by jono_misfit, on Flickr |
| |
|
|
eurogranada
Europe
To tinker or not to tinker, that is the question...
Posts: 2,556
|
|
Jan 12, 2021 11:16:08 GMT
|
|
Well done so far! Good on you for sticking with it and not giving in.
|
| |
|
|
jonomisfit
Club Retro Rides Member
Posts: 1,787
Club RR Member Number: 49
|
|
Jan 15, 2021 20:28:07 GMT
|
Things would be easier at times if I didnt do things  -about-face... masked up the inside and outside of the car...  P1040672 P1040672 by jono_misfit, on Flickr  P1040673 P1040673 by jono_misfit, on Flickr gave everything a light flatting over, a hoover, a dust, and a panel wipe, then threw some white on. First coat. 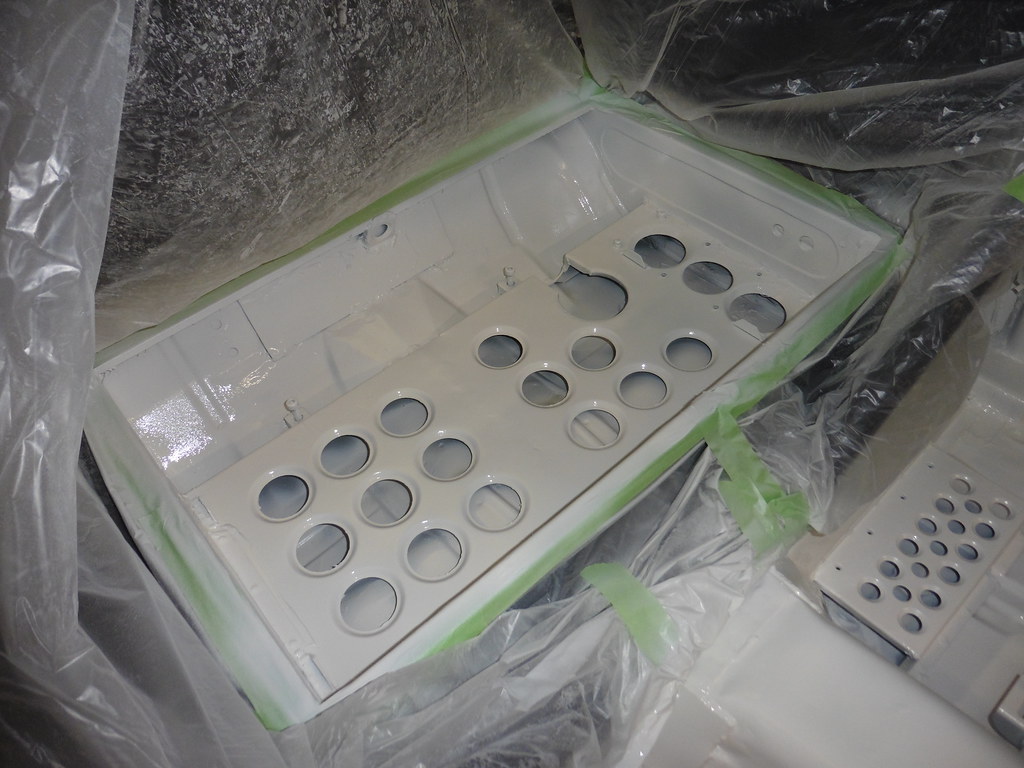 P1040674 P1040674 by jono_misfit, on Flickr  P1040675 P1040675 by jono_misfit, on Flickr Second  P1040676 P1040676 by jono_misfit, on Flickr  P1040677 P1040677 by jono_misfit, on Flickr third  P1040678 P1040678 by jono_misfit, on Flickr  P1040679 P1040679 by jono_misfit, on Flickr  P1040680 P1040680 by jono_misfit, on Flickr  P1040681 P1040681 by jono_misfit, on Flickr I'll remove the masking tomorrow and see if any off it failed and I have nice white plumes anywhere.... |
| |
|
|
jonomisfit
Club Retro Rides Member
Posts: 1,787
Club RR Member Number: 49
|
|
Jan 16, 2021 18:13:09 GMT
|
I pulled back the masking to see what I'd ended up with. 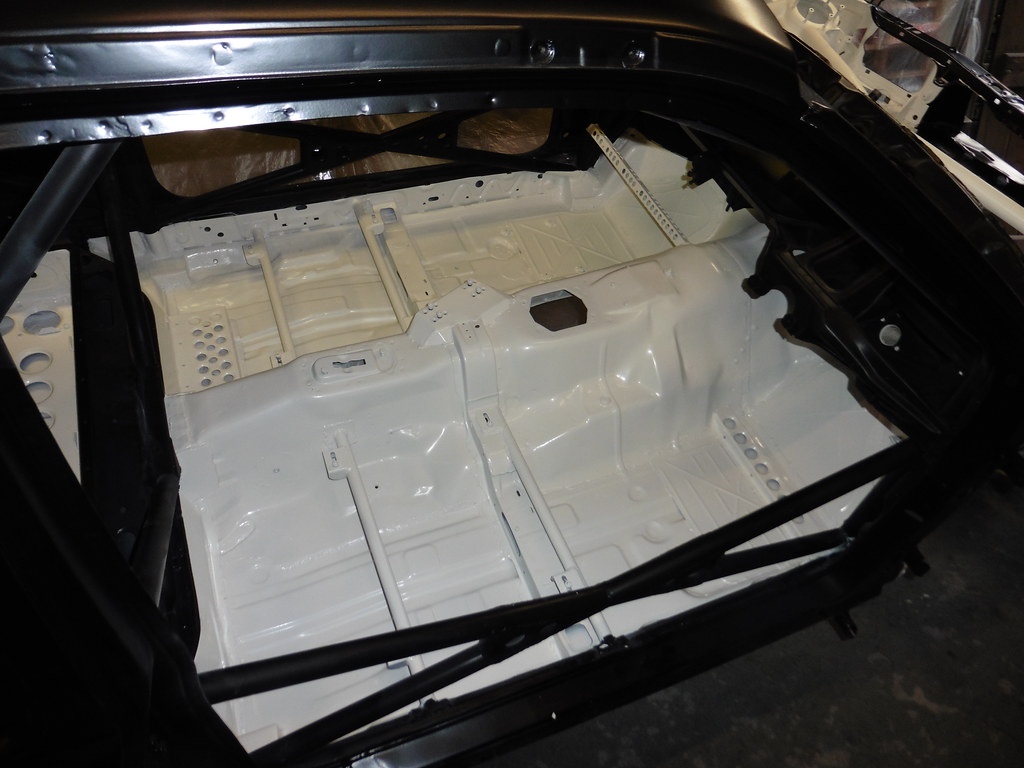 P1040682 P1040682 by jono_misfit, on Flickr  P1040683 P1040683 by jono_misfit, on Flickr 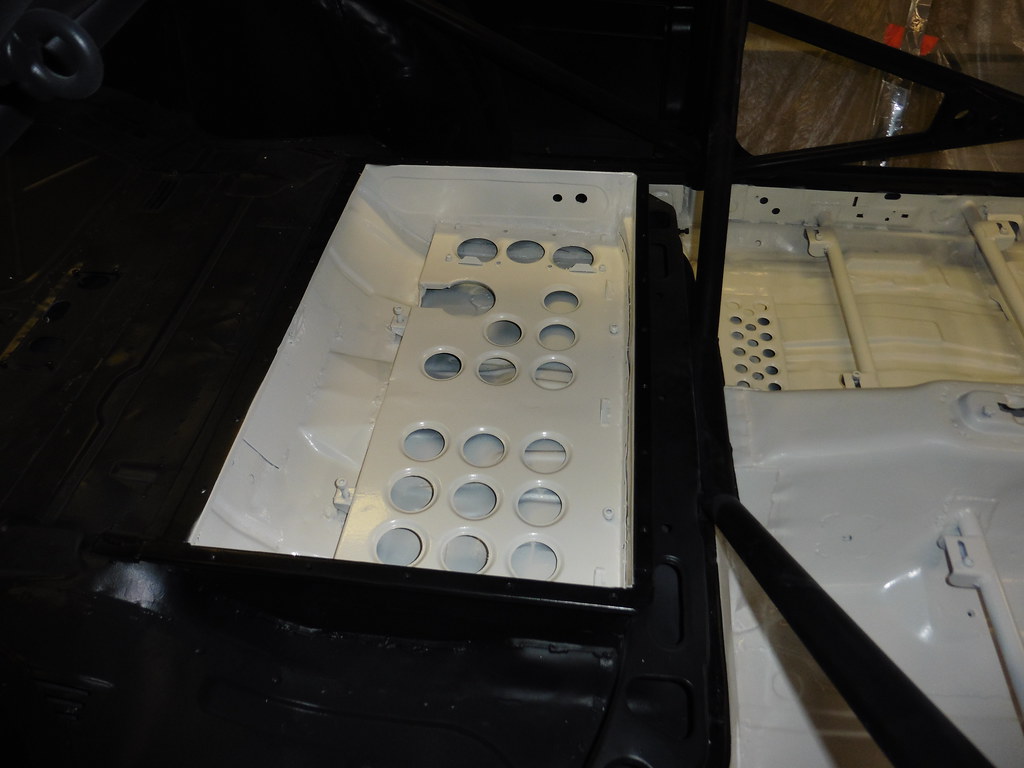 P1040684 P1040684 by jono_misfit, on Flickr  P1040685 P1040685 by jono_misfit, on Flickr Its come out nicely I think. There are loads of holes in the bulkhead stiffeners etc. that will just lead to detritus falling down them, or pose as routes for water into things.  P1040686 P1040686 by jono_misfit, on Flickr I'll close them off the normal motorsport way, aluminium foil tape.  P1040687 P1040687 by jono_misfit, on Flickr find a template the right size, draw round  P1040688 P1040688 by jono_misfit, on Flickr and cut  P1040689 P1040689 by jono_misfit, on Flickr You can buy 45mm diam ones, but a roll (1000) costs..... £105.... 25 cost £7.50... A roll of 50mm wide tape costs £4.50. It takes seconds to cut so its not like it adds up to a saving for me. and stick  P1040690 P1040690 by jono_misfit, on Flickr smaller ones are easier to make. Take one punch.  P1040691 P1040691 by jono_misfit, on Flickr And punch, Gives perfect 25mm diam circles. I need some 75mm ones. I could have bought wider tape, but i didnt.  P1040692 P1040692 by jono_misfit, on Flickr so stuck two bits together.  P1040693 P1040693 by jono_misfit, on Flickr and made ones to go in all the odd shaped holes.  P1040694 P1040694 by jono_misfit, on Flickr and started on the rear seat strengthener ones  P1040695 P1040695 by jono_misfit, on Flickr Why? mainly as it seems a perfect drap for dirt / dust / dropped bolts / etc.  P1040696 P1040696 by jono_misfit, on Flickr and did all the chassis leg vent holes, as I don't want cavity wax shooting ito the car, or water for that matter.  P1040697 P1040697 by jono_misfit, on Flickr  P1040698 P1040698 by jono_misfit, on Flickr |
| |
|
|
jonomisfit
Club Retro Rides Member
Posts: 1,787
Club RR Member Number: 49
|
|
Jan 16, 2021 18:21:06 GMT
|
I need to crack on and paint the wings, bonet, tailgate, bumpers, and skirts, but there isnt enought space.... so I need the car out of the garage. I gingerly started putting the suspension back in, trying to avoid clouting the fresh paint.  P1040699 P1040699 by jono_misfit, on Flickr it'll all come back off for a blast and paint.  P1040700 P1040700 by jono_misfit, on Flickr I forgot how ridiculously tight the beam is to the inner sill, mainly due to the soggy bushes letting the beam lean over.  P1040701 P1040701 by jono_misfit, on Flickr flipped the car over and fitted the front suspension again.  P1040702 P1040702 by jono_misfit, on Flickr  P1040703 P1040703 by jono_misfit, on Flickr again, all will come back off for a clean and re-build.  P1040704 P1040704 by jono_misfit, on Flickr and seeing as the car had the suspension back on. I couldnt help myself.  P1040705 P1040705 by jono_misfit, on Flickr  P1040706 P1040706 by jono_misfit, on Flickr  P1040707 P1040707 by jono_misfit, on Flickr to me, that wheel is going to look totes amazeballs with the tyre on and the car on to its final running high. jiggles it all round and dropped back down onto sill stands.  P1040708 P1040708 by jono_misfit, on Flickr which let me get to look at the little paint patches that are needed due to being covered by the body spit. front end  P1040709 P1040709 by jono_misfit, on Flickr inside front chassis legs  P1040710 P1040710 by jono_misfit, on Flickr  P1040711 P1040711 by jono_misfit, on Flickr rear  P1040712 P1040712 by jono_misfit, on Flickr  P1040713 P1040713 by jono_misfit, on Flickr I'll flat these back next time and spray them in with cans. Then it'll be back on the wheels and pushed outside to make some space. |
| |
|
|
bstardchild
Club Retro Rides Member
Posts: 14,965
Club RR Member Number: 71
|
|
Jan 16, 2021 18:21:29 GMT
|
|
Nice - Are you not tempted to blow some paint over them?
Edited to add I mean the aluminium foil hole coverings
|
| |
|
|
mk2cossie
Club Retro Rides Member
Posts: 3,058  Club RR Member Number: 77
|
|
Jan 16, 2021 18:24:06 GMT
|
If that rear beam is the same as the Sierra/Scorpio, you can get polyurethane bushes for the front mounts  |
| |
|
|
jonomisfit
Club Retro Rides Member
Posts: 1,787
Club RR Member Number: 49
|
|
Jan 16, 2021 18:25:25 GMT
|
|
Nah, not really.
It'd hide them a bit, but i'm sure it'd just flake off at some point, plus they end up getting pulled every now and then to check on inside of legs etc.
|
| |
|
|
jonomisfit
Club Retro Rides Member
Posts: 1,787
Club RR Member Number: 49
|
|
Jan 16, 2021 18:27:25 GMT
|
|
I have solid aluminium beam mounts, and will have a solid diff mount once I buy it.
My intent its to take all compliance out of the suspension with sperical bearings / rod ends in all the joints, so want the beam to be rigid as well to prevent any movement there.
|
| |
|
|
jonomisfit
Club Retro Rides Member
Posts: 1,787
Club RR Member Number: 49
|
|
Jan 22, 2021 18:34:56 GMT
|
I had a number of other things on, so was only a short trip outside. Dropped the car down onto it rolling about wheels. Its amazing how much smaller it seems when down on its wheels rather than up on the spit or the sill stands. Once i drop the suspension down its going to feel low. 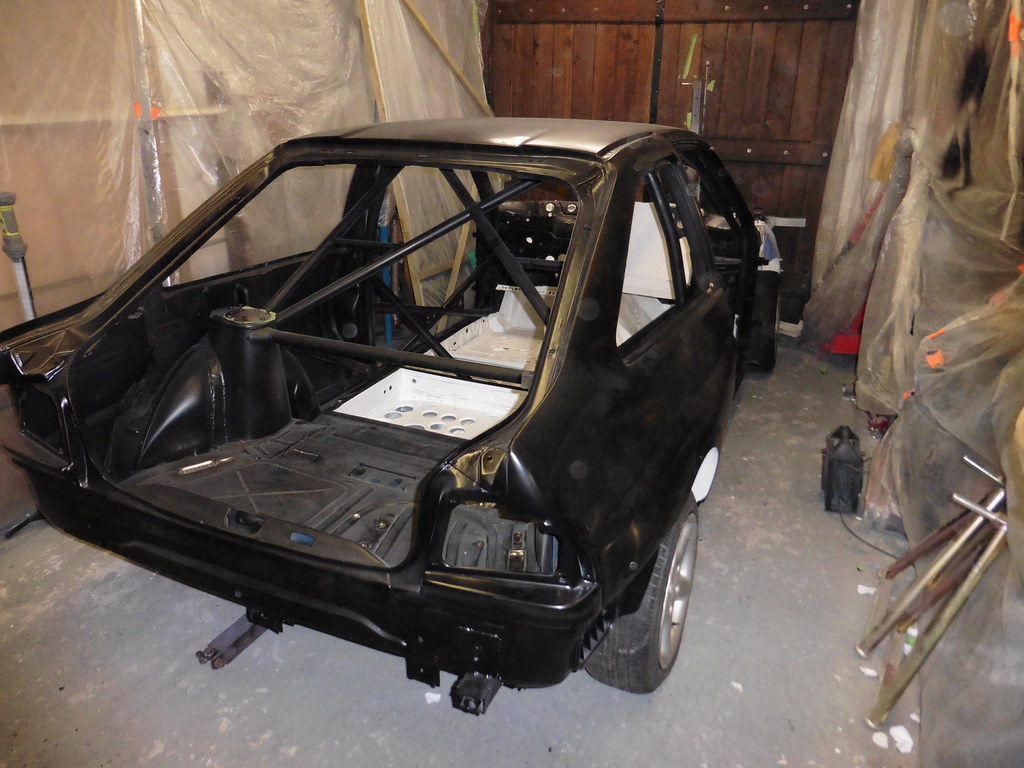 P1040714 P1040714 by jono_misfit, on Flickr  P1040715 P1040715 by jono_misfit, on Flickr then dug out the bonnet  P1040716 P1040716 by jono_misfit, on Flickr put it up on some tressels and started looking at the damage on it. The bonnet is from a rally car which went over (in Kielda I think) and the rear corner near the screeen took a dint. The previous owner pushed it out a bit, but there are some raised dents and a couple of small creases.  P1040717 P1040717 by jono_misfit, on Flickr Problem is they're up above the hinge mount so no direct access. I sanded back to see where the problems were, then gave them a heating with the blow torch to hot, tapped the centre with the pick hammer, and quenched it with a wet rag.  P1040718 P1040718 by jono_misfit, on Flickr  P1040719 P1040719 by jono_misfit, on Flickr not amazing results, but has tightened the skin, and they are no longer proud. Dressed the area a bit more with the hitting sticks. I then gave the whole bonnet a once over with the DA,focussing on the deep scratches and stone chips  P1040720 P1040720 by jono_misfit, on Flickr cleaned this corner down with panel wipe.  P1040721 P1040721 by jono_misfit, on Flickr and a first light skim of filler to get it smooth  P1040722 P1040722 by jono_misfit, on Flickr  P1040723 P1040723 by jono_misfit, on Flickr It'll mostly get sanded back off. I suspect it'll never be back to perfect and I have another bonnet that just needs vents cut which I can use later if it annoys me. Or I can do typical rally car and put a sticker in that area so you cant really tell its not flat.... Next session will be trying to get all the bonnet ready for paint, and the wings, and hopefully into primer at least. |
| |
Last Edit: Jan 22, 2021 18:36:48 GMT by jonomisfit
|
|
jonomisfit
Club Retro Rides Member
Posts: 1,787
Club RR Member Number: 49
|
|
Jan 23, 2021 18:29:27 GMT
|
I had some other things on, so it was a slightly shorter day today than normal. It was also snowing most of the day, so rather than push the car outside, I pushed it to the back of the garage and did the panel prep at the front end of the garage. I covered the car in a sheet to keep as much dust off / out of it as I can, however it will likely need a good blow down outside before I start the build up. I flatted off the filler, and marked up where the second skim needs to go.  P1040724 P1040724 by jono_misfit, on Flickr  P1040725 P1040725 by jono_misfit, on Flickr I then moved onto the front wings. 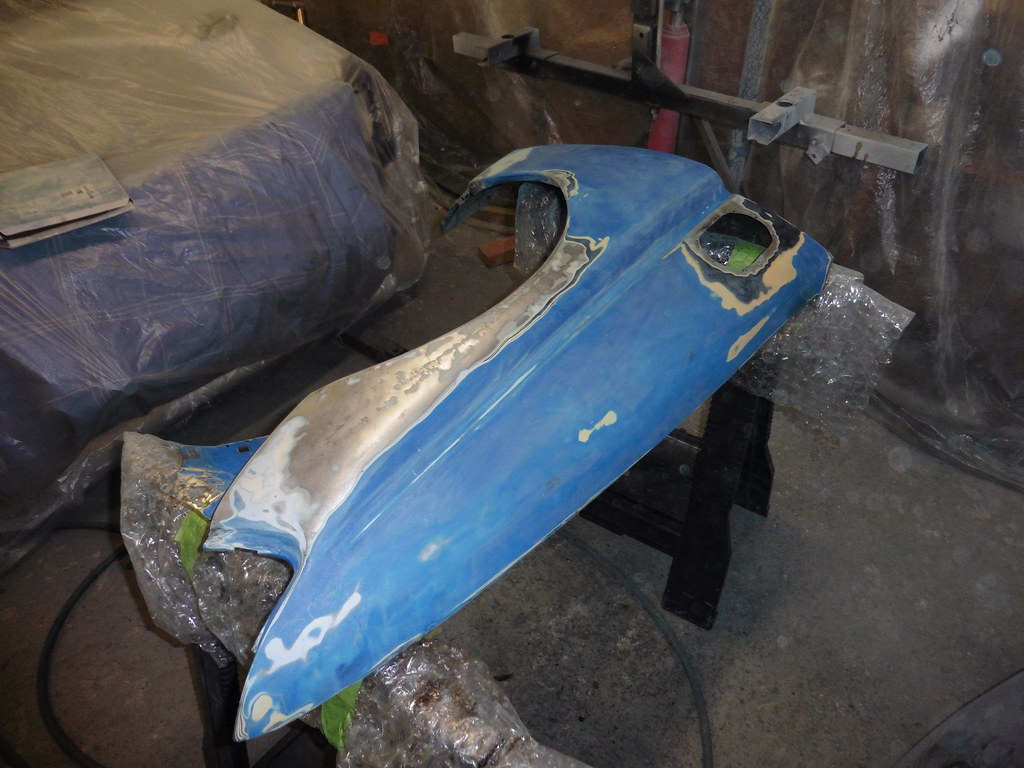 P1040726 P1040726 by jono_misfit, on Flickr This wing had a 200mm long scrape in it that I knocked out a while ago, but eh paint / filler had cracked so sanded back to a good surface.  P1040727 P1040727 by jono_misfit, on Flickr It turned out the front end had had some other knocks, and they'd just lobbed filler on it, so removed that and tapped it back flatter. It was easy to do, so no idea why the lobbed the filler on last time.... Its had a varied life this wing.  P1040728 P1040728 by jono_misfit, on Flickr Not so easy to see due to the flash but it goes: metal E coat Primer Imperial Blue Clear Coat Imperial Blue Clear Coat Imperial Blue Clear Coat Imperial Blue Clear Coat High build primer Manky Blue colour I'm going to prep and paint it as it is, however I suspect at a later point I will bare metal the wing to sort this. The front of the wing then had extras layers of primer,blue, primer blue where they had bodged the repairs, but I forgot to photo that before I sanded it all off. The layering is fairly visible round the pull handle cut out as well  P1040729 P1040729 by jono_misfit, on Flickr then flipped it over to clean the back up. There was a load of the black underseal on it. I gave it a good dose of "tar remover" I got from EBay, which after a wire brush and re application shifted most of it.  P1040730 P1040730 by jono_misfit, on Flickr then moved onto the other wing, which is a replacement as it only had, black panel coating, primer imeprial blue paint, clear coat, high build primer, manky blue.  P1040731 P1040731 by jono_misfit, on Flickr The reason I say its a replacement is its doesnt have E-coat, just the black coating than replacement panels come with. its got a few little knock marks 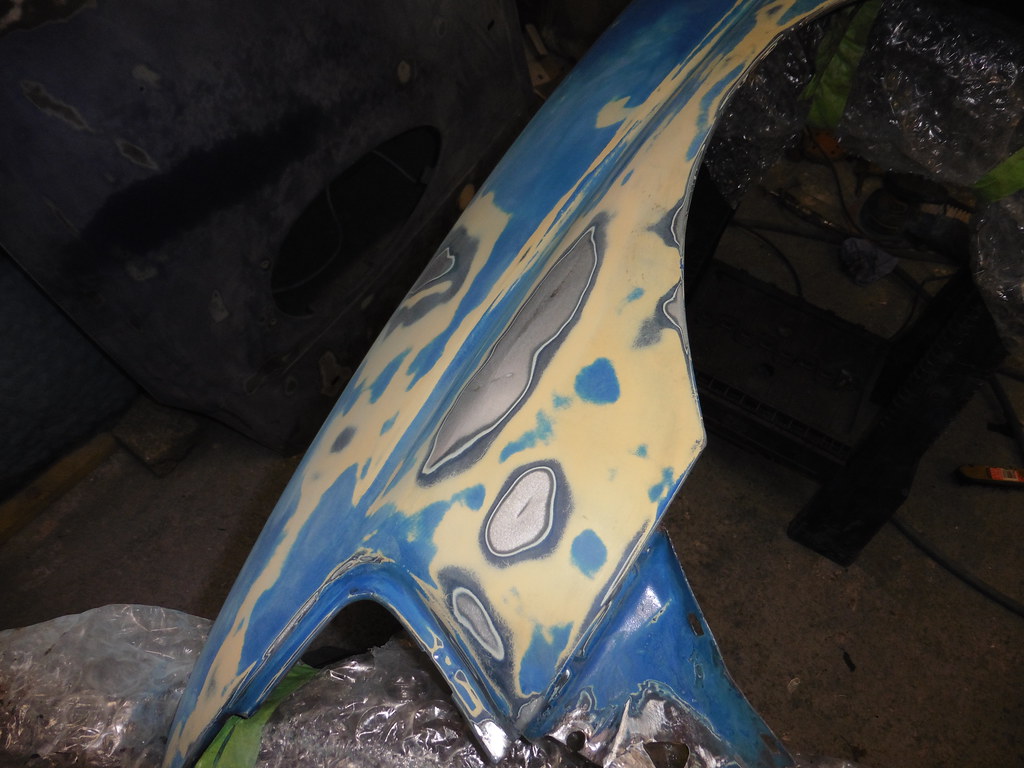 P1040732 P1040732 by jono_misfit, on Flickr  P1040733 P1040733 by jono_misfit, on Flickr then flipped the bonnet and started sanding that off  P1040734 P1040734 by jono_misfit, on Flickr there are some really awkward to get to bits inside the panel.  P1040735 P1040735 by jono_misfit, on Flickr after a good dust down of everything, three runs over with panel wipe, I hung the wings up 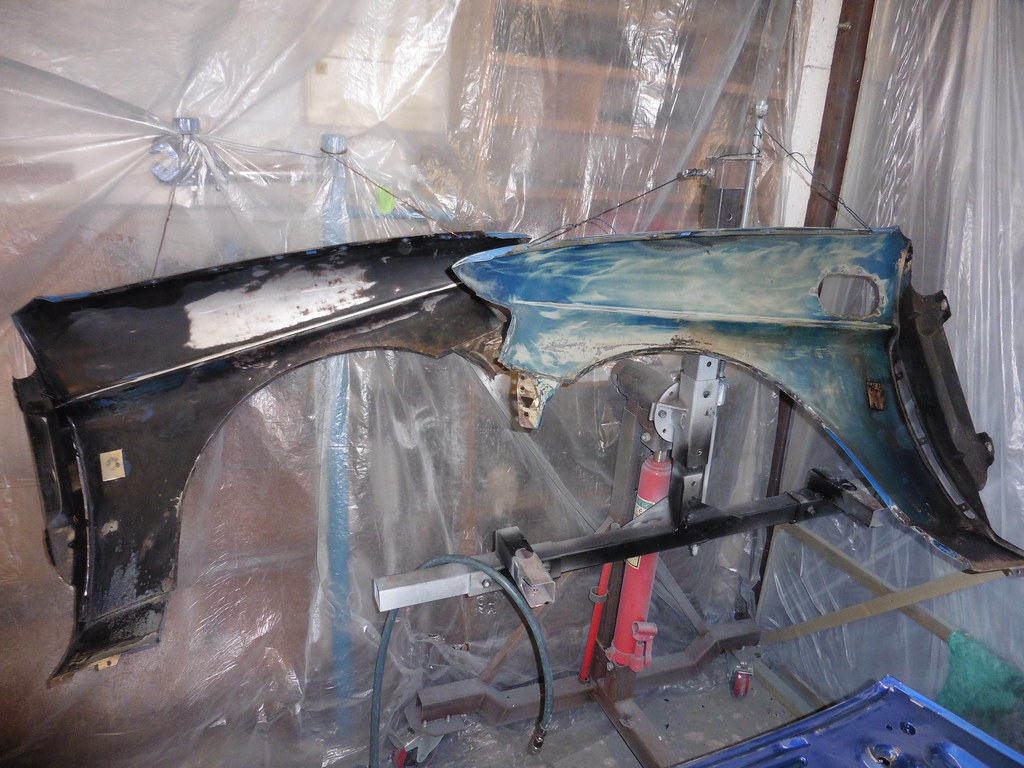 P1040736 P1040736 by jono_misfit, on Flickr and got the bonnet in position to paint.  P1040737 P1040737 by jono_misfit, on Flickr mixed up some black epoxy primer and shot the wings  P1040738 P1040738 by jono_misfit, on Flickr  P1040739 P1040739 by jono_misfit, on Flickr The wet paint shine causes a nice optical illusion then and inverts the image to my eyes, but your looking at the inside of the wings. and bonnet as well  P1040740 P1040740 by jono_misfit, on Flickr  P1040741 P1040741 by jono_misfit, on Flickr My camera is suffering with dust in the lense again so its going mental with the flash... I took a couple more with the flash off  P1040743 P1040743 by jono_misfit, on Flickr  P1040744 P1040744 by jono_misfit, on Flickr  P1040745 P1040745 by jono_misfit, on Flickr I managed a much smoother application than I had on the escort body. Hopefully I can continue that on to the visible side of the panels. |
| |
|
|
ian911
Part of things
 
Posts: 13
|
|
|
|
|
I feel for you working in the cold, its no joke mate.
|
| |
|
|
|
|
|
Jan 26, 2021 10:40:53 GMT
|
Lookee here, I turn my back and look how much has been achieved. Painting in current UK weather? You're a brave man but hell, what a transformation!  |
| |
|
|
jonomisfit
Club Retro Rides Member
Posts: 1,787
Club RR Member Number: 49
|
|
Jan 26, 2021 12:08:26 GMT
|
|
The cold has not been the most fun, but needs must and all that.
|
| |
|
|
|
|
|
|
|
|
what goes in the hole in the wing? where can i get that from?
|
| |
|
|
jonomisfit
Club Retro Rides Member
Posts: 1,787
Club RR Member Number: 49
|
|
|
|
what goes in the hole in the wing? where can i get that from? I think there's some pics on page 1. It's a recessed aluminium housing to put the fire extinguisher and power cut off pull handles out of the way from catching on things. Its fabricated so may be made by previous owner. You might try rallynutz or other rally component suppliers as I've seen them on a fair few cars so they may be a fairly common product. |
| |
|
|
 P1040642 by jono_misfit, on Flickr
 P1040643 by jono_misfit, on Flickr
 P1040644 by jono_misfit, on Flickr
 P1040645 by jono_misfit, on Flickr
 P1040642 by jono_misfit, on Flickr
 P1040643 by jono_misfit, on Flickr
 P1040644 by jono_misfit, on Flickr
 P1040645 by jono_misfit, on Flickr


 -about-face...


