|
|
|
Jul 12, 2020 20:24:44 GMT
|
|
right ok! this will be the third time! I was made up with the filler work as i am learning it.
when i say gunwash, i mean ebay thinners for £30 for 4 20 ltrs. I don't know if that is gunwash also!
I cant believe how many mistakes I'm making doing this car. I have learned so much though too!
|
| |
|
|
|
|
|
|
|
Jul 12, 2020 20:31:36 GMT
|
|
I made a similar mistake - I ordered the wrong hardener for the epoxy (got the code 1 digit out) and painted my sump twice making the same mistake both times till I realised my error!!
Yep, at that price it's gunwash.
Just order 1 litre of proper refinishing thinners in your next paint order - you only use a little so that will last ages.
|
| |
|
|
|
|
|
Jul 12, 2020 21:33:39 GMT
|
|
During the lockdown I only had cheap celly thinners, it worked fine with both epoxy primer(except when I forgot to add hardener!) and celly topcoat, actually one of the best finishes I've managed.
|
| |
|
|
|
|
|
Jul 13, 2020 18:50:21 GMT
|
right again a little confused. It says for hp body 534 high build primer Mixing ratio 4:1 + 50% thinners (1 coat 30-35um) (2 coats 120-140um) Is that celly thinners then? I didnt know it had to use so much thinners, so i put 2k in it and put like 10% in. I did the door on the mini a while ago, maybe i put a little more thinners in it and i rubbed it down today a little and it was ok, but i get this with the sanding pad 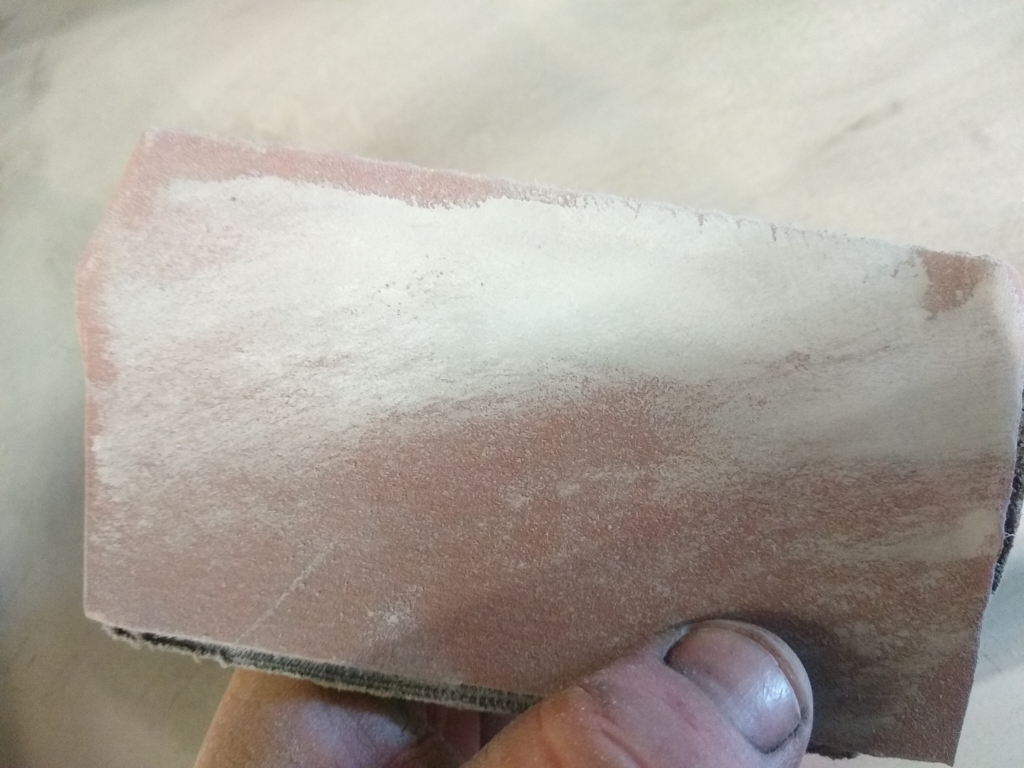 it goes into a power that i can run down, but fills the paper quite a bit. But the bootlid i did yesterday does this 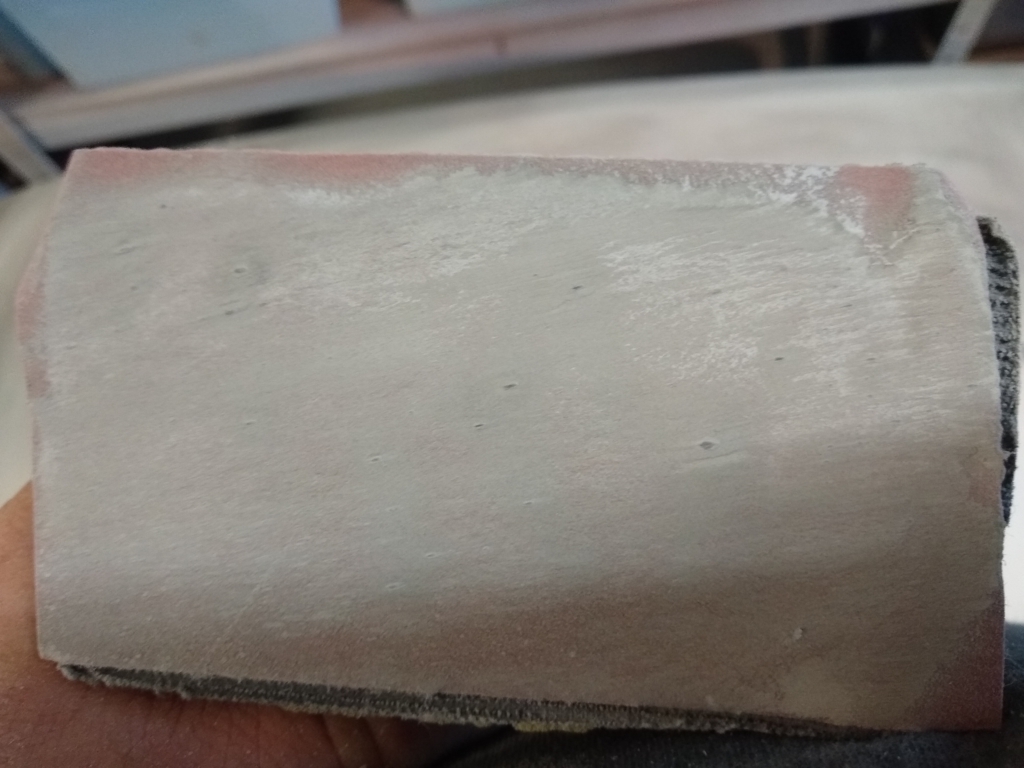 see the black bits, usually i can flat that primer down in an hour after applying it. That is what the roof has done too but that is the 989 with the wrong thinner in it. and with the 989 the refinishing thinner, is that like anti bloom celly thinner? Or is there another one again? thanks |
| |
Last Edit: Jul 13, 2020 18:53:18 GMT by DarrenW
|
|
|
|
|
Jul 13, 2020 23:04:49 GMT
|
right again a little confused. It says for hp body 534 high build primer Mixing ratio 4:1 + 50% thinners (1 coat 30-35um) (2 coats 120-140um) Is that celly thinners then? I didnt know it had to use so much thinners, so i put 2k in it and put like 10% in. I did the door on the mini a while ago, maybe i put a little more thinners in it and i rubbed it down today a little and it was ok, but i get this with the sanding pad it goes into a power that i can run down, but fills the paper quite a bit. But the bootlid i did yesterday does this see the black bits, usually i can flat that primer down in an hour after applying it. That is what the roof has done too but that is the 989 with the wrong thinner in it. and with the 989 the refinishing thinner, is that like anti bloom celly thinner? Or is there another one again? thanks The problem here is that you are mixing incompatible products - HB Body 534 is a 2 pack high build primer - the primer should be mixed at a ratio of 4 parts primer to 1 part hardener then thinned with a 2 K Thinner - 740 or 741 Body Acrylic Thinner on a 15 - 20% basis (Do not use Cellulose Thinners with 2K paints) - you are going to get well & truly fed up with this if you are not careful - slow down - take your time and look up the TDS sheets up for the products - a quick web search finds them - here's the one for this primer and its got all the answers that you need hbbody.ro/image/data/documents/tds%20si%20msds/AUTO%20534%20PRIMER_tds.pdfThat way you don't have to guess / assume or worse still do it all over again - and if you are still unsure - just ask on here and one of us will get back to you with a answer has quick as we can - hope you don't think that I'm preaching to you but you are learning in the hardest possible way - just step back from it a little and keep asking the questions or even check that you have understood the methods / mixing ratios with us first - it's great that you have posted pics of the problems has many others reading the forum also learn of the difficulties and how to avoid them - Well done for keeping at it - Chris |
| |
Last Edit: Jul 14, 2020 16:42:09 GMT by Deleted
|
|
|
|
|
Jul 14, 2020 18:49:53 GMT
|
|
thankyou so much mate, i really appreciate your help.
So i have used the hp body high build and the hp body 2k epoxy, both with SPRINTLINE 5L UNIVERSAL 2K Acrylic Paint Thinner. Also i tend to over thin it too, so it goes on better. I am not sure, that is the wrong thinner, or do i have to use their thinner?
The first pic where its clogged on the paper, that is a fault of the primer then not the paper?
I think the whole car is covered in the epoxy then filler then the high build in places. Is it best really i stip the whole car?
If its not right, its not right and it needs to be done. On the plus side of things, the first time i painted the roof, there was still dents in it, and the filler was quite deep, the second time i knocked the dents out more, and filled the roof in other places. ive learnt quite a bit in that time. If it needs to be done ill do it again...
thanks
|
| |
|
|
|
|
|
Jul 14, 2020 19:16:27 GMT
|
thankyou so much mate, i really appreciate your help. So i have used the hp body high build and the hp body 2k epoxy, both with SPRINTLINE 5L UNIVERSAL 2K Acrylic Paint Thinner. Also i tend to over thin it too, so it goes on better. I am not sure, that is the wrong thinner, or do i have to use their thinner? The first pic where its clogged on the paper, that is a fault of the primer then not the paper? I think the whole car is covered in the epoxy then filler then the high build in places. Is it best really i stip the whole car? If its not right, its not right and it needs to be done. On the plus side of things, the first time i painted the roof, there was still dents in it, and the filler was quite deep, the second time i knocked the dents out more, and filled the roof in other places. ive learnt quite a bit in that time. If it needs to be done ill do it again... thanks The 2K thinner that you used should be fine - and its most certainly the primer that's clogging the paper - if you are suffering with this on all areas of the car then there really only is one way to resolve it - applying anything over it is not going to help - so its a back to basics I'm afraid and strip it - at least its only a Mini - imagine my horror when I found out that the air drying paint I was applying to a large commercial vehicle had not had the agents added to it that activates the drying process - it all had to be washed back off & re-prepared |
| |
|
|
|
|
|
Jul 16, 2020 19:05:36 GMT
|
Just to double check, the first pic, is that clogging a problem, or is that how it should be? I have started to strip the roof again, hopefully prime it this weekend. I should go over the bare metal with the high build, and for example 40ml 534 primer 10ml 534 hardner 10ml silverline thinner 2k i can leave that, then fill over it, then when I'm happy, use the 989 and the mixing could be 40ml 989 primer 10ml 989 hardner 12.5ml silverline thinner. thanks again!!
edit this is the paper ive used to run it down, in 180 grade
|
| |
Last Edit: Jul 16, 2020 19:06:42 GMT by bmw2101
|
|
|
|
|
Jul 17, 2020 12:29:50 GMT
|
Just to double check, the first pic, is that clogging a problem, or is that how it should be? I have started to strip the roof again, hopefully prime it this weekend. I should go over the bare metal with the high build, and for example 40ml 534 primer 10ml 534 hardner 10ml silverline thinner 2k i can leave that, then fill over it, then when I'm happy, use the 989 and the mixing could be 40ml 989 primer 10ml 989 hardner 12.5ml silverline thinner. thanks again!! edit this is the paper ive used to run it down, in 180 grade That does look like a clogging problem with the paper but are sanding back dry ? and if so just do a quick experiment with wet & dry - same grade of paper but done wet and see how you get on Secondly you wont suffer from filler shrinkage if you undertake the filler work to bare metal first - it's how I do my profiling work - then apply your primers over the bare metal / filler areas - see pic below 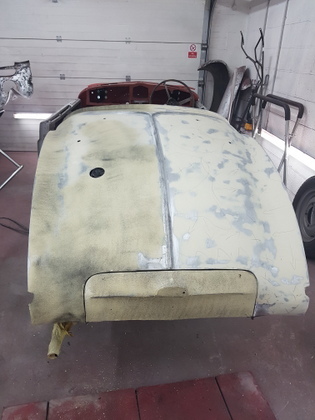 Your mixing % formulas / rates look fine Hope all goes well but post up your progress success (hopefully no woes) - Chris |
| |
|
|
|
|
|
Jul 17, 2020 21:00:01 GMT
|
|
I look at all this with a certain sense of panic. It has taken me, what seams like forever to start my bonnet repairs and now the thoughts that I might soon have to consider actually putting some paint on, with all the problems that bmw2101 has had now fill me with a definate sense of foreboading!!
On a slightly different tack. One of the 1/4" unf threads on my mkiv Spitfire headlight cowls is stripped. I don't think that there is enough alloy to re-tap it. What is the best way to try to get a thread back in there. I had actually thought of using panel bond on a lightly oiled bolt and sending it into the hole to try to reform the thread, unscrewing the bolt when the bond had cured but probably not a good idea.
|
| |
|
|
|
|
|
|
|
Jul 17, 2020 22:46:27 GMT
|
I look at all this with a certain sense of panic. It has taken me, what seams like forever to start my bonnet repairs and now the thoughts that I might soon have to consider actually putting some paint on, with all the problems that bmw2101 has had now fill me with a definate sense of foreboading!! On a slightly different tack. One of the 1/4" unf threads on my mkiv Spitfire headlight cowls is stripped. I don't think that there is enough alloy to re-tap it. What is the best way to try to get a thread back in there. I had actually thought of using panel bond on a lightly oiled bolt and sending it into the hole to try to reform the thread, unscrewing the bolt when the bond had cured but probably not a good idea. How about drilling it out and replacing it with a revitnut |
| |
|
|
glenanderson
Club Retro Rides Member
Posts: 4,091
Club RR Member Number: 64
|
Body & Paint Threadglenanderson
@glenanderson
Club Retro Rides Member 64
|
Jul 17, 2020 23:01:36 GMT
|
|
How thick is the panel with the stripped thread? A helicoil if it’s thick enough, a rivnut if not.
|
| |
My worst worry about dying is my wife selling my stuff for what I told her it cost...
|
|
|
|
|
|
|
|
Or fill it with quicksteel then drill and re tap.
|
| |
|
|
|
|
|
|
|
|
Thanks gents. I have not used either but now you have given me the leads I will investigate. I had also thought of filling it with 2k resin and re-tapping but was not sure what to use on this. I don't know if the cowl is aluminium or some alloy.
|
| |
|
|
|
|
|
Jul 18, 2020 19:23:43 GMT
|
|
Chris - The deed has been done and my Spitfire's headlight mounting repair panels are fitted courtesy of the Kent 2k panel bond and a handful of sealed rivets to hold the joints closed while curing.
Everything went fairly smoothly but I was surprised at how much effort was needed to get the mixed adhesive out of the nozzle. Perhaps my two mastic guns need replacing for next time or I need more Weetabix!! I will be interested to see how things look tomorrow when the joints should have partially cured, but, at the moment, it looks a nice solid job and certainly appears stronger than it was before. Thanks for your help and insight with this, I would never have though of this type of repair if I hadn't seen your door fitting technique on the Jowett that fell of the lift, oh so long ago.
|
| |
|
|
|
|
|
Jul 19, 2020 20:04:41 GMT
|
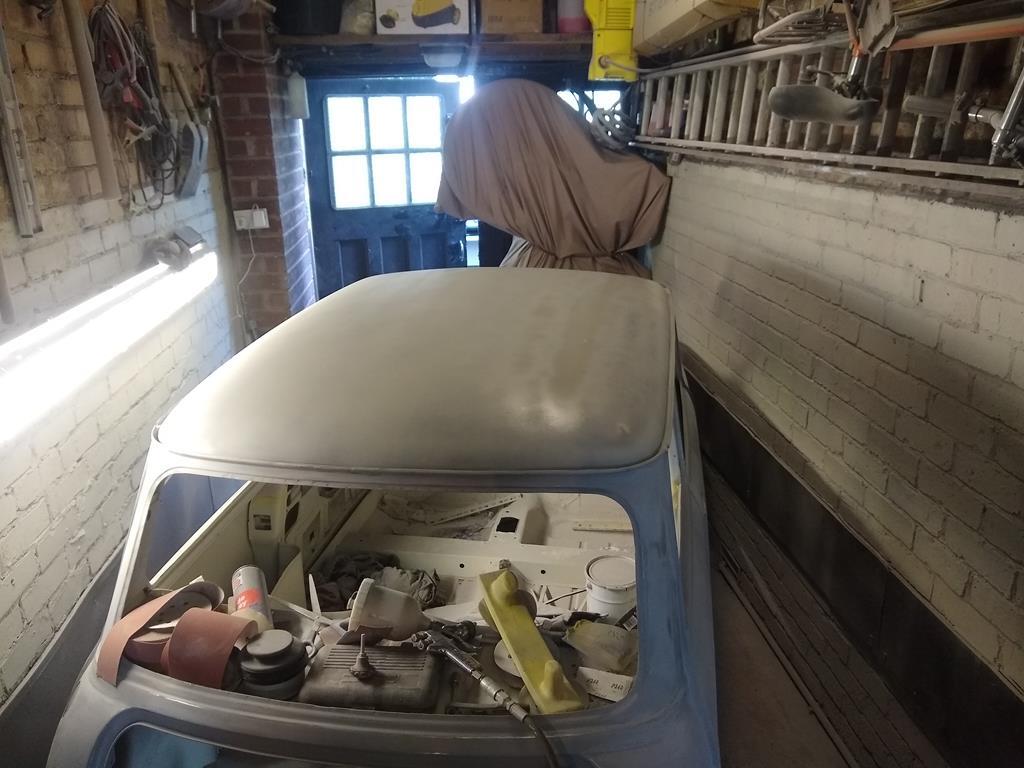
right so today i went in the garage again. I had stripped the paint and filler from the mini roof. I was concerned that it had been bare for 4-5 days now, so my plan was to get some high build on the roof. I don't know why, but i put the 989 on the roof by accident! So i left it for an hour, and had a rub at it in places, and again it balled up. I left that then and had a go at the bootlid which was in high build already, and now that was flatting ok. I then put that in 989 and left that to dry.
I scotched the roof and put filler where i needed it, and rubbed the filler down. The 989 came off enough and i got one of the dents sorted out.
I then wet flatted the 989 on the bootlid and it flatted perfectly. I wonder if its a paper problem I'm having as its silverline red oxide paper I'm using.
I then put the filler on the roof in high build. I think ill get the roof filled and ok, then 989 the roof again, and leave it until ive done the rest of the car, wet flat the roof and paint it.
also the high build it clogs the paper up but if i blow the paper off, its good again, but only does like 30 secs before needs doing again.
one other thing is, i had to put lots of thinners in the 989, it would not come out of the gun other wise, i think its a 1.8mm tip in it. 30 psi.
thanks !!!
 I also saw this on the way to work the other day and it made me think I'm lucky here!
 |
| |
Last Edit: Jul 19, 2020 20:13:17 GMT by bmw2101
|
|
|
|
|
Jul 28, 2020 16:52:40 GMT
|
|
I have bitten the bullet and started to strip the paint off my Spitfire bonnet.. the hard way. Stripping disc on angle grinder and mesh disc on DA sander. Progress is good but will take a few days due to other committments. Now, am I best treating what I have stripped with Hydrate 80 as I go along (at the end of each session) as protection, or just leaving it and flashing over the whole bonnet with the DA with 80 grit, panel wiping down and then treating with H80 when I have finished stripping?
|
| |
Last Edit: Jul 29, 2020 18:17:17 GMT by Badwolf
|
|
|
|
|
Jul 29, 2020 18:31:19 GMT
|
I have bitten the bullet and started to strip the paint off my Spitfire bonnet.. the hard way. Stripping disc on angle grinder and mesh disc on DA sander. Progress is good but will take a few days due to other committments. Now, am I best treating what I have stripped with Hydrate 80 as I go along (at the end of each session) as protection, or just leaving it and flashing over the whole bonnet with the DA with 80 grit, panel wiping down and then treating with H80 when I have finished stripping? Use the Hydrate 80 over any ingrained rust but you would be better waiting until you have the entire bonnet back to bare metal then treating it with a good quality primer |
| |
|
|
|
|
|
Jul 29, 2020 19:12:02 GMT
|
|
Thanks Chris. I have got on better than I expected with only one side panel left to strip. Amazingly there is very little ingrained rust. I hope to finish stripping tomorrow. I will then panel wipe the rusted bits and treat with H80 and leave for 24 hours. Then I intend to flash over the whole bonnet with 80 grade on DA sander, panel wipe and roller on the Mipa 2k primer that I got from Brighton Autopaints last year,.. probably 2 coats and let it set over the weekend. Yes, I do have suitable PPE for applying the 2k by roller.
|
| |
|
|
|
|
|
|
|
It just dosnt end! I am still doing the roof, but i put some filler in it today and had a quick look at the quarter panel. I have borrowed a long flat sanding tool from a good mate at work. So i started to rub down the filler and found this, its the best way i can show as i can. the pen marks are the mountains. 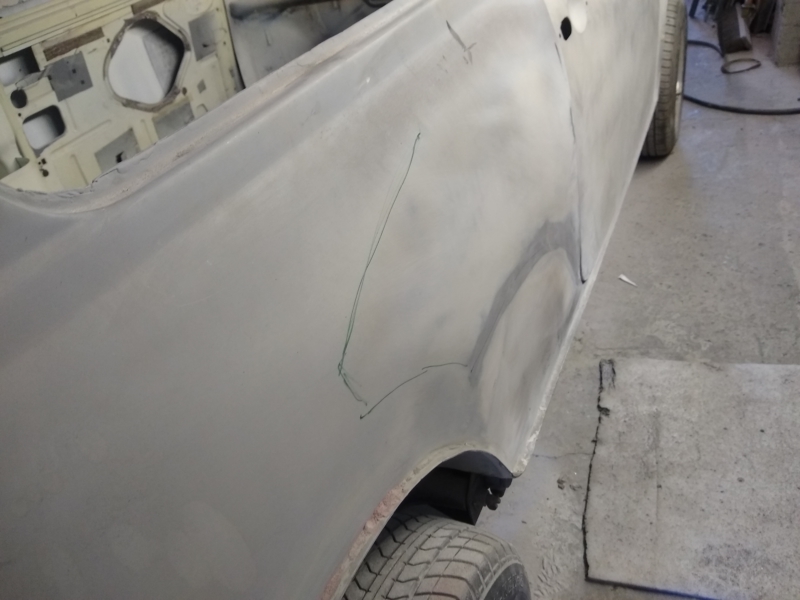 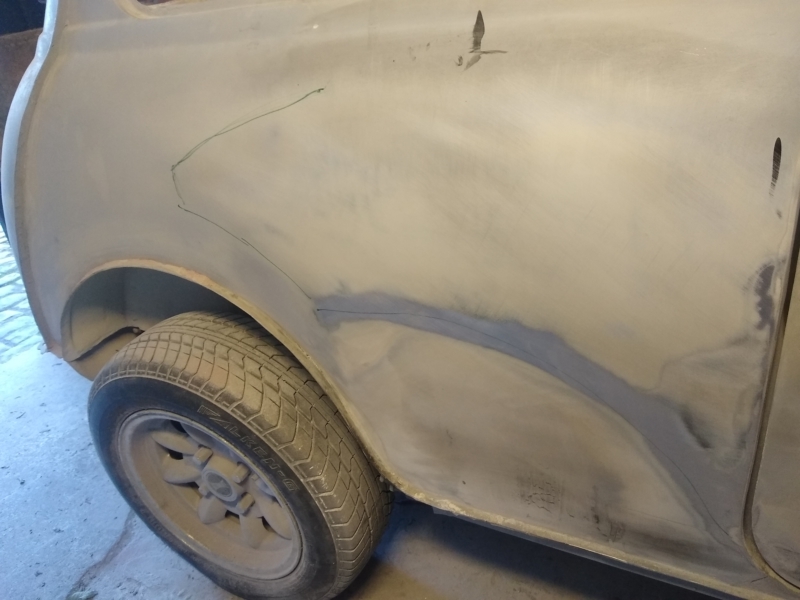 so you can see the lines on the quarter, i don't know how its that distorted, and how i havnt noticed this so far. Can you tell me first what i have done wrong with the welding, and also what to do now? Part of me is saying try to "V" where the lines are with a panel hammer, part just dosnt know what to do now. how i hadnt noticed it before i don't know. thanks AGAIN! |
| |
Last Edit: Aug 3, 2020 18:38:53 GMT by bmw2101
|
|
|
|


