|
|
|
Jan 26, 2018 14:52:32 GMT
|
|
Hi Chris,
Sorry if this has been asked before but is the profiling glaze dry sanded or wet sanded ??
(I'm assuming dry)
Thanks
|
| |
BMW E39 525i Sport
BMW E46 320d Sport Touring (now sold on.)
BMW E30 325 Touring (now sold on.)
BMW E30 320 Cabriolet (Project car - currently for sale.)
|
|
|
|
|
|
|
Jan 27, 2018 13:38:28 GMT
|
Hi Chris, Sorry if this has been asked before but is the profiling glaze dry sanded or wet sanded ?? (I'm assuming dry) Thanks Apologies for the slow response (managed to injure my back so attempted to rest / sleep it off yesterday - but now just so bored I am having to move about a little bit regardless how painful it is - I also don't want to seize up either) I would dry sand it just has you would a normal filler - However quite minor areas like a pinhole can be wet sanded - a lot of repairers use the glaze to replace the old cellulose stopper - the advantage is that with it being 2 pack it sets far quicker and applied correctly will not shrink under the final paint finish |
| |
Last Edit: Jan 27, 2018 14:01:25 GMT by Deleted
|
|
|
|
|
Jan 27, 2018 14:00:28 GMT
|
How do you avoid the 'cushion seams' you see on some older paint jobs? Can't think how else to describe it. Where you get panels meeting, usually doors, it's like the edges are slightly lower than the rest of the panel and as the light hits it you get this very slight cushioned effect. Normally it's a combination of factors - sometimes poor workmanship & laziness in ensuring panel alignment, profiling along with the paint finish itself - but lets not forget that for the last 30+ years vehicles have been built on computerised / robot operated production lines with laser alignment to very fine tolerances, not just the bodyshells but the paint process and quite a lot of the trim - compare that to previous methods and we are a world apart - quite often when classics / retro's are restored in todays market the restoration brings the standard / quality of finish to levels beyond that than when they were new. Good restoration practice is having the ability to recognise what was factory finish / original and restore the vehicle to that standard - hence sometimes that ill fitting trim / poor panel fit was there from day one when the vehicle was new - there is nothing wrong with making improvements either - however the market is forever critical often comparing the panel fit / paint finish available on modern vehicles to that on older vehicles - when in reality there are two completely different subjects achieved through two completely different methods. |
| |
Last Edit: Jan 27, 2018 14:05:17 GMT by Deleted
|
|
|
|
|
Jan 27, 2018 19:48:26 GMT
|
Hi Chris, Sorry if this has been asked before but is the profiling glaze dry sanded or wet sanded ?? (I'm assuming dry) Thanks Apologies for the slow response (managed to injure my back so attempted to rest / sleep it off yesterday - but now just so bored I am having to move about a little bit regardless how painful it is - I also don't want to seize up either) I would dry sand it just has you would a normal filler - However quite minor areas like a pinhole can be wet sanded - a lot of repairers use the glaze to replace the old cellulose stopper - the advantage is that with it being 2 pack it sets far quicker and applied correctly will not shrink under the final paint finish Many thanks Hope the back eases soon, little worse than your back being out, it affects so much of the rest of the body. |
| |
Last Edit: Jan 28, 2018 9:47:48 GMT by Alpina99: Missing content
BMW E39 525i Sport
BMW E46 320d Sport Touring (now sold on.)
BMW E30 325 Touring (now sold on.)
BMW E30 320 Cabriolet (Project car - currently for sale.)
|
|
|
|
|
Jan 29, 2018 20:13:27 GMT
|
So after a weekend of rest the back seams to easing off a little - so I had a half day trail run in the workshop this afternoon but took it steady Offside rear wing is the last external body profile to sort - it's had another skimming applied since this pic  Prepped and rust treated another batch of smaller items that will require painting - Starting handle, Front bumper irons & the trafficator boxes 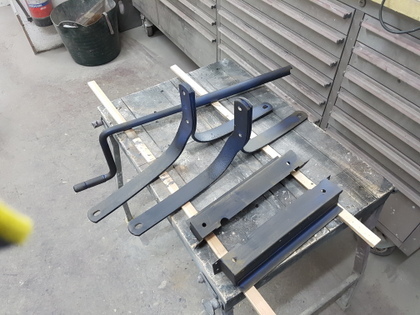 Offside front wing flange edge profiles completed and the wing refitted with the piping bead 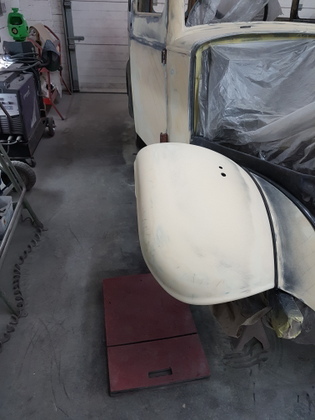 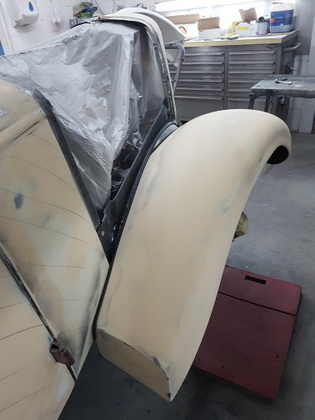 Which results in this image  Happy now with the fit of the front panels & wings - I will build & fit the bonnet to ensure that everything is correct in profile and the bonnet opens on either side without causing damage to the wings etc Just the back wing to sort tomorrow then the 9 internal metal window trim sections that require prepping for paint along with starting to sort the roof gutter trims & body profile trims |
| |
|
|
|
|
|
Jan 29, 2018 20:51:00 GMT
|
|
looking like a car again
|
| |
|
|
|
|
|
Jan 30, 2018 18:52:01 GMT
|
Started building the bonnet up 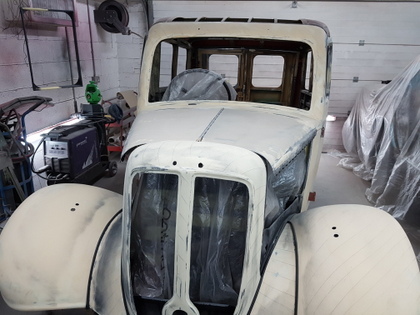 Refitted the catches to the side panels  Then refitted the side panels to the upper sections (piano hinge) 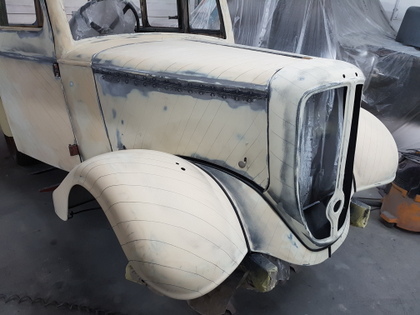 Fitted the other bonnet side panel and squared everything up - it's not quite sitting correctly but the cloth tape that protects the bulkhead & radiator cowl is yet to be fitted - the fits are not great but they never were when new with fairly wide aperture gaps to prevent the panels / paintwork from contacting / marking each other 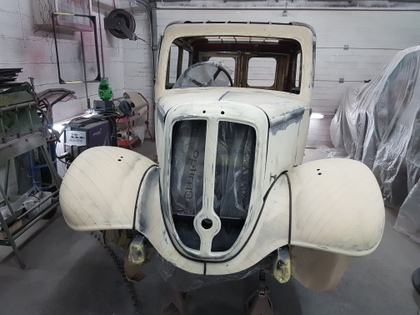 Meanwhile I have been prepping & treating the internal window trims which I should complete tomorrow |
| |
Last Edit: Jan 30, 2018 18:52:56 GMT by Deleted
|
|
vulgalour
Club Retro Rides Member
Posts: 7,286
Club RR Member Number: 146
|
|
Jan 30, 2018 18:55:45 GMT
|
|
This isn't recognisable as the same van any more.
|
| |
|
|
|
|
|
Jan 30, 2018 19:25:39 GMT
|
This isn't recognisable as the same van any more. Ho I don't know - here's the before I started picture 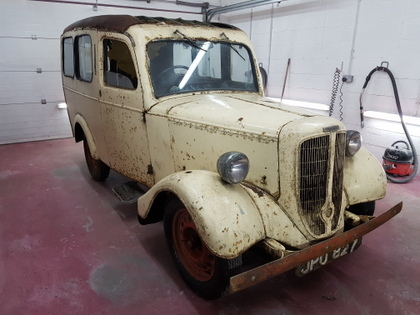 And has it is now - well they are more or less the same colour  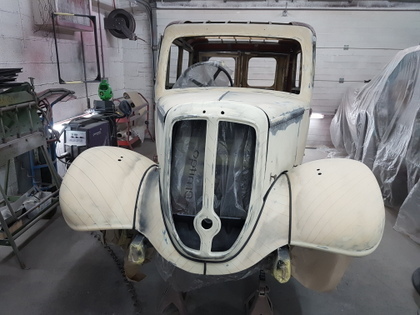 |
| |
|
|
eurogranada
Europe
To tinker or not to tinker, that is the question...
Posts: 2,556
|
|
Jan 31, 2018 11:23:48 GMT
|
|
Typical how the before picture hardly seems to show the need for all the work you had to put in to get it right. It looked pretty sound form the start. The colour is probably forgiving, lol.
Never thought I'd be the one to say this, but the before look is growing on me as well. I used to purely be about perfectly painted cars before... Oh what RR has done to me...
|
| |
|
|
|
|
|
|
|
Jan 31, 2018 19:45:34 GMT
|
Typical how the before picture hardly seems to show the need for all the work you had to put in to get it right. It looked pretty sound form the start. The colour is probably forgiving, lol. Never thought I'd be the one to say this, but the before look is growing on me as well. I used to purely be about perfectly painted cars before... Oh what RR has done to me... Alex - I can see where you are coming from but it would not have lasted very long in it's original barn found state it was so bad that it would have self decomposed within the first 100 miles of driving ! |
| |
Last Edit: Jan 31, 2018 21:16:00 GMT by Deleted
|
|
|
|
|
Jan 31, 2018 19:55:17 GMT
|
Just on with the trims window trims today in between lots of other things - here are the ones that are ready for polyester  And the others that I have in progress 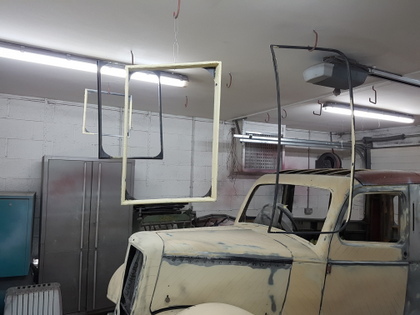  More tomorrow |
| |
Last Edit: Jan 31, 2018 21:16:27 GMT by Deleted
|
|
|
|
|
Jan 31, 2018 21:31:09 GMT
|
|
Good grief. You did all this, with a bad back, while I managed to cut out one completely plain door card.
*Sobs*
|
| |
|
|
|
|
|
|
|
So I cracked on with internal frames for the windows 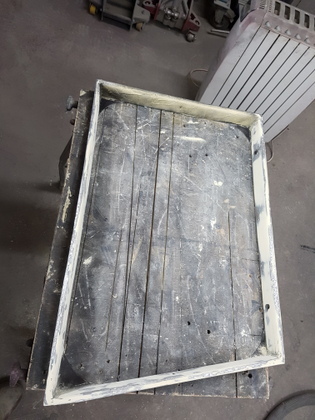 Now all completed and awaiting polyester primer  Removed the offside rear wheelarch in order to access the flange edge 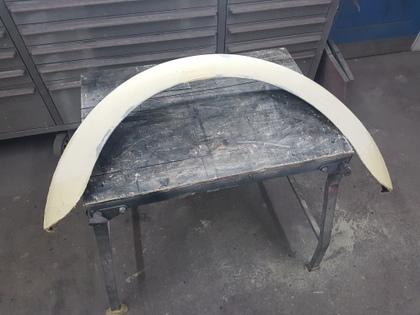 Now completed and that is the final panel profiled !! 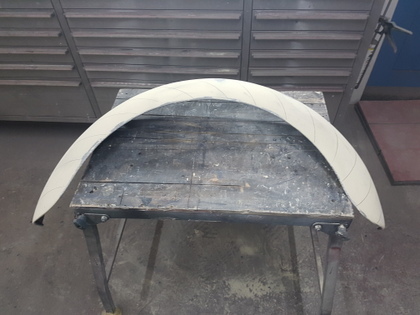 It's against my religion to drill holes into panels that are freshly painted so I always plan & allow to do this prior to even taking the primer off the shelf - spare wheel flap being set out using the old one has a guide template 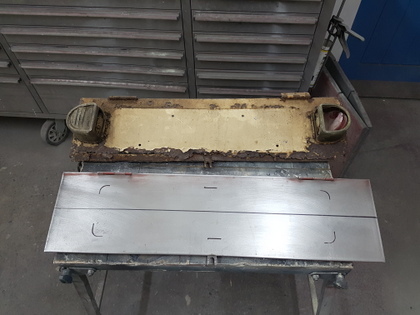 Mounted to the van with holes drilled for lights & number plate which are temporally fitted this also allowed for alignment of the rear reflectors which were also fitted temporally 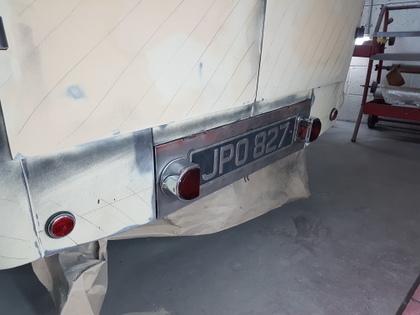 Then drilled the front number plate mounting 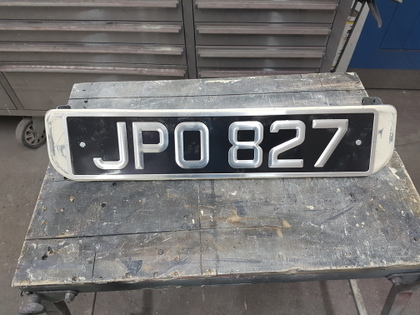 Which means all the loose / bolt on panels can now come off the van and I can start to form the roof gutters |
| |
|
|
vulgalour
Club Retro Rides Member
Posts: 7,286
Club RR Member Number: 146
|
|
|
|
|
Are they new rear lights? The old ones didn't come up that well, surely?
|
| |
|
|
|
|
|
|
|
Are they new rear lights? The old ones didn't come up that well, surely? The old ones are well past it - so the owner has supplied a new set along with new reflectors |
| |
|
|
|
|
|
|
|
A quick sort of smaller items to be prepped & painted were found in the bottom of the 'Requires prep & paint box' namely the front bumper bolts, a pair of blanking plates for the rear floor area and several clips for retaining the starting & jack handles to the inner wing panels on the engine side 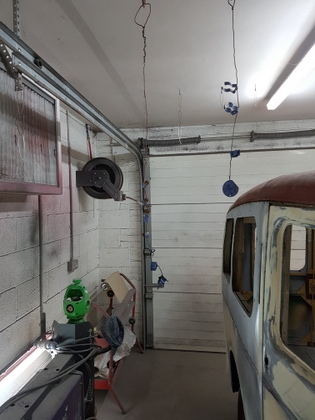 Then a strip down of the all the front panels in preparation for primer 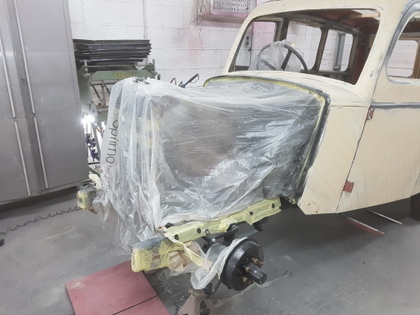 I put the loose panels / parts into temporary storage upstairs in the loft store 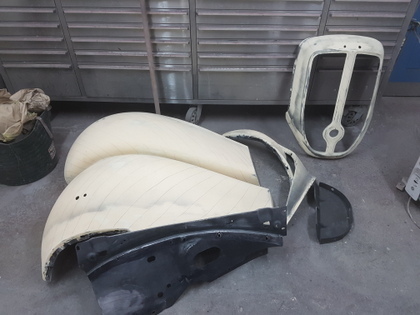 Then put the van back on its wheels 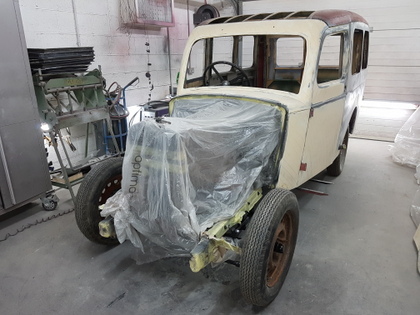 Next to sort is the roof gutter rails  These cover the terminus edge of the roof fabric - formed from alloy profile but require shaping to suit the vans roof profile - I started with the nearside and formed the front radius to suit the windscreen pillar 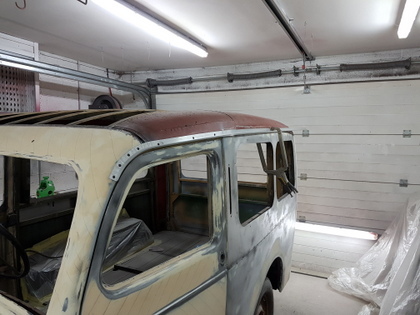 Initially fastened up with crosshead self tappers - once I have everything profiled and the fabric roof on I will refit the gutter rails with countersunk slot head screws prior to paint 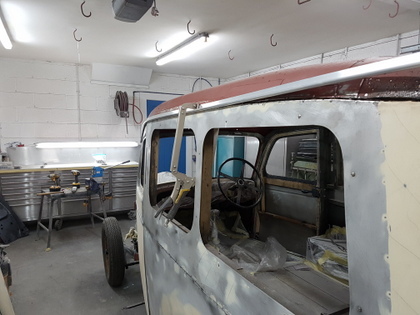 The radius on the gutter profiles being formed with the shrinker / stretcher 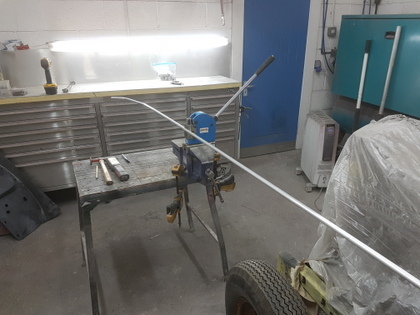 Getting there  I am leaving the rails over length to compensate for the fabric roof - once that is fitted I will know what the exact length of the rail needs to be 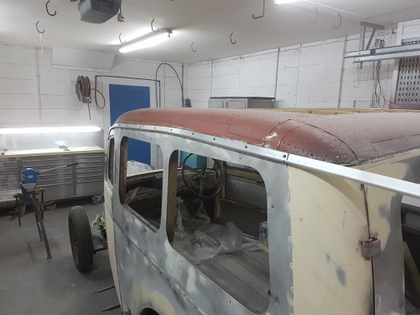 They were factory fitted in 3 sections - 1 rail either side and 1 rail for the rear - I had to form the rear radius by heating / annealing the rail then forming by hand with some gentle hammer & dolly work - had to remove the rail several times to work until I achieved the correct result 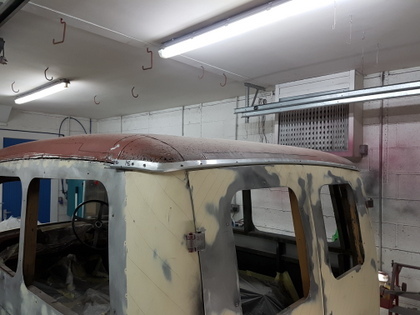 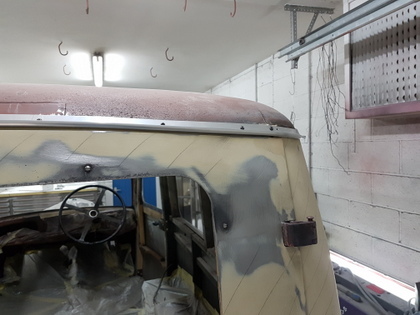 Just the offside rail to form in the morning |
| |
Last Edit: Feb 2, 2018 20:43:09 GMT by Deleted
|
|
vulgalour
Club Retro Rides Member
Posts: 7,286
Club RR Member Number: 146
|
|
|
|
|
Do you fit the roof fabric before painting then?
|
| |
|
|
|
|
|
|
|
Do you fit the roof fabric before painting then? Very much so - To attempt fitting the roof fabric along with the roof rail gutters - alloy finishing bead above the front windscreen after painting the van would lead to nothing but disaster - aside from this you need the roof gutters fitted has this determines the height of the vertical alloy trim that covers the panel joint between the rear panels and the rear pillar - the vertical trim then dictates the length of the horizontal alloy trim that covers the joint in the rear panels |
| |
|
|
|
|
|
|
|
|
its getting exciting now!....great work on the rails...very time consuming but rewarding by the looks of it.
JP
|
| |
I know its spelled Norman Luxury Yacht, but its pronounced Throat Wobbler Mangrove!
|
|
|
|


