|
|
|
Jan 22, 2017 16:24:54 GMT
|
With the sill off and put in the spares part of the garage - not the bin honest - i started to readjust the cock up at the sill closing panel at the rear end of the sill. I also took the cutter to the side panel above the sill as that was not straight either 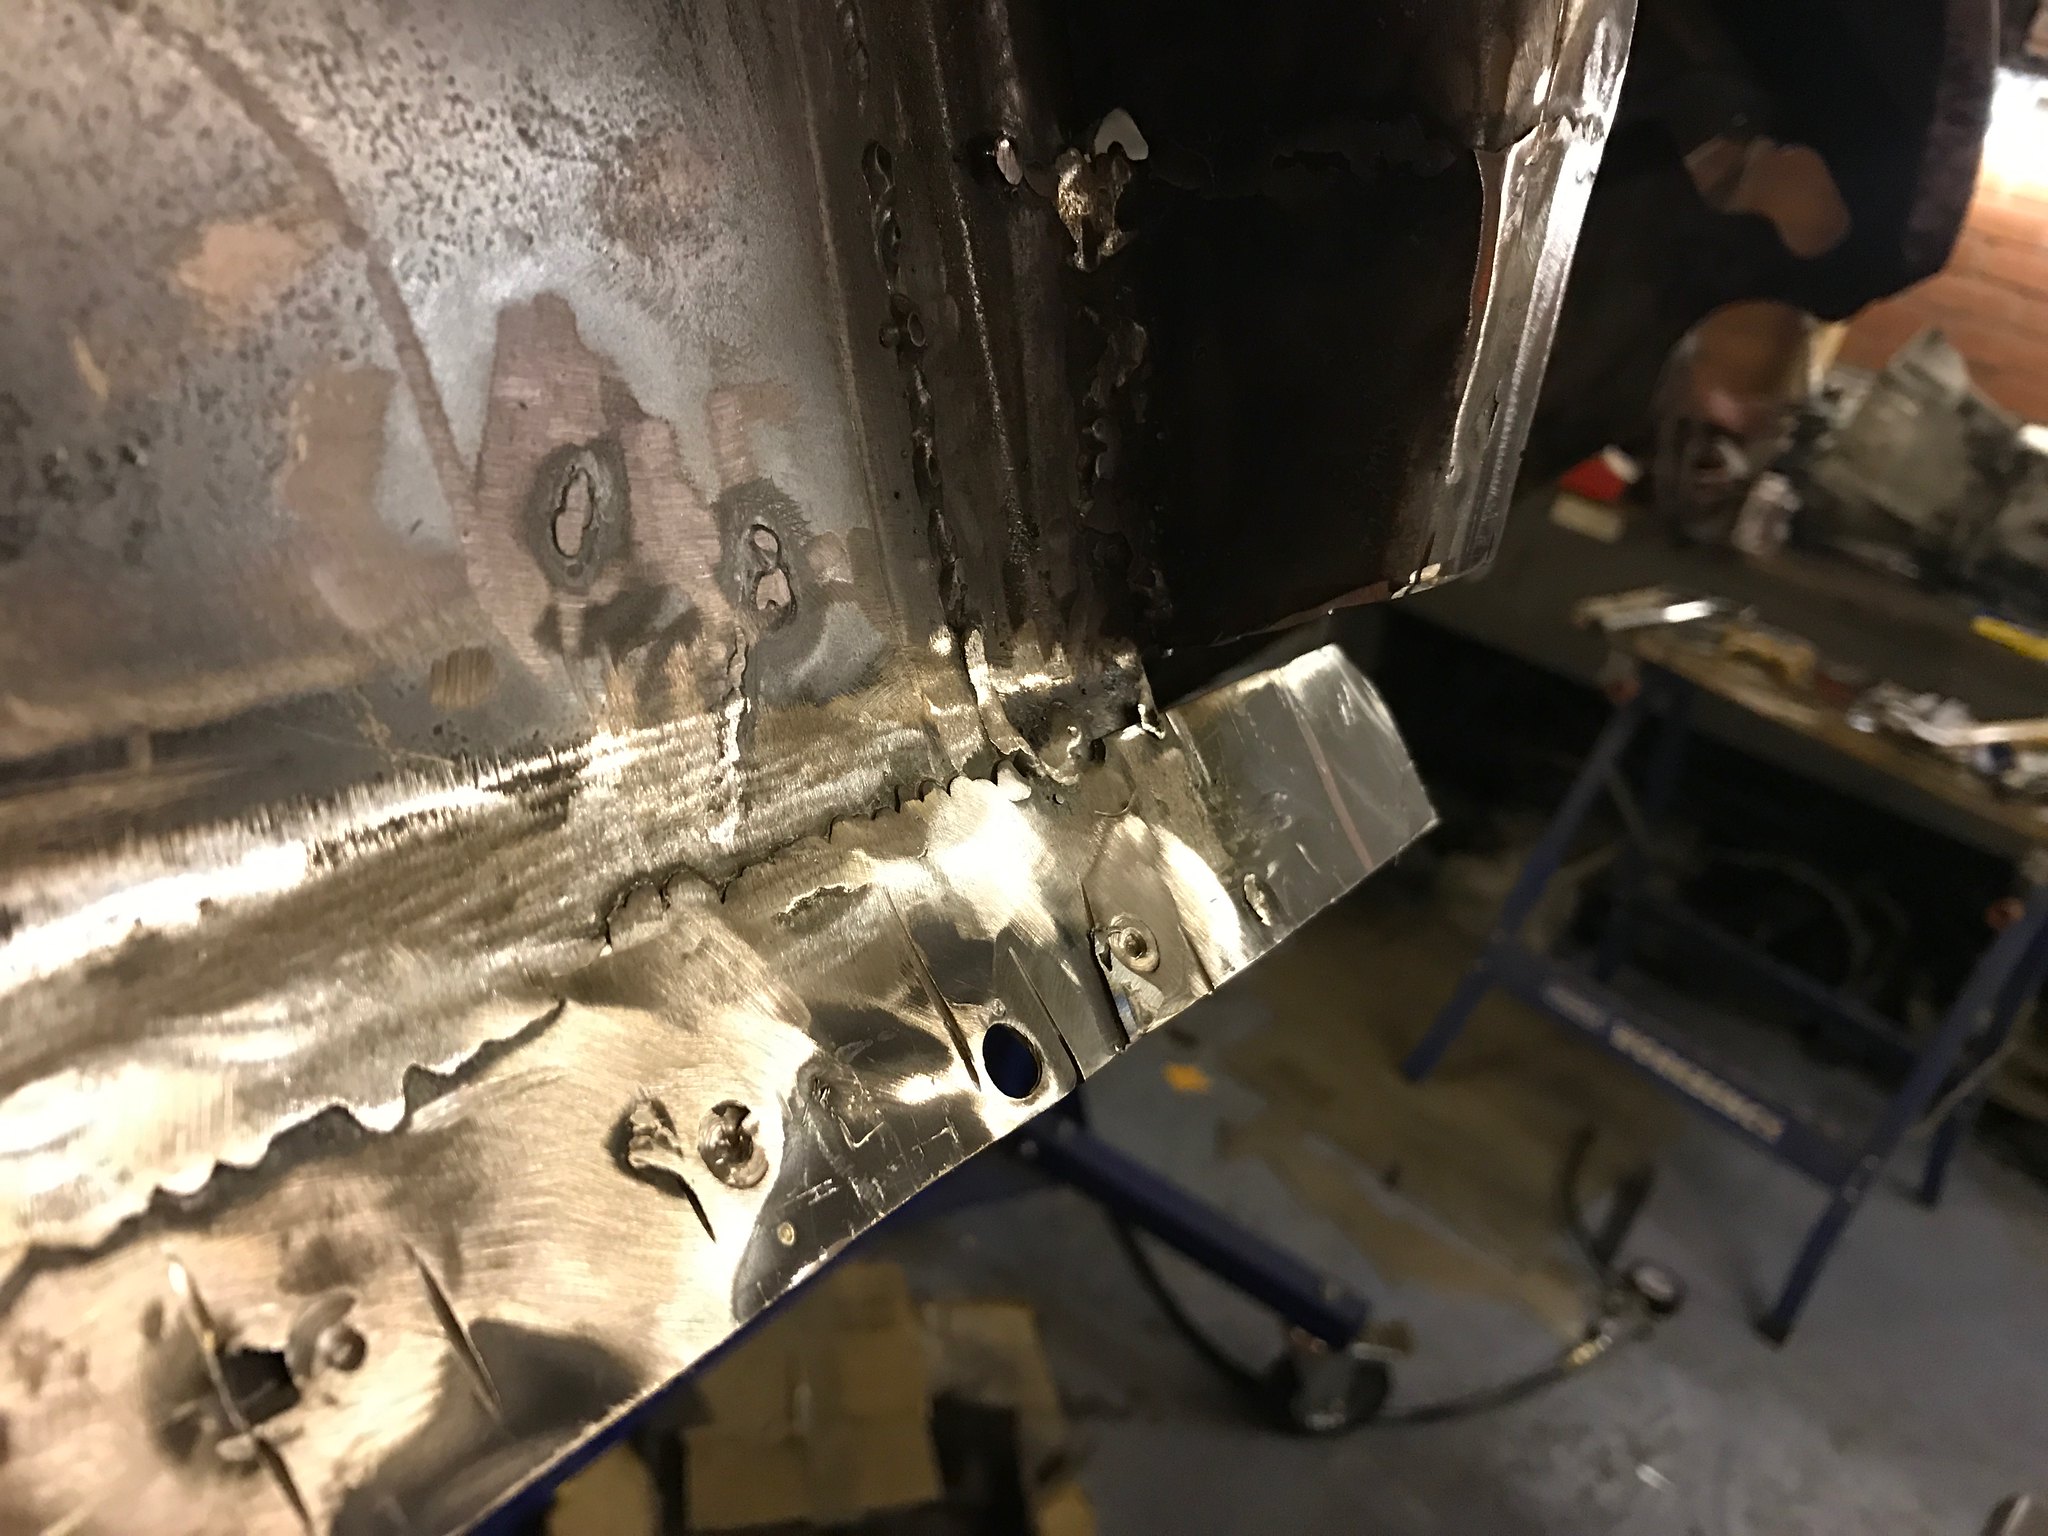 Untitled Untitled by Nevtiger, on Flickr 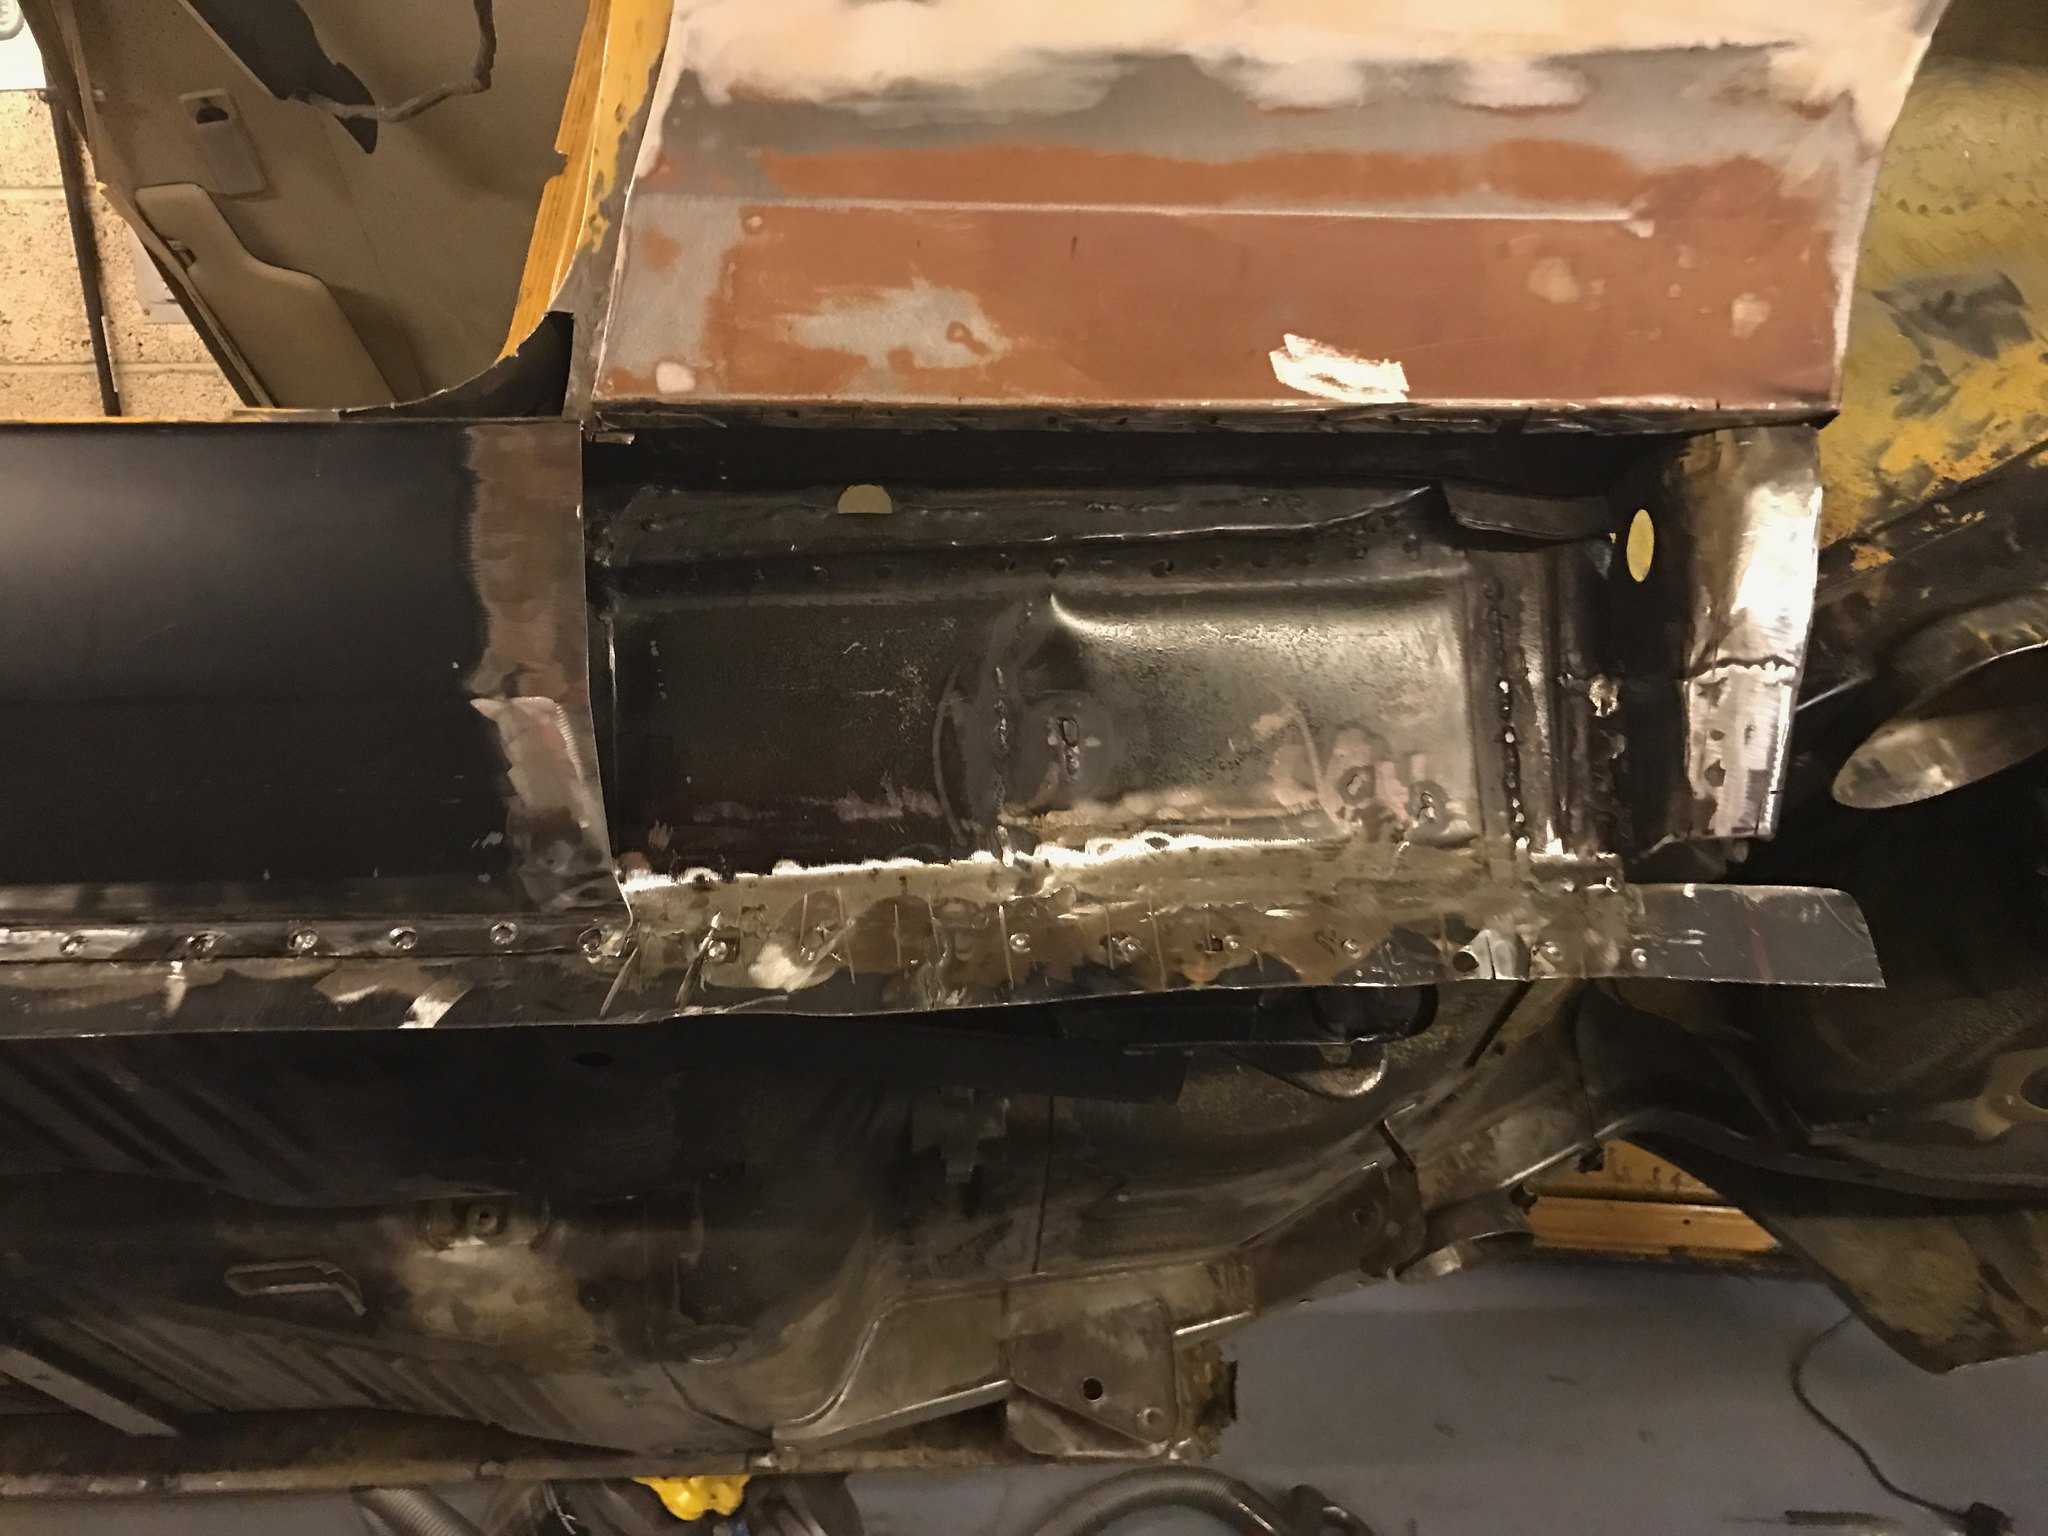 Untitled Untitled by Nevtiger, on Flickr And then as i am about to go away on the Monte Historic and i have run out of gas i went and picked up the re-conditioned rear C180 Callipers from Big Red and picked up my new gearbox..... Bigg Red seem really good to deal with and nice people. The gearbox is a Getrag 420G which is the 6 speed as used in BMW M5, 540i manual etc. Although a little overkill in the strength department it has a bell housing that will go over the Jag flywheel and i can mount this by making an adaptor plate. I can make an adaptor plate in the garage so it satisfies my attempt at trying to do most of the things on the car my self. This box came with the M5 shifter as well but i have another shifter from a Z4 that looks to have a quicker ratio so i may modify that instead. The rubber donut is also a larger size than either my existing Getrag Jag box or the ZF 6 speed from the Z4 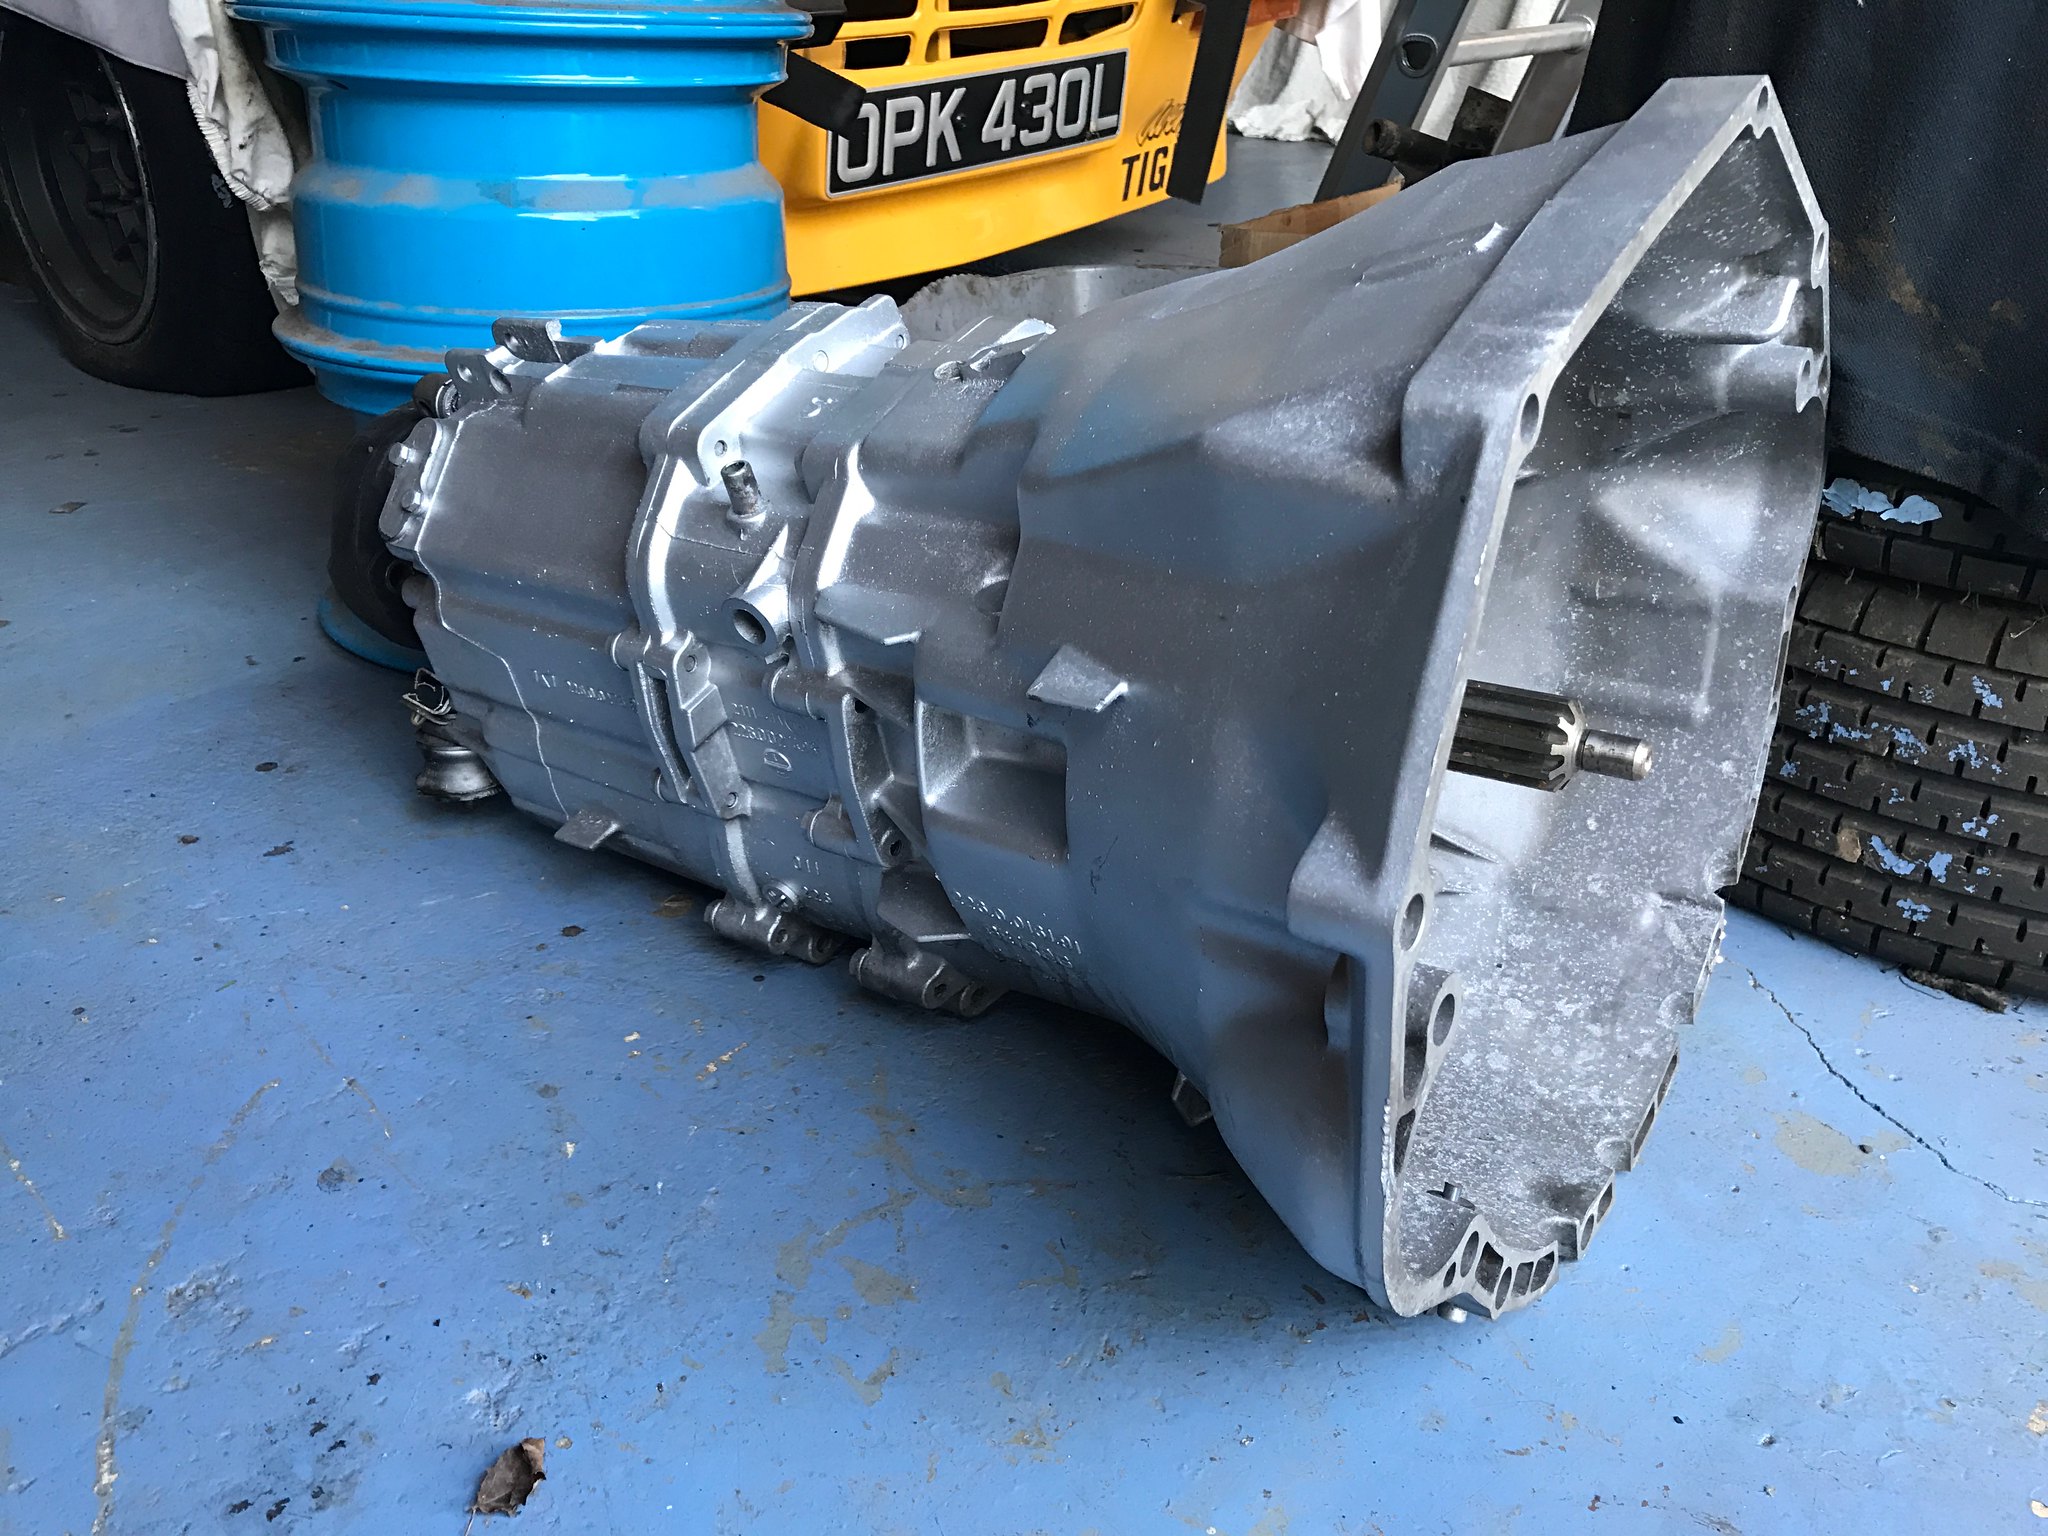 Untitled Untitled by Nevtiger, on Flickr 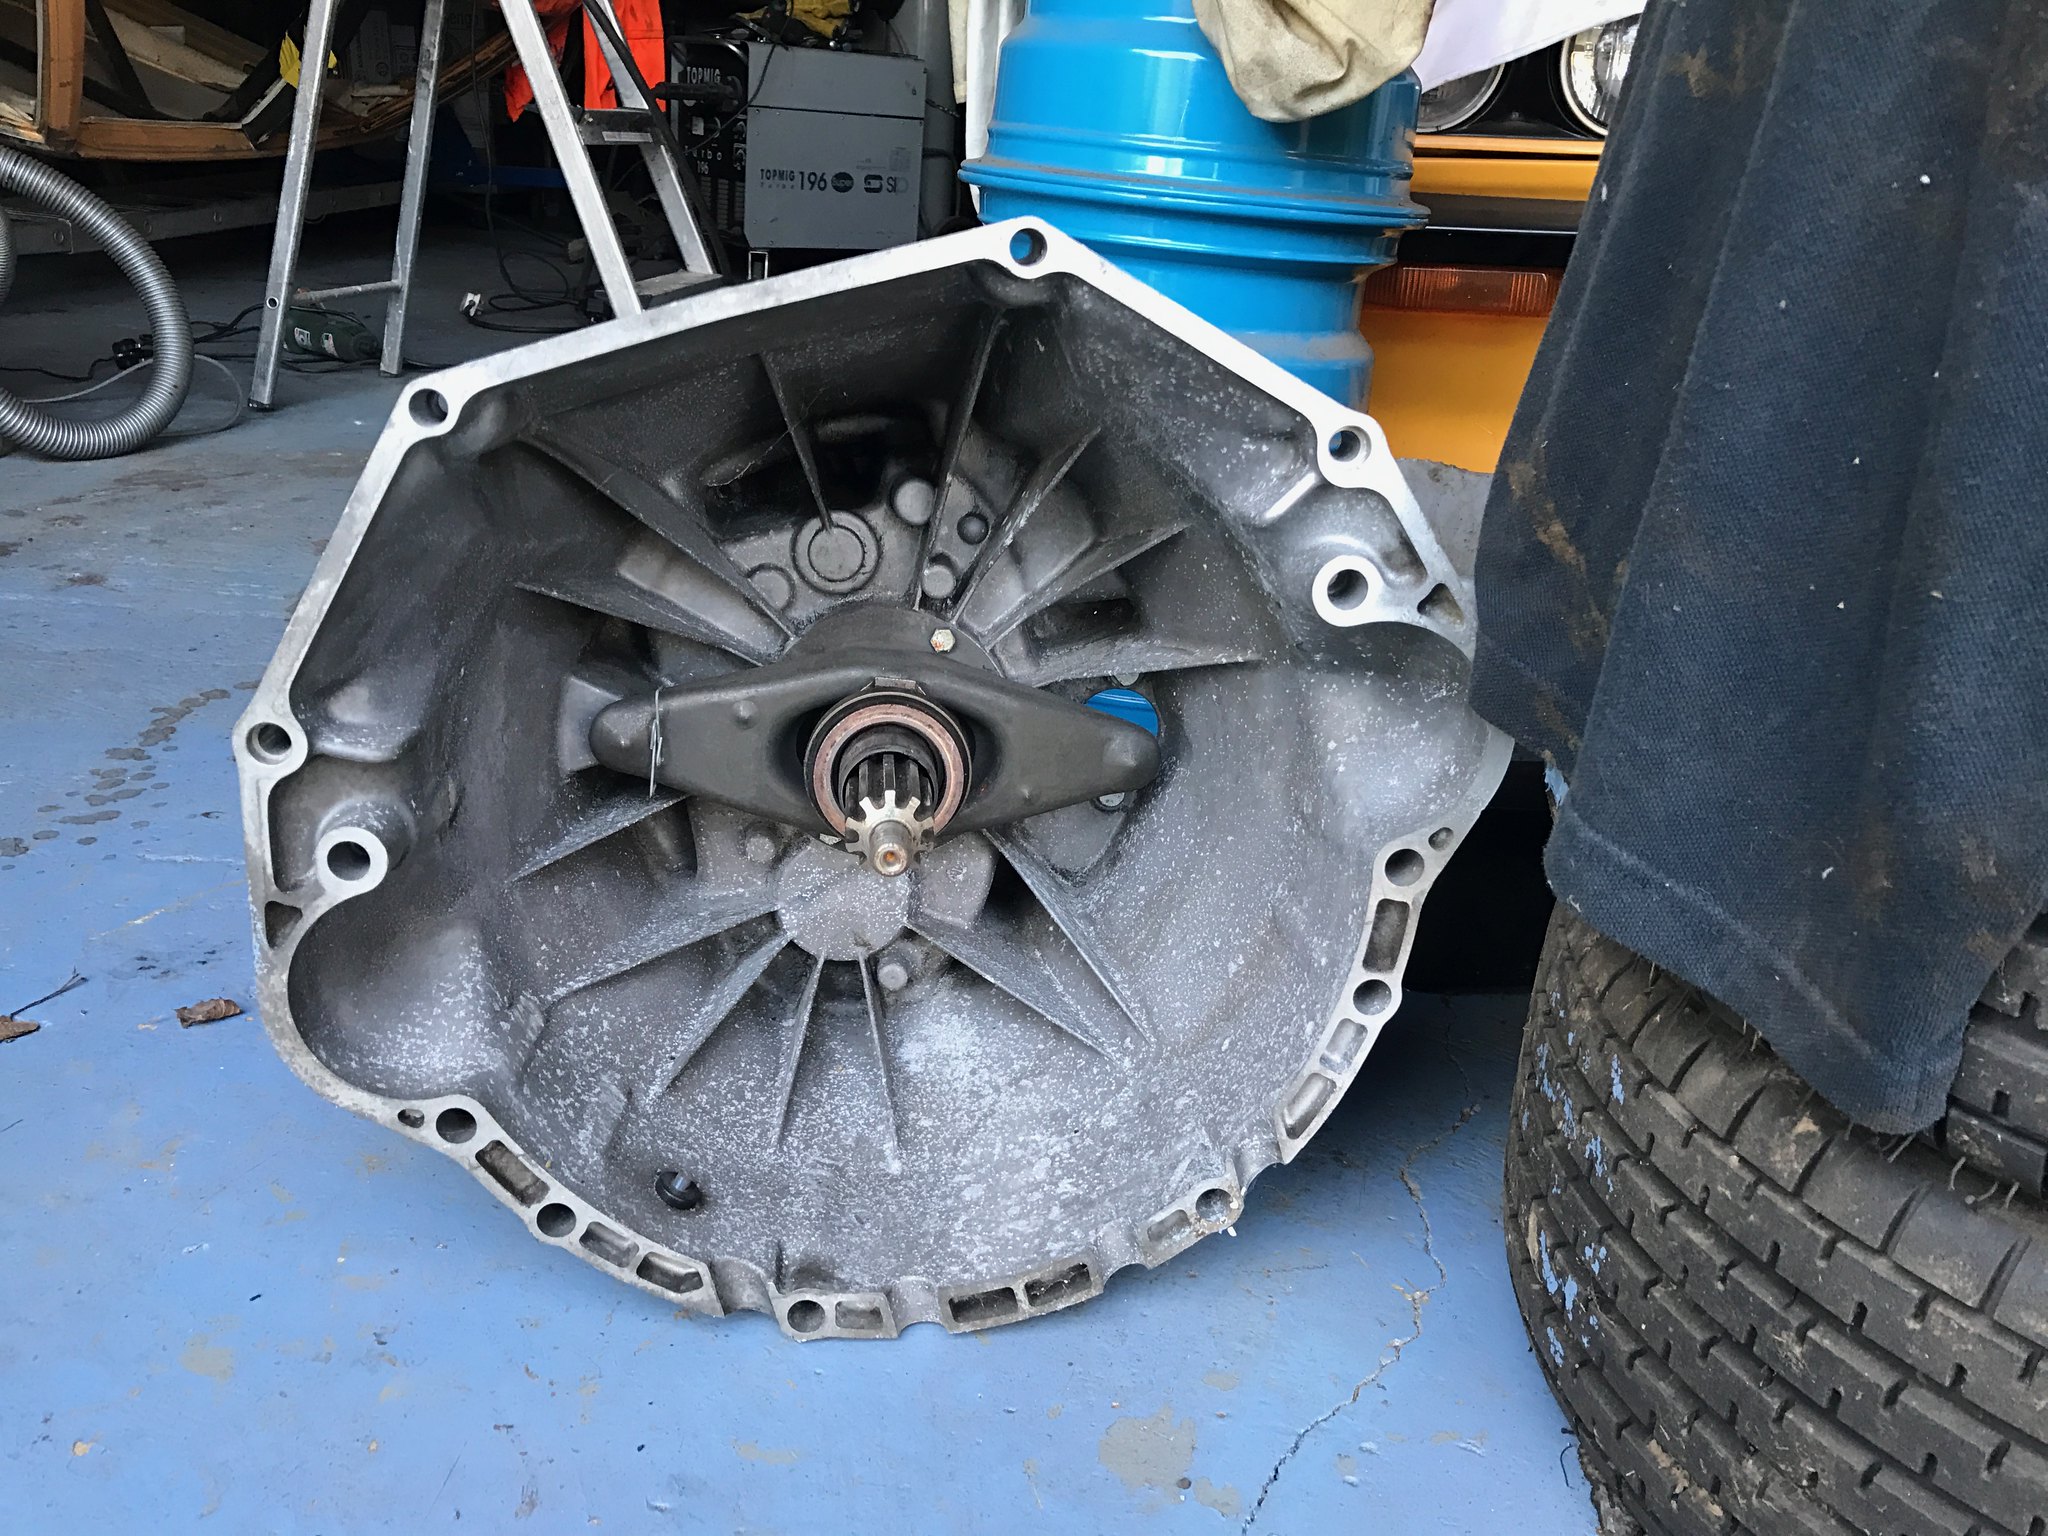 Untitled Untitled by Nevtiger, on Flickr 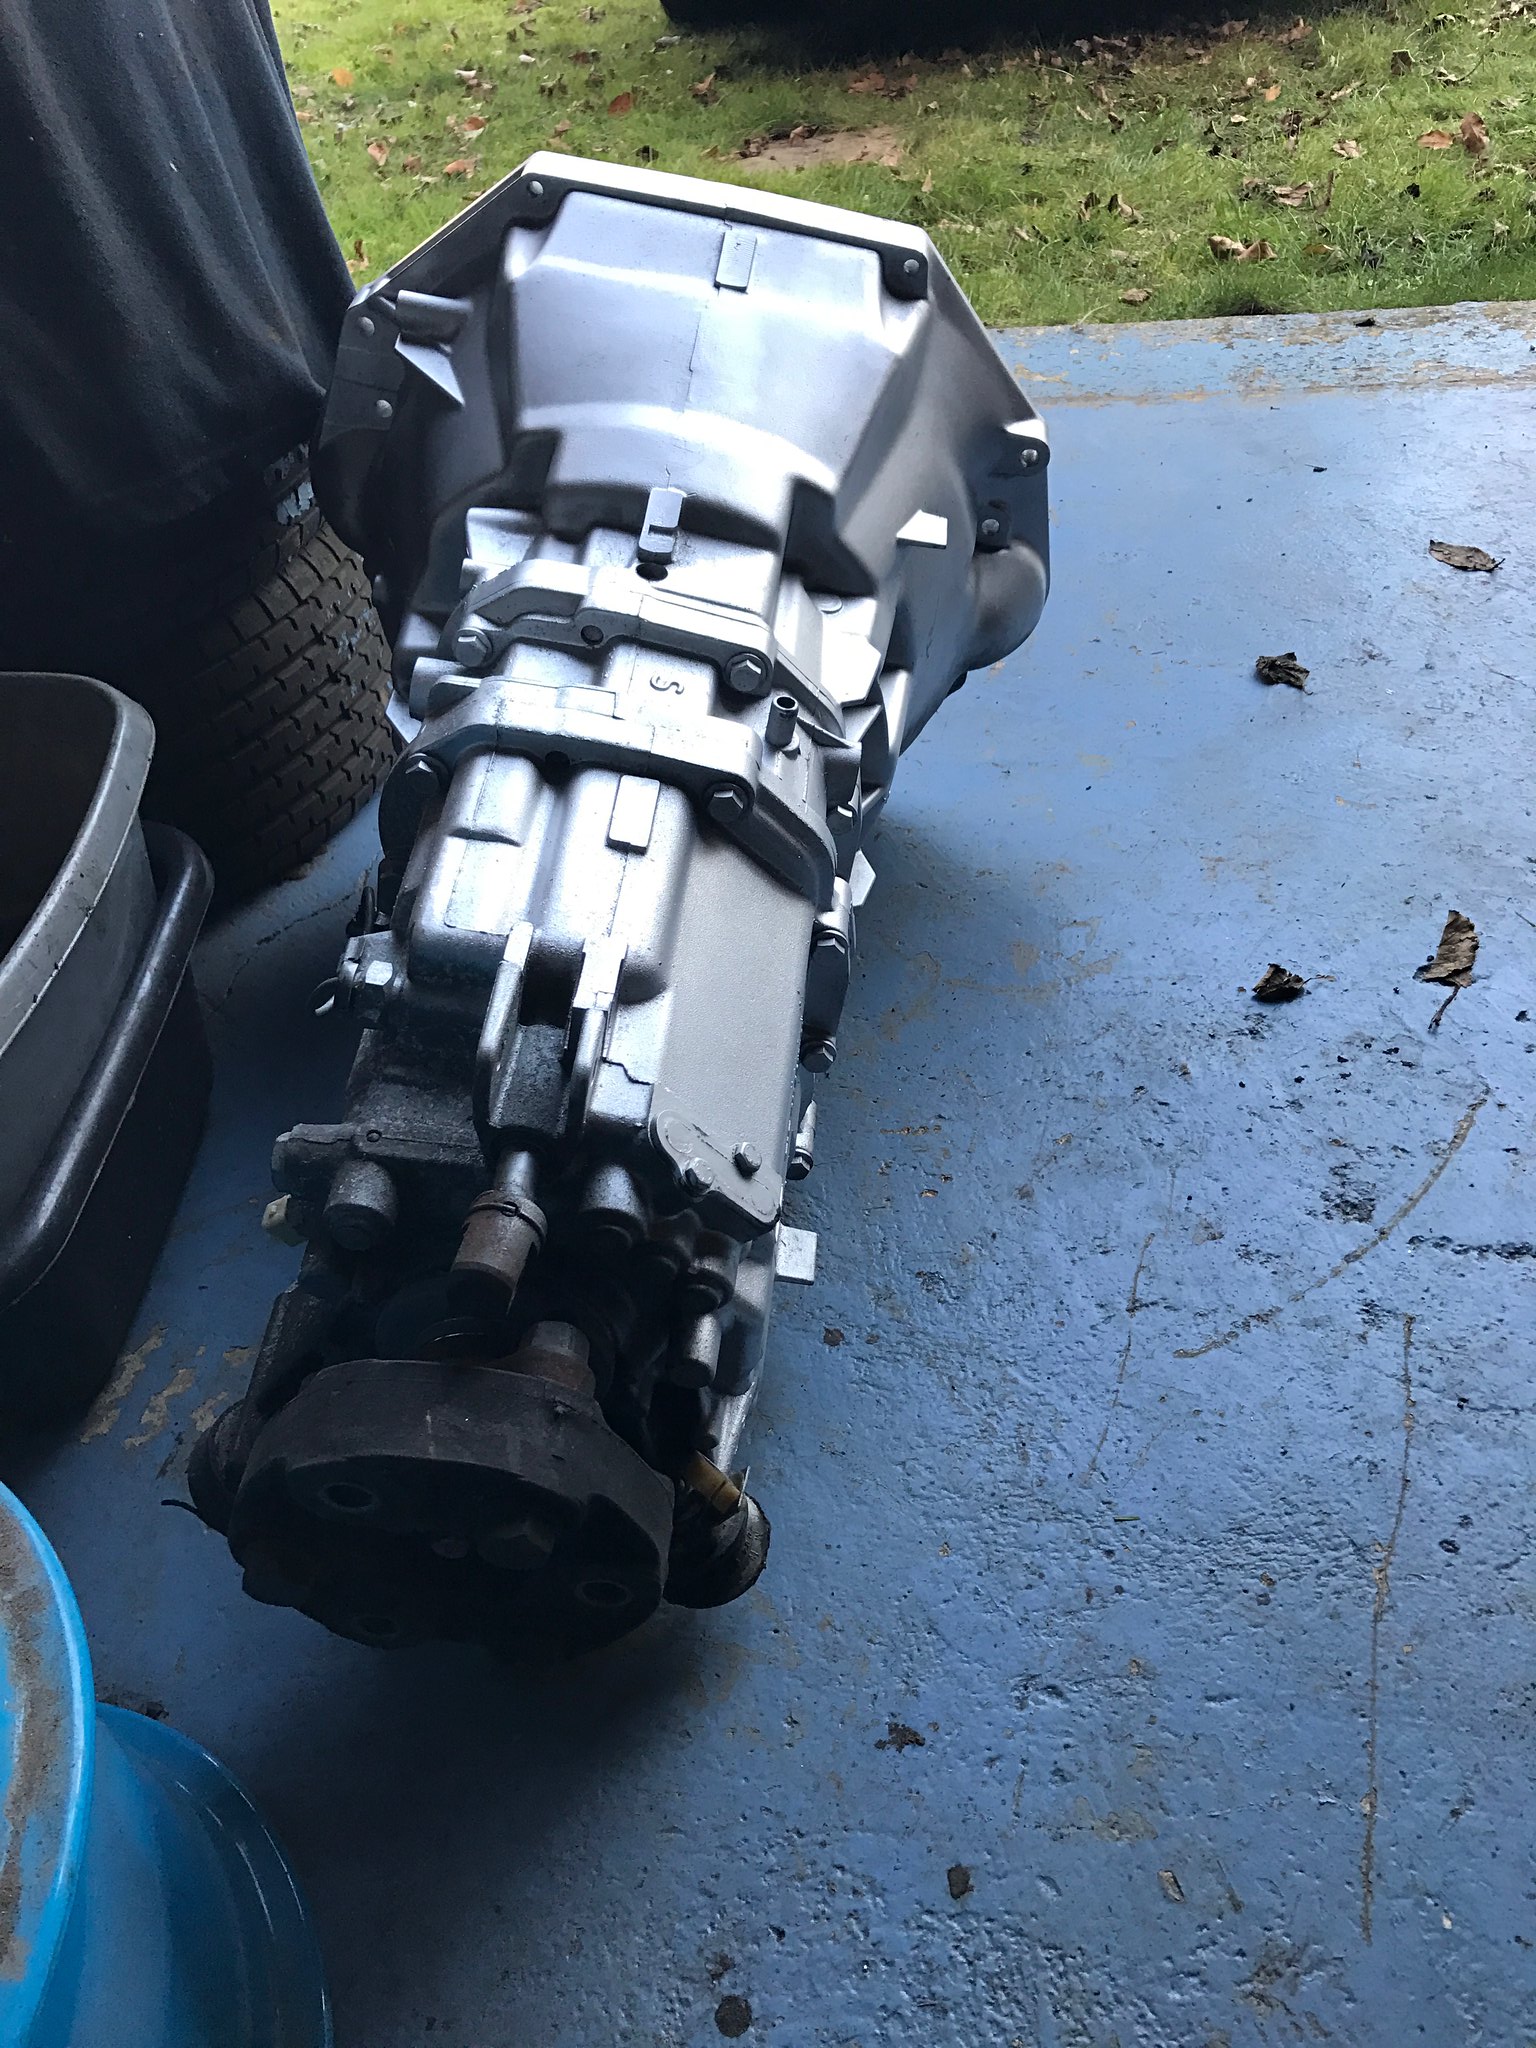 Untitled Untitled by Nevtiger, on Flickr |
| |
|
|
|
|
|
|
|
|
|
Much time has been spent mucking about with the Tiger so the Sunbeam has been a bit neglected so: Rear bottom corner on off side had a small pin hole so i took it out and had to make it big to get to the extent of corrosion on the inner panel 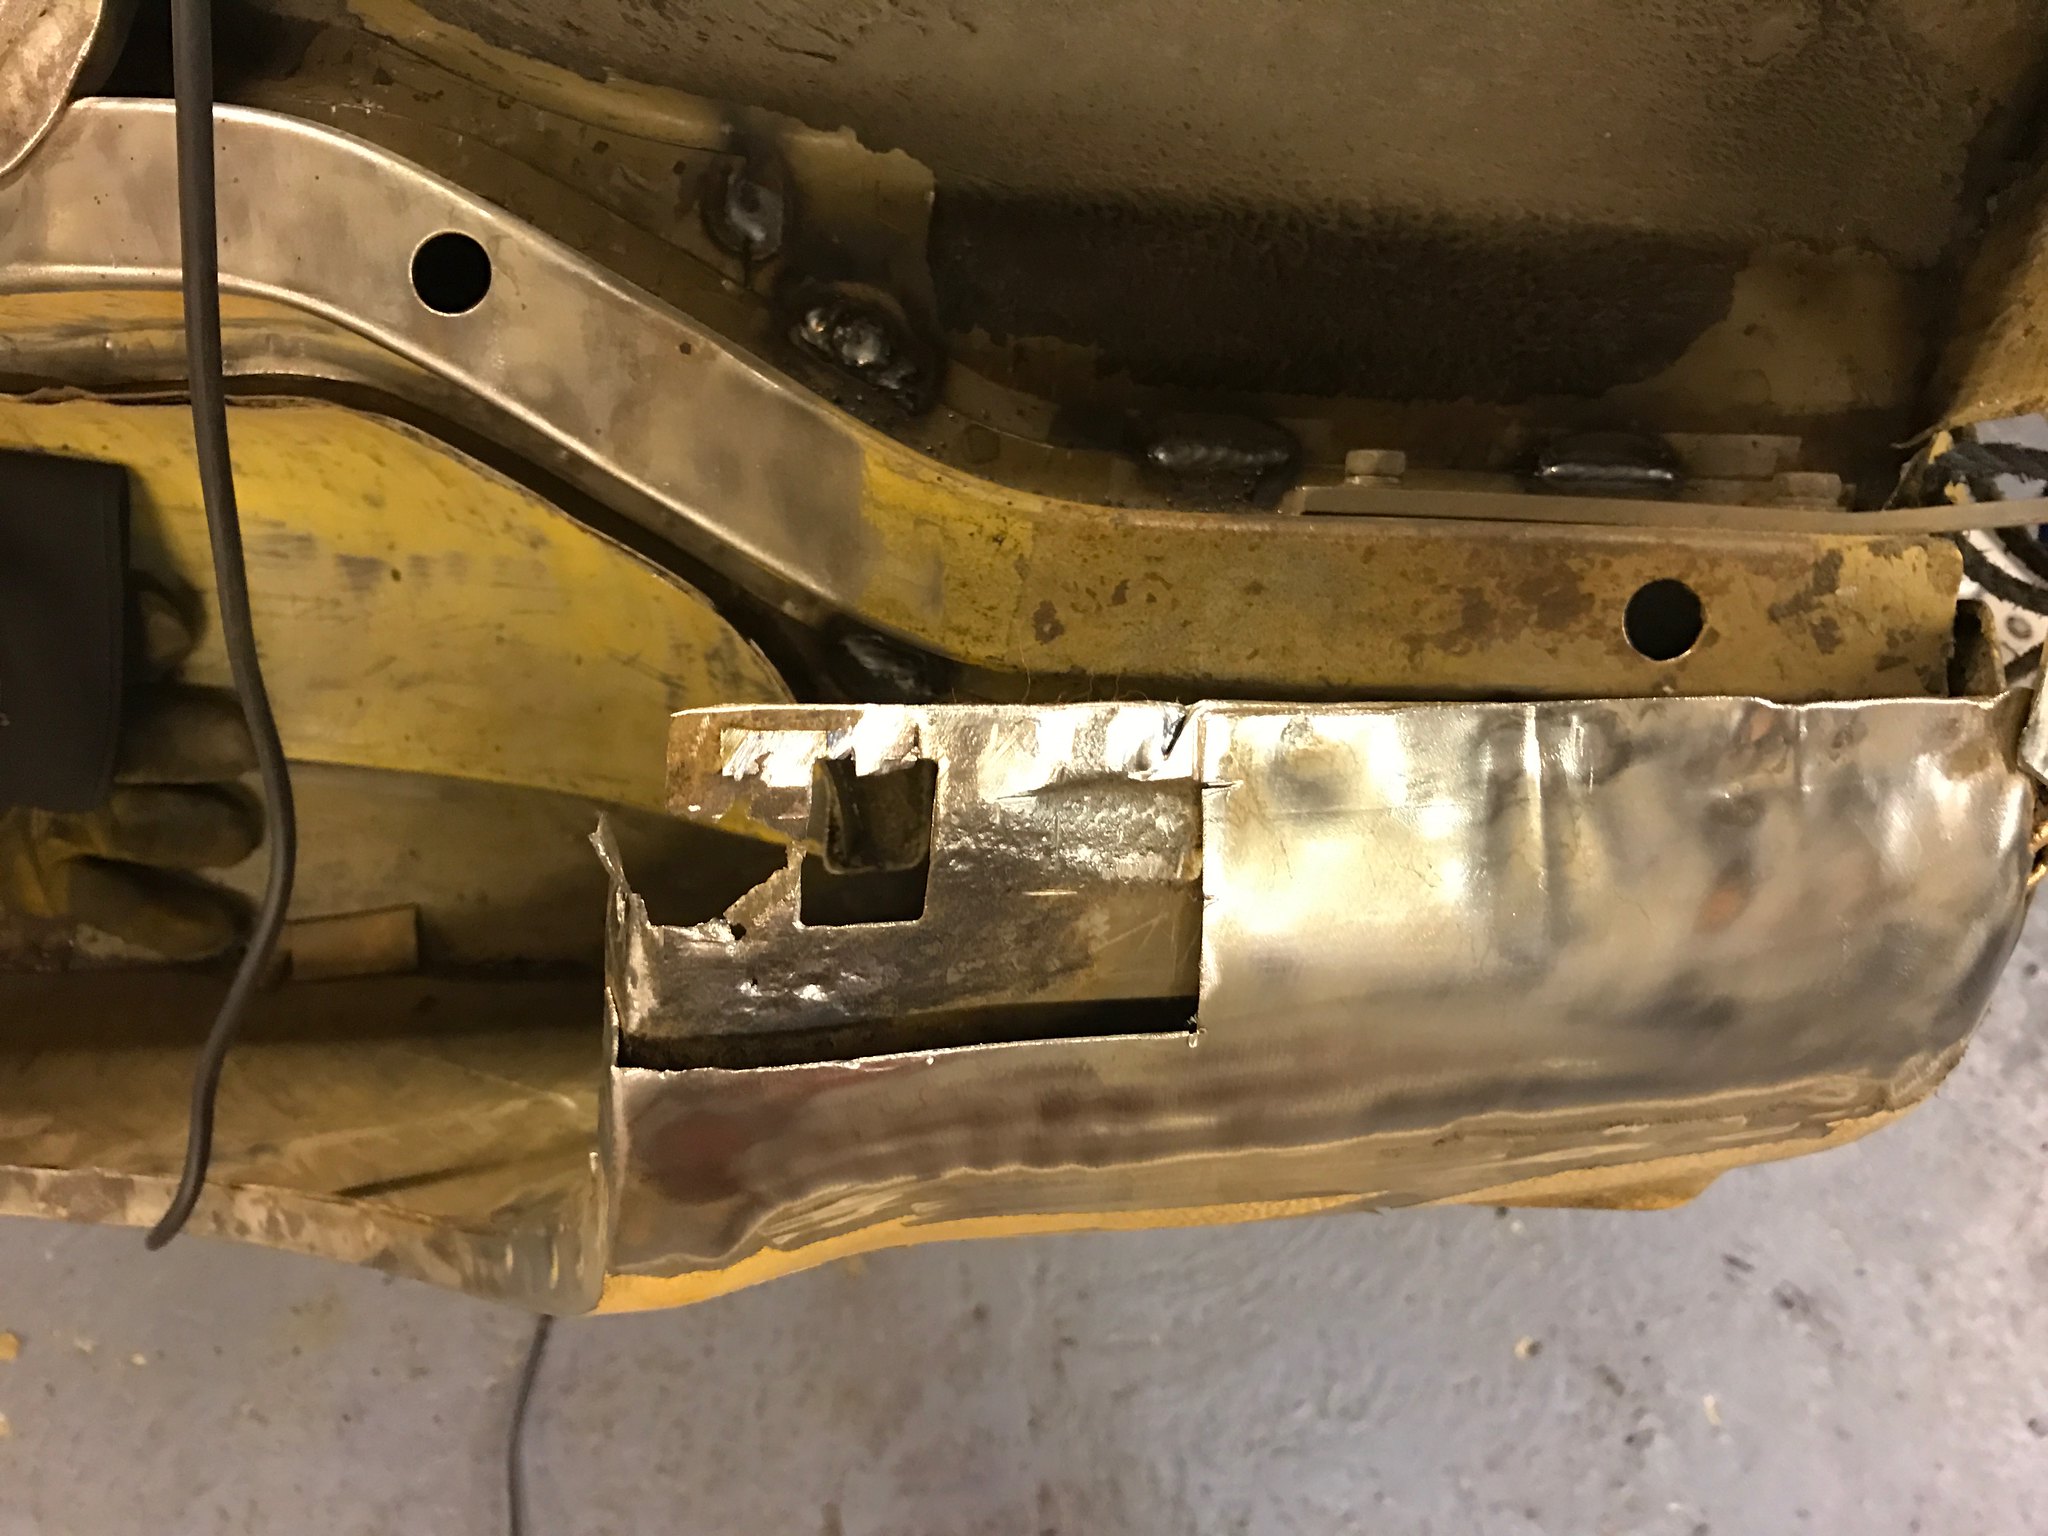 Untitled Untitled by Nevtiger, on Flickr 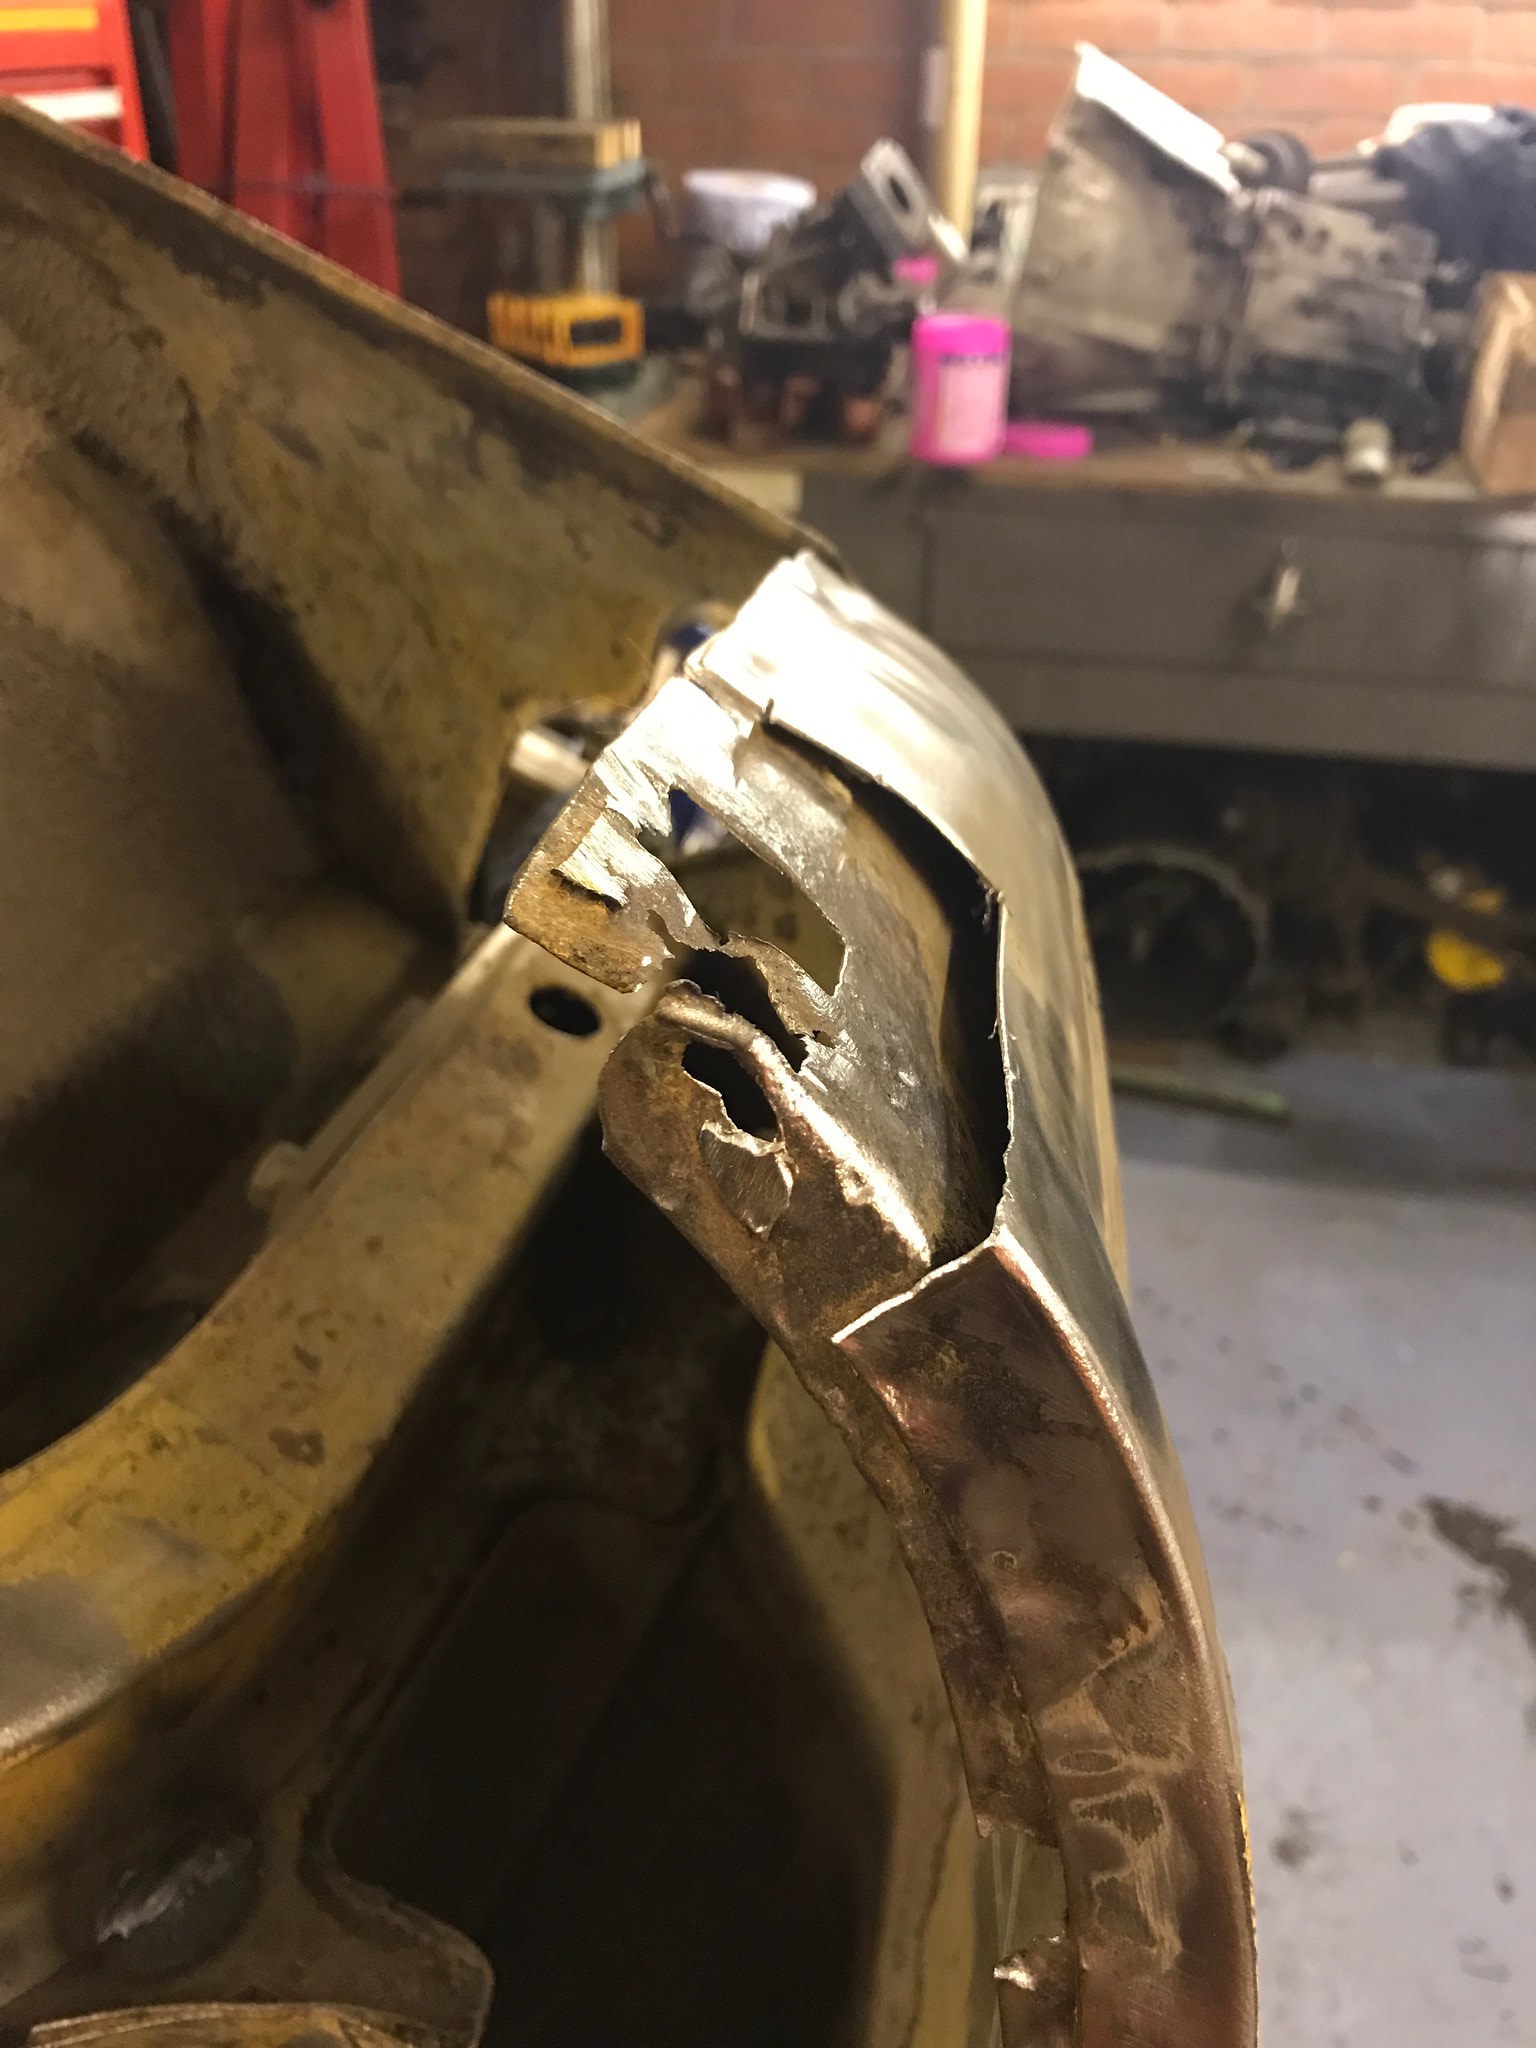 Untitled Untitled by Nevtiger, on Flickr And on the rear of the sill also there was some corrosion, not enough to warrant the whole panel being replaced 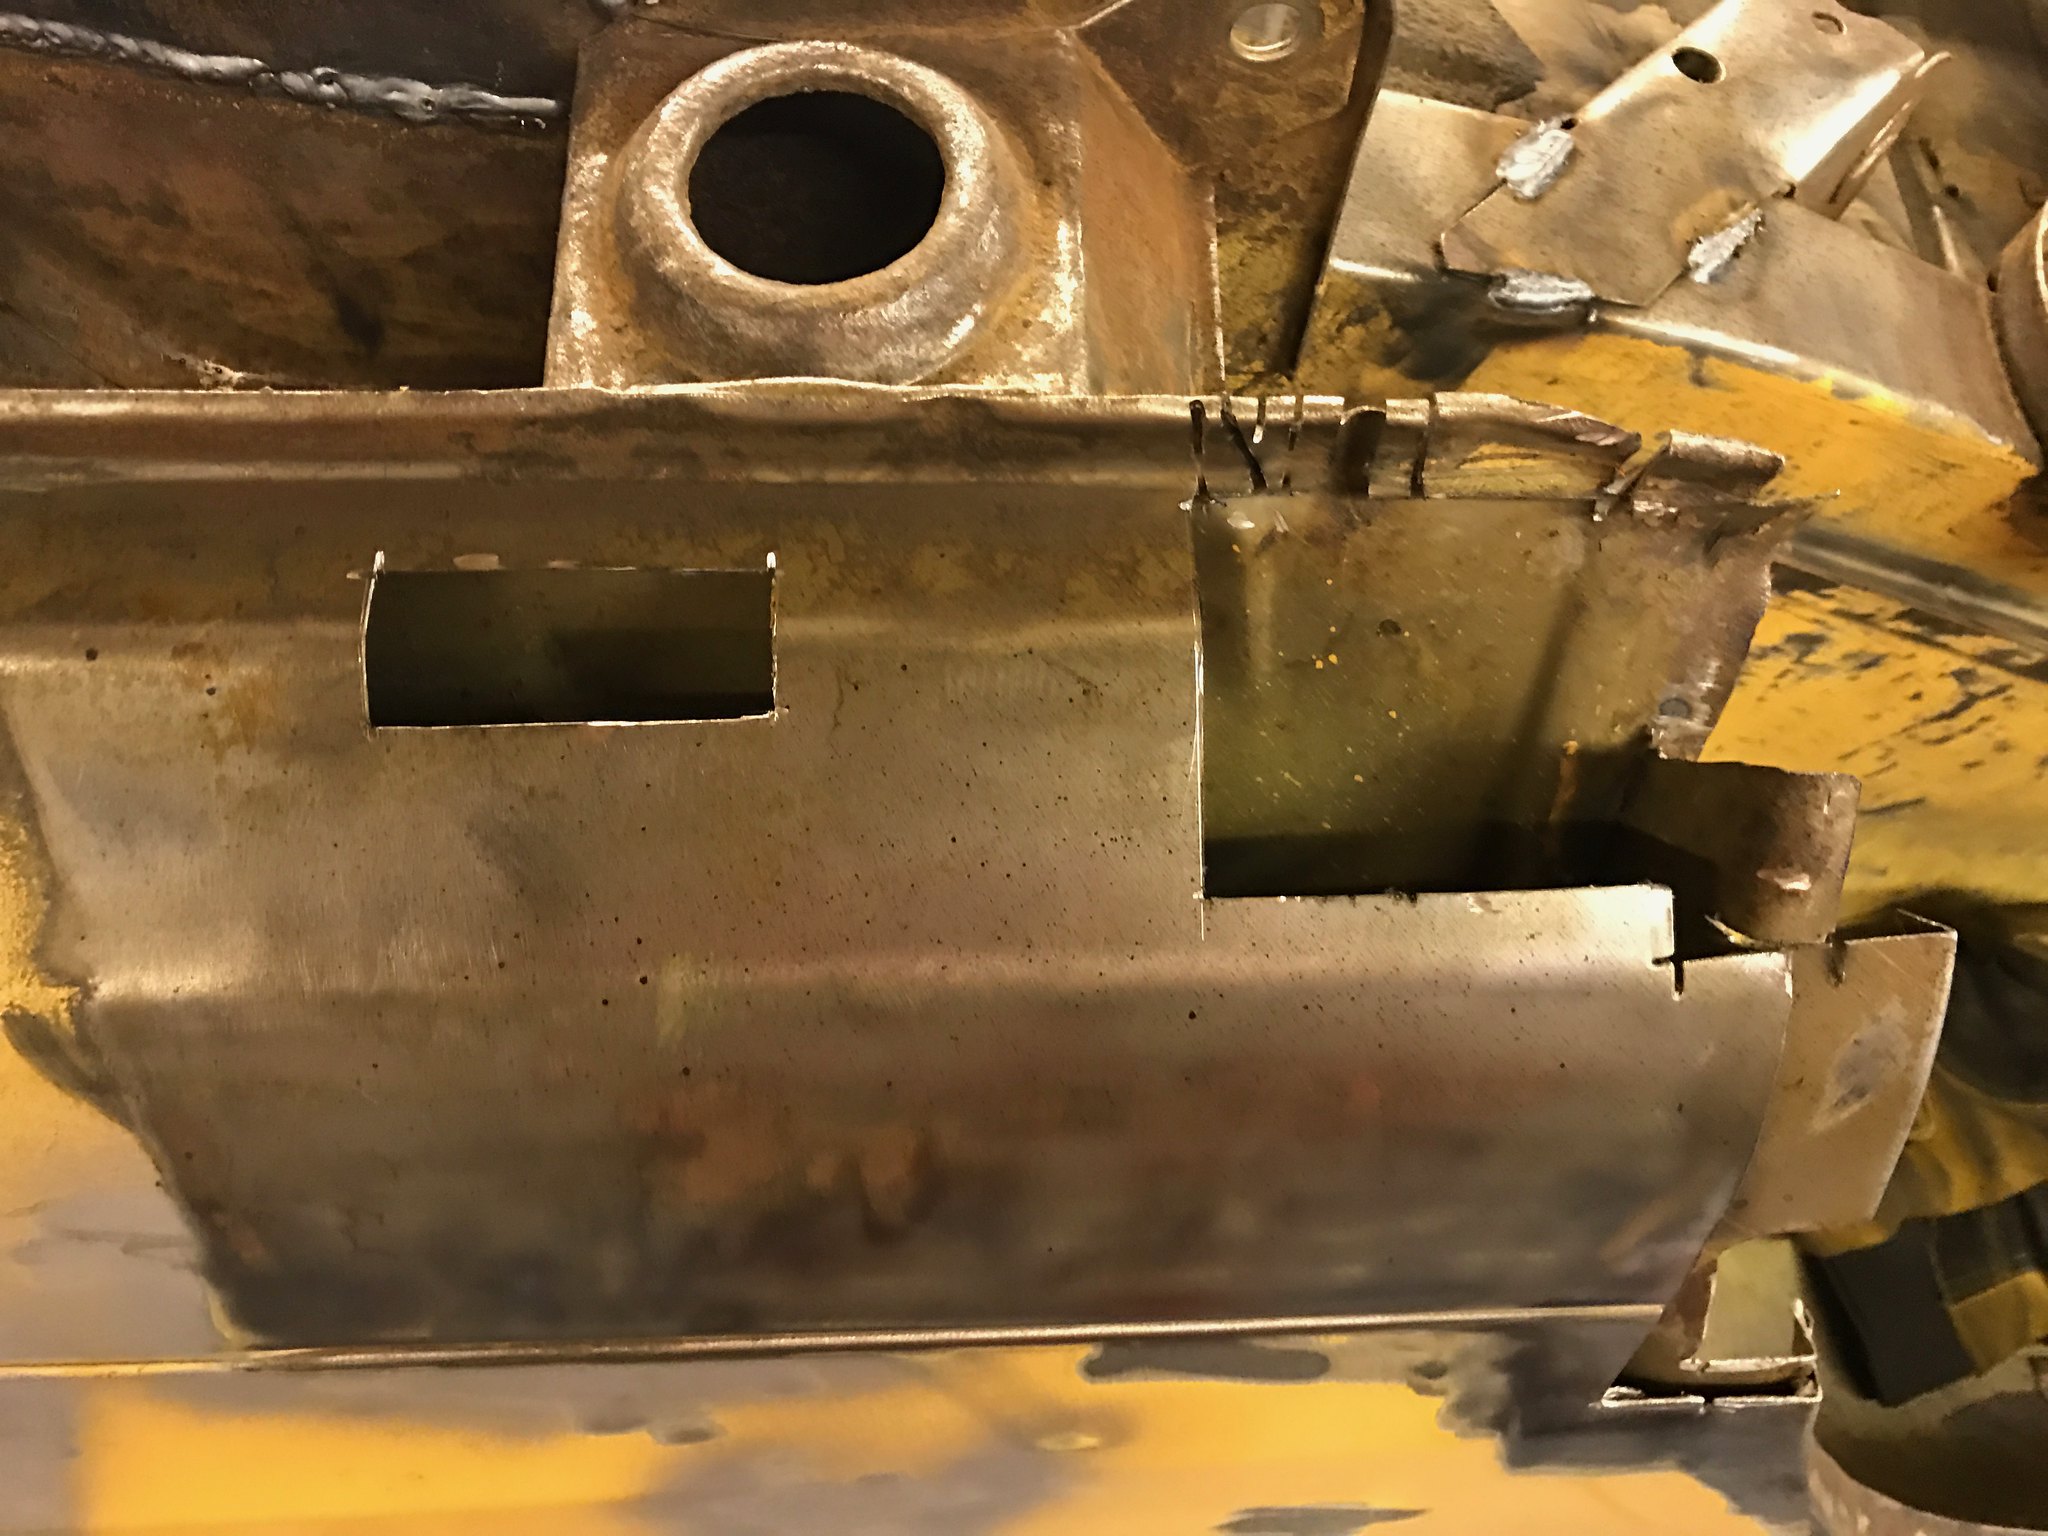 Untitled Untitled by Nevtiger, on Flickr 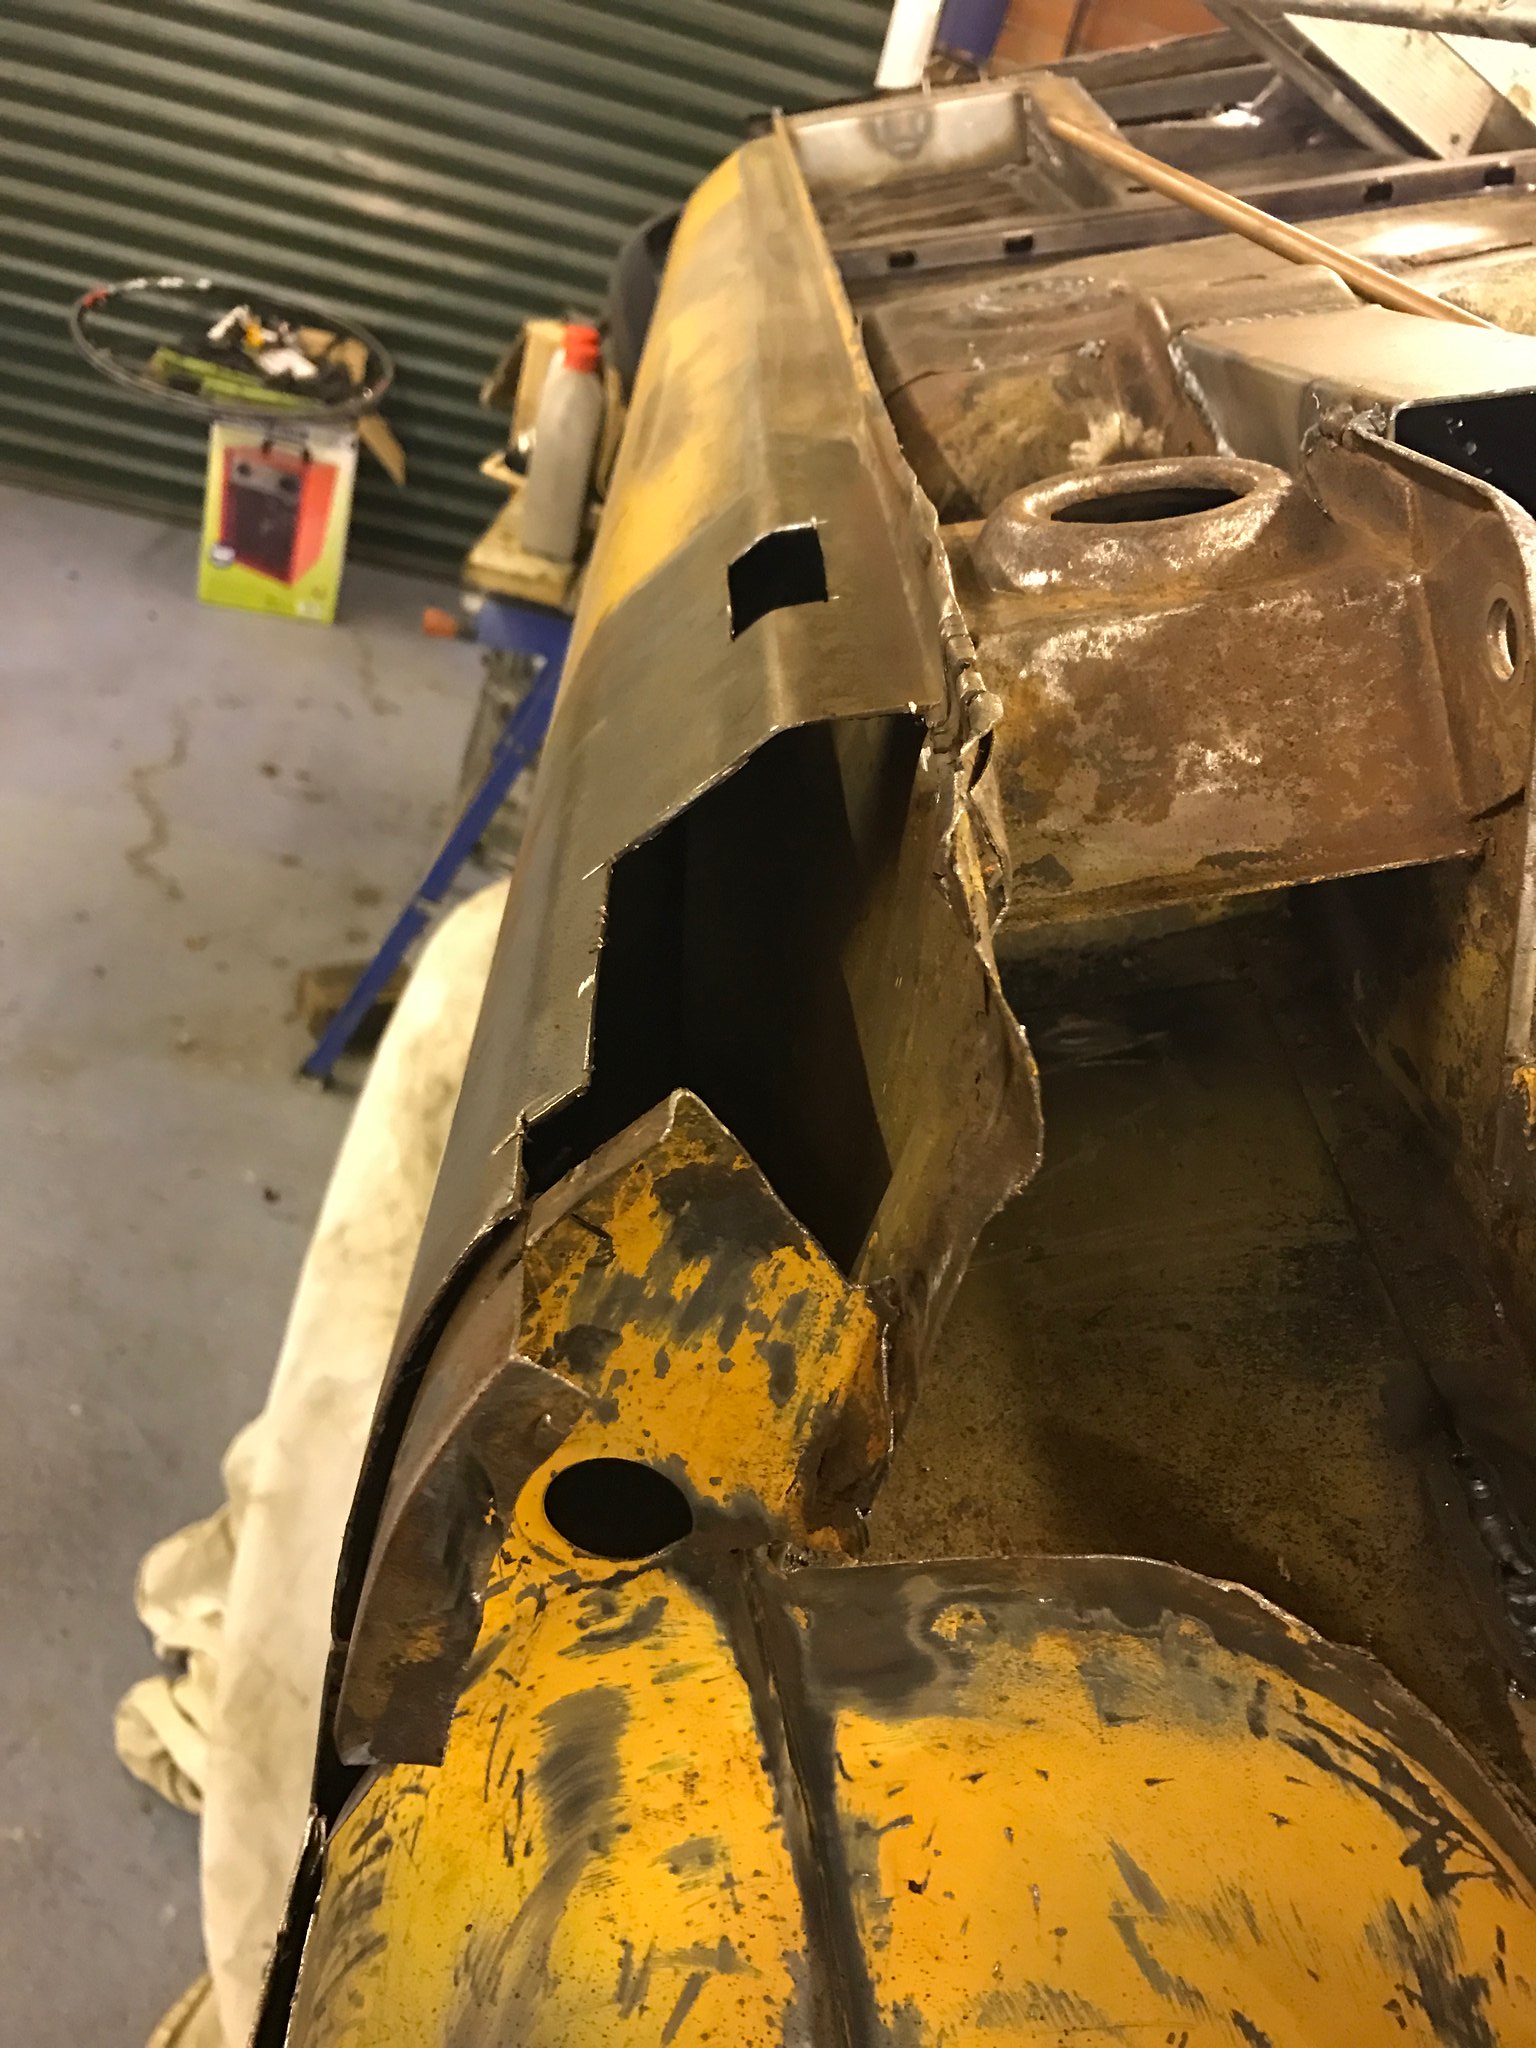 Untitled Untitled by Nevtiger, on Flickr Pretty sound in here otherwise and easily sorted with the Dinitrol that will get injected when finished. 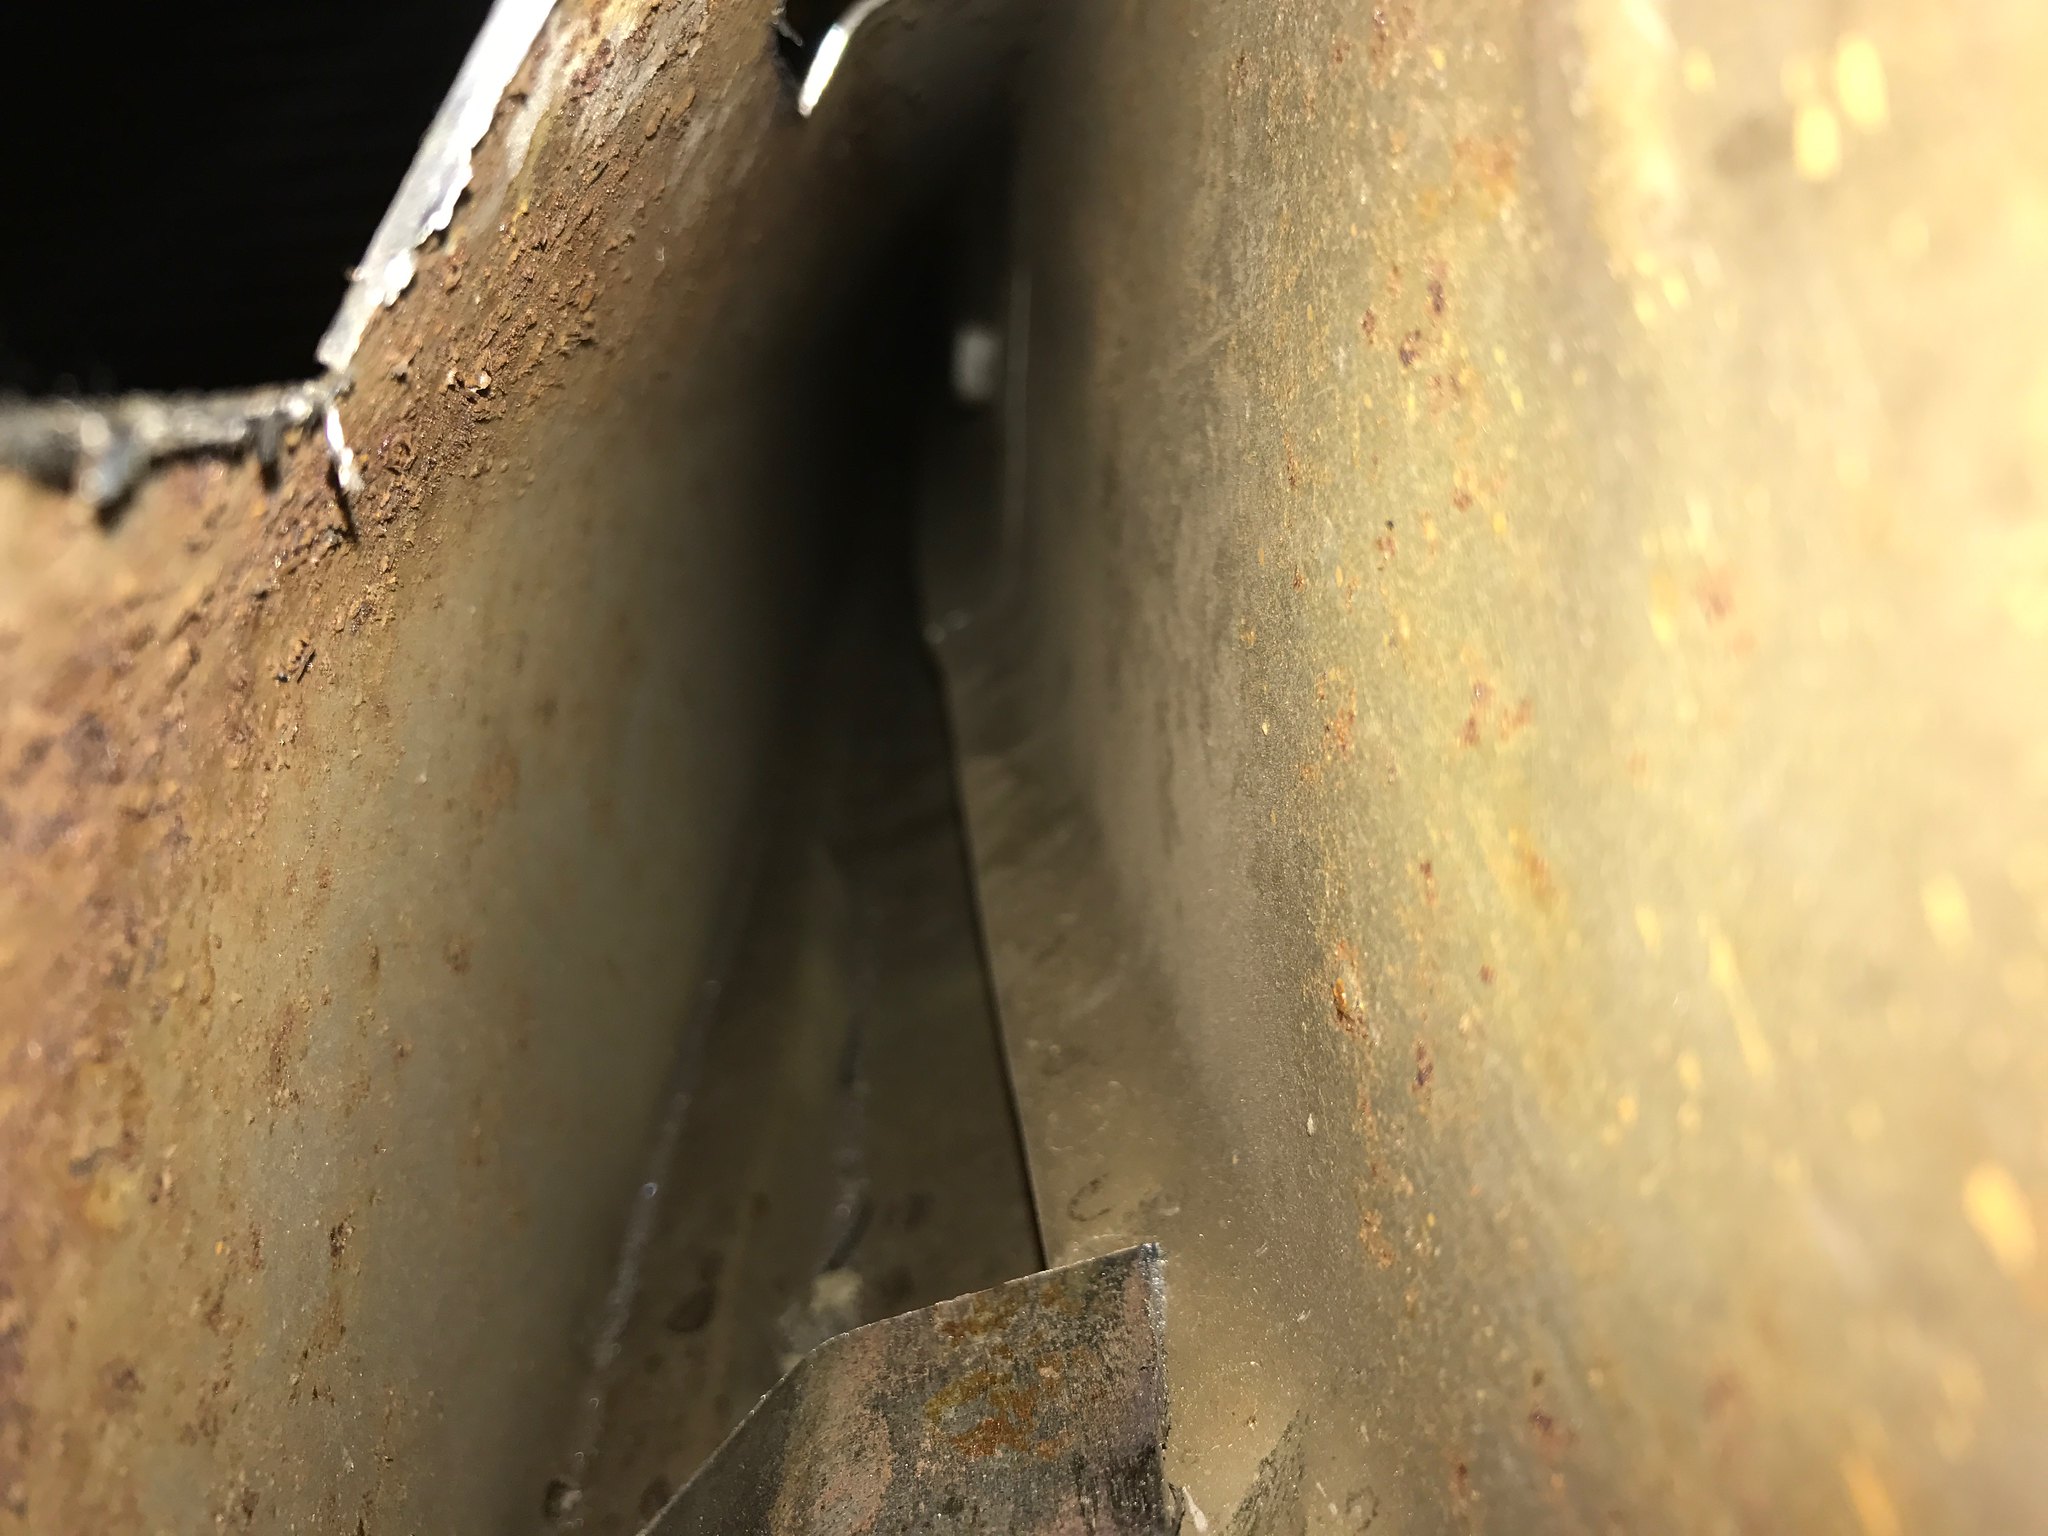 Untitled Untitled by Nevtiger, on Flickr The other side i cocked up i have bitten the bullet and ordered a full replacement outer sill with its standard 90 day wait. It does mean there will much less margin for error and i will be paranoid of getting it wrong again...... So roll on June to finish the other side off. Plenty to do in the mean time! |
| |
|
|
|
|
|
Mar 28, 2017 15:42:20 GMT
|
Progress is happening at a pace slightly slower than one would hope due to Holiday time :-) And working on the Tiger. Any way i cut out and made good more metal: So inner bit of the rear quarter replaced whilst keeping the drain hole 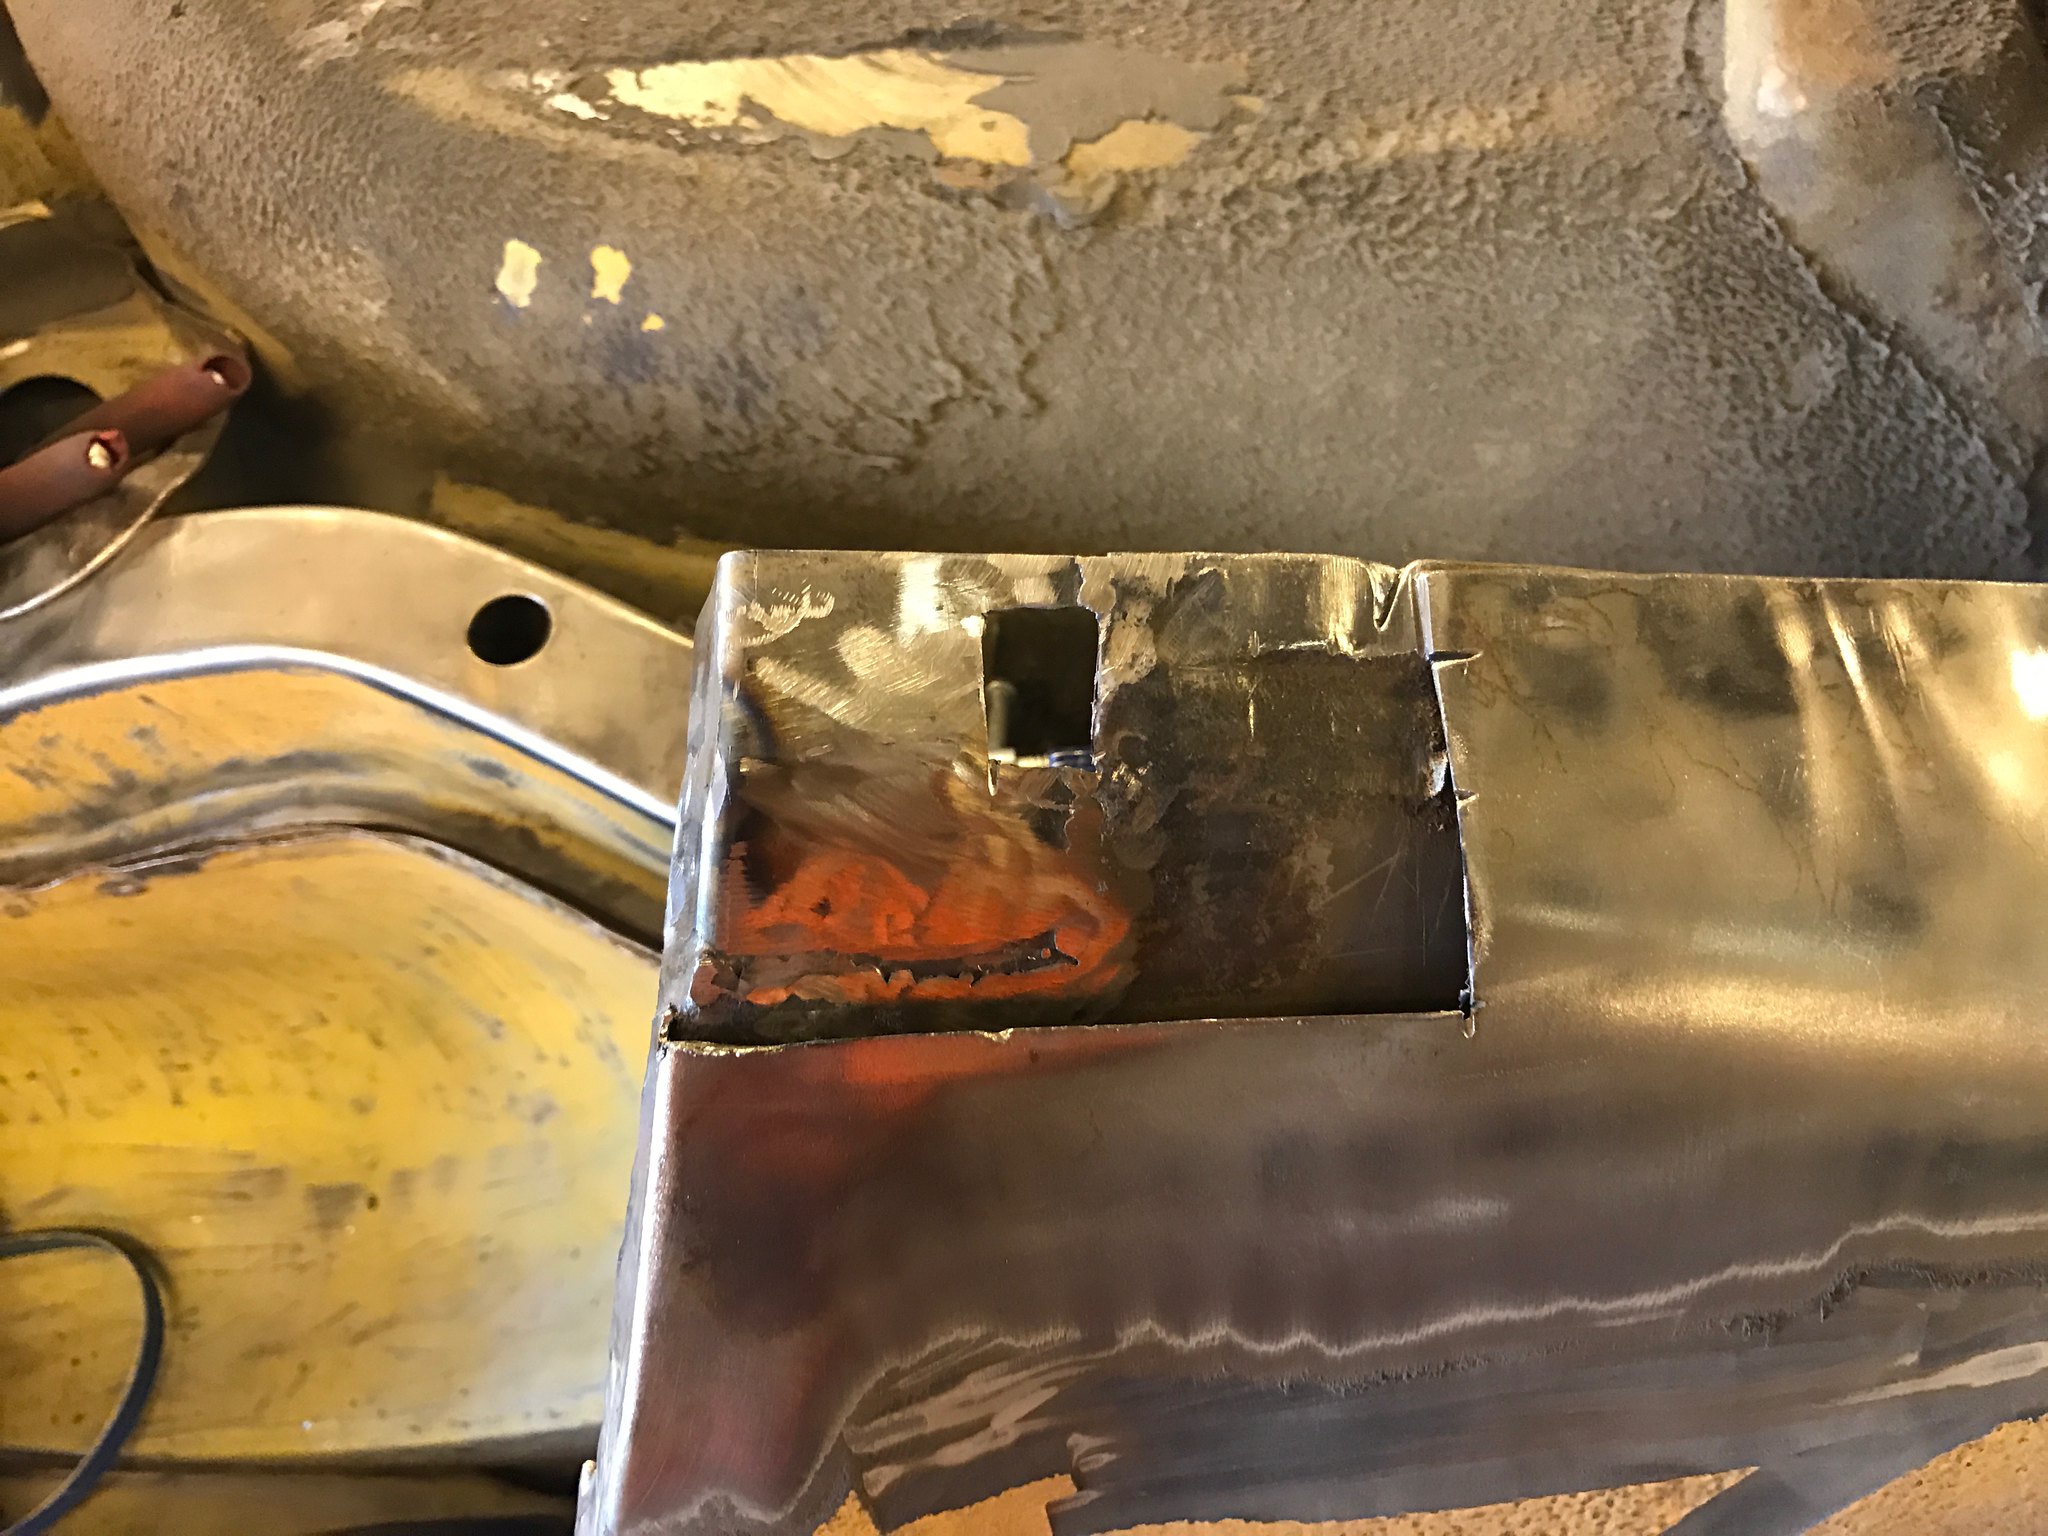 Untitled Untitled by Nevtiger, on Flickr Then i made the bit for the outer skin. Then i dropped it into the double skin portion. Time for a birthday present to come to the rescue. I don't need the stick magnet often but when i do...... 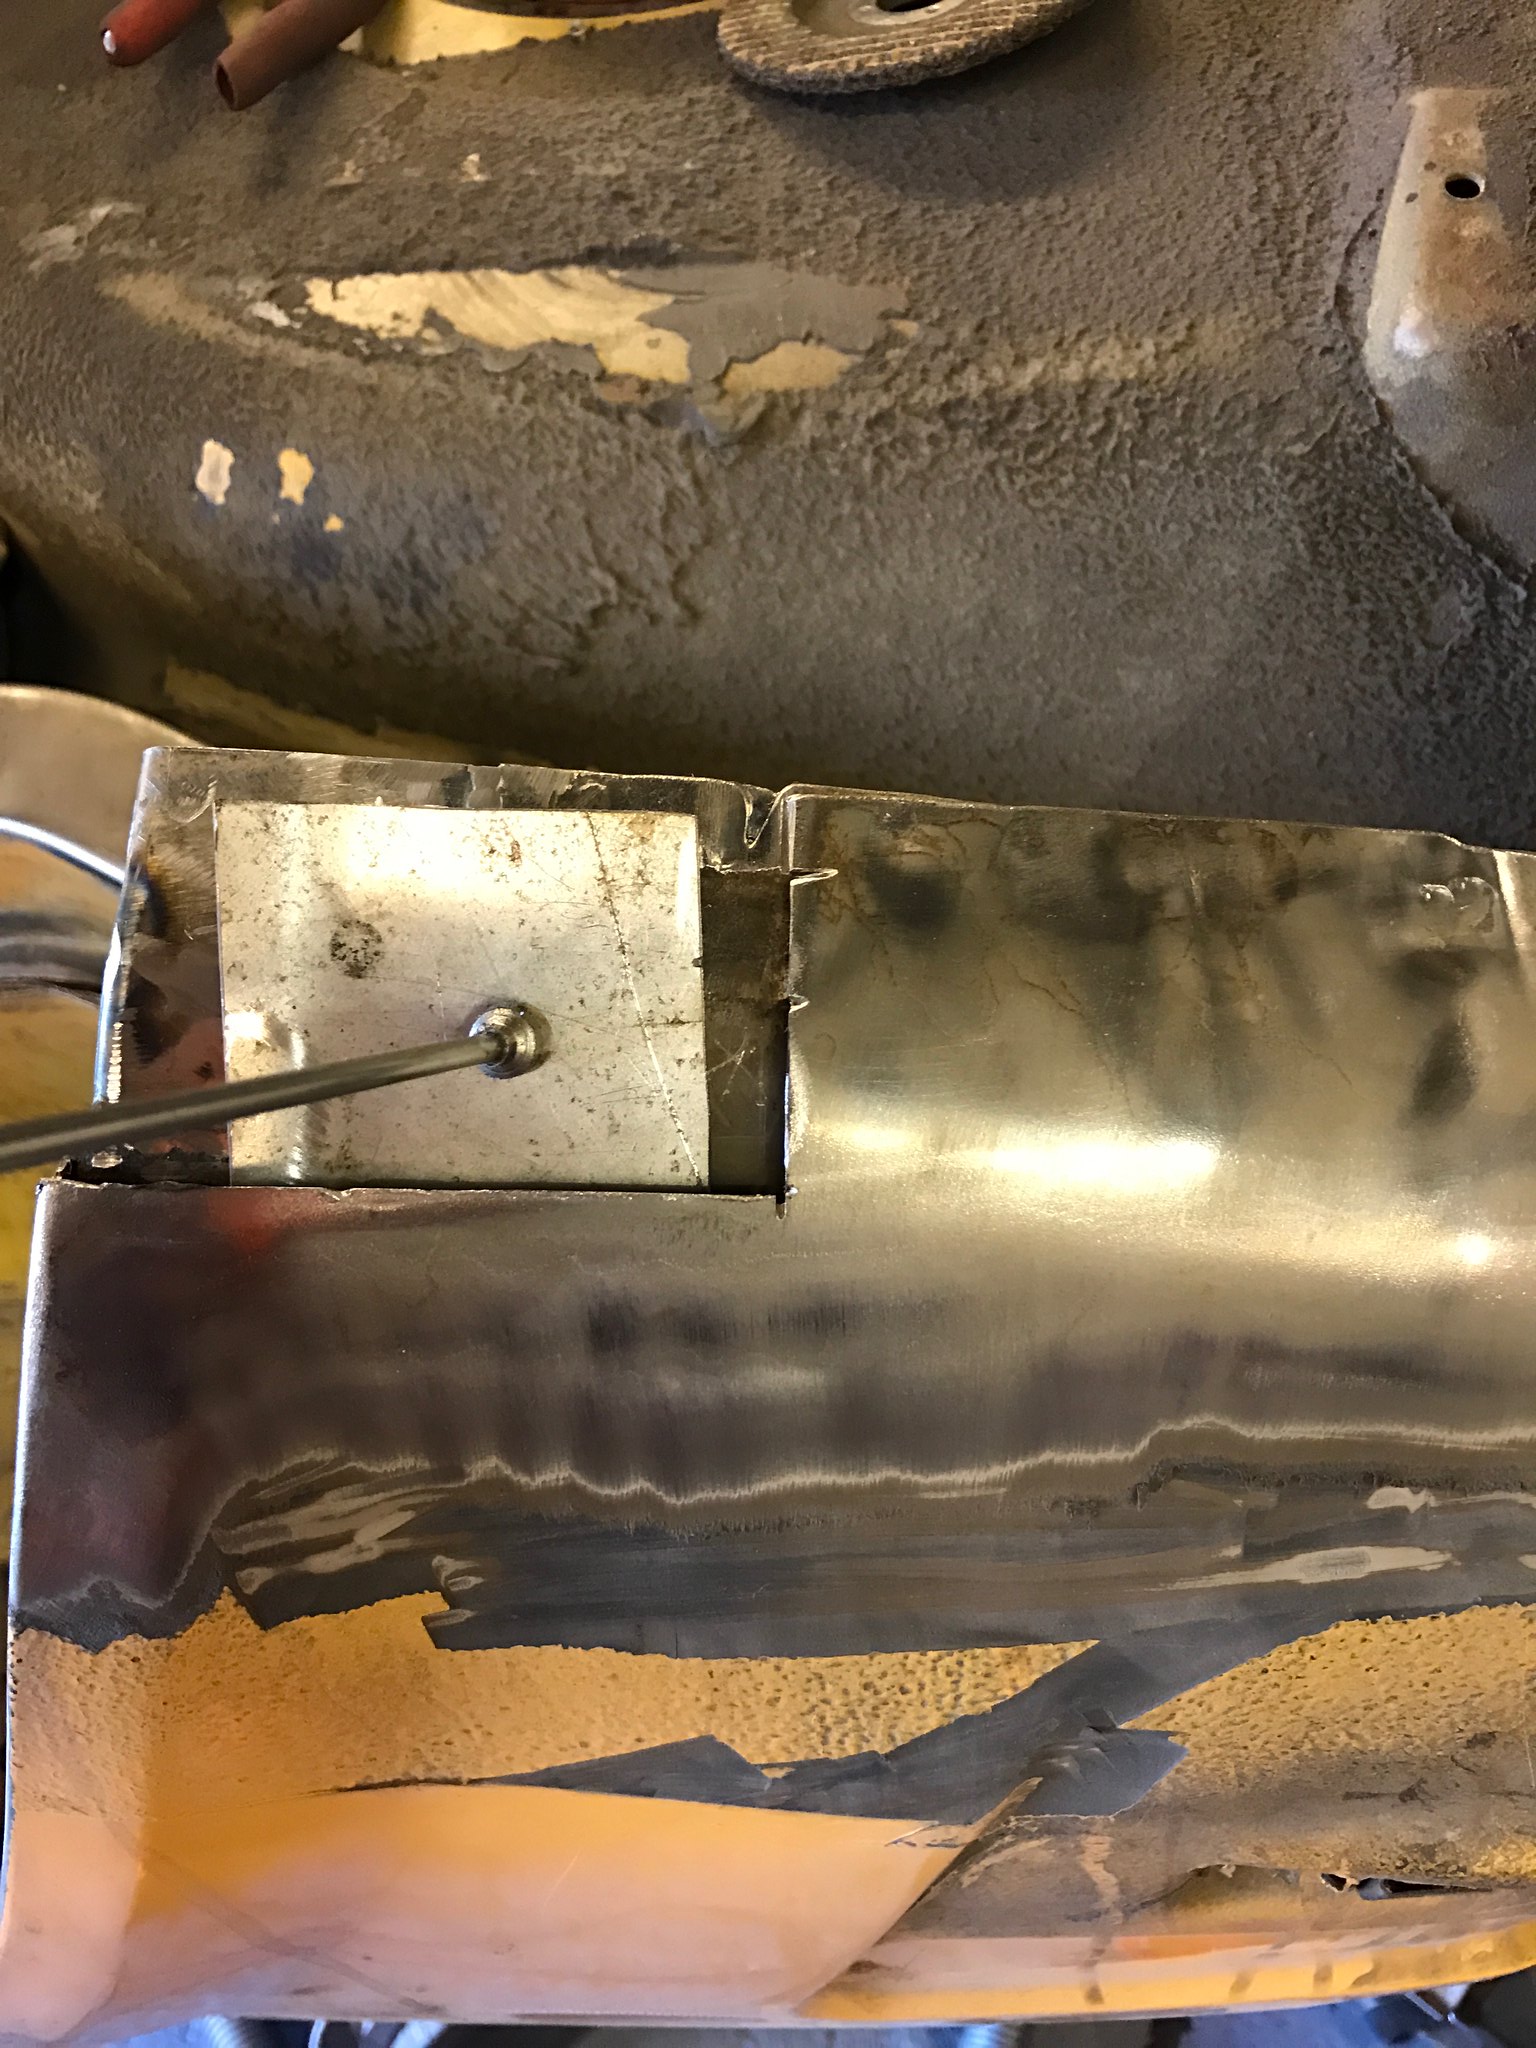 Untitled Untitled by Nevtiger, on Flickr More magnets doing what they should 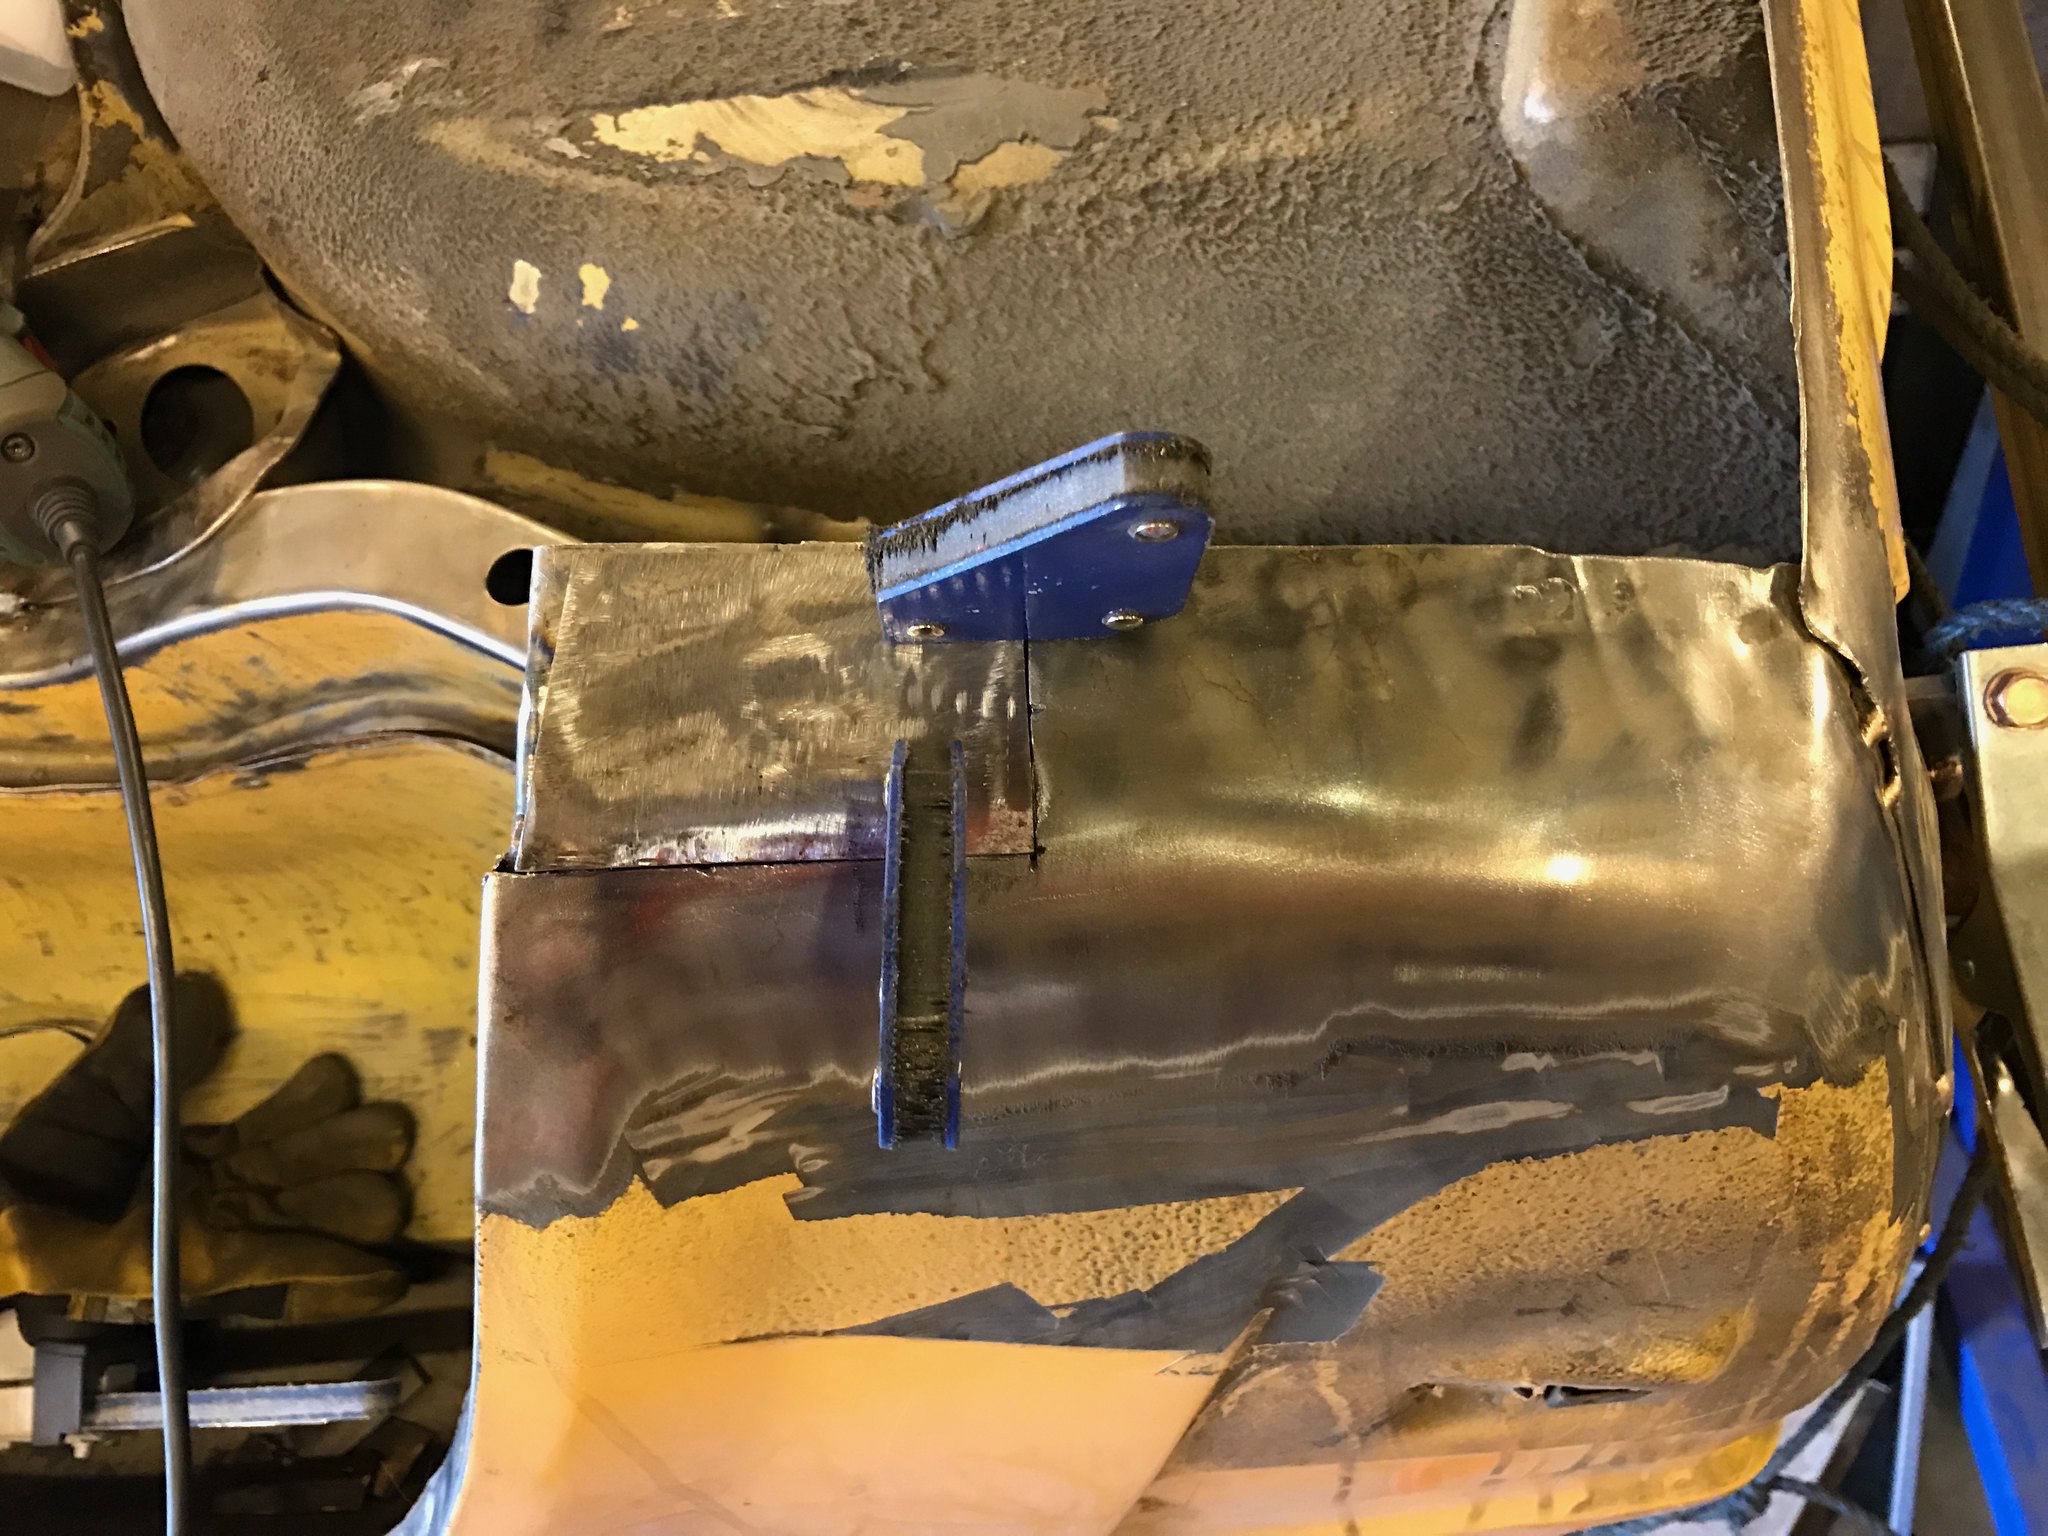 Untitled Untitled by Nevtiger, on Flickr Some tacks 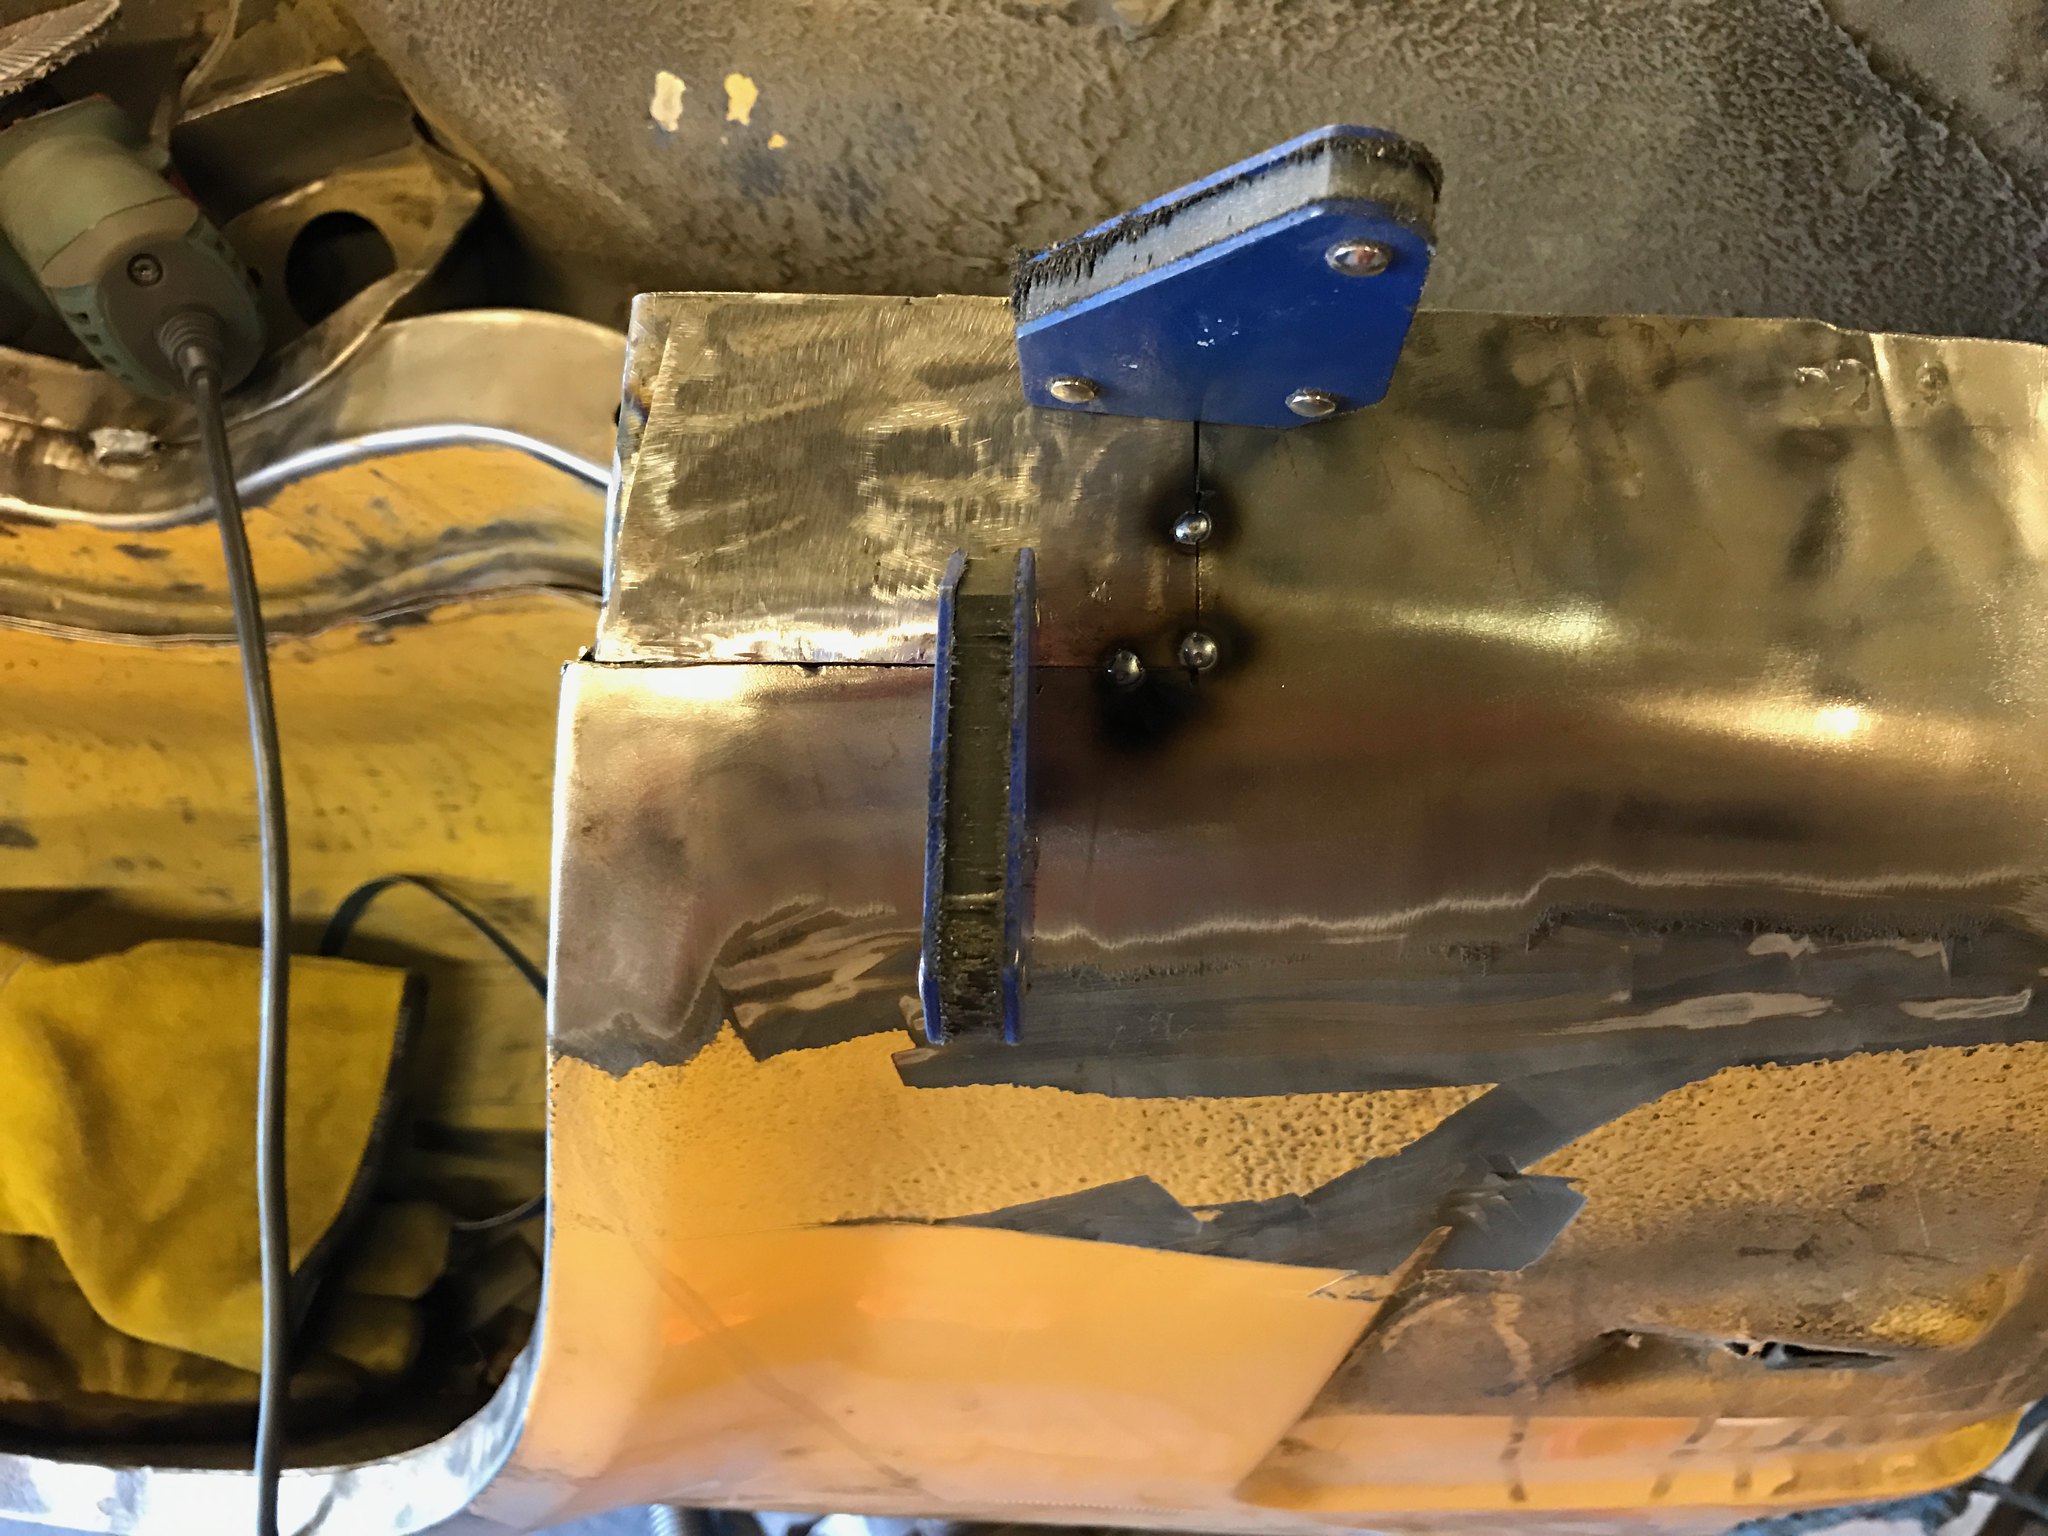 Untitled Untitled by Nevtiger, on Flickr And filled in, note i decided todo the return bit separately like a coward 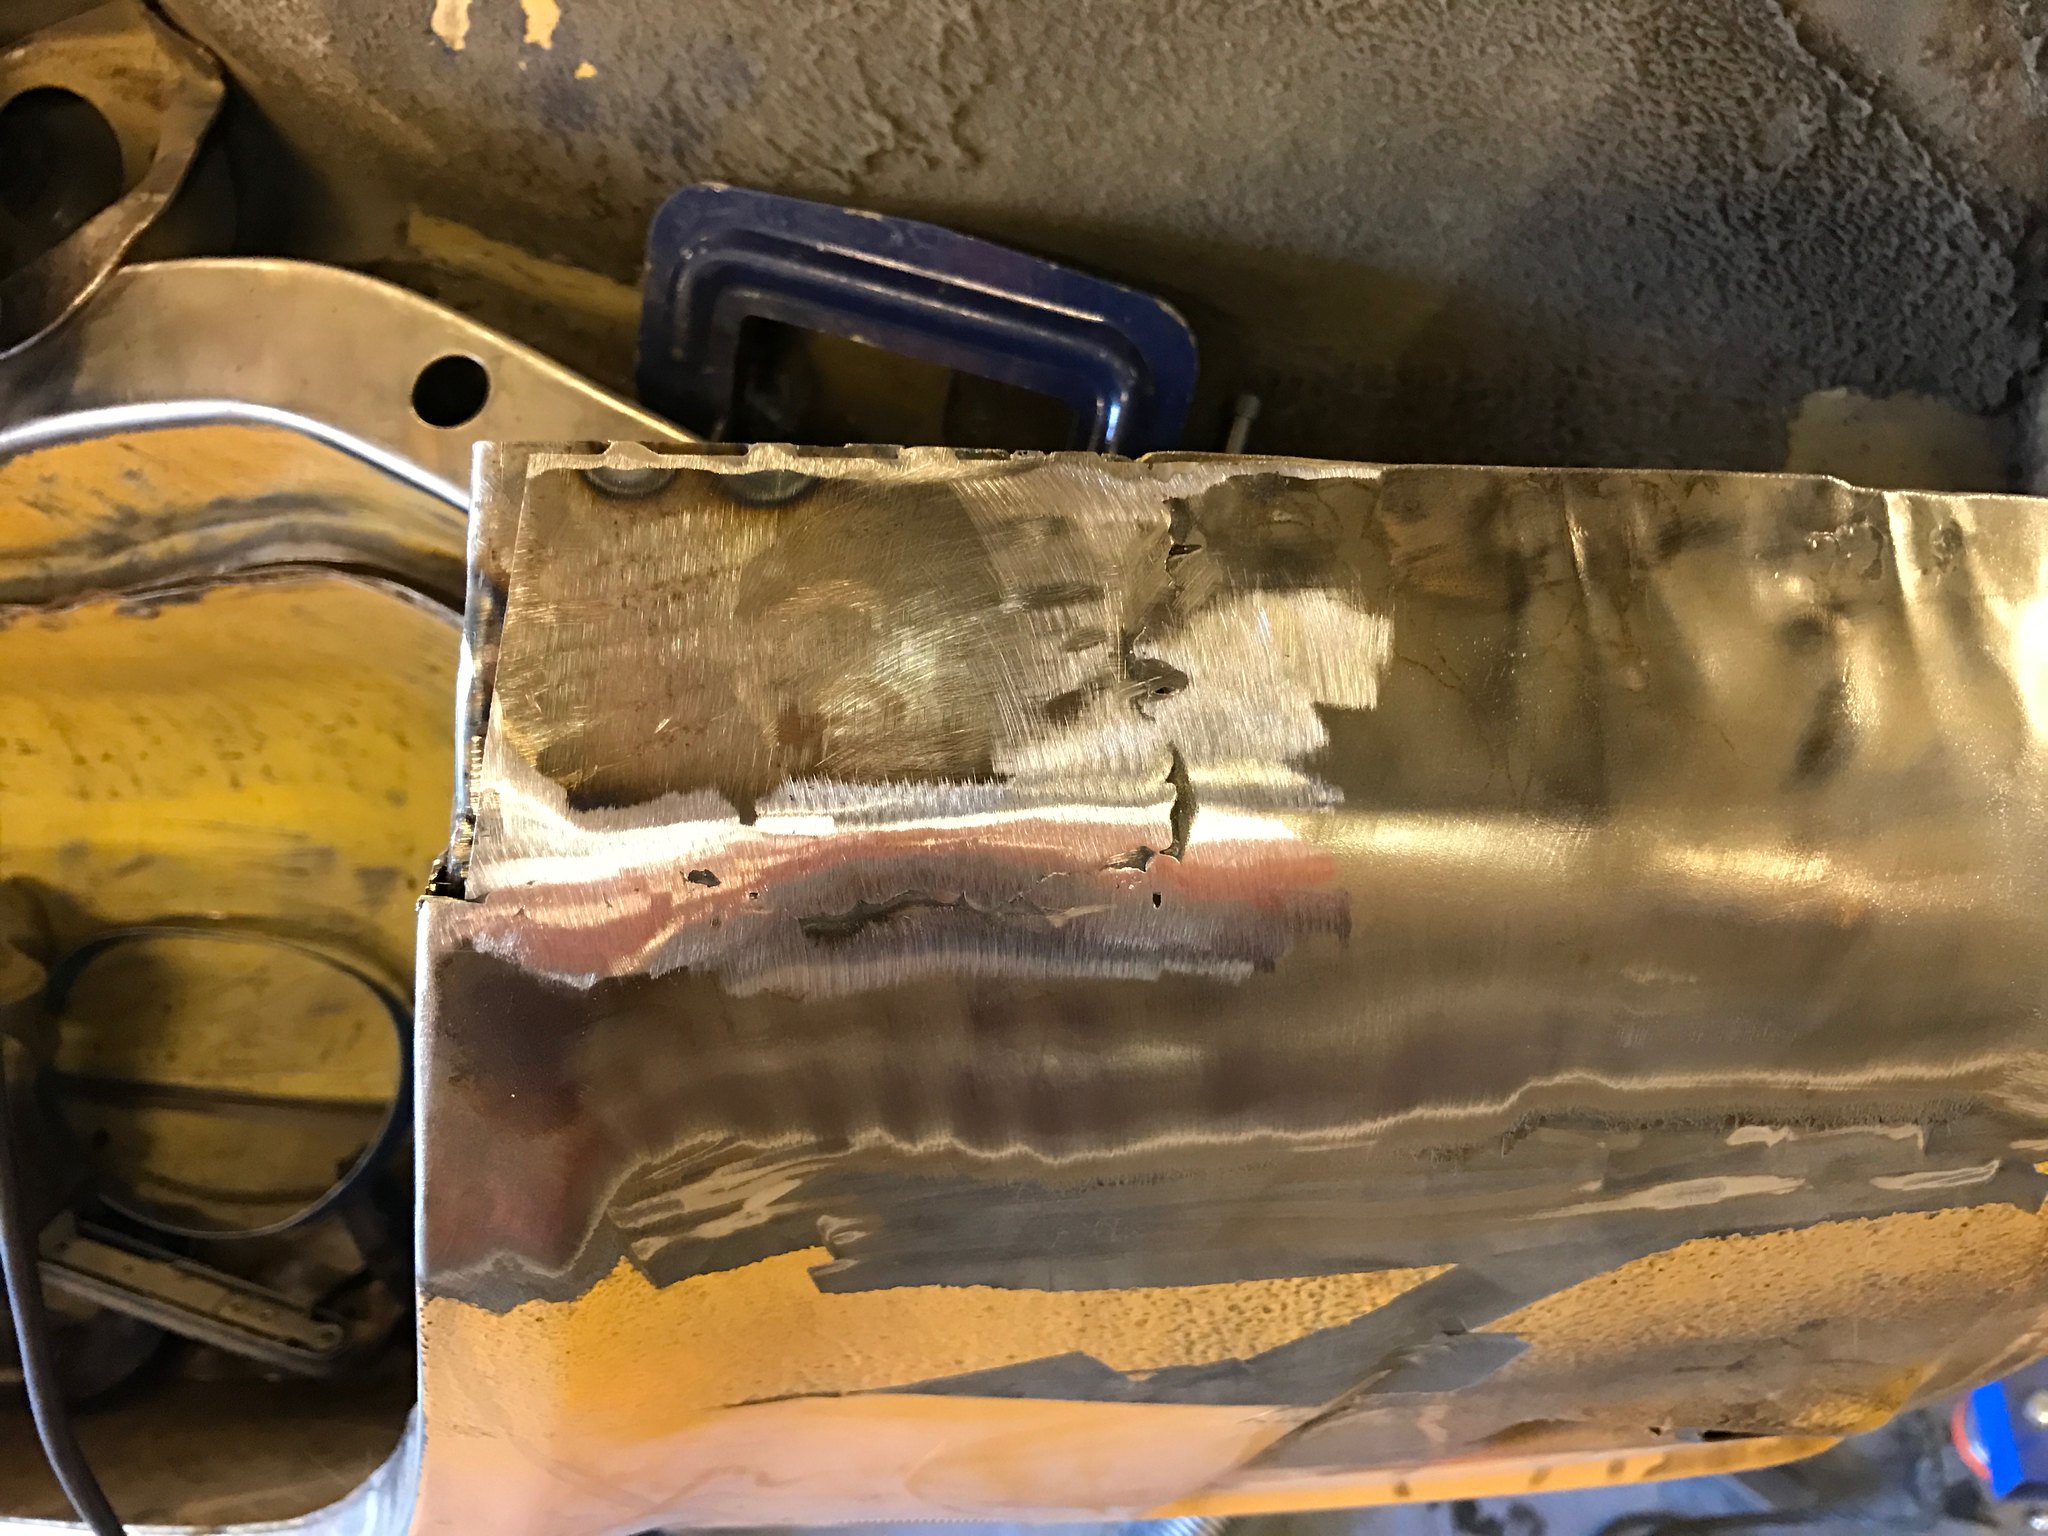 Untitled Untitled by Nevtiger, on Flickr 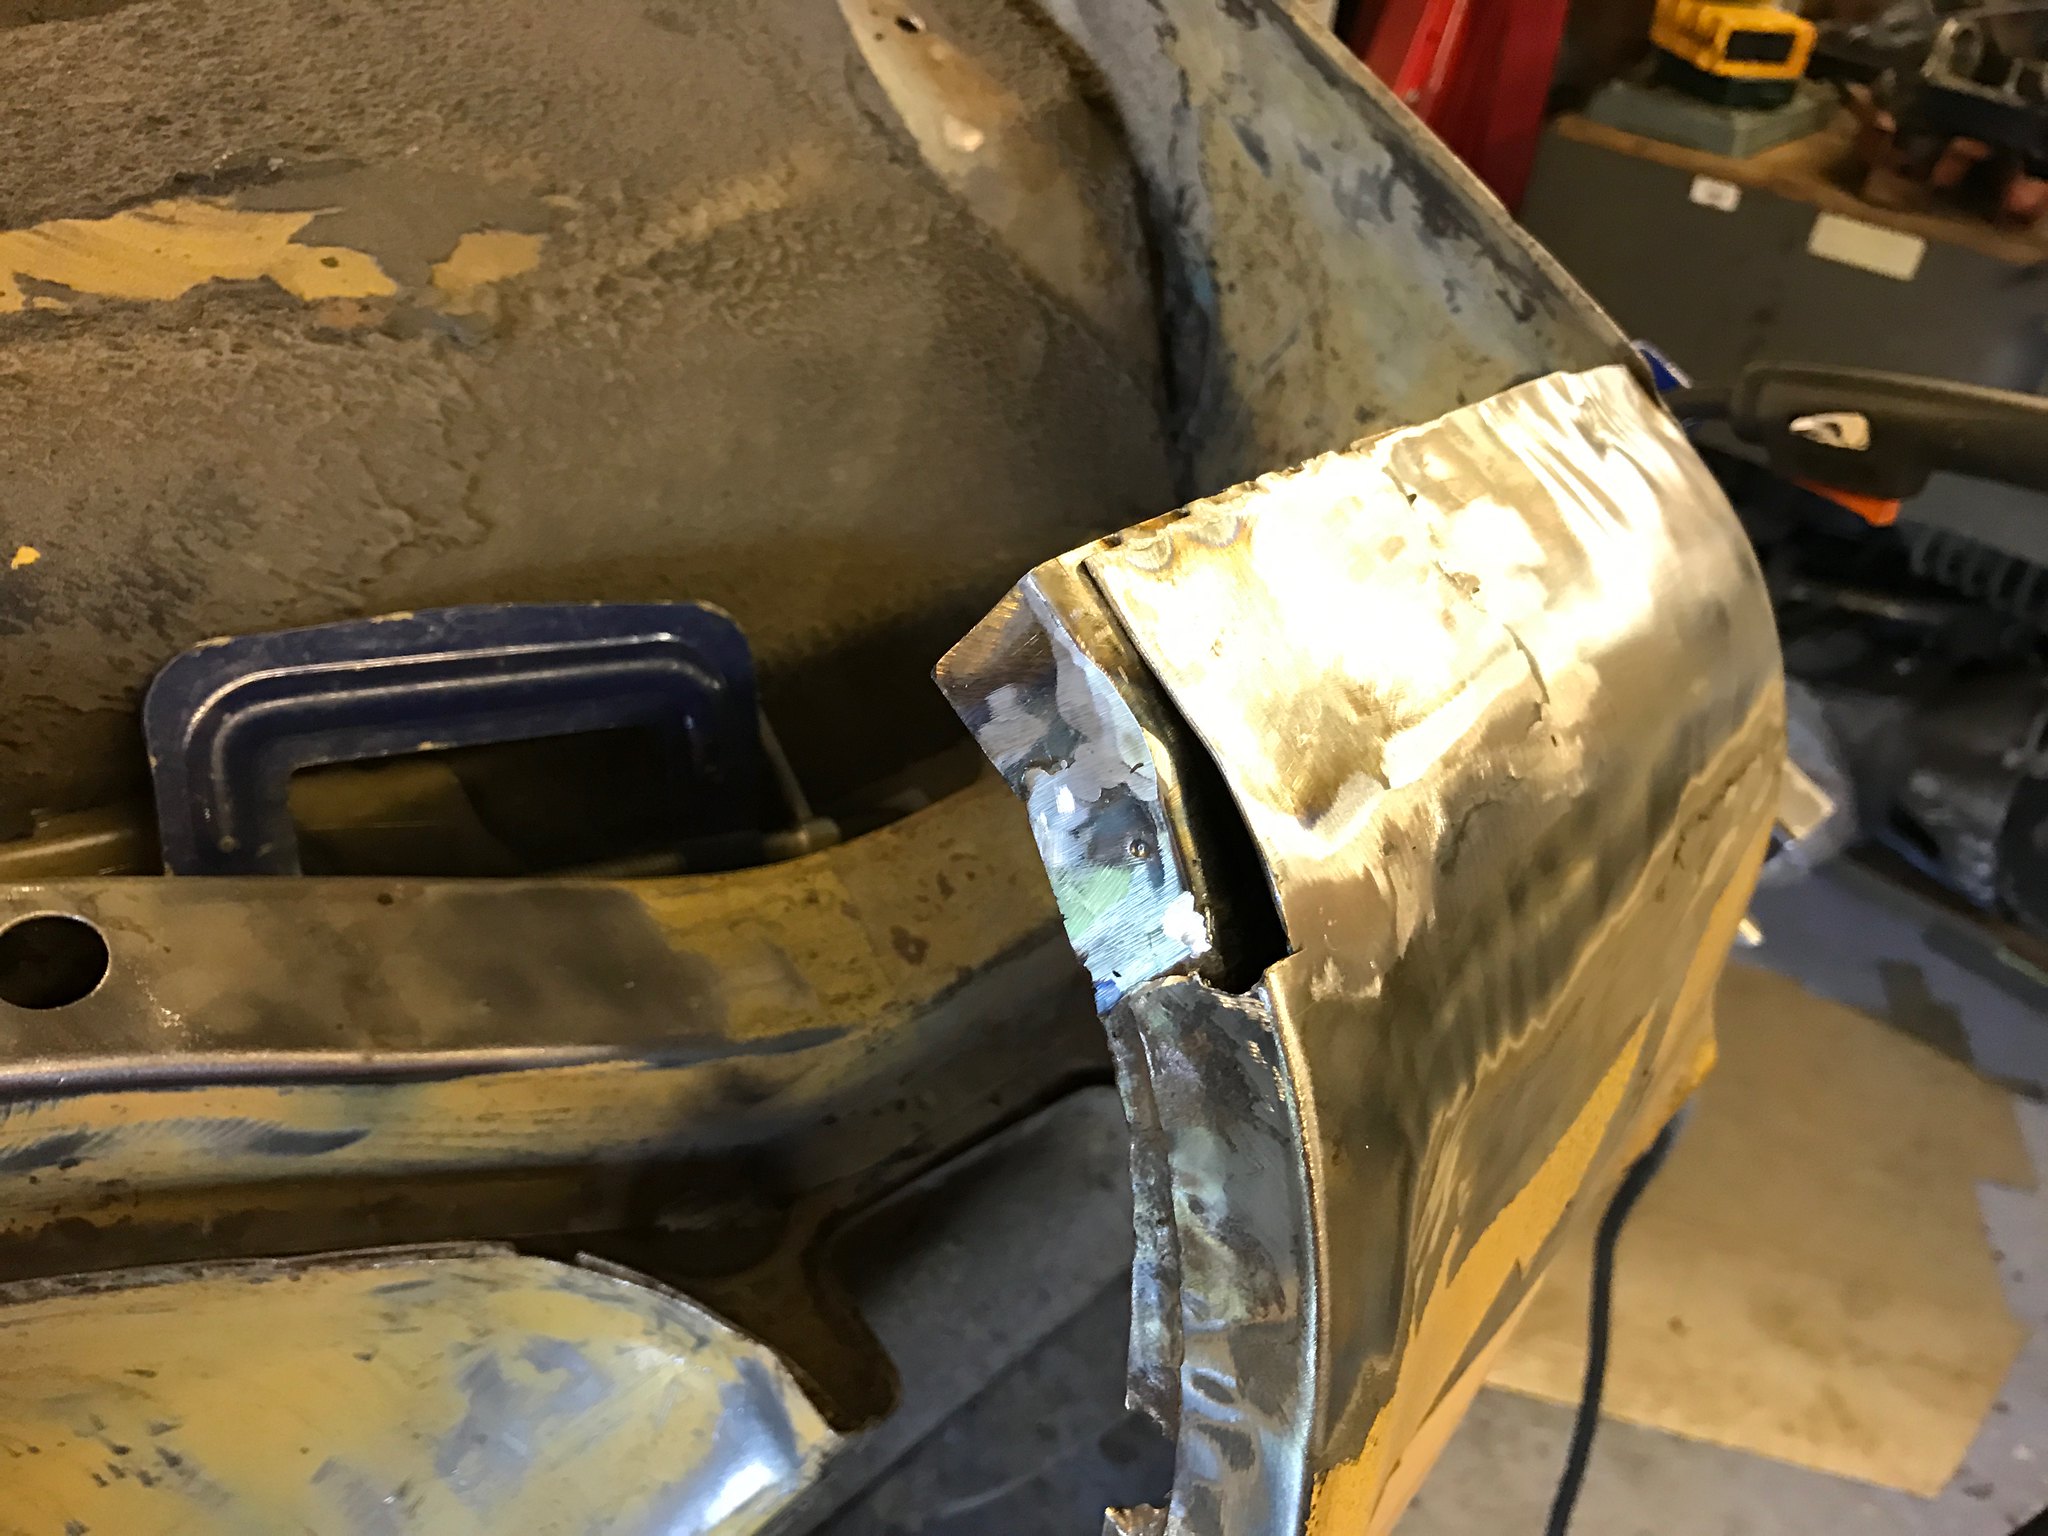 Untitled Untitled by Nevtiger, on Flickr All sorted minus a whiff of filler..... 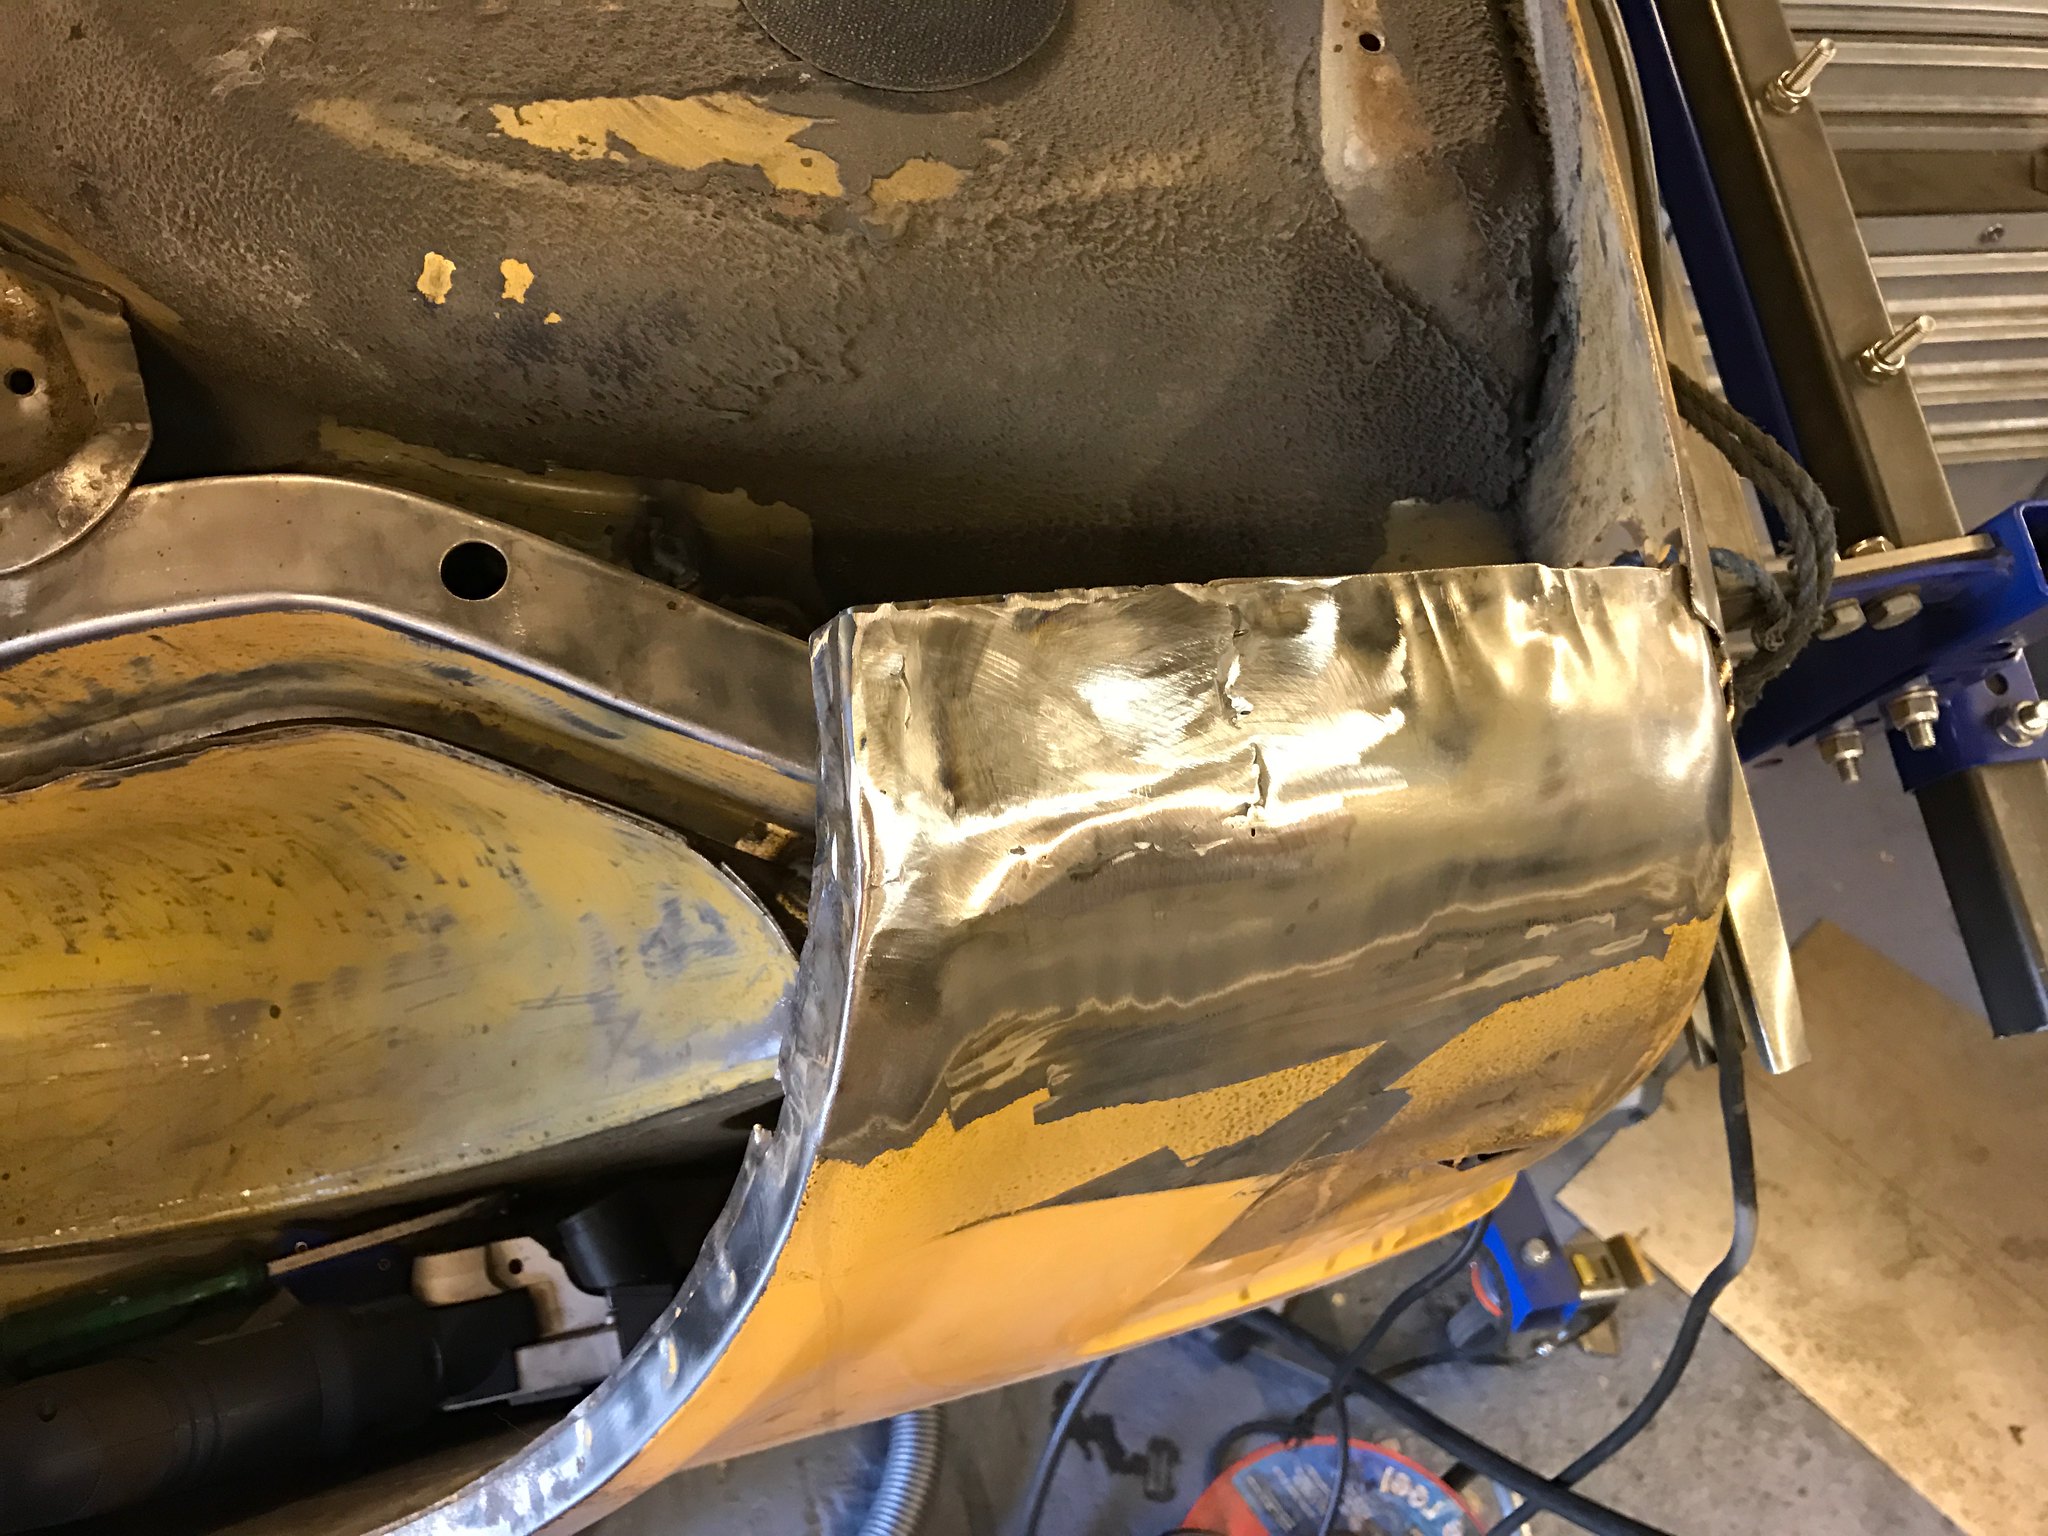 Untitled Untitled by Nevtiger, on Flickr Then i made it all go wrong a bit. I let this bit in to get rid of a small hole but really let in to much heat and got all sorts of warping. So will need a tad more than a whiff of filler......... 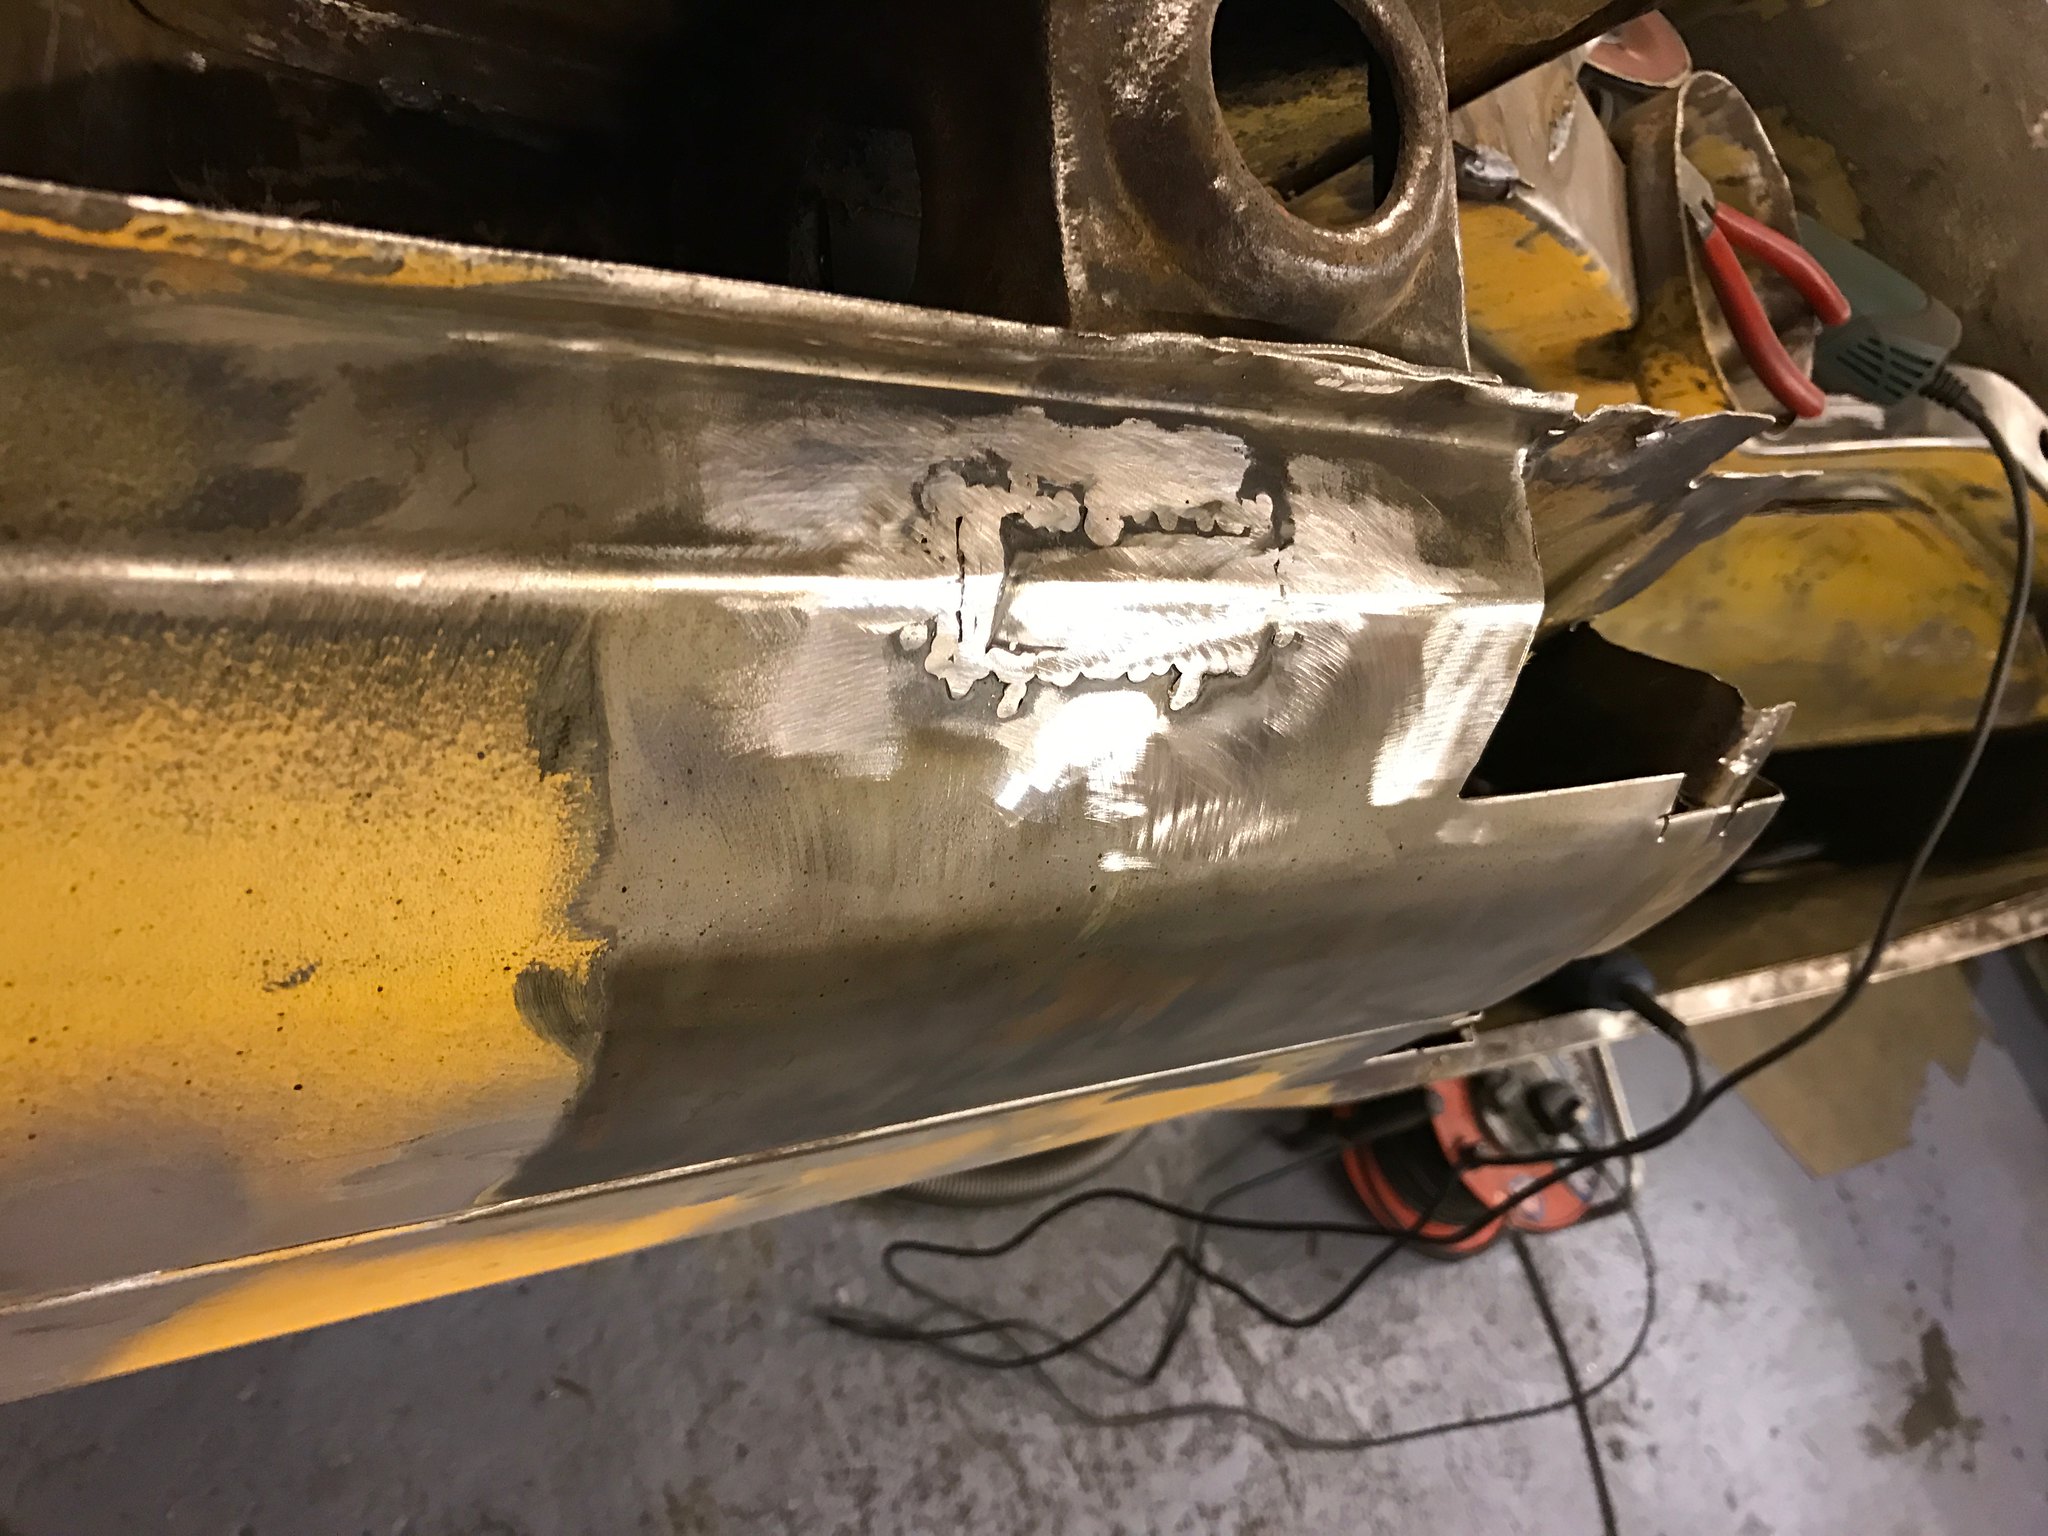 Untitled Untitled by Nevtiger, on Flickr Luckily its not an oft looked at part of the body AND its a learning experience. Don't rush is the lesson i think :-). I did hear it bend and buckle but didn't put two and two together as i was day dreaming of going sideways with many V6 sounds. |
| |
|
|
|
|
|
|
|
Although all my attention has been focused on the Tiger and getting it ready i did manage some time to sort out the flywheel for the AJ30 for the Sunbeam. Originally i wanted to mate a 6 speed gearbox to the engine and to that end i have ended with two of them. The first is the ZF 6 speed used on the BMW straight sixes and the second is the Getrag 420G as used on the M%. The Gettrag box is to big to use on the Sunbeam and the ZF i discounted as the bell housing was to small for a Jag sized flywheel - or so i thought - couple that with the £1250 that TTV needed for a custom flywheel i ended up buying the standard Jag Getrag gearbox which is 5 speed. It also has a direct top gear......... So to the flywheel, the standard one is a DMF and not that reliable from all accounts and i spent a while trying to find a solution which in the end TTV do a standard replacement steel solid flywheel for the Jag S Type. And that is what i have here, it also cost less than 30% of the custom one. With a direct top 5th the standard gearbox means i have to find a high diff ratio for the rear. Whilst moving the gearboxes about to get the space to corner weight the Avenger i thought i would see how much the Jag flywheel doesn't fit the BMW ZF. The answer is that it does fit, with enough clearance. Looks like the 6 speed is back on....... 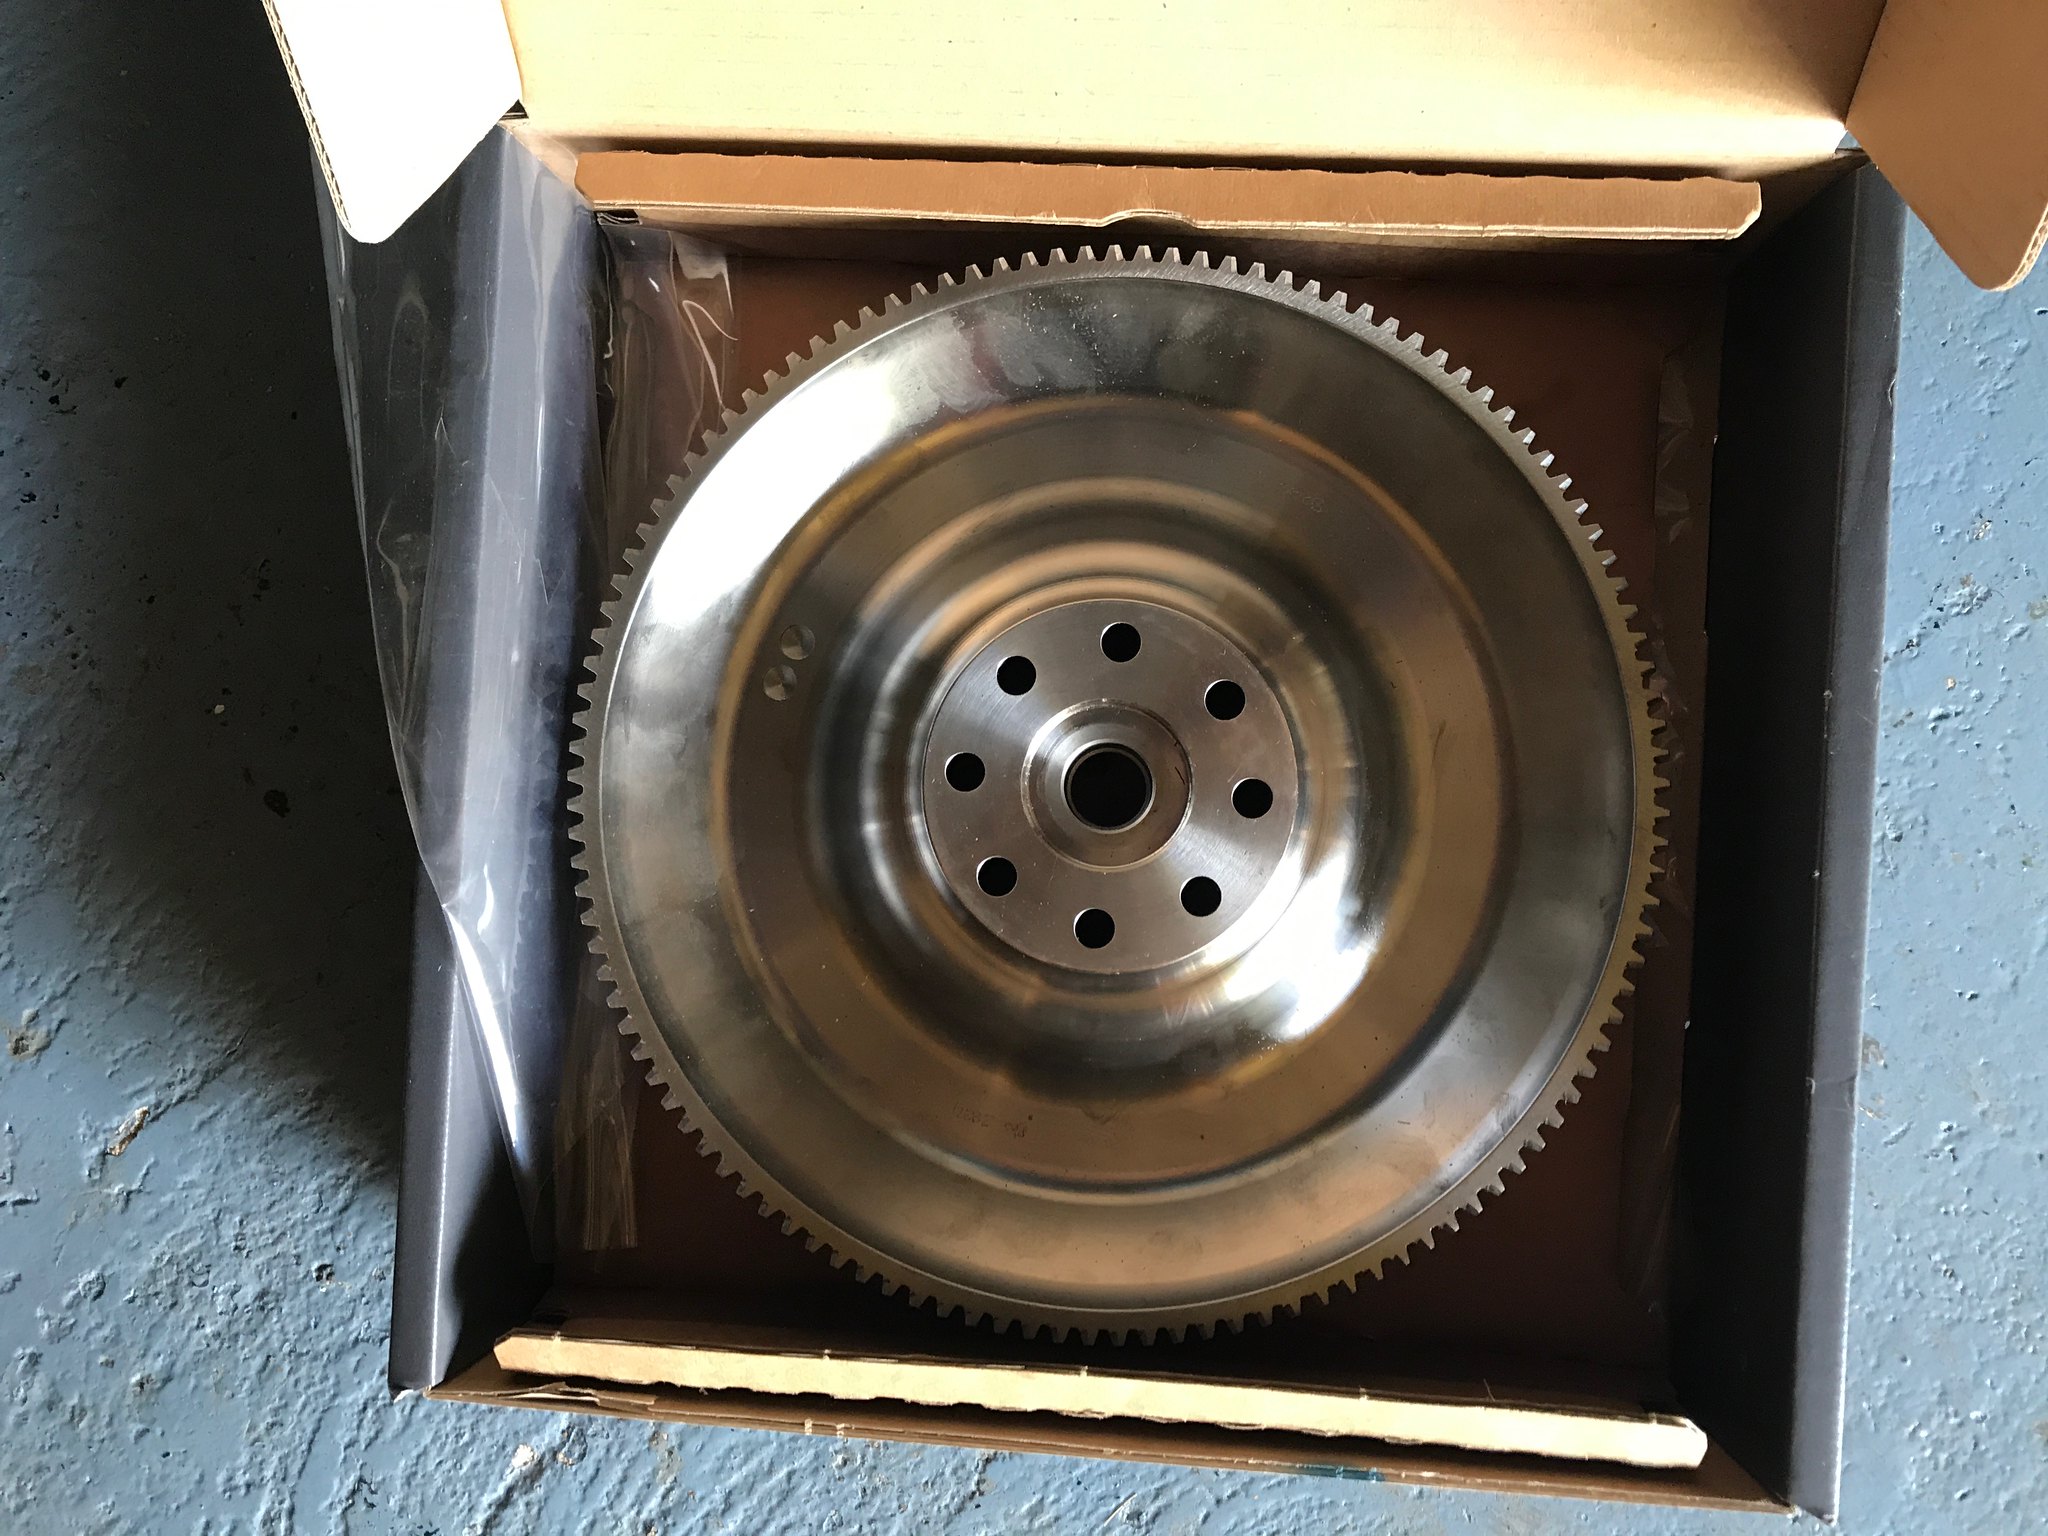 Untitled Untitled by Nevtiger, on Flickr 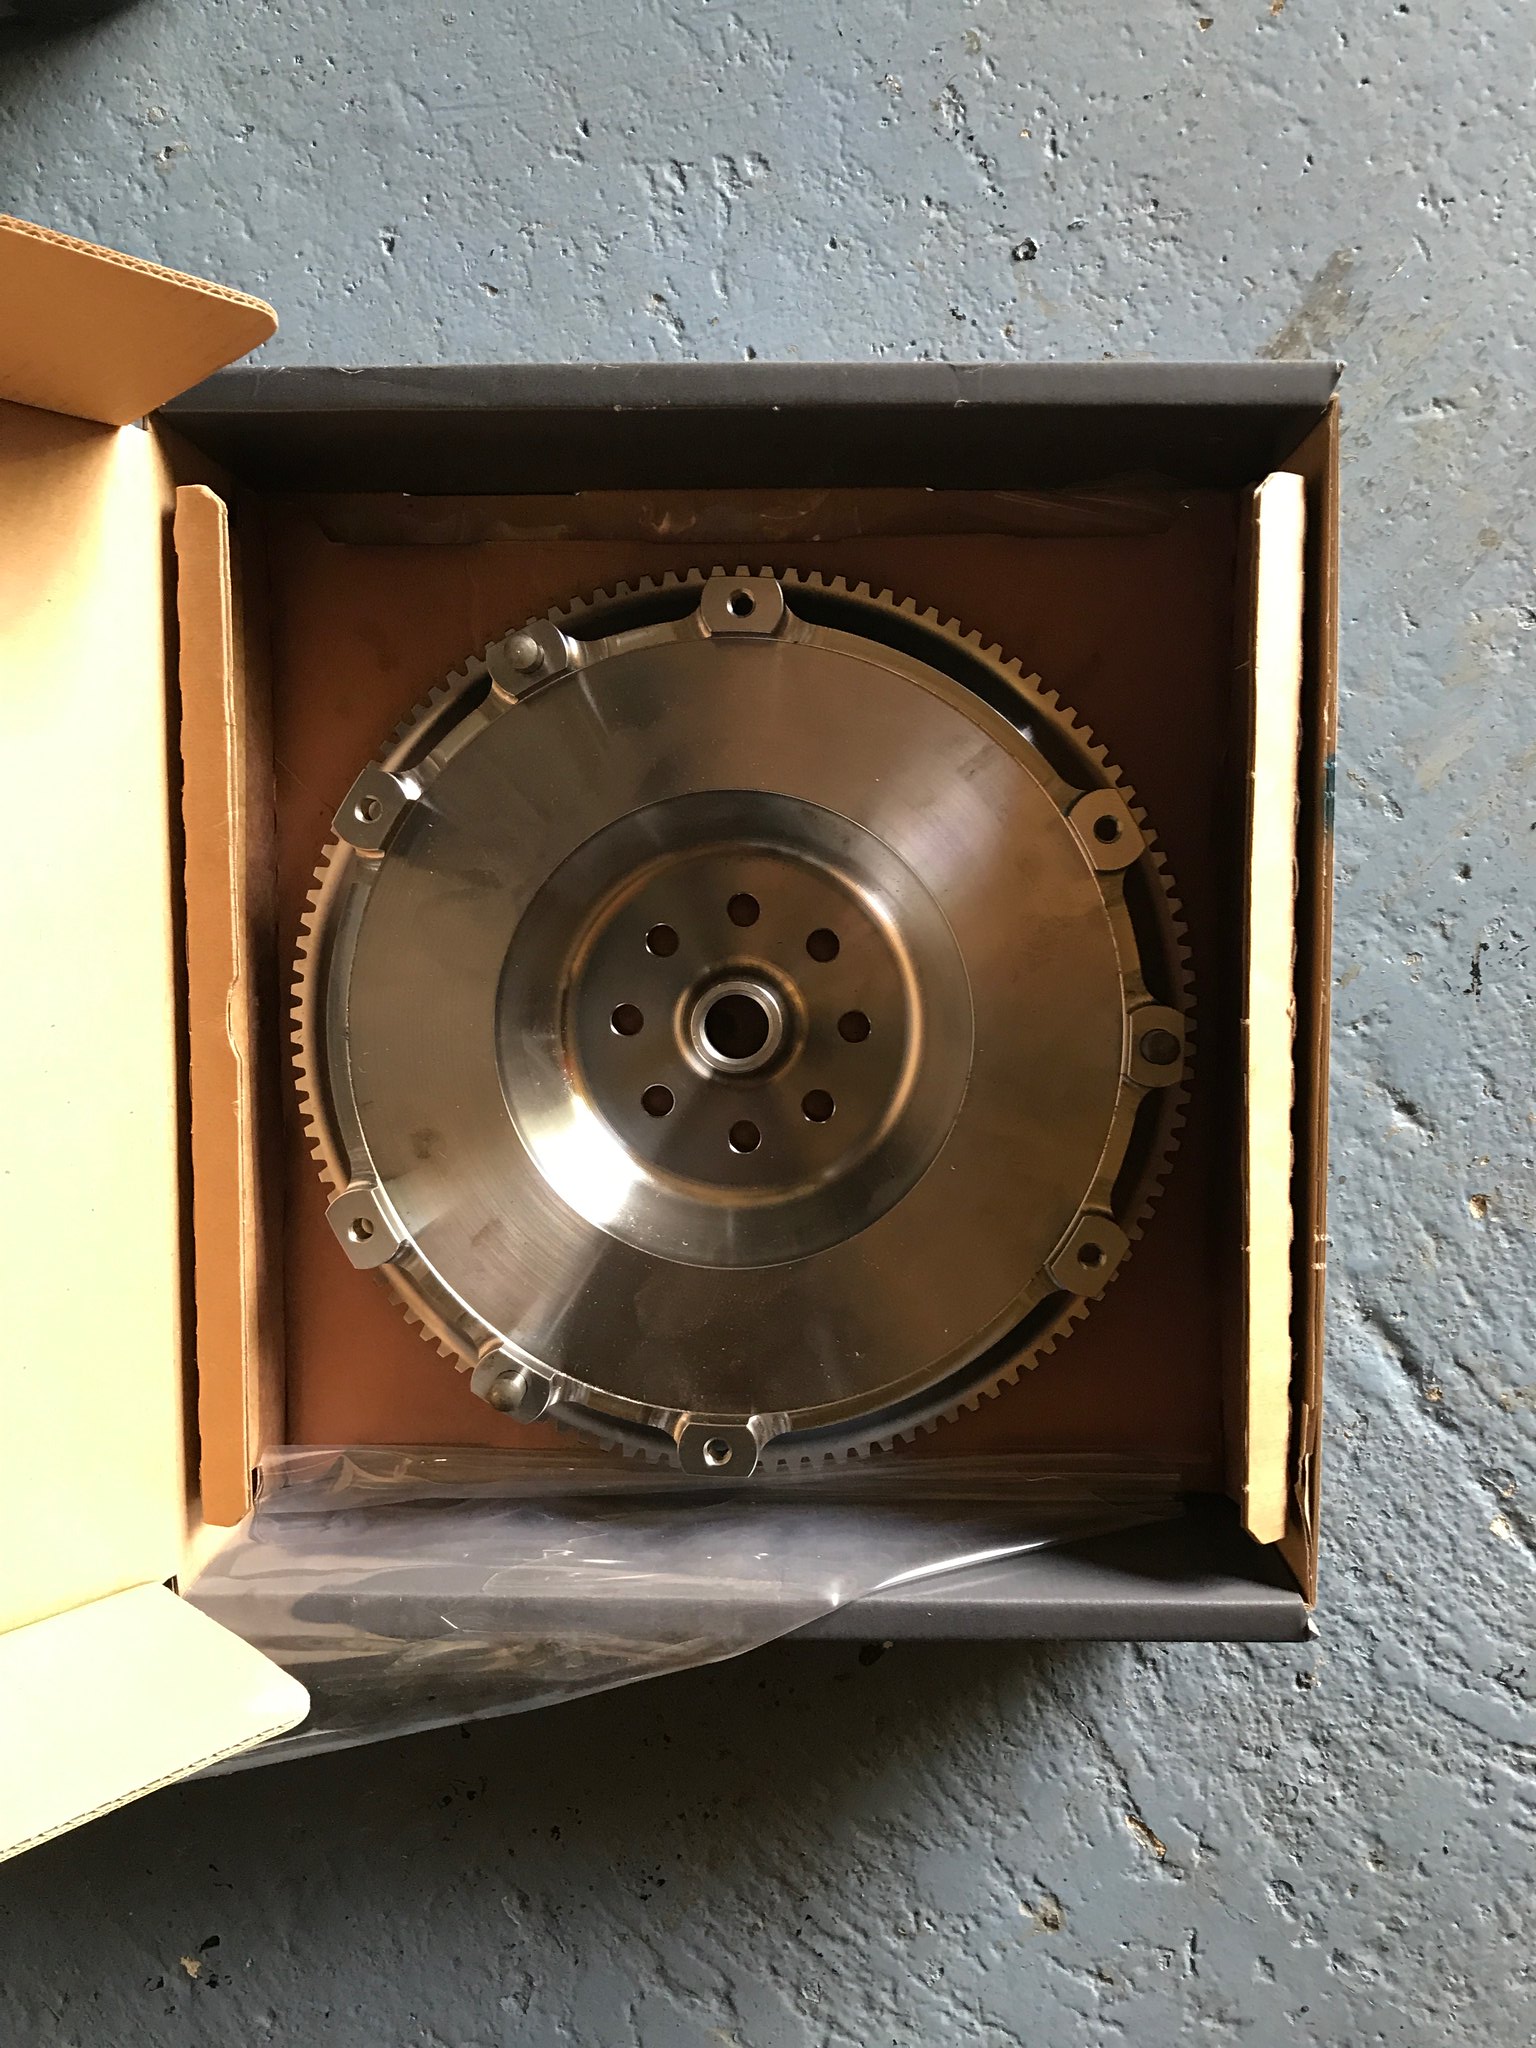 Untitled Untitled by Nevtiger, on Flickr |
| |
Last Edit: Dec 26, 2017 12:08:31 GMT by nevtiger
|
|
dikkehemaworst
Club Retro Rides Member
Posts: 1,636
Club RR Member Number: 16
|
|
|
|
|
You could hang this on your wall. That flywheel is a thing of beauty !!
|
| |
|
|
|
|
|
Dec 26, 2017 12:44:18 GMT
|
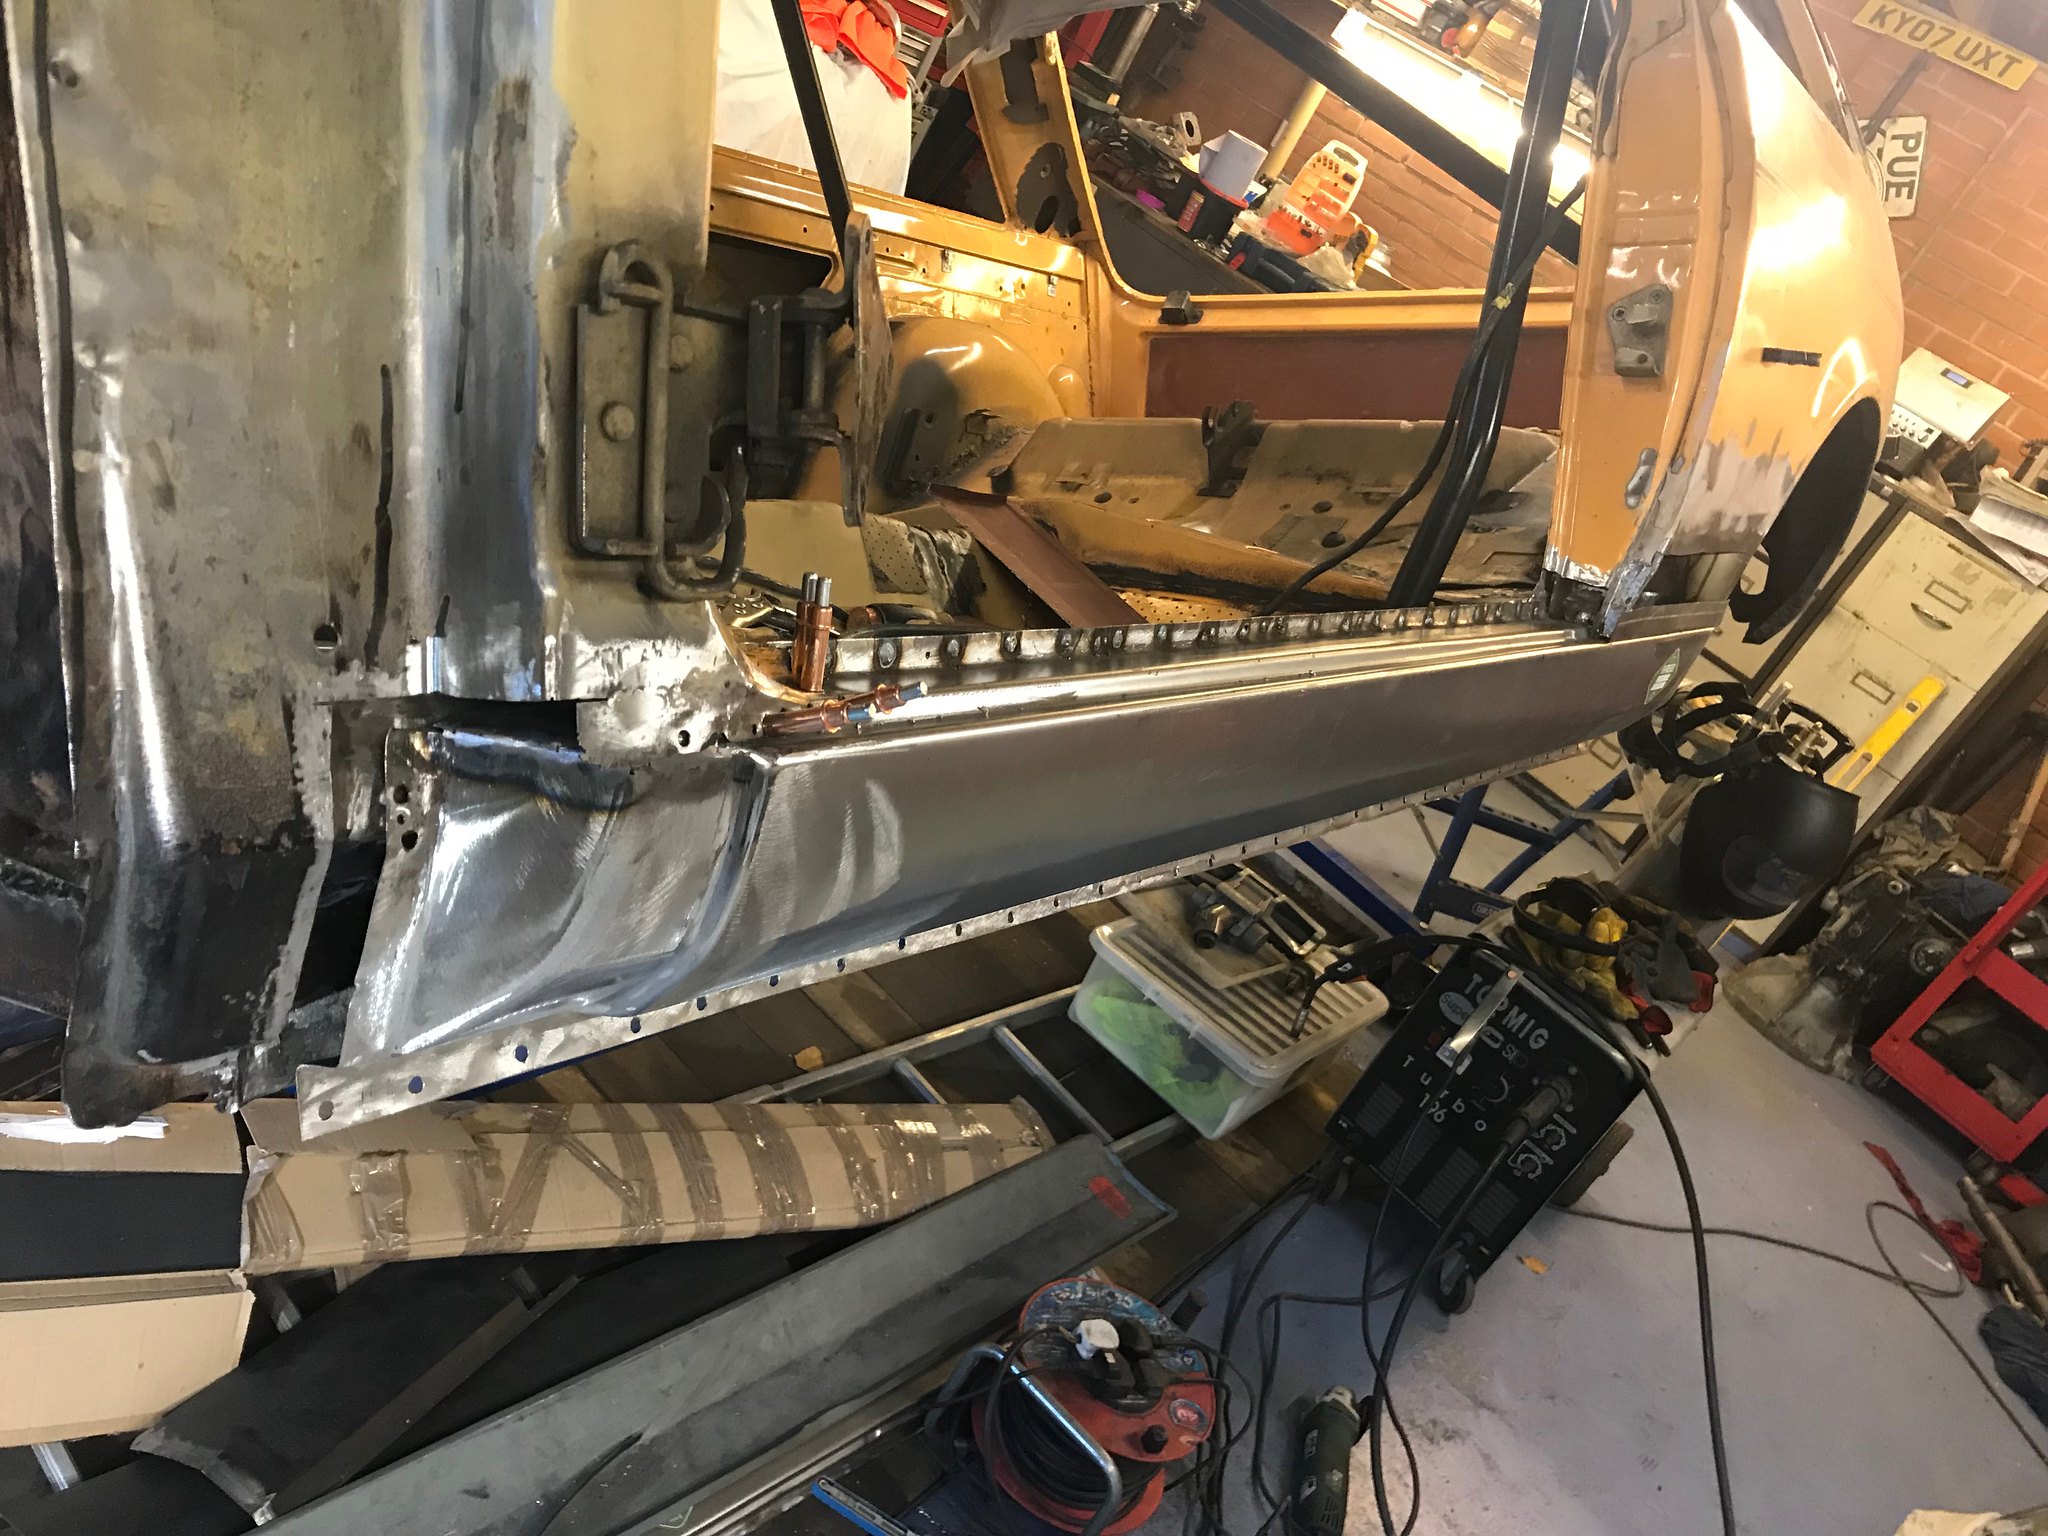
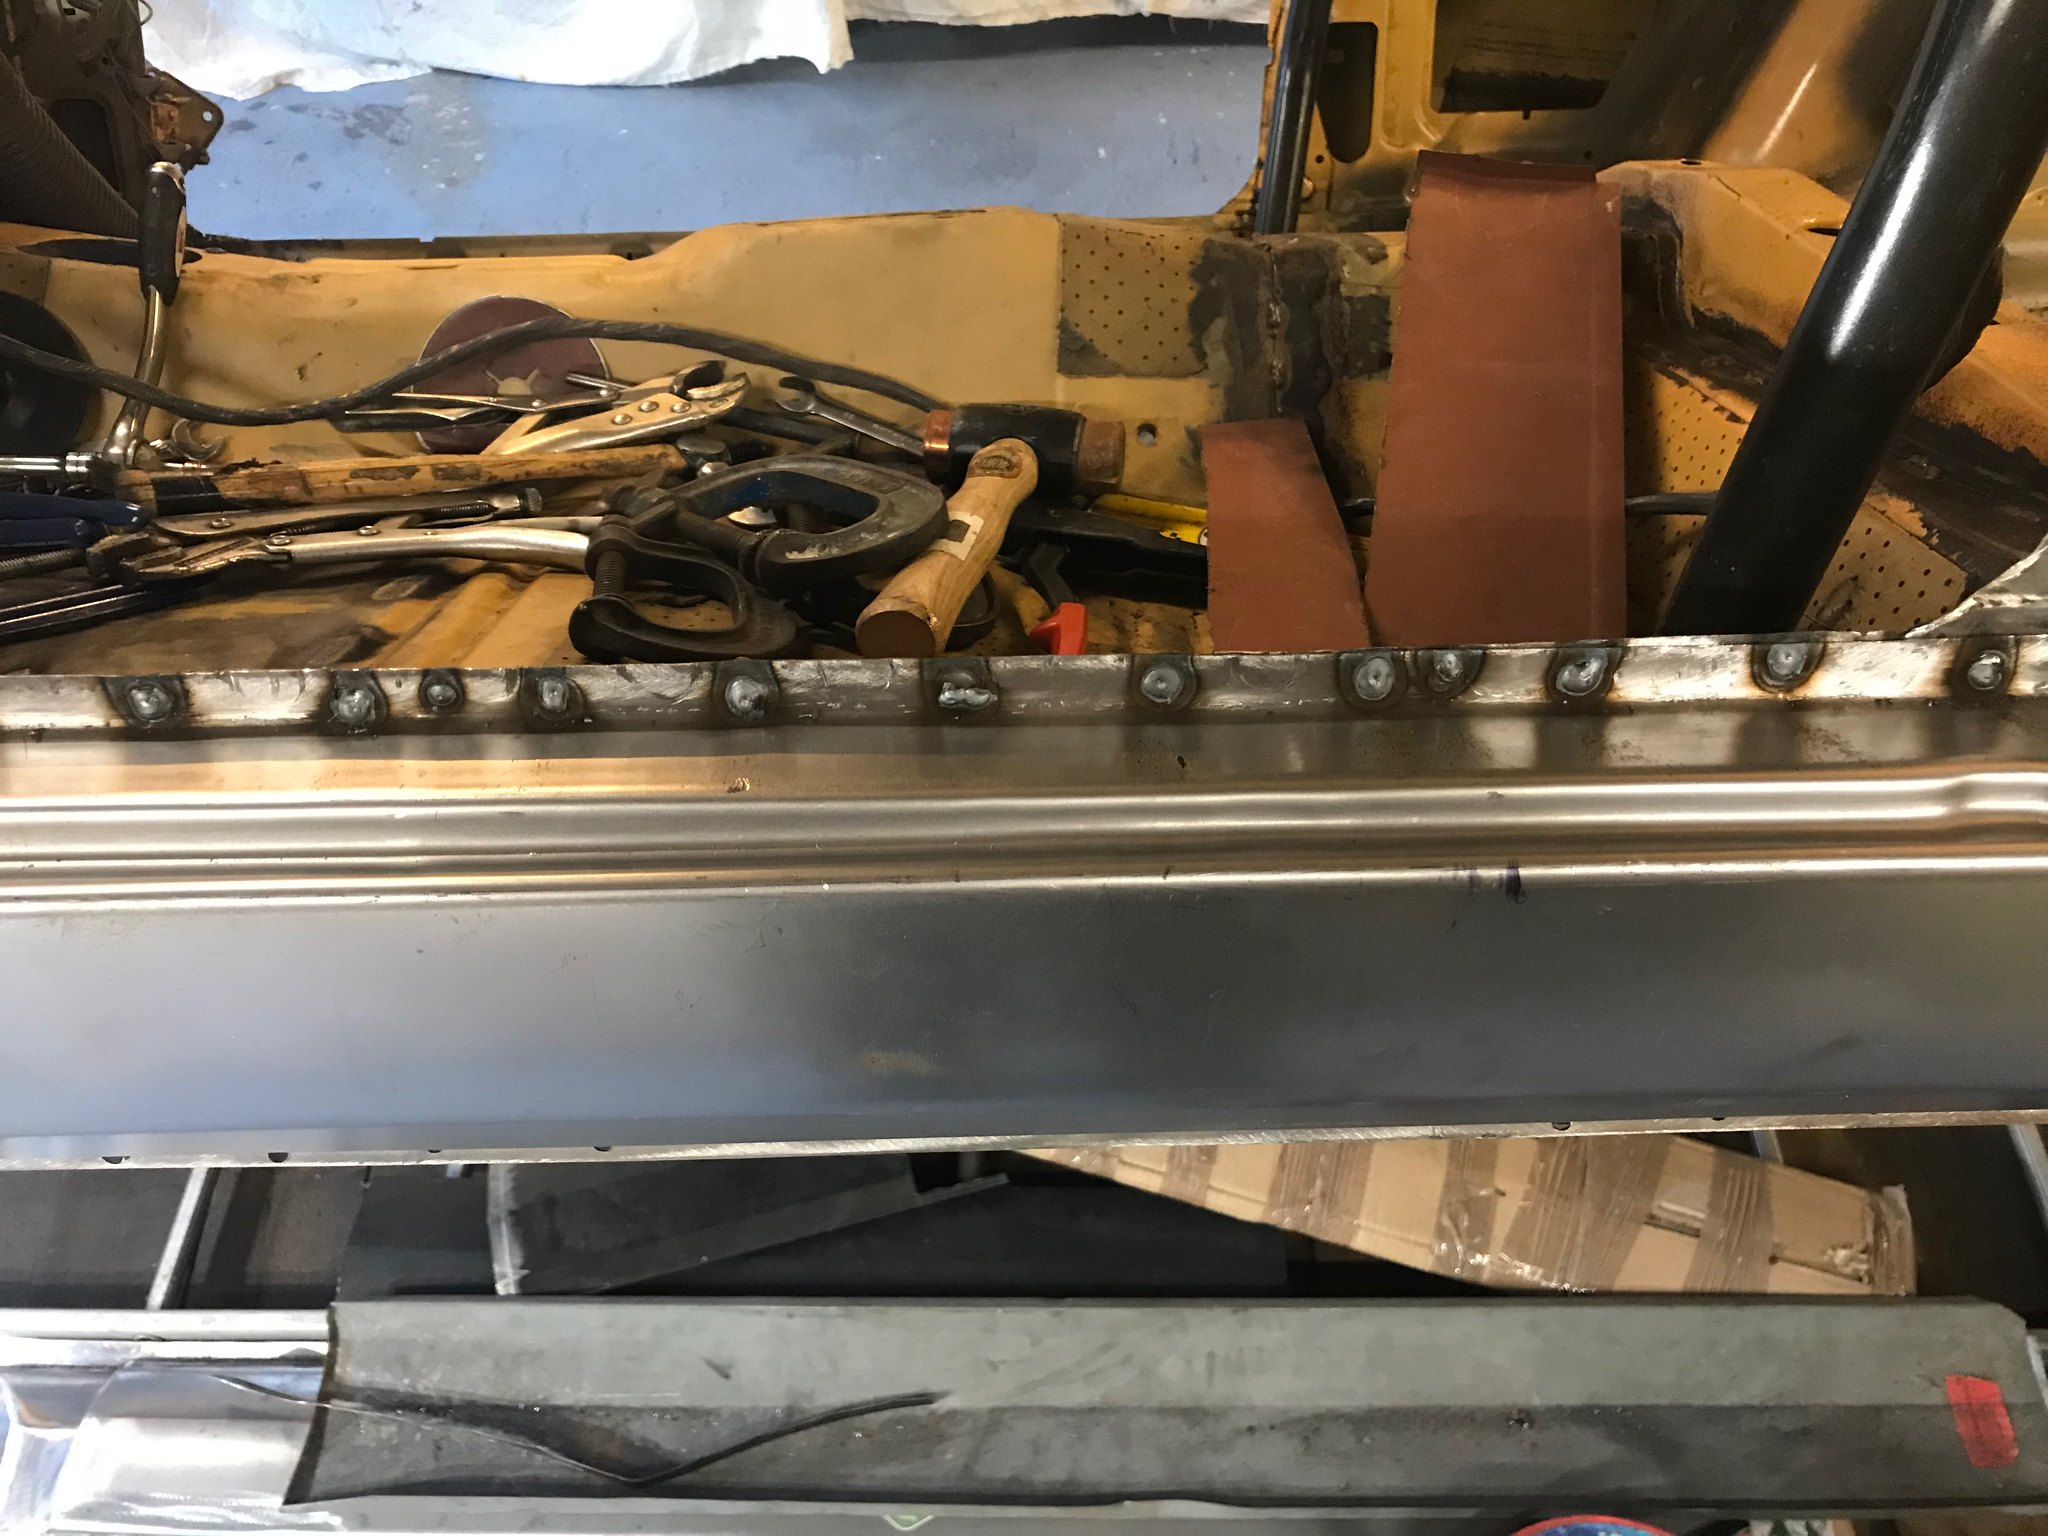
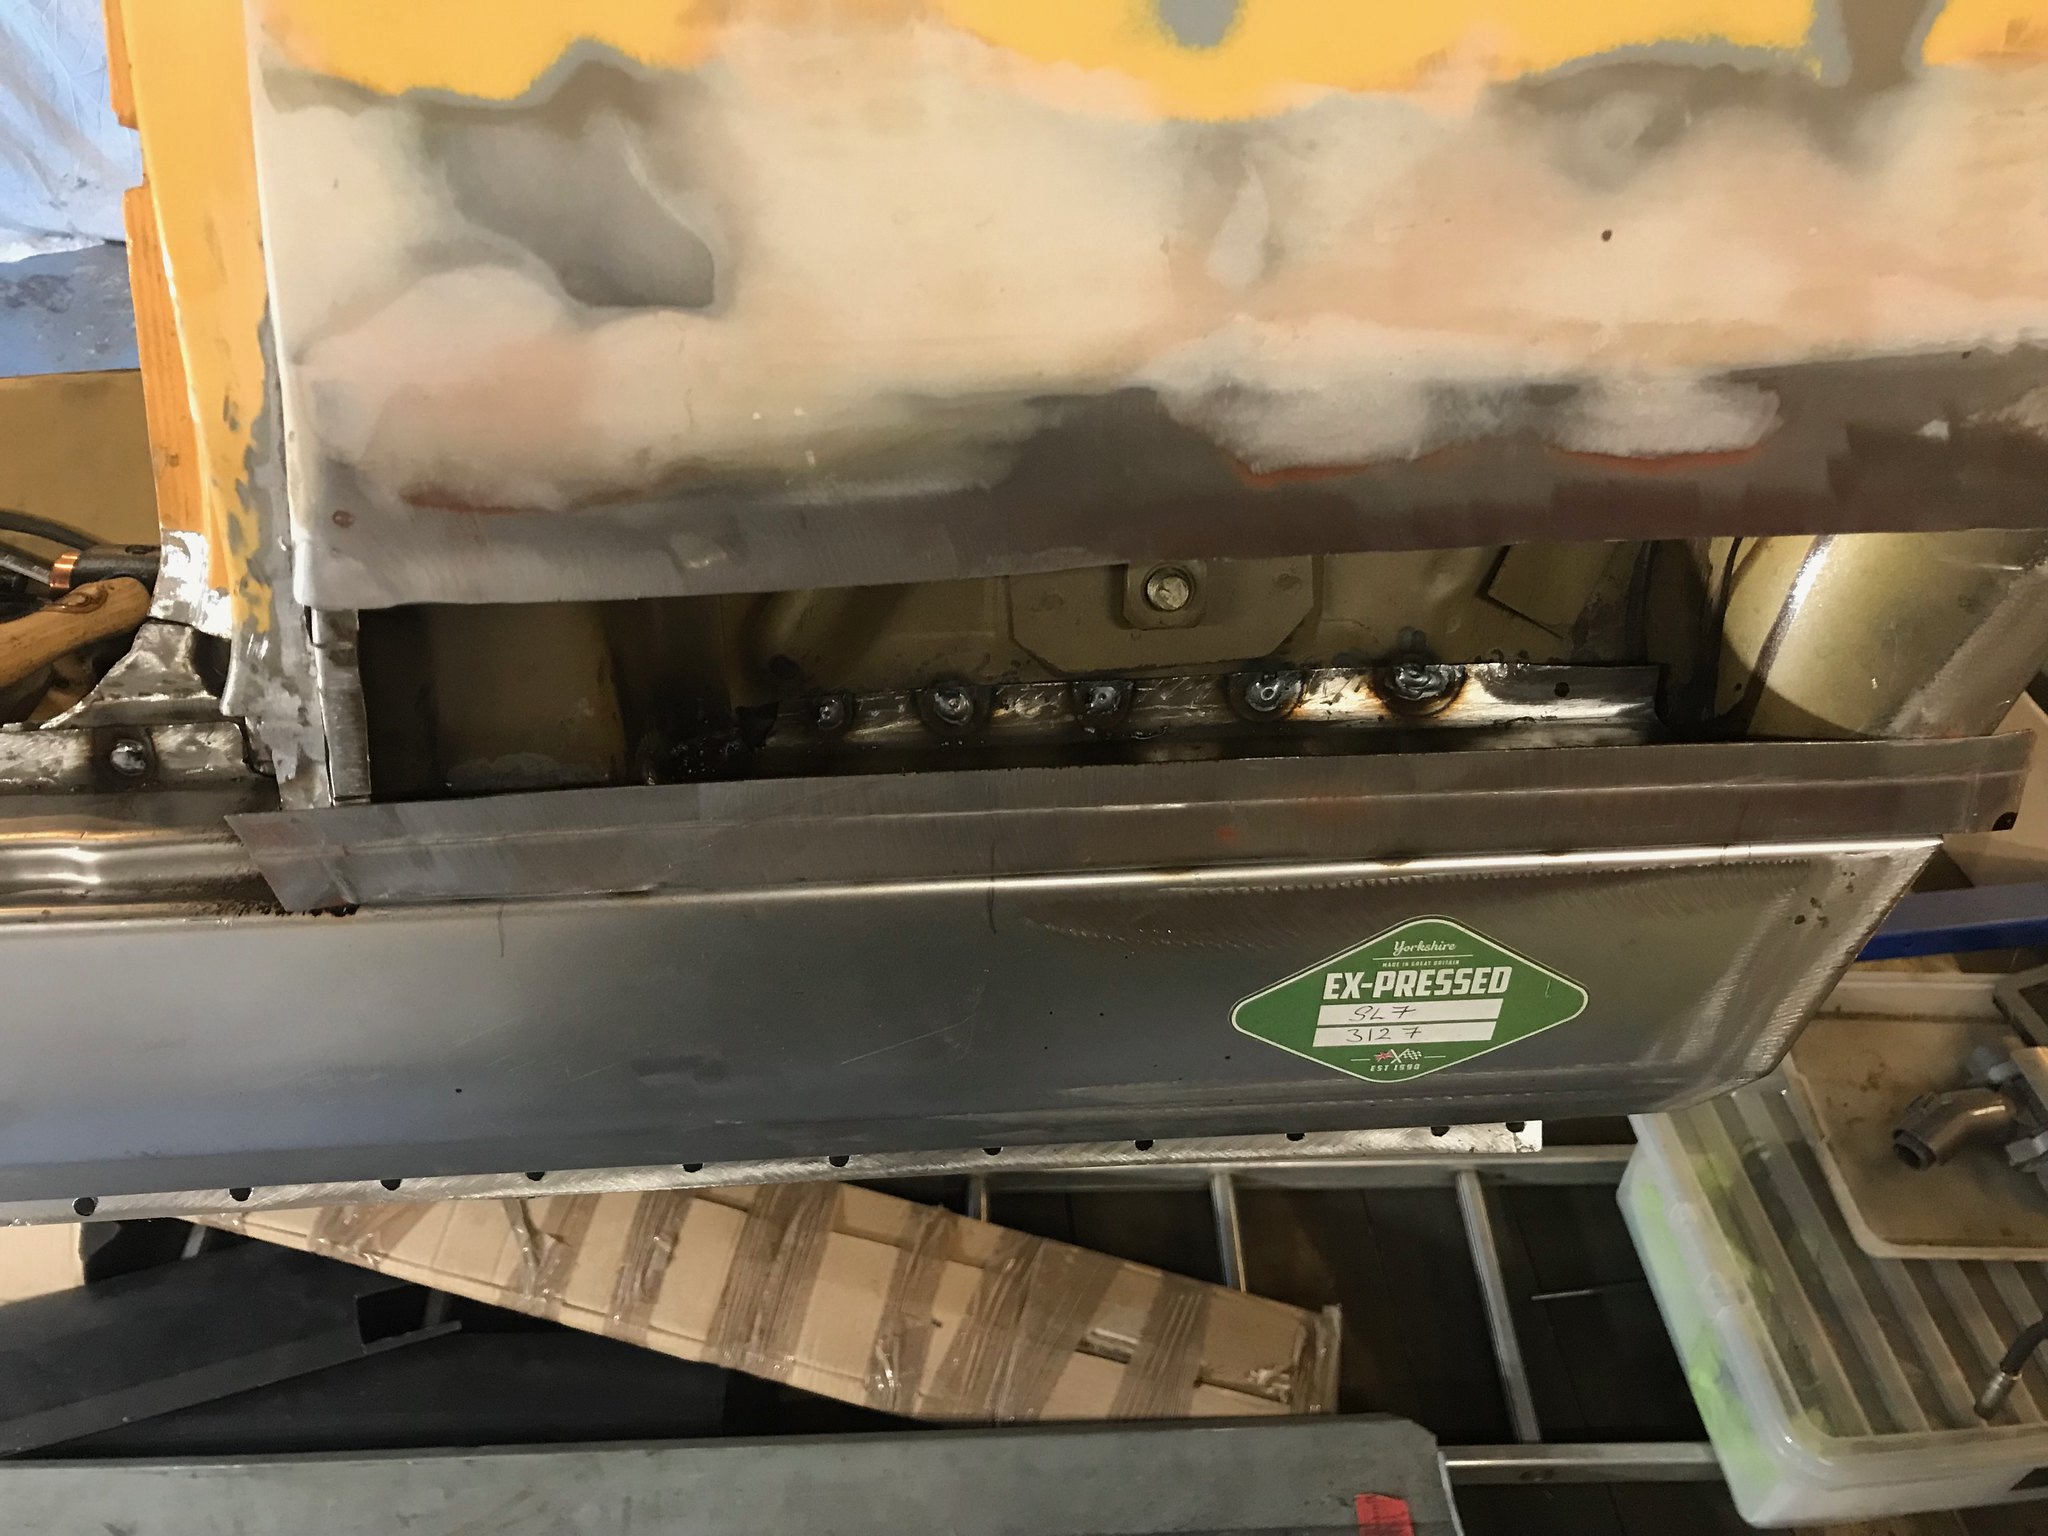
Ok, 9 moths of not getting near the car to work on has been a right pain. However, that job has sort of calmed down now so i was able to get on and do something. I realised that the sills were not going to take a repair easily (with my skills) so i decided to replace the whole thing. I ordered both near and off side sills from Ex-Pressed Steel over the period i was at work and they both turned up inside the 4 months they quoted for delivery. This is going to be complicated to get all back together! 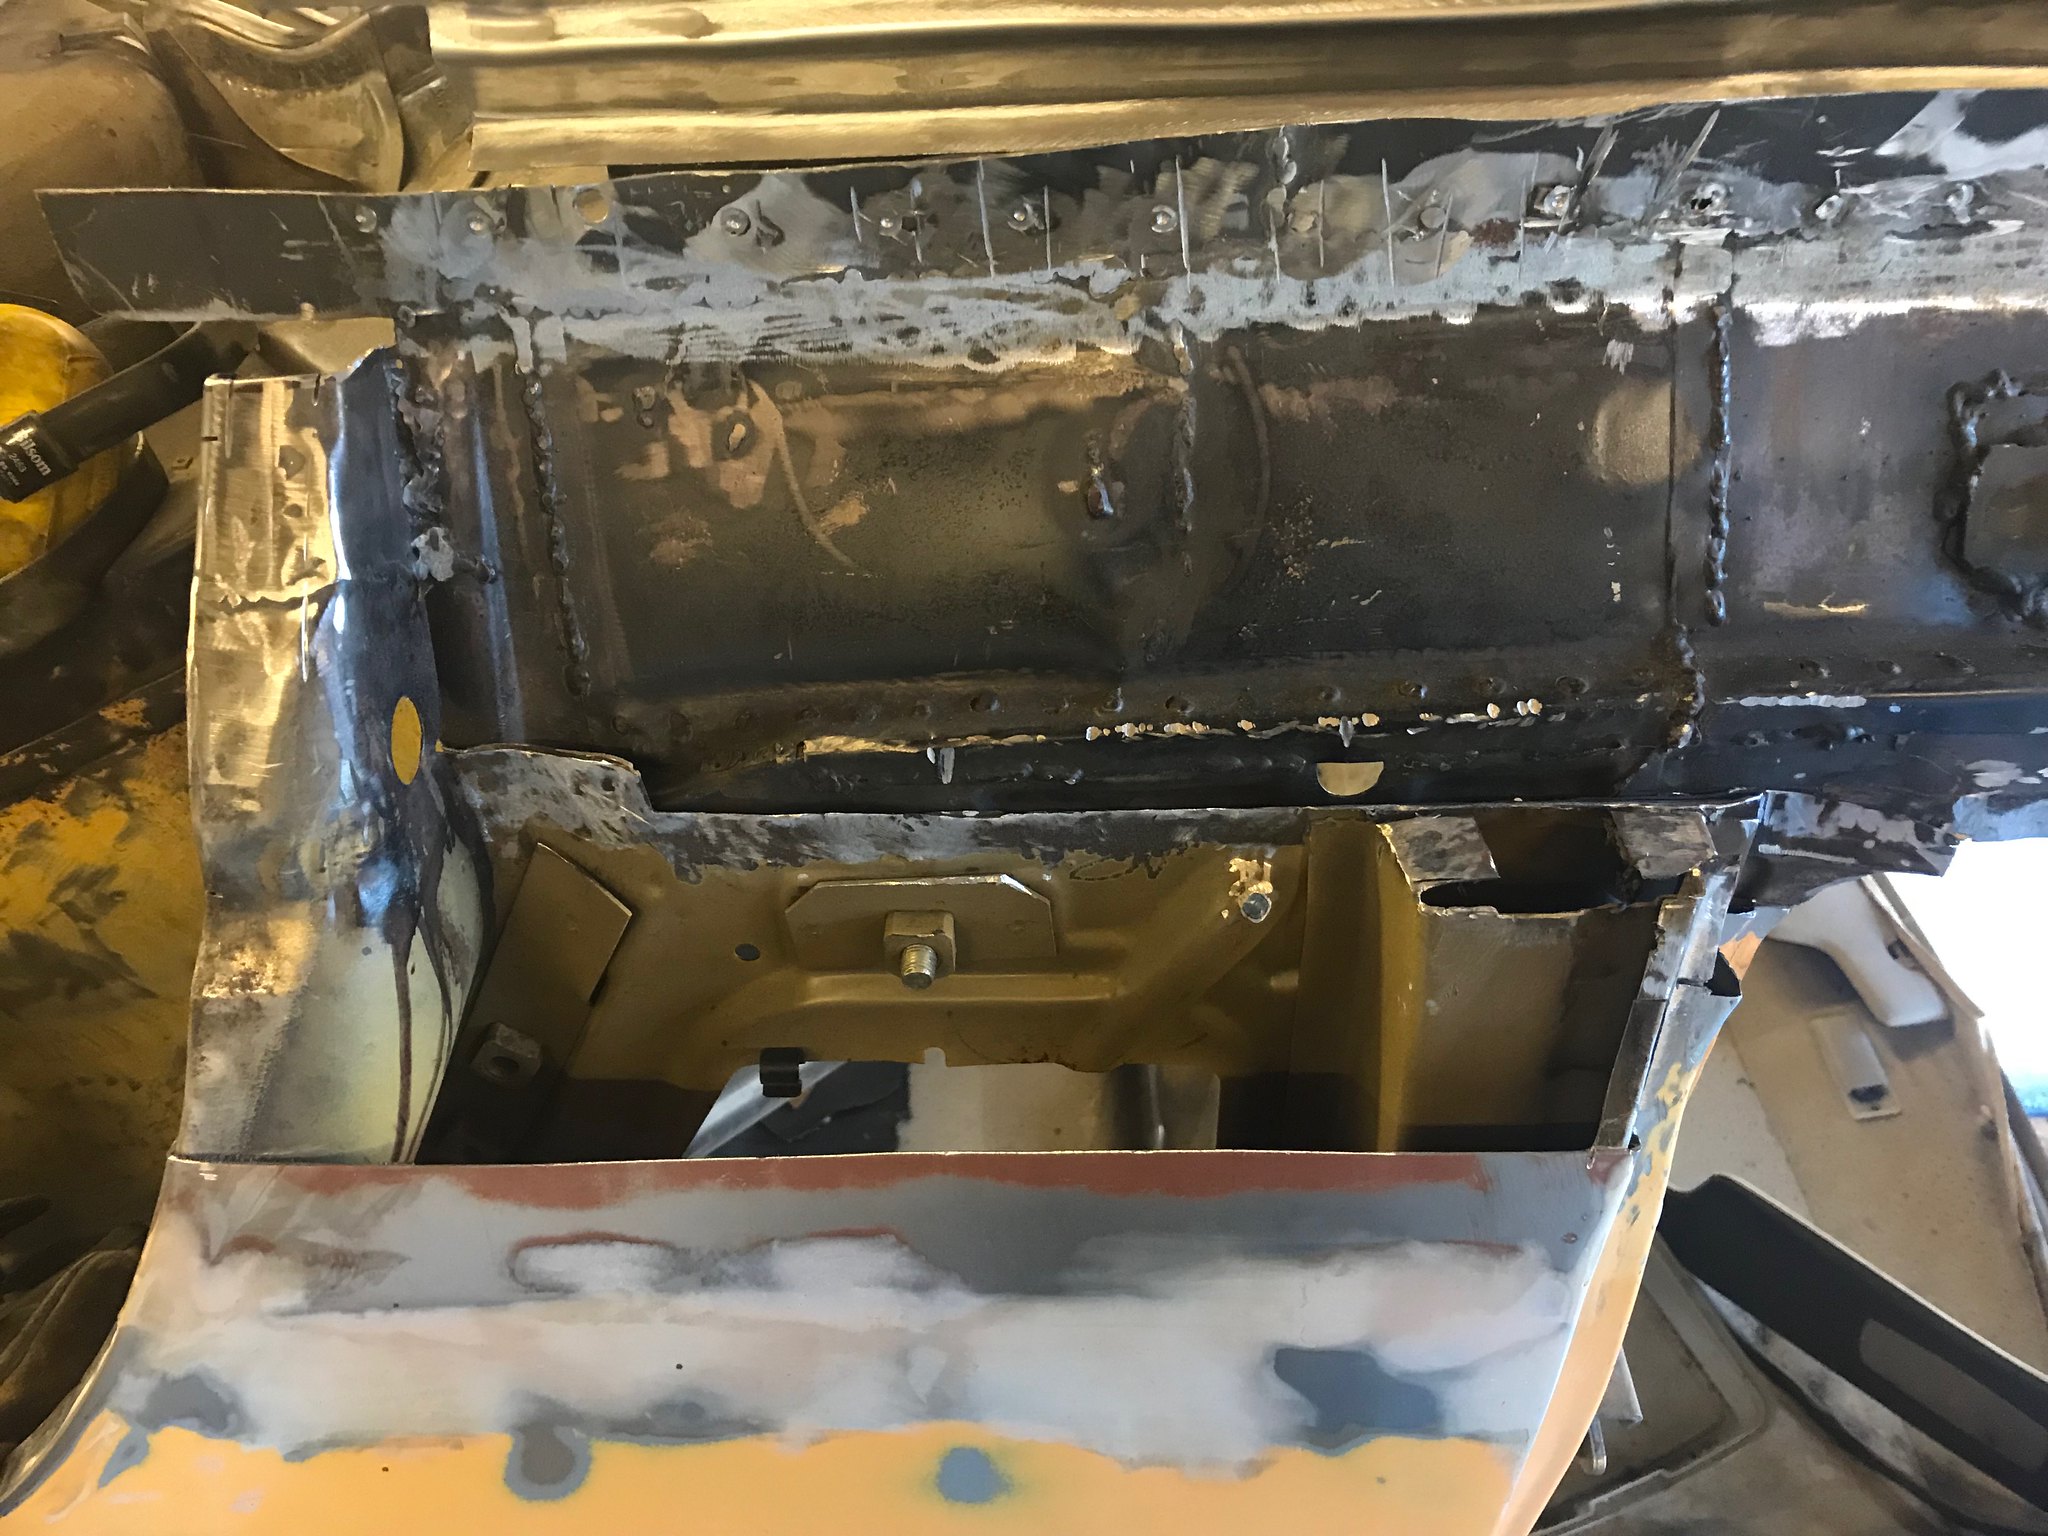 Untitled Untitled by Nevtiger, on Flickr The sill dives under the A post here, great, i wonder how the professionals do it?  by Nevtiger, on Flickr After a good session of getting all the various panels out the way i was ready to offer up the new sill. The sill didn't slot into place easily and once in place and clamped it had a huge gap to the door. The door is in the correct place as the stripes line up  Untitled Untitled by Nevtiger, on Flickr After a while of trying to work out the issue i realised that i could make it fit at the top or at the bottom. But not both. The angle of the top parts to the outside curve seemed to be wrong. 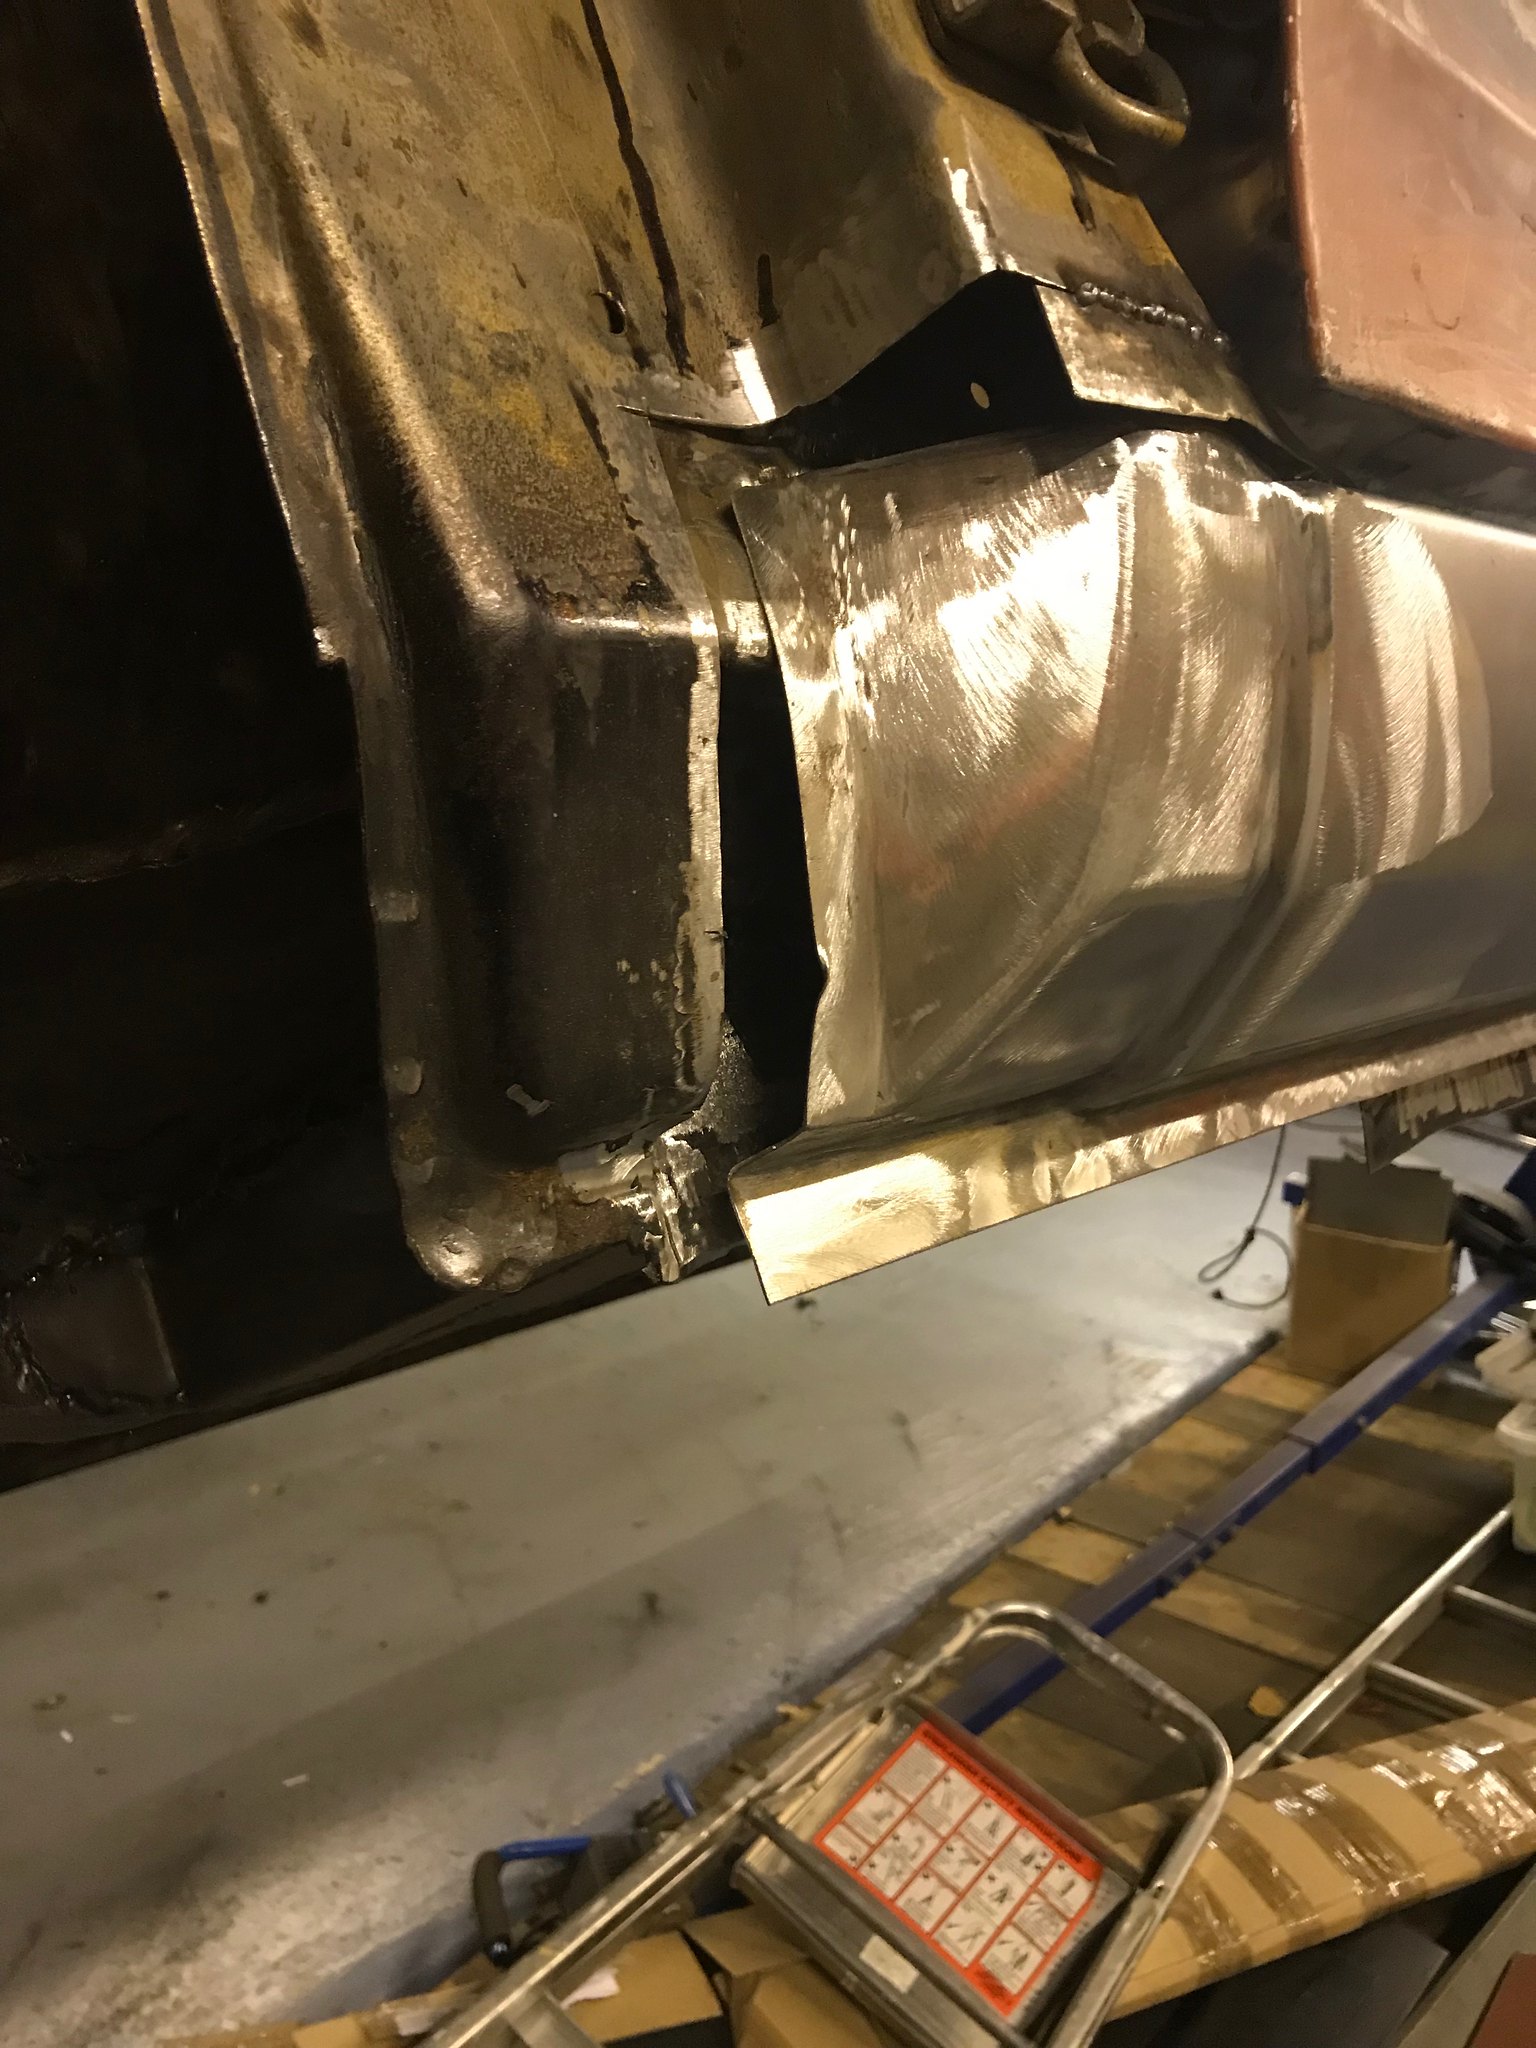 by Nevtiger, on Flickr 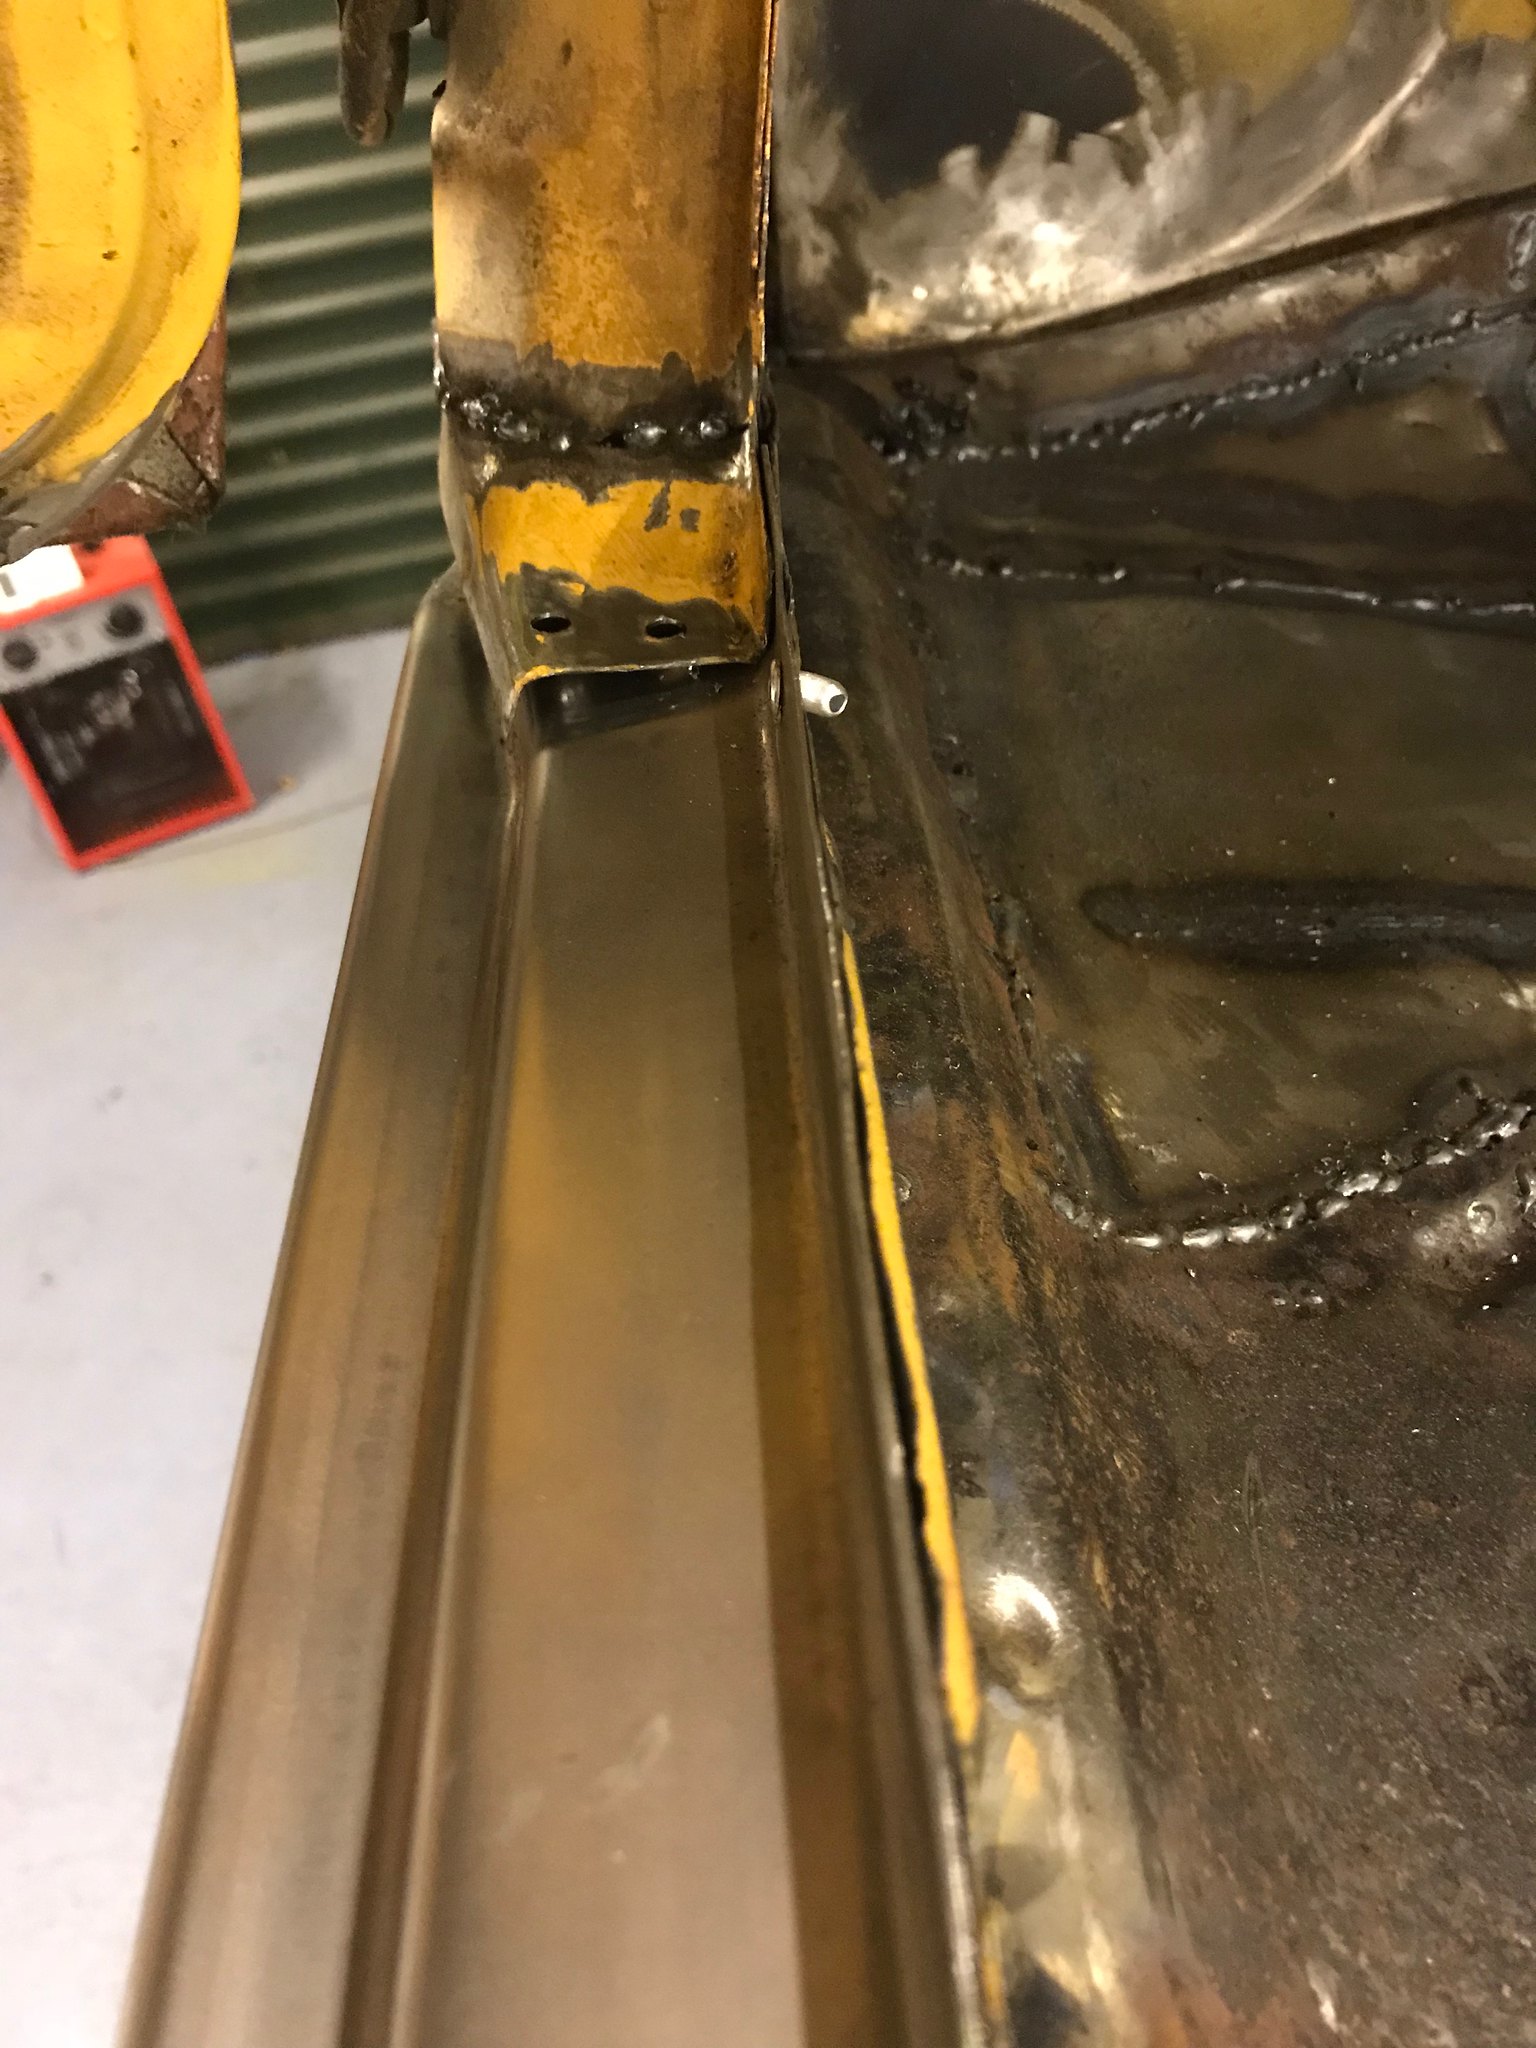 by Nevtiger, on Flickr I tried brute force. That sort of worked but no biscuit. So in the end i decided to fix the top in the place it should be. 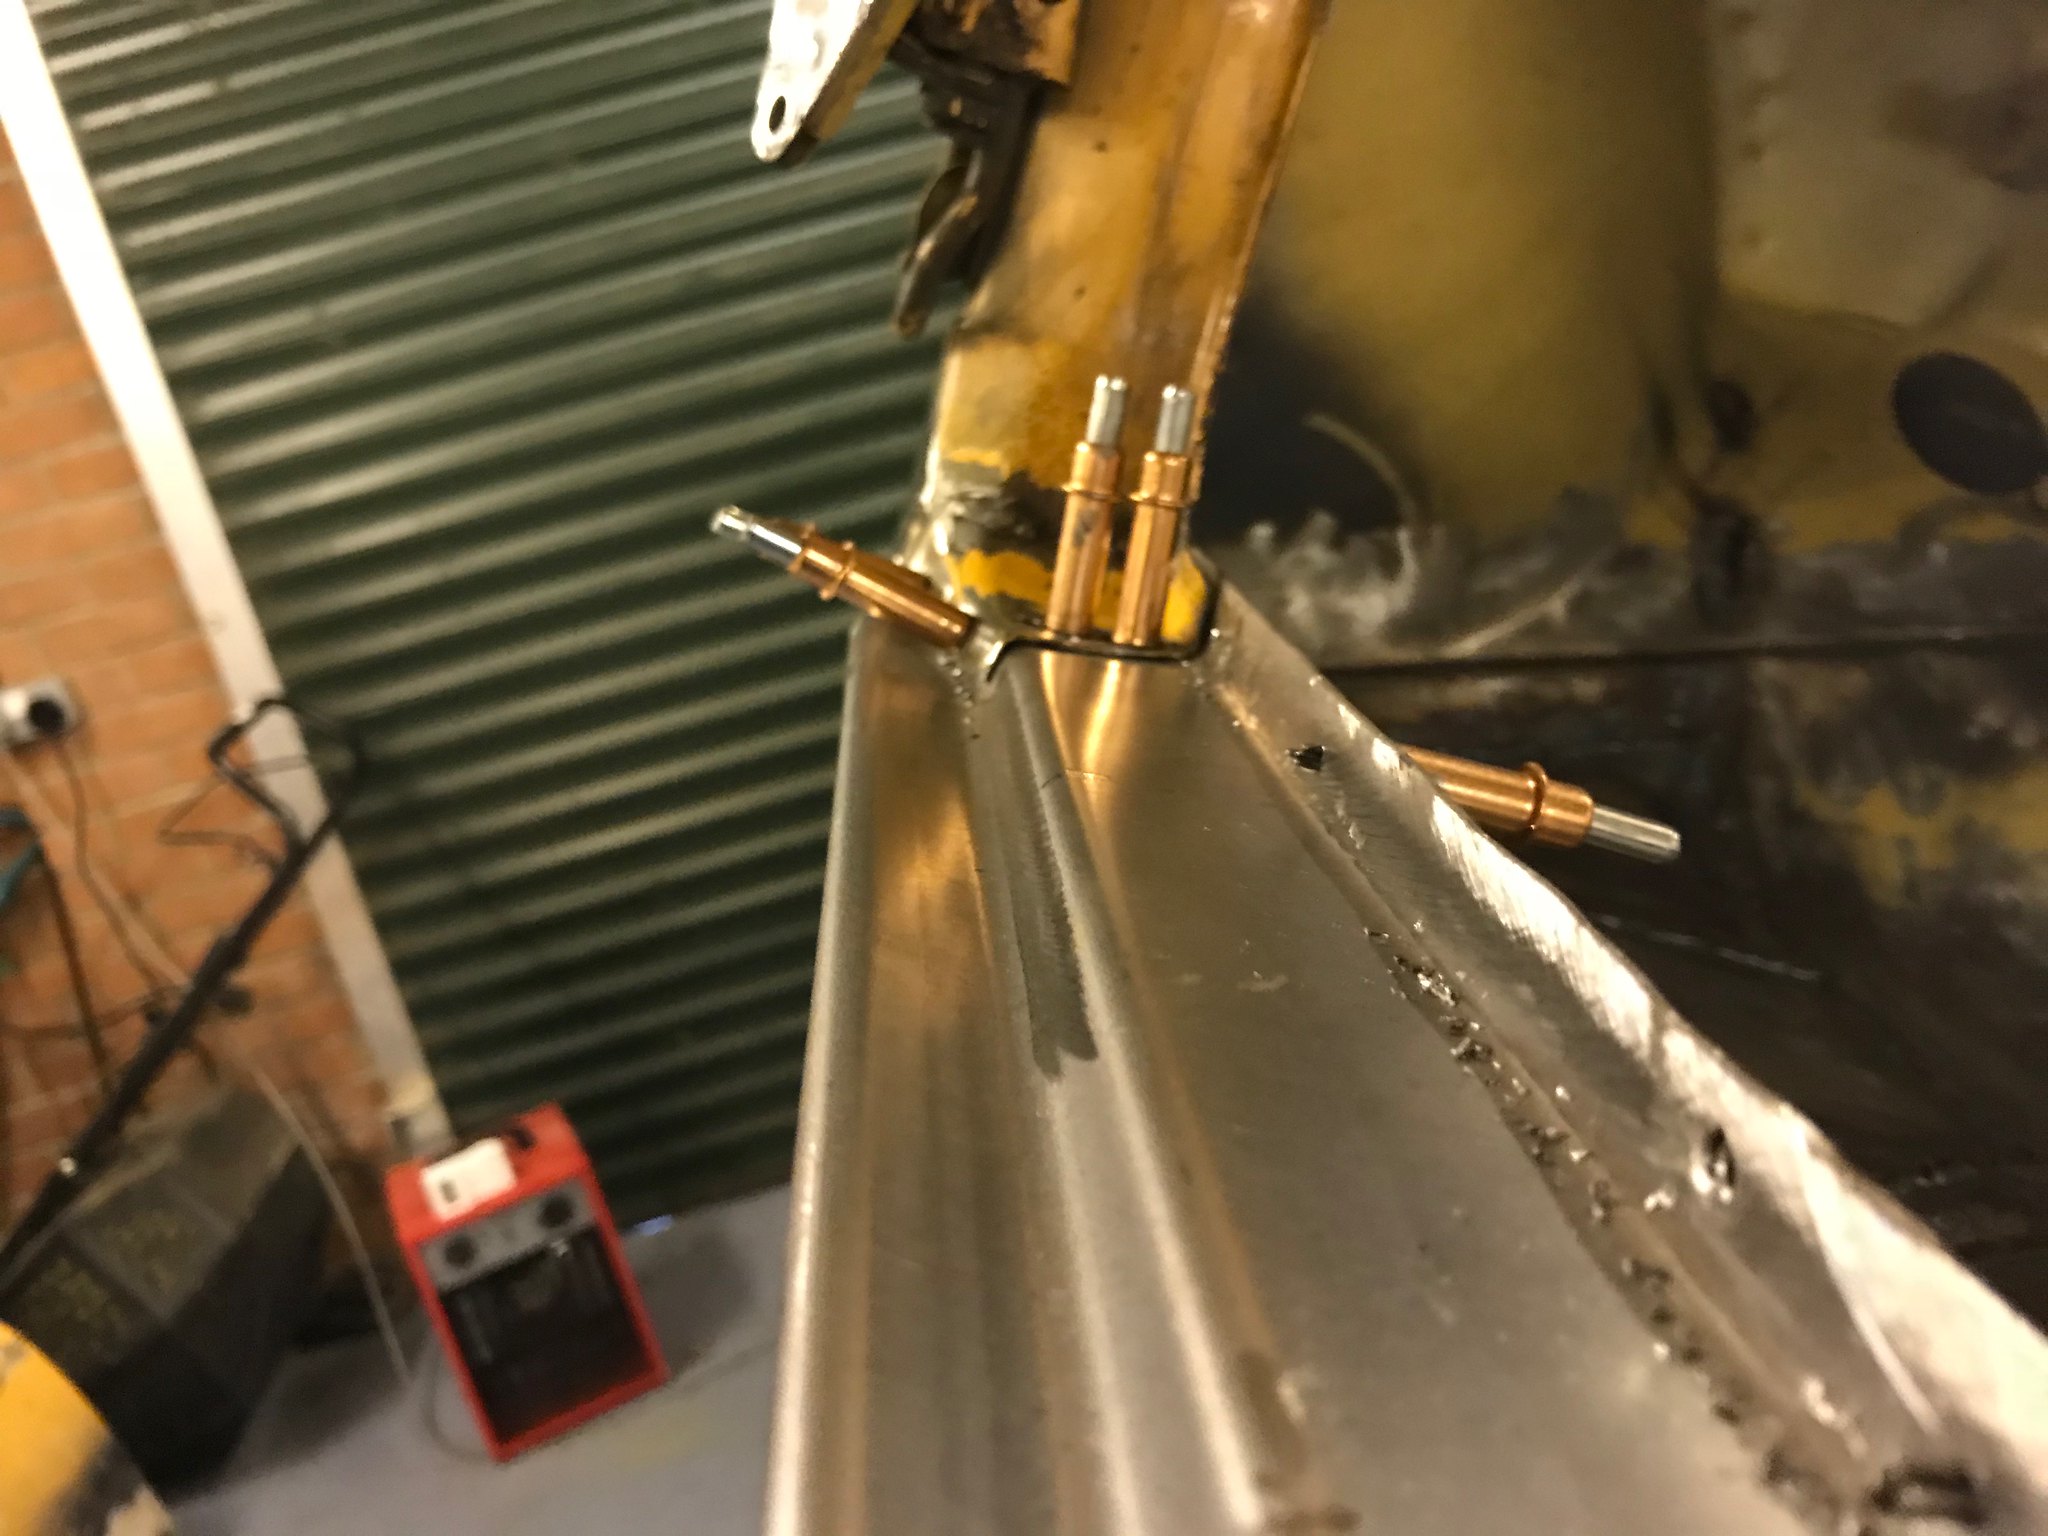 by Nevtiger, on Flickr Although it seemed like the wrong thing to do i then cut a slit at the from of the sill to allow the whole thing to bend and see if it would move into position 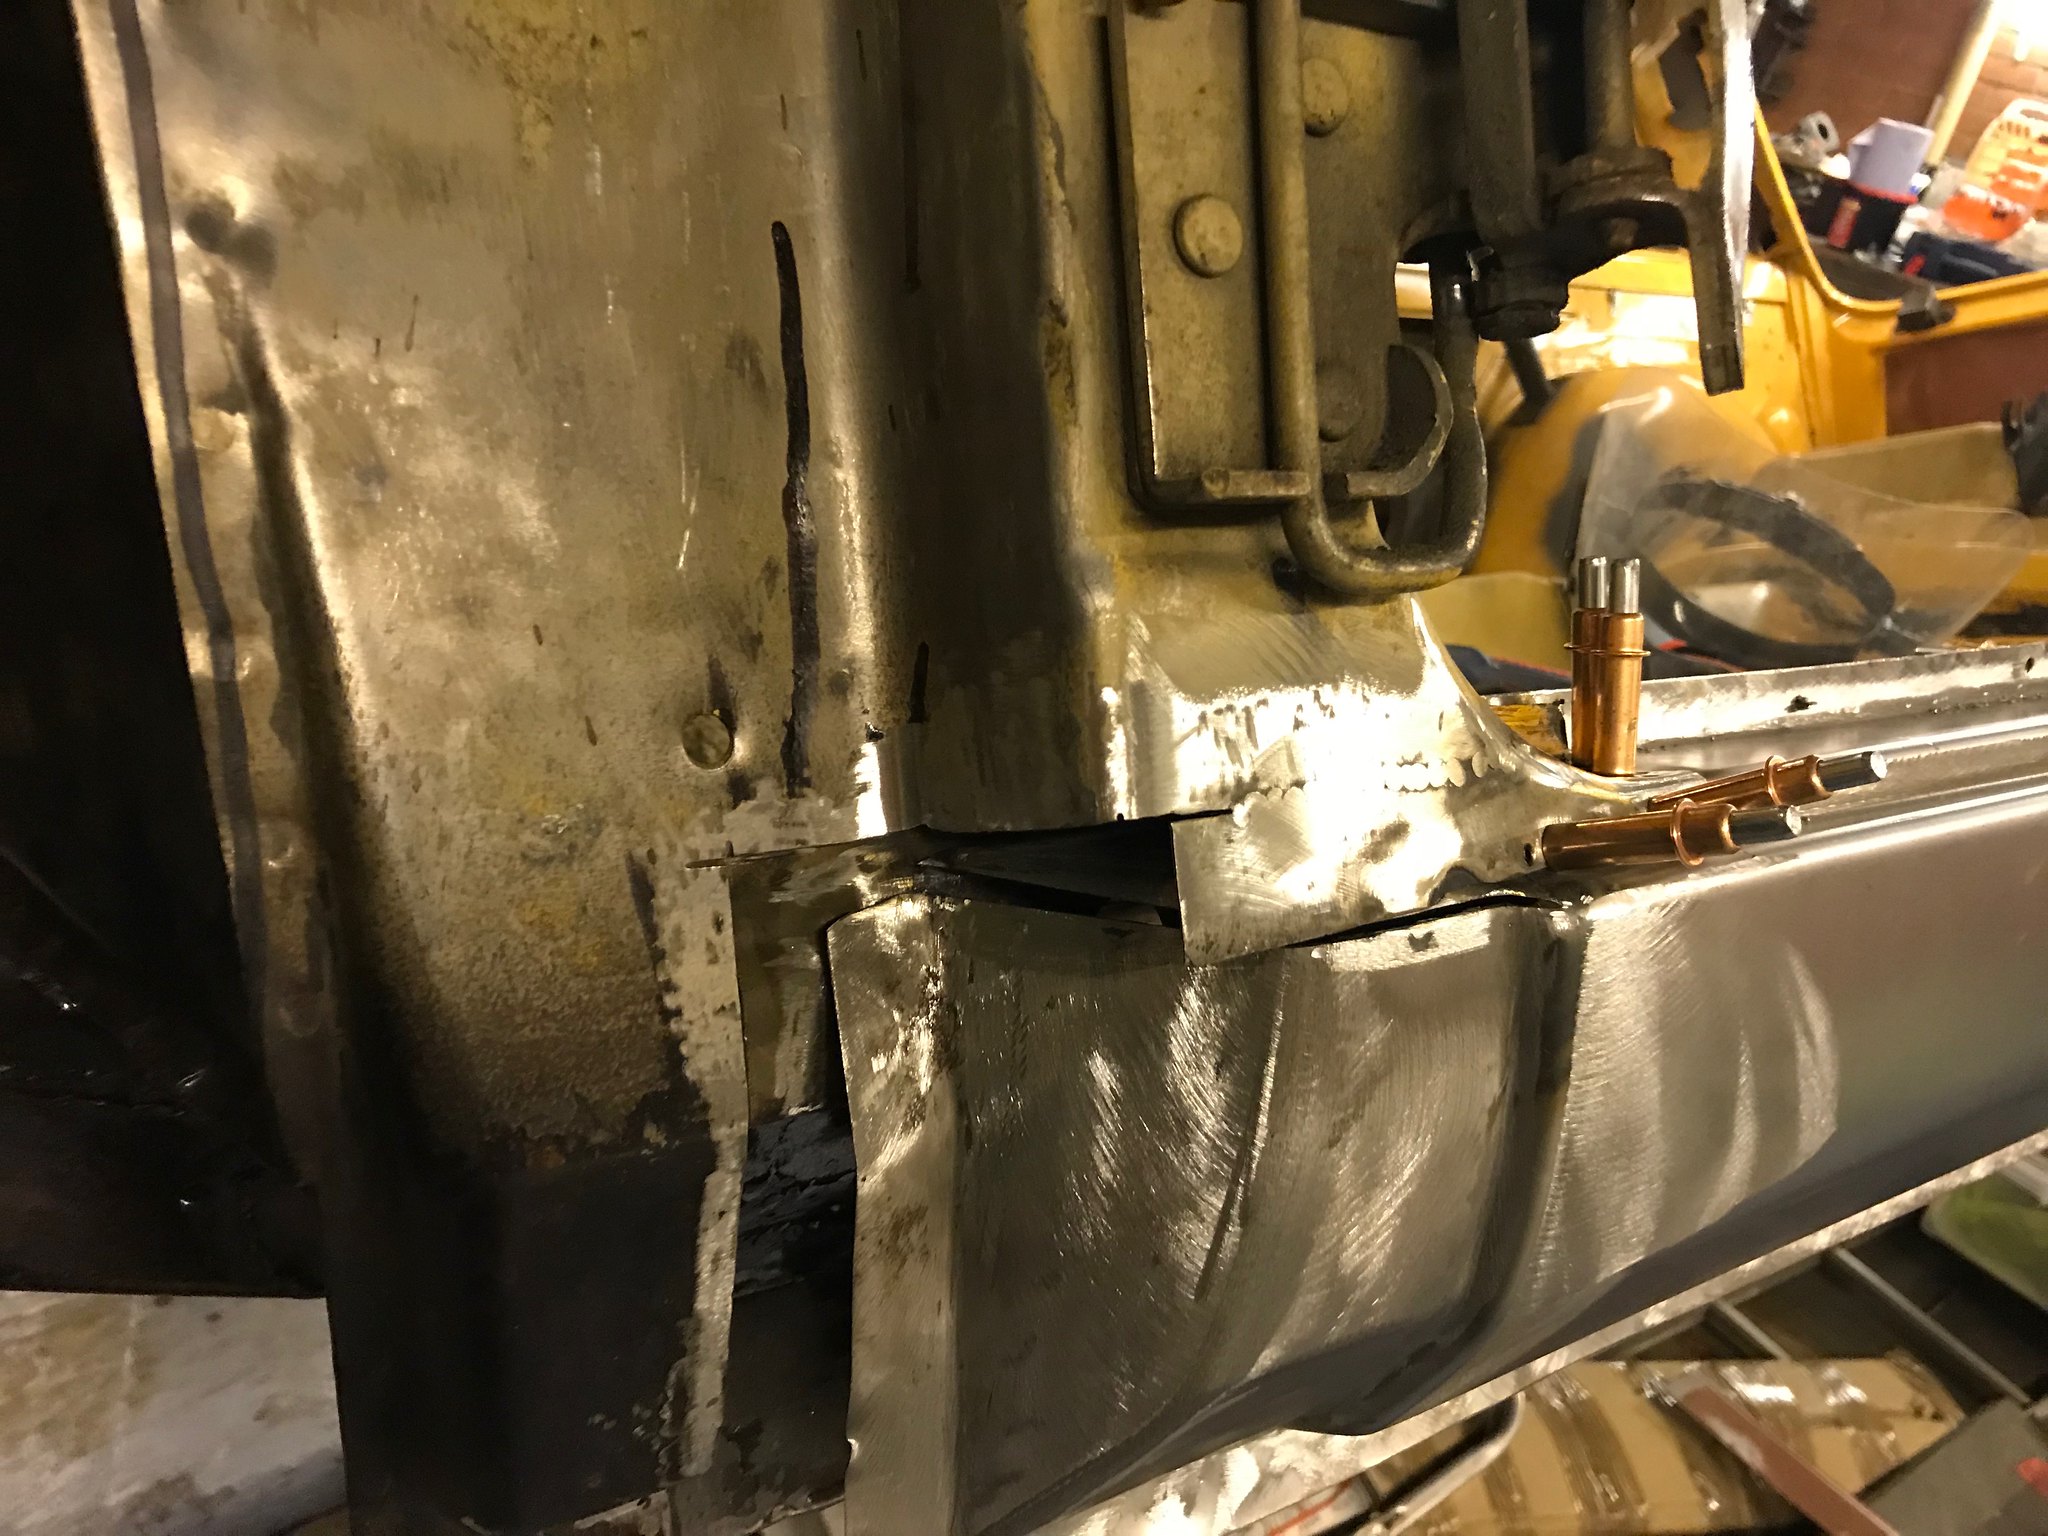 by Nevtiger, on Flickr In the end i needed to cut a fair wedge to get everything to line up  Untitled Untitled by Nevtiger, on Flickr All lined up and pinned into place. Then some tacks to hold the sill together. 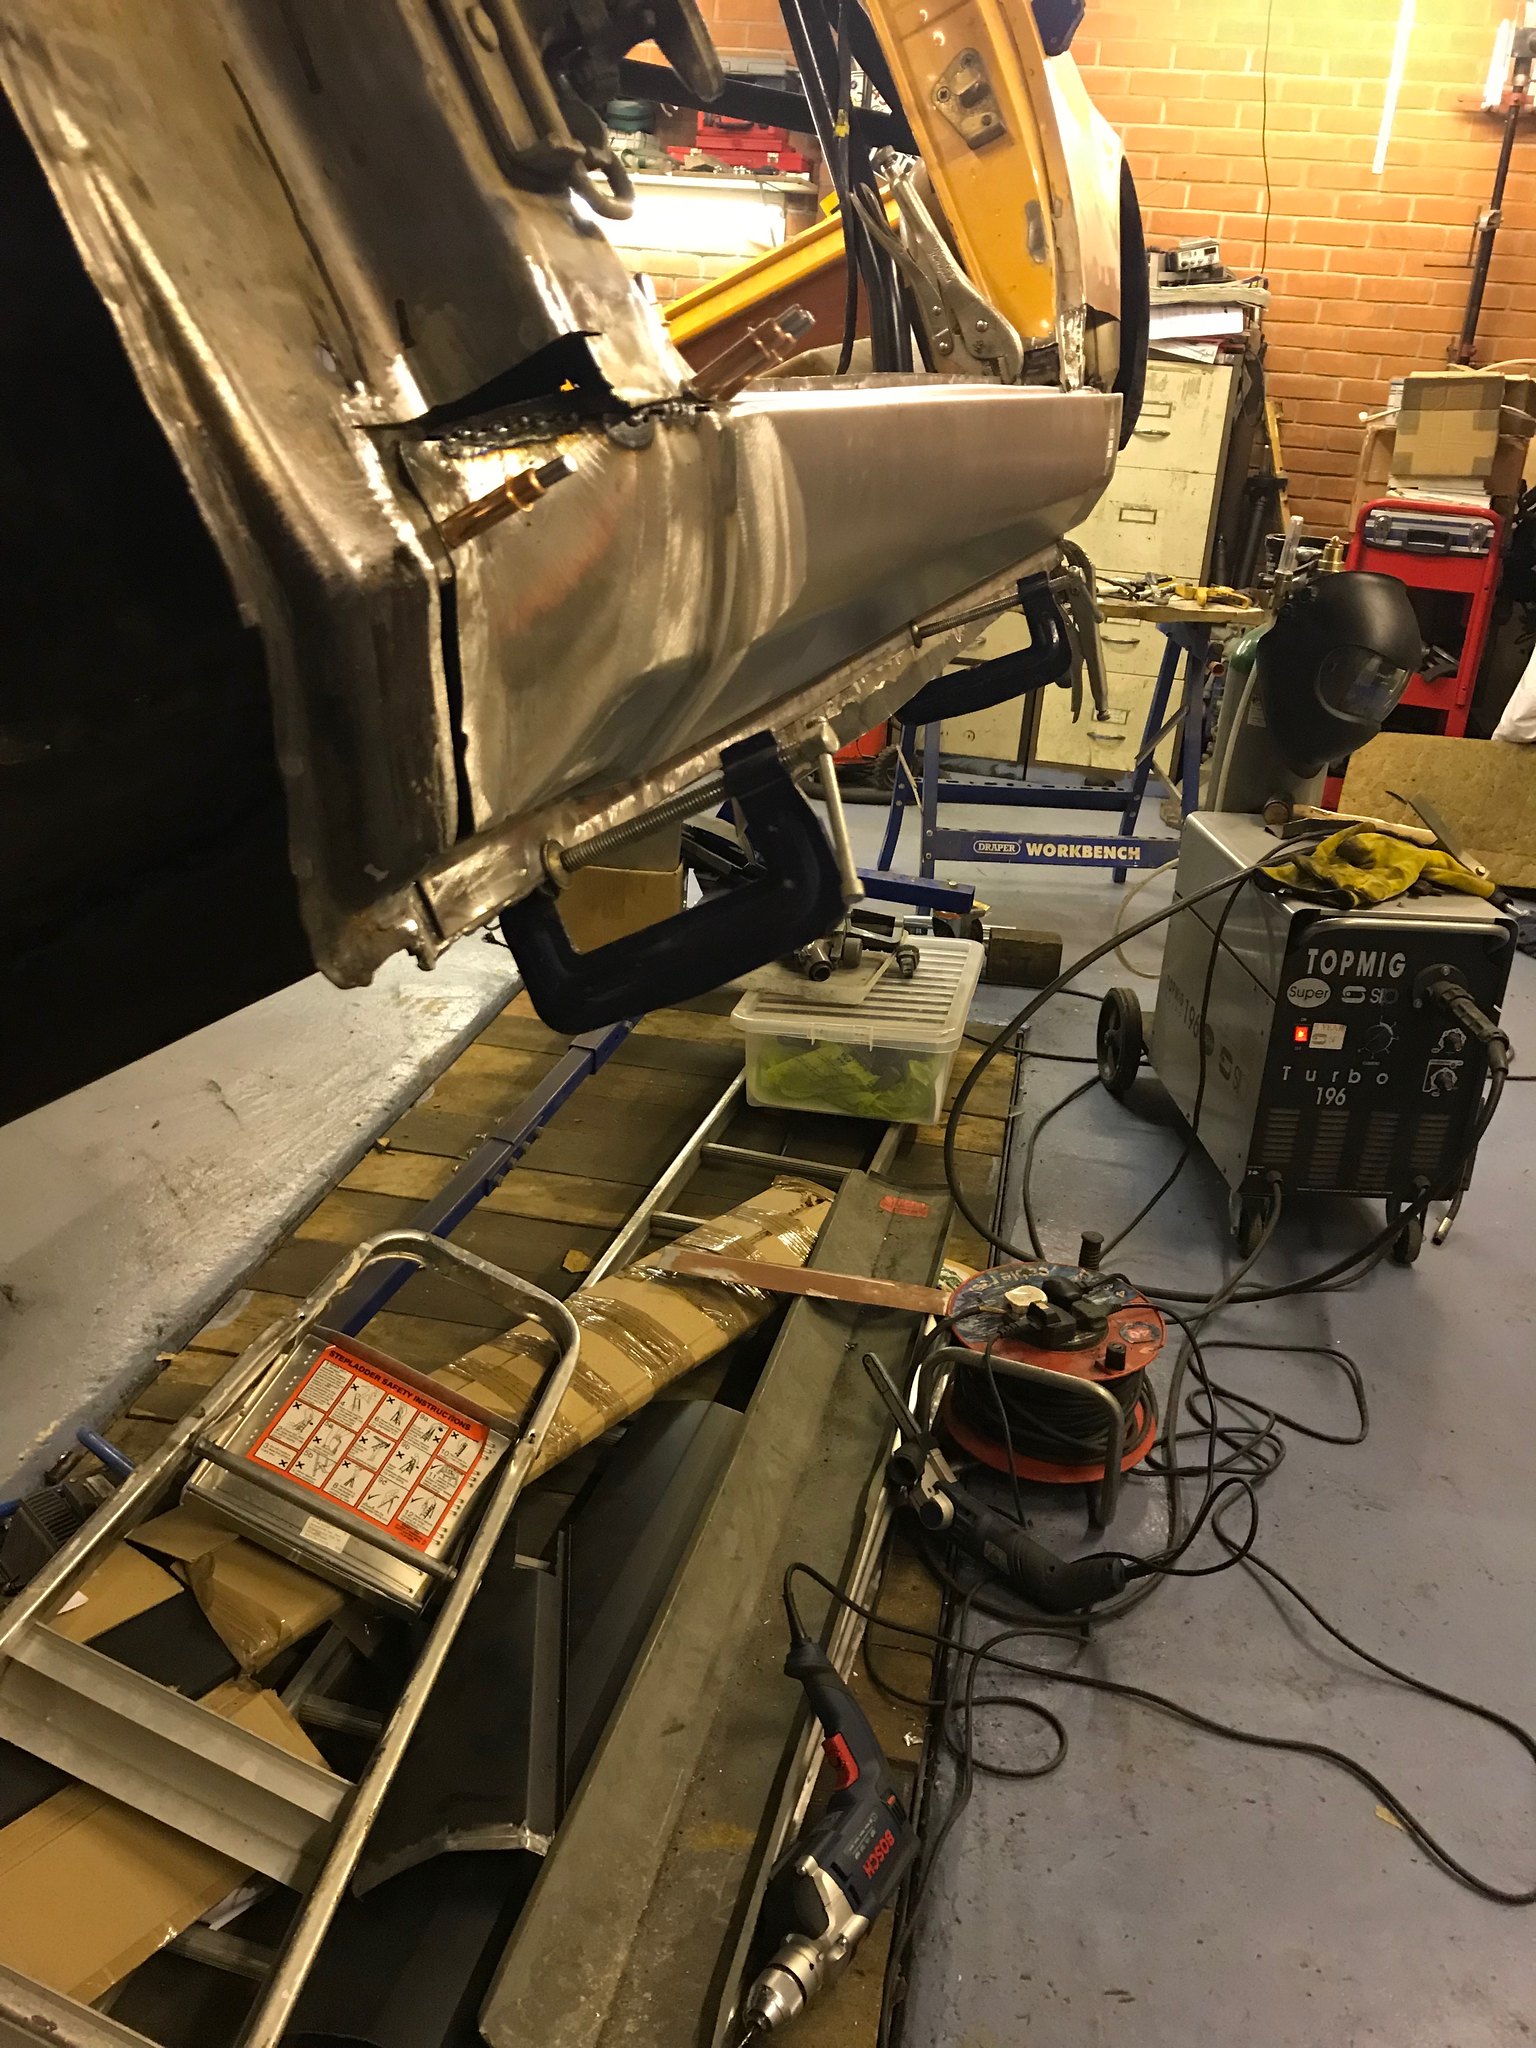 Untitled Untitled by Nevtiger, on Flickr Remove the sill and weld up the cut. This is the same place where the sill has been welded by Expressed when they manufacture the sill. I have no idea whether the sill is wrong or not but it needed a fair bit of manipulation to fit the original hard points on my car from when it was built by Chrysler. 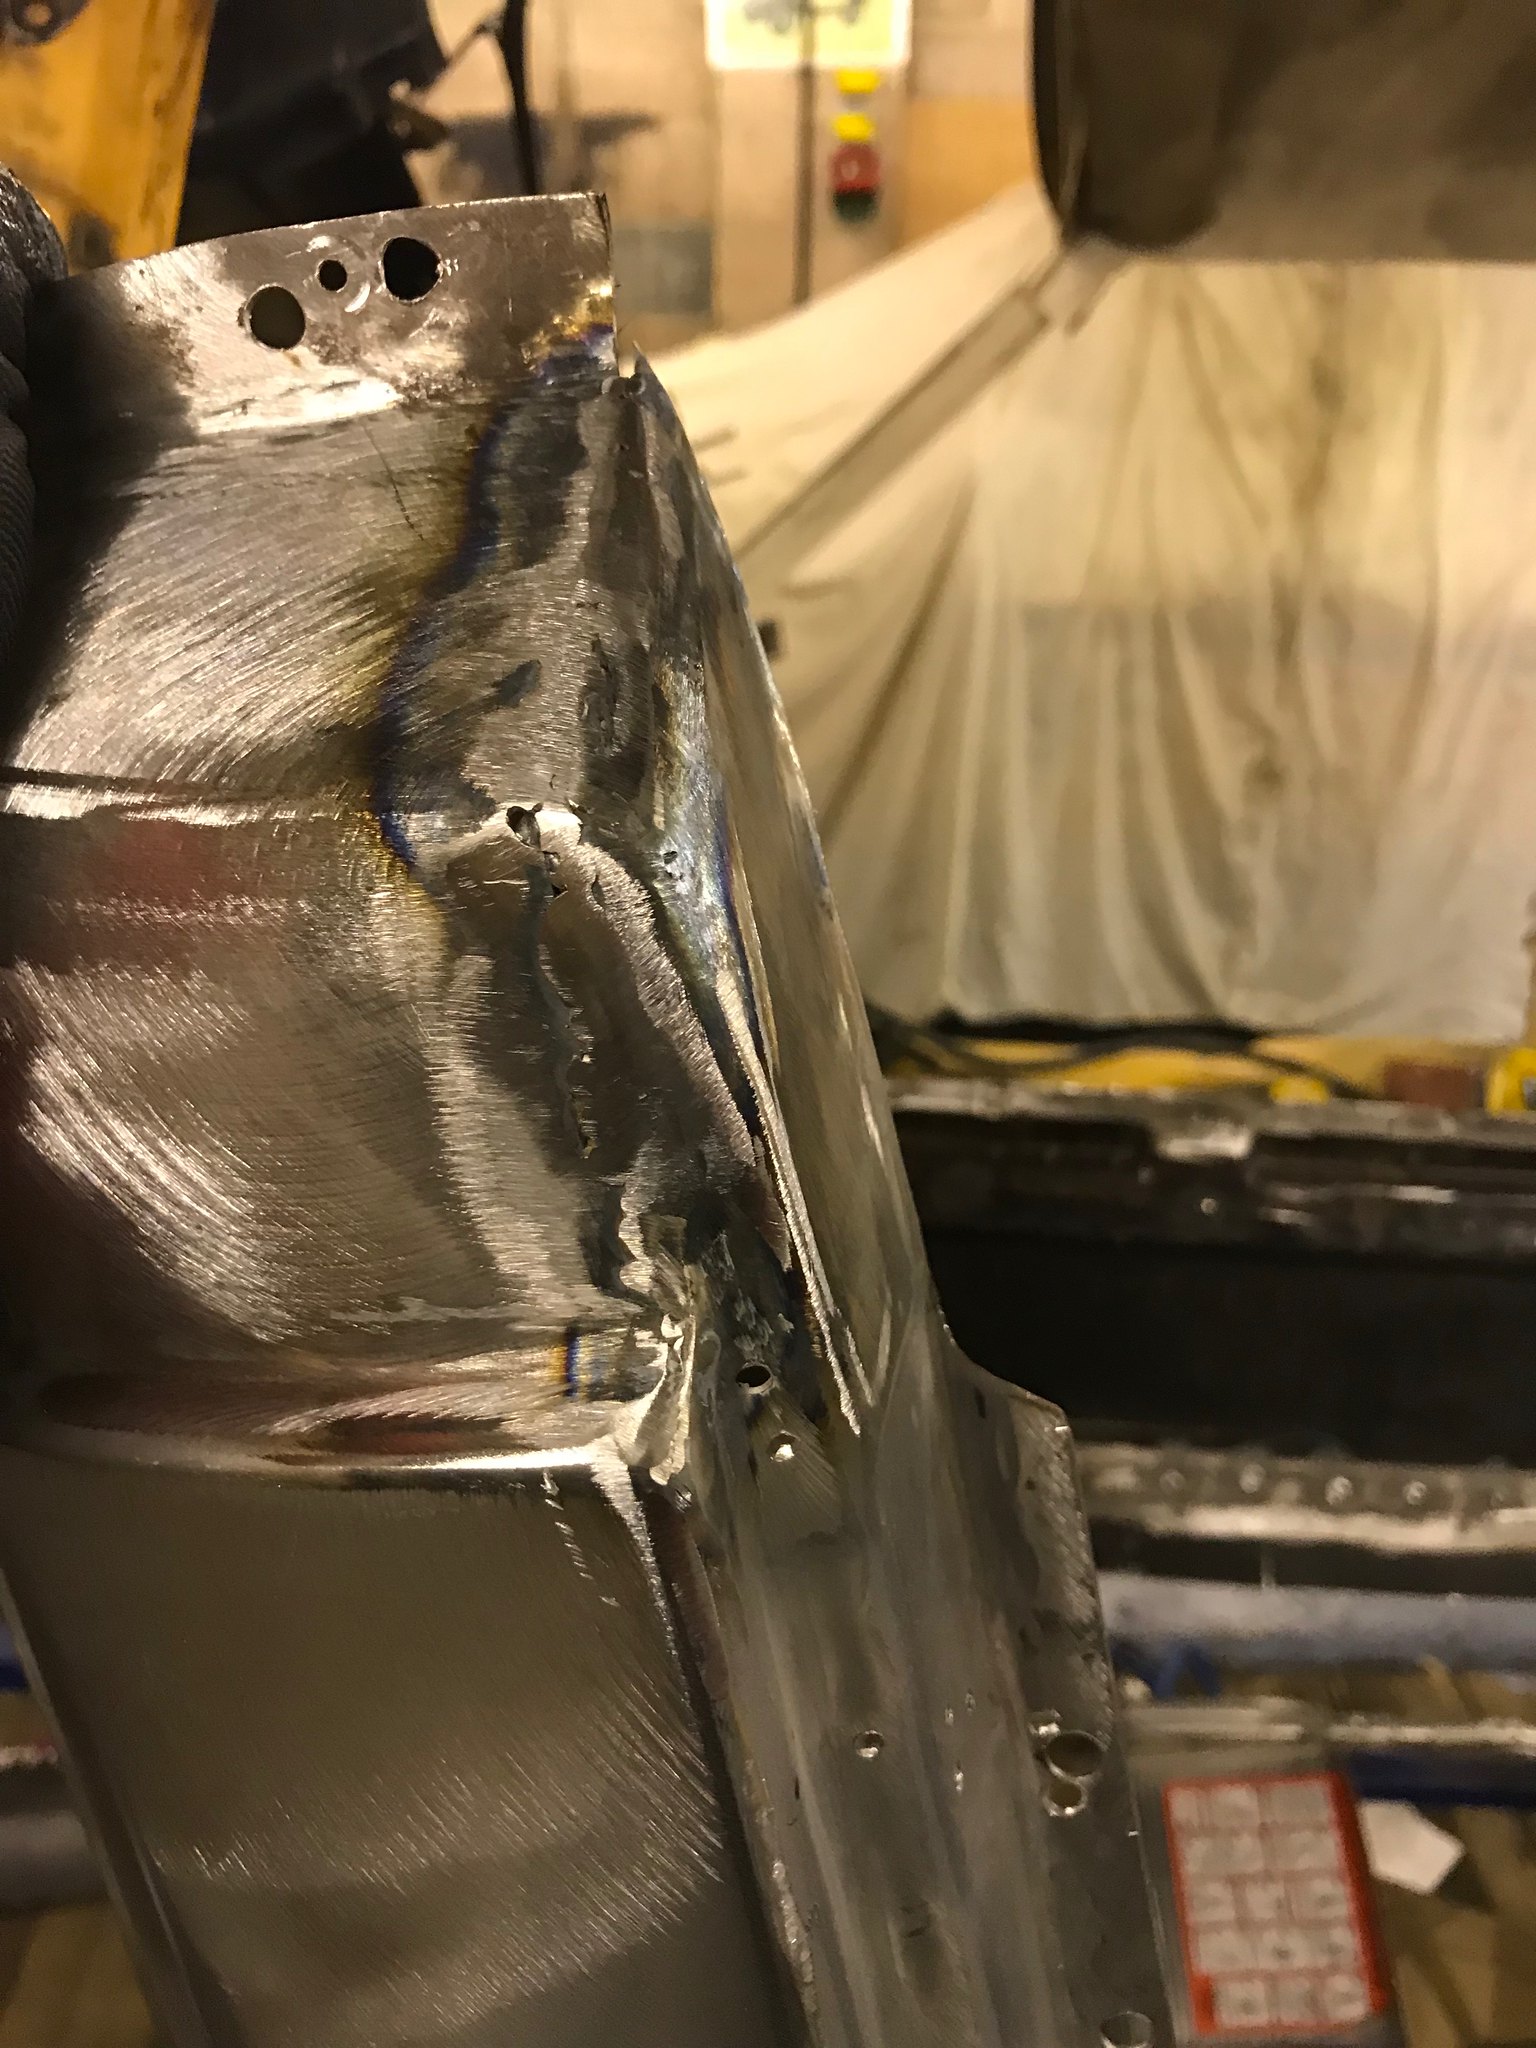 Untitled Untitled by Nevtiger, on Flickr All that is left to do is place it back on the car, fit the door - again - check alignment and then work out how to fill the bit just infant of the rear wheel arch! |
| |
|
|
|
|
|
Dec 28, 2017 14:47:54 GMT
|
She is coming on Nev, but I'm most looking forward to seeing you installing the complete new drivetrain. The gearbox is not going to be as simple an installatuon as you imagine, All of the gearboxes you mention are much bigger than the original tunnel in the shell, and a tight squeeze in such a small car. I see that you have decided to fit a roll cage from the outset after all..... probably a wise move. I have not quite resigned myself to doing the same as I'd like to keep the interior more stock looking on mine, but I do have some concerns about torsional stiffness without a cage? The big Getrag 6-speed unit from the M5 in particular is a bit of a beast.... 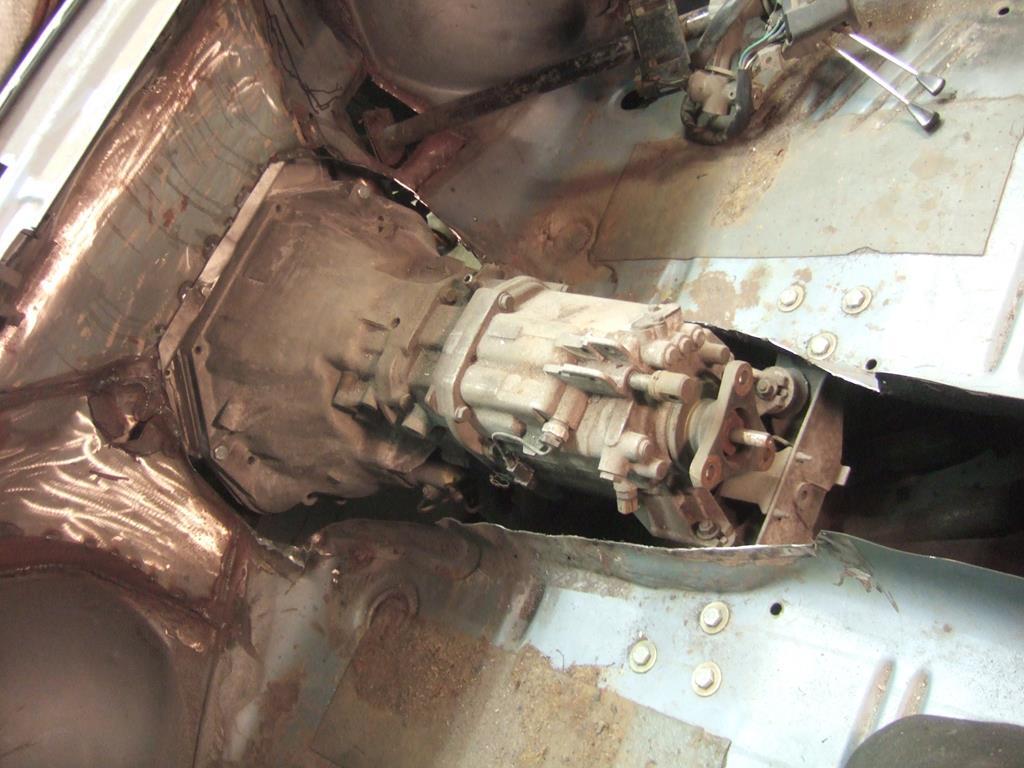 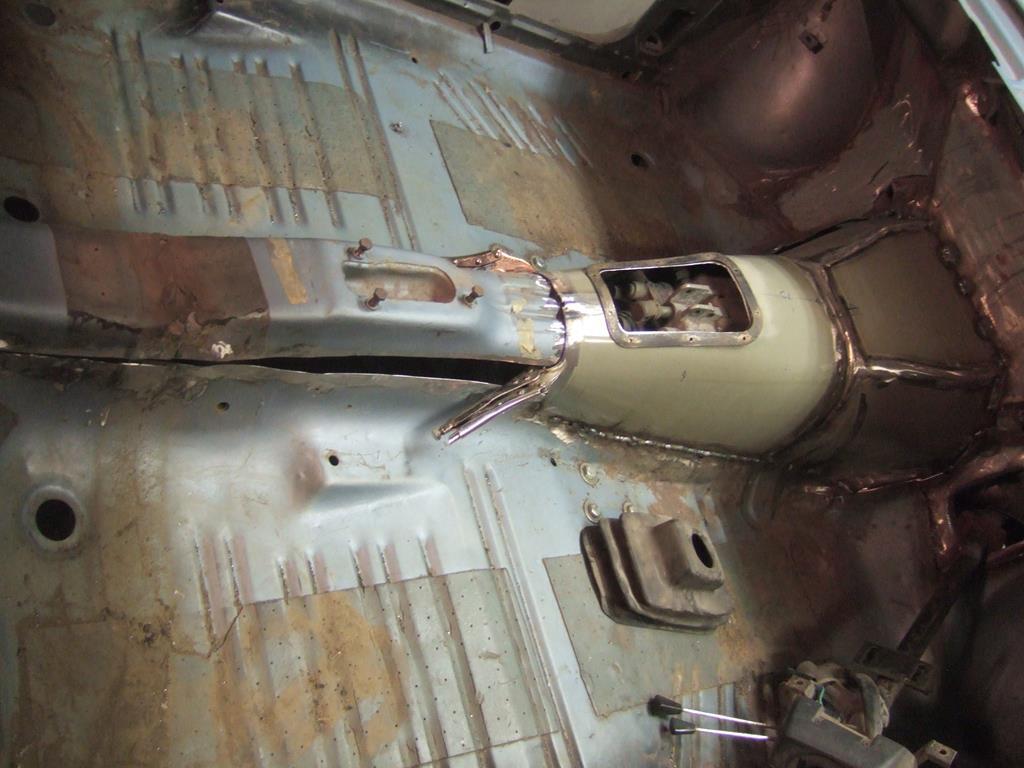 |
| |
|
|
njw
Part of things
 
Posts: 226
|
|
Dec 28, 2017 21:34:38 GMT
|
Talking of gearboxes, if you decide that you don't need that 420g give us a shout as I may know of someone looking for one....  |
| |
|
|
|
|
|
|
|
|
Jim,
Who knows? It will be easy once finished :-)
|
| |
|
|
|
|
|
|
|
|
|
|
|
|
lovely car tidy work try turning wire speed down a little , you l get less build up of weld , good job
|
| |
|
|
|
|
|
|
|
|
Wire speed?
I shall try that indeed.
|
| |
|
|
|
|
|
|
|
|
good work on the sill, i think you pulled it off
|
| |
|
|
|
|
|
|
|
|
very nicely done....
JP
|
| |
I know its spelled Norman Luxury Yacht, but its pronounced Throat Wobbler Mangrove!
|
|
|
|
|
Jan 12, 2018 16:23:36 GMT
|
Well it seems to have stayed on so probably best to crack on and finish it off A Pillar welded back in along with some added metal where i lost the bits i cut out: 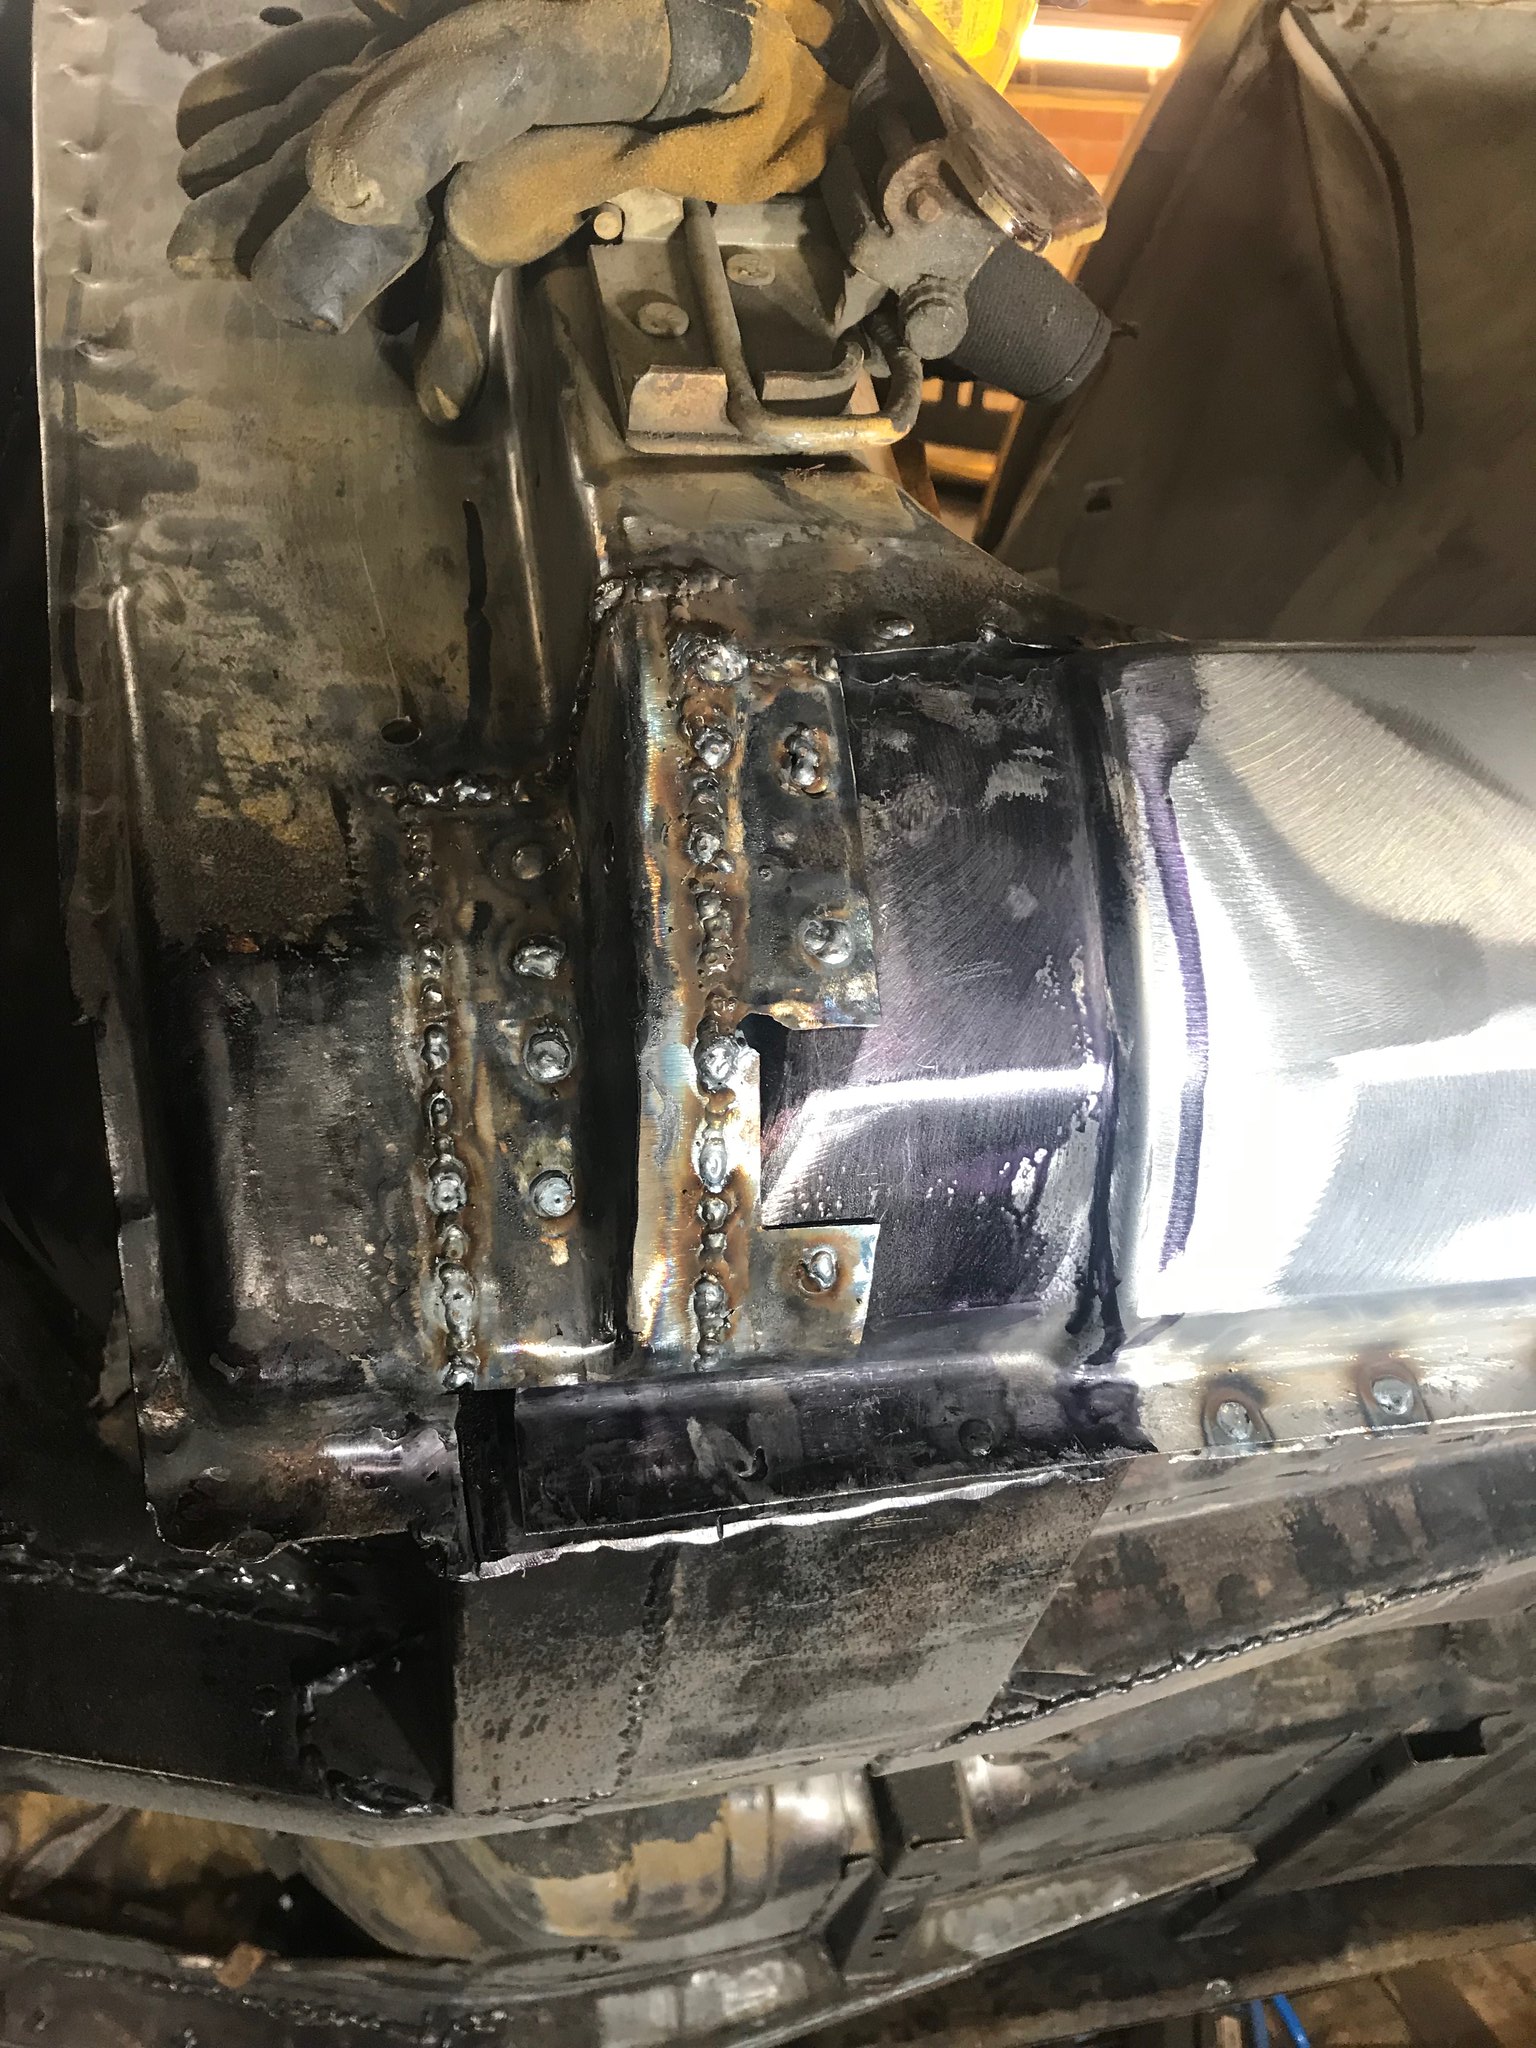 Untitled Untitled by Nevtiger, on Flickr Starting the dressing back: 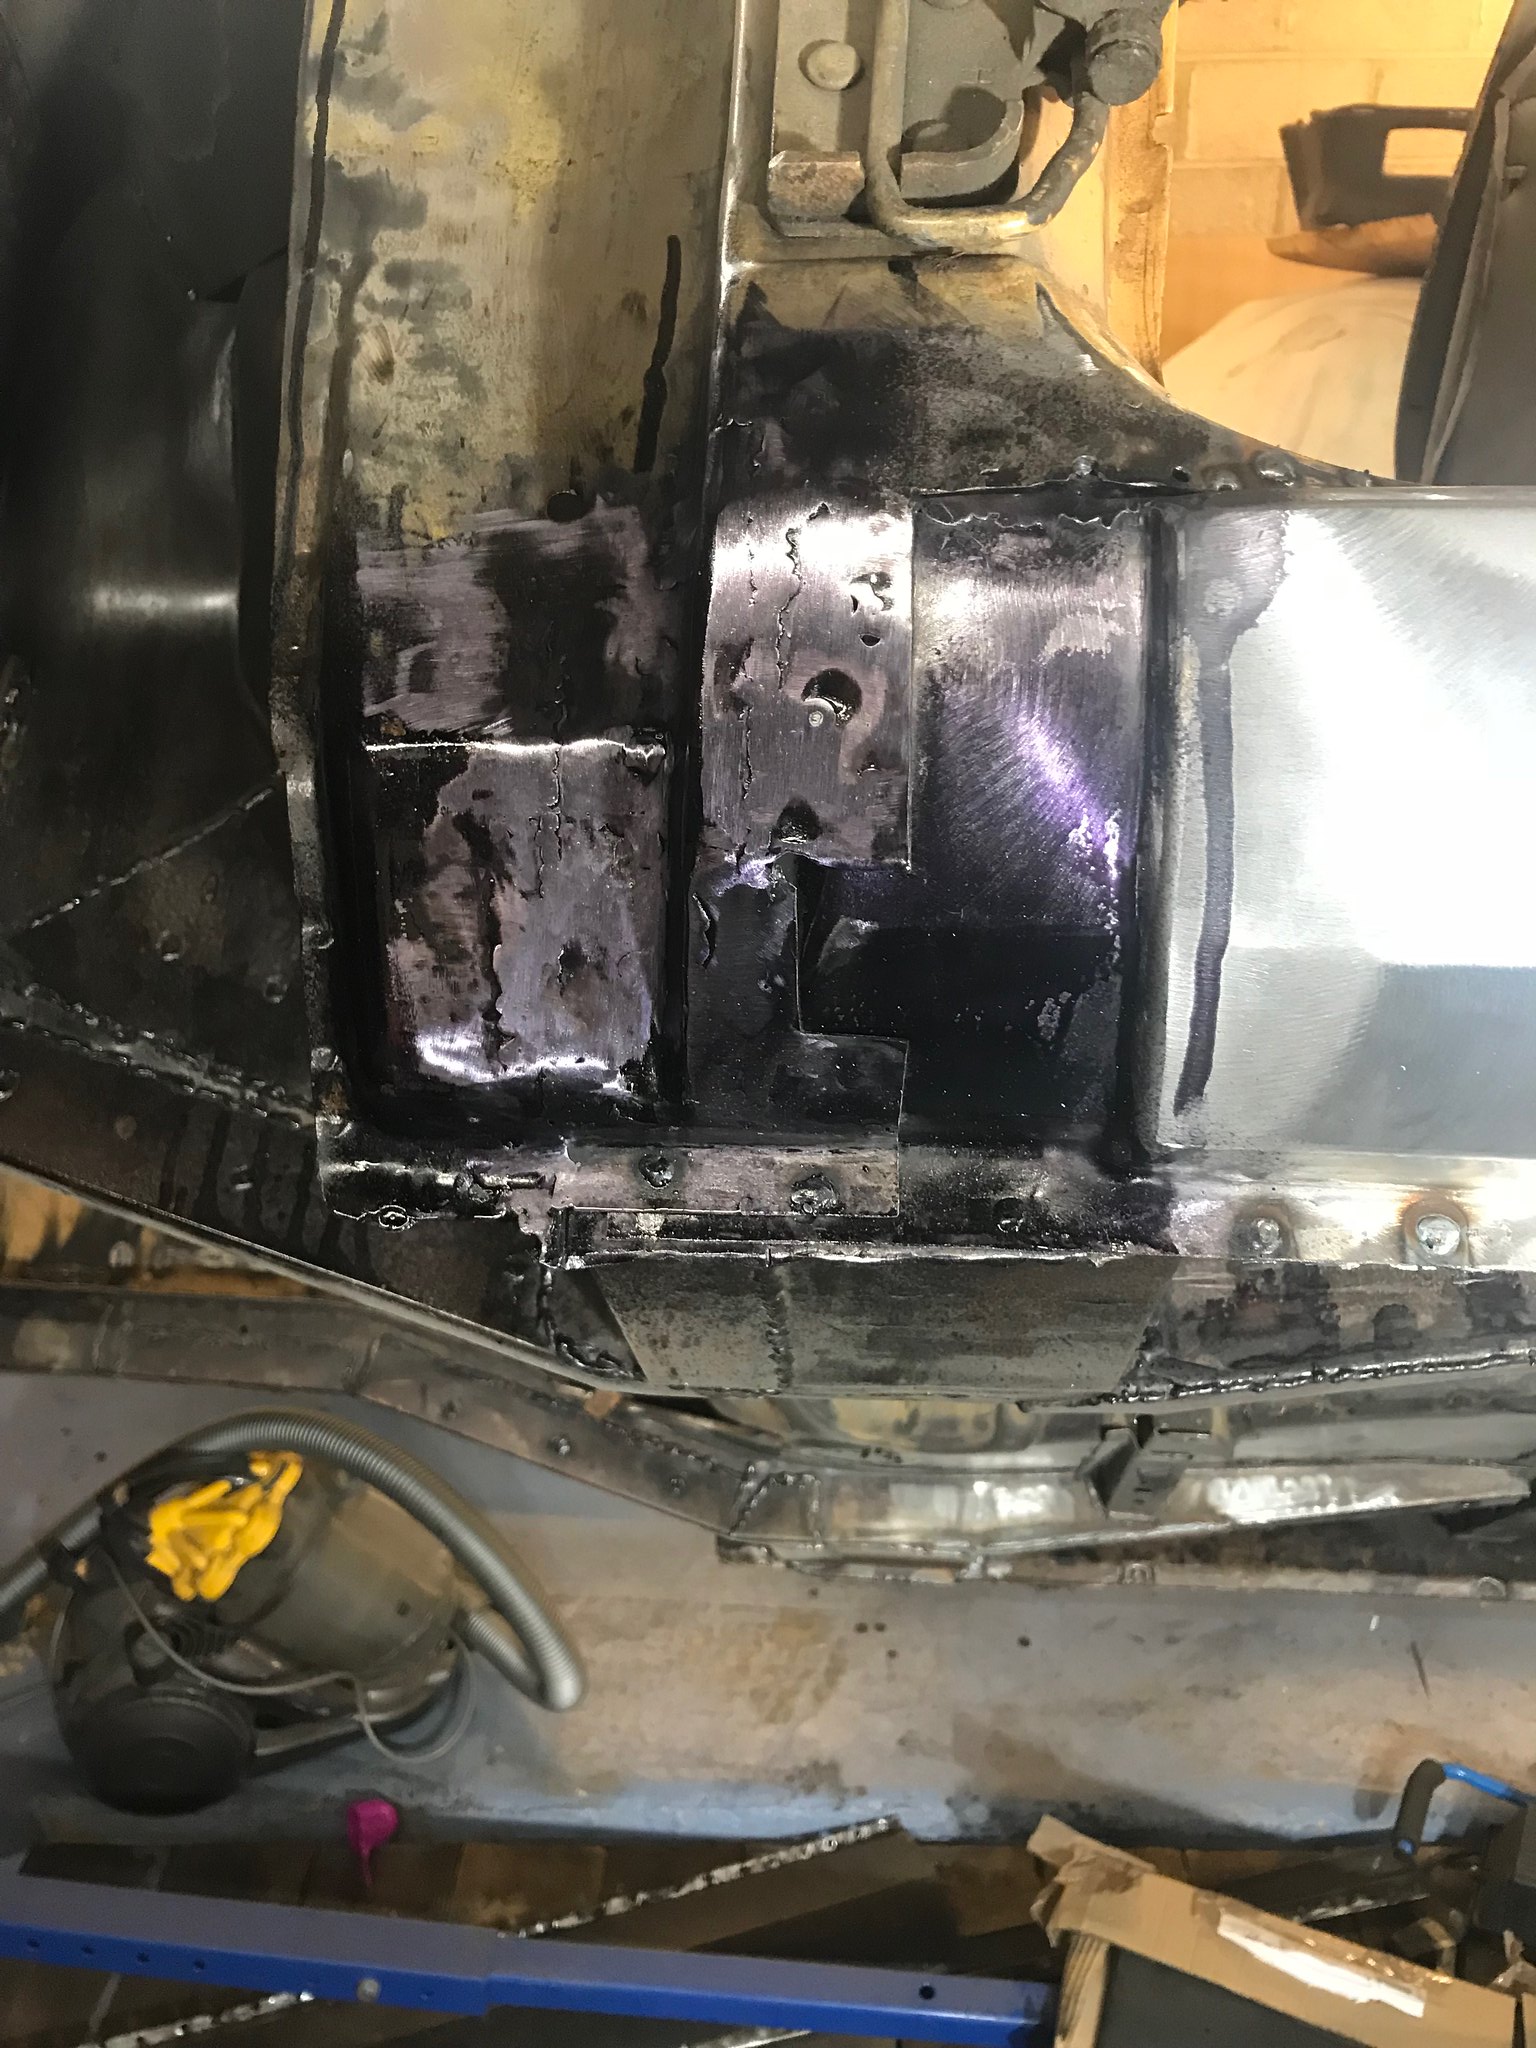 Untitled Untitled by Nevtiger, on Flickr And after more dressing, adding some weld, more dressing and some paint: 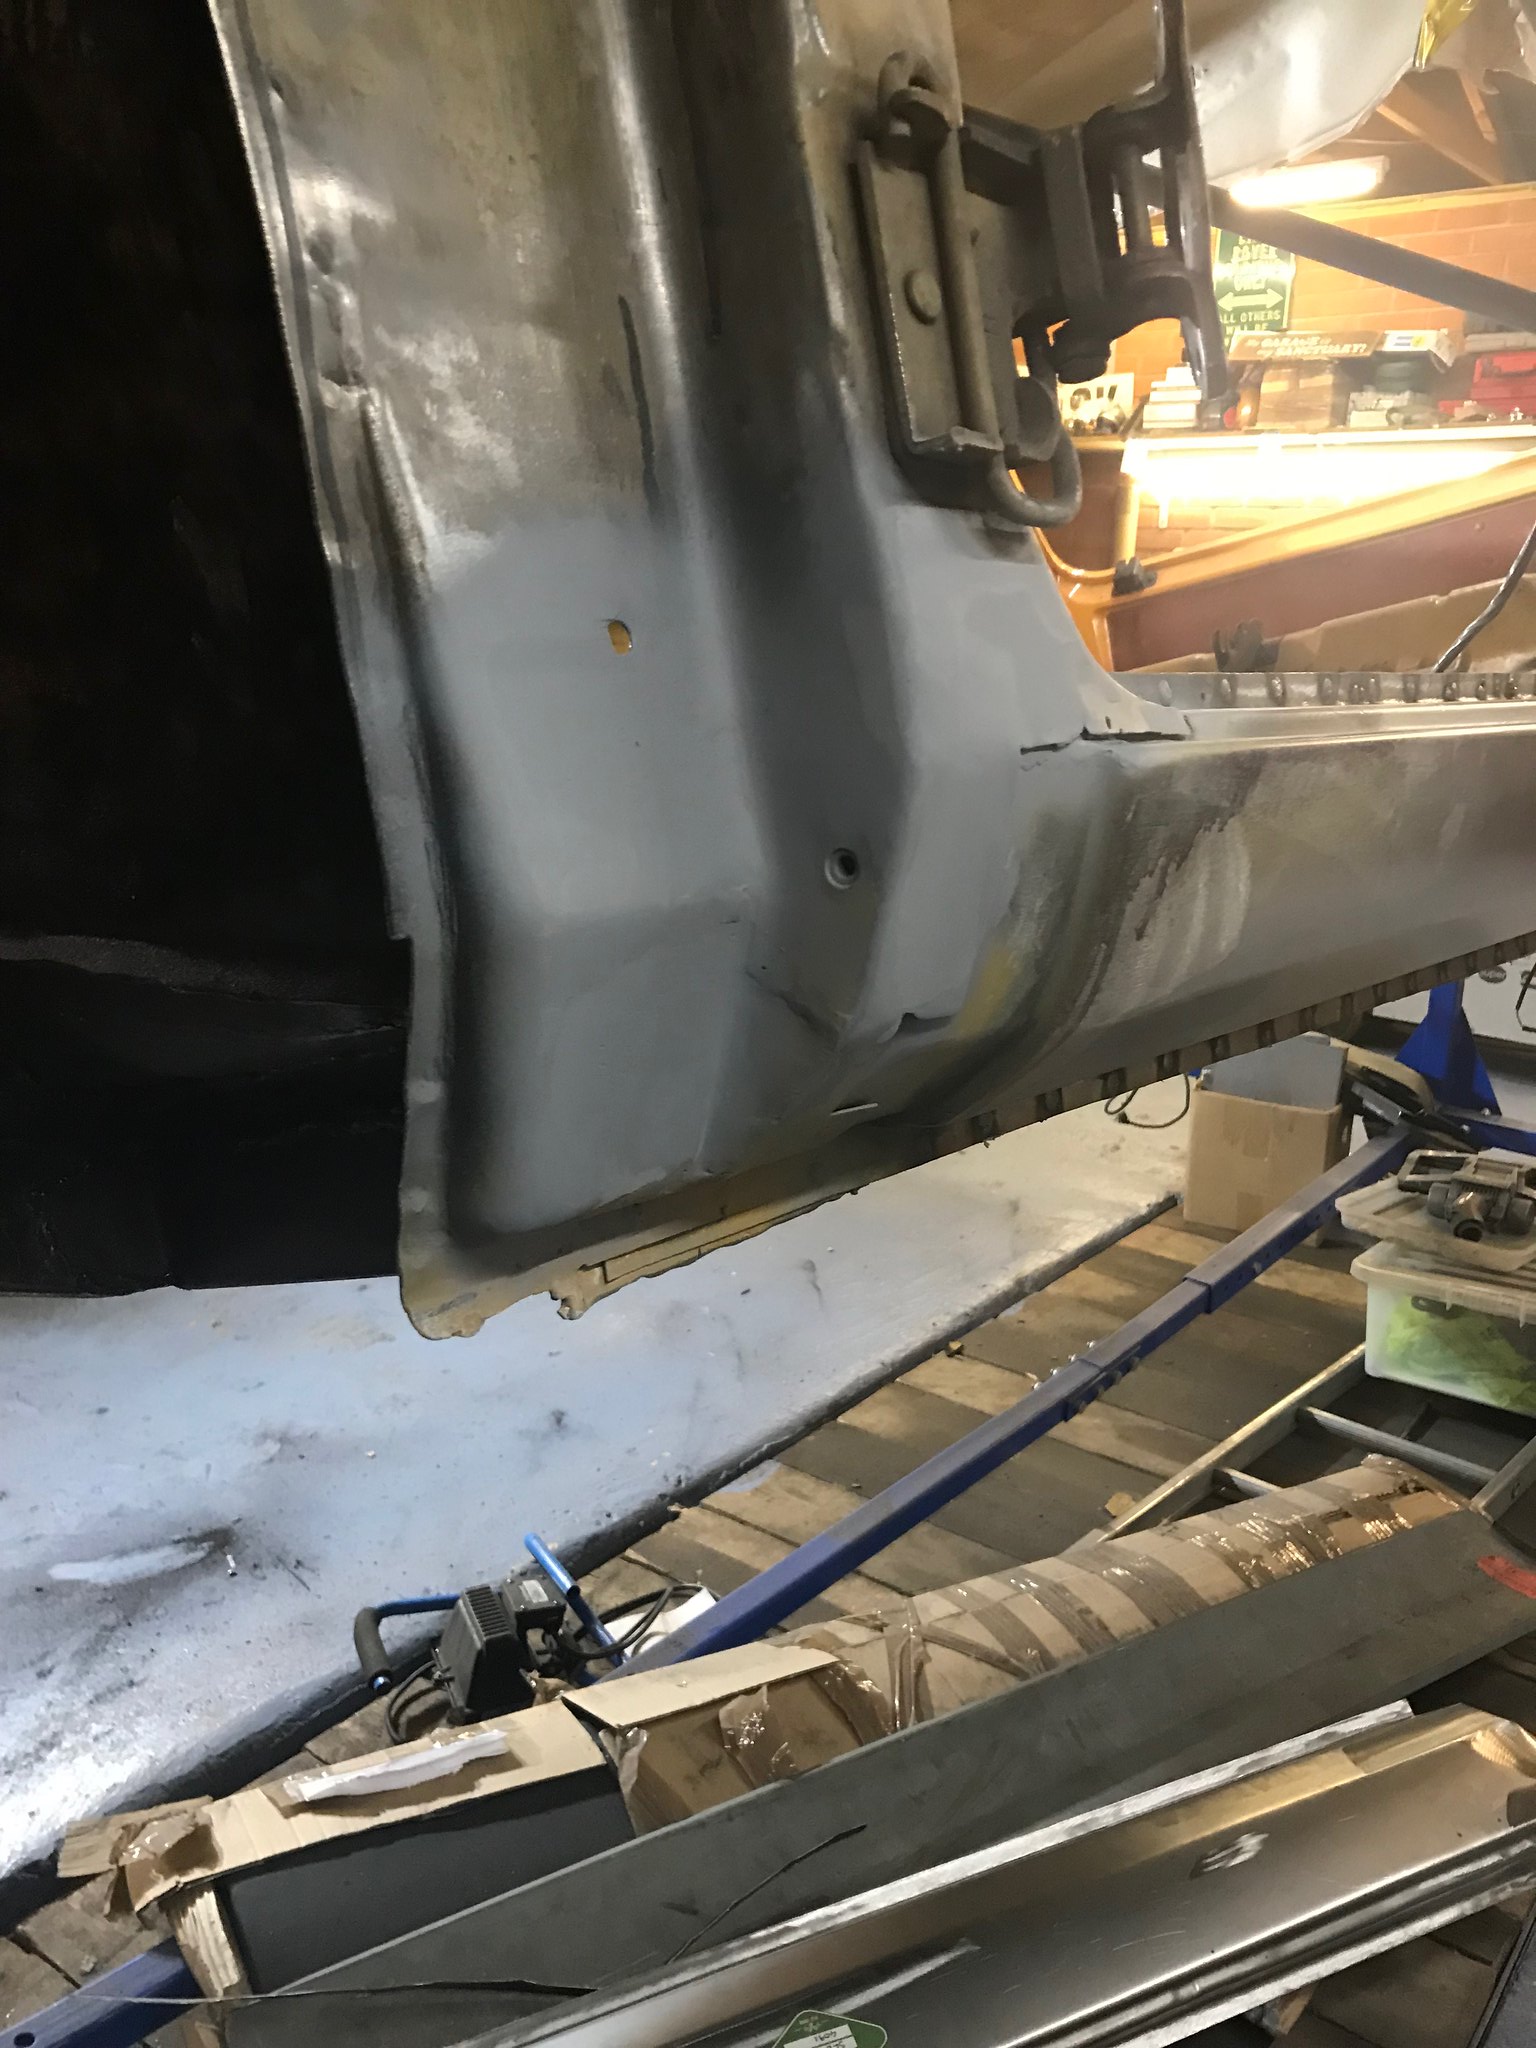 Untitled Untitled by Nevtiger, on Flickr And its all behind the wing and door! Then onto the B pillar and the rear panel closure. This is where it gets hard as i had cocked this bit up beyond all belief last time i tried it so i was very apprehensive. I knew it was not going to be perfect and would need some filler to tidy it up...... Stage 1 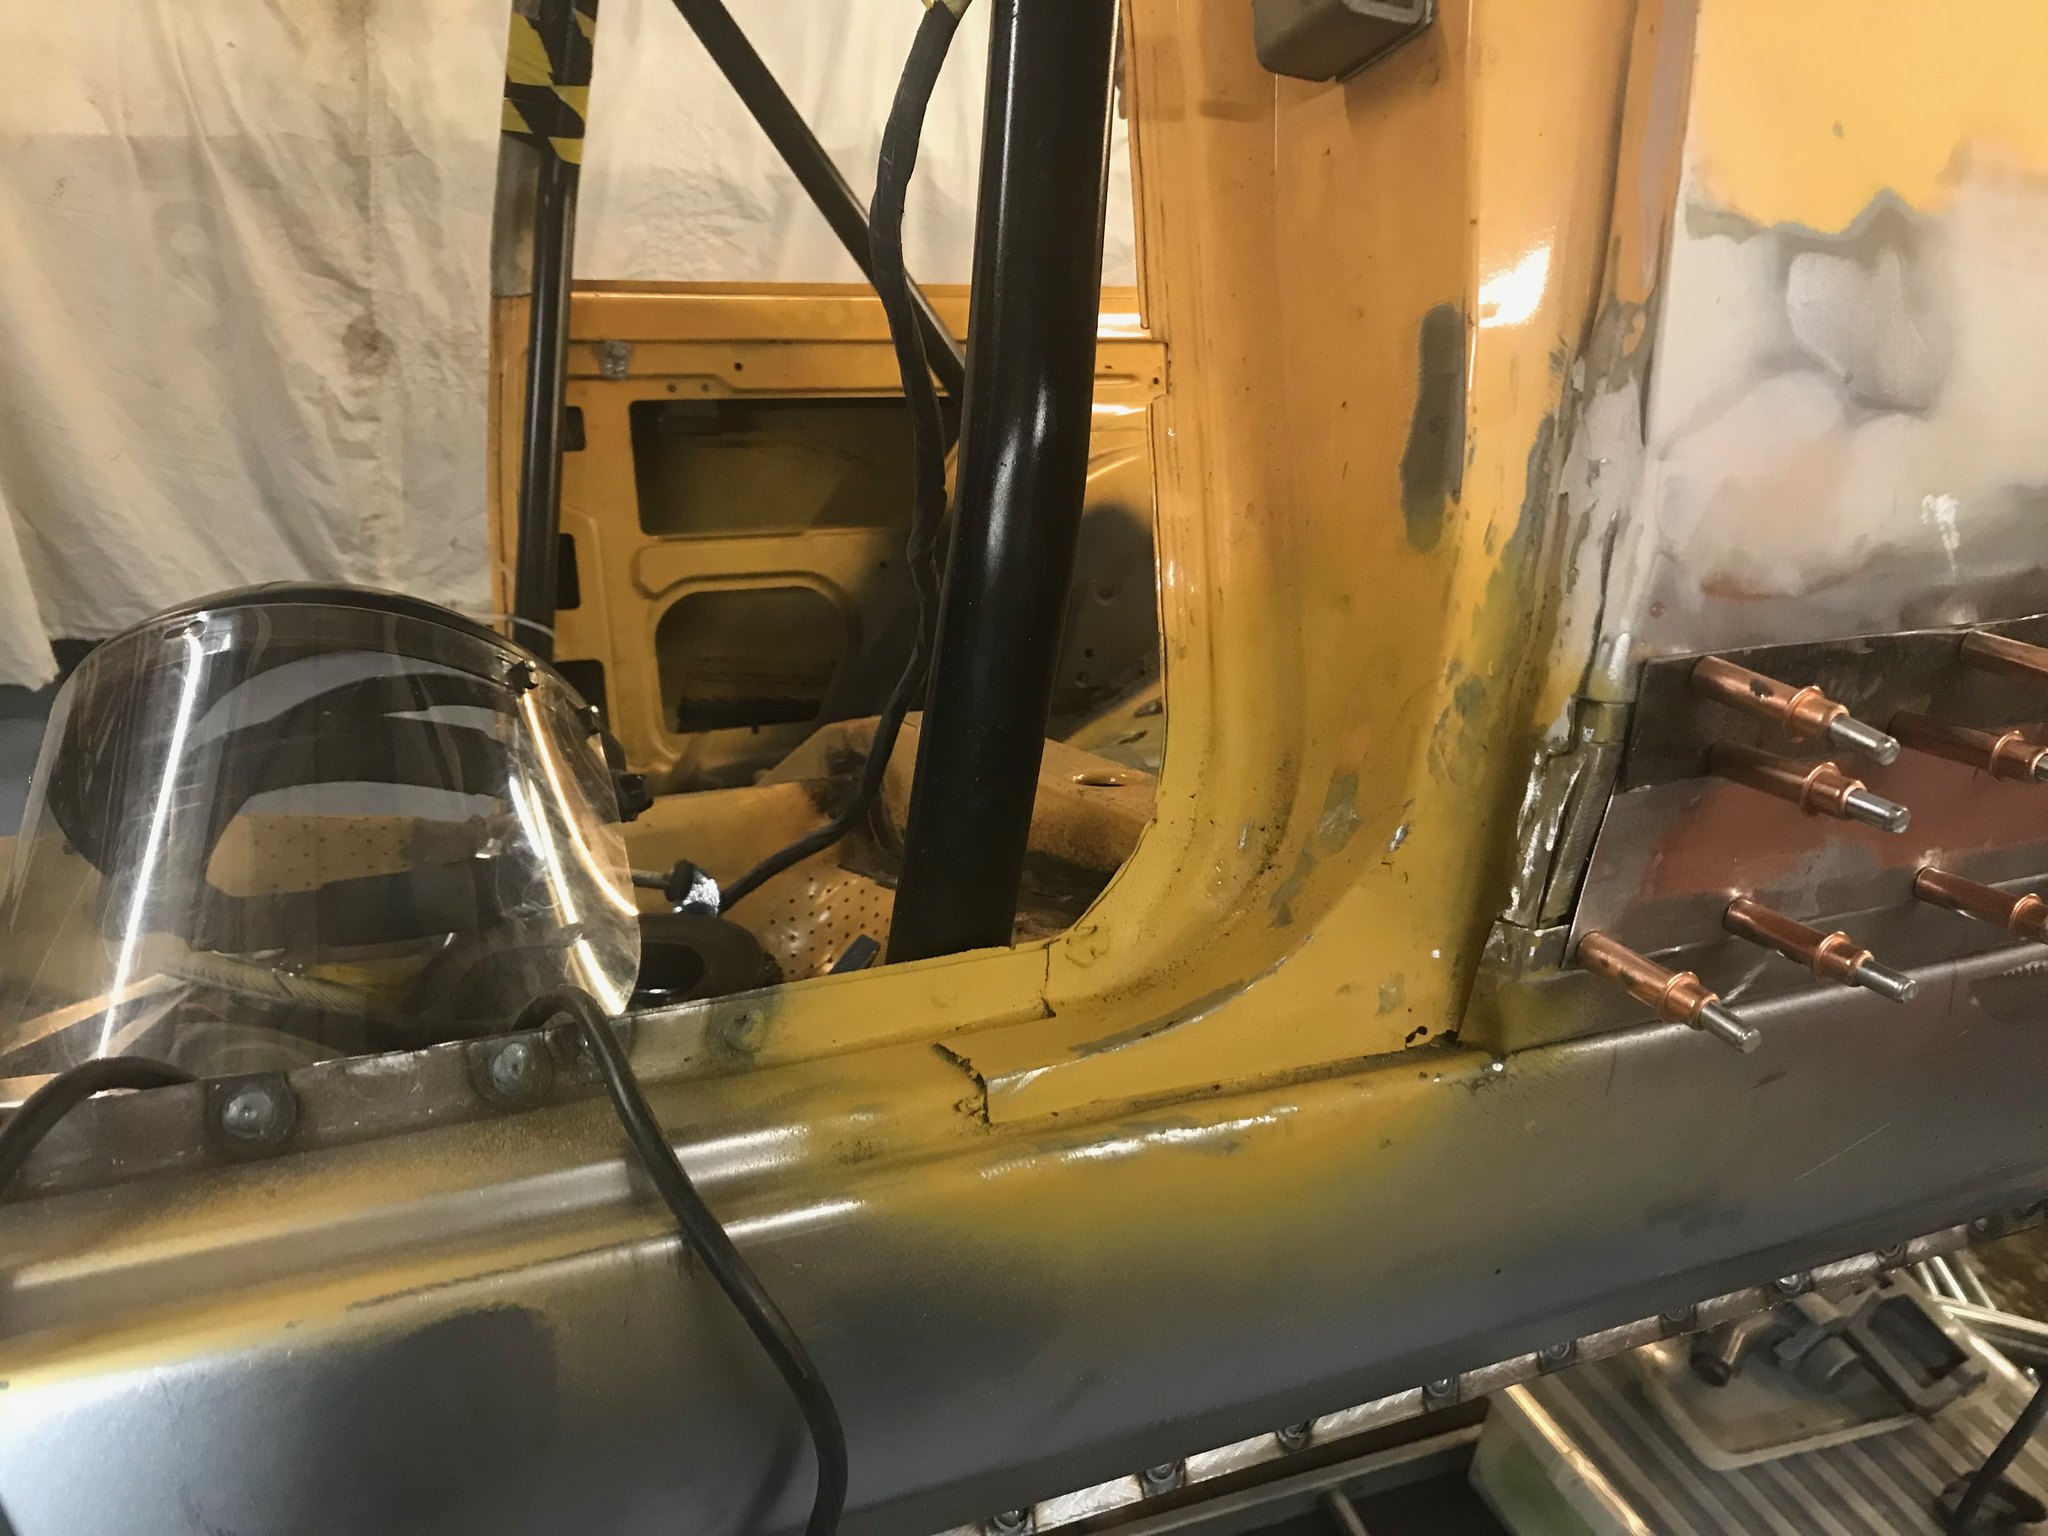 Untitled Untitled by Nevtiger, on Flickr Stage 2 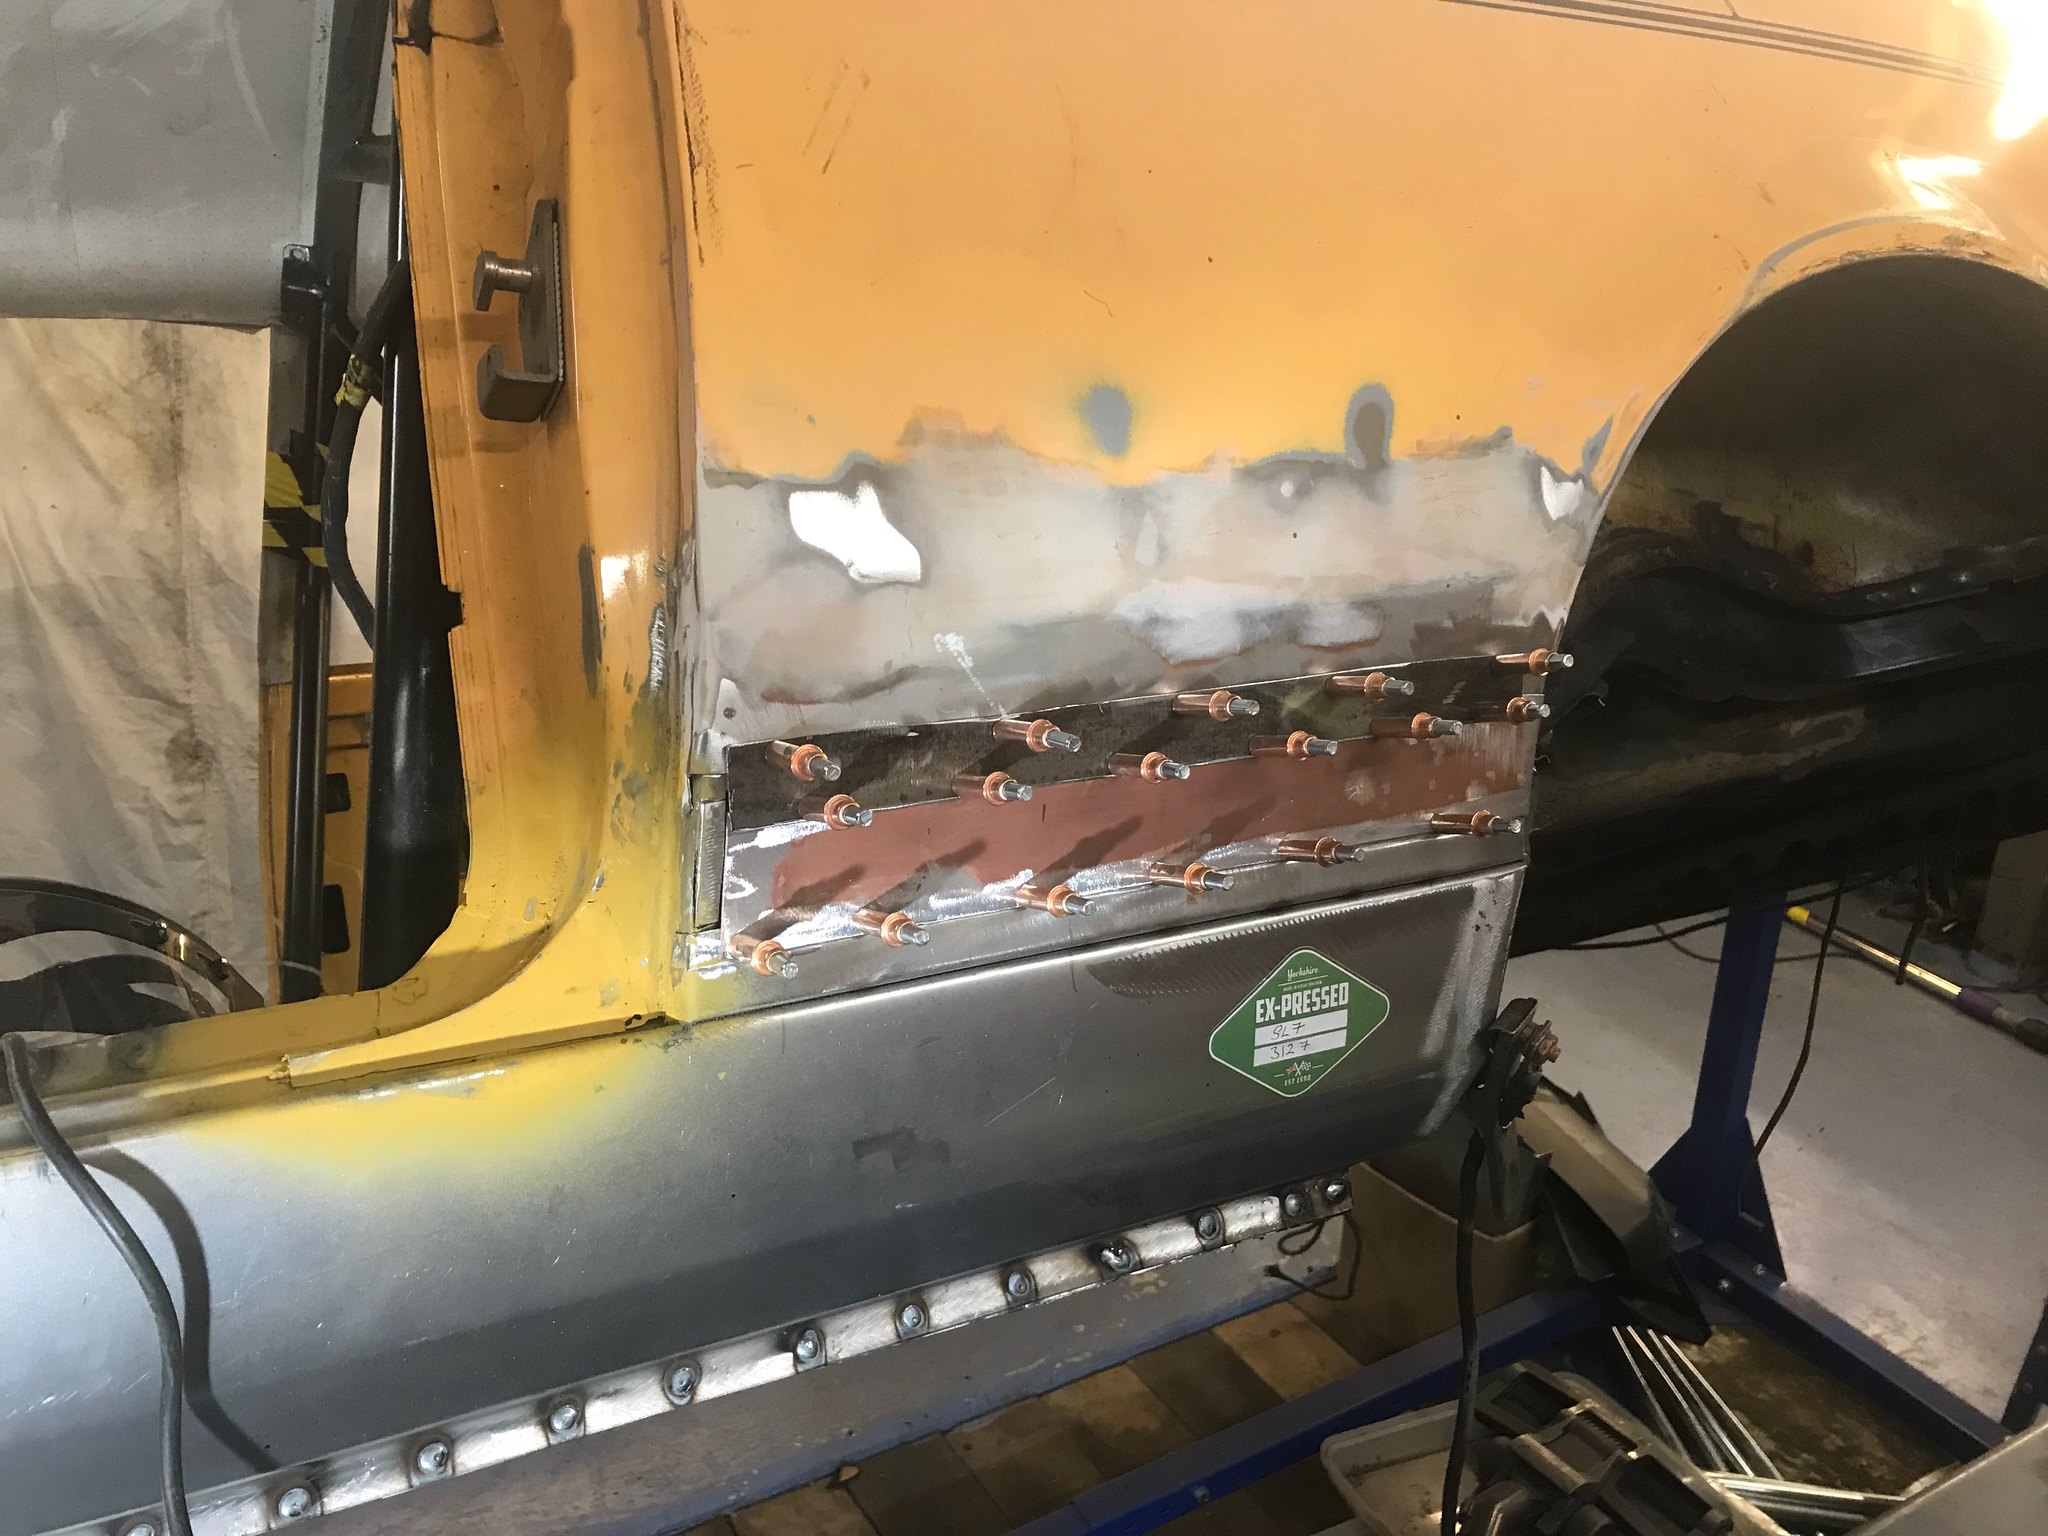 Untitled Untitled by Nevtiger, on Flickr Stage 3 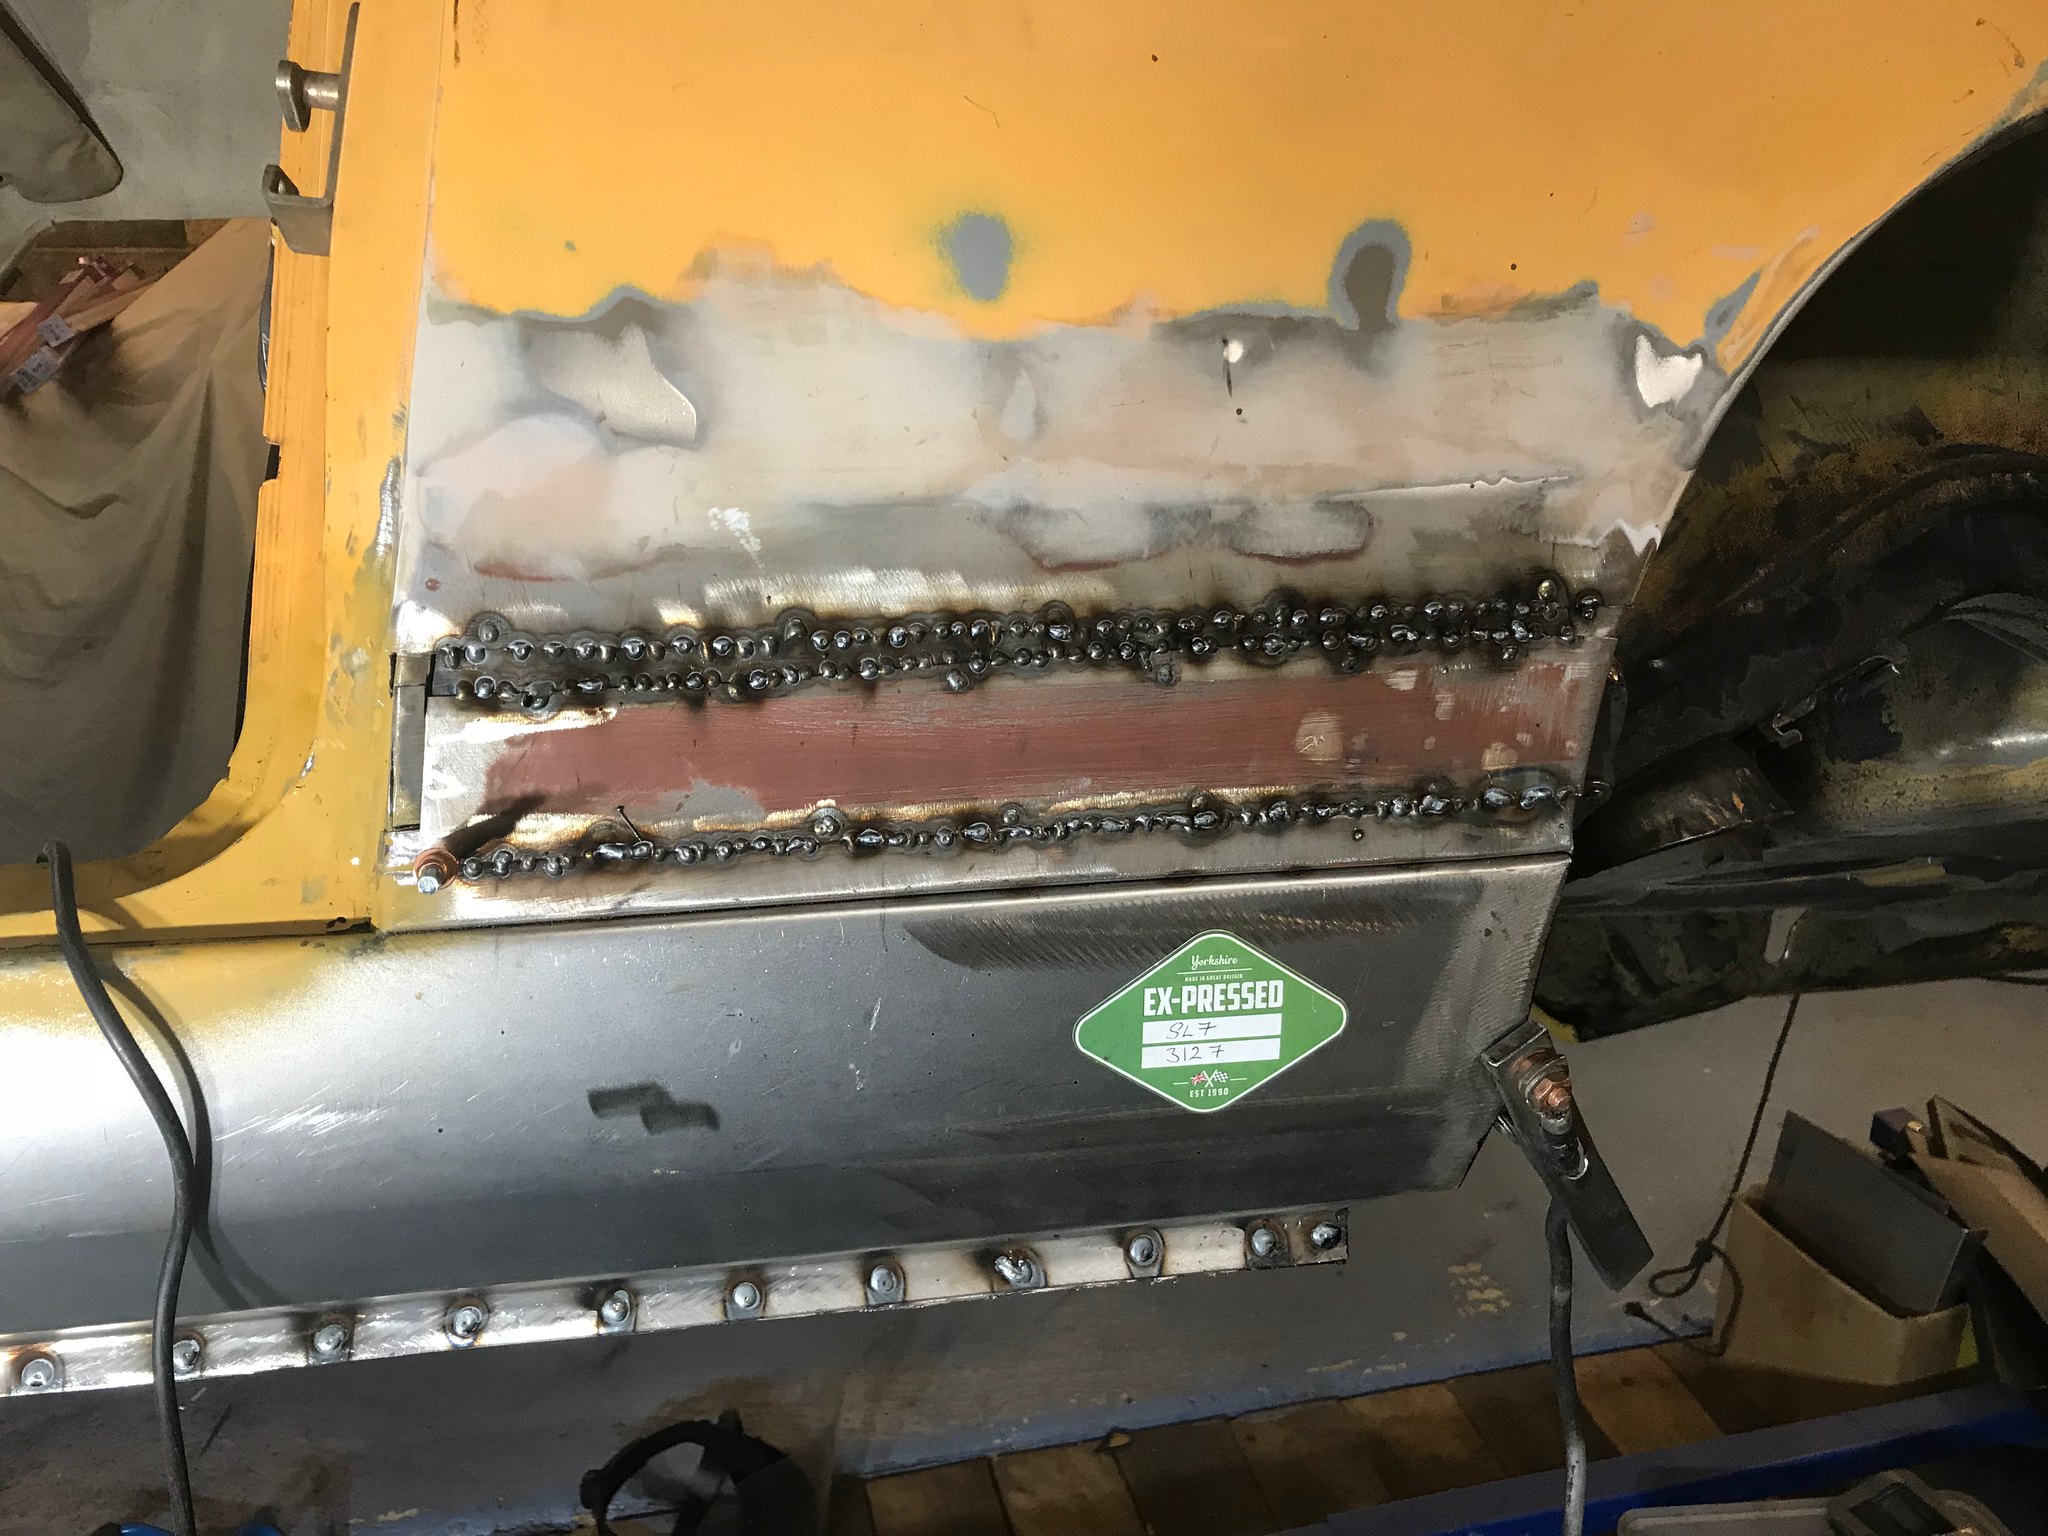 Untitled Untitled by Nevtiger, on Flickr Stage 5 (forgot to take a photo of 4) 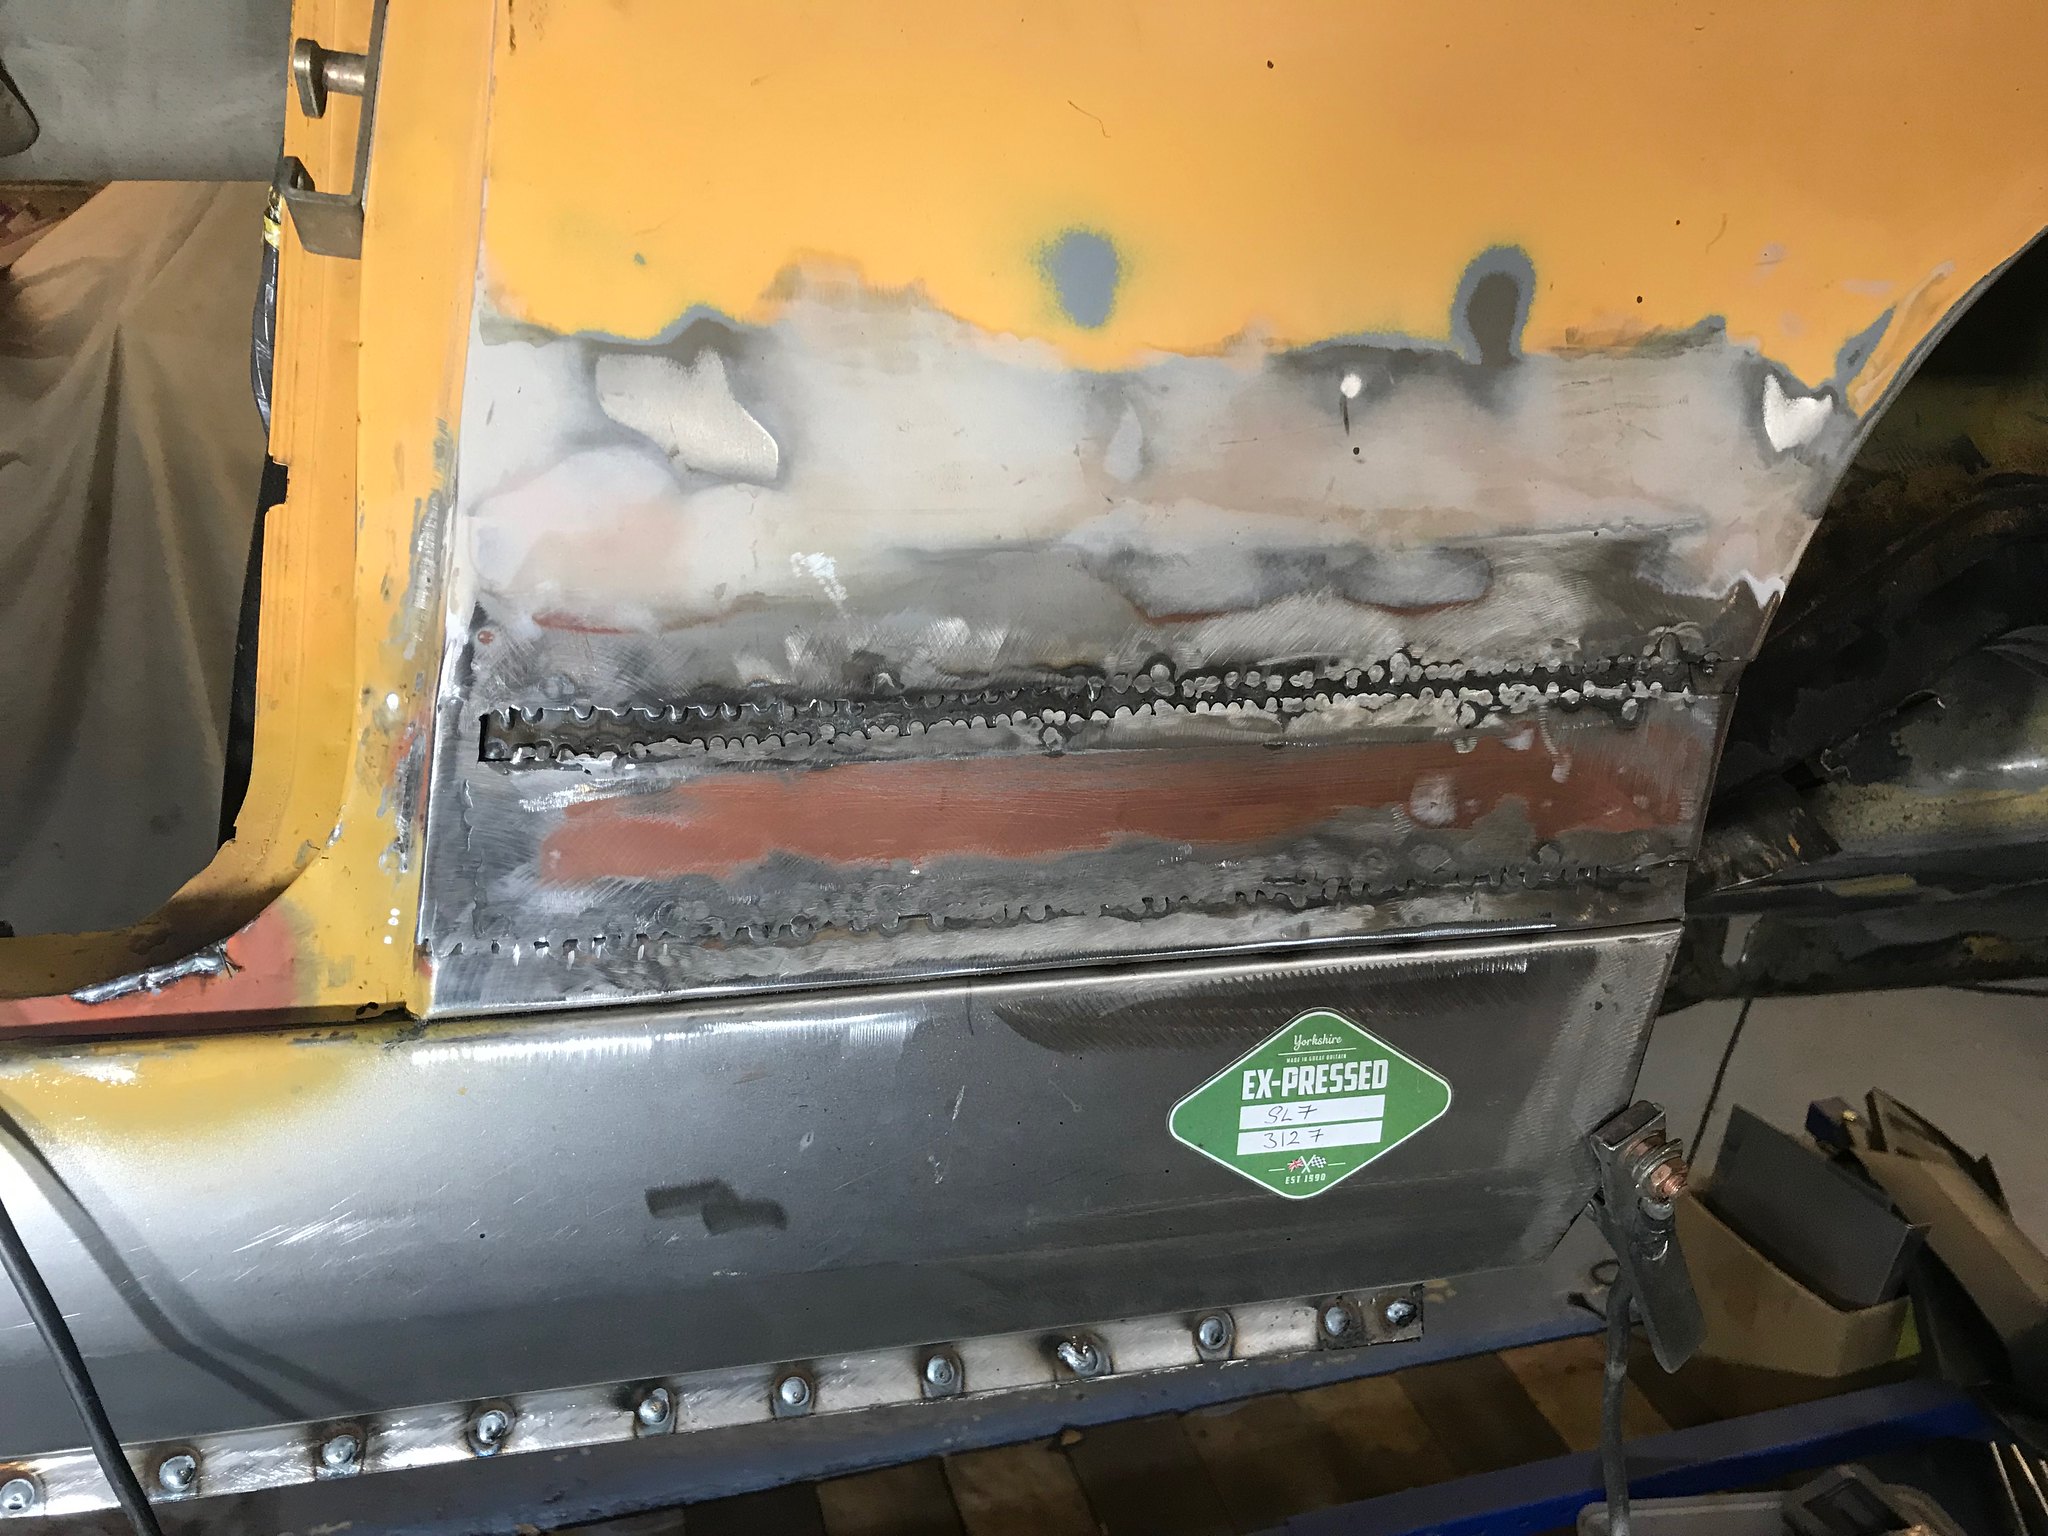 Untitled Untitled by Nevtiger, on Flickr 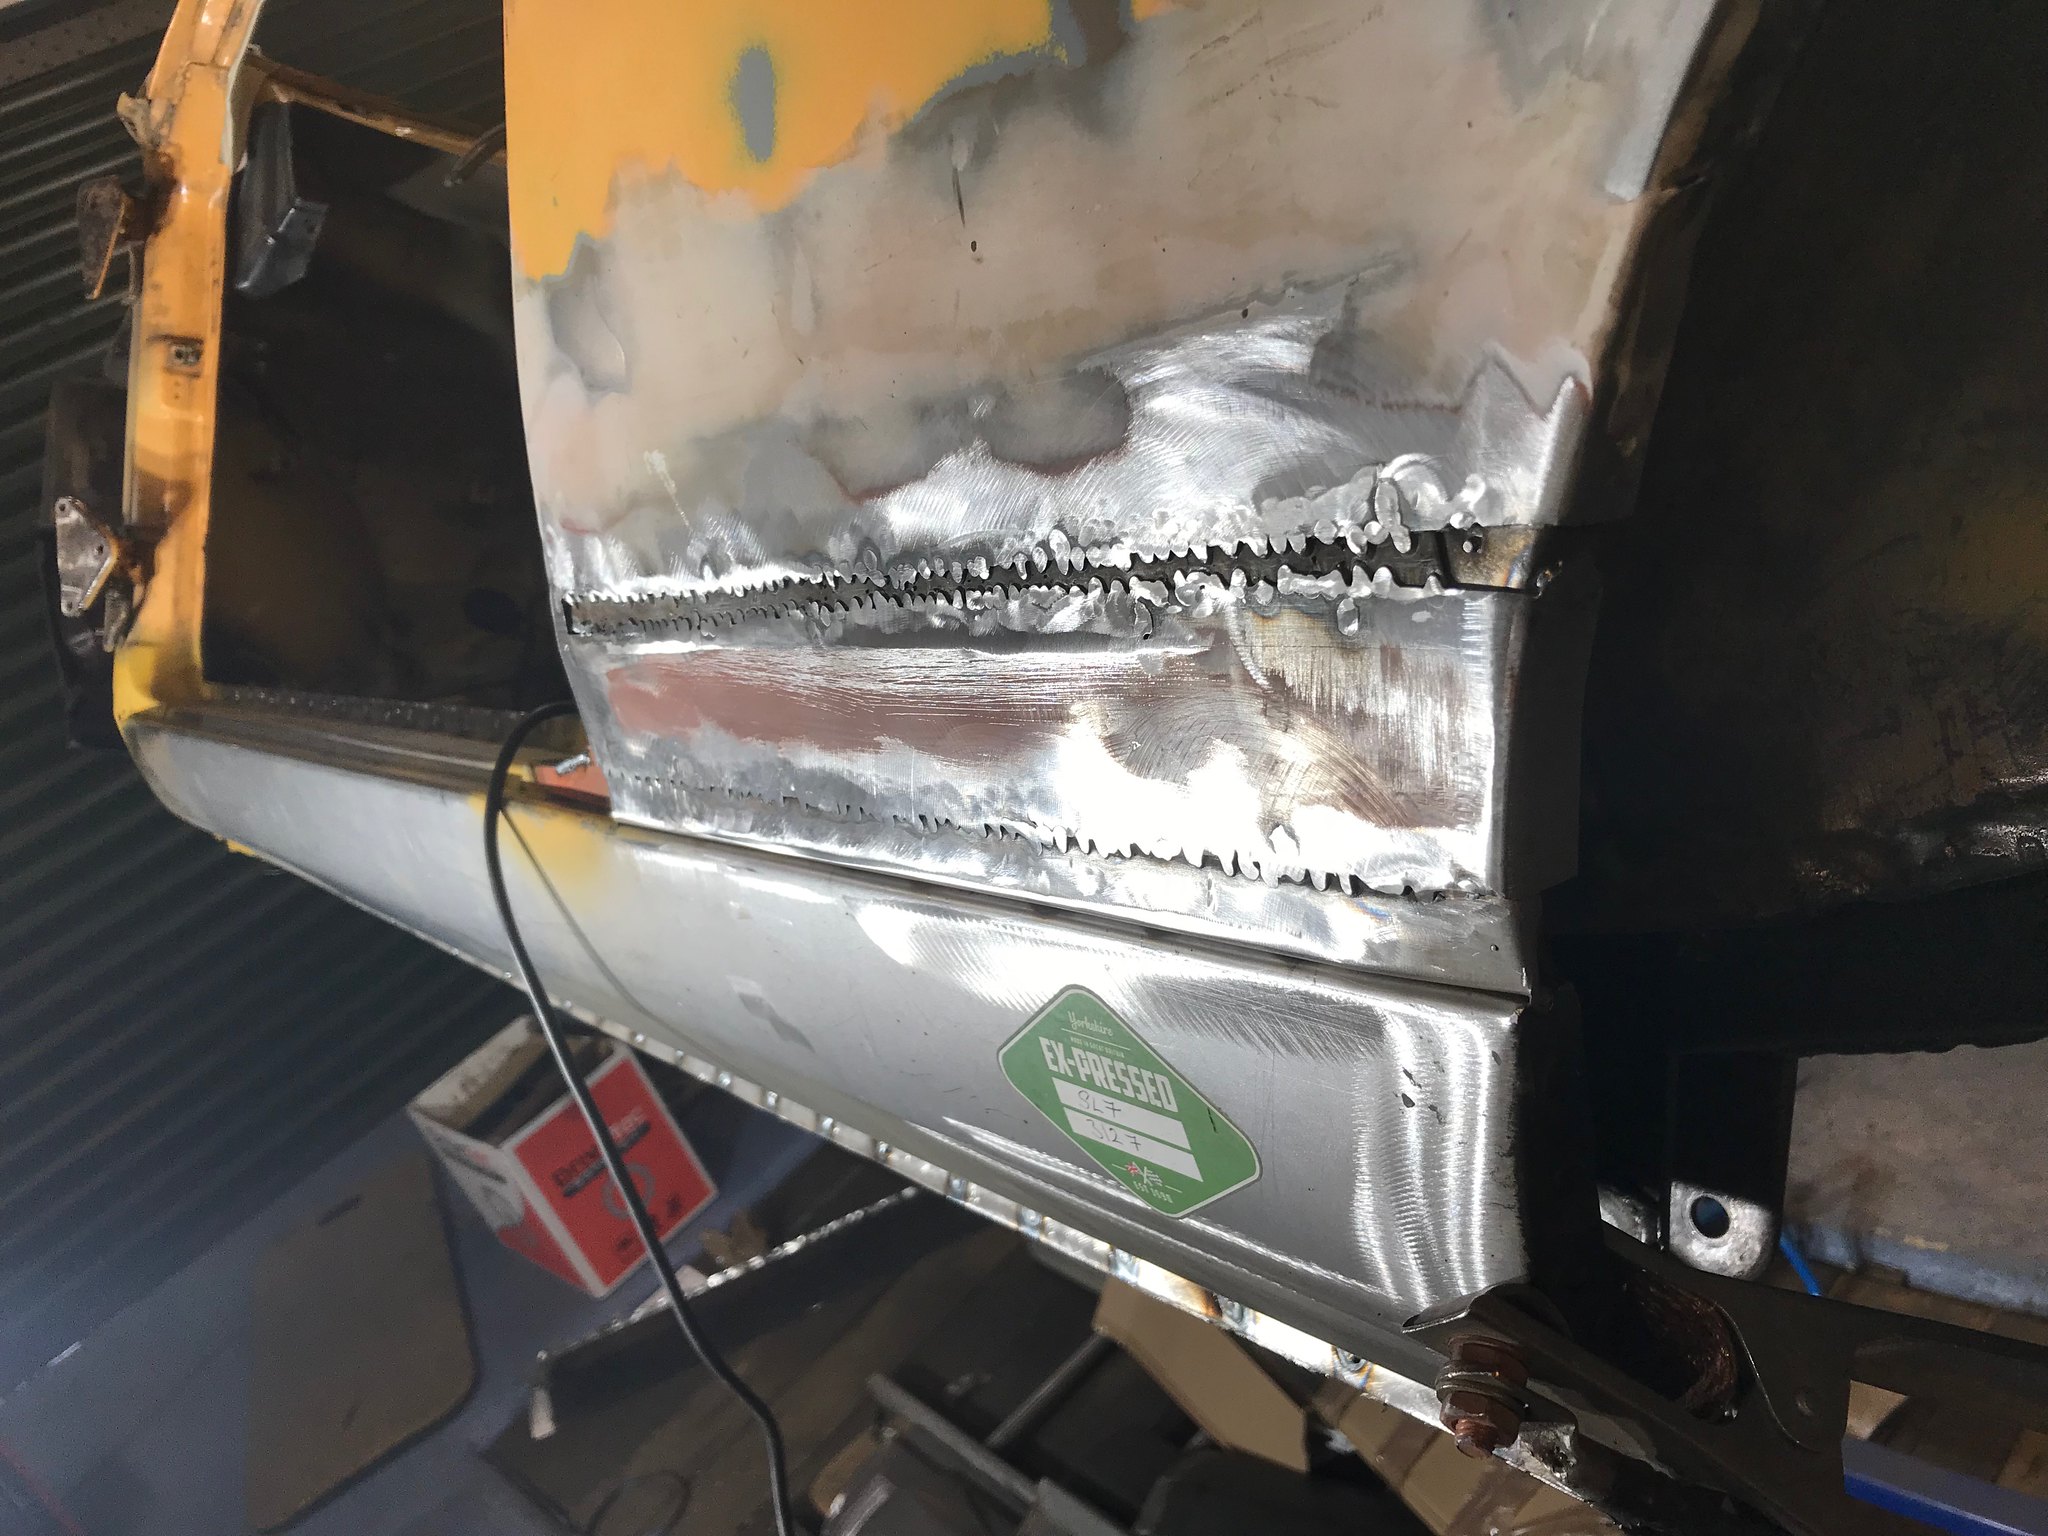 Untitled Untitled by Nevtiger, on Flickr Stage 6 - and thats as far as i got this side. Bit more profiling should see it finishedish. 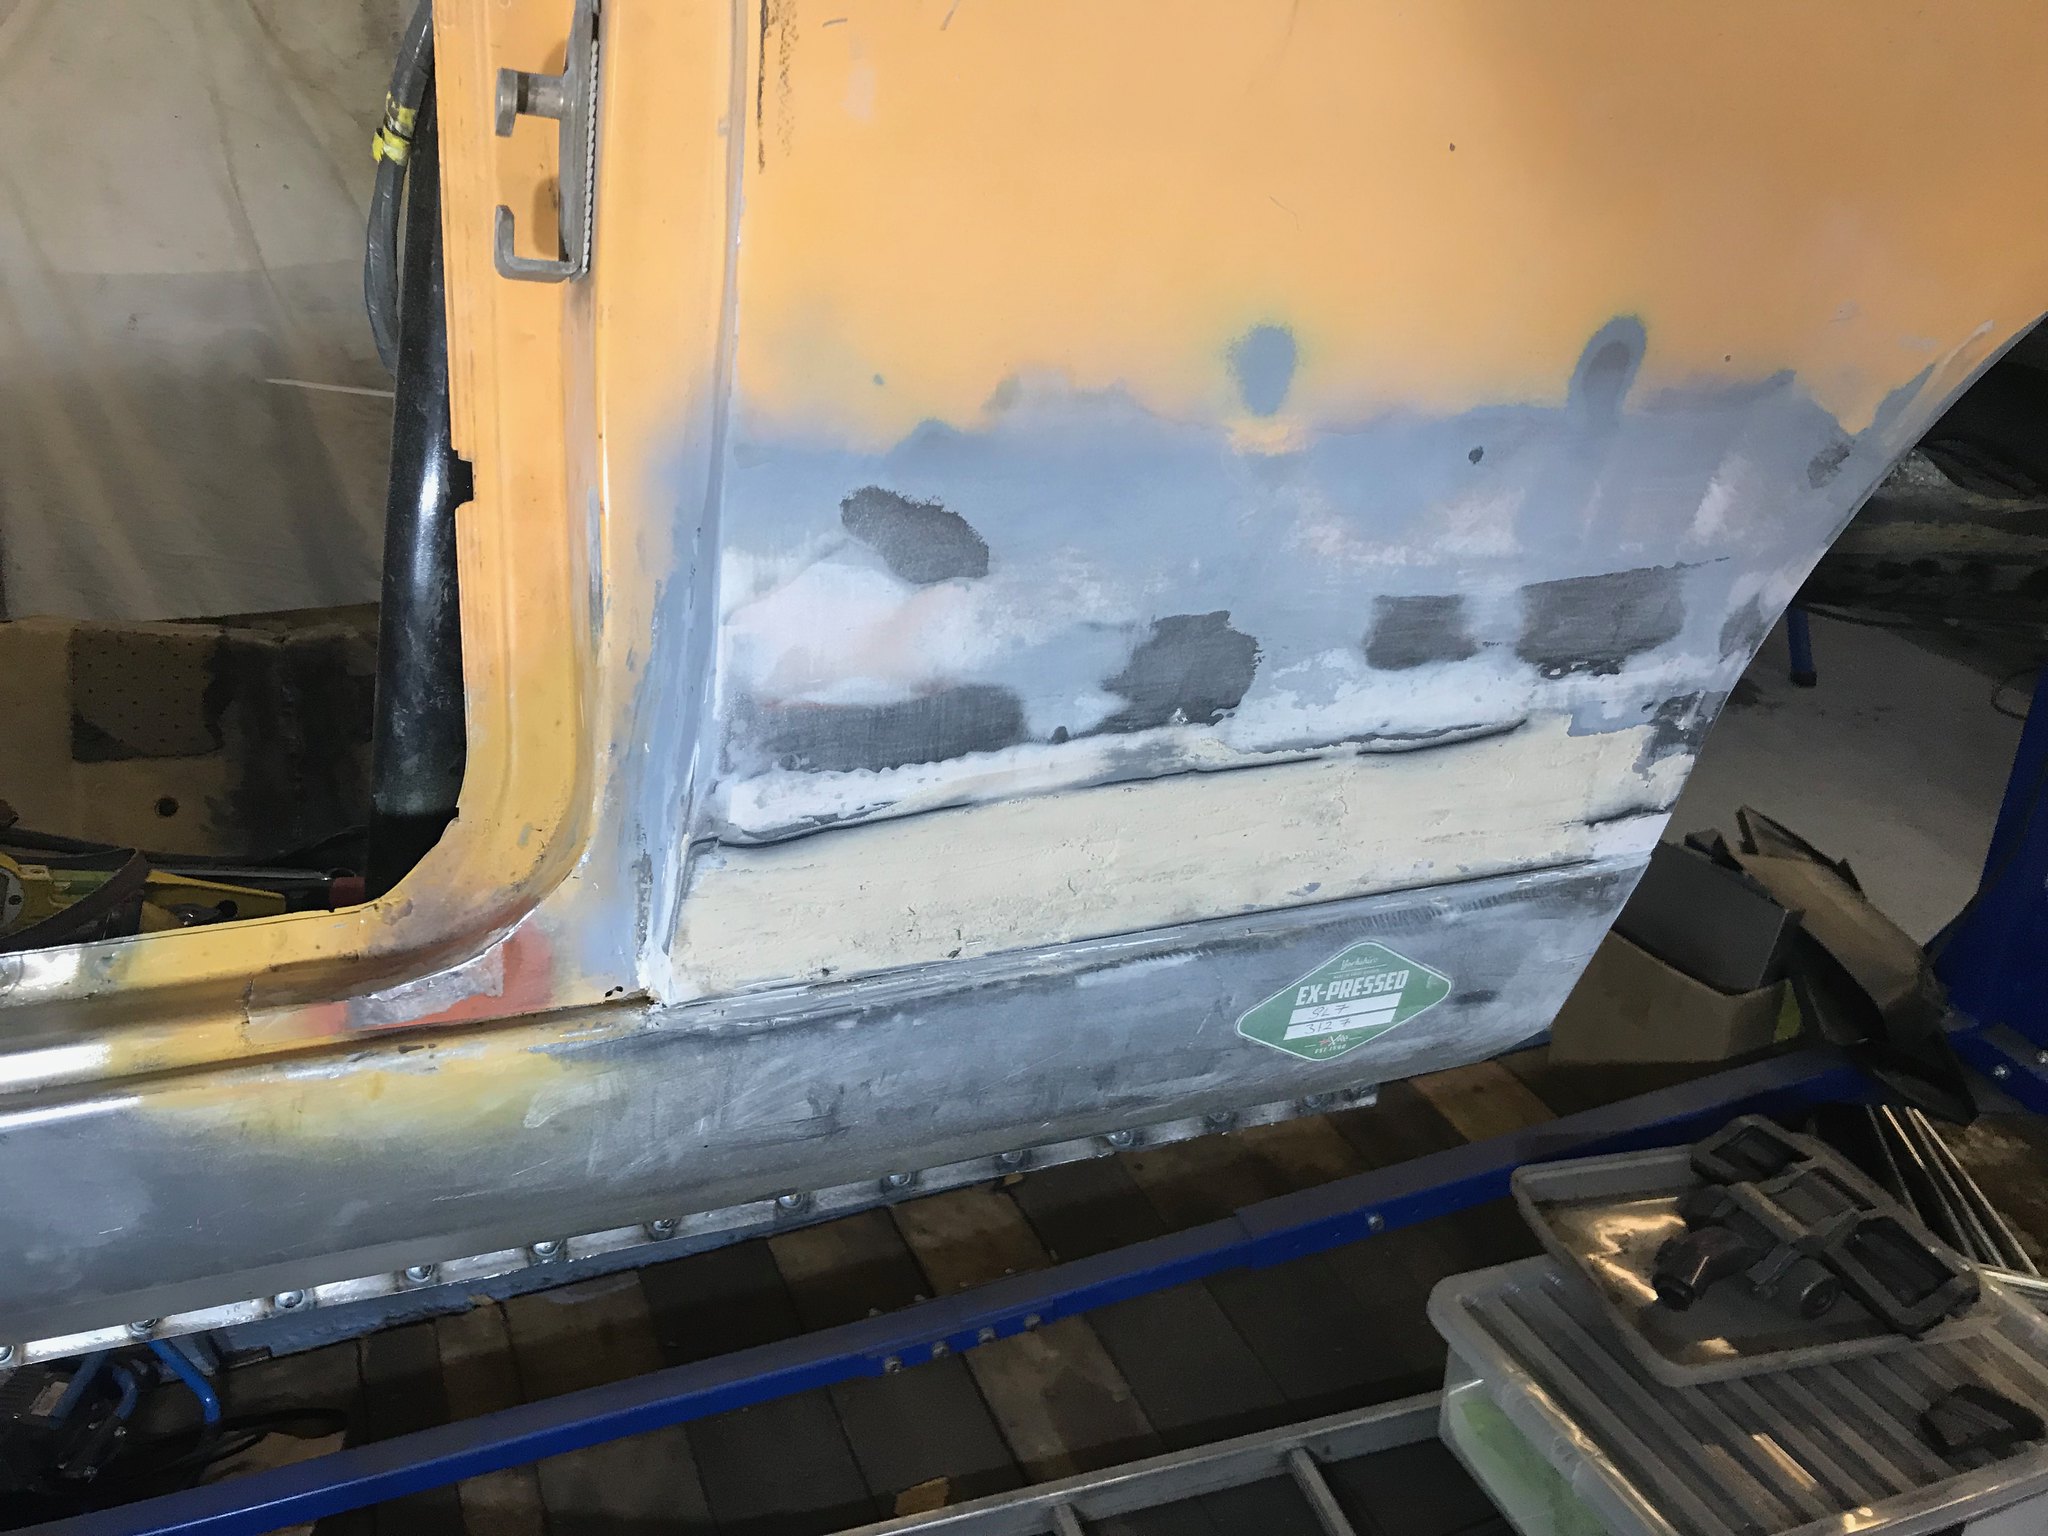 Untitled Untitled by Nevtiger, on Flickr I rolled the car the other way to look at the drivers side sill. I have another brand new Ex-Pressed Steel sill but upon reflection i think i will just repair this as the rest of the sill is sound and the front end i have already repaired. 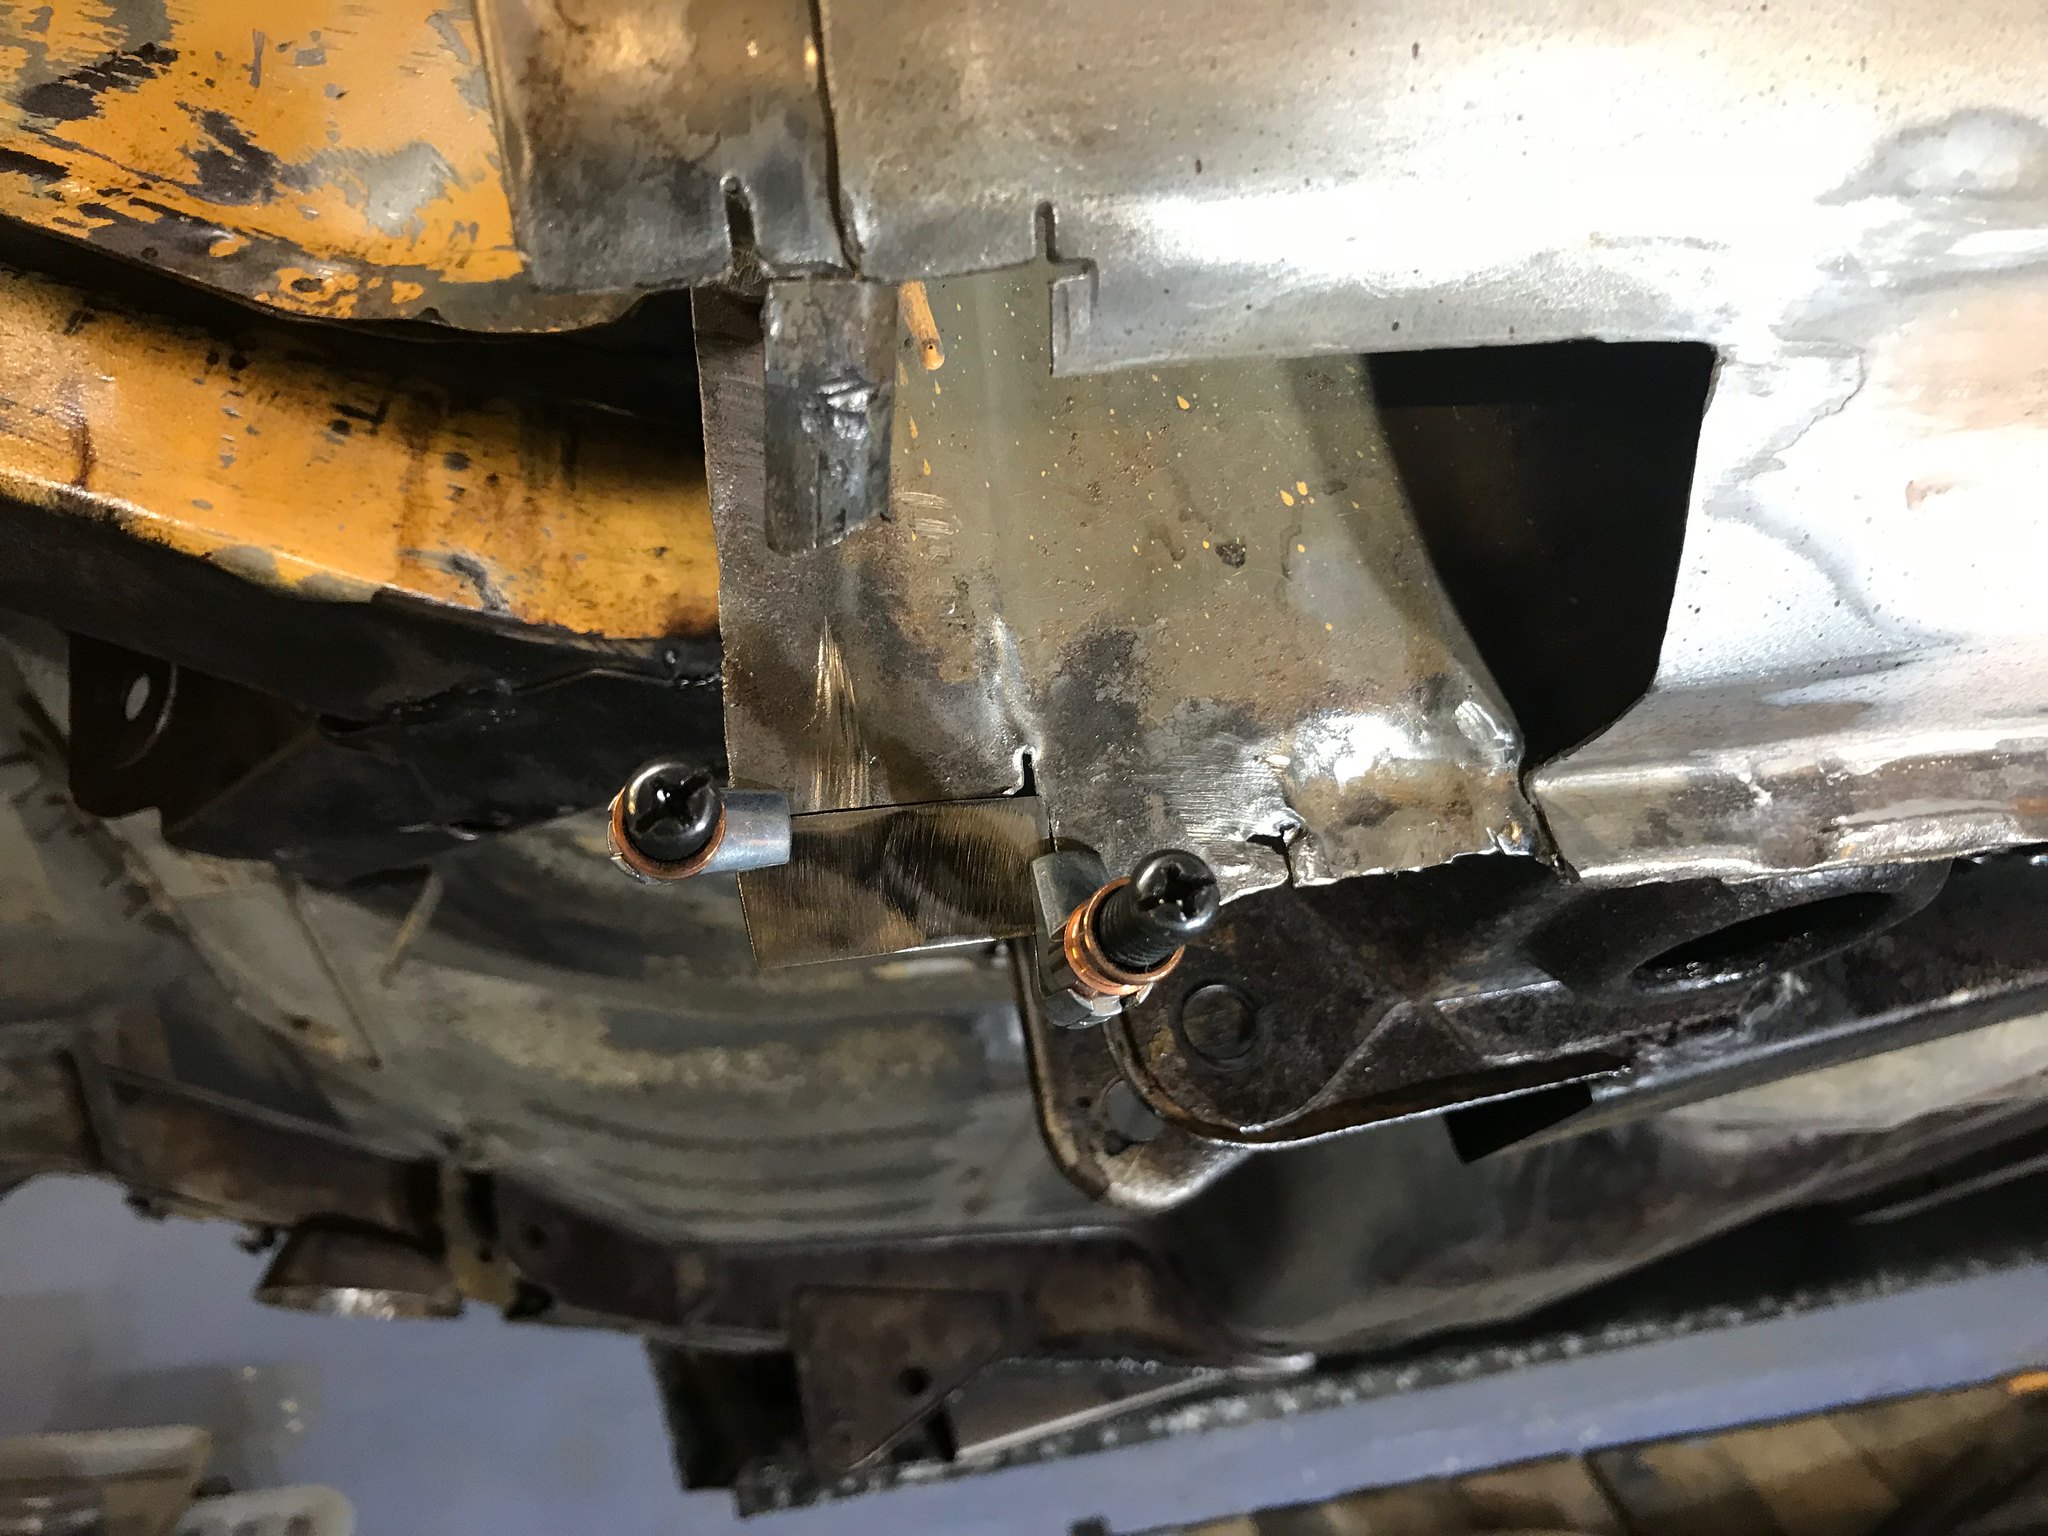 Untitled Untitled by Nevtiger, on Flickr |
| |
|
|
|
|
|
Jan 26, 2018 11:18:04 GMT
|
I finished off the little bit of the inner sill that needed attending to:  Untitled Untitled by Nevtiger, on Flickr 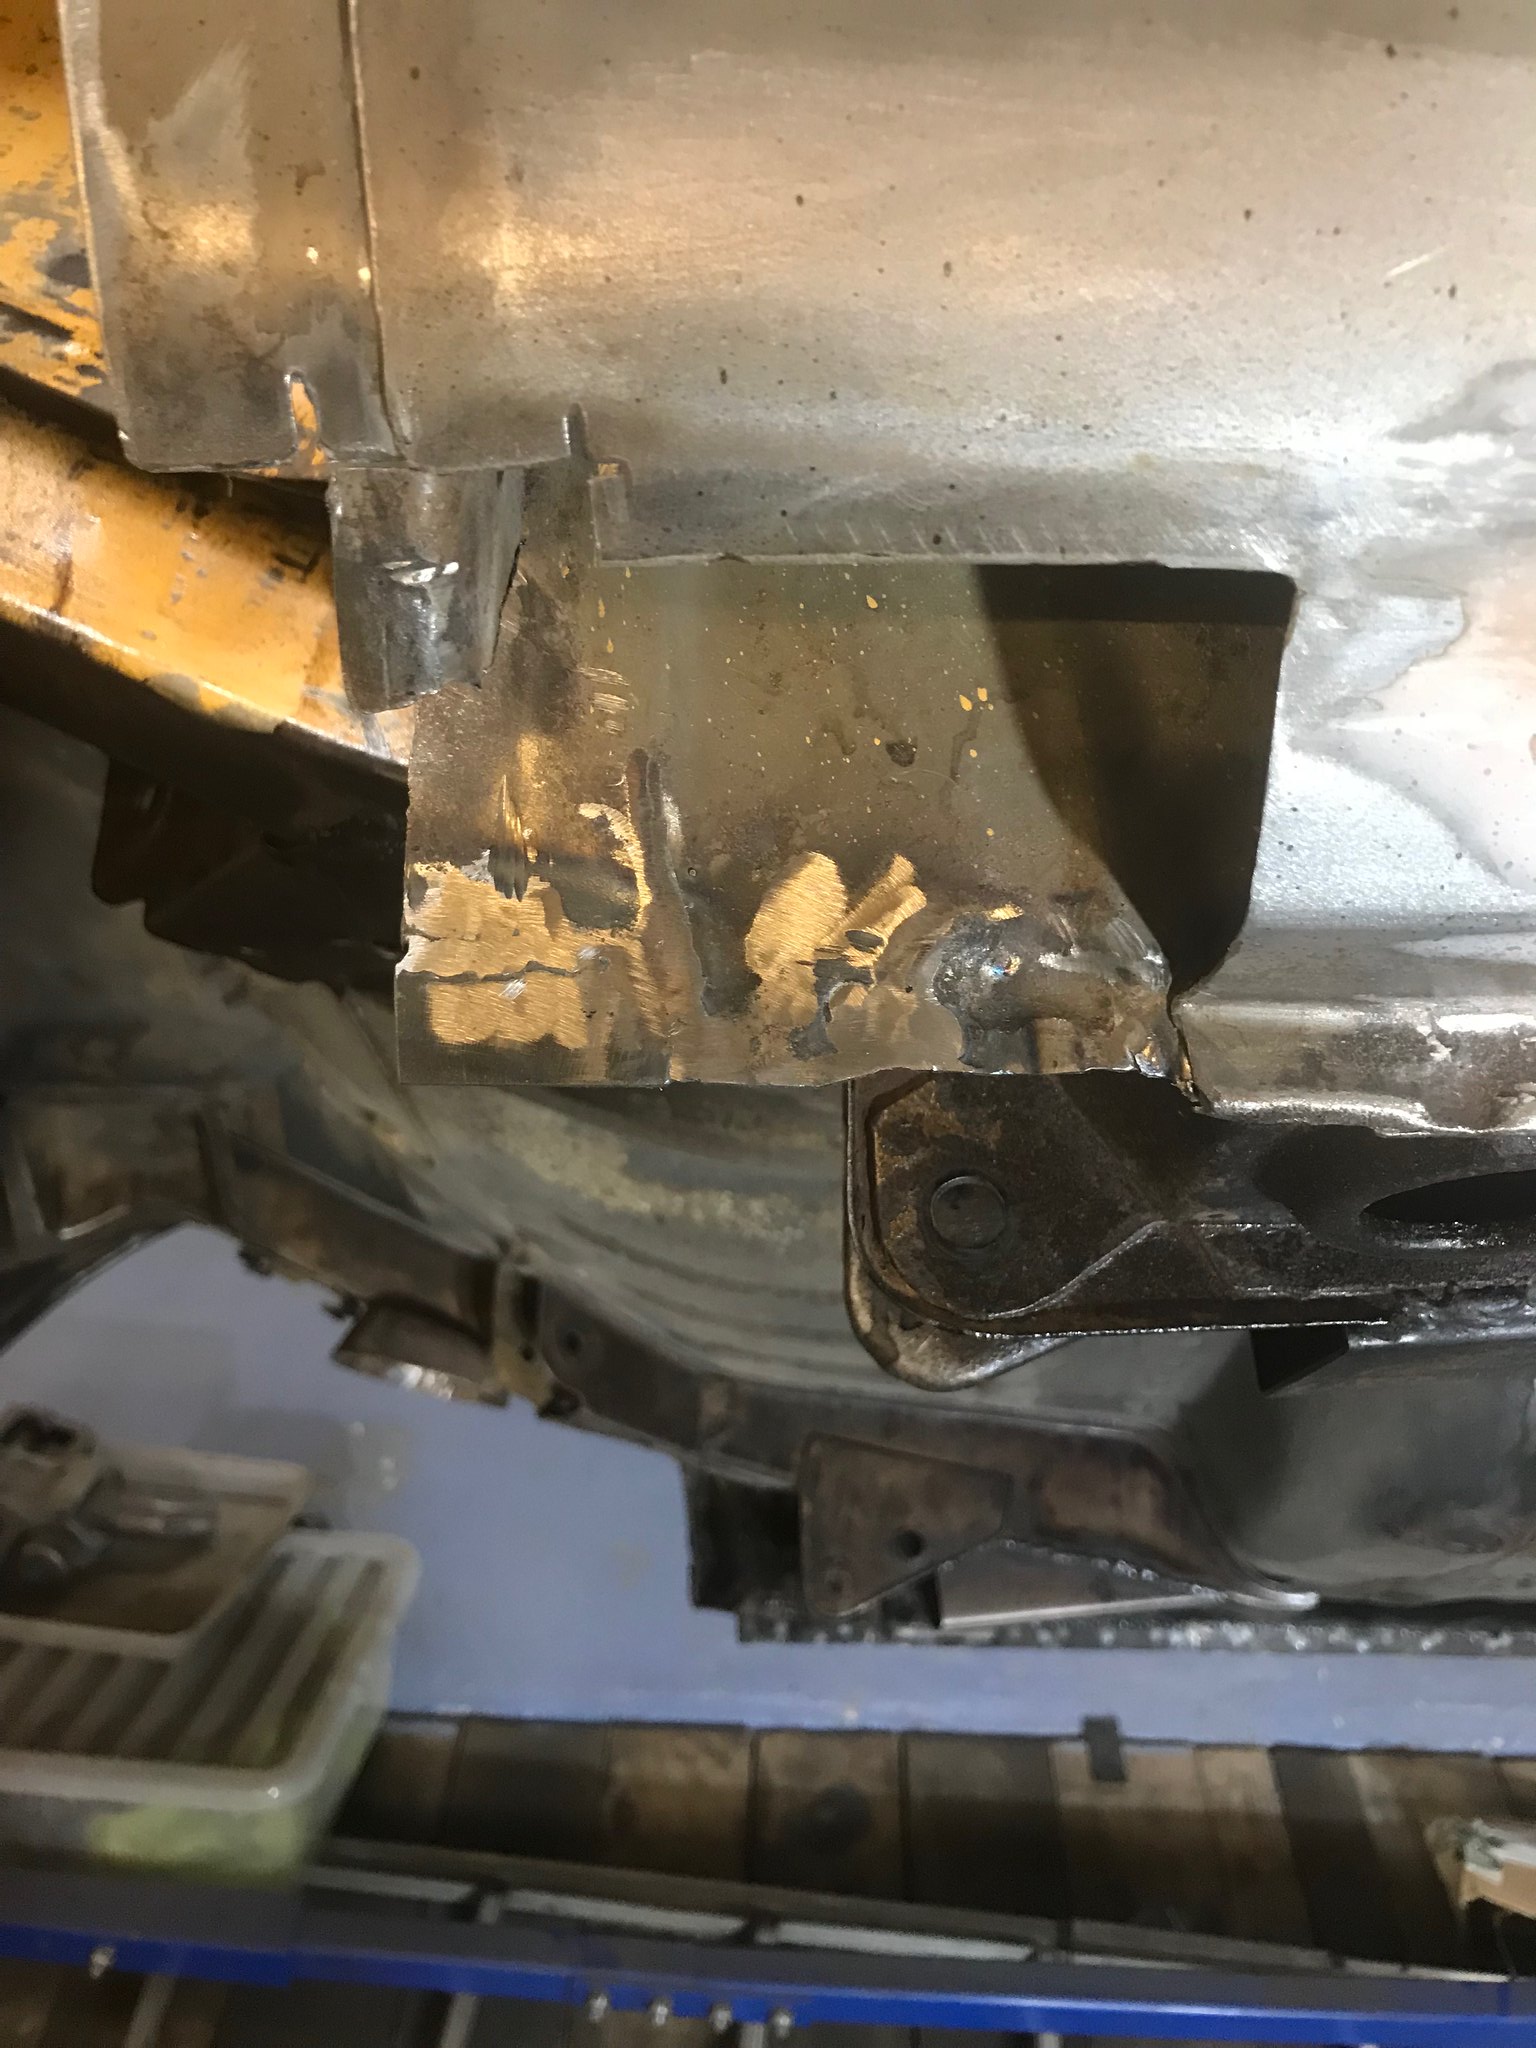 Untitled Untitled by Nevtiger, on Flickr This then allowed me to make up the return part of the inner sill that the outer sill sits on. This photo shows two pieces coming together. Its a bit of jump forward but i forgot to take phots of the intermediate steps. Therefore we can assume that the welding was awesome and the shapes flawless. 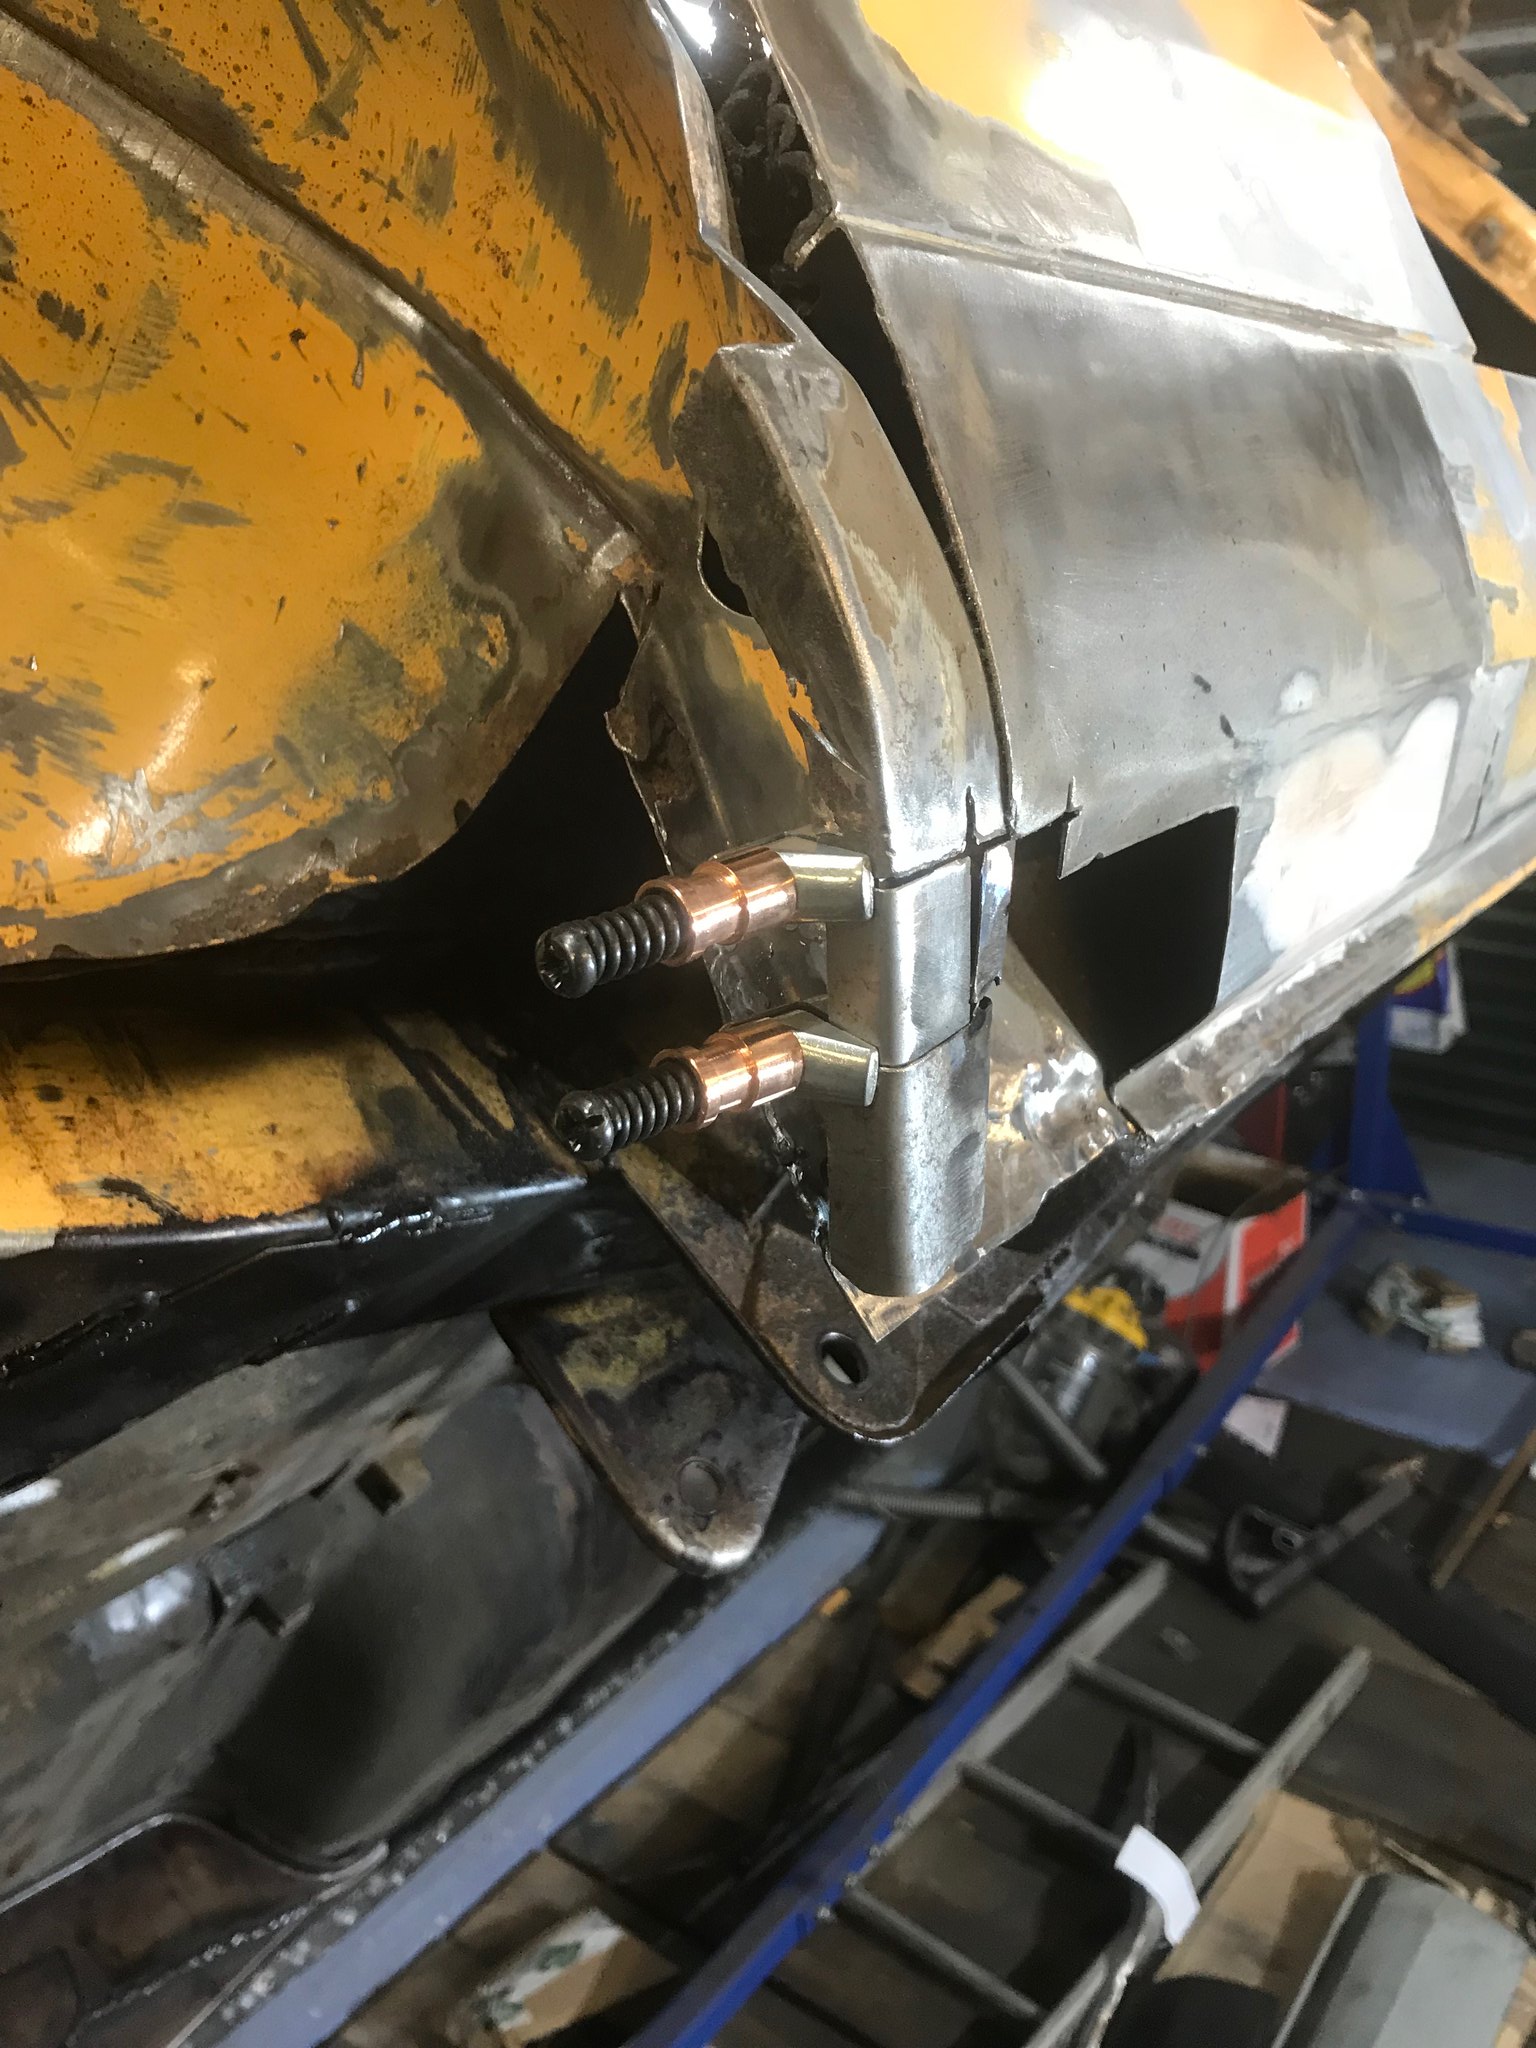 Untitled Untitled by Nevtiger, on Flickr |
| |
|
|
|
|
|
Jan 27, 2018 16:41:54 GMT
|
With the inner bit all flawlessly made its time to start the outer sill repair 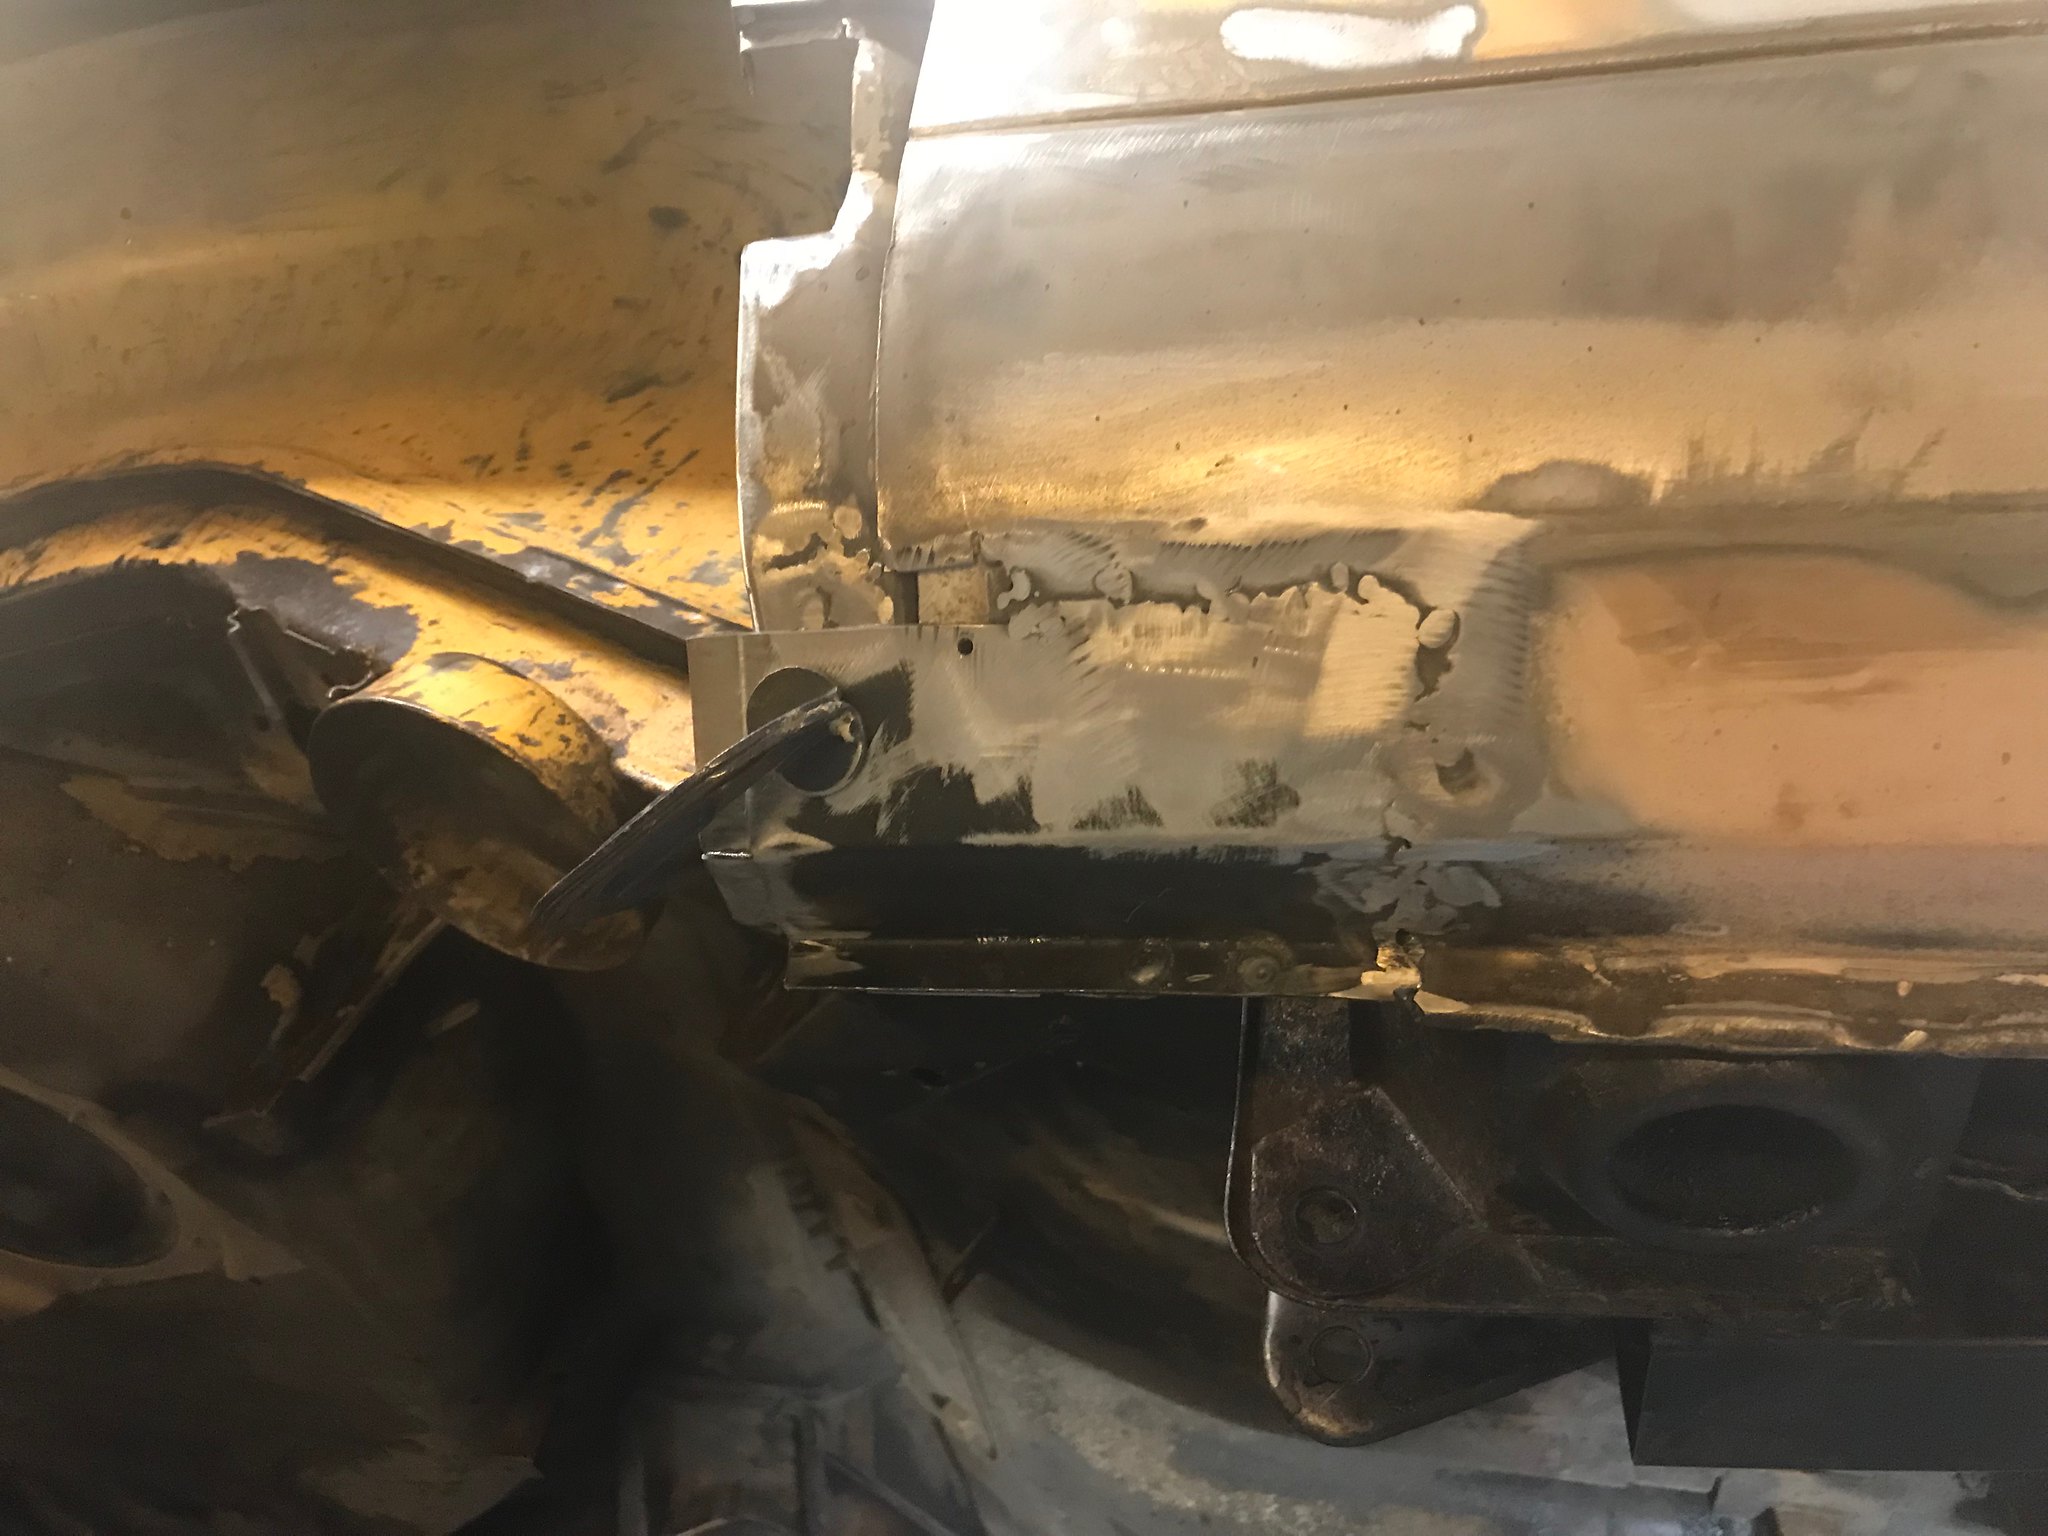 Untitled Untitled by Nevtiger, on Flickr A bit of sinkage but well within the tolerances i can build to...... This bit missing is a bit that has many curves and returns but at least is small.  Untitled Untitled by Nevtiger, on Flickr Its almost the right shape now 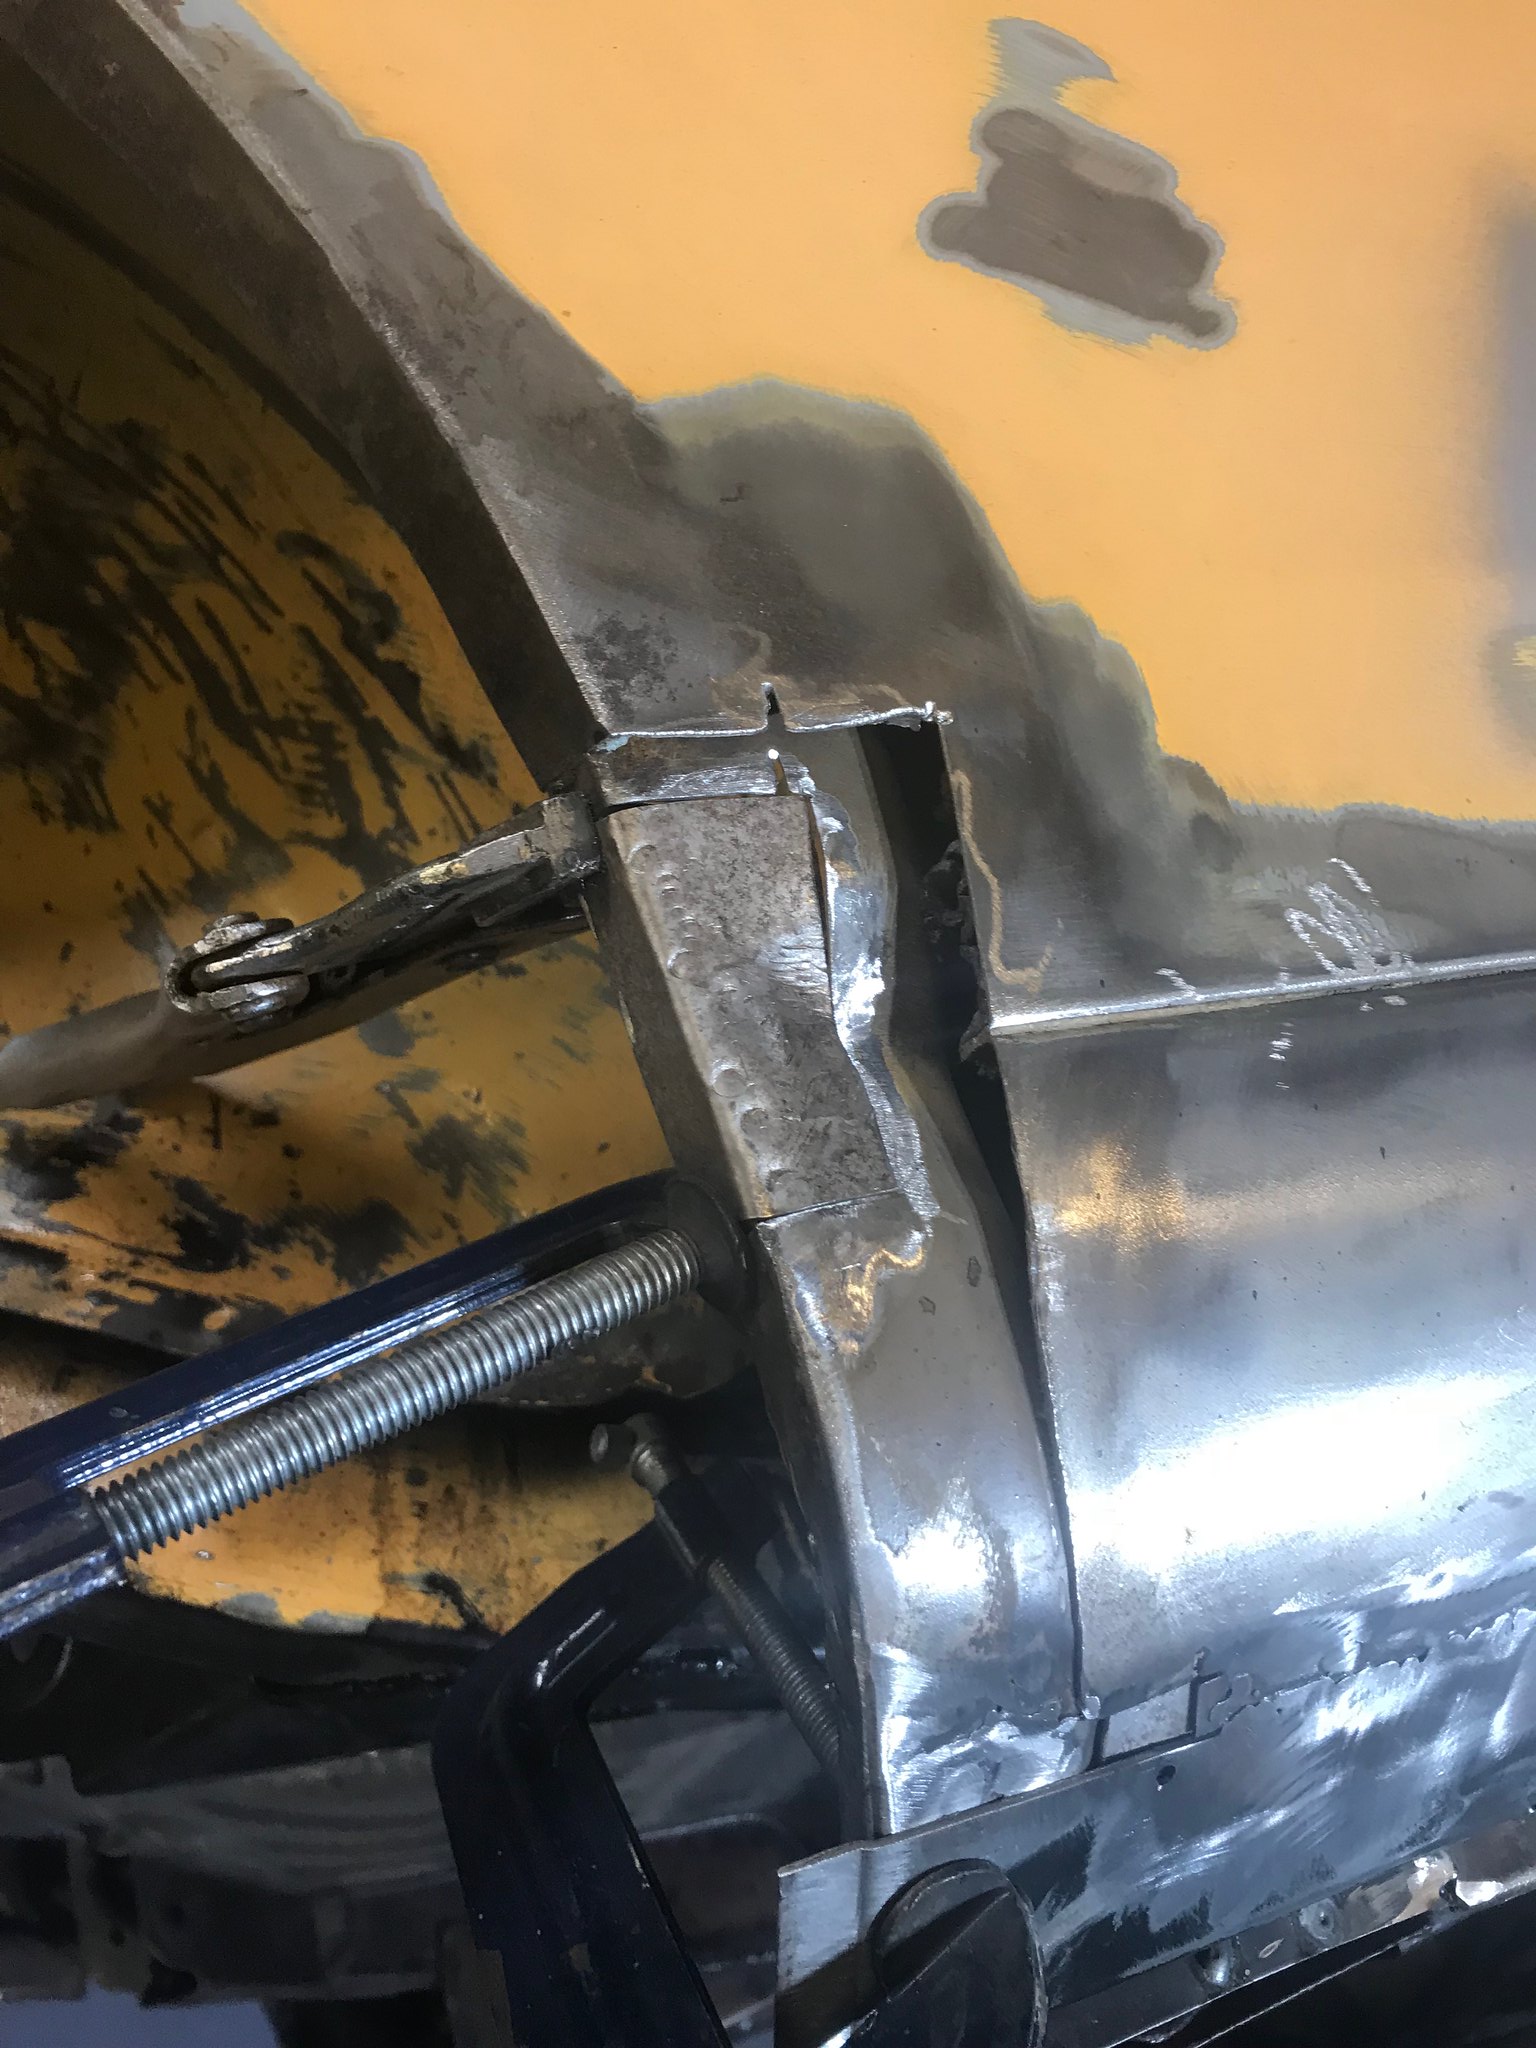 Untitled Untitled by Nevtiger, on Flickr Once it was the right shape it got welded in. It needs to be the right shape even though it will be hidden to accept the panel refunds of the panels the lay on top of it. 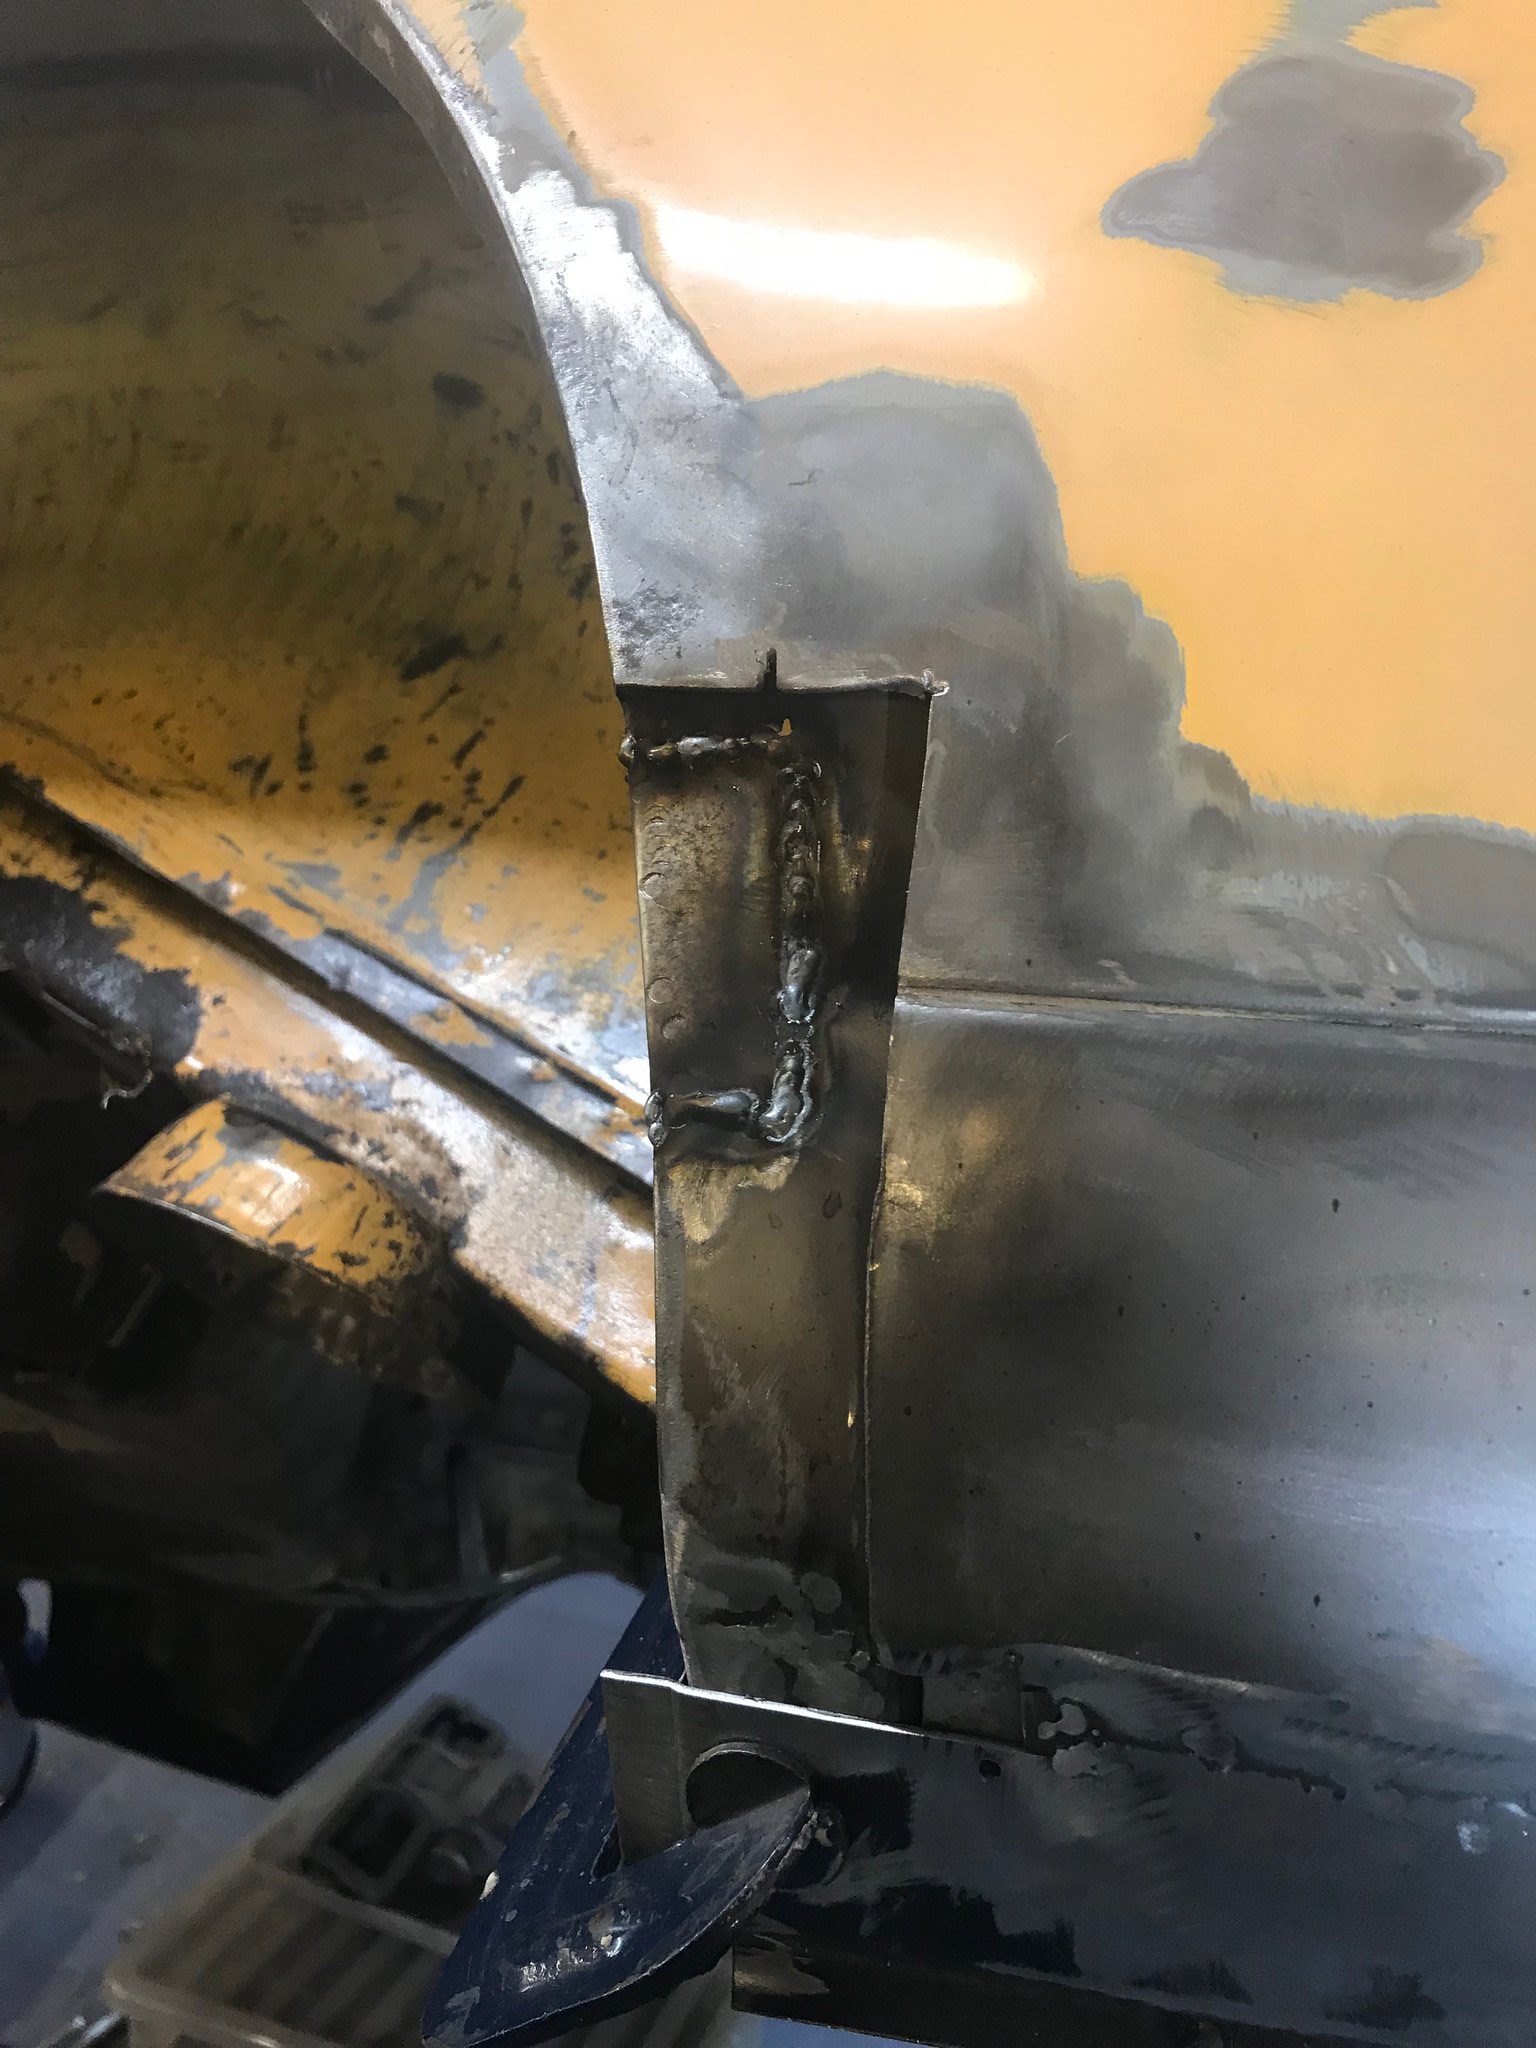 Untitled Untitled by Nevtiger, on Flickr Smoother back (-ish) and sprayed with Dinitrol epoxy rust cure. 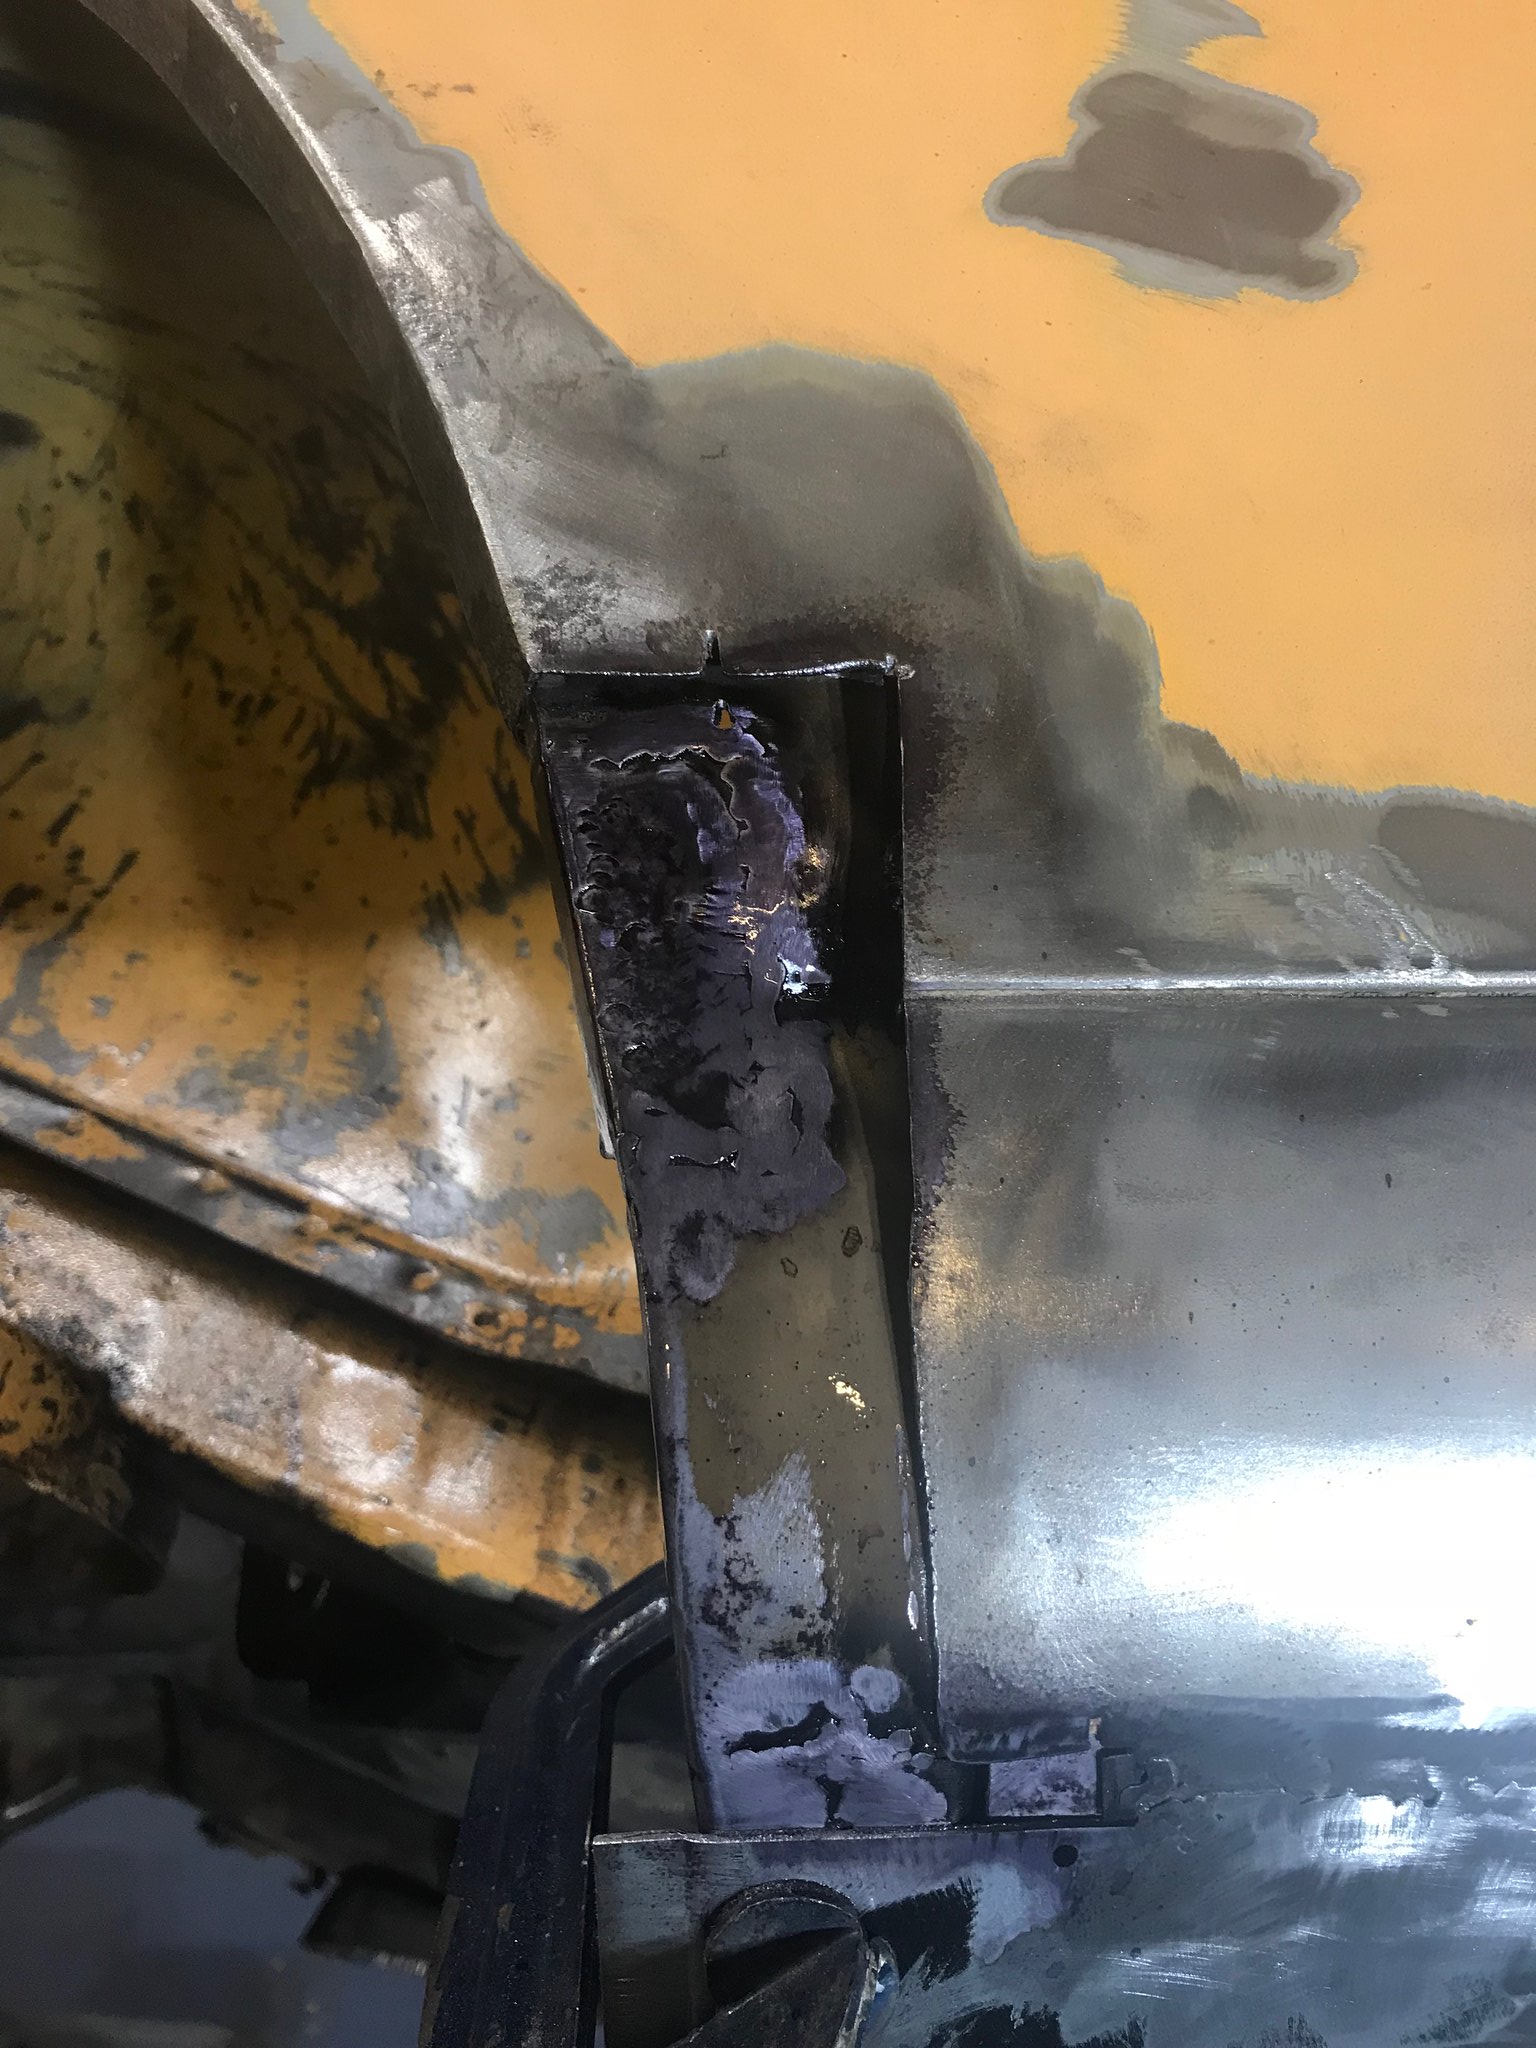 Untitled Untitled by Nevtiger, on Flickr Which means i can now put the top layers on. This where the sill and the body side come together and wanted it to look the same. In the past when people used to repair this area the join got lost due to the complex job of getting the sill in.  Untitled Untitled by Nevtiger, on Flickr I was quite chuffed with this as some of the joins are almost not needing filler to help hide them. 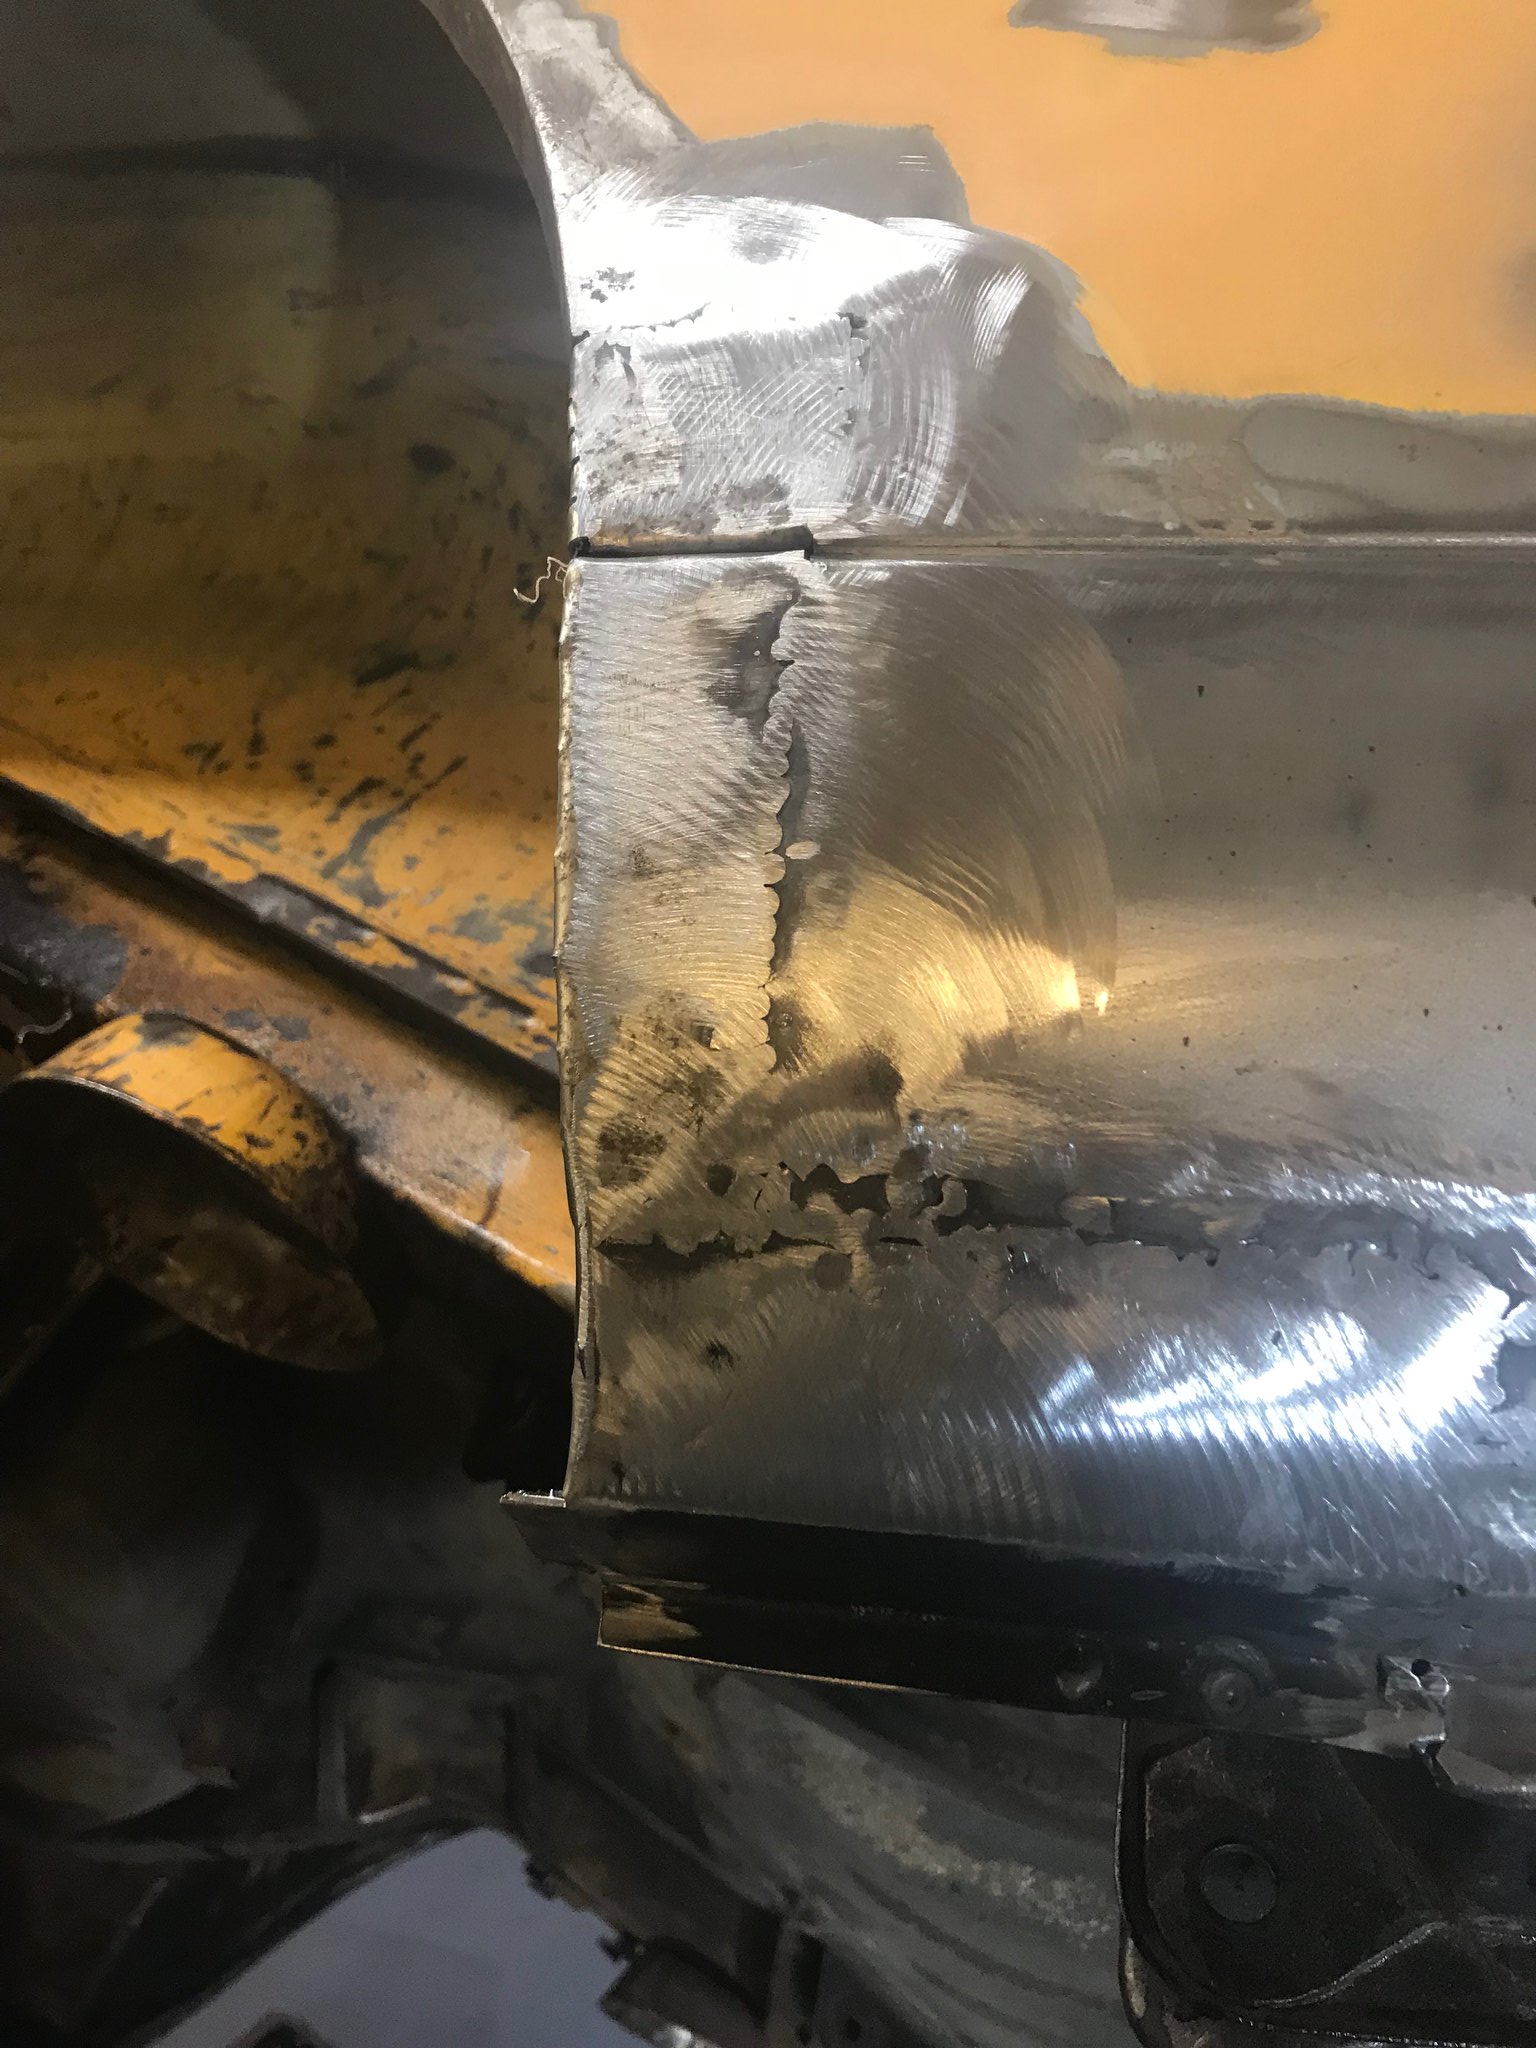 Untitled Untitled by Nevtiger, on Flickr I will whip some filler onto those and then see what it looks like. But in the mean time its onto the roof at the back, The GL had a vinyl roof with a strip pop riveted to hide the join at the rear. Time to weld up the holes. 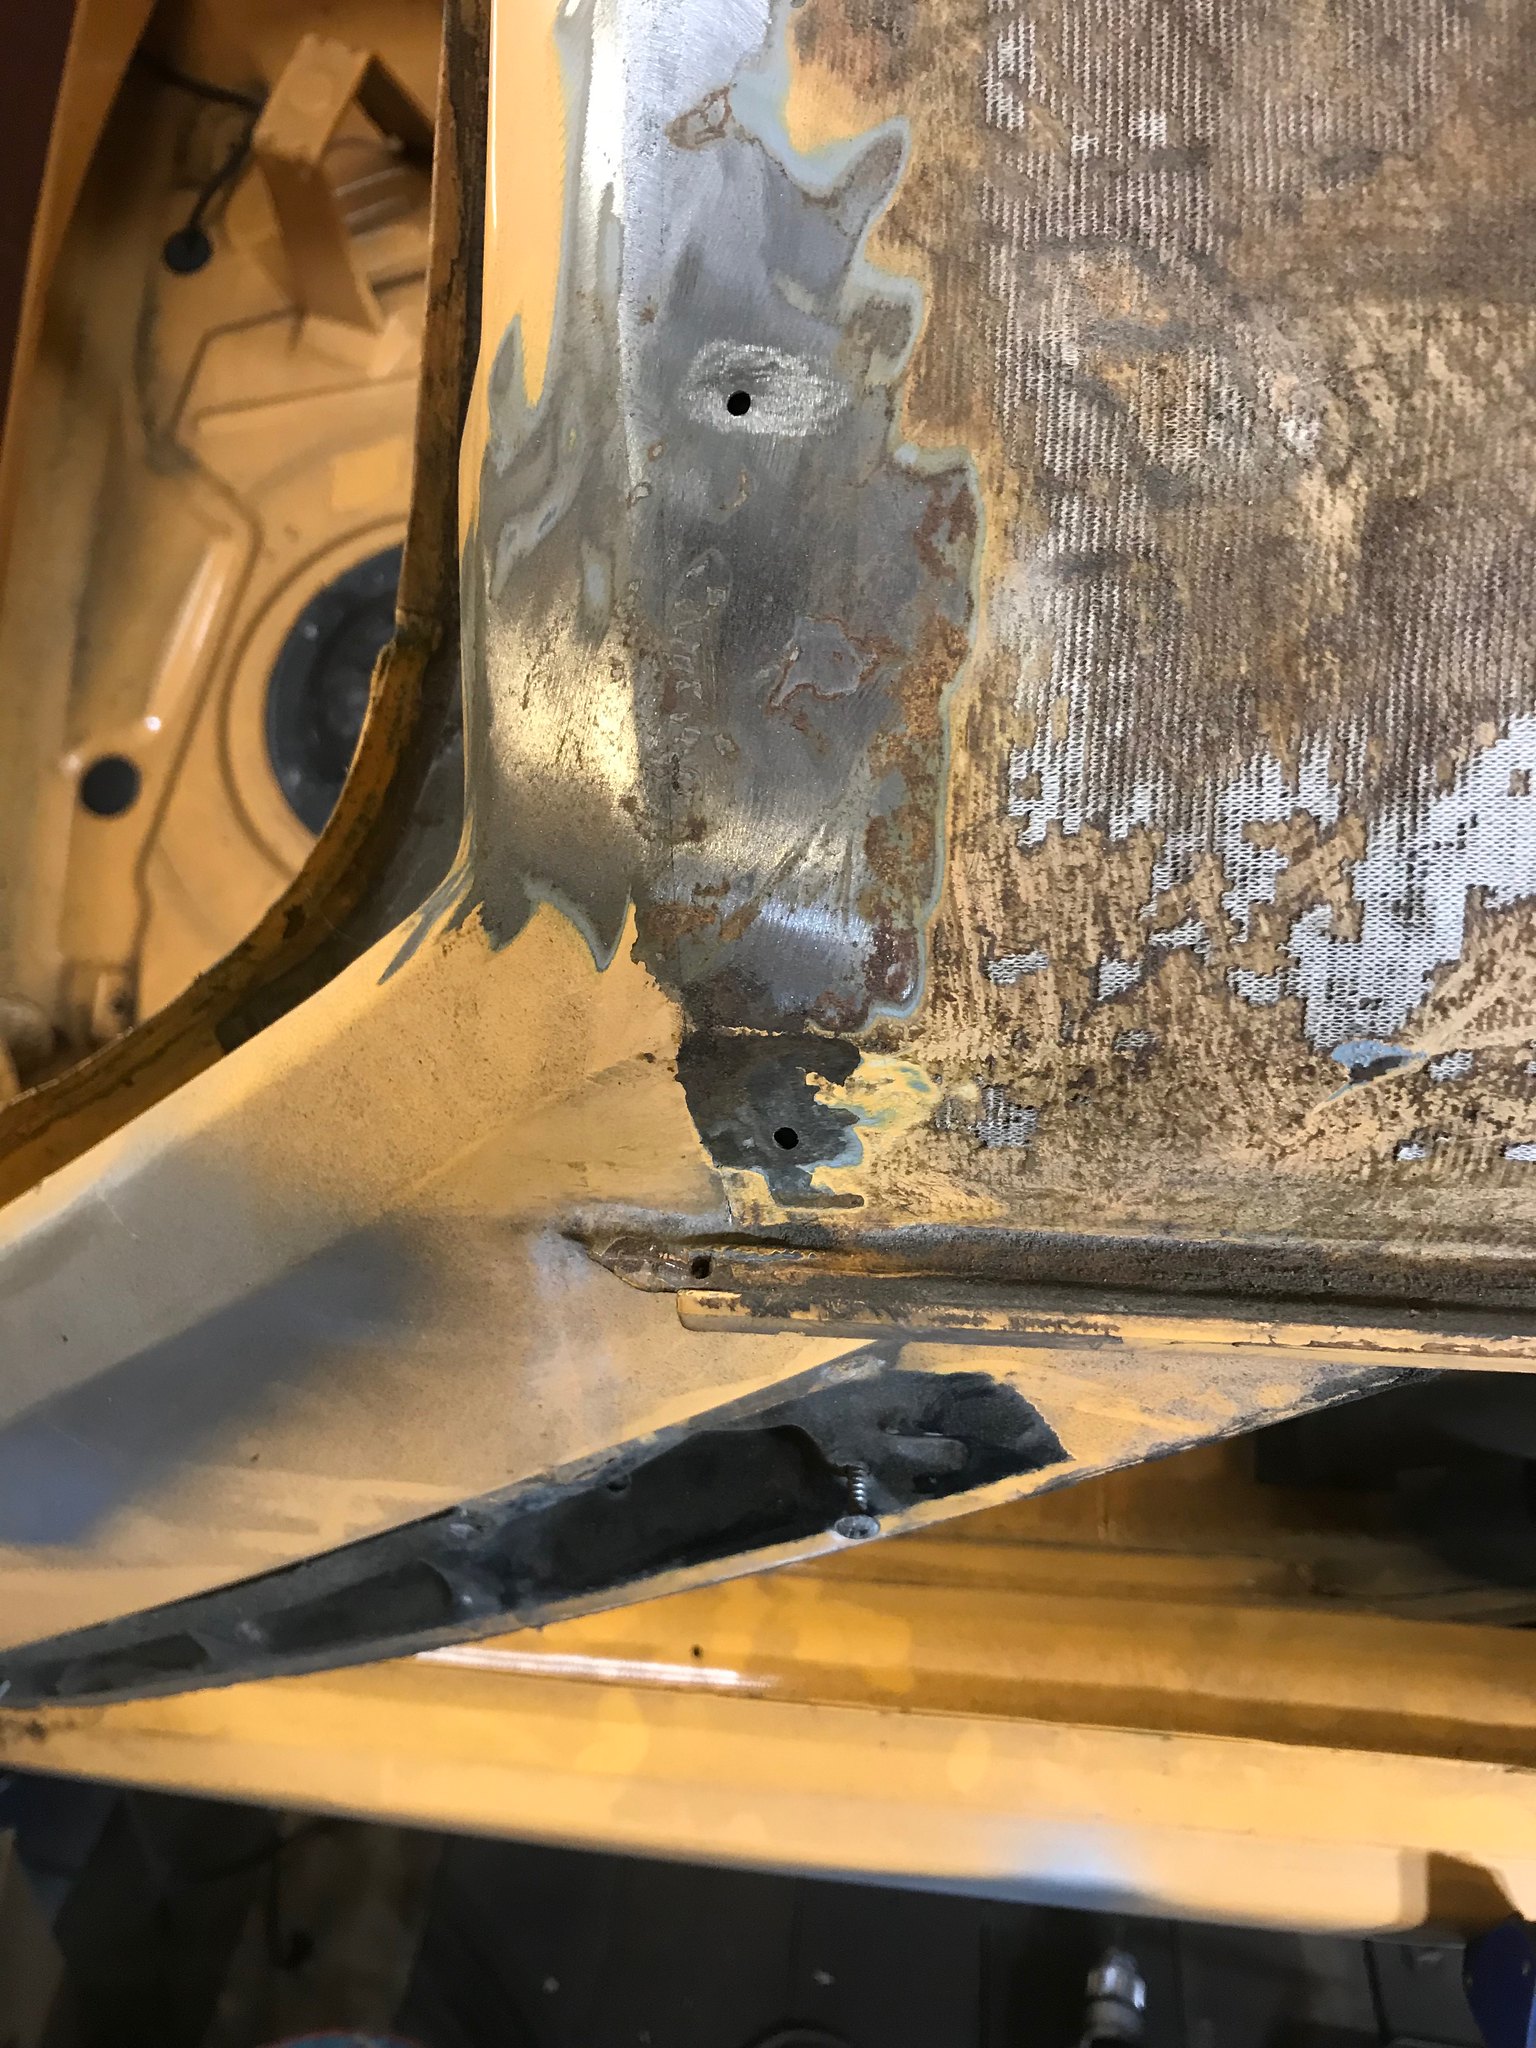 Untitled Untitled by Nevtiger, on Flickr 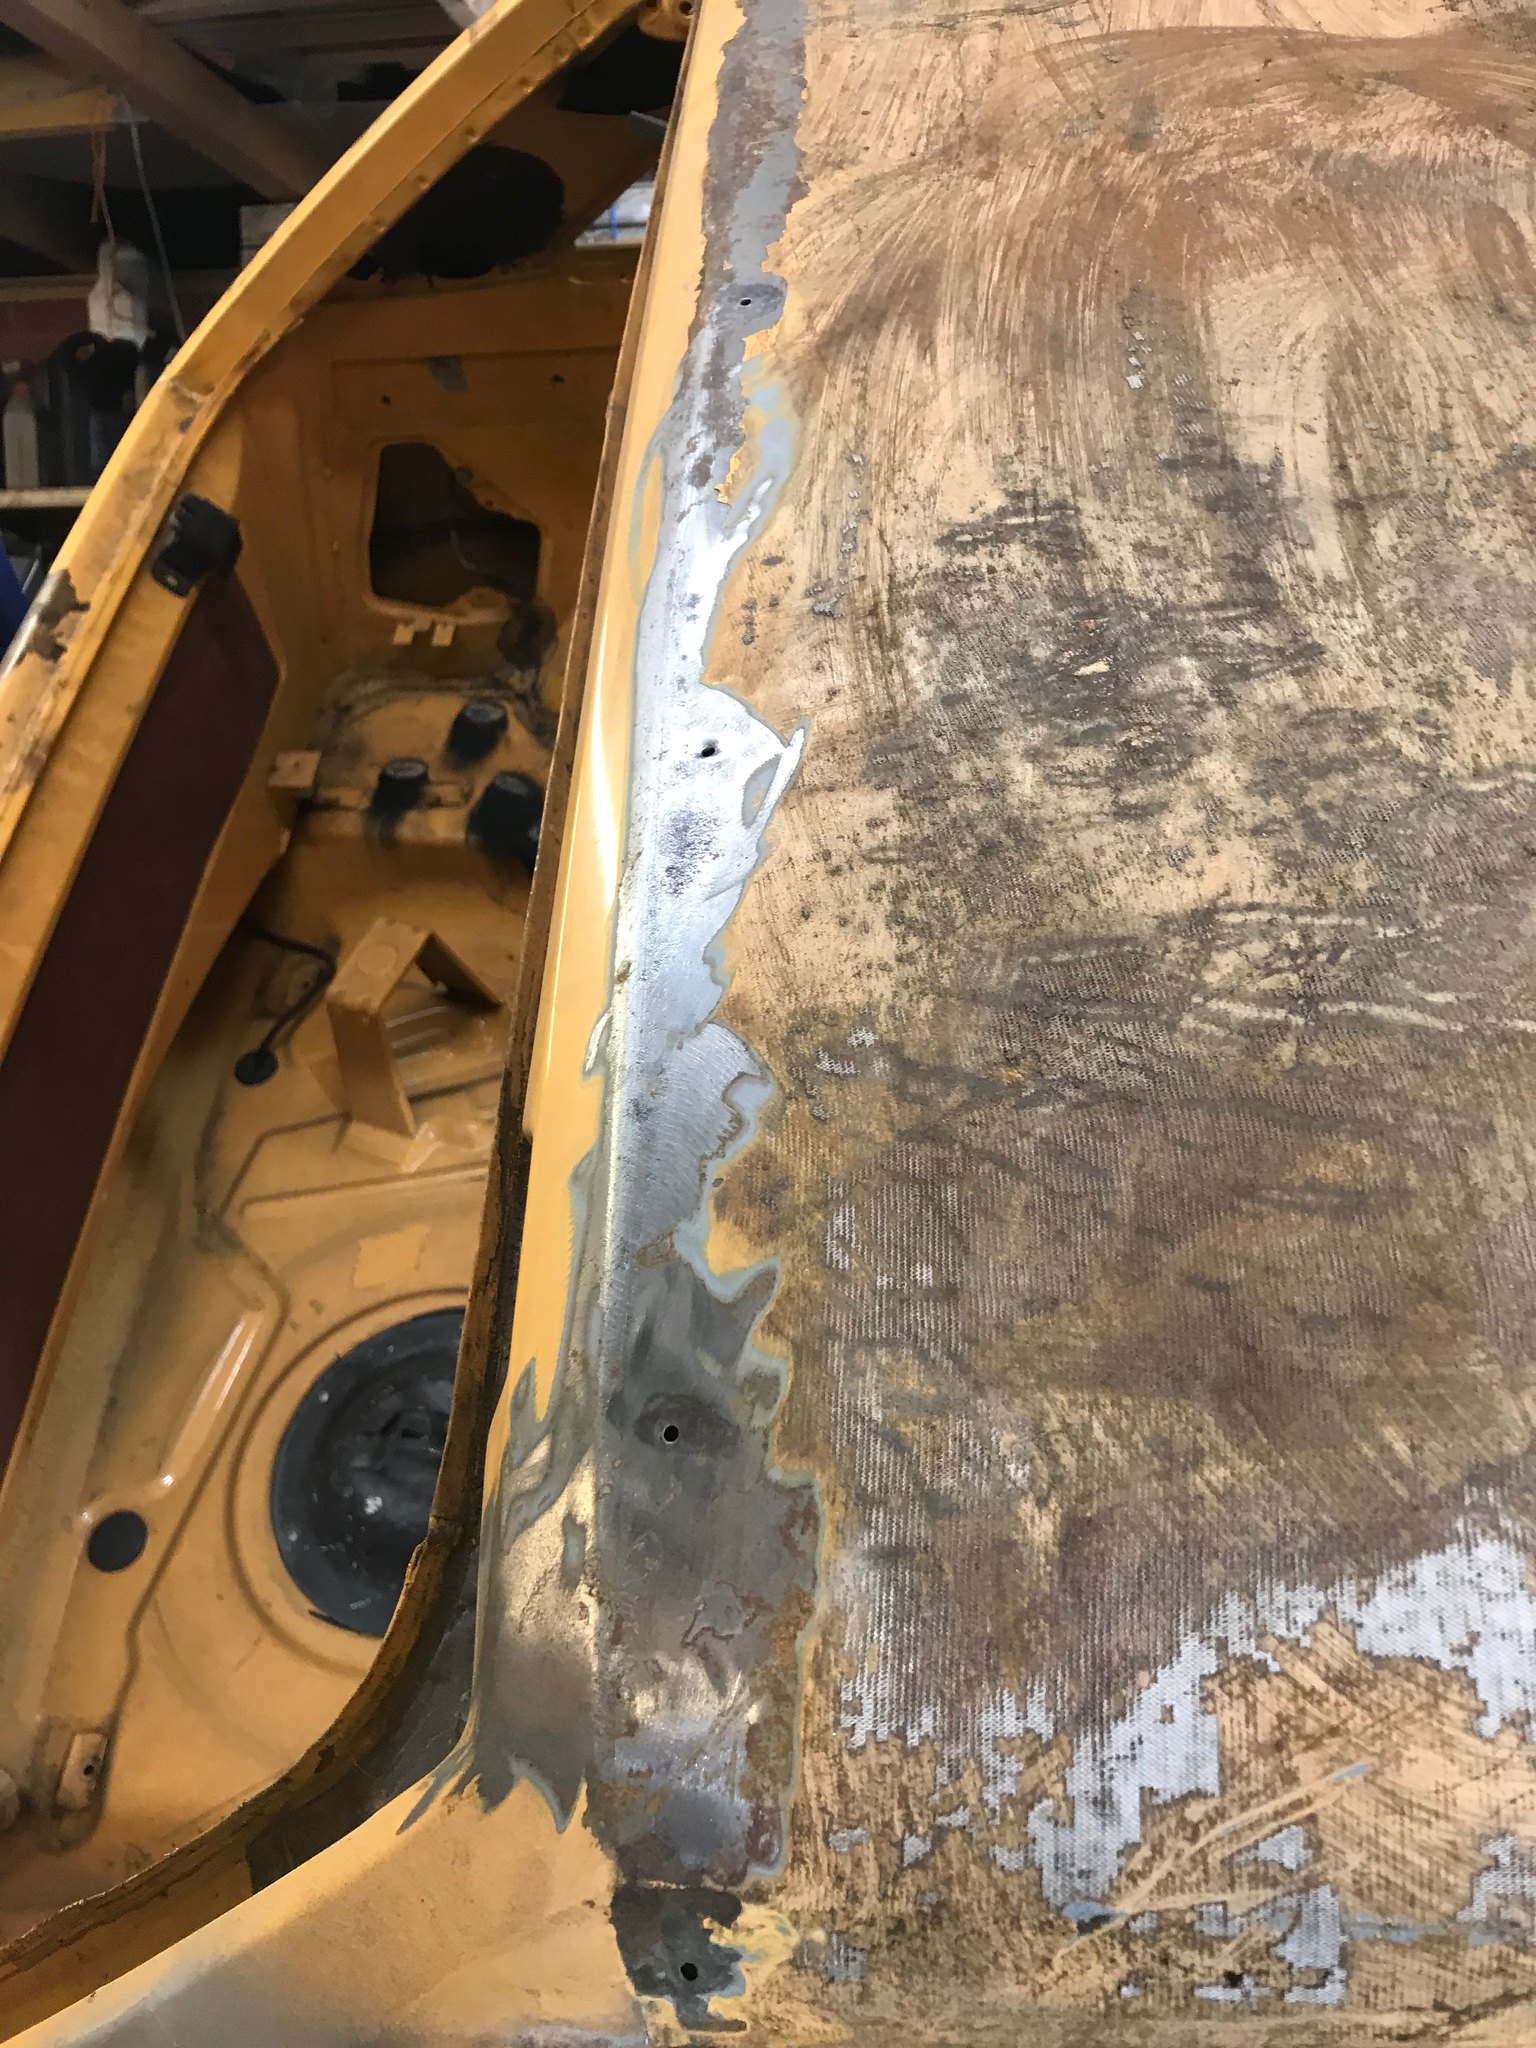 Untitled Untitled by Nevtiger, on Flickr 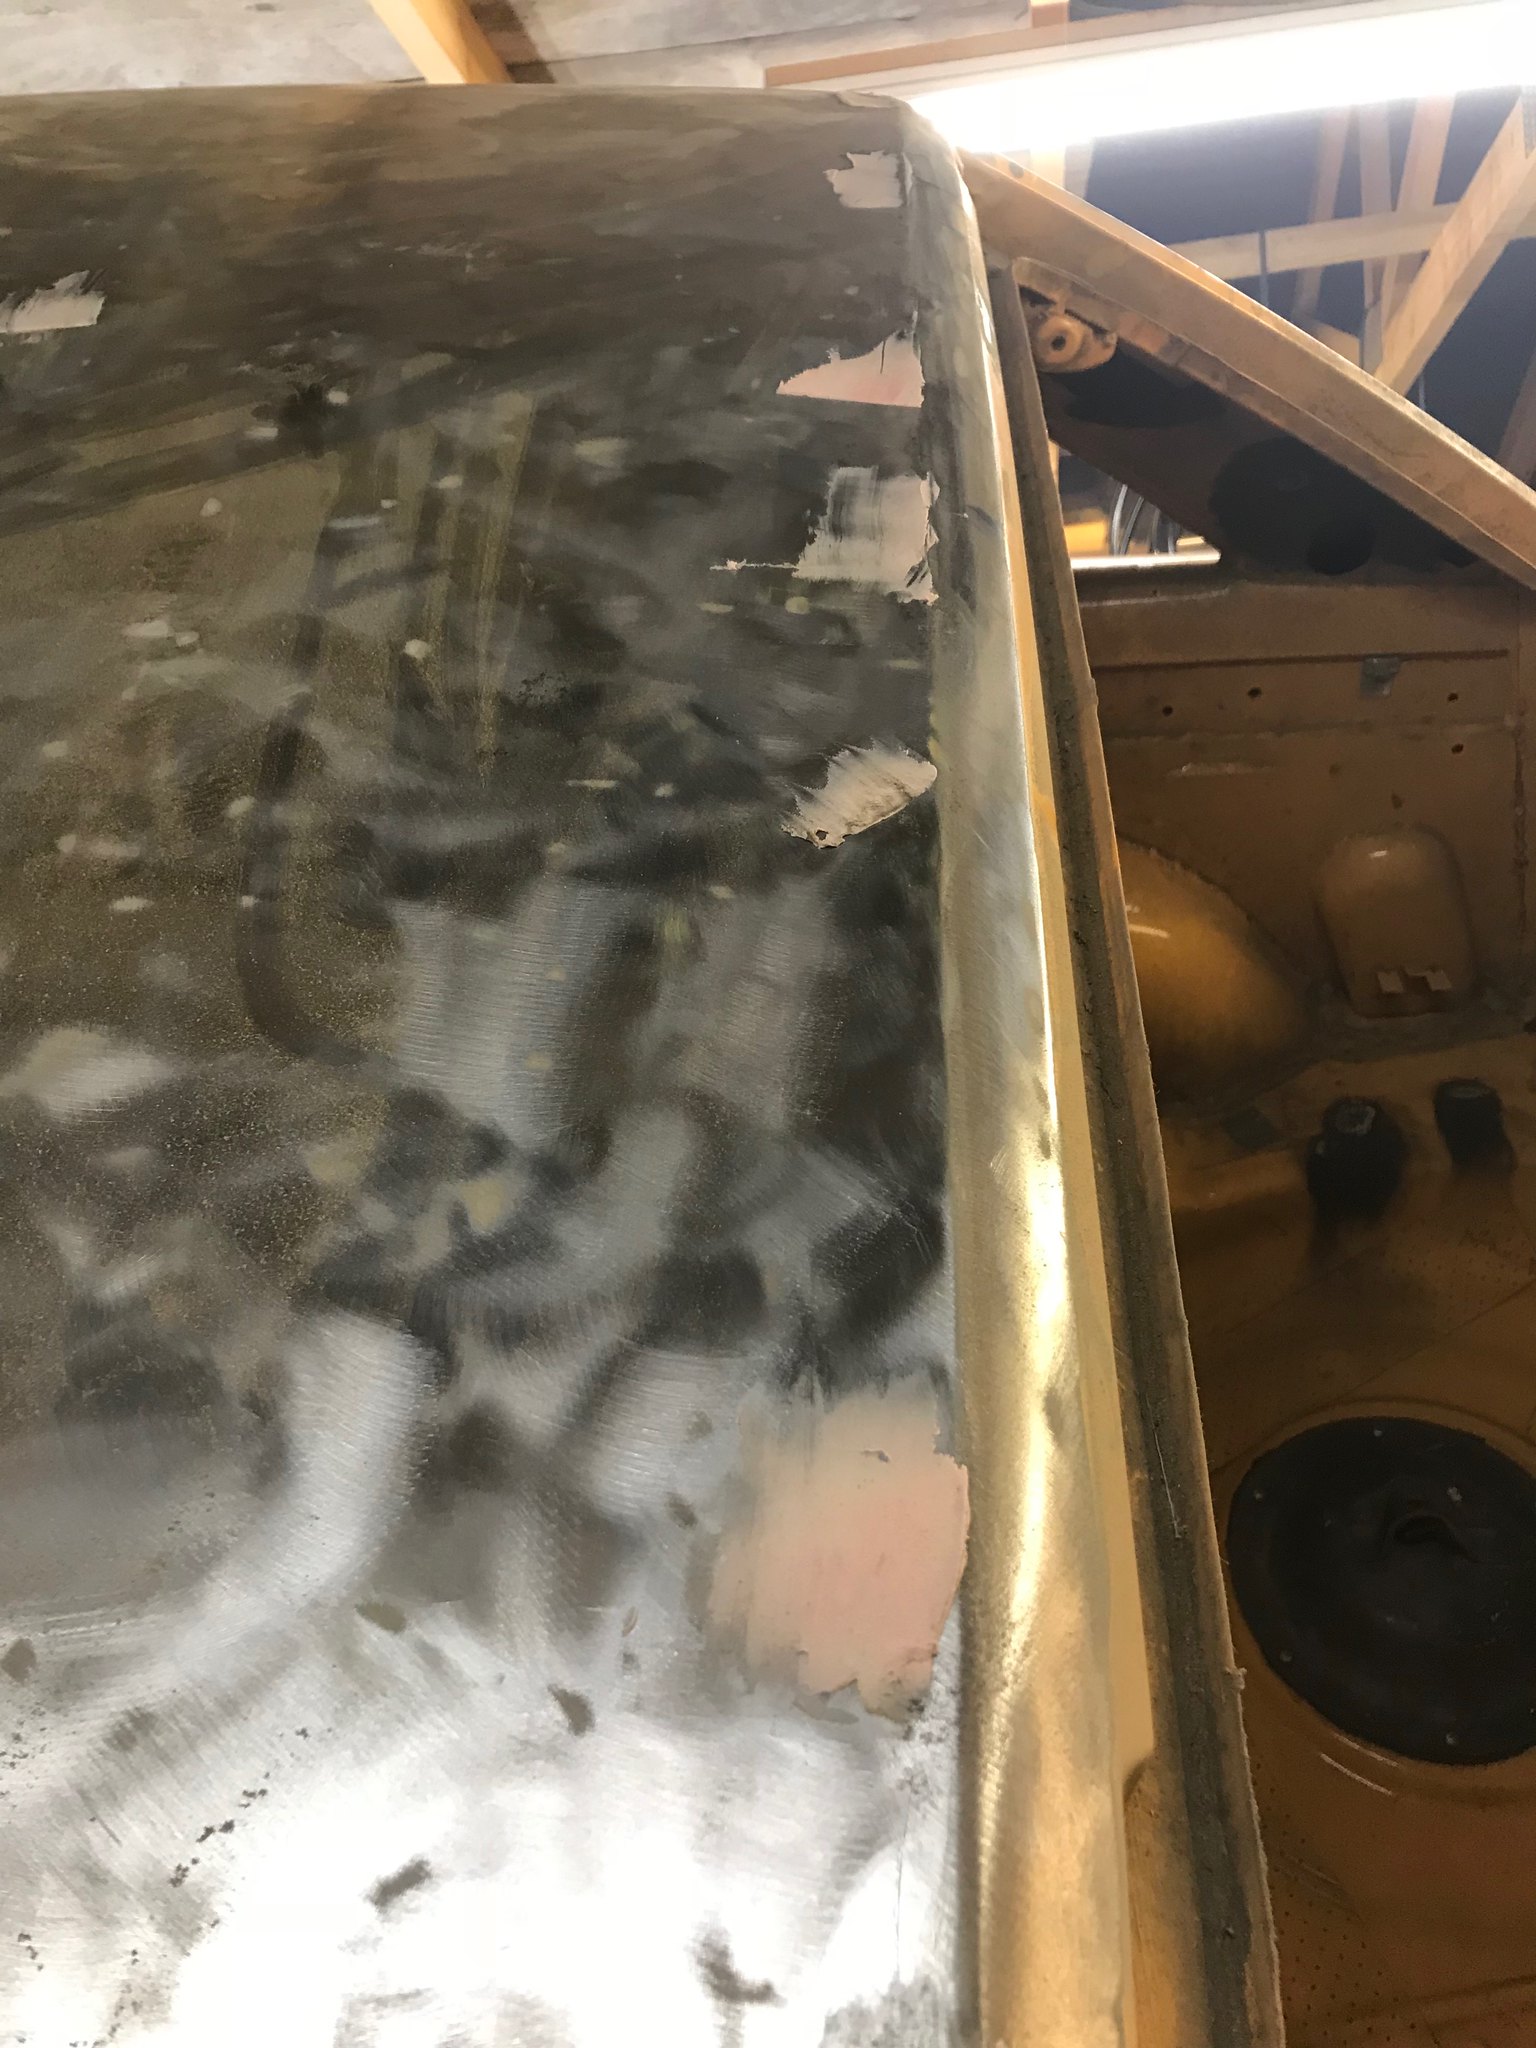 Untitled Untitled by Nevtiger, on Flickr The rest of the roof is deeply pitted in areas but i guess some filler primer will sort that out in time..... 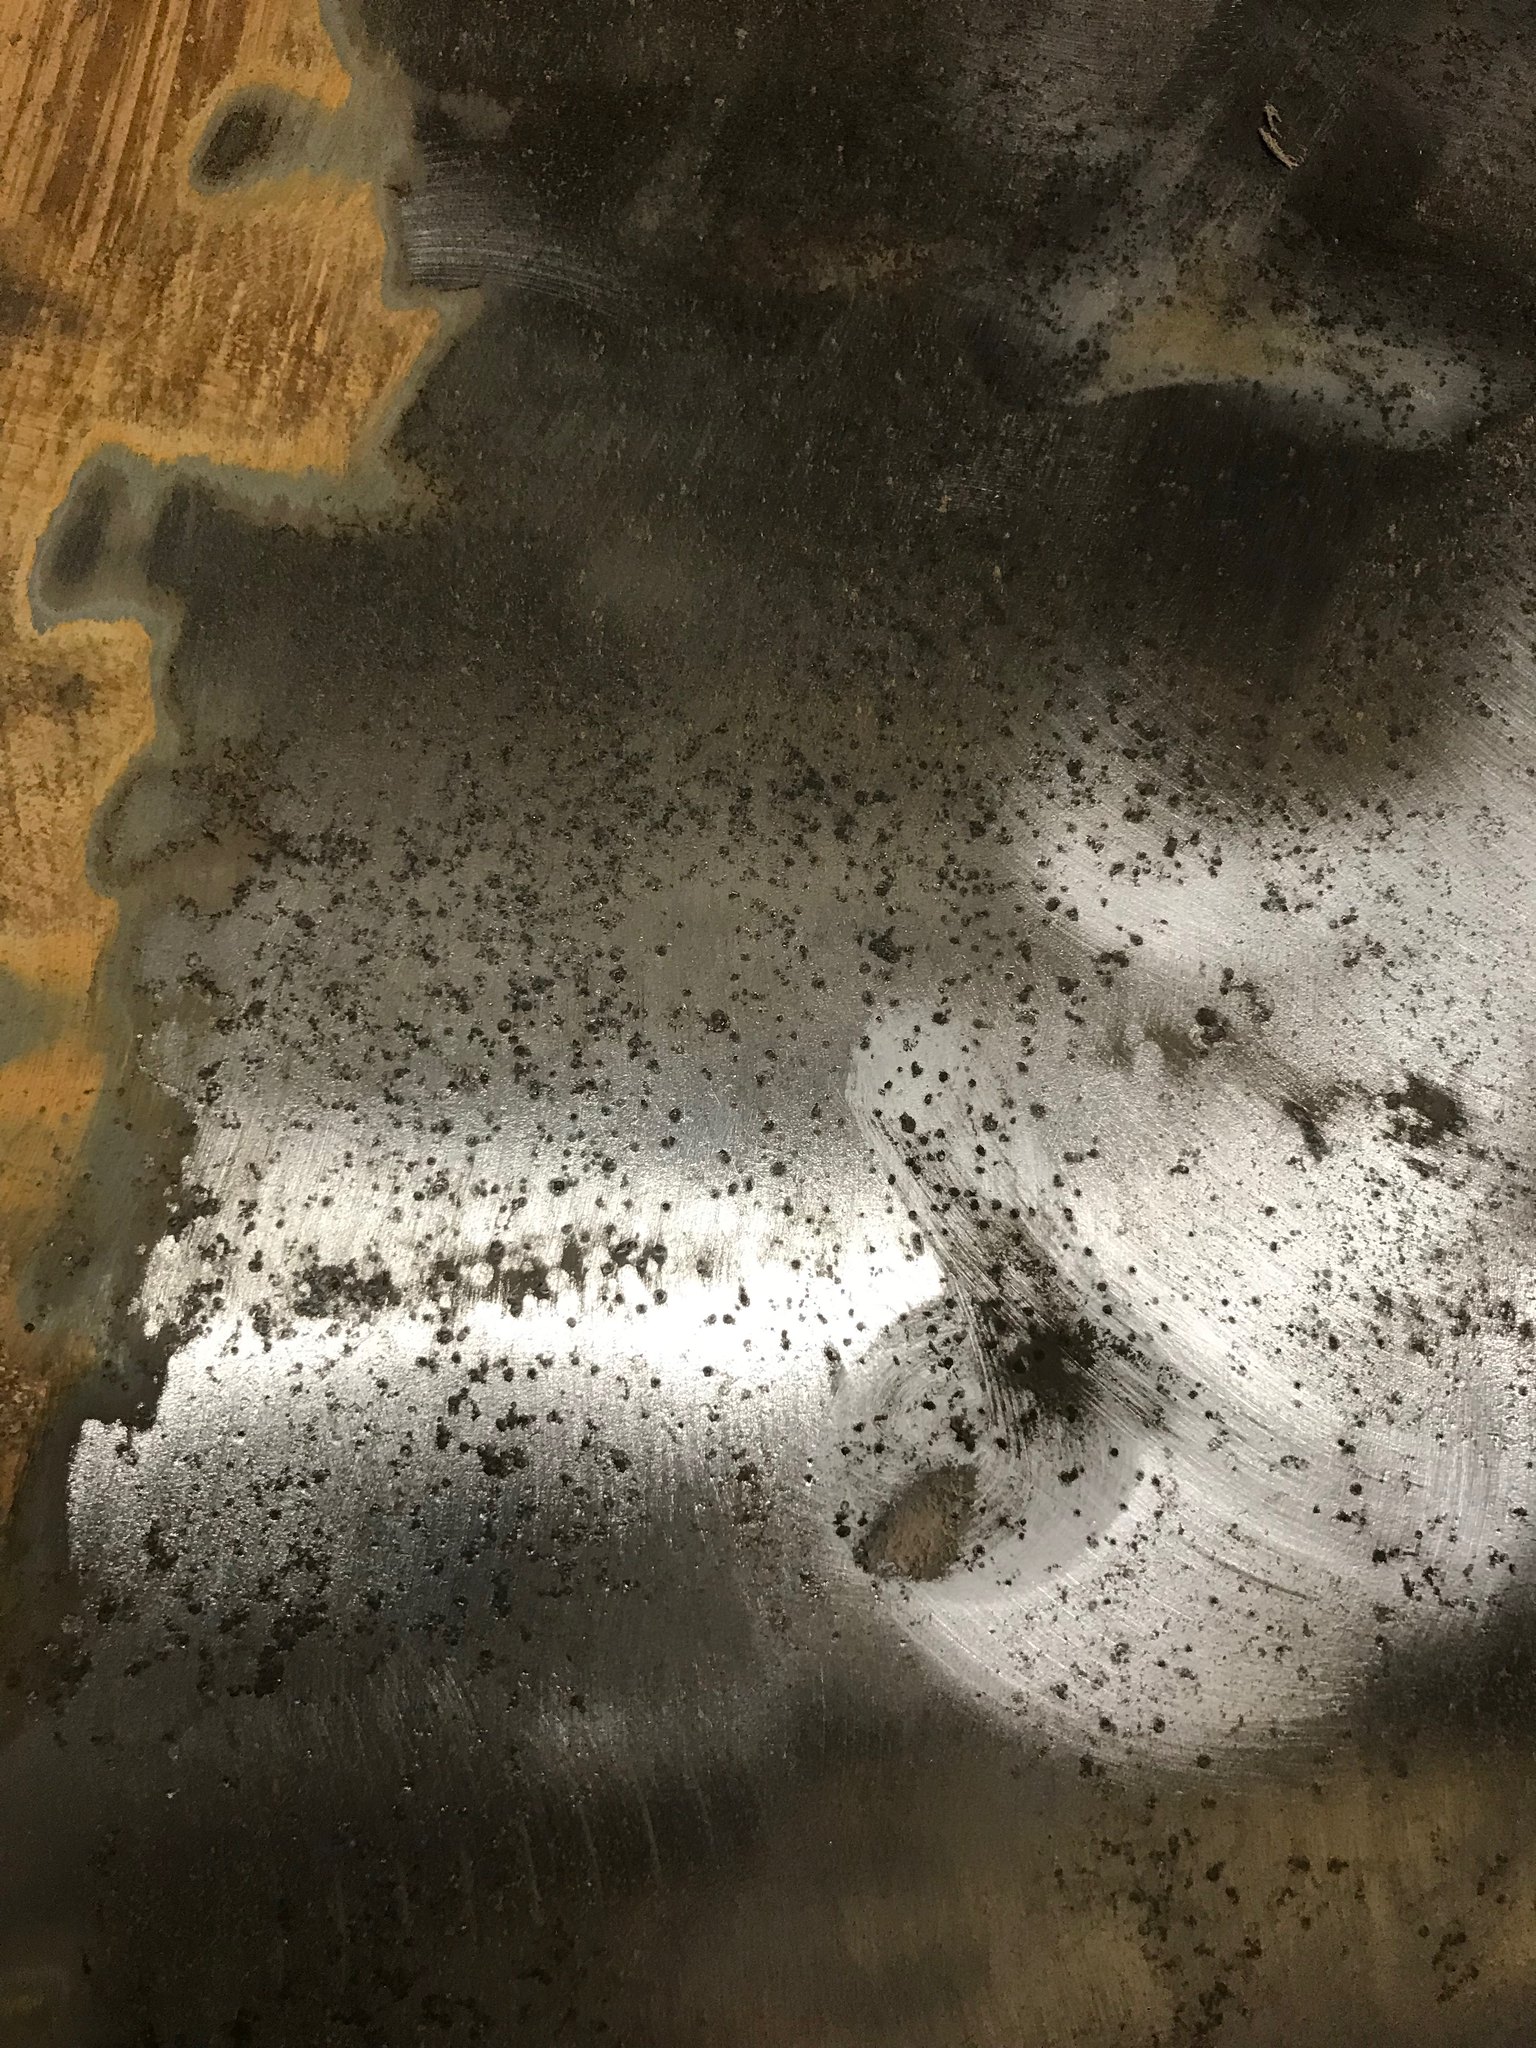 Untitled Untitled by Nevtiger, on Flickr There is just the roof front to deal with now. And that will be all the rust gone!!! Not quite all the welding as i want to finish off some of the seam welding, make some different less intrusive cage mounts and i suspect i will need to modify the transmission tunnel for the gearbox. |
| |
|
|
|
|
|
Mar 12, 2018 15:11:20 GMT
|
Quick update of slow progress! Front off roof started: 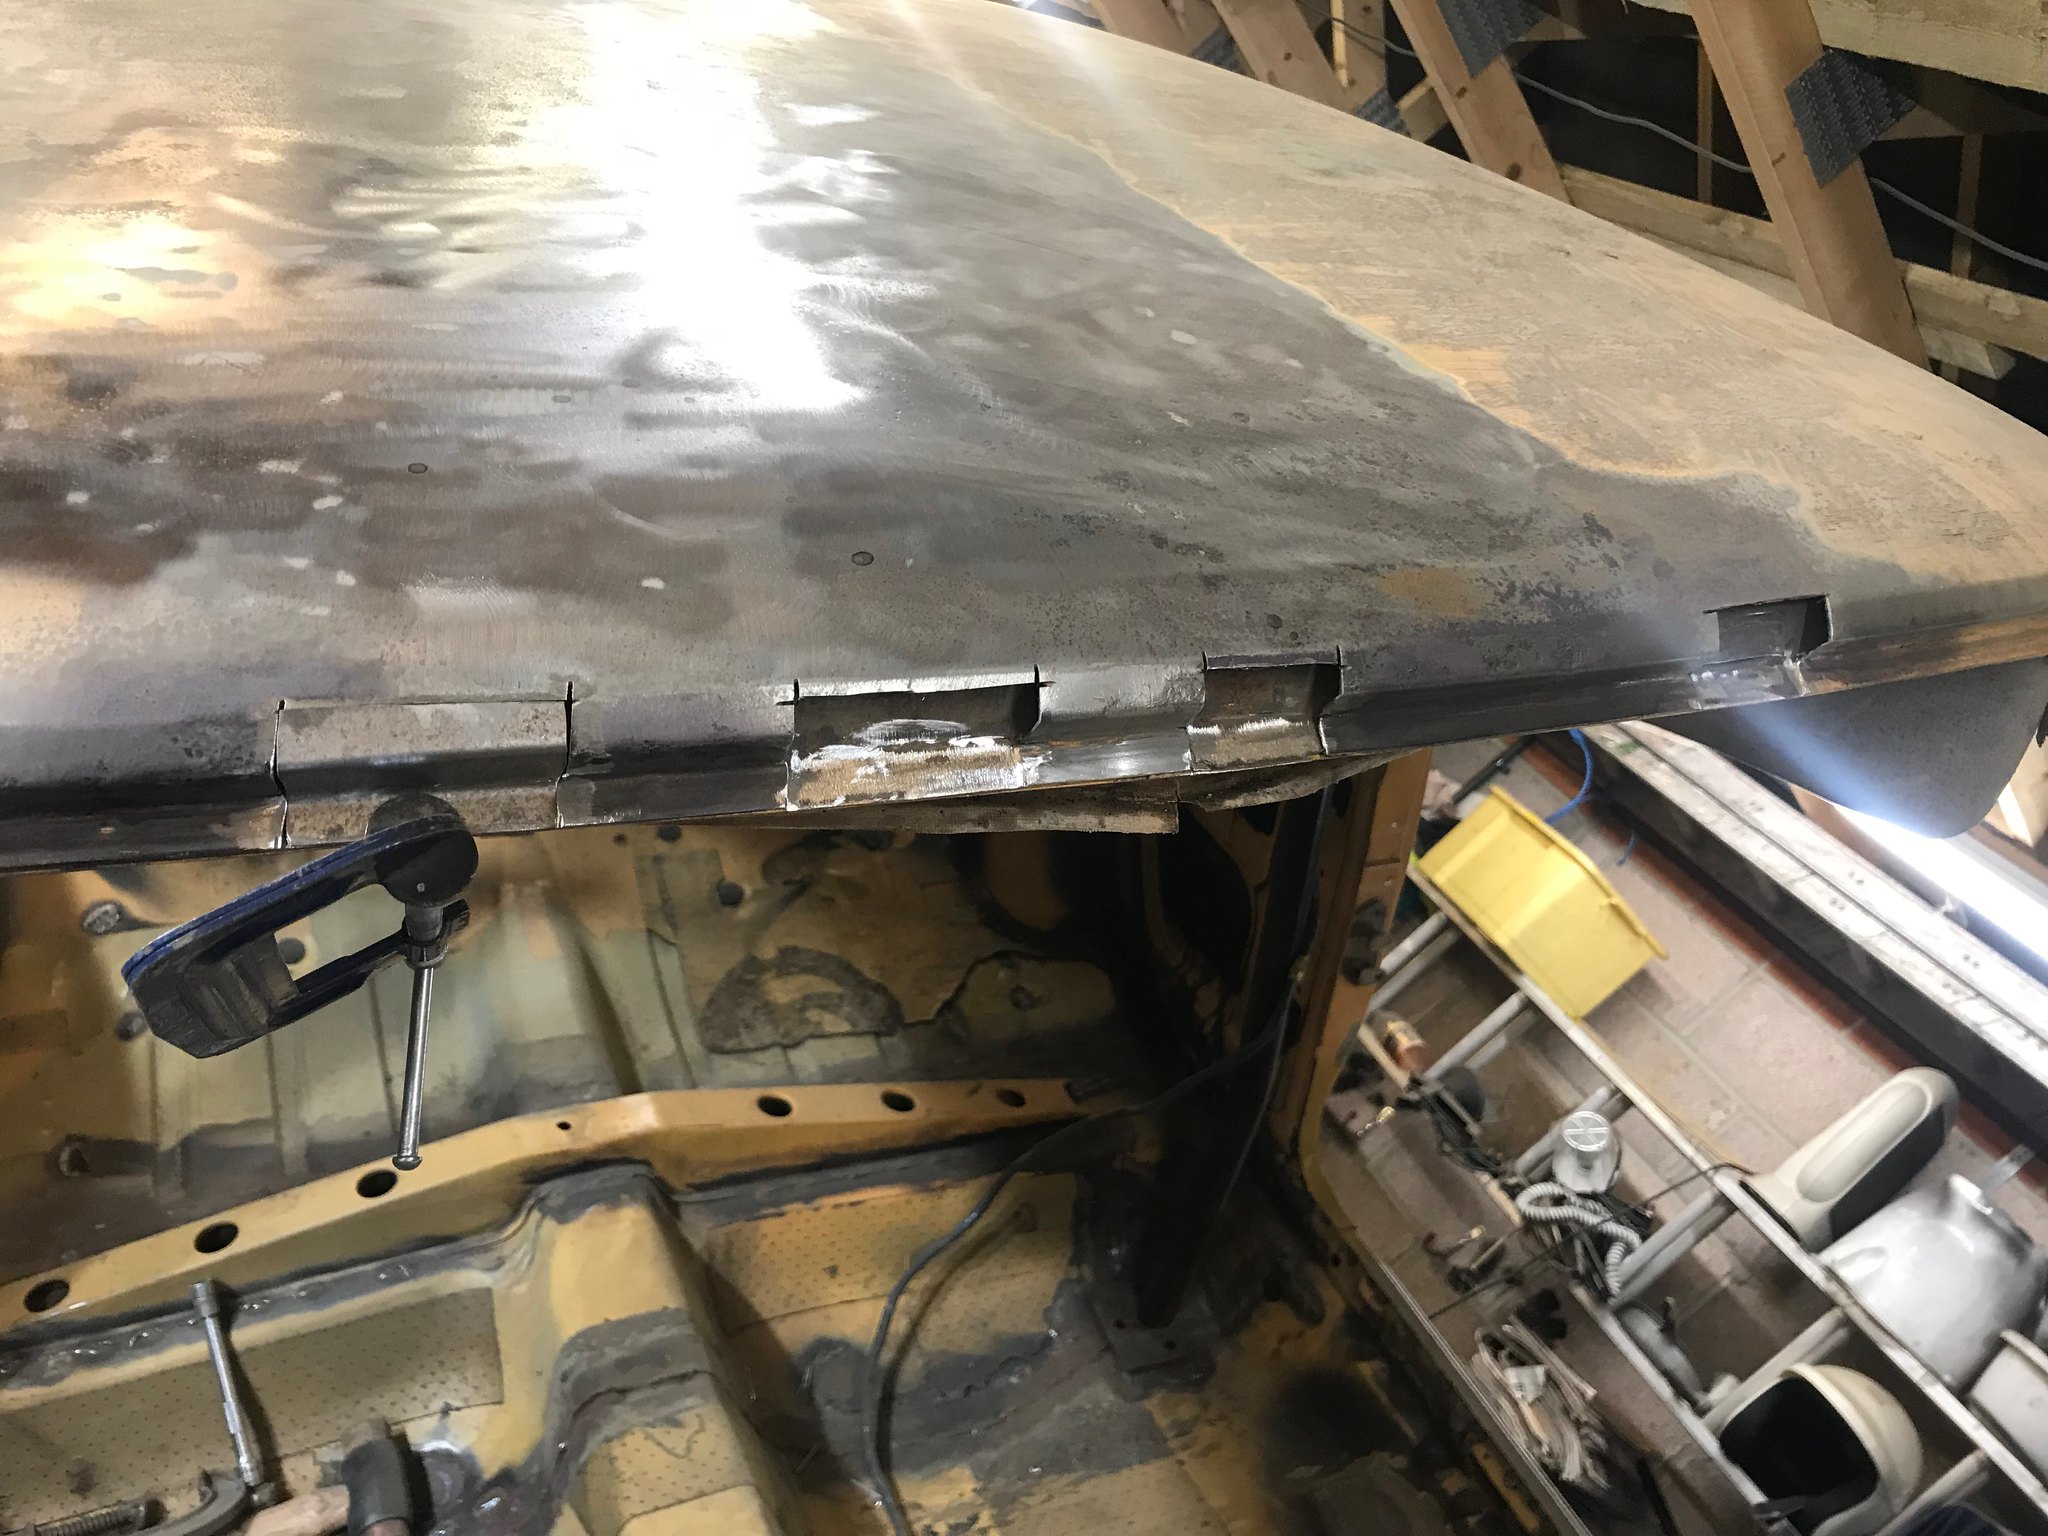 Untitled Untitled by Nevtiger, on Flickr 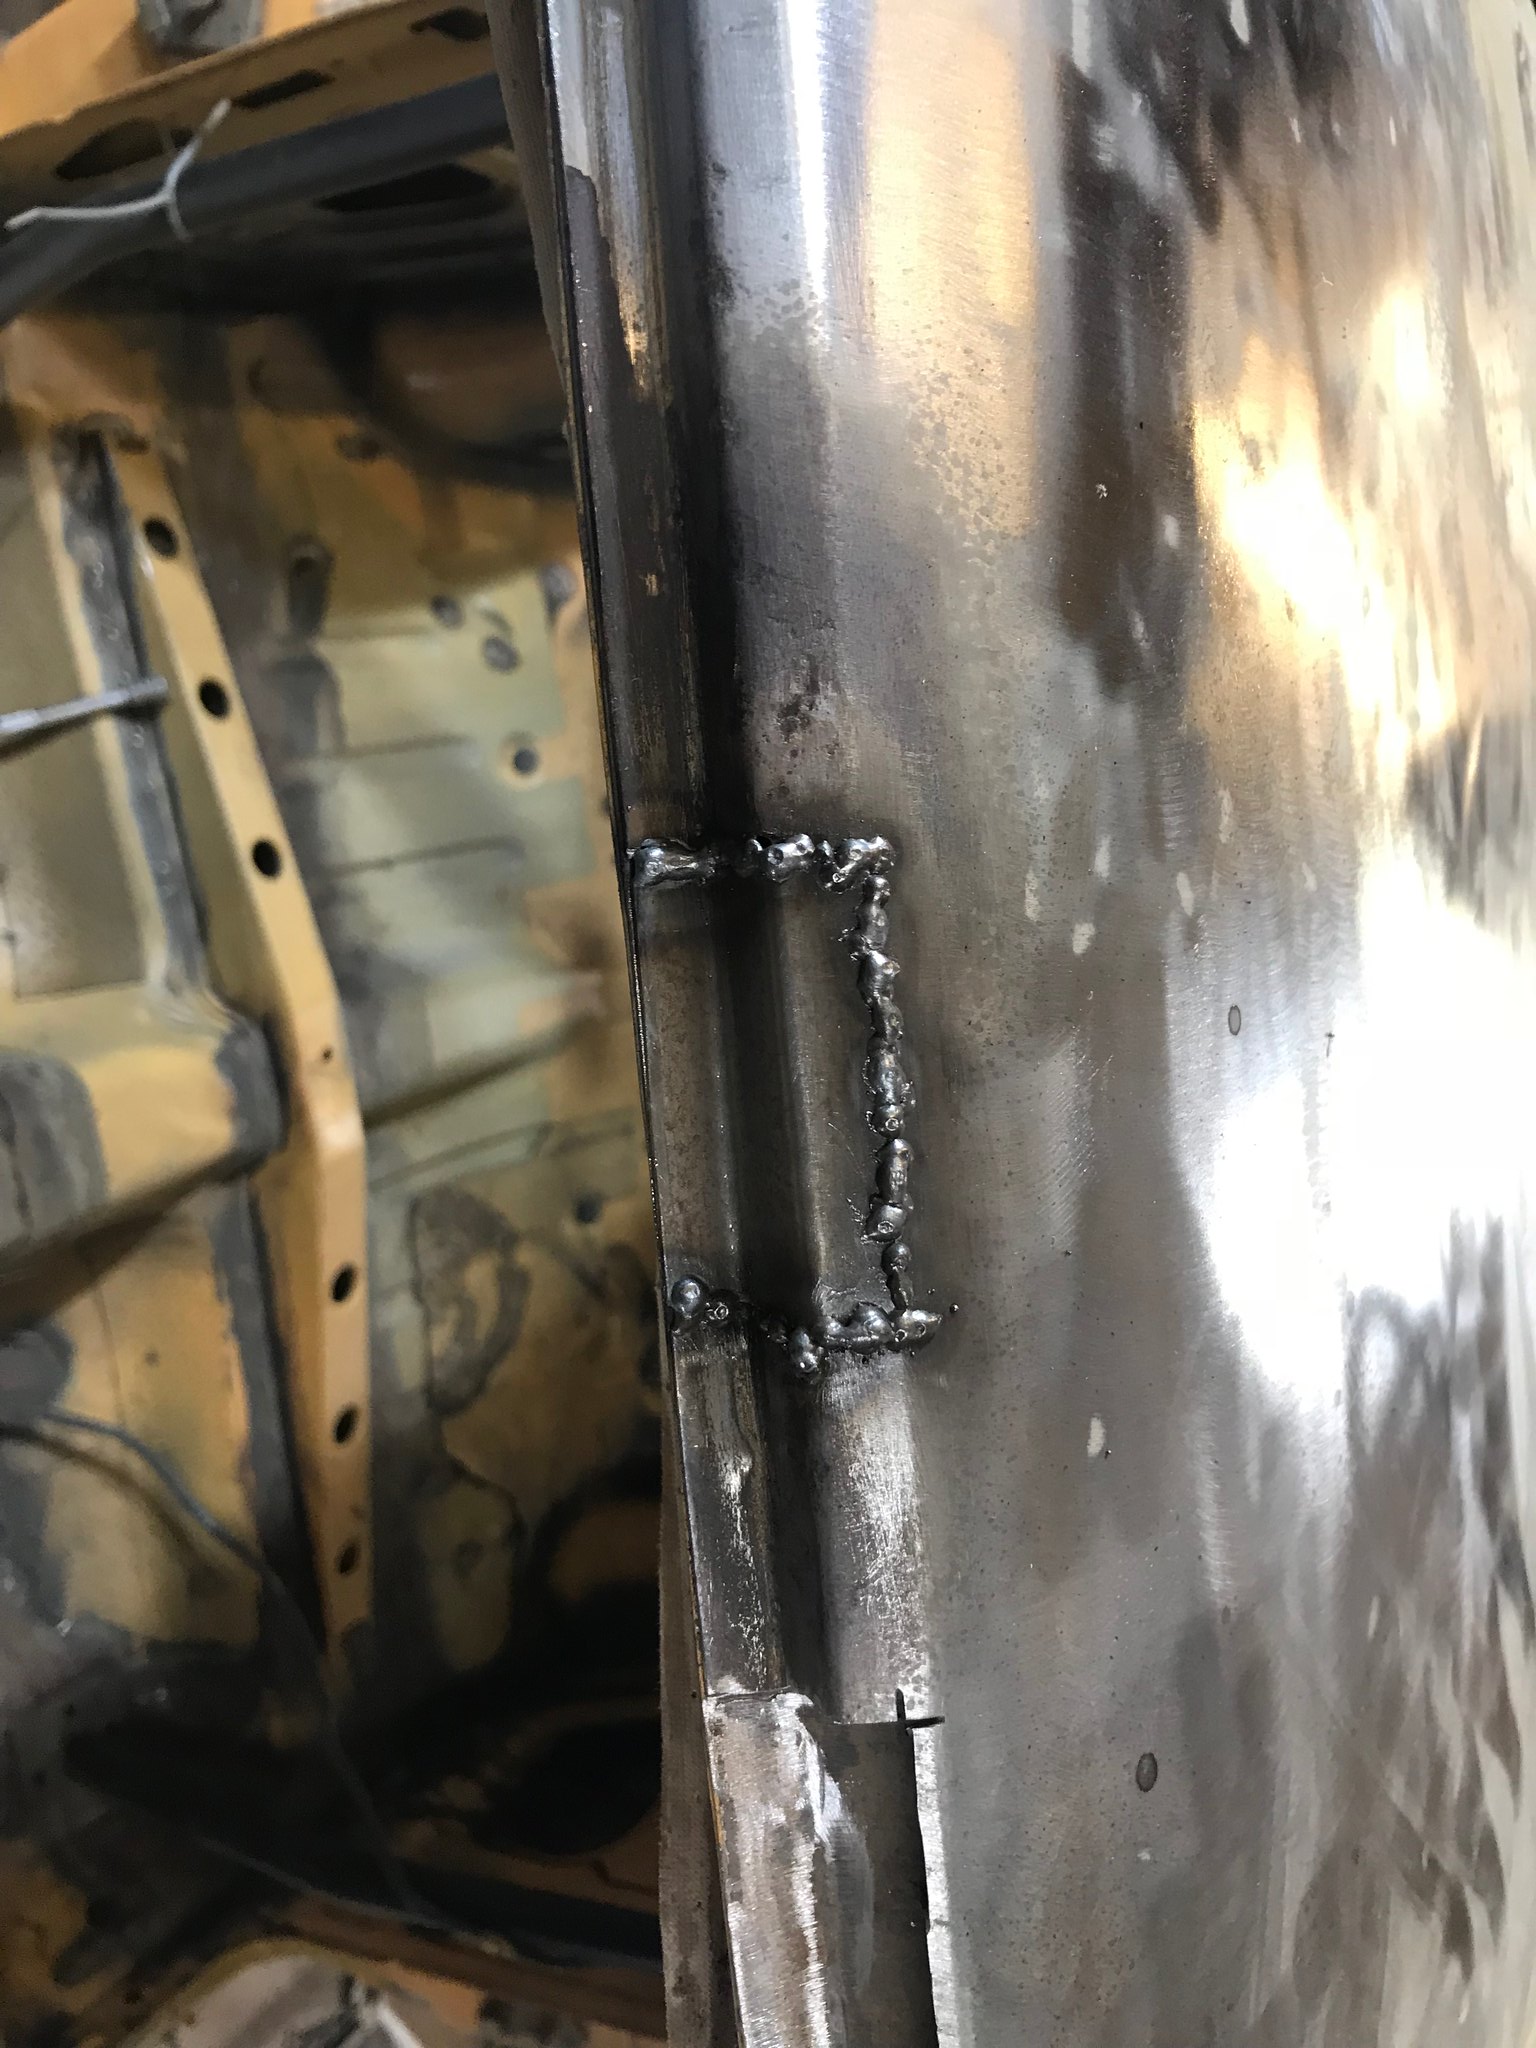 Untitled Untitled by Nevtiger, on Flickr Yep slow progress but not much welding left to do...... |
| |
|
|
|
|
|
|
|
More cutting of metal, bending it, welding it and then taking it back resulted in this: 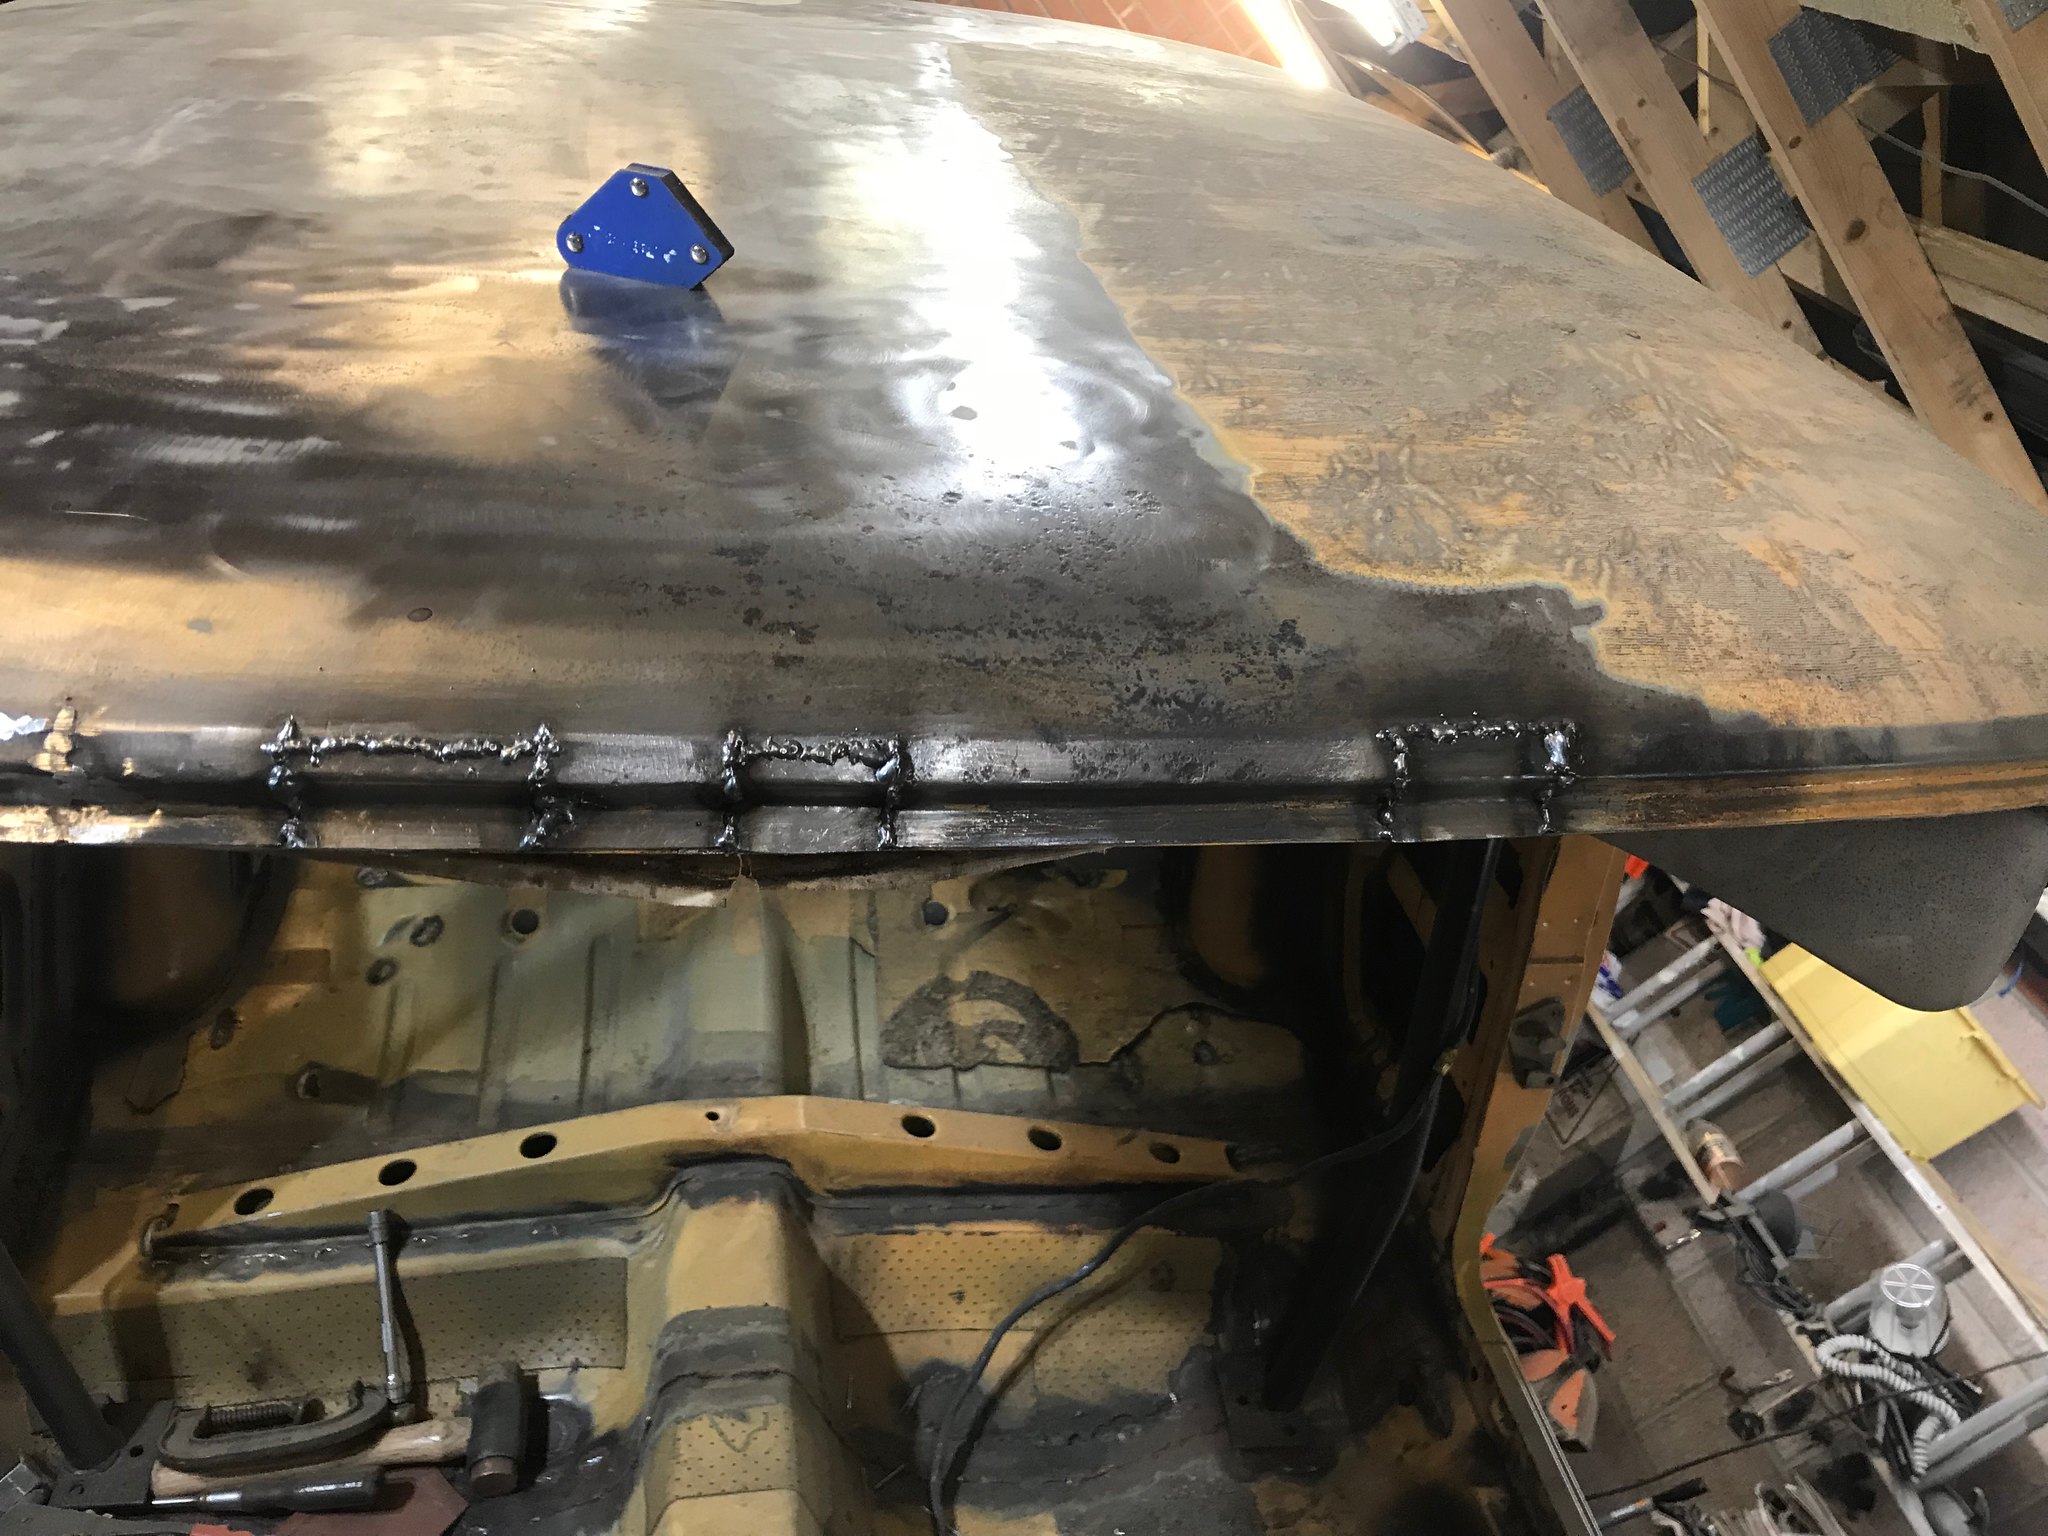 Untitled Untitled by Nevtiger, on Flickr 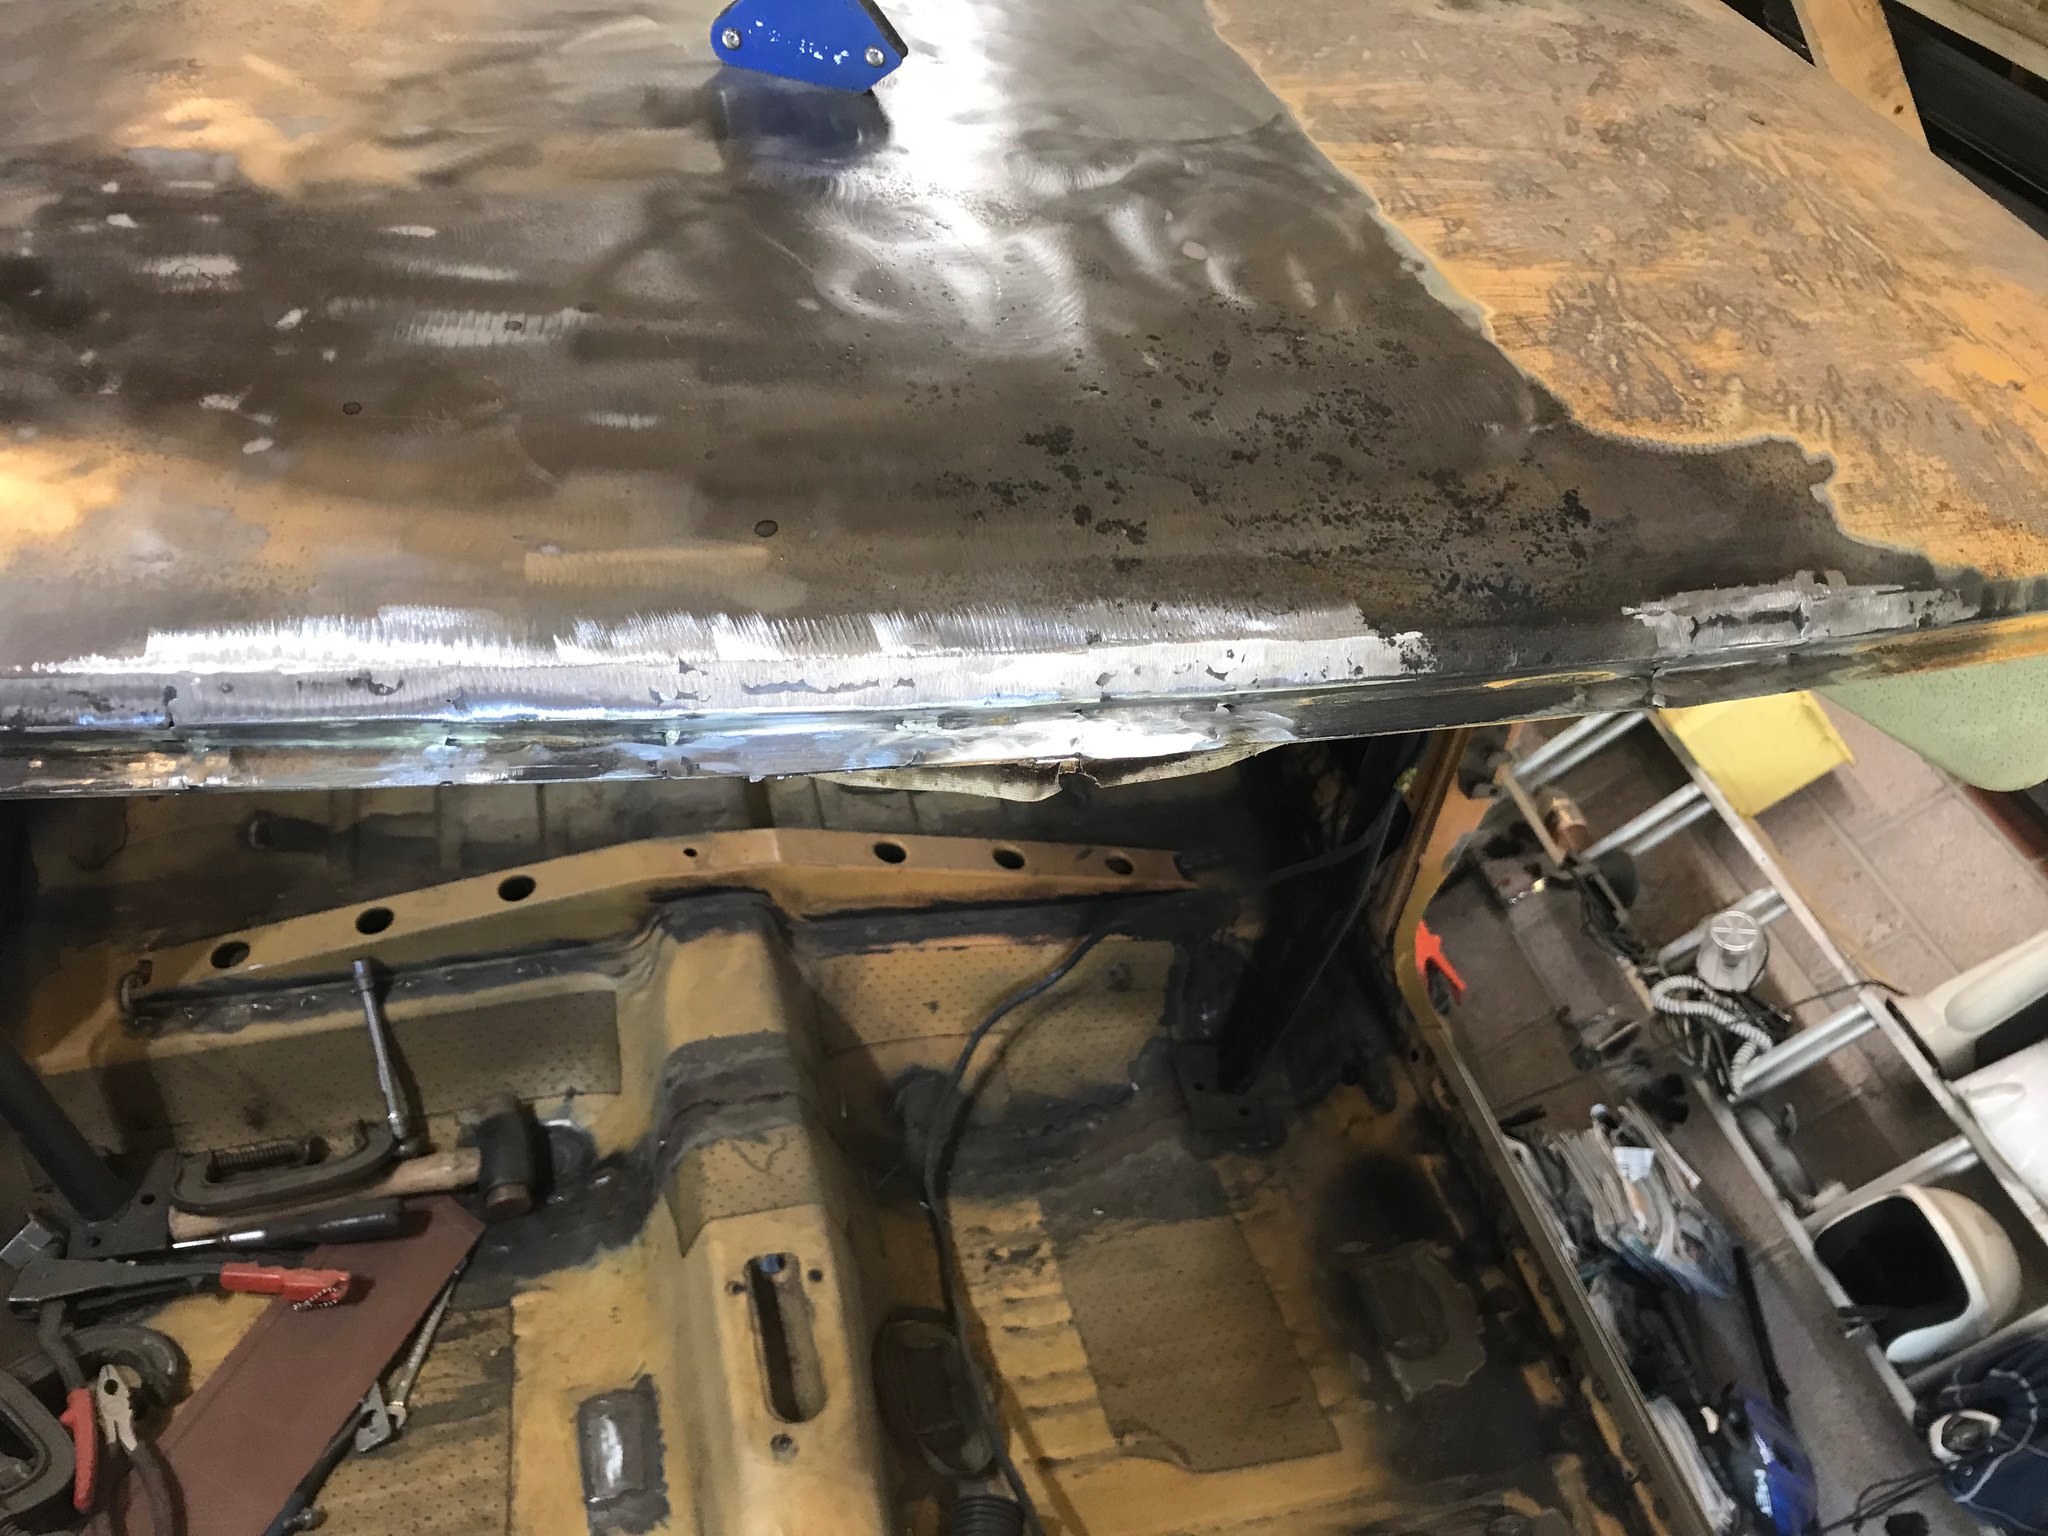 Untitled Untitled by Nevtiger, on Flickr I little bit of filler and it looks good as new. Most of this is hidden under the window rubber but the bits out side the rubber did not need any filler which pleased me. Then a trip to a work meeting and a quick detour in Kent resulted in the purchase of these bits: 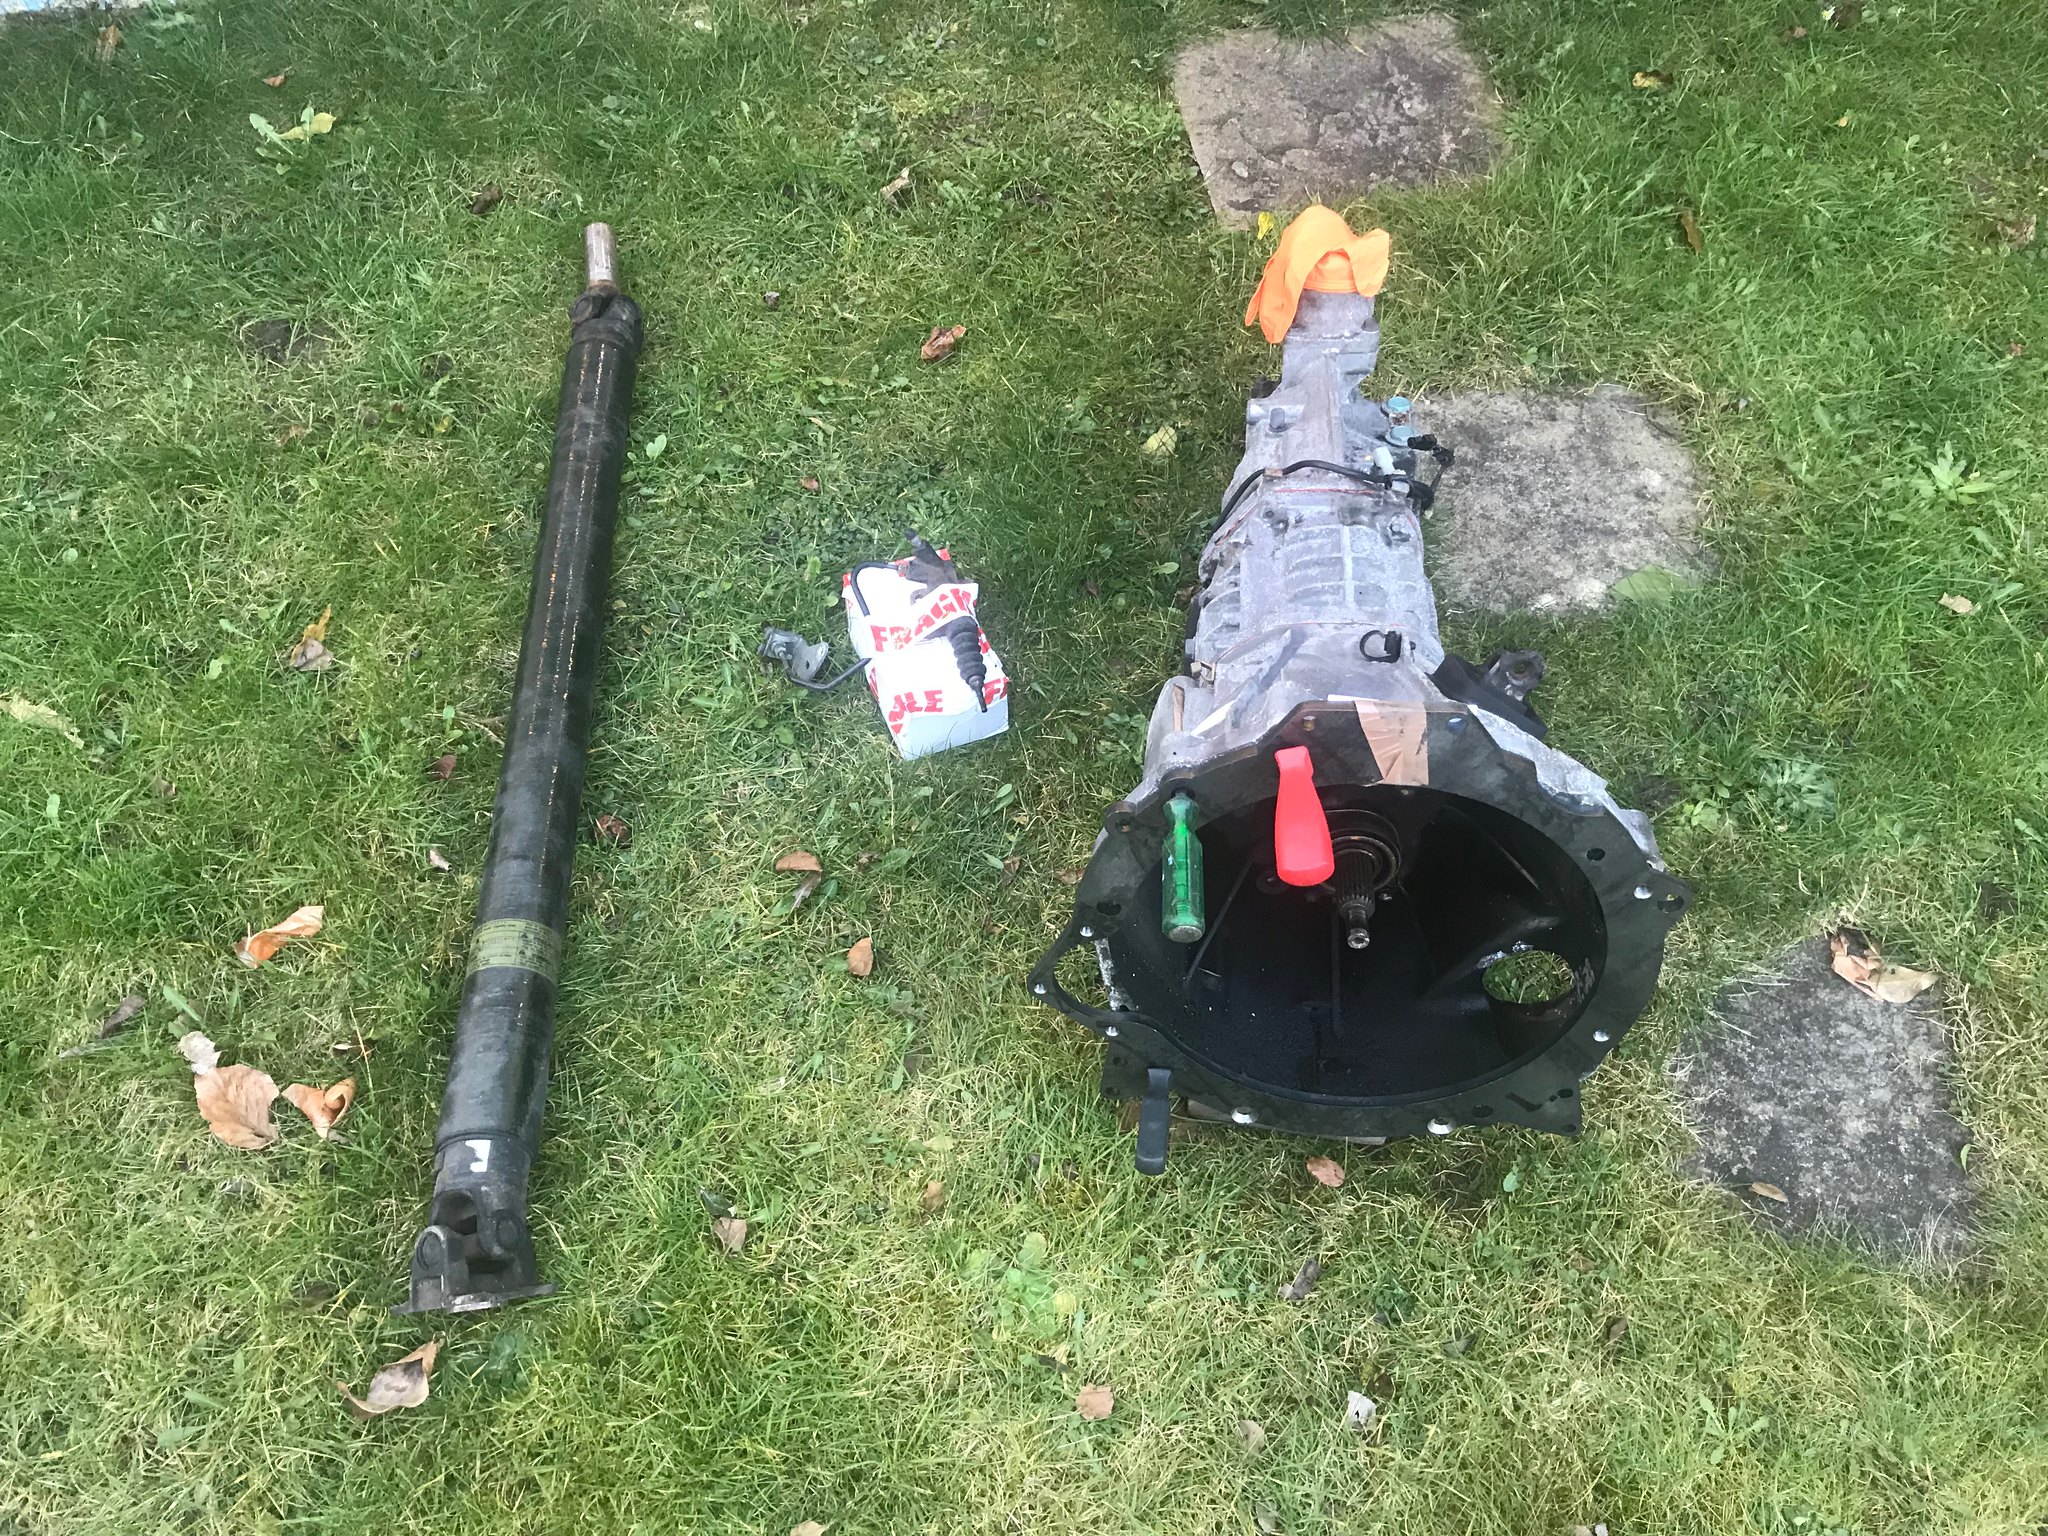 Untitled Untitled by Nevtiger, on Flickr Not the screw drivers! The box is the Mazda RX8 6 speed along with the clutch slave cylinder and the shifter and carbon prop. The adaptor plate came from a guy in south wales who makes a whole heap of different adaptors for the gearbox. Which means i now have 4 different gearboxes i have purchased for the project; M5 Gertag 420G 6 speed, BMW ZF 6 speed, Jaguar Getrag 5 speed and the RX8 gearbox! I have sold the 420G to a Russian...... He has paid a deposit but as of yet has failed to pick it up, oh well. I finished off the welding inside the car, the seam plates on the passenger footwell, and then wire brushed all of the welds including the ones that have been done from underneath. This is then all ready for spraying with RC900 and then seam sealing all of the seams. But just in case i need to cut the transmission tunnel i thought i would leave that until all welding is finished. If no transmission tunnel mods are needed the shell is finished....... 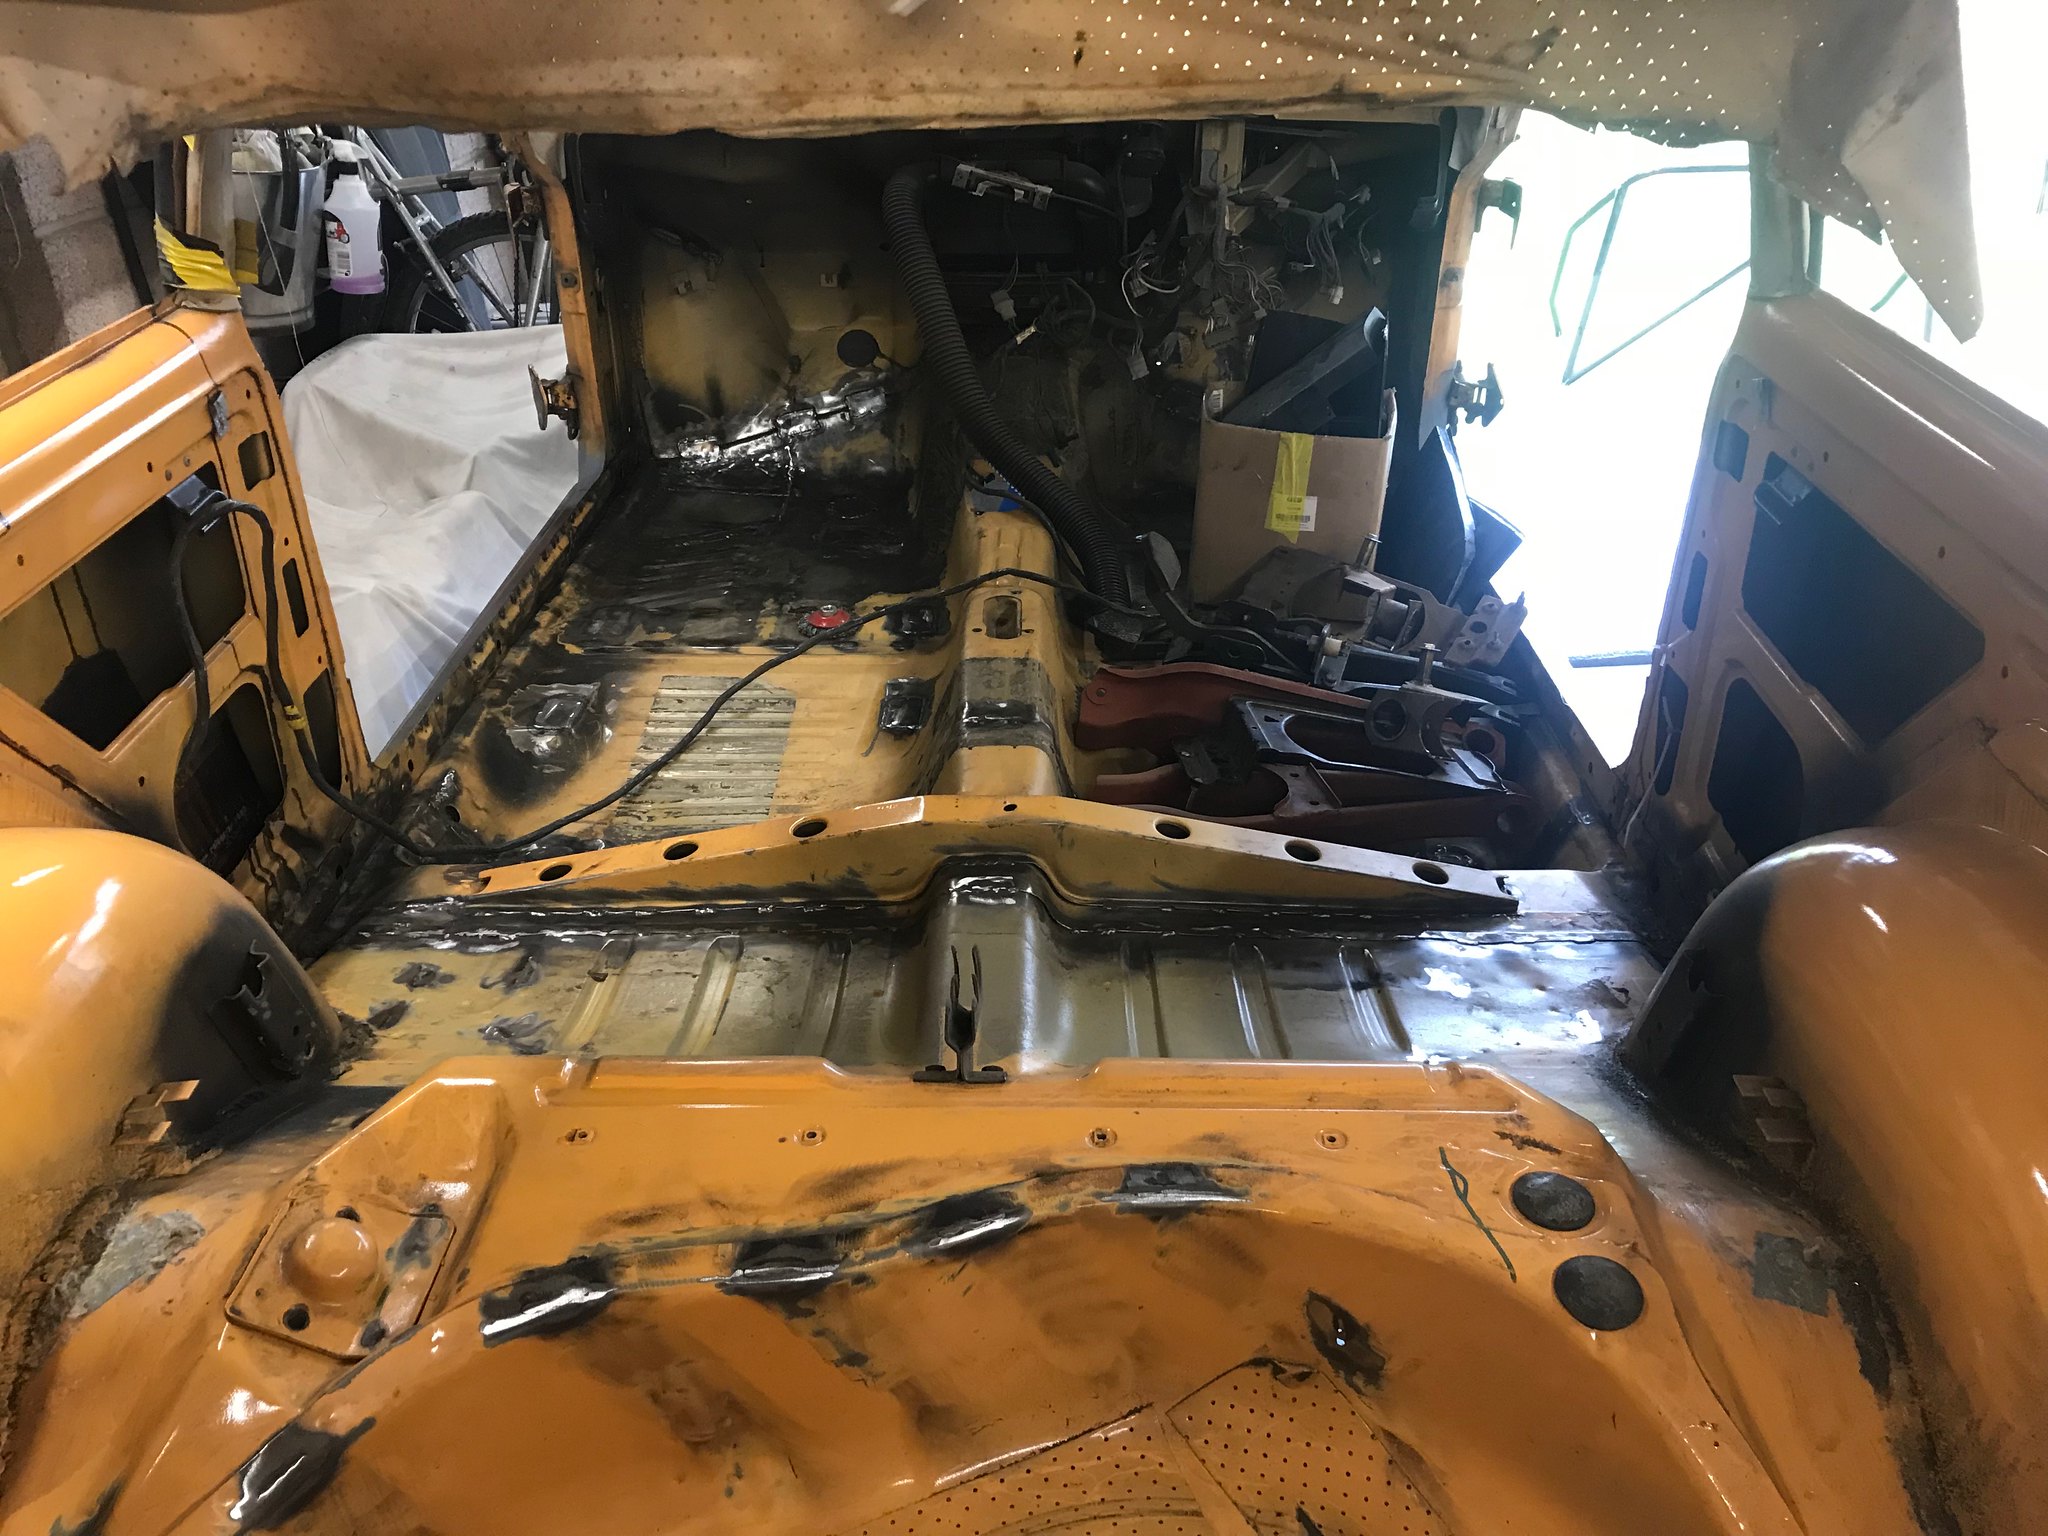 Untitled Untitled by Nevtiger, on Flickr So engine off the stand - this took half a day as i needed to clean the garage after all the welding and grinding, move stuff around and generally have a think - and on the bench. 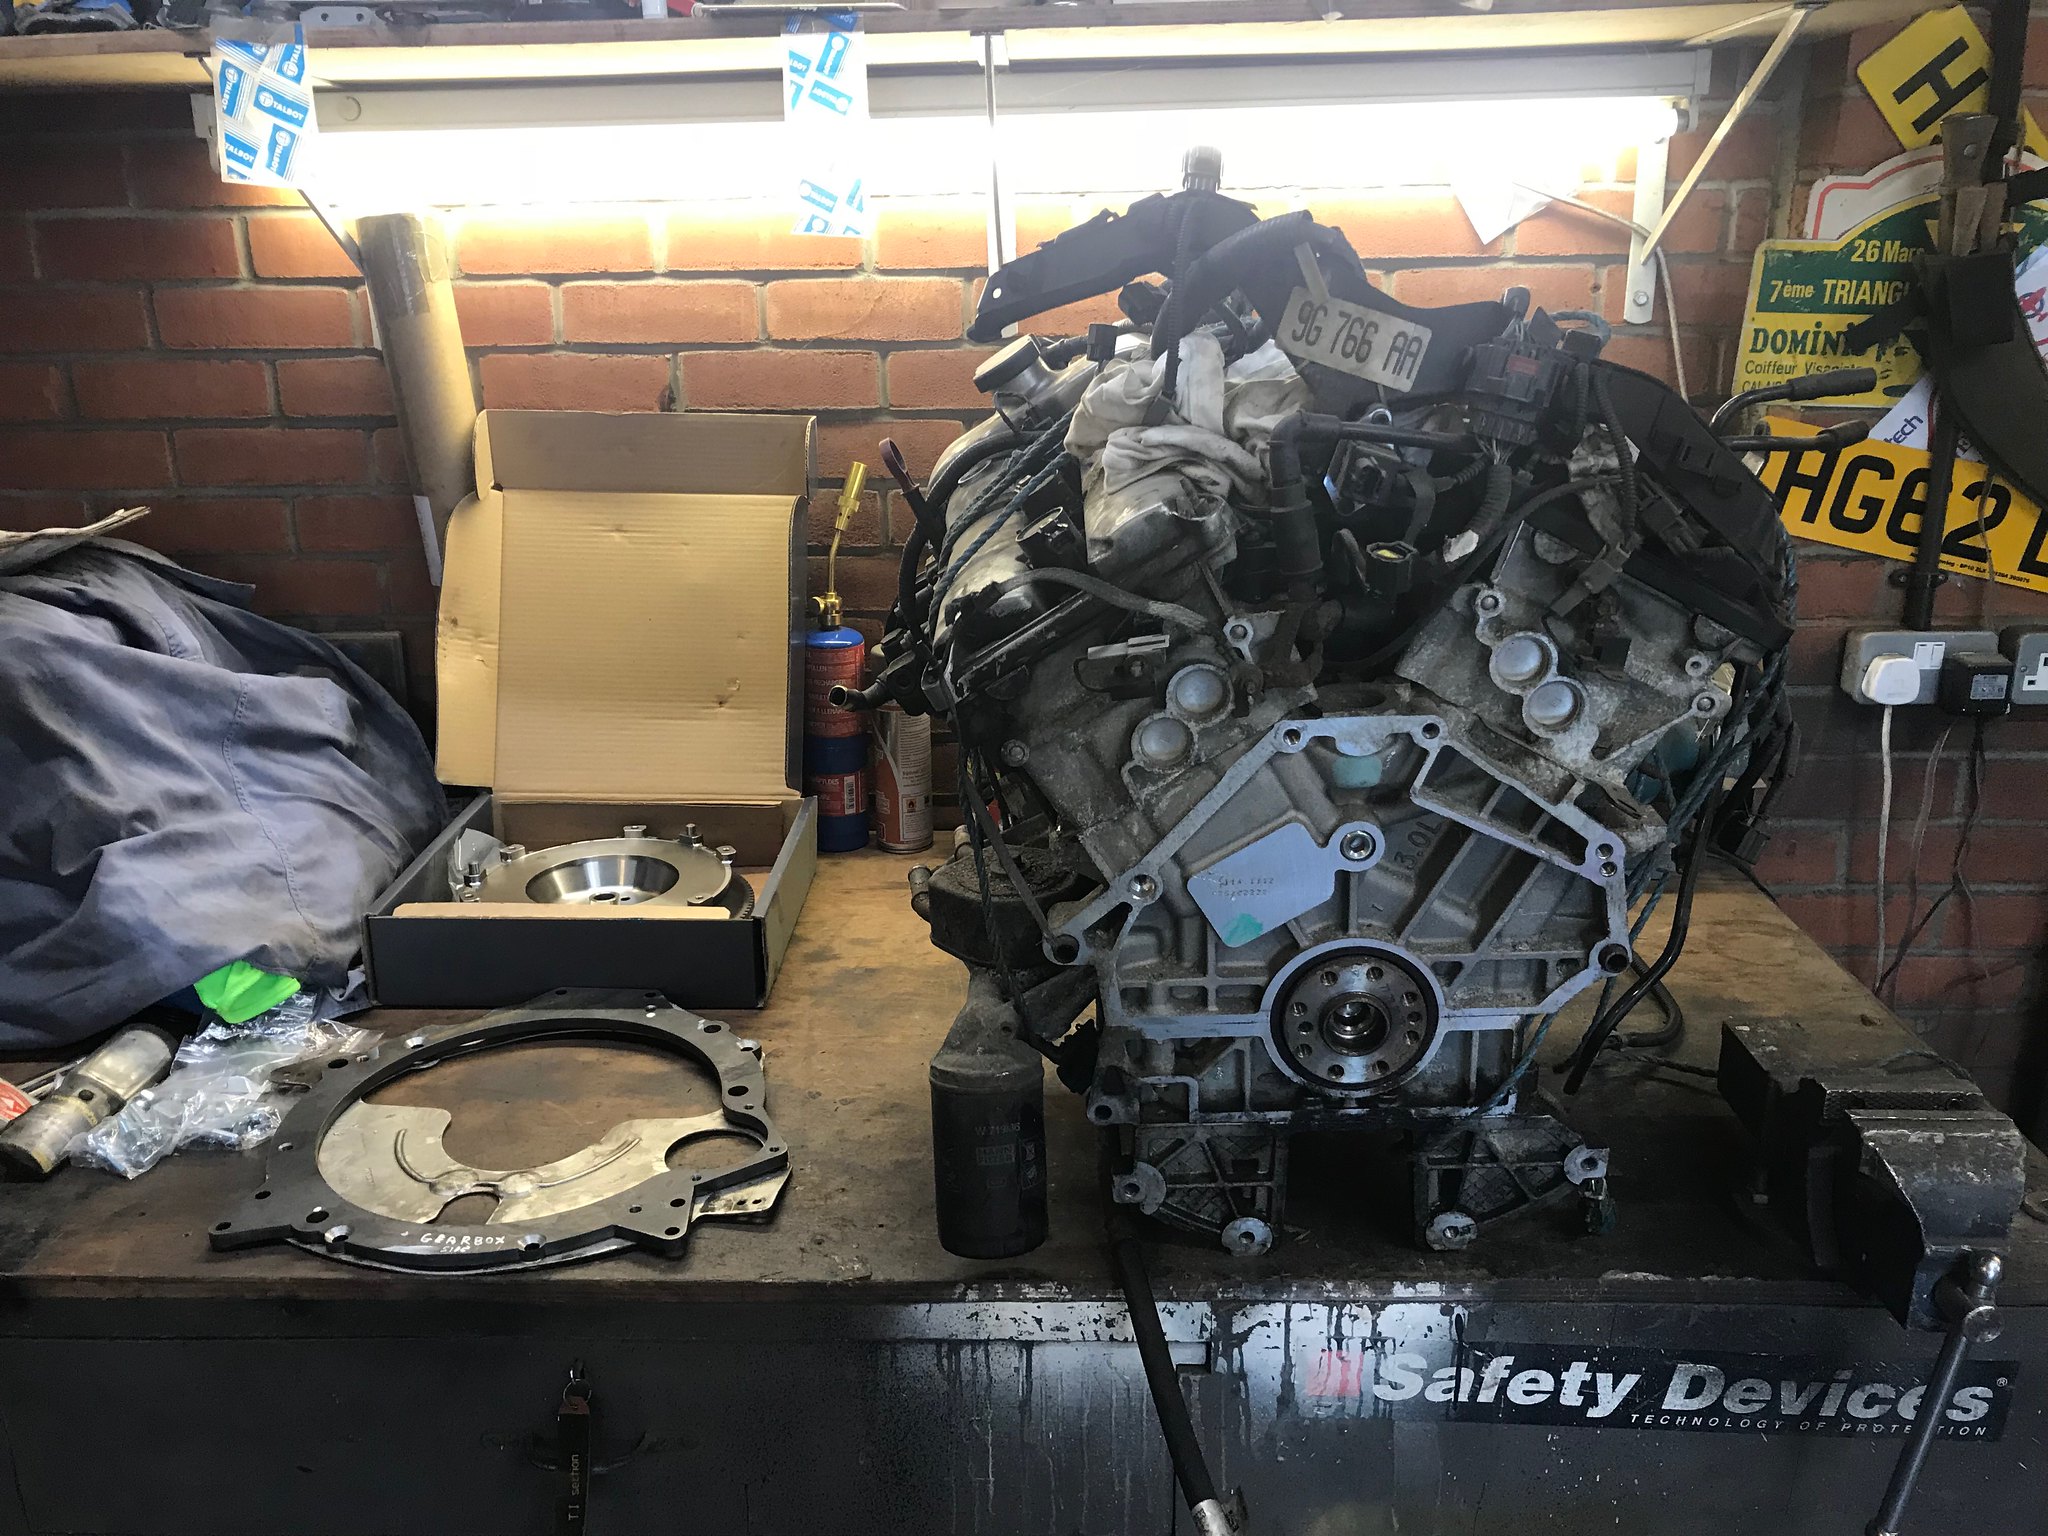 Untitled Untitled by Nevtiger, on Flickr Temporarily fit the flywheel and adaptor plate. [ 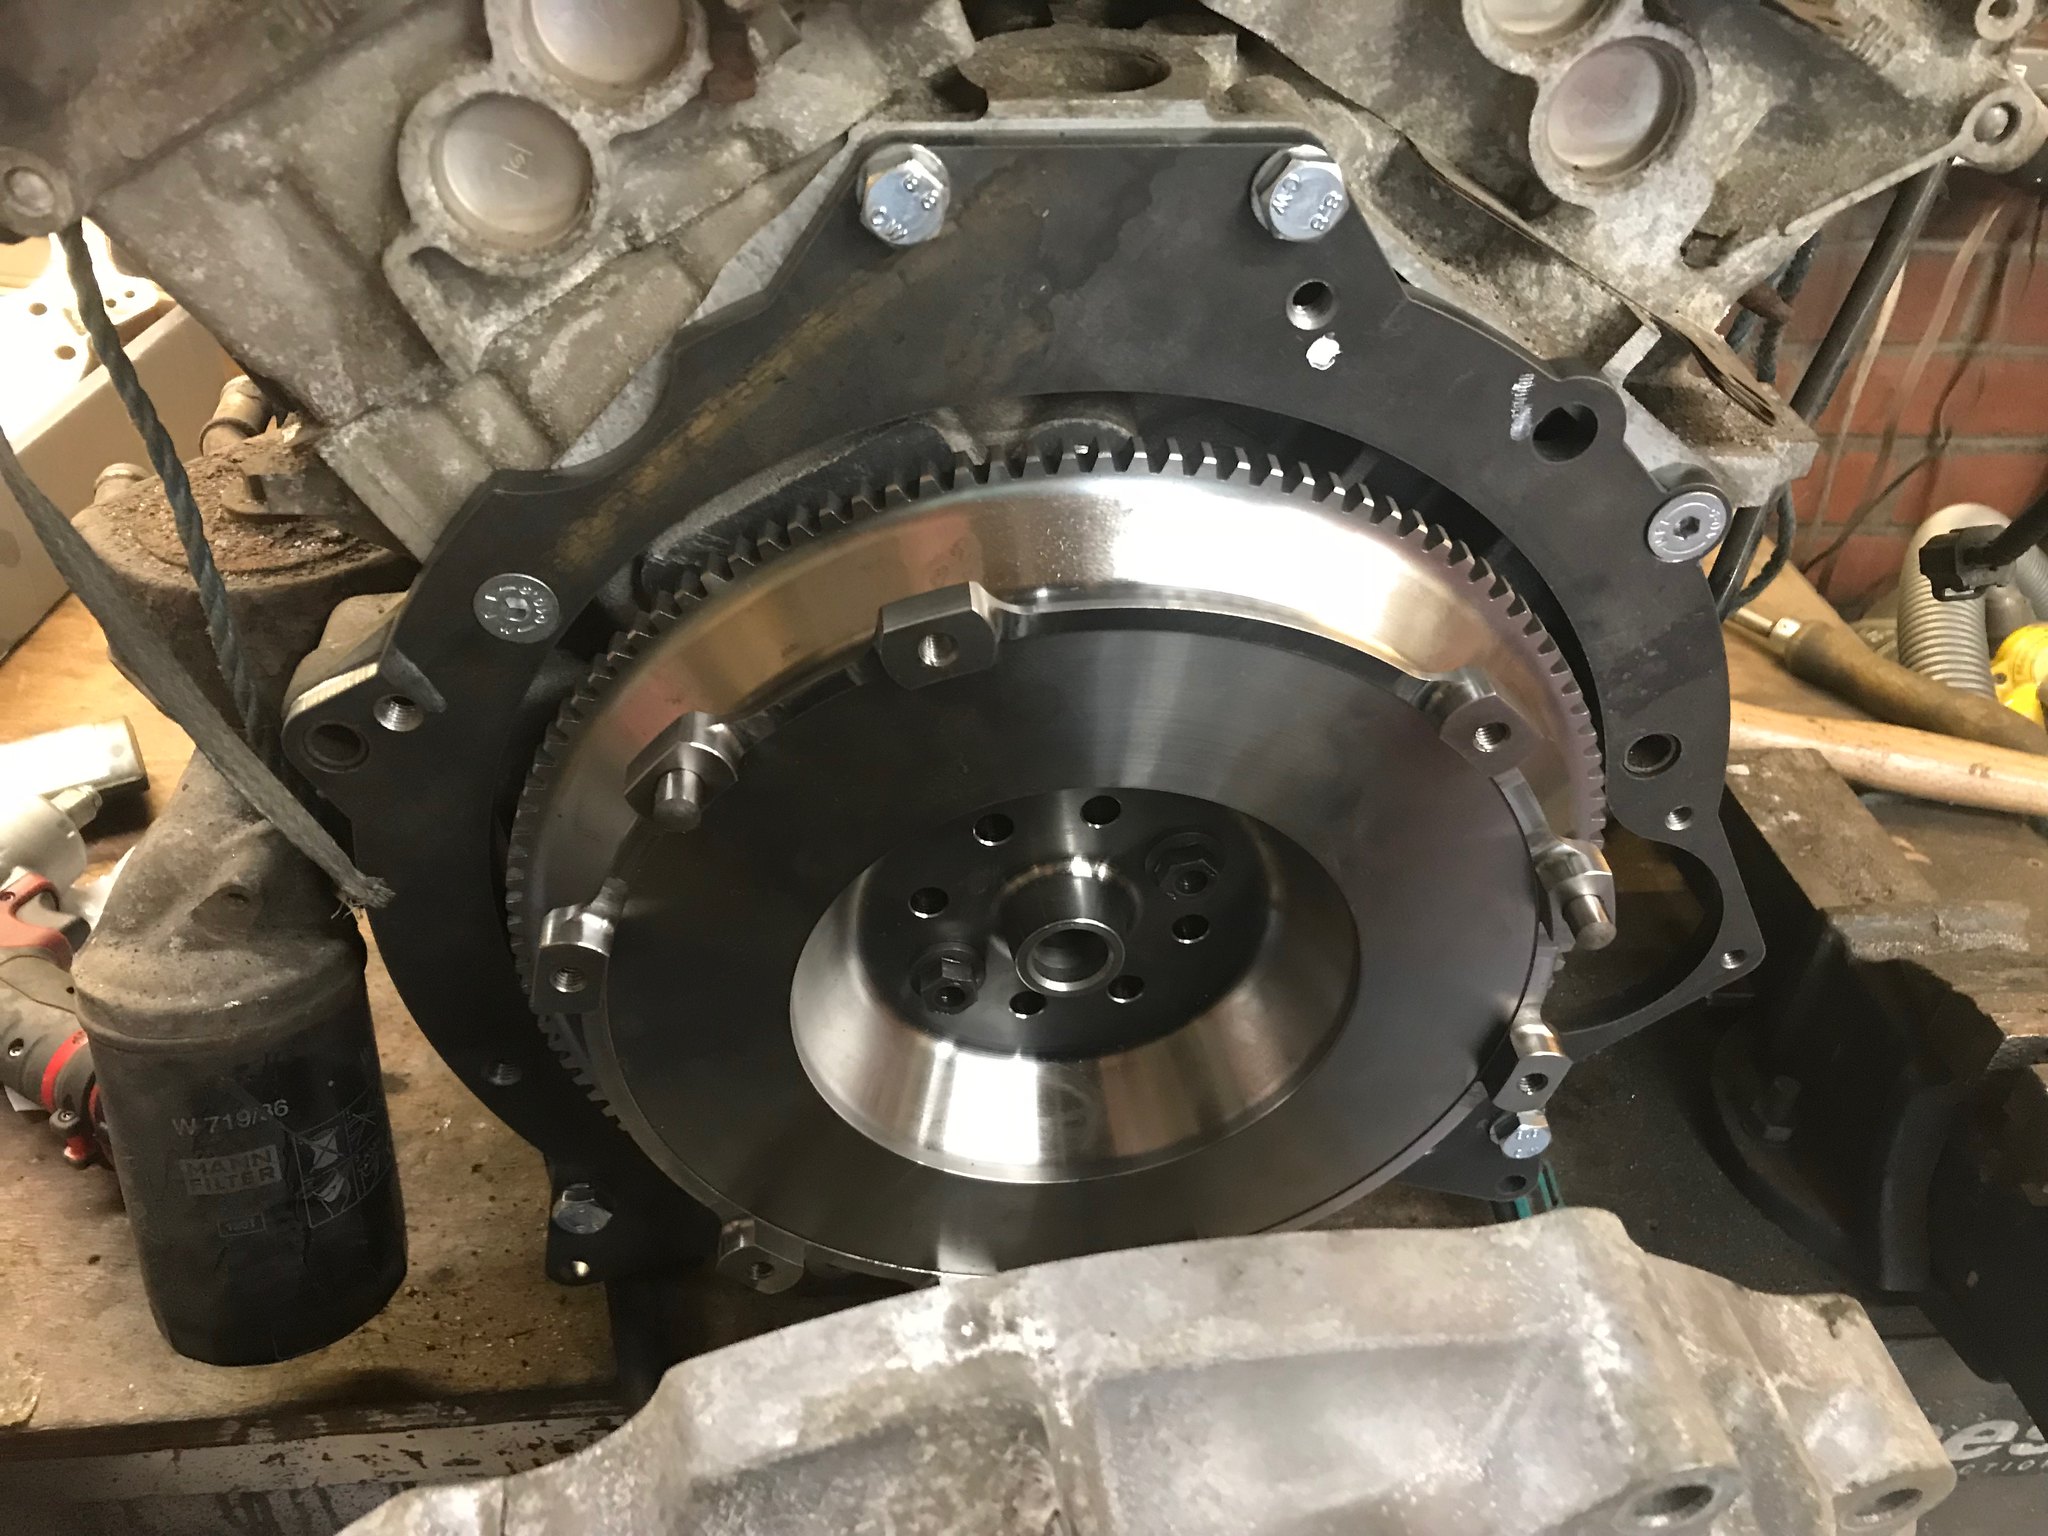 Untitled Untitled by Nevtiger, on Flickr And bolt the gearbox unto the engine. 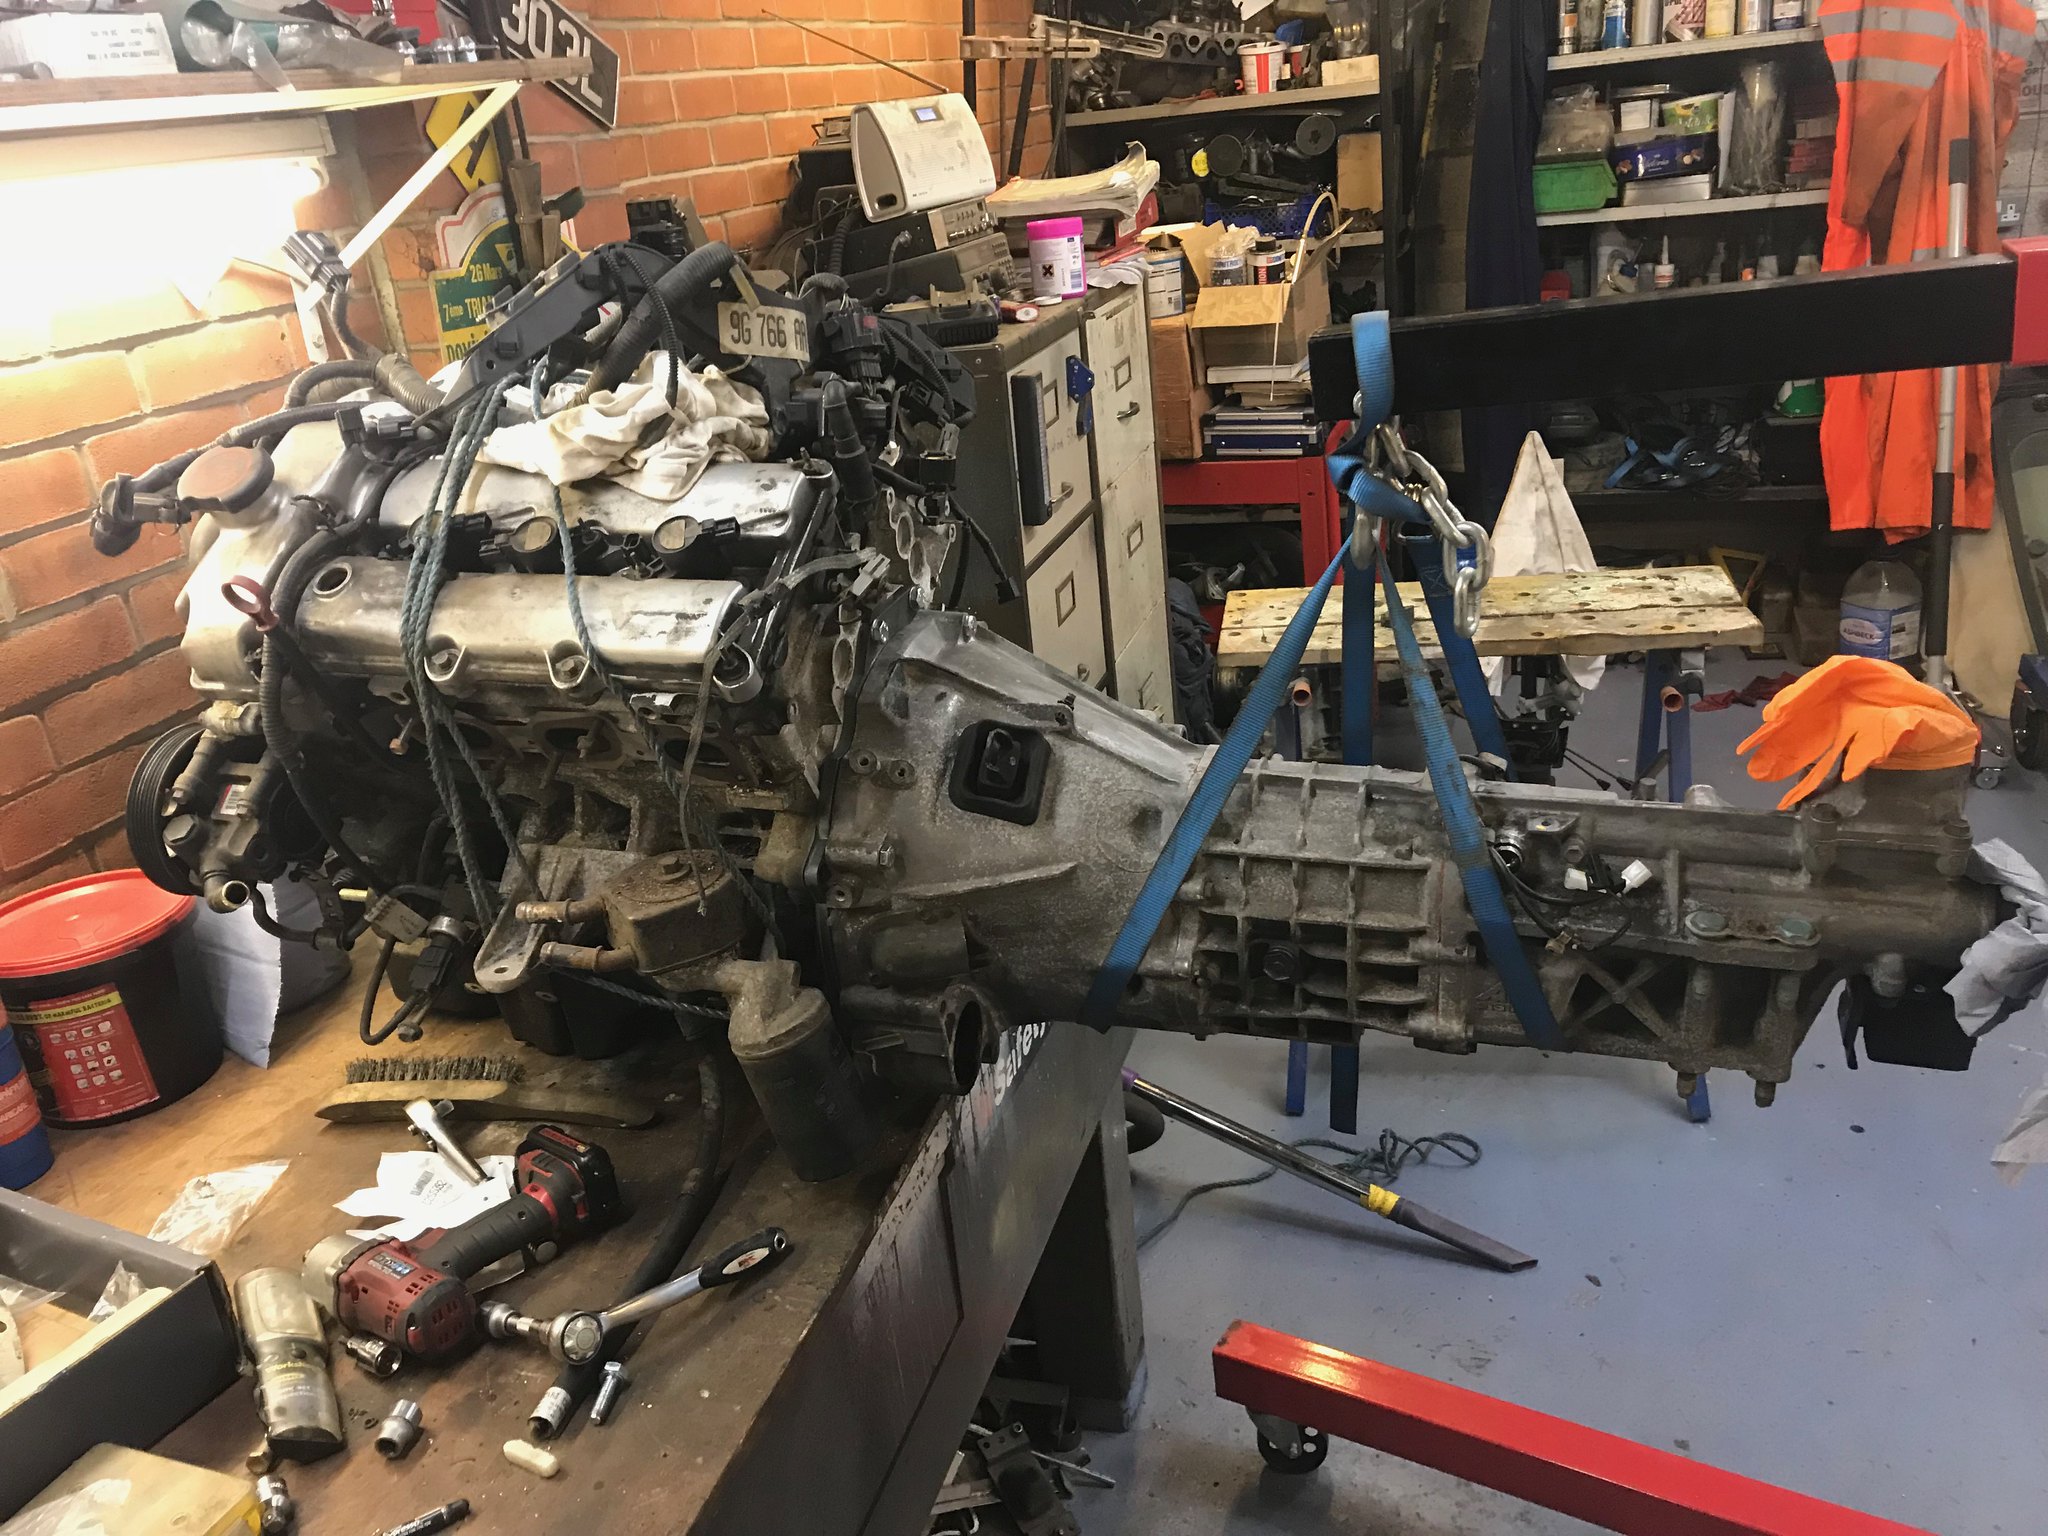 Untitled Untitled by Nevtiger, on Flickr First problem i have found is the clutch slave cylinder. The nearside cylinder heads interferes and something needs to be modified! Its about 7mm off so a combination of relieving the head casting protrusion and slight mod of the release arm should see it ok. 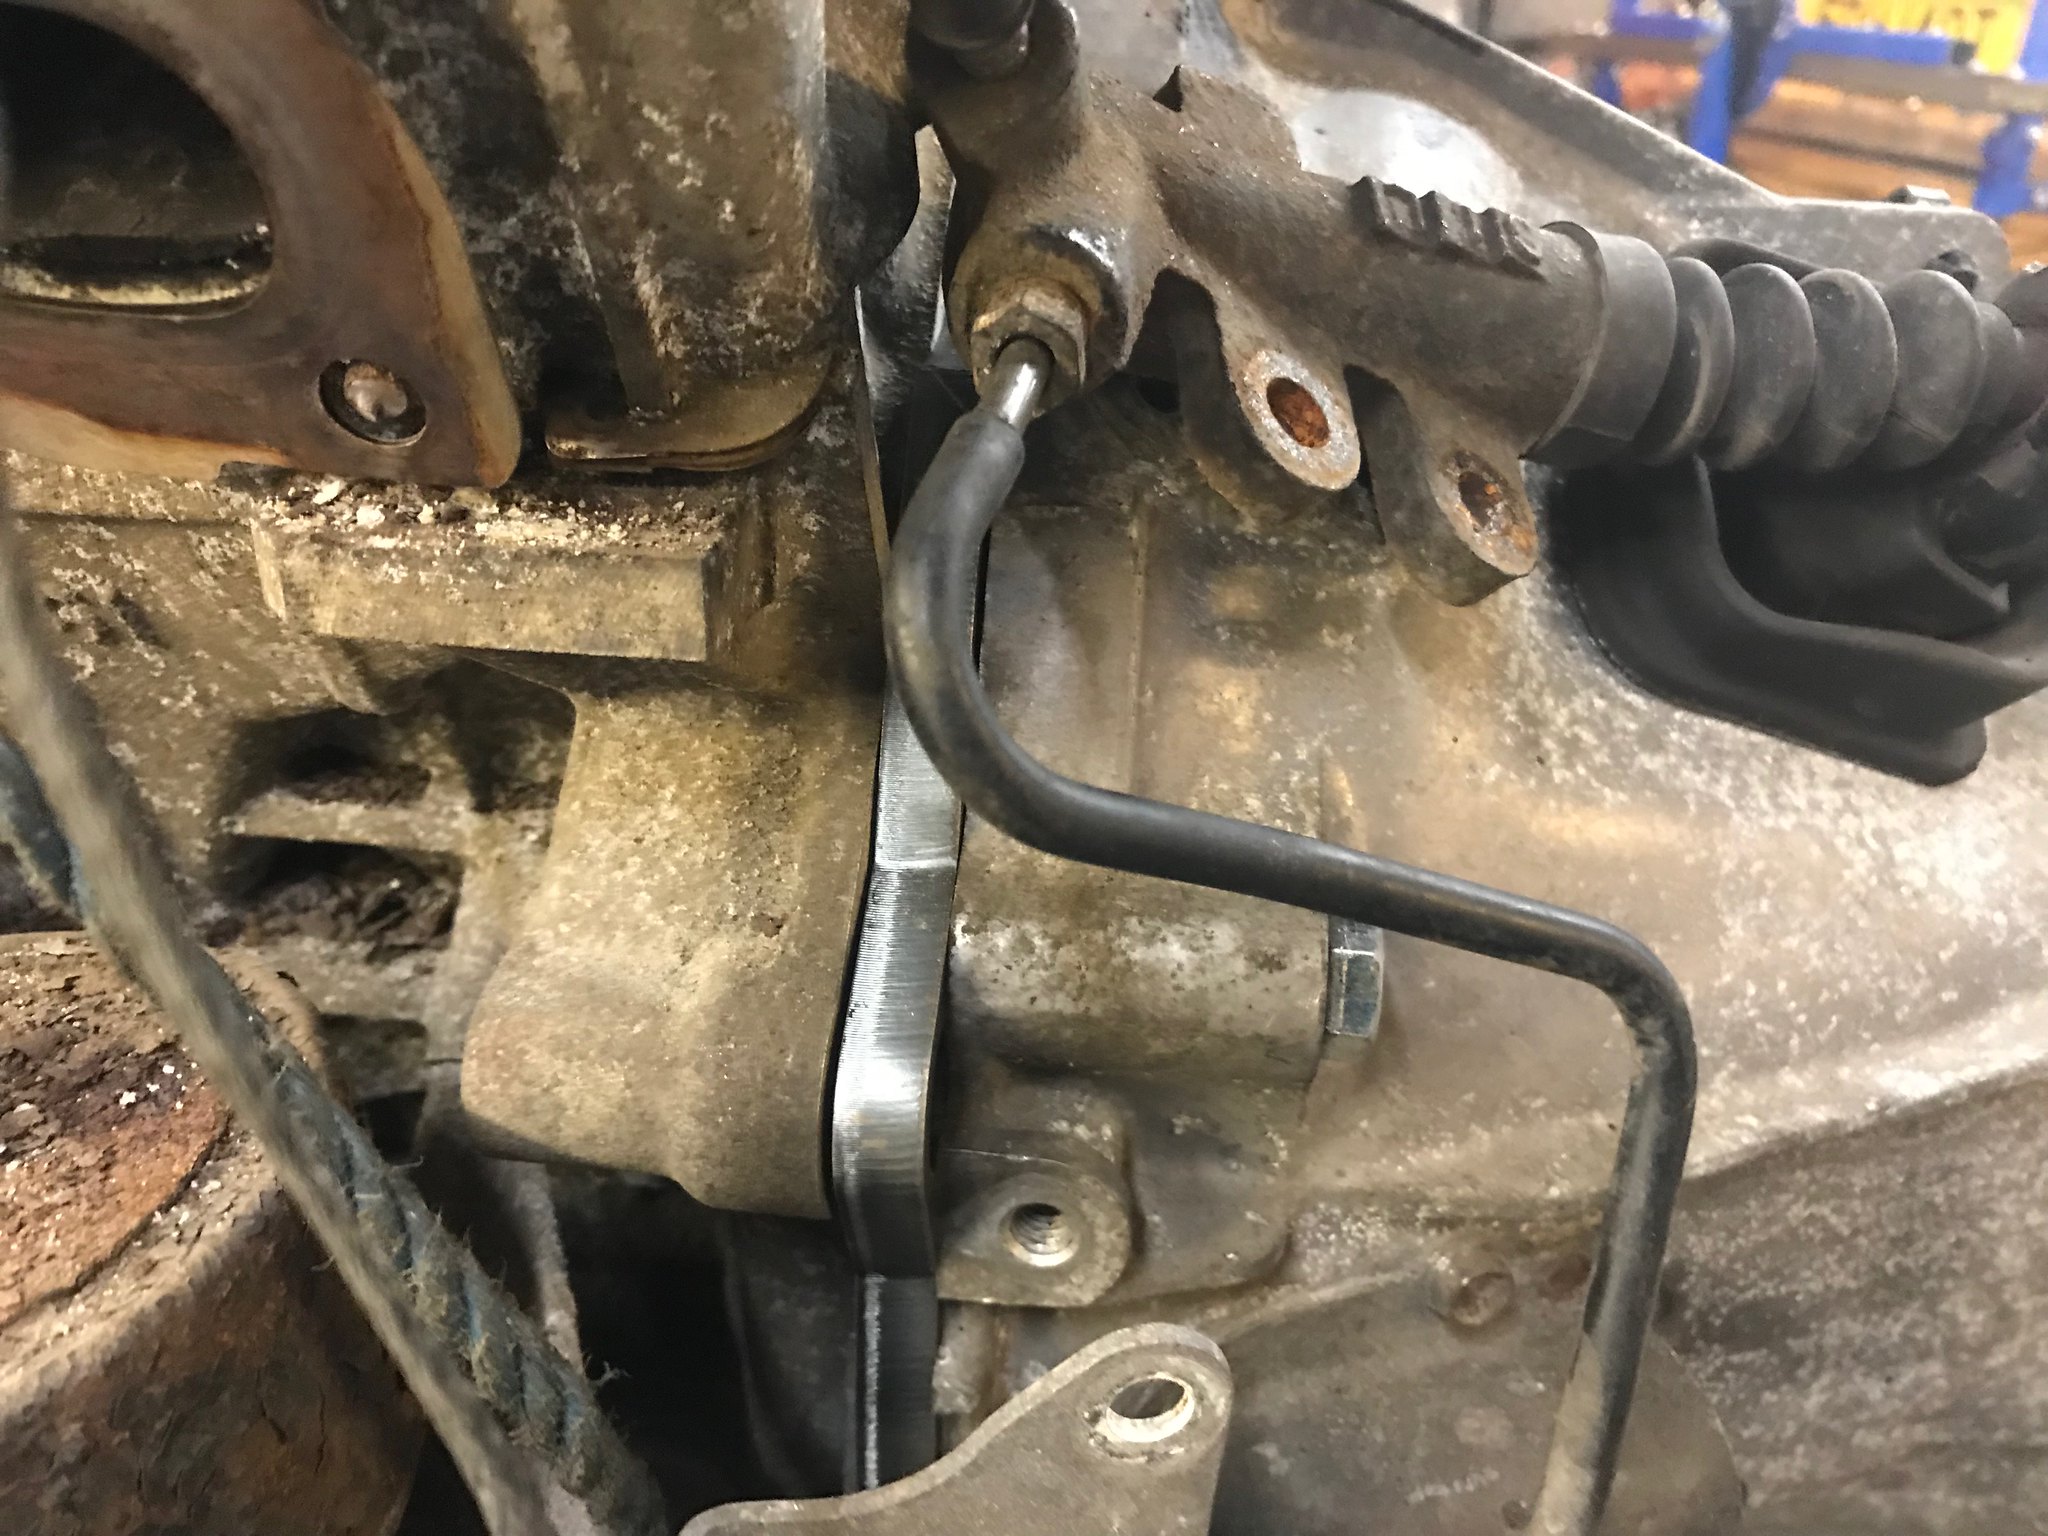 Untitled Untitled by Nevtiger, on Flickr Now all i have to do is trial fit the assembly into the shell. Which is on the spit. ah! |
| |
Last Edit: Mar 23, 2018 8:51:23 GMT by nevtiger
|
|
|
|
|
|
|
All i had to do was slide the engine and gearbox under the car and then lift it up into the shell. Sounds easier than actually doing it as the spit has a big bar right where i want to put the engine. A combination of being able to move the spit as its on wheels and rotating the shell to an angle meant its actually not too bad getting the engine assembly in and out. Ready to lift it up. 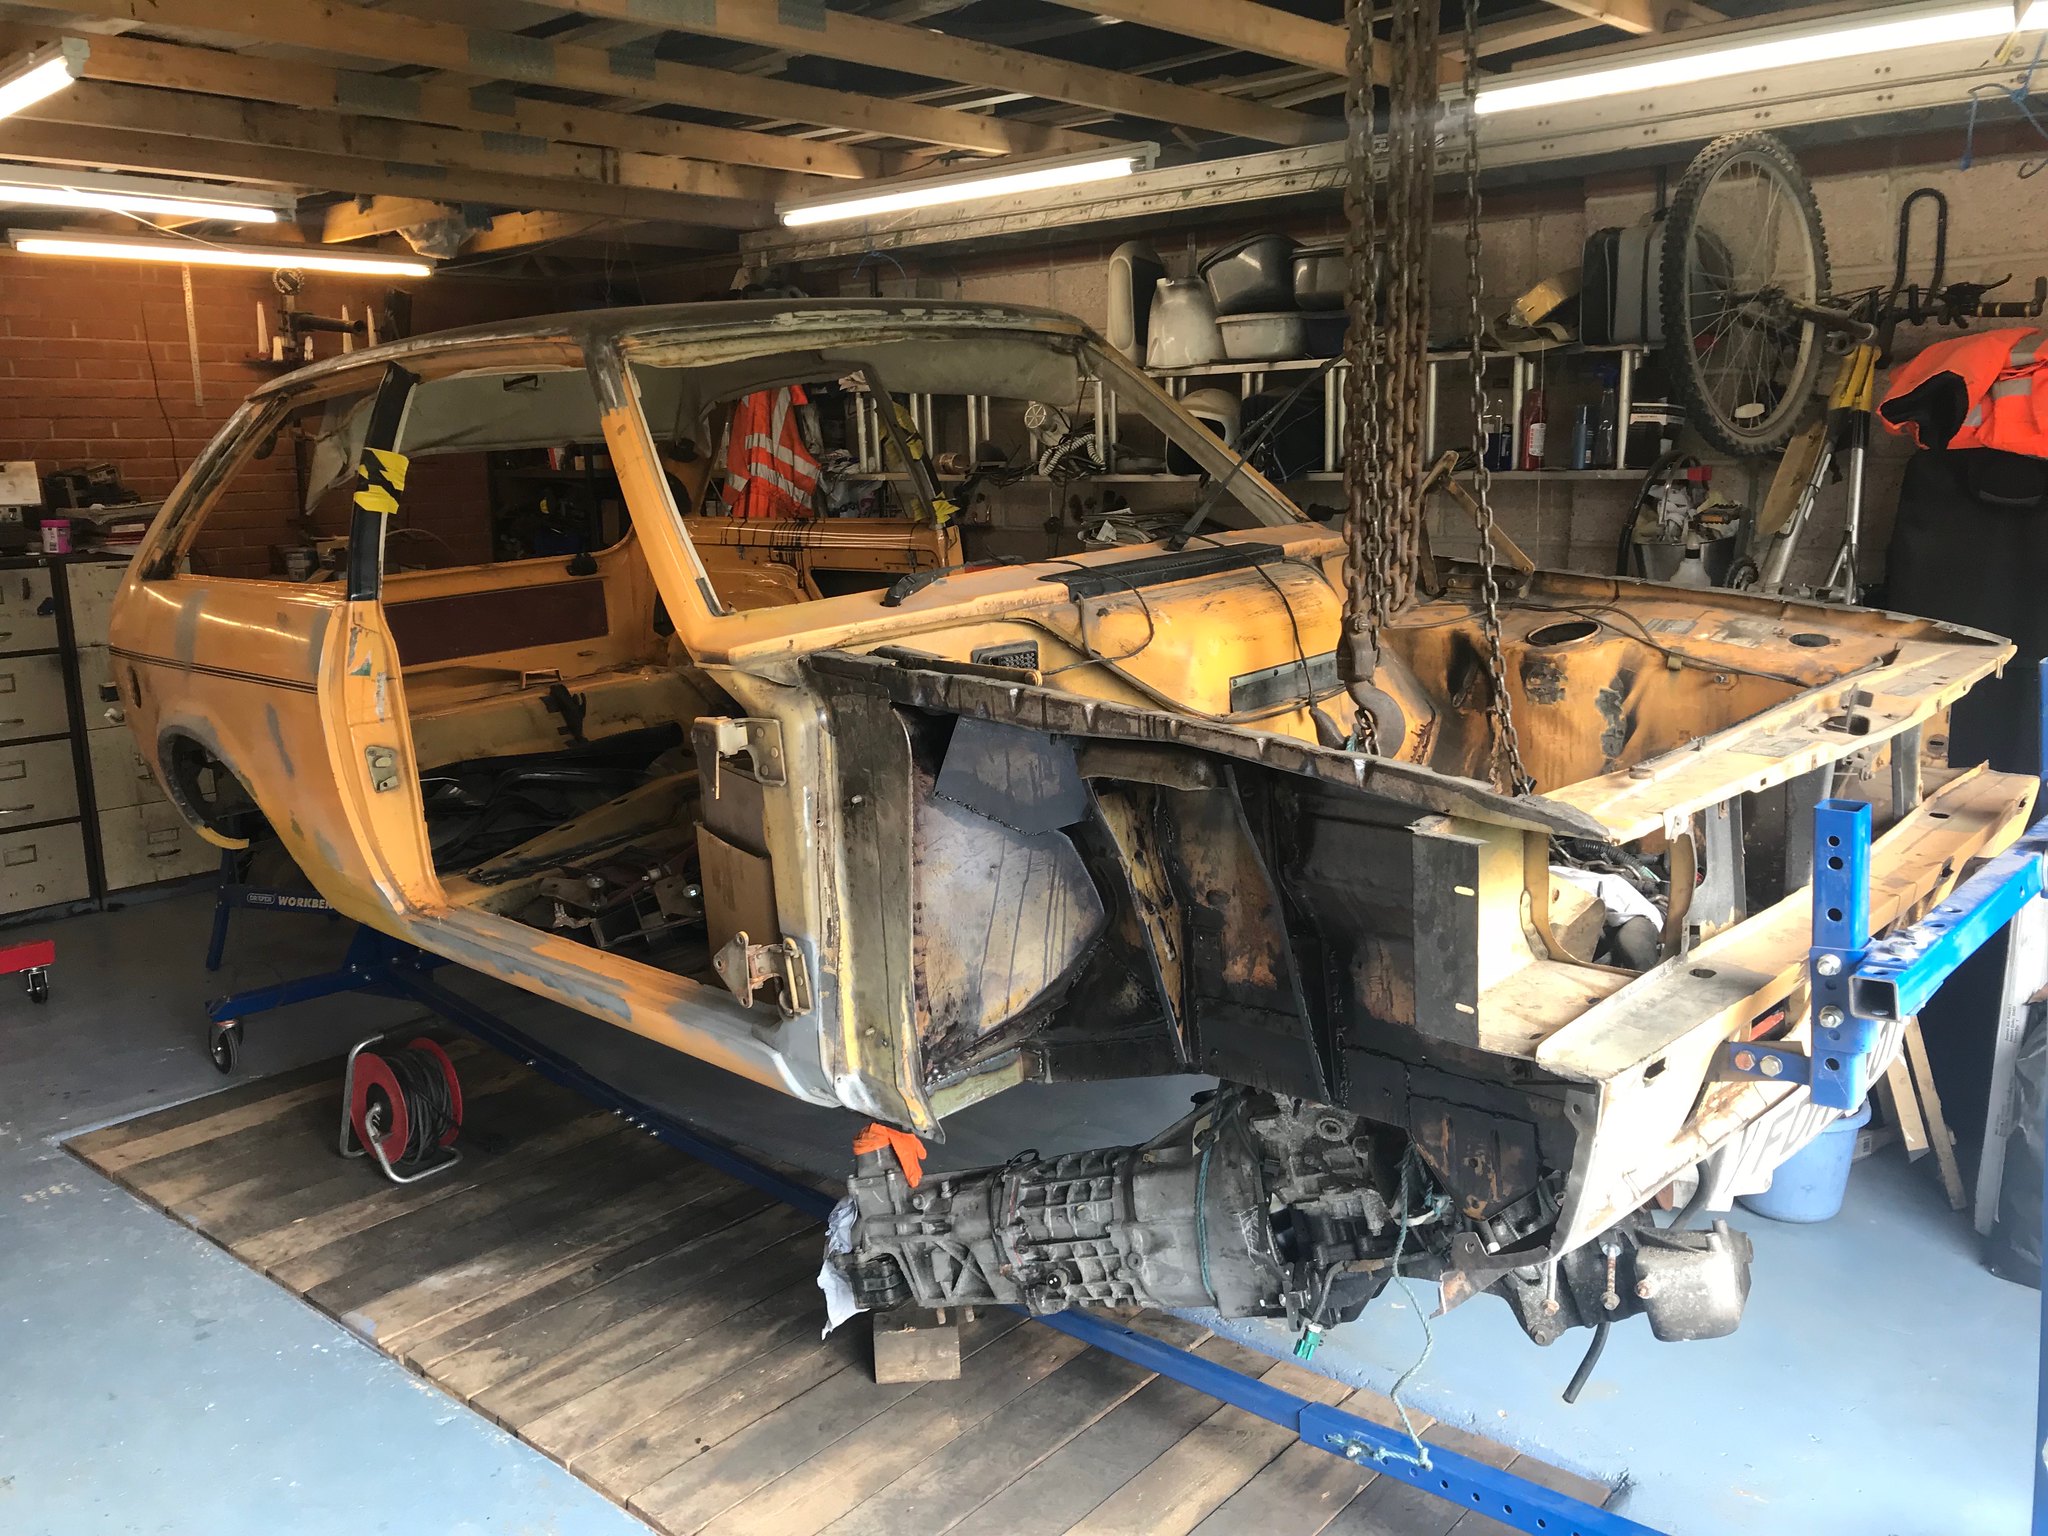 Untitled Untitled by Nevtiger, on Flickr Lifting the gearbox tail up to get everything level with my Gearboxenginehoistextensionpiece (pat pending) 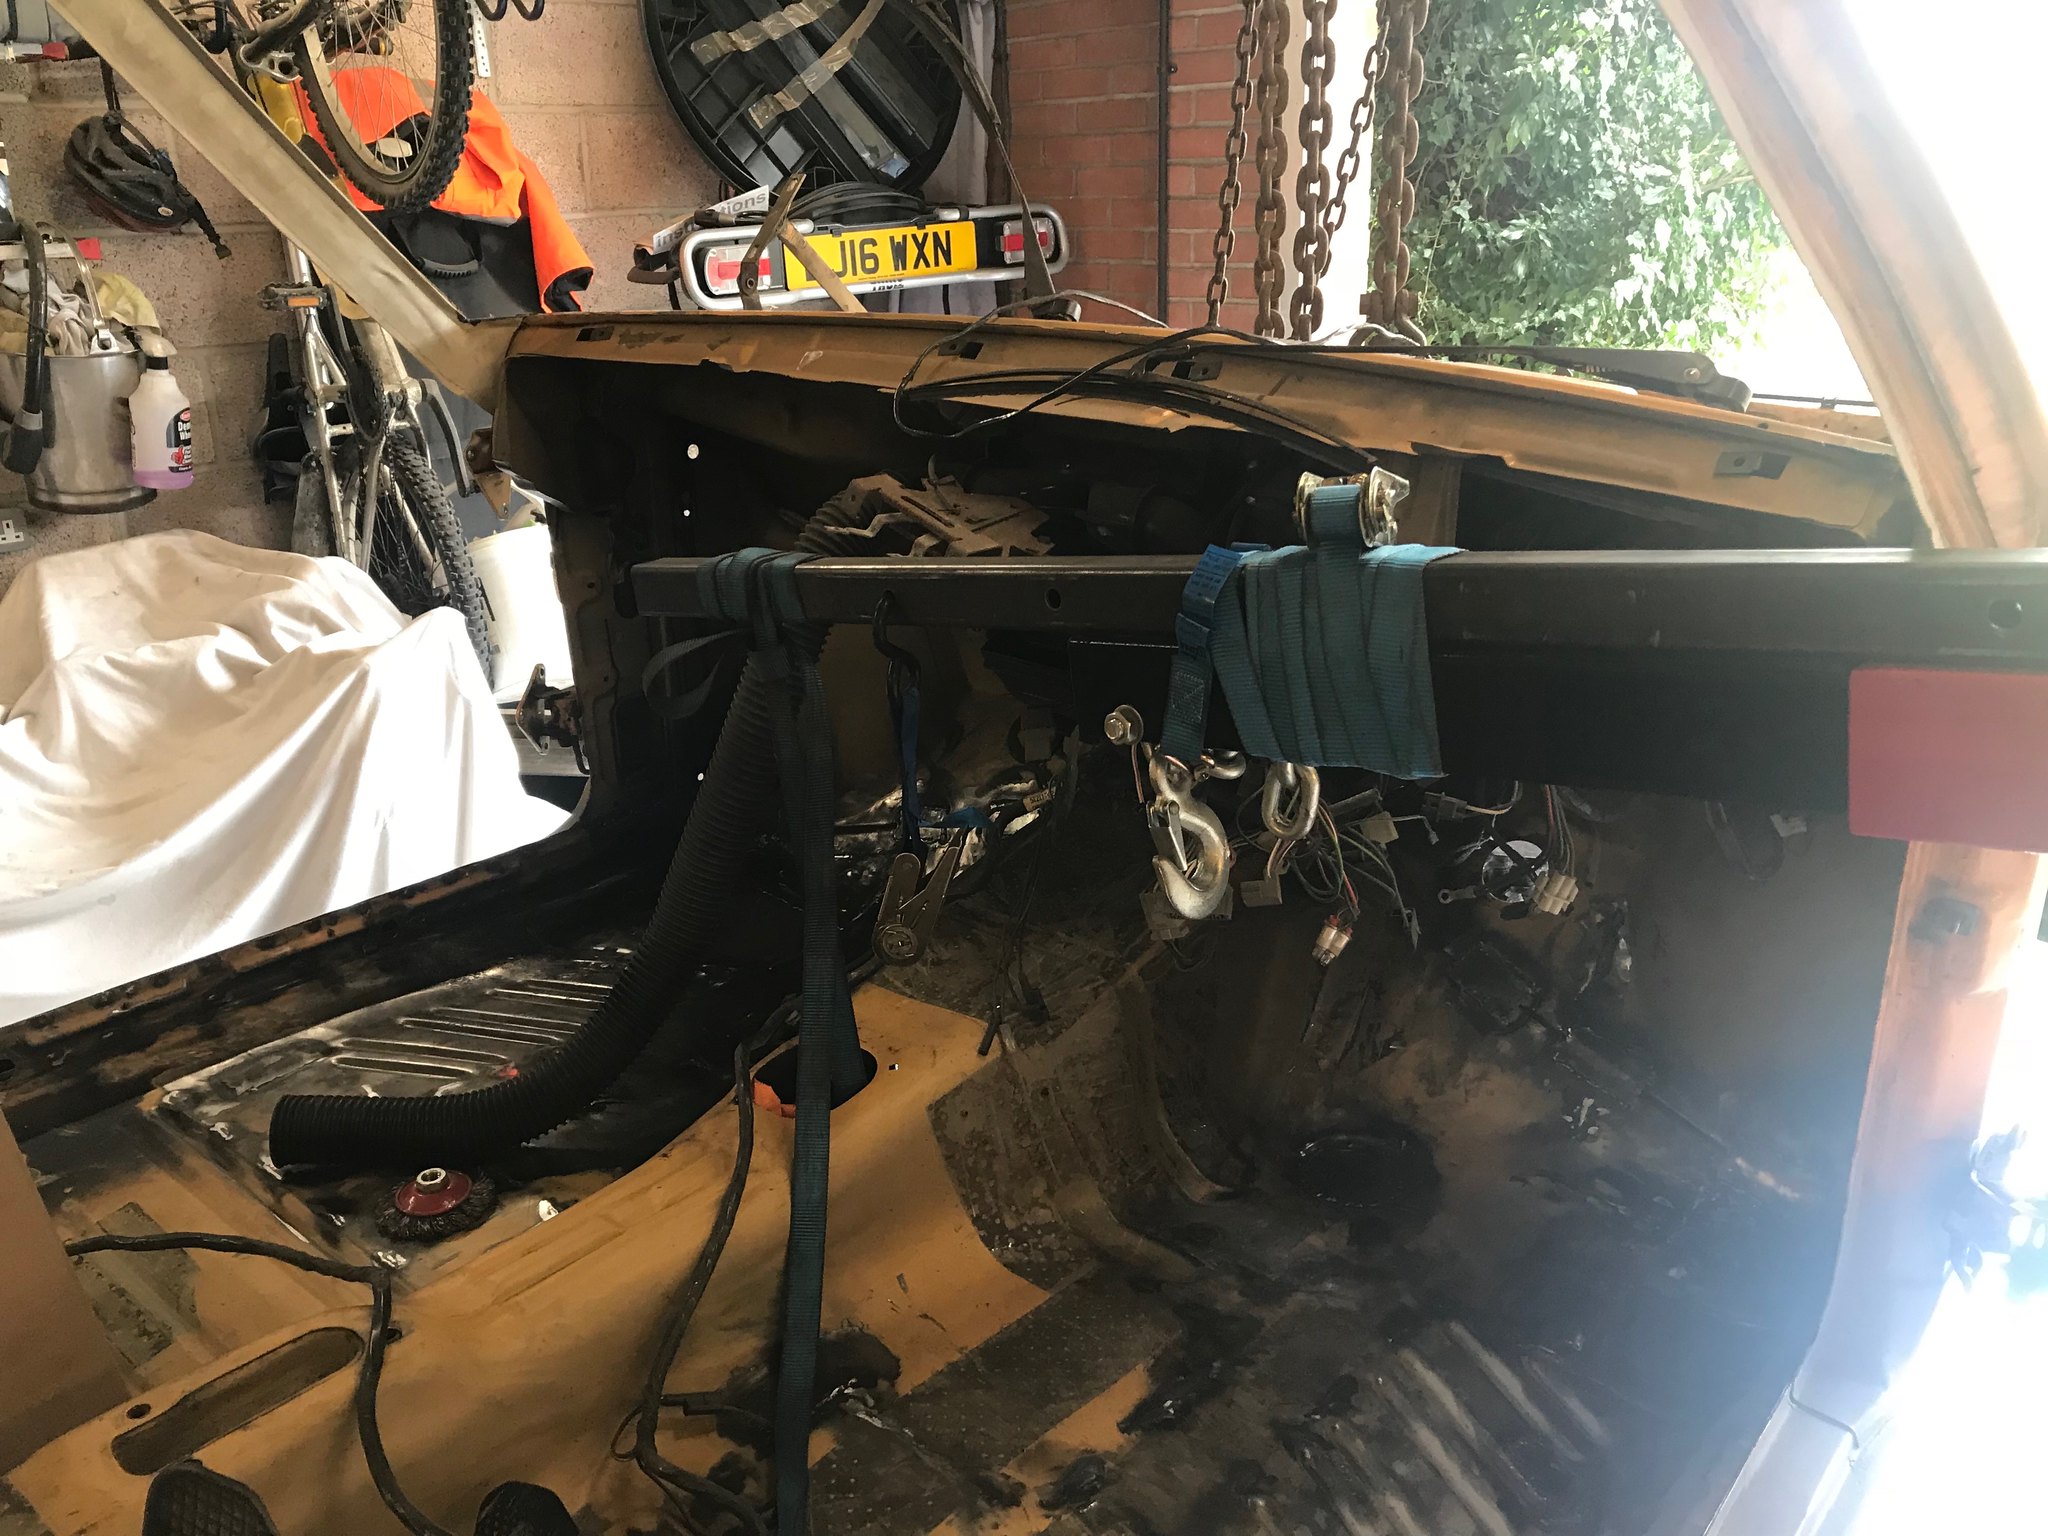 Untitled Untitled by Nevtiger, on Flickr Gearbox shifter comes up in slightly the wrong place. 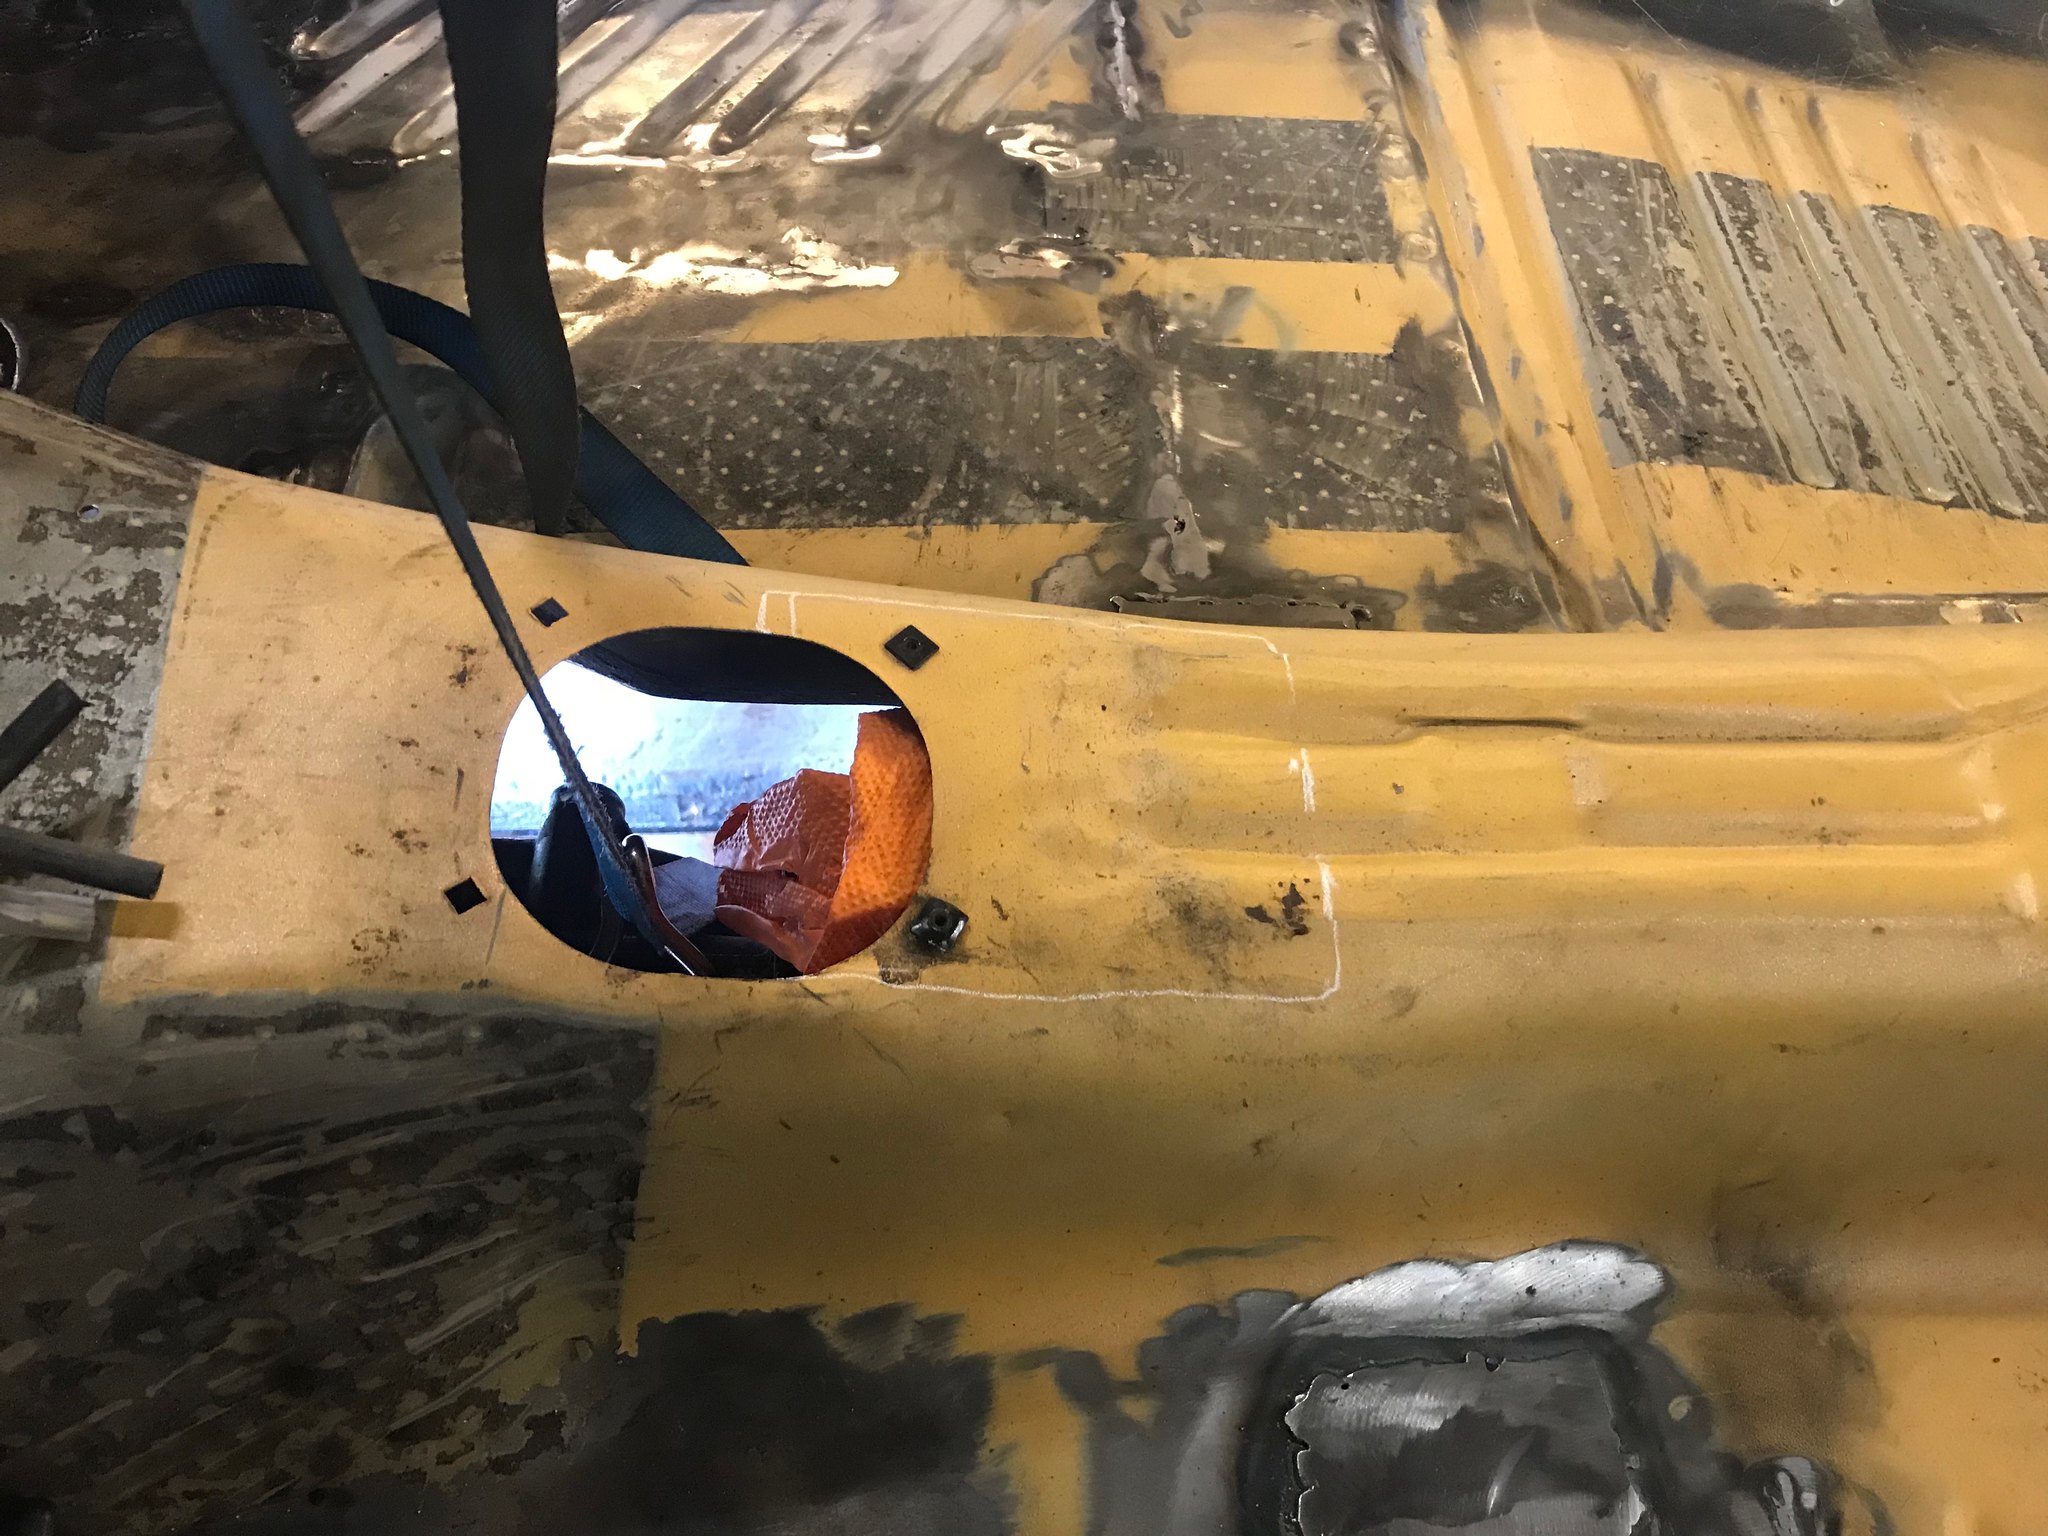 Untitled Untitled by Nevtiger, on Flickr Standard gearbox mounts get in the way. 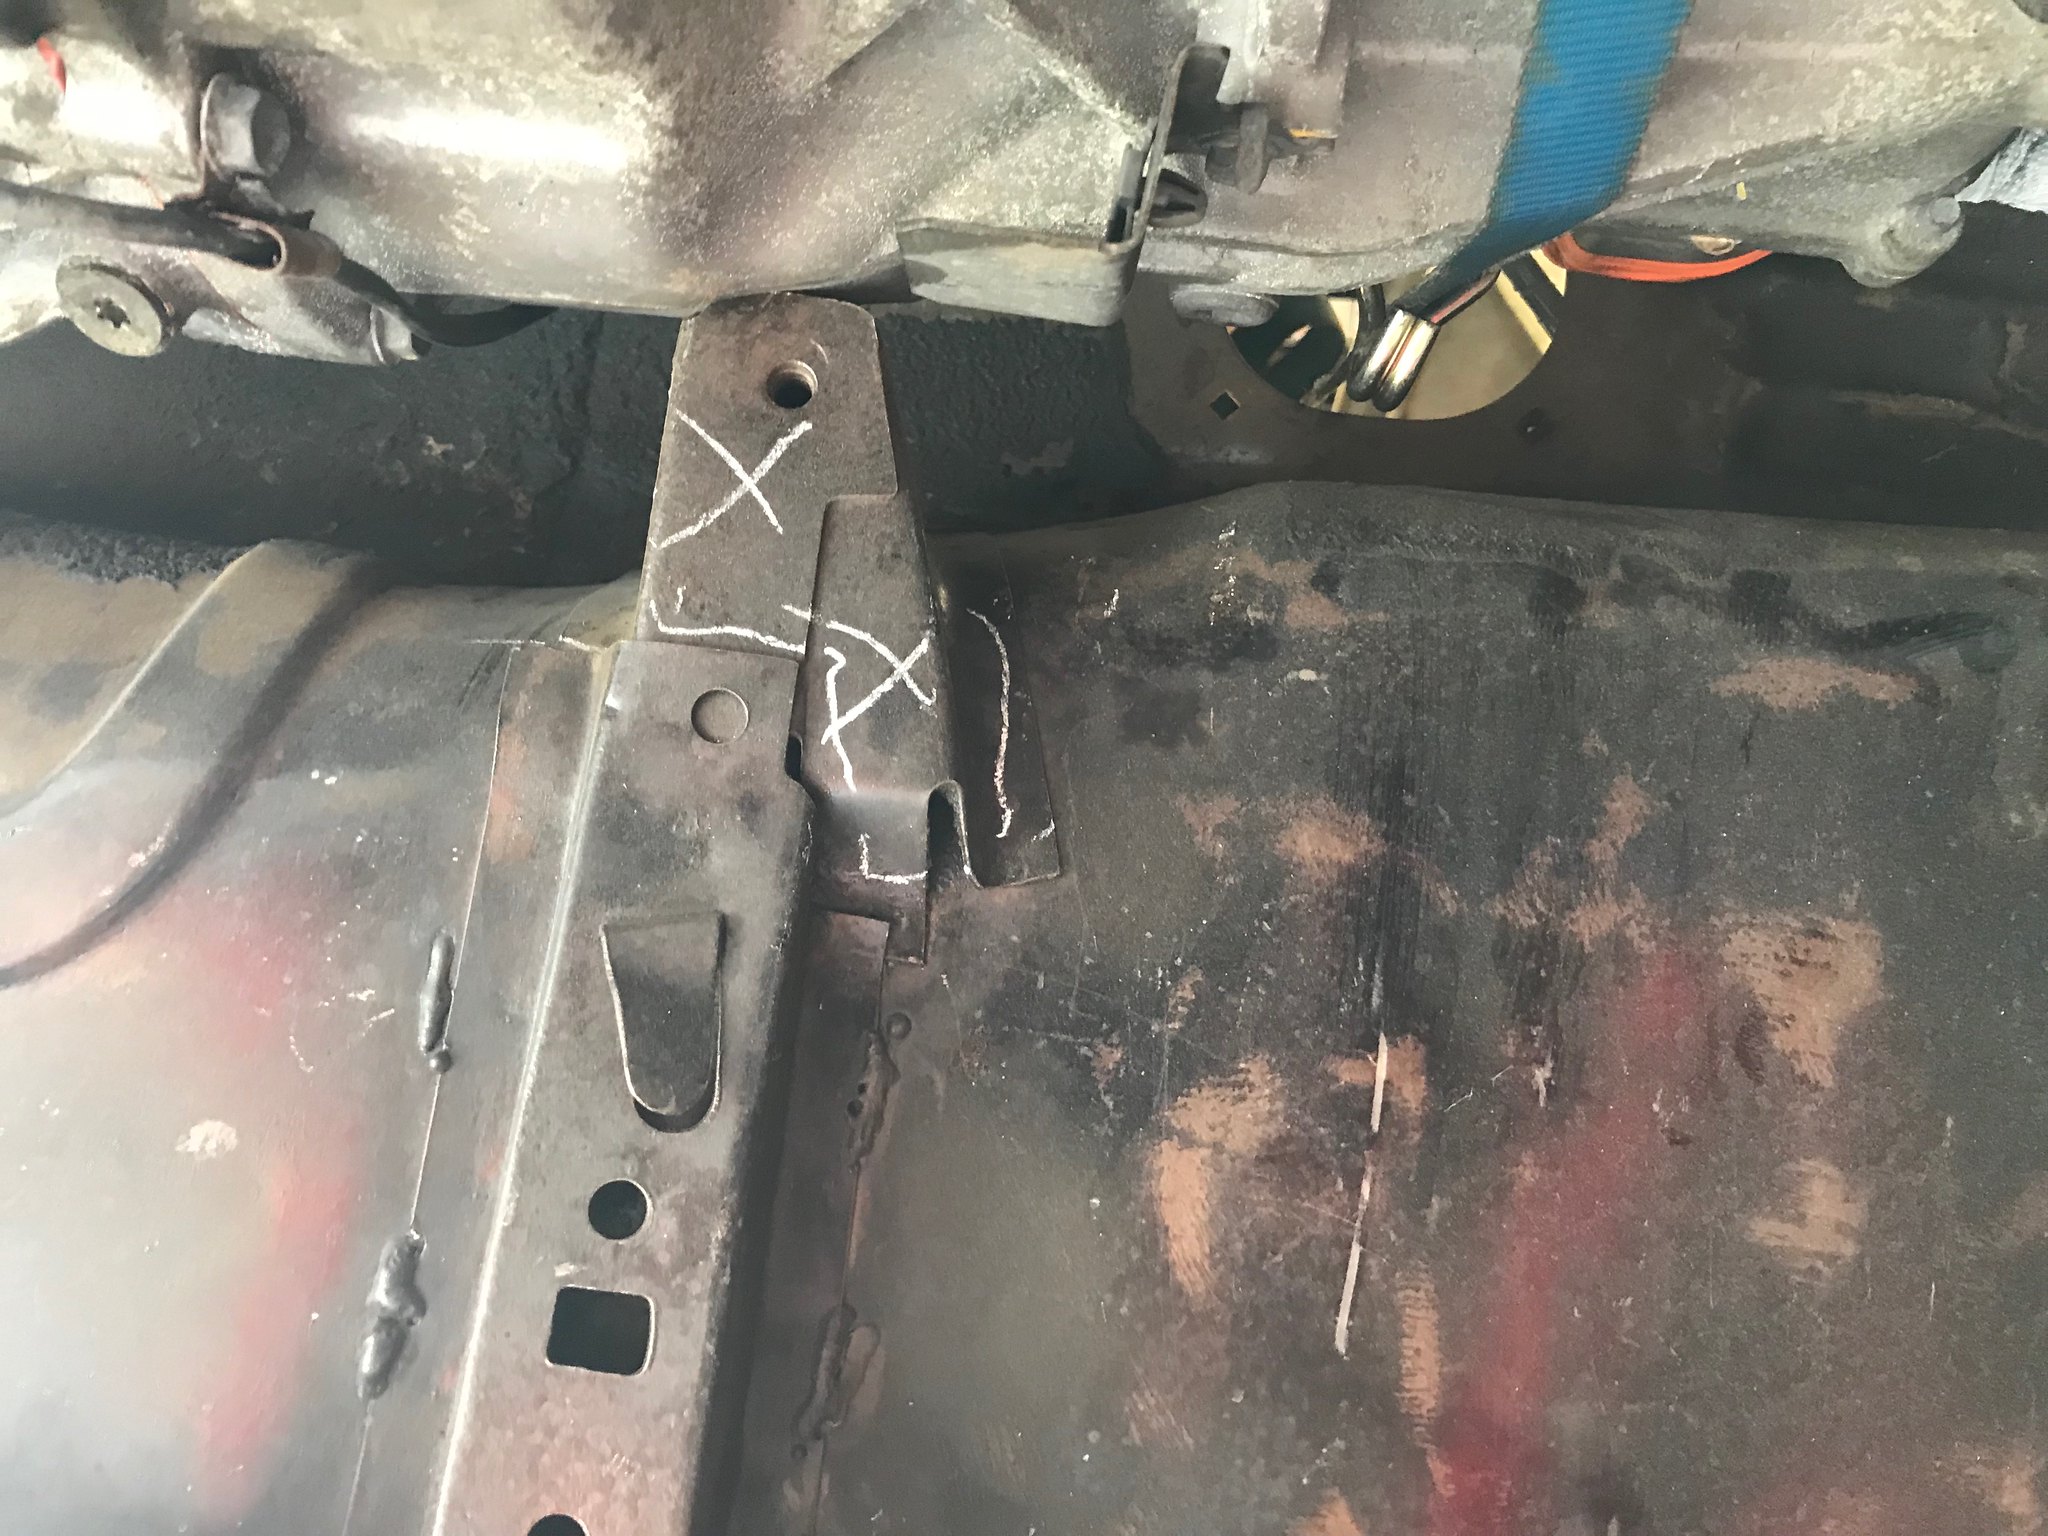 Untitled Untitled by Nevtiger, on Flickr 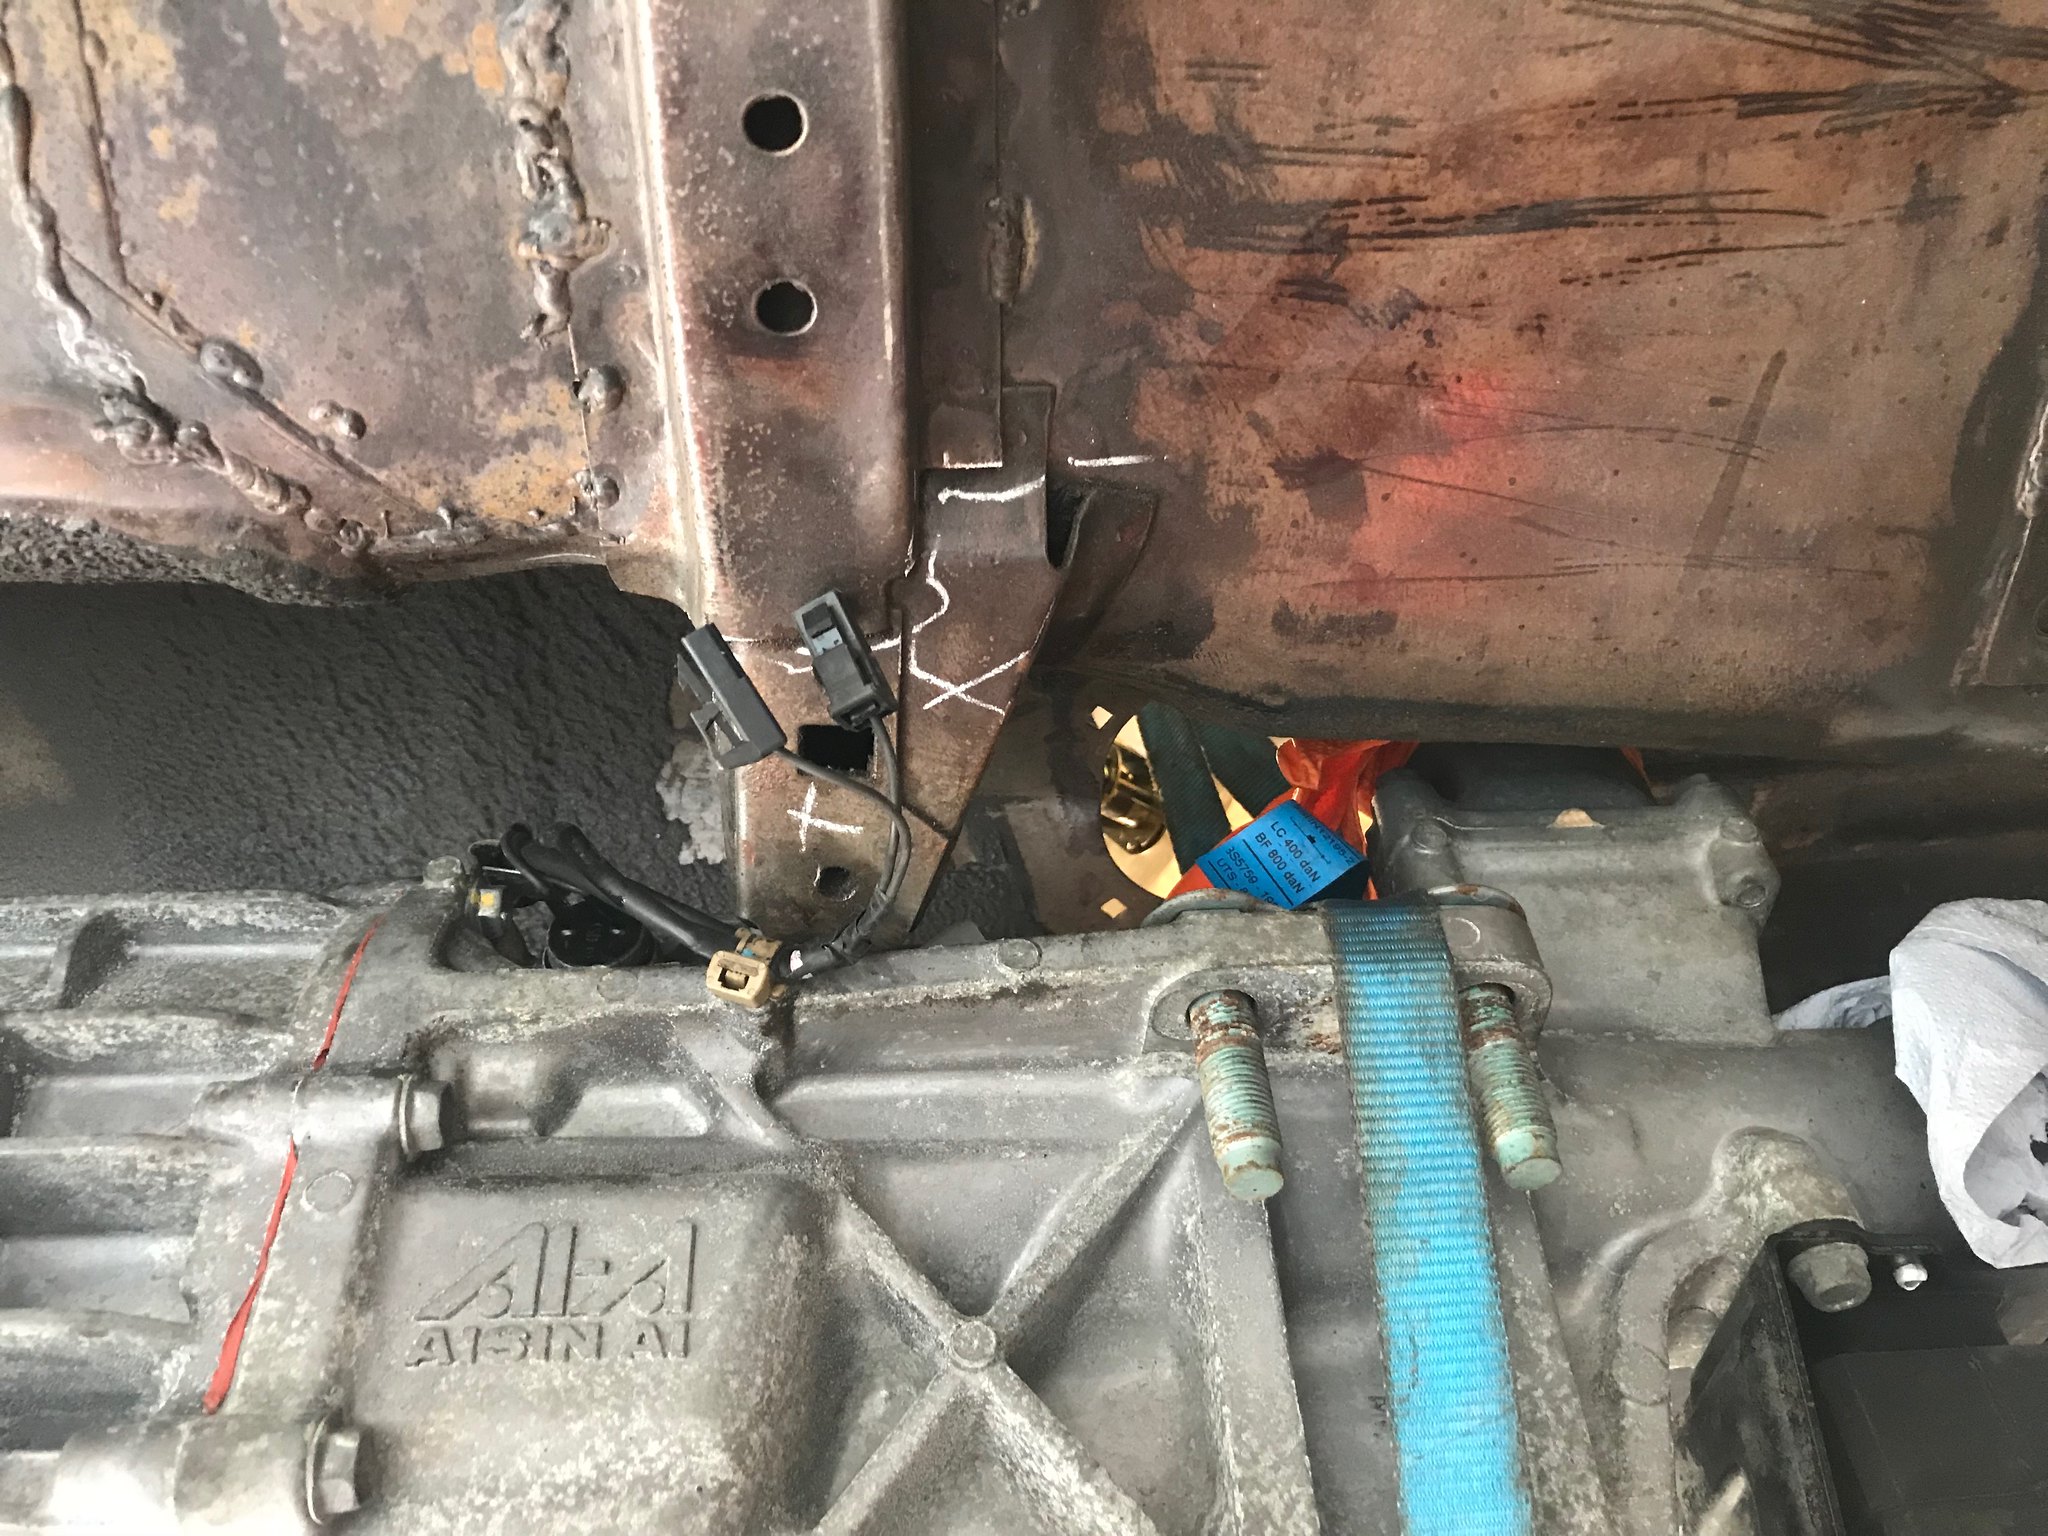 Untitled Untitled by Nevtiger, on Flickr But not anymore! 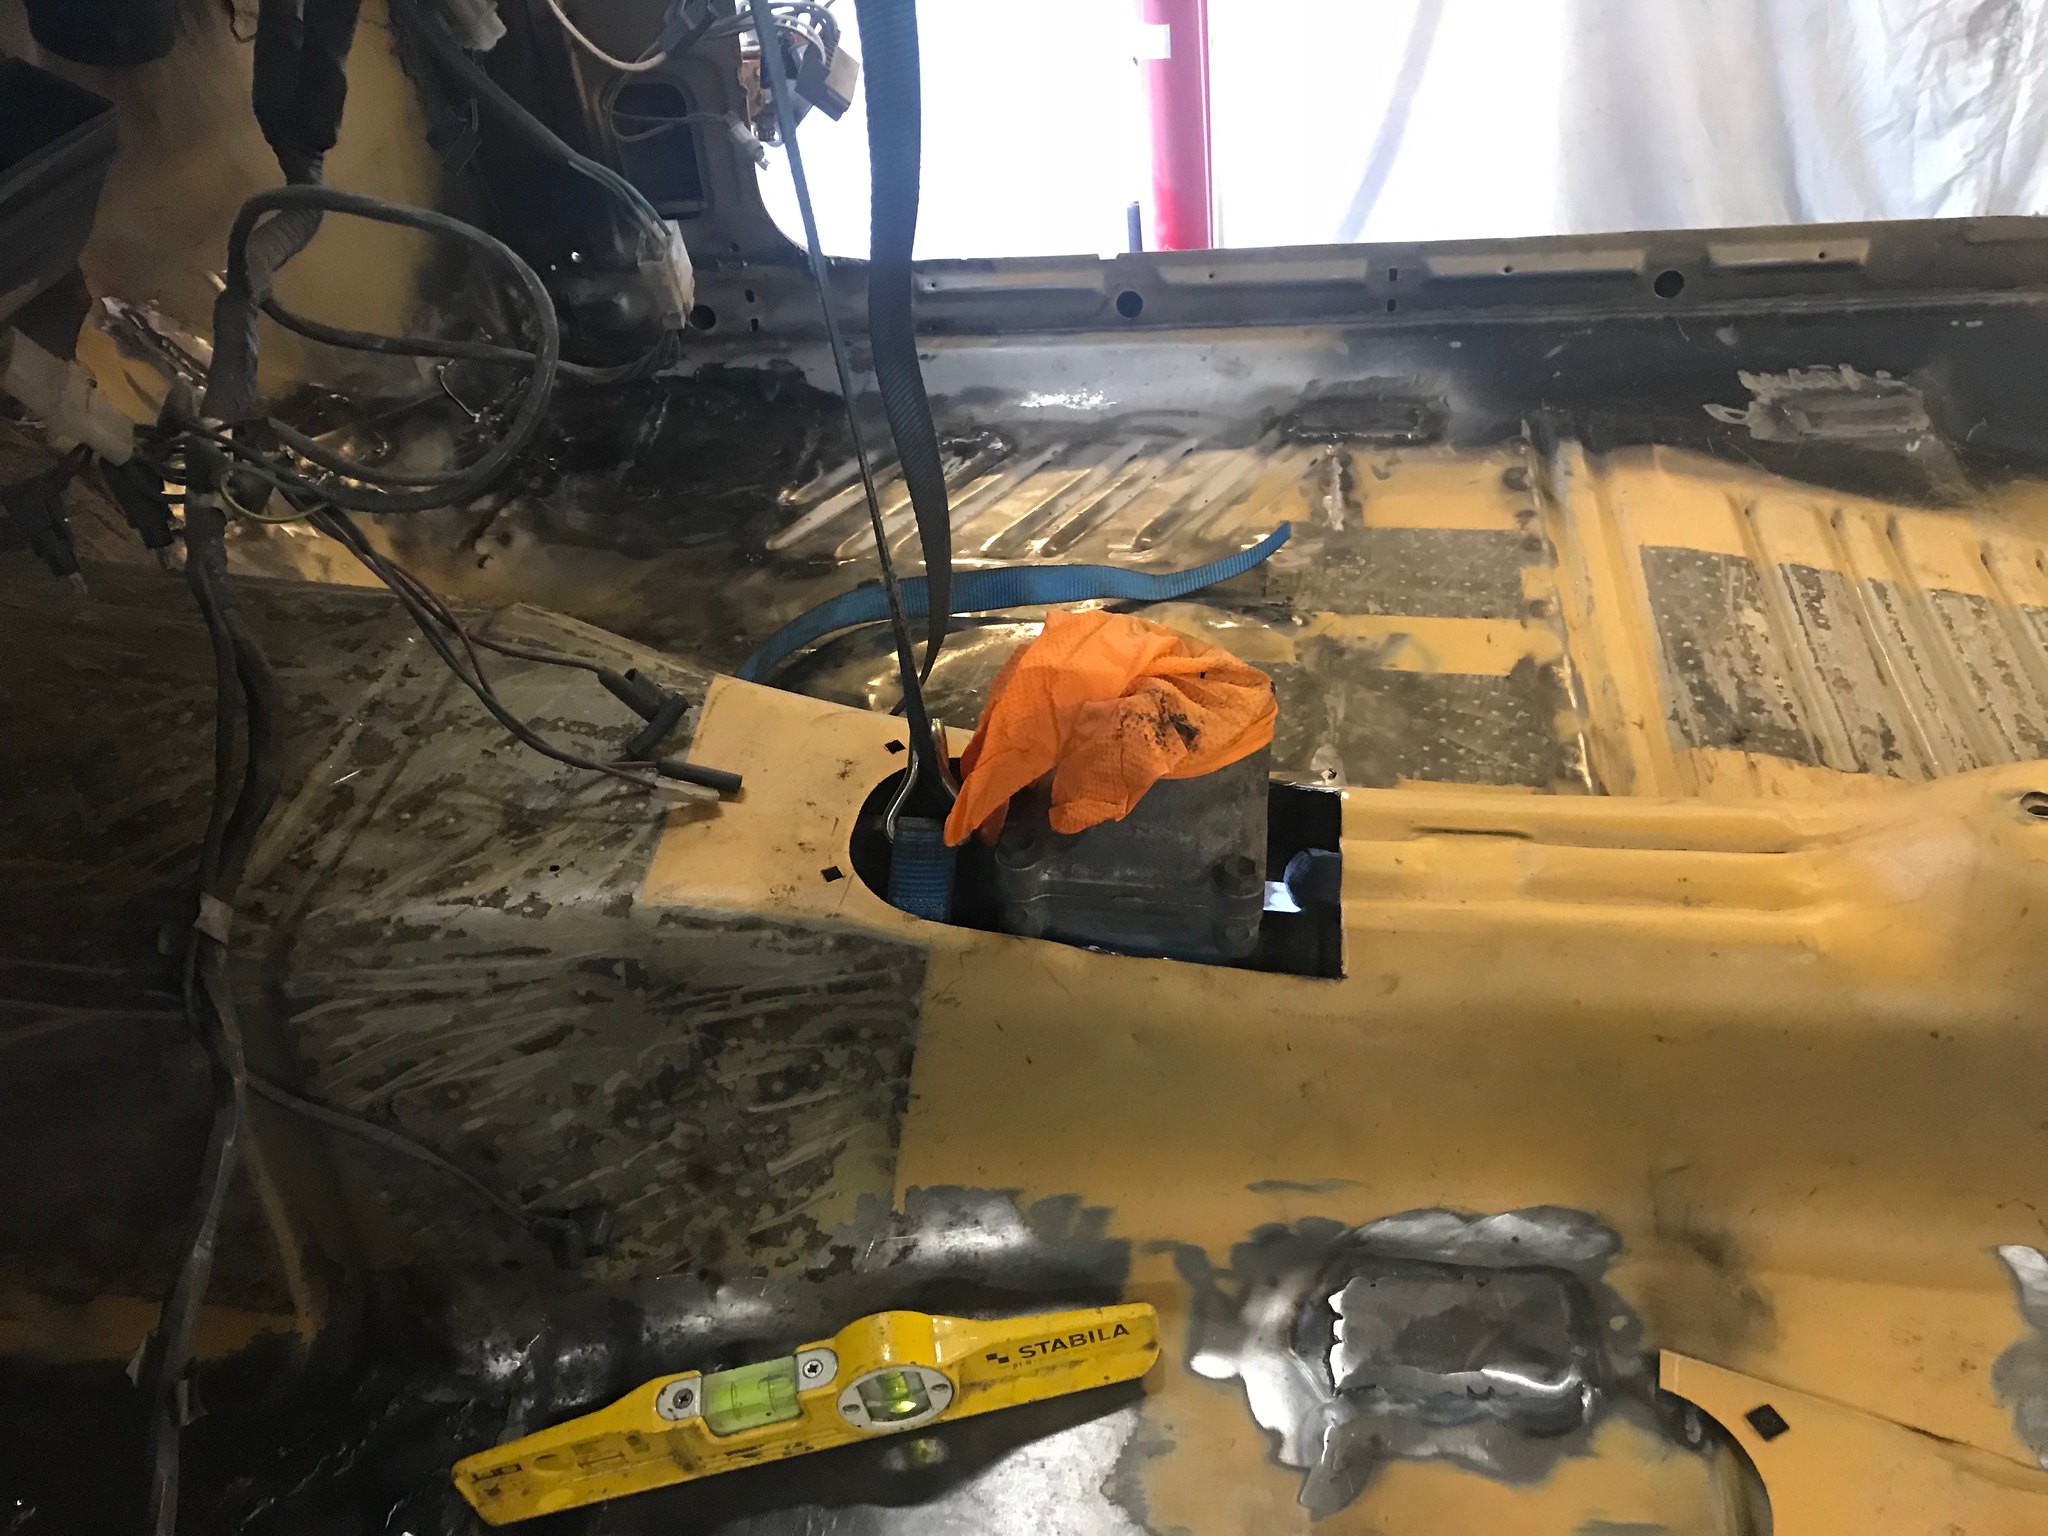 Untitled Untitled by Nevtiger, on Flickr I will have to build a small tower here to cover it! Crossmember clearance is good, although steering rack may need to move but has it happens it needs to move down and back to alleviate the inherent bump steer of the standard car. 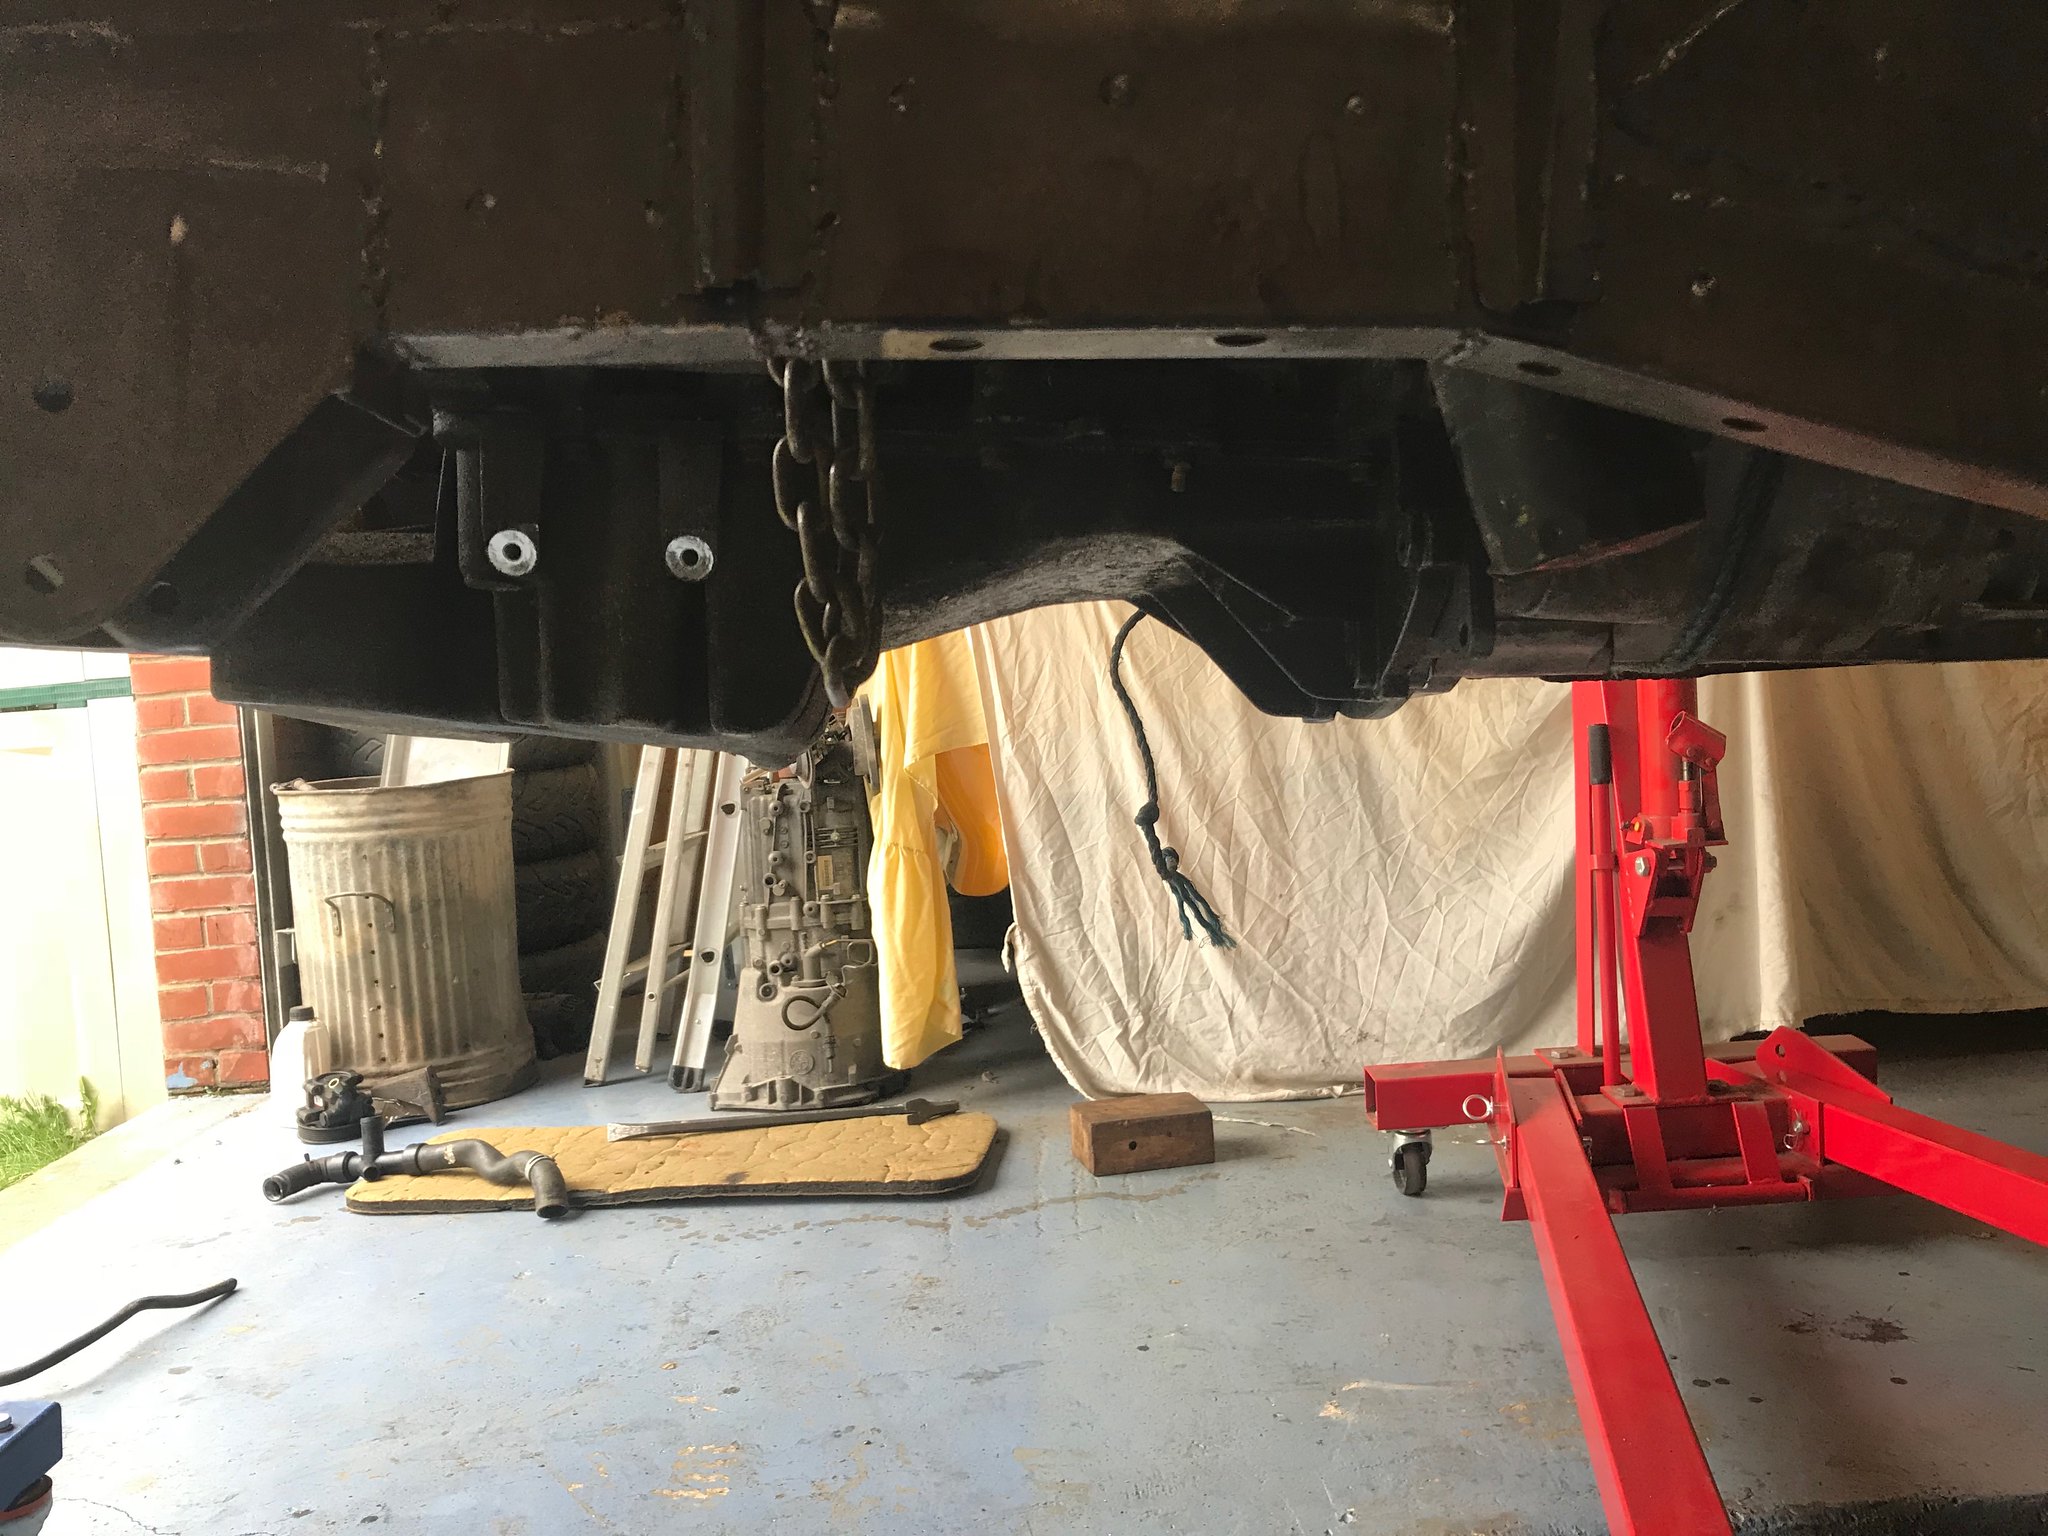 Untitled Untitled by Nevtiger, on Flickr Induction headroom maybe an issue 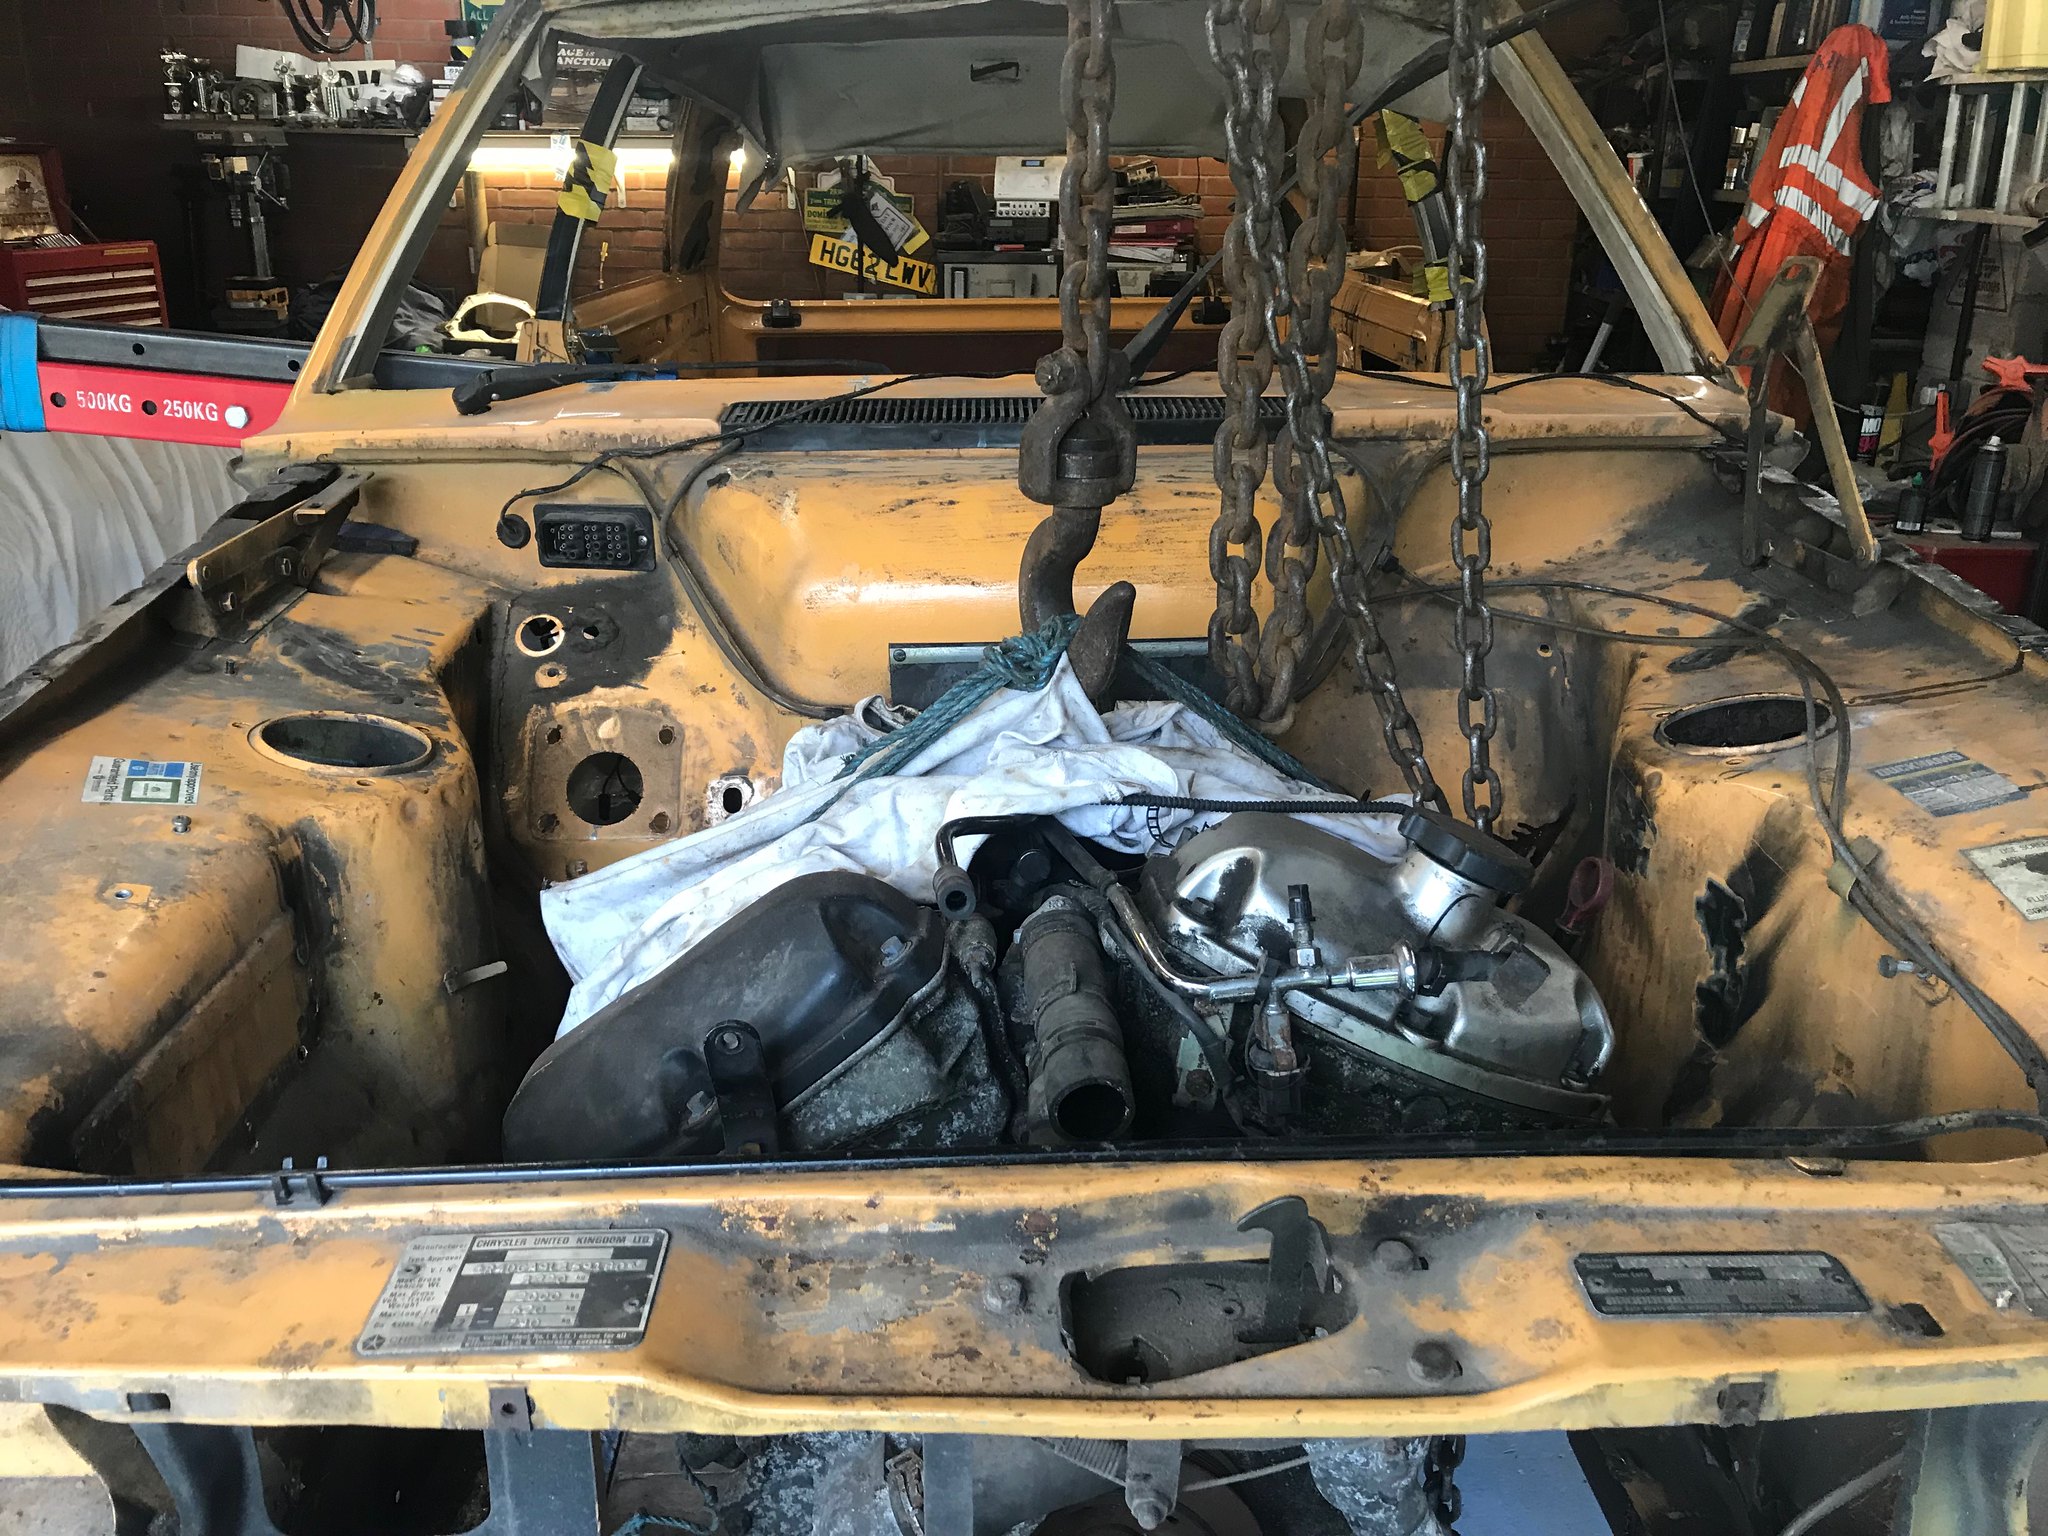 Untitled Untitled by Nevtiger, on Flickr Even the servo fits! 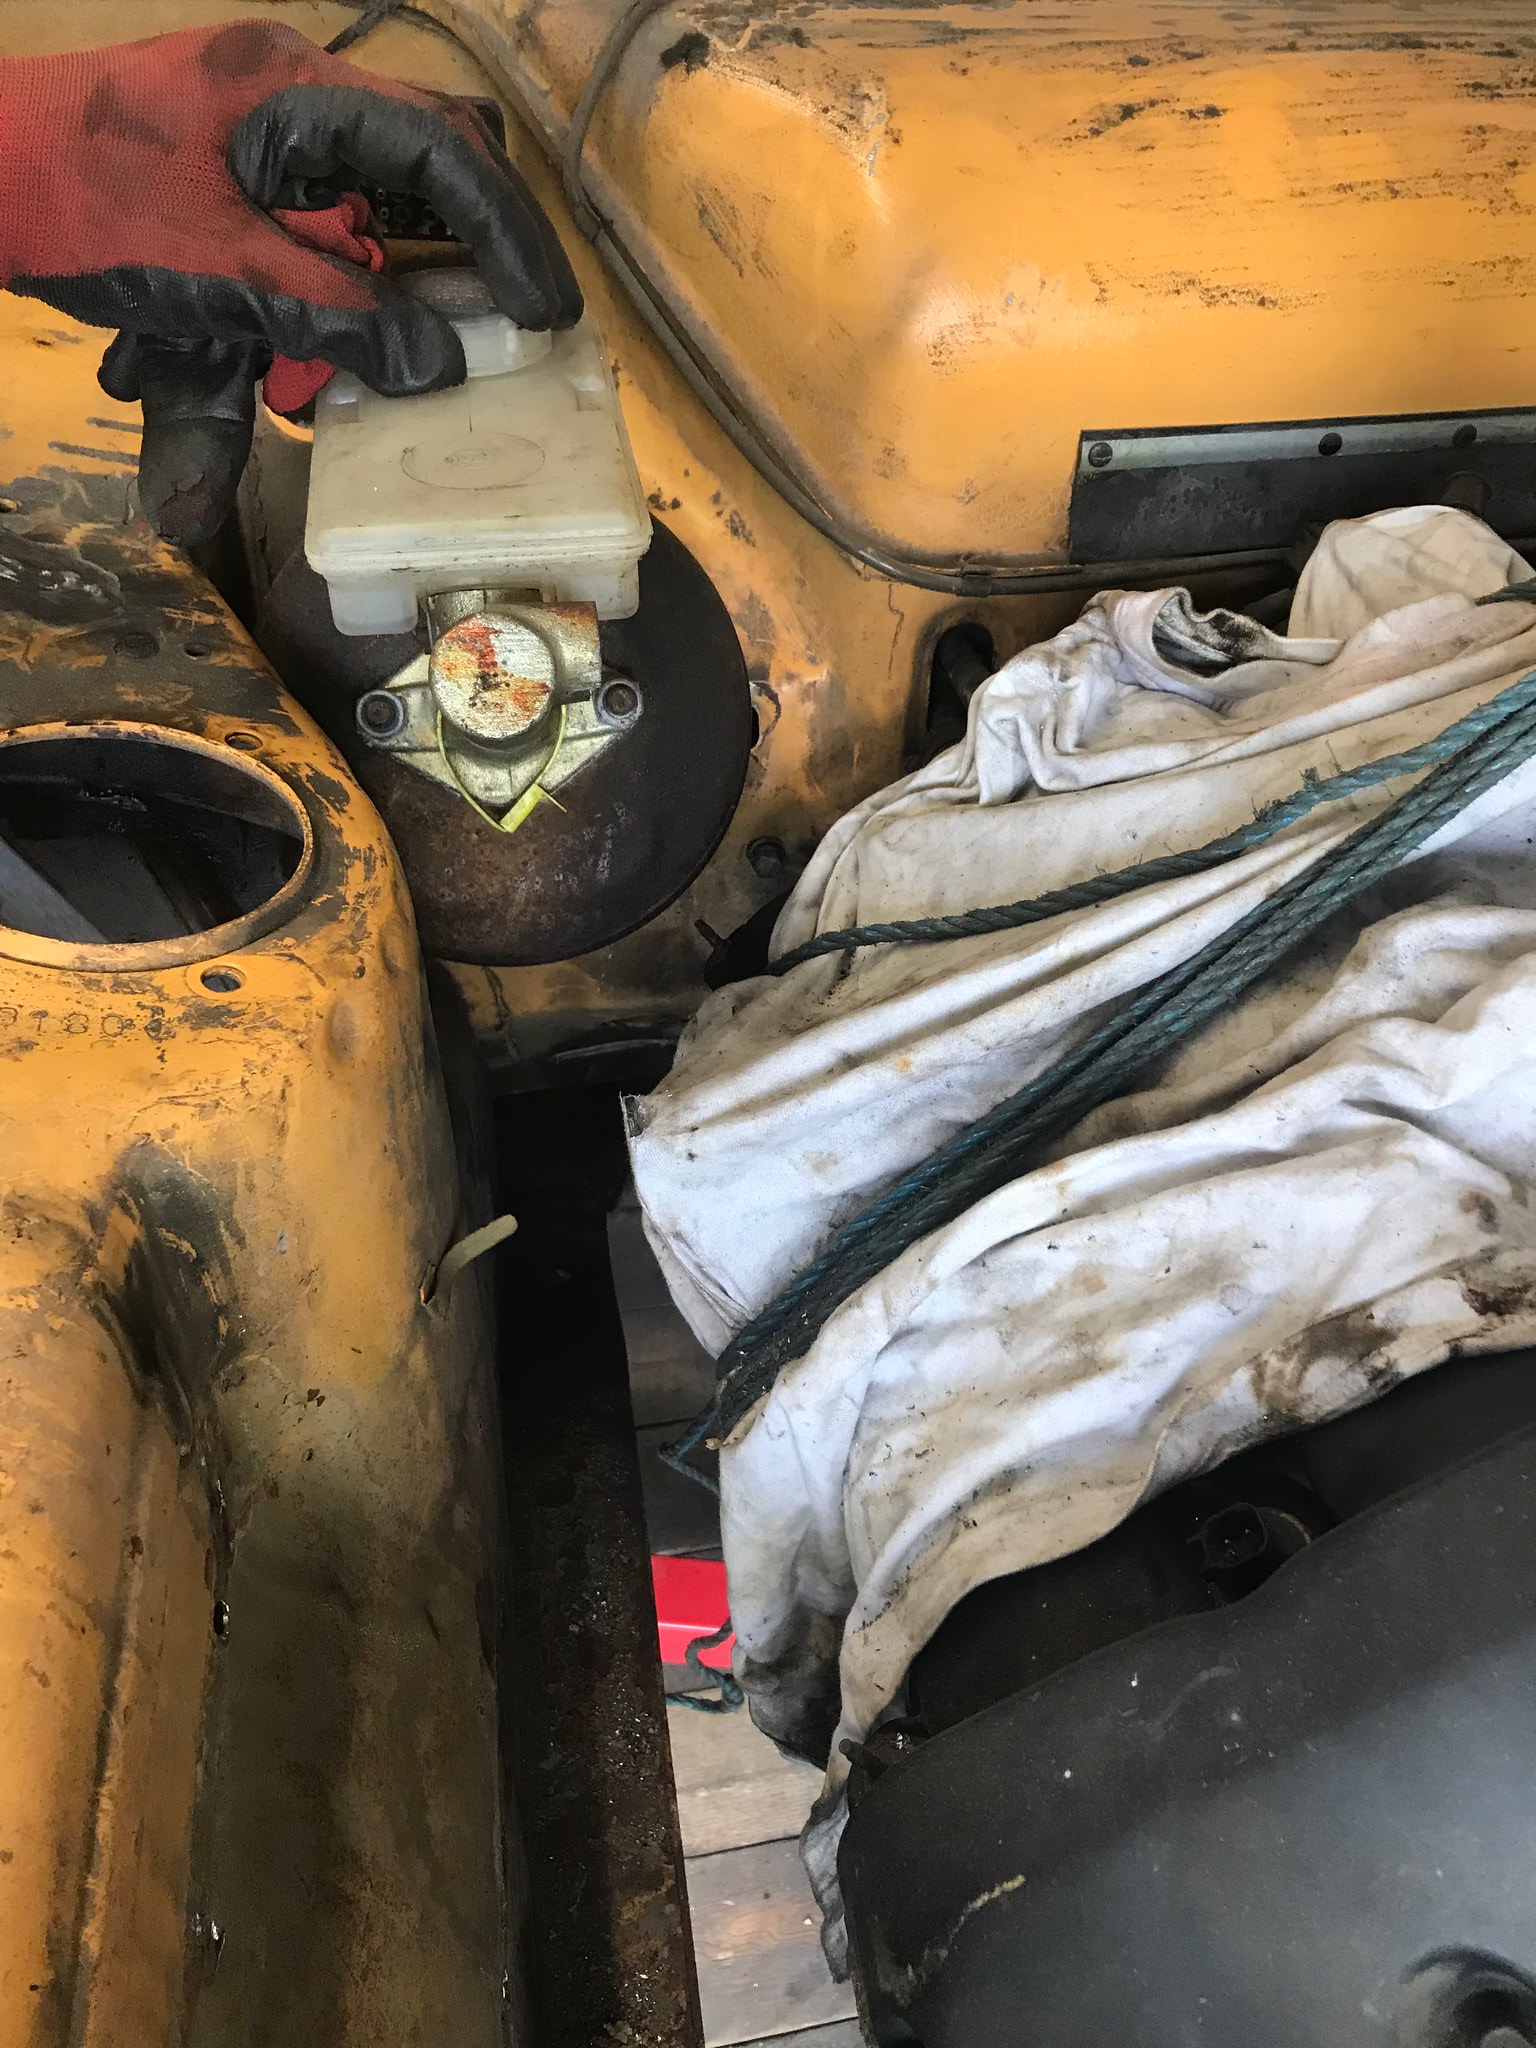 Untitled Untitled by Nevtiger, on Flickr |
| |
Last Edit: Mar 26, 2018 7:35:45 GMT by nevtiger
|
|
|
|
 Untitled by Nevtiger, on Flickr
 Untitled by Nevtiger, on Flickr
 Untitled by Nevtiger, on Flickr
 Untitled by Nevtiger, on Flickr
 Untitled by Nevtiger, on Flickr
 Untitled by Nevtiger, on Flickr
 Untitled by Nevtiger, on Flickr
 Untitled by Nevtiger, on Flickr
 Untitled by Nevtiger, on Flickr
 Untitled by Nevtiger, on Flickr


