|
|
|
Sept 22, 2016 19:18:01 GMT
|
.....or with a suitable primer , a match from a rattle can maybe?
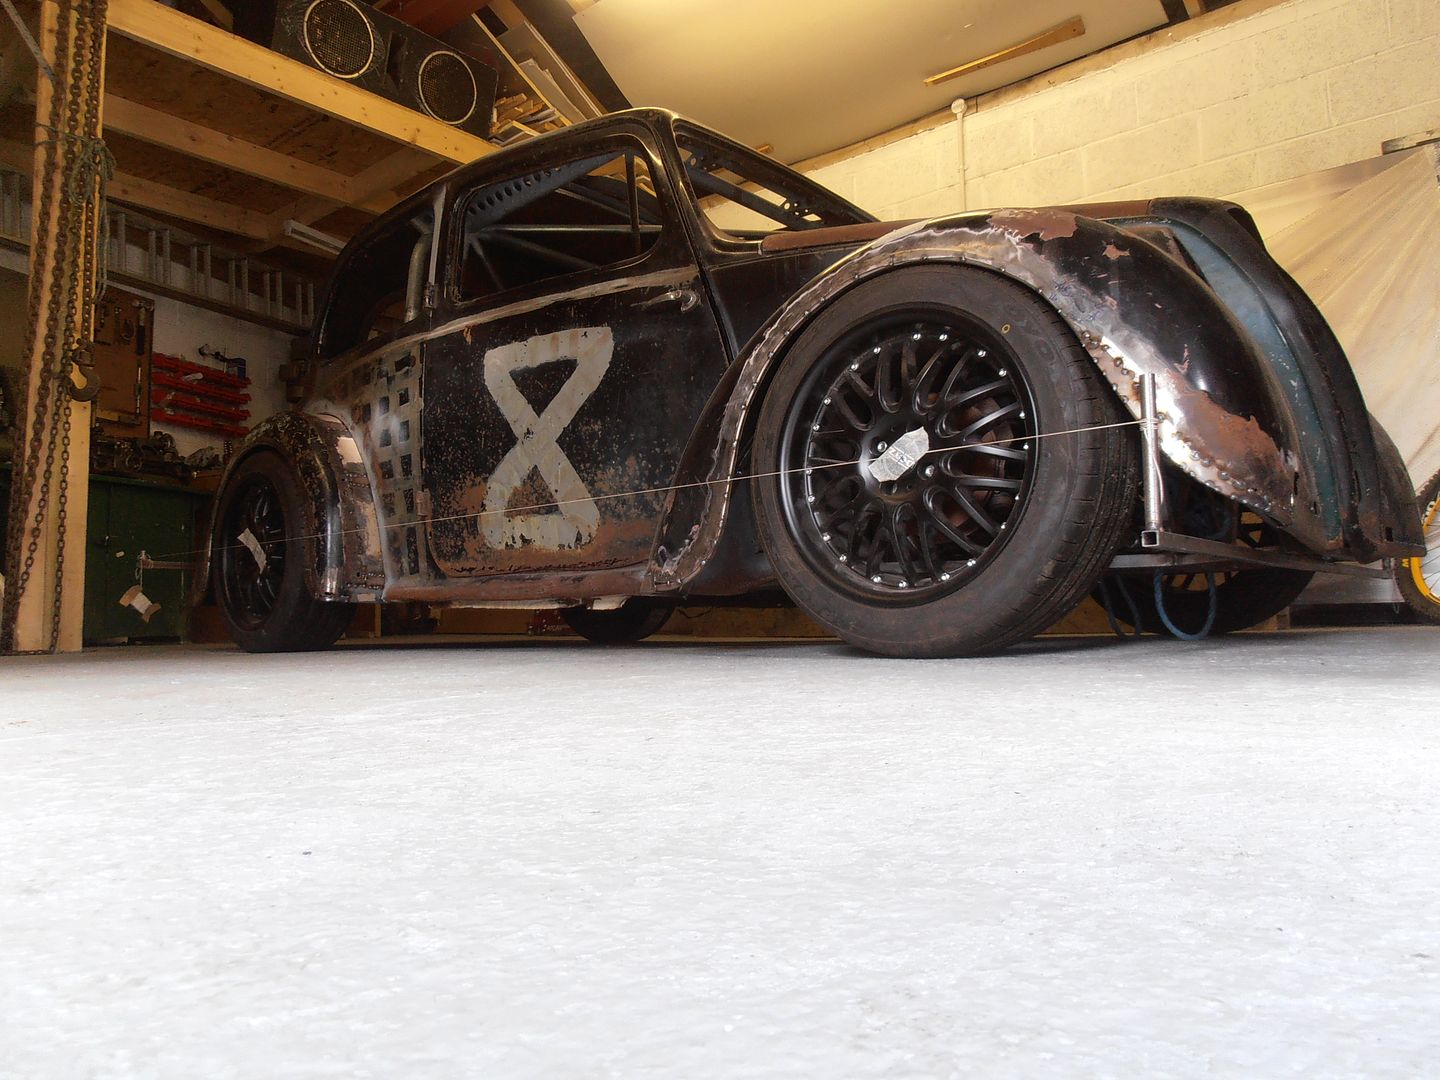
that really is quite a tidy one , isn't it?! |
| |
Last Edit: Sept 22, 2016 19:19:25 GMT by strikey
'80 s1 924 turbo..hibernating
'80 golf gli cabriolet...doing impression of a skip
'97 pug 106 commuter...continuing cheapness making me smile!
firm believer in the k.i.s.s and f.i.s.h principles.
|
|
|
|
|
|
|
Sept 22, 2016 20:13:07 GMT
|
|
These were built in Linwood I believe??
I actually stay on the site of the old rootes plant and my dad worked in the press shop he has some wicked stories of goings on would love a sunbeam or avenger keep up the good work! @
|
| |
|
|
MiataMark
Club Retro Rides Member
Posts: 2,971
Club RR Member Number: 29
|
|
Sept 23, 2016 10:31:48 GMT
|
|
As a student I had an Avenger 1500 GLS, twin headlights, twin carbs, Roystlye wheels and a vinyl roof, great car and was great to chuck around lanes. I always thought a Sunbeam woudl eb a great car, watched one them one on the BBC Rallysprint event at Donnington. Way back I did a Forumla Ford driving day at Brands Hatch and they were using Sunbeam Ti's for the instruction laps (shows how long ago).
Is it true that the doors are the same as the Avenger hence the funny swage line?
|
| |
1990 Mazda MX-52012 BMW 118i (170bhp) - white appliance 2011 Land Rover Freelander 2 TD4 2003 Land Rover Discovery II TD52007 Alfa Romeo 159 Sportwagon JTDm
|
|
|
|
|
Sept 23, 2016 11:55:31 GMT
|
|
The Brands Hatch TI's were busy cars! I bought a brand new crated TI engine with carbs from a container in a war in Maidstone from a bloke that had bought all the remaining spares from when the cars were used, i paid £250 - shows how long ago that was.....
The doors are very very similar and can be swapped with fettling.
Regards the dash? There is much more to this story............
|
| |
|
|
|
|
|
Sept 23, 2016 21:13:06 GMT
|
|
Bookmarked!
|
| |
FJSigma
1989 Volkswagen VW1500 (The argentinian Avenger)
|
|
|
|
|
|
|
So then filled in the holes. One went very well and the other sort of ok. Although much later i realised that i could see daylight through a part of the weld - this will be sorted......  image image by Nevtiger, on Flickr 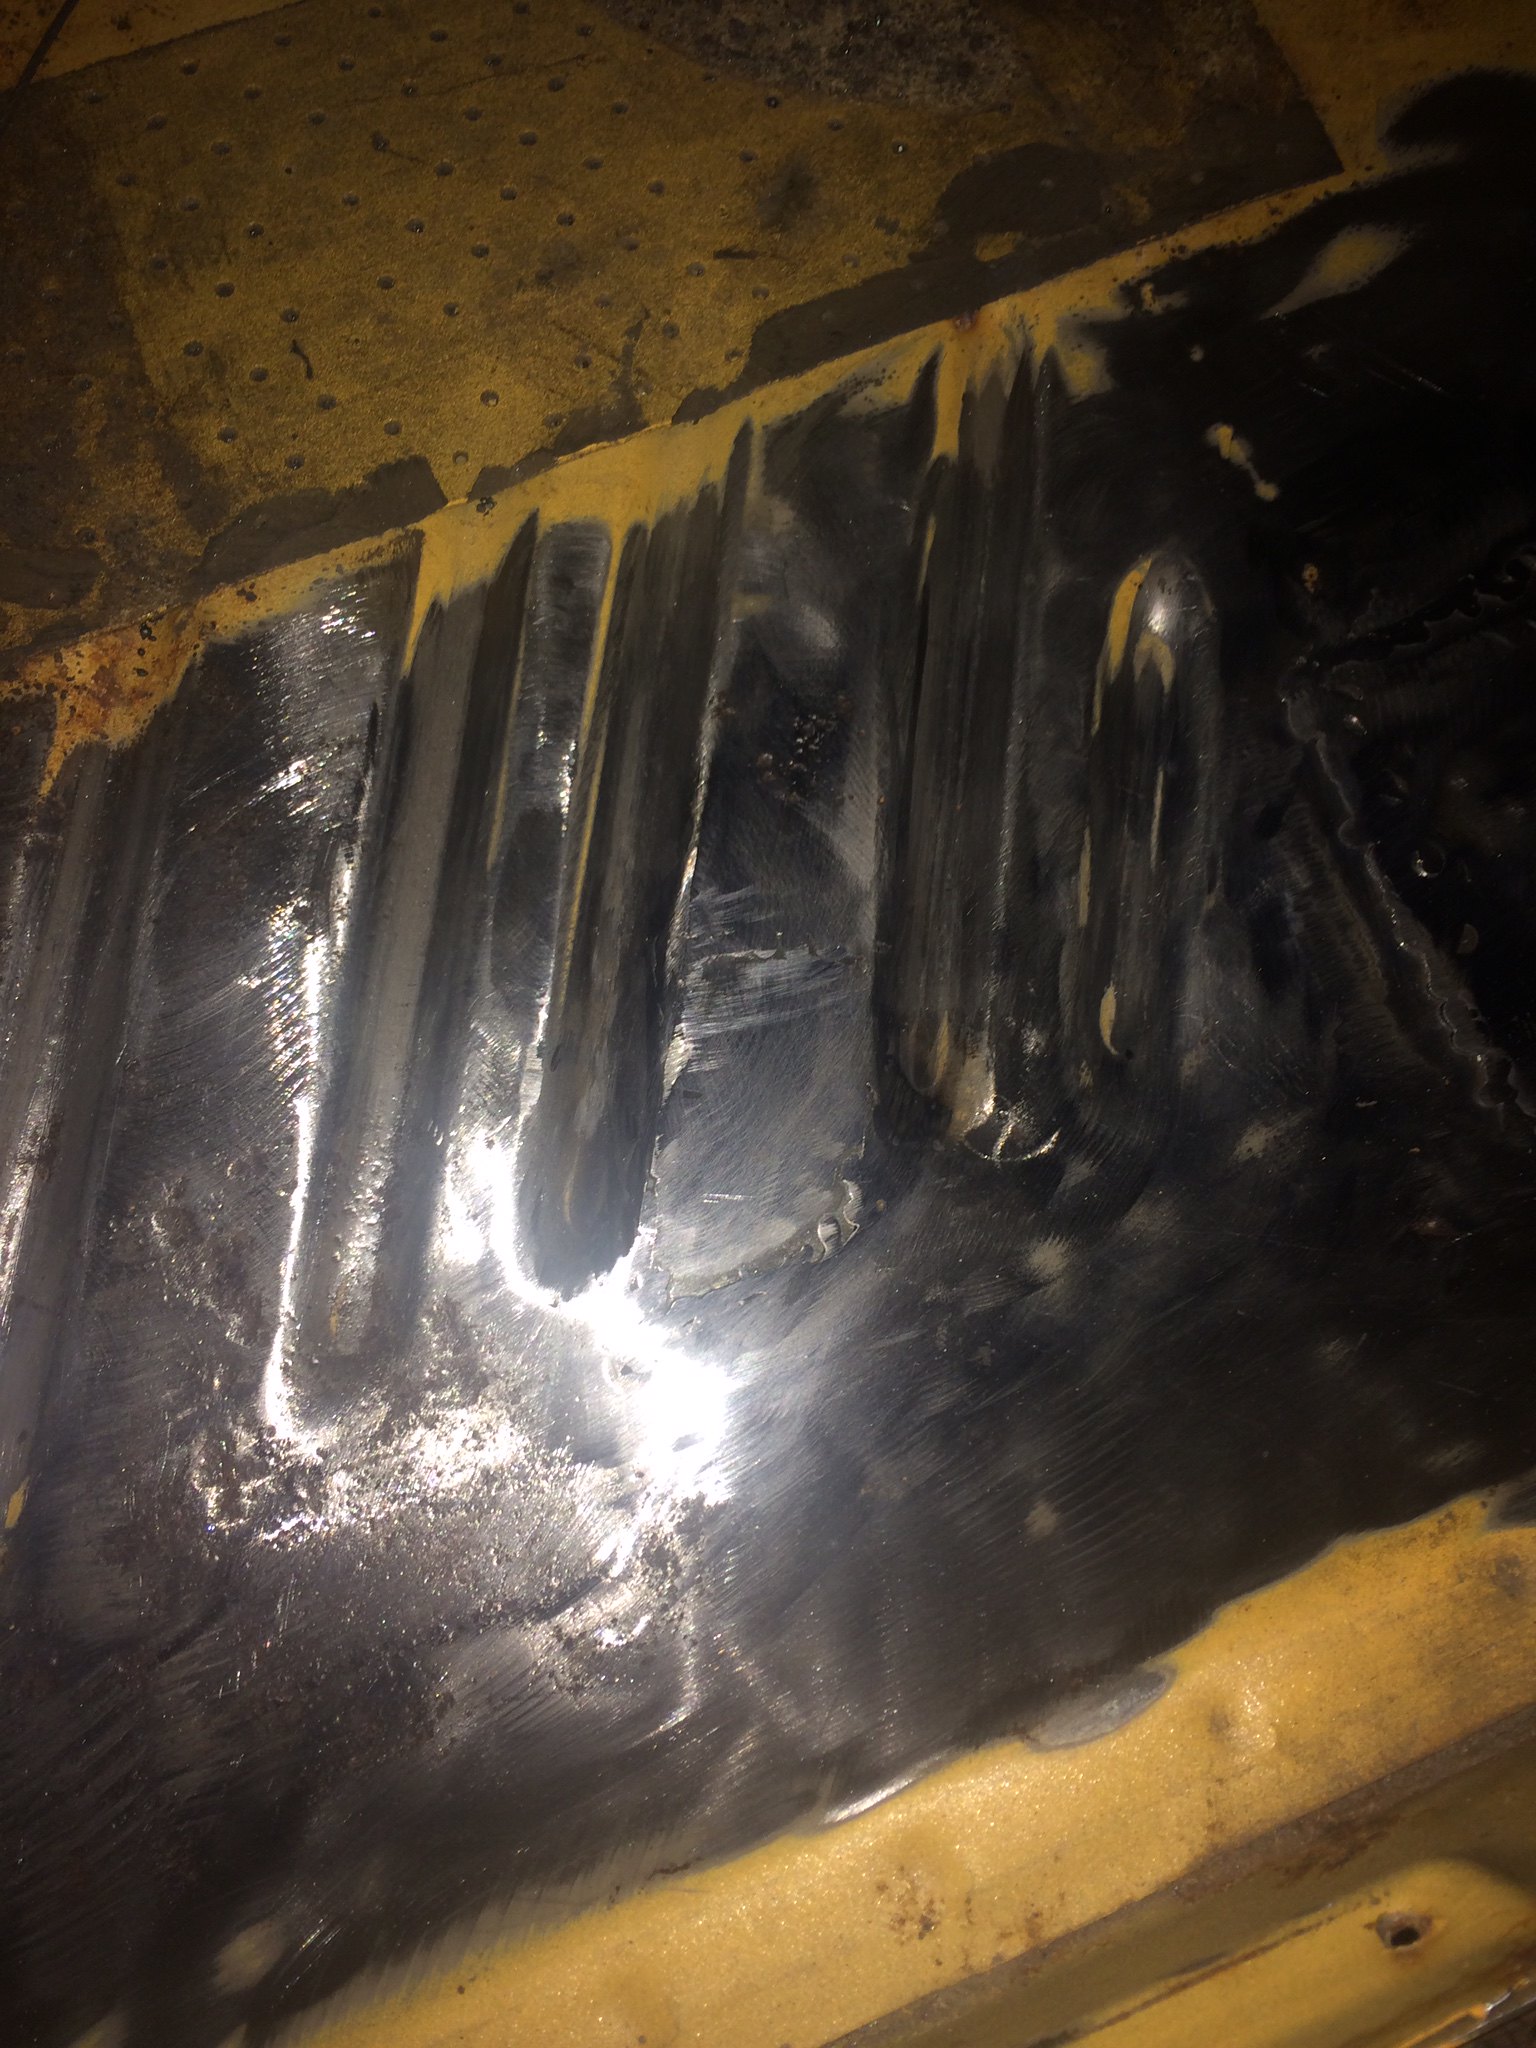 image image by Nevtiger, on Flickr Luckily the bits i am practicing on will be under the carpet! |
| |
|
|
|
|
|
|
|
Then it was to the drivers side sill top next to the A post. After a bit of drilling, cutting and removing this what was found:  image image by Nevtiger, on Flickr Rot handmade a home under the A post: 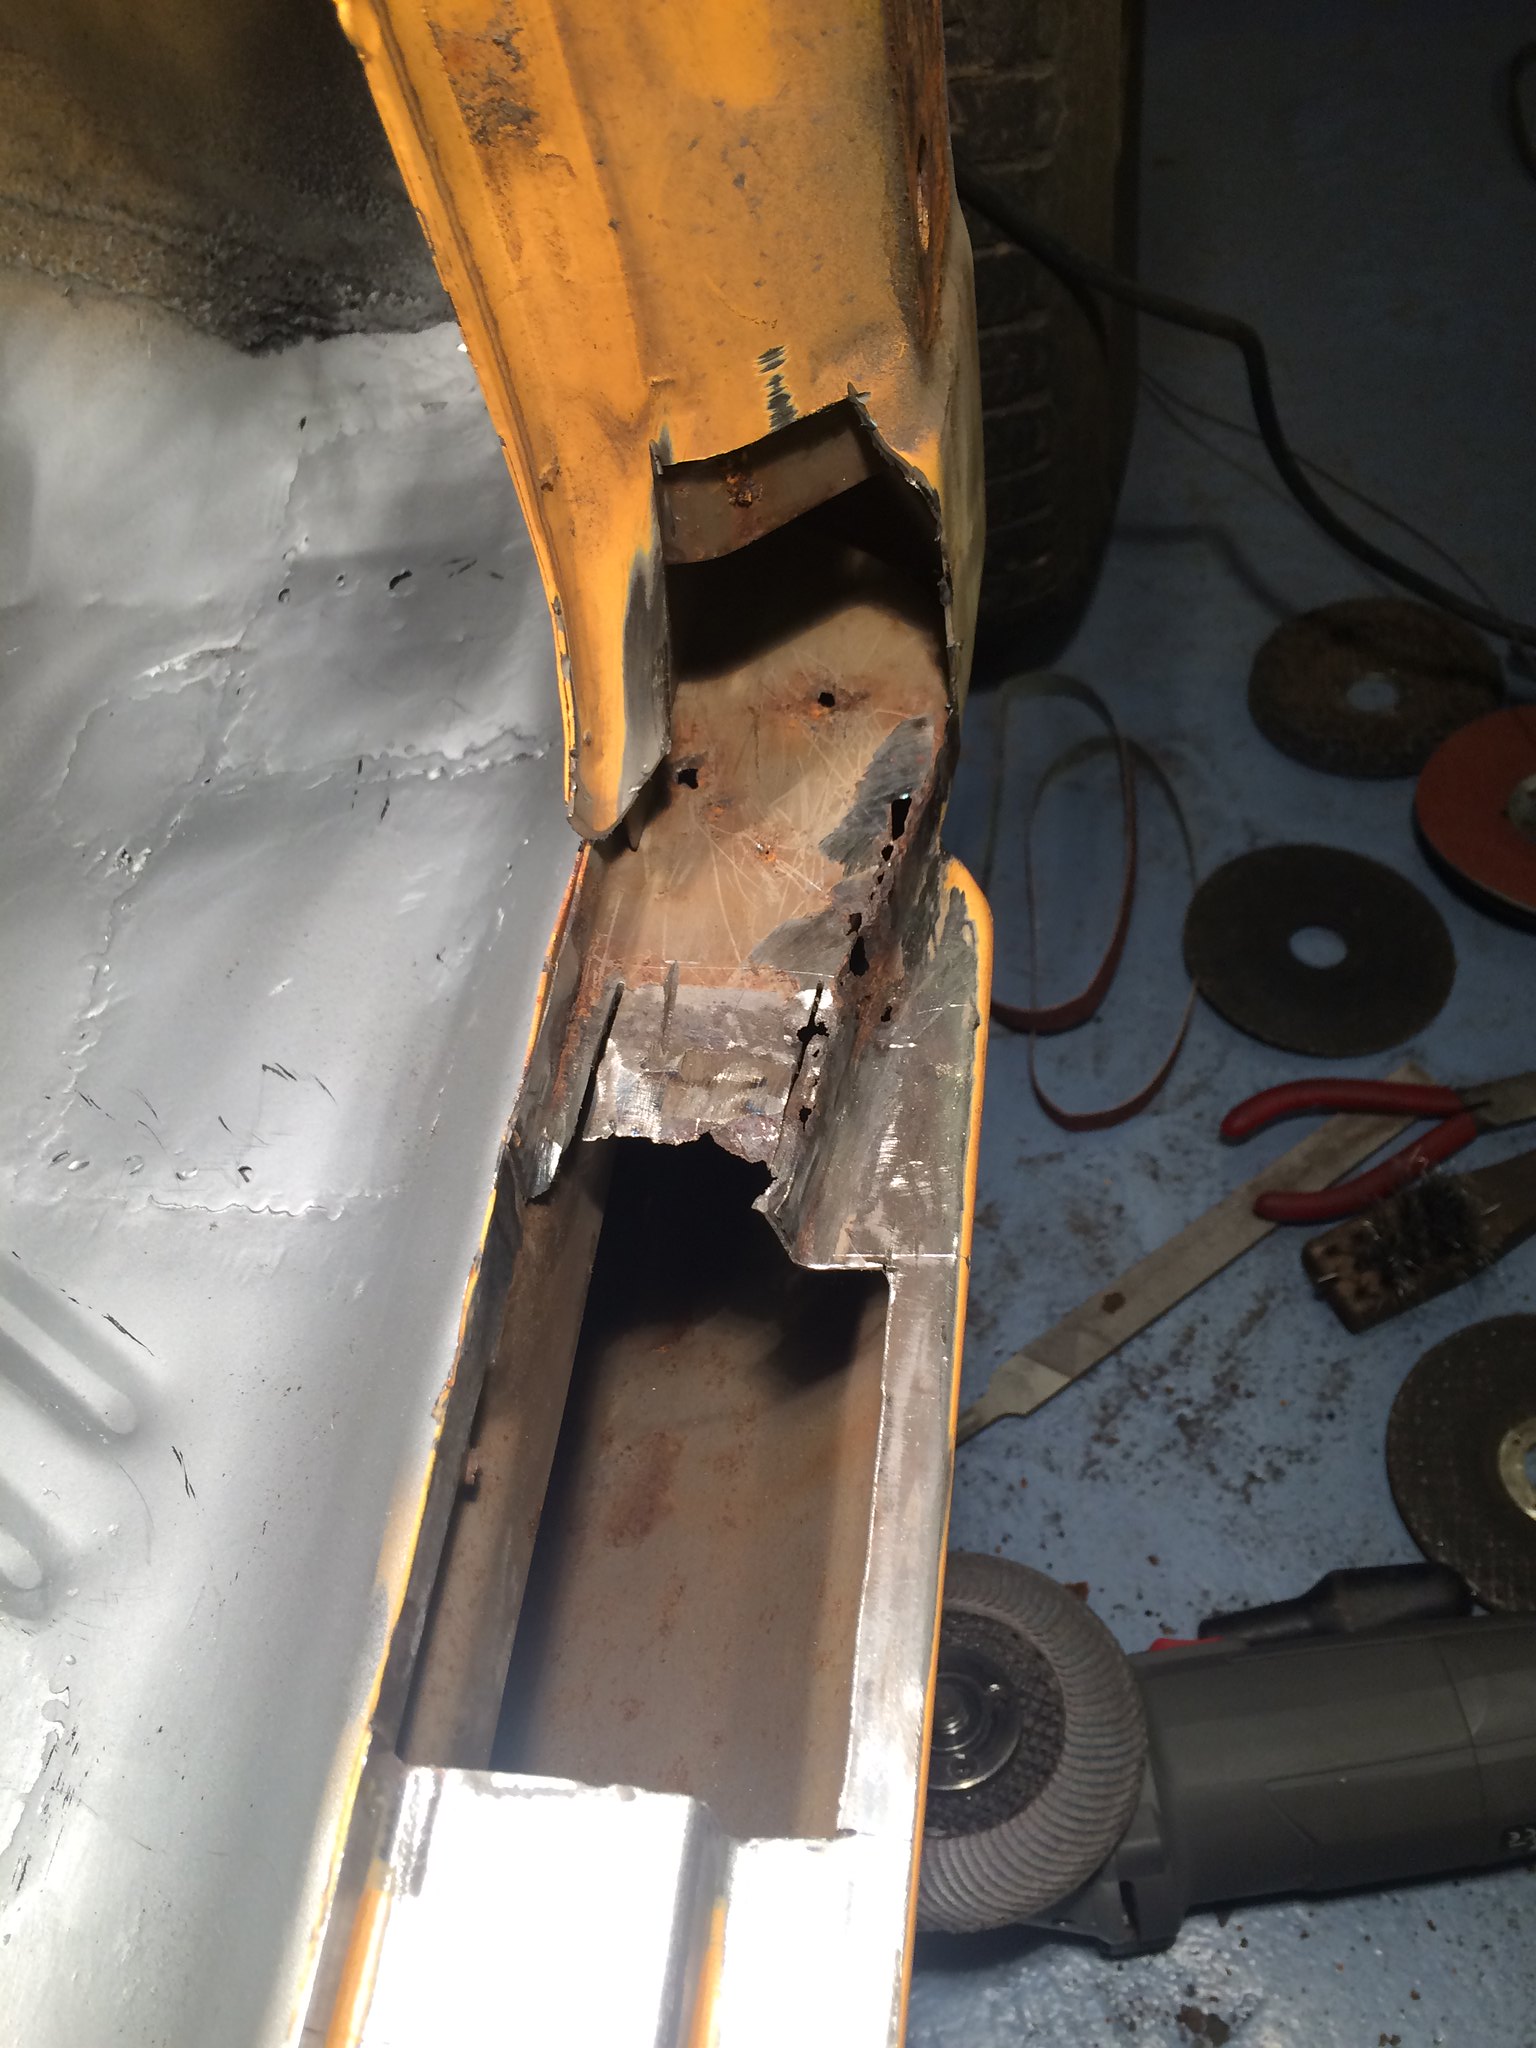 image image by Nevtiger, on Flickr So i cut it out and put in some new metal......  image image by Nevtiger, on Flickr 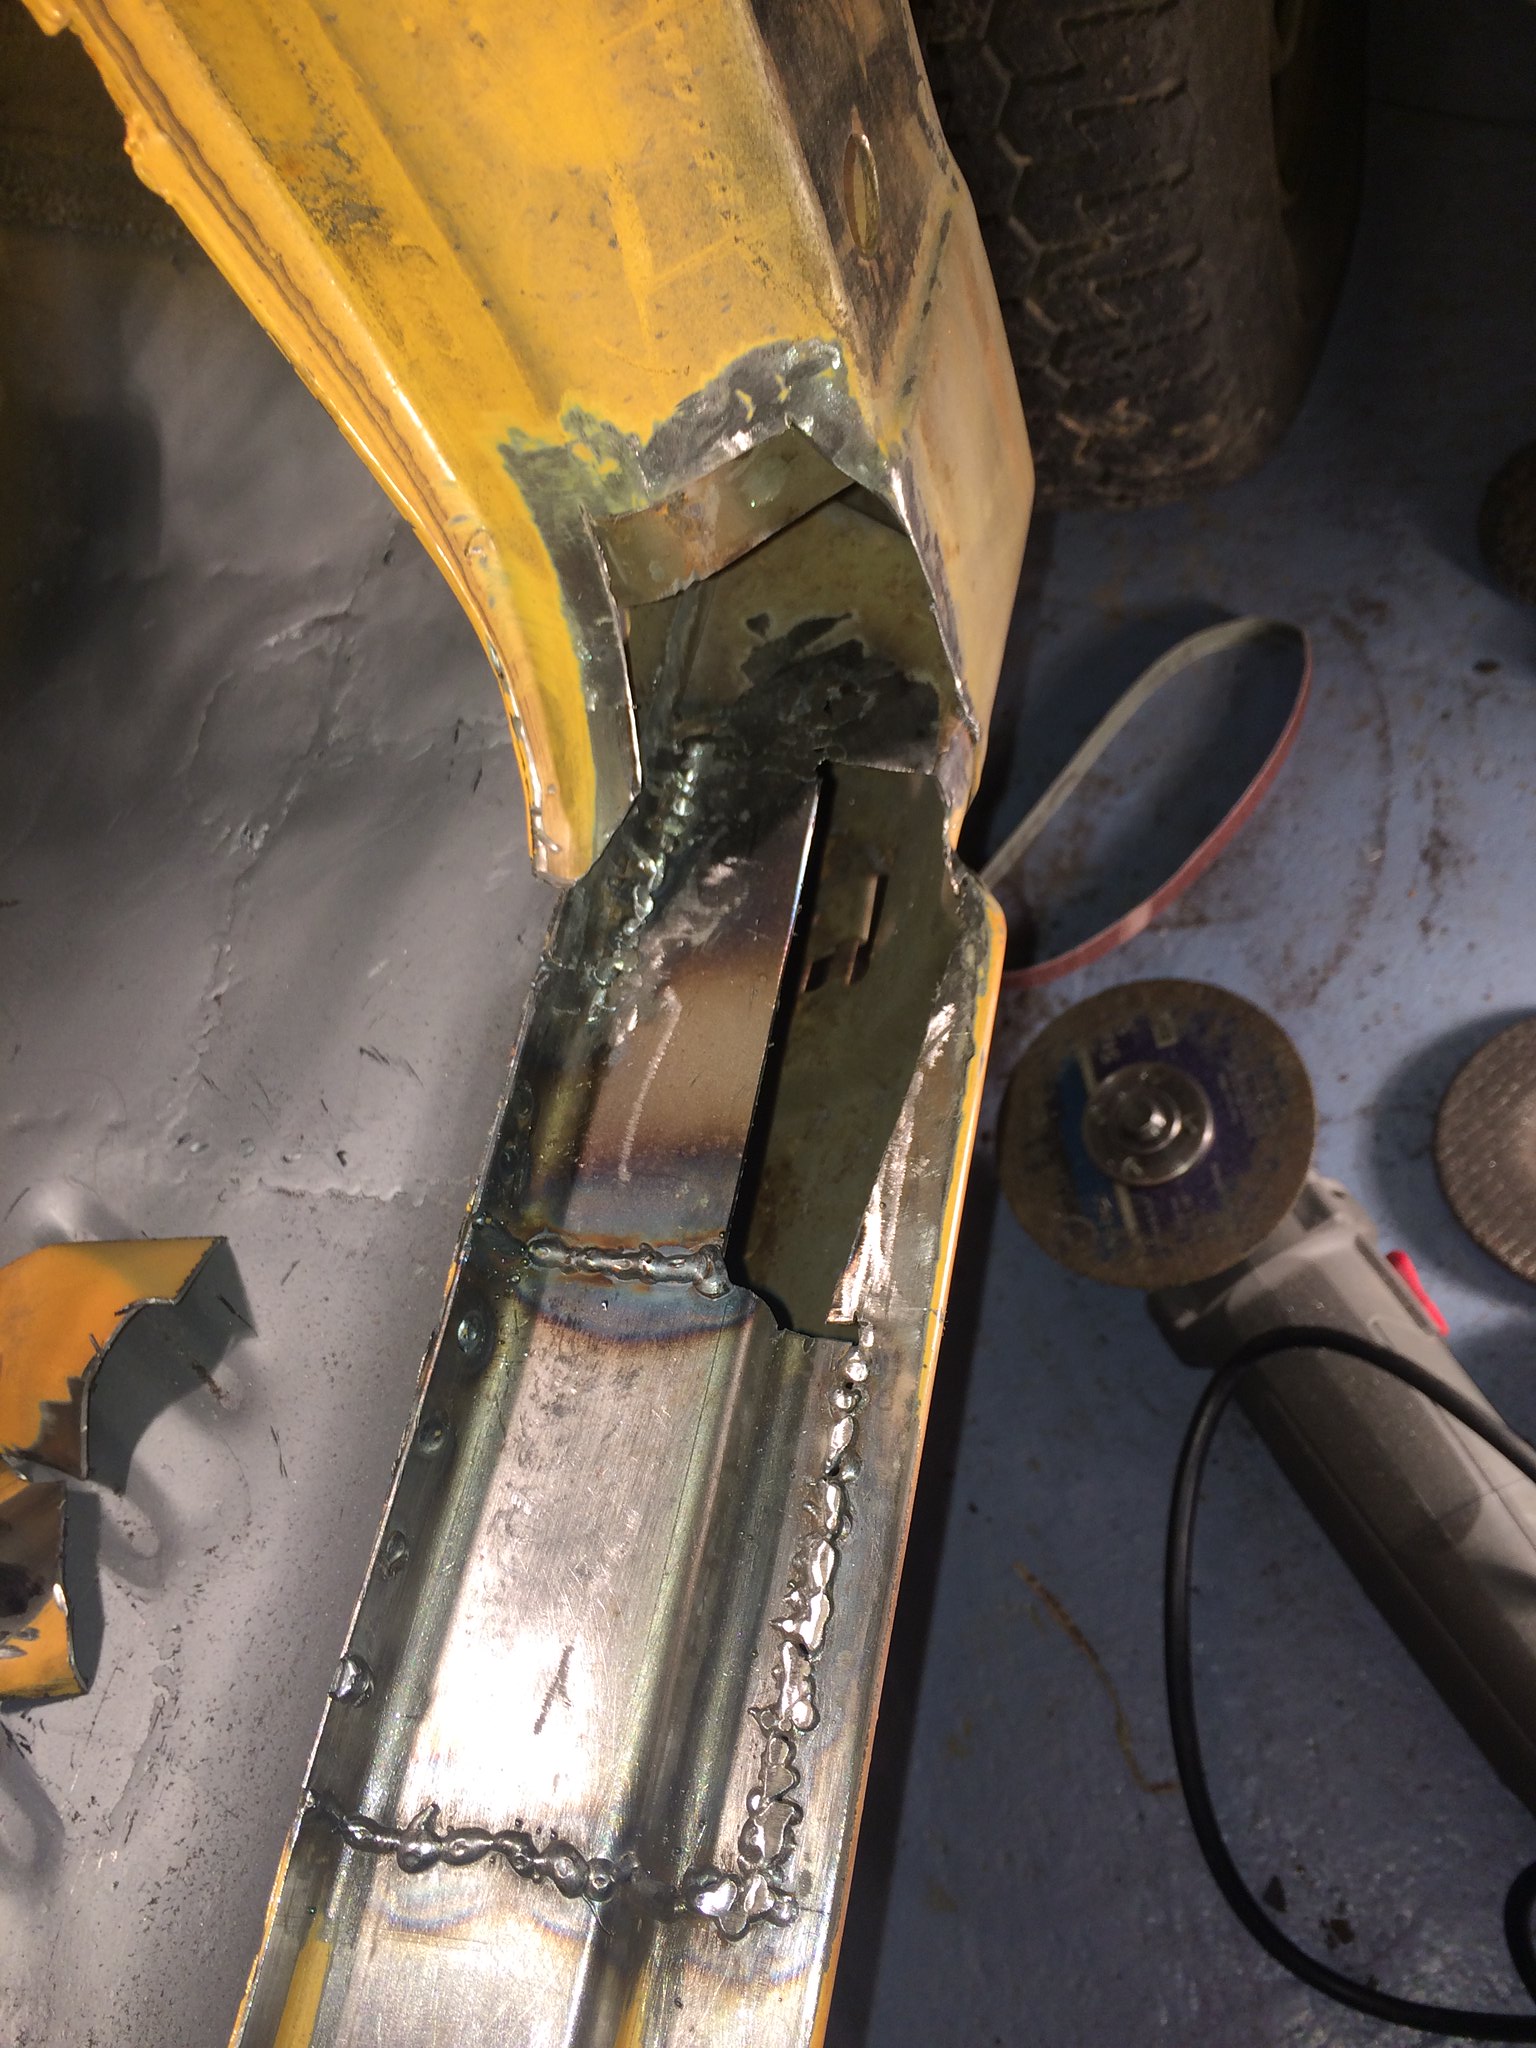 image image by Nevtiger, on Flickr A bit of bending and shaping: 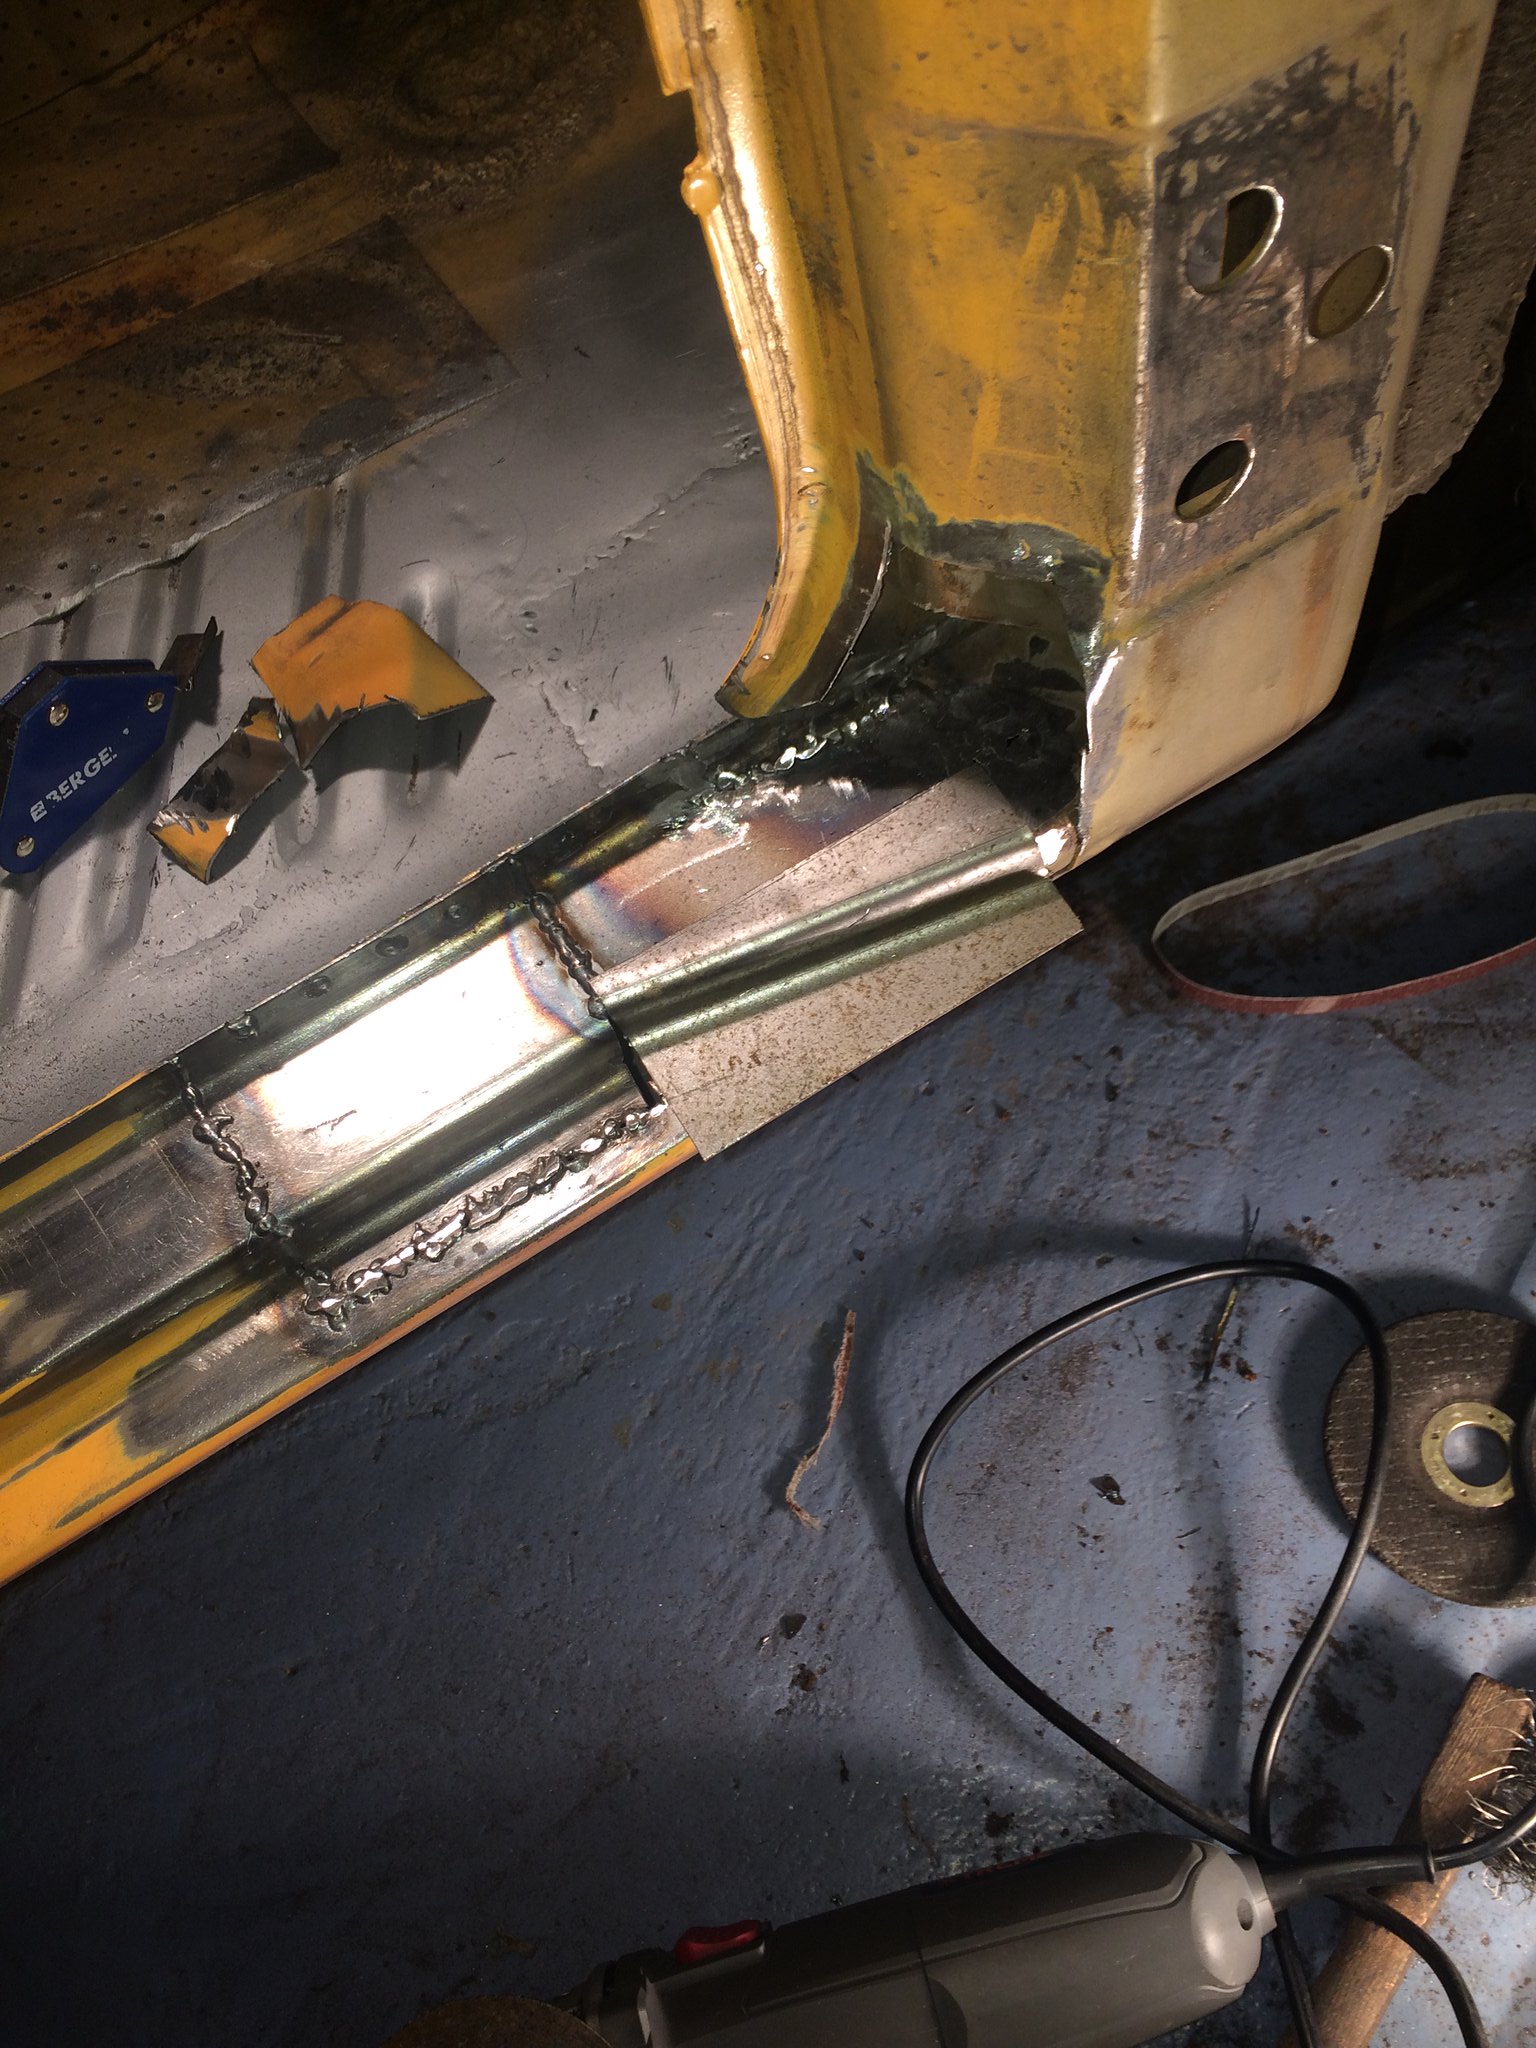 image image by Nevtiger, on Flickr A bit of welding and a bit of dressing back and putting a bit of the A post back in: 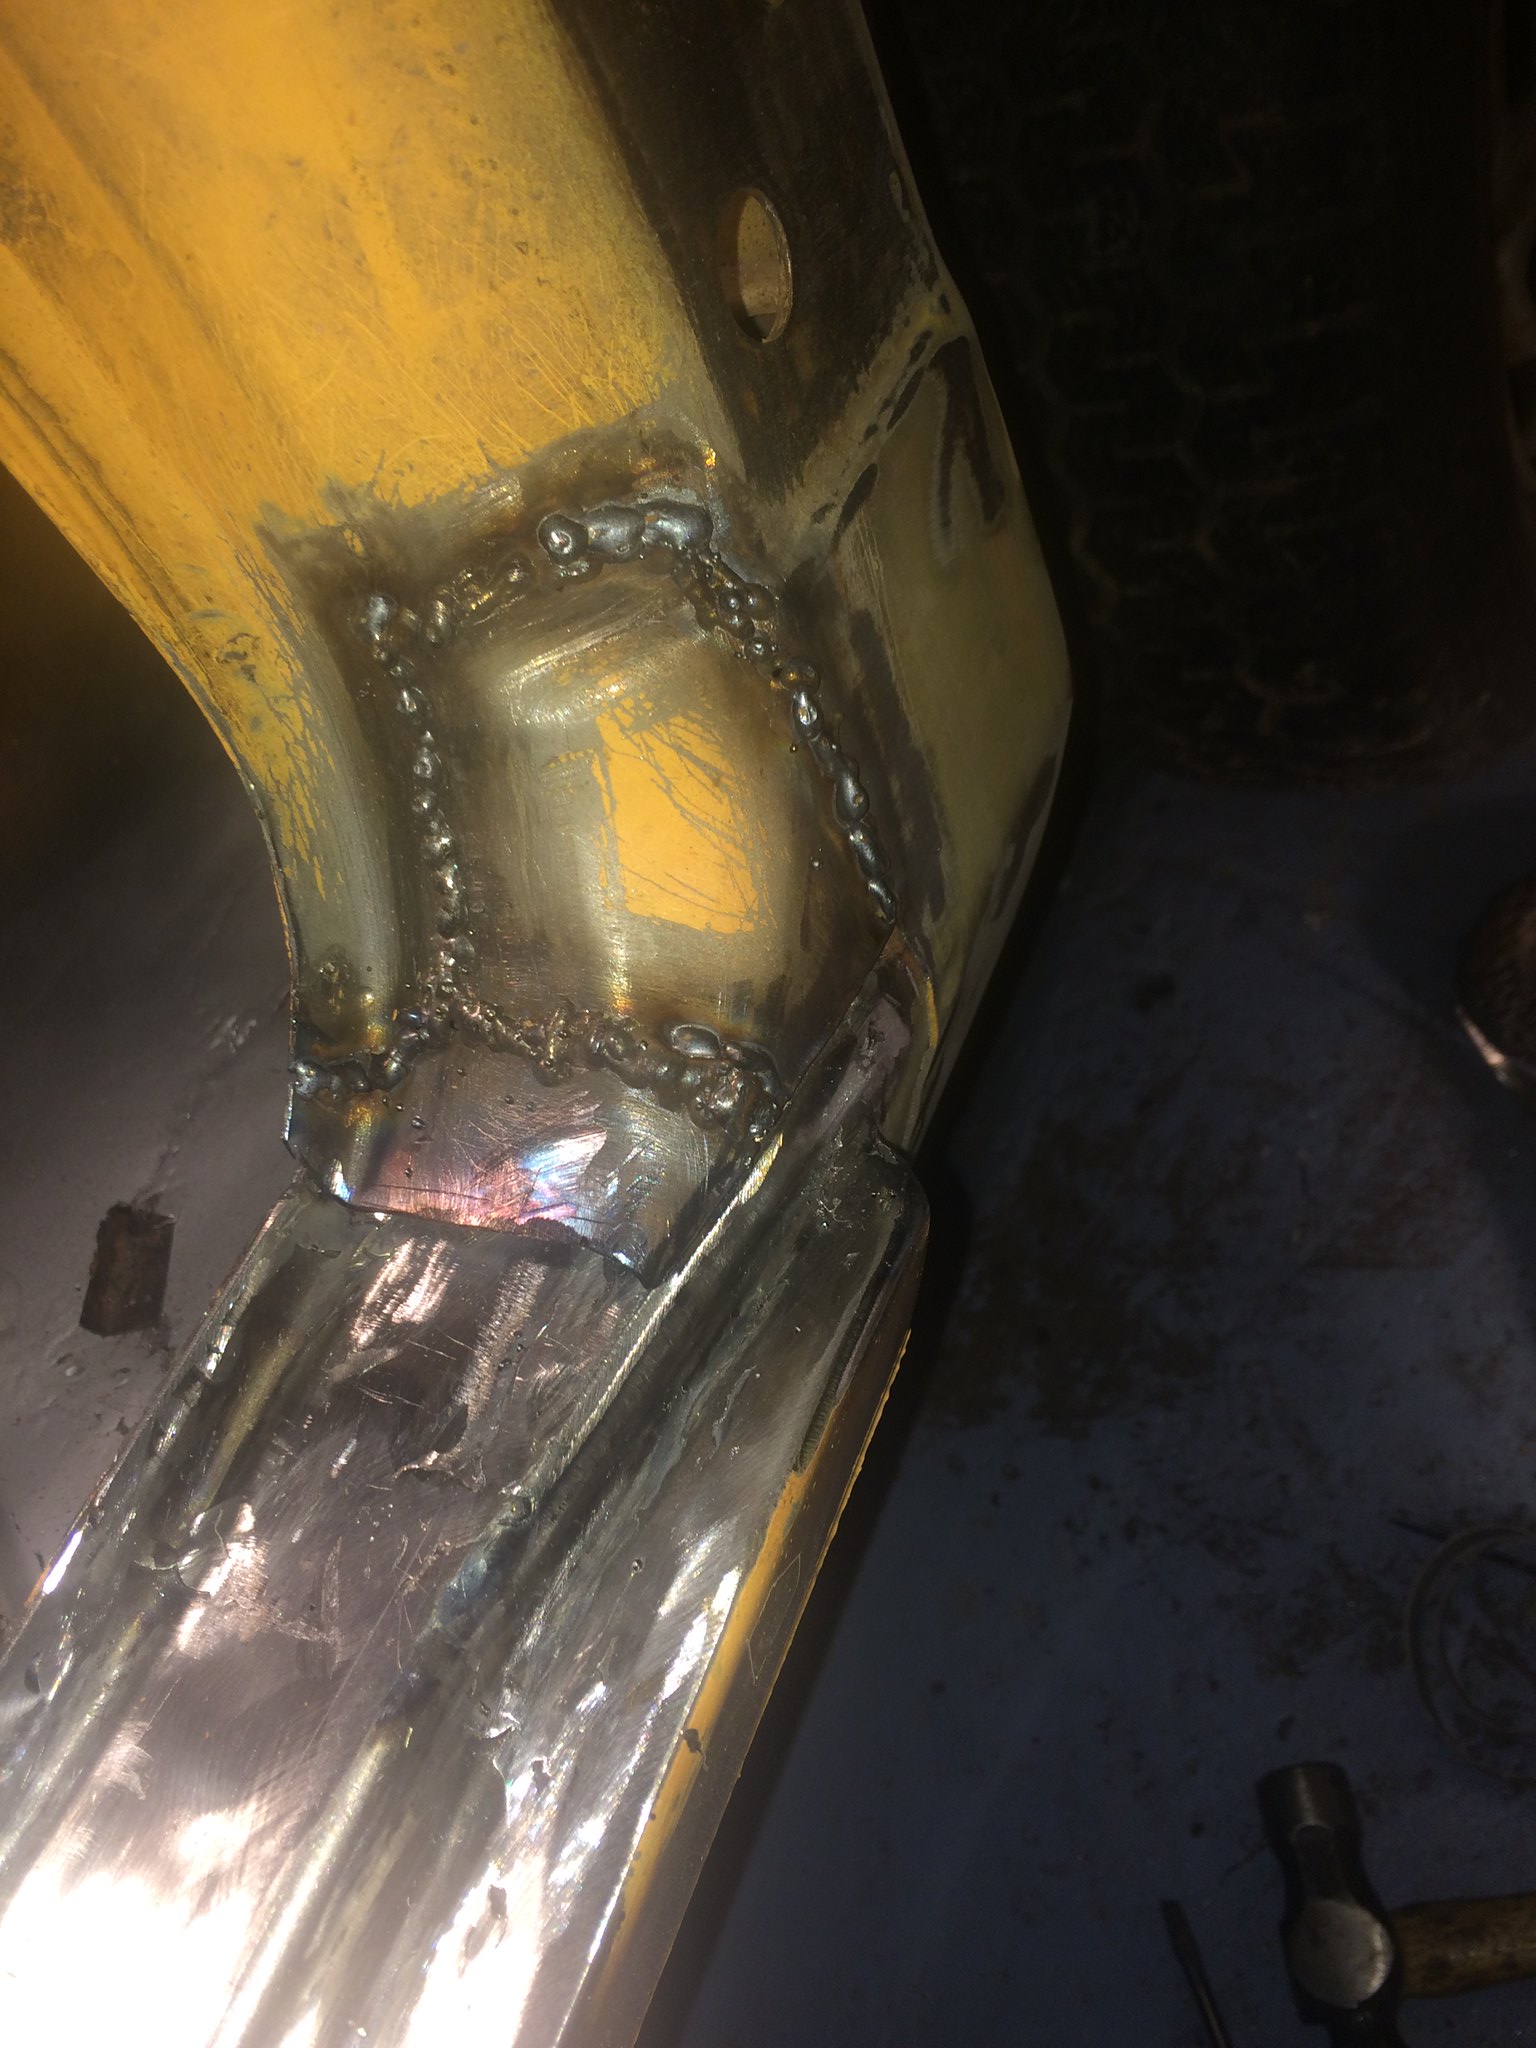 image image by Nevtiger, on Flickr Add a bit bit more metal: 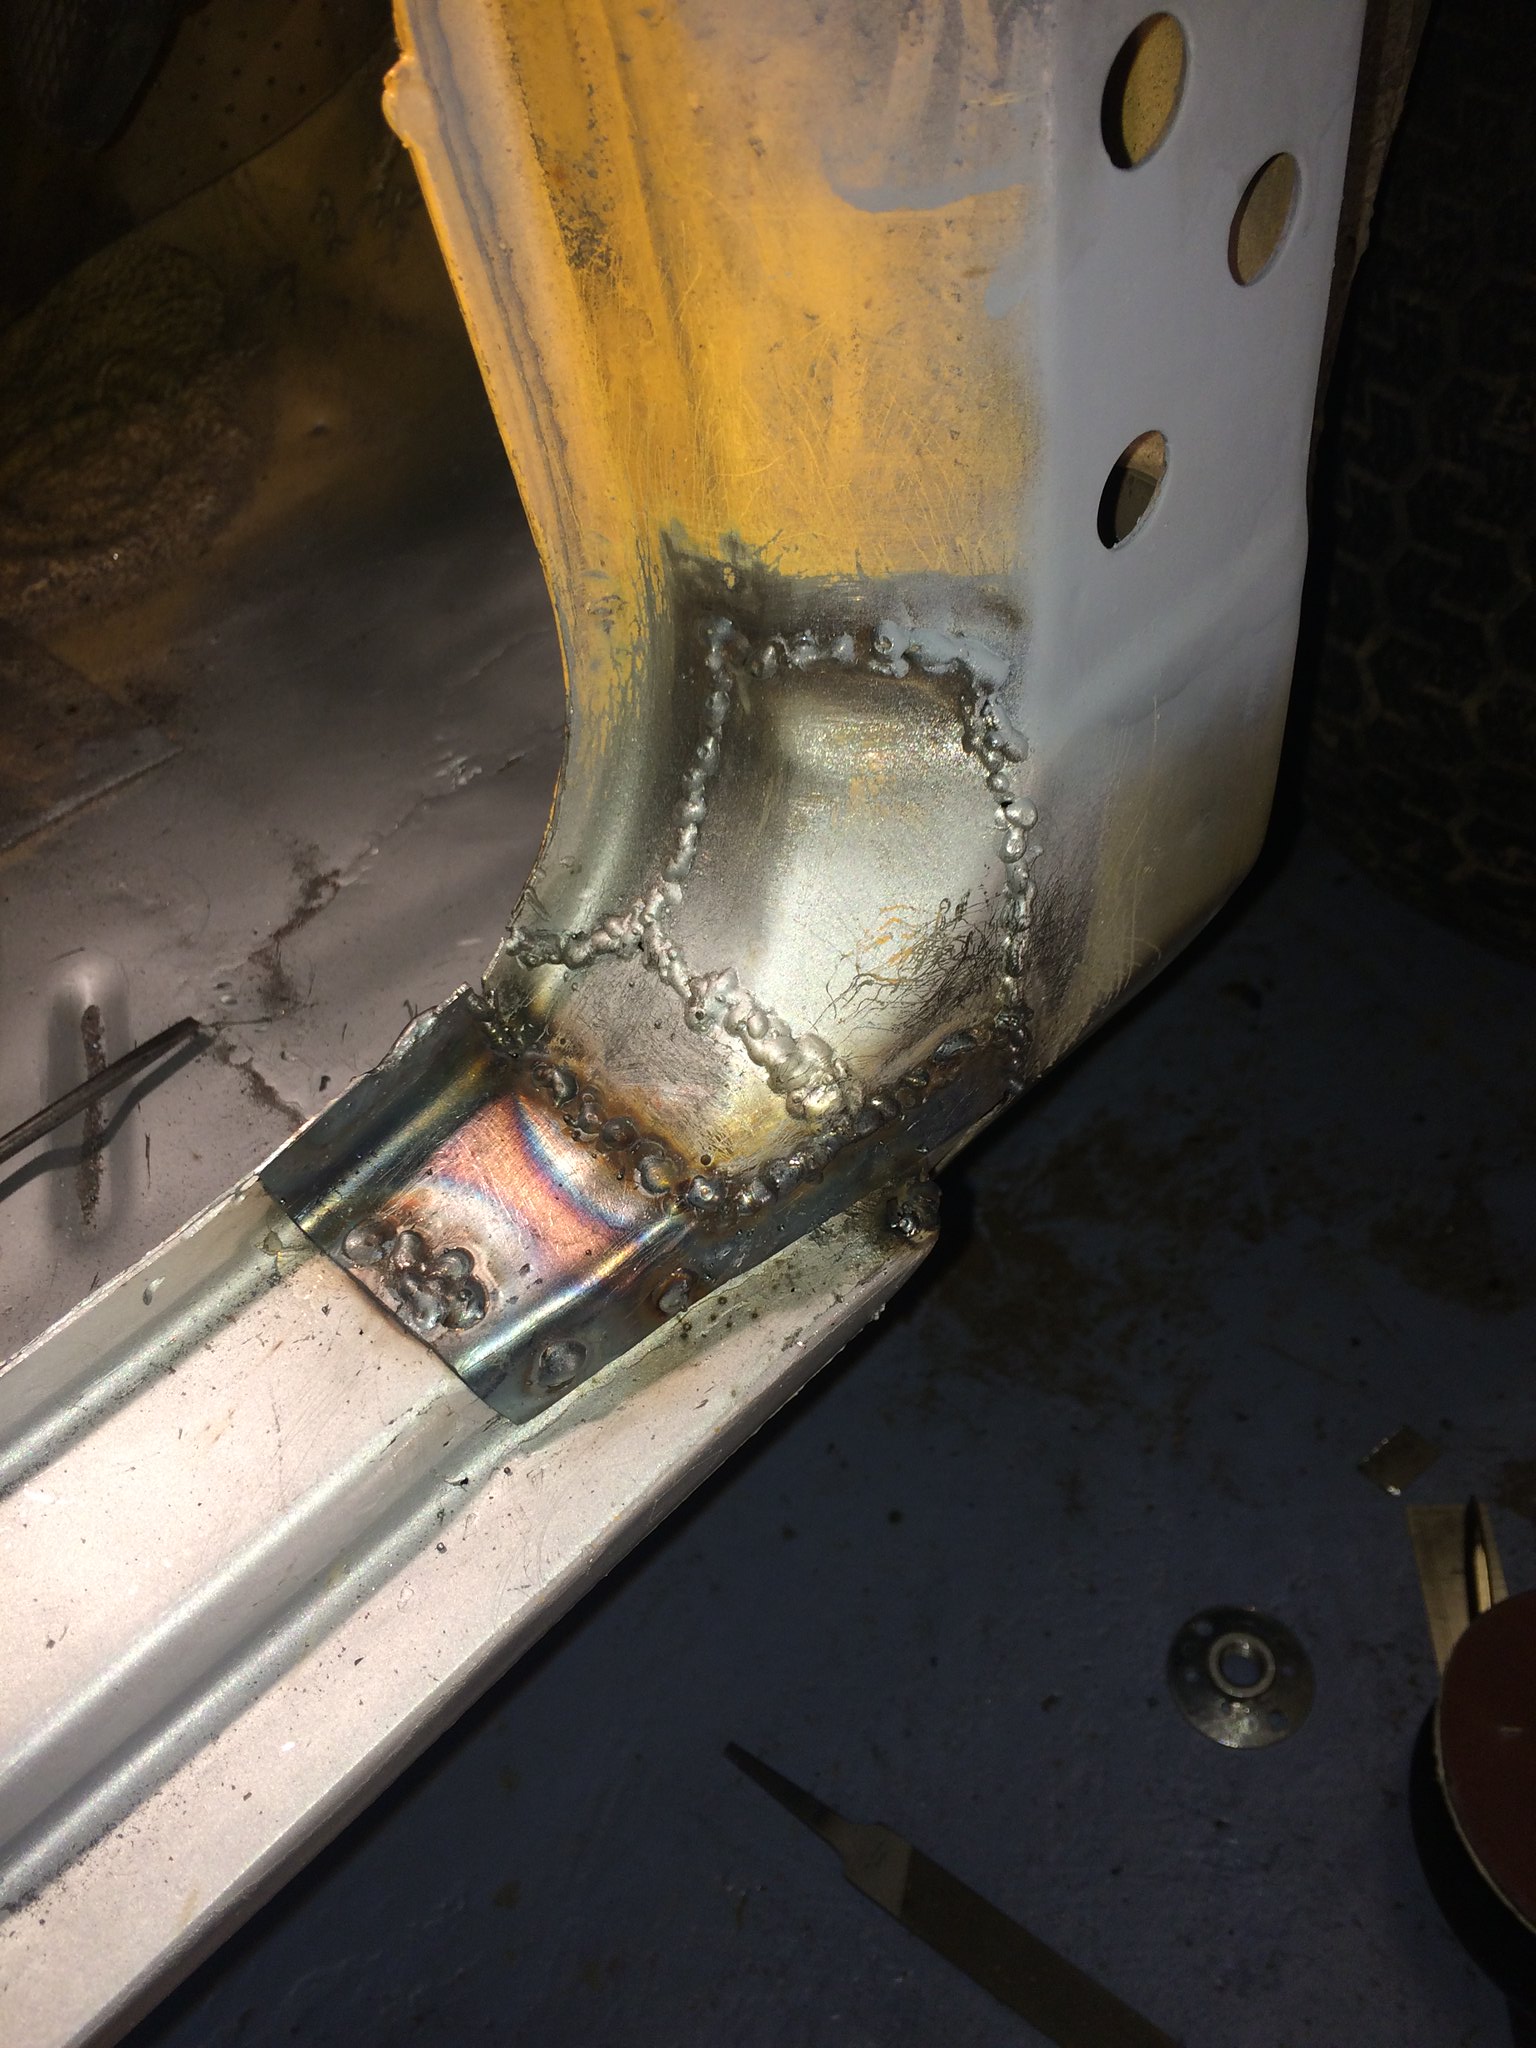 image image by Nevtiger, on Flickr And then dress it all back and i get this:  image image by Nevtiger, on Flickr Its getting there, worse bits will be hidden by the door rubber...... |
| |
|
|
|
|
|
|
|
|
wow, great results!....hard to tell from the pics but are some of your welds a bit "cold"?....I know I don't like to burn through the metal....
I gotta say, though, the results look terrific!....(and you are finishing sections of your repairs unlike yours truly!)
nicely done
Jp
|
| |
I know its spelled Norman Luxury Yacht, but its pronounced Throat Wobbler Mangrove!
|
|
|
|
|
|
|
|
Cold? I guess you mean not enough penetration?
I have been trying different settings but will try something else! I wish i knew what i was doing........
|
| |
|
|
|
|
|
|
|
|
continous welding with two pieces of steel butted together, with intent to dress back afterwards, is always tricky i've found. end up using less power to stop it blowing through (because of the air gap) but you actually want more power to penetrate "enough" so that when you dress it back you don't start chasing hair line cracks around, where 95% the filler metal is removed.
only way i can do it is overlapping spot welds, so quite high settings, lay one spot, let it partially cool (just stops glowing) then lay the next spot half over the previous. again, the downside i found with that method is you end up with porous weld (little pin holes in middle each spot weld) but its structurally better. i found if you have rust or damp cavity behind overlapping spot welds, untreated on the rear of the welds, it sponges through and starts showing within hours !
|
| |
Last Edit: Oct 5, 2016 10:49:47 GMT by darrenh
|
|
|
|
Phil H
Posted a lot

Posts: 1,448
Club RR Member Number: 133
|
|
|
|
I tend to weld in a similar fashion, darrenh - structurally sound even if it doesn't look the prettiest. |
| |
|
|
|
|
|
|
|
So on with the story: Bottom of the A pillar on the off side:  image image by Nevtiger, on Flickr New toys to help make stuff stay where it should!  image image by Nevtiger, on Flickr The eagle eyed will have spotted this is a double layer of body work and these bits always attract corrosion! A bit of welding and cleaning and we get this: 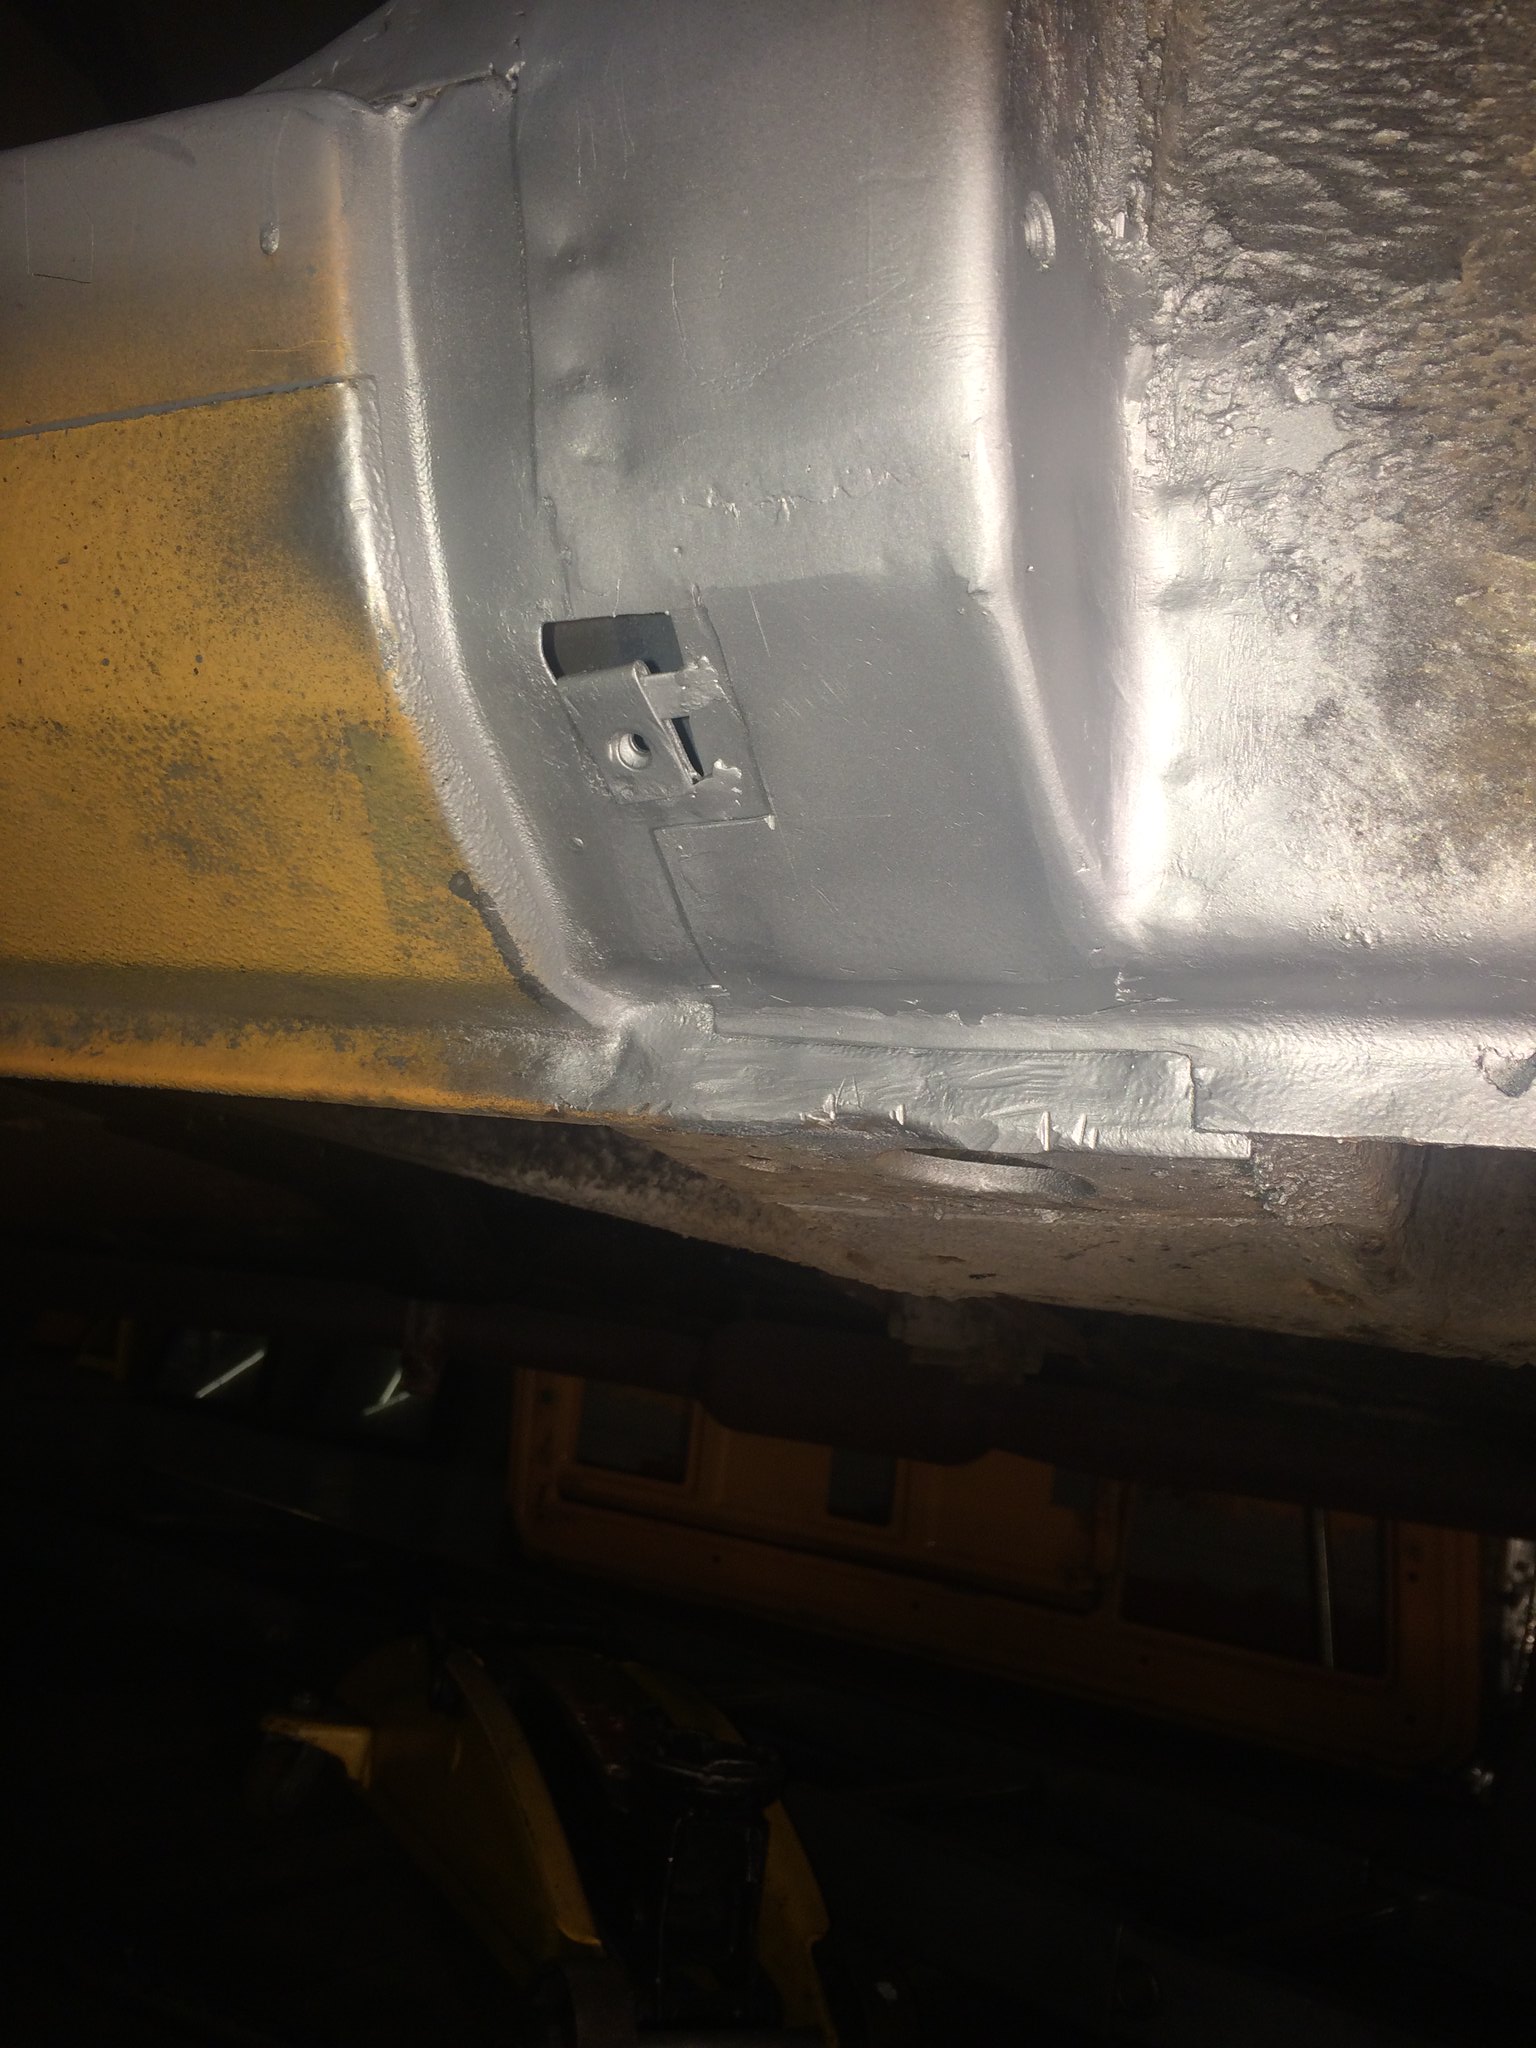 image image by Nevtiger, on Flickr At this point i had started using zinc 'weld through' primer to protect bits between visits to the garage. I have now stopped using it as the 'weld through' title is misleading with my skills!! |
| |
|
|
|
|
|
|
|
So with that little bit done i decided to go back to the drivers door: 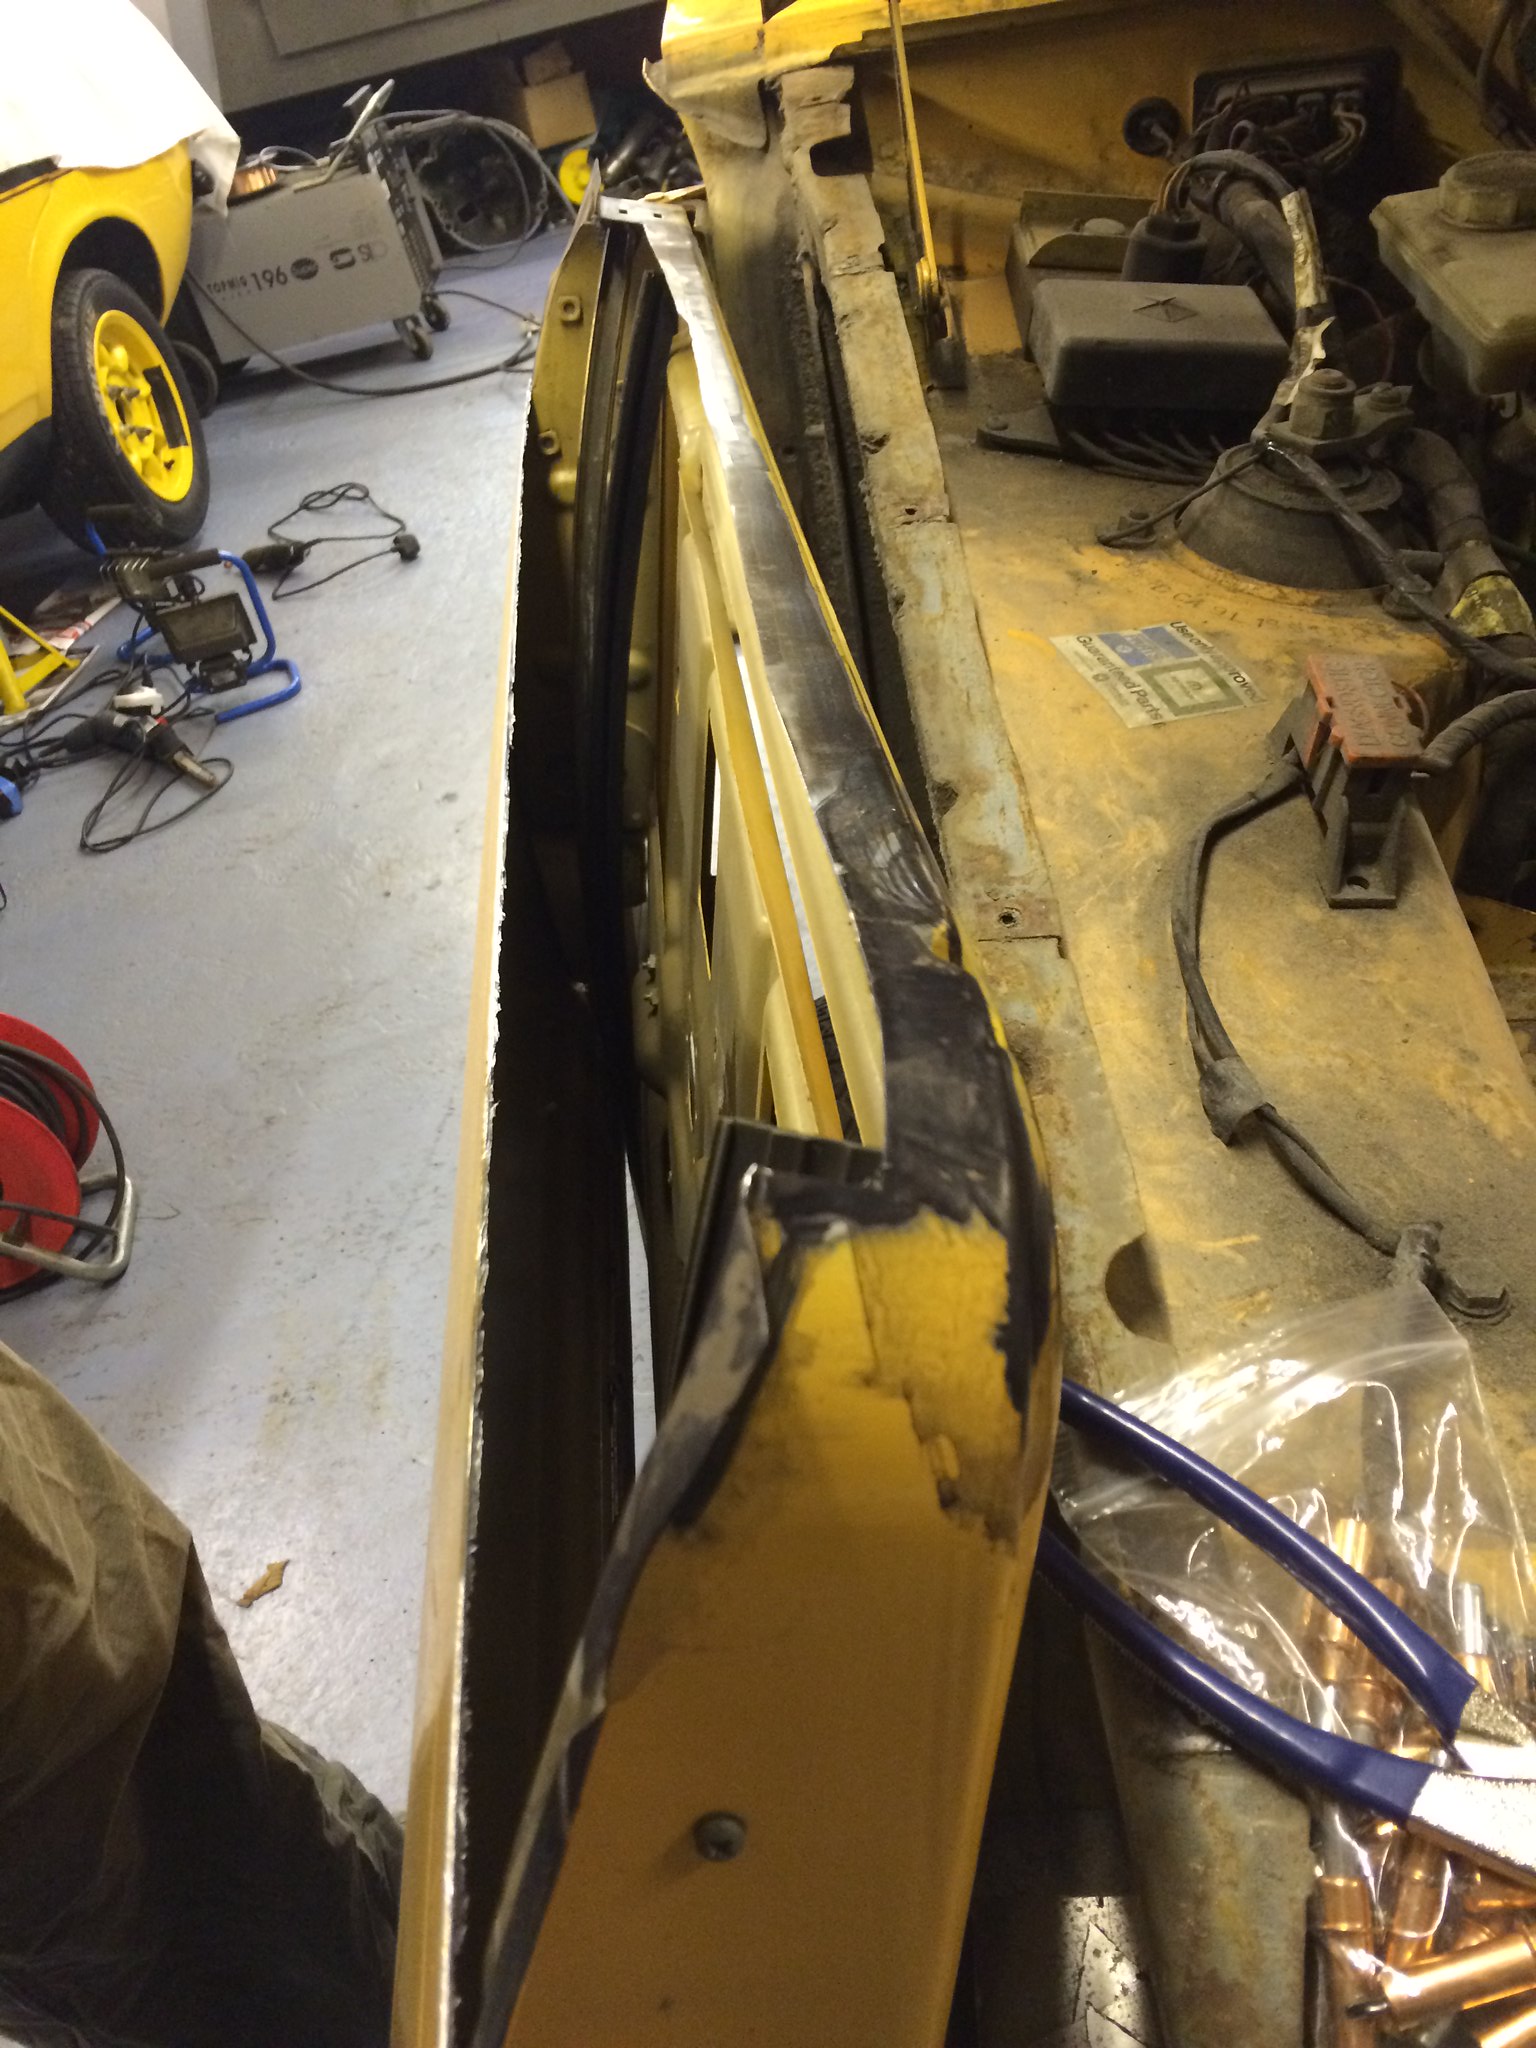 image image by Nevtiger, on Flickr This door is not as bad as the passenger door but none the less it will be interesting. The black stuff is rust convertor i used to treat bits that won't be replaced and might rust before i get the cavity wax stuff in!  image image by Nevtiger, on Flickr 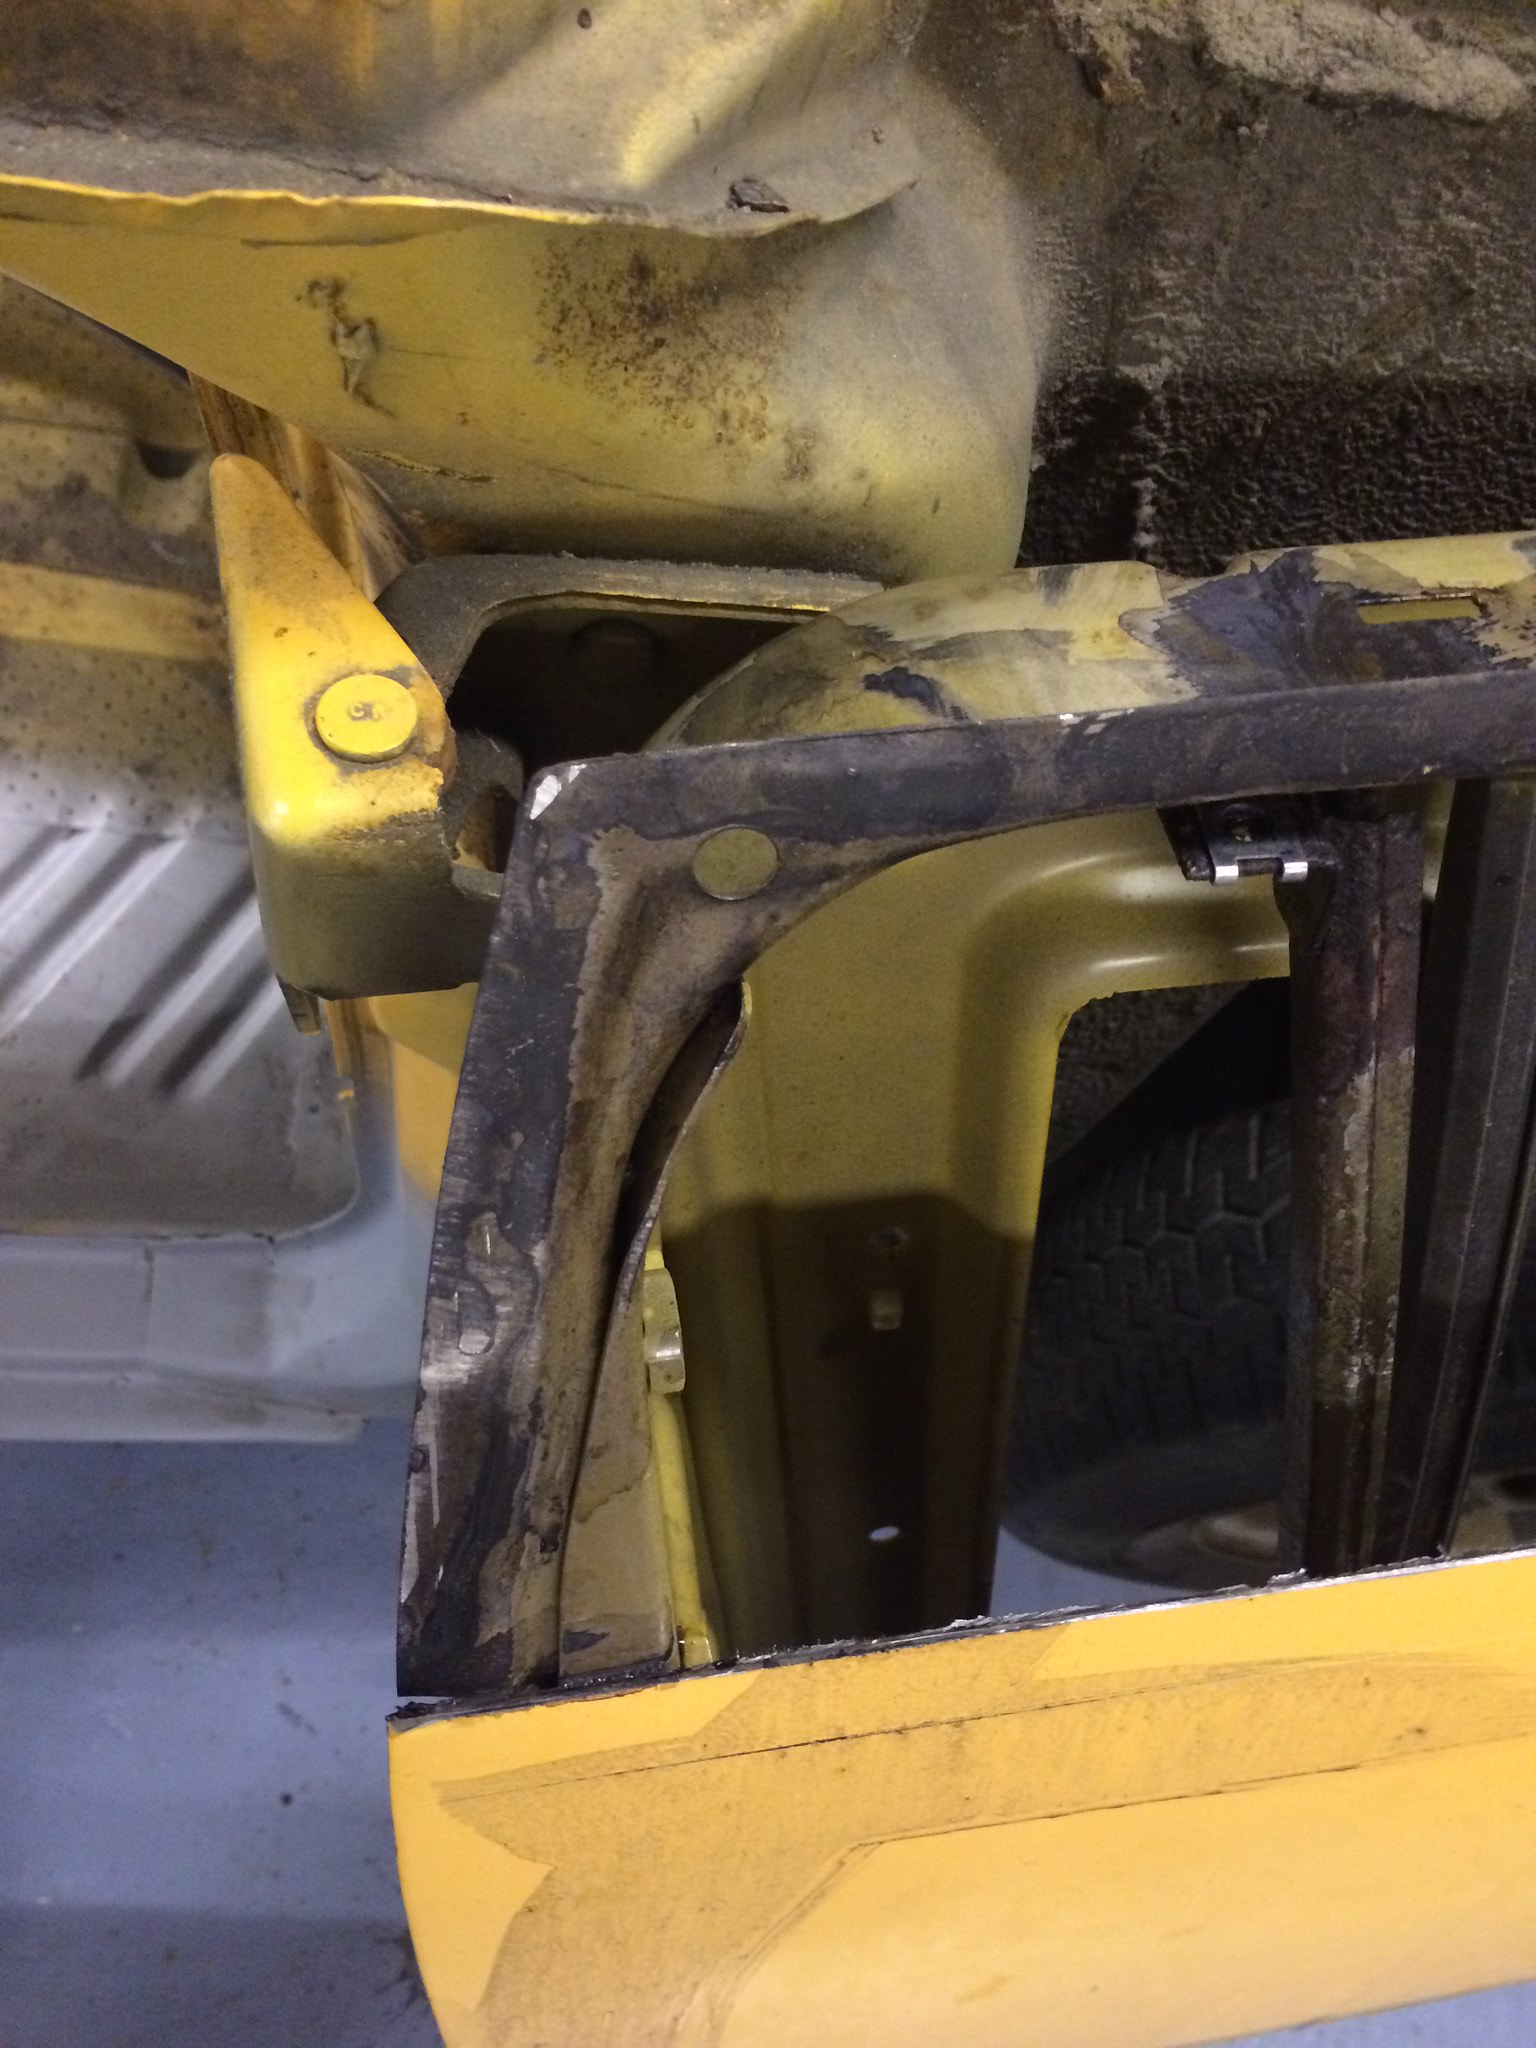 image image by Nevtiger, on Flickr A set of panel clips and pins from dad proved useful:  image image by Nevtiger, on Flickr  image image by Nevtiger, on Flickr 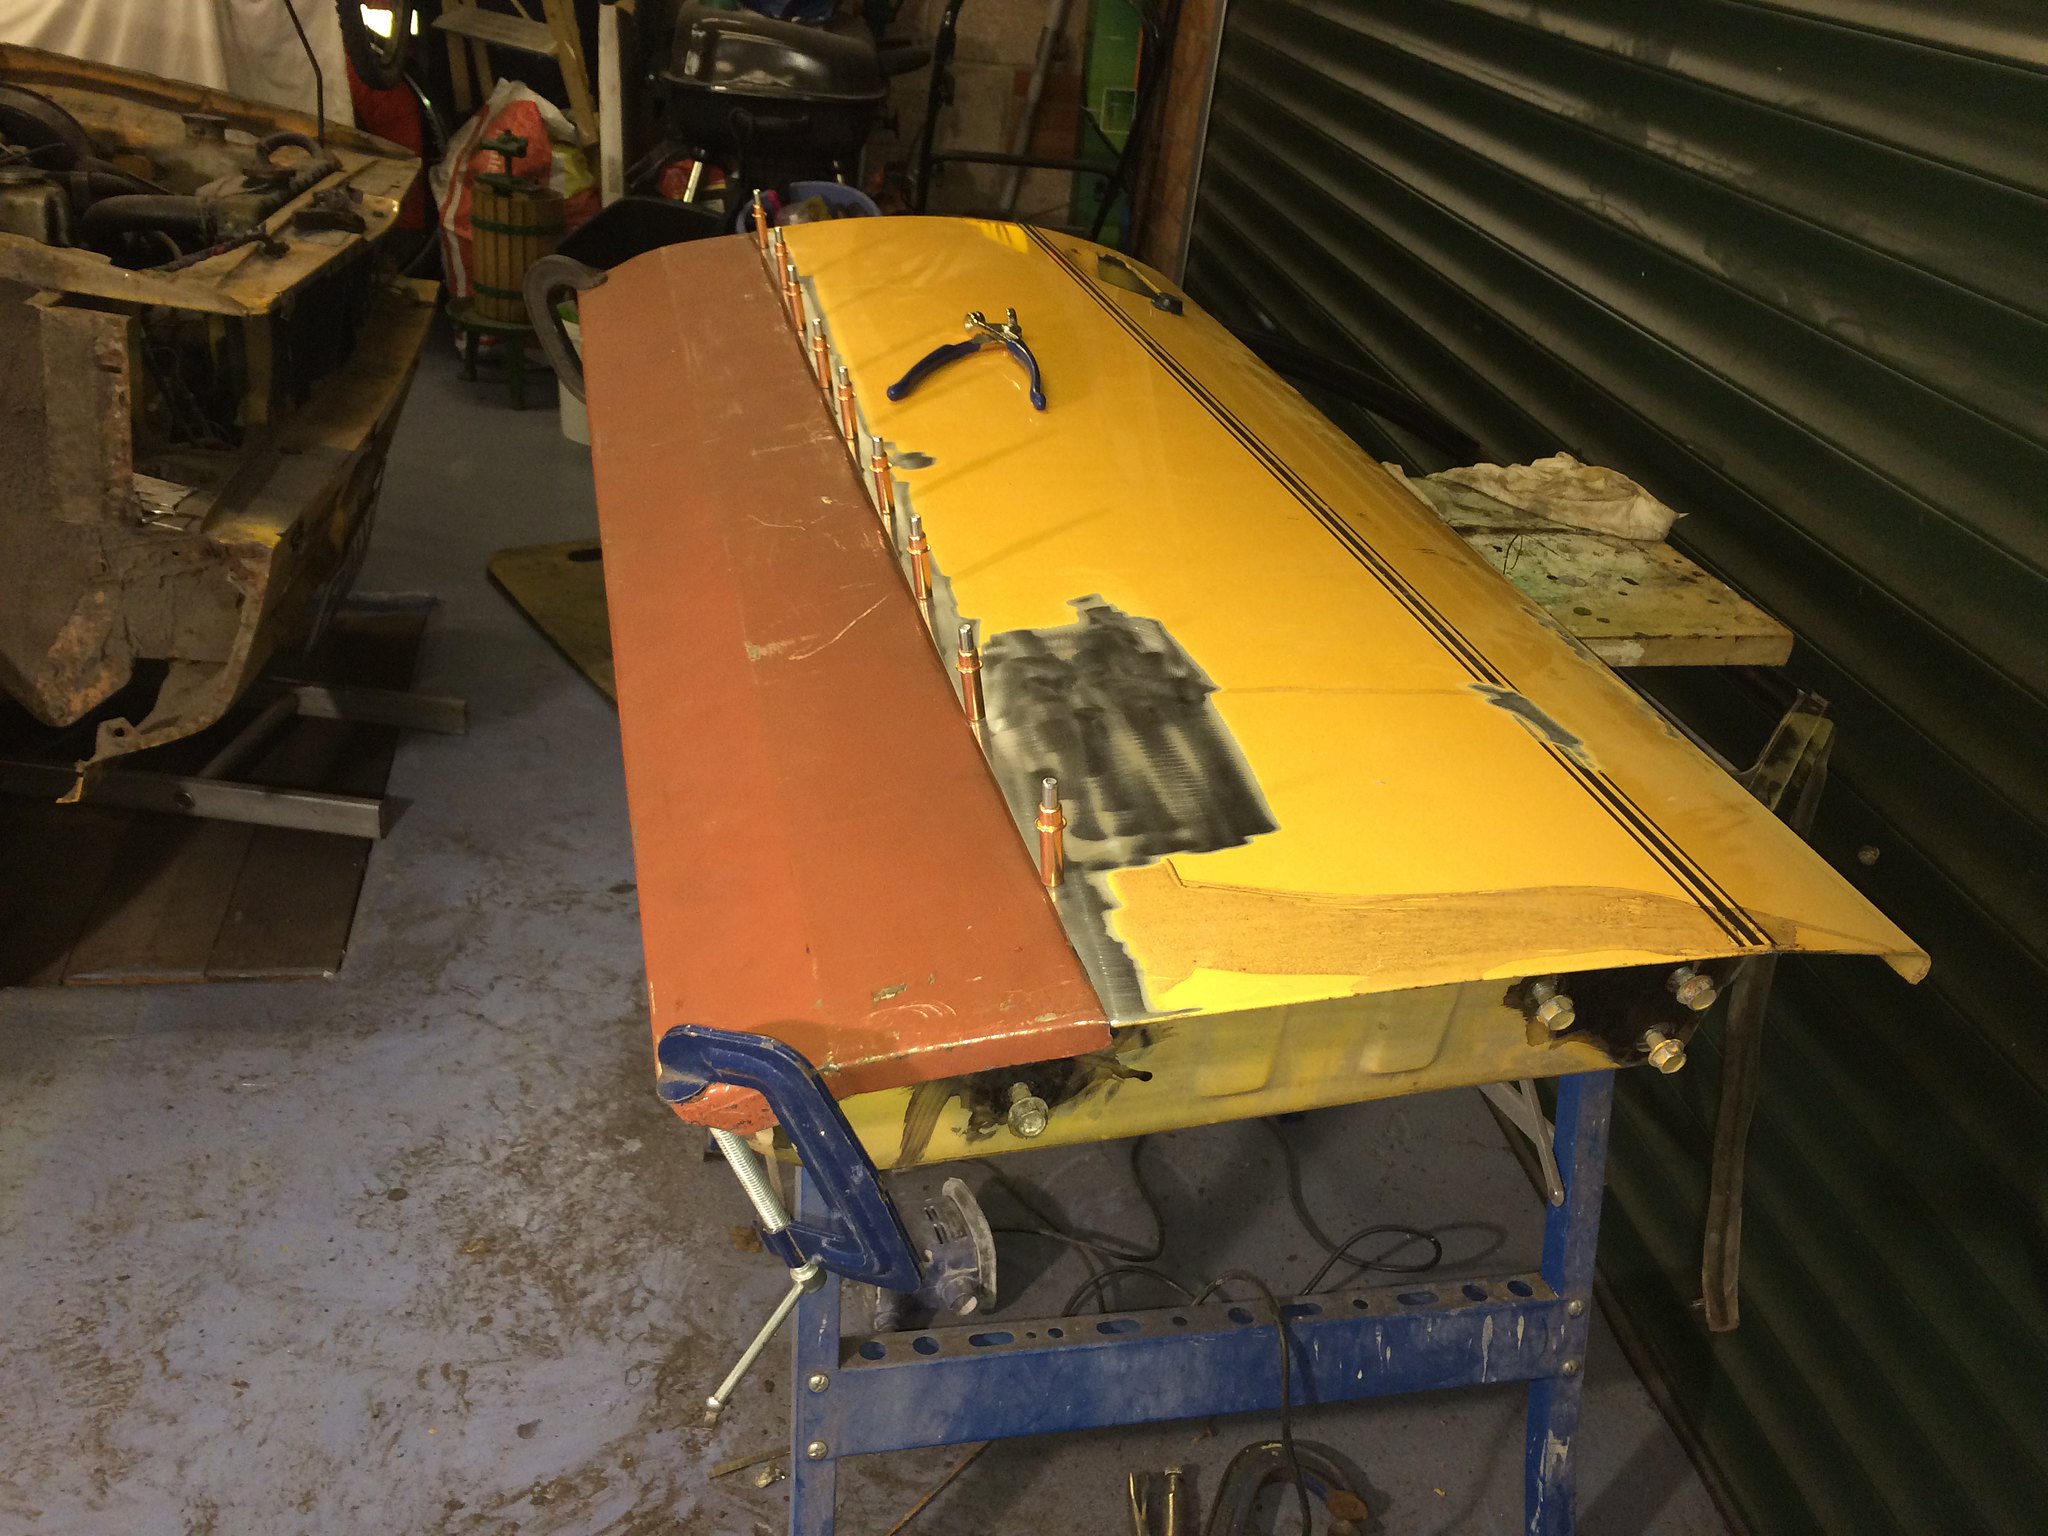 image image by Nevtiger, on Flickr Then with some filler and some paint we get this:  image image by Nevtiger, on Flickr |
| |
|
|
|
|
|
|
|
I have now stopped using it as the 'weld through' title is misleading with my skills!! not parweld stuff is it? i had a batch of paint which was like trying to migweld an oak tree. i came to the conclusion it was for the reverse of panels, i.e designed not to burn off from the penetration u-pol weld #2 on the other hand (on the shelf at halfords) goes up a treat  |
| |
Last Edit: Oct 6, 2016 14:06:08 GMT by darrenh
|
|
jonomisfit
Club Retro Rides Member
Posts: 1,788
Club RR Member Number: 49
|
|
|
|
|
Bilt hamber weld through primer works great.
That's the main one I use. You just have to wait for it to dry properly or it spits a lot.
The stuff frost sells worked ok, but other cheap zinc weld through I bought was rubbish. Almost a complete insulator.
To get good pen on butt welds I usually go fairly decent power and lower feed rate. I also only pulse weld as trying to run a bead makes it all ball and drop out.
|
| |
|
|
|
|
|
|
|
So after helping a friend fit a type 9 into his RS1800, which is by far the hardest ever gearbox change i have done as the engine doesn't really fit the escort the way Ford did it..... He bought me a spit - Bonus!!  image image by Nevtiger, on Flickr 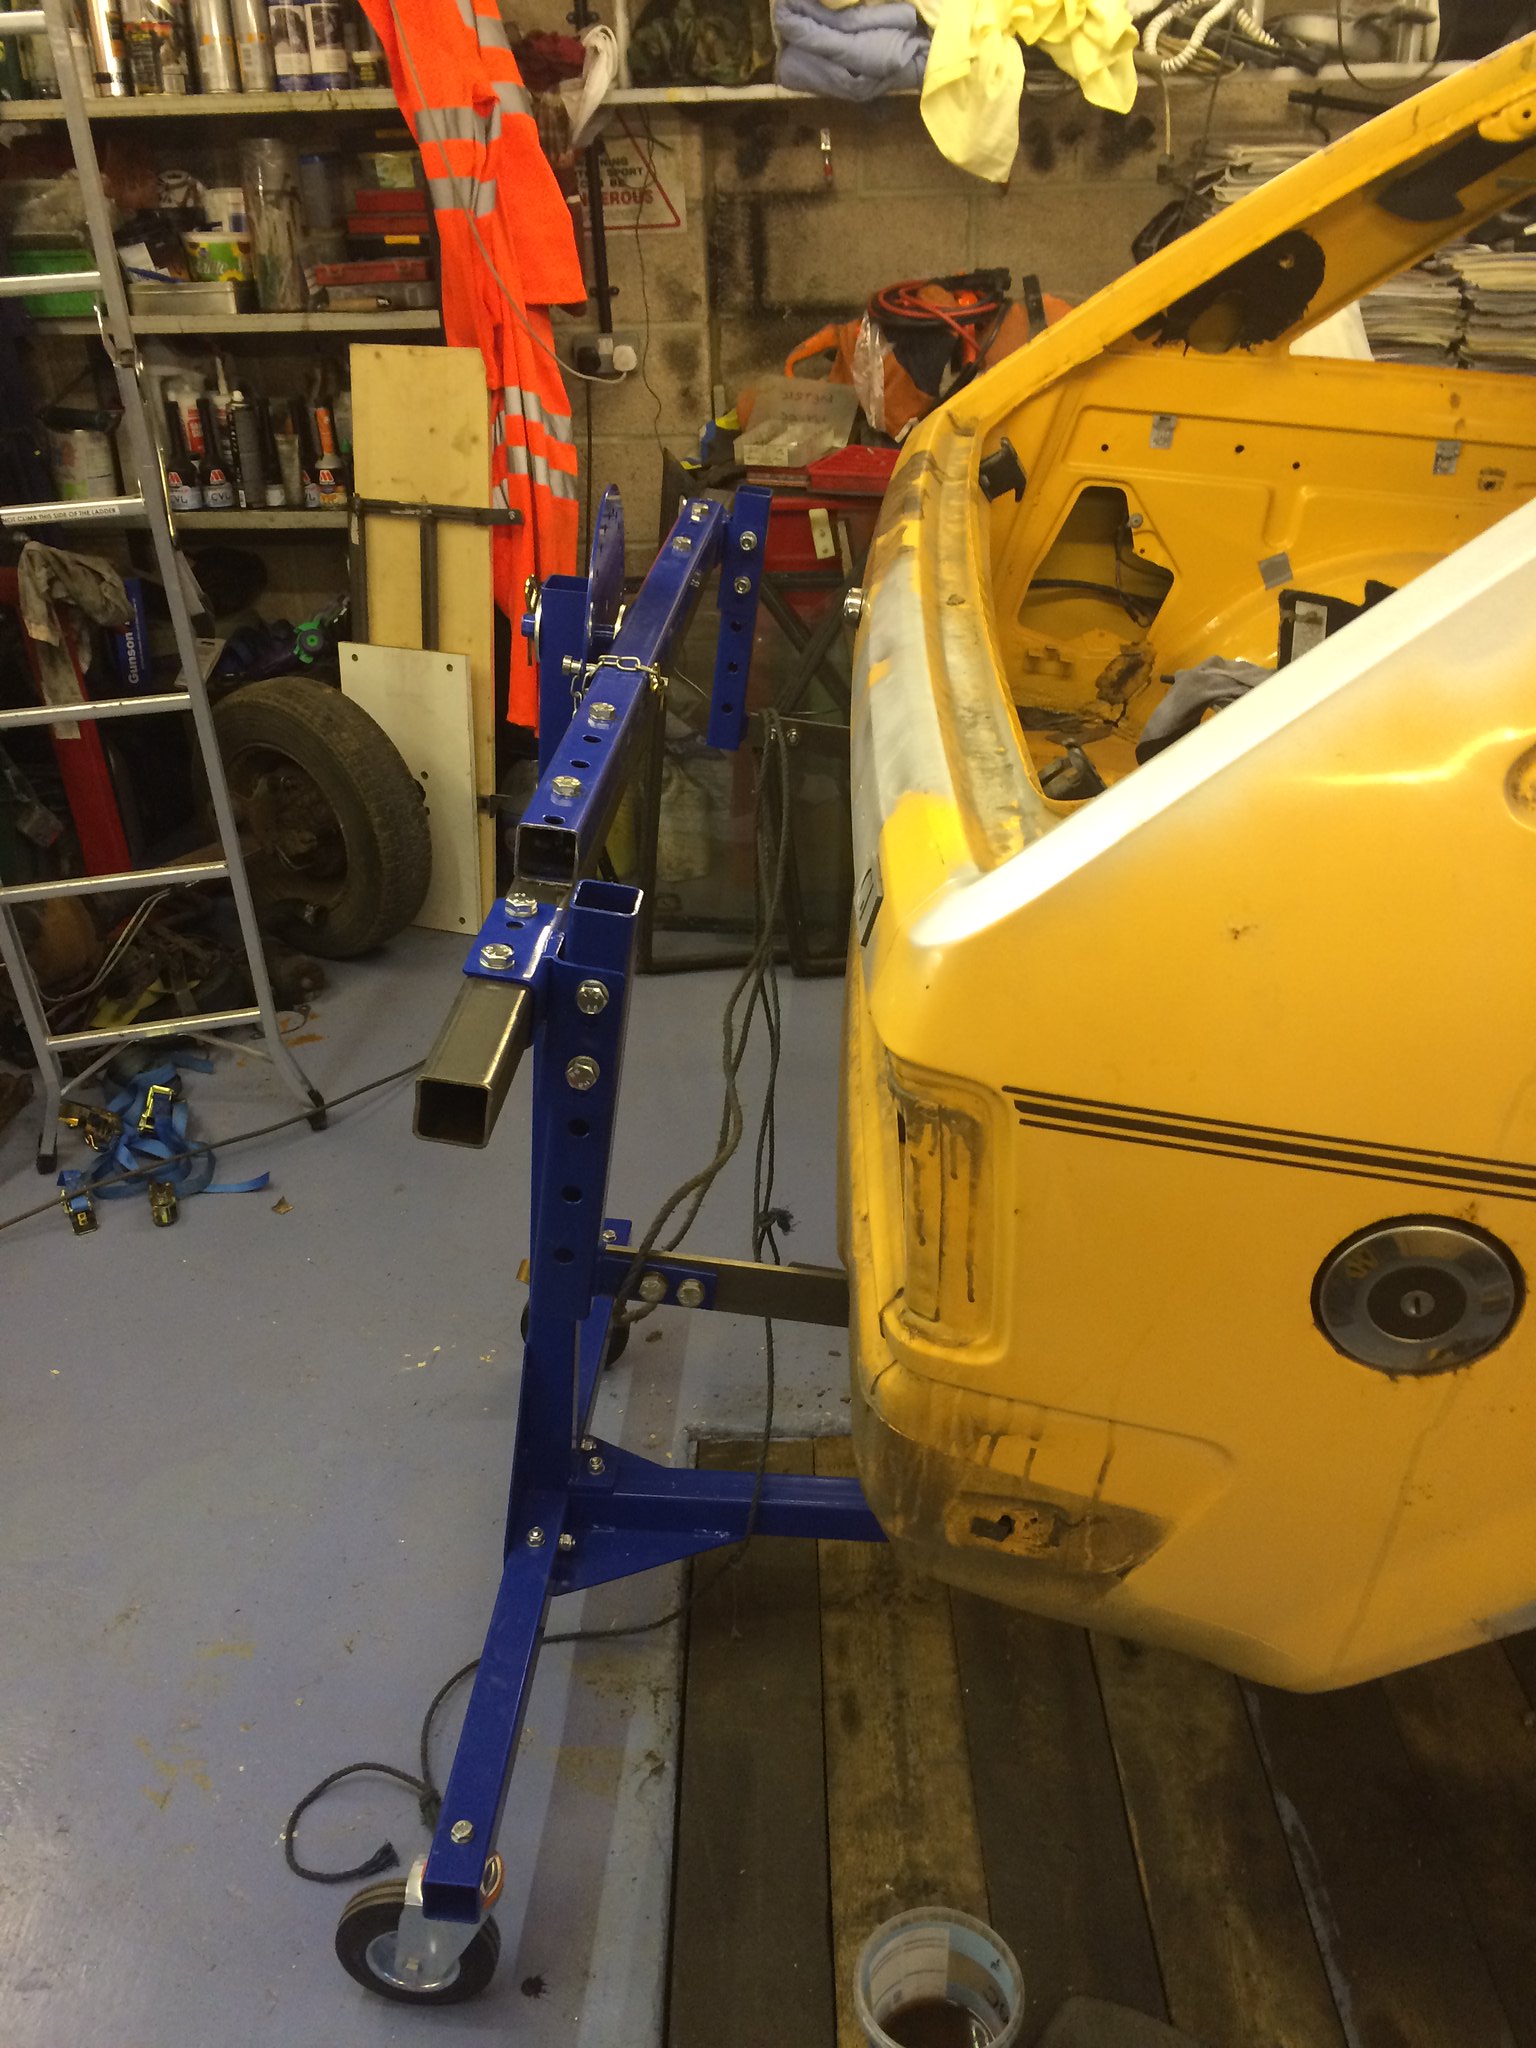 image image by Nevtiger, on Flickr So with a bit of modifying - i mean there is no point buying something and using it as intended is there? It is mounted. 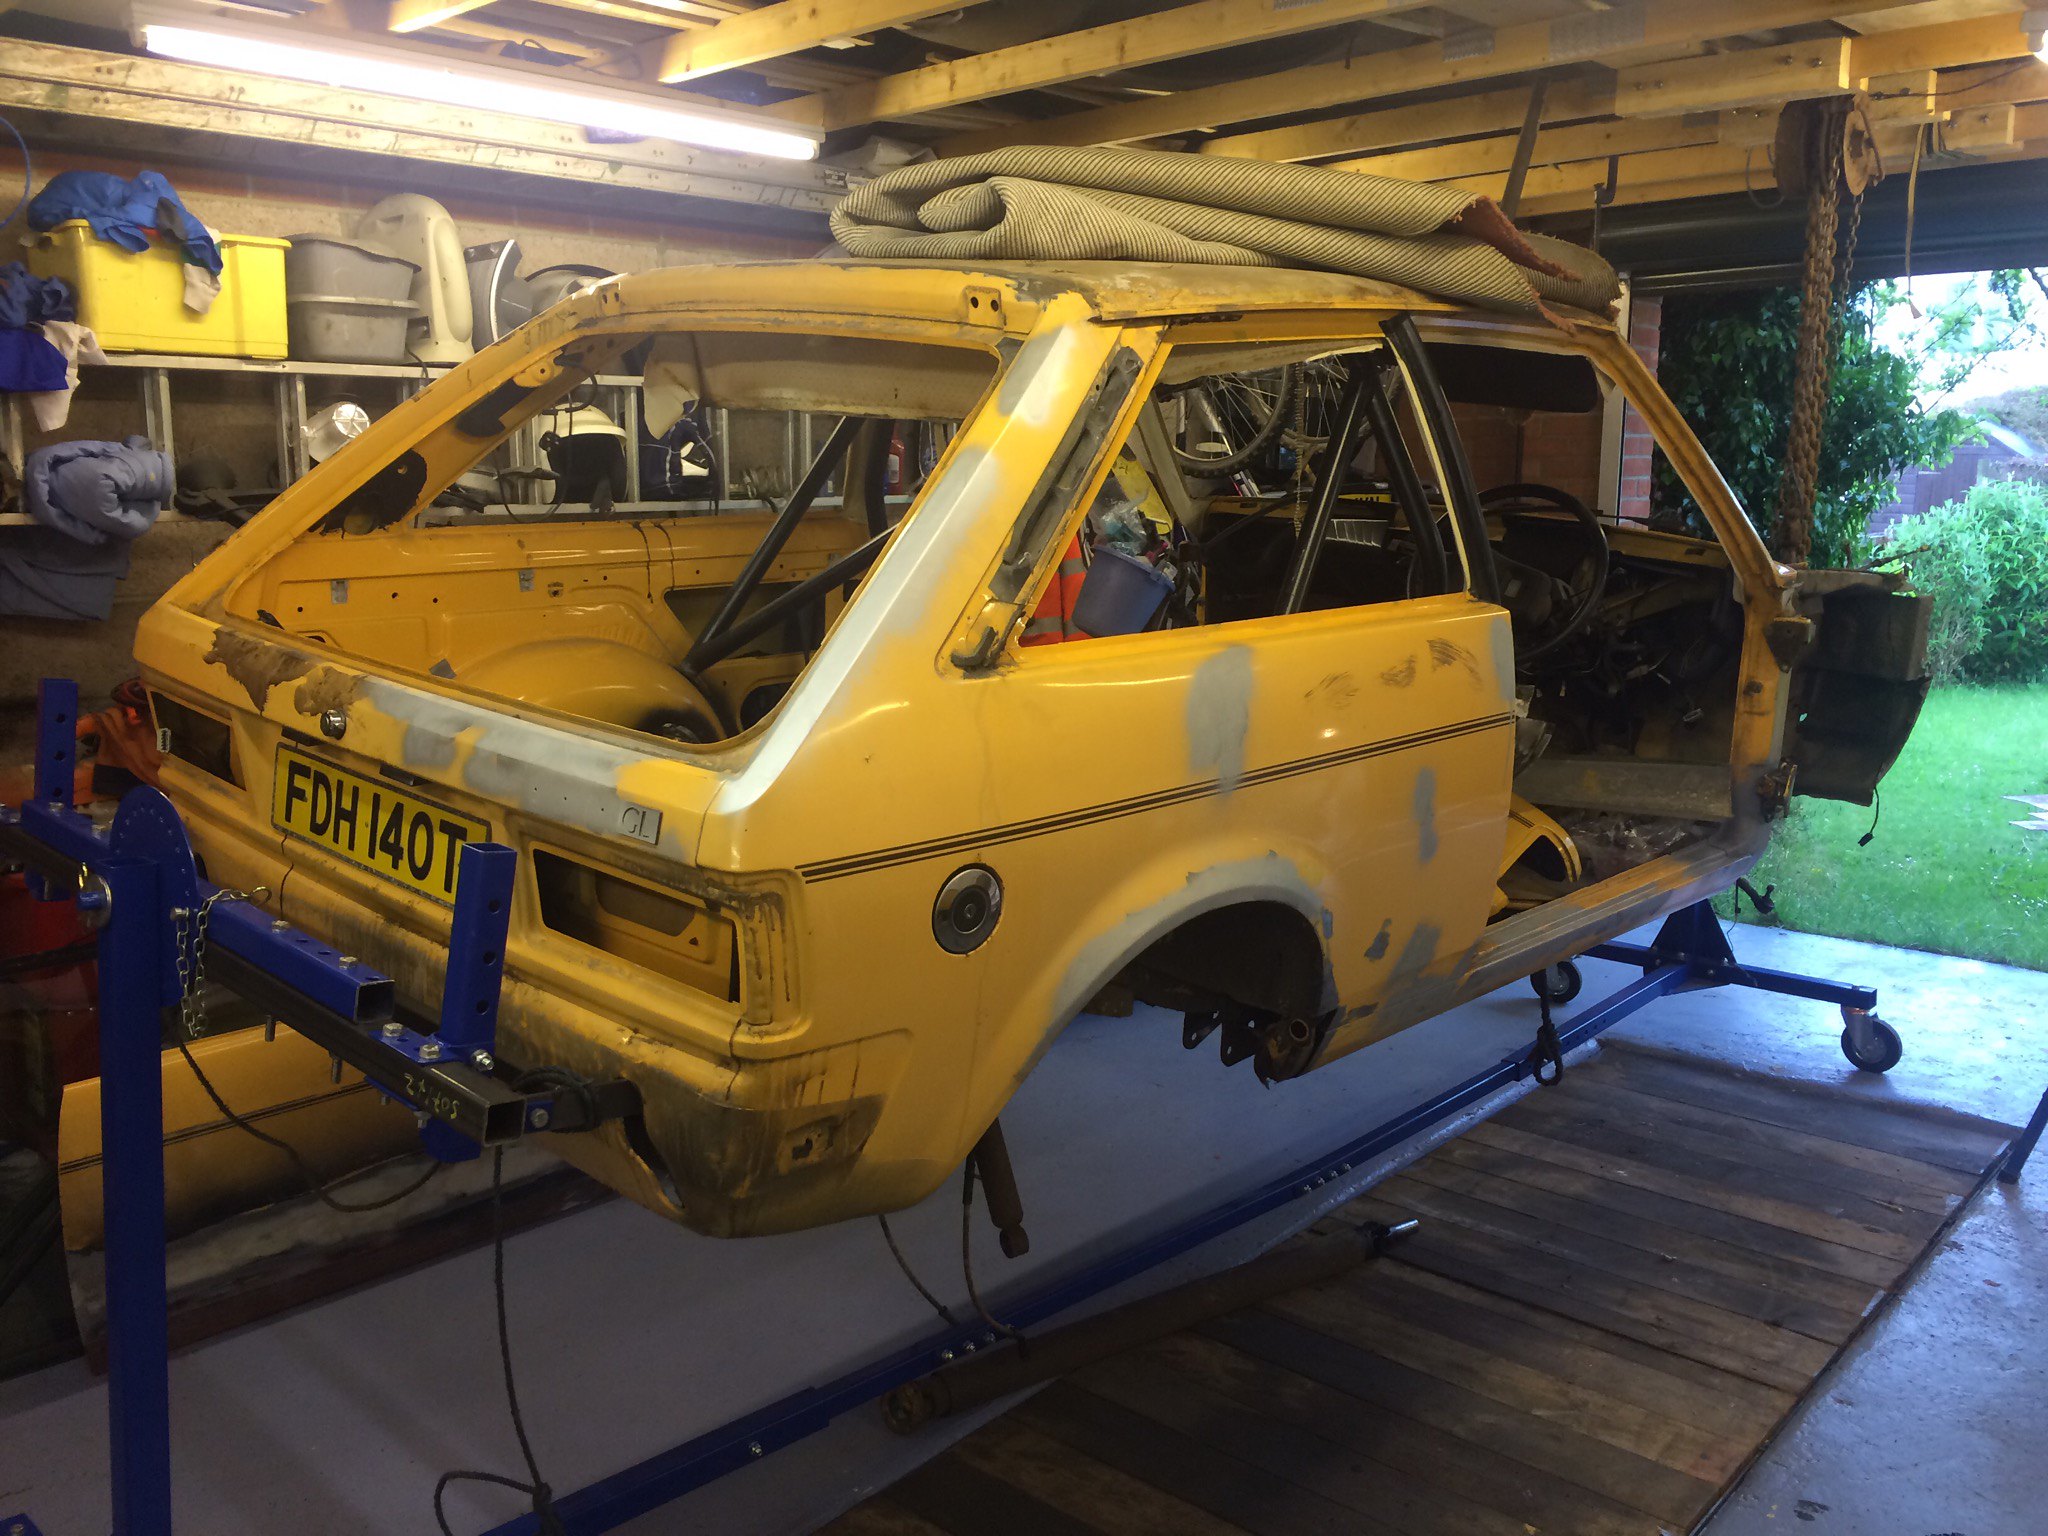 image image by Nevtiger, on Flickr 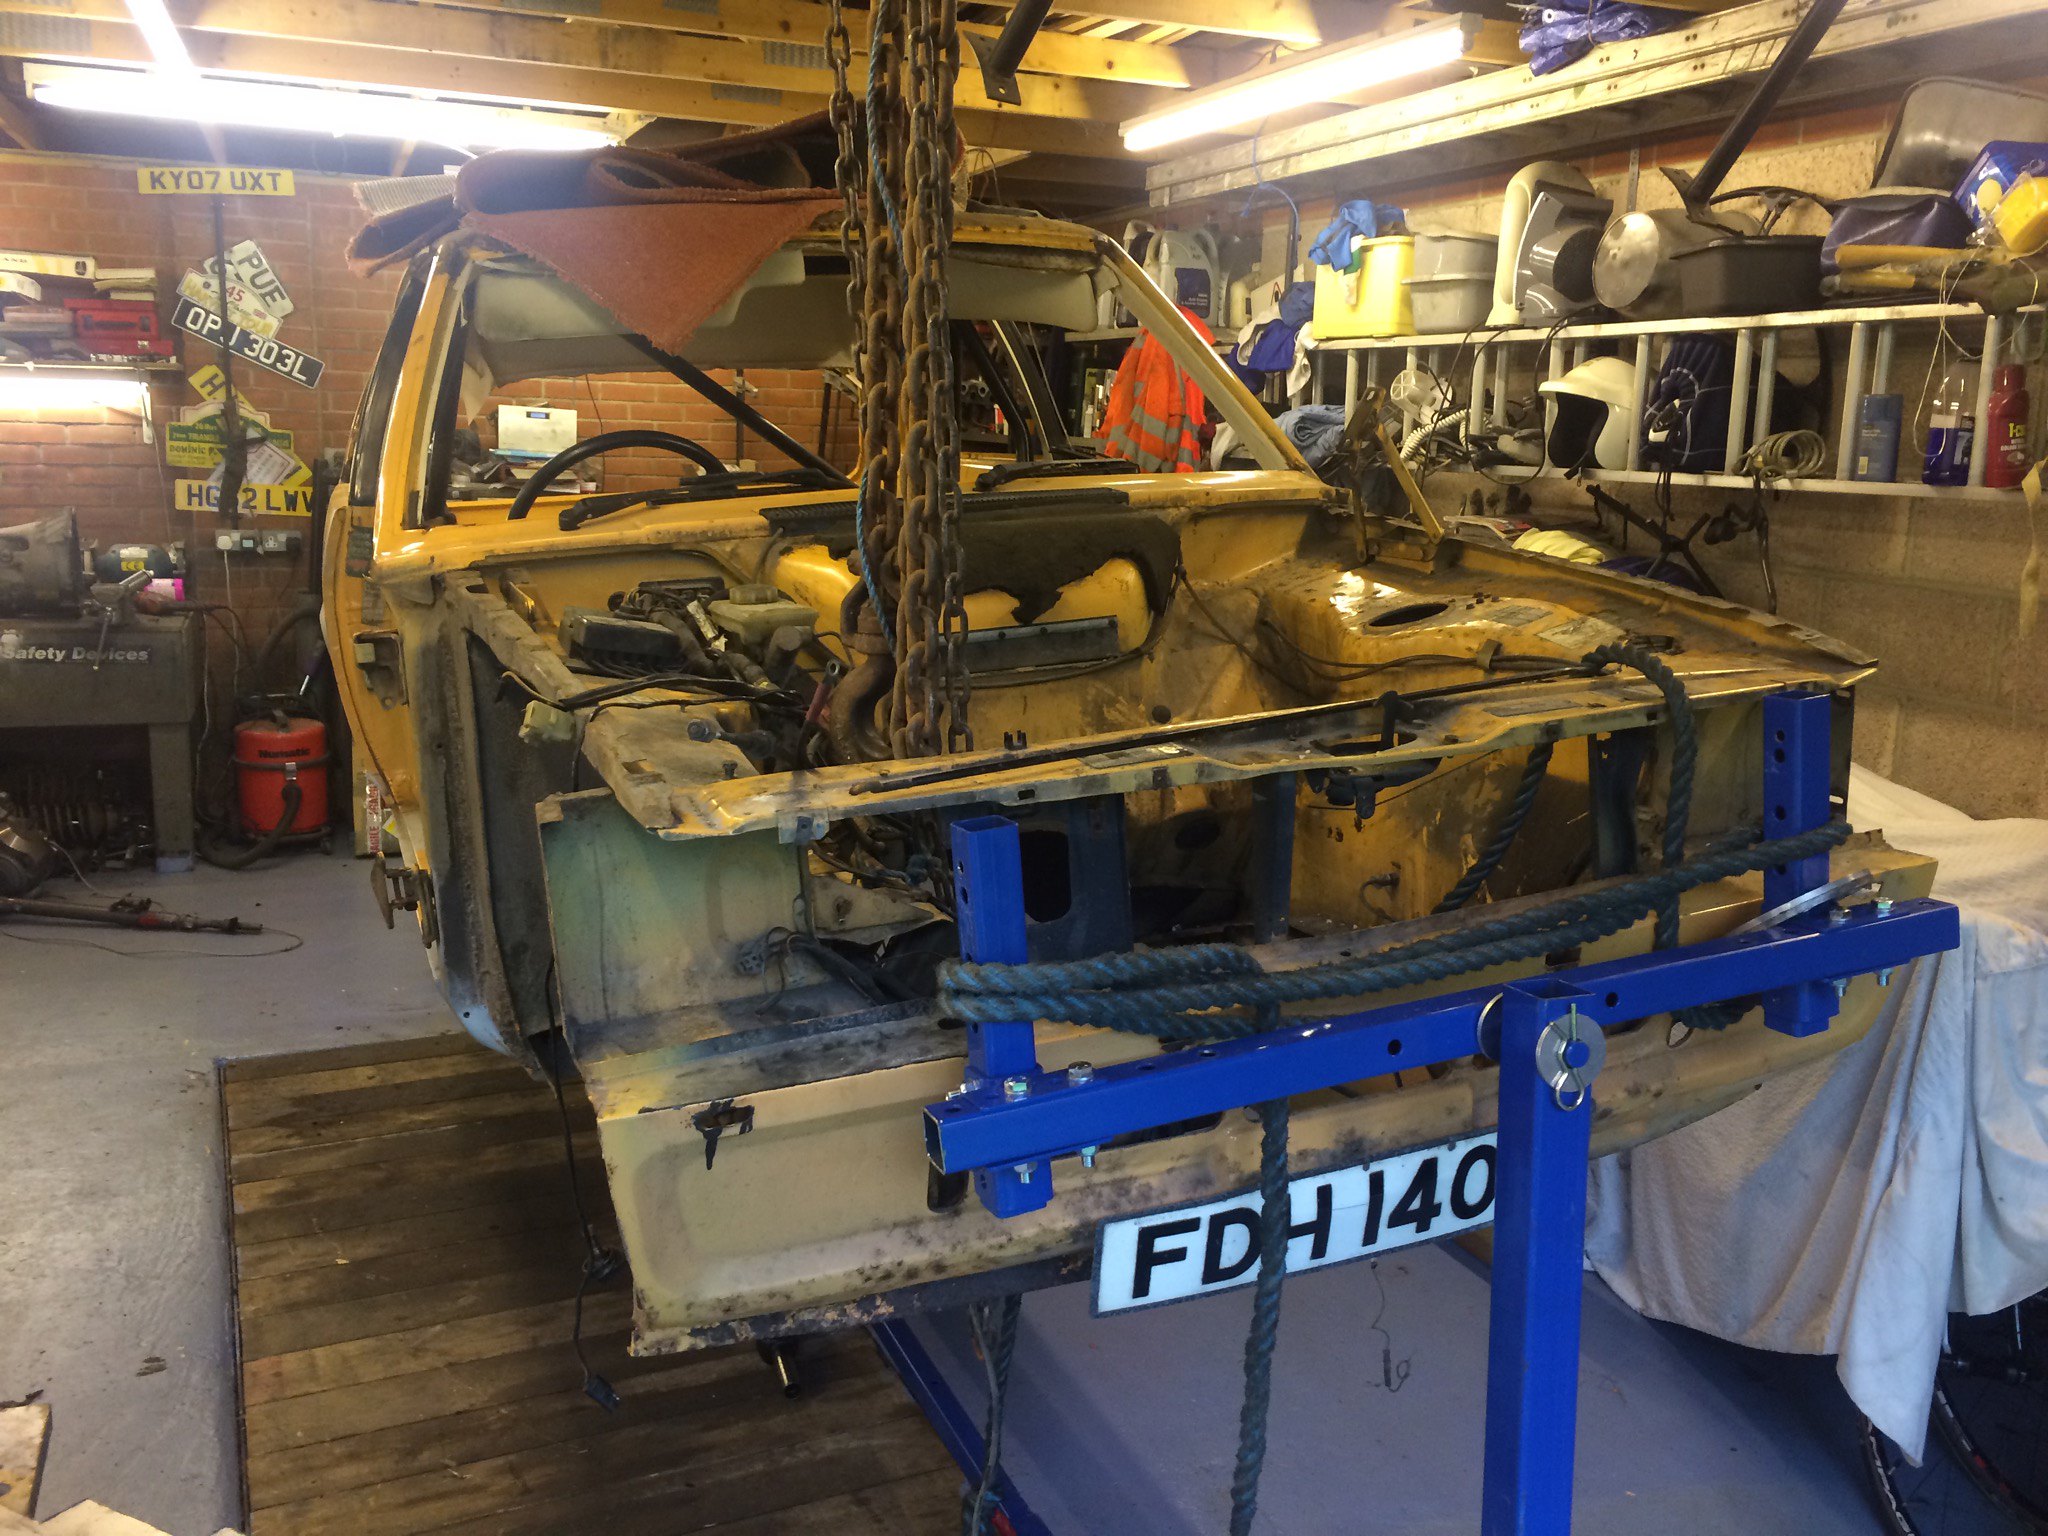 image image by Nevtiger, on Flickr |
| |
Last Edit: Feb 26, 2019 9:43:21 GMT by nevtiger
|
|
|
|
|
|
|
Thus i then wondered what i could do next. I found a spot or two of rust on the wings at the bottom corners. More practice.  image image by Nevtiger, on Flickr The new metal and the old eyeing each other up.  image image by Nevtiger, on Flickr Clean hands for their photo shoot  image image by Nevtiger, on Flickr Welded in and holes drilled on the inner skin. 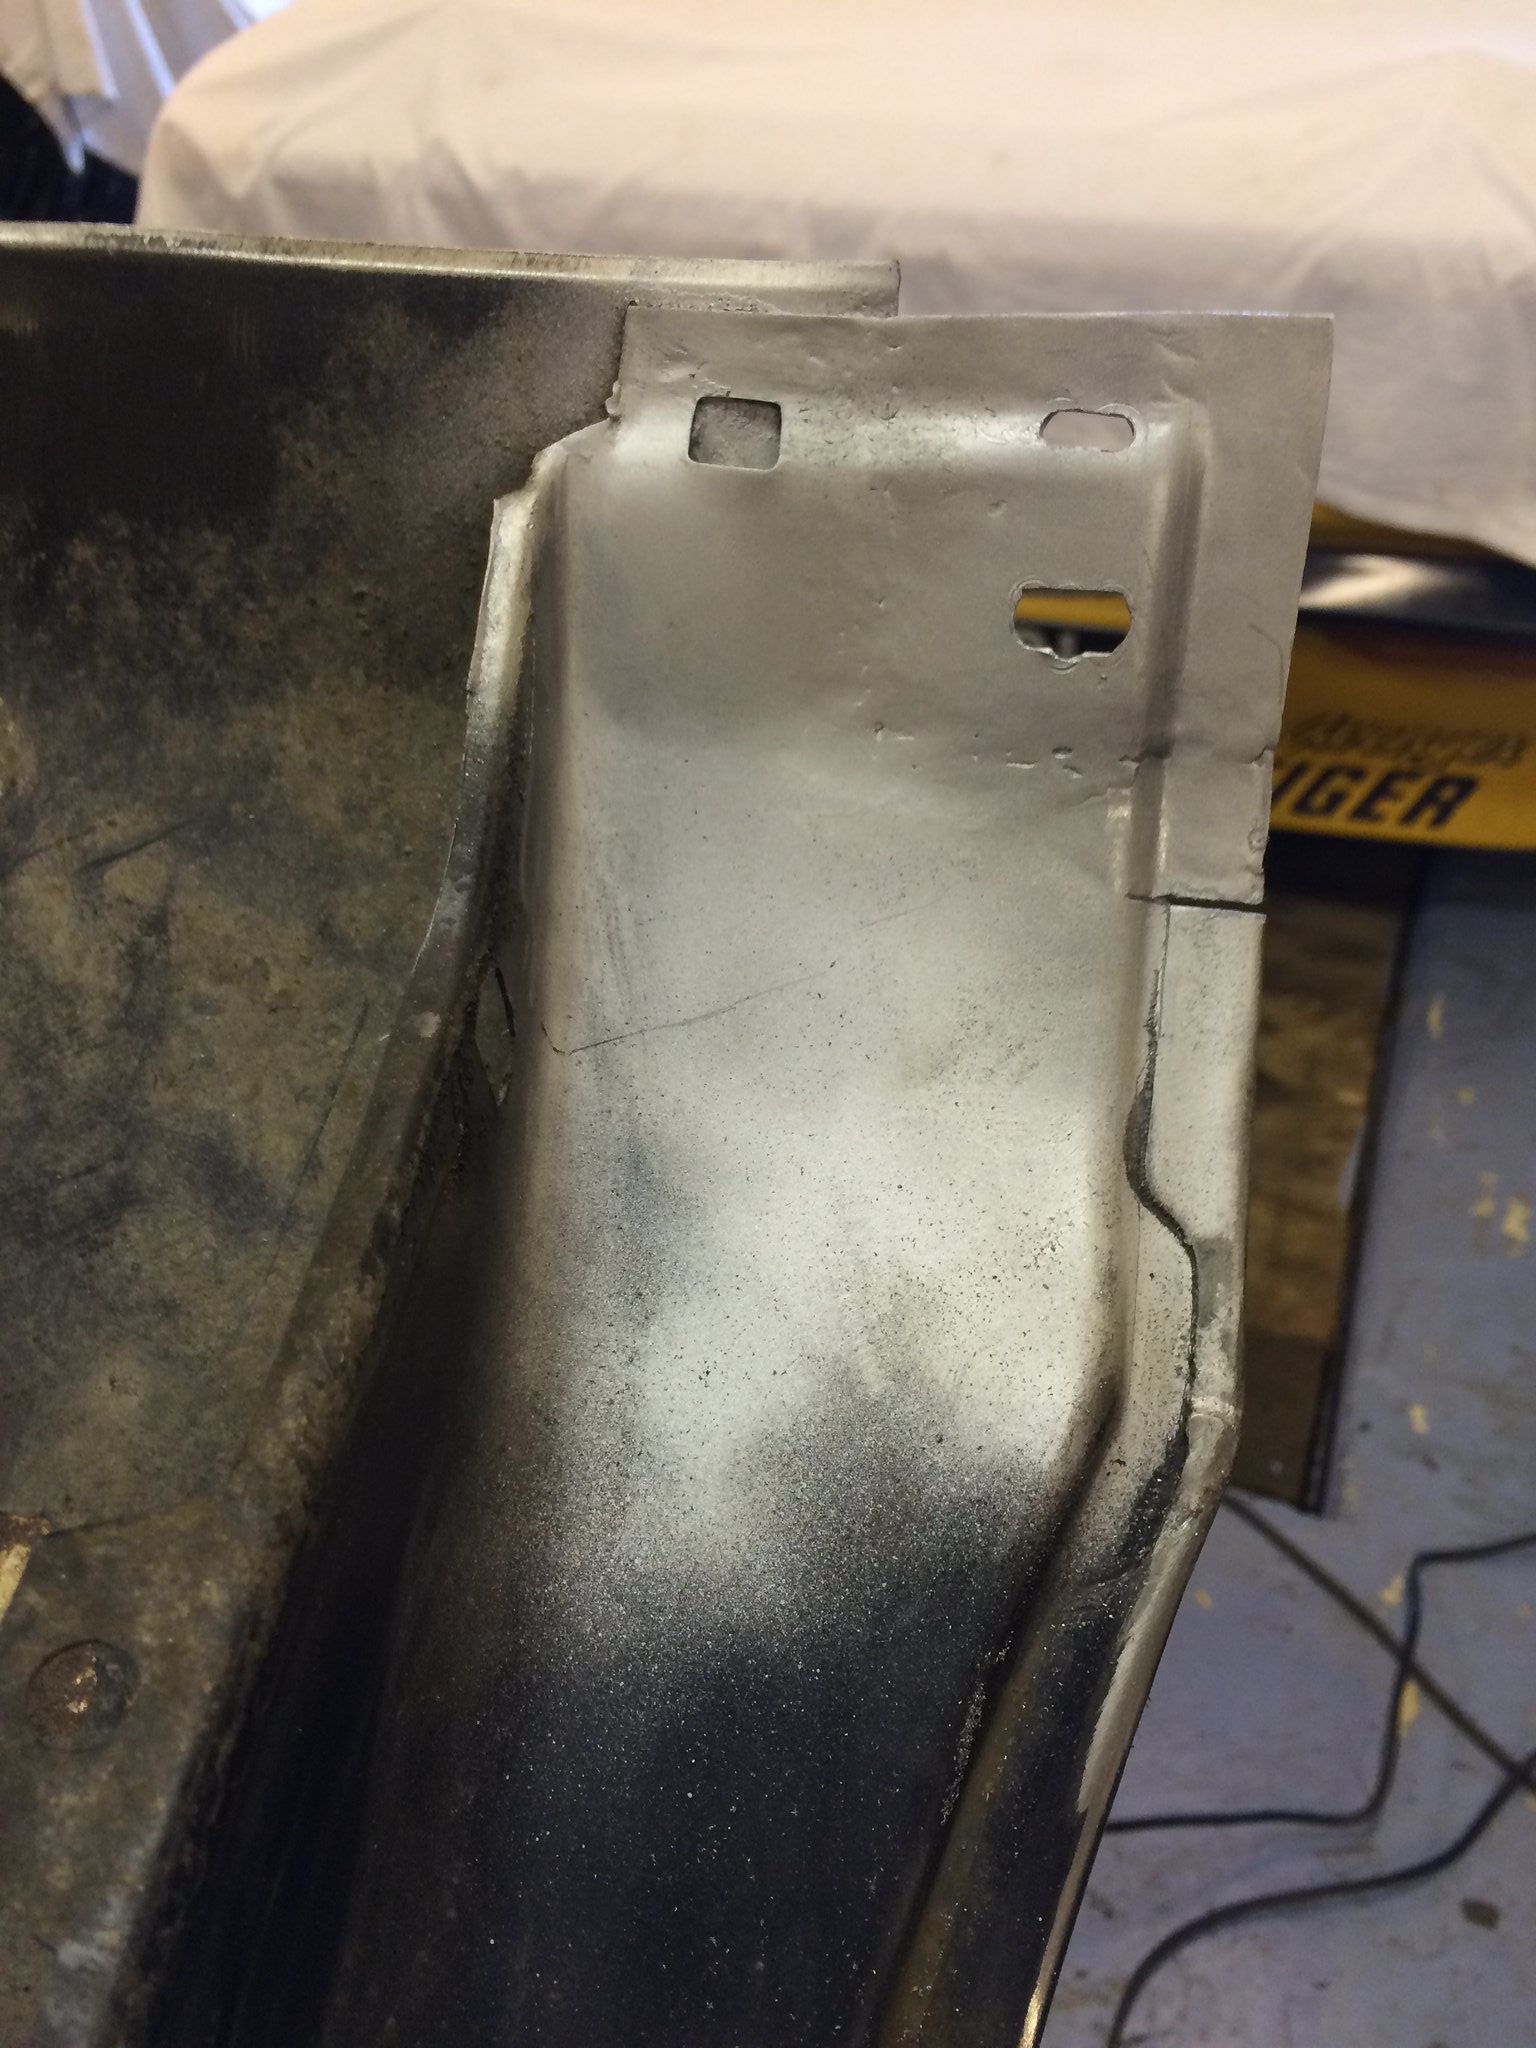 image image by Nevtiger, on Flickr And now the outer skin.  image image by Nevtiger, on Flickr And all done but with a little bit of warping...... 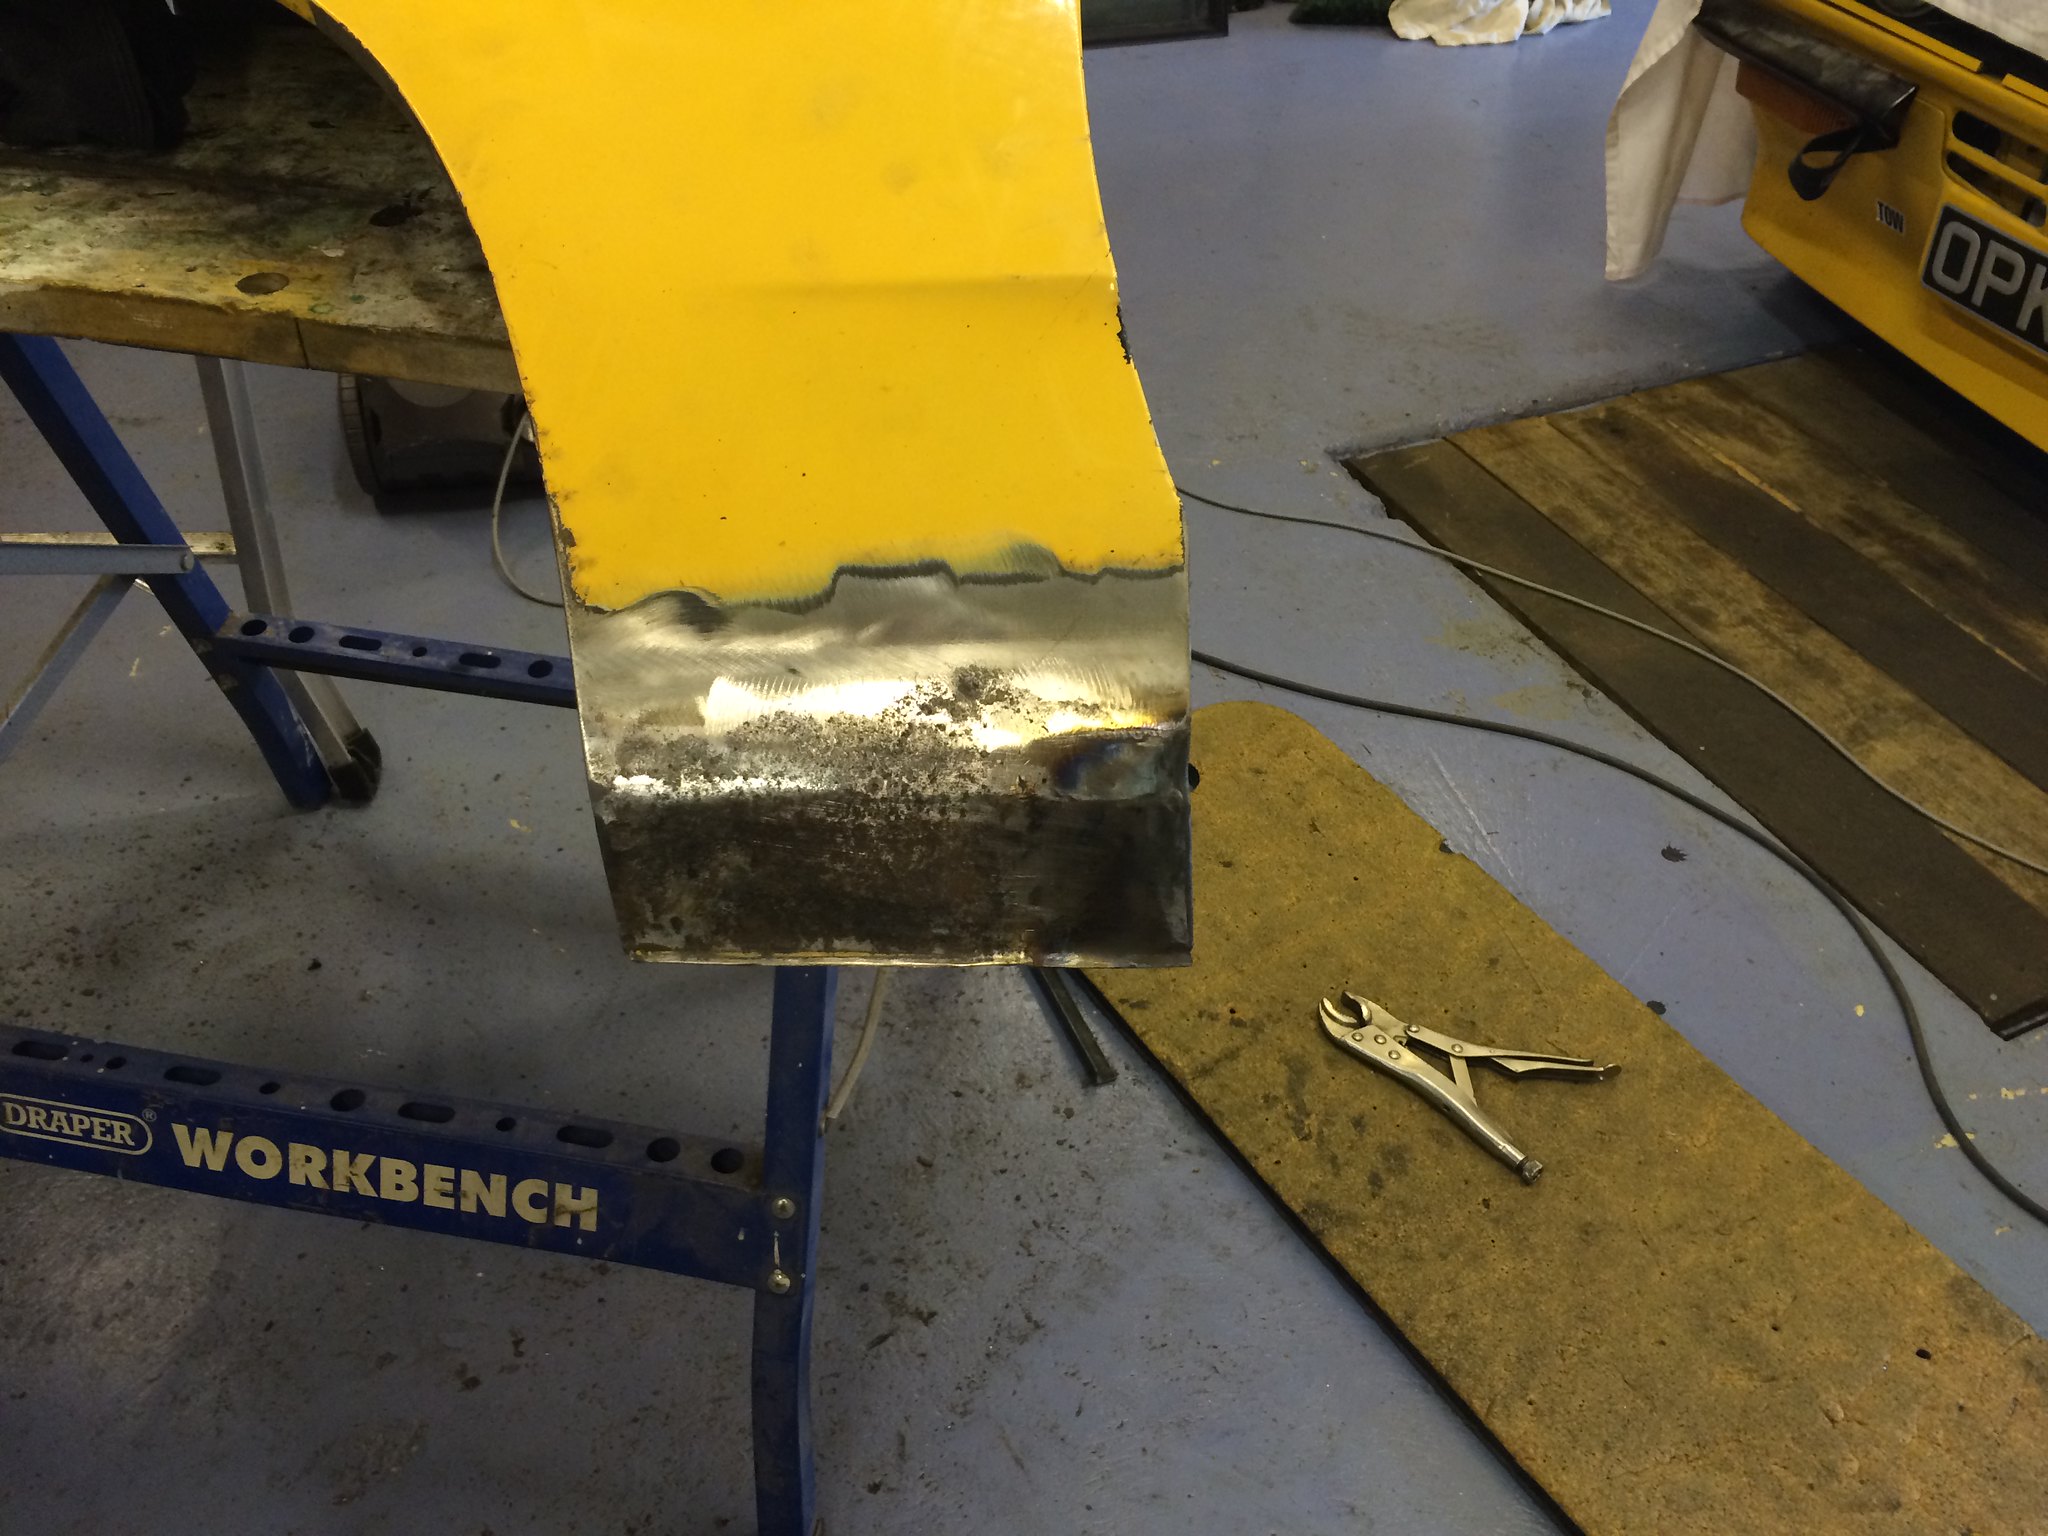 image image by Nevtiger, on Flickr Next wing please.  image image by Nevtiger, on Flickr Done  image image by Nevtiger, on Flickr Thats the wings repaired but all fast cars have rolled arches don't they? Mid 'Roll' which reality is a big hammer used slowly.  image image by Nevtiger, on Flickr When done the wings were jet washed off. twice! And then all the insides including the cavities and turned over bits were coated in a Dinitrol product which is an epoxy primer rust convertor and it seems really good. |
| |
Last Edit: Feb 26, 2019 9:51:22 GMT by nevtiger
|
|
|
|
|
Oct 17, 2016 10:44:09 GMT
|
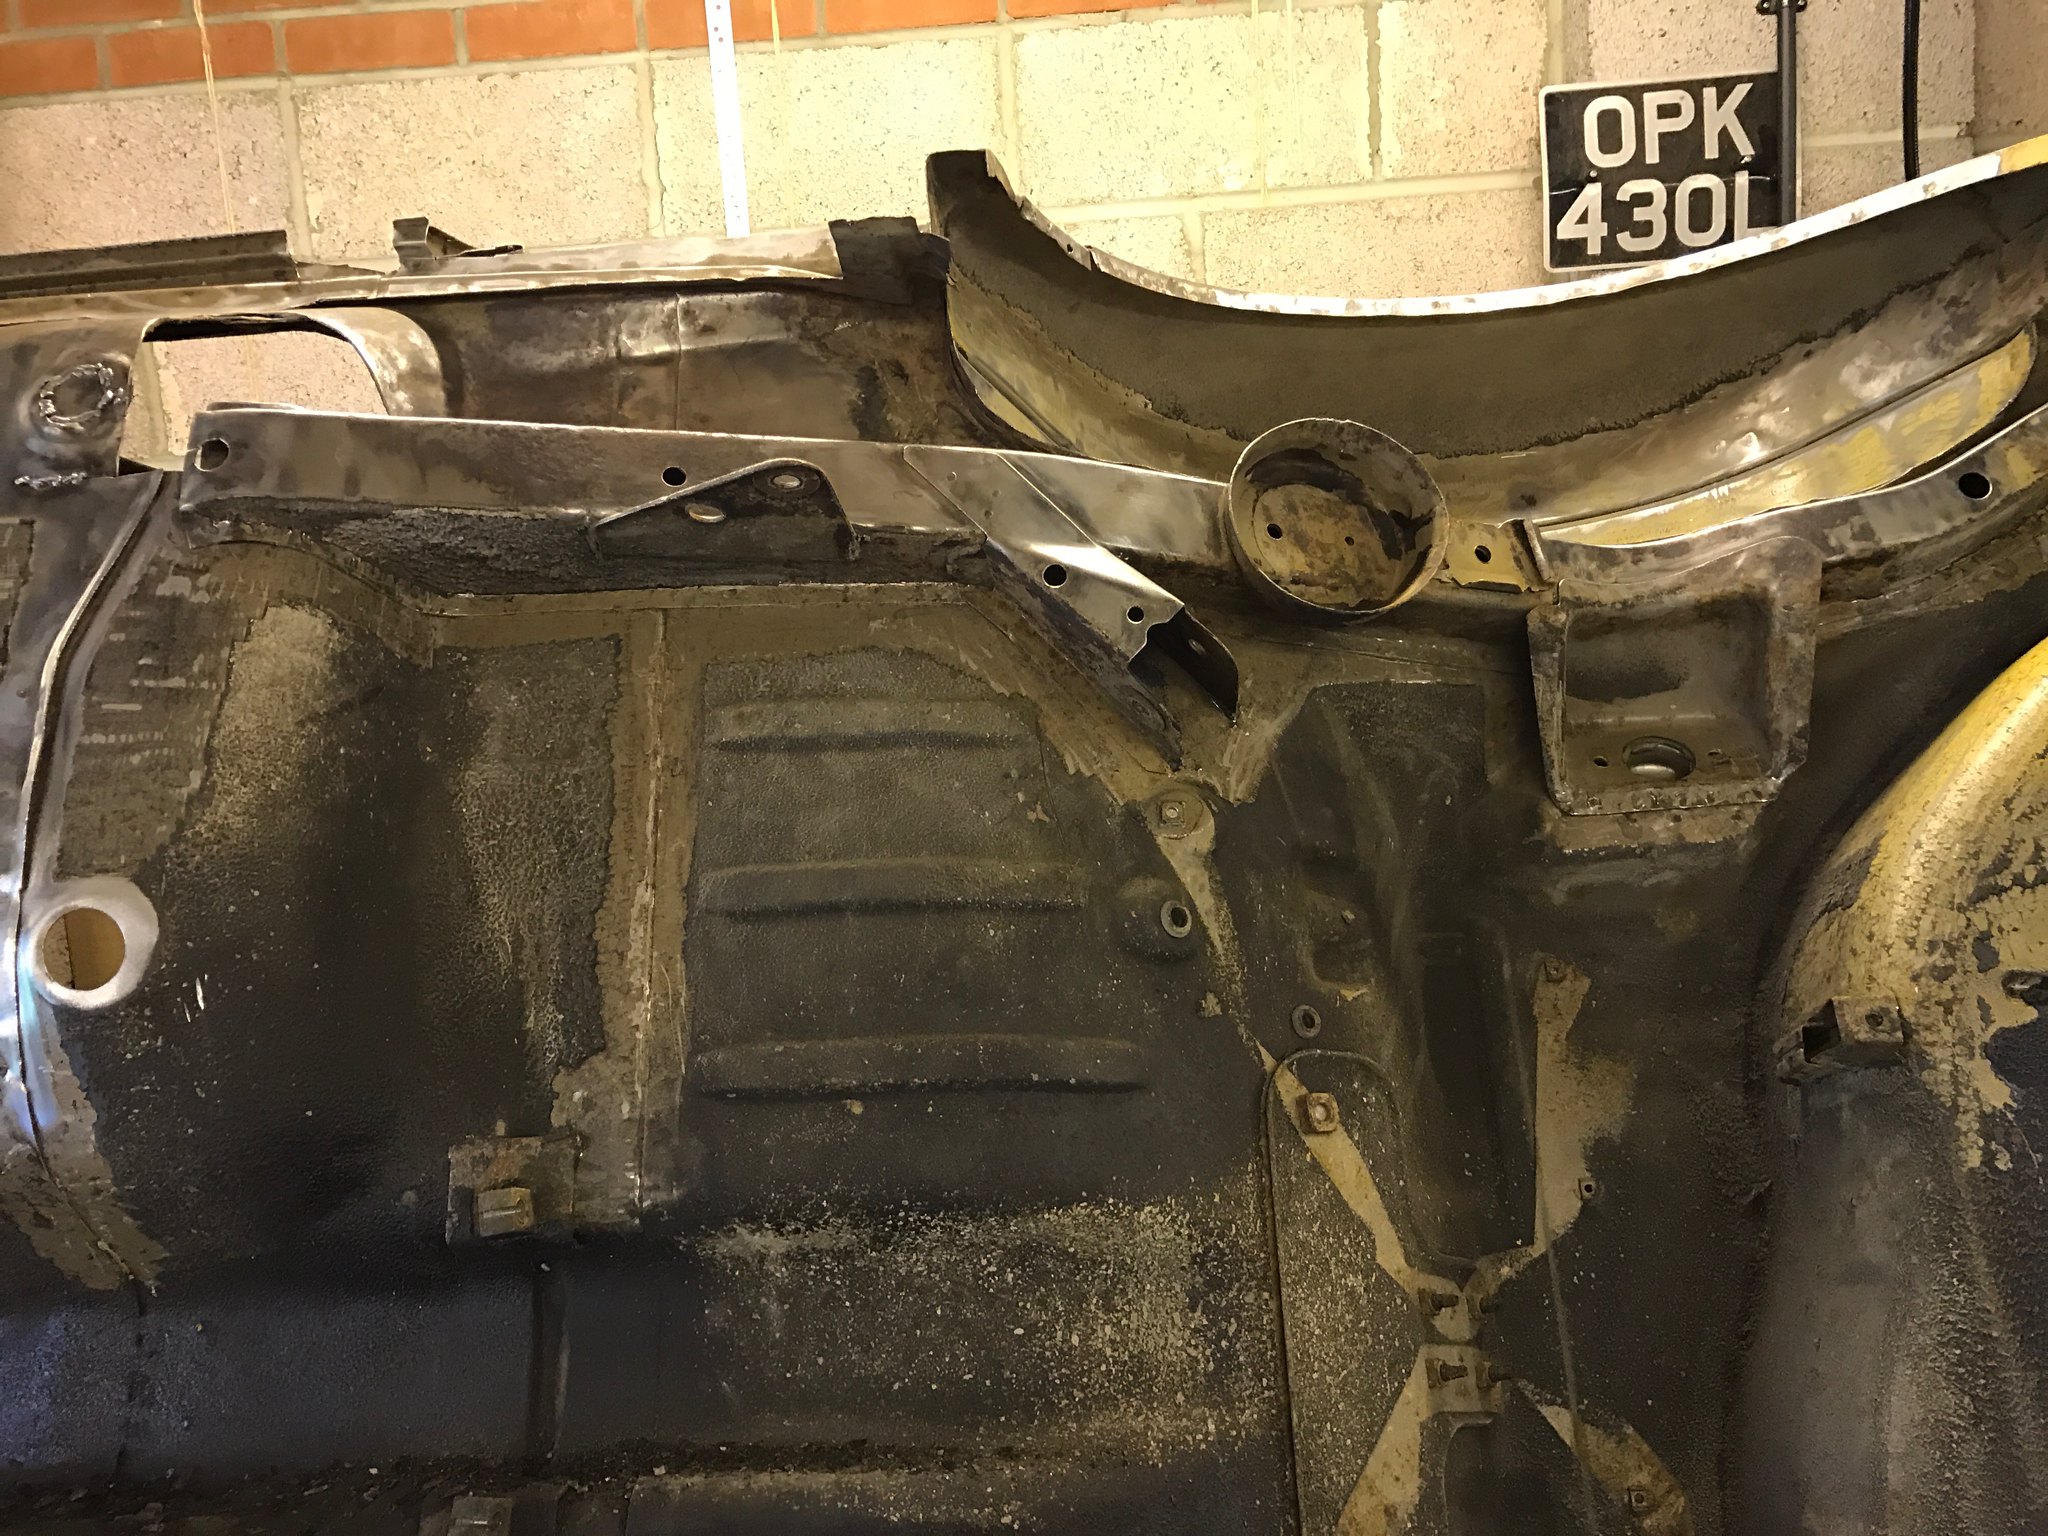
And then back to the shell. I started having a look at the sills and the passenger side - as always - is worse than the drivers side. So, the outer sill has come off and there is some rot in the inner sill so time to cut that out as well:  image image by Nevtiger, on Flickr 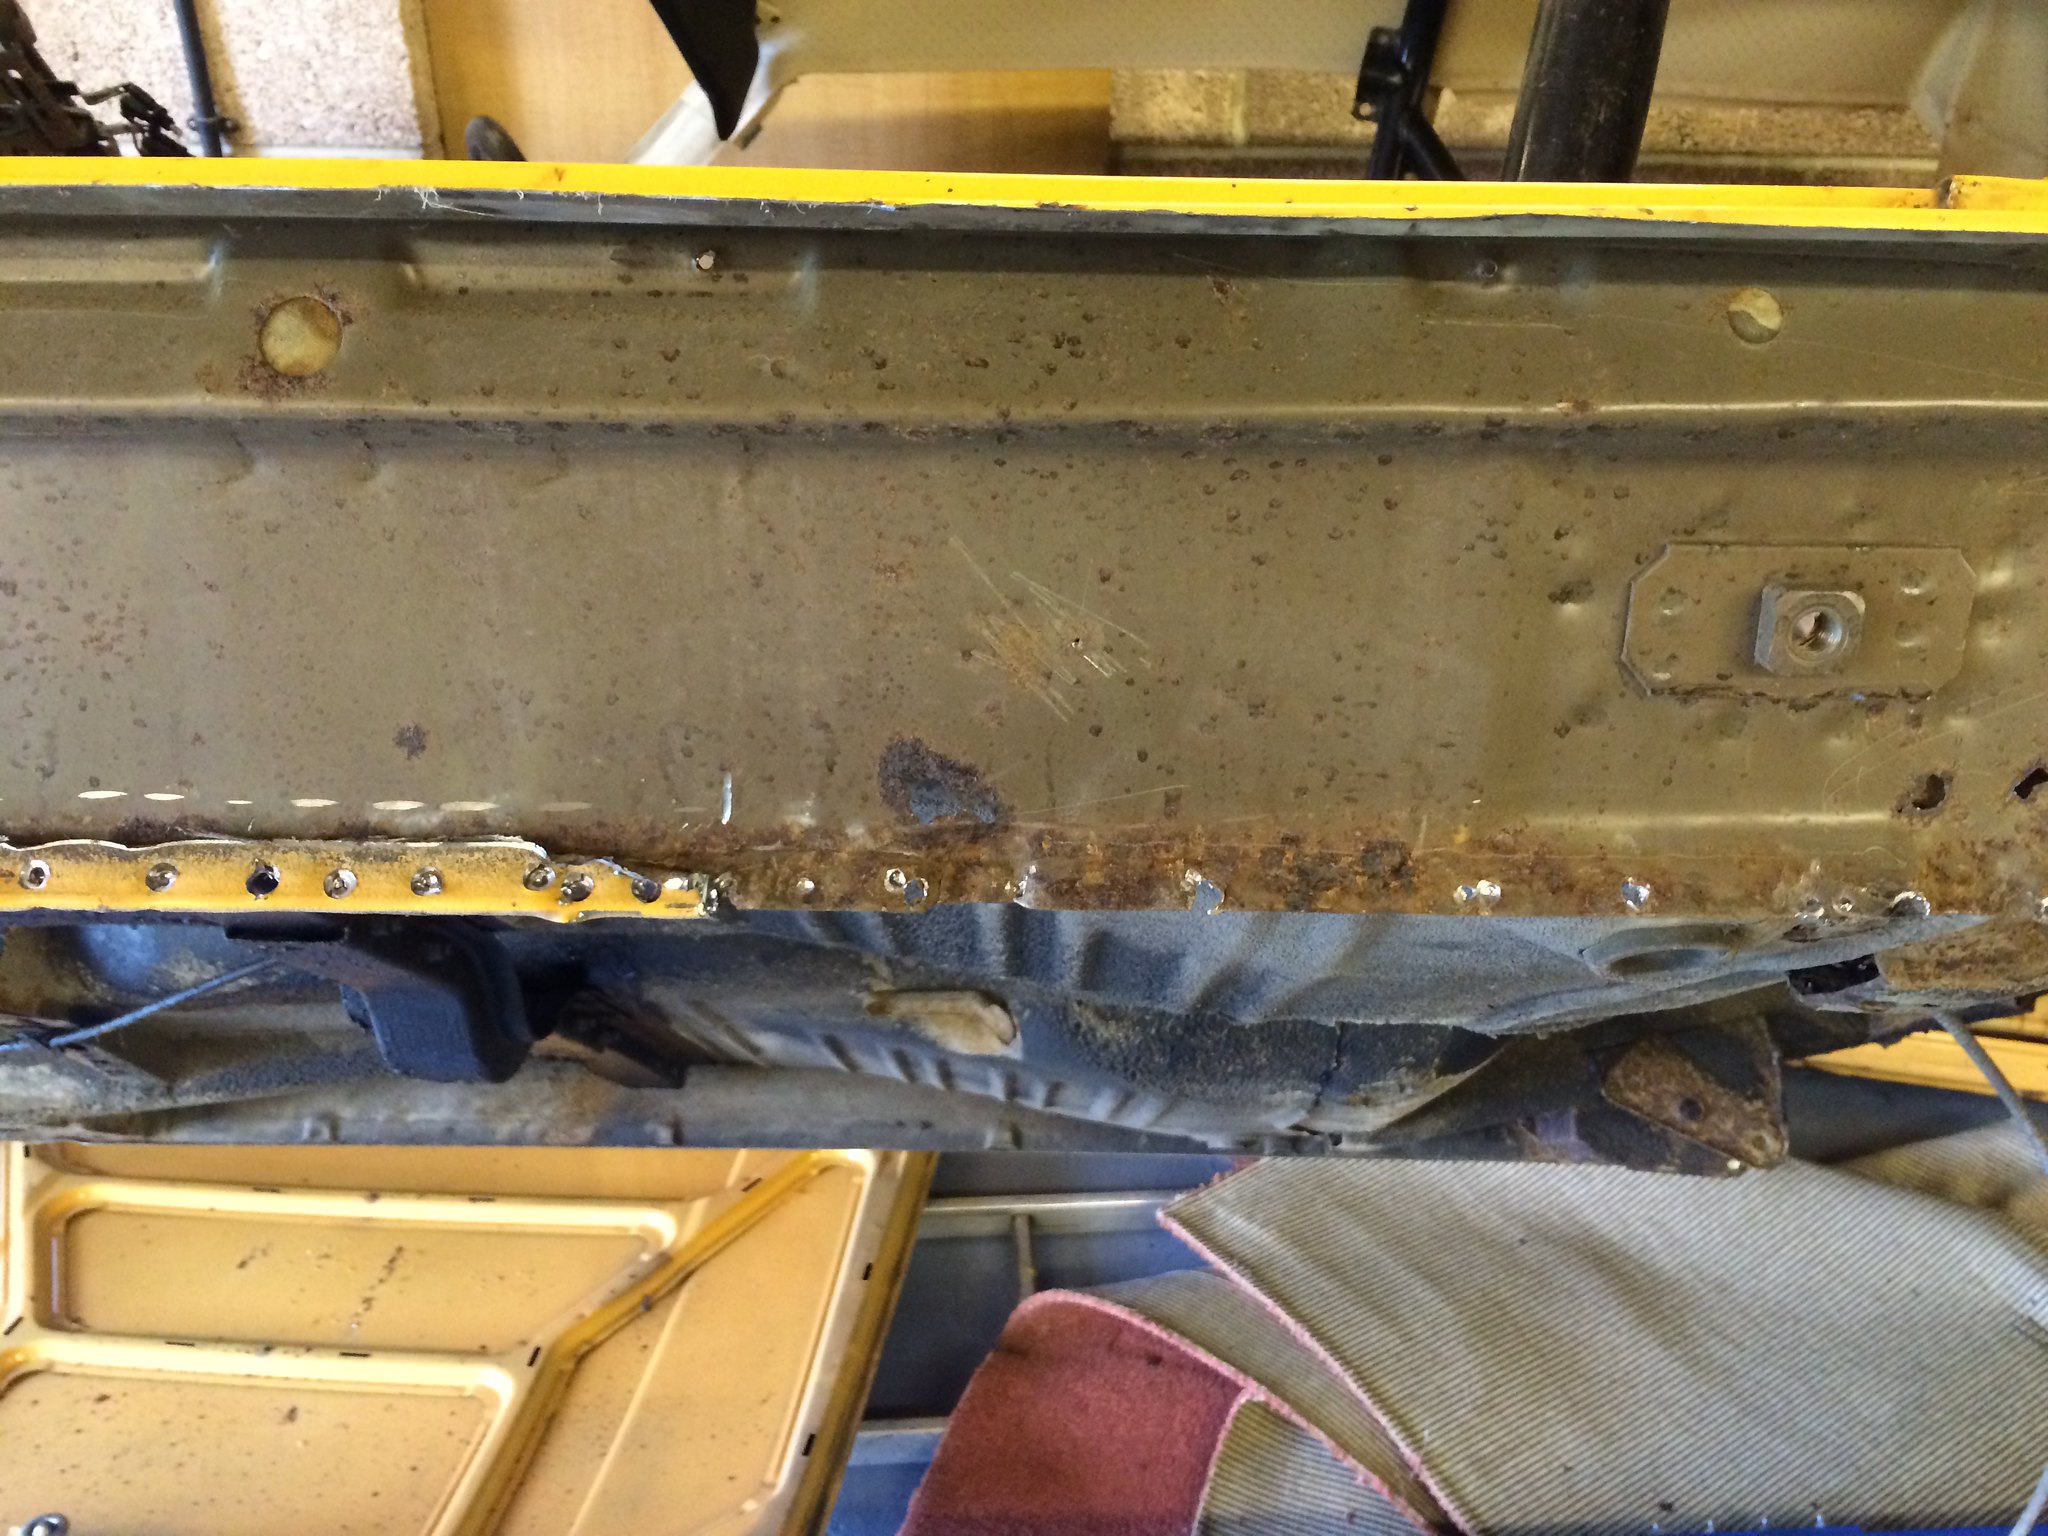 image image by Nevtiger, on Flickr A bit more rot at the front end.... 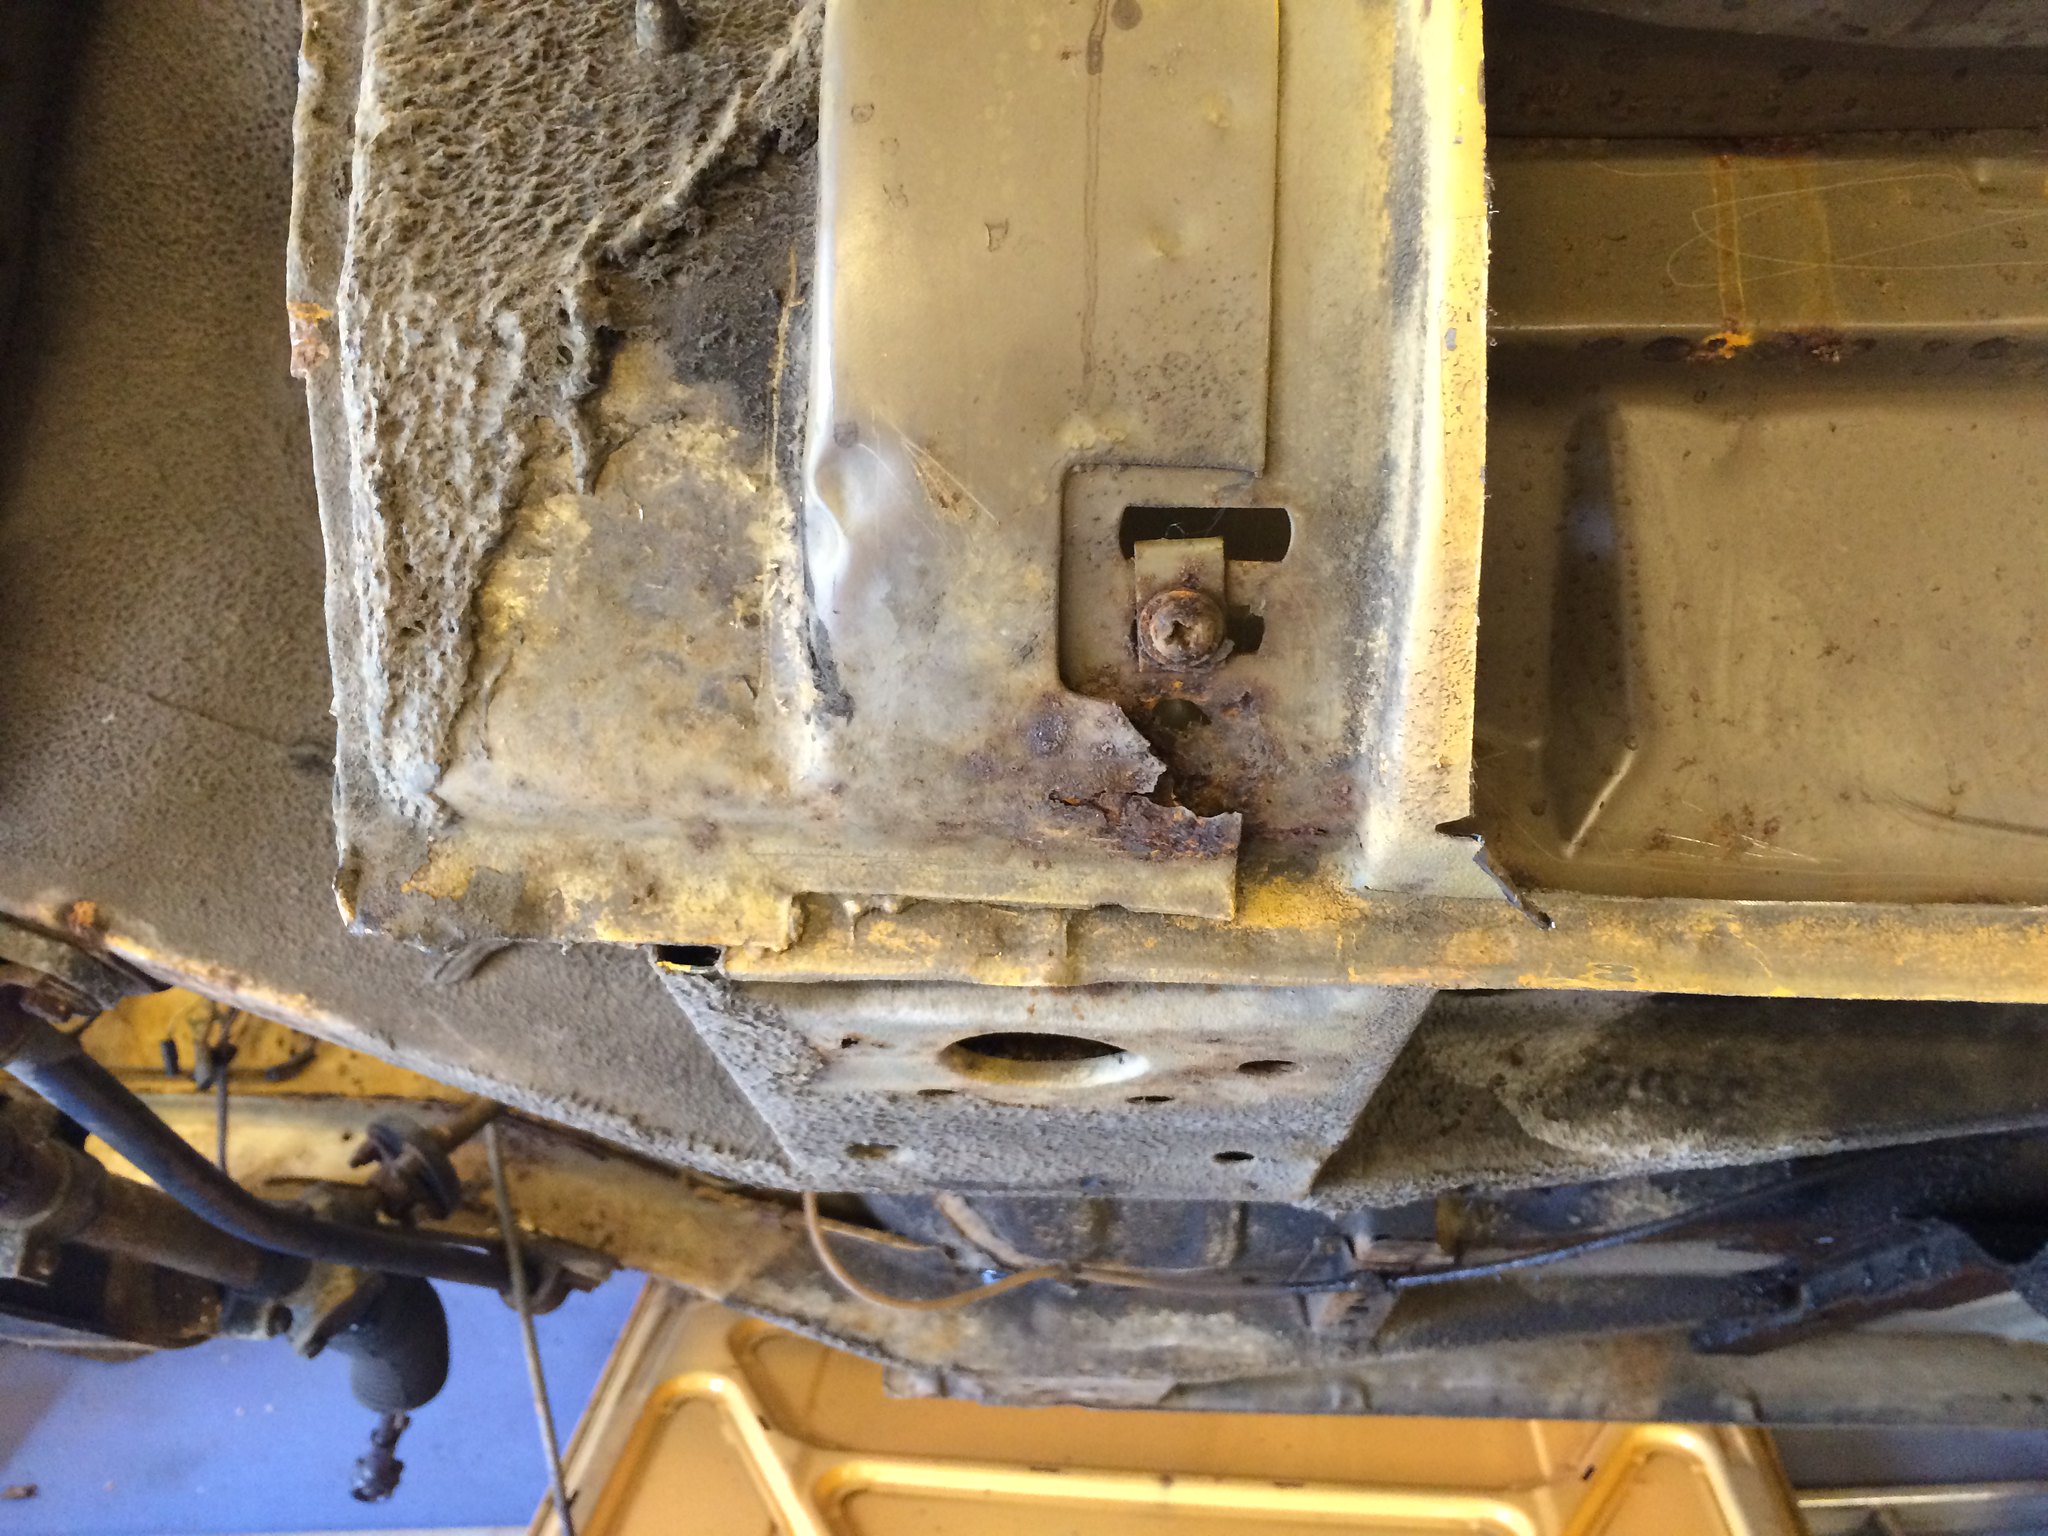 image image by Nevtiger, on Flickr Double skinned panels!!! They love rust.  image image by Nevtiger, on Flickr Ok, that is most of what needs to be cut out done - not all sadly....  image image by Nevtiger, on Flickr Wire brush and 115mm grinder results in a nice shiny bottom and me picking wire out of my skin afterwards. Amazing the wire makes it through three layers of clothing and if hit bare skin tends to go quite deep.  image image by Nevtiger, on Flickr When its all clean and welded back together i can fit this: 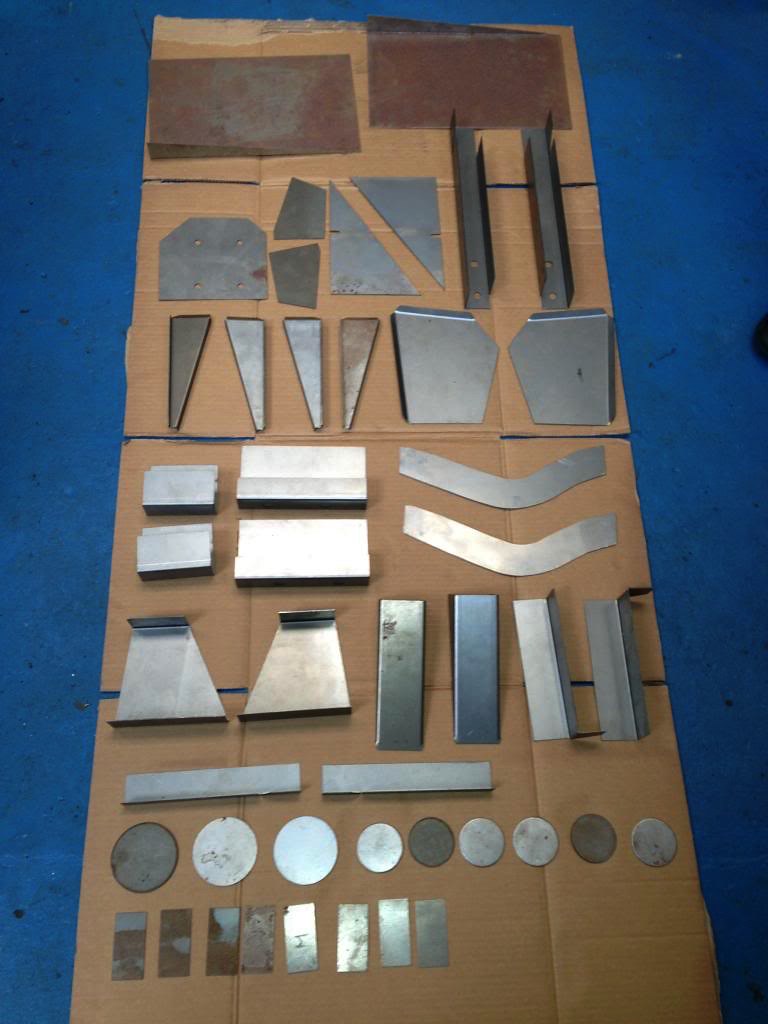 Image 05-08-2016 at 11.47 Image 05-08-2016 at 11.47 by Nevtiger, on Flickr This is a PTS rally car strengthening kit. The car won't be a rally car but it adds lots of strength where the shell can be weak. Overkill? Maybe but i work on the theory that if the shell is strong it doesn't move and that helps handling and means it will last a lot longer - well it will with plenty of 'Waxoil' stuff. |
| |
Last Edit: Feb 26, 2019 9:56:58 GMT by nevtiger
|
|
|
|
|
Oct 17, 2016 10:53:31 GMT
|
More cut out :-(  image image by Nevtiger, on Flickr But on the happier side the throttle bodies i got from a Triumph 955i seem to be close enough for my skills and that makes me happy: 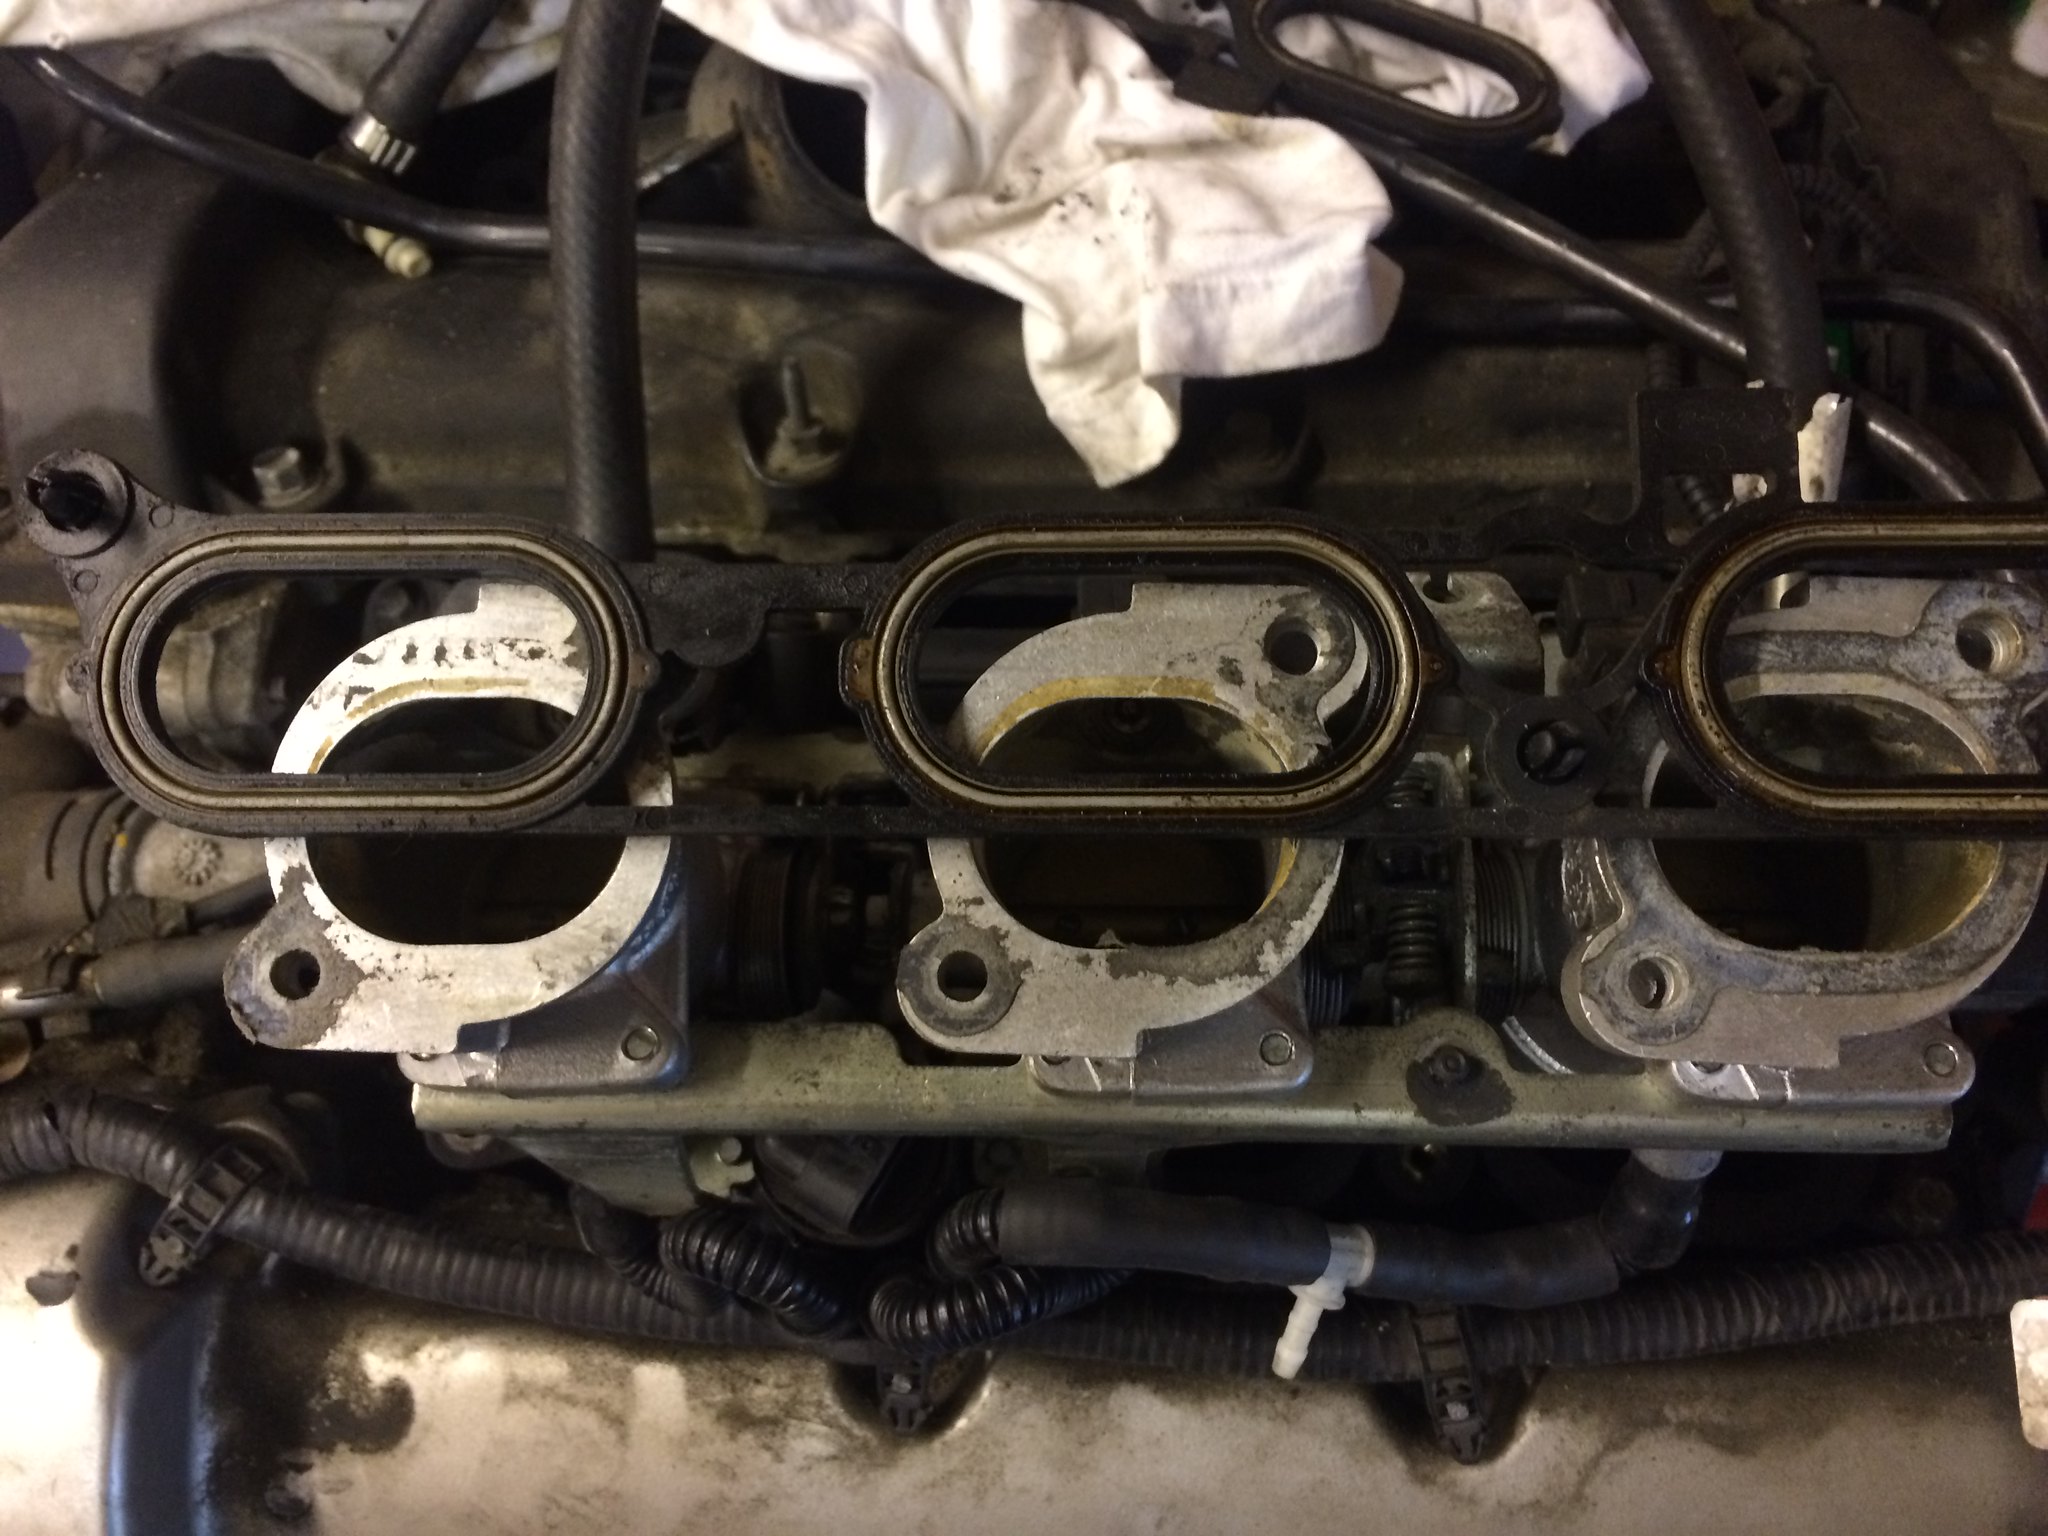 image image by Nevtiger, on Flickr 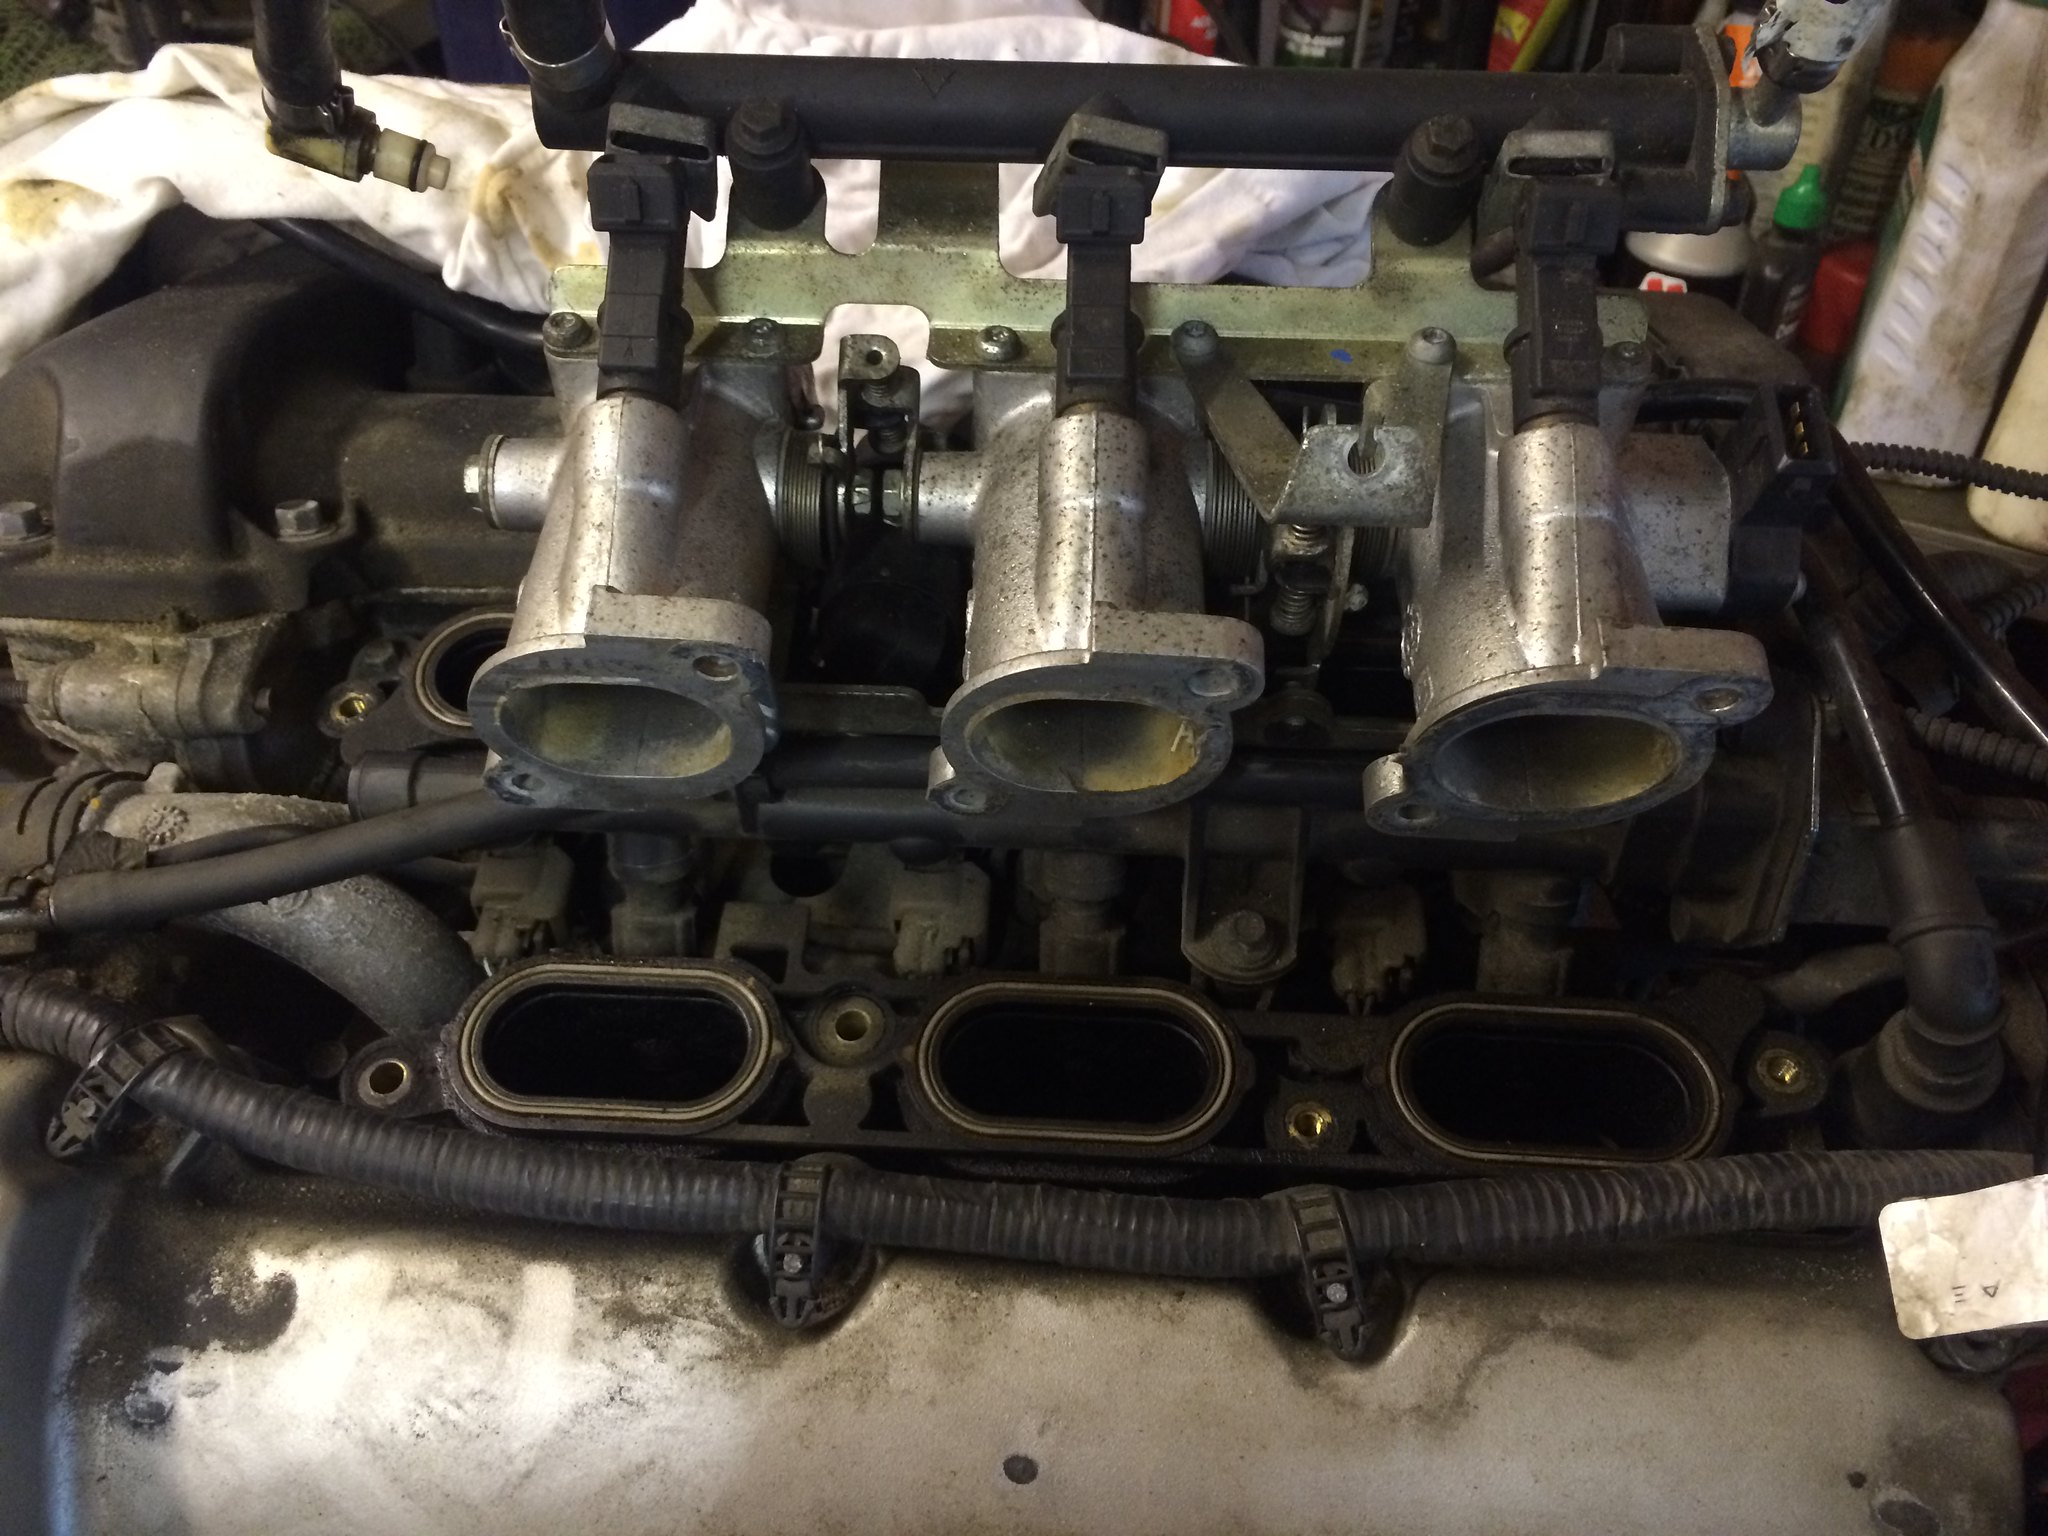 image image by Nevtiger, on Flickr 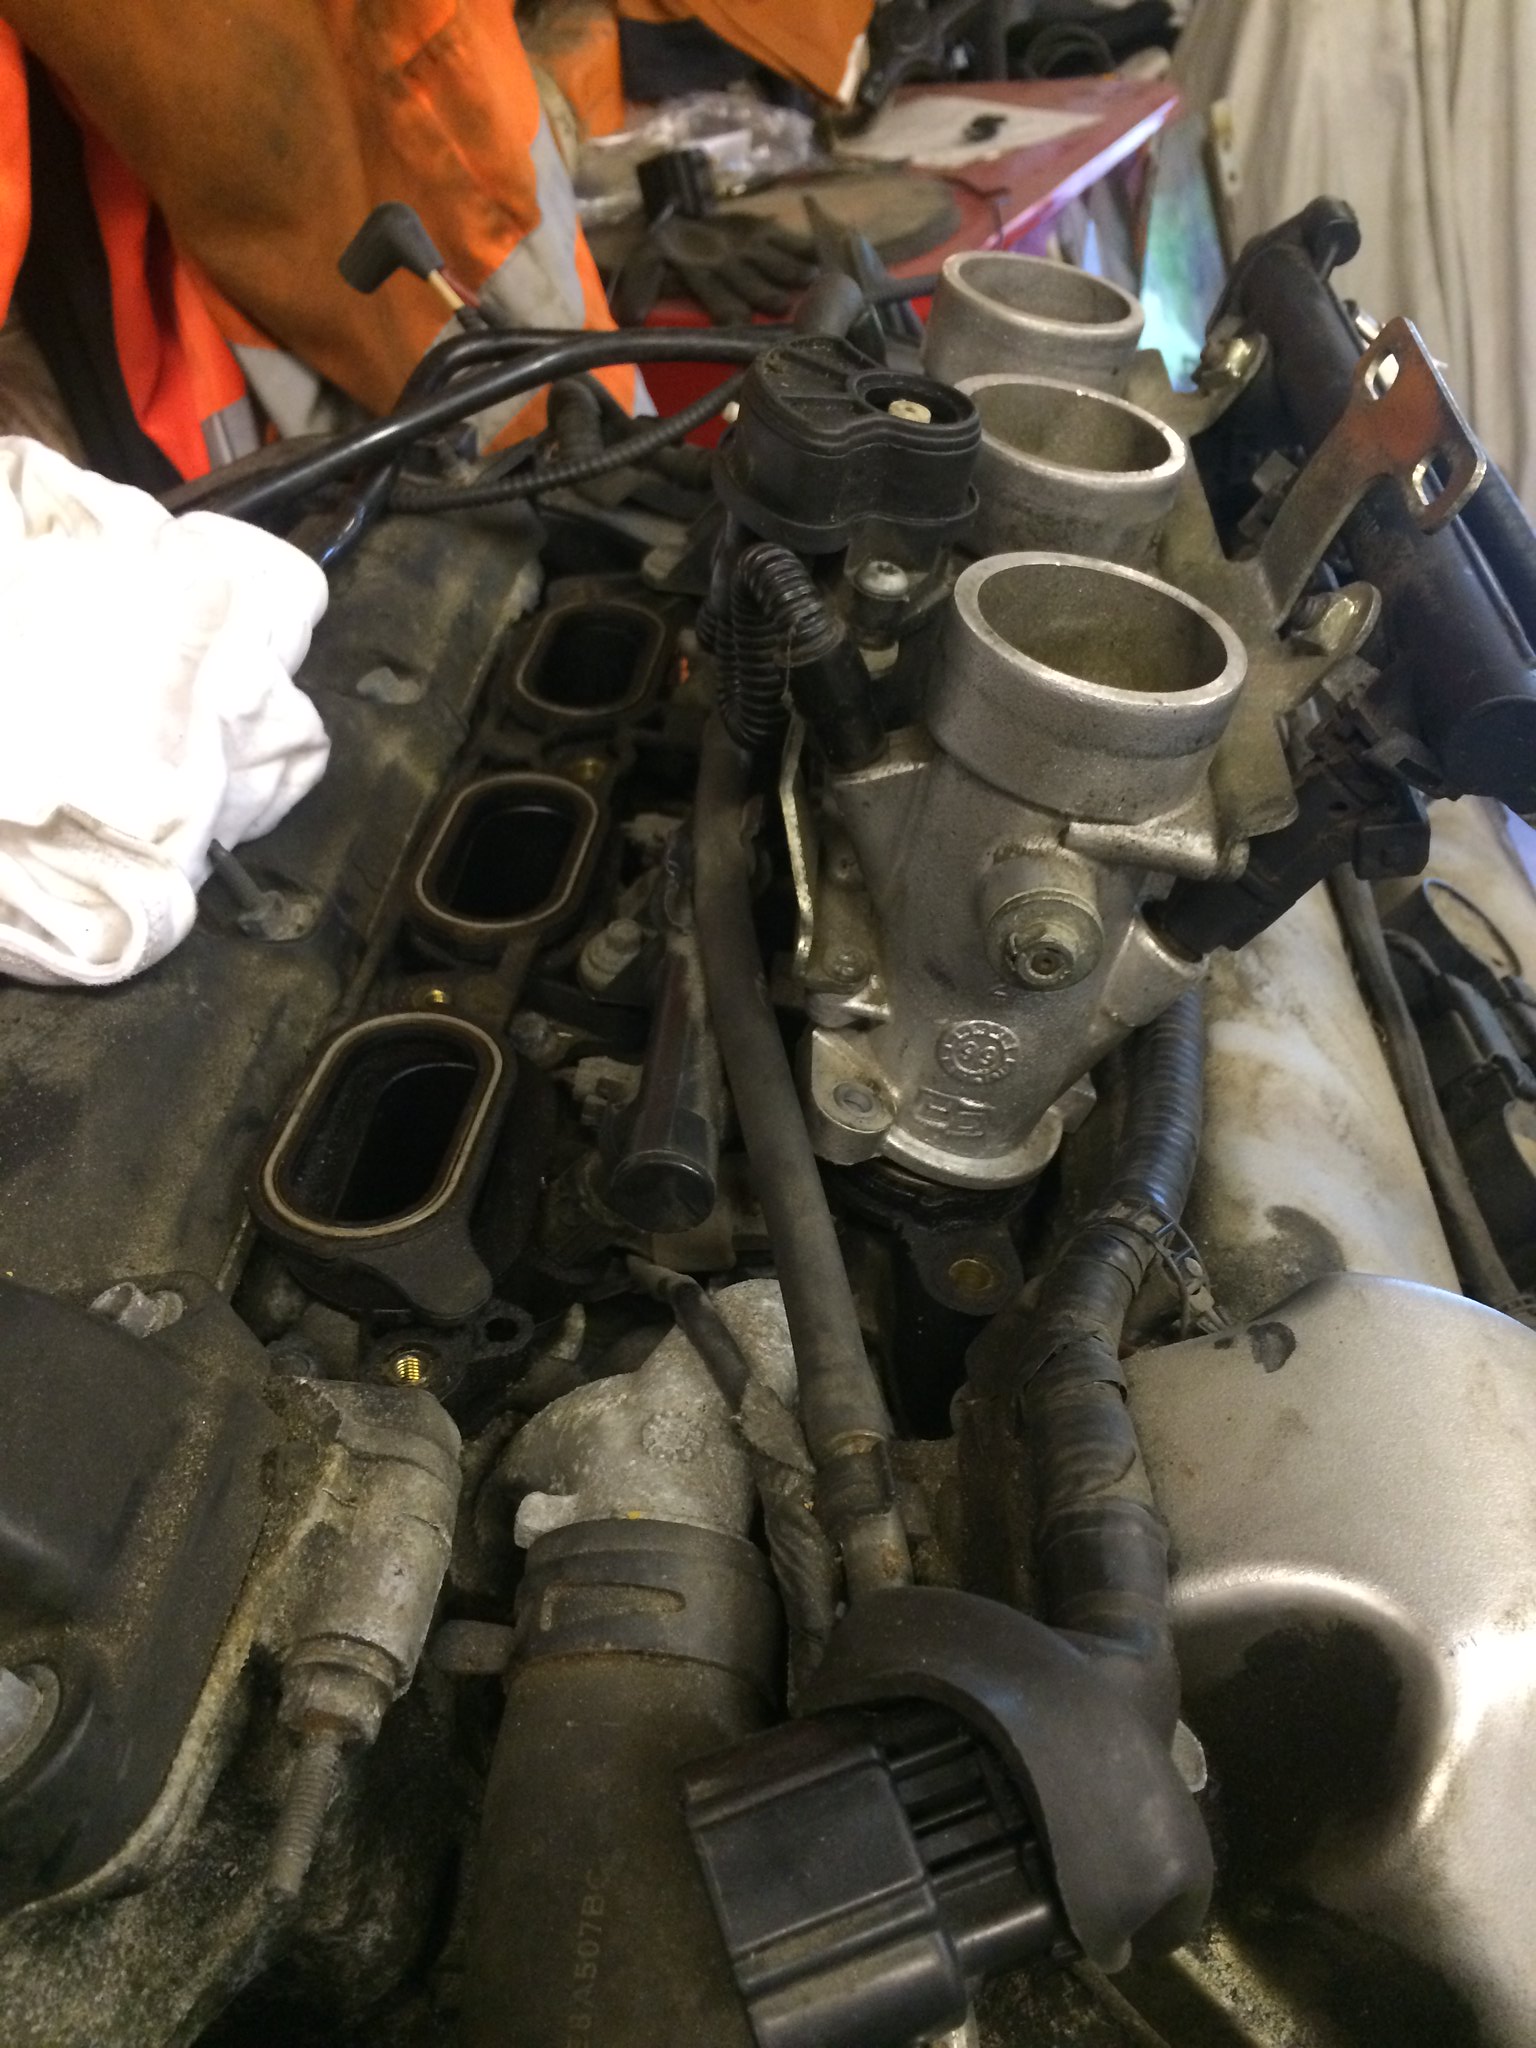 image image by Nevtiger, on Flickr |
| |
Last Edit: Feb 26, 2019 9:57:43 GMT by nevtiger
|
|
|
|
|
|
|
|
|
| |
Last Edit: Feb 26, 2019 9:58:26 GMT by nevtiger
|
|
|
|