|
|
|
|
|
Right detailing people, I'd love a step-by-step, basic "this gets your car pretty clean and shiny" guide. One written for us though, doesn't need lazer checking of treatment or any of that stuff. This. Please. Here, the concept of detailing is using some water to wash it so, if it's ever going to get properly done, I'm going to have to do it myself. Trouble is when I look at the shelfful of products, my eyes glaze over, never mind the paint.  |
| |
|
|
|
|
|
|
|
|
|
I've got some bits I can put together as a guide. I've just done a wheel cleaning guide for an owners club so I'll post it on here too  |
| |
|
|
|
|
|
|
|
All you need to know about Clay Bar'sIntroThe Clay Bar was invented in the 90's in Japan, and was patented up until a little while ago. They were then used in body shops, and are slowly now coming in to general use. This is why they haven't gained the recognition of polish and wax. Step by Step GuideOur clay can just be used with water, but we advise some shampoo to help lubrication. So all you need is: A clay bar, bucket of water, cap of shampoo, sponge or wash mitt and microfiber towel. Step 1: Wash and dry your car to remove all surface contamination. Step 2: Cut a piece of clay off the bar, then squeeze until easily pliable. Then squeeze into a flat circle with the diameter of 5cm. Step 3: Get your bucket of soapy water. Step 4: Working in small areas generously cover the area with soapy water using you sponge or wash mitt Step 5: Dip the clay bar into the bucket to lubricate it. Slide the lubricated bar over the wet surface. The clay should glide freely, no pressure is needed. Keep dipping the clay and lubricating the surface. Step 6: After completing an area wipe with microfiber towel. Step 7: Repeat process until car is complete. It's that simple Clay Bar Tips1. If dropped do not reuse, as it picks up dirt and you'll rub it into your paint. 2. You should hear the contaminants being picked up by the clay bar. 3. There is no pressure needed when using a clay bar, that's a myth. The clay bar works with friction. What Does Clay Do?Clay removes contamination from the paint to result in smoother paint and a deeper shine. Your car's paintwork will have embedded particle contamination such as brake dust, tar, iron fillings, insect residue, tree sap and more. The paint does feel like glass after you use a clay bar. The contamination diffuses the light so decrease the shine in your paintwork, so removing the contamination gives a better shine. Also using a clay bar give a better surface to work with when polishing and waxing. Our ClayOur clay is available on Amazon, and comes with a step by step guide so is great for beginners. Here is the link: Buffin' Stuff Supreme Clean Clay Bar
|
| |
|
|
93fxdl
Posted a lot
 Enter your message here...
Posts: 2,000
|
|
|
|
|
Suns out, so got back to my pitiful attempts at restoring a shine to the daily, a black sedona, gave it a quick rinse to shift this worst of the curse word.
Cut a piece off the bar (tip from a previous post, thanks poster) and got stuck in. A sedona is a lot of vehicle to clay.
Rinsed off, then fired on a quick coat of polish, used much less polish, and much easier to put on.
Car is now much much shinier, this mica flake is showing again. Am totally converted.
Still have the lower parts of the car to do, but first need to get some thinners to get all the tar spots off.
ttfn Glenn
|
| |
|
|
|
|
|
May 24, 2016 10:15:49 GMT
|
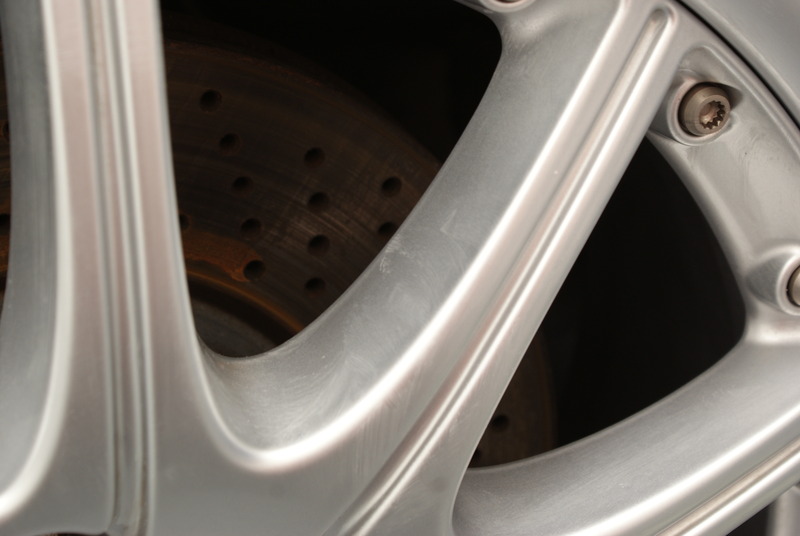
I said I'd do this ages but time got away from me... but here it is at last.Please note... This isn't the 'be all and end all' of cleaning your wheels. Just my method and preferred products for the task. If you'd like more advise or info on alternative protucts or tools, just ask )
My little guide on how to clean your wheels!This is always the first port of call when cleaning the car. If you wash the body work first, you're likely to flick up some of the dirt from the wheels off of your brushes.
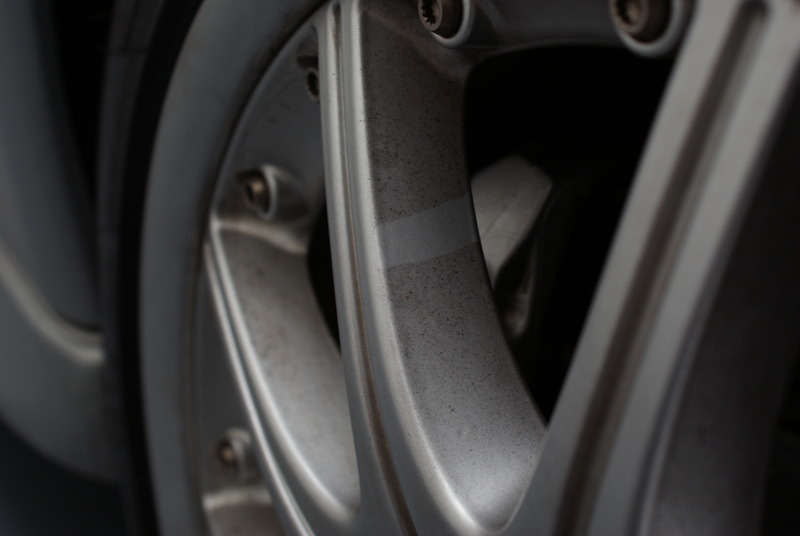
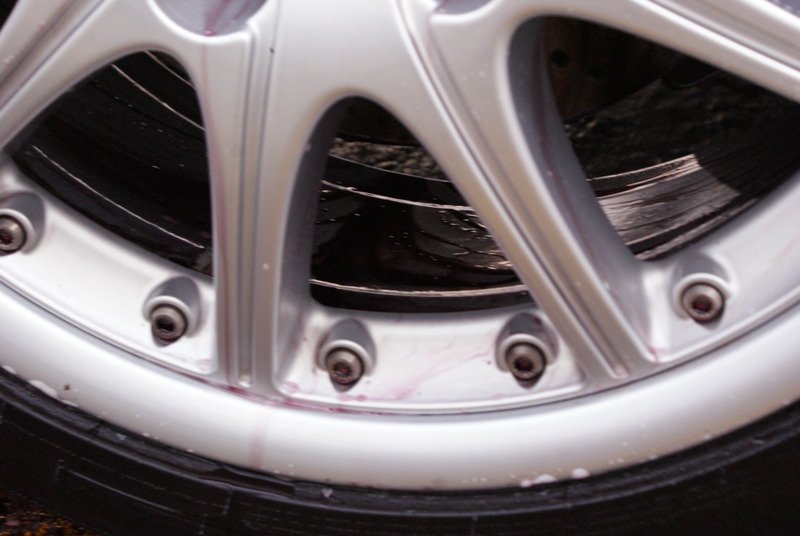
We start off with the dirty wheels.
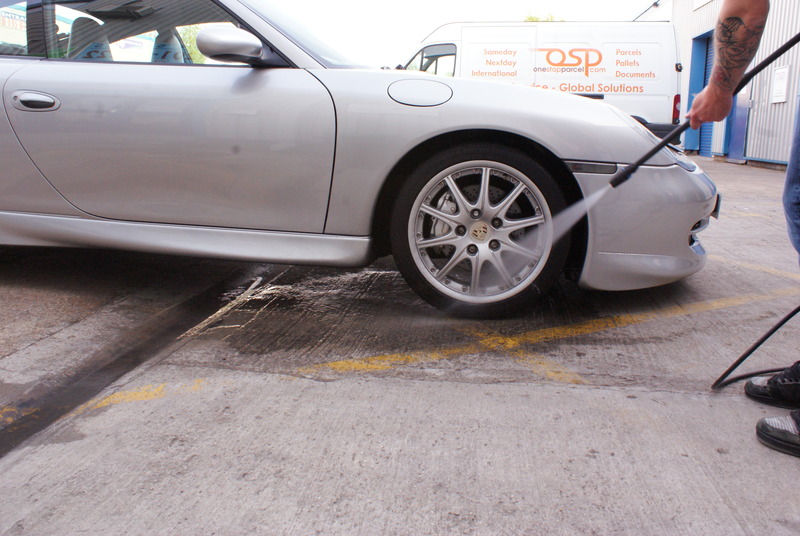
Step one. Rinse the wheels.This will release the dirt and brake dust sitting on the very top - the loosest part.
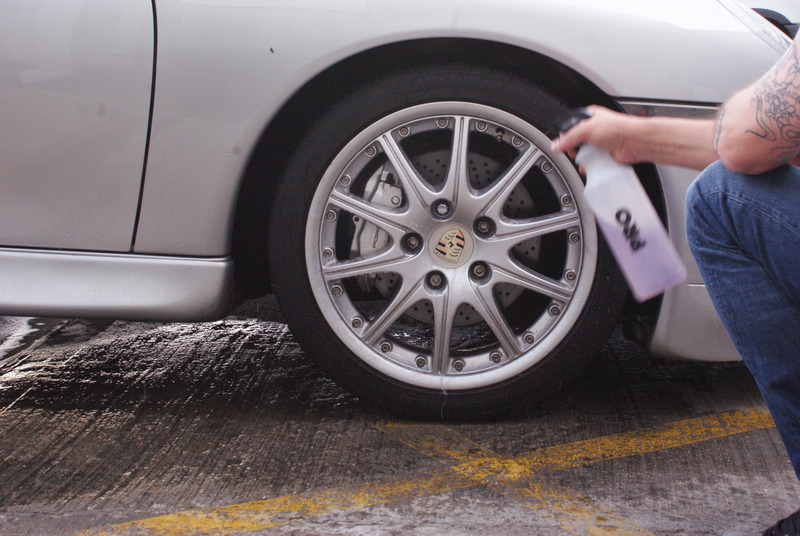
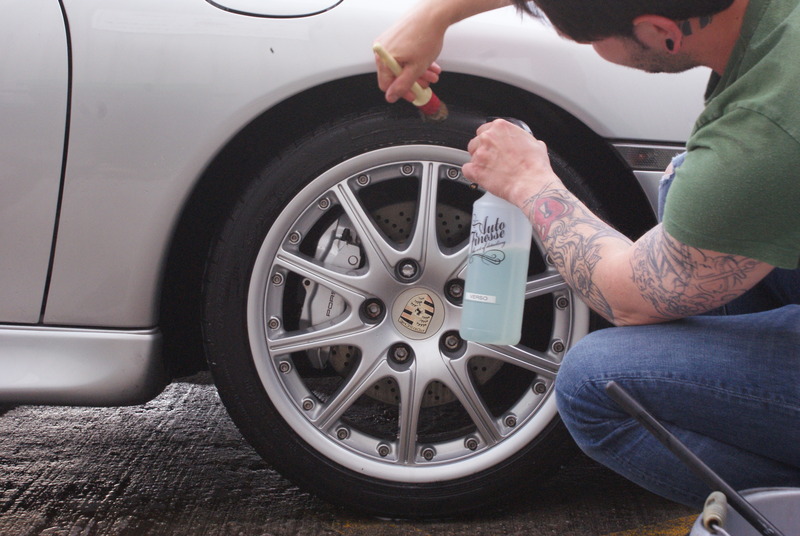
Step two. Apply your wheel cleaner.Choosing a good wheel cleaner is tricky with all the different varieties out there. Non-acidic cleaners are the most popular choice. These tend to be a strong alkaline. My go to is Auto Finesse Imperial.Ensure the whole wheel is covered including the barrels and allow to dwell for a few moments to allow it to start braking down the dirt and brake dust.
Step three. Ready your brushes.Different wheel designs will need different shapes and sizes of rush to get between the spokes and designs.I favor Wheel Woolies, Envy detailing brushes and valet Pro brushes.Get your self a bucket full of water with a few drops of shampoo in to rinse your brushes as you go and provide further lubrication and ease cleaning.

Step four. Initial cleaning.Clean the wheel backs first...

Then the faces...
And your calipers.

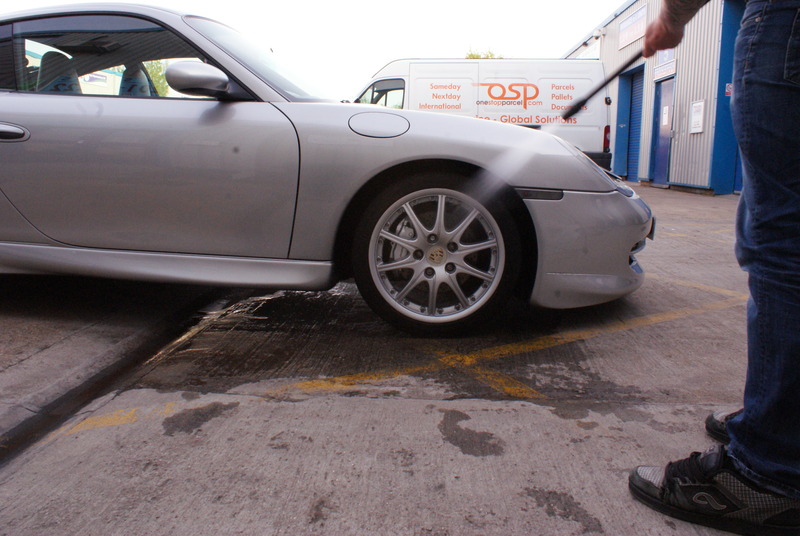
At this point it helps to roll the car so that the wheel rotates 180 degrees allowing you to check you haven't missed any bits.
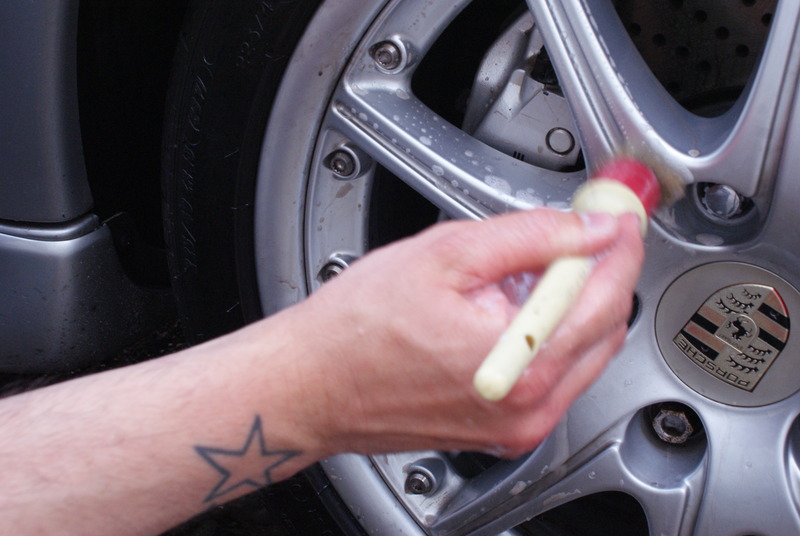
Step five. Tyes and arches.Apply an All Purpose Cleaner to the tyre walls and wheel arches. Agitate with brushes to remove old tyre dressings and crud from inside the arches.Here I'm using Auto Finesse Verso.
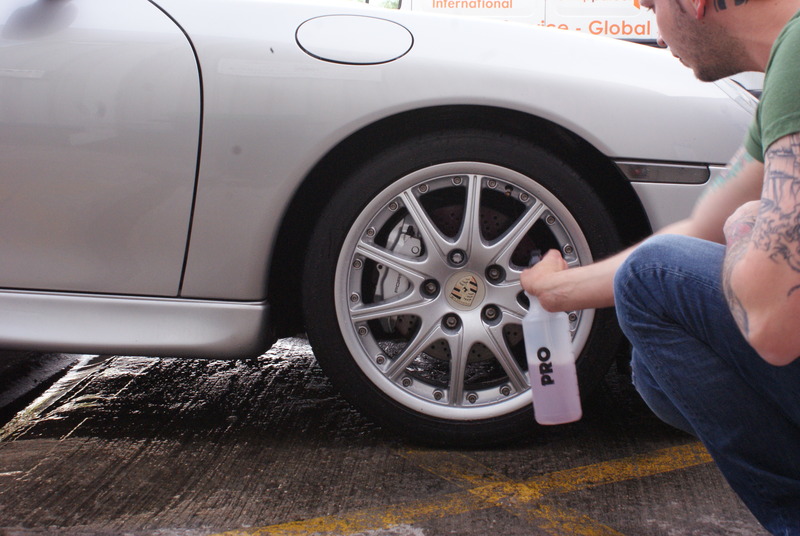
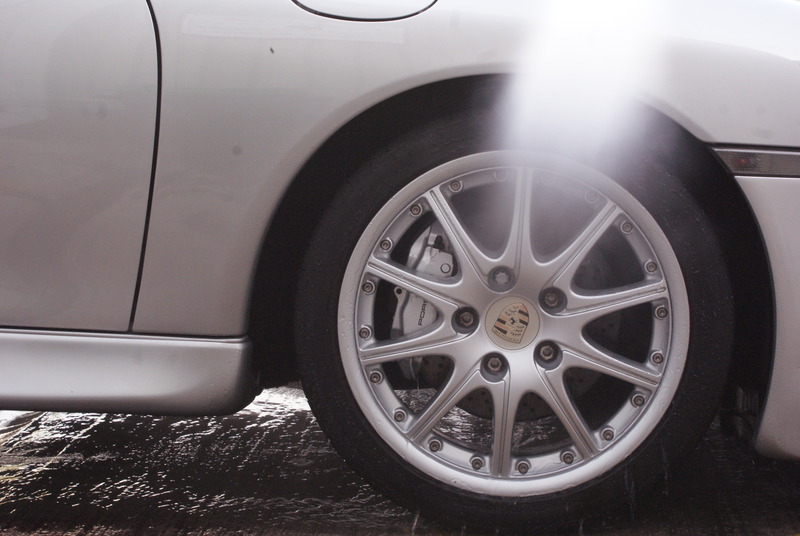
Step six. Give it a rinse.Thoroughly rinse away all of the wheel cleaner and dirt.
Step seven. Fallout Remover.The most fun part of cleaning wheels. The fallout remover bonds to and iron particles from brake dust that has embedded into the wheels paint. it turns a cool purple colour as it breaks it down. This one is Auto Finesse Iron Out.

Agitate any stubborn bits with your brushes before rinsing away.
At this point you can go on to remove any tar spots with a Tar Remover - Step eight.Clay the wheels if needed - Step nine.Then polish - Step ten.I didn't take any photos of that stuff 
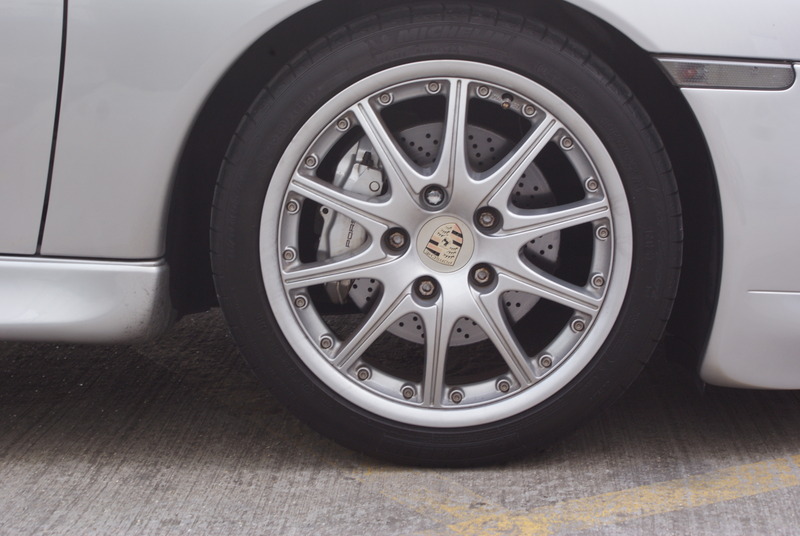
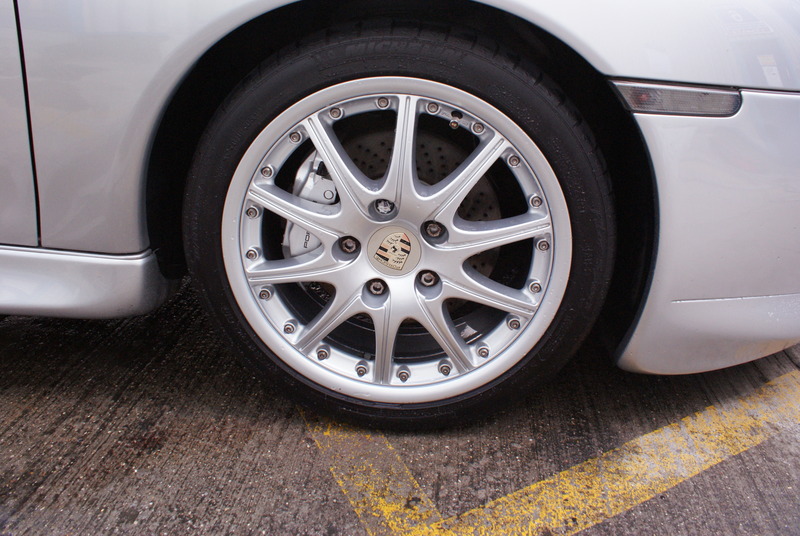
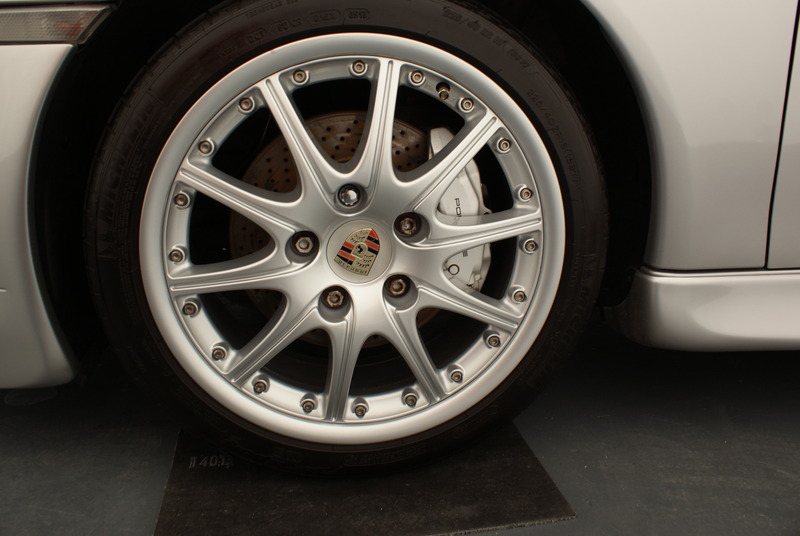
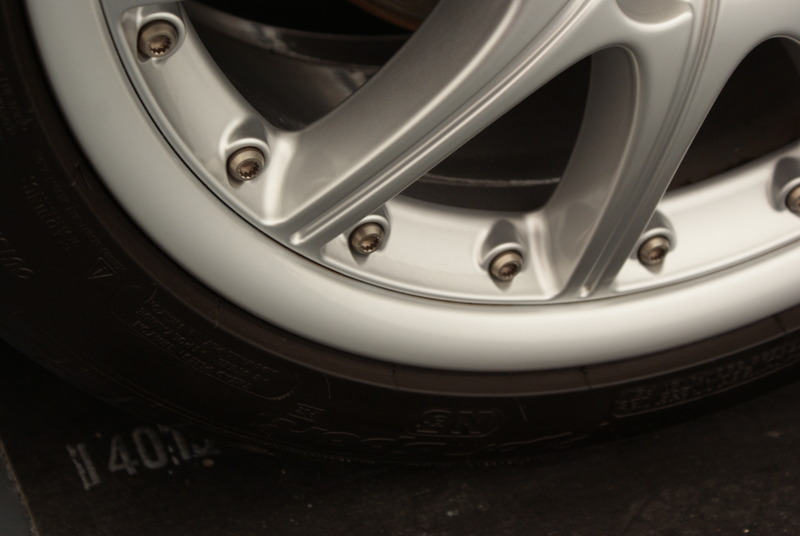
Here's one cleaned, polished wheel with Meguiar's Endurance tyre gel applied - Step eleven.

The next step, where are we? Step twelve?Protecting the wheels. There's two main options here. Long term coatings, or wheel specific waxes.Here I'll show you waxing the wheel With Auto Finesse Mint Rims.
Apply a thin even layer to the entire wheel surface. Get your hands in to coat the barrels and calipers too.
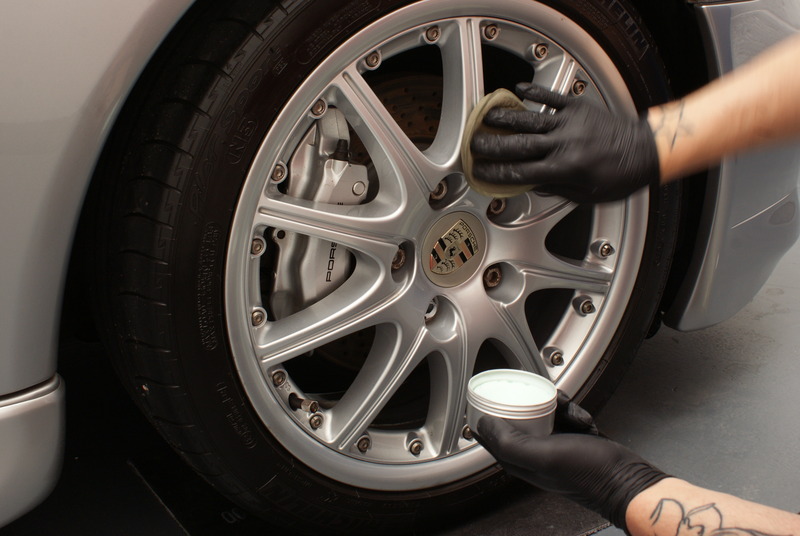
Buff away the residue once the whole wheel has been waxed.
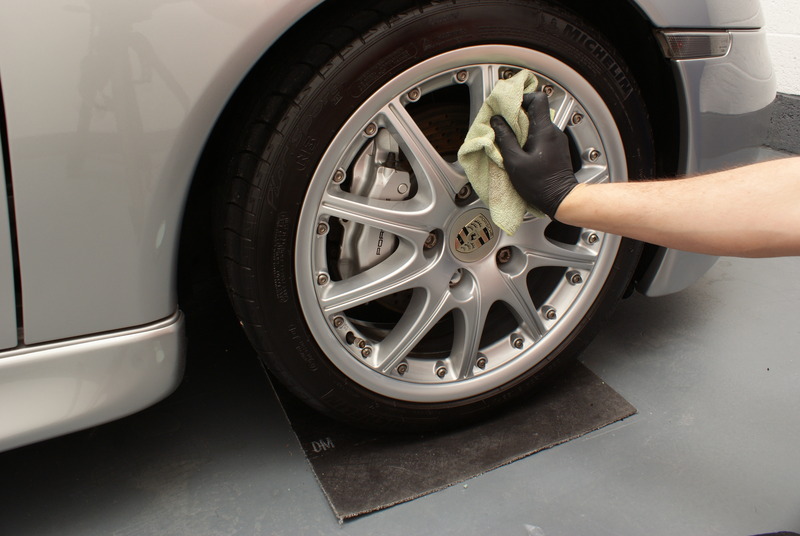
And there we have it. Nice clean and protected wheels

I hope that helps. If it's terrible just say and I'll try again
|
| |
|
|
|
|
|
May 29, 2016 22:28:10 GMT
|
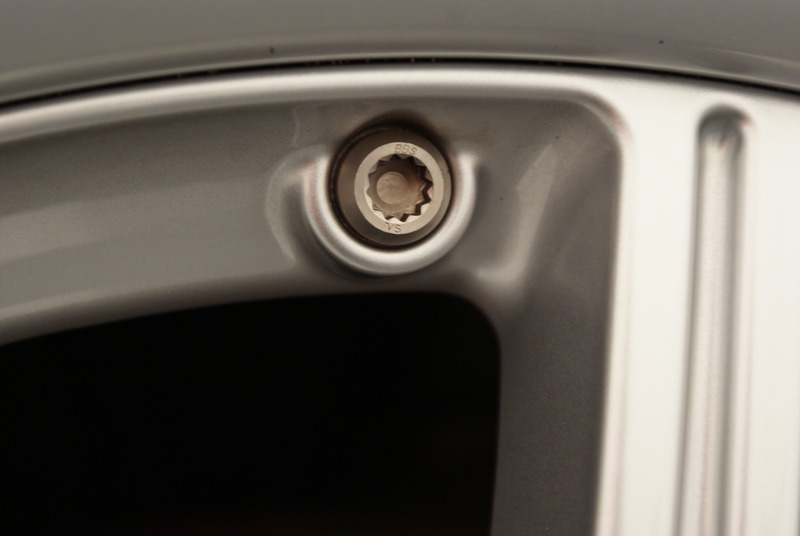
Anyone want to step up and do it? I joined detailing world quite some time ago because I wanted to see how I could get my Alfa 156 to look its best but I found that I ended up with more questions than answers. A simple “What polish?” question gets you into waxes, polishes, sealants and god knows what else, with prices going up to £1000 for polish. Everyone insists that what they use is best and, for a beginner, it was all a bit daunting. As part of my learing process I migrated towards Autosmart products because I used their trim and rubber treatment and really liked the results. Autosmart sell mainly to the trade but you can pick their stuff up cheaply on ebay if you don’t want 5 litre cans of everything. None of it is expensive so if you’re the sort of person who finds comfort in owning a £25 bucket, look away now. With the exception of the clay mitt, none of this stuff cost more than £5-£6 We start with a fairly manky Honda CRV. Not really RR material but it serves its purpose here I think. We have dead insects, brake dust, bird curse word, and faded plastic to deal with. My wife claims I haven’t washed the car this year. 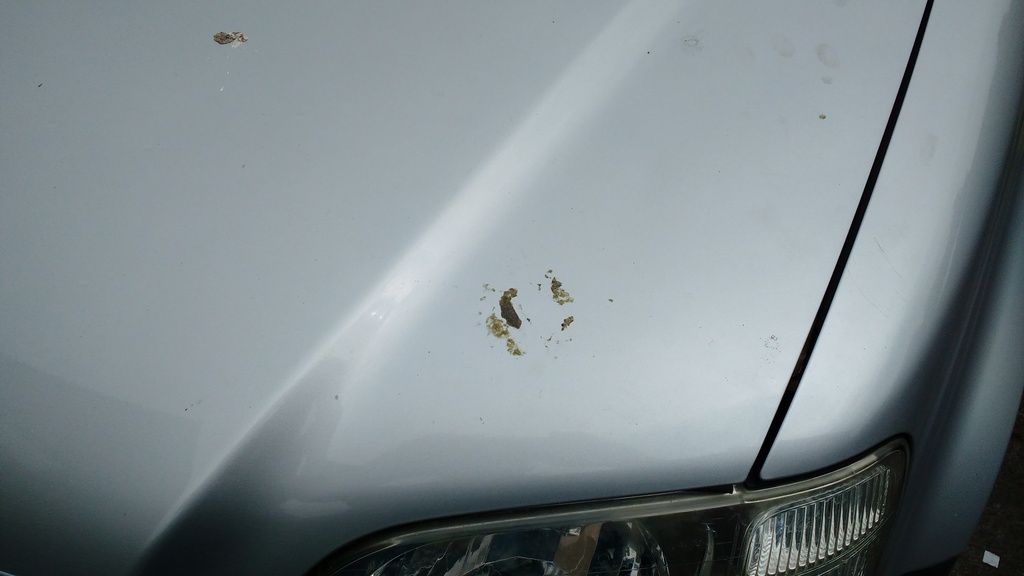 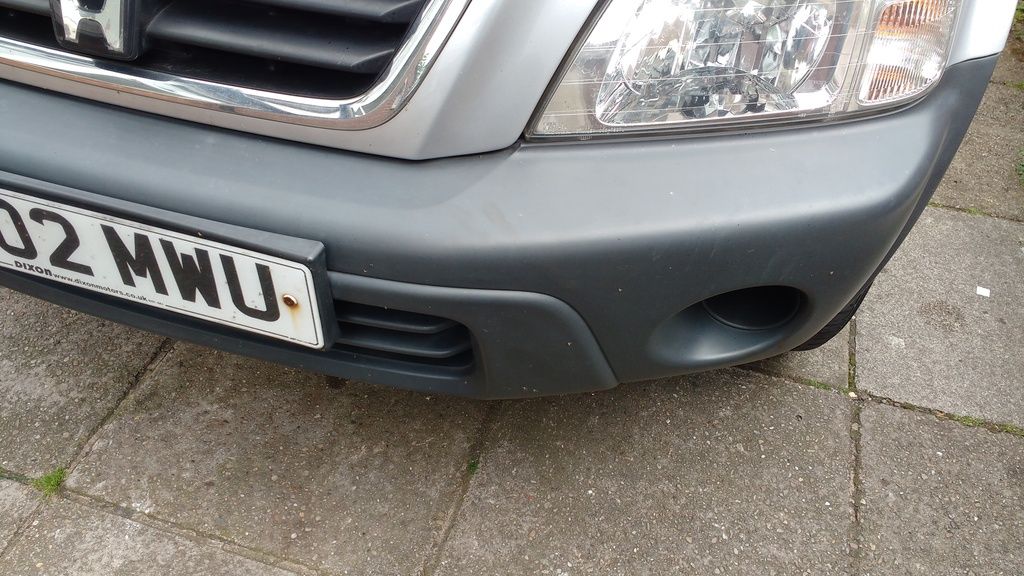 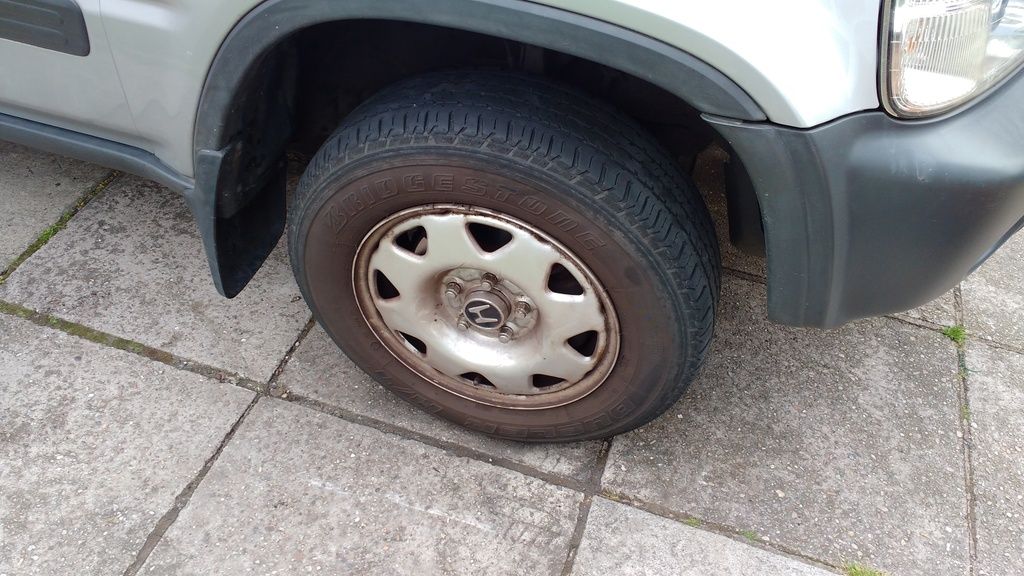 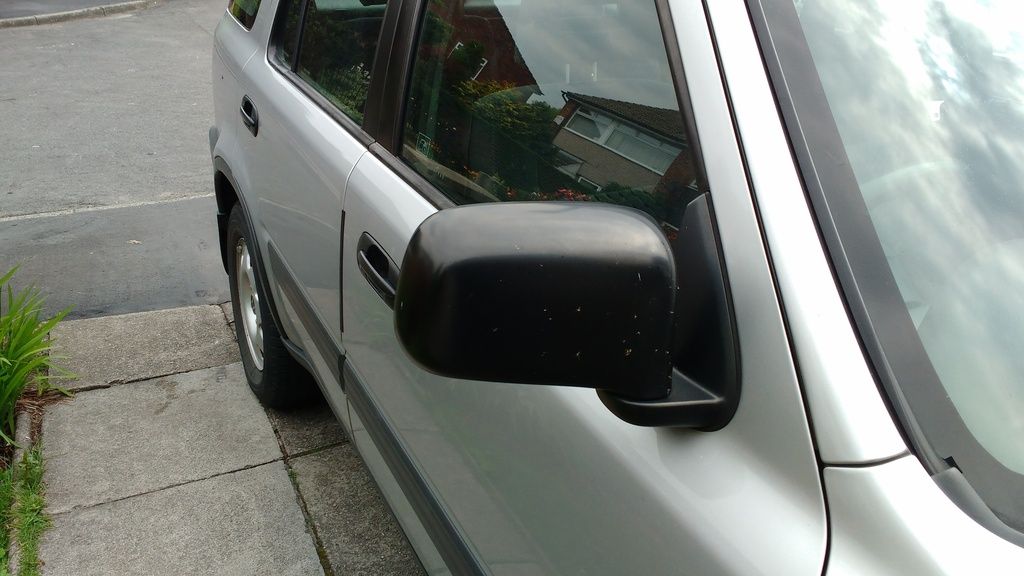 First job is a quick hose down and wash (do your wheels as described very well above at the same time. I used Autosmart’s fallout remover and wheel cleaner. The fallout remover doesn’t bleed like fancy ones but does the same job). When it comes to washes, sponges trap grit and scratch the paint. you need a sheepskin mitt, microfibre mitt, or something like that. As ever, ebay, poundland and Asda are you're friends. My car shampoo comes from poundland. Once done, look over the car and you will see lots of black dots of tar that don’t want to budge. For this you need tar remover, there are loads of different kinds but I’m using Halfords own. Follow the instructions on your particular product but basically you squirt it on, leave it for a minute or two, then wipe it and the softened tar off. 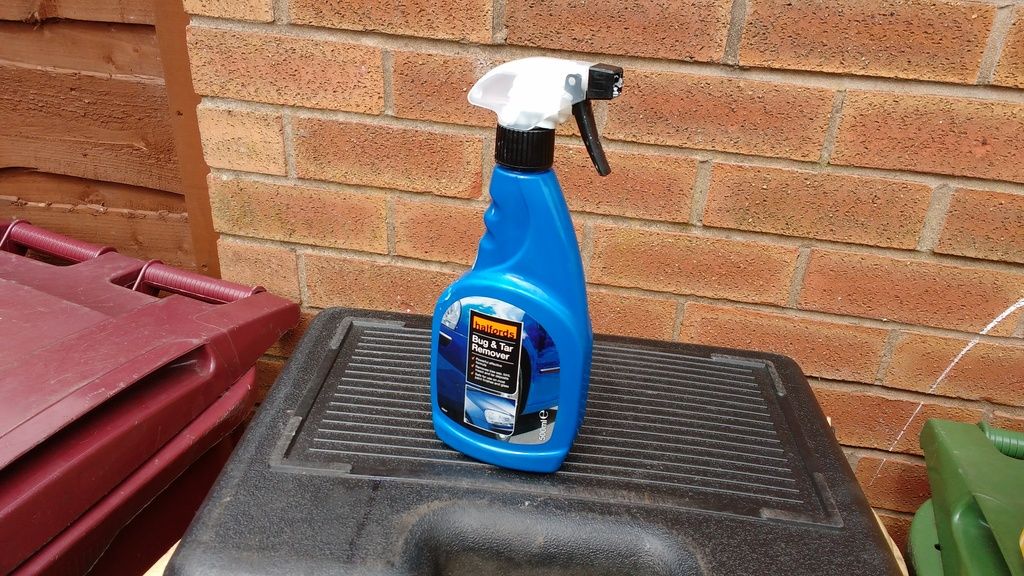 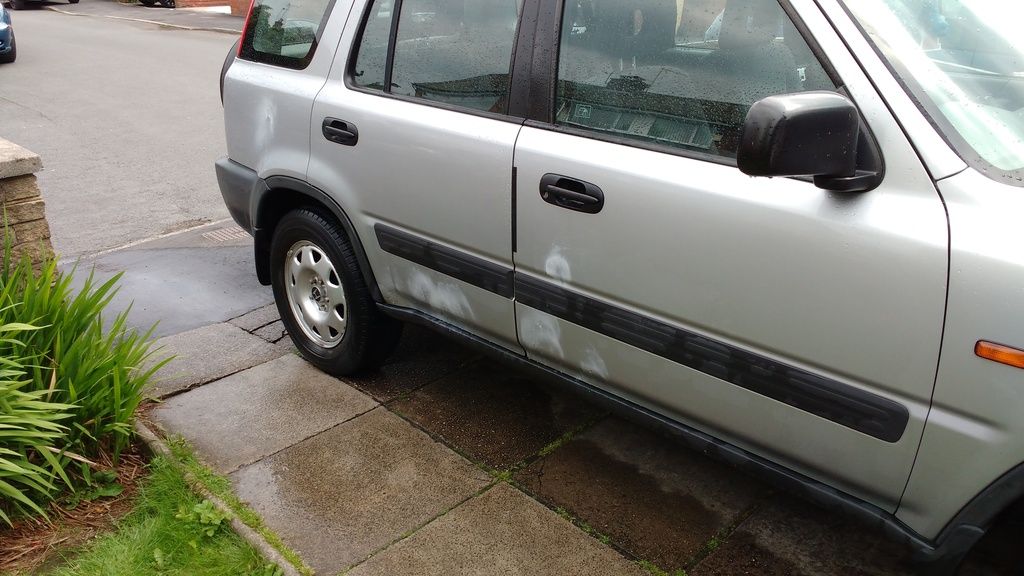 Once that’s done, I wash the car again to make sure it’s all gone. 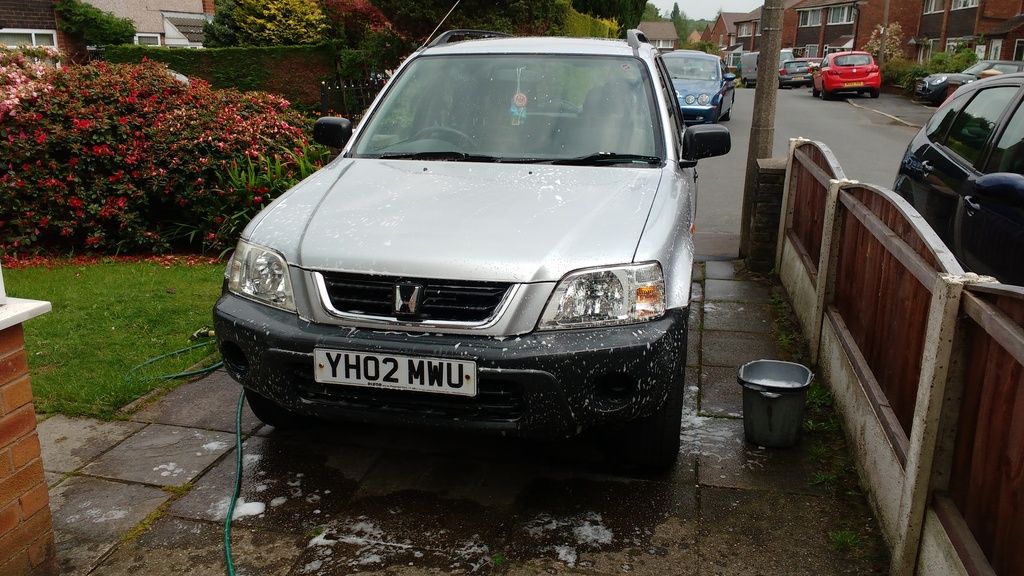 When it comes to claying, I don’t get on with clay bars, my hands are too big and clumsy. Instead I use one of these: www.halfords.com/motoring/car-cleaning/clay-bars-detailing-products/farecla-g3-body-prep-clay-mittIt’s the single most expensive thing in my car cleaning arsenal but has been used about 5-6 times already, much cheaper than clay. For this you need a lubricant in the form of a quick detailing spray of some sort. I use the cheapest I can find. 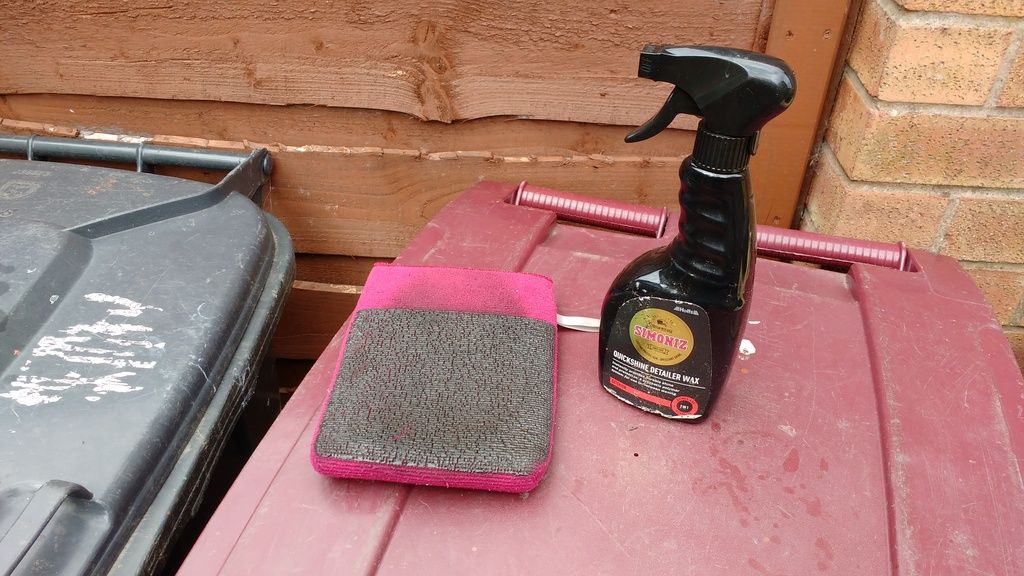 Basically you spray the panel with detailing spray, then wipe over it with the mitt. You don’t need to press on at all, just wipe the mitt over the surface. You will feel and hear the roughness initially but it will disappear as you work. This will leave you with a superficially clean car. Hose the car off at this point and dry it (I use microfibre cloths from Home Bargains). 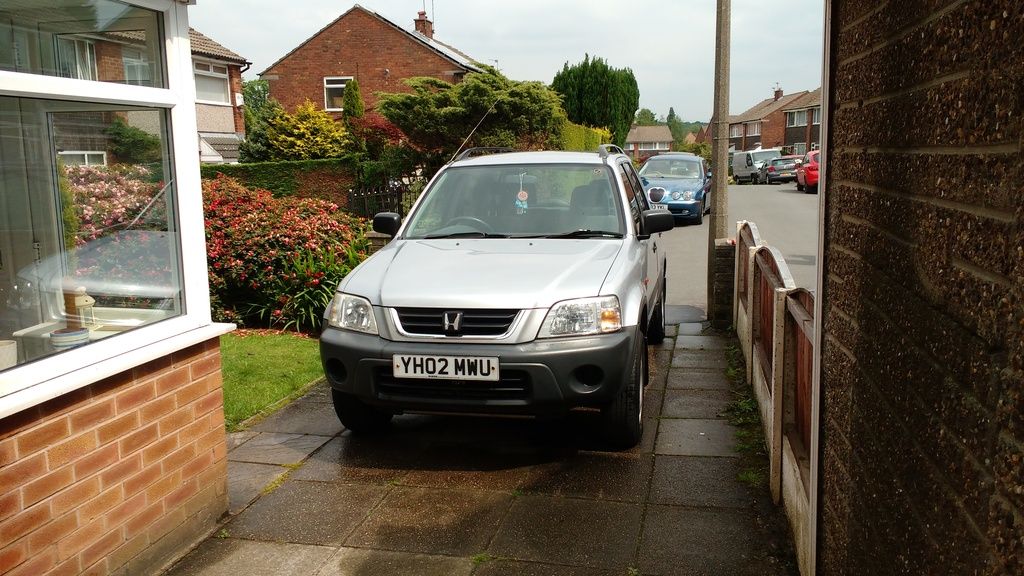 The paintwork will be smooth like glass now but unfortunately that finish isn’t very durable, water will bead up initially but will very quickly stop doing so. Also, if your car has a few miles and original paint, you will probably have lots of swirl marks in the paint. You can correct these by cutting back the paint but that’s way more effort than I’m prepared to put in on the family hack. What we need instead is some sort of polish with fillers to disguise those swirls. Auto Glym Super Resin Polish does an excellent job of this but I prefer Autosmart Platinum, it’s cheaper and produces less dust. 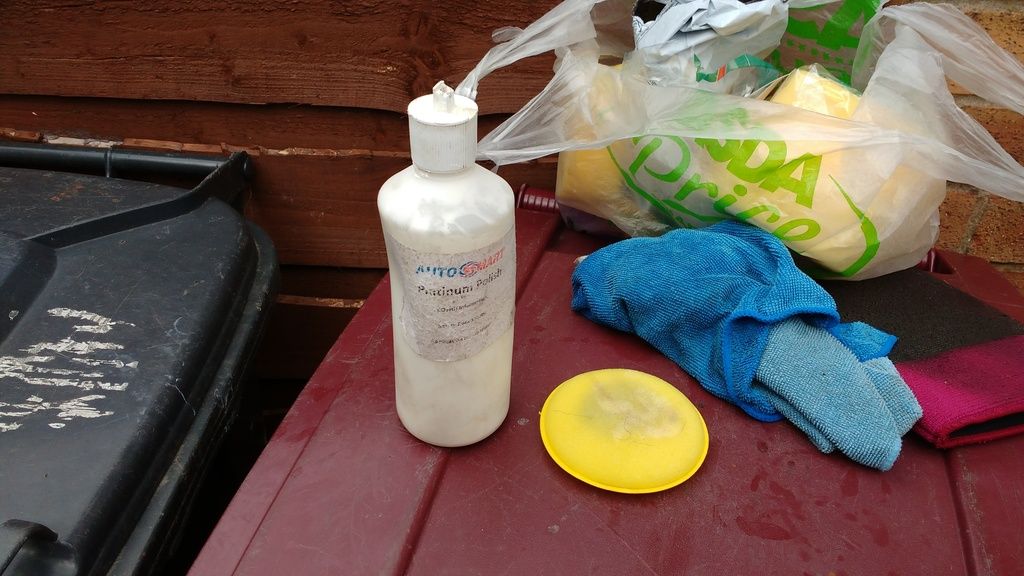 Apply it sparingly to the paint. I used to use old T-shirts but found that if I used these little pads from ebay, I used loads less polish. When it dries to a haze, wipe it off with a microfibre cloth. The swirls will be much reduced now and normally on this car I’d leave it there. However, if you don’t want to do this job too often, you need some sort of sealant over the top. That way all it’ll need is a wash and water will continue to bead up nicely for several months. I’ve just started using Autosmart Topaz and am quite impressed. www.autosmart.co.uk/New%20Products%20-%20Autosmart%20Topaz.htmlAgain, apply sparingly and wipe off when it dries to a haze. With this done, your paint should be looking pretty decent so it’s time for the details. The plastics on this car were very grey and faded when we bought it. I tried all manner of potions from Halfords and none worked for more than a few days. I therefore went old school and a little bit off-piste. 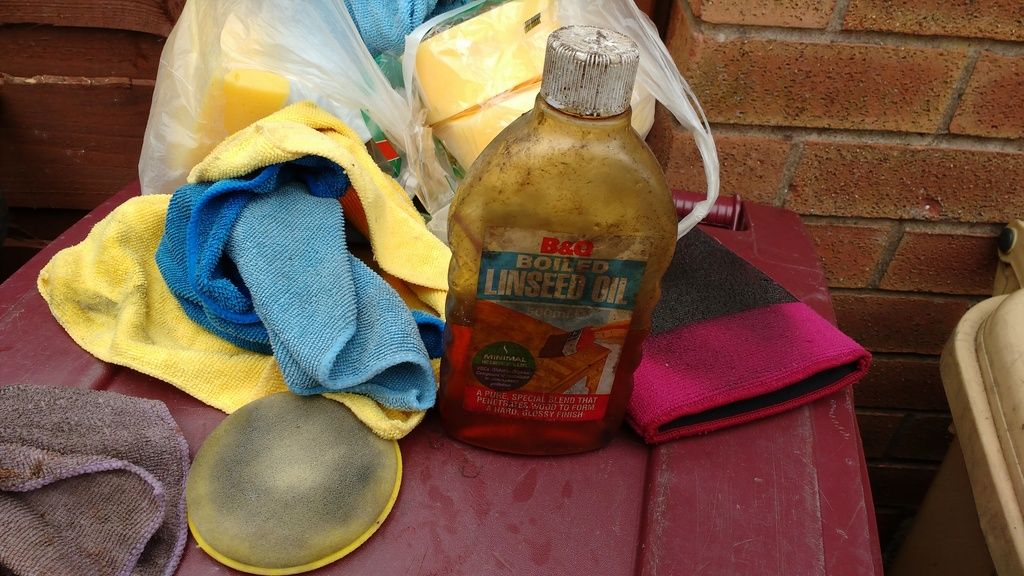 For tired plastics boiled linseed oil is brilliant. Rather than putting a shiny coating on the plastic, it seems to replenish the oil in it and lasts for ages. I last did this on this car last July . You just work it in with a rag until it looks evenly coated. If you get too much on there, just wipe it with a dry rag. A few notes of caution though. Firstly it stinks like putty and if you get it on your hands they stink for days. Secondly, if you leave your rags soaked with it they can apparently set on fire. Mine never have, not for want of trying. Thirdly, don’t apply it then immediately go for a drive, insects will stick to it like glue. All of this leaves us with a car that looks like this: 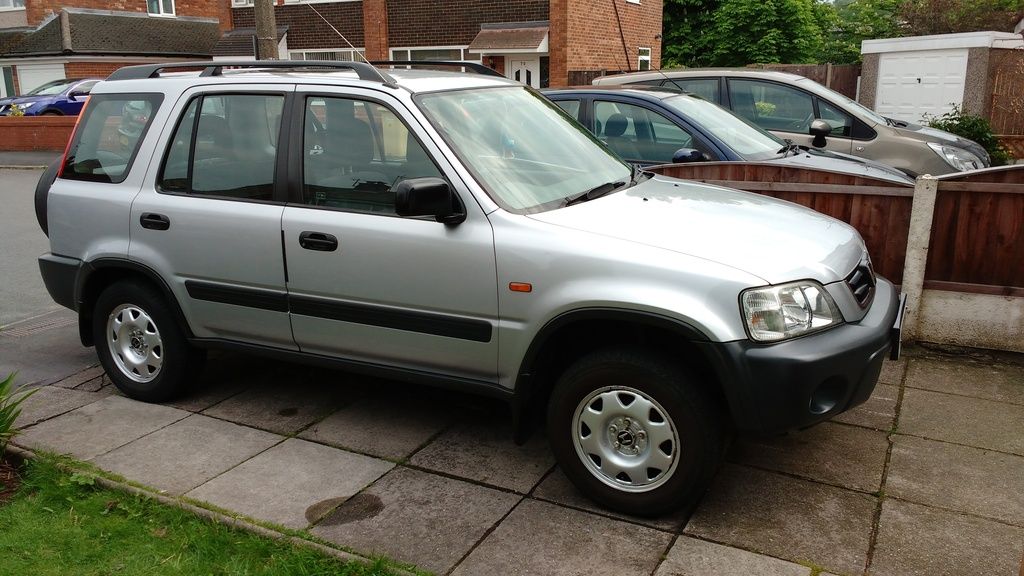 I don’t usually treat the tyres on this car because Mrs K really doesn’t care but for demonstration purposes I did this time. Autosmart Highstyle is my product of choice for this. Pour a bit in a cup, apply with a ½” brush, wipe over with a sponge. Once done, roll the car back a foot or two to do the bit at the bottom. This is the finished product. Time taken, probably 3 hours working at a leisurely pace. 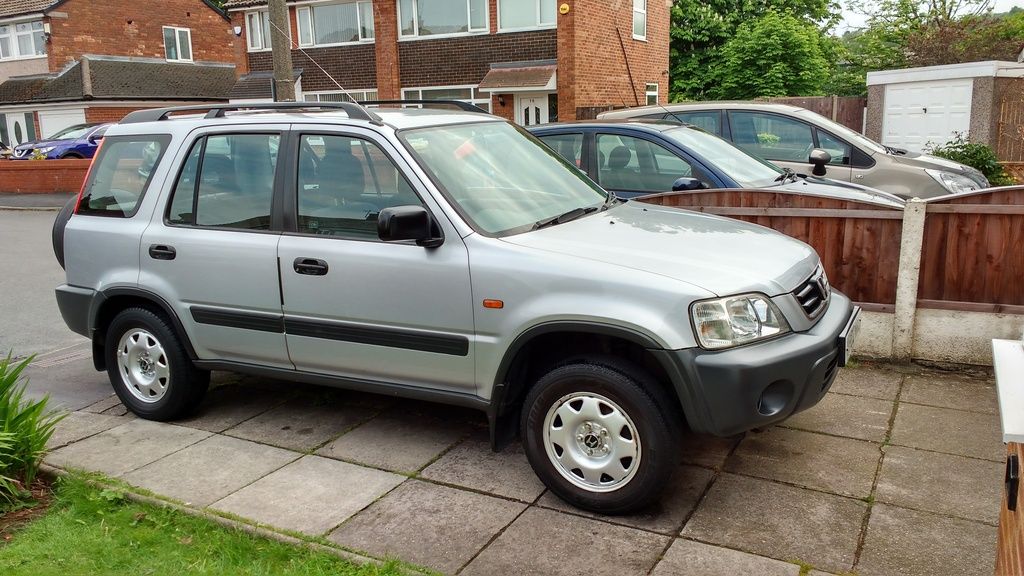 All it’ll need for the next six months is an occasional wash and maybe the tyres redoing periodically. |
| |
Jaguar S-Type 3.0 SE
|
|
|
|
|
|
|
|
Clay bars are amazing.
I first used one about 4 years ago and have used them ever since.
Can be a little daunting at first as it feels like it takes forever but as soon as you get into it its lovley.
Gives you a good base to start your polishing stages off.
Also works wonders on glass.
|
| |
|
|
duncanmartin
Club Retro Rides Member
Out of retro ownership
Posts: 1,320
Club RR Member Number: 70
|
|
May 30, 2016 18:29:25 GMT
|
I said I'd do this ages but time got away from me... but here it is at last.Please note... This isn't the 'be all and end all' of cleaning your wheels. Just my method and preferred products for the task. If you'd like more advise or info on alternative protucts or tools, just ask )
Thanks, that was really interesting, I just have 2 questions: 1. Where have all your pictures gone? 2. The actual question! My wheels have a painted face and bare alloy rim. Can I use the wheel cleaner, fallout remover, and wheel wax/preserver type products? I've been steering clear and using just the car shampoo and wheel woollies (plus metal polish for the rim). The detailing sites have all sorts of conflicting advice that just leaves me confused. My wheels look like this: 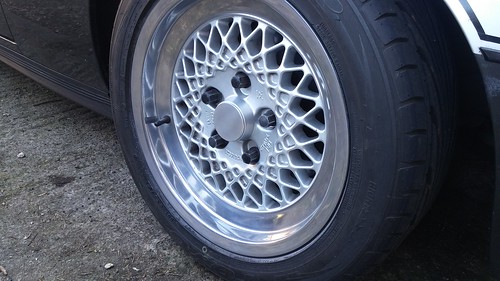 20150418_163706 20150418_163706 by duncancmartin, on Flickr I don't want to damage them, but getting them seriously shiny is a huge amount of work (hell, just getting them clean is hard enough!), so help from either stopping dirt sticking, or chemically removing it would be most appreciated! Thanks Duncan |
| |
|
|
andyborris
Posted a lot
Freedom is just another word for nothing left to lose.
Posts: 2,161
|
|
May 30, 2016 18:31:16 GMT
|
|
I tried it...and I'm not really sure if it improved the paint on a 16 year old MX5!
It did pick some c**p out of the paint, but that just meant the wear & tear in the paint showed slightly better! However, it was quite chilly today, so perhaps the clay wasn't working at it's best, it was almost impossible to fold the clay, does this mean it's too cold?
|
| |
|
|
|
|
|
May 30, 2016 19:11:44 GMT
|
I tried it...and I'm not really sure if it improved the paint on a 16 year old MX5! It did pick some c**p out of the paint, but that just meant the wear & tear in the paint showed slightly better! However, it was quite chilly today, so perhaps the clay wasn't working at it's best, it was almost impossible to fold the clay, does this mean it's too cold? What clay bar did you use? Also a warmer clay is a lot better, it needs to pliable, so squeezing it and folding it should make it work a little better |
| |
|
|
|
|
|
|
|
May 30, 2016 19:57:19 GMT
|
|
I just finished cleaning my Honda Accord and used a Bilt Hamber clay bar. Then paintwork has come up like glass and looks stunning.
It's been a long time since I last used one, in fact I was probably one of the first to use a clay bar in the country. I was a car valeter for a long time and I was quite often given new products to try before they sold them to other cumpans. The one I was given to try was made in Japan, as was the the micro fiber cloth that I tried long before it was available in the shops.
|
| |
1955 Austin A30
1981 Jawa Mustang
1990 Trabant 601 (Tommy)
1989 Trabant 601
2009 Jaguar XF
2012 Toyota AYGO
2018 Scomadi TL
|
|
|
|
|
|
|
duncanmartin I'm not sure where the pictures have got to. I'll make it into a new thread somewhere and start again As for the products. The ones I use are perfectly safe with bare metal wheels. If you washed them with your regular routine, applied a fallout remover and then a wheel wax, it will make the process much easier in future. The wax will help to prevent the brake dust and road dirt from sticking to the wheel meaning it will rinse and wash away without a lot of effort. You won't need to polish the lips every time too.
|
| |
|
|
|
|
|
|
|
Here's a little review of the new Buffin' Stuff clay bar. 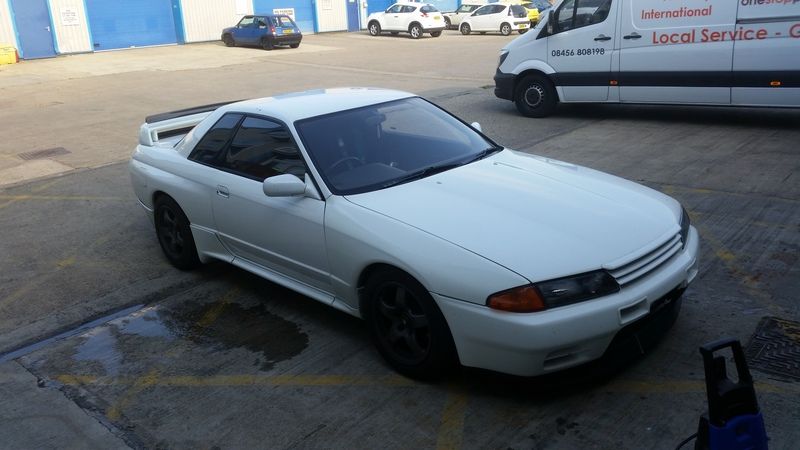 This R32 Skyline GTR is incredibly solid without a single spec of rust in sight. 100% original and straight panels. The car has all the Nismo option parts running in N1 spec and tuned to 550BHP. I got to go out on track in it at Silverstone at J Fest and I can tell you it's insanely quick! The wheels were cleaned first, as always. The car was Prewashed with ODK Arctic. All the rubbers, nooks and crannies with Auto Finesse Verso. The car was then washed using Auto Finesse Lather Iron fallout remover was used on the entire car. 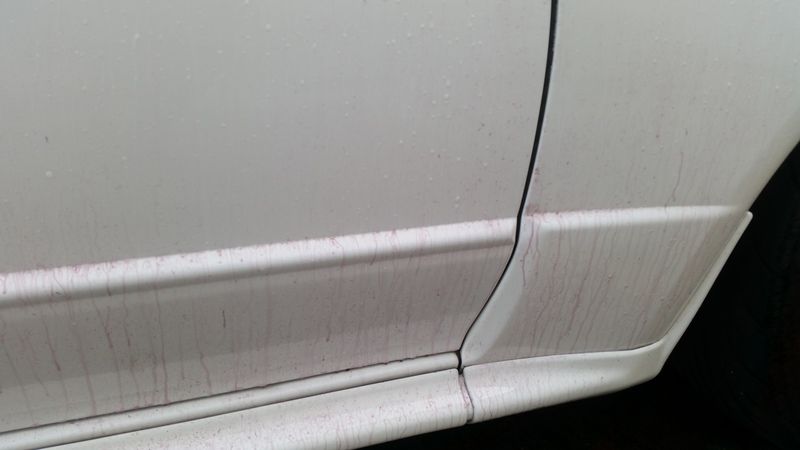  Tar spots were treated and most of the rubber was removed with Tardis, a few bits were left for a trial. The fallout and tar removal stages help prevent the clay from getting clogged up so quickly. Also, it prevents any larger bits of tar and such being dragged across the paintwork. Inside the car was dried before being clayed. I first tried using just water for lubrication. It seemed to work, but I've never been a fan of this method so opted for some rinseless wash (Meguiar's D114) in a spray bottle. I tore off a small piece of clay, which was enough to complete the whole car - and these are long cars! 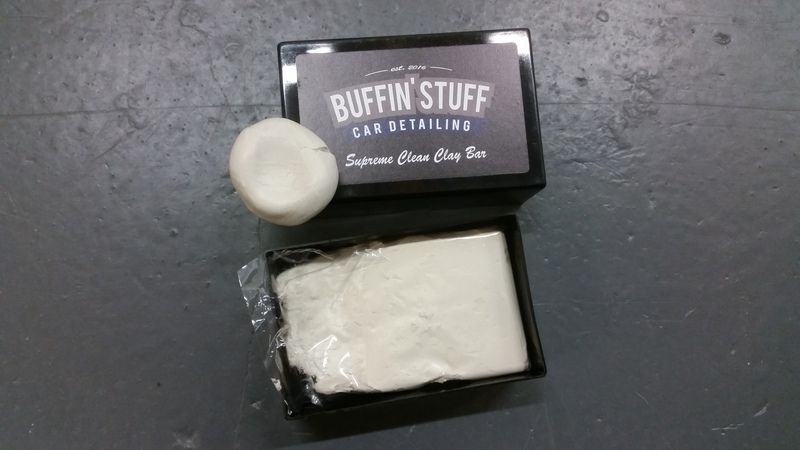 Rubber on the windscreen. 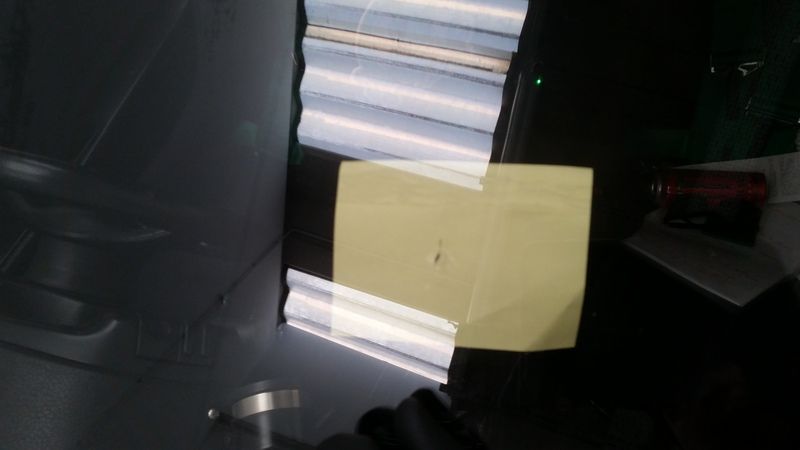 The area was sprayed liberally with the lubrication and the clay worked with zero pressure. Then wiped dry with a plush microfiber towel. 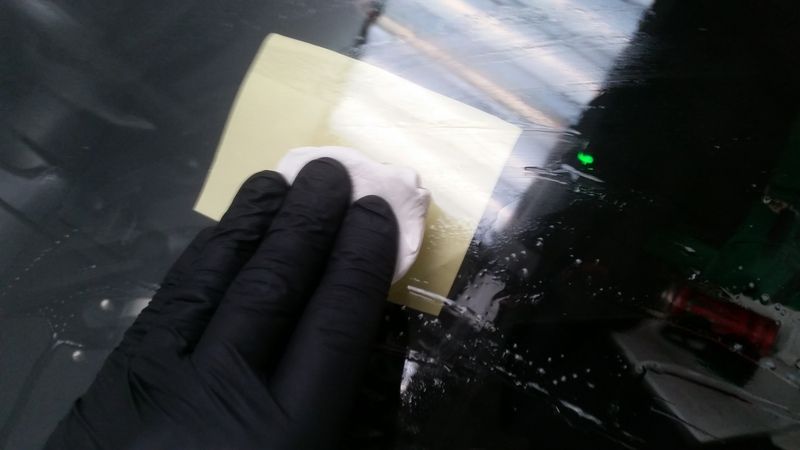 Which removed the rubber effortlessly. 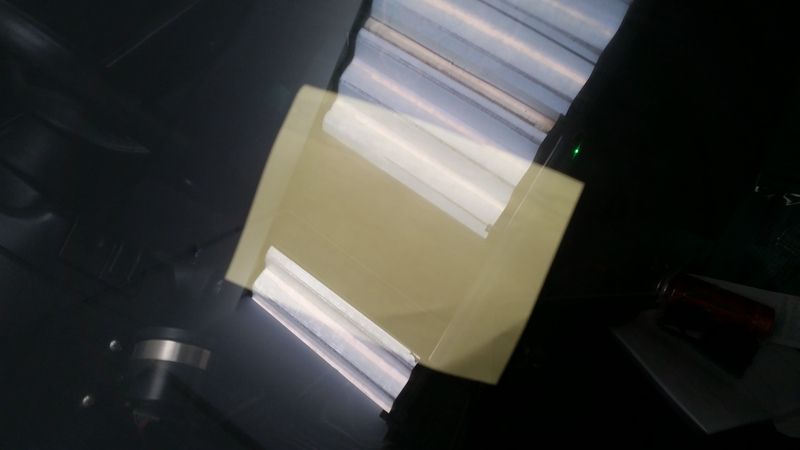 Front bumper and a bug on the wing. Treated the same way.  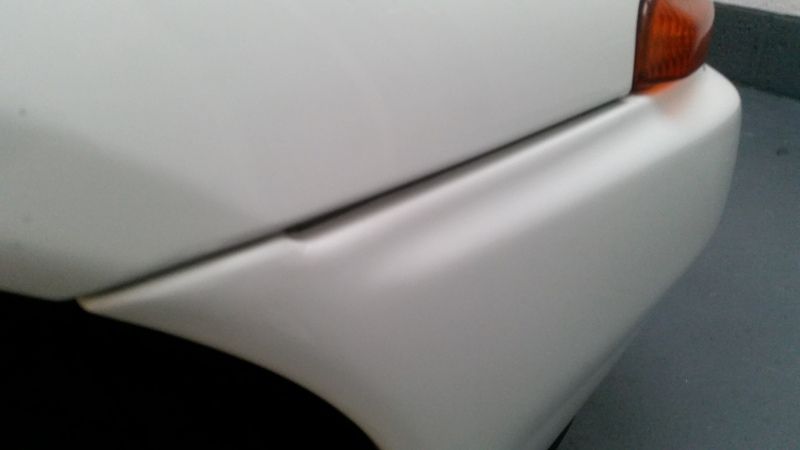 So on a car that has been pre-washed, washed, fallout removed and tar removed... Look at how dirty the lube is going on the rear of the car! 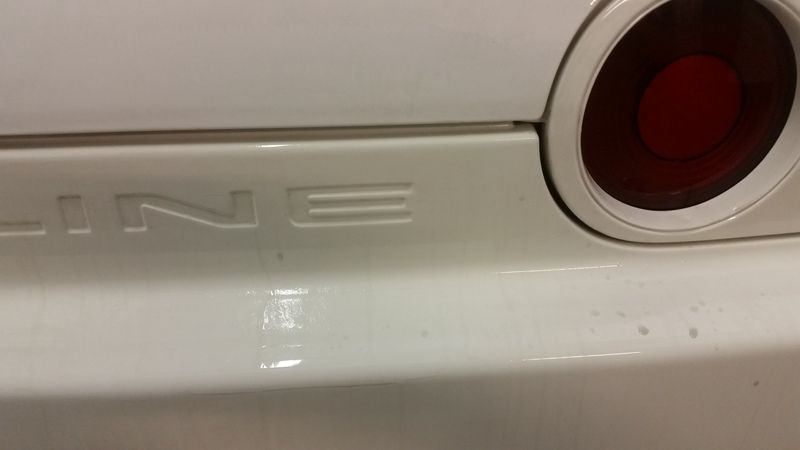 Claying 50/50!  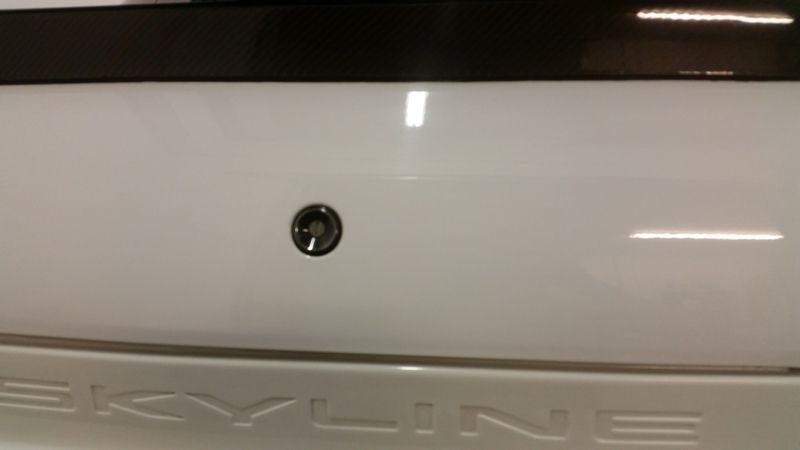 Tar spots. 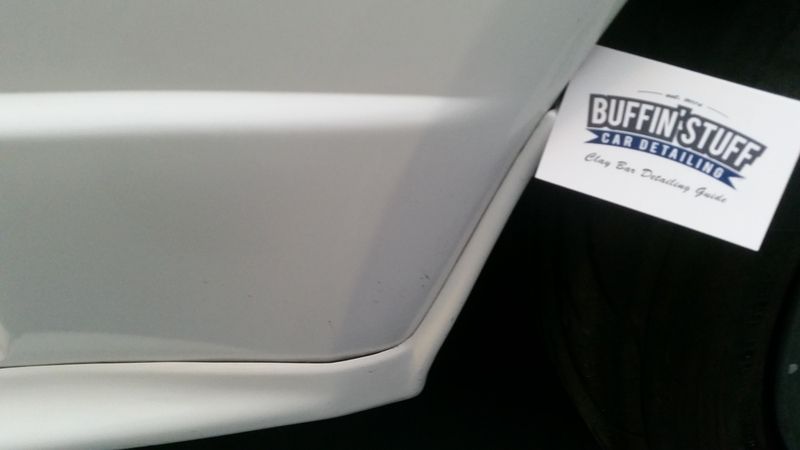 These were removed with ease. 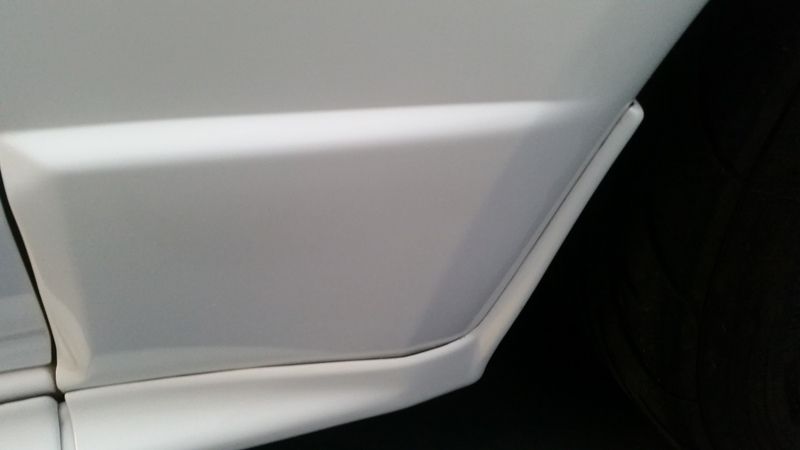 All Finished up. 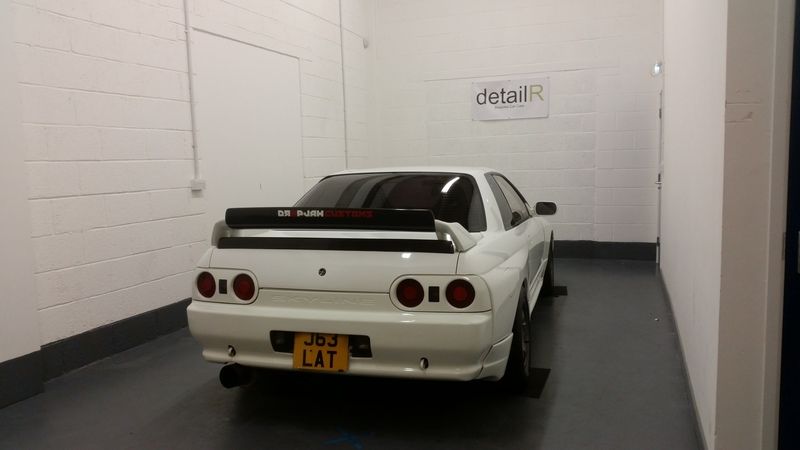 I have to say, this is honestly one of the best clays, maybe even the best that I have ever used. And I've used them ALL! It's very soft so it's very easy to nead and fold to find a fresh clean area when working. It picks up really well which surprised me for such a soft clay. You'll normally find the ones that pick up the most will be very firm. Being soft, it didn't cause a single bit of marring during use. An aggressive clay can sometimes cause a little damage on these soft paint types. All in all, this is a very, very good clay. very user friendly and does an amazing job. I'd definitely recommend it for price, value, ease of use and the results it's given so far. Thanks to Joe for sending it out! Thanks for reading. Any comments or questions always welcome 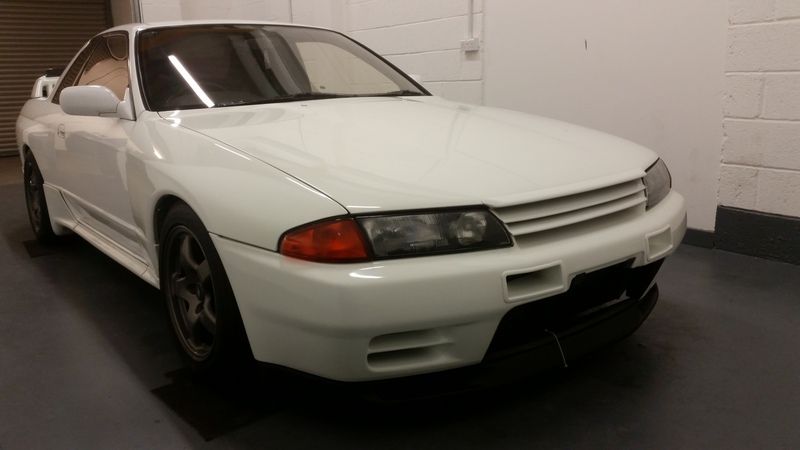 |
| |
|
|
|
|
|
|
|
my old MGB not long after purchase. giffer owner washed it with fairy liquid etc etc Left side before, right after one treatment. paint probably 10-15yo at the time  wash, claybar, meguiars "ultimate" polish, meguiars carnuba hard wax. did one panel per day by hand during lunchbreaks. currently using a liquid carnuba but prefer the hard wax. looking try a synthetic wax next, like meguiars nxt. |
| |
|
|
drdick
Part of things
Posts: 359
|
|
|
|
|
I'm glad I read to the end of this because for the first three pages I was all "what the curse word a clay bar?".
I'm in my 40s and the number of times I've washed a car is probably less than my age, I hate it, its boring and, basically, pointless. I get the local eastern europeans to jetwash my car every now and then, they do a bang up job for about 8 quid. But lets say I was feeling flush, are there companies out there that will clean my car with these miracle products?
|
| |
|
|
|
|
drdick
Part of things
Posts: 359
|
|
|
|
Wow, that does look sparkly. If I ever own a car that has decent paint or isn't covered in scratches, rust and dents then I could be tempted. |
| |
|
|
|
|
|
|
|
|
The more I read this thread, the more I think feel the need to give the old girl a treat and try some of this technology.
She actually scrubs up quite well, but this isn't the most paint friendly part of the world so it may work wonders in shifting the grime of years.
|
| |
|
|
|
|
|
|
|
Here, the concept of detailing is using some water to wash it so, in my mind thats still the case in the uk. the word "detailing" makes me reel in horror / cringe before anyone bites on that, don't forget the threads is called "perceptions on clay bars" |
| |
Last Edit: Jun 2, 2016 11:11:59 GMT by darrenh
|
|
tsoob
Part of things
Posts: 107 
|
|
|
|
Wow, that does look sparkly. If I ever own a car that has decent paint or isn't covered in scratches, rust and dents then I could be tempted. I kind of get a kick out of claying, polishing and waxing old bangers more than cars with good paint, as the transformation is sometimes amazing, especially on metallics |
| |
|
|
|
|