|
|
|
Apr 17, 2018 13:55:09 GMT
|
Rattlecan matt black / grey primer combo as a full disguise for all the impressive work underneath ? How did you get on with finding some nice bonnet clips to hold it in ? James I have a compressor and spray gun so will give that a go. First time for everything :-) Decided on the Car Builder Solution offering. This sits pretty flush and pulls the bonnet down. I will add a push button latch to the middle to hold it in place. 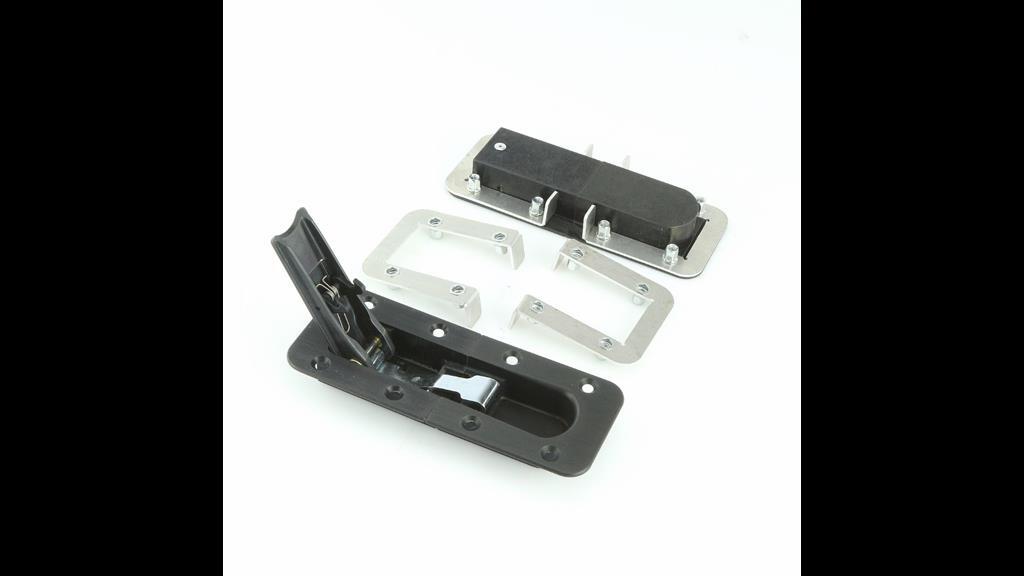 |
| |
|
|
|
|
crahel
Part of things

Posts: 210 
|
|
|
|
|
|
| |
Last Edit: Apr 18, 2018 4:41:17 GMT by crahel
1973 Lancia Fulvia s2 coupe (sold)
1998 Audi a4 sedan (sold)
2000 Nissan maxima (sold)
2007 Audi convertible.
|
|
|
|
|
|
|
I bought a pair of these when I had a standard bonnet and they are the makers of the ones I am planning to use. The Aerocatch is perfect for horizontal surfaces where you push down to lock but I need latches that can be fitted to the sides of the front clip and pull down, similar to the ones fitted to the Herald, Spitfire and E-Type. However, I will use the locking AeroCatch (or similar) option on the top of the bonnet as a location and security/safety device. |
| |
|
|
|
|
|
Apr 18, 2018 10:27:01 GMT
|
Just been surfing AliExpress and found these. 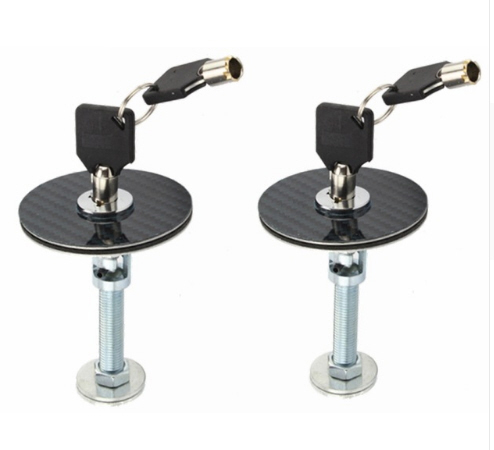 Perfect for clipping down the rear of the clip, and a lot cheaper and lighter than AeroCatch :-) £8.38 a pair including shipping :-) I will reduce the diameter of the plates (or even remove) as the bonnet is quite thick along the rear edge. |
| |
Last Edit: Apr 18, 2018 10:29:16 GMT by nalesutol
|
|
|
|
|
Apr 18, 2018 11:11:12 GMT
|
|
Looks like a Dzu style cam-lock. As I am in the market for something similar, link to vendor please?
|
| |
|
|
|
|
|
Apr 18, 2018 12:32:58 GMT
|
|
|
| |
Last Edit: Apr 18, 2018 12:34:05 GMT by nalesutol
|
|
|
|
|
Apr 18, 2018 13:47:37 GMT
|
|
Thanks. I like the push-button type since engine compartment security is not a driving factor.
|
| |
|
|
|
|
|
Apr 18, 2018 14:59:07 GMT
|
|
|
| |
|
|
|
|
|
Apr 19, 2018 20:21:53 GMT
|
Although the splitter is pretty stiff, the area above it that runs up to the grill area is too flimsy and bends. So, to address this and increase splitter thickness I am sticking some closed cell foam sheet on then covering with a couple of layers of wet lay carbon. The foam can be shaped to a certain extend with the application of heat but still need to be pressed down firmly. After the failure with vacuuming yesterday I decided to use a traditional method - clamps and tape :-) Not pretty but, hopefully, effective. I will find out tomorrow. If successful I will use the same method on the splitter. 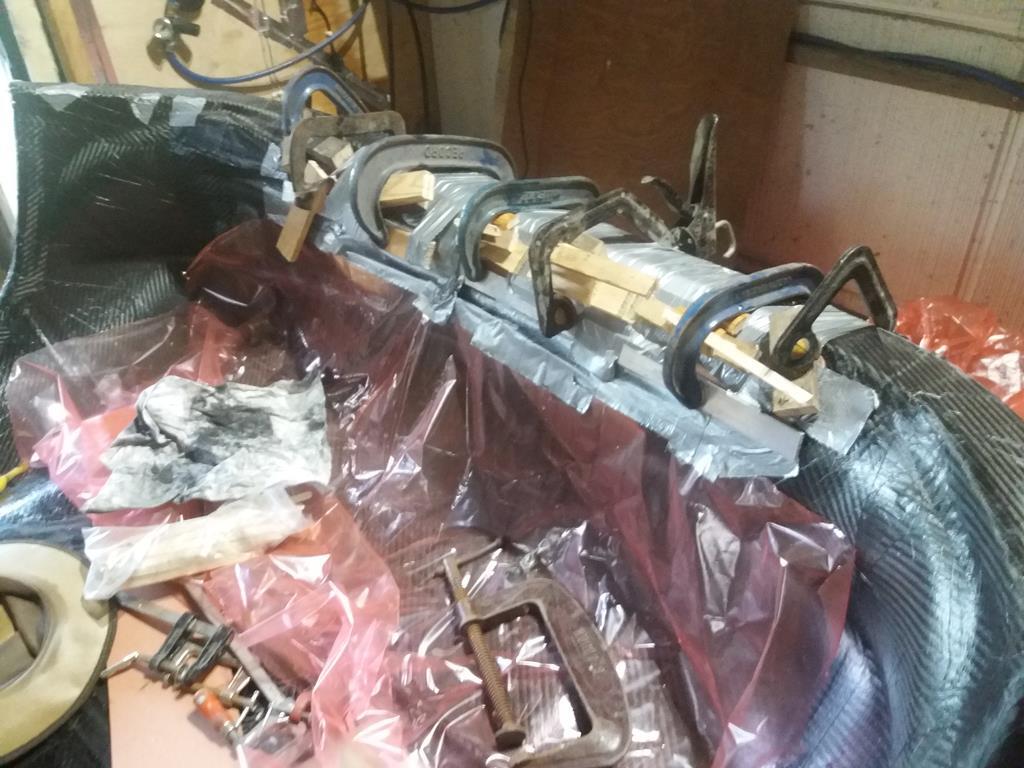 |
| |
|
|
|
|
|
Apr 20, 2018 19:12:38 GMT
|
Success. 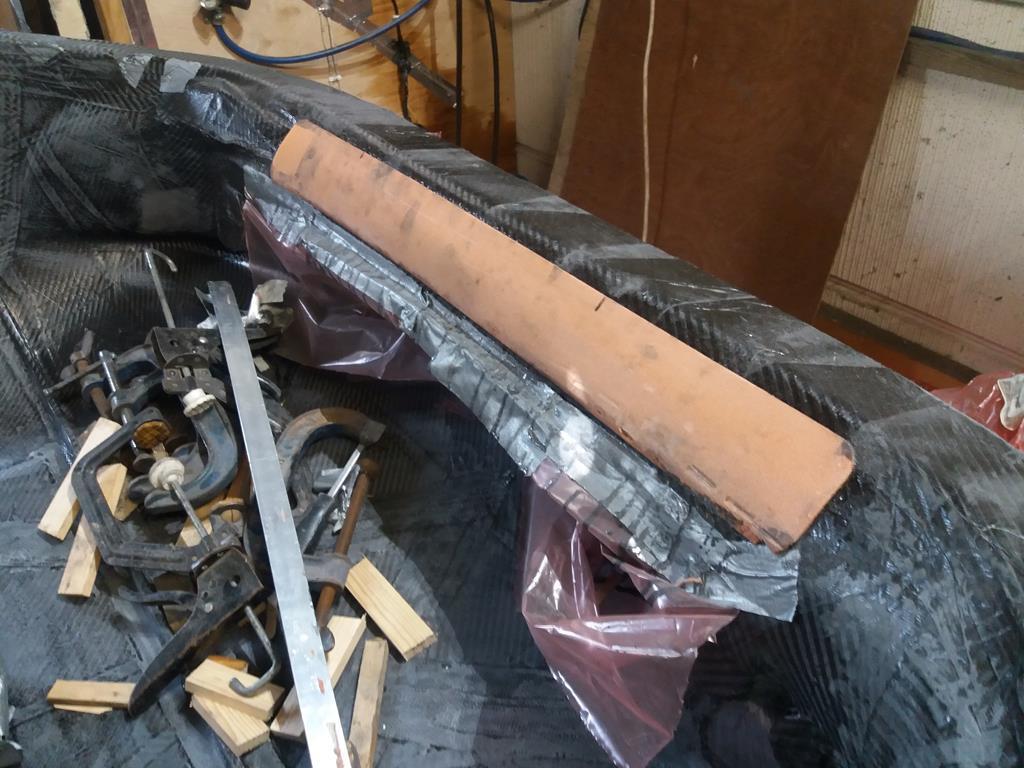 Next task is to add the foam to the splitter. |
| |
|
|
|
|
|
Apr 21, 2018 21:58:51 GMT
|
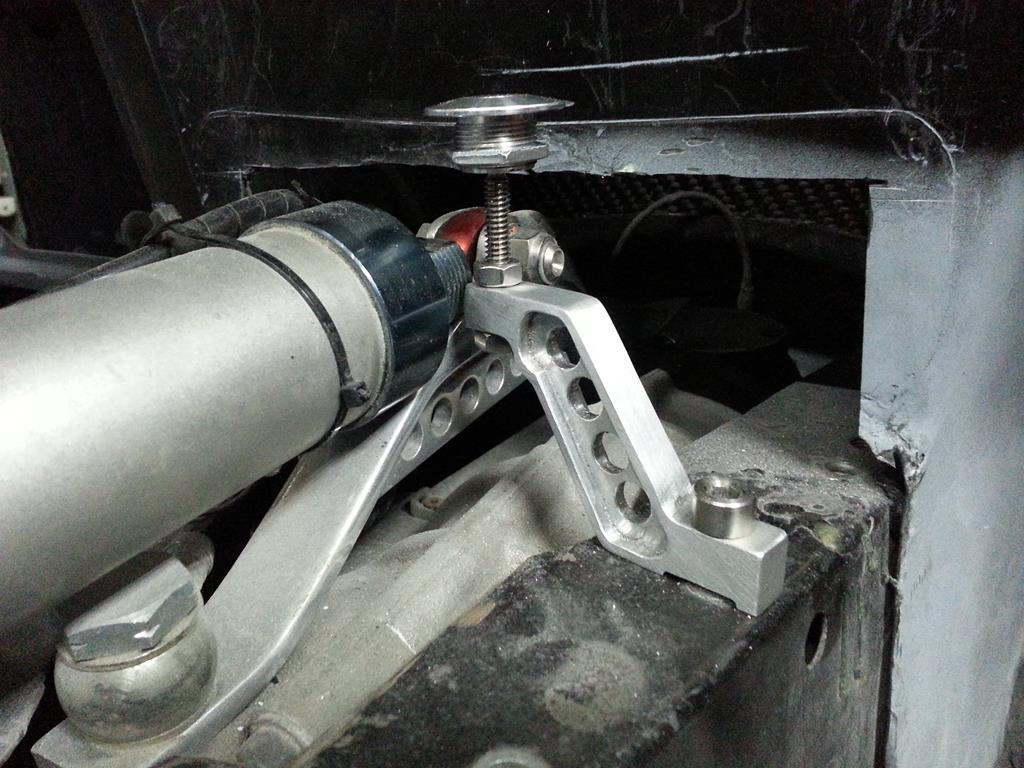
I have been ruminating on how to attach the front of the clip to the chassis. It needs to be hinged but also removable. After playing on CAD for a while, and sticking to my mantra of KISS I have come up with this: Frame is 20mm od 19mm id titanium tube and bolts to front suspension chassis uprights. the same tube is bonded to the front of the clip just above the splitter line. To join the two together two 19mm od 16mm id tubes are welded together to form an L-shape. One end (B) slides into tube A and the other (C) slides into tube D and secured with a removable clip. The bonnet can rotate around tube B but can be removed by releasing the retaining clips. Tubes B and C will have to be machined very slightly undersize so they turn smoothly inside tubes A and D. Any thoughts? 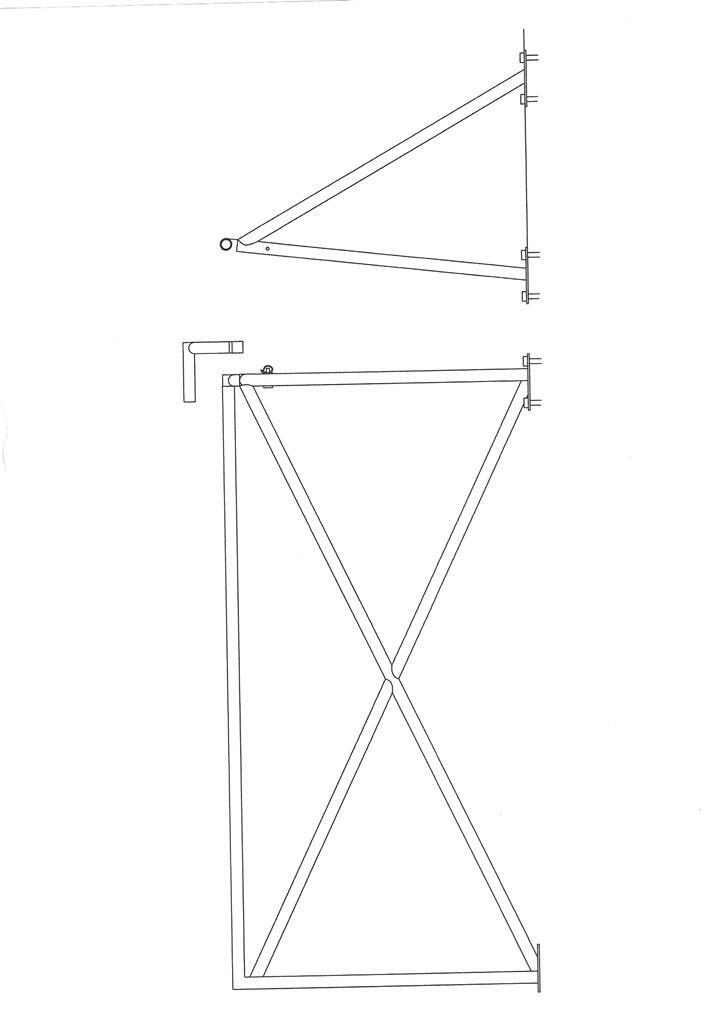  |
| |
Last Edit: Apr 21, 2018 22:06:21 GMT by nalesutol
|
|
|
|
|
Apr 22, 2018 10:11:05 GMT
|
|
Frame update:
Now aluminium, 28mm OD frame and 25mm OB hinges. As my original titanium design was a little marginal on tube wall thickness for the diameter, larger tubes end up a similar weight to aluminium but around £100 more expensive!
|
| |
|
|
|
|
|
Apr 23, 2018 16:40:01 GMT
|
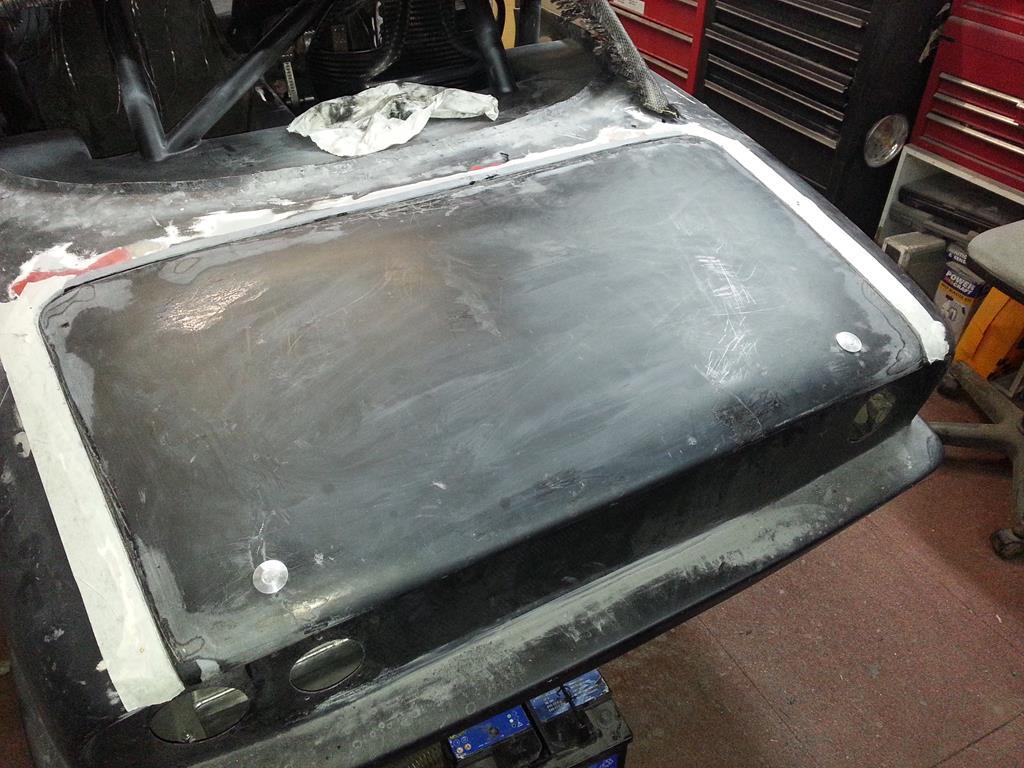
Started on bonnet repair. Filled in bulges from the back a few days ago and sanded them flat today. Requires some more reinforcement and holes filled but started to come together. This will end up a lot heavier than I hoped but it will do for now. Once fitted I will decide whether I make a new bonnet section or not. 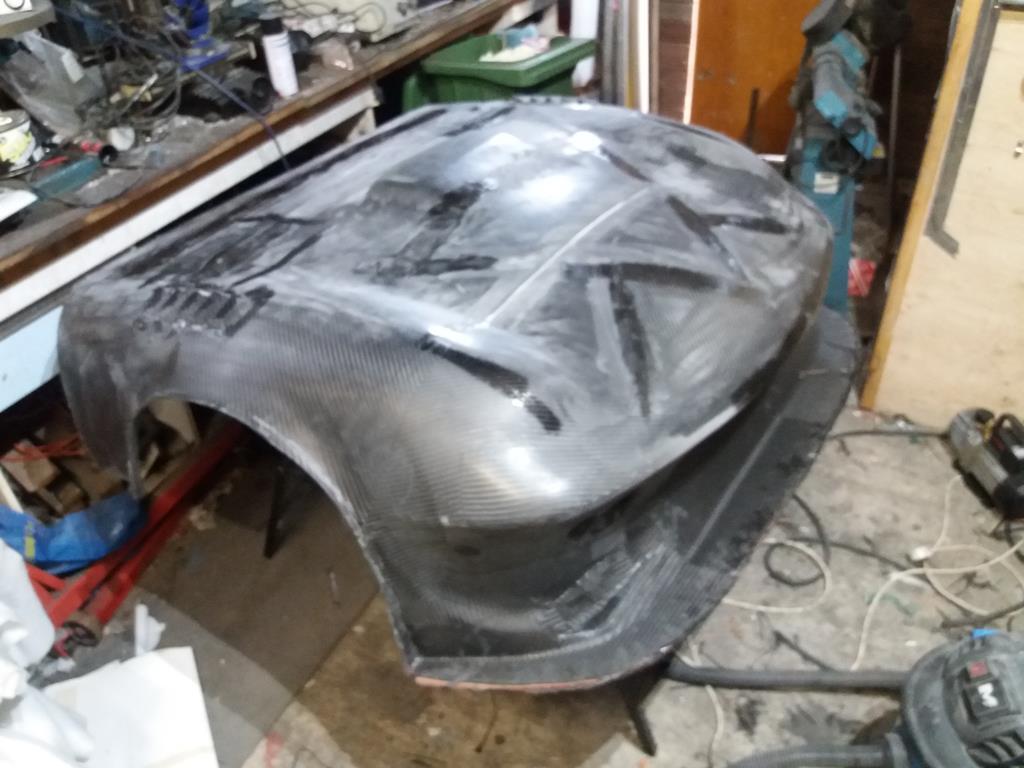 |
| |
Last Edit: Apr 23, 2018 20:58:44 GMT by nalesutol
|
|
|
|
|
Apr 24, 2018 13:04:22 GMT
|
|
Elan is back from wirer's, with a list of jobs for me to do. Then it will be going back for final fitting of sensors and commissioning. Nearly, but not quite, there :-)
|
| |
|
|
|
|
|
Apr 24, 2018 17:25:46 GMT
|
|
Well done on the bonnet and hinge fitting - Do you have a date in mind that you would like to get it up and running for?...I would say finished, but I suspect there will always be things that you will want to improve!
|
| |
|
|
|
|
|
Apr 24, 2018 17:38:54 GMT
|
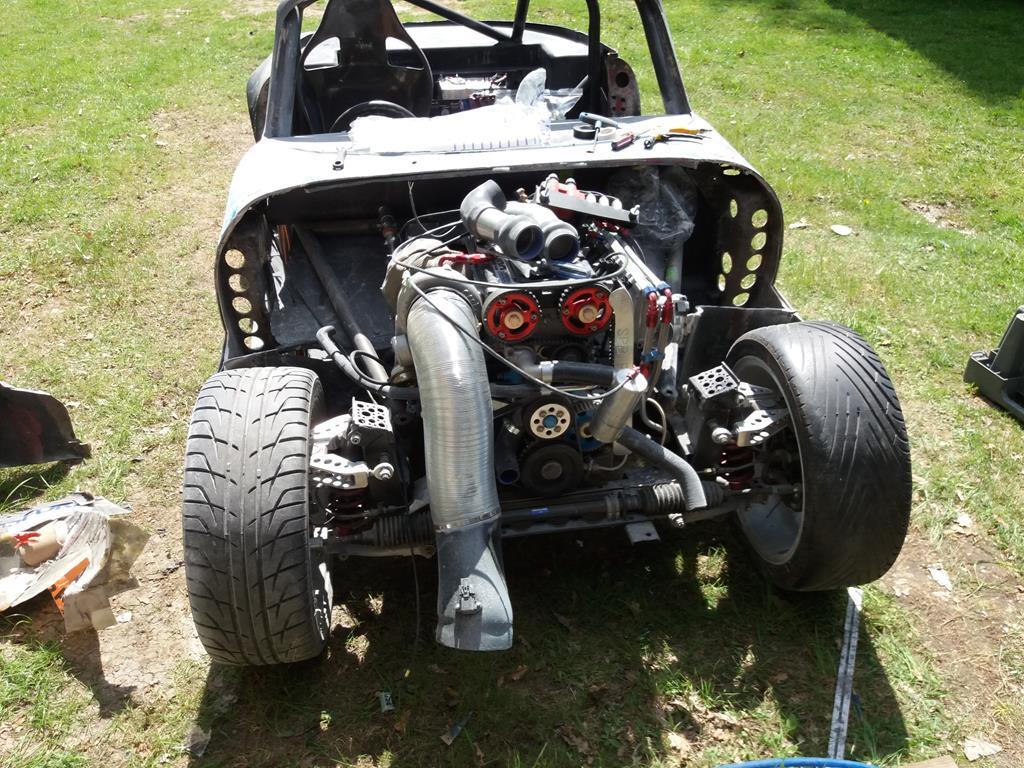
OK, point of no return has been reached and passed. I thought that I might be able to remove the front in one piece but this proved too awkward, so I just hacked it off! Managed to burn out one grinder in the process :-) What has been removed weighs 19kg and the bonnet was around 1kg, so 20kg so far. The inner wings are approx 8mm thick so they will be replaced. This piece weighs as much as my new front weighs at the moment (6.6kg) 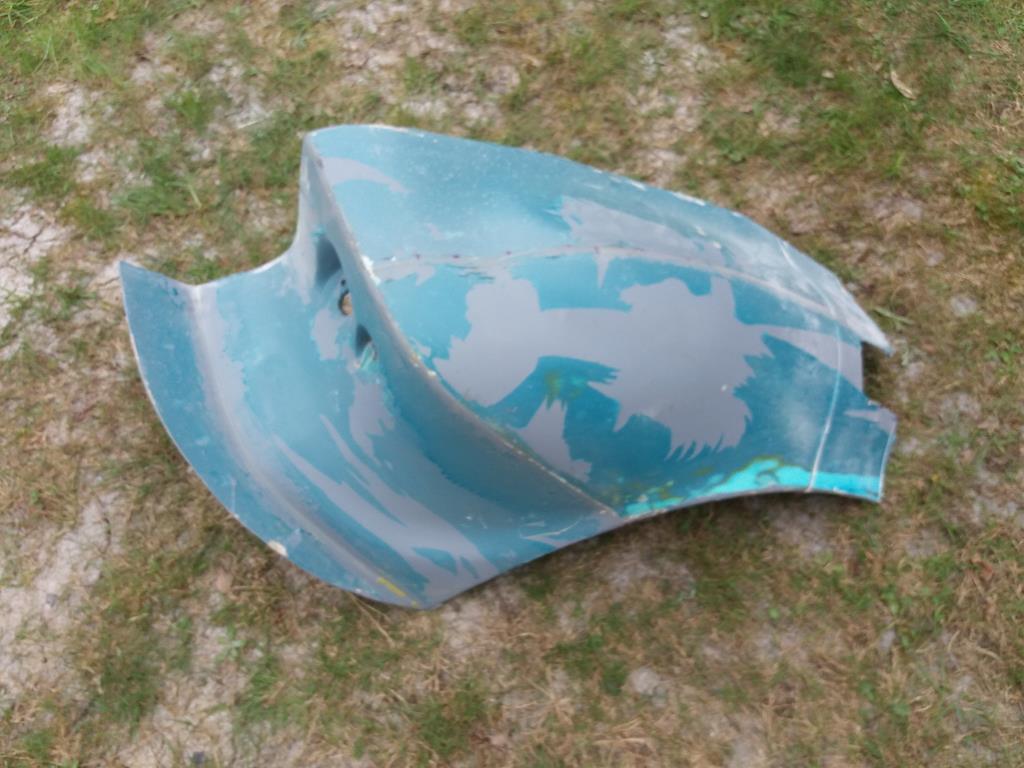 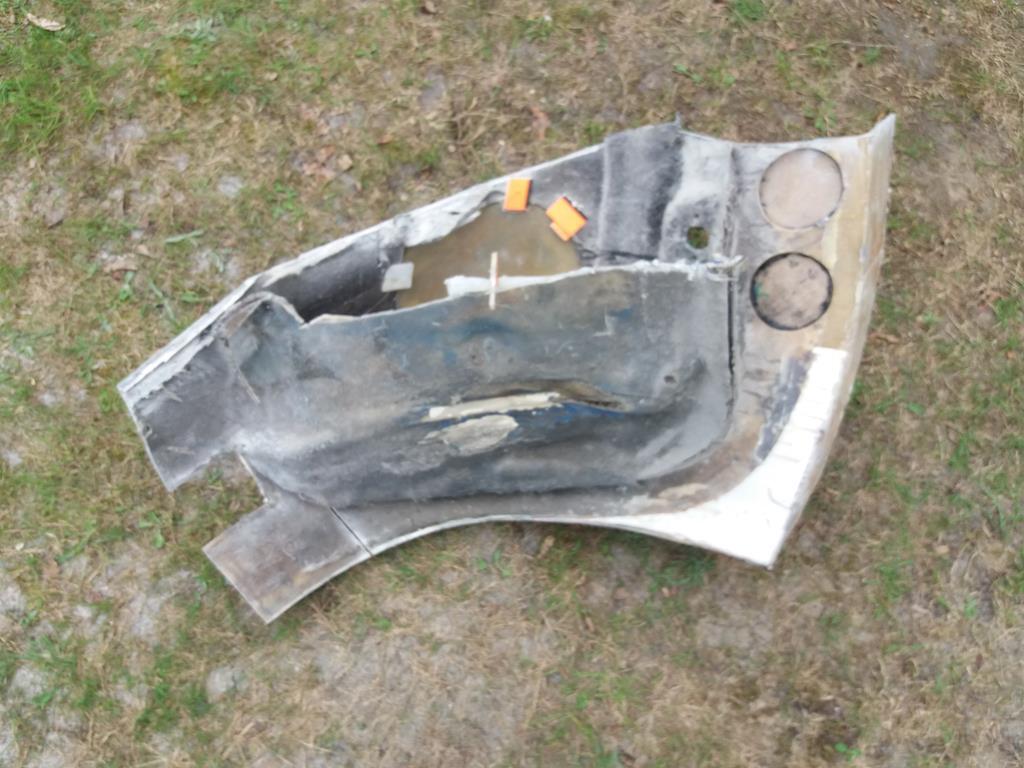 Radiator and intercooler  |
| |
Last Edit: Apr 24, 2018 17:47:13 GMT by nalesutol
|
|
|
|
|
Apr 25, 2018 20:54:59 GMT
|
|
|
| |
|
|
mk2cossie
Club Retro Rides Member
Posts: 3,035
Club RR Member Number: 77
|
|
Apr 25, 2018 21:19:15 GMT
|
Is there an elephant missing it's trunk somewhere?  |
| |
|
|
bstardchild
Club Retro Rides Member
Posts: 14,938
Club RR Member Number: 71
|
|
Apr 25, 2018 21:33:16 GMT
|
|
Christ everything I look at has holes in it!!!!
|
| |
|
|
|
|
|
Apr 25, 2018 22:13:50 GMT
|
Christ everything I look at has holes in it!!!! And your point is? :-) |
| |
|
|