jamesd1972
Club Retro Rides Member
Posts: 2,907  Club RR Member Number: 40
|
|
Nov 29, 2023 15:36:34 GMT
|
|
Looks nice, check the date (DOT code) on the tyres as they can often be quite old so a bargaining point. Also worth a TER check ?
Getting close. Going to have to go back on your diet !
James
|
| |
|
|
|
|
|
|
|
Nov 29, 2023 18:51:58 GMT
|
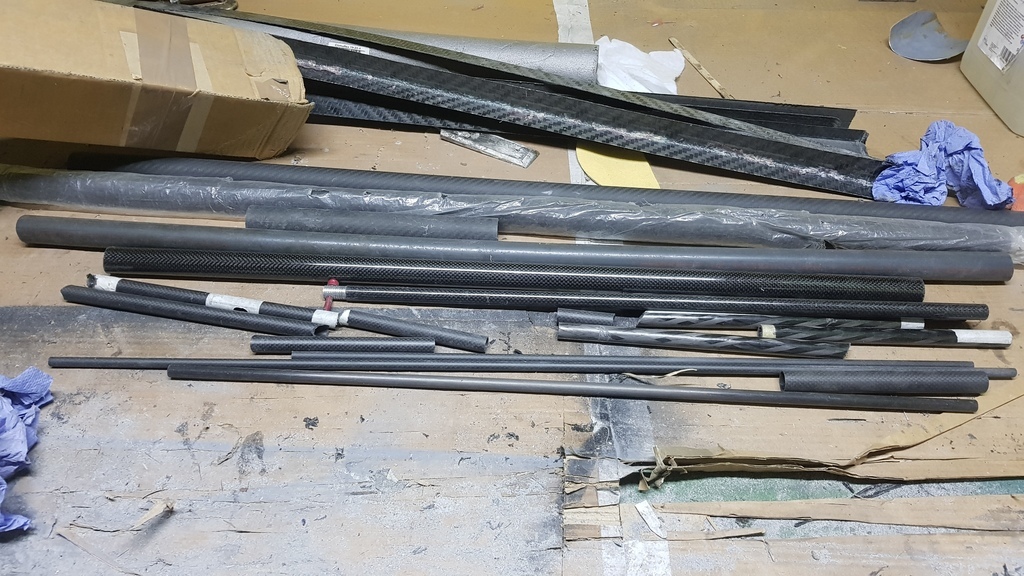
On a roll now :-) Aluminium sheet arrived today so I can get started on molds for two more aero projects. Aluminium is a good mold material as it gives a nice, smooth finish to the carbon without any work required :-) Just need to make sure that the aluminium is up to temperature otherwise the surface con be full of pinholes as the resin doesn't flow properly. 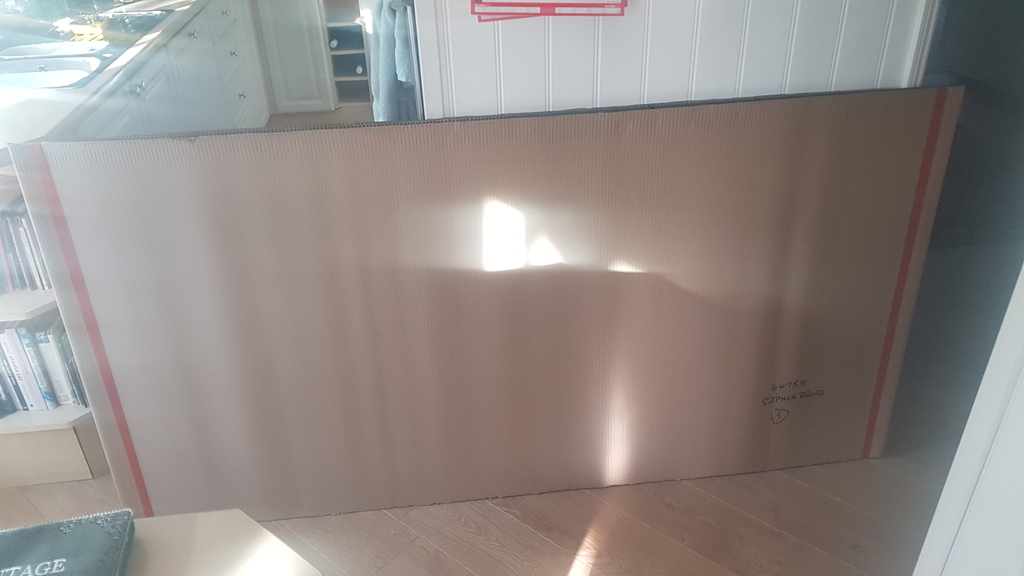 |
| |
|
|
|
|
|
Nov 29, 2023 18:54:38 GMT
|
Looks nice, check the date (DOT code) on the tyres as they can often be quite old so a bargaining point. Also worth a TER check ? Getting close. Going to have to go back on your diet ! James Thanks, good idea. I will do a TER check. Brain James keep a record of registered owners. Yes, I have put on a couple of Kgs recently so back on the treadmill :-) |
| |
Last Edit: Nov 29, 2023 18:56:50 GMT by nalesutol
|
|
|
|
|
Nov 30, 2023 18:48:19 GMT
|
Keeping to my rule of showing the good, bad and ugly, this is my paint problem. I naively thought that the paint would fill these small scratches, what a silly boy (or words to that effect that RR would censor) I was. So, so far I have gone over most of the clam, apart from the front area, with 80 grit to get the worst out. Once the front is done I will go over again with 320. Hopefully that should be smooth enough. 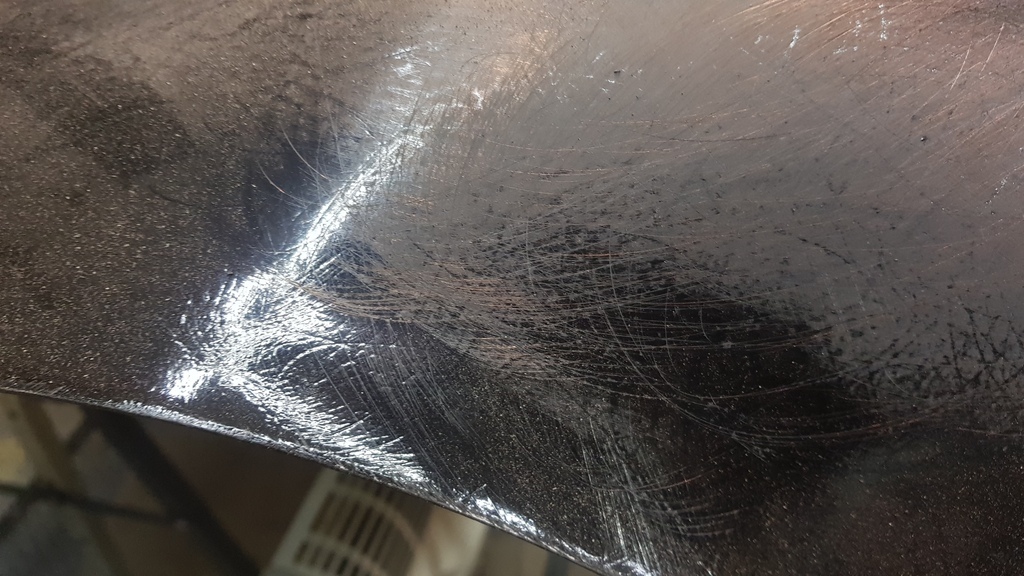 Started on the mold for the next aero part. However I need some more vacuum bagging material so I will start laying up the prepreg tomorrow with the bagging arriving on Saturday. Fortunately the prepreg lasts over a month at room temperature and it certainly isn't that in the garage at the moment! 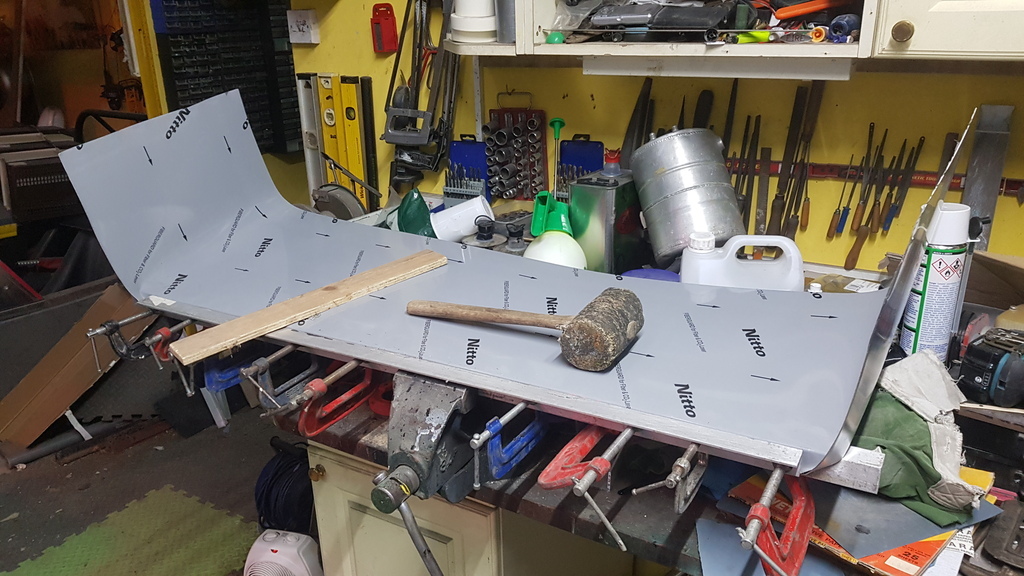 |
| |
|
|
|
|
|
|
|
|
You would be better to just key the paint and shoot some high build primer over the lot, gloss will always show the scratches.
I would recommend Lechlar Green ti high build, lovely stuff.
Shoot it over with a large nozzle gun and then flat it back with 800 grit paper.
|
| |
|
|
|
|
|
|
|
You would be better to just key the paint and shoot some high build primer over the lot, gloss will always show the scratches. I would recommend Lechlar Green ti high build, lovely stuff. Shoot it over with a large nozzle gun and then flat it back with 800 grit paper. Cheers, I will look this stuff up. |
| |
|
|
|
|
|
|
|
|
|
| |
Last Edit: Dec 3, 2023 18:14:10 GMT by nalesutol
|
|
|
|
|
|
|
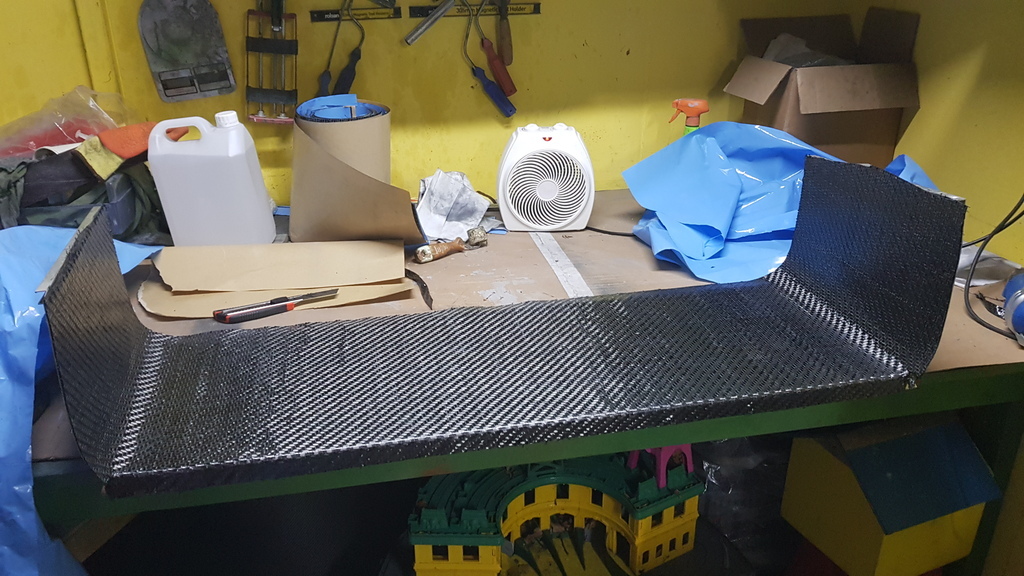
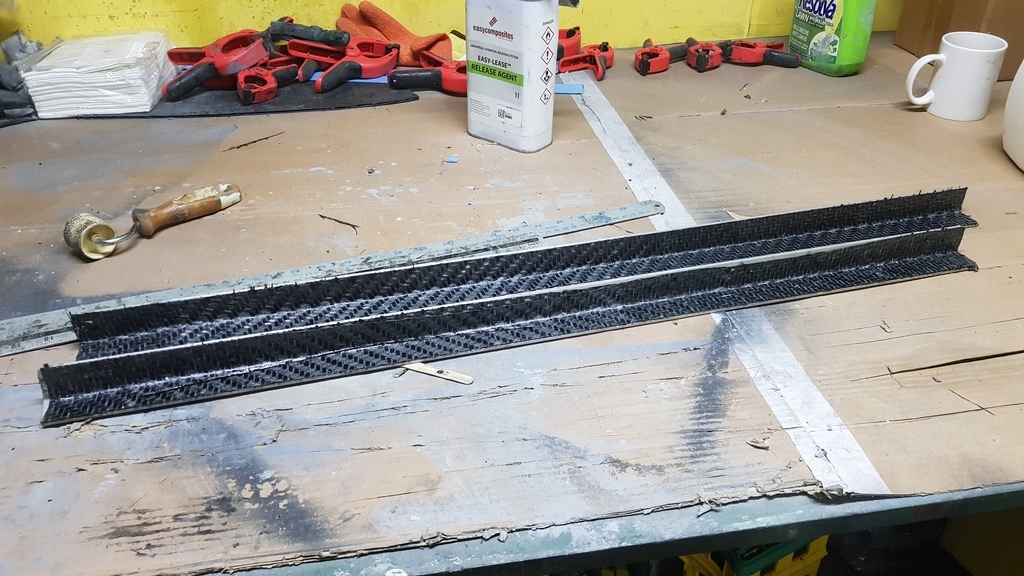
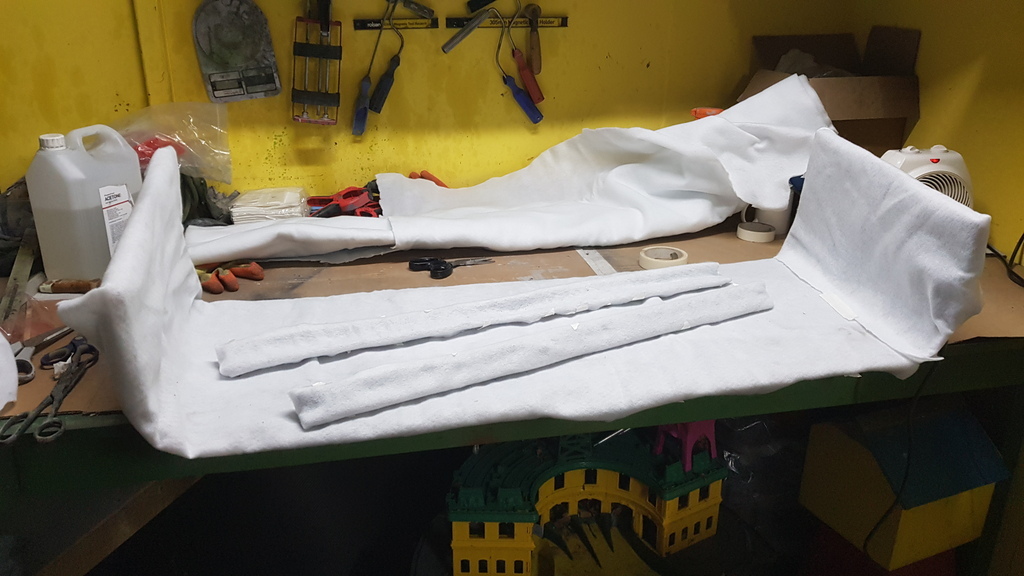
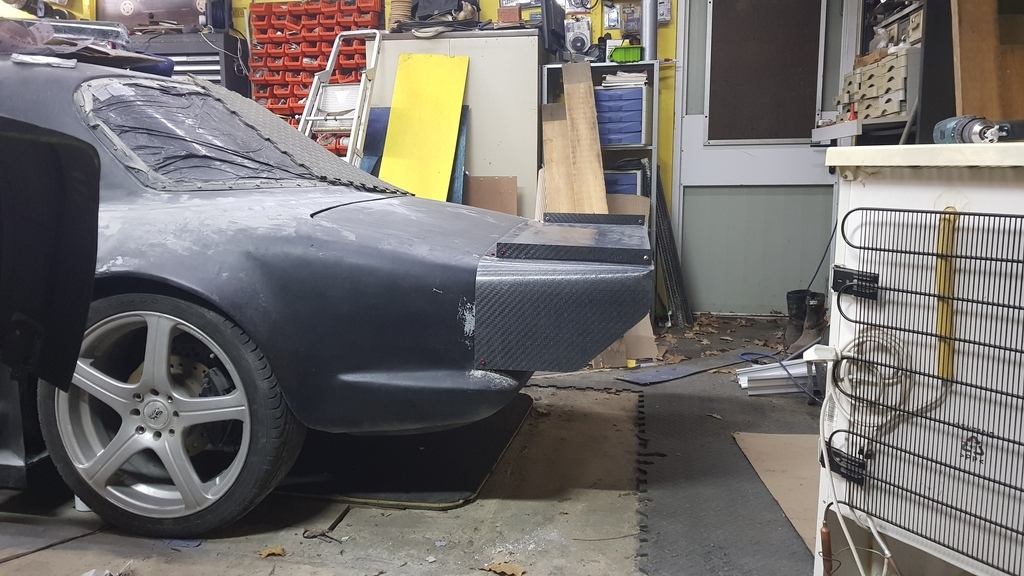
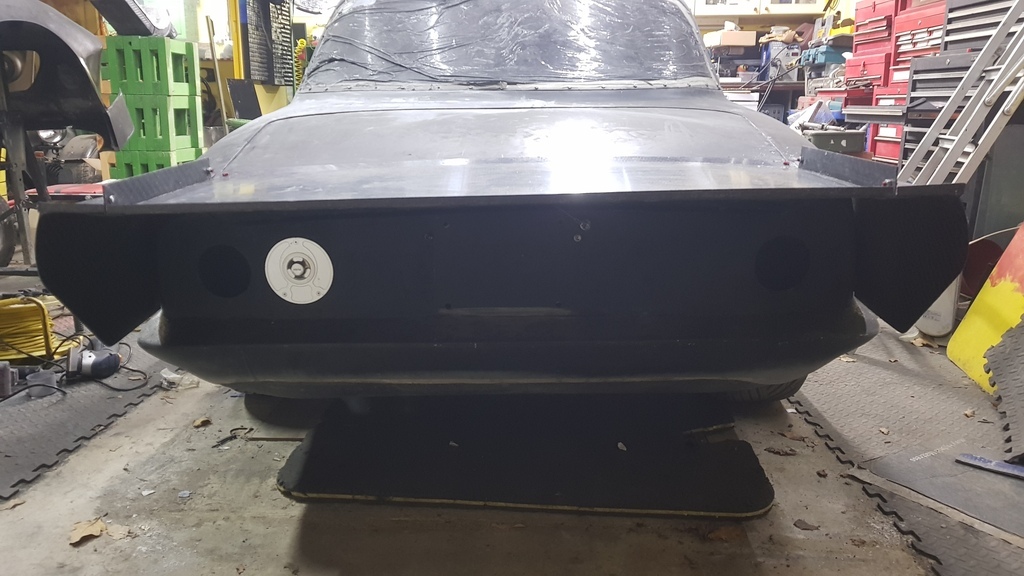
Vacuum bagging material arrived this morning so I hightailed it up to the garage to bag the aero stuff. Bagged and pulling vacuum for first time. You usually have to play around a bit, letting air back in so you can reposition the bag so that no area is bridged, the bag must be in contact with the part otherwise proper compaction of the carbon will be compromised. In theory, you should be able to make the back air tight so the pump can be turned off. However, I have never managed to get these large bags to be 100% sealed so the pump stays on for the duration of the curing process. My oven, for those who haven't seen inside. 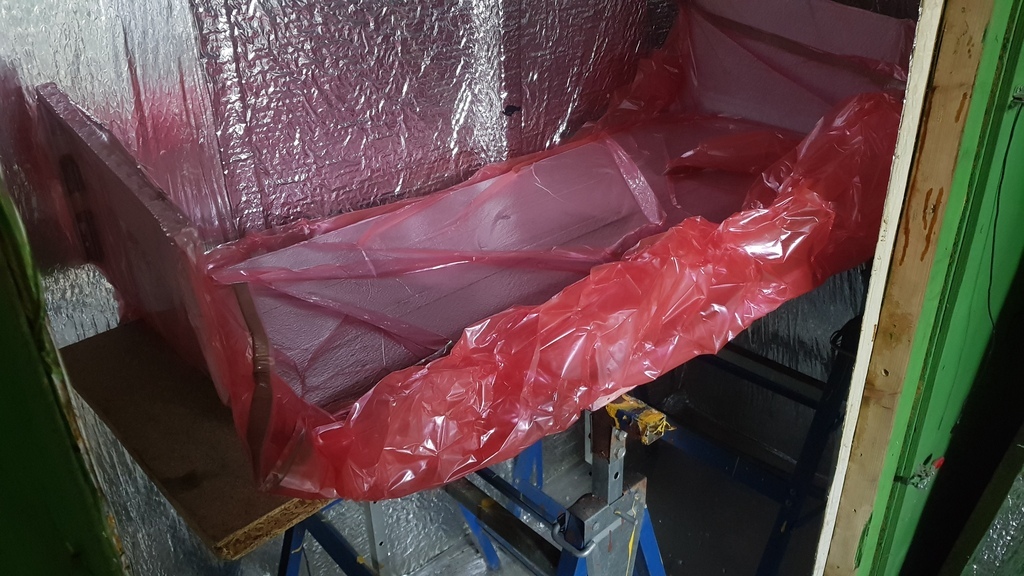 Curing process went to plan, but I had a bit of a panic when unwrapping the part. The two sides had bowed outwards away from the vertical. I guessed due to the different expansion and contraction rates of the aluminium and CF. I was working out how I was going to make new end sections as I puled the part off of the mold but I needn't have worried. When I separated the CF from the aluminium the CF sprung back into place. I must assume that the stresses of cooling distorted the aluminium but the CF was cured so it retained it's shape. Phew! 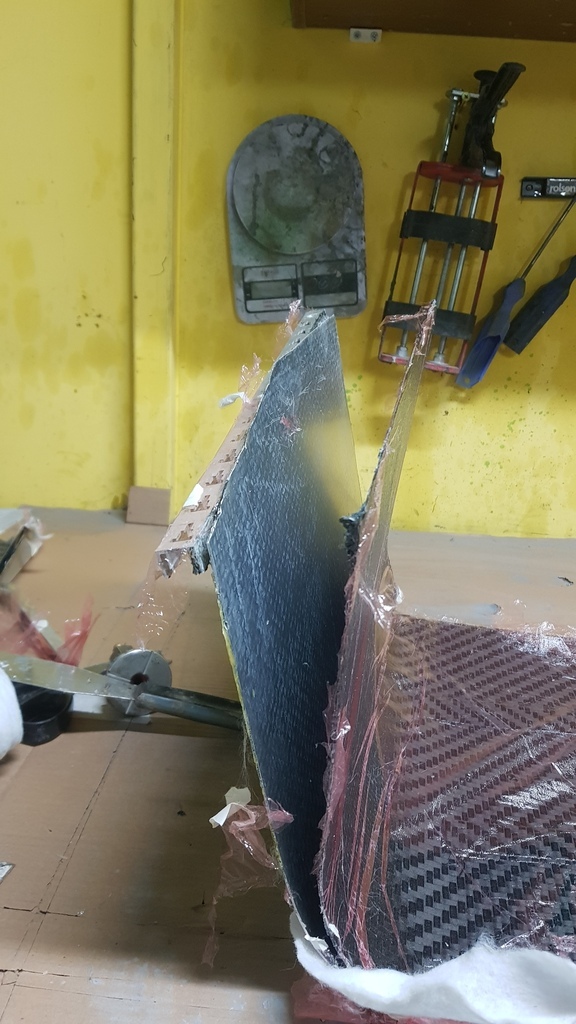 Part looks OK, with only a few pinholes. It also fits quite snugly so that is good. Nest job is to trim the Gurney flap and first fit so I can shape the end plates. I also need to cut into three pieces so the boot can still be opened. That is what the angle strips are for. It weigh in at just over 1.3kg. That is heavier than my doors! However it is three layers thick, rather than the doors' two. This is due to the large flat section that would tend to sag with only two layer and it also has higher loadings on it than the doors. I added two 30mm wide strips made from 2 layers of CF lengthways to add extra stiffness. 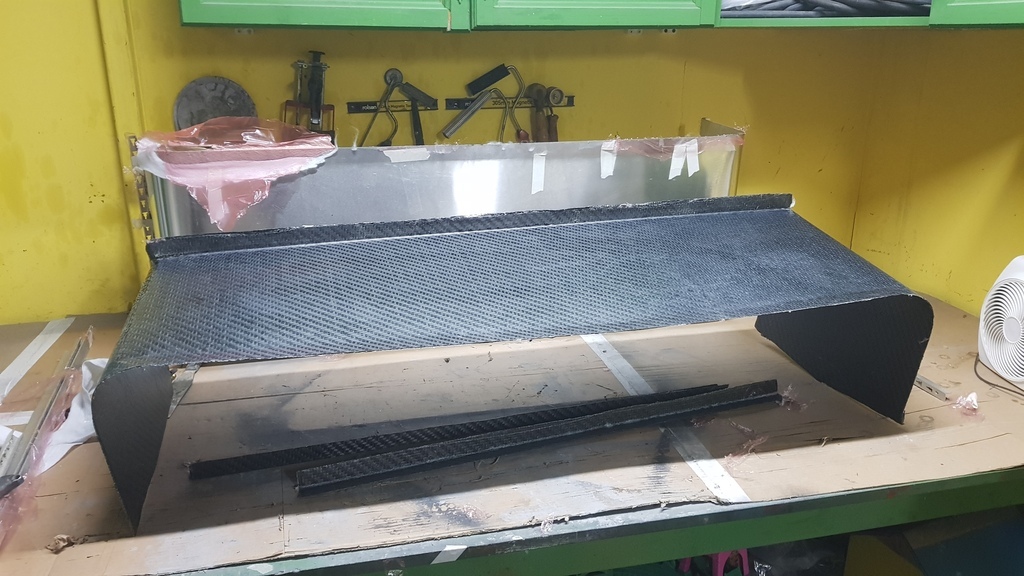 |
| |
Last Edit: Dec 4, 2023 23:26:46 GMT by nalesutol
|
|
|
|
|
|
|
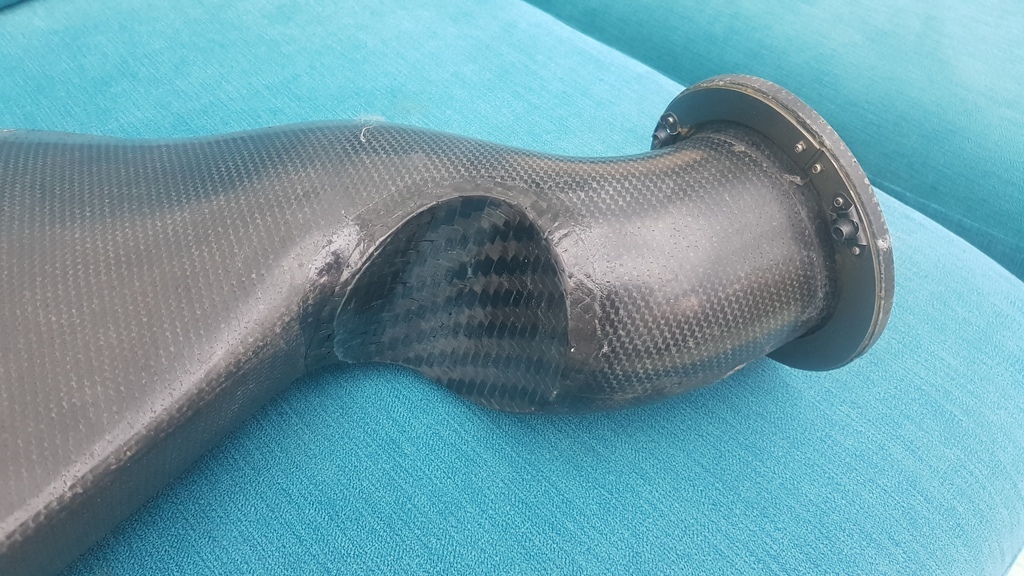
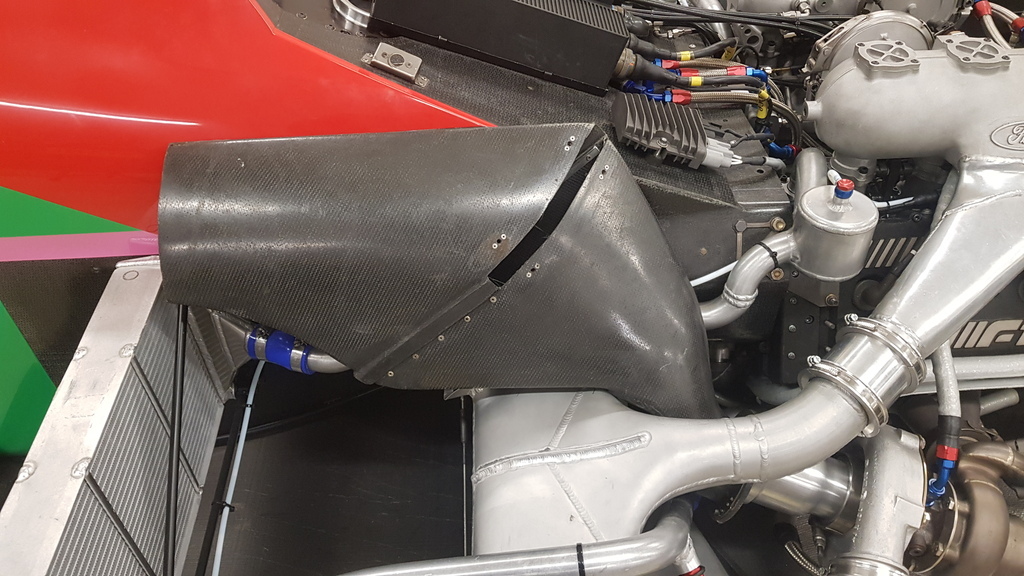
Light relief. My son, Alex, has asked if I can patch this modified air duct. It is for a 1987 F1 Benneton. The car has been a static display exhibit for some years but the owner now wants it to become a runner. Many parts were missing and there are no available plans and very few photos so they just have to do the best they can.One issue they have is that the air duct on the left side fouls the radiator top pipe. Alex has cut a chunk out of it that he wants filled with carbon, can I do it? 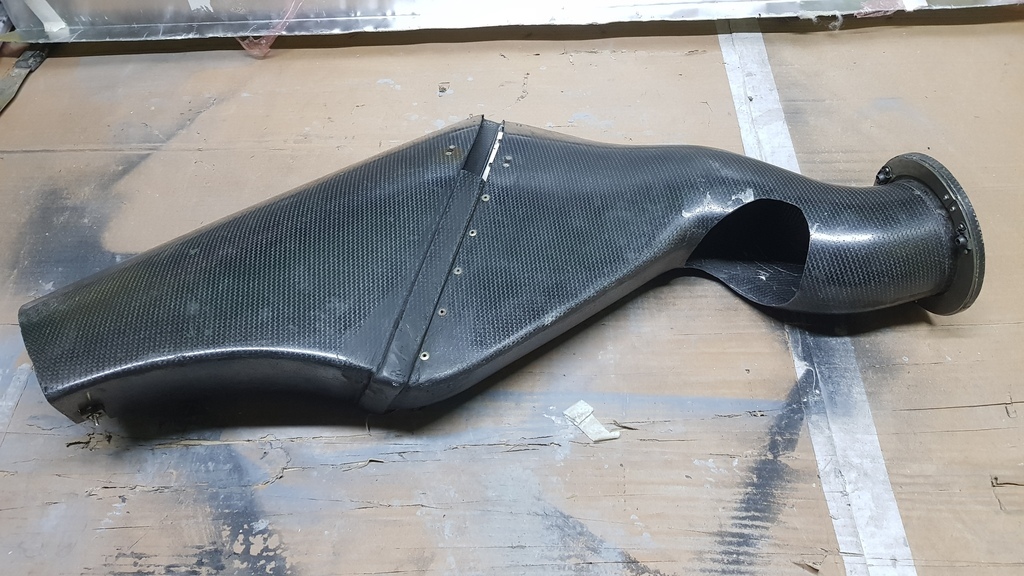 Never one to refuse a challenge, I started on it this evening. Wet lay carbon or prepreg? Decided on prepreg as it is less messy and easier to get a neat edge. First job was to tidy up the cut edge and make an aluminium plate to fit. This will act as both a mold and support. I will use 2 layers of prepreg, one each side so as to sandwich the existing carbon between them. Only a small section will be visible (one edge) but I still want to make a neat job. 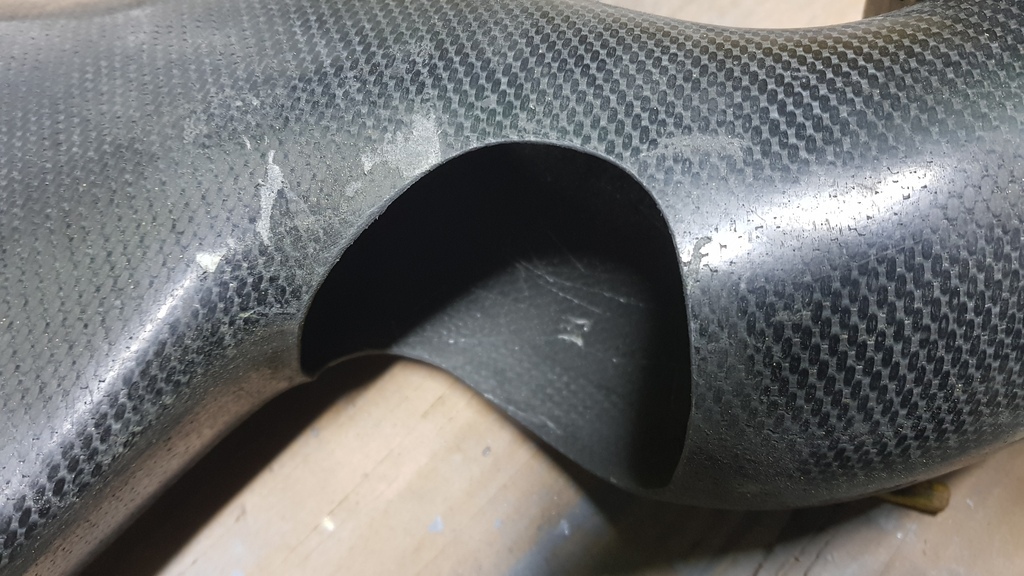 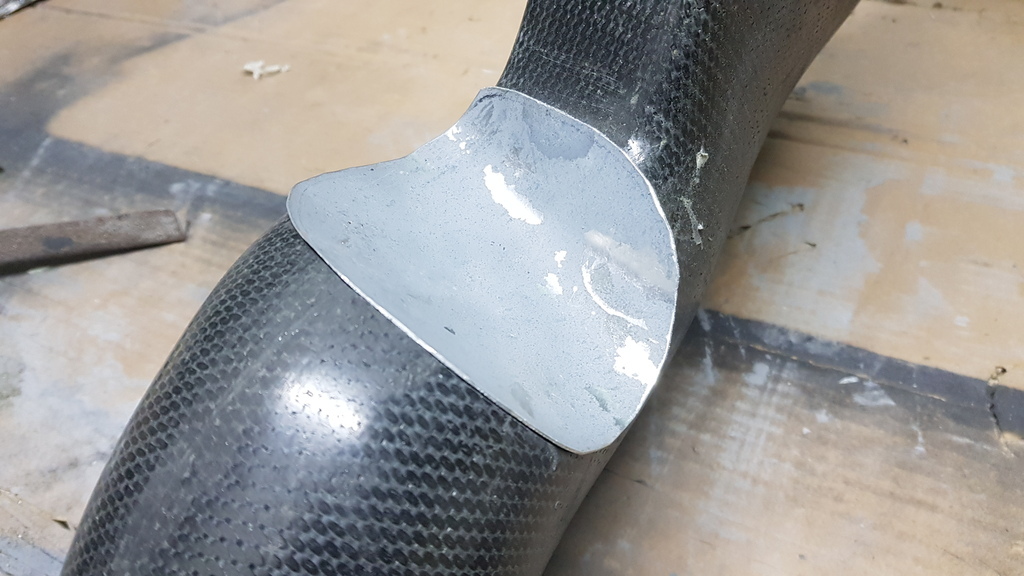 The trickiest part will be bagging. The bag has to go all round the intake, inside and out, so both faces experience a vacuum, otherwise there is a risk of the duct distorting or even collapsing under 14.7psi of pressure, not a good idea. |
| |
Last Edit: Dec 5, 2023 22:07:26 GMT by nalesutol
|
|
|
|
|
|
|
|
Could you fit an inner tube (cut open and cut ends shut to make a sausage) inside the part and provide counterpressure to the vacuum? It'll take some balancing, but may be doable?
|
| |
|
|
|
|
|
|
|
|
No need. It is 'simply' a matter of making the bag long enough so it can be turned in on itself and passed through the airbox.
The inner tube idea isn't silly, however. I have used this method, but with a balloon, to pressurise the internal side of a hockey stick mold. This method can produce much more pressure than vacuuming can so it is more akin to a mini autoclave :-)
|
| |
Last Edit: Dec 8, 2023 9:08:56 GMT by nalesutol
|
|
|
|
|
|
|
Past the point of no return :-) 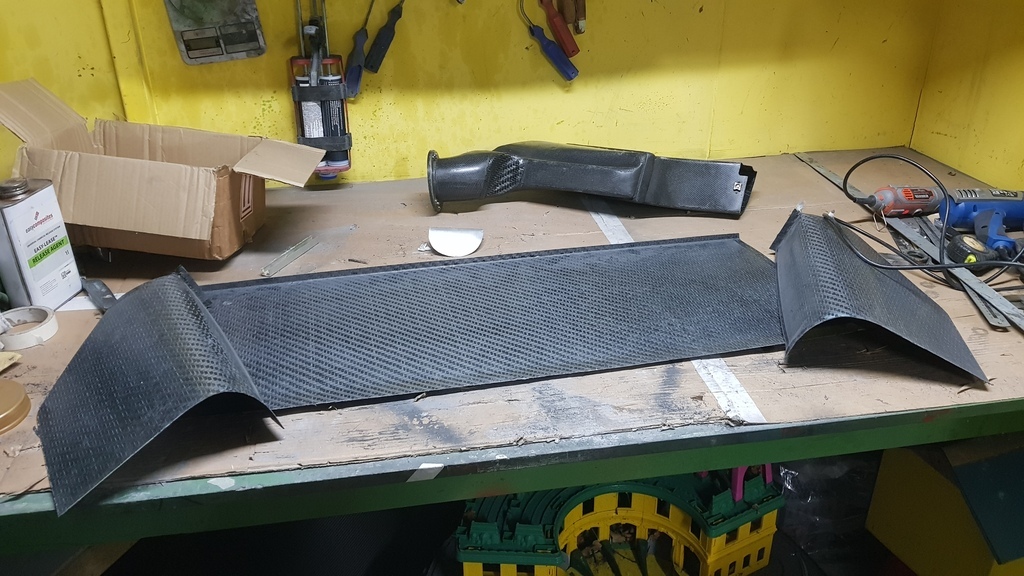 |
| |
|
|
|
|
|
|
|
|
|
Pretend that it is a few days later :-) 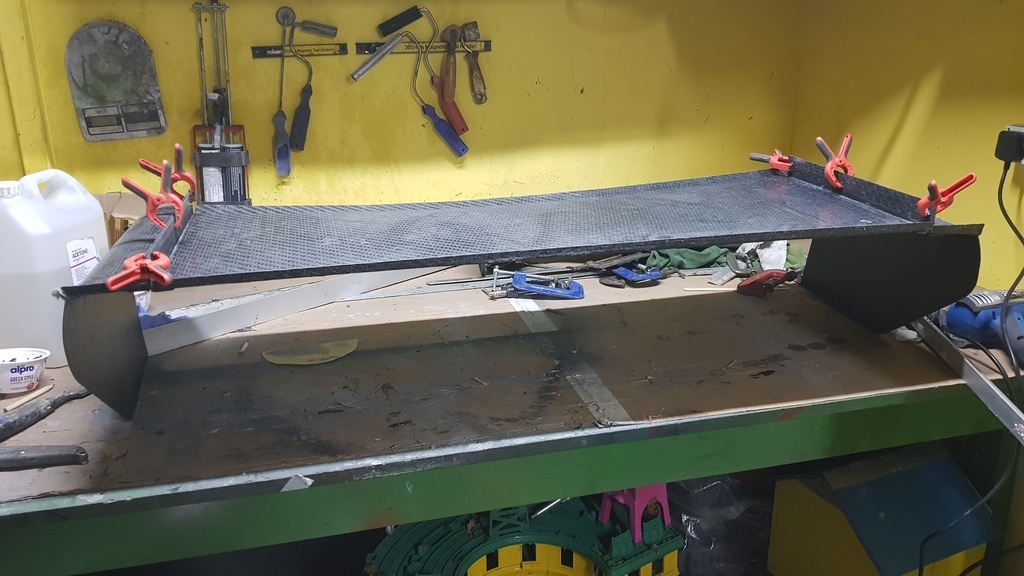 |
| |
Last Edit: Dec 9, 2023 21:58:24 GMT by nalesutol
|
|
|
|
|
Dec 10, 2023 15:04:52 GMT
|
|
|
| |
|
|
|
|
|
Dec 10, 2023 18:18:05 GMT
|
|
One possible option:
|
| |
|
|
|
|
|
Dec 11, 2023 21:11:47 GMT
|
|
When making CF angle sections, can I replace the vacuum bag with a second length of angle and lots of clamps?
|
| |
|
|
|
|
|
Dec 13, 2023 21:08:19 GMT
|
|
|
| |
|
|
|
|
|
Dec 13, 2023 21:15:32 GMT
|
|
|
| |
Last Edit: Dec 13, 2023 22:25:30 GMT by nalesutol
|
|
jamesd1972
Club Retro Rides Member
Posts: 2,907
Club RR Member Number: 40
|
|
Dec 13, 2023 22:31:19 GMT
|
|
Trying to get low drag for high top speed ?
James
|
| |
|
|