|
|
|
Aug 31, 2016 16:04:39 GMT
|
This is the "failed to get to the Gathering" update :/ So I decided with a week to go that I really really wanted to go to the Gathering. It's 40 miles from me, which is nothing compared to what many people do, and it's a great deadline to work against. So petitioned the other half, who agreed she would do more babycare so I could get the car sorted  Monday before the Gathering, I started with seatbelts. These are from quickfit safety belts, made to order. It looks like the Celica had 2 options - a static belt with the upper point on the C-pillar, or an inertia reel with the upper point on a flexi pivot hanging from the roof where the B-pillar would be if it wasn't pillarless. I didn't want static belts but didn't want to cut into my mint black headlining, so went for a hybrid option which was inertia reels, inclined rearwards 30 degrees, to pivot at the C-pillar. Installed, they looked like this 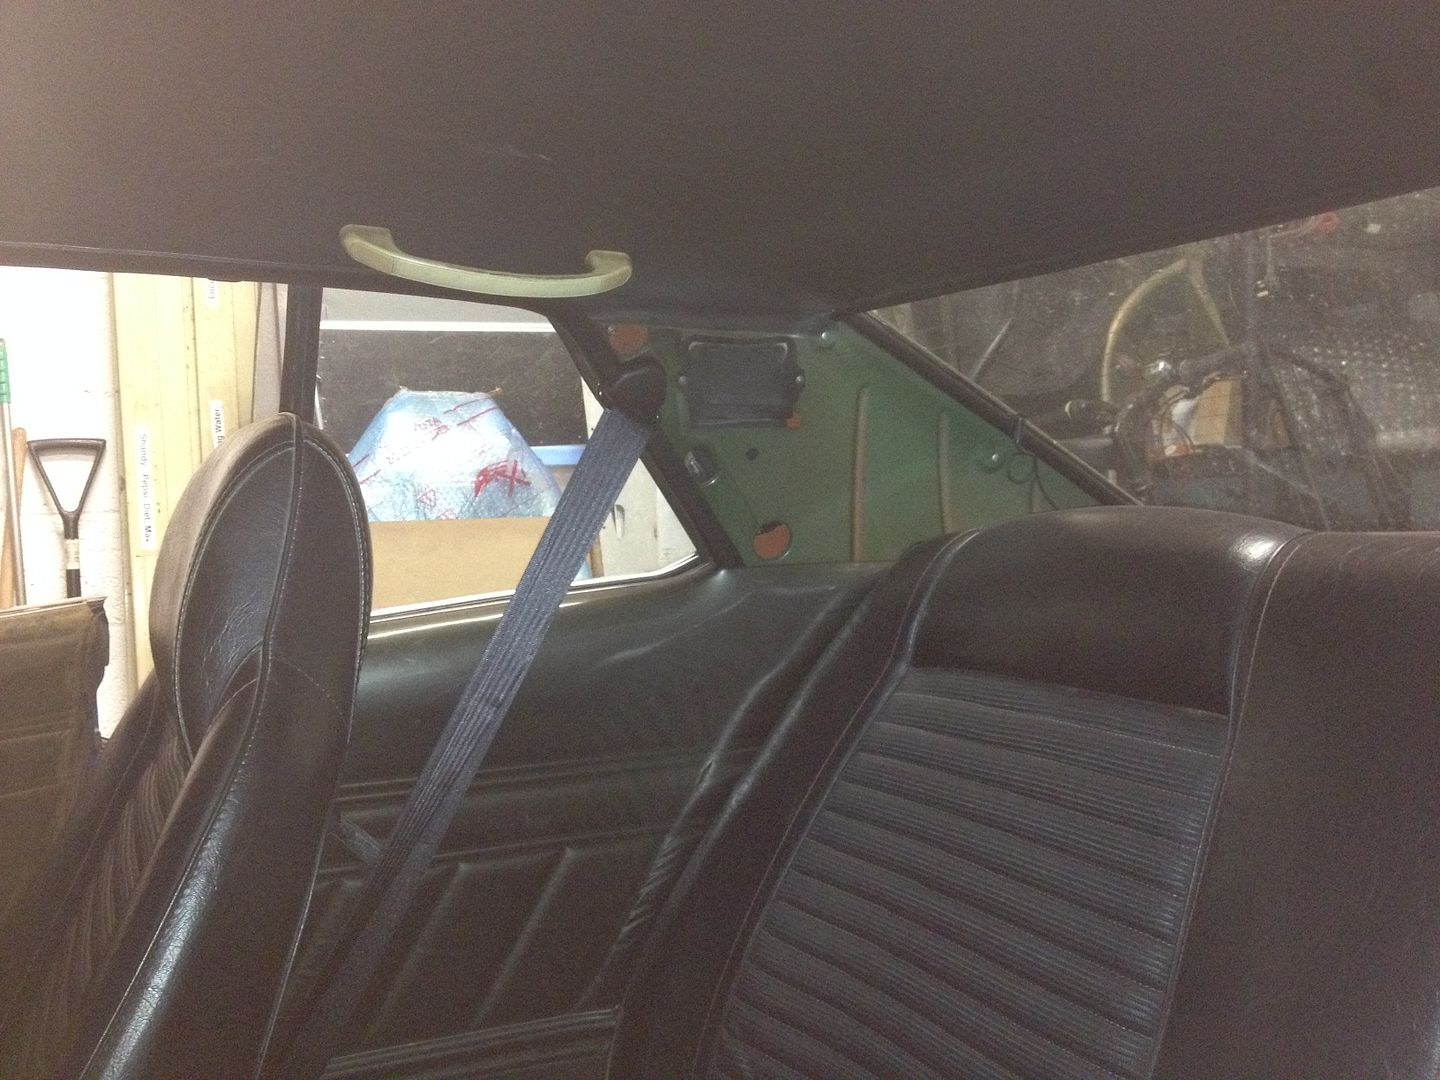 but were too short - I couldn't buckle them. I'd specified extra length but hadn't added enough. Also got buckle receivers that were too short. So, one pair of seatbelt extenders and a pair of old MX5 buckle receivers later, they look like this 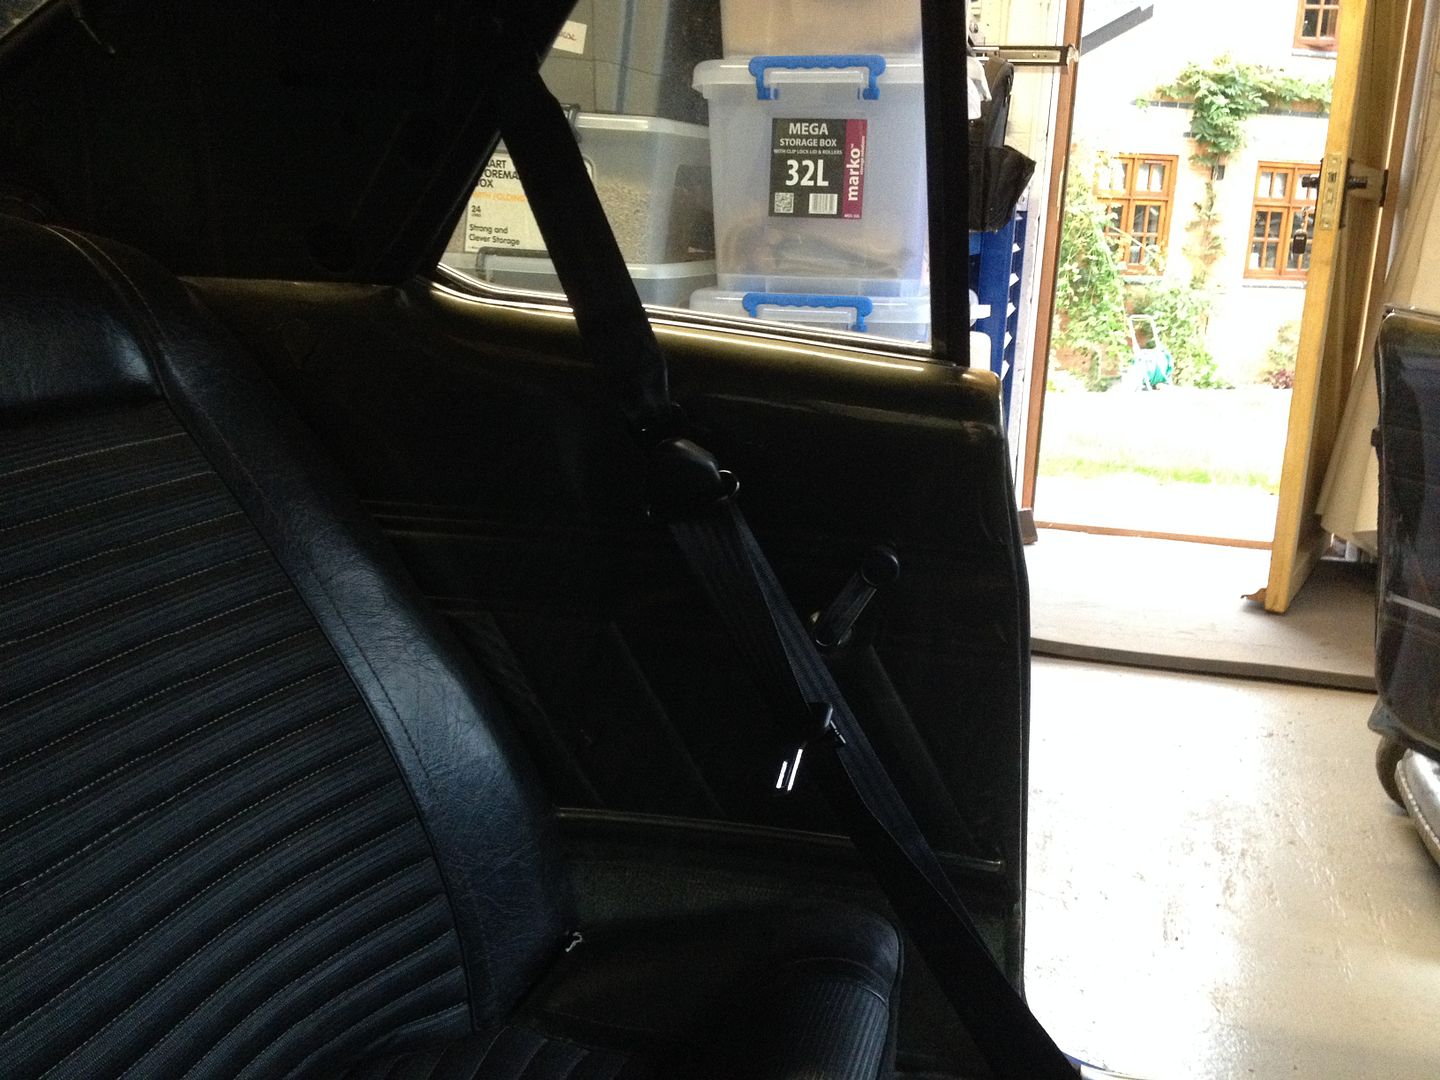 It's pretty neat, easy to get hold of the buckle when seated, and doesn't get in the way of anyone in the back seat. Saturday morning and despite my head telling me it was a bad idea, my heart is telling me to get the white paint off the front bumper. Heart won. Head still wishes it hadn't... Several coats of paint, filler and high build removed over several hours with paintstripper, a scraper and sanding pads. Bloody hard work but the end result suits the car much better I think. There's a place for body coloured bumpers on Mk1 Celicas but I'm going chrome (eventually). Partway through 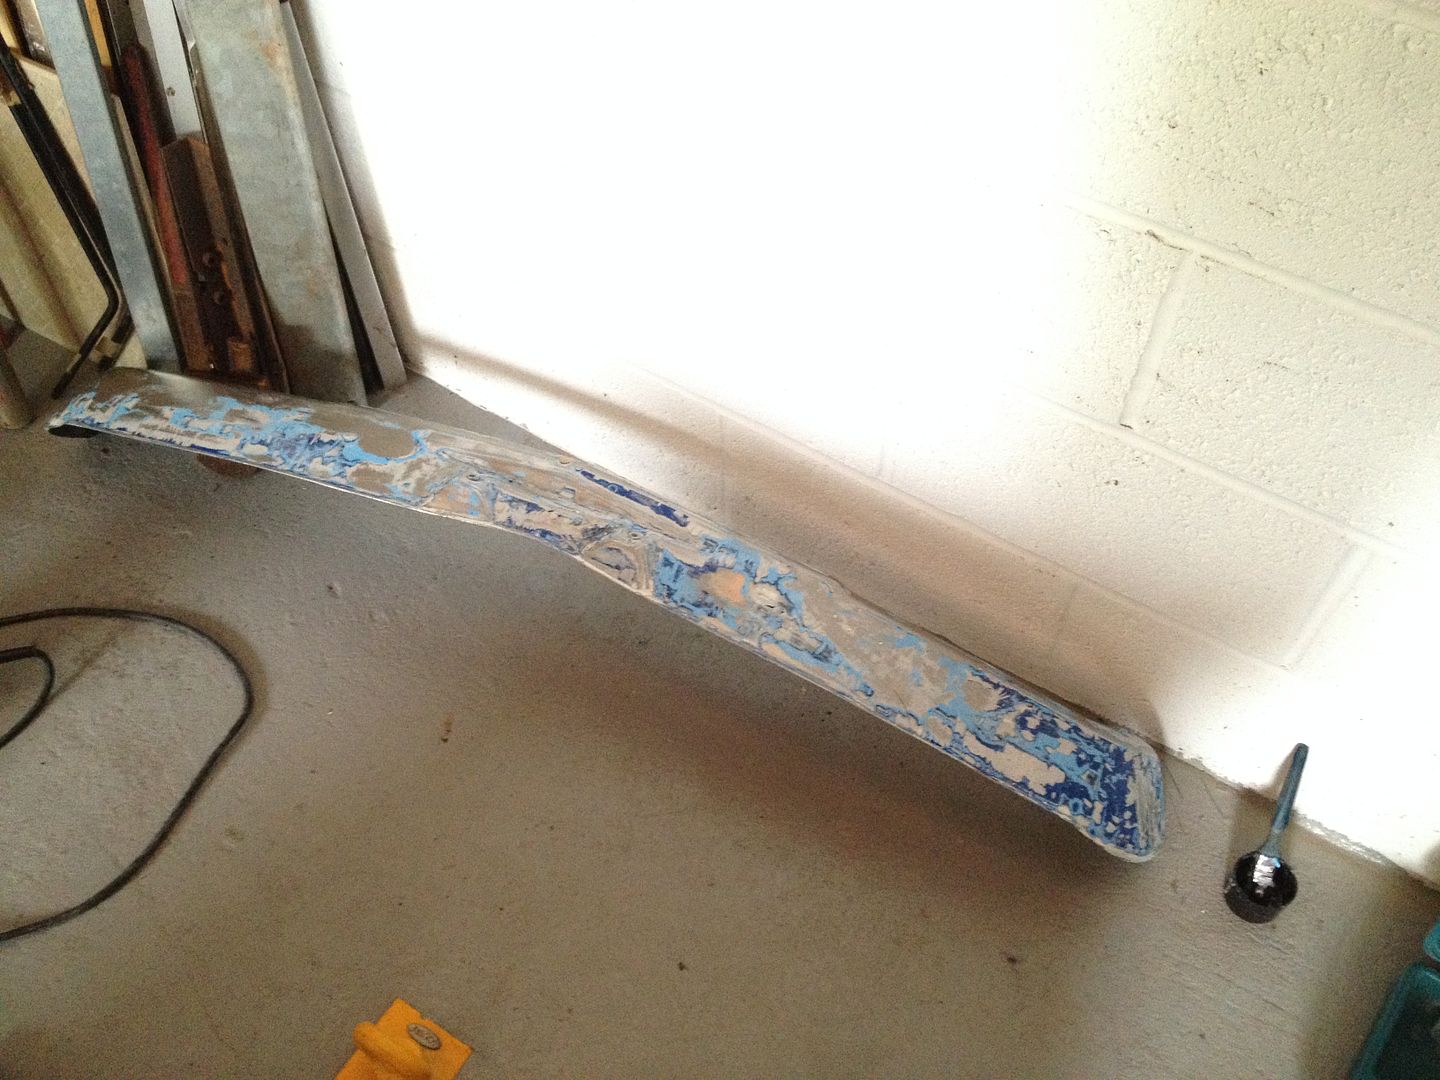 Finished 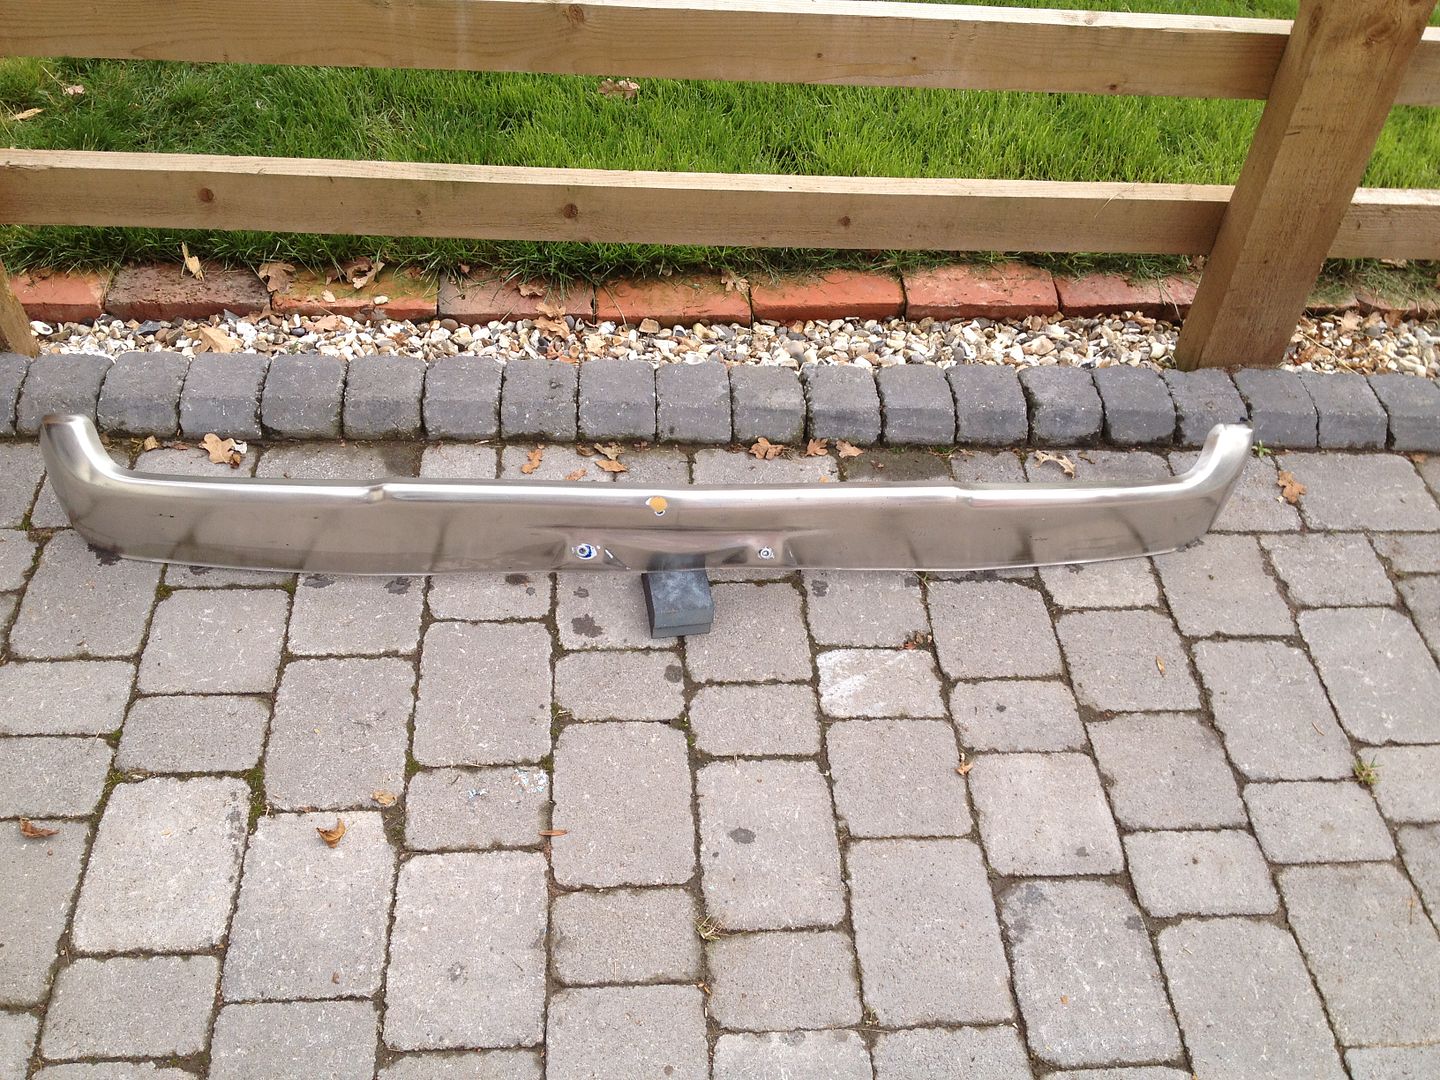 Next, bodywork. Which I should have done first... Lots of lifted paint along the front wing tops, along the front valence etc. Pics are sparse as I was cracking on with as much as I could and it was already Saturday lunchtime, car needed to be sorted for Sunday morning. The car was green originally. Then it got painted blue, which the engine bay still is. Then it got a blowover in white. But seems like every respray in Japan is preceded by a thick coat of high build, which means once you've ground through to bare metal there's 3-5mm to build back up before repainting. At which point I discovered my filler had dried up! Nothing else for it than a couple of coats of high build, flat back as much as I could in a hurry, and get some paint on to seal it. 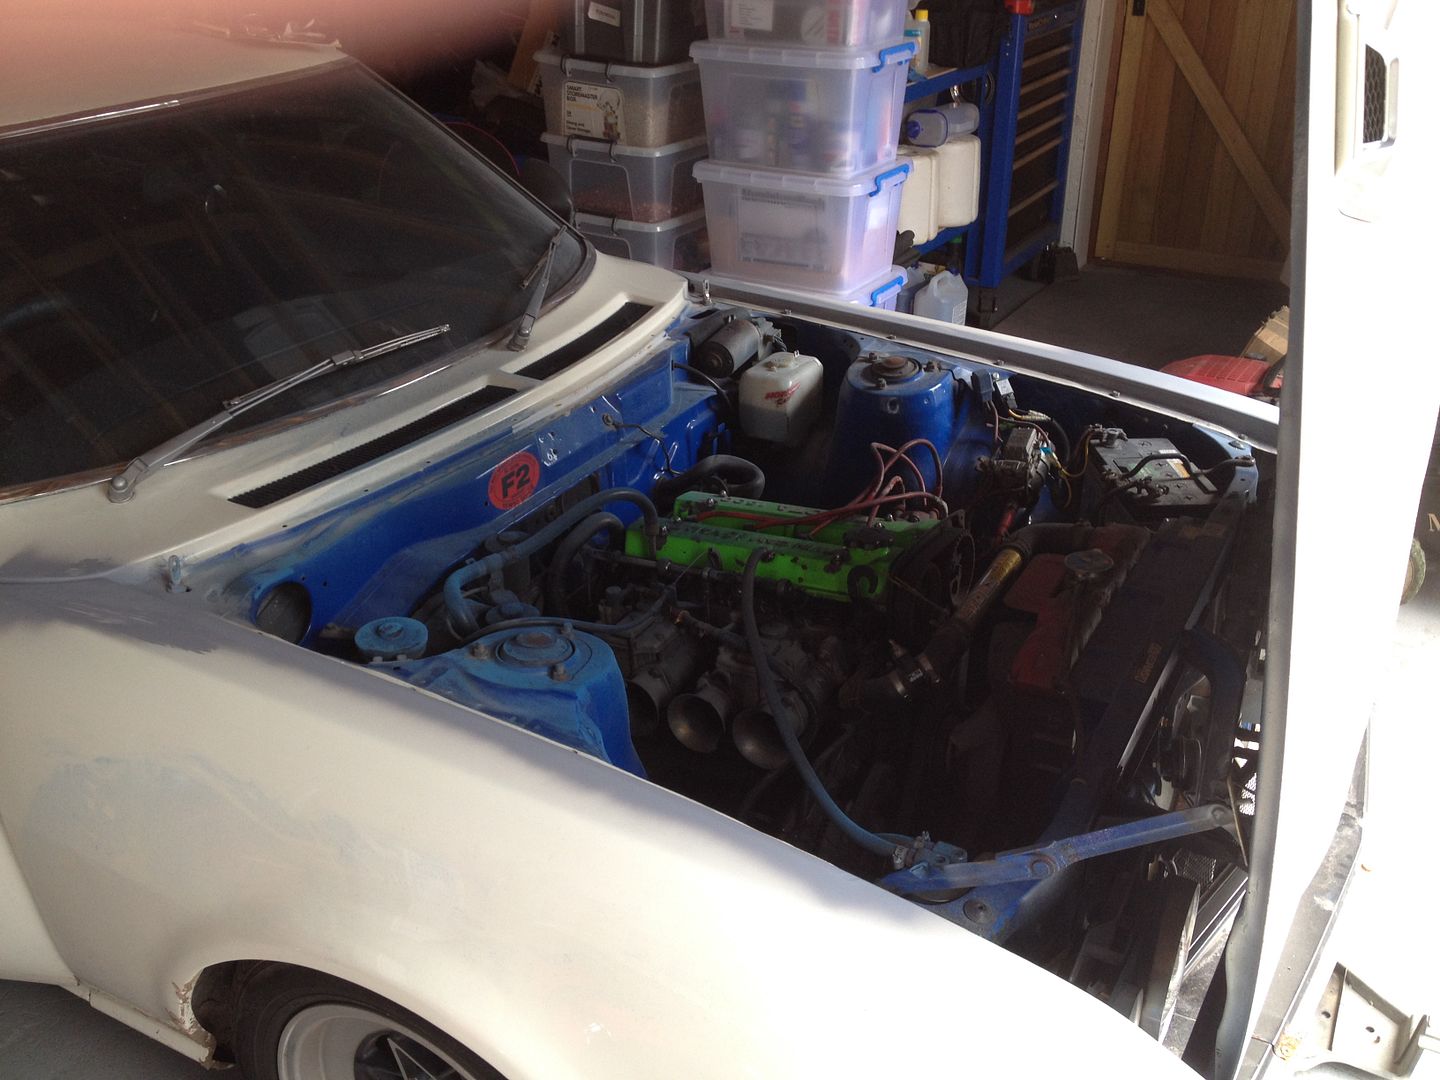 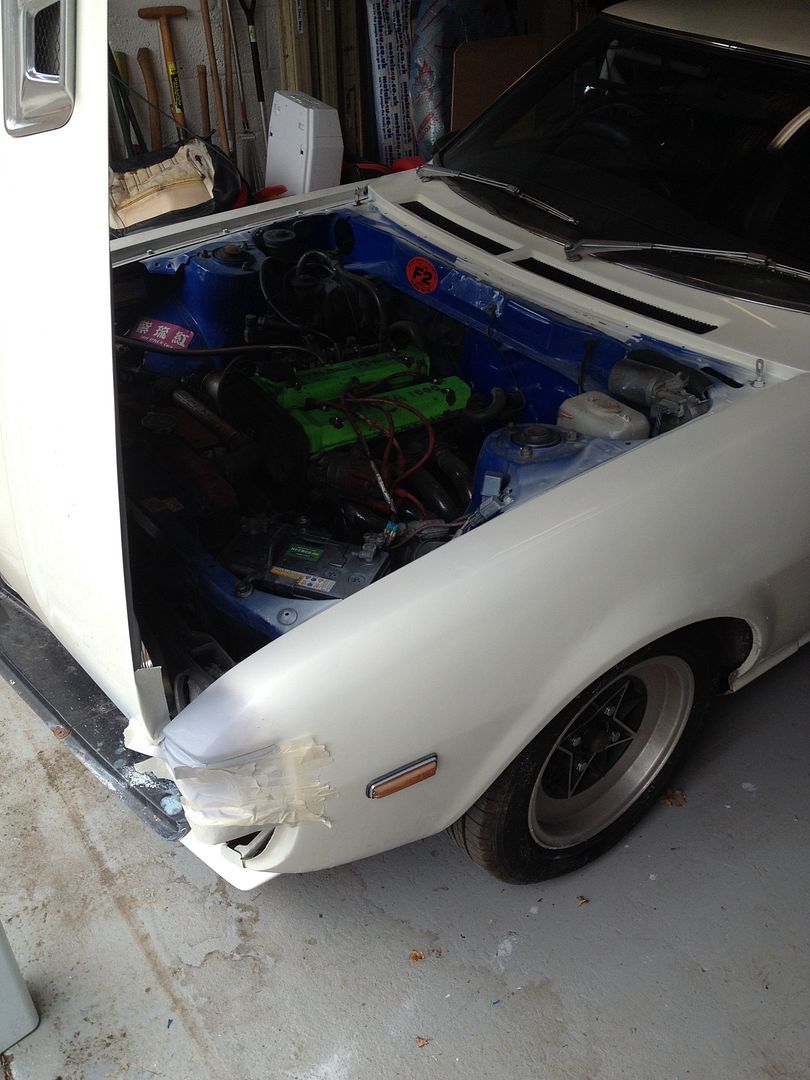 Which, from a distance of a few feet, doesn't look bad. At least the cracks in the paint, and resultant minor rust, has been taken back, treated, primed and painted. It's going to need bare metalling sometime, but not quite yet. End of the front end bodywork phase and it looks like this 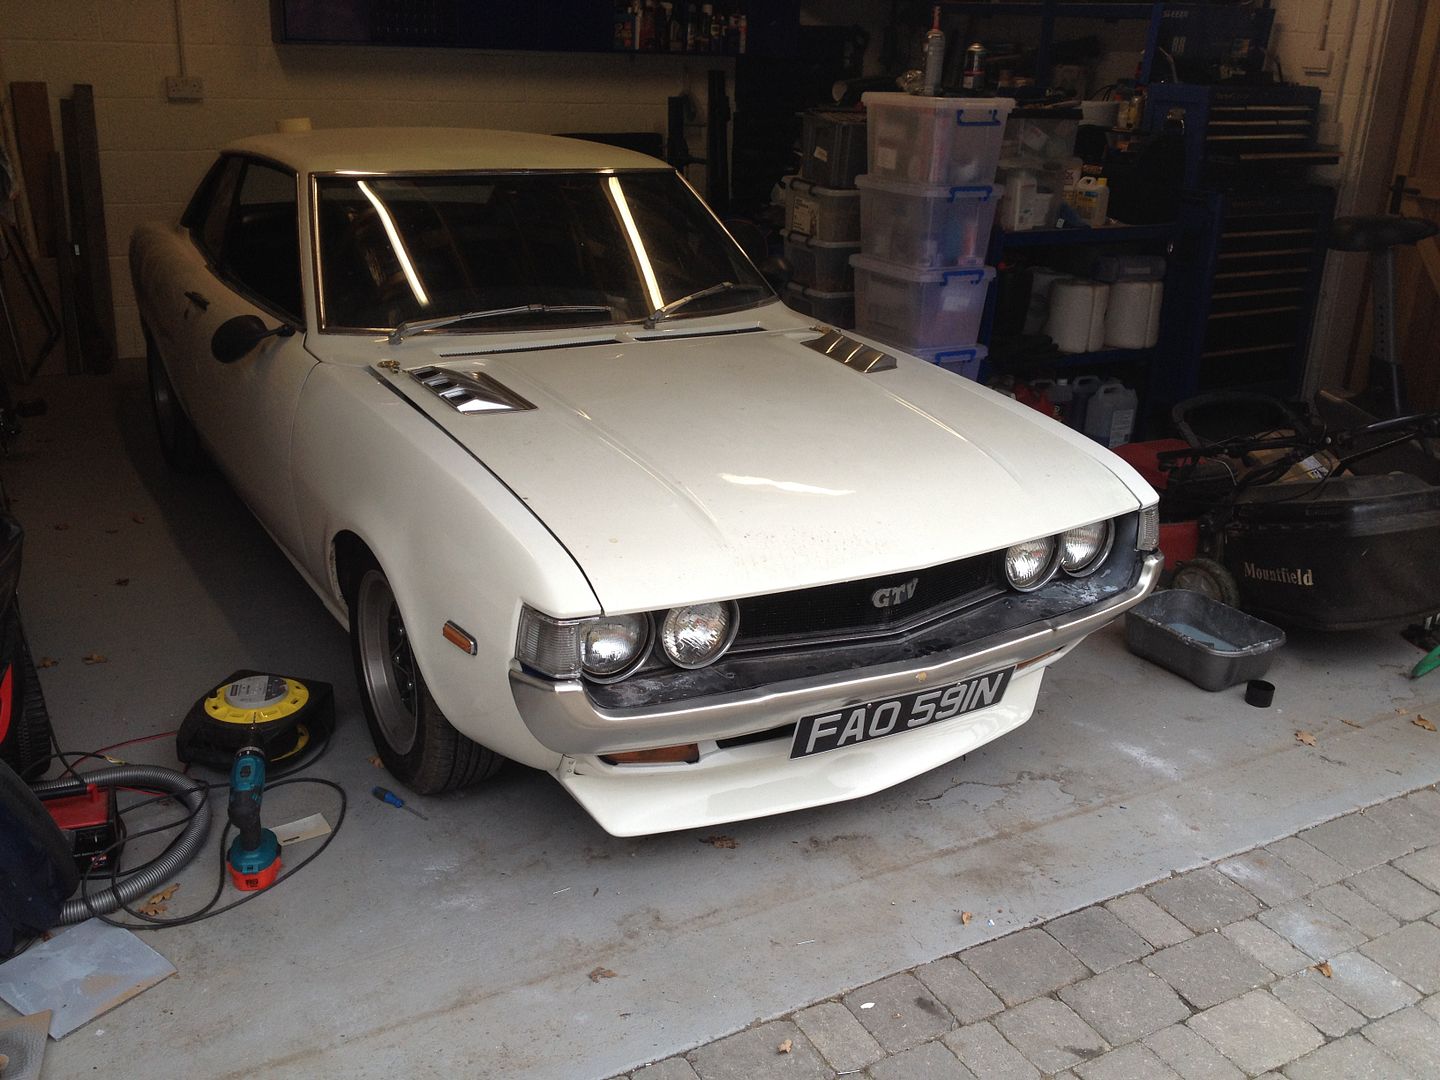 The only other thing I really managed was to get the carpet in, and door trim protectors removed. 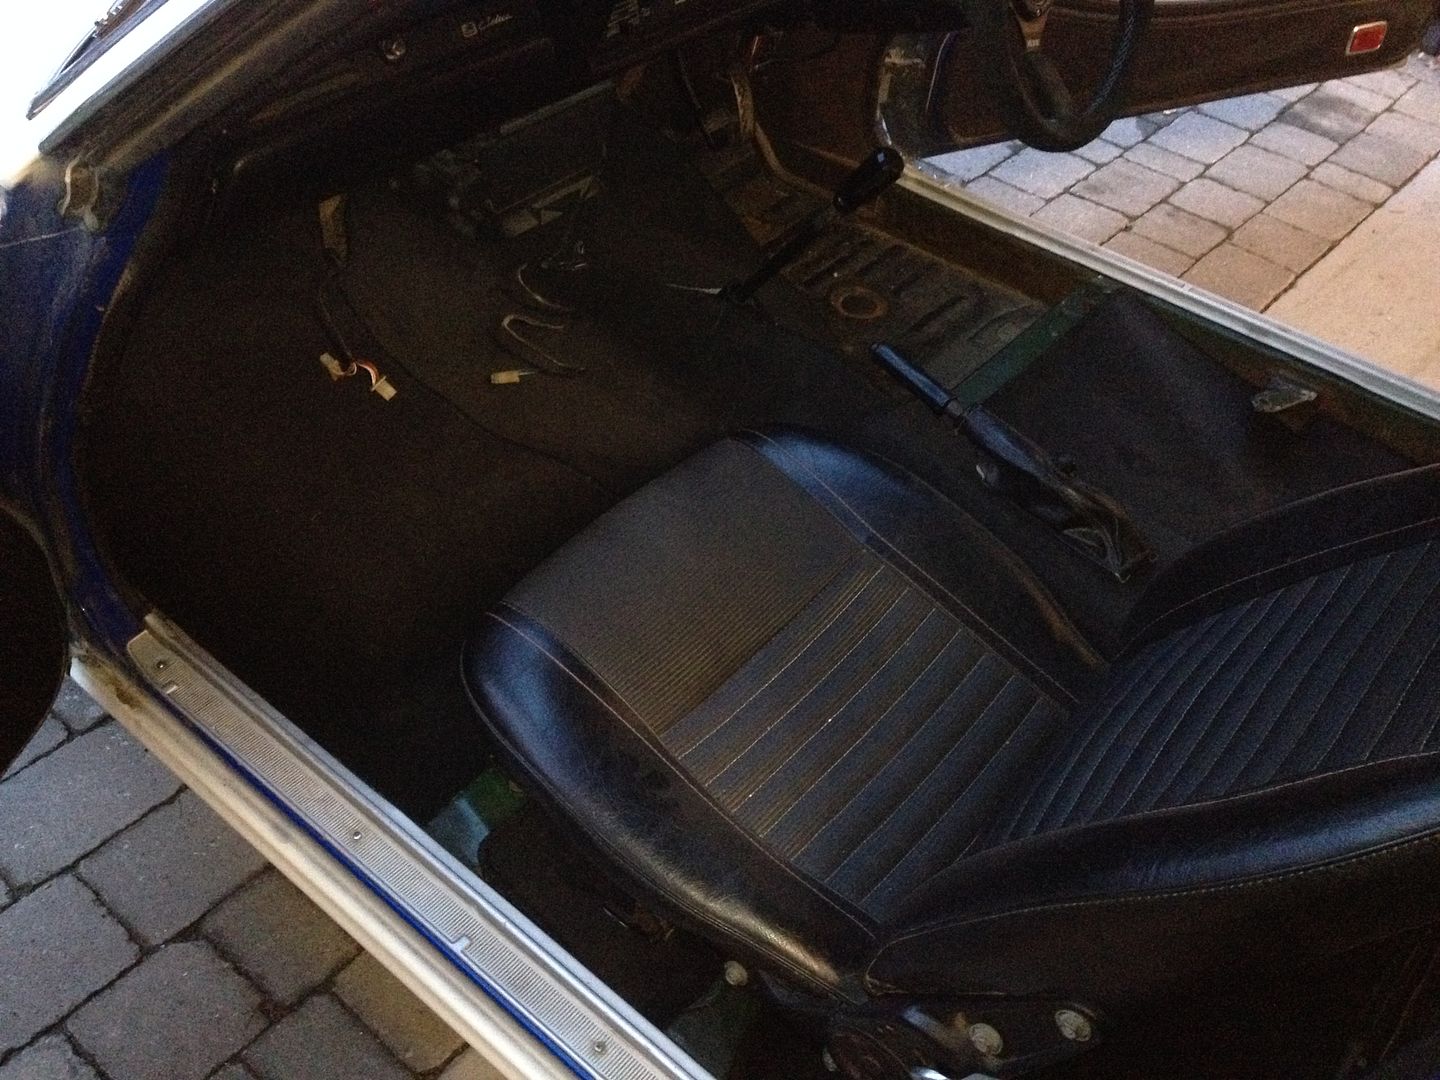 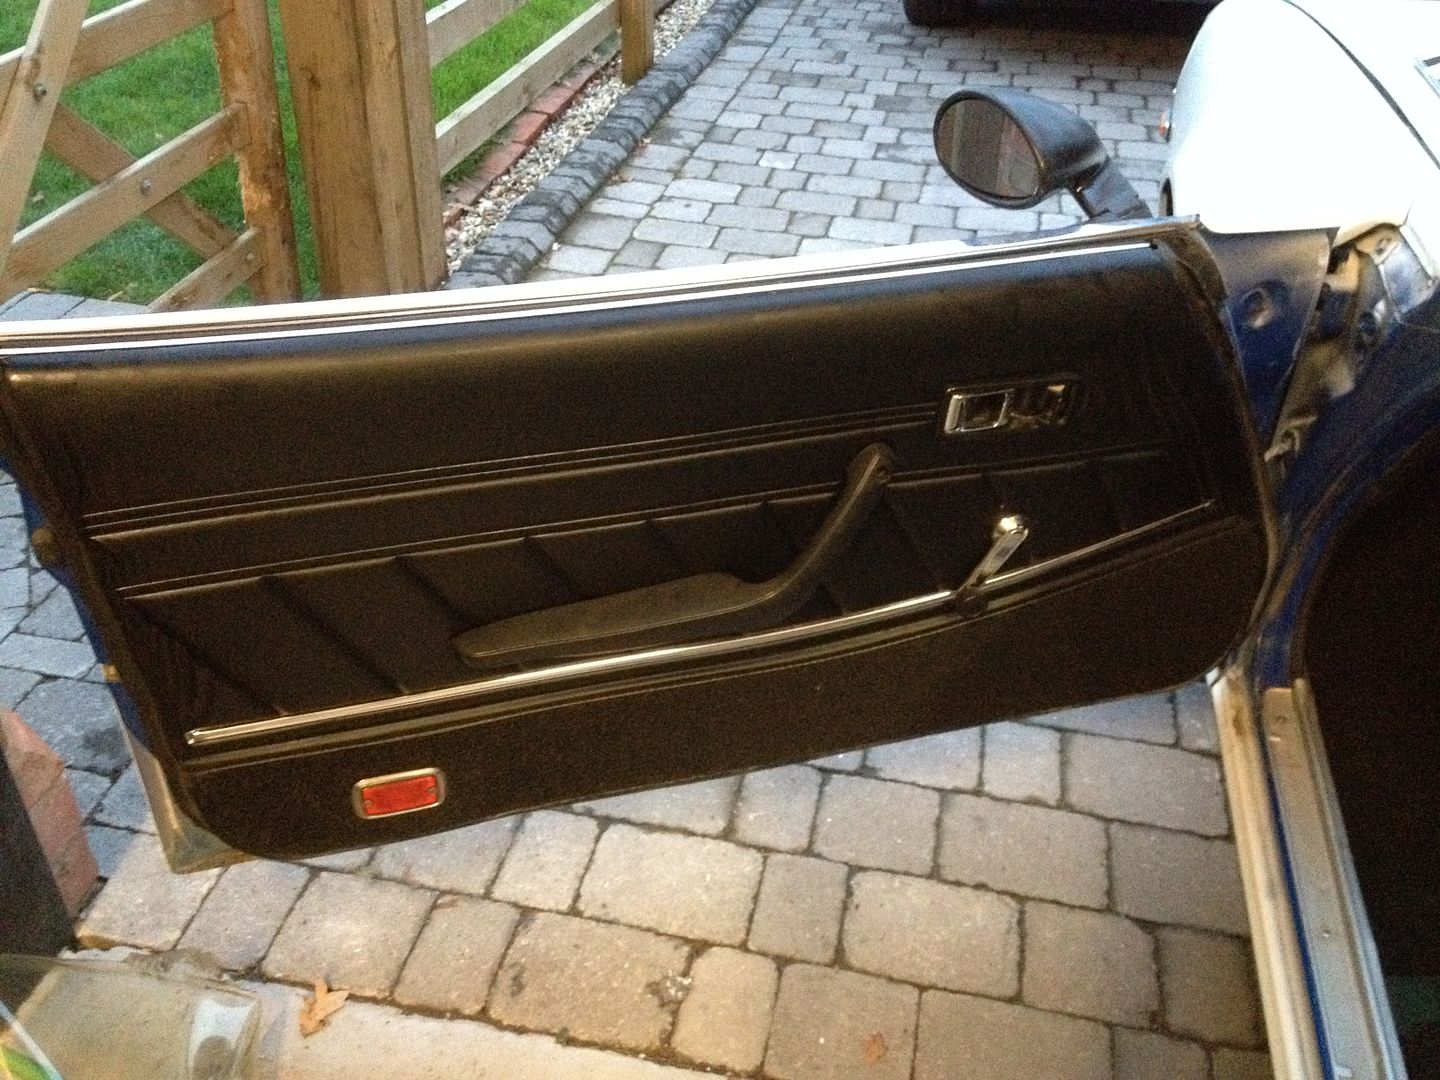 Very happy with the trim panel condition after 42 years, albeit some of the foam scrim has sagged. The backboards are a little warped too so it'll warrant replacing the board and foam sometime. At least the cabin was civilised, the seatbelts worked, the main painted areas protected from water ingress, fluids checked, battery topped up, tyre pressures sorted (deflated no more than 5psi on any tyre since it went through auction 12 months ago) and I replaced the bonnet pins, which had been bugging me. Last thing - RR sticker and a message to anyone thinking it a bit scruffy 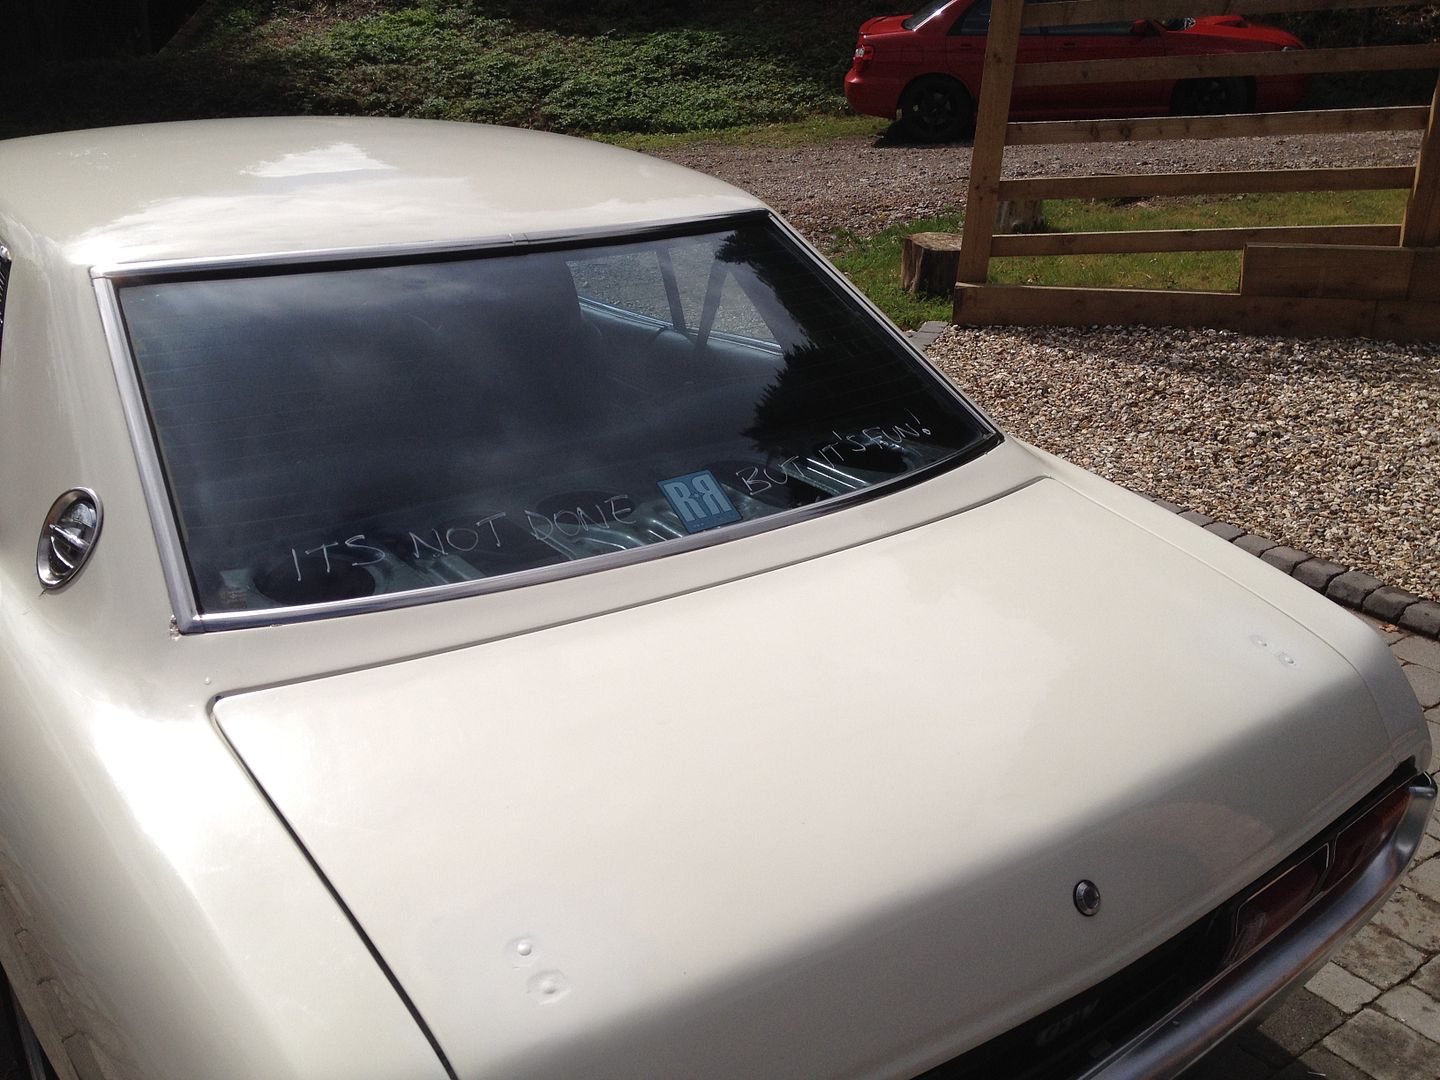 And off to Shelsley Walsh at midday Sunday, bang on my drop-dead timing.   |
| |
|
|
|
|
|
|
|
Aug 31, 2016 16:21:04 GMT
|
And? You didn't see the car there? No, well sadly you wouldn't. Regular readers will remember me saying the ride quality was shocking as the springs have been cut down so far it's just off the bumpstops. What this means in practice is that when driving over a flyover at about 55mph, the front bounces up then down, just as the rear goes over the not-very-aggressive bump in the road, and the rear lifts off the deck  This happened twice in quick succession but all seemed ok. Then I got to the next roundabout and got bangbangbangbang clank clank. Stop, check, not much I can do at roadside as I'd never thought to put a jack in the boot. That's it, get it home. What had happened? The rear coming off the deck had dislocated both rear springs at the lower seat on the axle. When jacking the car up there was a clear 10cm between base of spring and top of spring seat - clear air. Unsurprising that when I hit a decent bump, the spring rate went infinite as it went through the bumpstop, threw the rear in the air, and only a matter of time before the axle dislocated from the springs. Conclusion? Should have replaced the springs instead of stripping and polishing the front bumper! Outcome? Rear is now on springs that don't dislocate on full droop... but it does mean that until I get the fronts done, it's all a bit 70's Hot Rod. Just need wider rims and I'll have the full Carlos Fandango look! 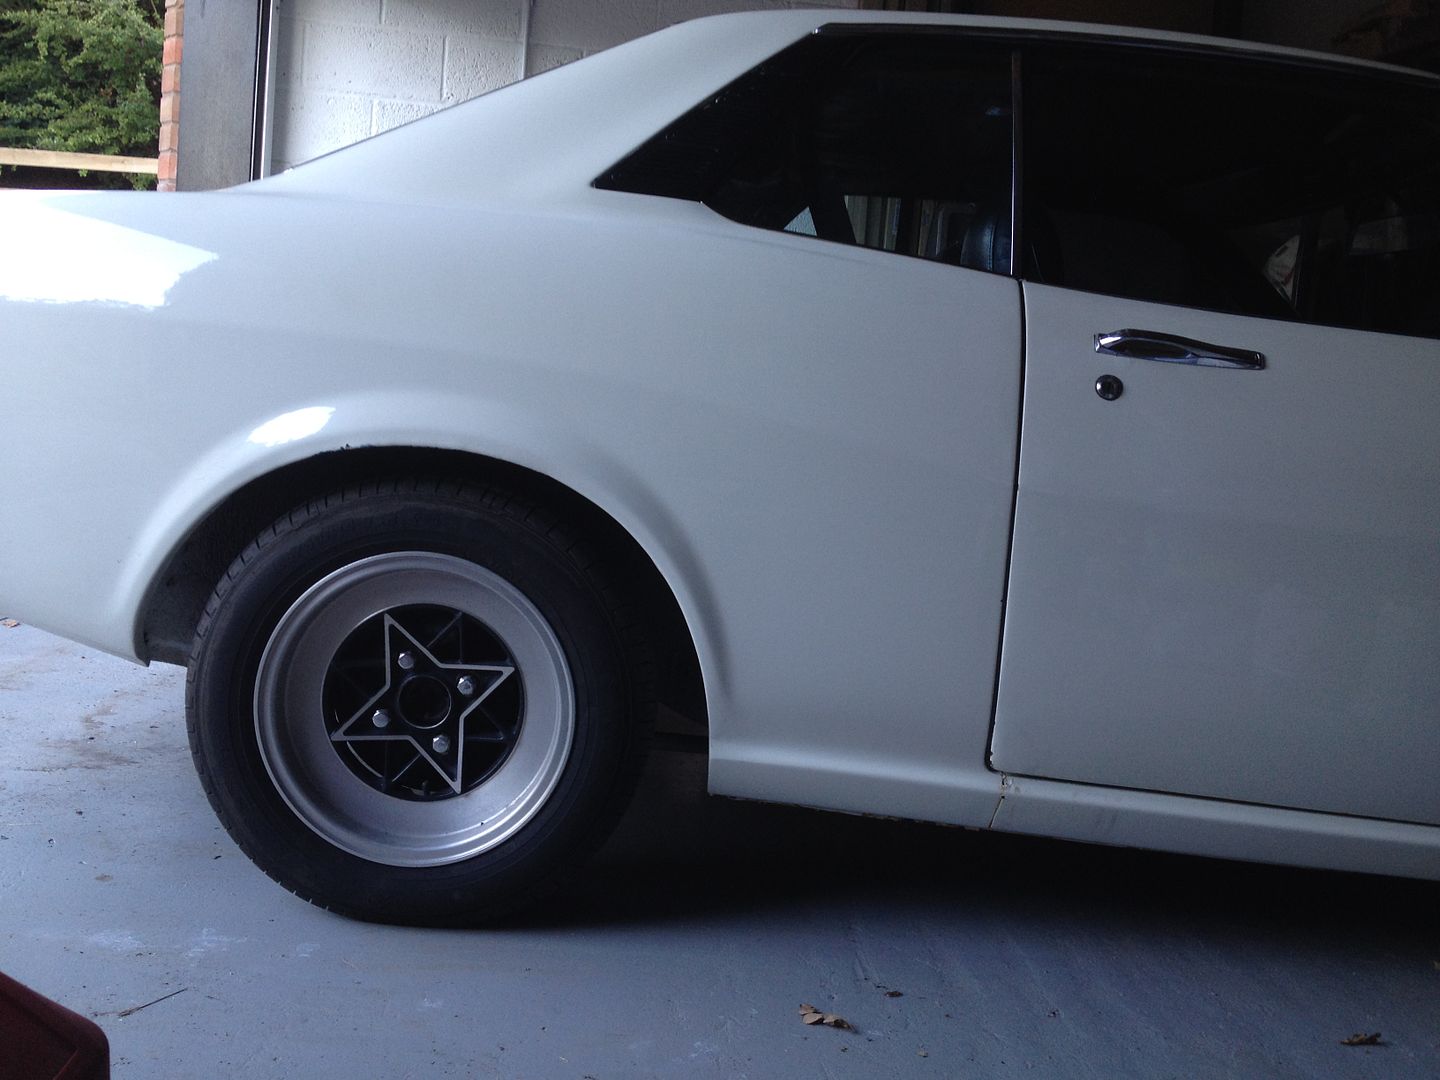 I'll get the fronts done at the weekend, see where the ride height is, and maybe modify a bit with my mate Gary the Angle Grinder. But we'll see what stance and ground clearance I've got first before making irreversible adjustments. |
| |
|
|
|
|
|
Aug 31, 2016 16:24:06 GMT
|
|
A: love the chrome bumper
B: awesome wagon in the background
c: really nice garage and driveway
D: what is that other vehicle hiding behind the wagon?
Love the progress on this car...looks great...good luck with the suspension...couple of scary moments, I guess.....
JP
|
| |
I know its spelled Norman Luxury Yacht, but its pronounced Throat Wobbler Mangrove!
|
|
|
|
|
Aug 31, 2016 16:28:39 GMT
|
|
Last night was Test Drive time. Proper go at it, rather than the tickle to the MoT station and back that I did back in March.
Report goes something like
:big grin: well this LSD definitely works
:big grin: that's a lightened flywheel for sure
:big grin: heel and toe downshifts are a doddle
:big grin: lots of steering feedback
:big grin: that's a very looooong 11 I've just left
Slightly more worrying is the car's tendency to head for the verge when turning into a corner; it getting very sketchy at motorway speeds; 20 adjustments to the steering in one corner where one application of lock usually does me; the fact it's so damn loud you can't hear the induction trumpets; the brakes are about as bad as you might expect; and that it dies momentarily on long left handers and over bigger compressions.
All in all, loving it. The engine wanted to be thrashed, gearing is very very short and it feels very slow compared to my blobeye Impreza and E91 330i, but a whole pile of fun.
Now I need to get on with the bodywork - a few more areas of cracked paint to sort for the time being - and get a custom stainless exhaust on it once it's at the right ride height.
Real shame I missed the Gathering but I'm super happy that at least I've got the car up and running. It only took me about 18 hours in total, so it ought to have been done far sooner this year!
Thanks for looking, next update won't take as long.
|
| |
|
|
|
|
|
Aug 31, 2016 16:36:14 GMT
|
I've had a few questions about the orange thing! It's my last project (probably) as it's inevitably going to take years to complete. I started designing it at college, put it into production with a former classmate / work colleague, went bust, owed a lot of money, and got hold of the orange car - the final prototype chassis fitted with the Autosport launch show bodywork - around 10 years ago. I've been waiting for a decent garage to get started reworking it for trackday use since (and then got a Celica to postpone the start of it yet again...) 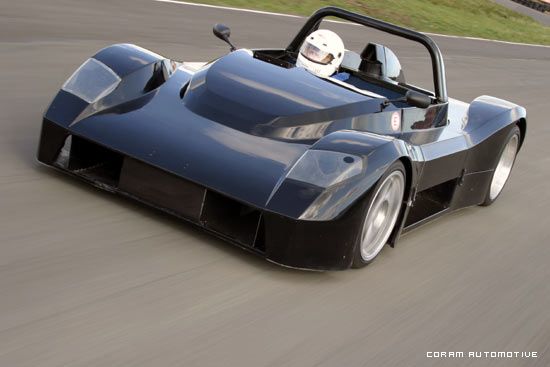 Nothing beats designing and building your own vision of what a car should be. I took it a bit further. It'll be redeveloped into something slightly different, but still a trackday car. I'm guessing at 2-3 more years before I even look at it though. |
| |
Last Edit: Aug 31, 2016 16:36:48 GMT by jamesie
|
|
samta22
Club Retro Rides Member
Stuck in once more...
Posts: 1,276  Club RR Member Number: 32
|
|
Sept 2, 2016 10:23:41 GMT
|
|
Looks like it's all coming together nicely - good stuff! Hoping to get some hours on mine tomorrow but will see, alas the bodywork is a little more crusty than yours!
What springs did you go for in the rear in the end?
|
| |
'37 Austin 7 '56 Austin A35 '58 Austin A35 '65 Triumph Herald 12/50 '69 MGB GT '74 MGB GT V8'73 TA22 Toyota Celica restoration'95 Mercedes SL320 '04 MGTF 135 'Cool Blue' (Mrs' Baby) '05 Land Rover Discovery 3 V8 '67 Abarth 595 (Mrs' runabout) '18 Disco V |
|
|
|
|
Sept 2, 2016 20:18:44 GMT
|
|
Still loads to do - pics definitely flatter it.
Being stored in the garage as it was drying out after construction hasn't helped the car, and some iffy bits have really got worse in the 8 months or so it's taken for the place to dry out properly.
But mechanically it seems good, just needs the carbs setting and a few wiring issues sorting. At least now it's a rolling resto.
I got a full set of springs from powercoil, lowered about 45mm. Looks like that still might be a bit high, but it's hard to tell as the Super Sharks are running 185/60/14s which are a bit undersized compared to standard fitment. If I get tyres that are the right diameter (and fill the arches a bit more) chances are I'll get away with it being a little higher.
The roads round my way are either busy (usually with 45mph-everywhere types) or rough and undulating, so for most fun you avoid the beaten track and get onto the B roads. So I'm happy with a bit more ride height if it means I can drive the car a bit harder and be more bothered about the direction the road goes rather than where the potholes and bumps are.
|
| |
|
|
|
|
|
Sept 3, 2016 12:02:34 GMT
|
Nice updates! Cool to see some more progress with this. I really like how much character this has. Those SSR Super Sharks do look cool on it though and the bumper does look good! Sucks you didn't quite make it to the gathering, me and a few other gen 1's made it there! I parked up next to Gursajan's GTV. Thing is awesome.  |
| |
|
|
|
|
|
|
|
|
That looks just awesome. Really original looking too.
I'm definitely having it ready for next year's Gathering, even if it has to sit idle for a few weeks beforehand.
We should have a Gen 1 space with Bennyup, Carlb1970 and whoever else has one. Sounds like there's enough to group them together.
Just taking my time now deciding whether to put 15s or 16s on it. Going to depend on ride height and tyre diameter and I'm erring to the 16s because I need larger diameter tyres to up the gearing a bit - it's just so short-geared as it sits and a new CROWNwheel and pinion in a longer ratio is out of budget for the forseeable future.
Daughter has chicken pox at the moment so time is not available, but if she's good by Saturday the front springs will go on and let's see where my ride height is.
|
| |
|
|
samta22
Club Retro Rides Member
Stuck in once more...
Posts: 1,276  Club RR Member Number: 32
|
|
|
|
A gen 1 outing at RRG would put the pressure on but definitely give me something to aim for too  Will keep an eye on spring progress - it's one of the jobs on my imminent to do list. Still not sure whether to go upgraded springs or the whole hog... dealing with the rears seems to be the tricky bit. |
| |
'37 Austin 7 '56 Austin A35 '58 Austin A35 '65 Triumph Herald 12/50 '69 MGB GT '74 MGB GT V8'73 TA22 Toyota Celica restoration'95 Mercedes SL320 '04 MGTF 135 'Cool Blue' (Mrs' Baby) '05 Land Rover Discovery 3 V8 '67 Abarth 595 (Mrs' runabout) '18 Disco V |
|
|
|
|
|
|
Sept 17, 2016 20:46:58 GMT
|
Yes I Done Some Stuff! First, a comedy shot of the front springs. Removed, and to be fitted: 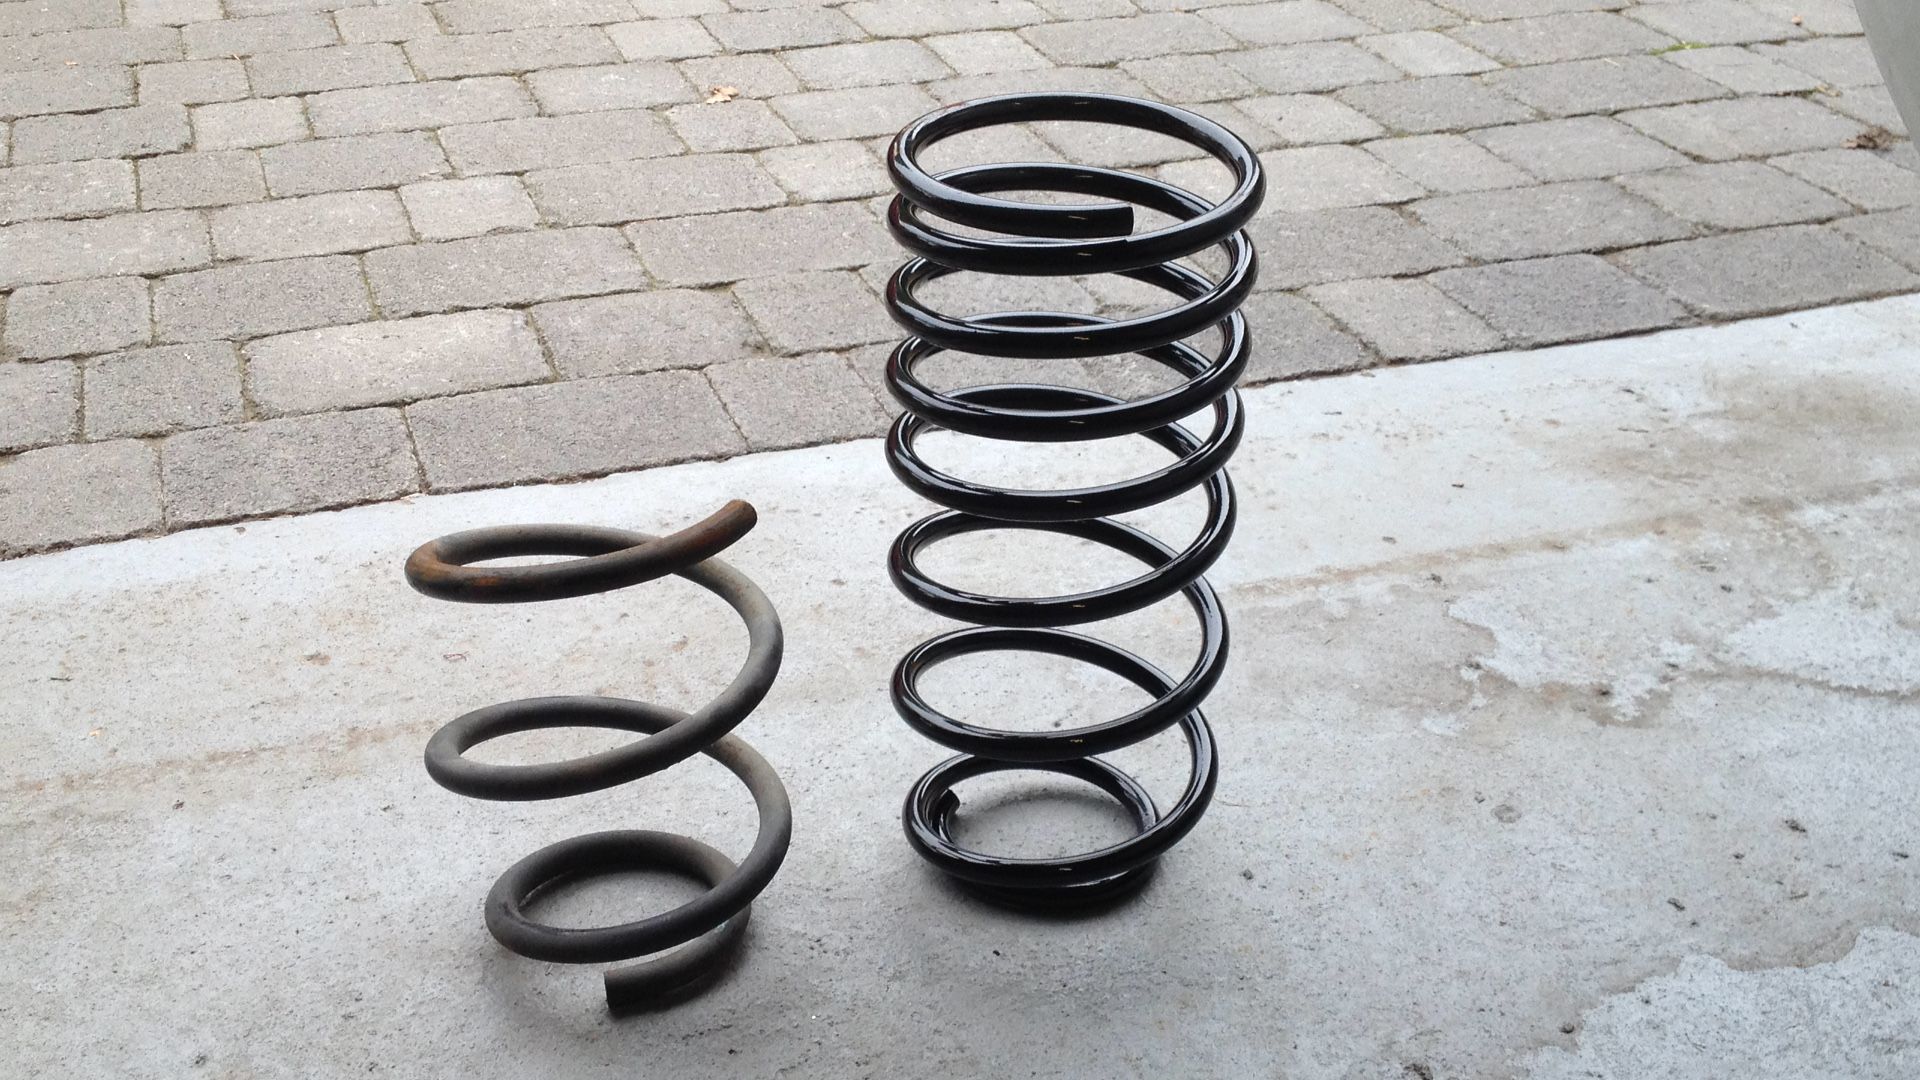 Takes the biscuit for a chopped spring, if you ask me. Next, front struts have been taken off the car and inserts removed for replacement. Sadly although these are marked KYB, the KYB people in the UK seem to think it's not made by any damper manufacturers at all. And the ones they list in their catalogue don't fit. I've got some Corolla ones coming Monday. Let's see if we can make them fit. 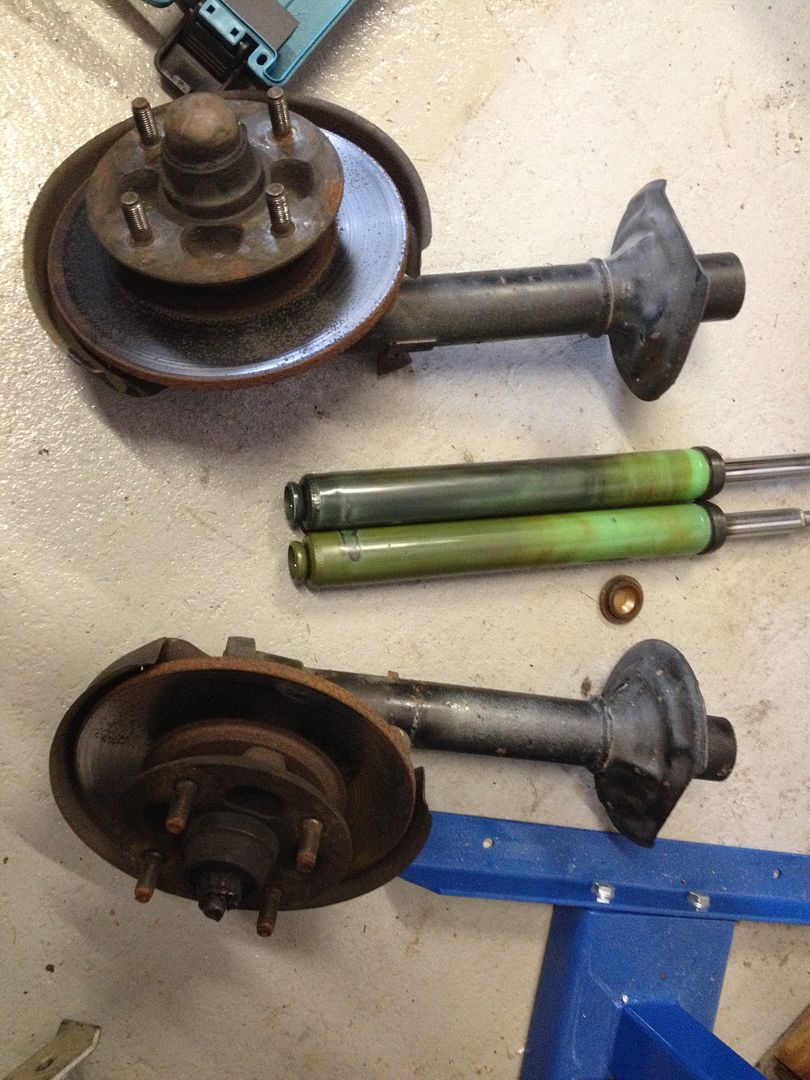 After mucking about tidying up the garage for a bit, I got on and removed the Jasma manifold. 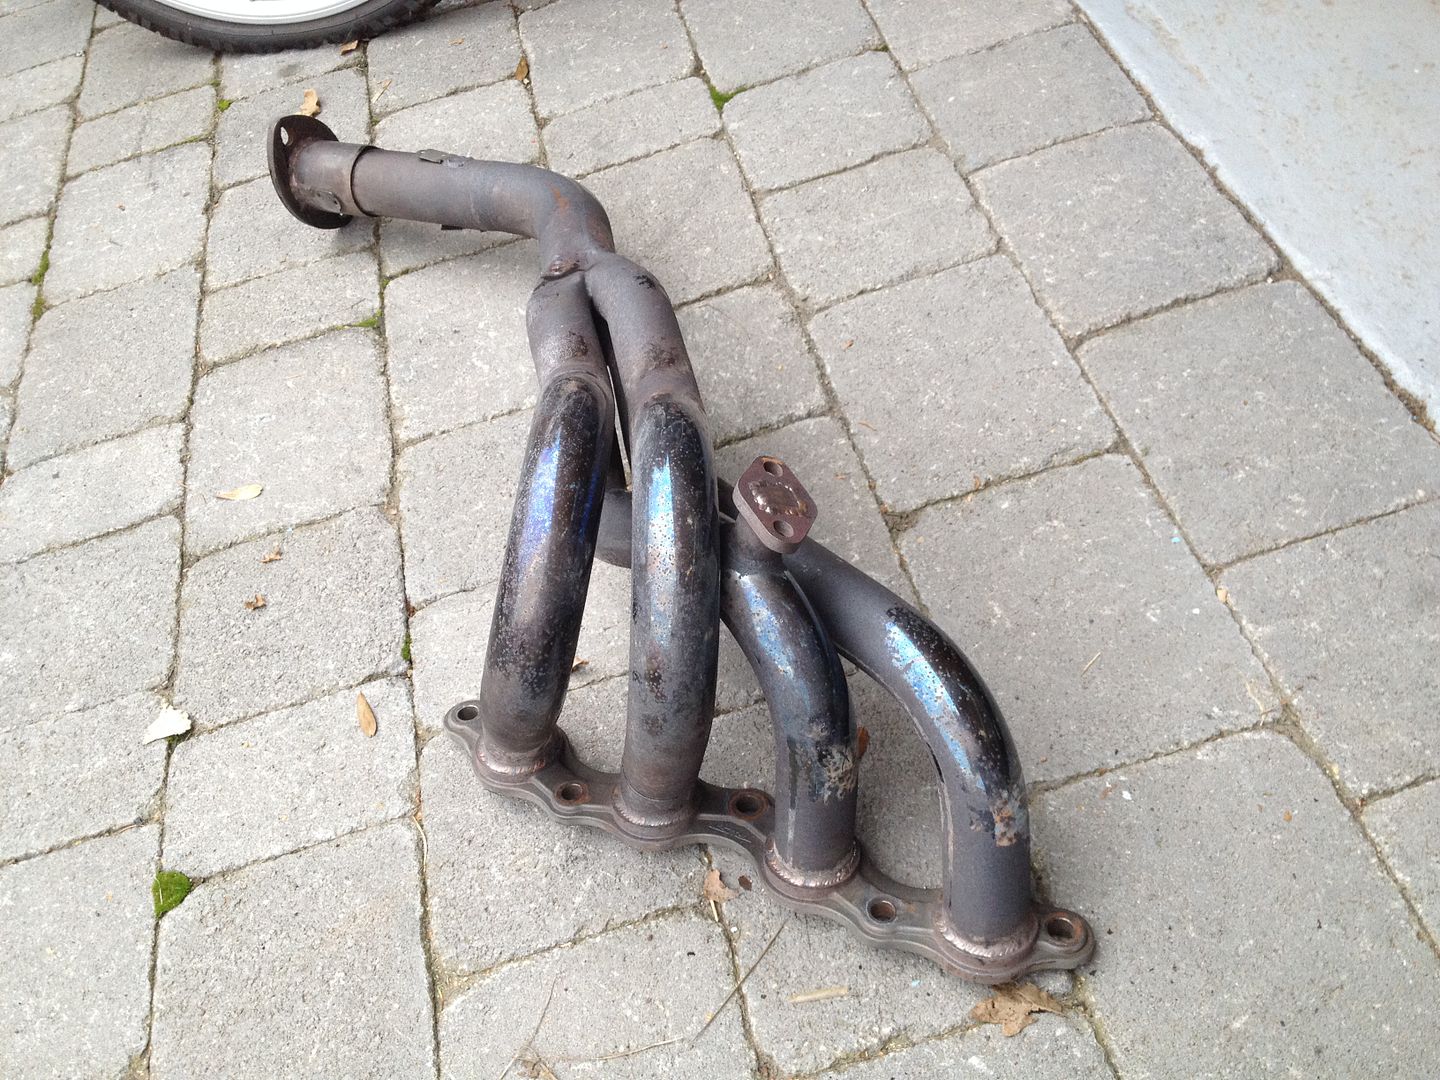 Then wrapped it - I'm still itching from that :-( 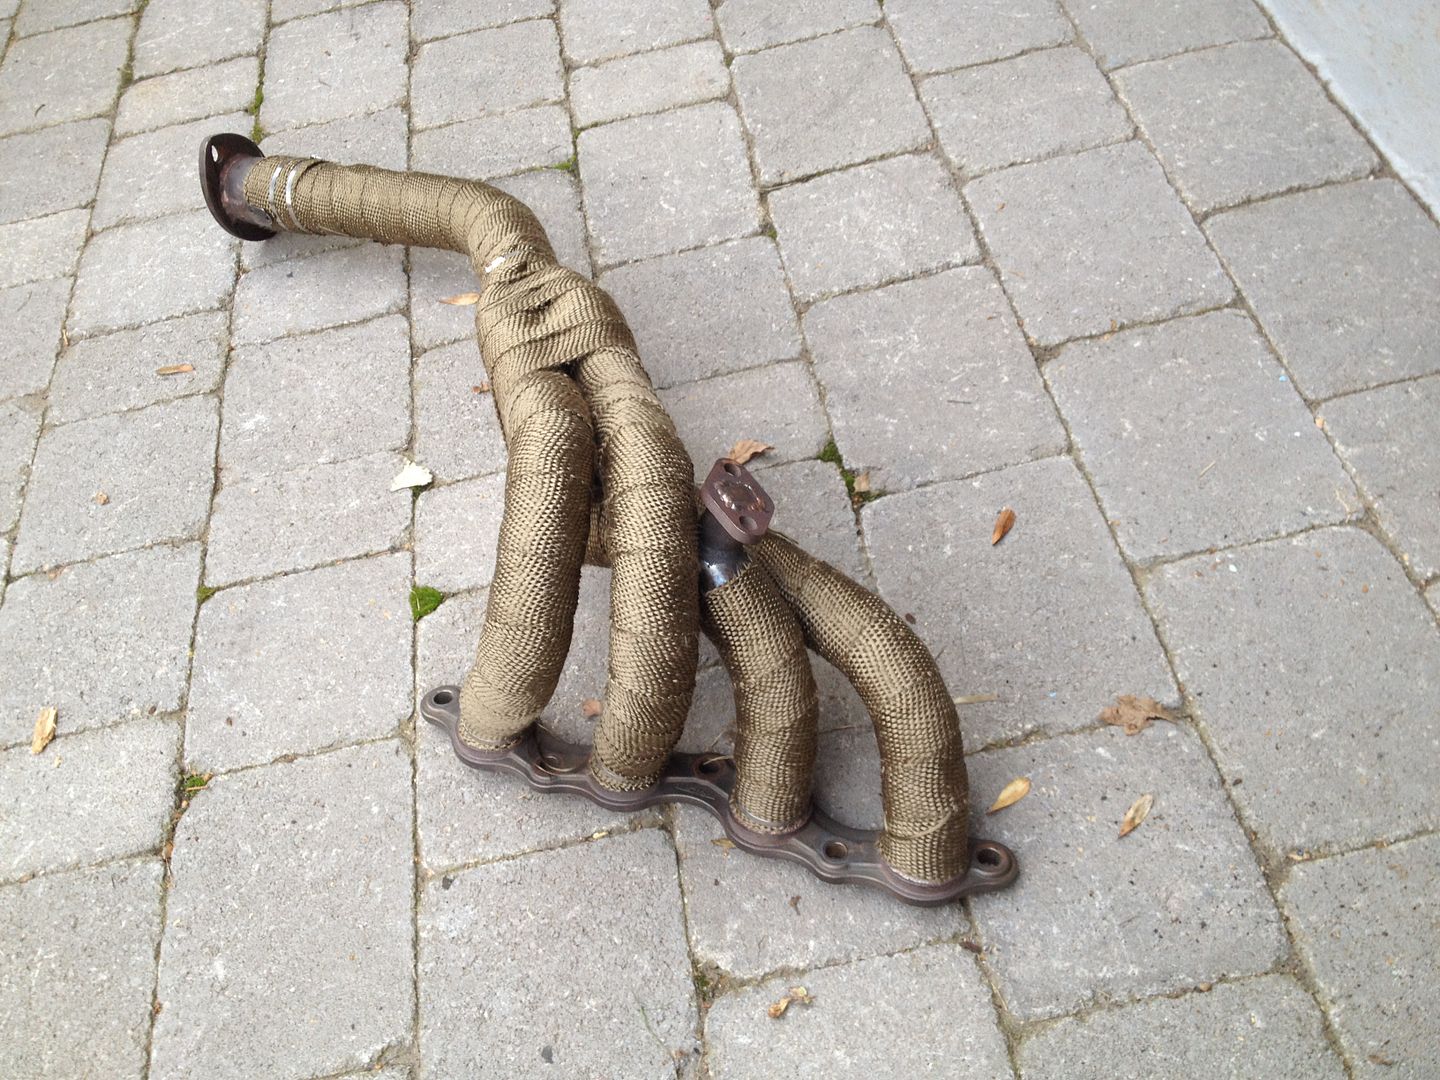 Next, cam cover. The car arrived with a green cam cover. God knows why, it hardly suited. And was flaking and 'orrible. 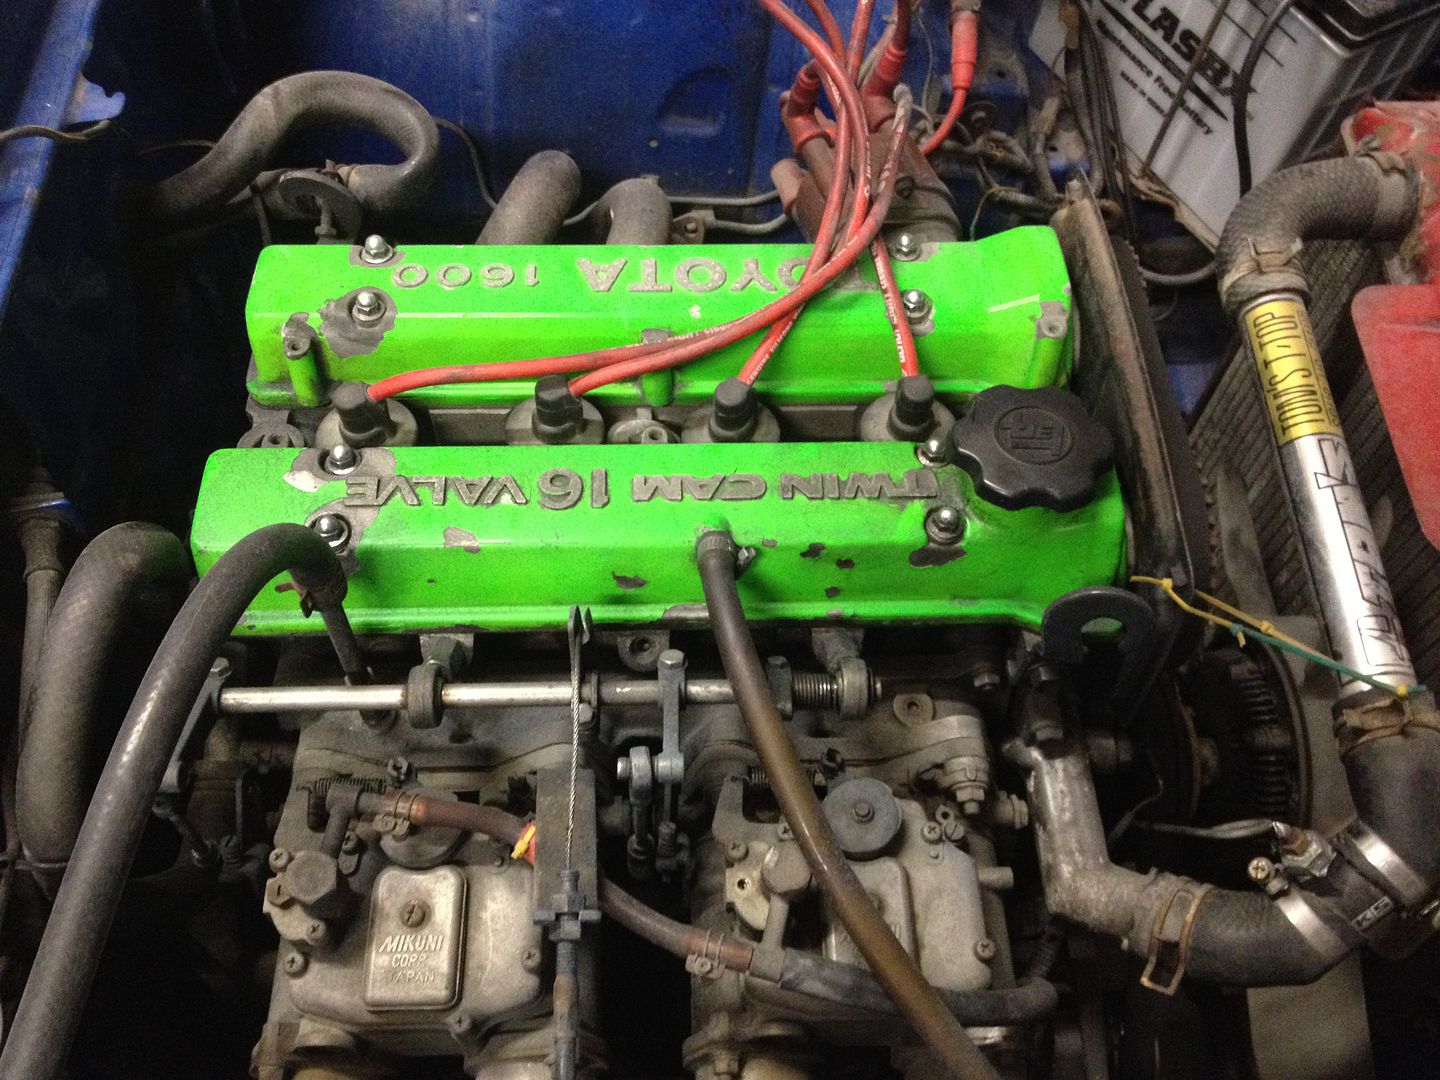 Life seemed too short to get the one on it blasted, painted, flatted back and the lettering repainted, so I bought one. It's in lovely nick for its age, that'll do. Also bunged on new plug leads and a valley cover to stop the lead heads swinging around. Pretty. 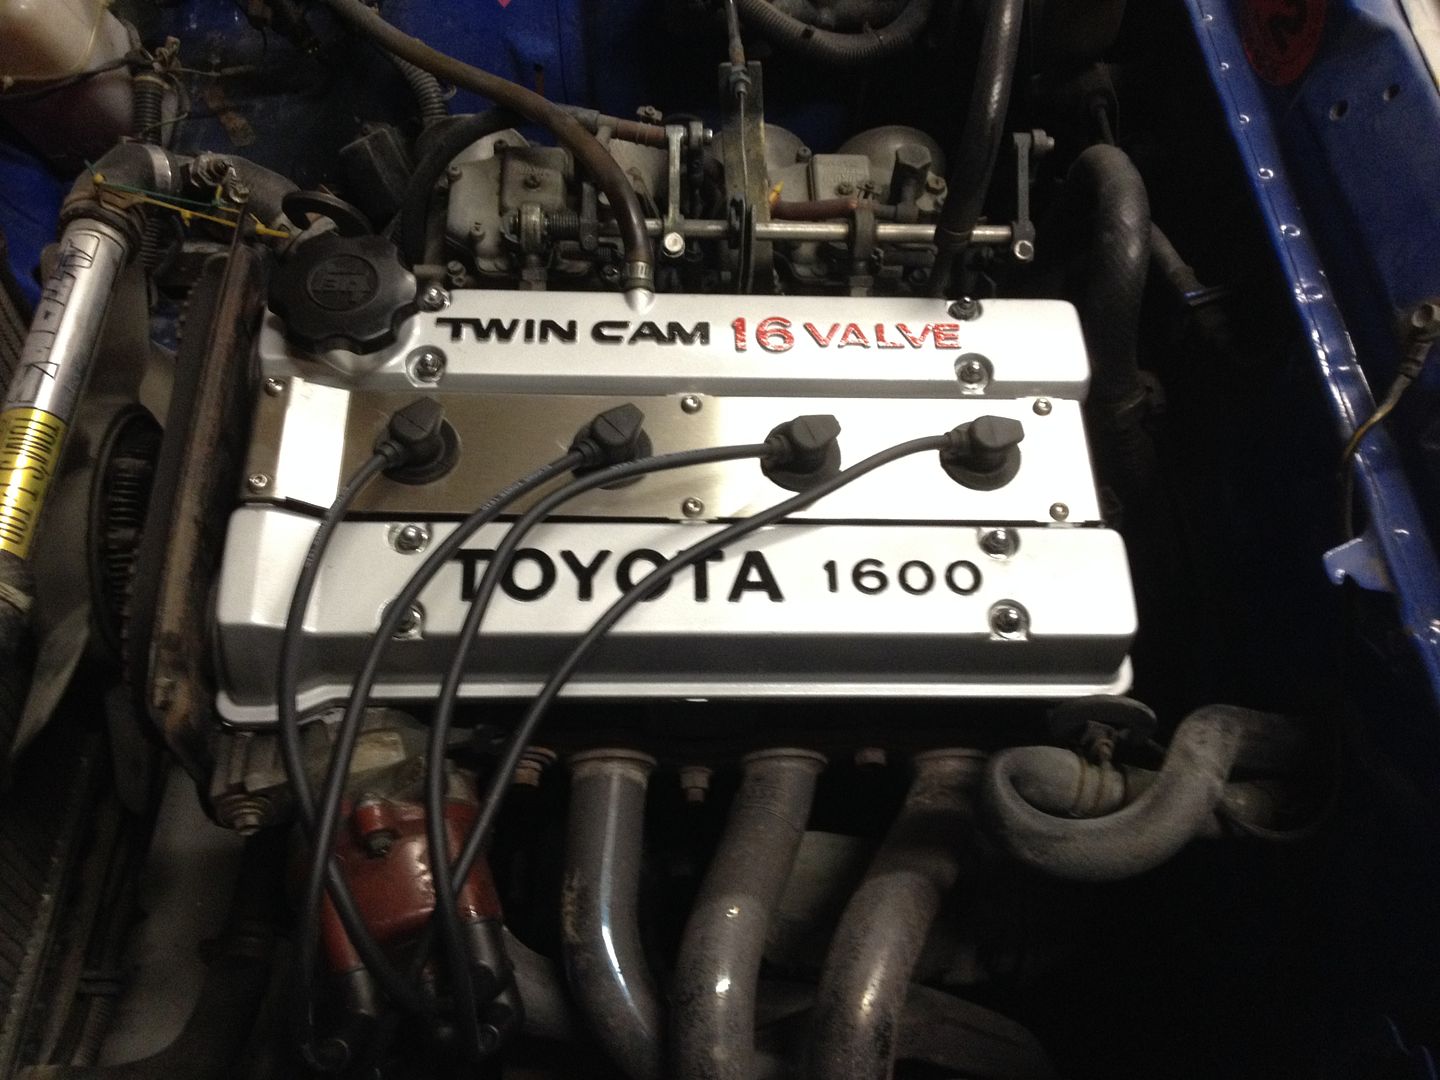 All of which leaves me with this, when the manifold was bunged back on 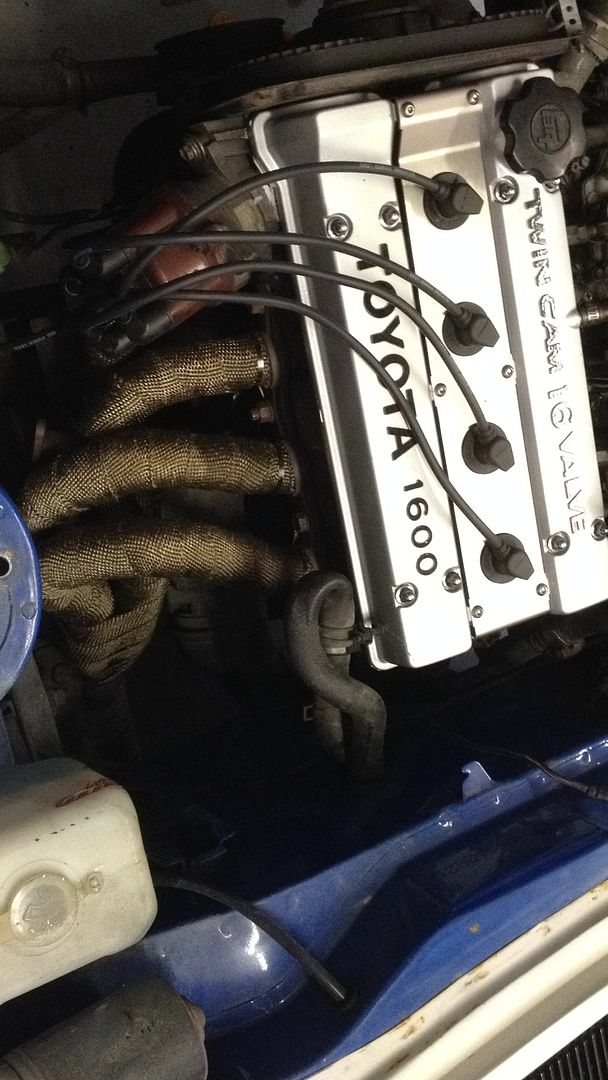 Got to be pleased with that. Plus, once I've got the new inserts and springs fitted, it's ready to go for a custom stainless exhaust. I'm getting there... slowly... |
| |
|
|
|
|
|
Sept 17, 2016 21:36:18 GMT
|
|
Nice work there! Cover looks tasty! Those springs are even worse than my original rear chopped springs it came over on haha
Exhaust wrap is the worst, horrid horrid stuff when it gets all in between your fingers.
Down for a good Gen 1 meet up!
|
| |
|
|
|
|
|
|
|
|
Well interest in this didn't die, but time on it became tricky so I ended up mothballing it for a while.
Firstly I went and bought an e46 330ci to use as a track car, but stripped it bare around when my daughter was toddling and I had a bit of spare time, but then my son was born and there was no time at all. And there still isn't really any.
So the e46 regretfully got broken for spares, I lost money on it, and should have just driven it rather than trying to make a BTCC car out of it...
When that didn't work well I sold my blobeye WRX and bought a Mk6 Fiesta ST with a quaife diff, coilovers, braces, polybushes, Milltek and more. Loved it. Just my thing. Completely inappropriate for a 45 year old but who cares. Sold it (at a significant loss FFS) for a more mature daily:
A 944s2 for daily use, which I put up a thread about.
And that lasted about 5 months while I realised I didn't really even have time to wash the damn thing let alone keep it maintained properly. So it got sold, again I lost money on it. Not doing too well here.
So now I'm in a new Fiesta ST_Line 140, which really isn't my cup of tea, but it starts and gets me to work and doesn't need anything doing to it. It costs what it costs per month, no surprises, no time needing spent on it. While I do DIY which is the bane of my existence.
So! After all that lot, I still have a TA22 in the garage slowly deteriorating. Oh and I took the front bodywork off to check for rust and it's as well that I did, sent the bumpers away to be blasted and repaired, stripped a few bits here and there, and have a completely undriveable car that I'm determined to get running for the summer.
I've got a week off next week, and have been allowed some real downtime after using all my holidays for the last 2 years working on the house. So it's full steam ahead to get the Celica back on the road.
Here's an abridged list.
- fit an alloy ae86 radiator to go with the ae86 engine, all new hoses, plumb in and test the heater matrix
- repaint and refit all the front end metalwork
- upgrade to halogen headlamps, fit new bowls and adjusters
- repaint the bumpers (bit curse word about this, 400 quid of blasting and repair and they're still not good enough to chrome...)
- cobble up an exhaust so I can drive it to get a custom system fitted
- bodge up the paintwork where it's been scratched and chipped while in the garage being used as a shelf for the last 2 years
I've also got ae86 Gaz coilovers to be fitted, with new ally hubs and ae86 brakes. But haven't been organised enough to send the calipers away for refurb so can't put it on new suspension because I'd have no brakes til they came back.
But will do what I can next week. More posts will follow! With pics! I promise!
|
| |
|
|
|
|
|
|
|
OK so me the div, forgot I'd got a pic or two that can spice up the stream of consciousness above. So here's the car in its current state (minus the bonnet) 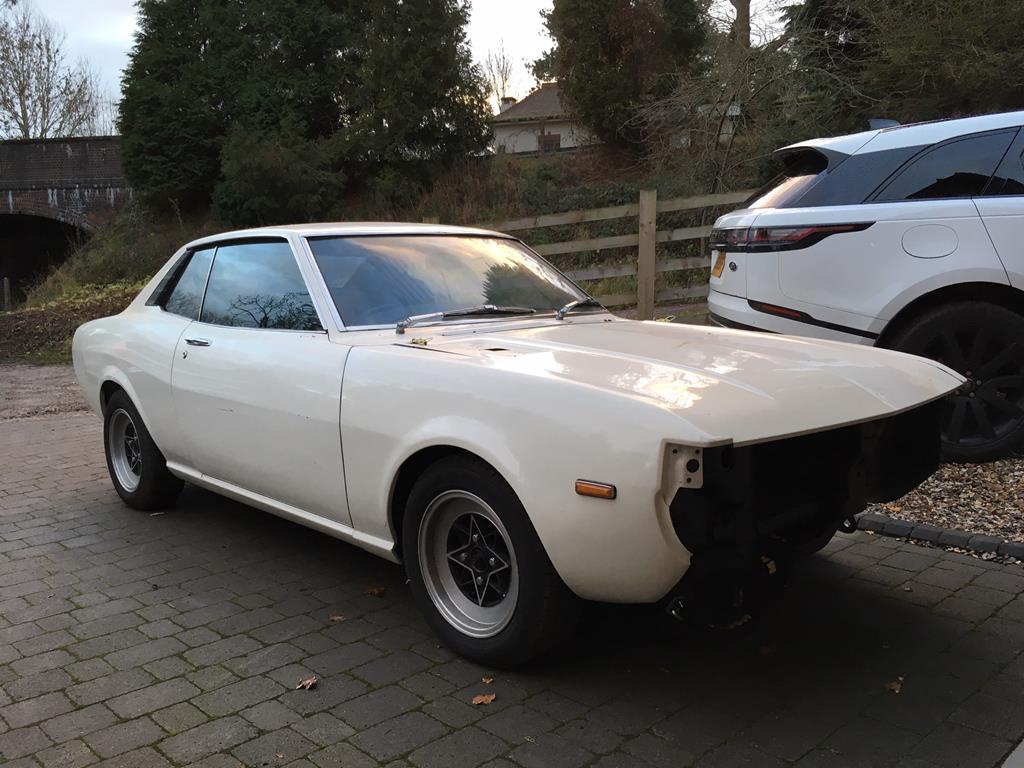 Garage cleared as far as I can, ready to get on with it 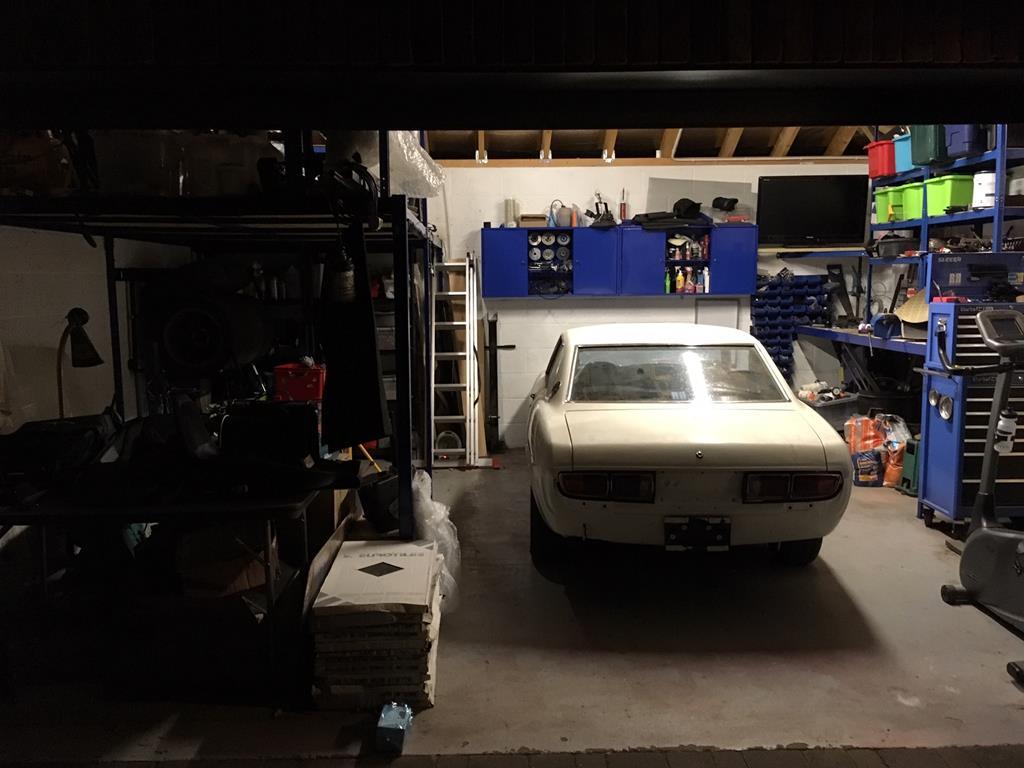 Shiny coilovers and spindles. Not so shiny calipers. New discs were a mighty 20 quid posted! 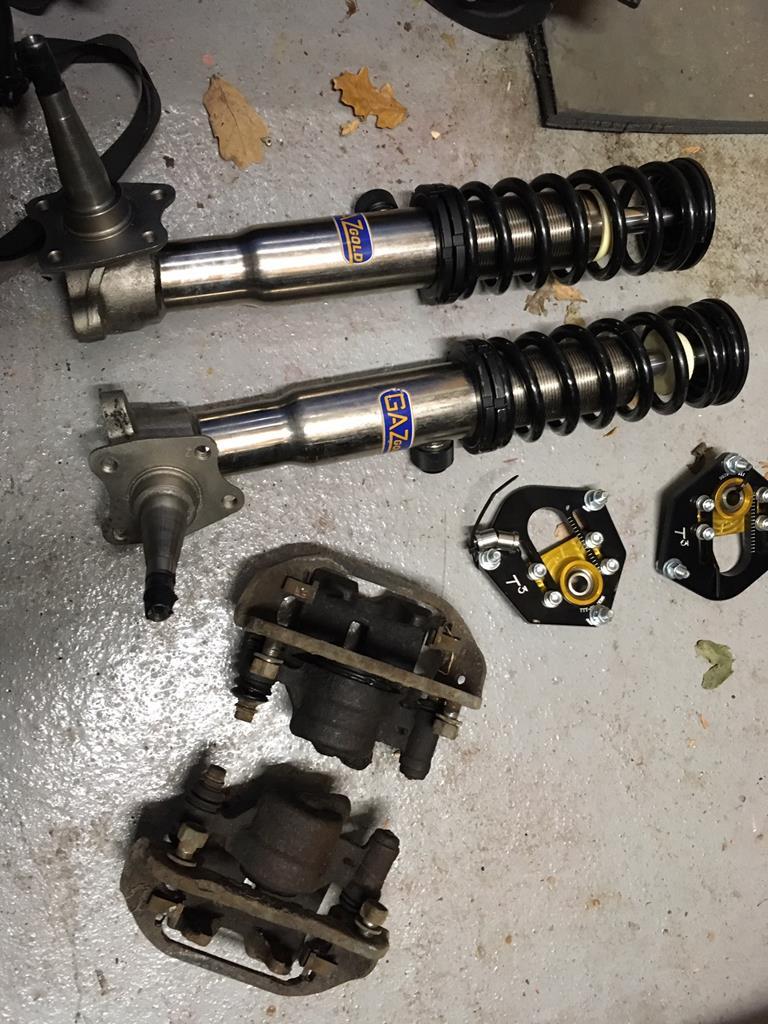 More shiny. These are lovely. These aren't cheap. I'm not thinking about it. 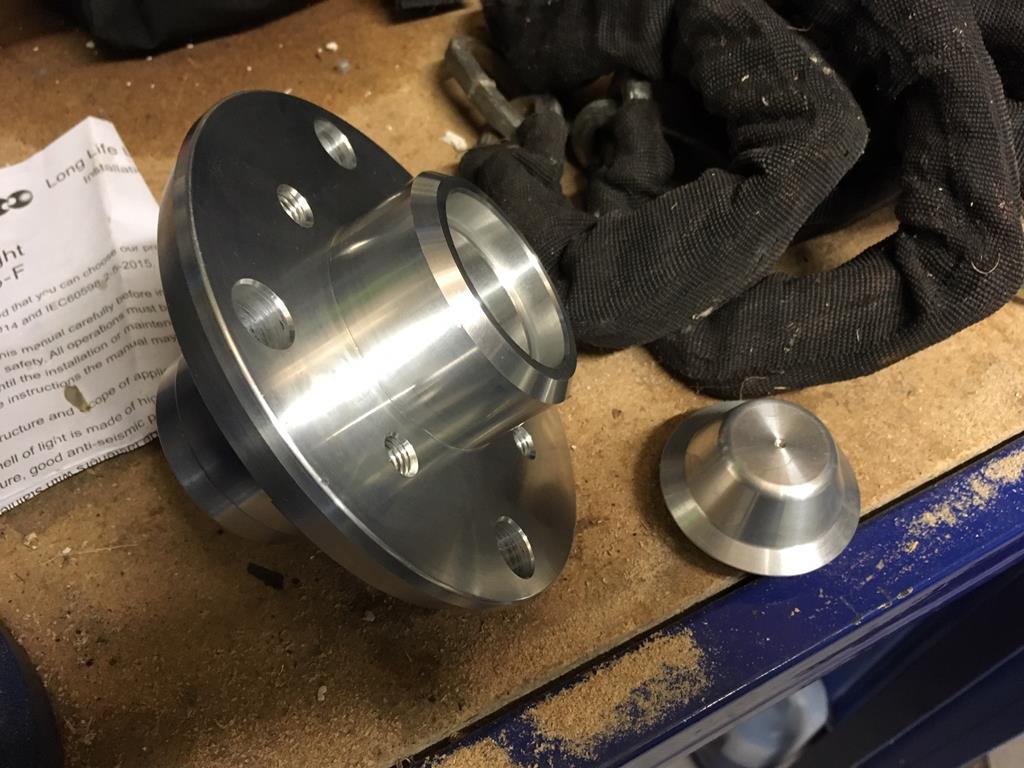 And matching rears, which Gaz were really helpful with. They're not listed on their pricelists but a quick email was all it took. 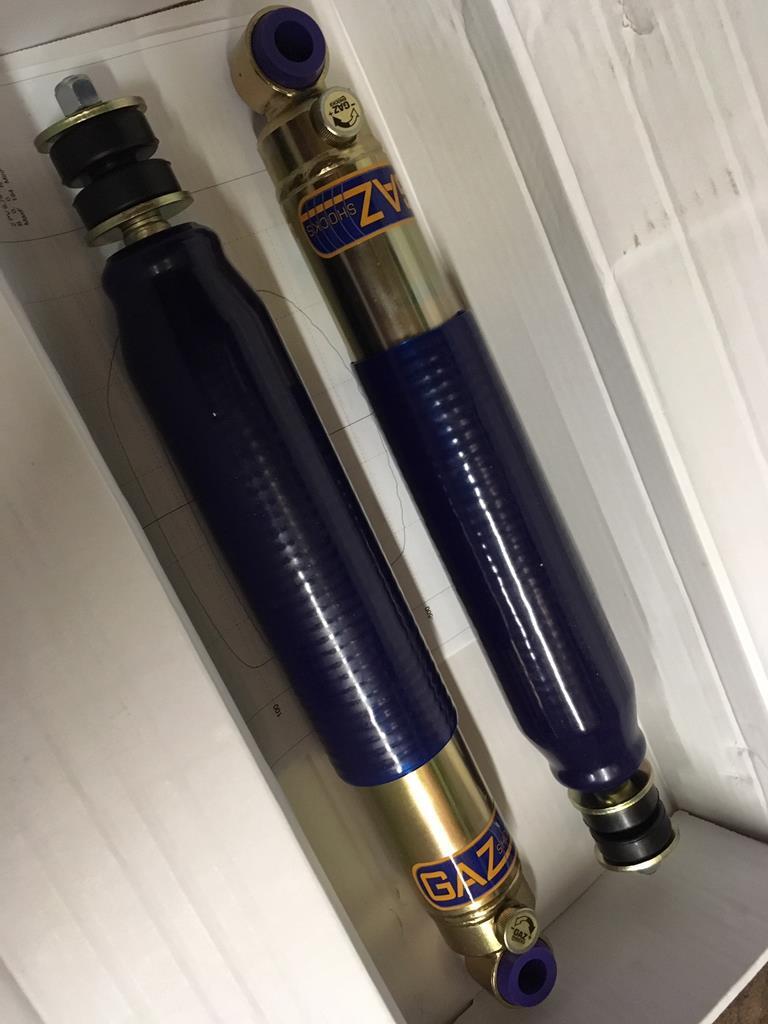 The coilovers will have to be fitted later. I did replace the front dampers in the TA22 front legs so it's not desperate but I do want less roll, a lower stance and maybe, just maybe new wheels... |
| |
|
|
samta22
Club Retro Rides Member
Stuck in once more...
Posts: 1,276  Club RR Member Number: 32
|
|
|
|
Welcome back James and straightaway thanks for causing suspension ponderings!  I might just have to do some research into those. Although in truth I have plenty to be getting on with for the time being and have purposely not gone down the AE86 route with regards to suspension/brakes etc. for the time being... Looking forward to seeing it progress once more. |
| |
'37 Austin 7 '56 Austin A35 '58 Austin A35 '65 Triumph Herald 12/50 '69 MGB GT '74 MGB GT V8'73 TA22 Toyota Celica restoration'95 Mercedes SL320 '04 MGTF 135 'Cool Blue' (Mrs' Baby) '05 Land Rover Discovery 3 V8 '67 Abarth 595 (Mrs' runabout) '18 Disco V |
|
|
|
|
|
|
|
Thanks Sam, nice to get a welcome back.
Only reason I went AE86 struts is to get a better brake pad material and for adjustable dampers.
There wasn't much wrong with the new KYBs I put on it, for the road, but I'm not going to be able to justify a track car for a few years at least so the celica will need to stand up and be counted.
So adjustables are needed and the Corolla ones make the most sense for that. Plus availability of brake upgrades if they're needed, although for cost and weight reasons I hope they won't be.
Cost me 1200 quid so far for suspension, and that's mostly unused parts from someone who made a loss from buying them new.
I didn't plan to spend that much and don't think it's really good value, but once I bought the struts it snowballed a bit!
|
| |
|
|
|
|
|
|
|
So, Sunday saw some good progress. Started with the radiator. Here's the standard rad cobbled up to fit the 4AGE. 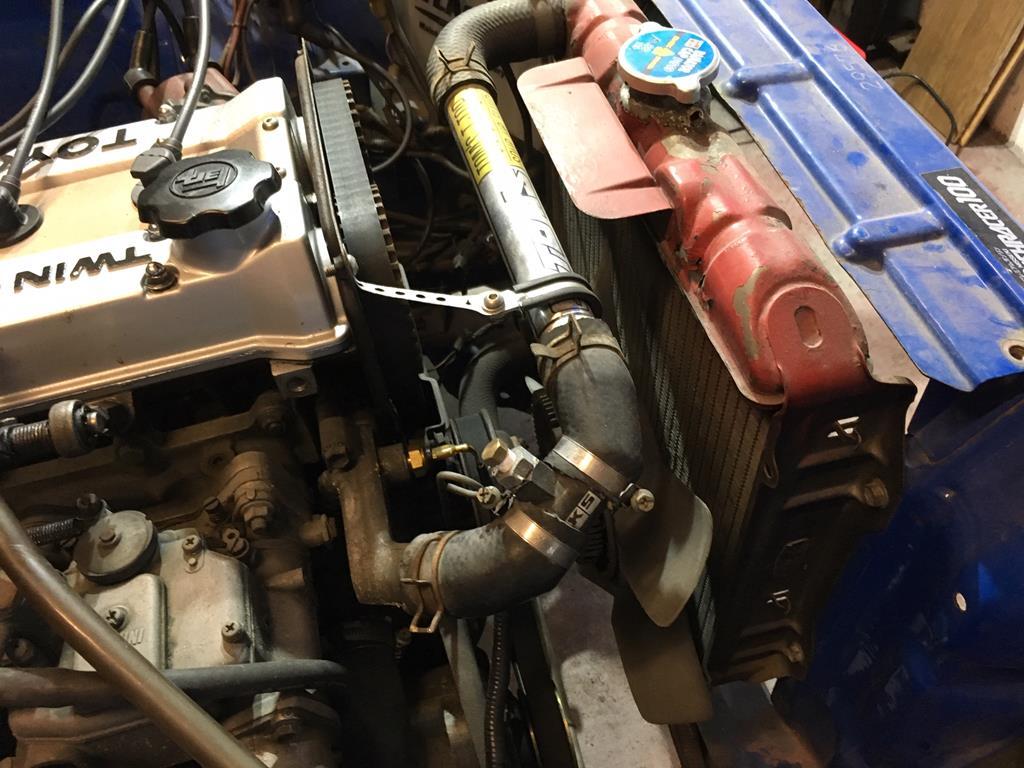 I've bought an aluminium upgrade radiator for an AE86 as the inlet, outlet and hoses are then standard bits. The only part not being so is the mounts. No biggy, right? Anyway, here's the strip down process. Starting with the standard celica rad. 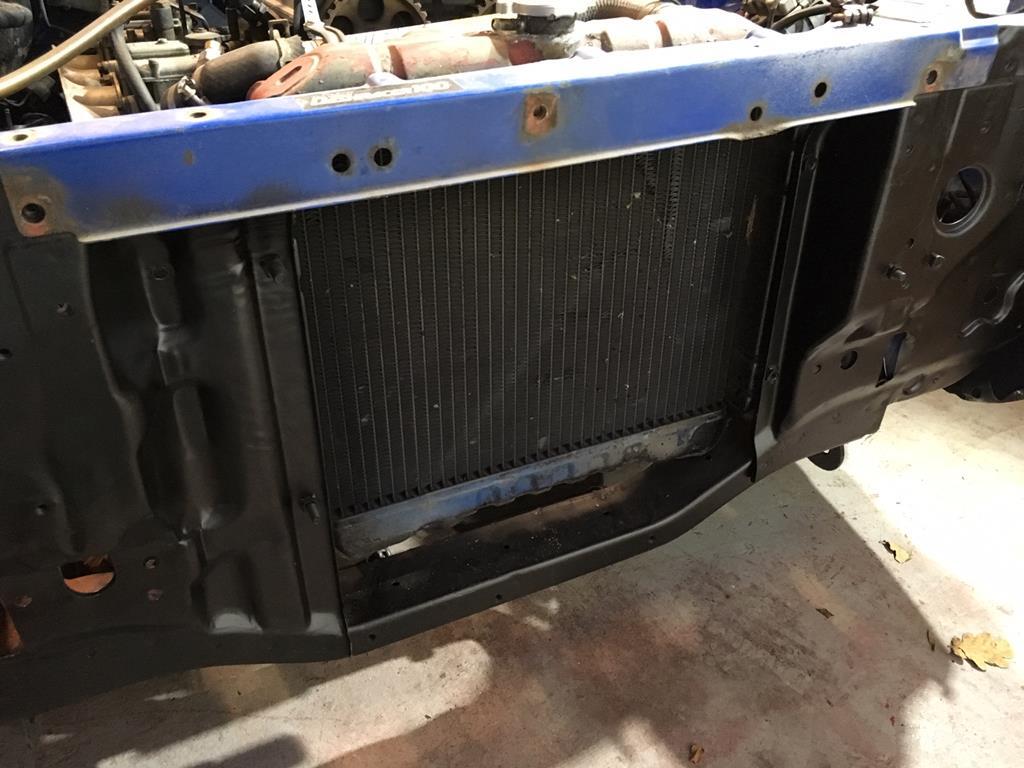 Removing the top brace 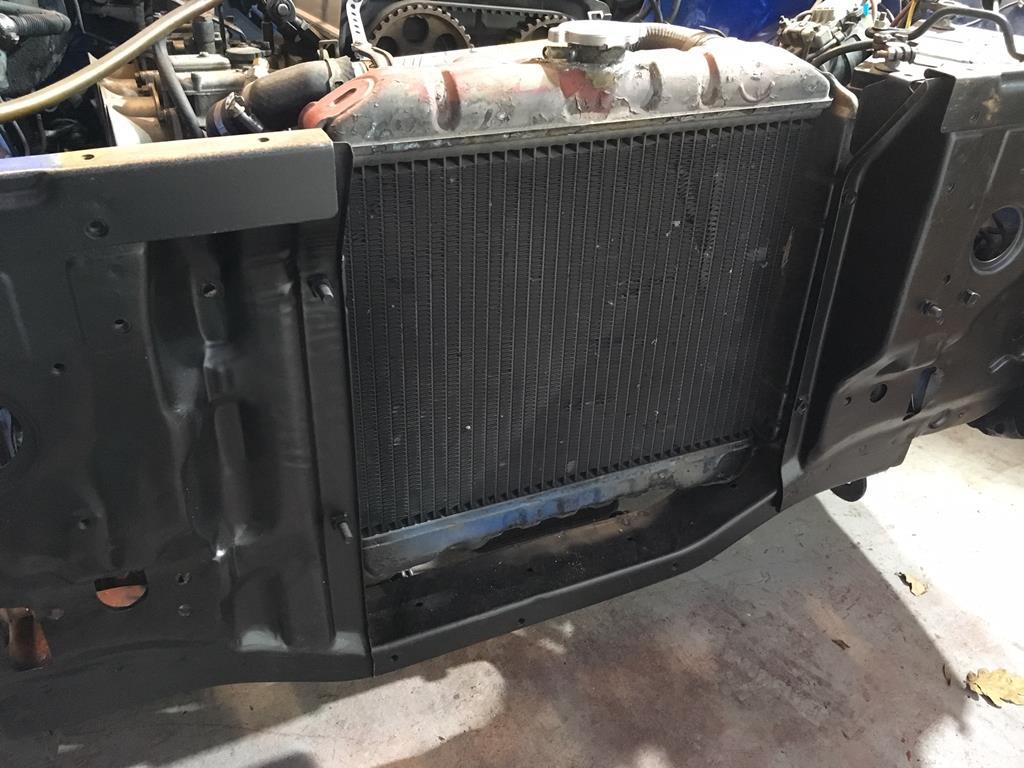 To see the aperture - far too narrow for the new rad. 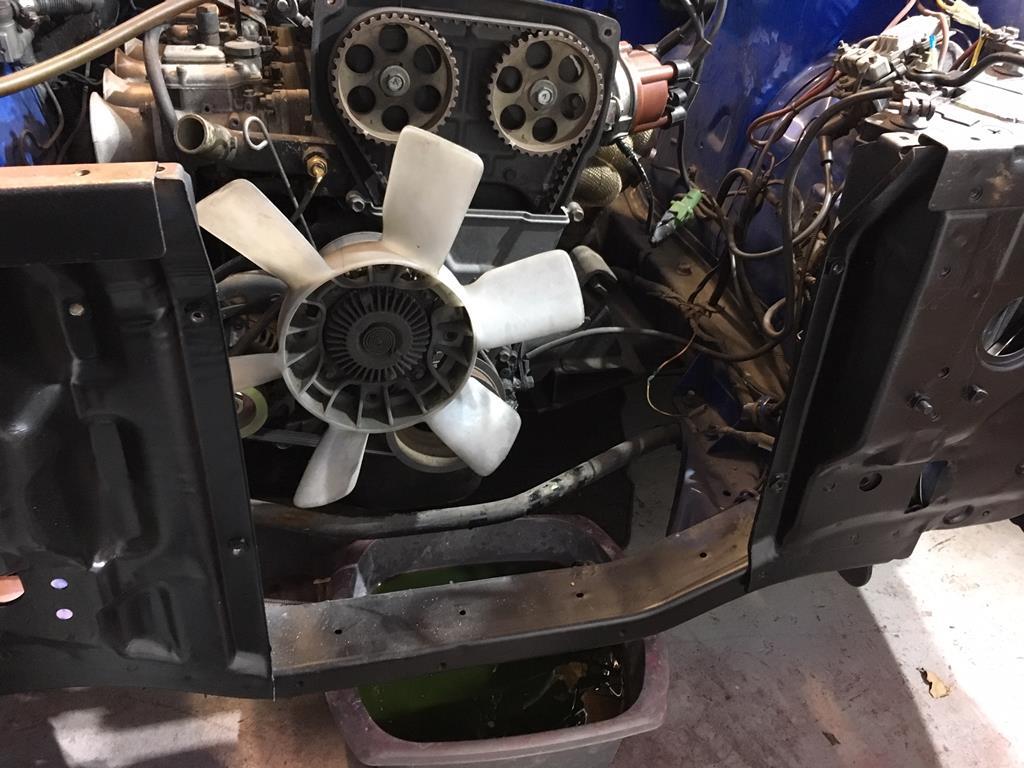 We also have a viscous fan. Not keen on these, so off it comes. 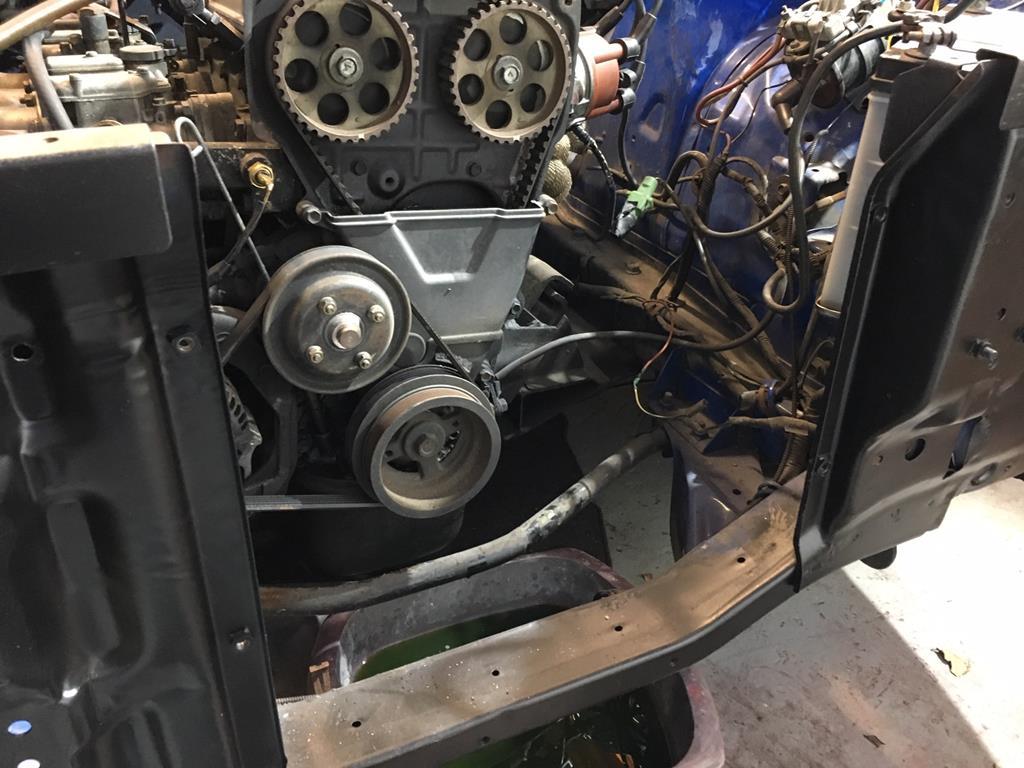 And laying in the new rad I can see that the measurements taken before I bought the new rad were accurate - it'll fit without affectnnig any structure or needing any major fabrication. 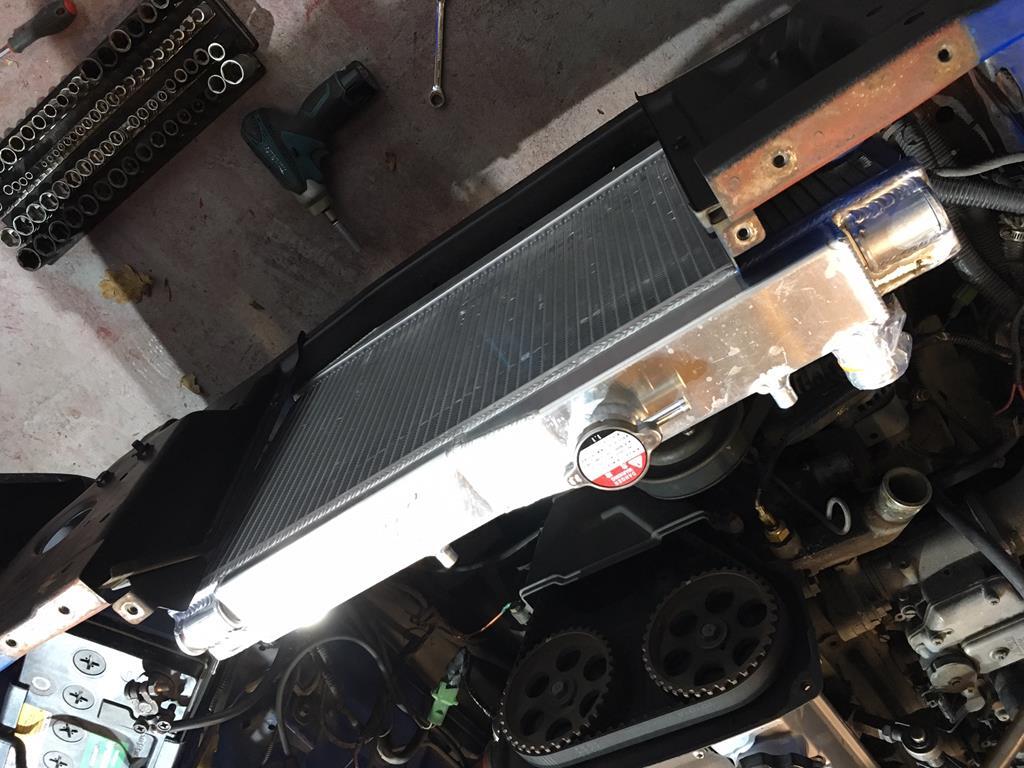 Chop chop on the left hand side - the small piece removed is on the floor next to the grinder. 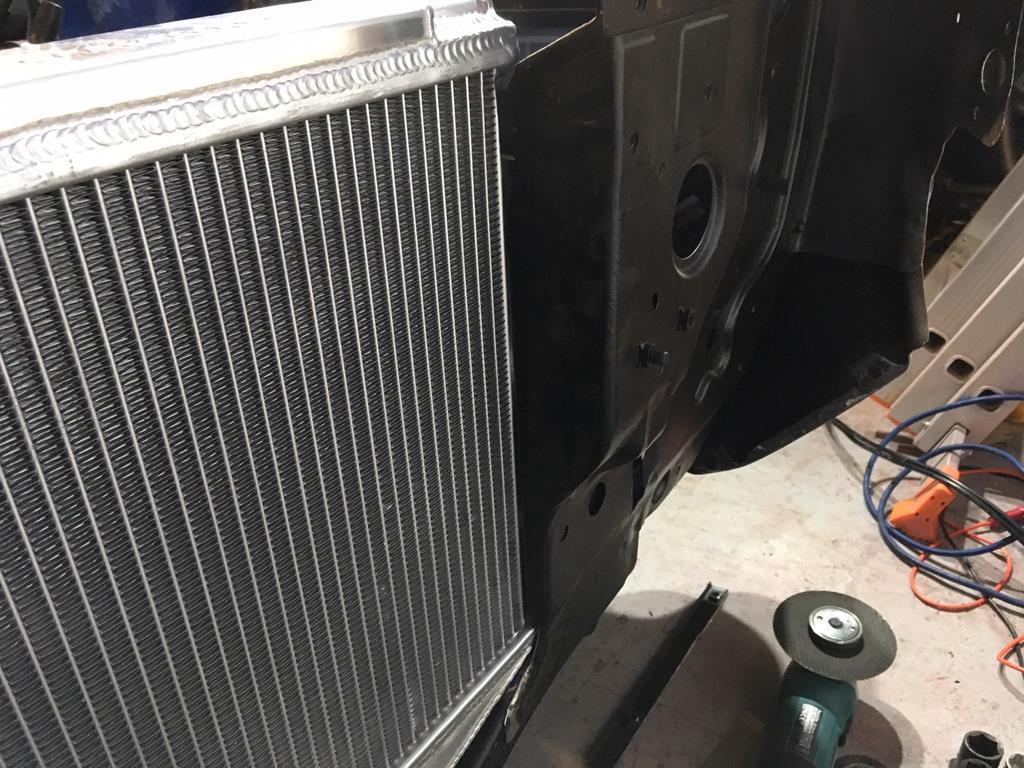 A fair bit more on the right - about 12cm of metal removed, some bending and profiling of the existing metalwork, and it's pretty flush here too. The profile of the front panel forms the wavy profile you can see here. I'd need to cut the whole section out and replace it with flat sheet to get it looking any different, and I don't think it looks out of place as it is - especially as it will mostly be seen in the engine bay, not from where this pic's taken. 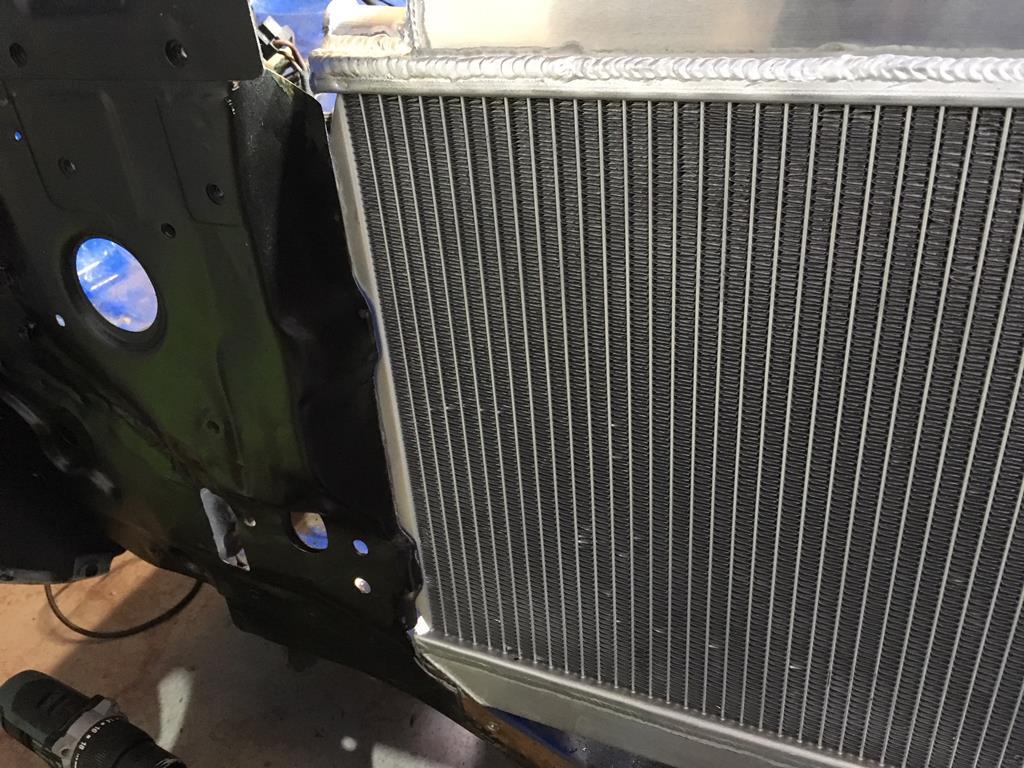 And with the rad in place, just gravity holding it there though. 2 lower mounts are just a pair of brackets, but the uppers will be trickier plus there's a 3" gap from top of rad to the cross brace. And because the rad top has 2 levels and a slope between, it won't be that easy to close that aperture - but I need to do it somehow and frankly with minimum welding as I'm not great at it, and don't have the luxury of time to practice before I do work on the car. 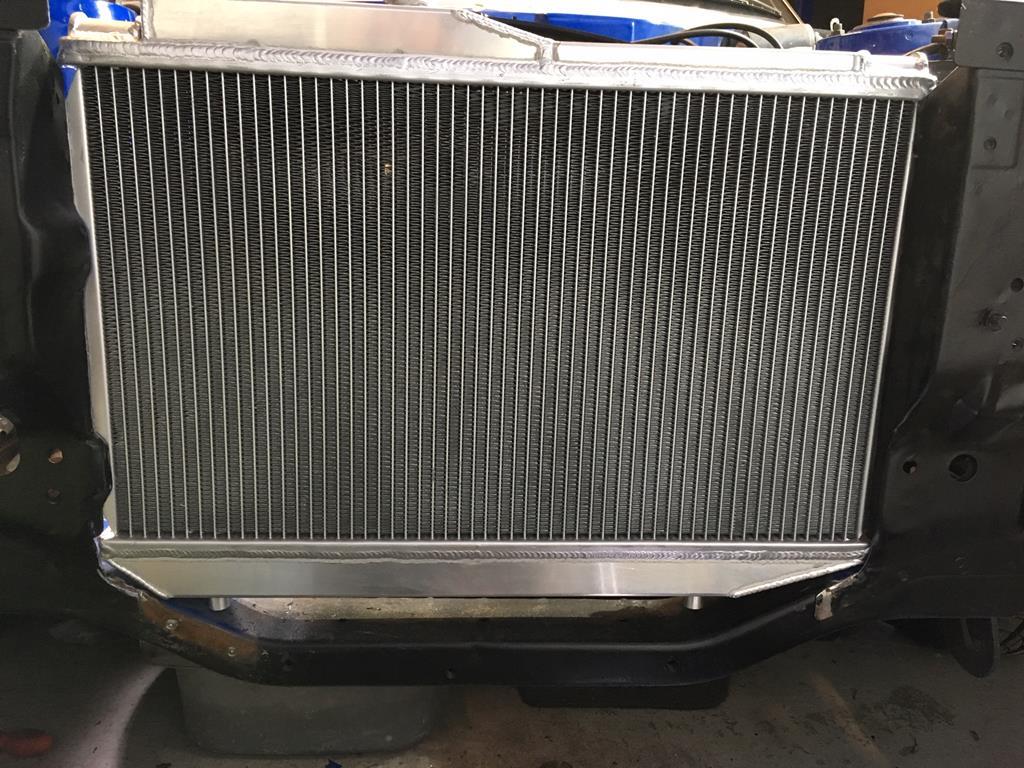 That was the end of play on Sunday. More later. |
| |
Last Edit: Mar 8, 2019 10:20:53 GMT by jamesie
|
|
|
|
|
|
|
|
Sorry, pics are all out of order. Sorting now...
|
| |
|
|
|
|
|
|
|
Monday saw me jet washing paving slabs and getting a bit of time in the garage too. First stop, make a bracket. Which I did, and forgot to take pics. Next step, weld it in. At which point I found that I had a leak from regulator to welder, and no gas. So we went from this, which wouldn't seal no matter what I did 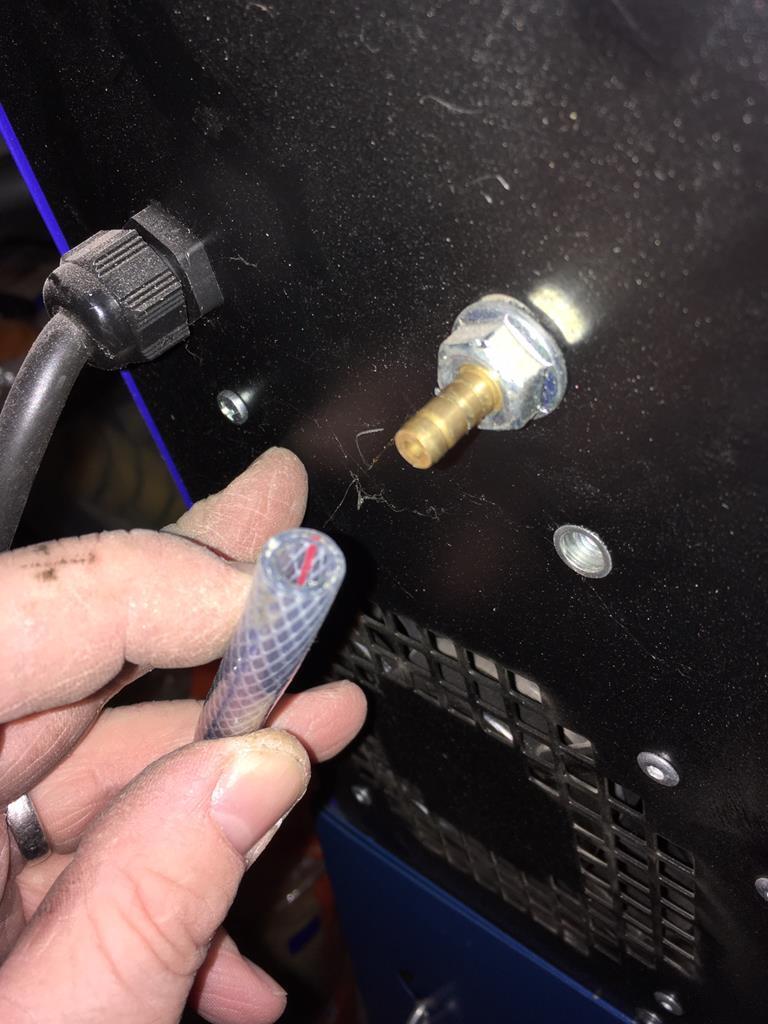 To this 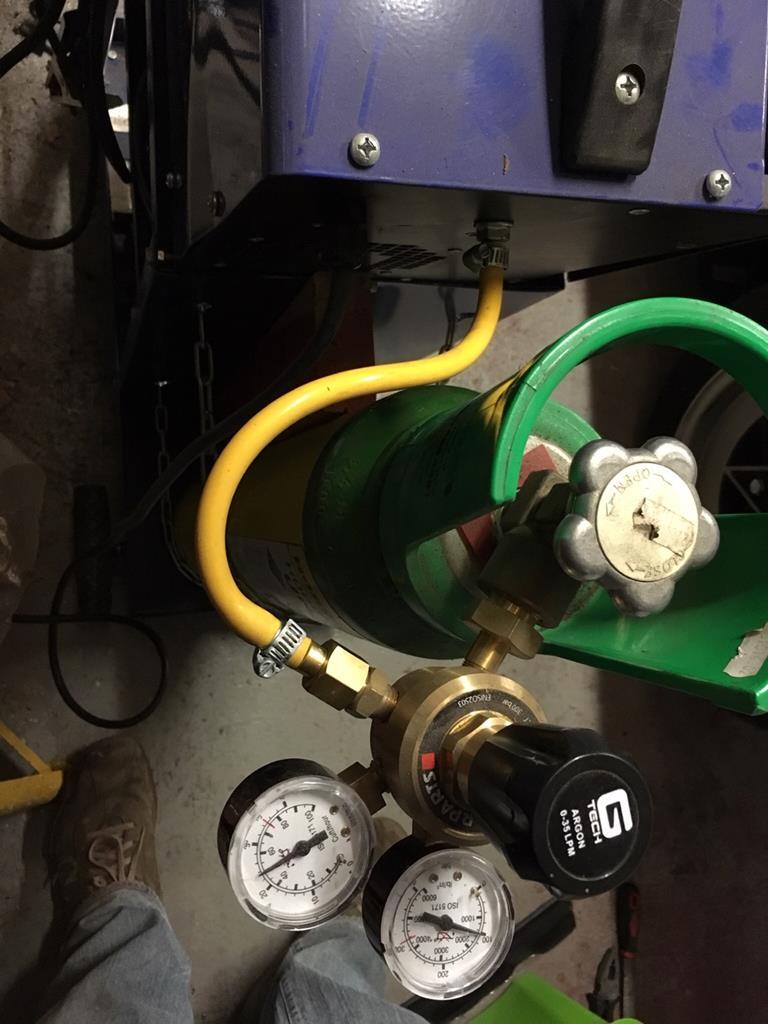 But that was all I managed. Tuesday and Wednesday were family and house days. Sad face. |
| |
|
|
|
|
|
|
|
And yesterday I welded the bracket tabs up 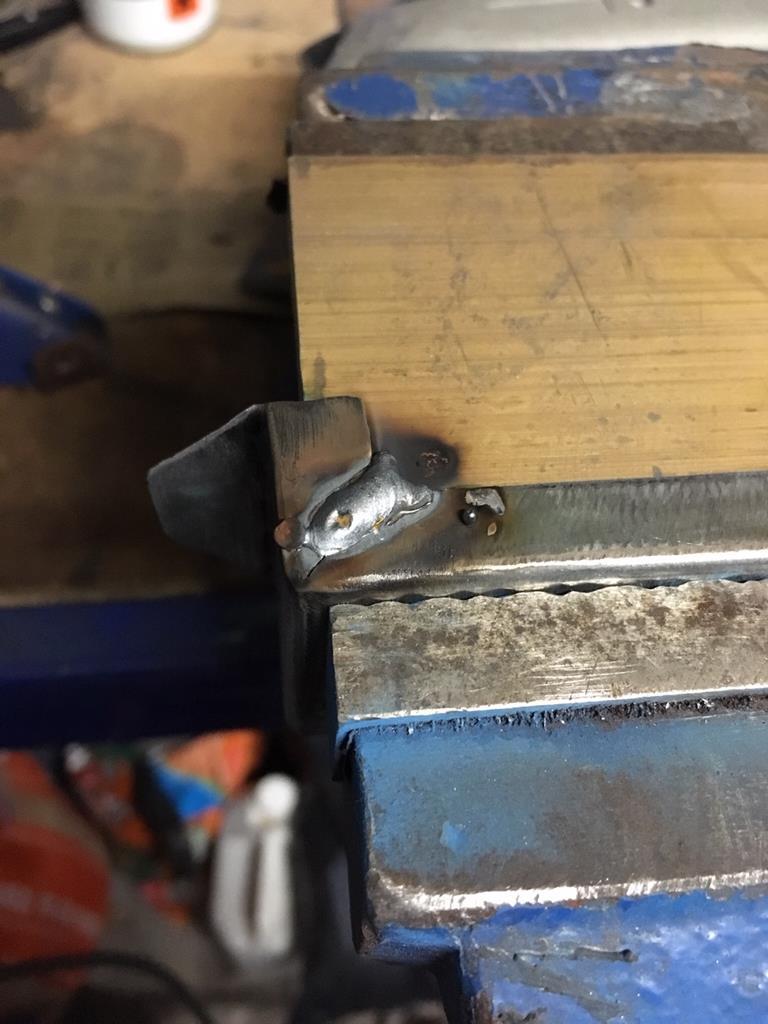 And the bracket on to the front crossmember 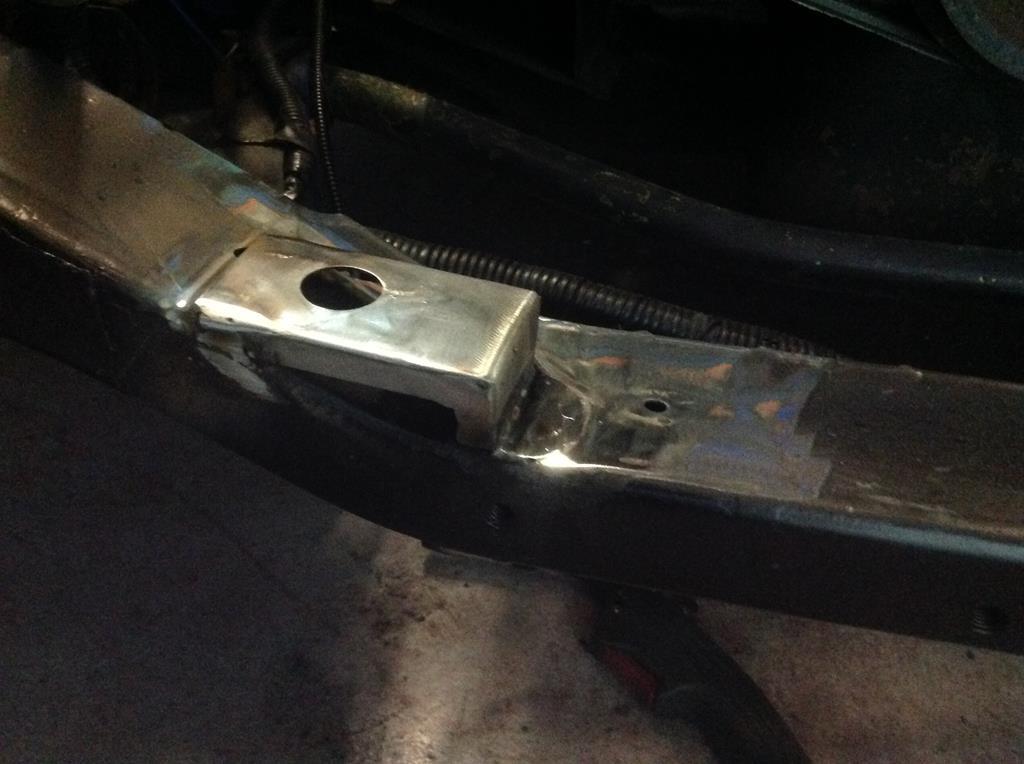 And then retired hurt with a migraine. Sorry about the last pic, it's dreadful but getting pics from the phone to the iPad is a pain in the wotsits, so... Hoping to get some time later today to at least do the lower left bracket, securing the top would be a fantastic achievement as fitting some standard hoses and coolant would get me pretty close to completing the cooling system. I also forgot to mention that I looked at the heater circuit and thought about it a fair bit, and decided to keep it bypassed but remove the bodged loop that was there, and probably causing an air pocket, and replace with a simple single piece of hose. It's not visible under the carbs but is miles tidier. I'll have to sort the heater out later. The engine's coming out at some point and that's when I'll worry about the rear thermostat housing, coolant sensors, heater circuit and the heater matrix. Won't be needing it this summer. Oh and the engine bay got a massive jet wash and degrease. Sorry the pic isn't oriented correctly. 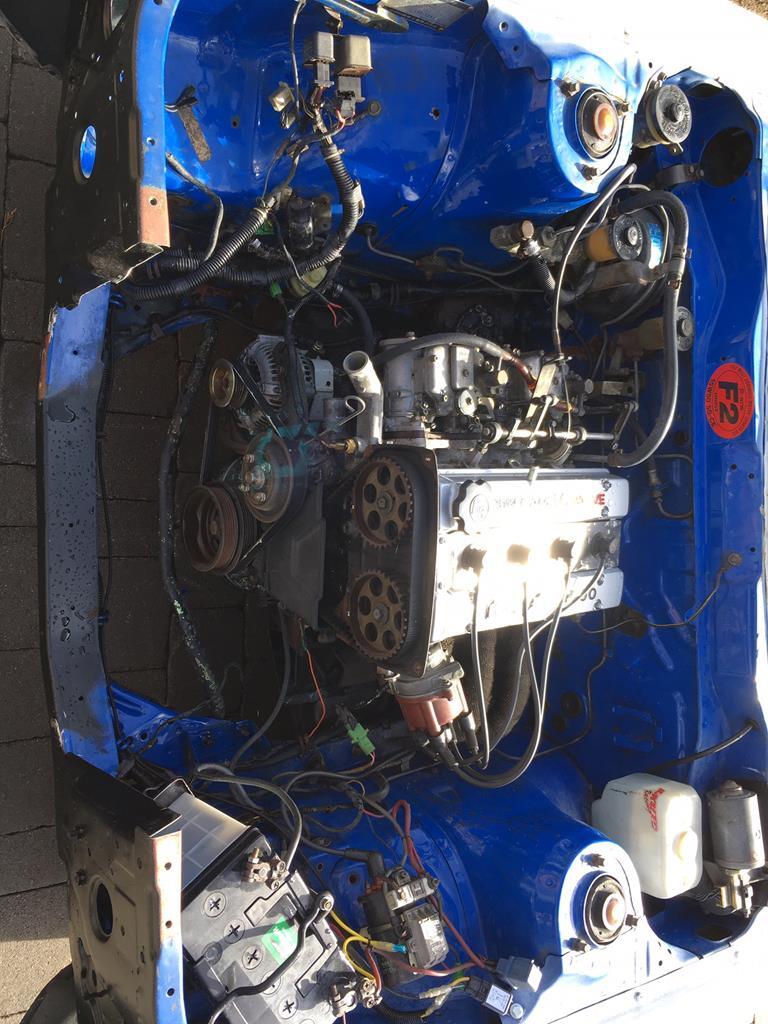 |
| |
Last Edit: Mar 8, 2019 10:39:58 GMT by jamesie
|
|
|
|


