Darkspeed
Club Retro Rides Member
Posts: 4,867
Club RR Member Number: 39
|
|
Sept 9, 2018 18:33:20 GMT
|
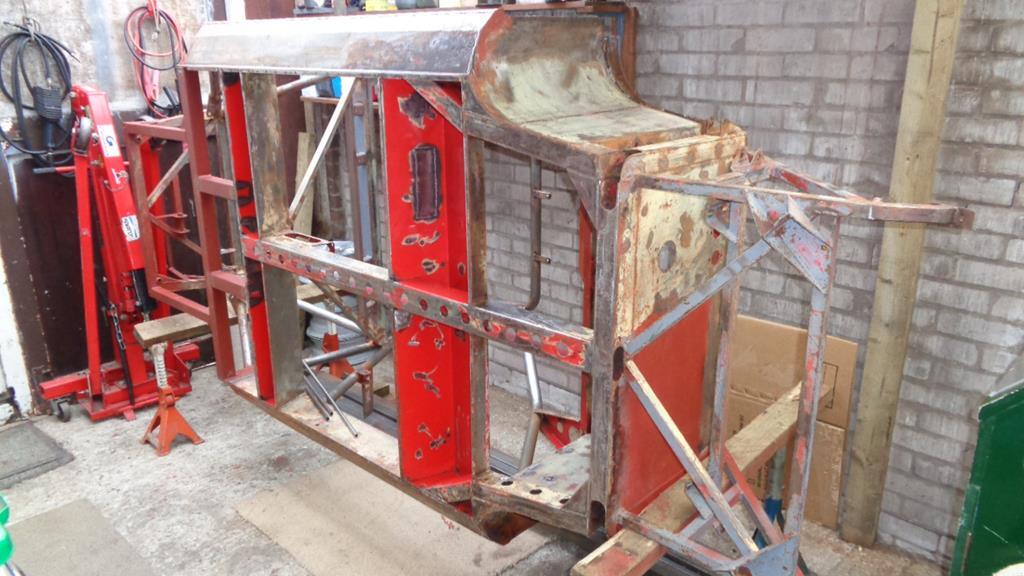
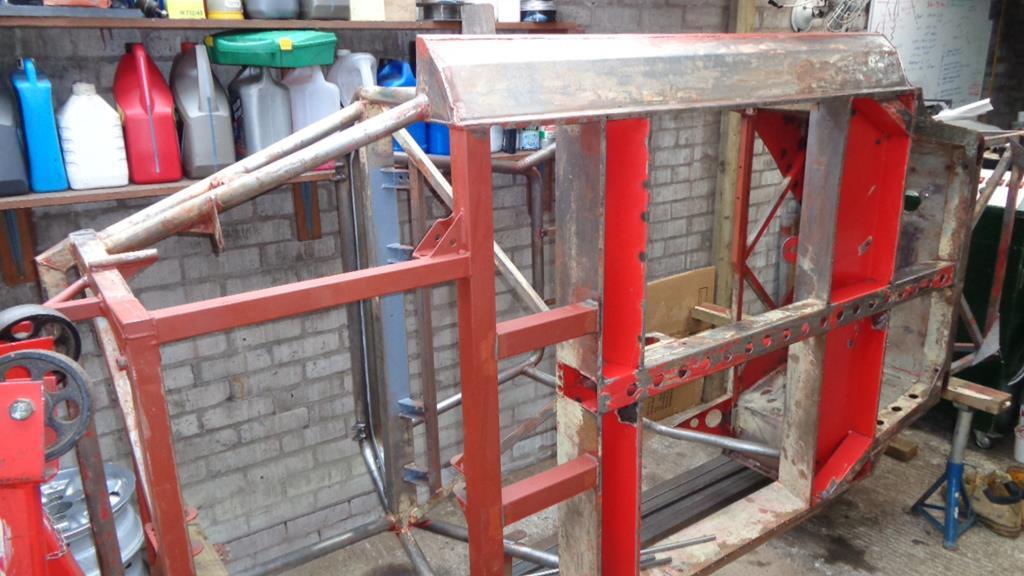
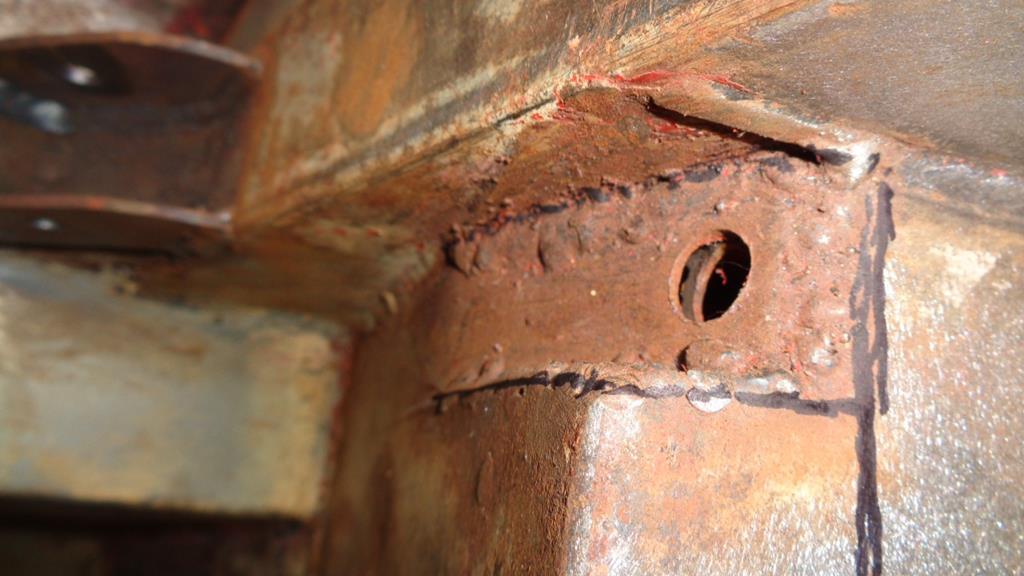
More paint removal. 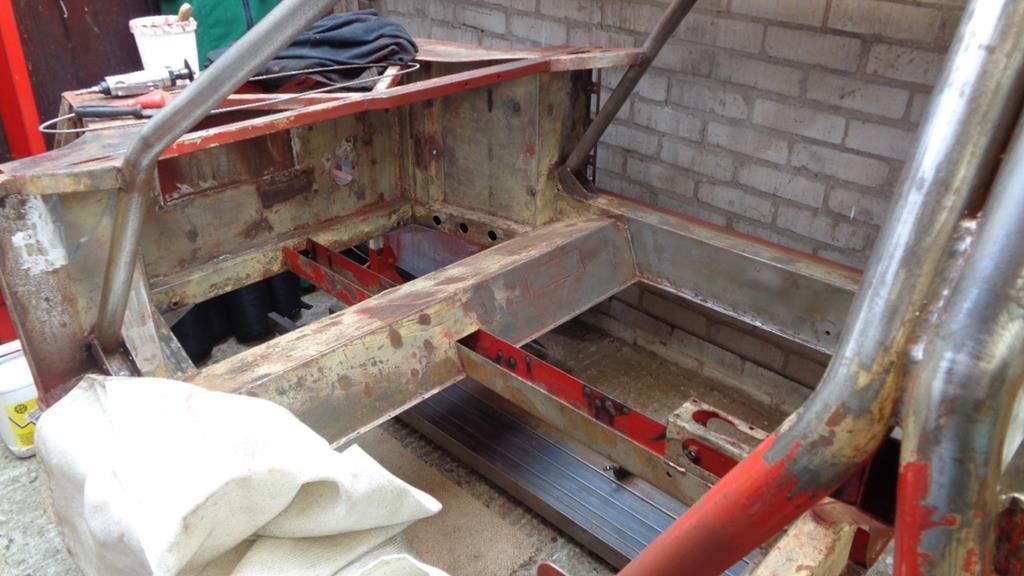 Welded in the rear screen frame 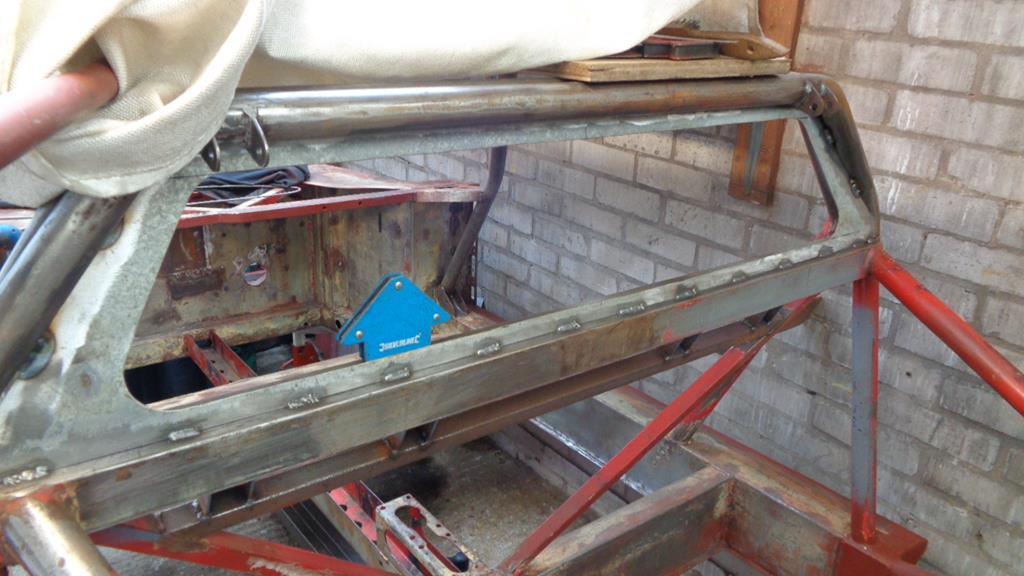 Started to look at the Gearshift support 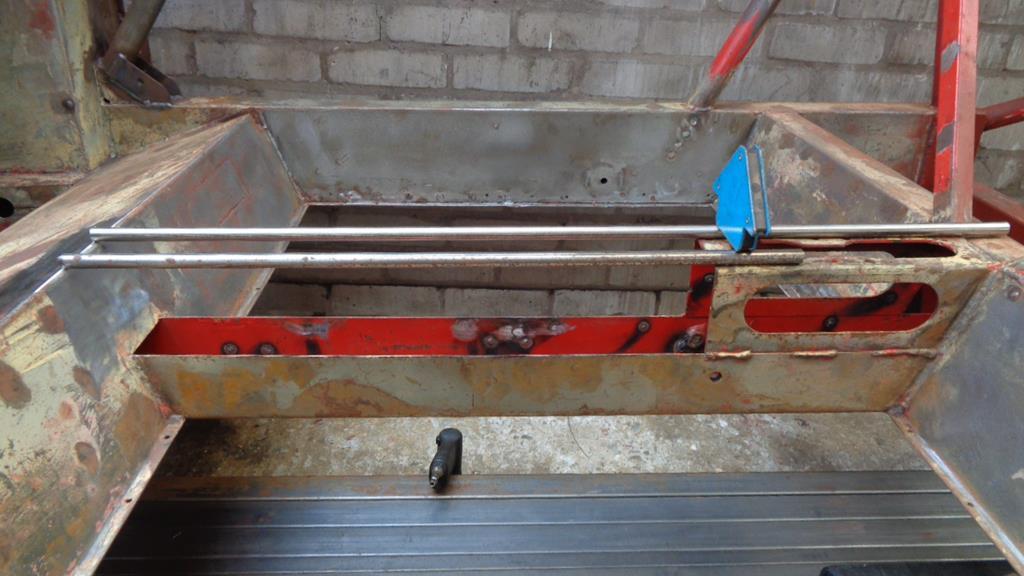 Also found a few more drilled holes in the chassis that need to be welded up so they got done as well but when you have seen dozens and dozen of welded up rivet and bolt holes you have seen enough. Plus a bit more grinding and removal of odds and ends that should not have been there and I can gradually start to see the beginning of the end. |
| |
|
|
|
|
|
|
|
Sept 10, 2018 19:59:59 GMT
|
|
Well, I have just spent an afternoon and early evening captivated by this thread (rather than preparing my annual accounts that my accountant is chasing me for...)
What a thrilling read.
I'll be following this with interest.
Peter
|
| |
|
|
Darkspeed
Club Retro Rides Member
Posts: 4,867
Club RR Member Number: 39
|
|
Sept 10, 2018 22:07:18 GMT
|
Well, I have just spent an afternoon and early evening captivated by this thread (rather than preparing my annual accounts that my accountant is chasing me for...) What a thrilling read. I'll be following this with interest. Peter Thank you for the kind words they are appreciated  - There are more project capers in the links below now they have been split up into separate threads rather than the collage that this thread drifted into for a bit should further diversions from what you really should be doing be required. |
| |
|
|
Darkspeed
Club Retro Rides Member
Posts: 4,867
Club RR Member Number: 39
|
|
Sept 16, 2018 20:27:58 GMT
|
Steadily working through the paint stripping grabbing an hour here and there with 10-15 minutes of sanding on another section of the chassis whilst the chemicals do their thing. 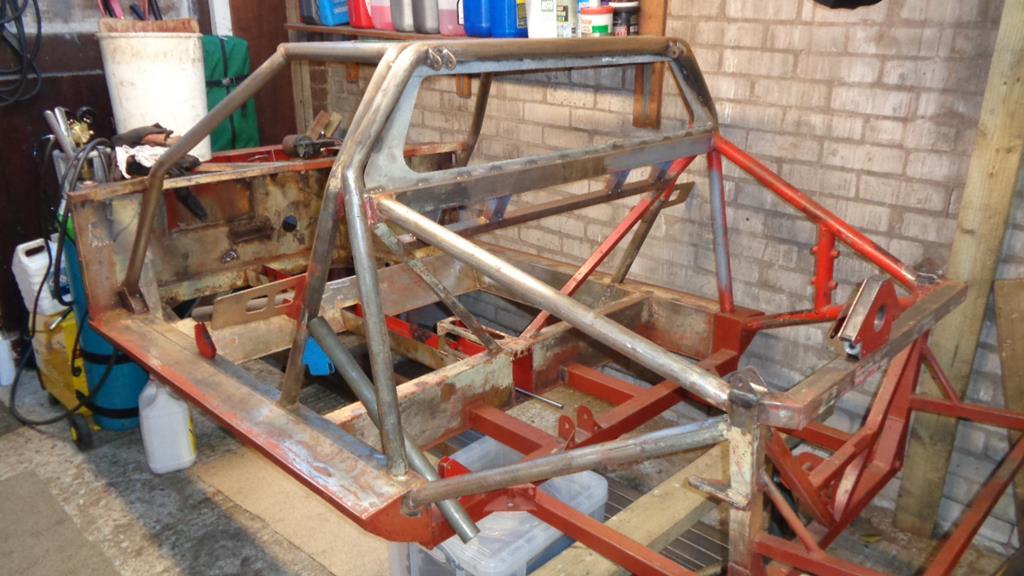 Gave the original engine mount a bit of a tidy up to improve both looks and weight. A bit more work with the sander and it will be off to be painted.  Also looking at adding a few of extra bracing tubes to the chassis here and there - First of which will run from the back of the door bar mount. Much as I did with the G15. In this case the additional chassis strength will not be as significant as that was. 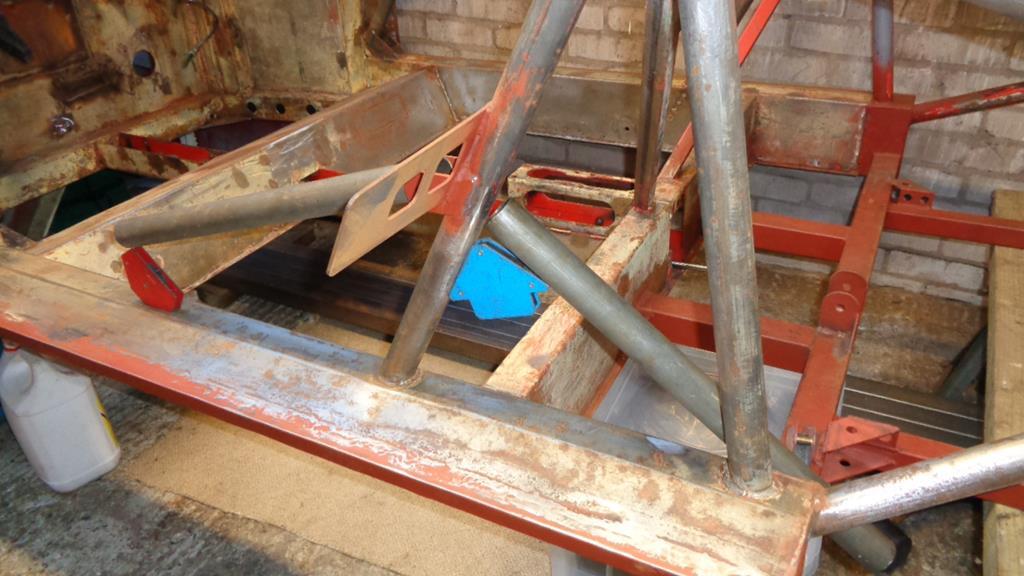 |
| |
|
|
Darkspeed
Club Retro Rides Member
Posts: 4,867
Club RR Member Number: 39
|
|
Sept 20, 2018 22:17:53 GMT
|
|
A small step - I finally go around to dropping the manifolds off with my mate for him to work his magic with improving the interface where the carb and manifold meet - Much as I expected he looked at and said "that's curse word! a lot of material is going to have to come out of there, you up for welding if I break through as it likely to get a bit thin in places to sort that out" I just told him to crack on and if it needs building up with weld in places then that's what it needs. The 44's do not sound to be much bigger than the 40's but when the runners were a bit small for the 40's and completely the wrong shape that's a lot of material to get removed.
May have mentioned it already but the decision has been made to go with the carbs on this rebuild as there are so few replica's running carbs even less running the triple IDF's. Everything out there now is built on modern donor EFI or throttle bodies but this old dog is going old school. I can smell the fuel bill from here.
|
| |
|
|
Darkspeed
Club Retro Rides Member
Posts: 4,867
Club RR Member Number: 39
|
|
Sept 23, 2018 19:46:17 GMT
|
Spent more time on paint removal today had the lad assist me with walking the chassis outside and turning it around. It's a comfortable weight for two to manage at the moment. Before 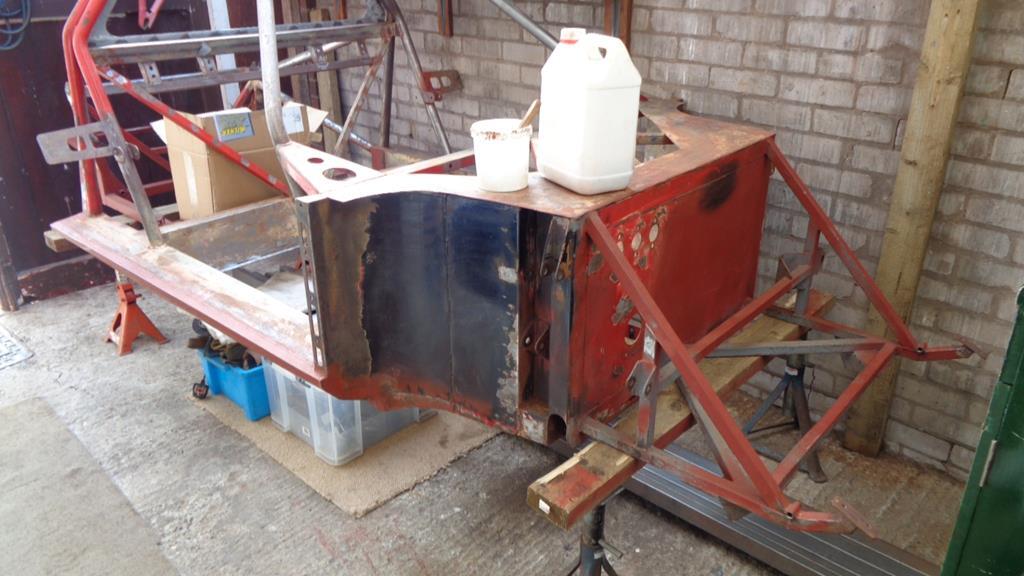 After - well almost after, I did a bit more after this shot and I have now almost completed the paint removal.  Now for quite a bit of sanding and and sorting out gearlever mounts and brackets for oil coolers, header tanks and the like. |
| |
|
|
|
|
|
Sept 24, 2018 10:46:53 GMT
|
|
great to see the progress, did you see the retropower guys are having a go at one
|
| |
|
|
Darkspeed
Club Retro Rides Member
Posts: 4,867
Club RR Member Number: 39
|
|
Sept 24, 2018 11:18:56 GMT
|
great to see the progress, did you see the retropower guys are having a go at one Yes, I have seen that car - Not my tempo - "having a go at one" apt. |
| |
|
|
Darkspeed
Club Retro Rides Member
Posts: 4,867
Club RR Member Number: 39
|
|
Oct 15, 2018 18:45:17 GMT
|
|
|
| |
|
|
Darkspeed
Club Retro Rides Member
Posts: 4,867
Club RR Member Number: 39
|
|
Oct 26, 2018 22:07:33 GMT
|
|
Had a report back on the inlet manifold and after a couple of hours with the carbides the carb end of one of the manifolds is nearly completed - by calculation there will have been around 8 hours + of work put into them to get them opened up to suit the 44's and get the air flow capability improved. The other benefit being that they are get considerably lighter during this process.
|
| |
|
|
Darkspeed
Club Retro Rides Member
Posts: 4,867
Club RR Member Number: 39
|
|
|
|
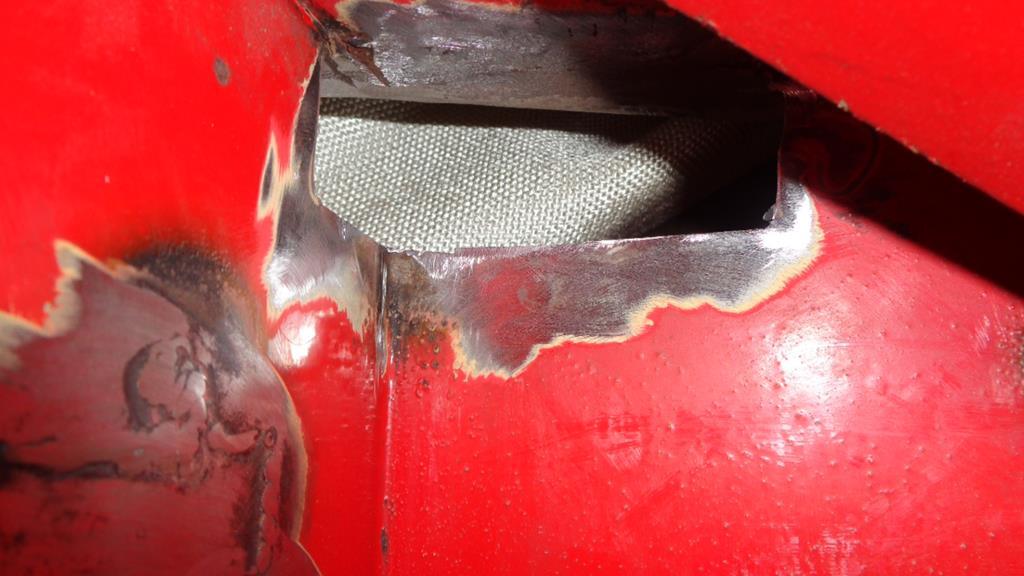
Got a couple of photo's In the last picture you will see that to get the shape that was required, even though the manifold was about 1/4" thick, the material was not quite thick enough and ended being so thin it was broken throuigh when polished so some building up was required. A lot of material has been removed - I will have them back in a week or so and will drop them back on the bench to see if we have gained a few extra CFM 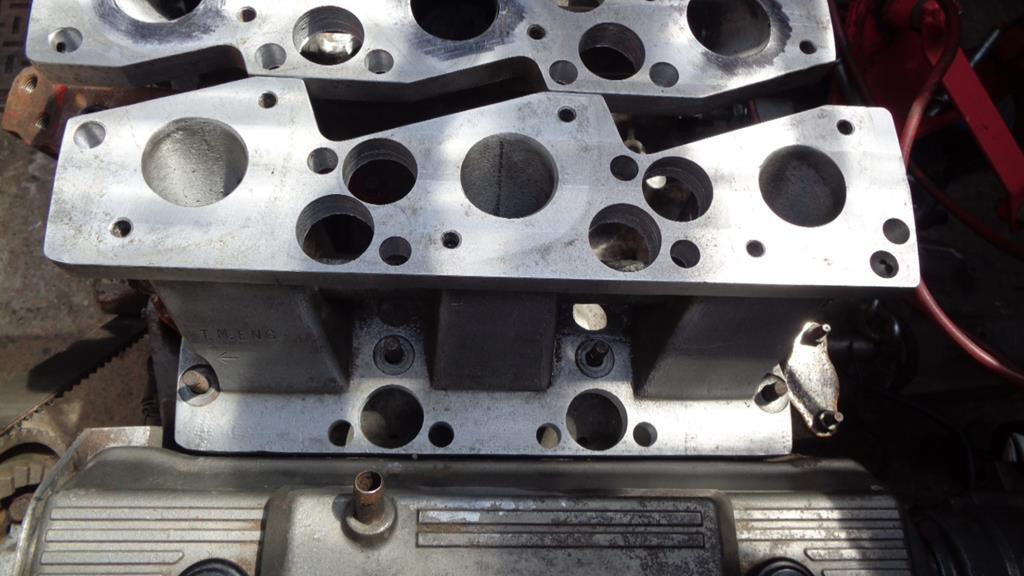 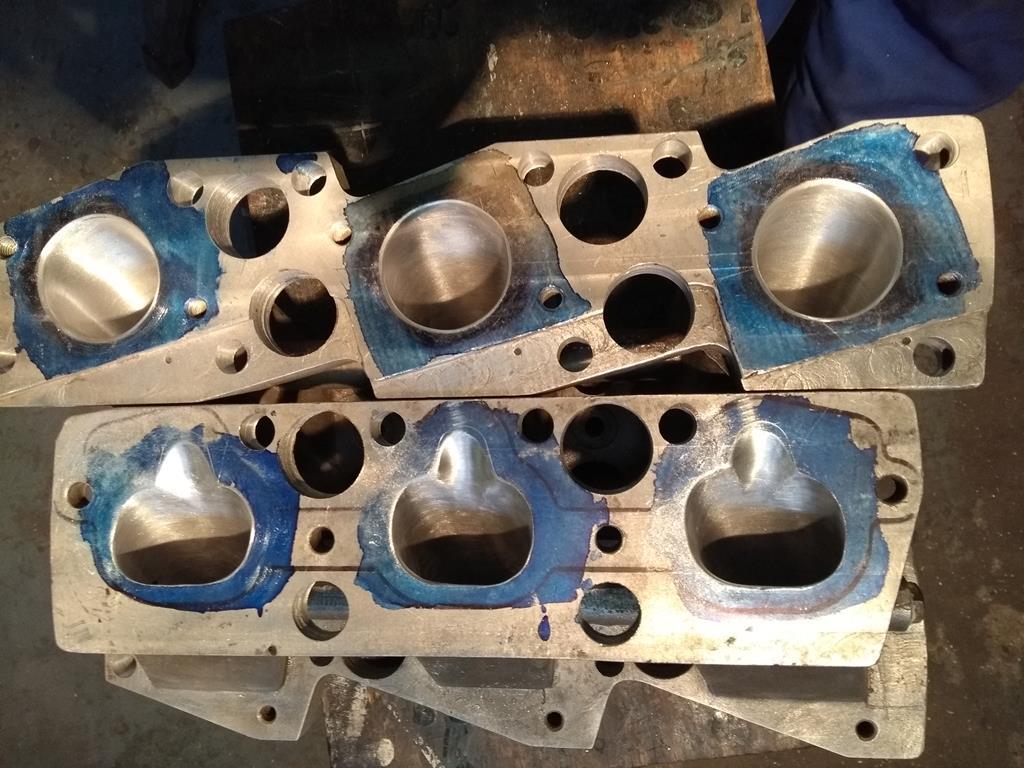 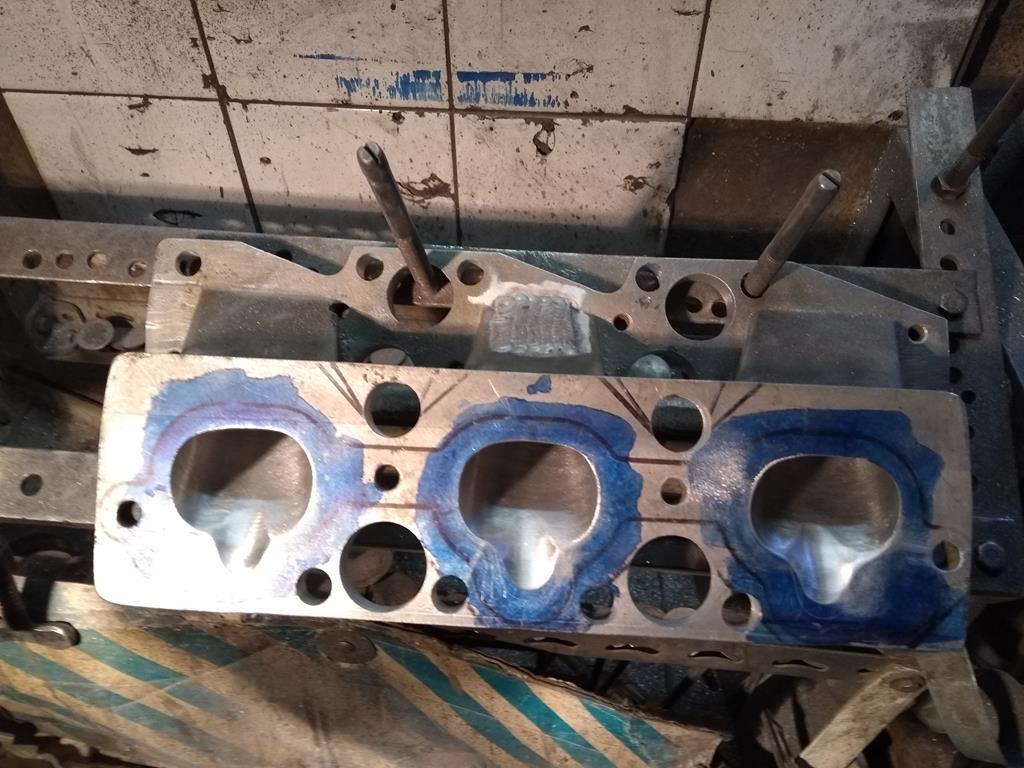 |
| |
Last Edit: Nov 3, 2018 22:47:19 GMT by Darkspeed
|
|
Darkspeed
Club Retro Rides Member
Posts: 4,867
Club RR Member Number: 39
|
|
Nov 24, 2018 20:53:57 GMT
|
Tested in the Flowbench thread - The results of which have provided proof of very worthwhile improvements in flow and good to feed many many ponies. 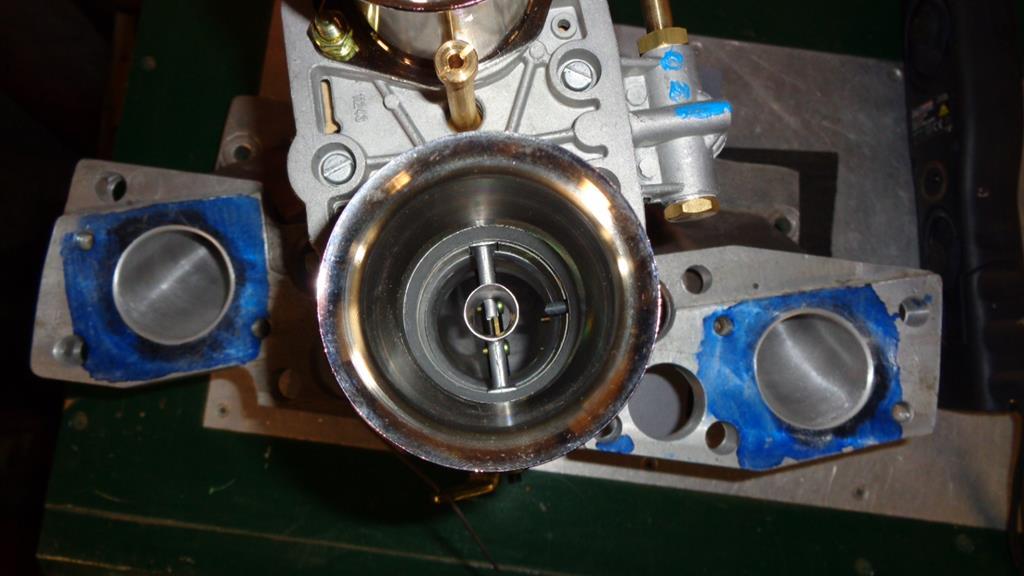 |
| |
|
|
Darkspeed
Club Retro Rides Member
Posts: 4,867
Club RR Member Number: 39
|
|
|
|
|
|
| |
|
|
|
|
|
|
|
|
Try rollering it on, use a 4" wickes gloss sponge - discard after use. This gives a good stippled finish with even coverage.
|
| |
|
|
Darkspeed
Club Retro Rides Member
Posts: 4,867
Club RR Member Number: 39
|
|
Dec 10, 2018 17:39:10 GMT
|
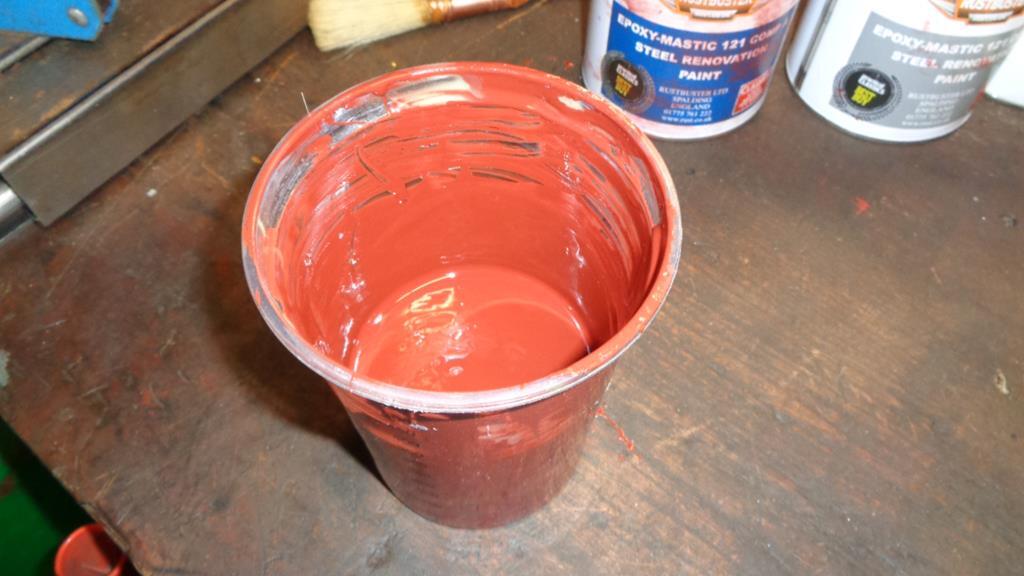
Try rollering it on, use a 4" wickes gloss sponge - discard after use. This gives a good stippled finish with even coverage. Looking for as smooth as possible - Too cold for that though and the temp means it's still not anywhere near curing after 24 hours. Will try 10% thinners next time plus trying to pick a warmer day. |
| |
|
|
|
|
|
Dec 11, 2018 22:38:25 GMT
|
|
I used epoxy mastic on the Rx3 and my viva. Great stuff but it is thick. It feels so satisfying to put on knowing how effective it is a proper barrier.
|
| |
|
|
Darkspeed
Club Retro Rides Member
Posts: 4,867
Club RR Member Number: 39
|
|
Dec 16, 2018 16:33:06 GMT
|
Carried out a few more bits of welding today Filled in that final bit of ugly that had been chopped into the large mid cross member. Cleaned back top and bottom - cut a new piece from 16 gauge welded and flatted off with the 40 grit flapper.  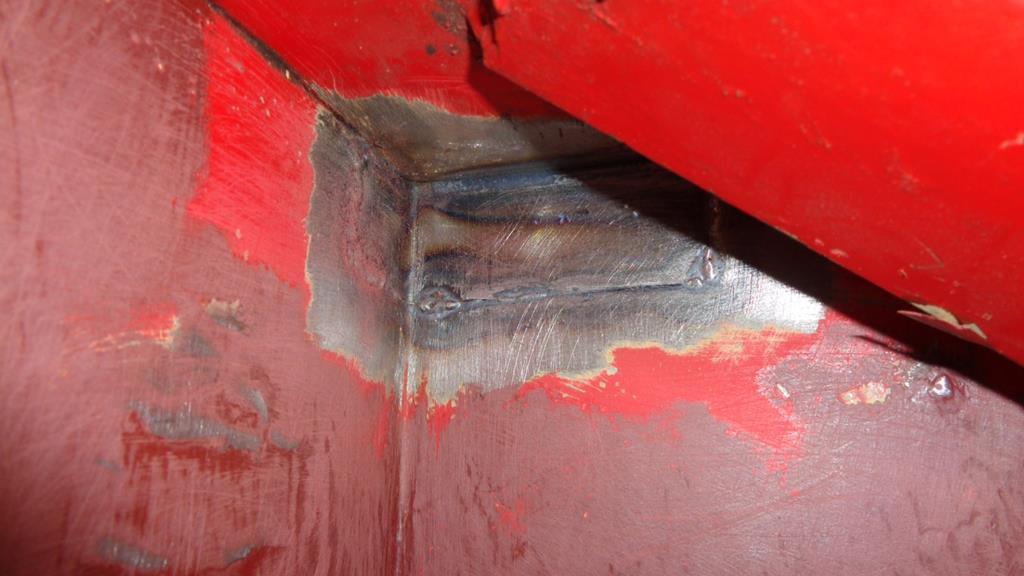 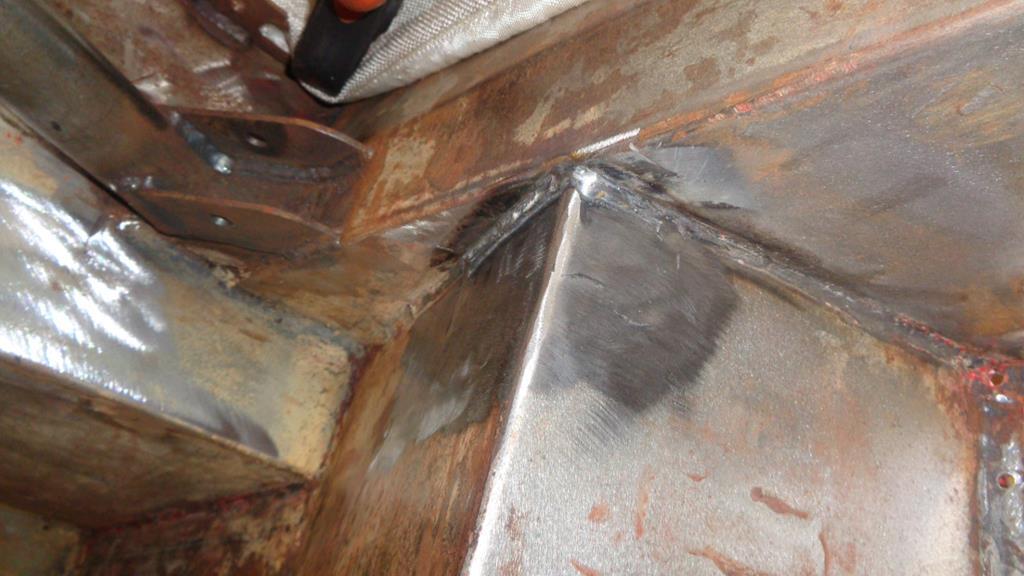 I did notice that whilst cleaning back the area for welding the epoxy mastic also flatted off and sanded back very nicely its really nice to work with and is really tough. Will get a bit more painting done this week with a bit more welding in between.  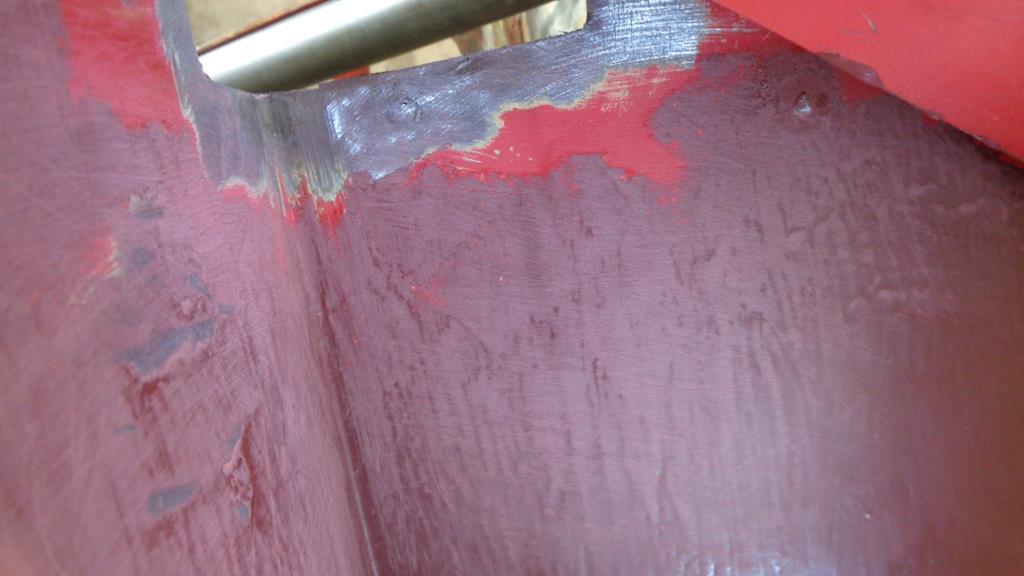 The couple of cross tubes from the door bar back to the chassis still need to be done and a couple of 3mm x 50mm strips for the seat mounts to bolt to - these will need a few holes in before welding. Finished the welding in of the rear window surround as well so need to order up some sealant to seal it fully and then a window rubber seal.  It's getting very near to the time where I need to order up the floor for the car. The old one has been kept for a pattern for the drill holes for all the rivets - I had pretty well decided that I would use anodised aluminium for the floor but I am half drawn to using a sheet of stainless steel as Lister bell fit on the STR's  I will have a ponder on that one - I have had no issues with flimsy floored cars in the past 18 SWG gauge being the norm - I was going to opt for 16 SWG to 2mm on the Stratos. |
| |
Last Edit: Dec 16, 2018 16:35:47 GMT by Darkspeed
|
|
|
|
|
Dec 16, 2018 18:16:01 GMT
|
|
Very nice work. Does that paint have rust inhibitors in it? I'm looking for something to go on my bulkhead. Used Jotun 87 before which is a bit like Por15, but doesn't actually kill rust.
|
| |
|
|
Darkspeed
Club Retro Rides Member
Posts: 4,867
Club RR Member Number: 39
|
|
Dec 16, 2018 19:20:47 GMT
|
Very much doubt there is anything in there to kill or cure rust - I suspect that it's just a re-badged Jotun - I don't hold much faith in rust "cures" having a preference for cutting it out putting in good steel and then sticking a good durable coating over the top that keeps out the oxygen. @grumpynorthener is probably your man for advice on rust treatments and thin sheet steel - The thinnest steel on this thing is 1.6mm. About the stuff - Which is why I though well why not. |
| |
Last Edit: Dec 16, 2018 19:24:48 GMT by Darkspeed
|
|
Darkspeed
Club Retro Rides Member
Posts: 4,867
Club RR Member Number: 39
|
|
Dec 31, 2018 13:27:36 GMT
|
reminded by the rallycross thread on from v12turbo - In the UK Retro Rallycross events John Cross is campaigning a Litton Corse i similar to my Strato's replica - as the litton was specifically designed to be a stage Rally Car the chassis and integral cage are fully MSA certified so all good for a competition logbook from the off.  Not sure if this link will work to the facebook vid - but it shows just how tiny the Stratos is www.facebook.com/BritishRallyX/videos/1201027480063098/www.facebook.com/BritishRallyX/videos/1201027480063098/Looks like that's a no then on being able to share a facebook video. |
| |
Last Edit: Dec 31, 2018 13:28:54 GMT by Darkspeed
|
|


 - There are more project capers in the links below now they have been split up into separate threads rather than the collage that this thread drifted into for a bit should further diversions from what you really should be doing be required.


