|
|
|
Dec 15, 2016 21:16:18 GMT
|
|
I had an issue with fuelling on my motorhome with the same engine. There was a heat exchanger on the side of the cylinder head which warms up the fuel. It developed an air leak which was fixed by bypassing it. Not a perfect solution but it worked.
Also, does this have the priming device on top of the fuel filter? They are prone to air leaks too.
|
| |
67 VW Split bus
69 Beetle Cab
96 Jeep Cherokee XJ Sport
|
|
|
|
|
|
|
Dec 18, 2016 10:14:53 GMT
|
|
hi there
I have been buying and selling motorhomes with this engine for over 20 years and the problem you have is fairly common.
The breather system needs a good clean and check for split pipes etc.
Crankcase pressure can build up when the engine is running,especially on boost. When the engine then idles this excess pressure carries engine oil into the inlet manifold as the pressure dissapates and it this oil that the engine then runs on for a few seconds as yours does.
I have a comprehensive manual for this engine on cd if you need any info.
Cheers - mike
|
| |
|
|
|
|
|
Dec 26, 2016 12:01:47 GMT
|
|
I bloody love this projec and the CX. After I finish my current project I'm going to get a late phase 2 car, pref GTI and fit a PSA 2.7 V6 HDI, crusing continental crossing machine!
|
| |
|
|
|
|
|
Dec 31, 2016 16:56:08 GMT
|
Glad to see that this is continuing to get better and better! My own CX project has been cut short afgter some curse word set fire to the place it was stored. 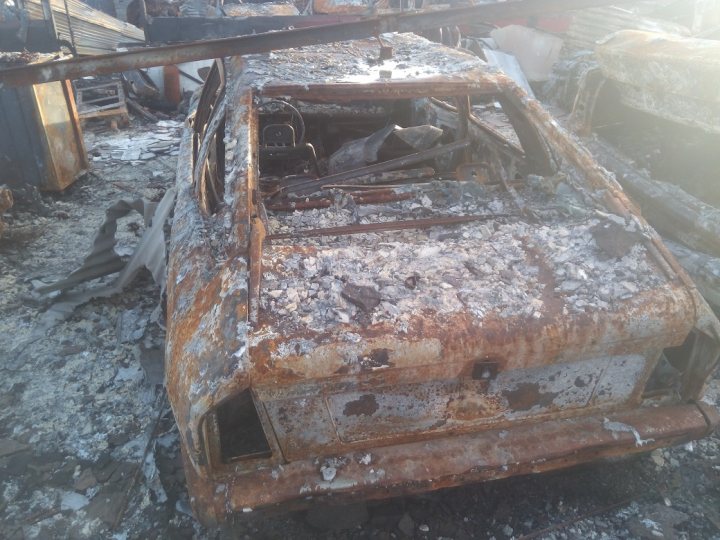 Best of luck with yours- they are great cars, if a little discombobulating to work on! |
| |
|
|
MrOtter
West Midlands
"Your car is your story, so don't let someone else write the book." - Moog
Posts: 281
|
|
|
|
hi there I have been buying and selling motorhomes with this engine for over 20 years and the problem you have is fairly common. The breather system needs a good clean and check for split pipes etc. Crankcase pressure can build up when the engine is running,especially on boost. When the engine then idles this excess pressure carries engine oil into the inlet manifold as the pressure dissapates and it this oil that the engine then runs on for a few seconds as yours does. I have a comprehensive manual for this engine on cd if you need any info. Cheers - mike I see where you're coming from with this, but I don't think it's the breather system - I've run the car with it disconnected before and the problem was unchanged, so I don't think it's engine oil vapour in the inlet. There is a small pressure pipe running from the intake manifold to the diesel pump though (I assume it links to an actuator of some kind to change fuel timing/quantity with respect to boost?), which I want to have a look inside in case that's drawing in diesel from a failed seal or diaphragm or something. Forgive my ignorance, but I'm slightly confused why a few people have suggested an air leak somewhere? That wouldn't cause the engine to start revving up by itself would it, surely it would want to stall instead? 320touring that properly sucks man, I can't believe it! Do you reckon you'll get another CX one day? |
| |
|
|
Phil H
Posted a lot
  
Posts: 1,448
Club RR Member Number: 133
|
1984 Citroën CX 25 TRD TurboPhil H
@philhoward
Club Retro Rides Member 133
|
|
|
|
Depends where the air leak is - if it's in the pump then all sorts of strange things can happen as they tend to use opposing hydraulic pressures to maintain flow rates. Lose the "back pressure" side and you end up with more effective "forward pressure" - in the case of a diesel, that means more fuel. More fuel = more power = more revs.
|
| |
|
|
MrOtter
West Midlands
"Your car is your story, so don't let someone else write the book." - Moog
Posts: 281
|
|
|
|
Depends where the air leak is - if it's in the pump then all sorts of strange things can happen as they tend to use opposing hydraulic pressures to maintain flow rates. Lose the "back pressure" side and you end up with more effective "forward pressure" - in the case of a diesel, that means more fuel. More fuel = more power = more revs. Ah cool, that makes sense, I was just thinking in terms of air getting in to the diesel supply lines. I'll have to take a good look over everything I can see around the breather/fuel systems then and see if anything looks amiss from the outside. I'm still driving the car once a week or so and it's not getting any worse, so at least it's not a catastrophic issue. |
| |
|
|
MrOtter
West Midlands
"Your car is your story, so don't let someone else write the book." - Moog
Posts: 281
|
|
May 27, 2017 14:49:28 GMT
|
It's been a while hasn't it... through winter and personal matters I haven't done any major work on my cars in a while. I've just finished doing the headlining and pillar trims in the Citroen though so thought I'd throw a few photos up. I did this over a period of 2 or 3 months, just doing little bits here and there. Okay then, so as I might've mentioned before, the old headlining in the car had completely fallen off when I bought it, so I ripped out what was left so I could get the car roadworthy and drive it around. Finally it came time for me to reupholster the headlining card, which also meant doing the A, B, C, and D pillar trims that were all trimmed in the same fabric, which had also pretty much all fallen off. Here's a couple of photos of how it was before.  IMG_1111 IMG_1111 by Sven Cumner, on Flickr 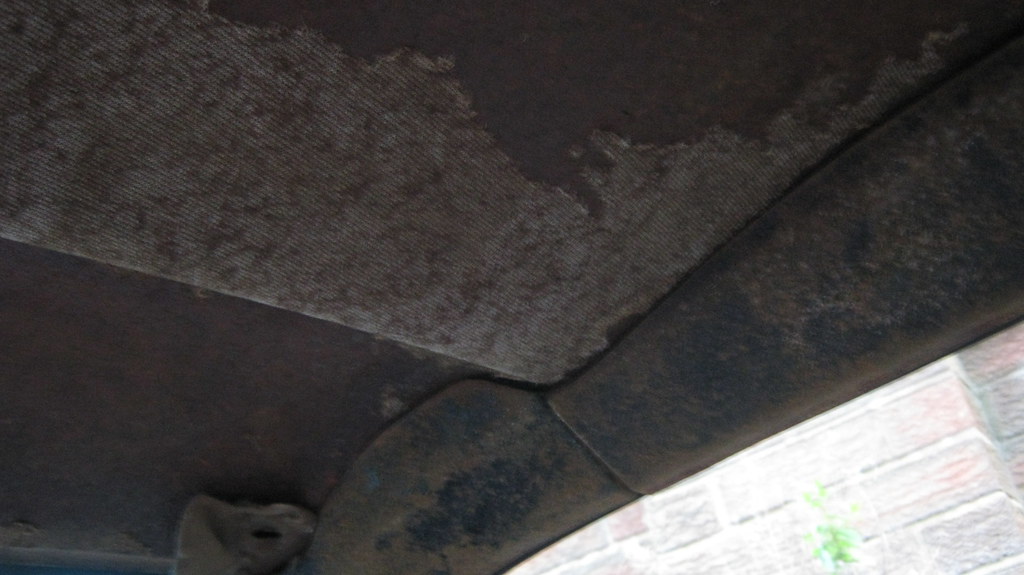 IMG_1112 IMG_1112 by Sven Cumner, on Flickr After a lot of faffing around to first remove all of the pillar trims, I managed to just about squeeze the headlining panel out of the rear door. 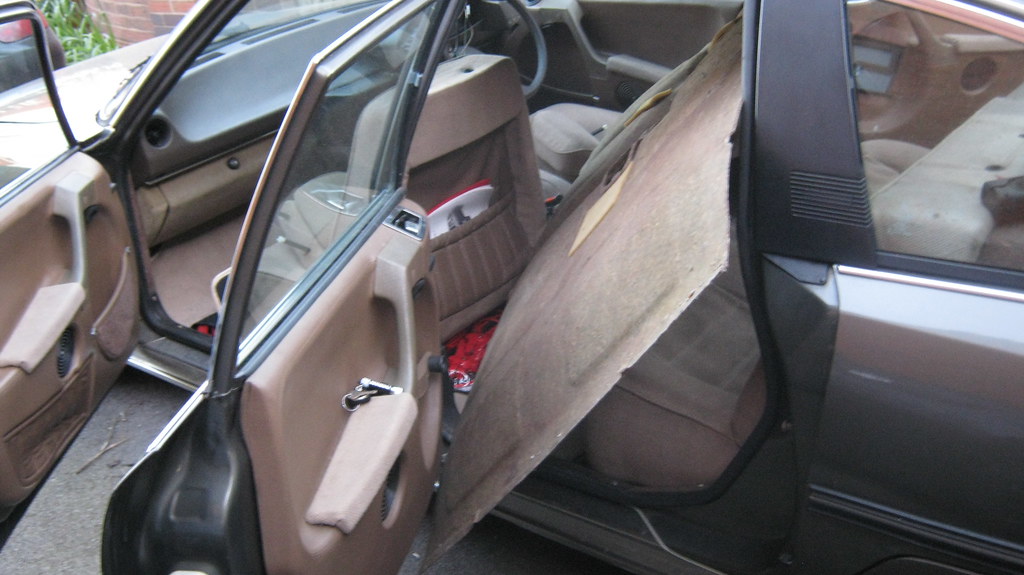 IMG_1113 IMG_1113 by Sven Cumner, on Flickr Along with having to reupholster the headlining itself, I also had this big pile of panels from the pillars. Six on each side! This was going to take a while AND be fiddly.  IMG_1116 IMG_1116 by Sven Cumner, on Flickr As you can see, pretty much everything above the window line was trimmed in fabric.  IMG_1117 IMG_1117 by Sven Cumner, on Flickr  IMG_1118 IMG_1118 by Sven Cumner, on Flickr To give another reason to rip off the old, thin, brown fabric, a lot of the panels had gone pretty mouldy. A remnant of the condition the interior was in when I bought it (i.e. damp and nasty and full of strange organic matter). 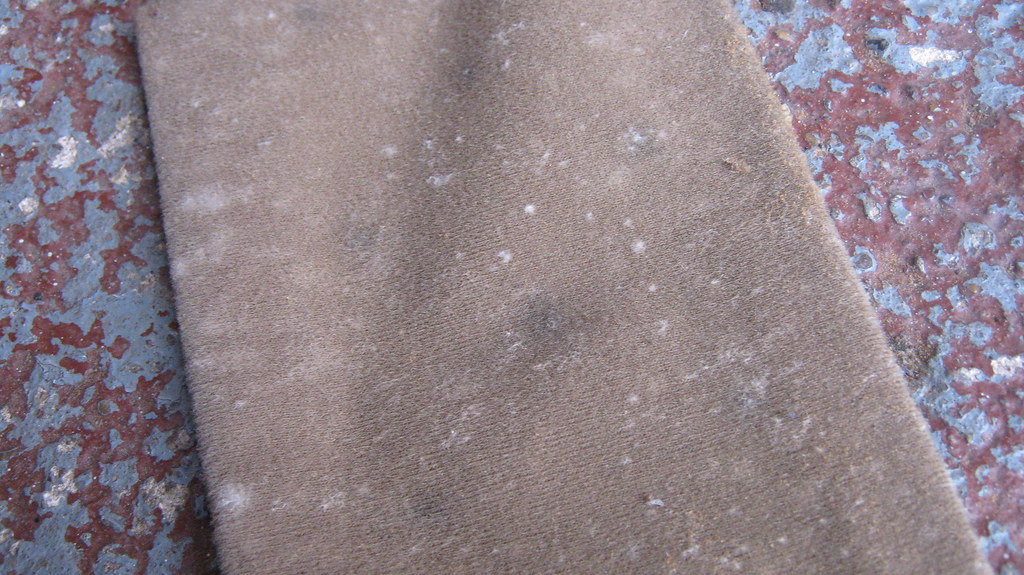 IMG_1119 IMG_1119 by Sven Cumner, on Flickr I started with the pillar trims, ripping off the old fabric, then scraping, sanding, and cleaning each panel ready to accept the new fabric.  IMG_1120 IMG_1120 by Sven Cumner, on Flickr Here's a comparison of the old and new for one of the D pillar trims. I chose a lighter colour only really because it was a choice between the creamy colour I went for and a much darker brown, and I thought there was enough dark brown in the interior as there was.  IMG_1121 IMG_1121 by Sven Cumner, on Flickr And here's the trim panel with the new fabric glued on. I messed up in a few places whilst doing all of these panels, but I don't think it retracts from the overall final effect. Plus, it only cost me about £60 for the fabric and glue, so a lot cheaper than paying a professional and I can live with a few defects   IMG_1122 IMG_1122 by Sven Cumner, on Flickr So I spent a lot of time doing this sort of thing. 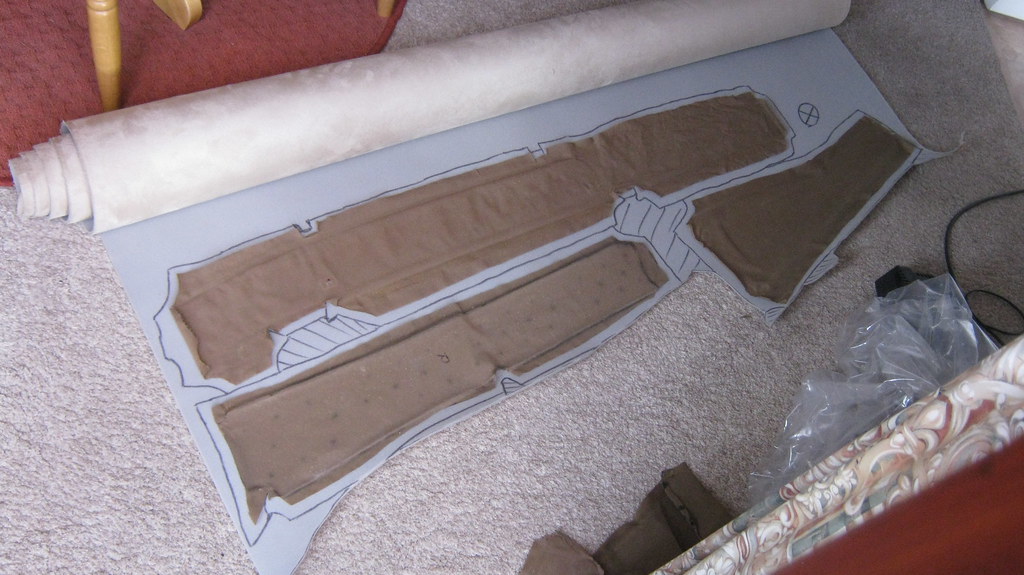 IMG_1123 IMG_1123 by Sven Cumner, on Flickr Until I ended up with stuff like this. 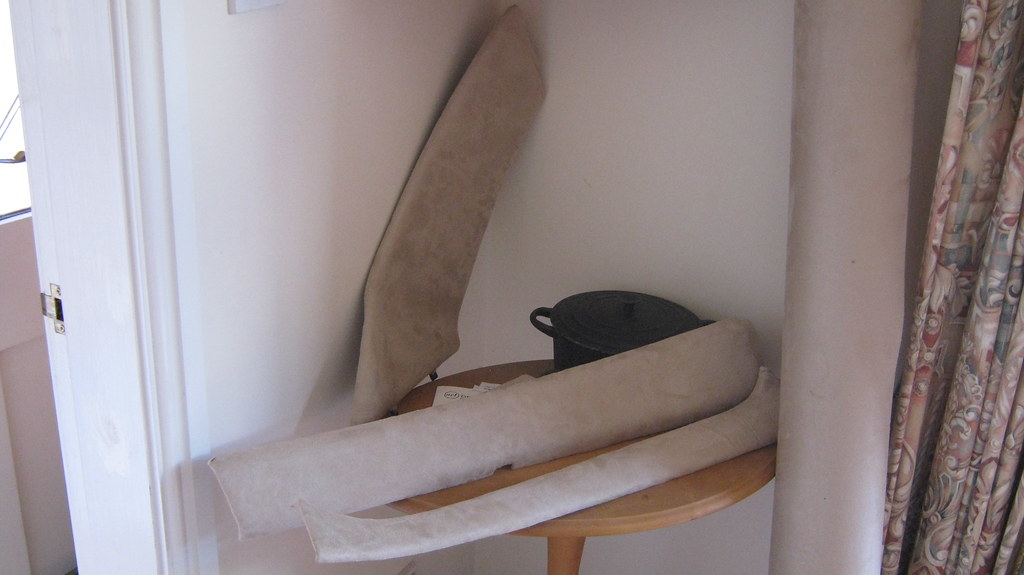 IMG_1124 IMG_1124 by Sven Cumner, on Flickr  IMG_1125 IMG_1125 by Sven Cumner, on Flickr Then after all of the pillar trims were done, I could finally do the headlining itself. 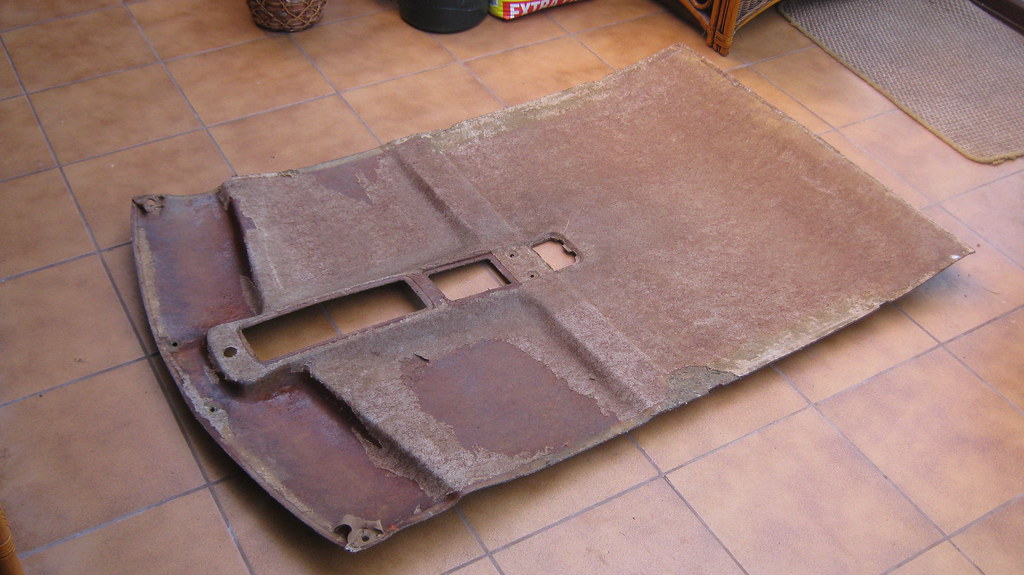 IMG_1126 IMG_1126 by Sven Cumner, on Flickr 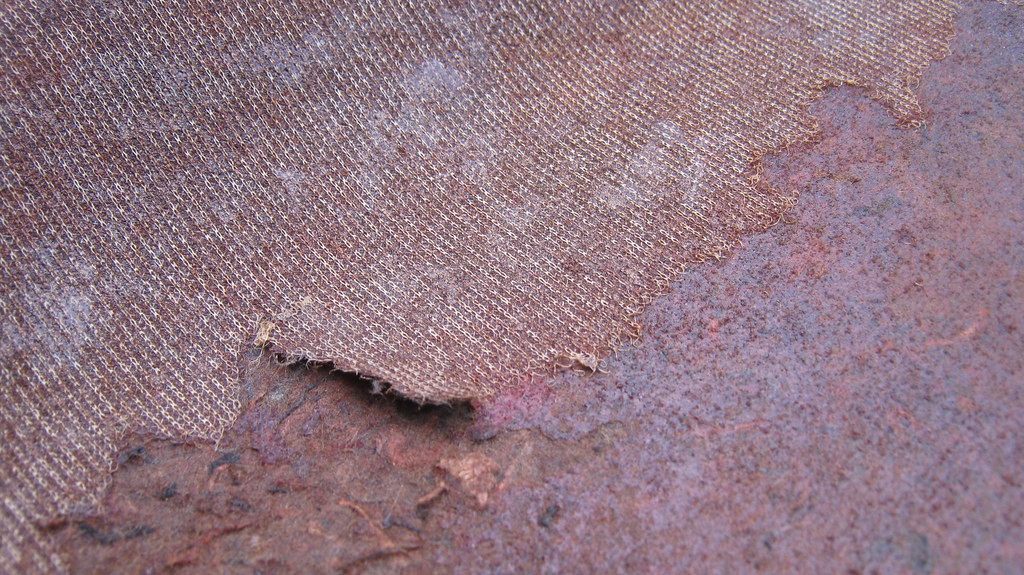 IMG_1127 IMG_1127 by Sven Cumner, on Flickr  IMG_1128 IMG_1128 by Sven Cumner, on Flickr  IMG_1132 IMG_1132 by Sven Cumner, on Flickr Then a few more hours putting everything back together. 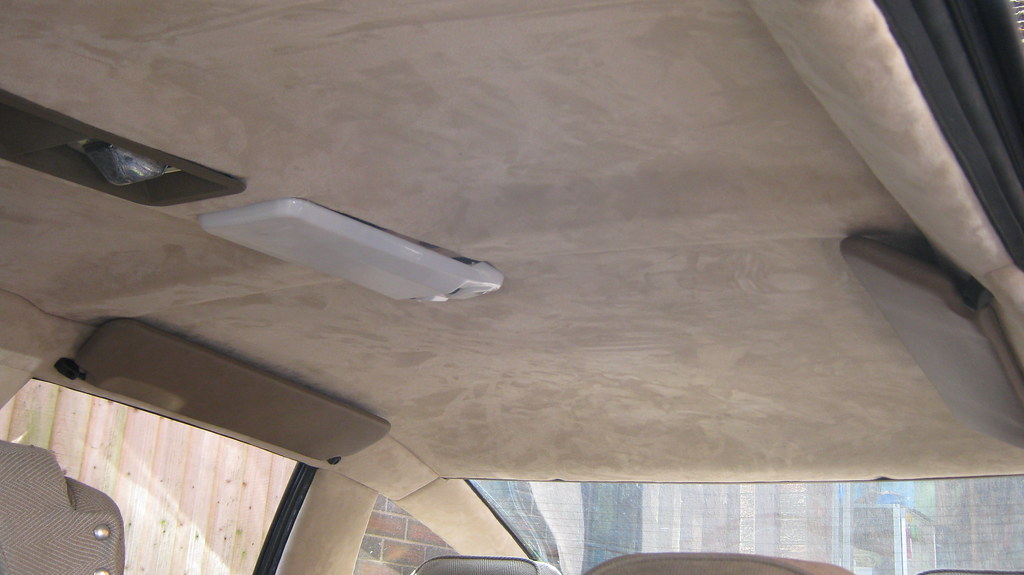 IMG_1133 IMG_1133 by Sven Cumner, on Flickr 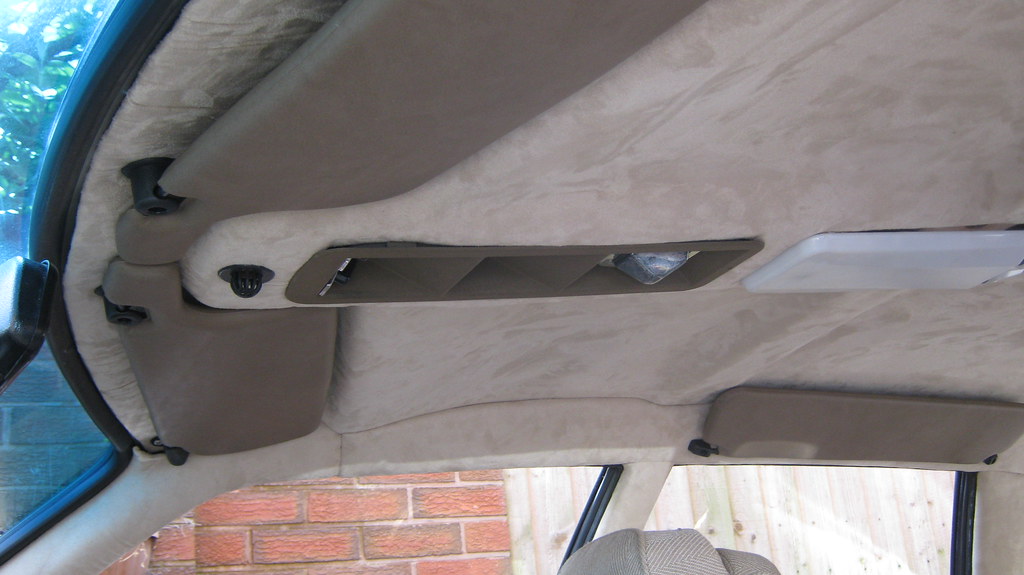 IMG_1134 IMG_1134 by Sven Cumner, on Flickr  IMG_1135 IMG_1135 by Sven Cumner, on Flickr 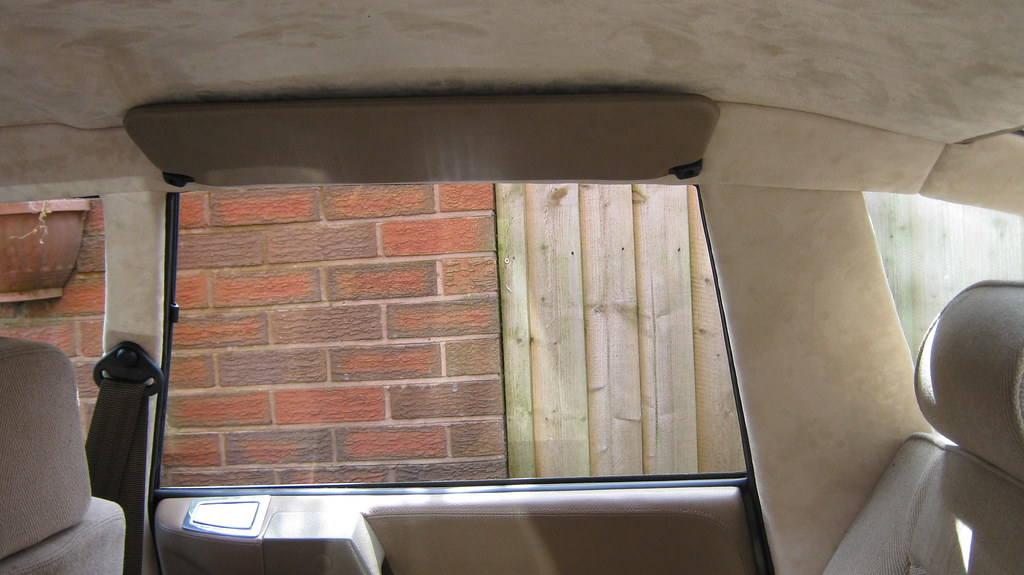 IMG_1136 IMG_1136 by Sven Cumner, on Flickr  IMG_1137 IMG_1137 by Sven Cumner, on Flickr A long and fiddly job, but it needed doing. Hopefully the fabric stays up there for a decent while! I also did another little job around the front end of the car. I bought these innocuous bits of rubber off the internet (actually from the same CX breaking that I got the bumper corner from) which go underneath the headlights. They were always missing from my car and it was one of those details that annoyed me looking at photos of the car from Queen Square last year.  IMG_1138 IMG_1138 by Sven Cumner, on Flickr I popped the grille off and slid them in to place, gripping the lip of the chrome bumper.  IMG_1139 IMG_1139 by Sven Cumner, on Flickr There we go, one small detail sorted but it makes a big difference to me! 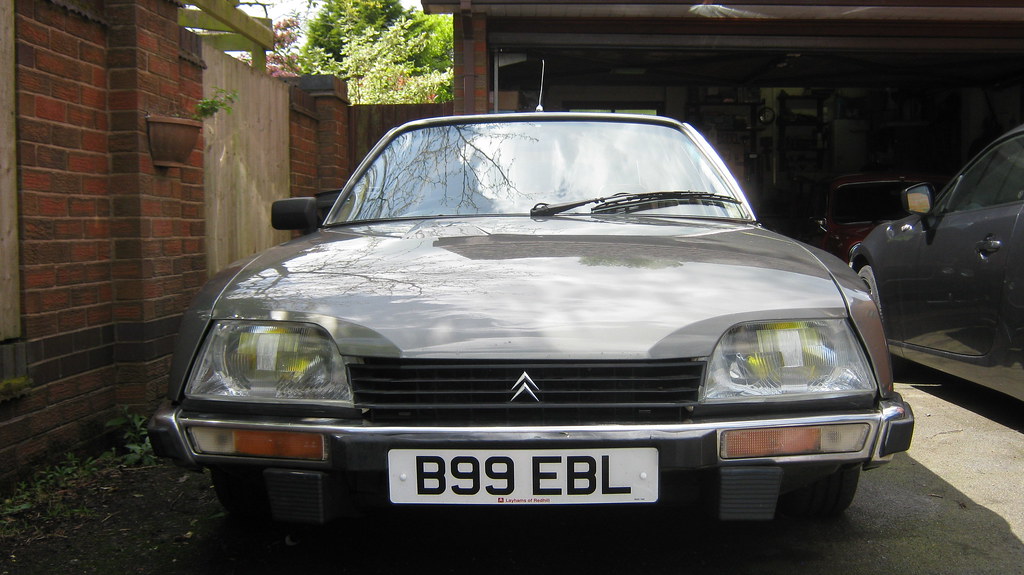 IMG_1140 IMG_1140 by Sven Cumner, on Flickr Compare it to how the car looked without the strips and you might notice how it looks like there was something "missing" before.  DSCN1687 DSCN1687 by Sven Cumner, on Flickr Anywho, that's all for now. I've got a few cosmetic jobs to do and then I'm going to sell the CX, hopefully within the next few months sometime, but who knows! |
| |
Last Edit: May 27, 2017 14:54:37 GMT by MrOtter
|
|
|
|
|
May 27, 2017 14:57:40 GMT
|
|
great job on the headlining , its looks amazing in that colour. I cheated many moons ago when I got enveloped by the headlining on my range rover , I bottled it and bought a new one as it was still available.
|
| |
'80 s1 924 turbo..hibernating
'80 golf gli cabriolet...doing impression of a skip
'97 pug 106 commuter...continuing cheapness making me smile!
firm believer in the k.i.s.s and f.i.s.h principles.
|
|
|
|
|
May 27, 2017 18:52:25 GMT
|
|
Great update, and great work on the retrimming! Love the contrast with the sunvisors - love the rear sunvisors! - and the roof console.
|
| |
Last Edit: May 27, 2017 18:52:36 GMT by norniron
Ich habe kein Geld!
|
|
|
|
|
|
|
May 27, 2017 19:50:47 GMT
|
|
read the whole tread and like your thorough approach. You now have a reliable limousine. I have good memory's about my BX diesel which i bought when 6 years old with 140.000km. Drove it without problems up to 230.000 and it all ended in a 6 car accident. As the BX are also front heavy, my rear wheels ended on the bonnet of the VW golf which rear ended me. Wasn't hurt and got Fl 1700,- above the price which i payed originally for the car from the insurance company.
Peter
|
| |
|
|
|
|
|
May 27, 2017 21:14:57 GMT
|
|
that roof lining is a complete triumph !!
i am mid retrim with one of my astras, which also has a very thin scrim foam between the formed board and the fabric itself. any tipes for contact adhesvivisisising without losing your mind ?
|
| |
|
|
|
|
|
|
|
|
Excellent work, shame you are selling now its finished. What are you replacing it with ?
|
| |
1994 Mercedes e220 petrol estate, daily driver.
1998 Peugeot 406 Coupe 3.0 v6, shopping car.
|
|
|
|
|
May 28, 2017 12:09:43 GMT
|
|
Just re-read through the thread, it's a great turnaround!
Going through a box of old car magazines my grandfather had last year I found a brochure for the CX. He never bought one though (I'm sure he would still be complaining about it if he did) and I don't ever remember seeing any out here in Australia..
|
| |
|
|
|
|
|
May 28, 2017 12:39:10 GMT
|
that roof lining is a complete triumph !! i am mid retrim with one of my astras, which also has a very thin scrim foam between the formed board and the fabric itself. any tipes for contact adhesvivisisising without losing your mind ? That foam isnt 'between' as such, but comes attached to the headliner material. You can buy the fabric with or without that foam layer. You may already know that  |
| |
|
|
MrOtter
West Midlands
"Your car is your story, so don't let someone else write the book." - Moog
Posts: 281
|
|
May 29, 2017 20:49:42 GMT
|
Thanks for the kind comments all! that roof lining is a complete triumph !! i am mid retrim with one of my astras, which also has a very thin scrim foam between the formed board and the fabric itself. any tipes for contact adhesvivisisising without losing your mind ? The only things I really know to do are to start from the middle on whatever you're doing, and go in small steps, don't put on too much glue in one go. Its a long and tedious process but it pays not to rush. Also make sure you leave each surface to tack off for a minute or so before putting them together. And yeah the stuff I used was the fake suede with the scrim foam attached to it. |
| |
|
|
MrOtter
West Midlands
"Your car is your story, so don't let someone else write the book." - Moog
Posts: 281
|
|
May 29, 2017 20:53:53 GMT
|
Excellent work, shame you are selling now its finished. What are you replacing it with ? I'm going to move on to my Jag project (link in signature). I've hardly touched it and I've had it over a year so need to move the Citroen on so I can focus on that. It'd be great to keep all the cool old cars, but I'd rather move on to different ones so I can experience more of the automotive world! |
| |
|
|
|
|
|
May 30, 2017 13:25:00 GMT
|
|
sad to see the citroen go...but bring on the xj!!!
|
| |
'80 s1 924 turbo..hibernating
'80 golf gli cabriolet...doing impression of a skip
'97 pug 106 commuter...continuing cheapness making me smile!
firm believer in the k.i.s.s and f.i.s.h principles.
|
|
|
|
|
May 30, 2017 21:17:00 GMT
|
|
Been waiting for you to re appear! Sorry to see your selling, must be one of the best readers cars. Would love to own it, but think I'd have to live in it,as I'd be divorced soon after ;-)
|
| |
|
|
MrOtter
West Midlands
"Your car is your story, so don't let someone else write the book." - Moog
Posts: 281
|
|
Jun 28, 2017 13:36:09 GMT
|
Tiny update. I've repainted the black part of the bootlid and fitted some brand new gutter trims to the roof. Here's the section of bootlid I'm on about.  IMG_1143 IMG_1143 by Sven Cumner, on Flickr Doesn't look that bad here because it was sunny so you can't see all the scratches and faded paint. 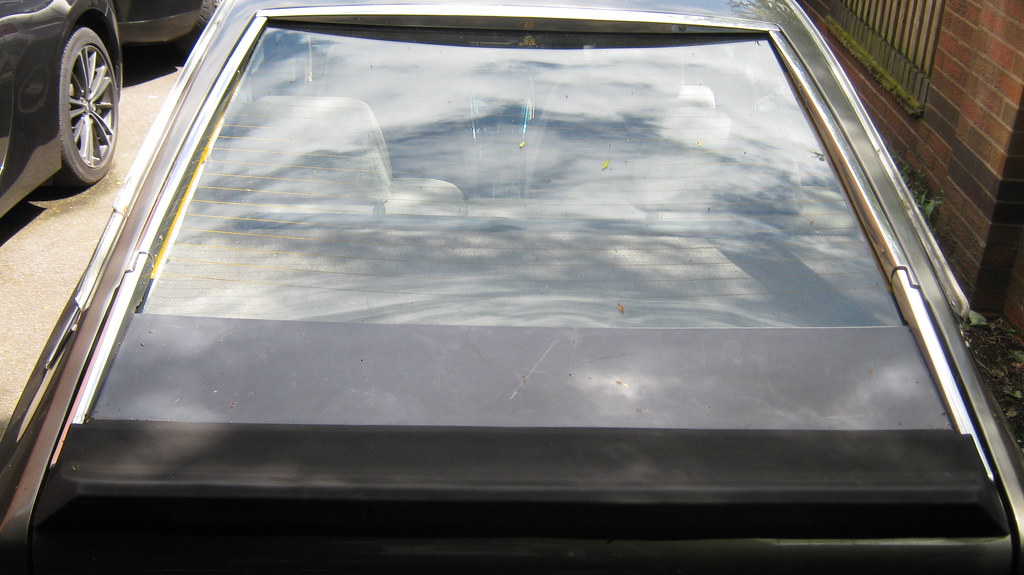 IMG_1144 IMG_1144 by Sven Cumner, on Flickr I wanted to take the spoiler off.  IMG_1145 IMG_1145 by Sven Cumner, on Flickr Gave it a wash under there.  IMG_1146 IMG_1146 by Sven Cumner, on Flickr The usual sanding, masking, etc.  IMG_1147 IMG_1147 by Sven Cumner, on Flickr Then a few coats of primer and satin black.  IMG_1148 IMG_1148 by Sven Cumner, on Flickr Job done. There's still a small dent there, I should've put a little filler in really but didn't think it was worth it at the time.  IMG_1150 IMG_1150 by Sven Cumner, on Flickr 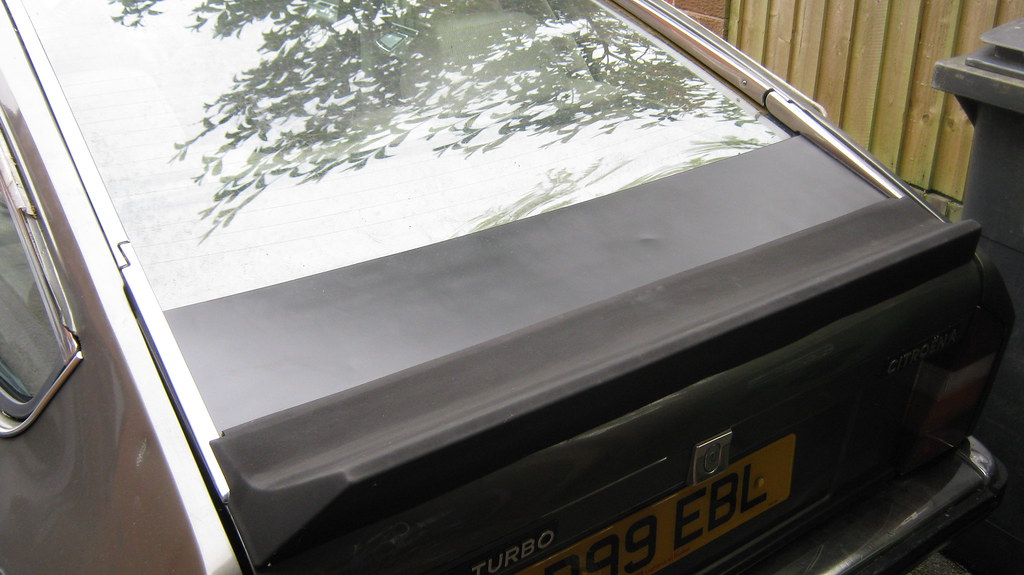 IMG_1151 IMG_1151 by Sven Cumner, on Flickr The gutter trims took about 5 mins to swap over, nice and easy, if it a little expensive! Here's why I was changing them. Very much past their best.  IMG_1153 IMG_1153 by Sven Cumner, on Flickr  IMG_1154 IMG_1154 by Sven Cumner, on Flickr  IMG_1155 IMG_1155 by Sven Cumner, on Flickr Old.  IMG_1156 IMG_1156 by Sven Cumner, on Flickr To new.  IMG_1157 IMG_1157 by Sven Cumner, on Flickr With the end caps I got off the car breaking for parts on ebay.  IMG_1158 IMG_1158 by Sven Cumner, on Flickr  IMG_1159 IMG_1159 by Sven Cumner, on Flickr Only a small change, but yet another detail that was bugging me!  IMG_1160 IMG_1160 by Sven Cumner, on Flickr Just the front and rear undertrays/valances to do now and then I think I'll be ready to sell. |
| |
|
|
|
|


