A bit more.....
Occasionally I get requests to work on other peoples wrecks which I kindly decline. No amount of payment can capture the effort that goes into some rebuilds. Normally the advise I give is enroll in metal working classes at a local college after work. There are teachers there that can make entire quarters from a flat sheet. The colleges are generally well equipped with blocking hammers, english wheels, panbrakes, press brakes, guillotines, post dollys, TIG, MIG OXY, spot welders, pullers etc etc.
My second bit of advise is to pick and choose your battles, no point spending a million hours repairing something that is available in better condition either new or used !
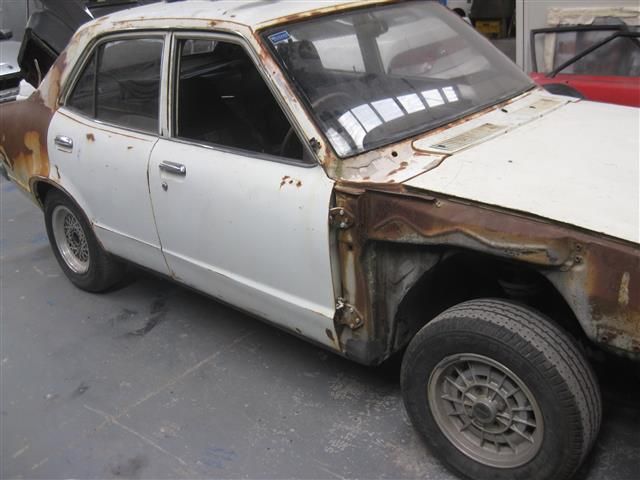
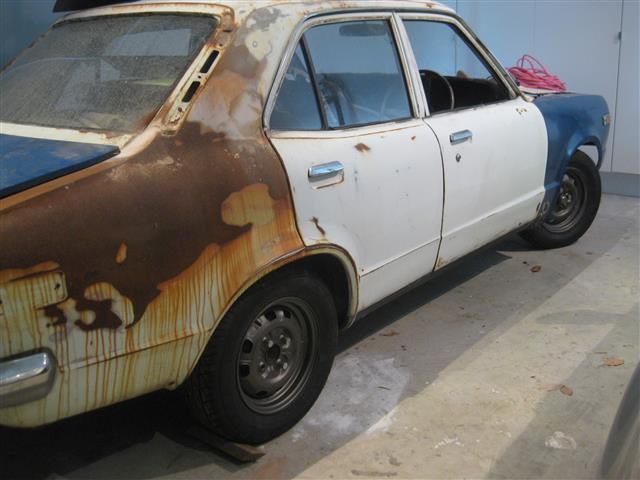
More sedan work...... lots of panel replacement in the pipeline. It takes more effort to remove old useable panels off a wreck than buy brand new ones. If only they were still available.
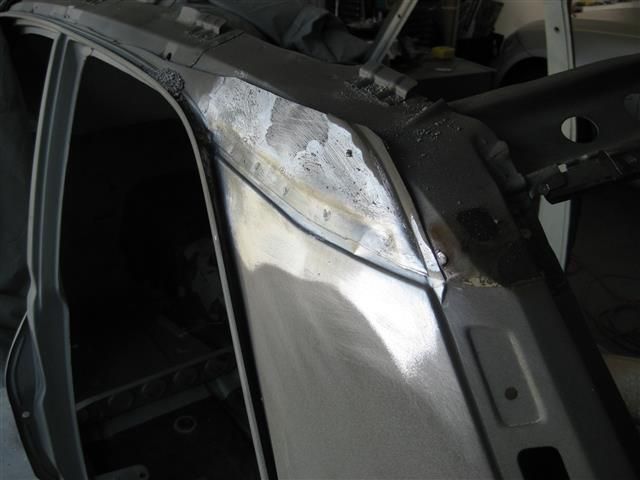
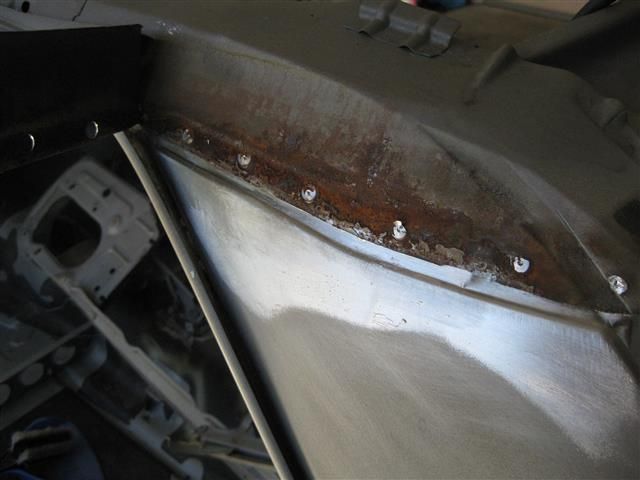
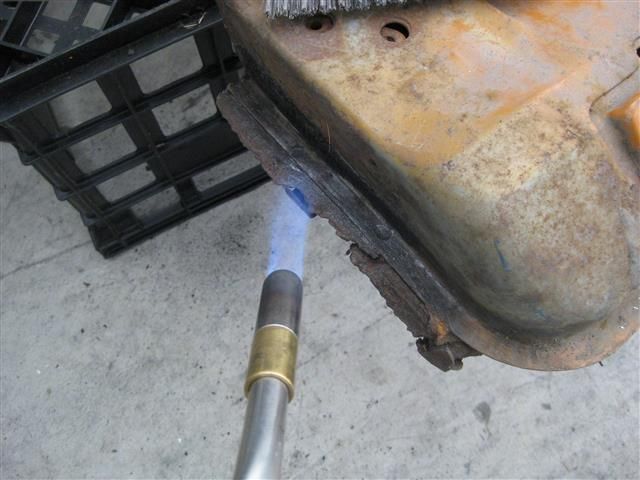
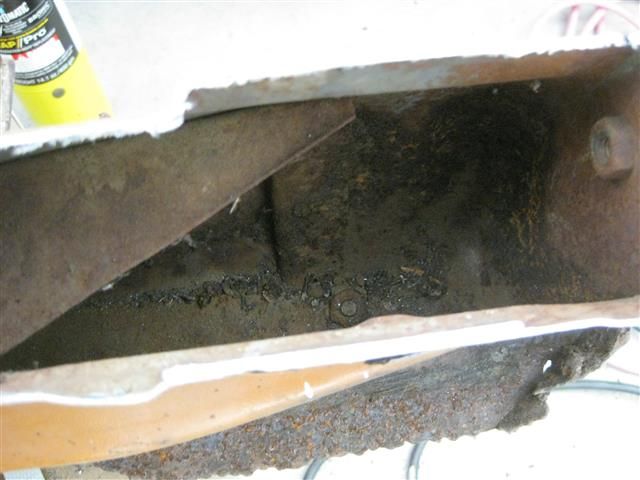
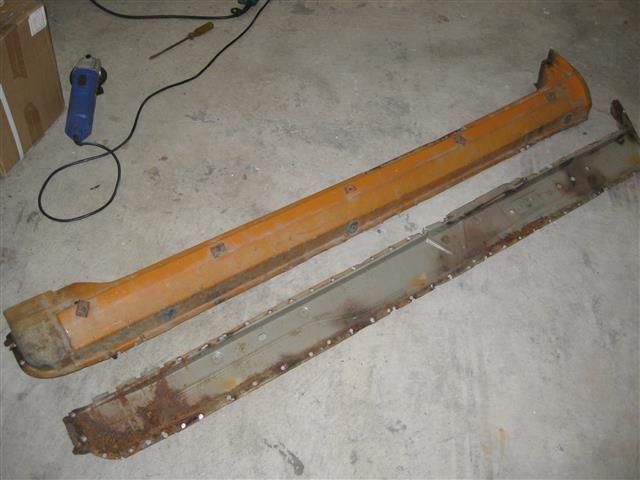
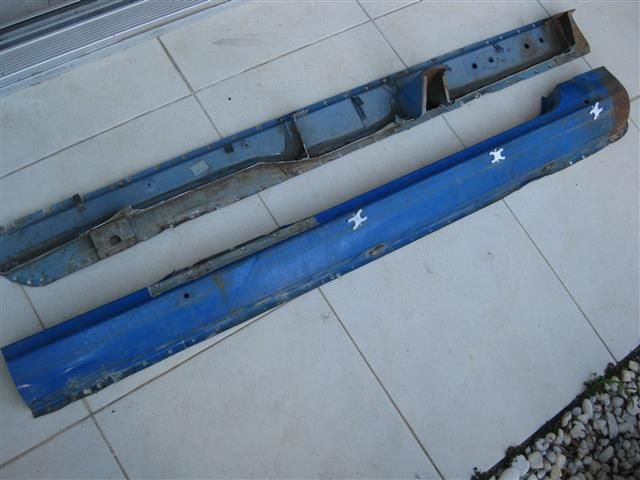
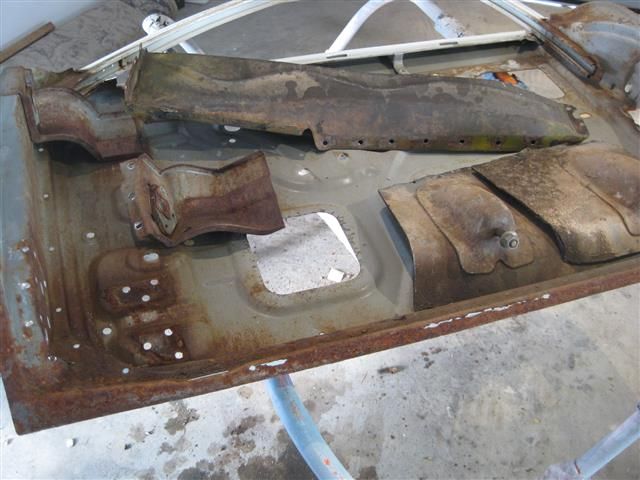
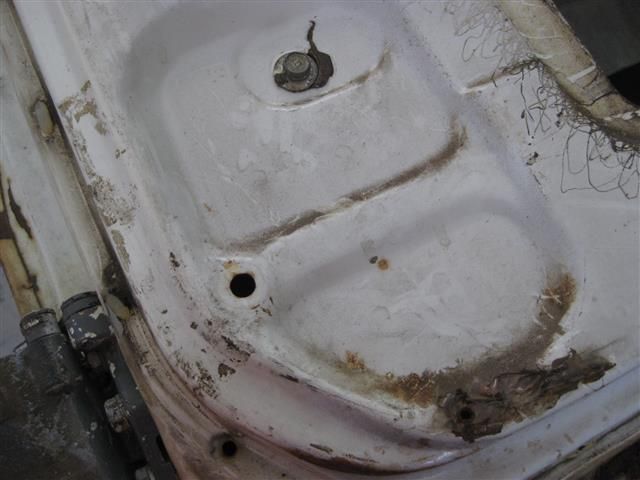
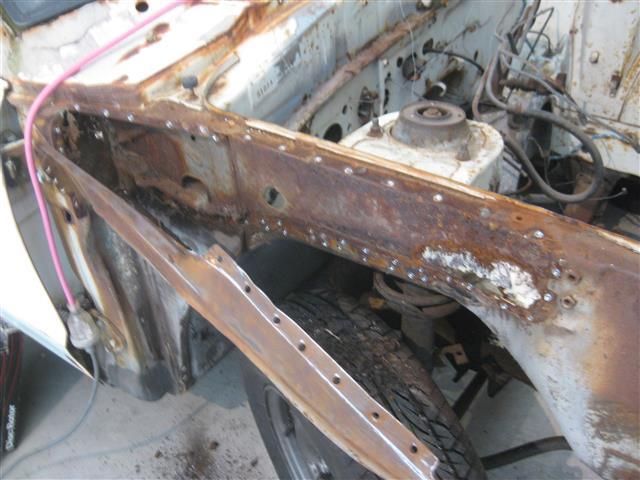
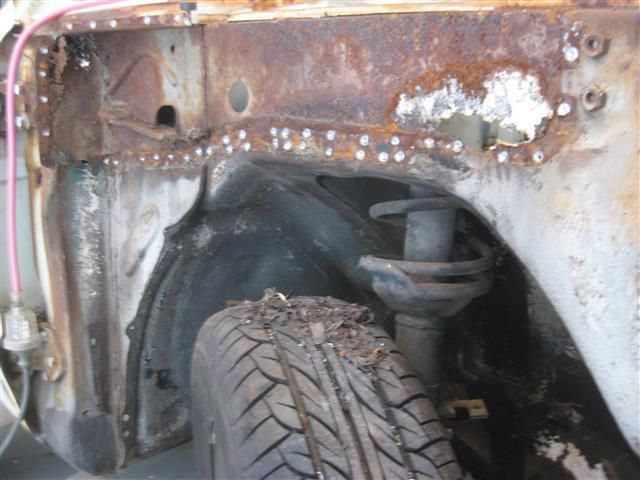
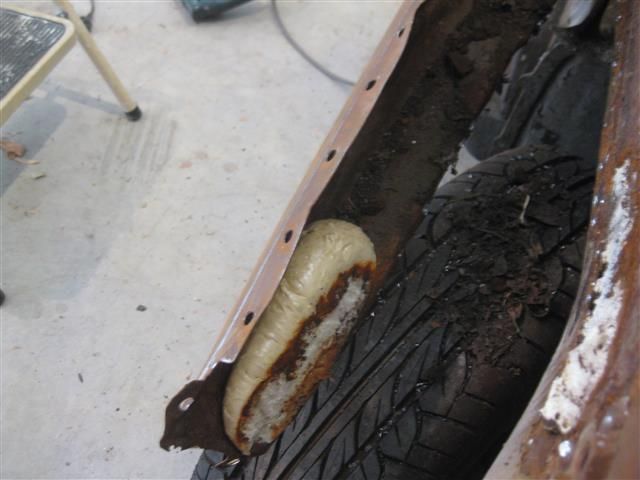
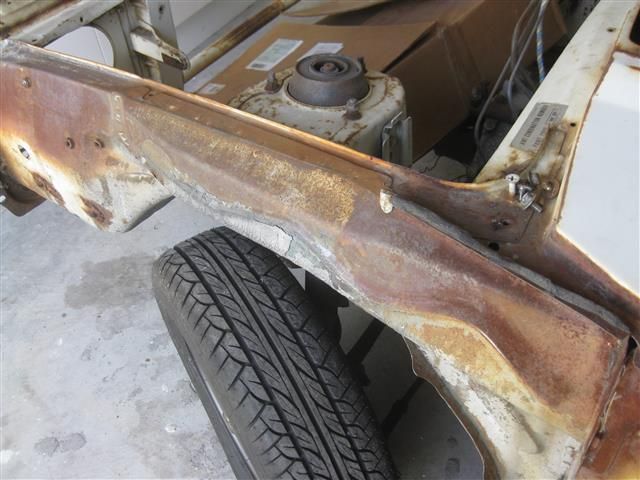
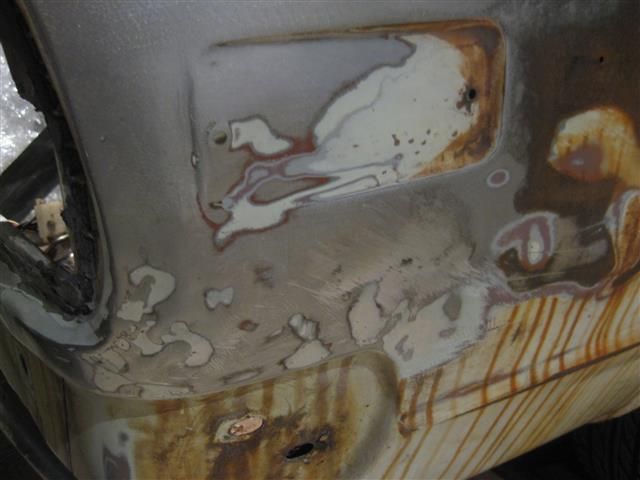
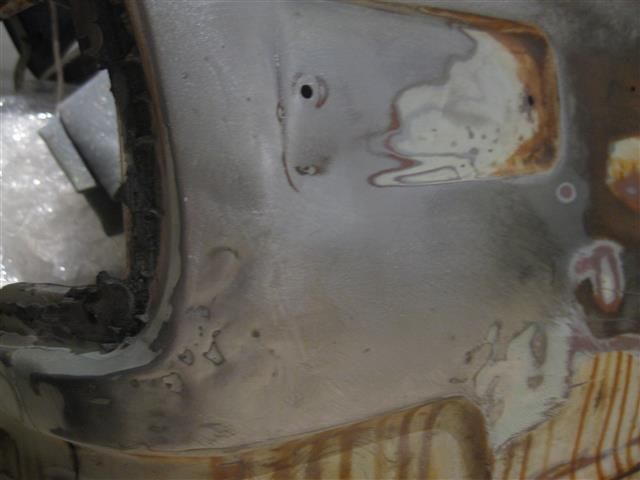
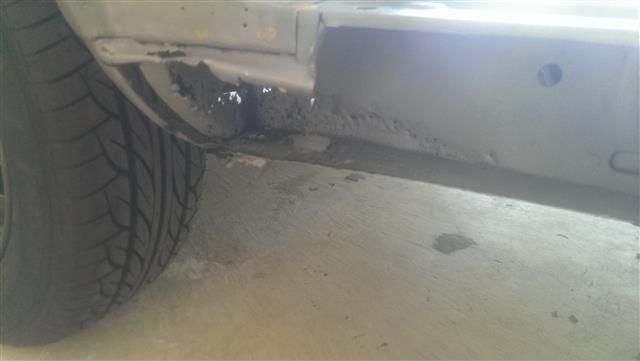
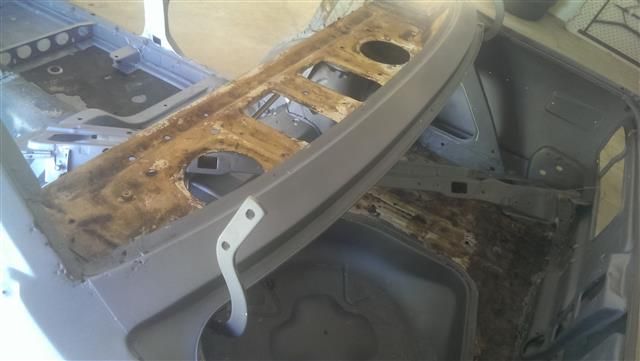
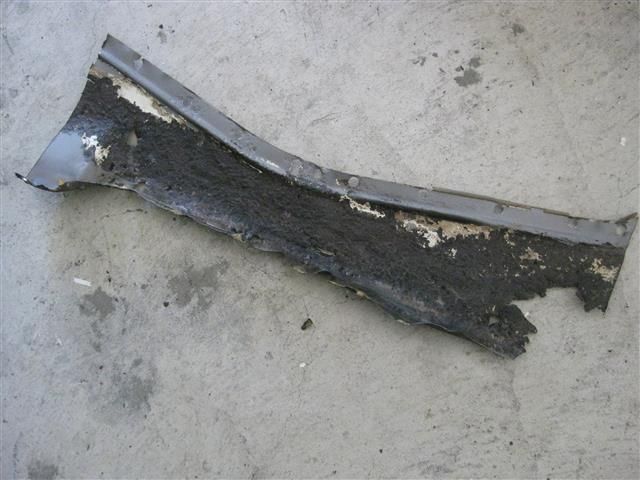
First we start with the left replacement sill. Pic 1 removing the sealant to expose the spot welds. Pic 2, in typical Mazda style, clean on the outside, surface rust on the inside.
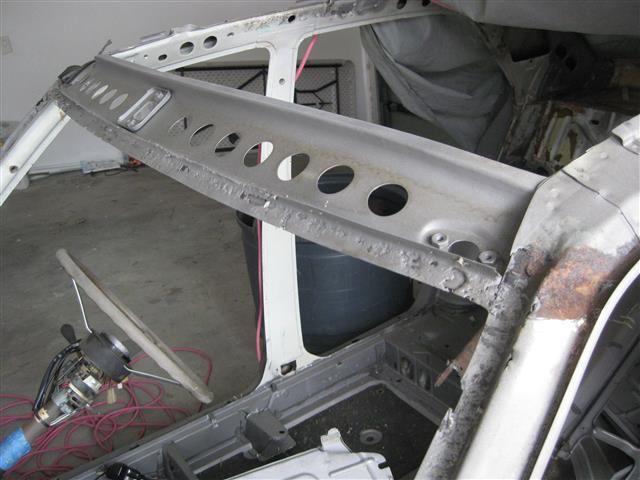
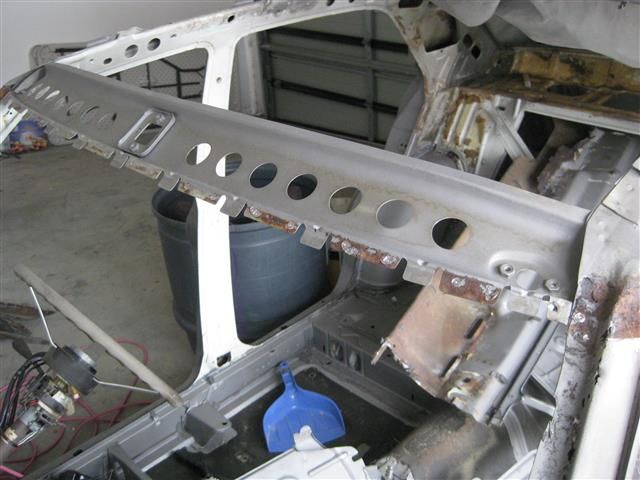
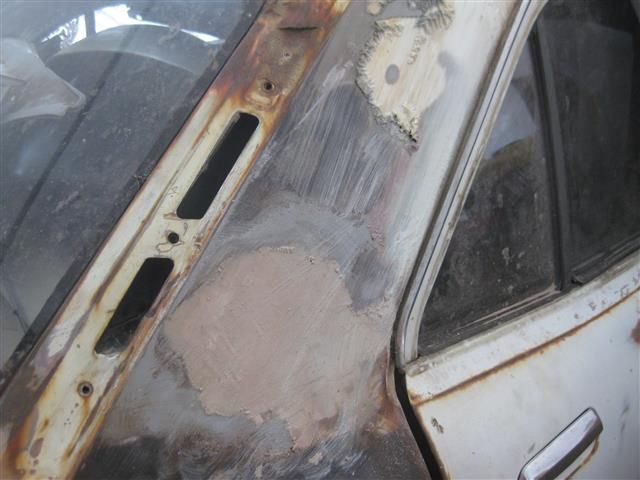
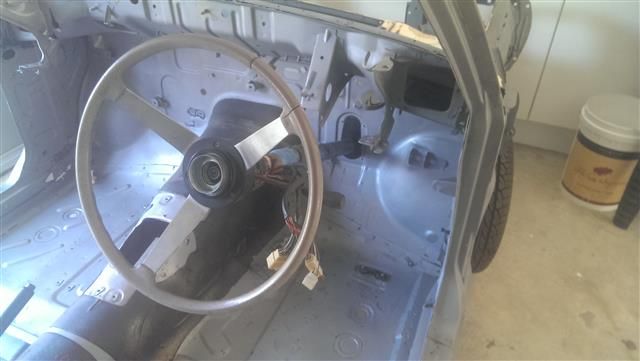
Removing the center pillar.
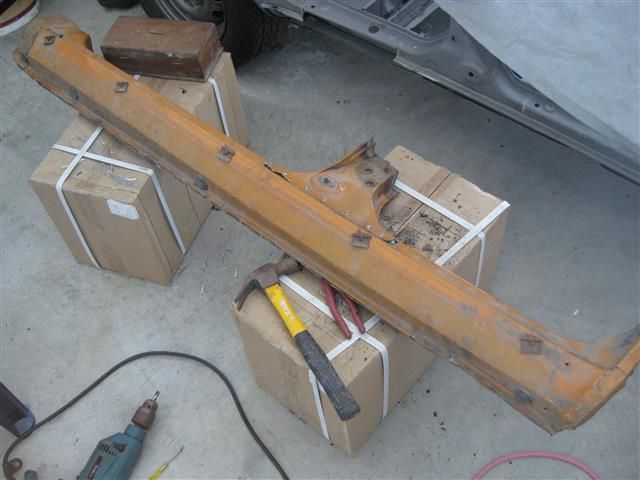
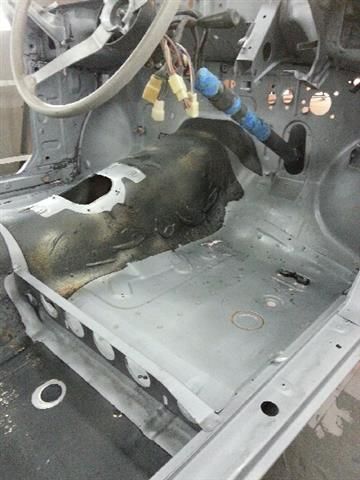
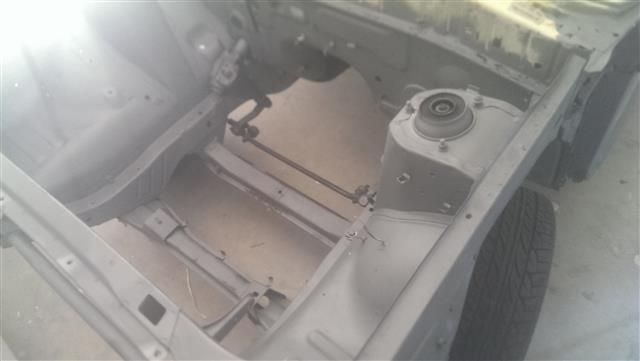
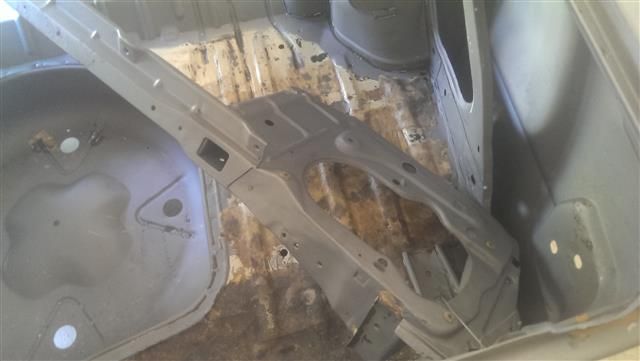
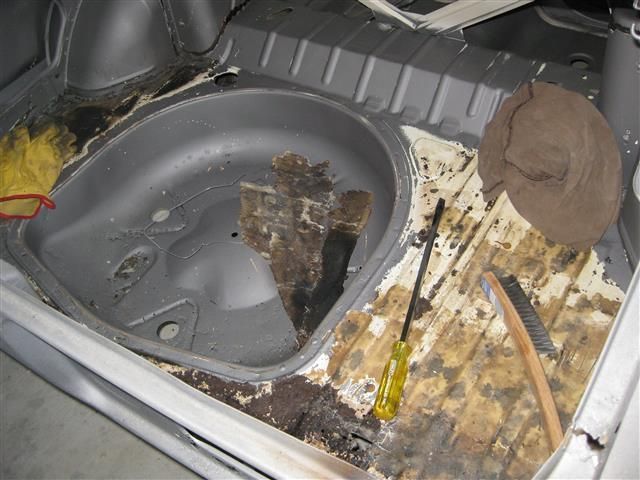
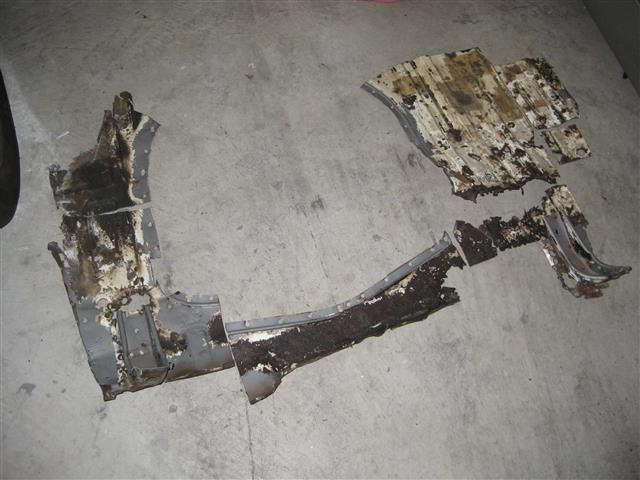
Unpicked, takes longer than you think. Patience goes a long way to ensure the panel is not damaged. I will also be using the front of the inner sill as that section is rusted out on both sides of the car, it has a unique shape that would be difficult and time consuming to make a replacement section. I'll also be using the outer seat sill panel area as it's very common for the inner sills to crack where the seat mounts are spot welded, more on that further down.
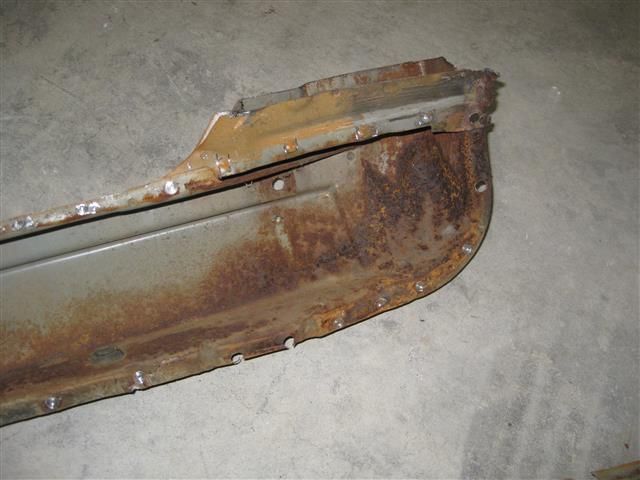
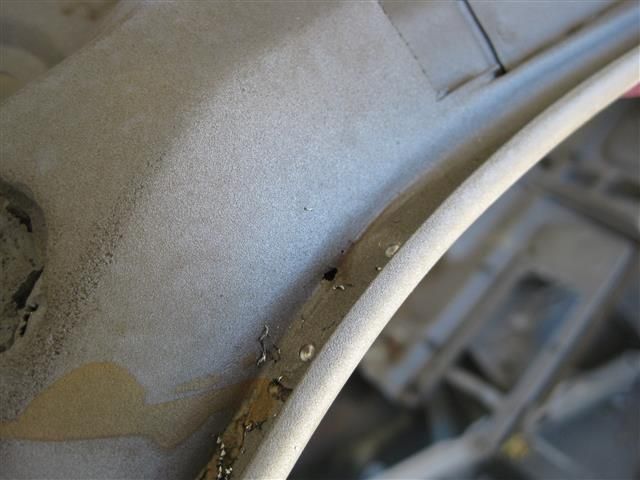
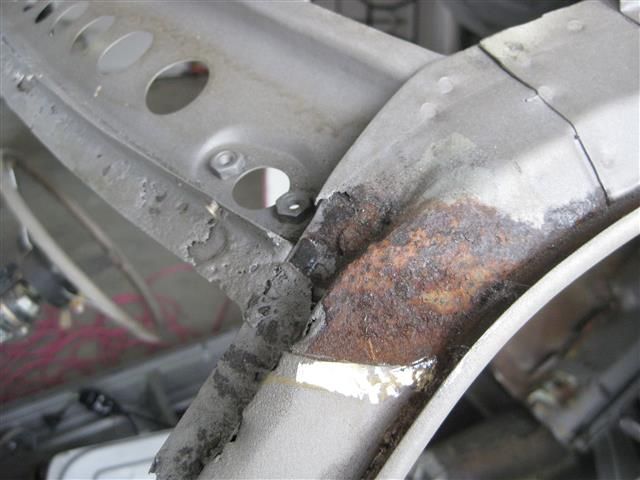
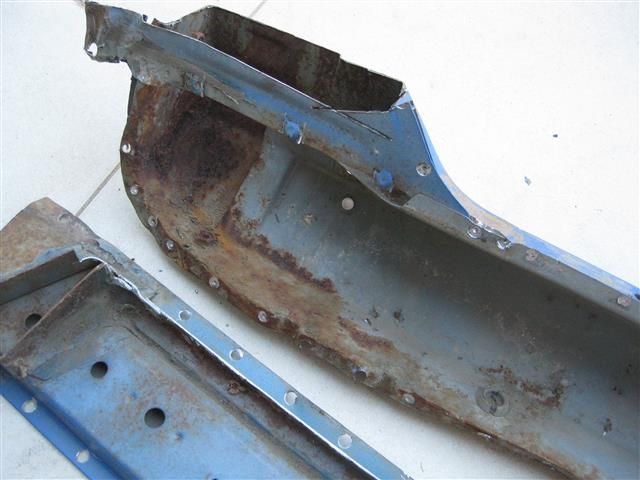
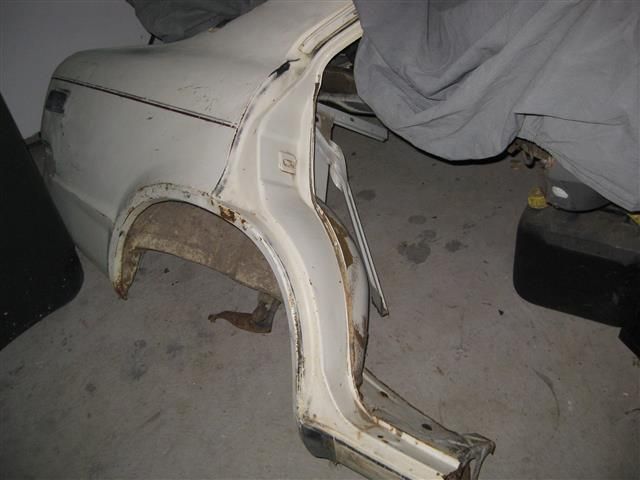
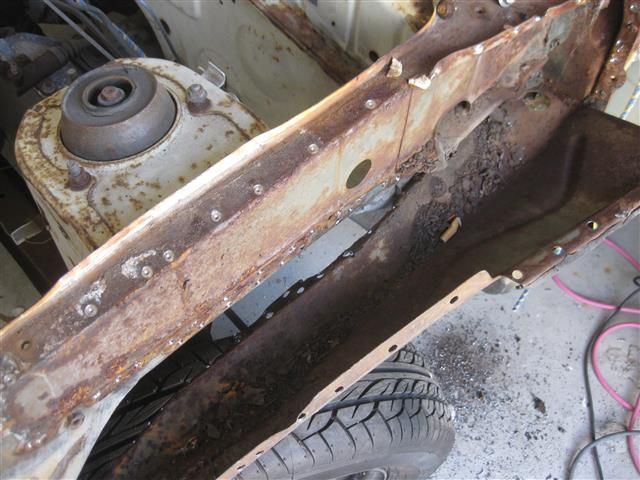
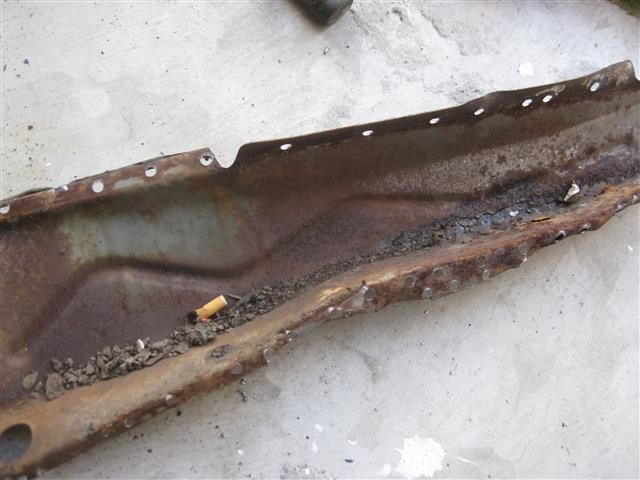
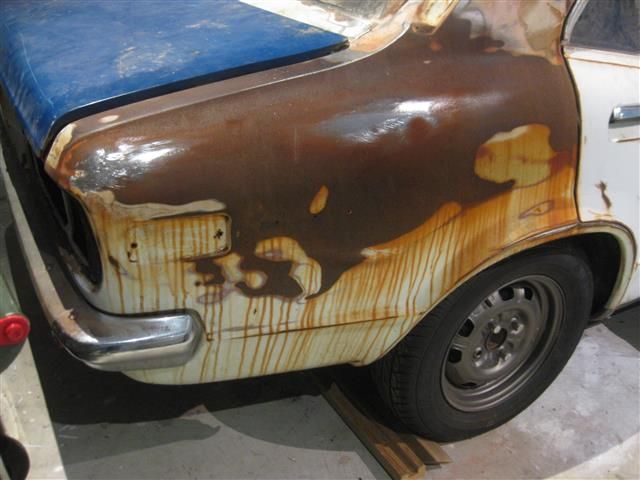
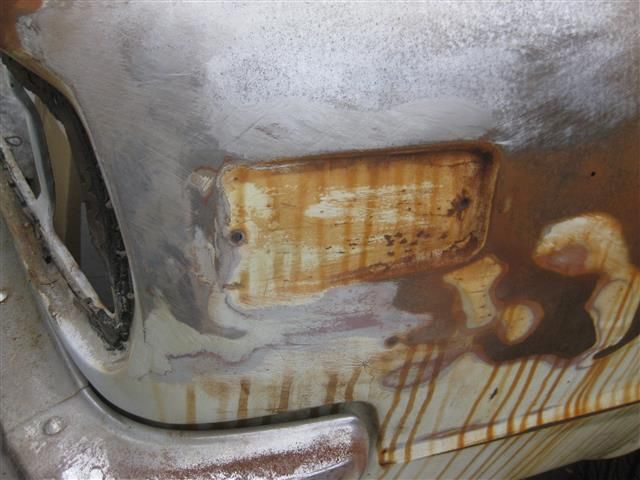
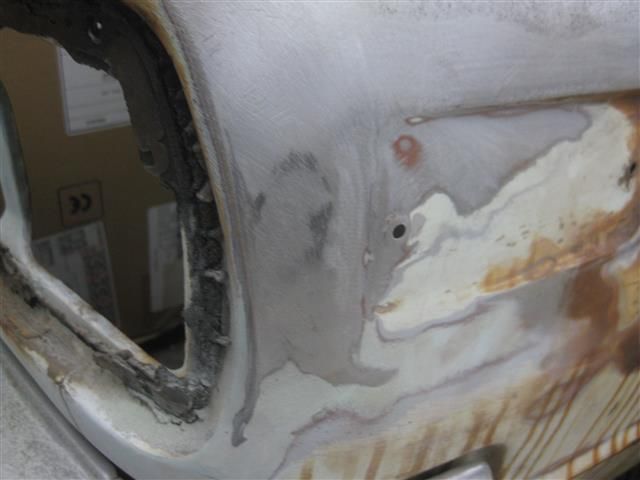
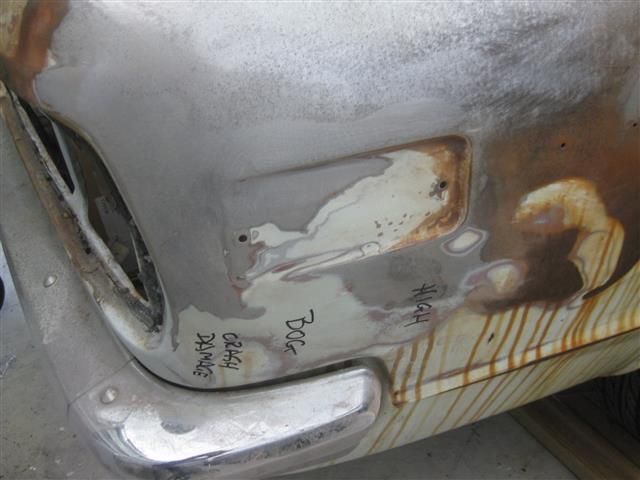
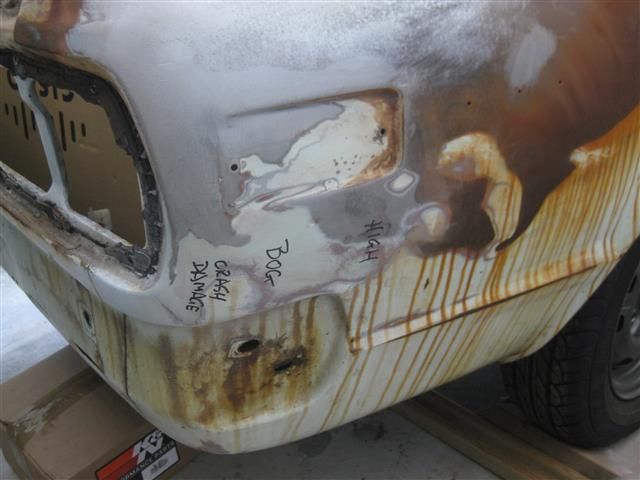
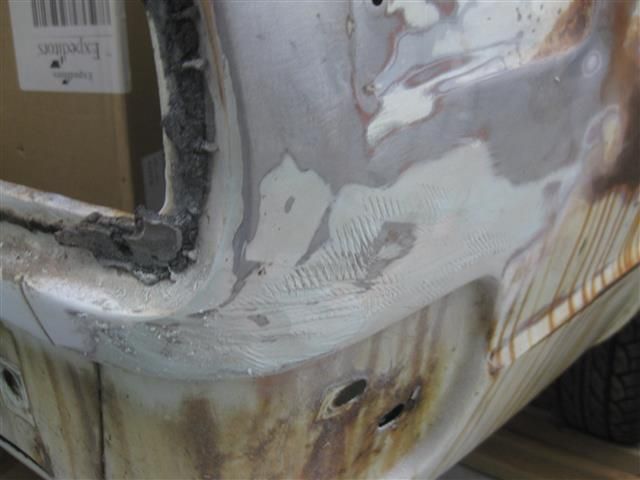
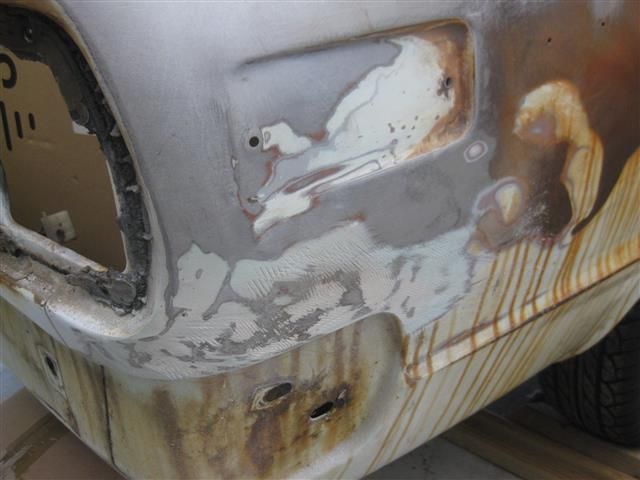
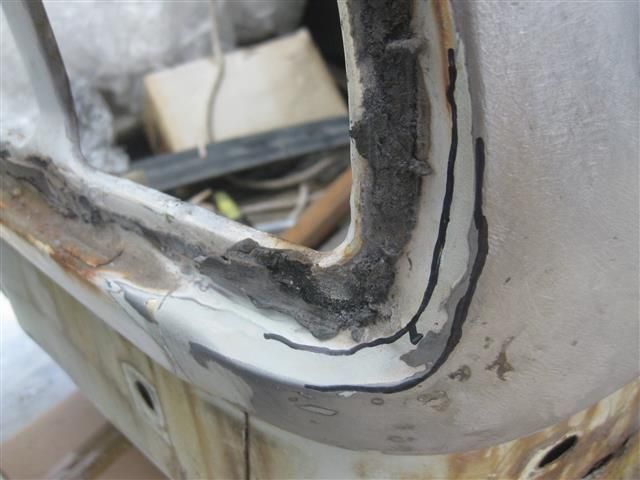
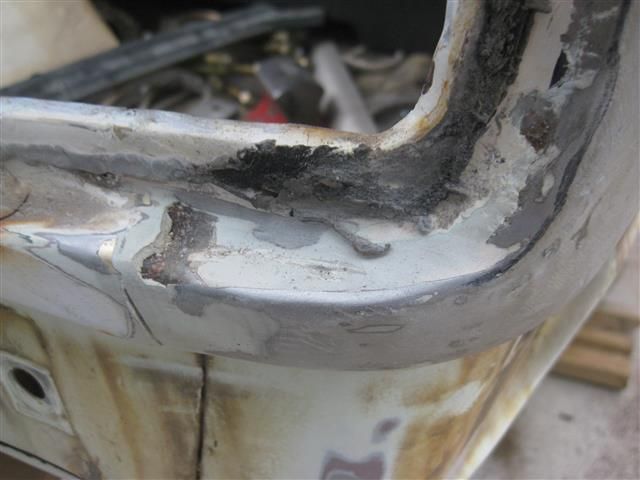
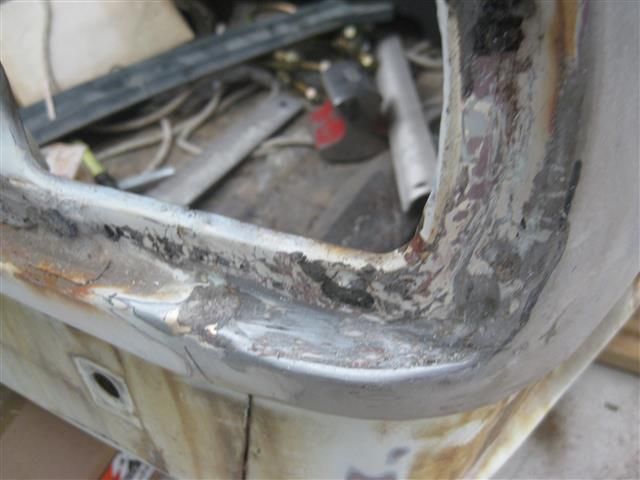
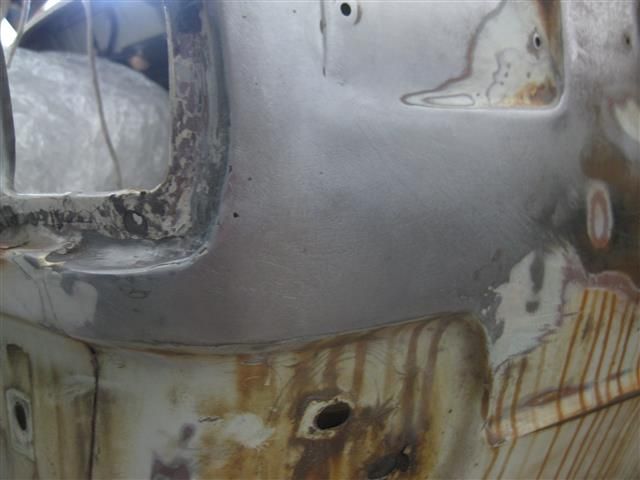
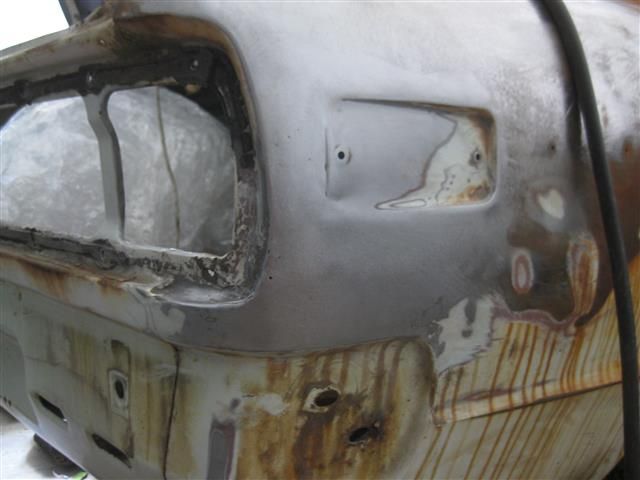
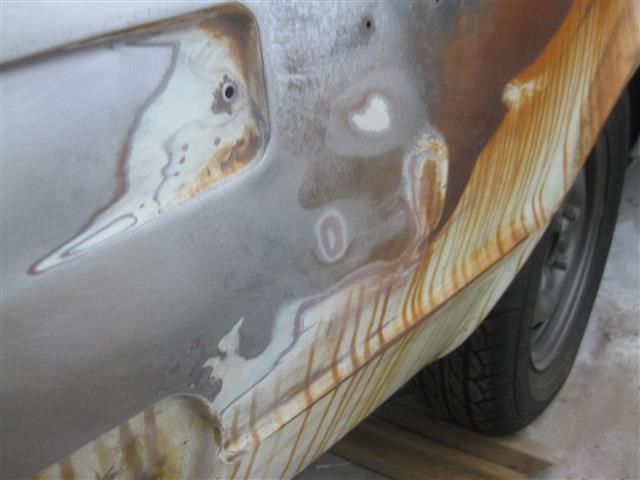
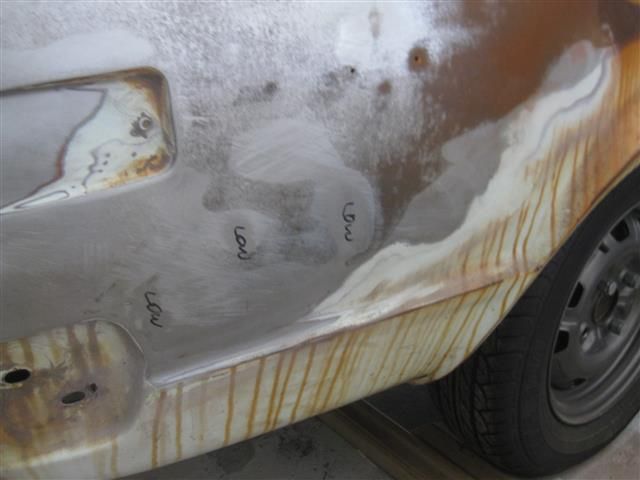
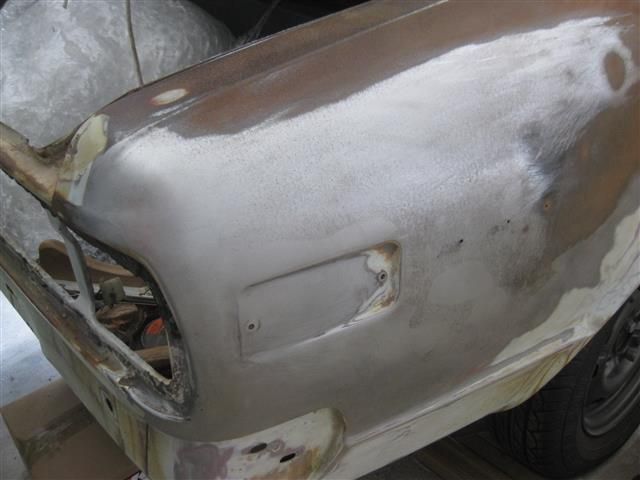
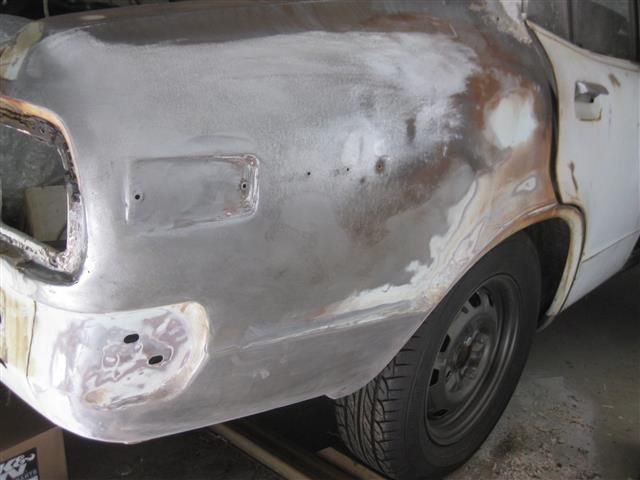
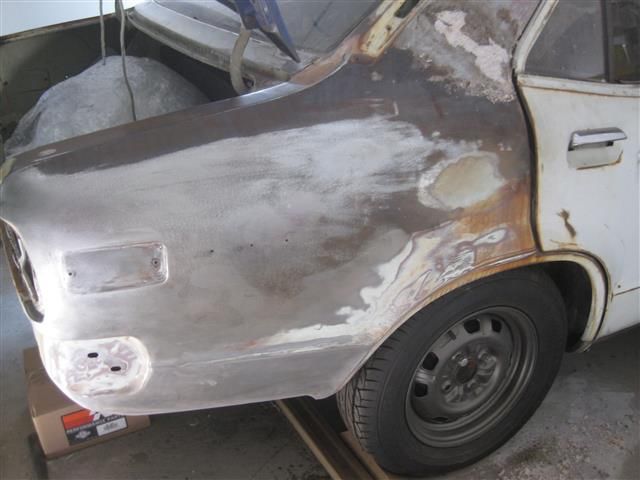
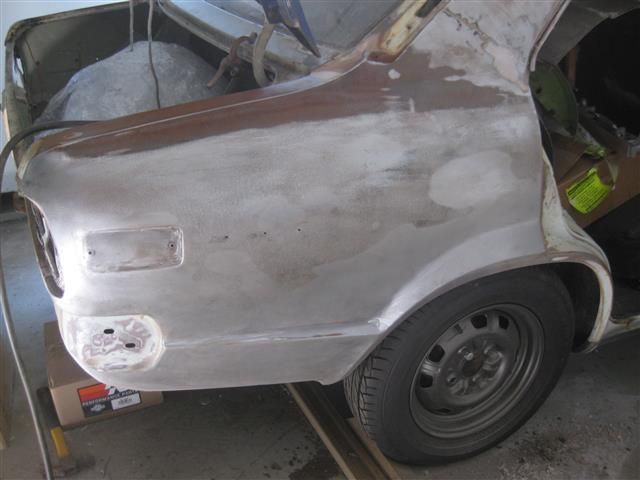
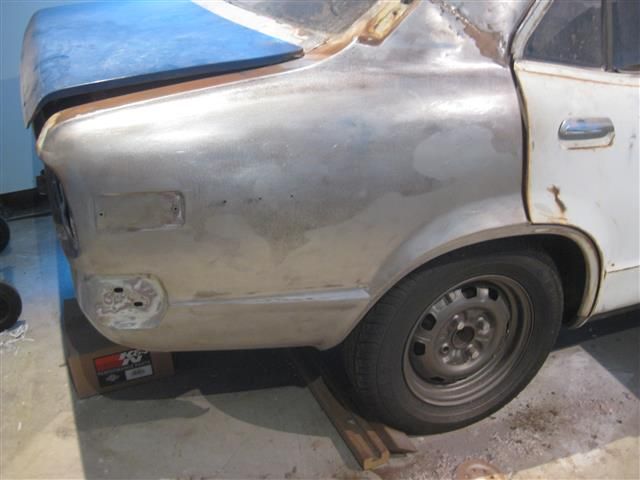
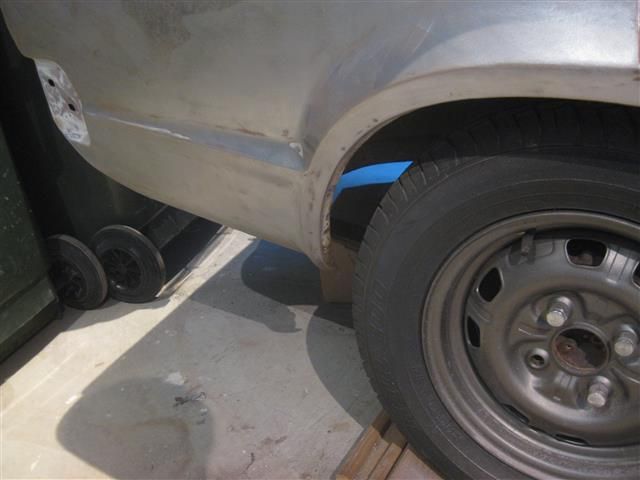
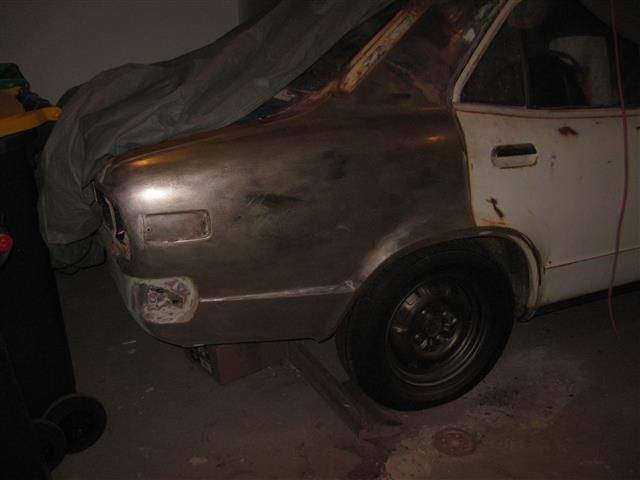
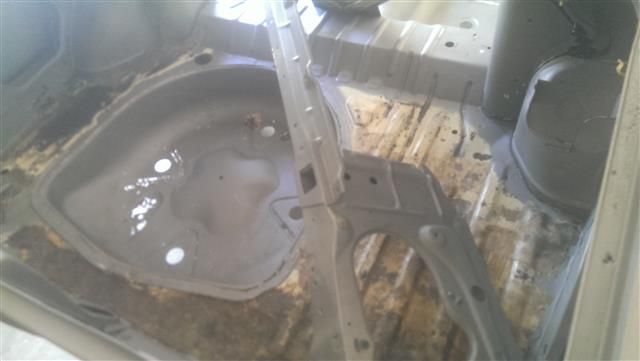
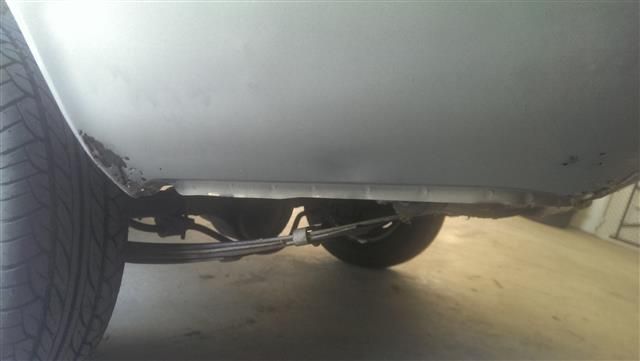
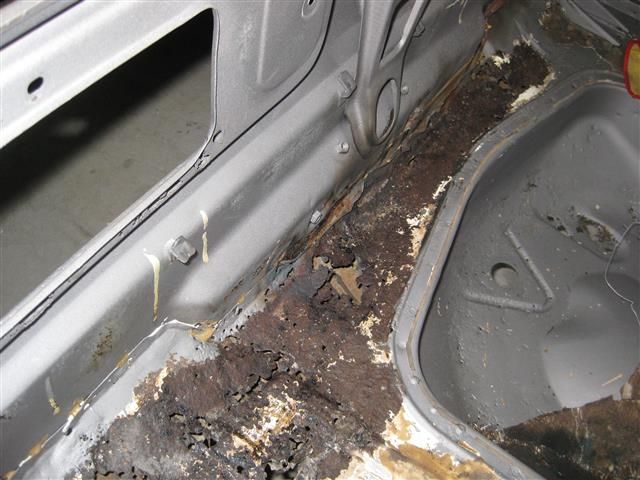
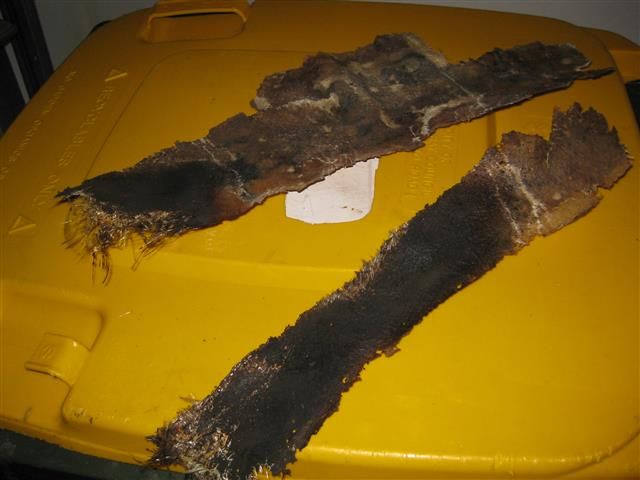
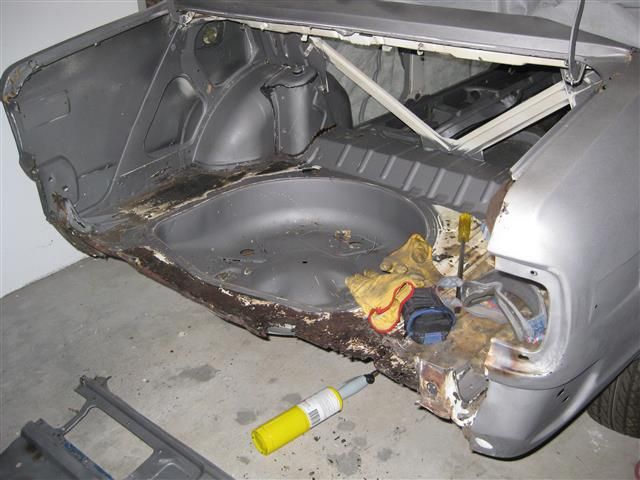
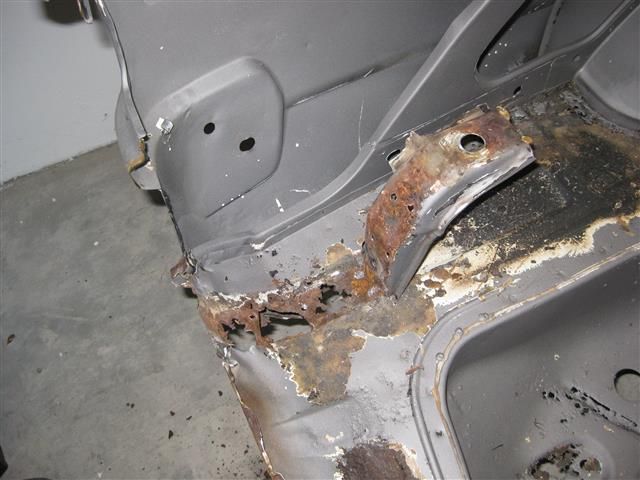
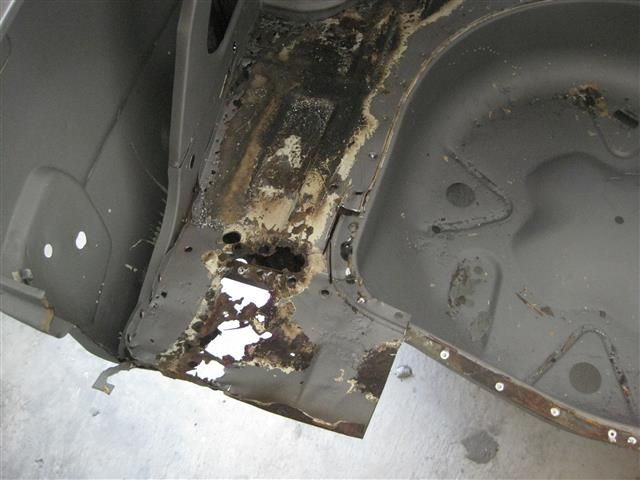
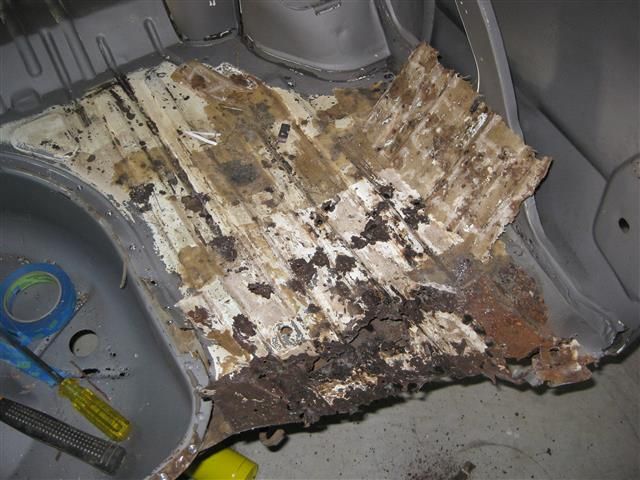
The dog leg is also a problem area. Generally speaking coupes will have far more serious rust issues in the rear of the car than sedans. That's not to say sedans can't rust just as bad ! The dog leg section will clean up nicely. Pic 2, the right sill panel is missing the dog leg so I bought a used quarter to make my life easier. Thanks Ray you're a legend 8)

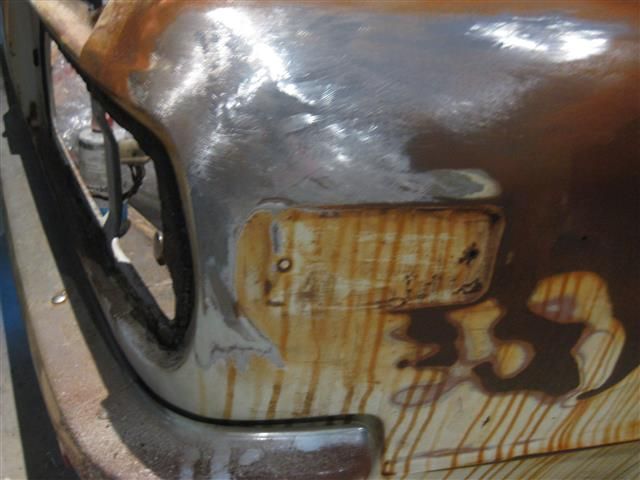
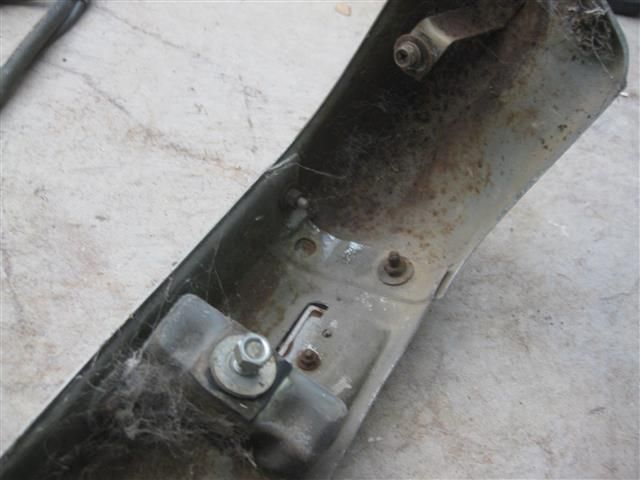
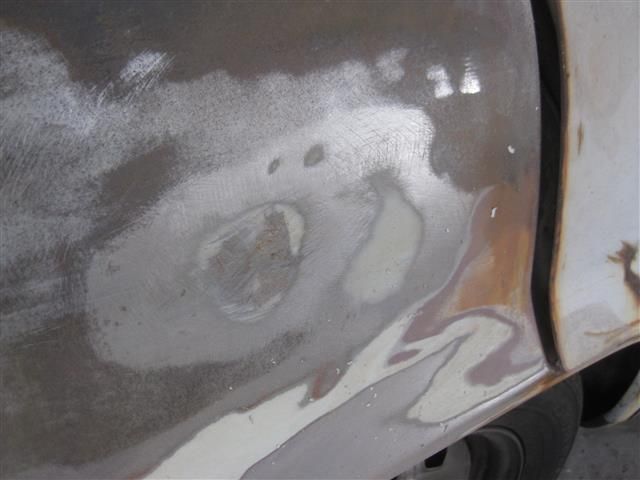
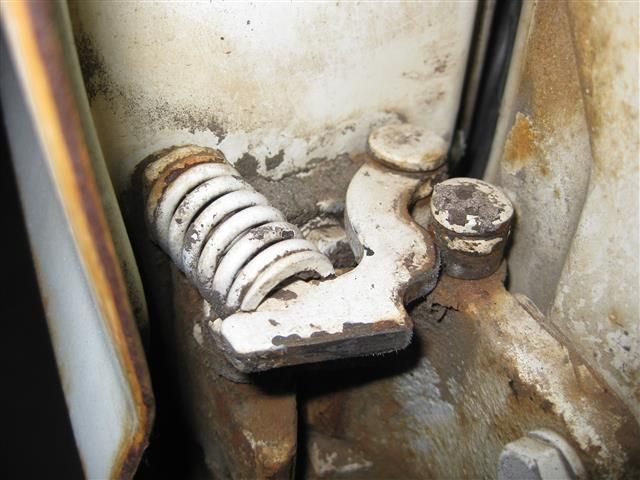
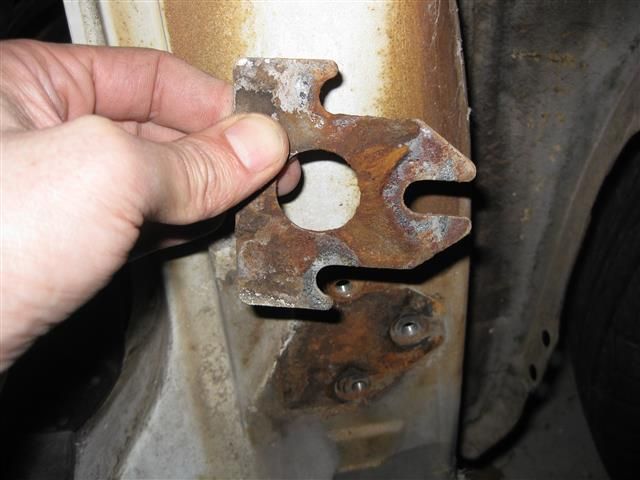
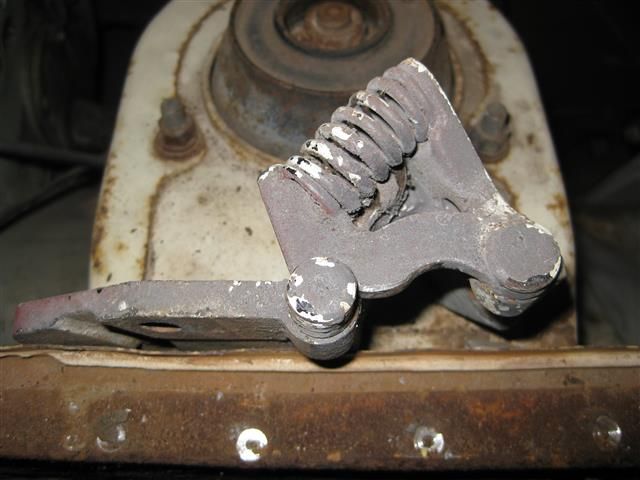
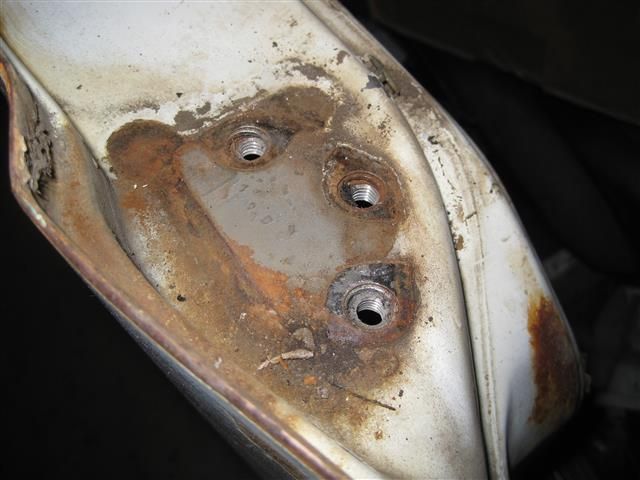
Both left and right outer seat mounts are stuffed on the car including. I've got one replacement that being the on the drivers side. Pic 1 the good replacement. Pic 2 the cracked original. If I can't find a good left side I'll make a template and have it laser cut. These are all typical 808/Rx3 problems. In it's race car guise the race seat was mounted to the floor with a reinforcement plate and not on the original mounts.
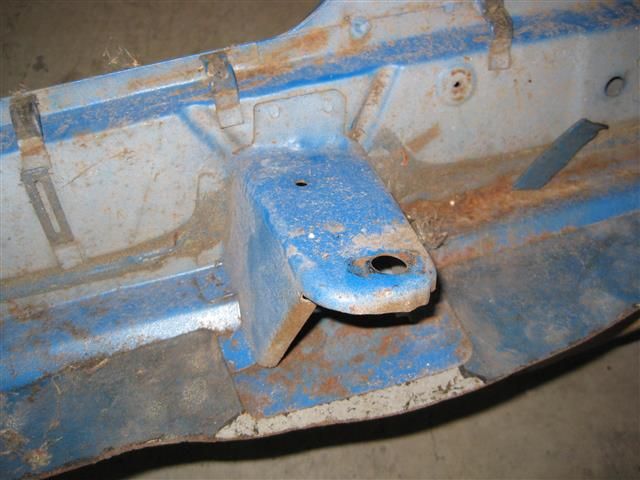
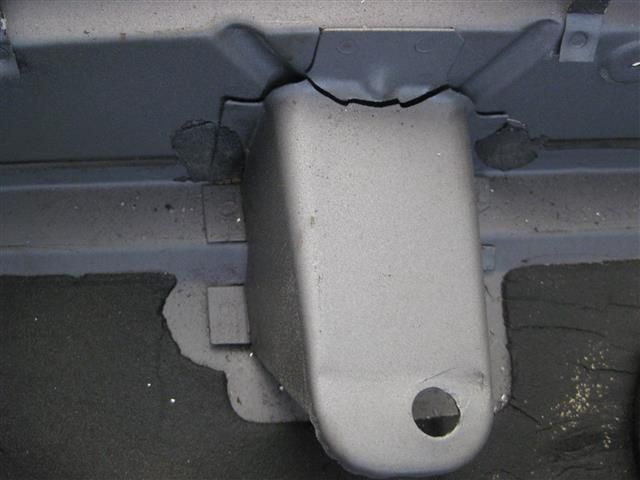
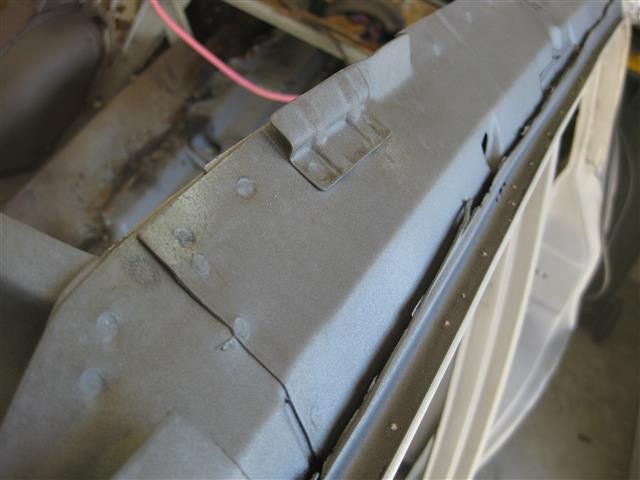
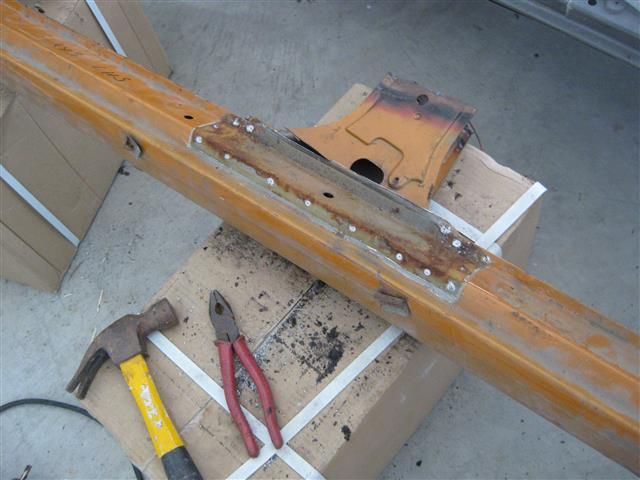
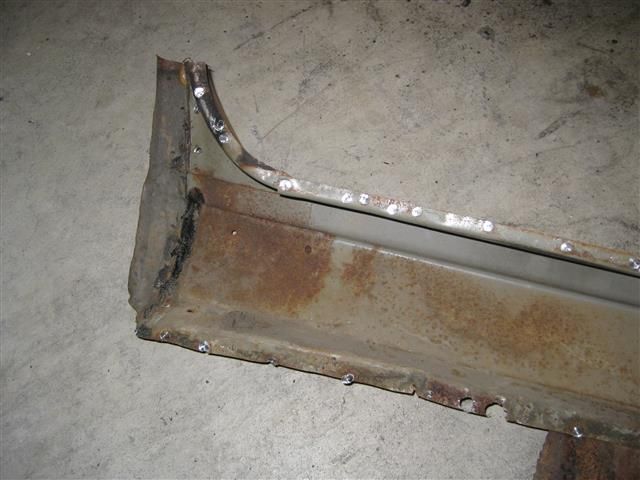
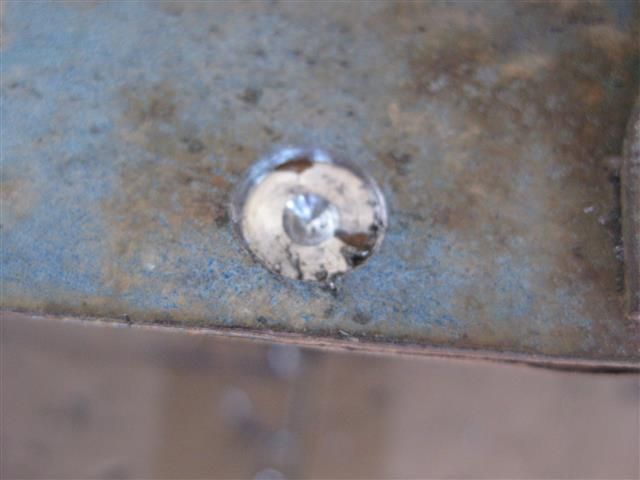
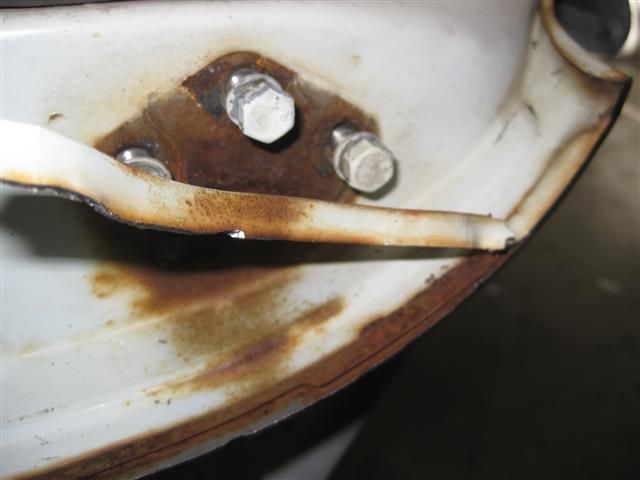
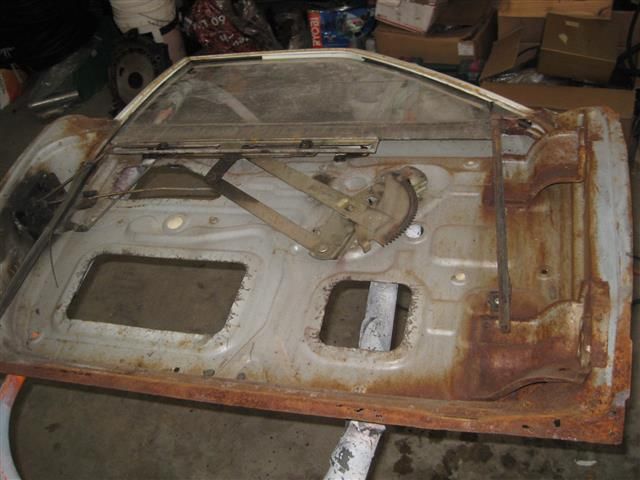
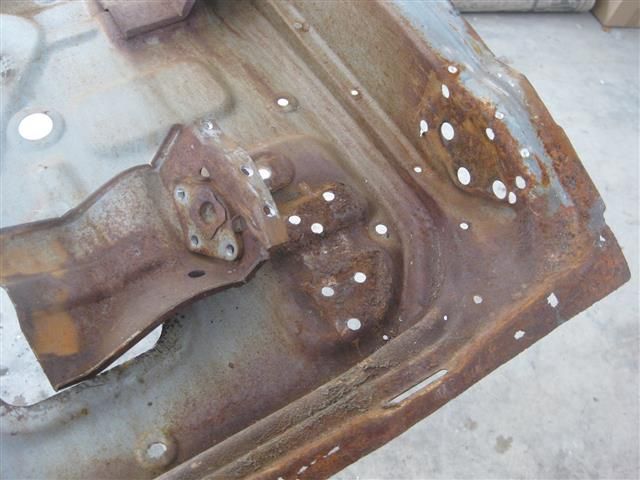
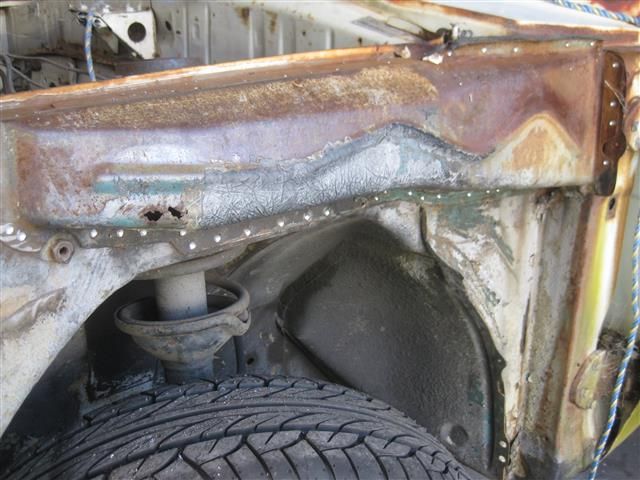
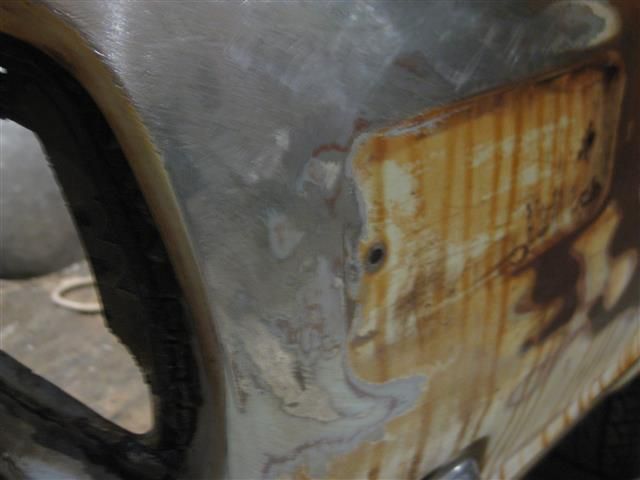
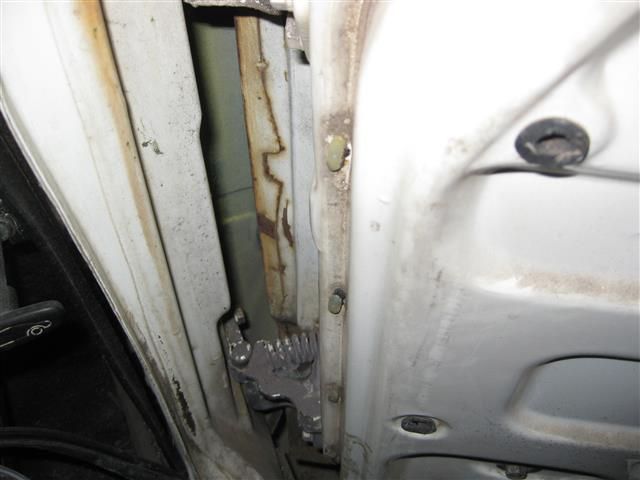
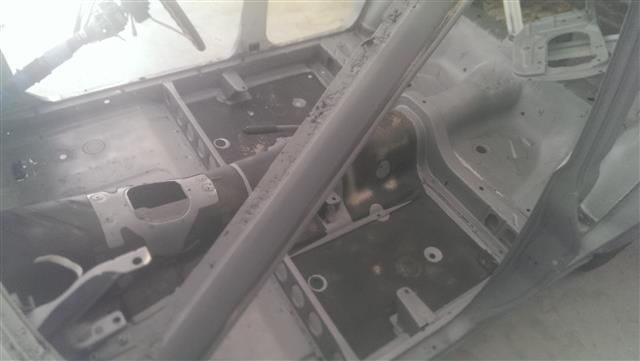
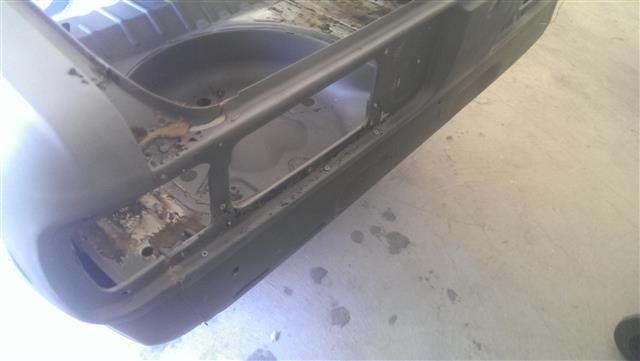
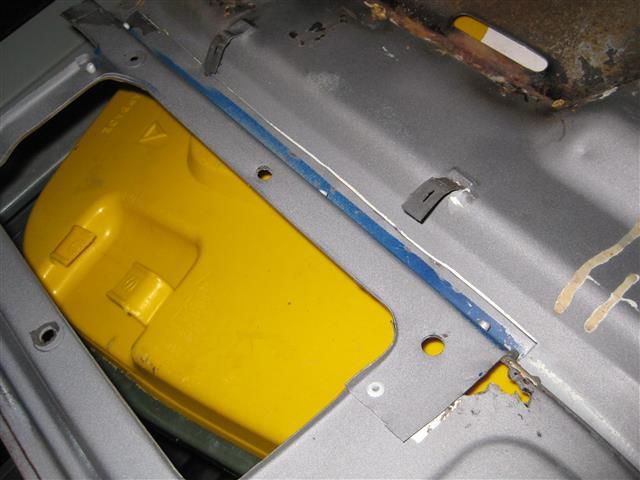
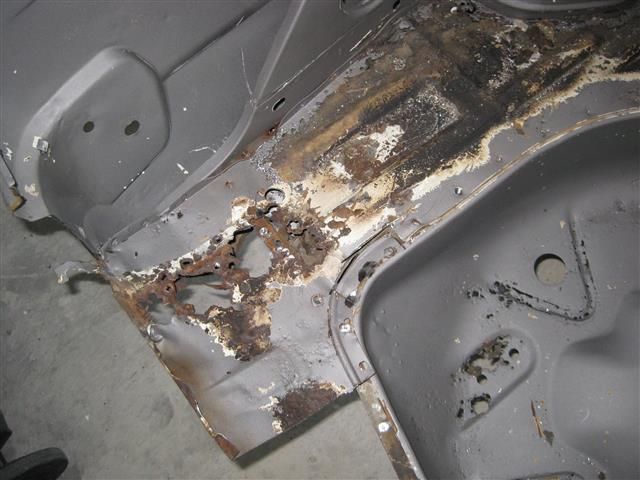
Pic 1, normally hidden from view but this is where the inner sill panel cracks behind the spot welded seat mounts. Some cars are worse than others. If you're a big fella chances are there will be cracks in the inner sill which normally can't be seen without removing the outer panel. The other panel that sits in front of the cracked area makes up the inner B pillar panel. Pic 2, Right inner and outer replacement sill unpicked...
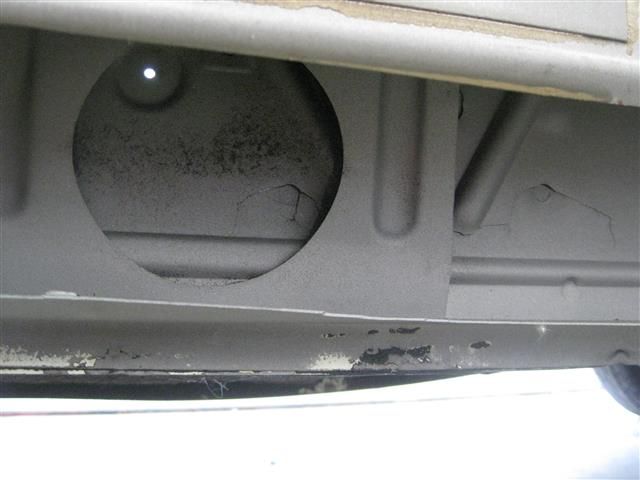
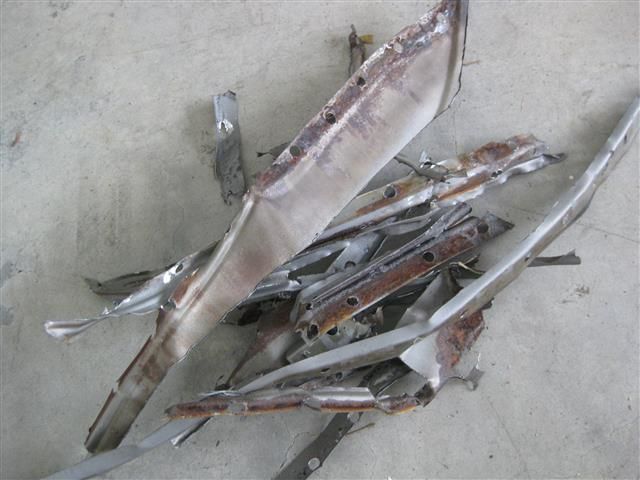
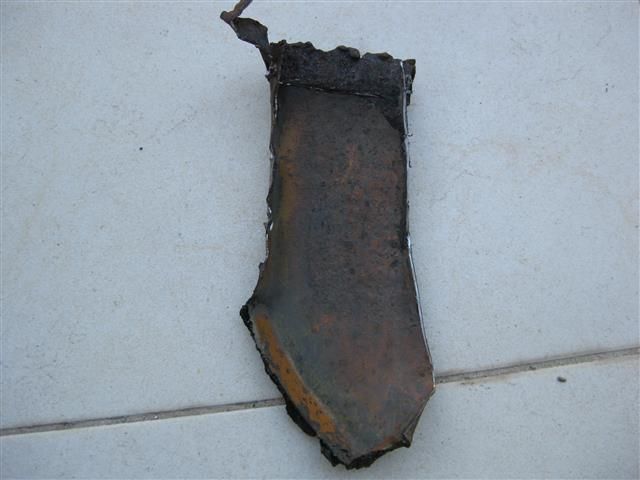
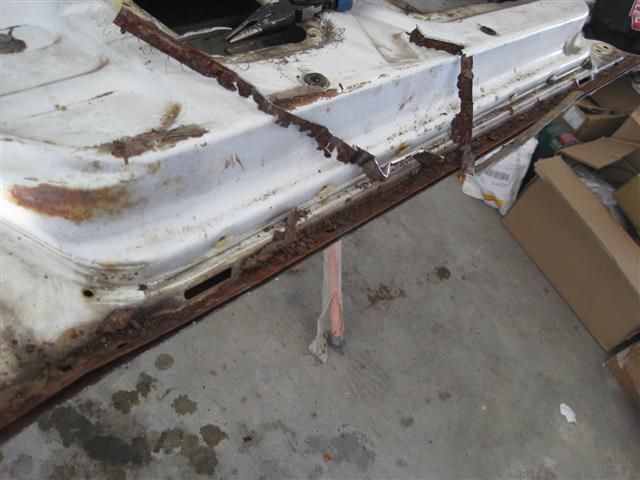
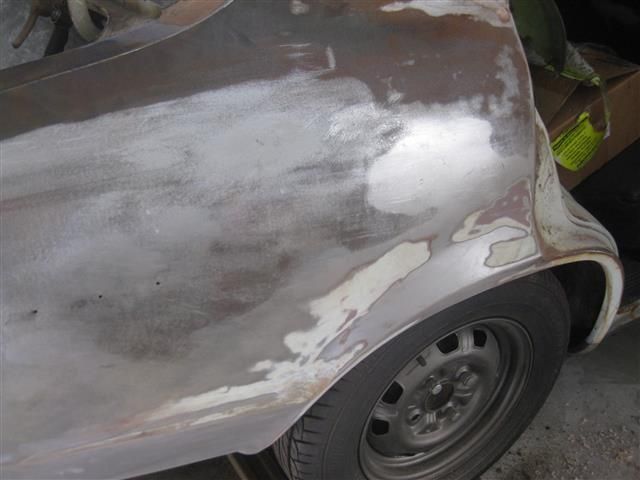
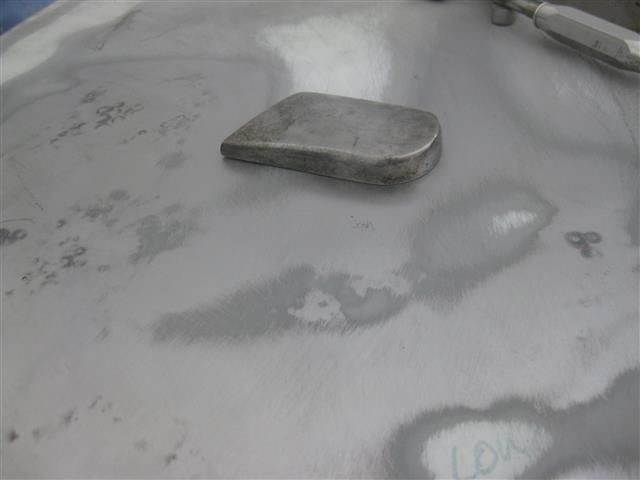
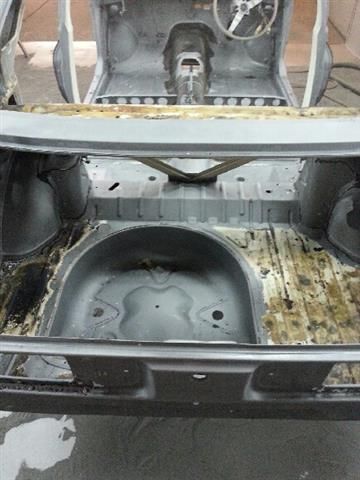
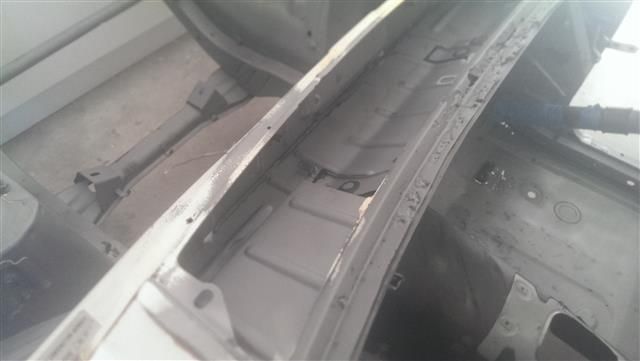
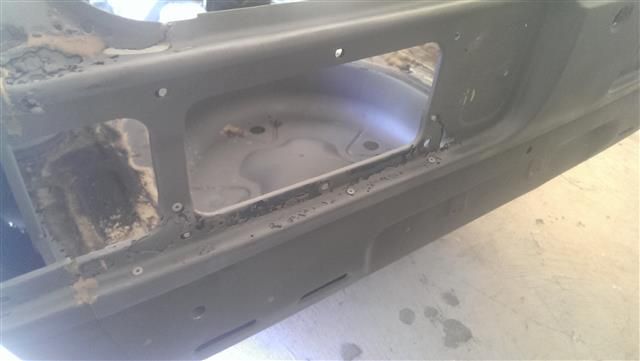
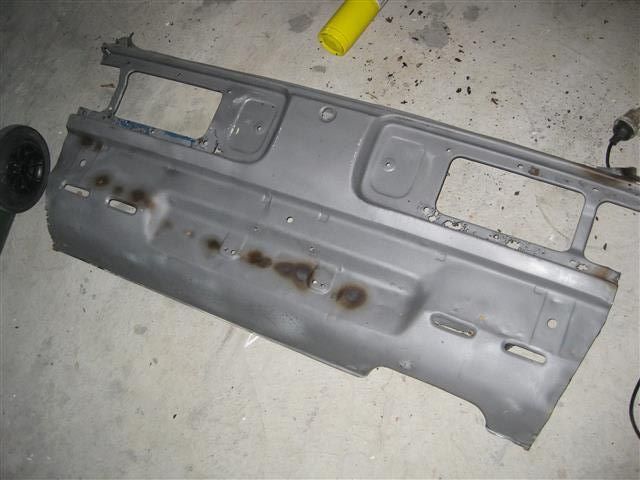
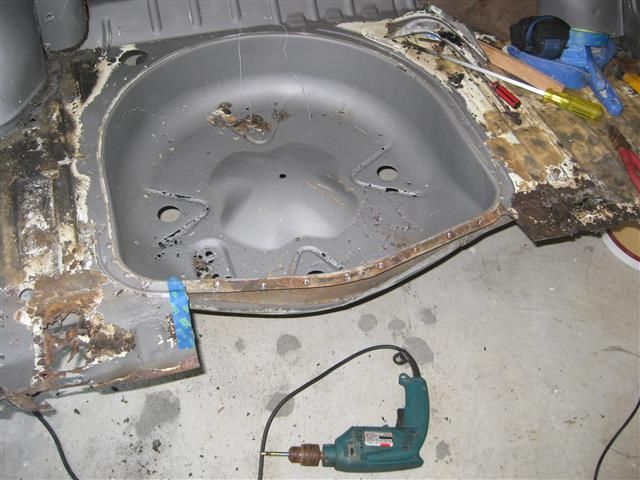
Again, the sills look good on the outside but are a little rusty on the inside. All these parts will be cleaned up further, beated where damaged from using jacks in the wrong place then sent away to be sand blasted spotless. Pic 2, I saved the the cap that seals the sill panel from the rear within the wheel tub. This will be used to make new replacements.
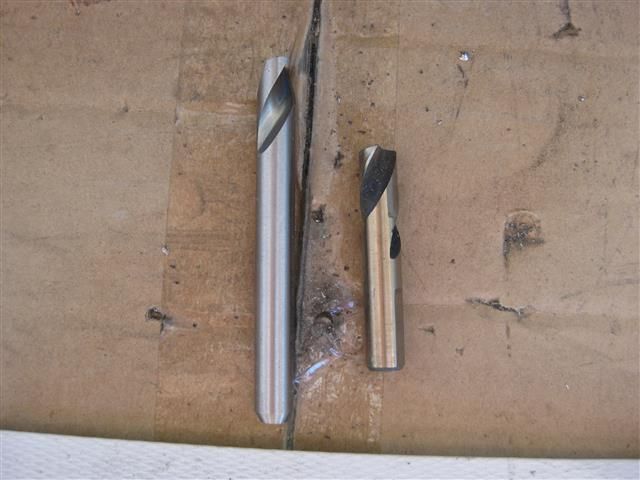
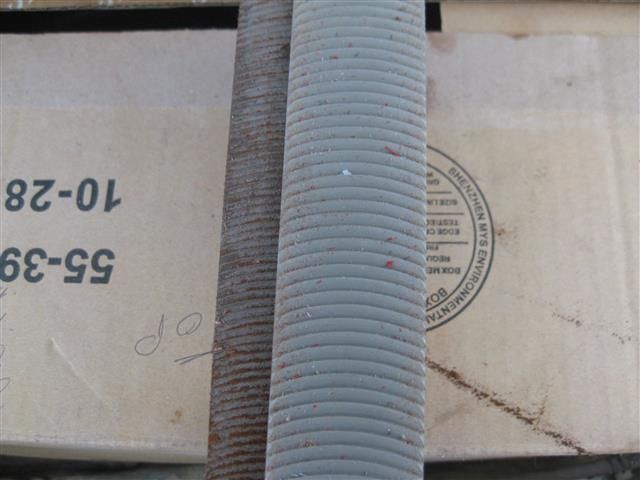
Next the donor quarter cut for bits and pieces. Pic 2, a little on removing spot welds. The drill bits are generally available in 2 lengths. What you see are 2 different brands. These are the only 2 brands that I will use, from my experience all the others I have tried are garbage. The left one is the Alpha brand and is the cheaper of the two. They work and last quite well. The gold colour one is made by Suttons and if my budget was unlimited it would be the pick of the two. They are sightly more expensive, the cost adds up because they don't last forever. In my opinion they give a nicer cut and the pivot point does less damage. The down side is they don't last quite as long as the Alpha brand and they are more fragile so to speak. It's not uncommon for the small pivot to chip off which renders the bit useless as they then wonder all over the place.
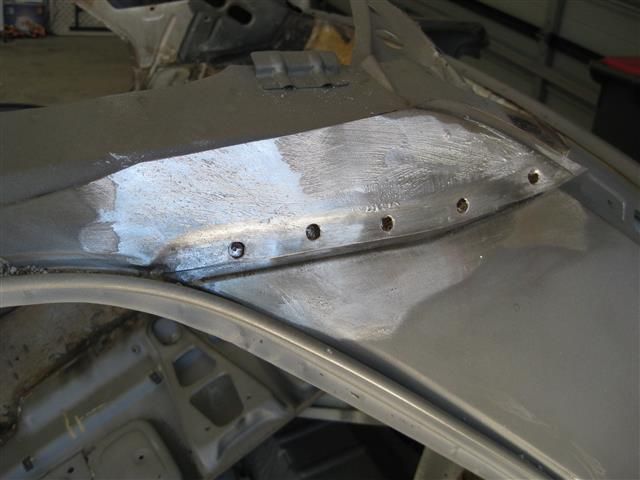
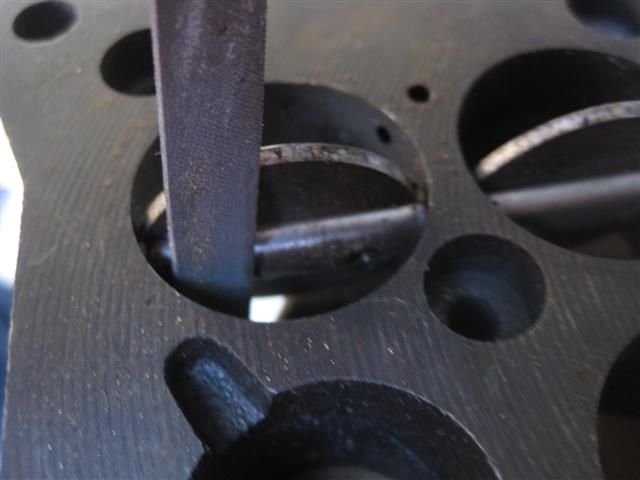
I was asked on how to use the bits because some people still drill through both panels. First I drill a small pilot hole in the center of each spot weld. I think its debatable whether cutting compound or oil prolongs the life of the bits as you're drilling out hardened steel from the spot weld process. The bits definitely don't last forever, you'll probably use one for each sill panel for example. The bit will still work but will be past it's best. The best way to understand why they don't last is imagine drilling through panel steel, easy right ? Now try drilling through a MIG weld.
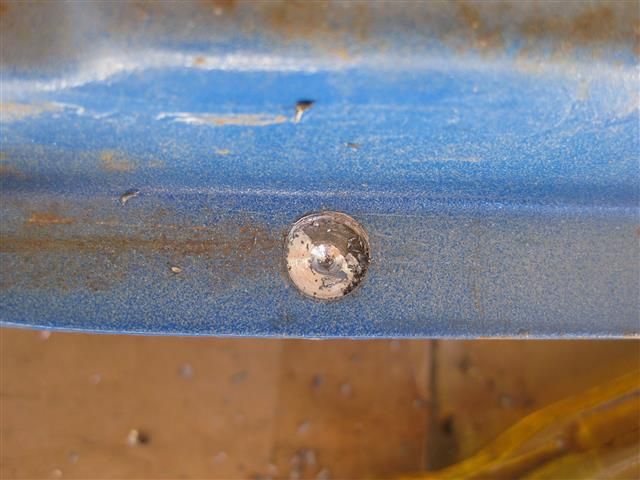
Removing spot welds in Mazda's is quite easy. First trick is let the bit do the cutting. There's no need to apply much pressure. Now keep at eye on the spot weld, in a Mazda it normally will change to an orange colour when you hit the center point. Mazda engineered the panels to rust (the orange colour) so people like me would have an easier time restoring them 40 years after the year of manufacture, serious :shock: If you apply to much pressure while drilling you'll miss the colour change. Sometimes you'll see the primer coat instead of rust depending on how the car was kept. Once you get to this point, use a wide flat screw driver to crack the join. Also have a think about how the panel will be re attached, that will change what gets a hole (plug weld) and what doesn't (spot weld).
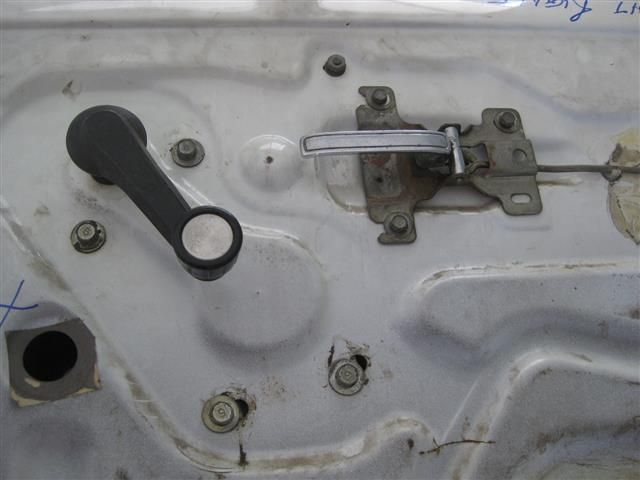
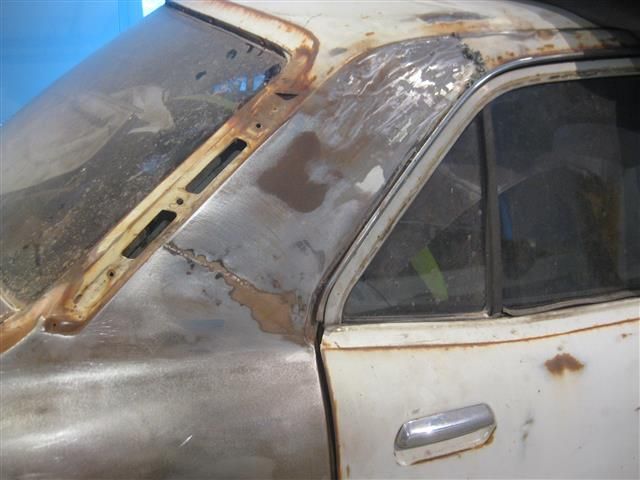
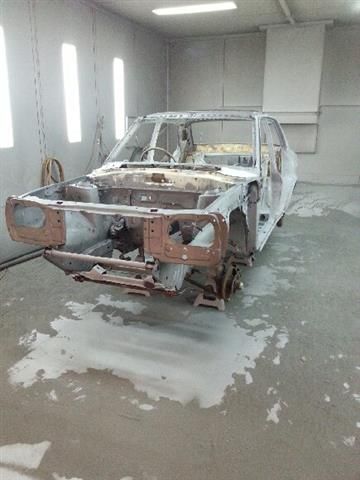
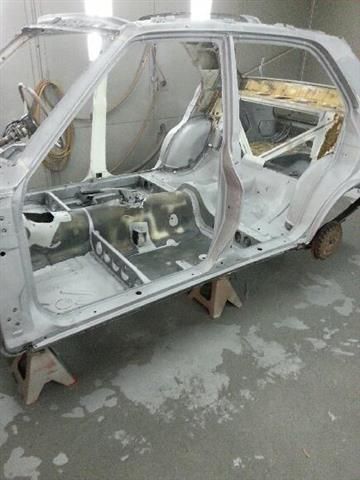
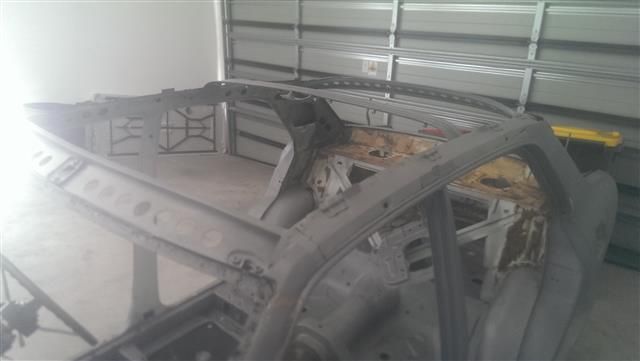
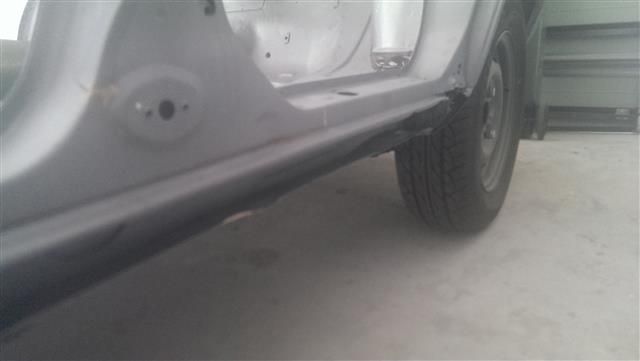
Last for now... the door shells are stripped, aligned and installed back on the car. What I'll be doing here is taking measurements around the doors and front guard when it goes on so when the remainder to the sill comes off the car for the replacement sills I have good reference points. The original doors fit very well on this car. Once the sills are done I'm still thinking removing at least one A pillar, I don't want to but it may be the only way to get the repair I want. I'll make that decision later on after the cowl comes off. Once that's done the I'll grind the edges off the door skins, send the shells away for blasting and then the new skins can go on.
I can now see this is going to take a while #-o
It was around this time that I was fed up with panel work lol
Most of the following is for the sedan....
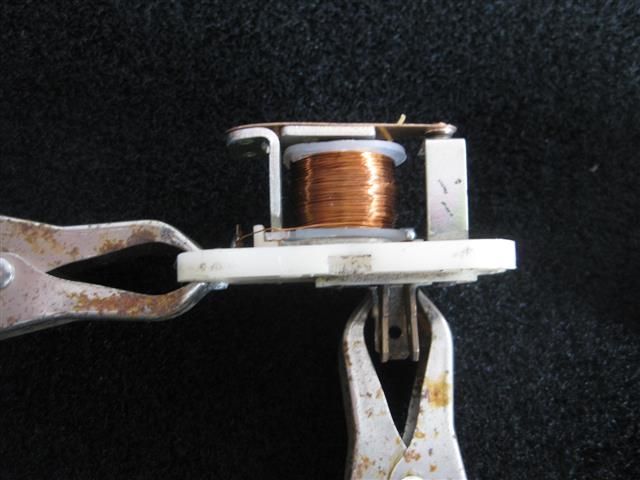
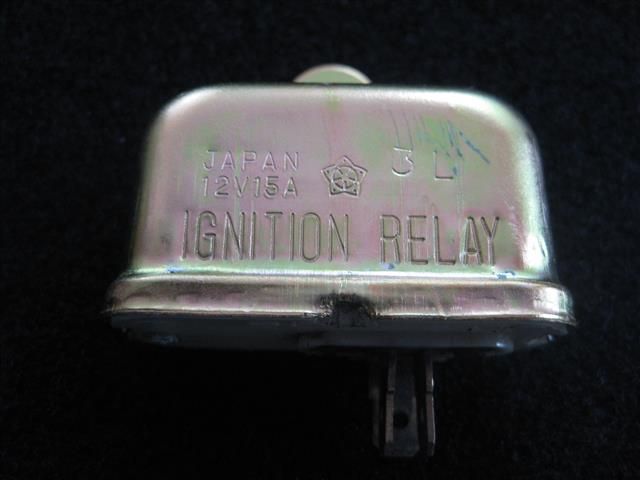
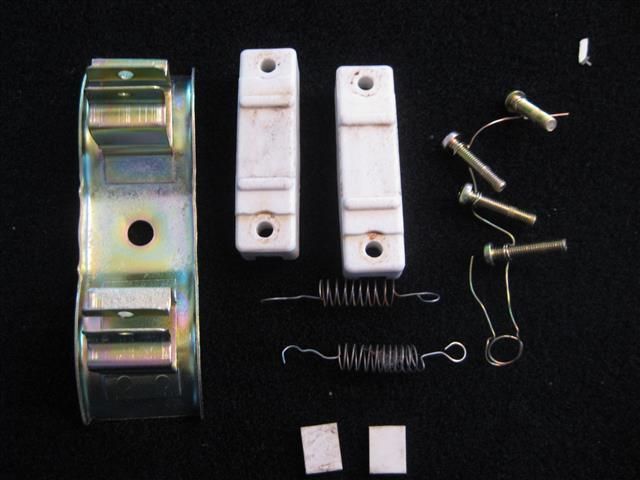
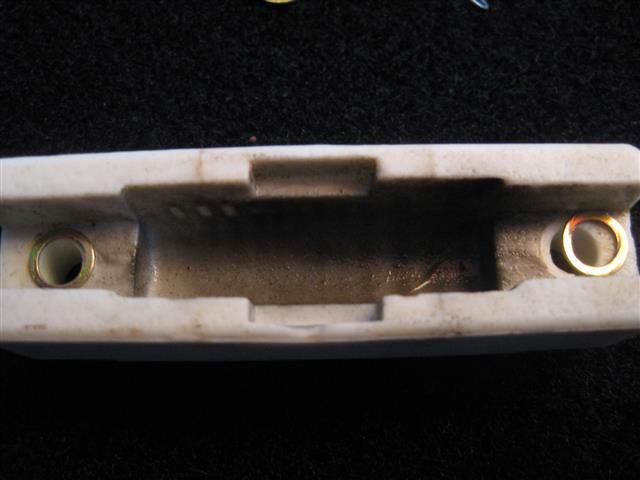
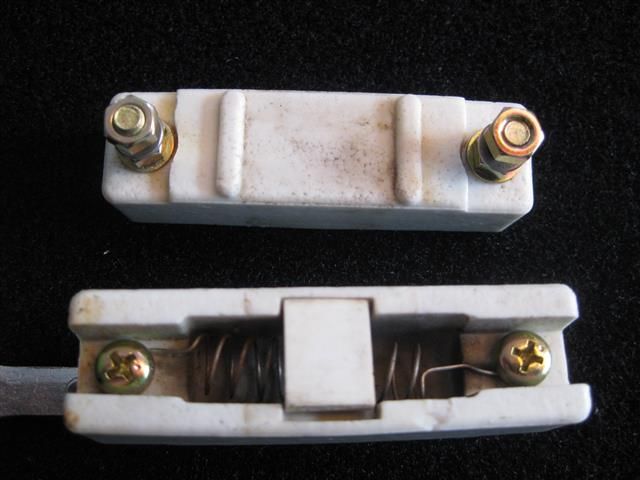
Testing and assembling the coil ignition relay, the case has been freshly plated. When crimping the case make sure the case has a good connection to the earth tap.
Ballast resistors cleaned, bracket zinc plated....
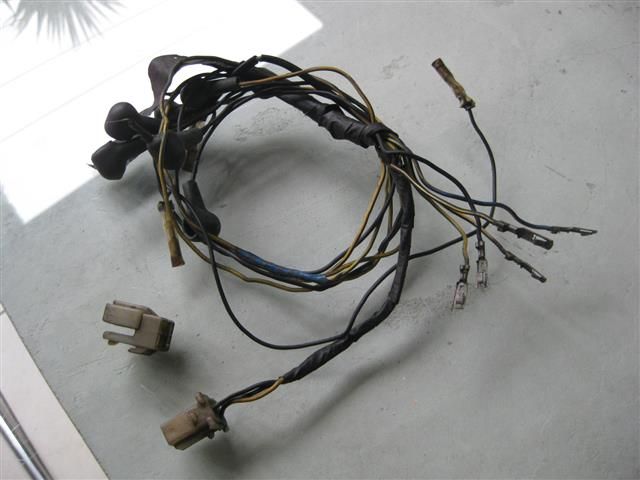
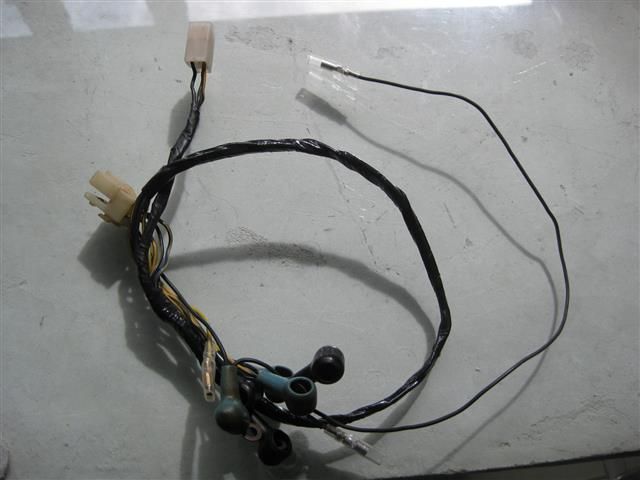
Ignition wiring degreased, plugs changed for new ones, damaged terminals replaced, crimped soldered, yellowed plugs replaced....
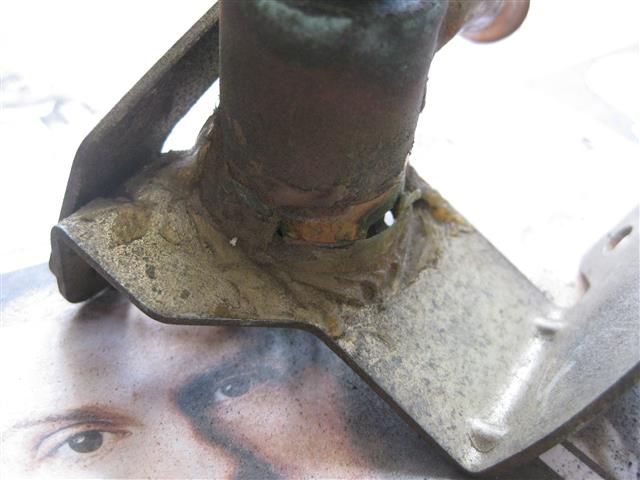
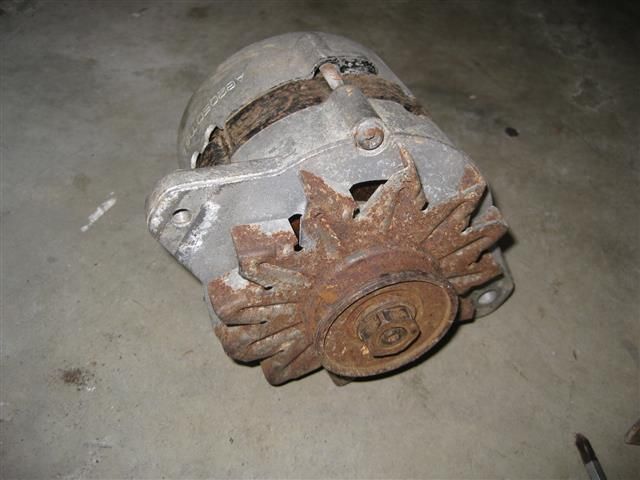
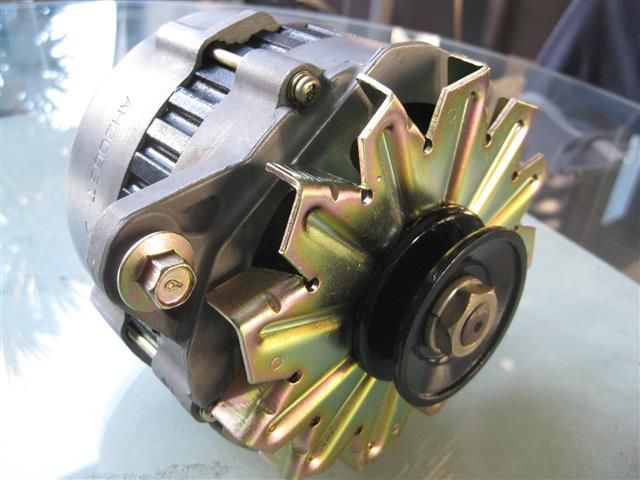
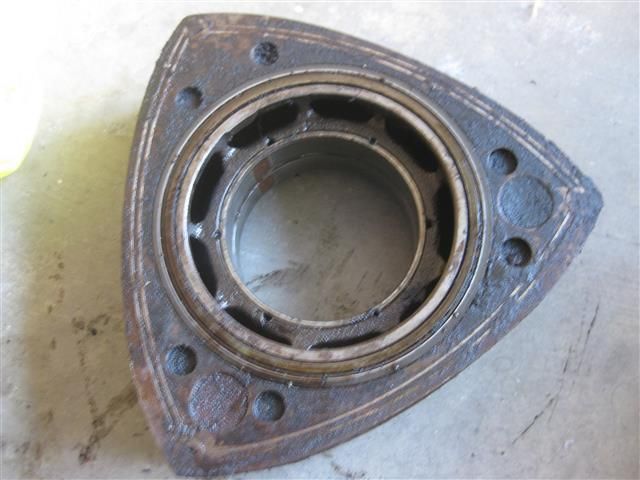
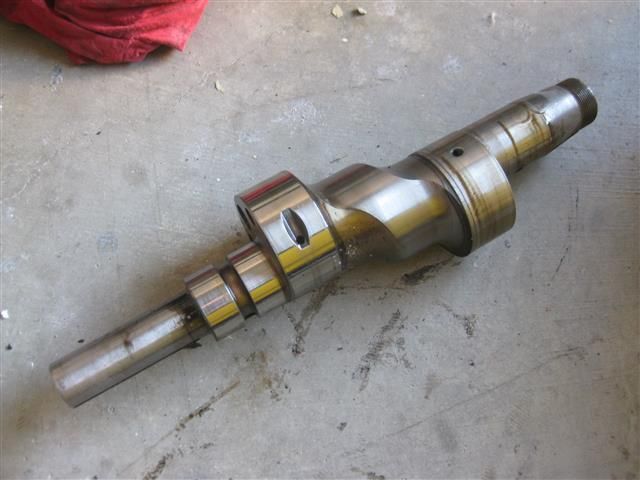
Last week I picked up a 10a oil cooler and I got another alternator to make 1 good one from 2. While there Jim showed me his yellow standard 10a coupe and the factory blue original 10a sedan. Both cars were really impressive especially the sedan. To survive so many years and still look like it does is nothing short of amazing. I've seen photos of it before but looks so much better in real life. Anyway I think the alternator came off the titanic... I had to use a cold chisel to remove one of the long screws, the rattle gun had a hard time getting the main nut off as well.
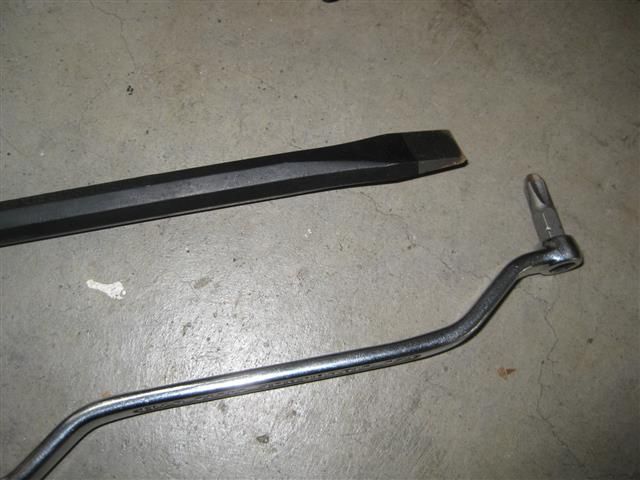
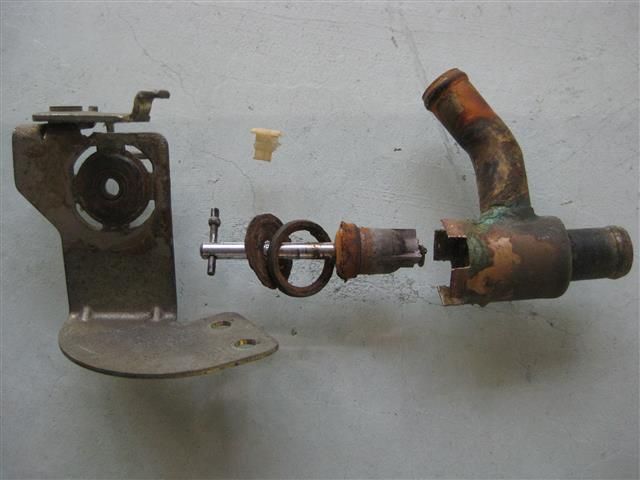
Coming apart... the screw that holds the heatsink to the rear case snapped, seized real good !
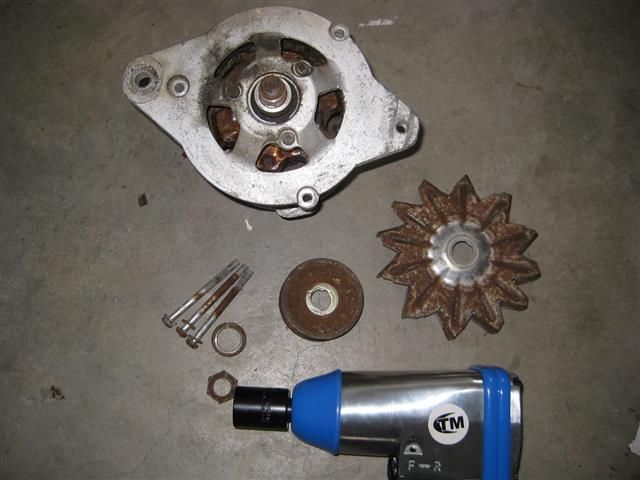
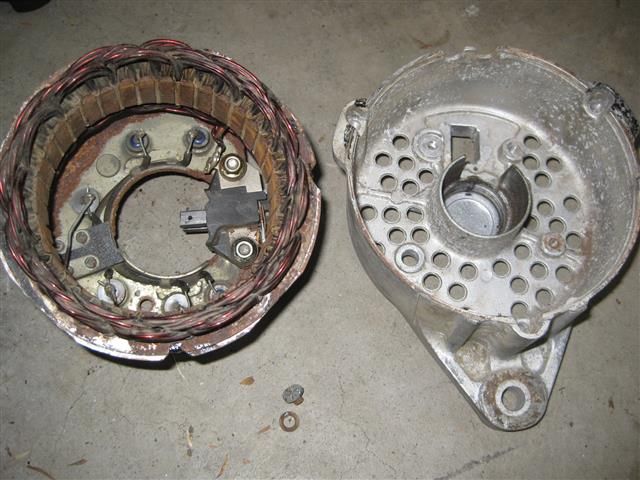
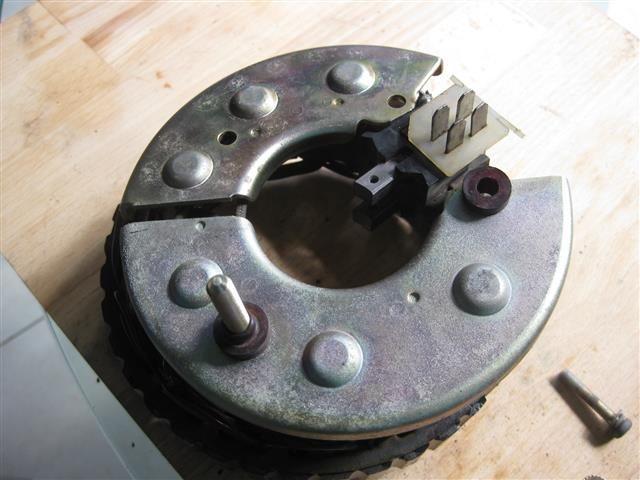
Heatsink was rusted through in spots so I replaced them with the ones from the other alternator which I had zinc plated. I've already covered an alternator build so no point going through all the detail again. It's here so if I sell the car the new owner knows they are getting a good alternator at least :lol: 6 diodes in the second photo, 3 are positive bias, 3 are negative bias...
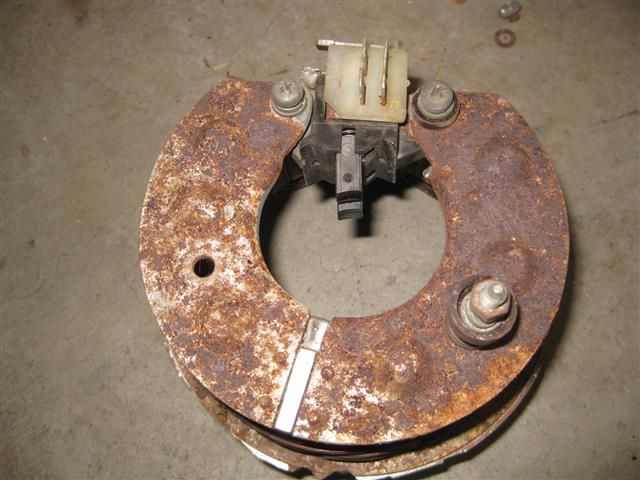
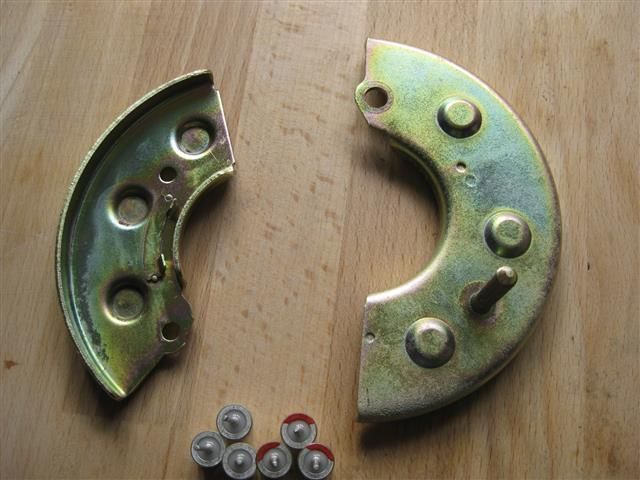
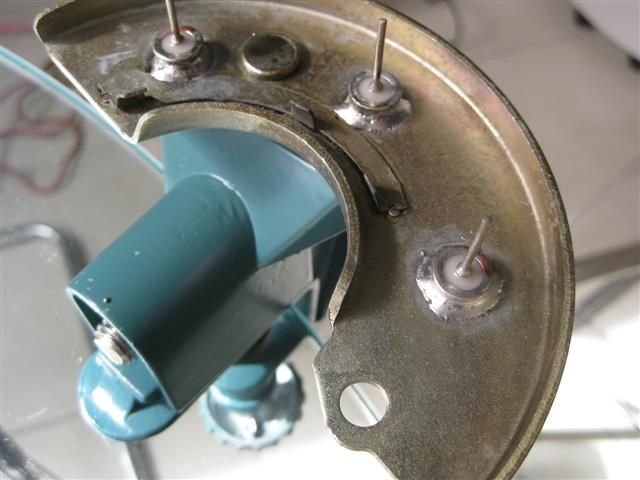
Diodes installed in one of the heatsinks, need to make sure the solder "sweats" up the side of the diodes and that the right bias diodes are installed in each heatsink. Photo 2, the titanic alternator had a good brush holder so used that... don't forget the insulator on the B+ terminal otherwise you'll have a short circuit.
Field windings tested and then installed. The winding is tested for open and short circuit with the steel core. Photo 2, new bits and plated bits !
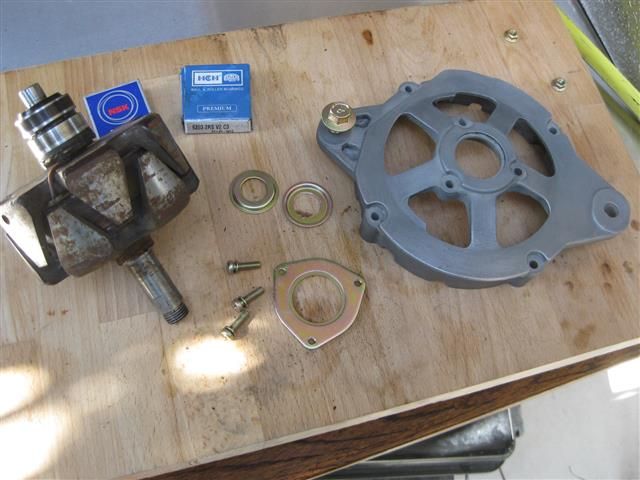
New front bearing installed...
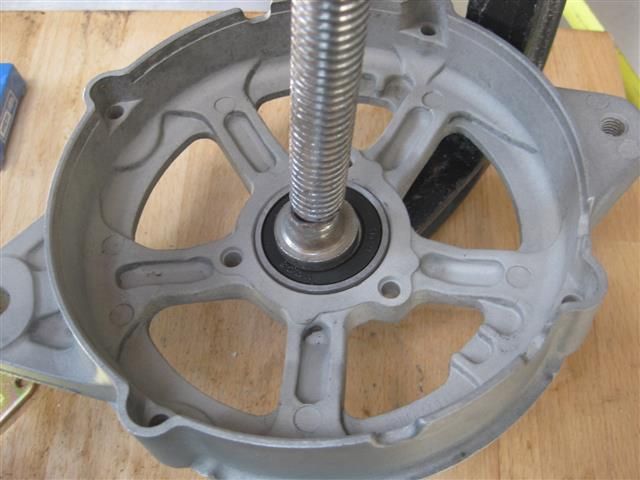

Securing the front bearing... more fresh zinc parts Photo 2, installing a new rear bearing on the rotor.
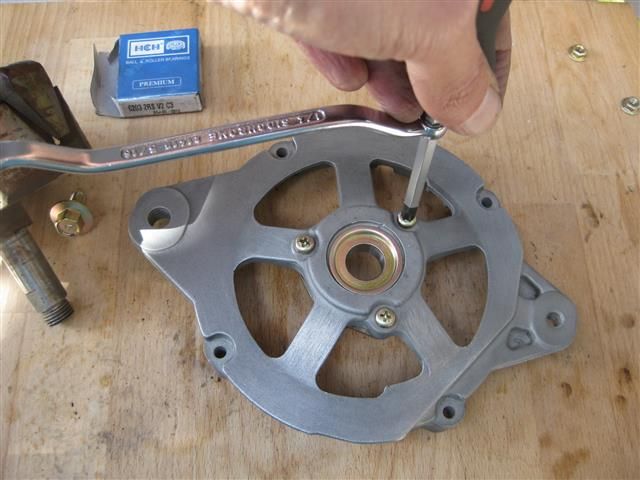
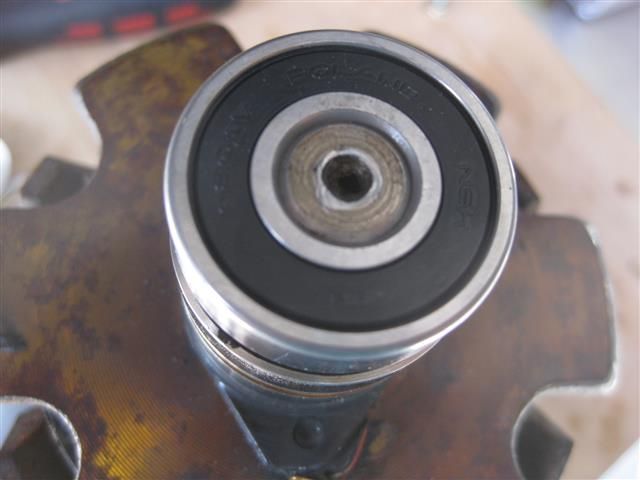
Photo 1 small allen key used to hold brushes in retracted position so rotor can be installed. Photo 2, rotor dropped in
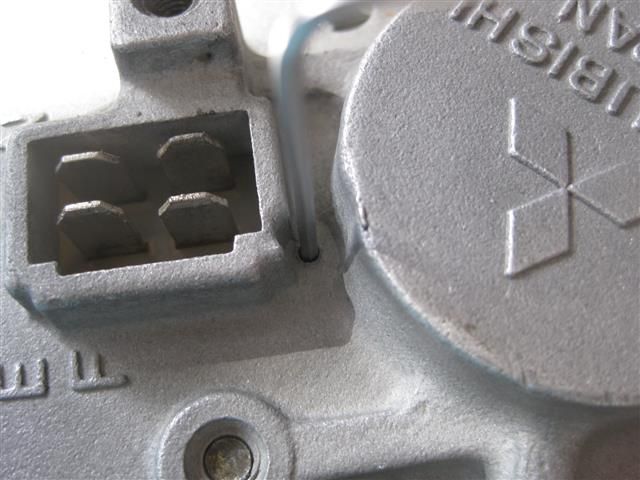

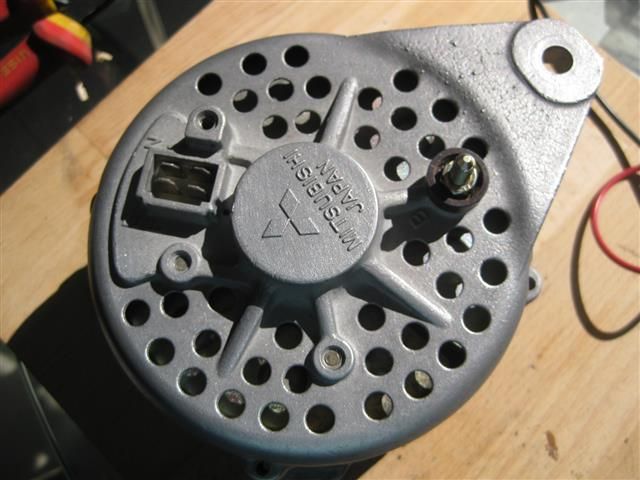
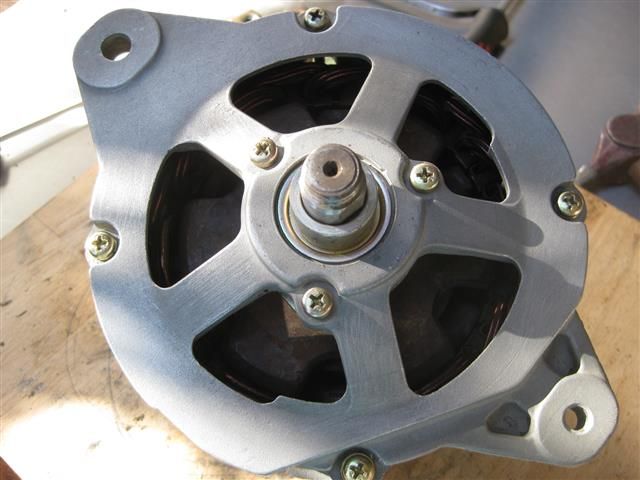
Front case screwed down and photo 2 the rebuilt alternator 8) Last check you should probably do is make sure the B+ terminal isn't shorted to the case.
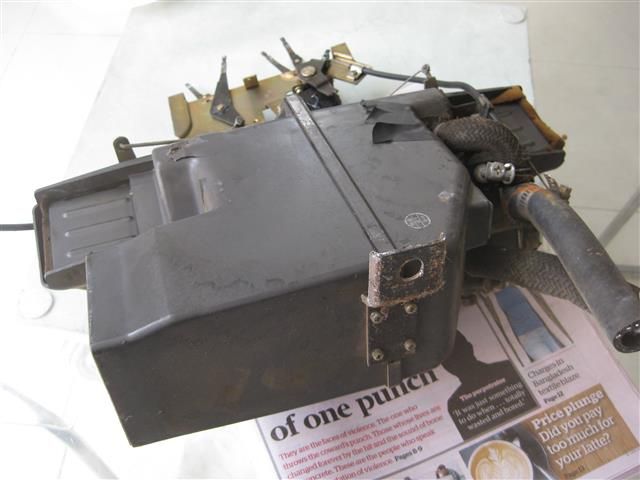
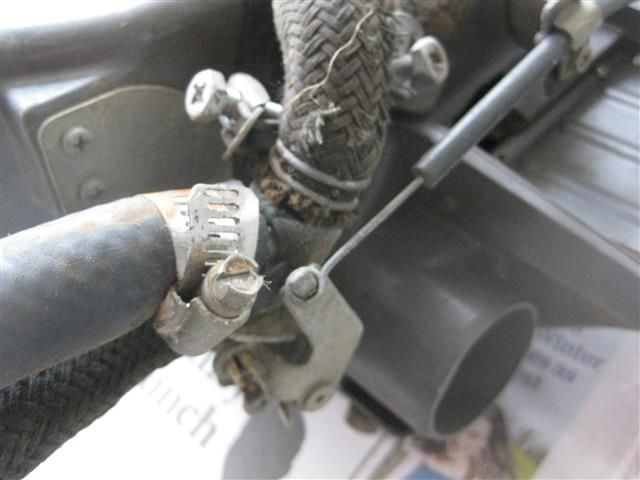
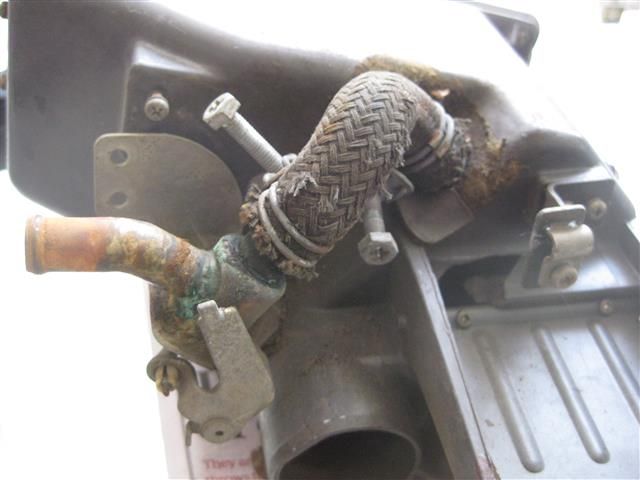
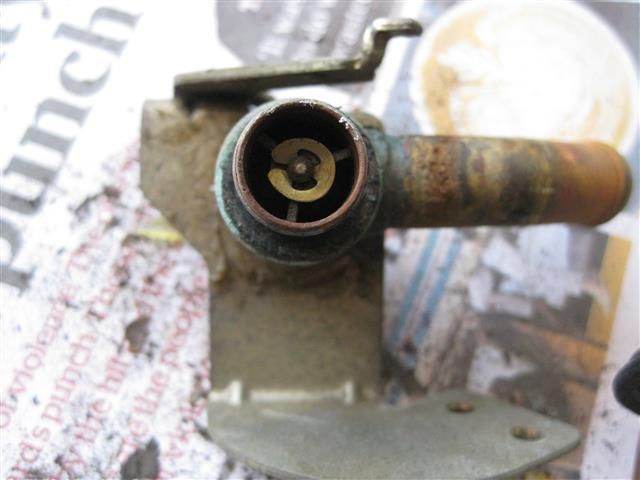
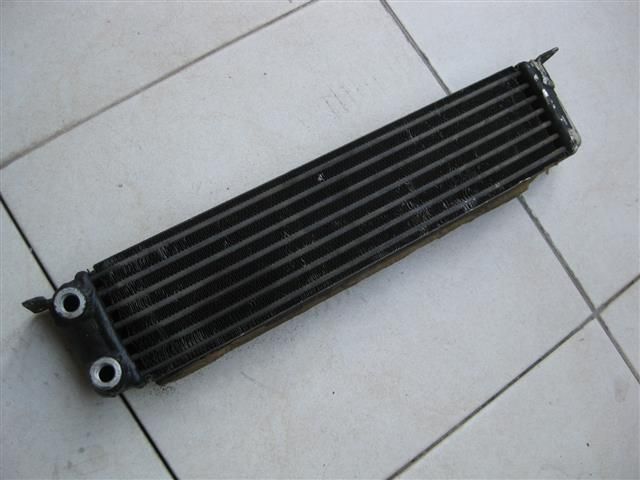
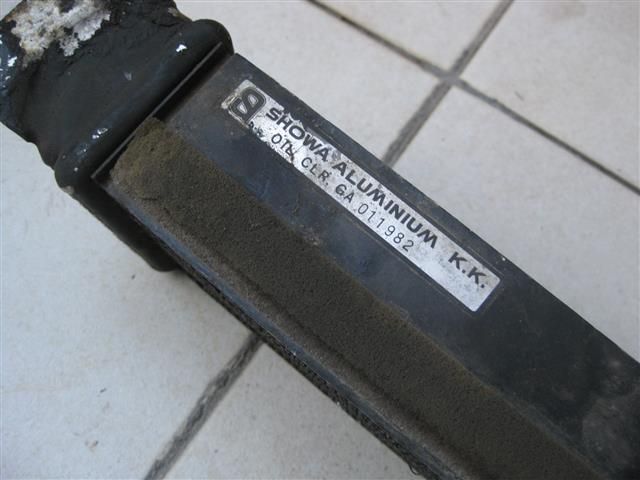
The sedan 10a cooler that was bought last week... surprisingly in very good condition, a bit of a clean and a coat of paint and it will look like new again.
==================================================================================
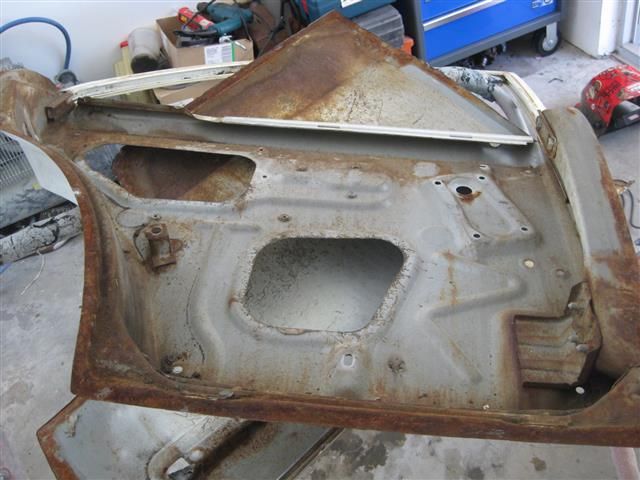
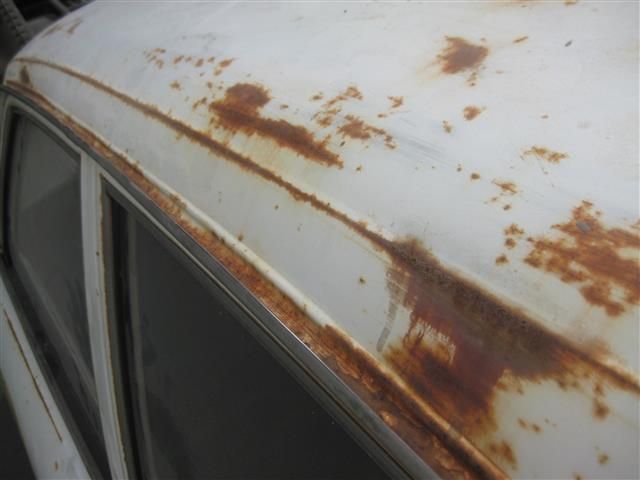
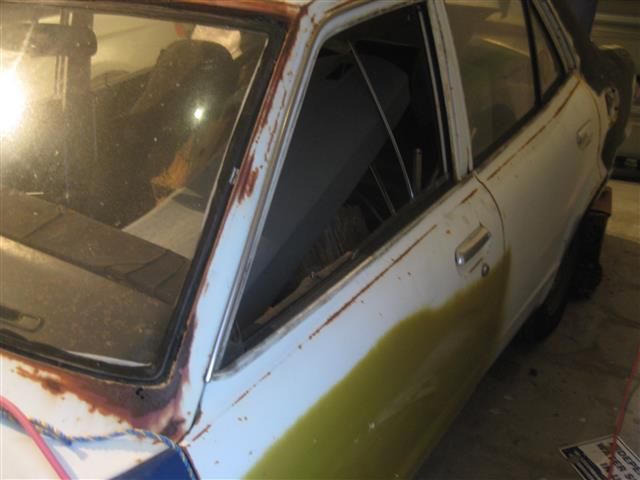
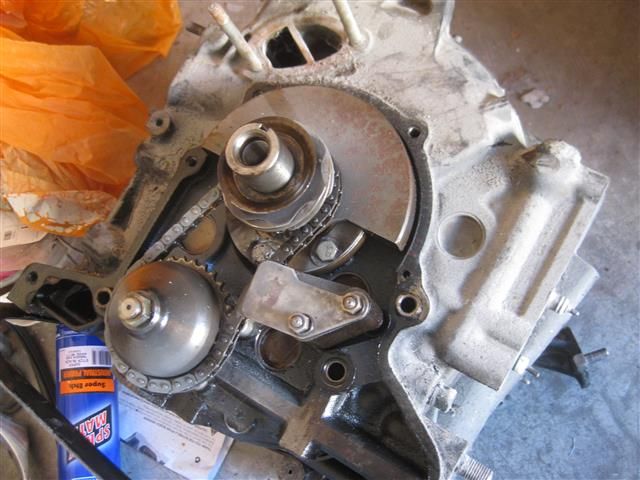
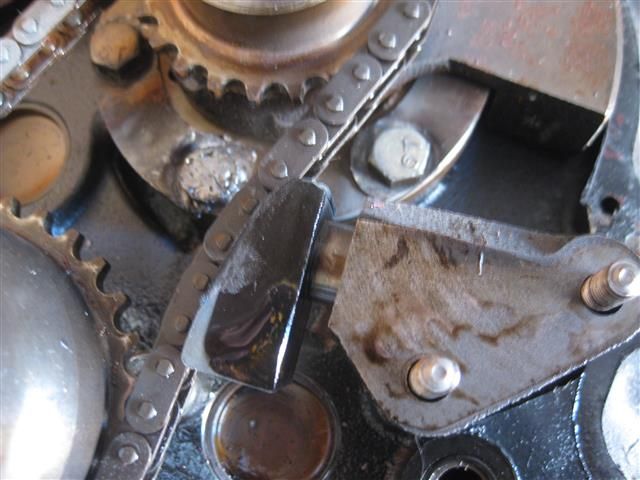
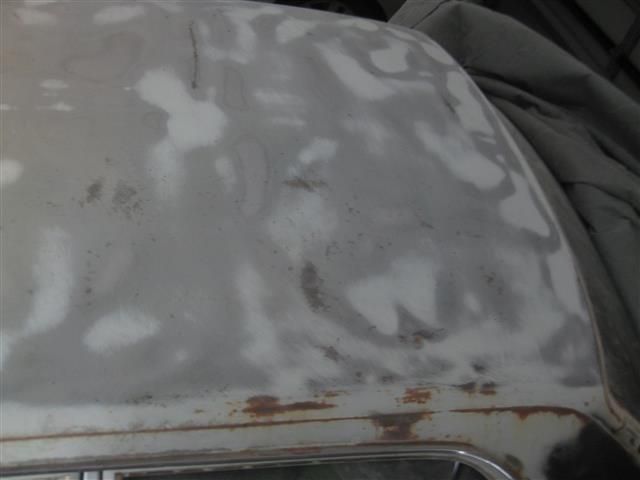
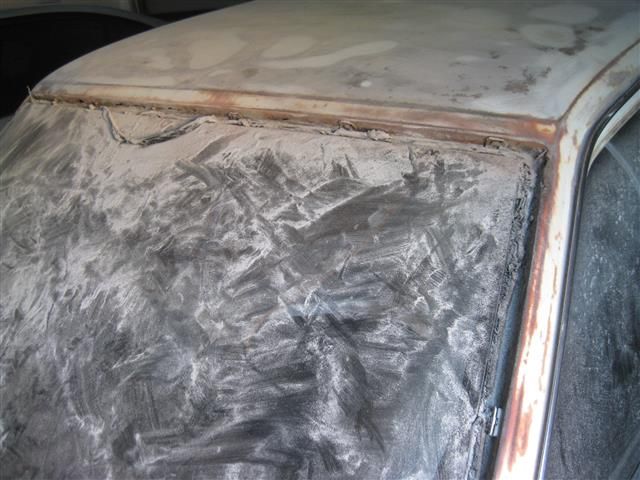
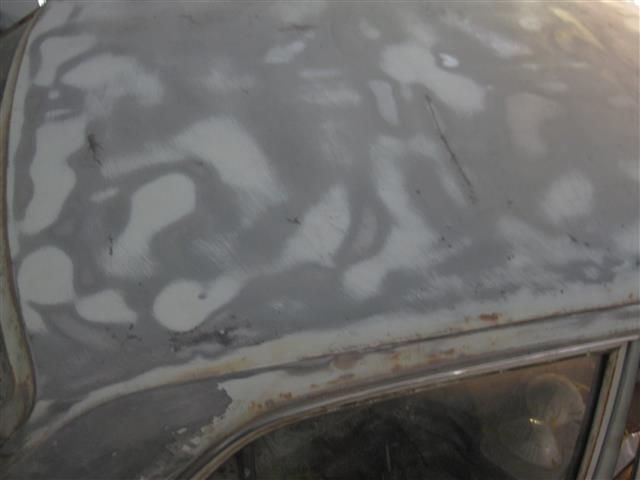
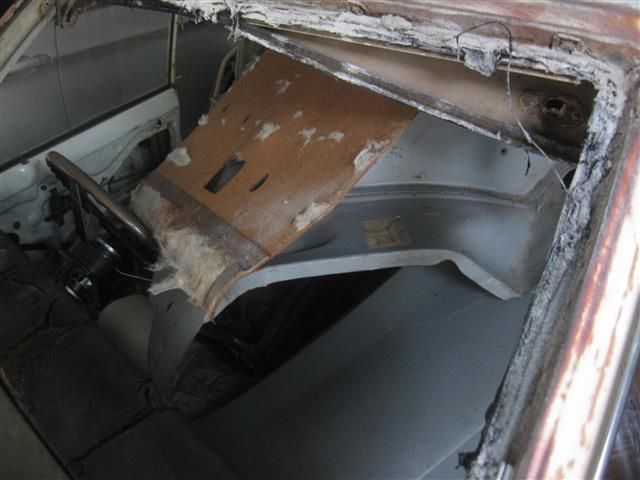
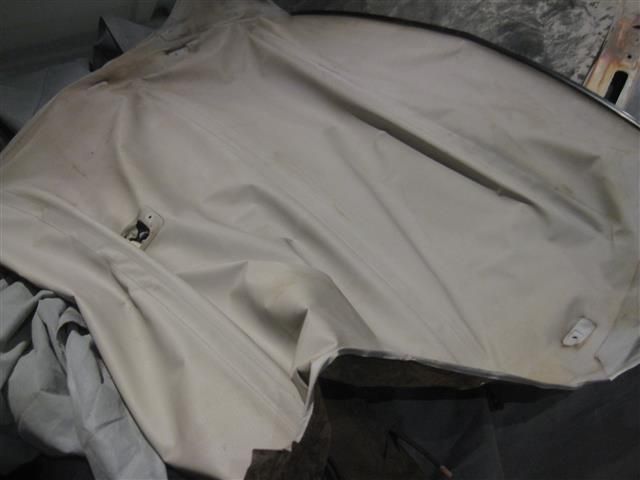
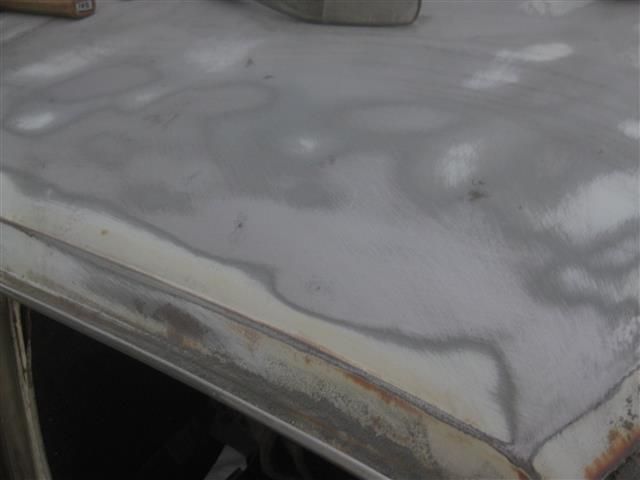
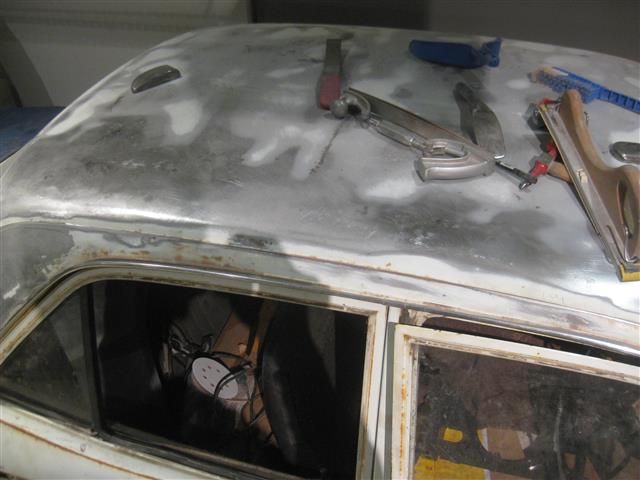
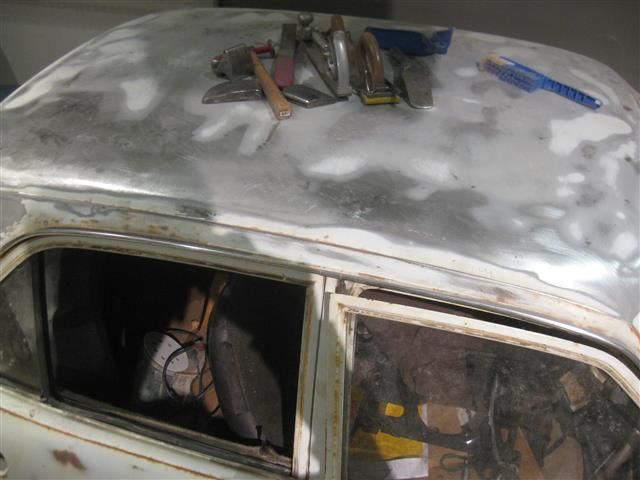
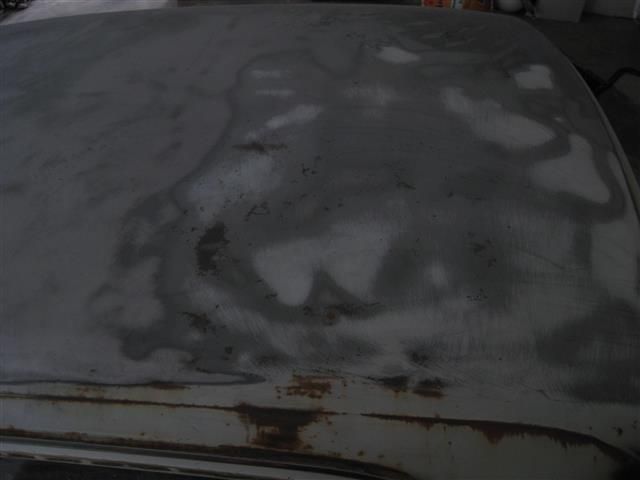
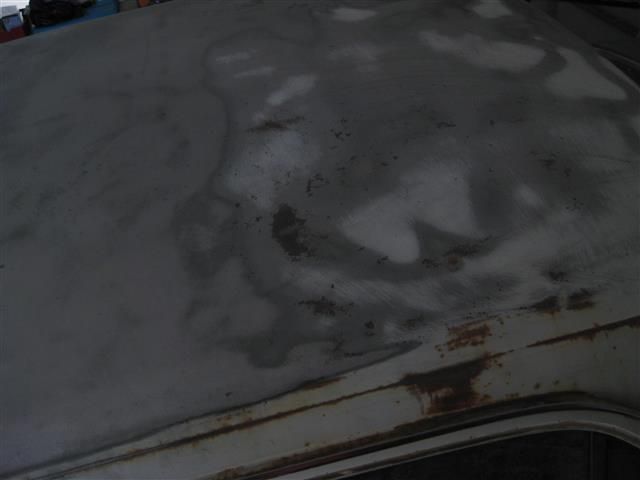
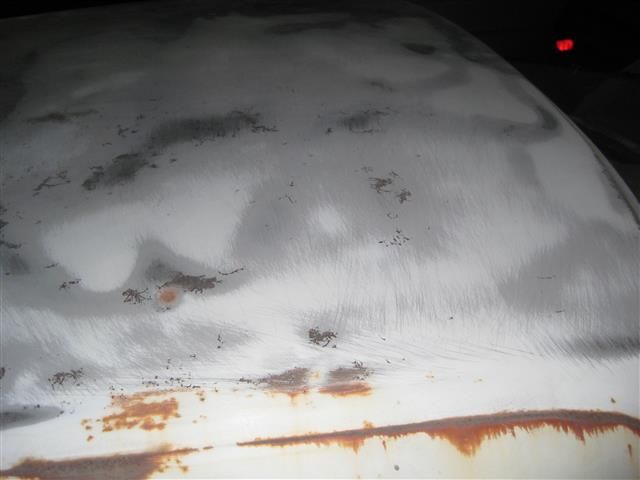
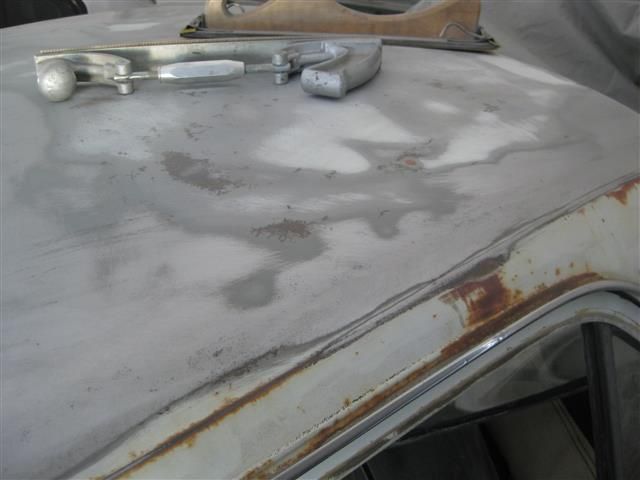
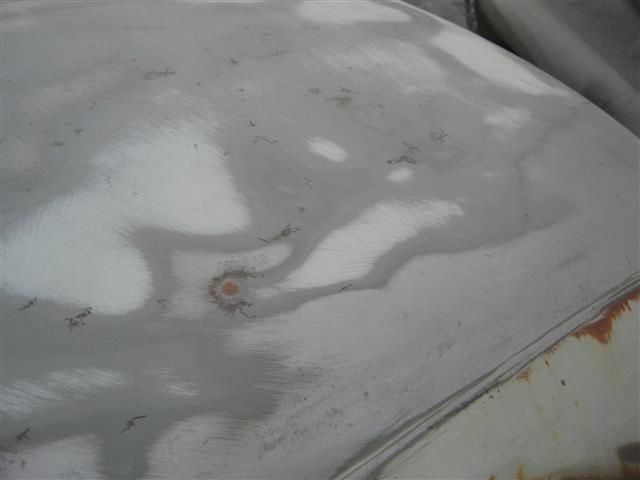
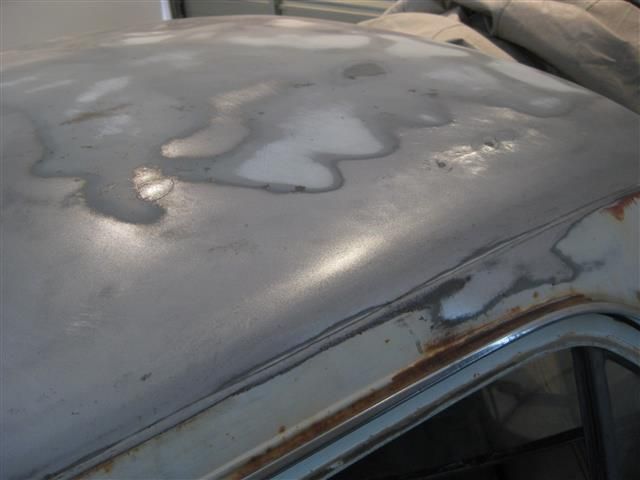
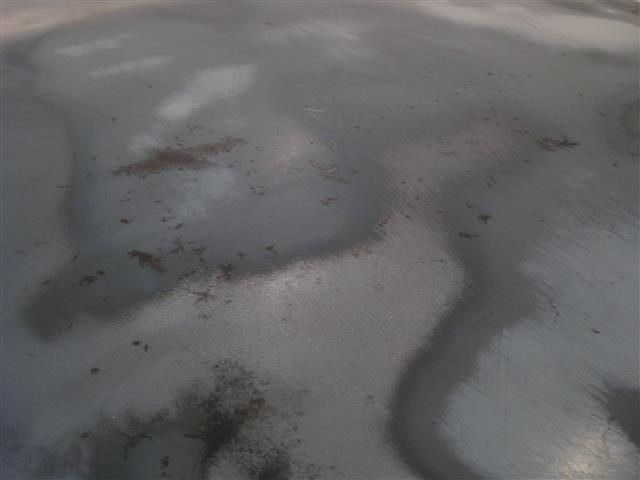
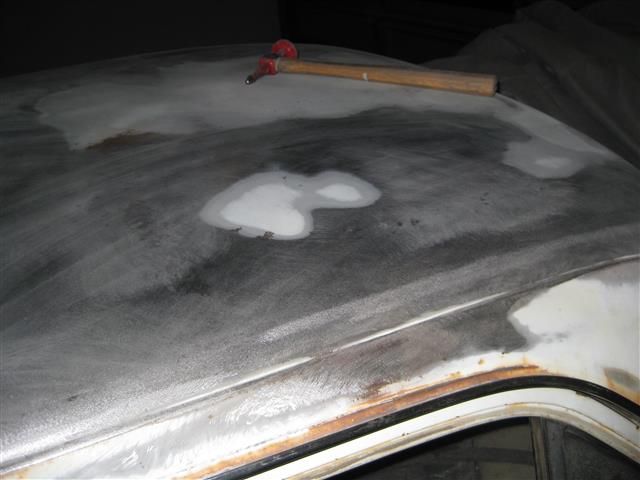
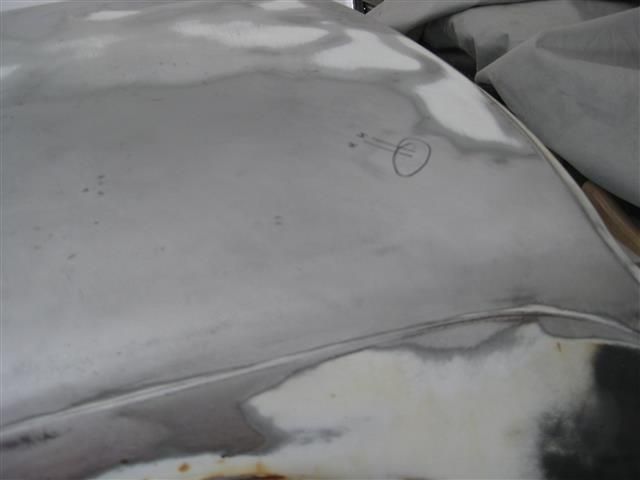
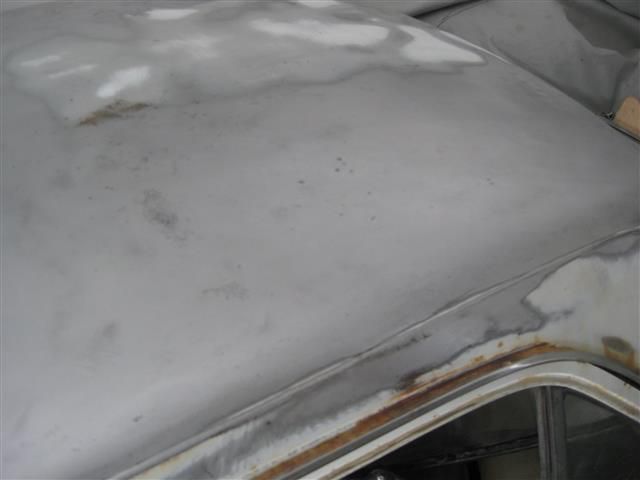
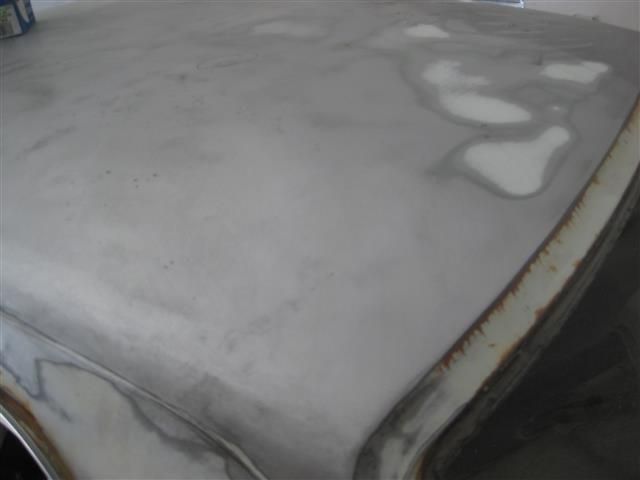
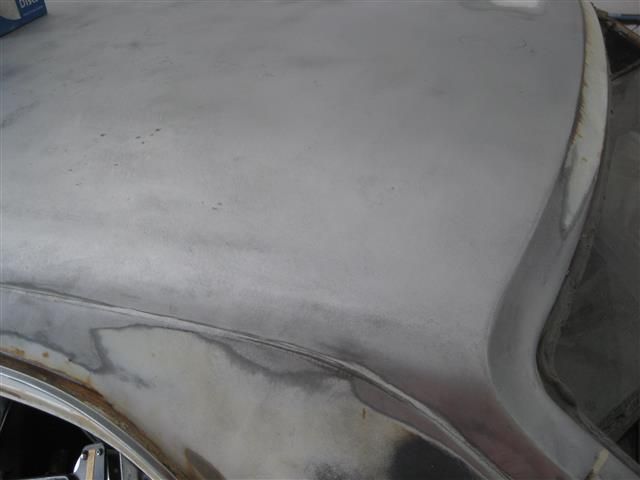
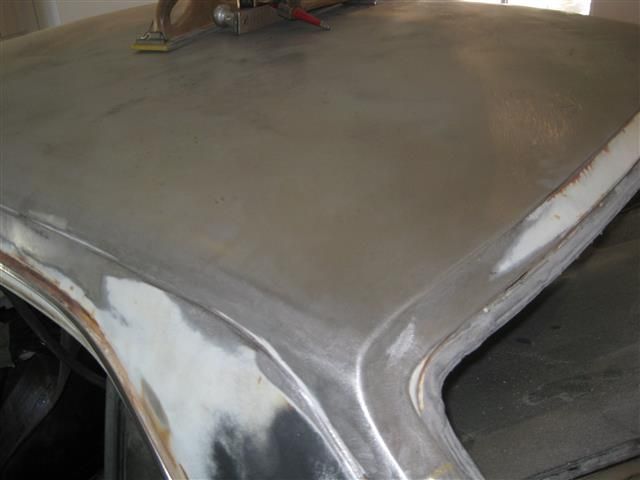
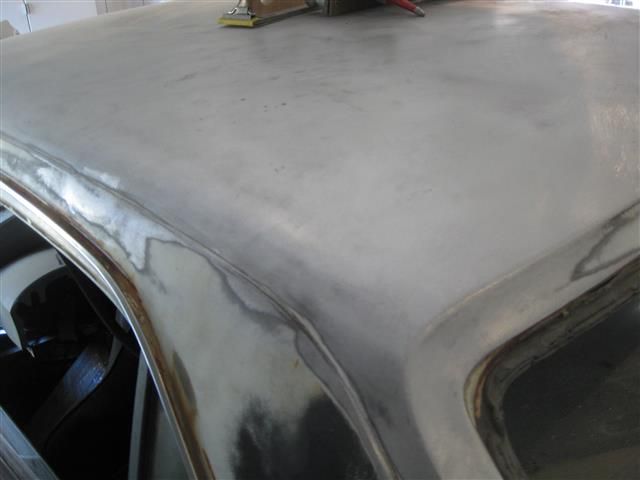
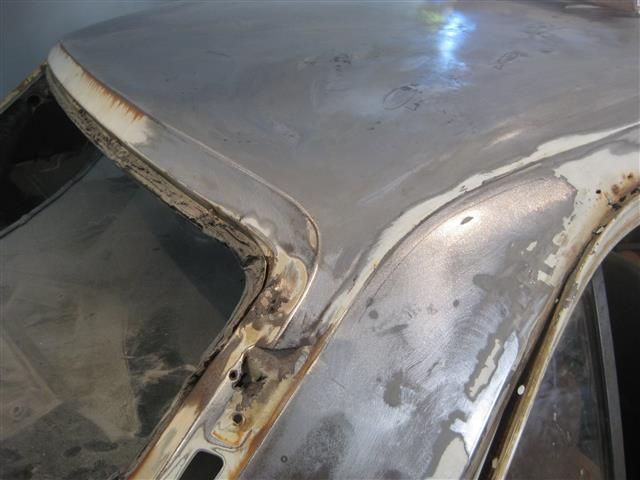
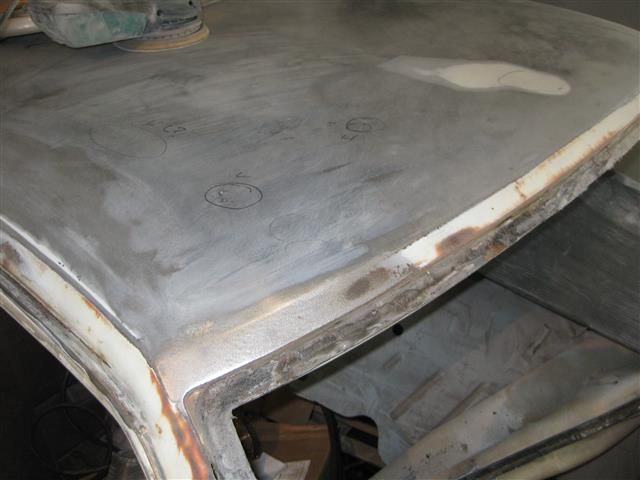
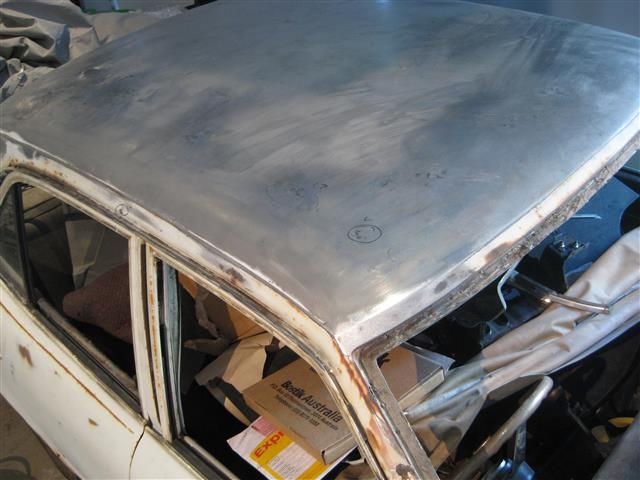
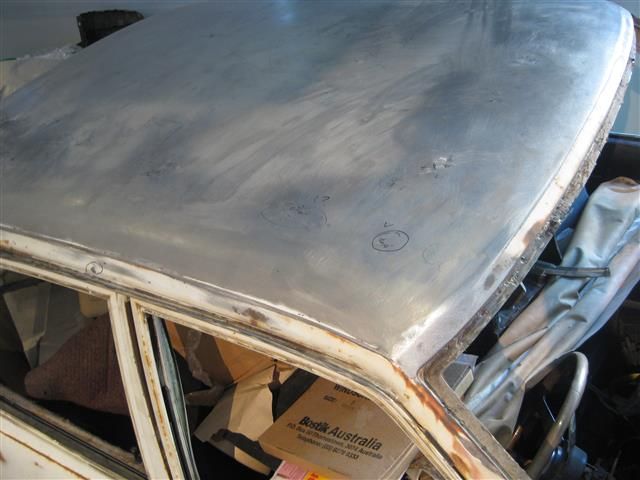
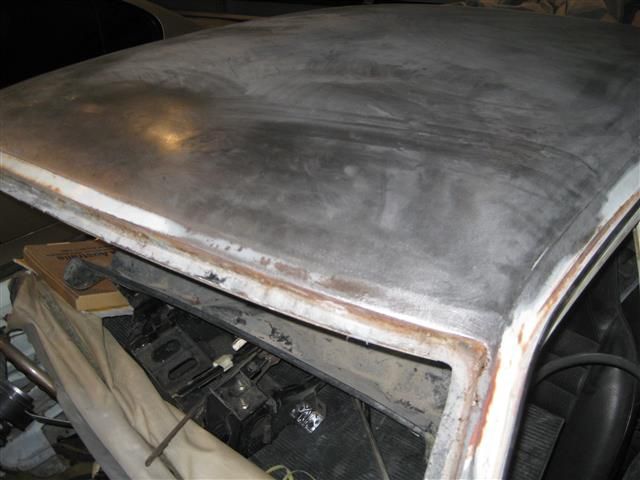
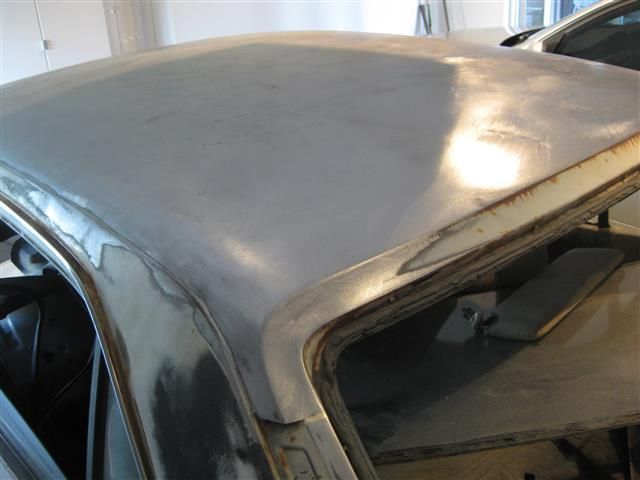
I've been doing bits and pieces on the sedan but haven't really accomplished anything. I started on the roof again, then on a used boot lid, then I decided to use the genuine new one I have, then did a little work on the headlight bezels before I decided to repair all the doors. In between all that I was tempted to pull apart the gearbox for new bearings and a rear seal :lol:
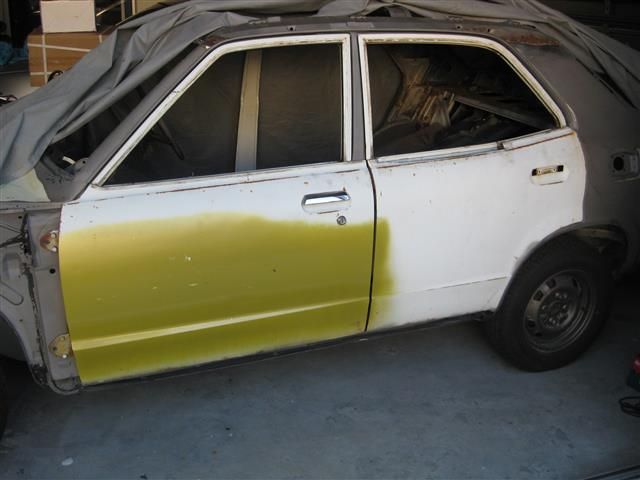
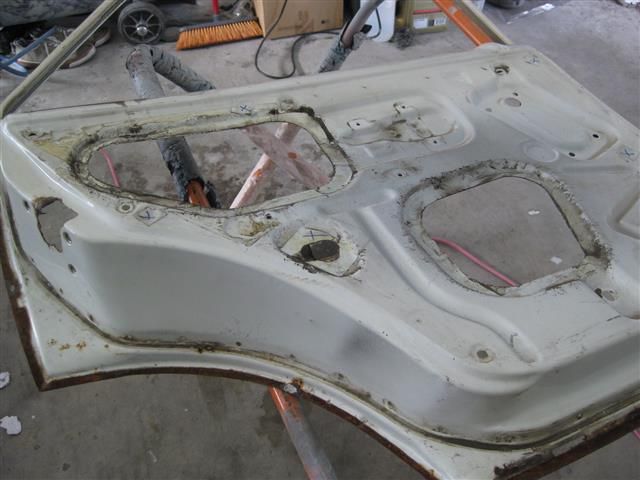
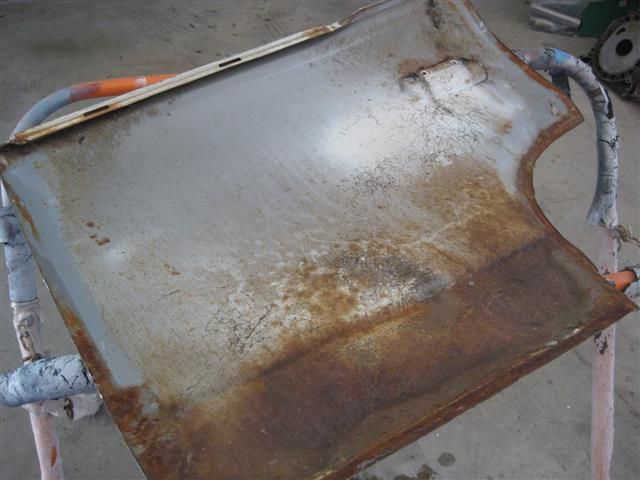
So it starts with the drivers door, the car still has the original doors so I thought I may as well have a go repairing them before replacing. .....jewel green test coat, too drab for my liking, reminds me of skivvies and cardigans ! I run a grinder around the edge of the door to remove the old skin.

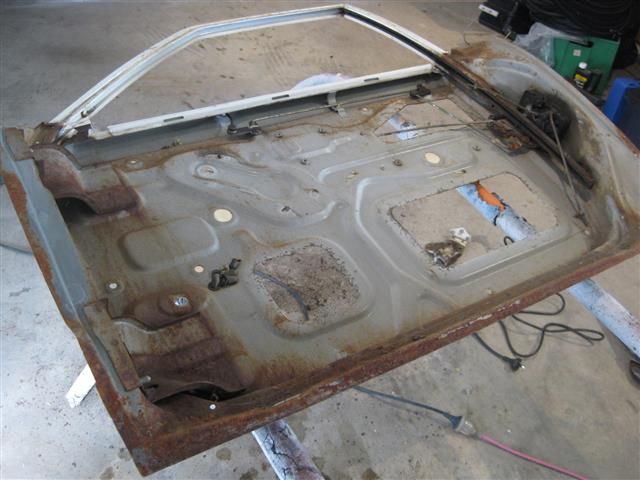
Skin removed.... It needs a some basic rust repair partly at the bottom, nothing complex though.
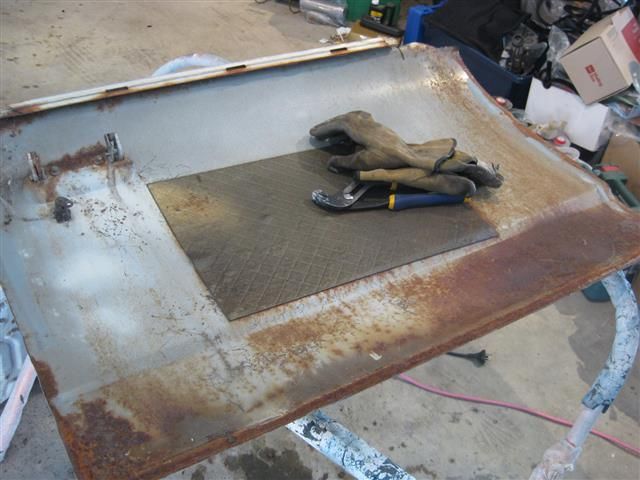
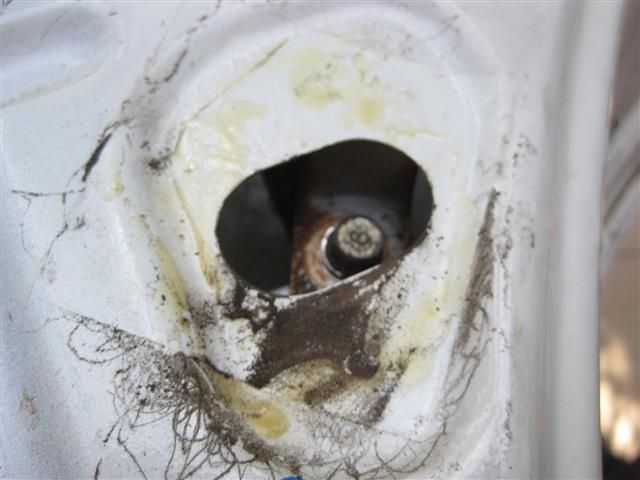
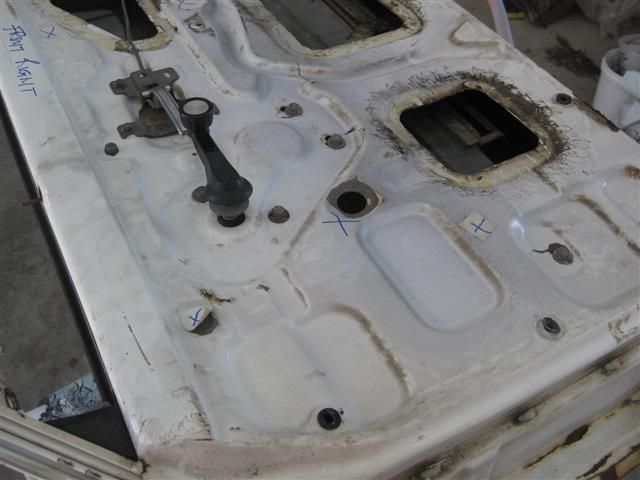
Photos to remind me of how things go back together.. X marks where the factory taped over holes....

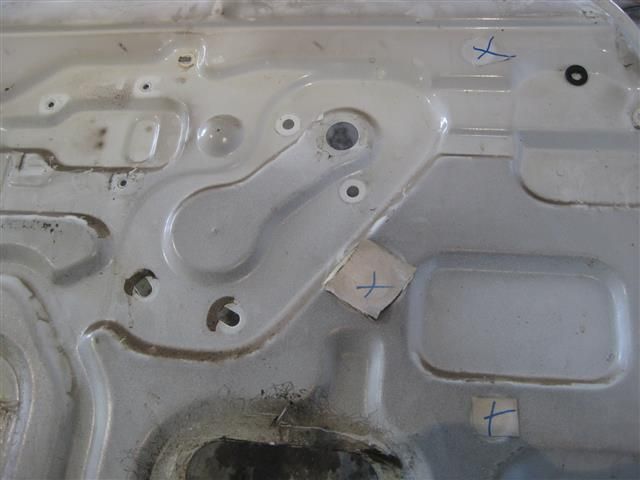
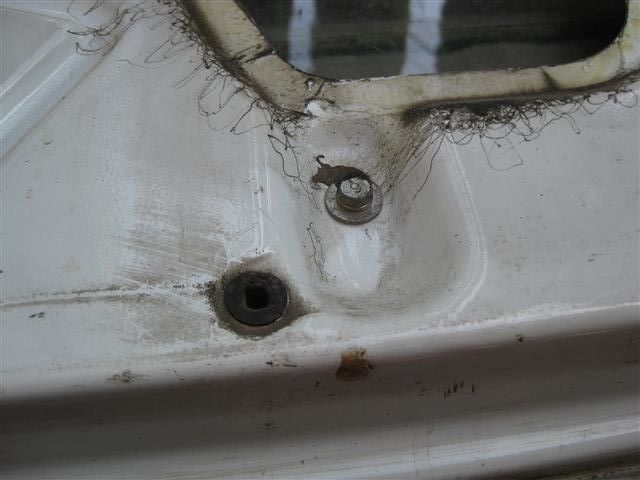
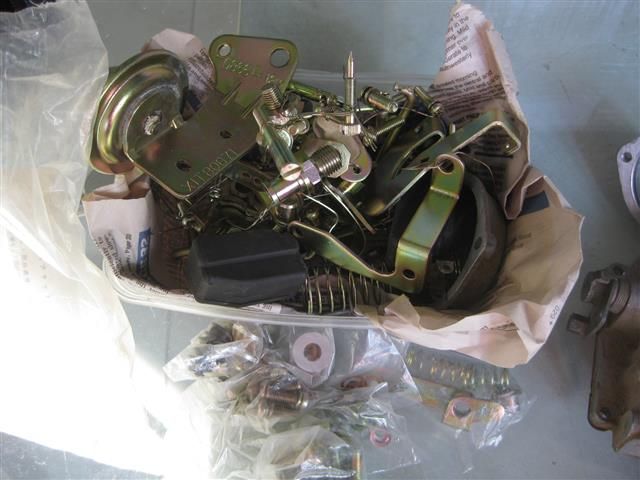
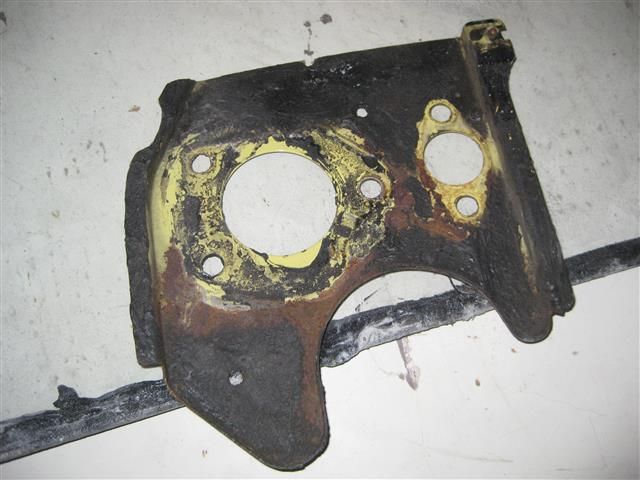
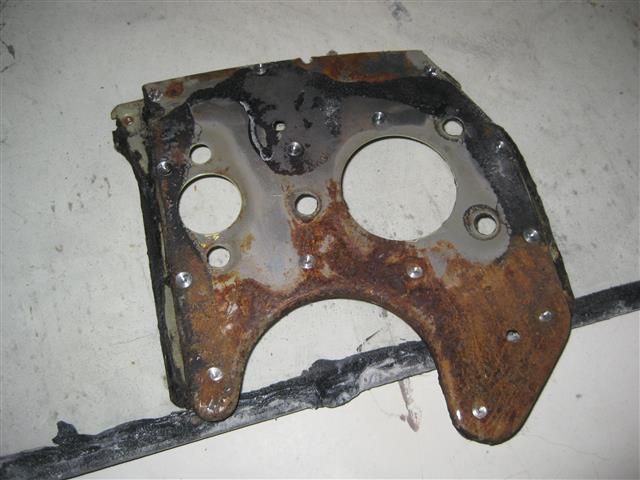
A few more X marks in Pic 1.... Photo 2, I removed the lower door hinge reinforcement so the door can be 100% cleaned of surface rust. Not as bad as it looked. Some parts that arrived recently, someone was cutting up a Rx3 so grabbed the gearbox mounts and front strengthening panel (still need opposite side)..... thanks Mr B !
The door shell and a few things will be dropped off to the sand blaster so I can start making some real progress. ......AND yes I have a new set of genuine Mazda door skins to go on.
=============================================================================
Another update, a few more reference photos of the doors.
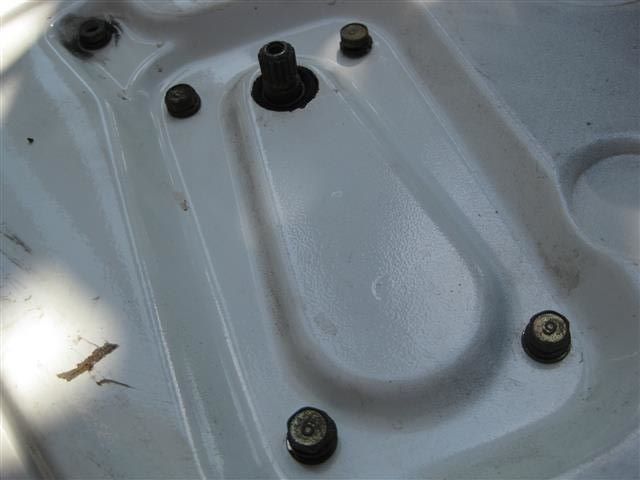
More door skin removal and noting where nuts and bolts belong before being sent away for zinc plating.
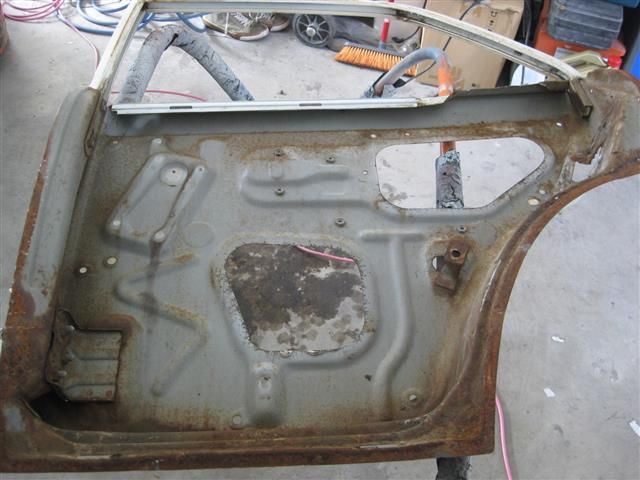
Reference photos of nuts and bolts...
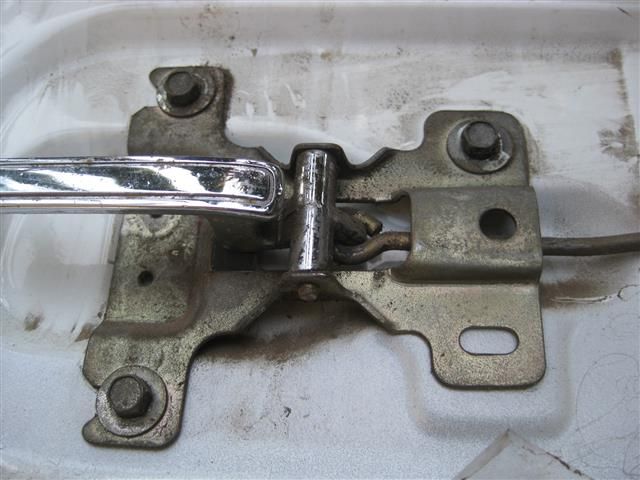
... bolt reference and another skin coming off
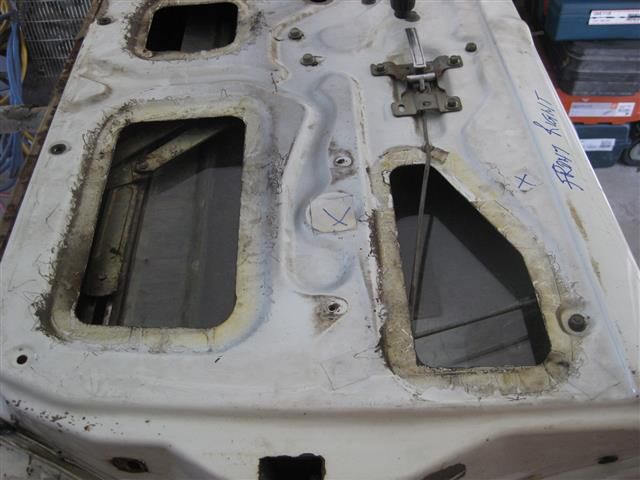
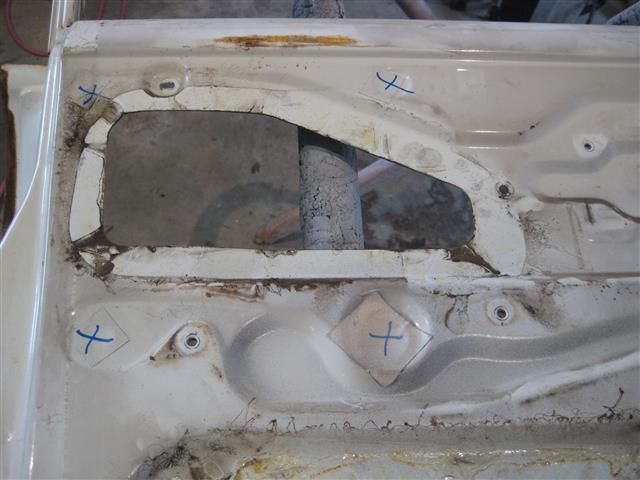
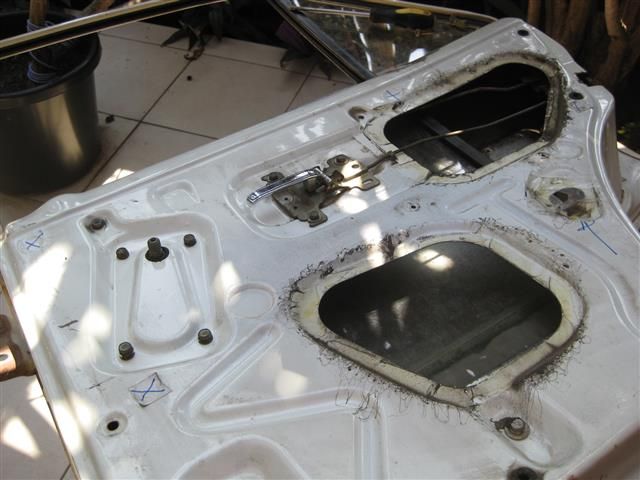
Front right door photos..... X marks factory tape
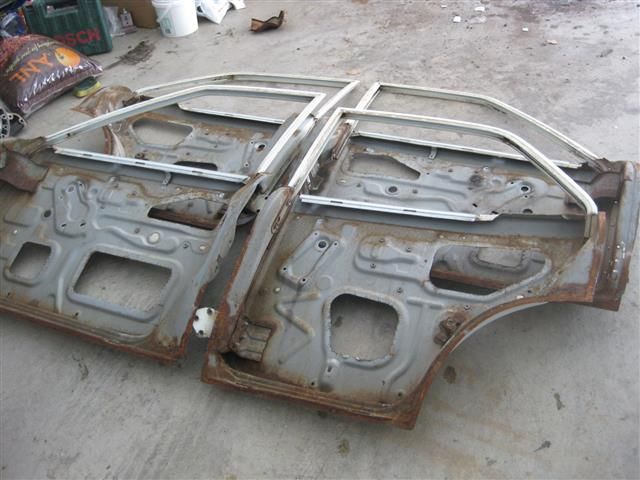
Grinding the drivers door skin edges for removal. This is probably the worst of the doors. They should be easy to repair, if not I'm sure I can find others. The lower hinge support bracket has been removed like the passenger side. Over time the front door shells seem to bend around that area. Removing the support lets me address the surface rust, straighten the shell and then temper the steel to help prevent it happening again. Last photo, all 4 shells are ready to be sent for sand blasting. When they come back they will be repaired and primed then fitted with new genuine skins.
My builds have slowed right down for a variety of reasons, one of them being while searching for some Mazda parts I stumbled across a couple of old looking boxes of hobbies I was into as a kid from the early 80's. A barn find in my own house ! Most of this stuff is nostalgic and from Japan so sort of fits in here.
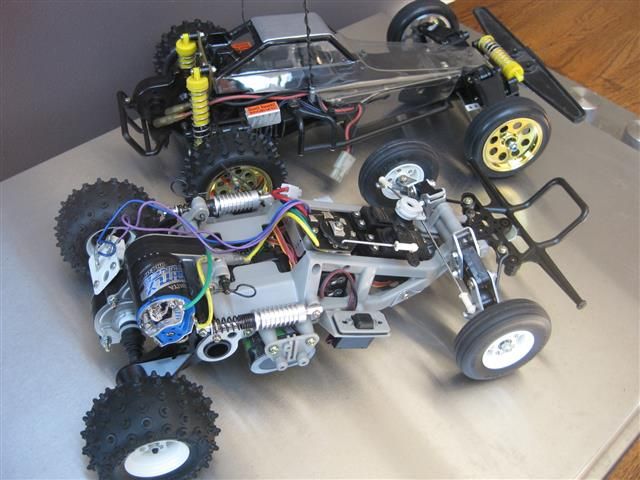
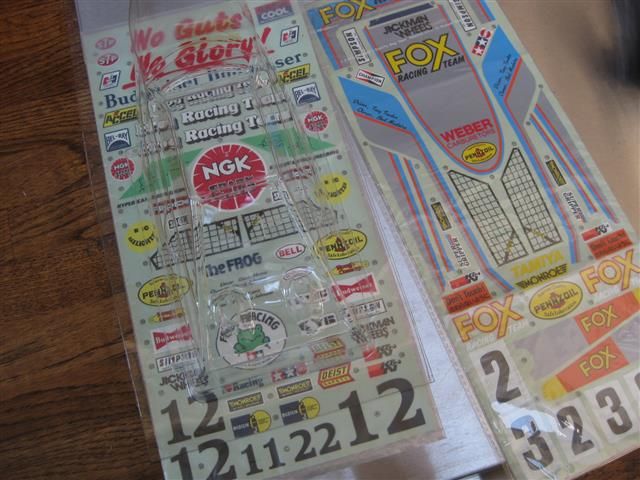
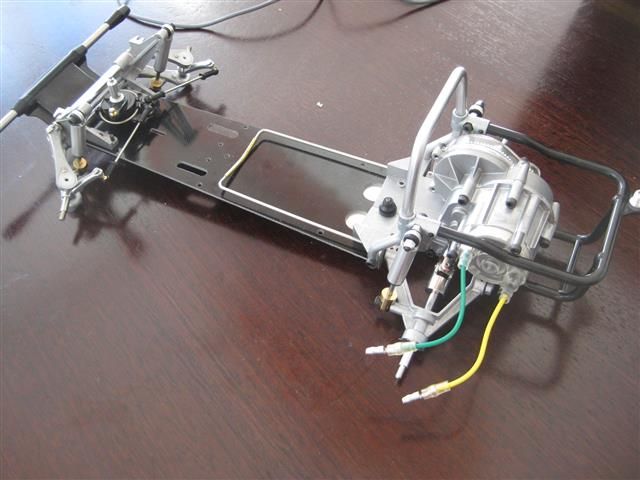
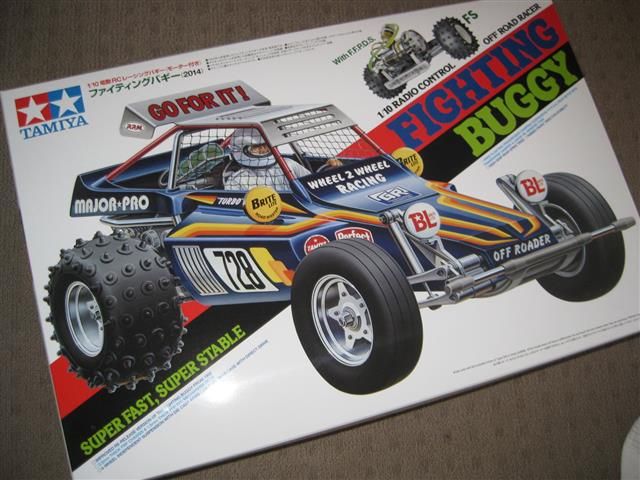
These are original 80's Tamiya Frog and Fox RC cars. The Frog is a 10/10 and escaped use, the other is a 9/10. I had a habit even back then of buying a few spares which is why I have a couple of new original shells. Funnily enough Tamiya have re released some of these cars which are based on the originals except with some of the original design faults fixed. I also found a couple of other cars (4wd drives) from the mid to late eighties but they aren't in as nice condition. One of those cars has some sort after bits and pieces.
From what I can gather some people object to some of these kits but I'm not one of them. I recall as a kid, must have been around 80,81 maybe 82 standing in a toy shop and seeing a couple of RC cars that I really wanted. One of those was a Baja style VW beetle called the Sand Scorcher. At $400 just for the kit they were awfully expensive back then. Well I discovered recently that some of these original kits have been remade (with some improvements) so I couldn't help myself :-) The first is based on a car called the Rough Rider, the second is based on the Super Champ. What interests me is the torsion spring style setups just the real car they are based on.
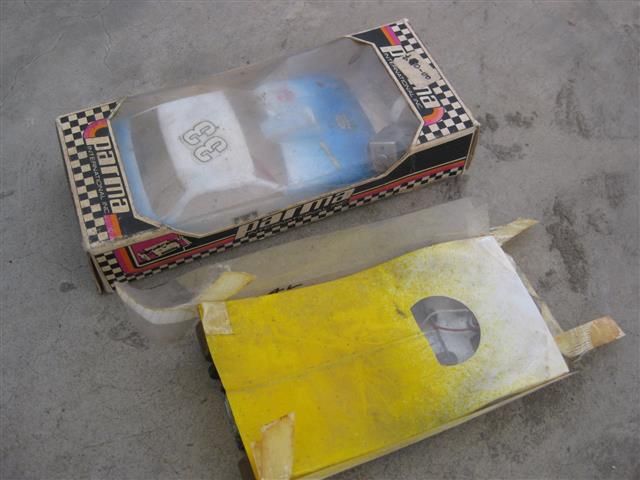
So I dug a little deeper into the boxes and found a couple of old slot cars. Again we used to run these on special tracks at a place in Parramatta in the 80's. I'm not sure if the place still exists. When I told my brother he says we have to get all this stuff going again. He's pretty keen to go to a slot car track, I'm not sure if the place in Parramatta is open but apparently there's somewhere in Marrickville. I also found a couple of my old RC planes, my Pitts Special has finally been put to rest but the other is OK and has been given to a friend to sort out. I will probably be flying that one again out Wisemans Ferry way to get re acquainted with the hobby. Finding this stuff is like being a kid all over again :-)
....anyway back to the Mazda
I've been collecting bits and pieces as things come up. I'm a little confused what engine to stick in it. I'll be building a stock 10a but want to fit something else before that goes in. One part of me says to fit a mildly ported 12a single distributor Rx3 engine, the other says to fit a twin distributor 12a PP with an aiuto 85 Rx7 rotating assembly I have. Big difference between the engines.
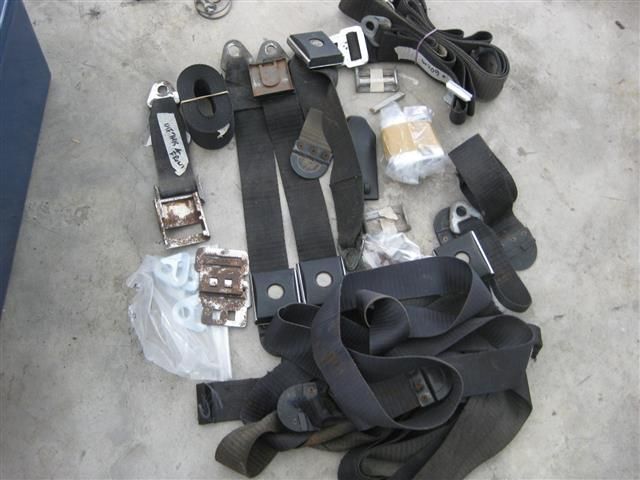
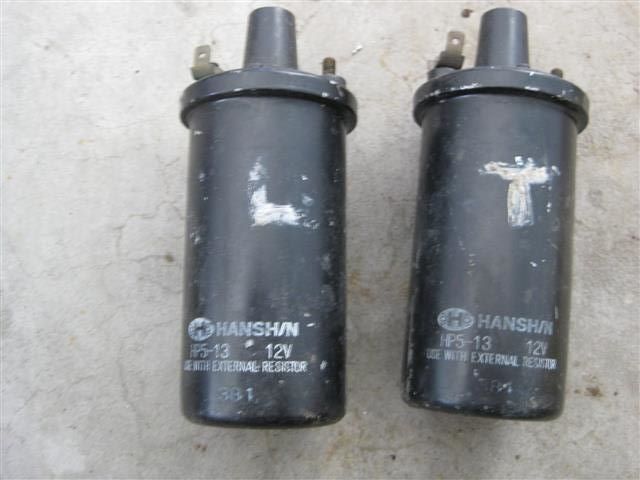
Sorting out the seat belts for refurbishment, and I want to make some silk screen prints of the original print on the coils that were in the car.
More bits to the puzzle...
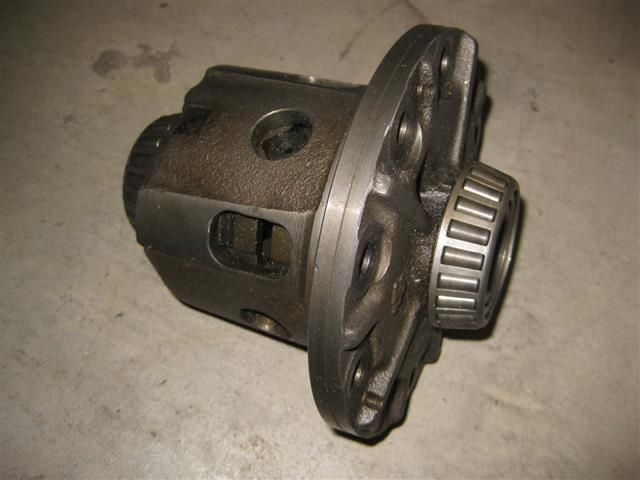
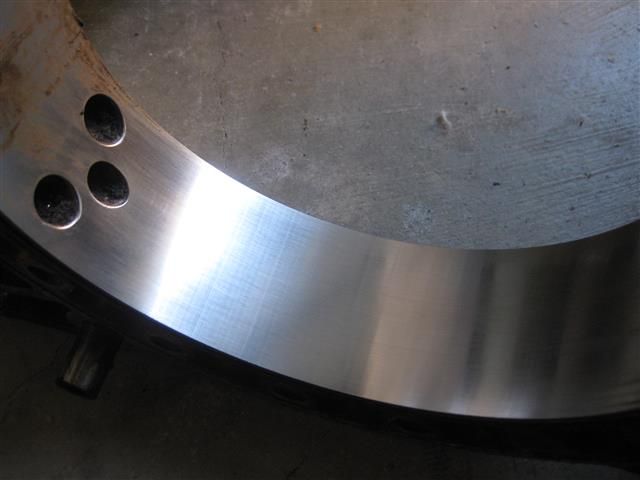
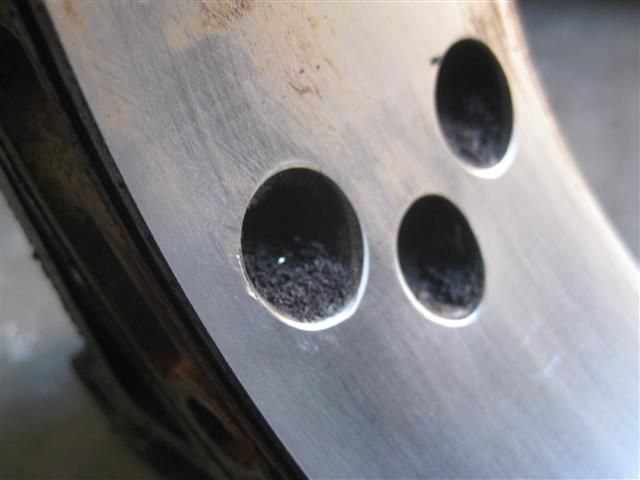
Twin distributor side housings that I got cheap with no measurable wear for the imaginery PP. Also some distributors that I'll have converted to electronic like my bridge port 10a. Always like something different. Turbos are good but I'd rather have an engine like that in something that handles better than a 70's Mazda. I'm a sucker for the NA sound. I stumbled across a 24 spline LSD for the car by accident that said buy me :-)
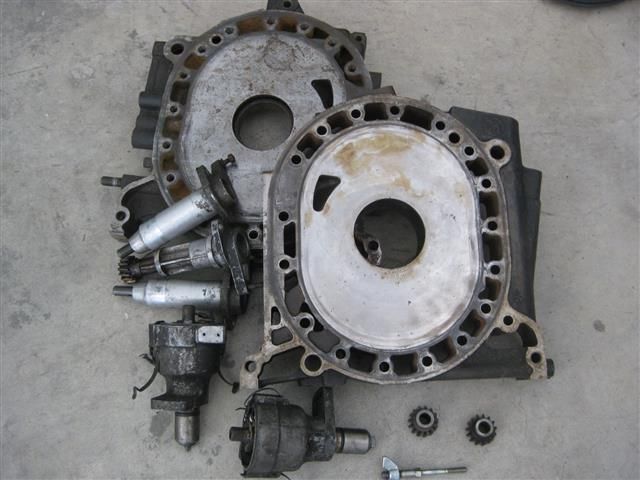
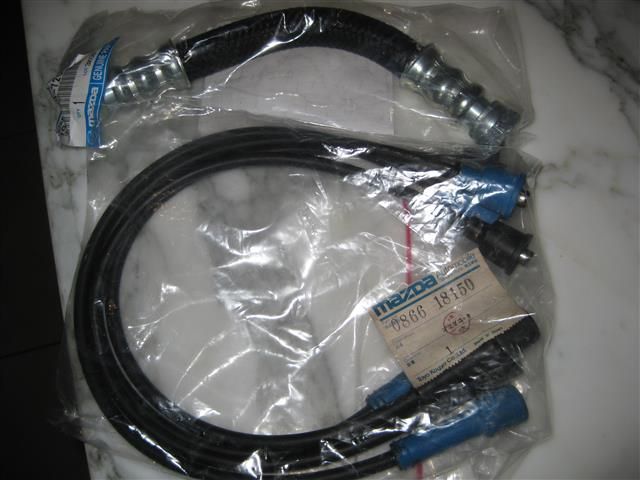
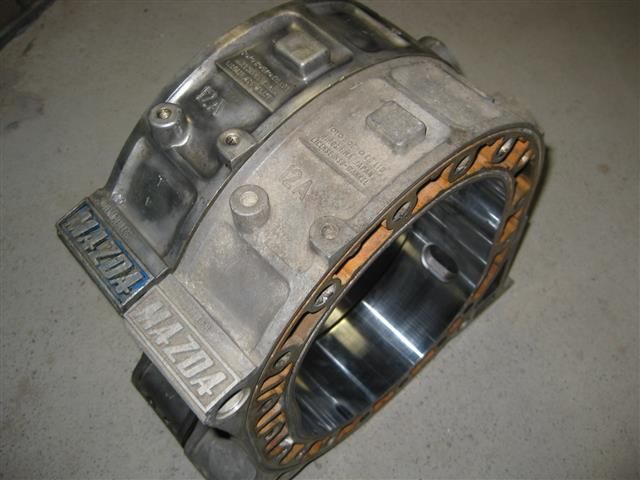
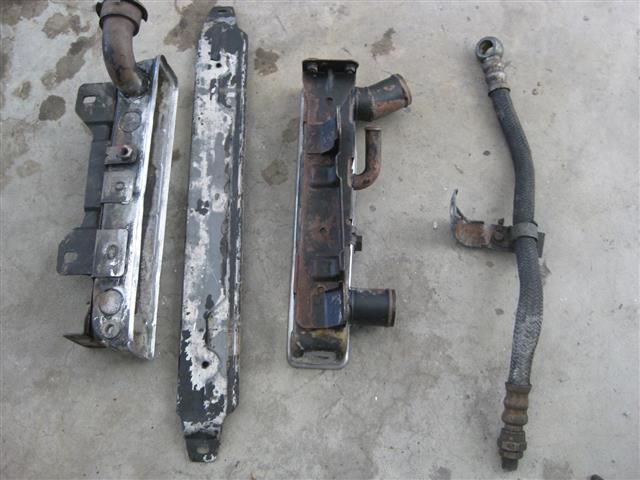
Here's the other option, a sensible Rx3 12a. These housings are incredibly hard to find with perfect chrome, they were cheap and too good to pass up ! Seond photo, 12a TD Rx3 end tanks from the USA. Savanna's i assume use the same radiator. I compared these to the 10a radiator and found they are identical, the side brackets are soldered in a slightly different position. I also got the original oil hose brackets, another nice find.
===============================================================================
Nothing major in this update, just doing bits and pieces on the sedan.
I was going to start assembling the carburetor but realised there were about 3 parts that hadn't been zinc plated, a bit of a pain in the ass to have done this time of year. In the last photo I'm filing down the brass screws so the butterflies can be removed so the primary and secondary shafts can be sent away for zinc plating. I'm not sure what to do with the carb solenoid as it's the only part that won't look new. I'm not sure if the plating solution will damage the coil. I've got 2 of those plus another solenoid off another car that looks very similar if not the same, just have to find it. Yes I'm making one good carb out of 2 that I bought in pieces.

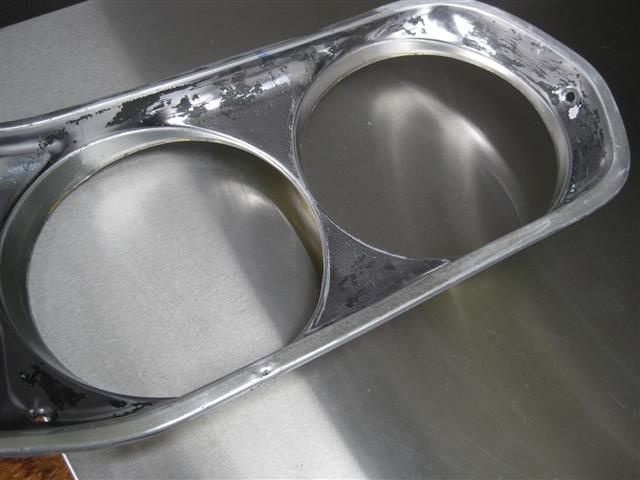
I repaired the worst of the headlight bezels, after stripping the paint it was a lot worse than expected. There was nothing to loose so had a go repairing it, 2 hours later I was happy with the result. The hardest part is repairing the exposed areas which are now done and polished. There are a handful if minor ones left on the area that gets painted. I'll knock those out just before paint another time.
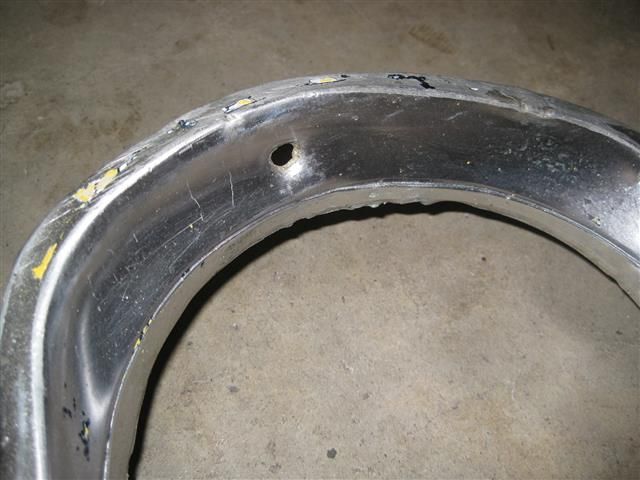
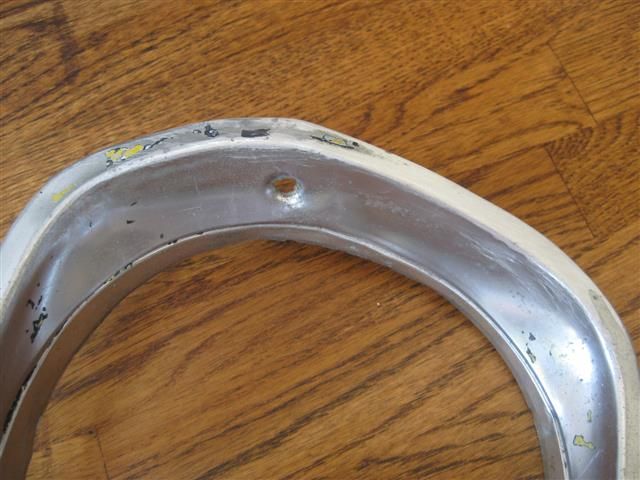

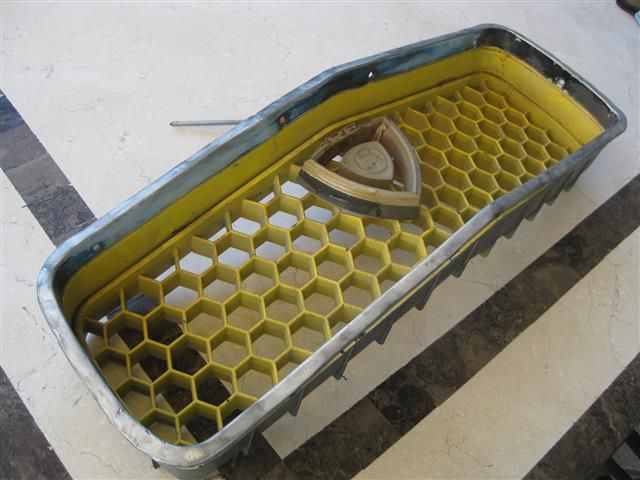
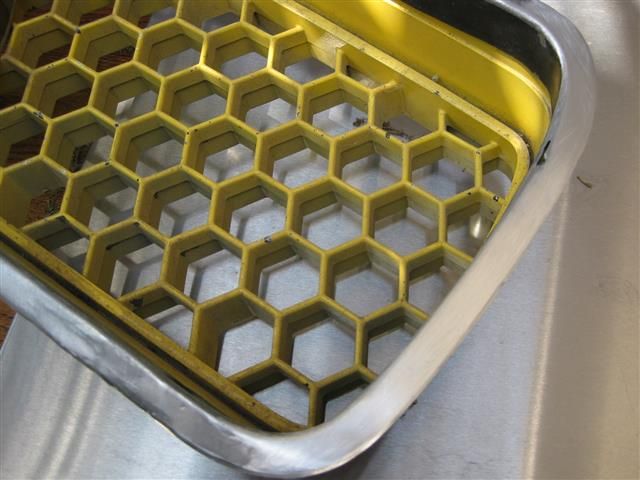
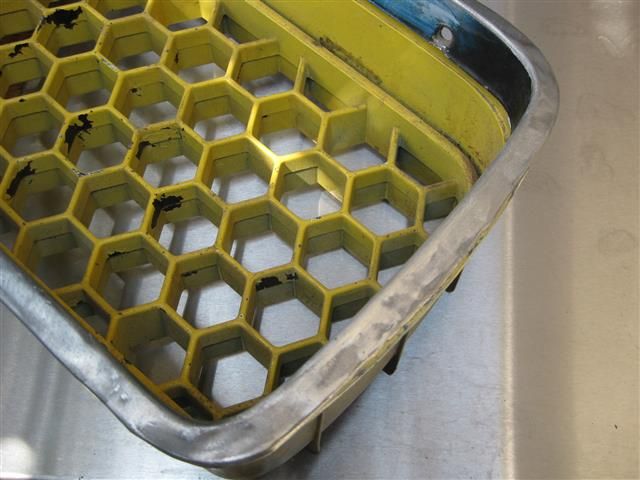
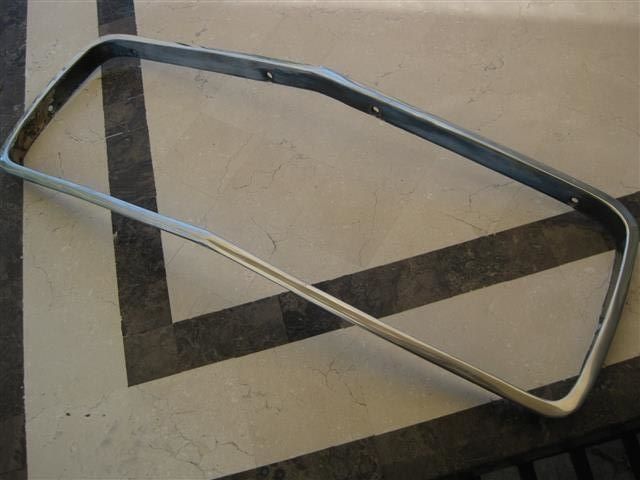
Rather than do the opposite bezel I thought I'd make a start on the grill surround. This one is really bad, there's a tiny tear on one side that I'll either have aluminium welded or use some of this stuff
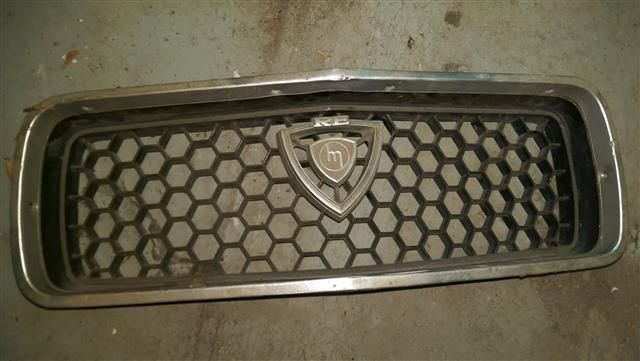
www.durafix.com.au/index.php There's also a good chance it'll end up in the bin. I have another somewhere that's not great either that came with the nosecone I bought for the coupe, that one is mostly OK except for one side that's had a hit. If I manage to repair it I'll put up the photos. The plastic grill and badge look OK apart from the crappy paint. I'll give those to a friend to let soak in his molasses bath. If the chrome is OK on the badge I'll have Dave fill it with new resin. Have a good laugh at the photos...

===============================================================================
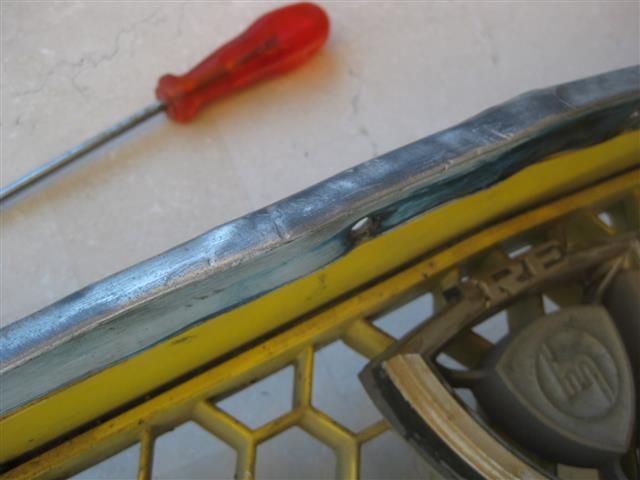
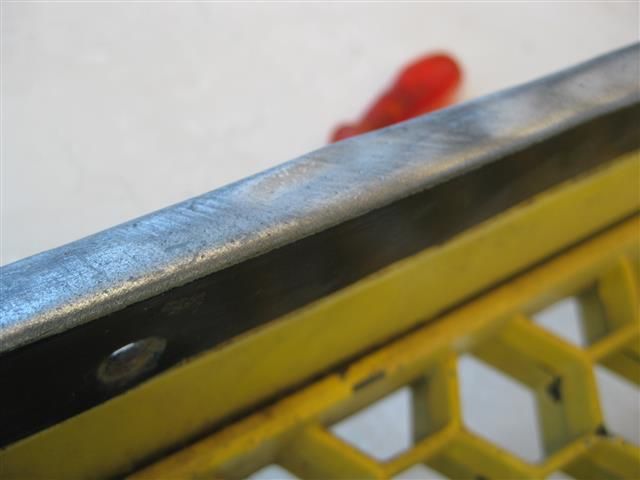
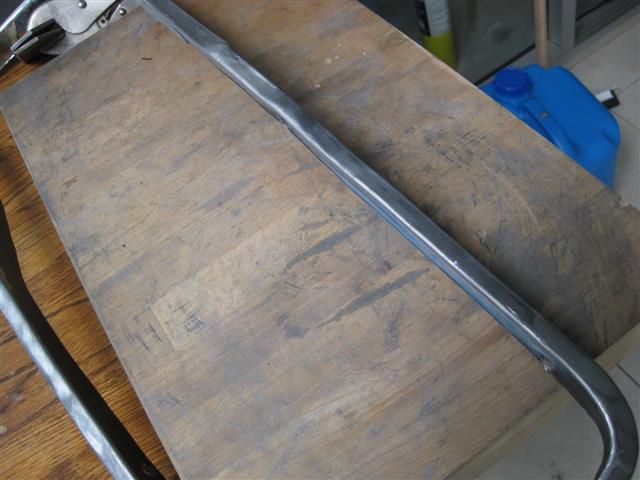
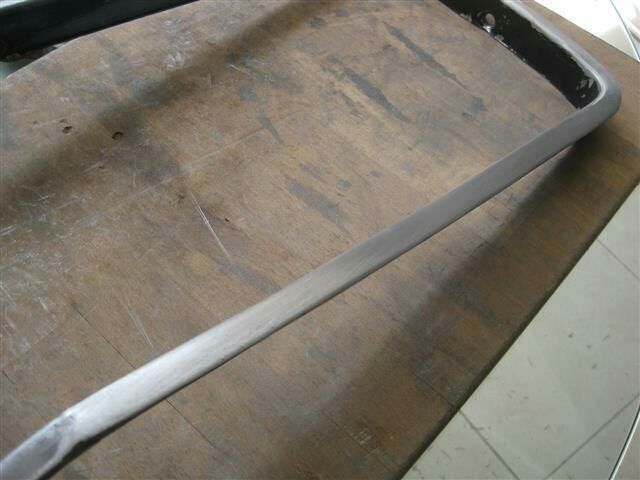
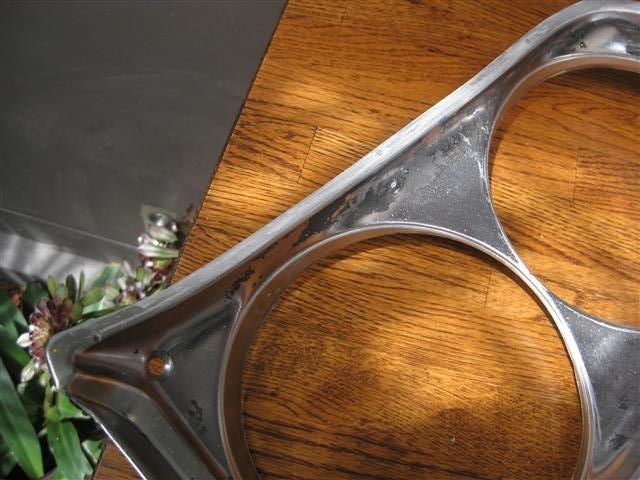
Well I started on the grill, I'm waiting for the durafix rod to arrive so I can plug the tear from the accident. If that doesn't work I'll give aluminium welding a go, either using an Oxy setup or it might be an excuse to buy a TIG. I was keen to get started on it, I've pretty much done both side areas. I decided to stop just in case I stuffed up plugging the hole. I know you can get repro grill surrounds in steel but I like to use original parts where I can.
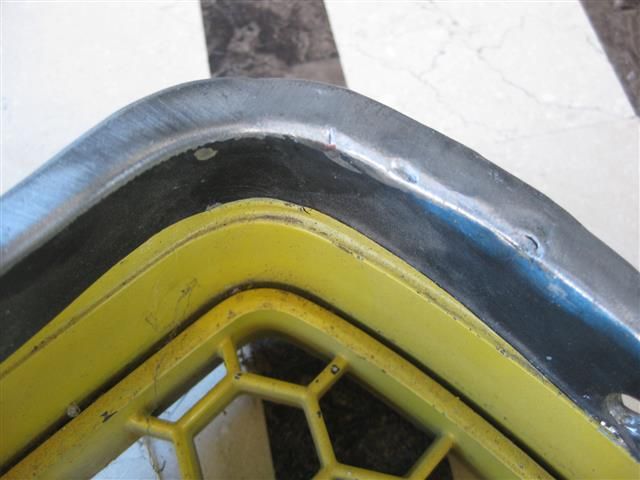
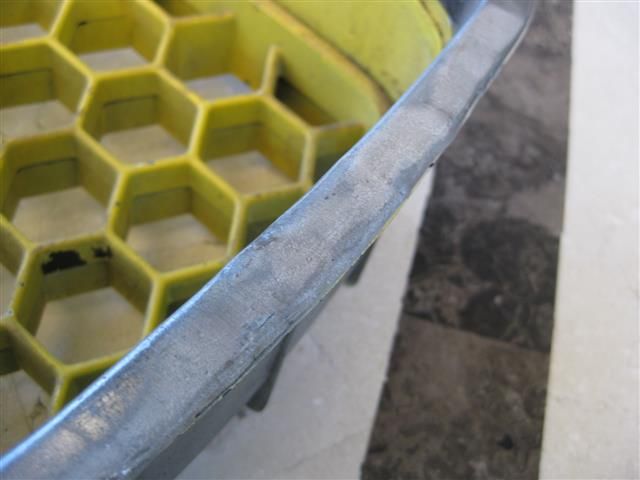
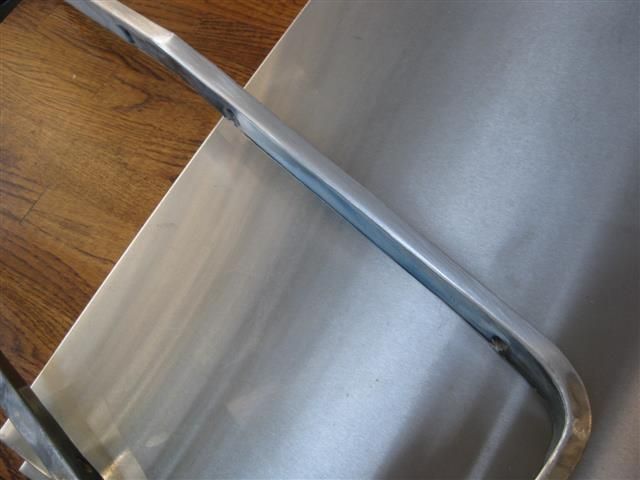
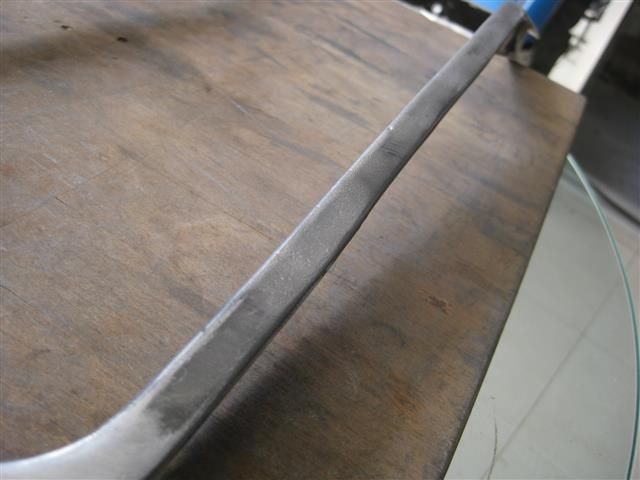
Pic 1, side one, straightened out, just waiting for the alloy rod to arrive to repair the tear. Pic 2, side 2, I thought I wouldn't get too ahead of myself and straightened the inner and out edges and stopped there. With a bit of luck it'll be finished at the end of the week.
================================================================================
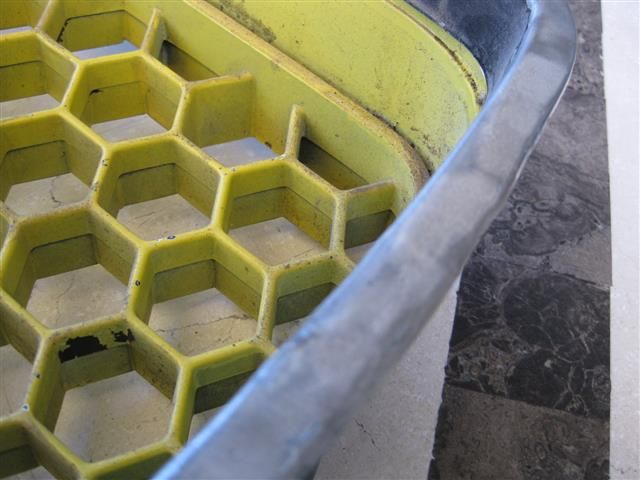
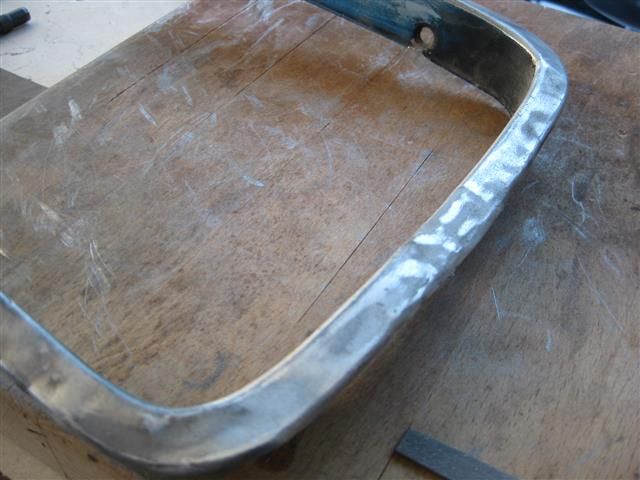
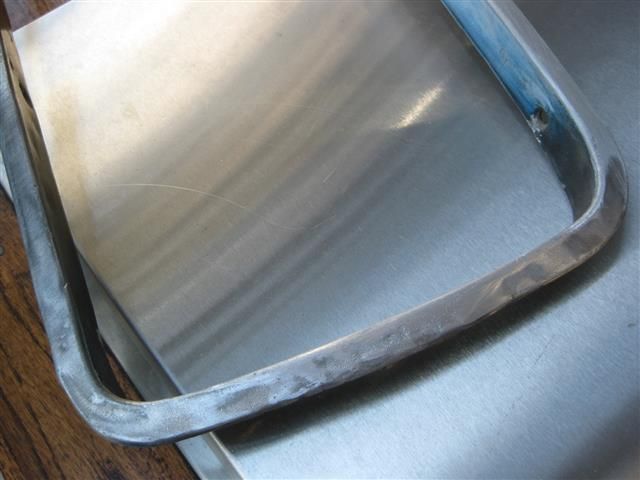
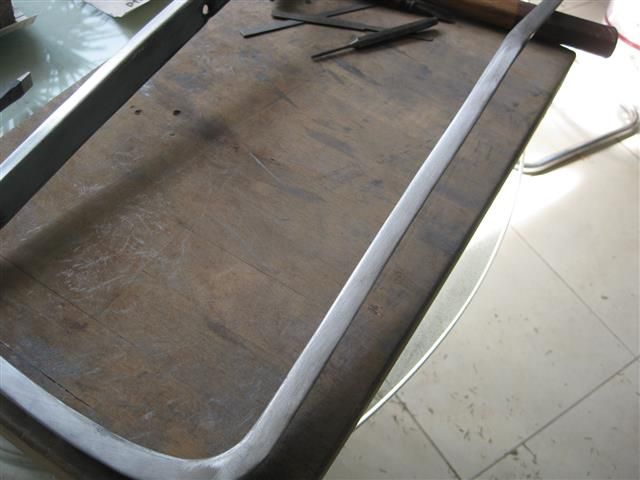
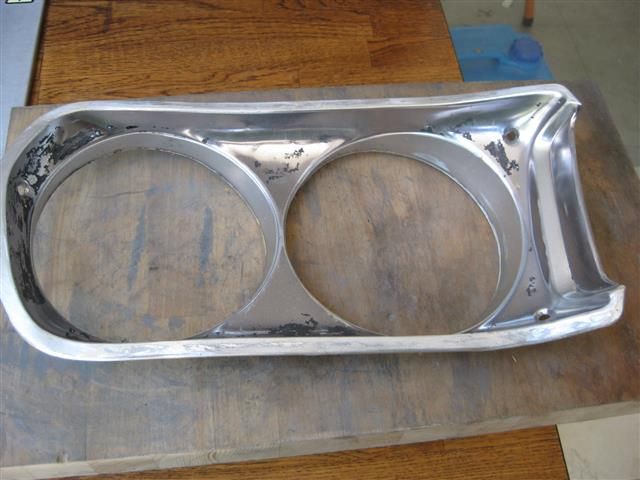
The front grill surround is now repaired. It took a few days to repair. I could only work on it a couple of hours a day before loosing concentration. Like always I should have found a better one but when I see people selling grills with the alloy surround for $500 it was extra motivation to fix it as bad as it was.
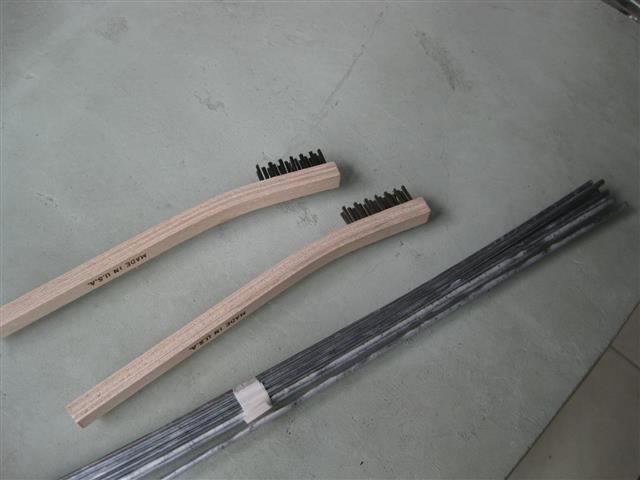
Photo 1 general photo of more damage, photo 2 the Durafix rod and stainless brush arrived to repair the hole. The rods are sort of fluxless brazing. The instructions say if you can braze aluminium cans you can braze anything. I thought I'd better have a little practice before putting a flame on the alloy grill. True to the instructions the first drink can melted and went up in flames. I eventually got the technique to an acceptable level ready to try on something that mattered.
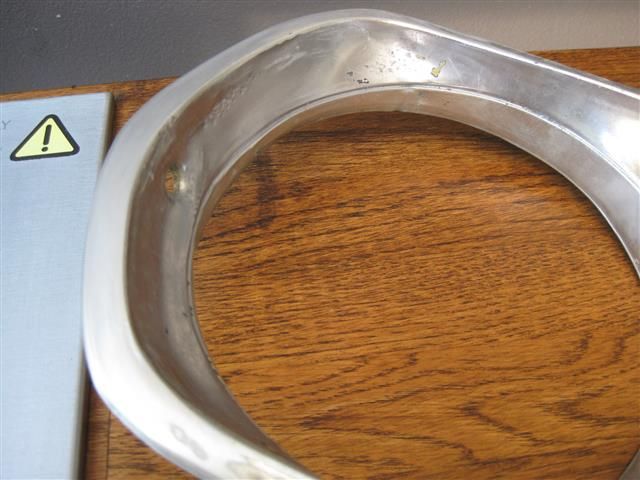
The alloy grill trim hole is cleaned and the plugged, I managed to do it without melting or overheating the grill. Photo 2, I braze from the inside and let the rod flow through the hole. You have to remember that the trim is about 0.5mm thick so there isn't much room for mistakes.
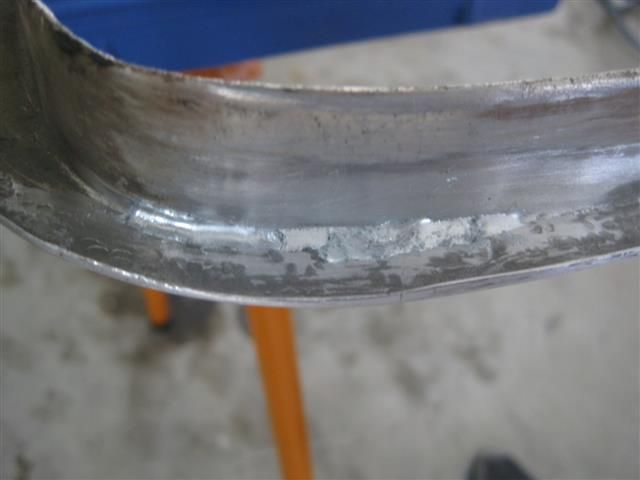
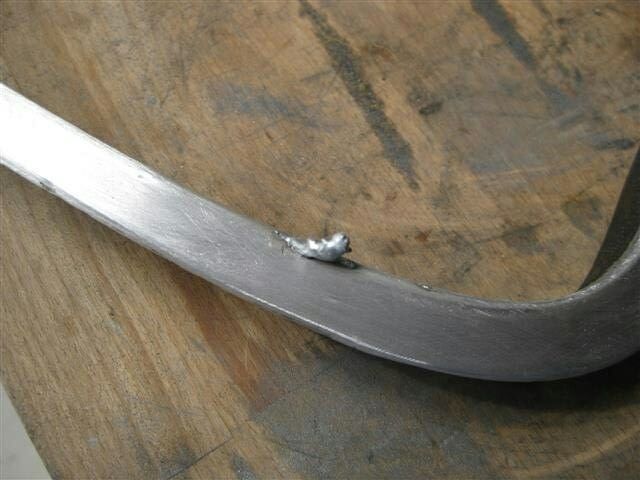
Photo 1 the excess material is carefully ground away. Photo 2, I finish repairing around the hole ready for polishing.
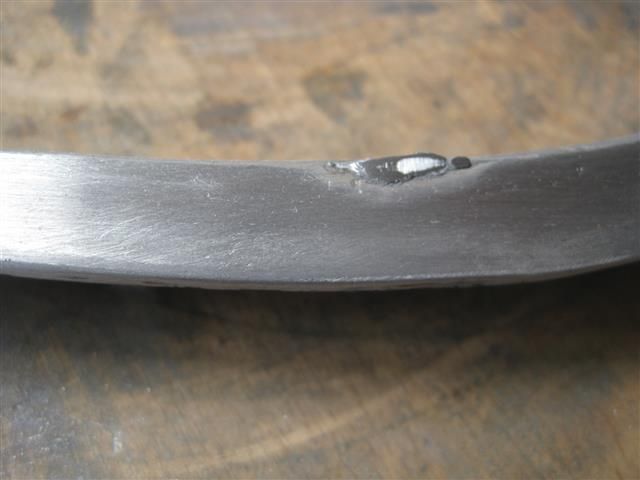
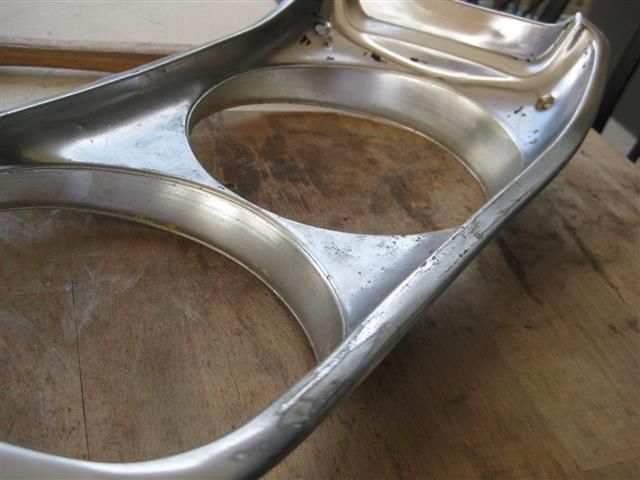
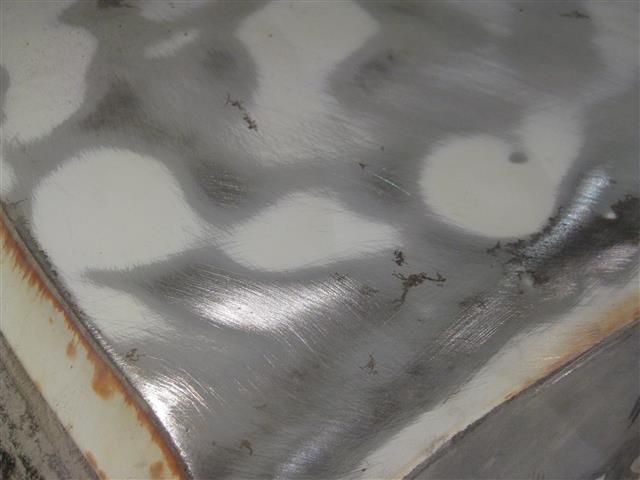
Before and after of next area.
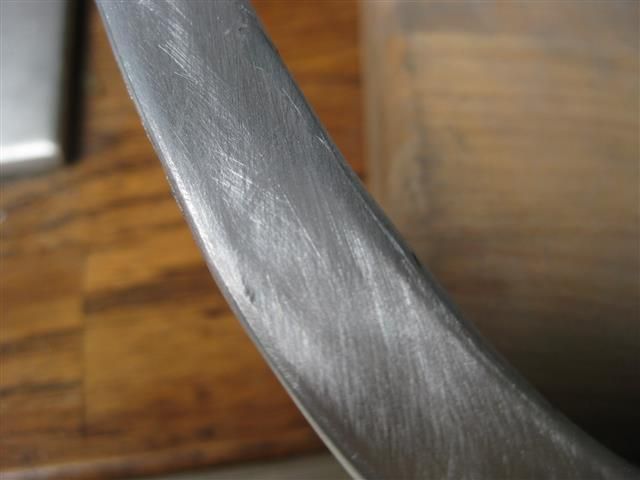
Before and after, edges reformed.

Before and after, it's hard to show all the damage in the photos before shot.
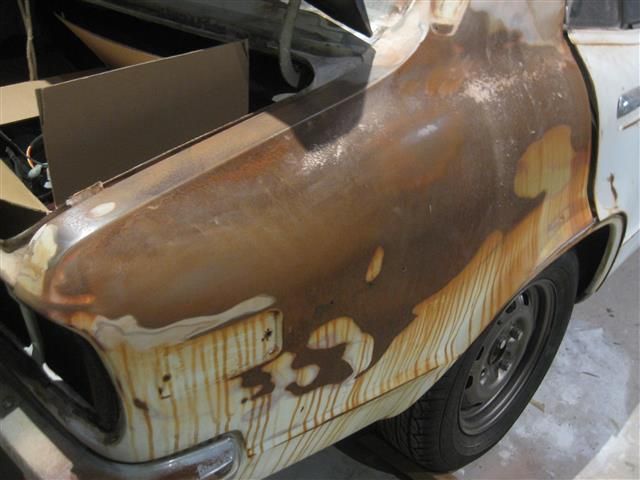
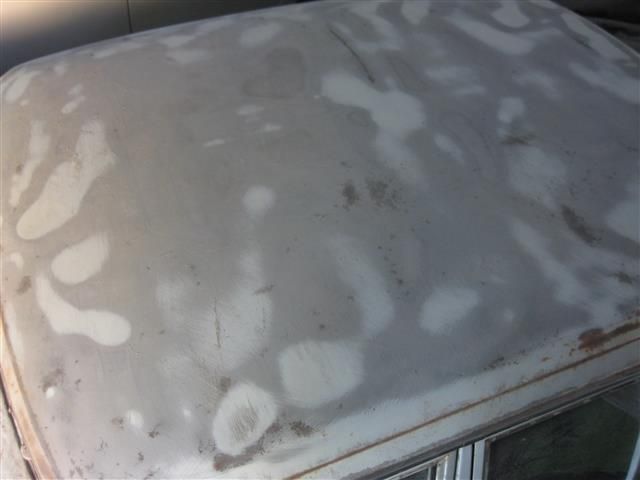
Before and after, the area was heavily pitted most likely due to the car having a tarp thrown over the car for many years. It would certainly explain all the rust ! The pits were taken out by using a DA sander on slow speed with 120G and very lightly going over the surface( (I didn't have anything finer for the DA). Remember there isn't much to work with.
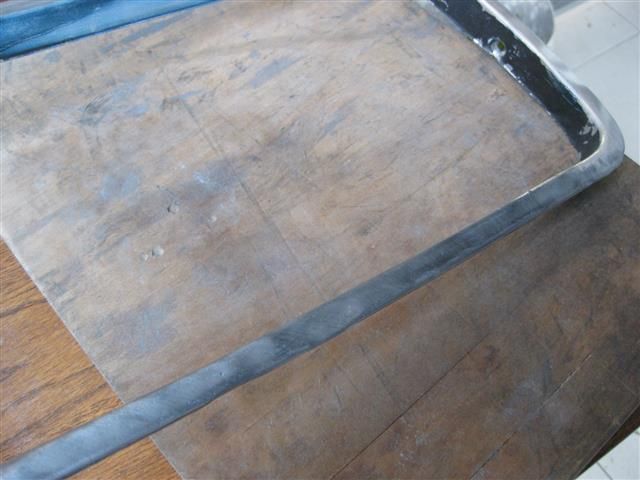
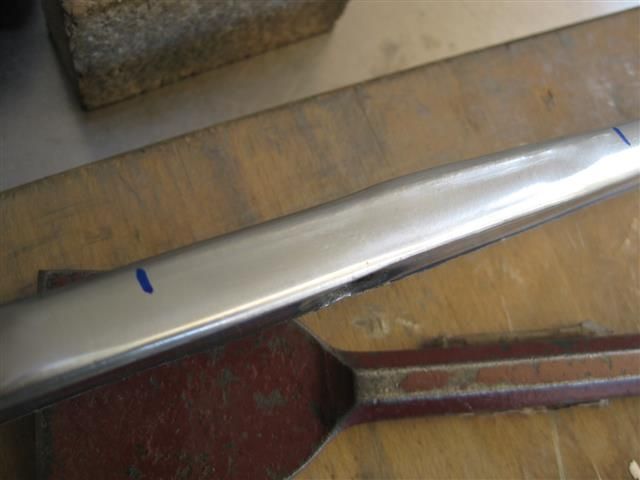
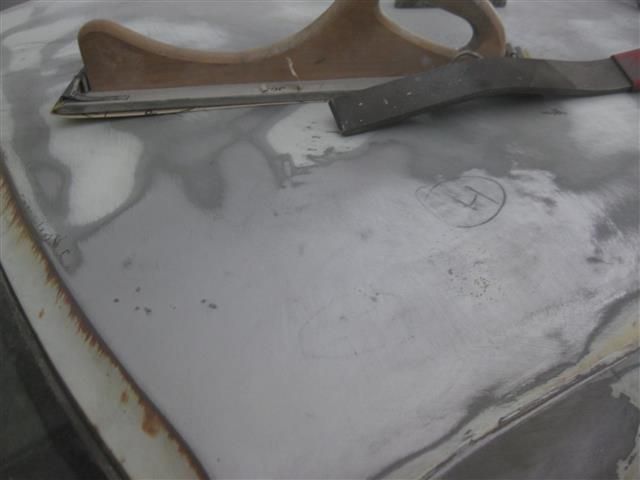
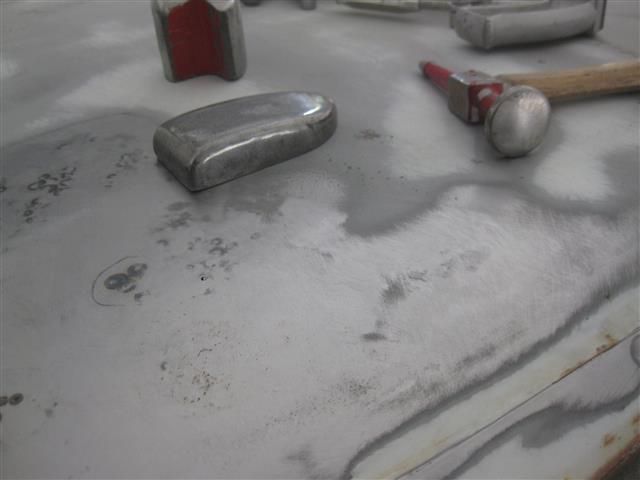
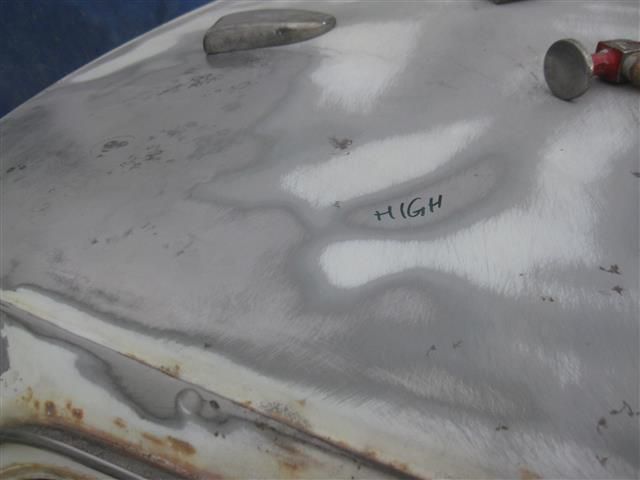
I thought I was all done and that I could live with an imperfection at the top of the surround, well I lived with it for a couple of hours before deciding to having another go at a particular area. No one could probably see it but me but it was bugging me ! It was impossible to photograph but there was an area about 4cm where the line wasn't quite right and needed to be embossed to get the shape right. You guessed it the area is in between the blue marks.
A brick bolster is shaped accordingly and then the line given 2 or 3 heavy blows to restamp a straight line..... now I'm happy :lol: You're got to remember too much force and you'll crack the alloy.The brick bolster doubles as a dolly. The area is rubbed back and polished again. Earlier on I lost concentration and the buffer caught the trim, damaged the trim and spat it out ! I wear heavy leather gloves and a welding helmet when working on the buff. Lucky I was able to repair it. As for where the hole was it cannot be seen because of where it is. The Durafix rod does buff to more of a chrome shine than an aluminium shine. Either way the repair is pretty small and not noticeable. If it was noticeable it would have bugged me enough to have someone aluminium weld the hole shut.
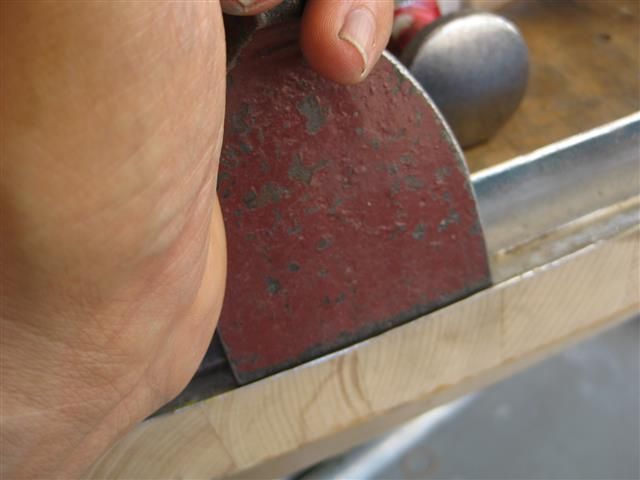
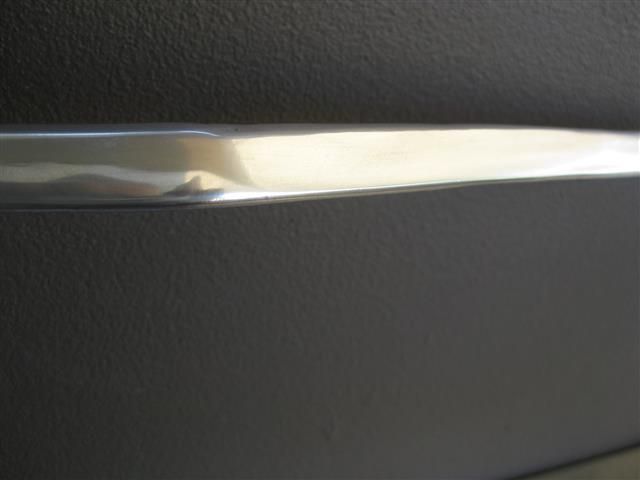
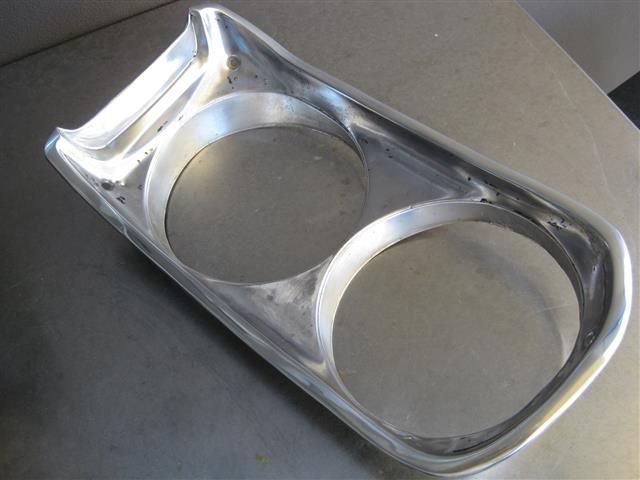
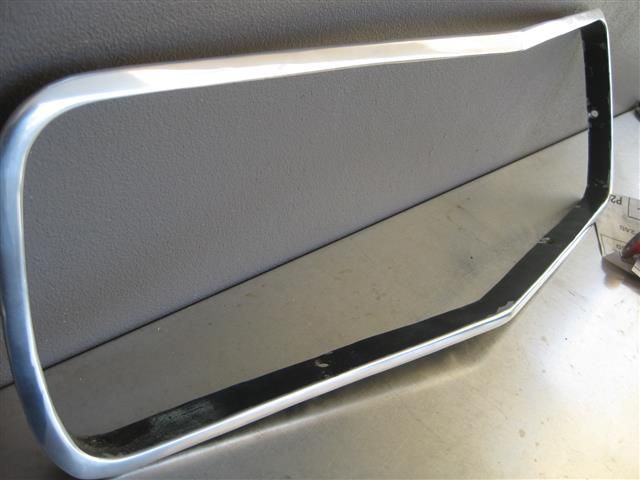
Photo 1, fresh off the buff, all done and yes I'm more than happy, It took about a week to repair, as mentioned earlier it was far from an idea piece to repair. Repairing trims is very tedious, I can't stress that enough. It doesn't take much for them to end up in the bin. By far the worst part after spending all that time is the using the buff, dangerous would be an understatement. A lack of concentration feeding the item at the wrong angle will cause the trim to catch, be ripped out of your hands, wound around the buff and fly across the room. Whether it's repairable after that depends on how lucky you are :lol: All that's left to do is spray the inside section silver.
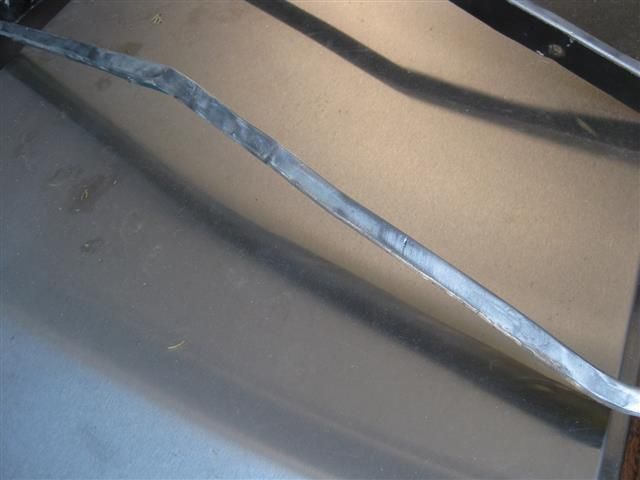
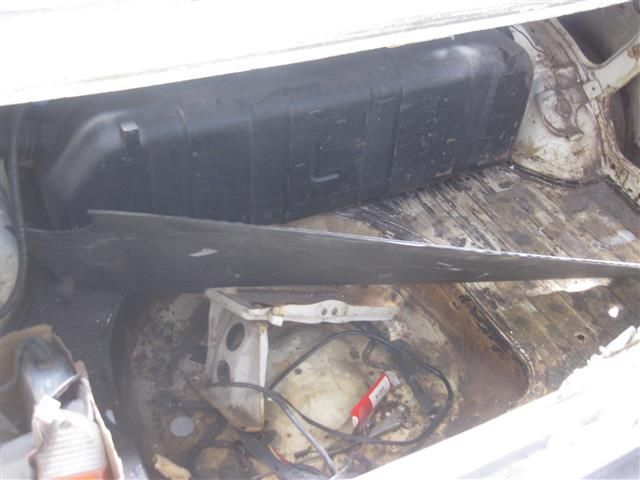
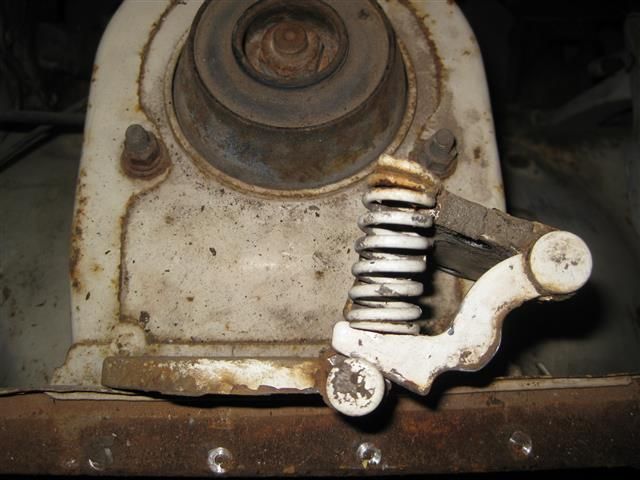
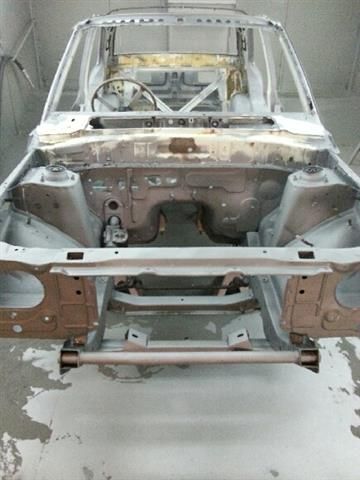
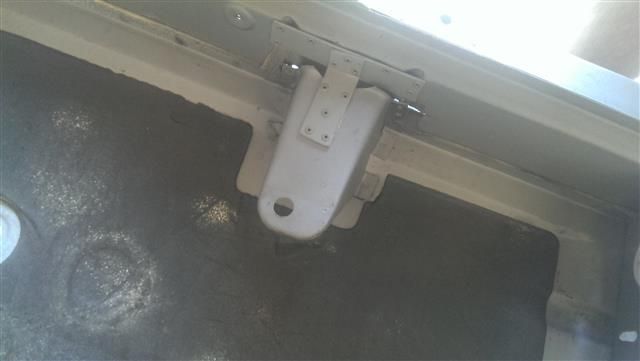
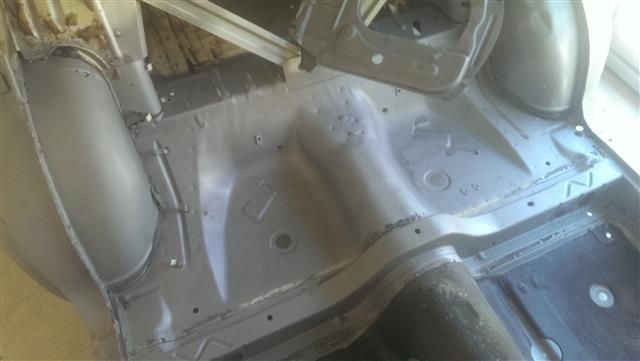
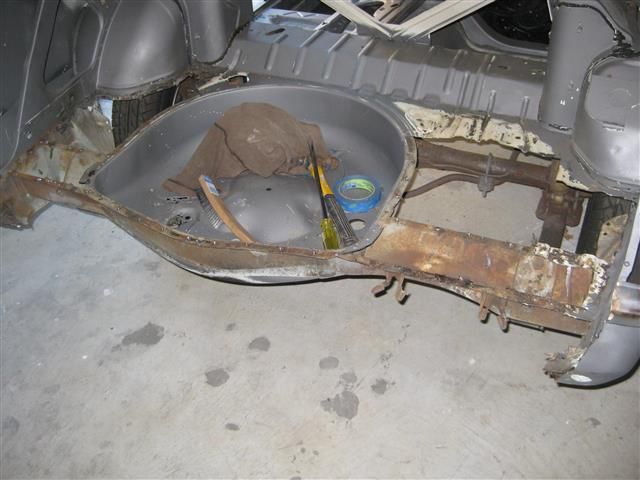
Photo 2, reminds of the poll on which engine should be used. The 12a TD PP will get the go ahead but not in this car. I've decided I want one modified example and one standard. The sedan will be pretty much 80's Aussie spec which is nothing more than a mild port and a set of 13 or 14" mags. I've spoken to my mechanic, he says that it won't be much worse that a well setup bridge port. The reason for the photo is that to build a street/ circuit PP I need another couple of meters of muffler room which means the tyre well needs to go to also make room for an additional muffler. Once the tyre well goes the floor brace you see needs to be extended. Wanting this car more originalish than my coupe I'm not prepared to do that to this car.
So what I'll be doing before installing the new boot floor in this car is make a template of it and a Rx2 boot floor and custom make something like the rx2 has to make it look all standard. That car will either be a US LHD s124 (12a) 73 car if I could be bothered swapping out the firewall to RHD, but it will most likely be a 72/73 s124 twin dizzy Savanna when the time is right. Whatever I end up with will most likely be another rusty heap of junk so not too worried about my modifications I have in mind.

=====================================================================================
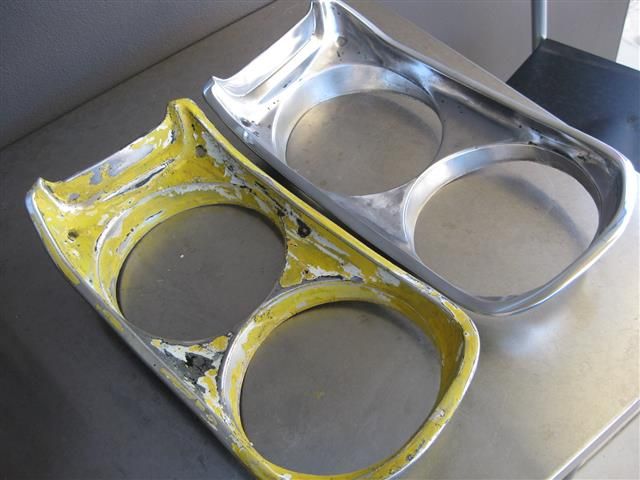
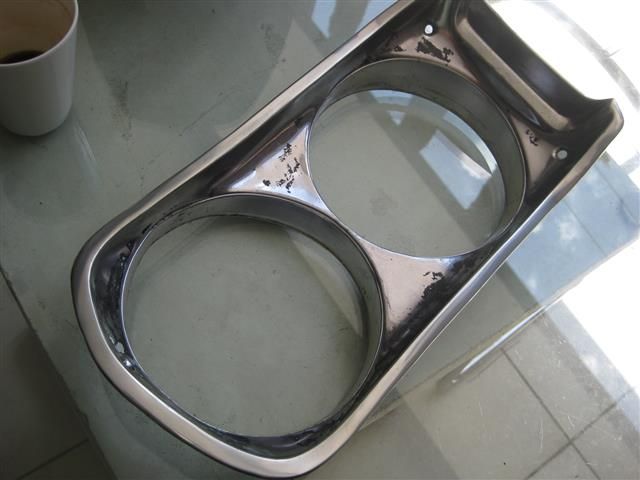
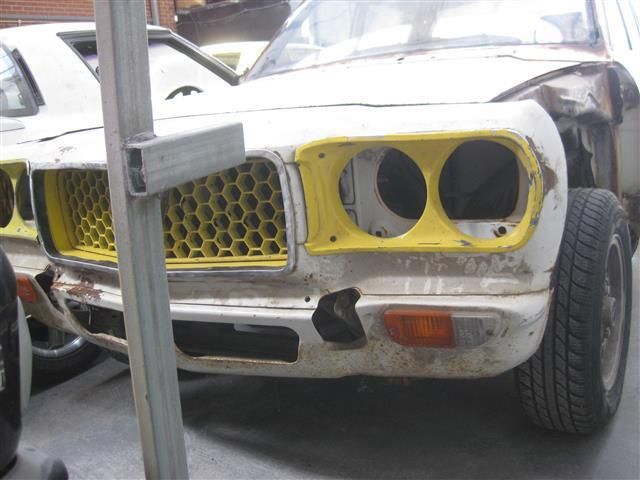
Here's that grill. It's funny how time skews things. I could have sworn I thought it was a lot worse. I remember thinking at the time, that'll never get fixed and had someone repair the one that came with the car which was probably worse. There's also another spare headlight bezel somewhere which I recall being pretty good. The grill has never been touched making it perfect for matching the paint for the yellow one that is currently getting stripped. These can be kept as spares and the ones I repaired get to live another day.
Multiple coats of yellow paint finally stripped.
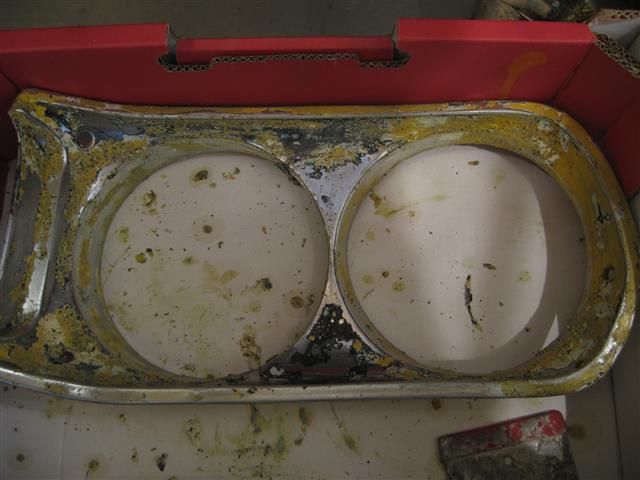
The curved end was pretty bad, the rest of it was probably a much better starting point than the opposite side was. The ends had to straightened and curved again to get the shape back. It appeared to be an easier job than the grill and the other bezel but for some reason I struggled a bit with it. I got there in the end and am pretty happy. The hands and skills just weren't working that day.

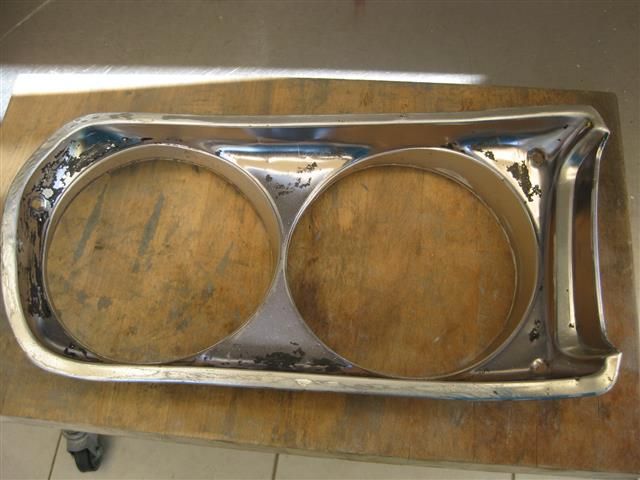
The other damaged areas...
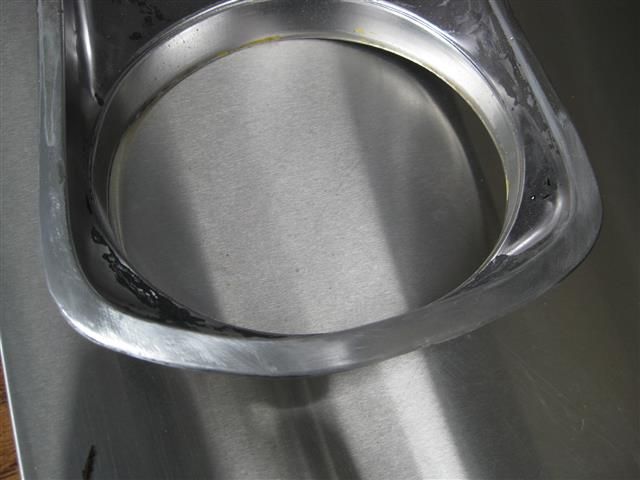
Bezel ready for buffing and finished ready for painting. There's one small area in the lower inner corner that could do with another 30min (near he grill) but I think I'm being nit picky especially since when mounted on the nosecone it won't ever be noticed. There's only so much work you can do to these parts without destroying them so, at his stage it's not bugging me and probably best to play it safe. They all came up really nice and look much better than being painted yellow. If I told you guys how much time I spent resurrecting the 2 bezels and grill surround you wouldn't believe me :lol:
Sometime next year all going well I'll pay Dave a visit, drop off the grill badge and show him the 2 front bars I have, hopefully he won't hit me over the head with the bars and tell me to go away. Front bars are pretty hard to find these days. The nosecone is one of the best I've seen, just needs stripping and priming from what I can tell. I might do the headlight buckets to finish the front off.
Other news I picked up 10a carb paper gaskets from Wilson Carbs in Melbourne to complete the kit I have. The carb needs a couple more things plated then it can be put together ticking other item off the long "to do" list.


 The correct screws are taped to parts.


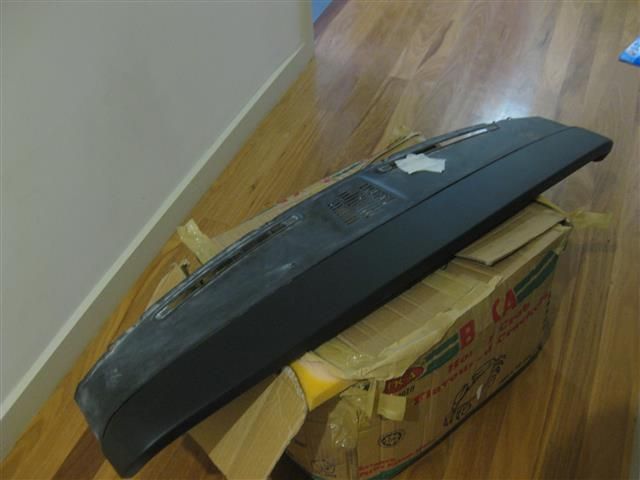
 Worried you're going to end up with a four foot long RX-3